Forward Observe, Yu Jing Soldiers!
I haven’t seen a lot of Yu Jing in our local meta lately, especially since our local JSA players have been working on Hassassins and Kazaks, so it was nice to see Nick back in the LGS with his vanilla Yu Jing army after a long absence! Nick’s got a few games under his belt and is building out his Yu Jing as he learns. He picks up stuff really fast, and after only a few games is really presenting some tough problems to solve on the table!
This week was supposedly our practicing Firefight at 400 week, but we got a learning game of Supplies in at 300 instead. I took my Corregidor, which I haven’t been feeling very confident with, to get some more practice with them.
Overview
- Mission: Supplies
- Forces: Jurisdictional Command of Corregidor versus Yu Jing (300)
- Deploy First: Yu Jing
- First Turn: Yu Jing
[img]https://assets.infinitythegame.net/infinityarmy/img/_logosweb/logo_502.png[/img][b] Jurisdictional Command of Corregidor[/b]
[b]GROUP 1 | [/b][img]https://assets.infinitythegame.net/infinityarmy/img/_logosweb/orden_regular.png[/img]9 [img]https://assets.infinitythegame.net/infinityarmy/img/_logosweb/orden_irregular.png[/img]1
[img]https://assets.infinitythegame.net/infinityarmy/img/_logosweb/502/logo_22.png[/img] [b]LUPE BALBOA[/b] Combi Rifle, Nanopulser, Panzerfaust, Smoke Grenades / Pistol, CCW. (0 | [b]23[/b])
[img]https://assets.infinitythegame.net/infinityarmy/img/_logosweb/502/logo_1.png[/img] [b]ALGUACIL[/b] HMG / Pistol, Knife. (1 | [b]18[/b])
[img]https://assets.infinitythegame.net/infinityarmy/img/_logosweb/502/logo_1.png[/img] [b]ALGUACIL[/b] Missile Launcher / Pistol, Knife. (1.5 | [b]15[/b])
[img]https://assets.infinitythegame.net/infinityarmy/img/_logosweb/502/logo_1.png[/img] [b]ALGUACIL[/b] Combi Rifle / Pistol, Knife. (0 | [b]10[/b])
[img]https://assets.infinitythegame.net/infinityarmy/img/_logosweb/502/logo_1.png[/img] [b]ALGUACIL[/b] Combi Rifle / Pistol, Knife. (0 | [b]10[/b])[img]https://assets.infinitythegame.net/infinityarmy/img/_logosweb/502/logo_10.png[/img] [b]MORAN (Forward Observer)[/b] Combi Rifle, CrazyKoalas (2) / Pistol, Knife. (0.5 | [b]22[/b])
[img]https://assets.infinitythegame.net/infinityarmy/img/_logosweb/502/logo_10.png[/img] [b]MORAN (Forward Observer)[/b] Combi Rifle, CrazyKoalas (2) / Pistol, Knife. (0.5 | [b]22[/b])
[img]https://assets.infinitythegame.net/infinityarmy/img/_logosweb/502/logo_17.png[/img] [b]TRANSDUCTOR ZOND[/b] Flash Pulse, Sniffer / Electric Pulse. (0 | [b]8[/b])
[img]https://assets.infinitythegame.net/infinityarmy/img/_logosweb/502/logo_9.png[/img] [b]BANDIT Hacker (Killer Hacking Device)[/b] Light Shotgun, Adhesive Launcher / Pistol, DA CCW. (0 | [b]25[/b])
[img]https://assets.infinitythegame.net/infinityarmy/img/_logosweb/502/logo_4.png[/img] [b]HELLCAT[/b] HMG, E/Mauler / Pistol, Knife. (1.5 | [b]31[/b])[b]GROUP 2 | [/b][img]https://assets.infinitythegame.net/infinityarmy/img/_logosweb/orden_regular.png[/img]6
[img]https://assets.infinitythegame.net/infinityarmy/img/_logosweb/502/logo_5.png[/img] [b]INTRUDER Lieutenant[/b] Combi Rifle + Light Flamethrower, Grenades / Pistol, CCW. (0 | [b]35[/b])
[img]https://assets.infinitythegame.net/infinityarmy/img/_logosweb/502/logo_25.png[/img] [b]SEÑOR MASSACRE (Fireteam: Haris)[/b] Breaker Combi Rifle, E/M Grenades, Eclipse Grenades / Pistol, AP CCW, E/M CCW. (0.5 | [b]30[/b])
[img]https://assets.infinitythegame.net/infinityarmy/img/_logosweb/502/logo_11.png[/img] [b]JAGUAR[/b] Adhesive Launcher, Panzerfaust / Pistol, DA CCW. (0.5 | [b]13[/b])
[img]https://assets.infinitythegame.net/infinityarmy/img/_logosweb/502/logo_11.png[/img] [b]JAGUAR[/b] Chain Rifle, Smoke Grenades / Pistol, DA CCW. (0 | [b]10[/b])[img]https://assets.infinitythegame.net/infinityarmy/img/_logosweb/502/logo_17.png[/img] [b]TRANSDUCTOR ZOND[/b] Flash Pulse, Sniffer / Electric Pulse. (0 | [b]8[/b])
[img]https://assets.infinitythegame.net/infinityarmy/img/_logosweb/502/logo_2.png[/img] [b]TOMCAT[/b] Combi Rifle + E/Mitter, Antipersonnel Mines / Pistol, Knife. (0 | [b]20[/b])
[b] 6 SWC | 300 Points |[/b] Open in Infinity Army
[img]https://assets.infinitythegame.net/infinityarmy/img/_logosweb/logo_201.png[/img][b] Yu Jing[/b]
[b]GROUP 1 | [/b][img]https://assets.infinitythegame.net/infinityarmy/img/_logosweb/orden_regular.png[/img]10
[img]https://assets.infinitythegame.net/infinityarmy/img/_logosweb/201/logo_9.png[/img] [b]HSIEN Lieutenant[/b] HMG, Nanopulser / Pistol, AP CCW. (2 | [b]61[/b])
[img]https://assets.infinitythegame.net/infinityarmy/img/_logosweb/201/logo_7.png[/img] [b]DÀOFĚI[/b] Spitfire / Pistol, Shock CCW. (2 | [b]55[/b])
[img]https://assets.infinitythegame.net/infinityarmy/img/_logosweb/201/logo_11.png[/img] [b]GŬILÁNG[/b] MULTI Sniper Rifle, Antipersonnel Mines / Pistol, Knife. (1.5 | [b]33[/b])
[img]https://assets.infinitythegame.net/infinityarmy/img/_logosweb/201/logo_4.png[/img] [b]ZÚYǑNG (Forward Observer)[/b] Combi Rifle / 2 Breaker Pistols, Knife. (0 | [b]28[/b])
[img]https://assets.infinitythegame.net/infinityarmy/img/_logosweb/201/logo_21.png[/img] [b]KEISOTSU (Forward Observer)[/b] Combi Rifle / Pistol, Knife. (0 | [b]10[/b])
[img]https://assets.infinitythegame.net/infinityarmy/img/_logosweb/201/logo_21.png[/img] [b]KEISOTSU (Forward Observer)[/b] Combi Rifle / Pistol, Knife. (0 | [b]10[/b])
[img]https://assets.infinitythegame.net/infinityarmy/img/_logosweb/201/logo_1.png[/img] [b]ZHANSHI (Forward Observer)[/b] Combi Rifle / Pistol, Knife. (0 | [b]12[/b])
[img]https://assets.infinitythegame.net/infinityarmy/img/_logosweb/201/logo_1.png[/img] [b]ZHANSHI (Forward Observer)[/b] Combi Rifle / Pistol, Knife. (0 | [b]12[/b])
[img]https://assets.infinitythegame.net/infinityarmy/img/_logosweb/201/logo_1.png[/img] [b]ZHANSHI (Forward Observer)[/b] Combi Rifle / Pistol, Knife. (0 | [b]12[/b])
[img]https://assets.infinitythegame.net/infinityarmy/img/_logosweb/201/logo_12.png[/img] [b]NINJA Hacker (Killer Hacking Device)[/b] Tactical Bow / Pistol, DA CCW, Knife. (0 | [b]29[/b])[b]GROUP 2 | [/b][img]https://assets.infinitythegame.net/infinityarmy/img/_logosweb/orden_regular.png[/img]1 [img]https://assets.infinitythegame.net/infinityarmy/img/_logosweb/orden_irregular.png[/img]2 [img]https://assets.infinitythegame.net/infinityarmy/img/_logosweb/orden_impetuosa.png[/img]2
[img]https://assets.infinitythegame.net/infinityarmy/img/_logosweb/201/logo_2.png[/img] [b]ZHÀNYING (Sensor)[/b] Breaker Combi Rifle, Nimbus Grenades, MadTraps / Pistol, Electric Pulse. (0 | [b]28[/b])
[img]https://assets.infinitythegame.net/infinityarmy/img/_logosweb/201/logo_13.png[/img] [b]SHAOLIN[/b] Chain Rifle, Smoke Grenades / Pistol, Shock CCW. (0 | [b]5[/b])
[img]https://assets.infinitythegame.net/infinityarmy/img/_logosweb/201/logo_13.png[/img] [b]SHAOLIN[/b] Chain Rifle, Smoke Grenades / Pistol, Shock CCW. (0 | [b]5[/b])
[b] 5.5 SWC | 300 Points |[/b] Open in Infinity Army
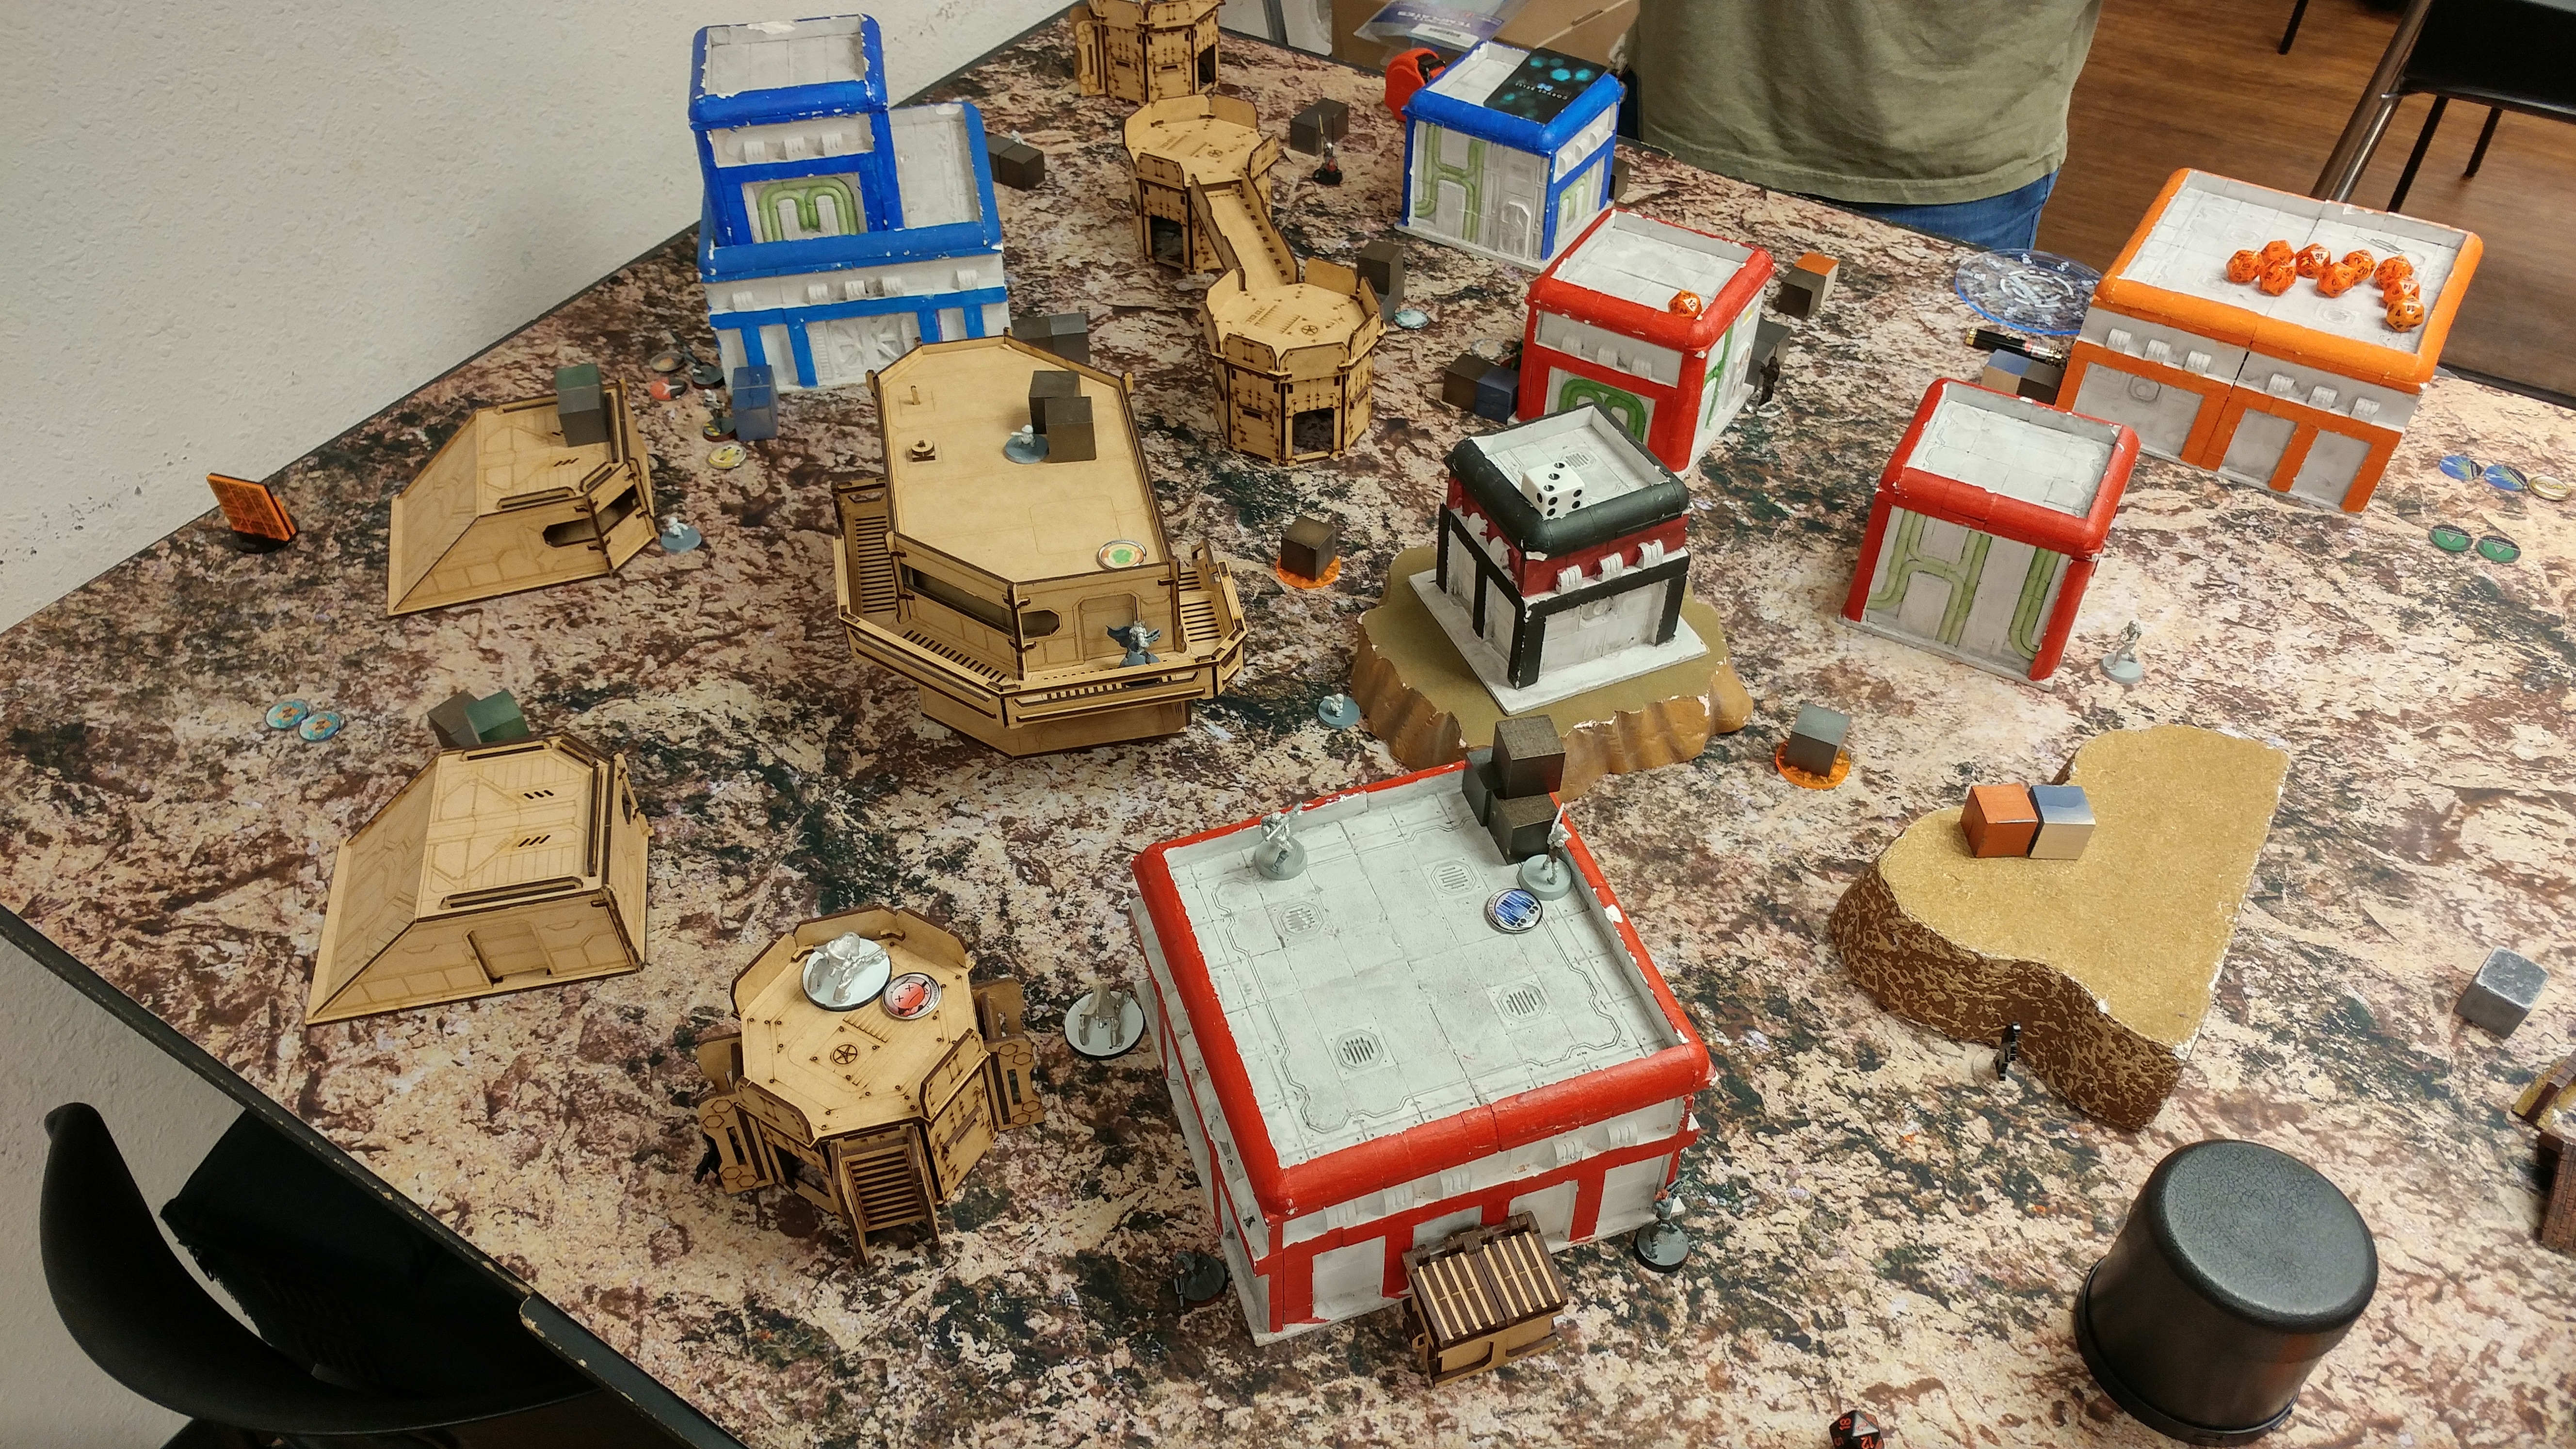
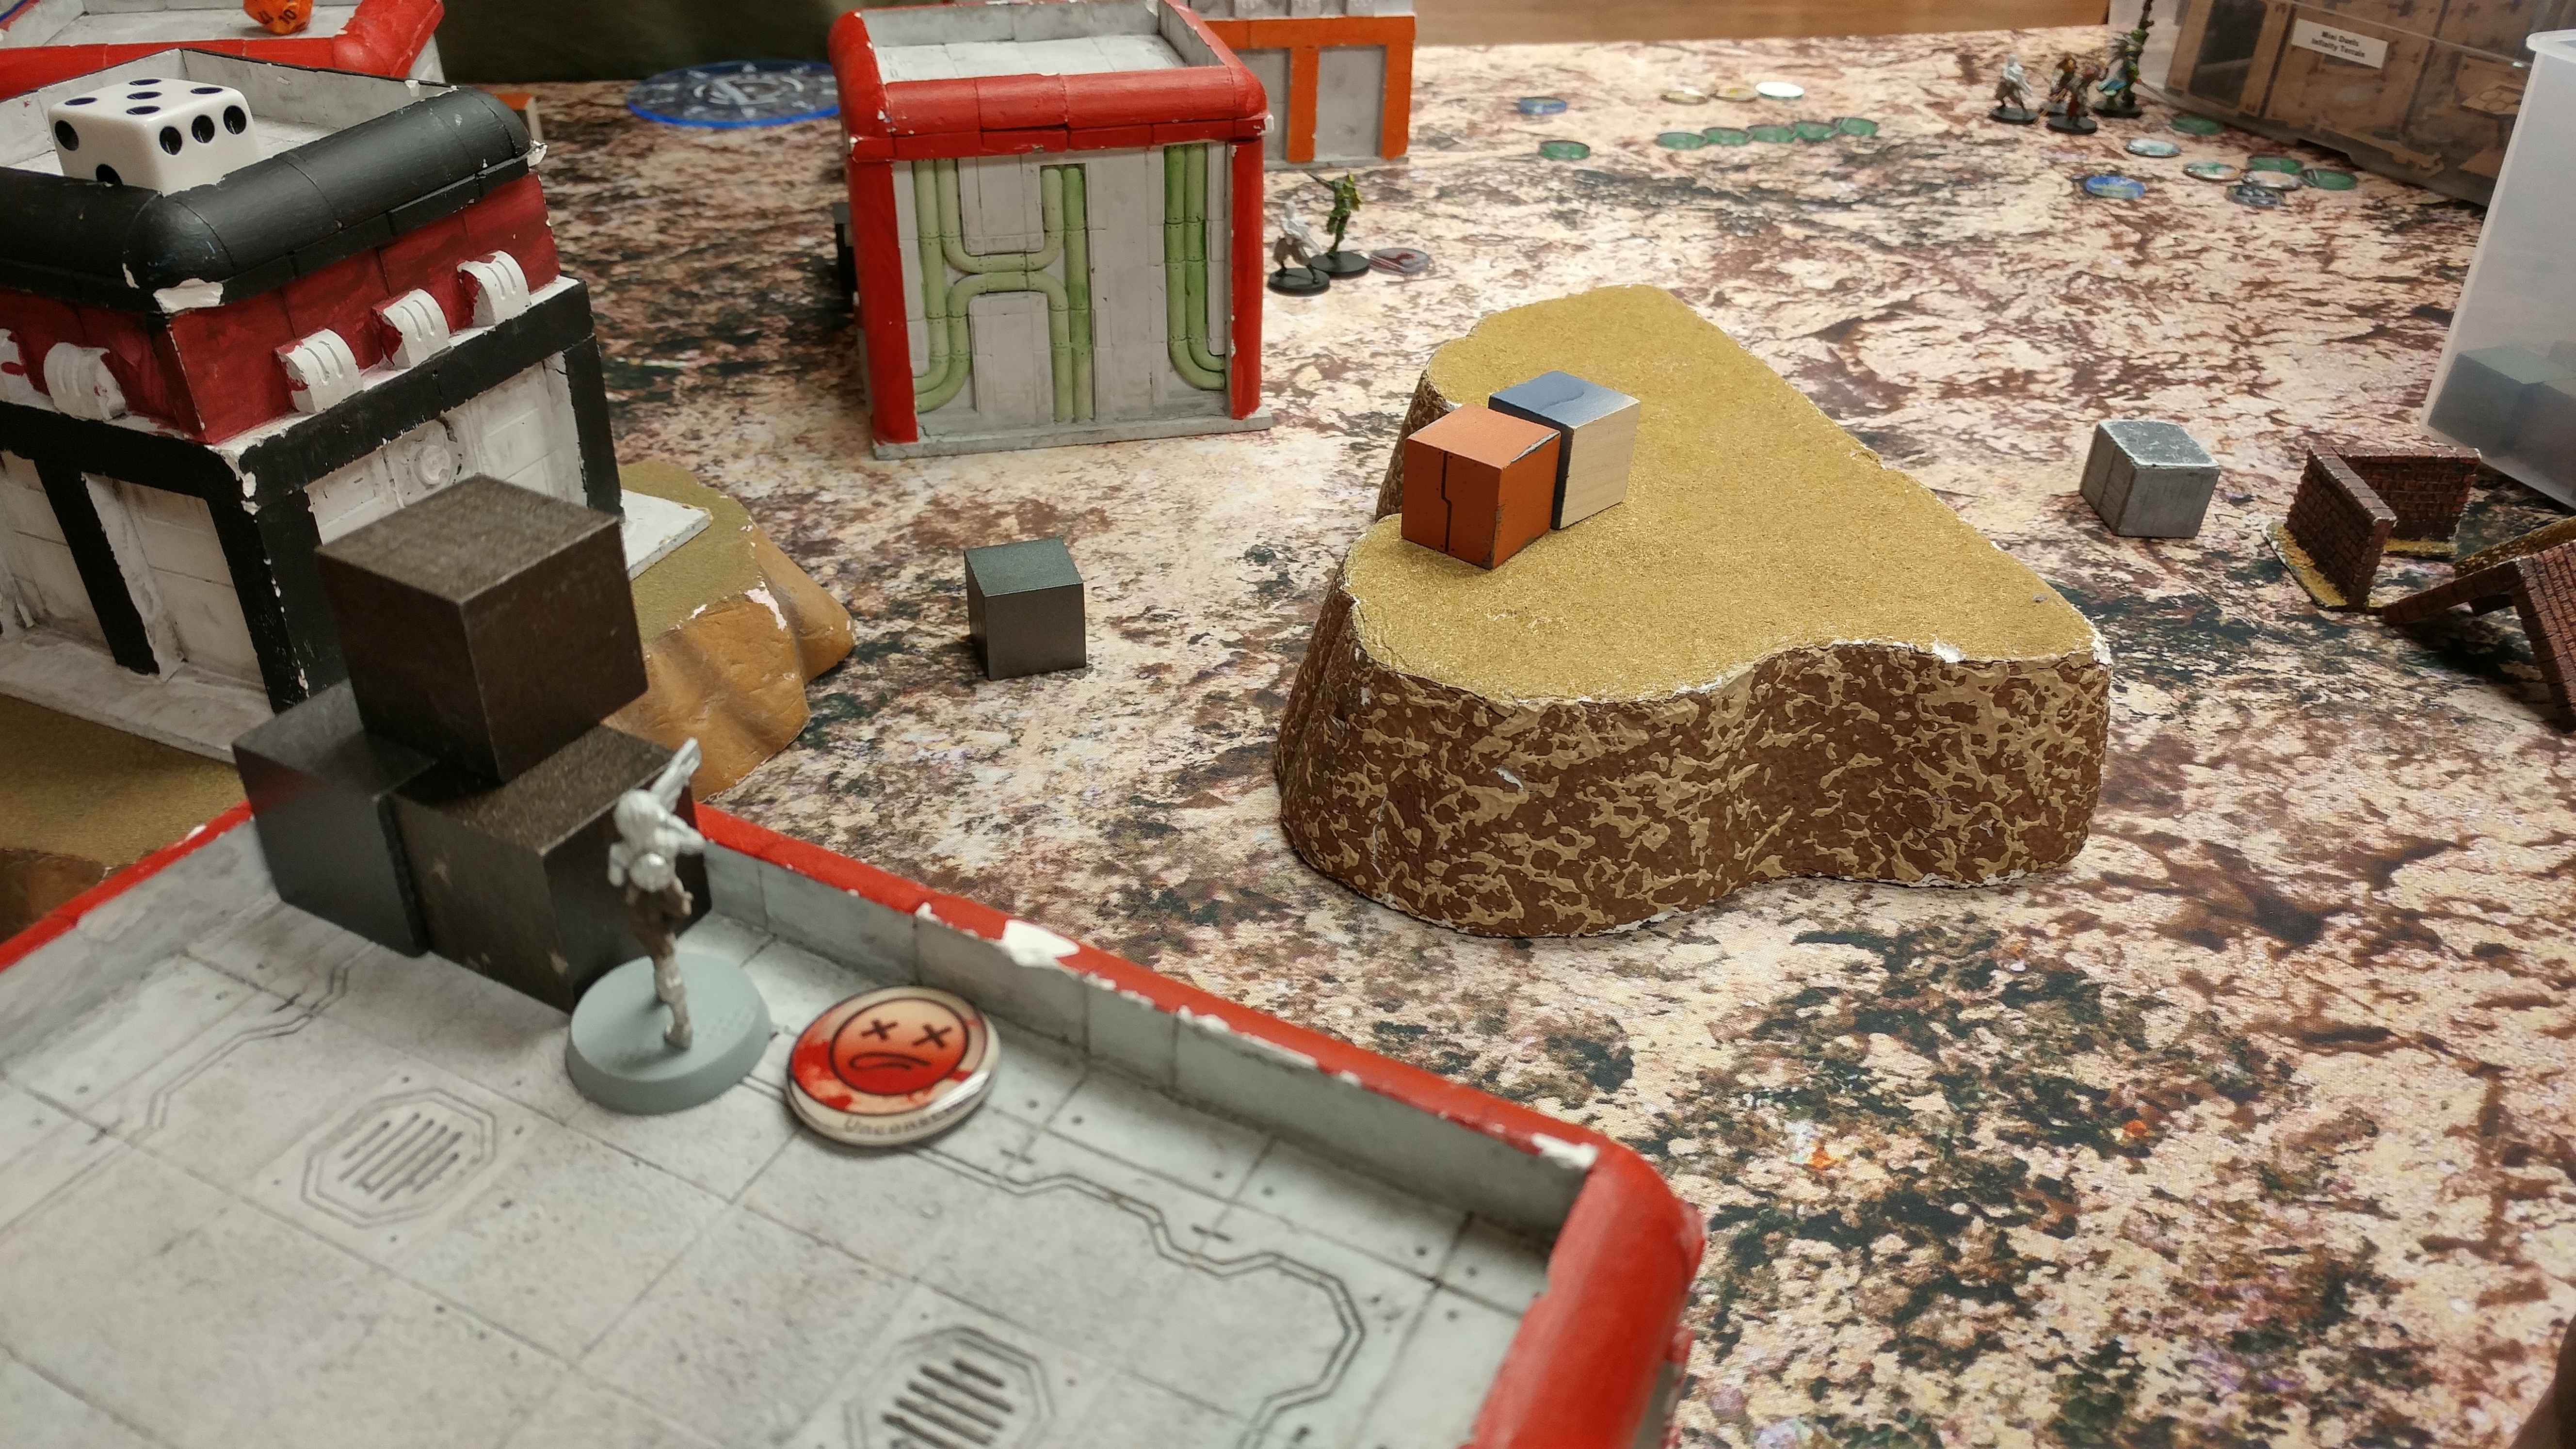
Deployment
Since we were playing on a 6′ x 4′ board, we used a hard-edged piece of terrain as the board edge on the right to delineate the right board edge. Nick had to deploy first. He put his Zhanying with Mad Traps prone on a roof in my back left. His two Shaolin monks were hiding behind the small blue building in his backfield, with light infantry FO troops sprinkled across his deployment zone. One near the Shaolin, a few behind scatter terrain, and one on the right behind the red building. His Daofei and Guilang covered the right and middle objectives, respectively, from behind the small building in the center. Nick then sticks the Hsien HMG behind the leftmost red building, with the Zhuyong FO nearby.
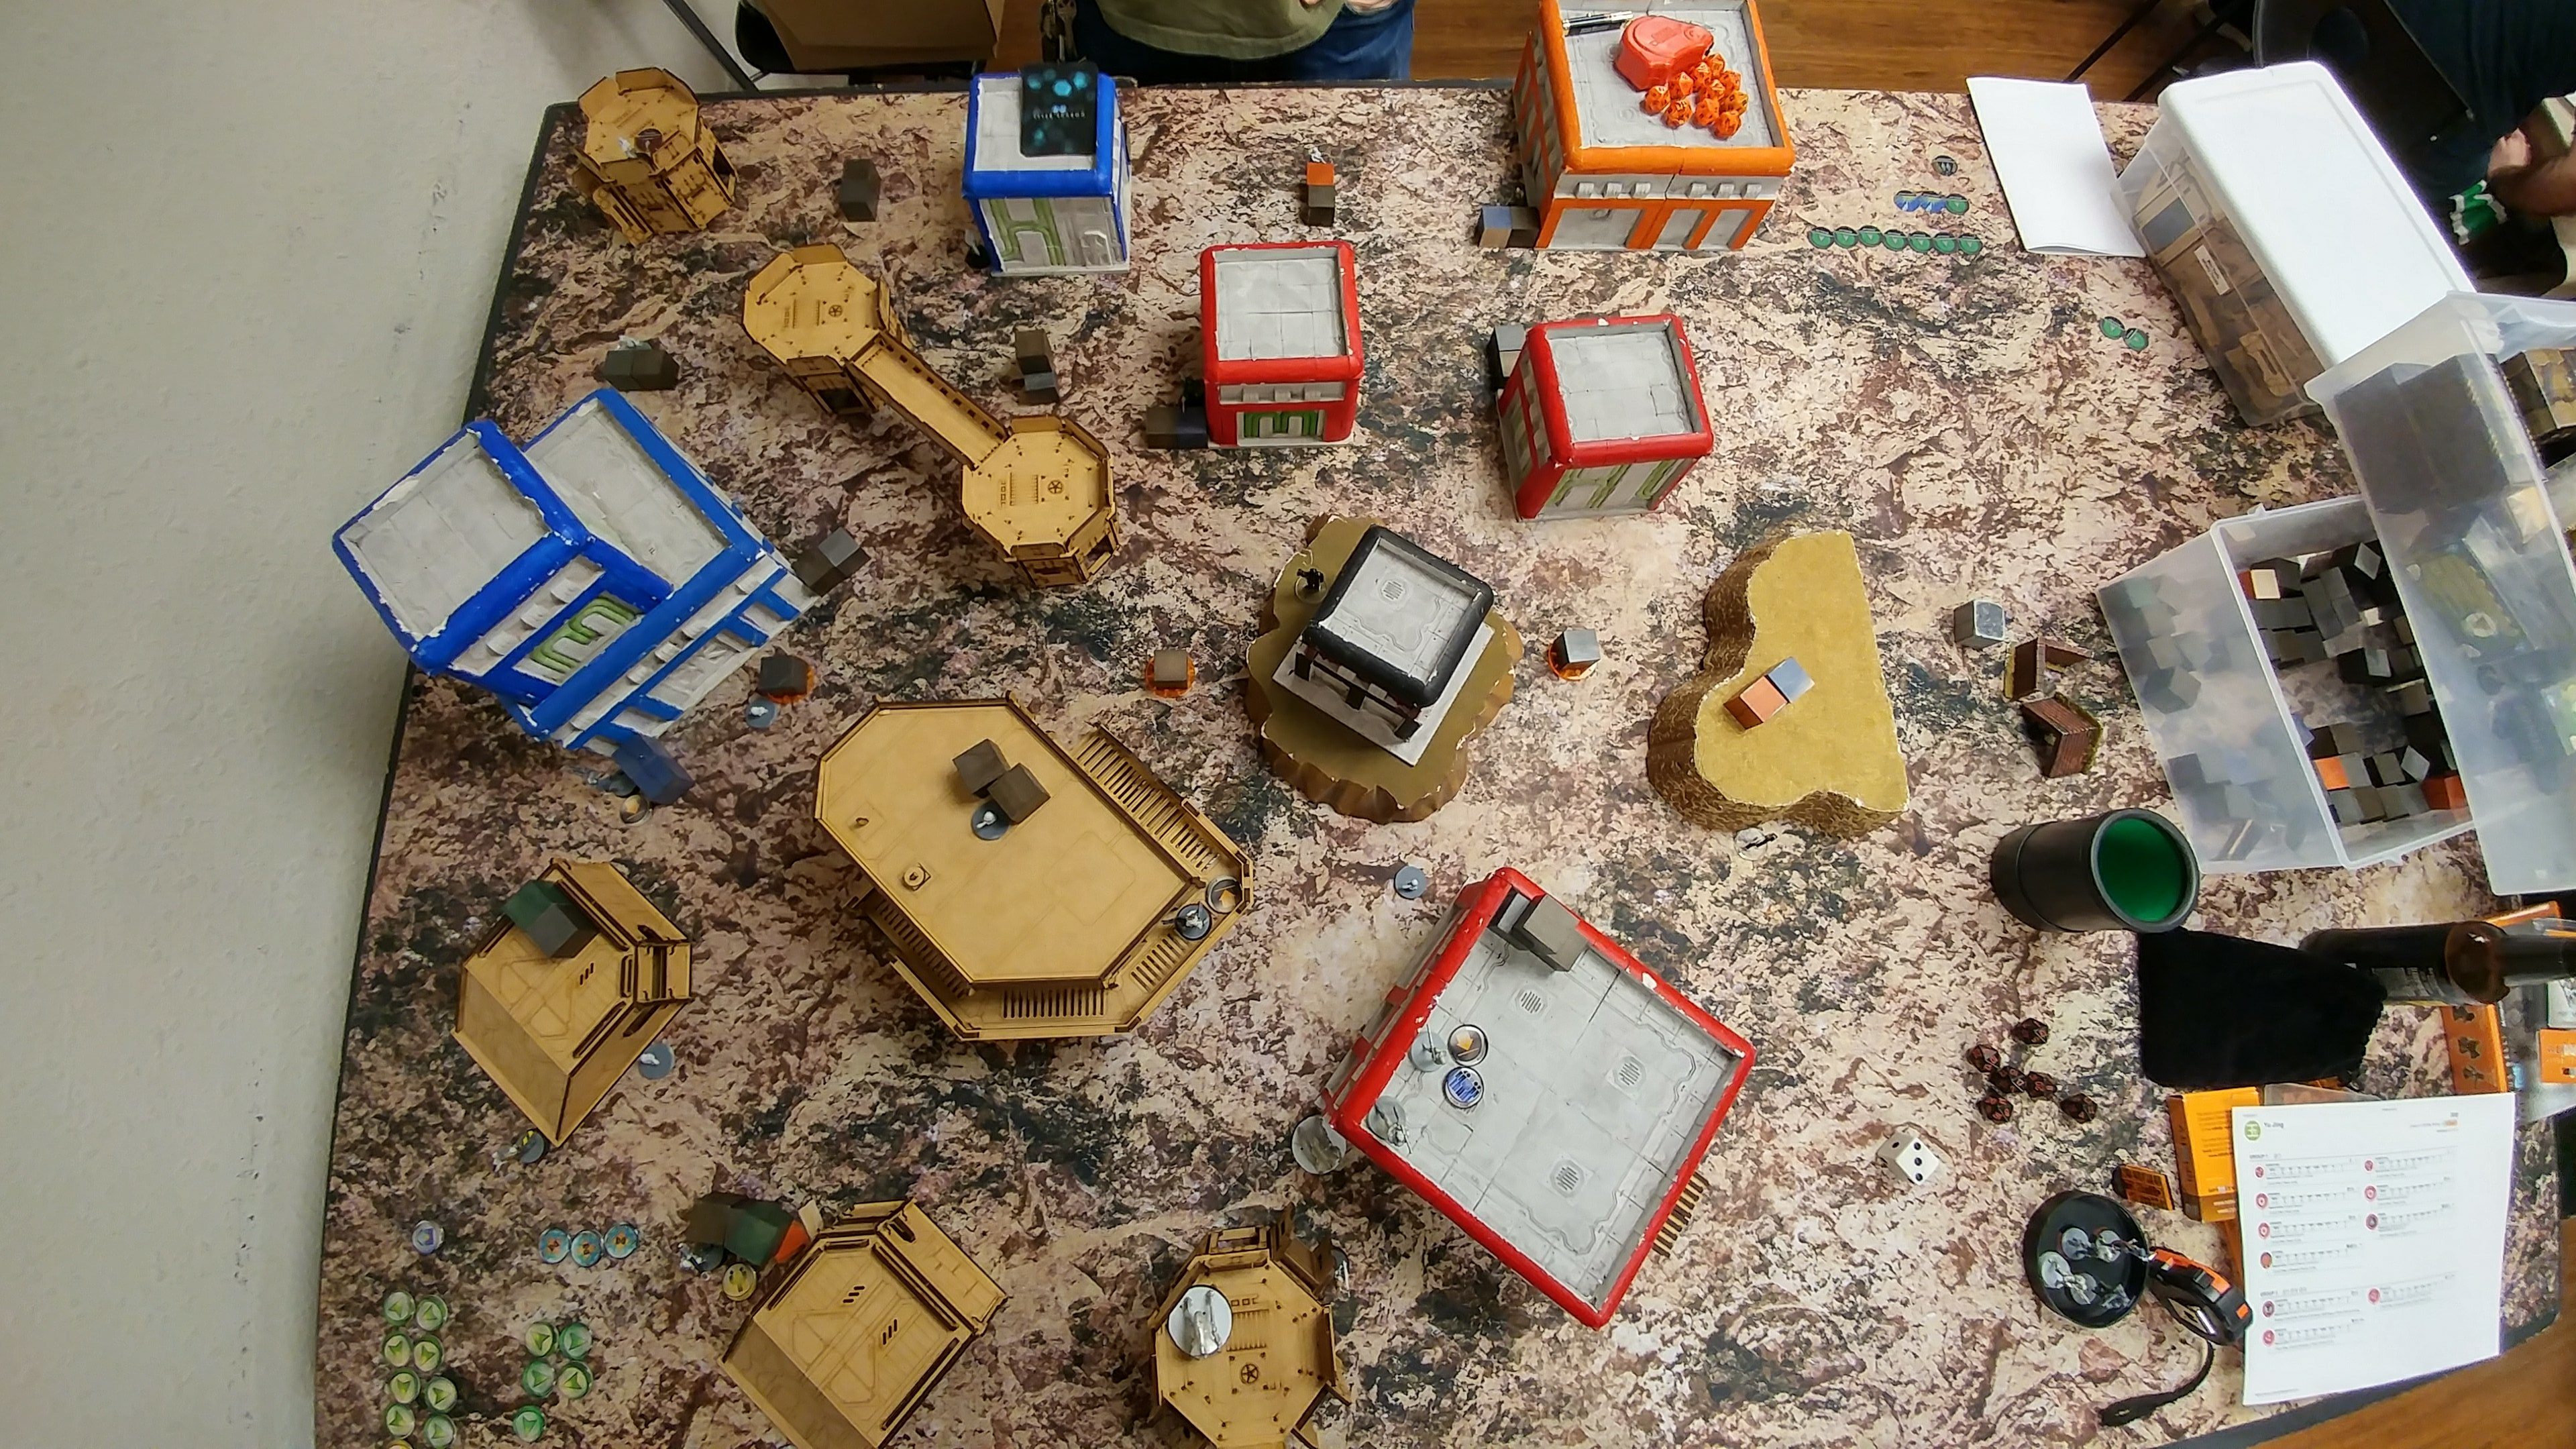 He’s playing vanilla Yu Jing, and I haven’t list built Yu Jing enough to count points, so I’m obligated to honor Tiger Soldiers. I deploy the Jaguar Haris on the left accordingly, with the Jaguar Panzerfaust ready to face off against the Zuyong and the Jaguar Chain Rifle and Massacre watching for AD troops. I can read the writing on the wall and know there’s a smoke + MSV2 trick coming, so I deploy the link and flash pulse bots to counter it. I stack Lupe in line with a flash pulse bot, and put the Alguacil ML nearby in case the Hsien pushes forward aggressively, and tuck the other two Algauciles into the corners of the large red building in my deployment zone, watching for AD. Lupe and the bots have their butts flapping in the breeze, so I back them up (literally) with the Intruder just in case there are any Tiger Soldiers in a dropship. To get everyone in 8″, I make the HMG Alguacil the link leader and throw her prone next to the Algaucil ML, since I don’t suspect any Raidens with templates lurking about.
 I throw a Moran on the Comanche Barracks walkway with his attendant Koalas, making sure to keep them 8″ away from the camo tokens to ensure a legal deployment. The other Moran goes on the left to try and protect/grab the left box. I’m done except for reserves, and Nick declined to hold anything back, so I waffle a bit over whether or not to be aggressive and attempt to throw the Bandit over the centerline, but decide to keep her on my side of the table to grab the right box. She gets tucked into a nook of the terrain on the right.
Turn 1
Top of Turn 1 – Yu Jing
The first Shaolin rushes around the corner and chucks some smoke. I hit with an ADHL but Nick rolls a 1. The other Shaolin comes straight around the same corner and we try our luck again, this time with everyone failing their rolls. Nick spends an irregular order and finally sticks some smokoe with one of the Shaolin, which allows the other to run back the way he came to go around to the other side of the building and chuck some smoke for the Hsien. With the last order of the pool he shuffles the Zhanying’s MadTraps around.
Smoke, check. MSV2, check. Here comes the Hsien! Nick wants to break my link, but the only thing he can see without moving really far out is the Algaucil ML. The smoke blocks everybody else, but the Hsien has to be out of cover to make LoF. I delay ARO, and Nick picks up four dice. He needs 14’s, I need 17’s and choose Anti-tank mode. I roll a 16 and a 12, and Nick rolls 15, 15, and two single-digit numbers. 6 ARM saves later there’s no Hsien.
 Nick decides to defend the objectives and let me deal with the speedbumps he sets up in my turn and drops two mines with the Guilang sniper before recamoing it and backing it up into a better positoin. The Daofei sprays down my Alguacil rifleman with his Spitfire, but she passes all 3 ARM saves. The Daofei is now out of LoF, but watching both objectives, flanked by two mines. After recamoing the Daofei, Nick passes the turn.
Bottom of Turn 1 – Corregidor
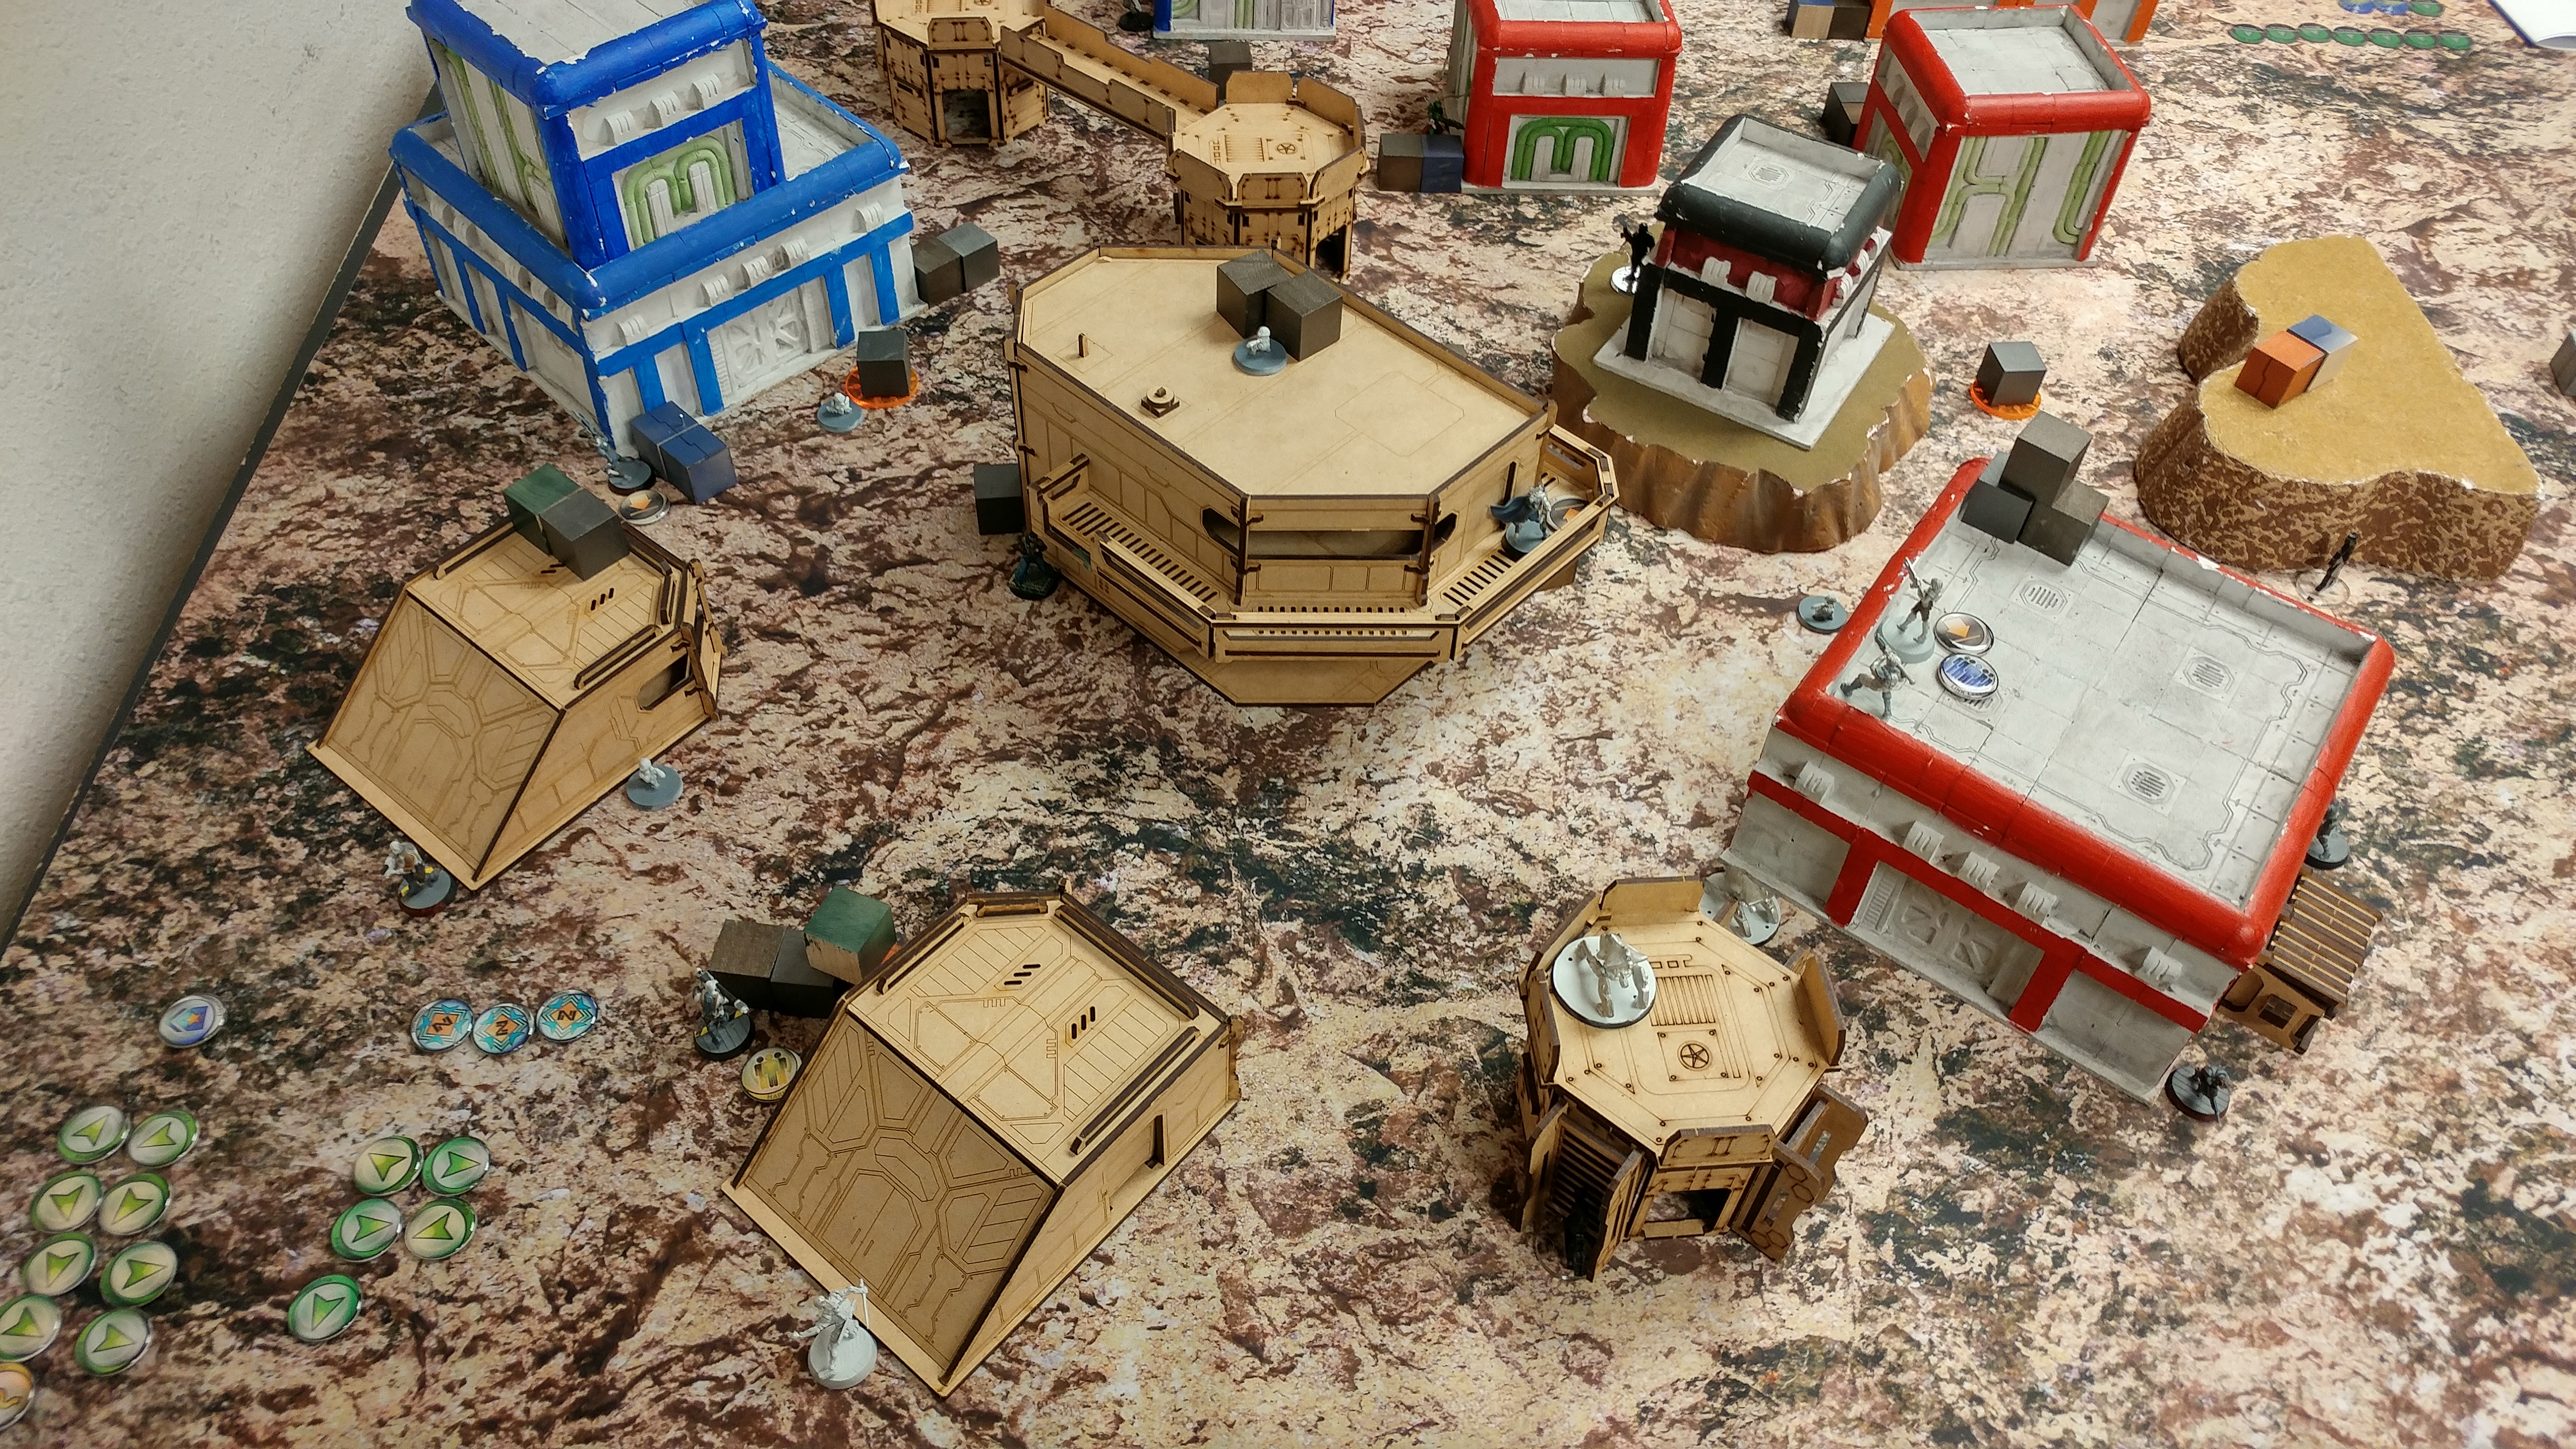
I really don’t want to deal with all the mines yet, so I settle for attacking his order pool and his specialists. Fortunately for me, in his list they’re one and the same. The Alguacil HMG guns down one of the line infantry FOs she can see after standing up, not sure which flavor, but it’s dead now so… The HMG forces another FO back into cover, the one by where the Shaolin started, so now, aside from the Daofei and the mine, the center objective is unprotected. I pop the central Moran up and try to discover the mine covering the center objective, but fail WIP. I settle for grabbing the left box, and move the Jag Haris up, smoking the left objective. The Moran scoots up, snags the box, and scurries away into cover, setting up his Koalas to protect him from anything approaching his position.
I bring in a Tomcat with mines on the right, and don’t have enough orders to get him into cover but manage to get three shots off in the back arc of one of the many FOs that Nick’s got on the table. Of course, needing 15’s, I roll nothing but 16’s and up. Siiiiigh. I attempt to discover the Guilang with the Alguacil HMG, but fail the WIP roll and there’s nothing else to shoot so I waste an order. I throw the Moran on the Comanche Barracks catwalk into suppression and pass the turn.
Turn 2
Top of Turn 2 – Yu Jing
Well, as I had suspected, the Hsien was Nick’s Lt, and he’s in Loss of Lieutenant. The Shaolin advance under smoke without incident, and then it’s the Zuyong’s turn.
 Nick pushes the Zuyong through the smoke and into the Hsien’s original position, gunning down one of my flash pulse bots on the way.
 The Guilang spends a few orders (and command tokens) to drop a mine off next to my Tomcat, and the FO that the Tomcat missed earlier forces a dodge out of the Tomcat, which I fail and the mine blows my Tomcat off the table. Golf clap! Well done, Nick! With his last order, he throws the Zuyong into suppression and secretly nominates the Zhanying as his Lt.
Bottom of Turn 2 – Corregidor
Well, I’ve got a box, but I need two to seal the deal. I check LoF with Nick, and he agrees that if I’m prone next to the objective on the right, I can avoid getting blown up by a mine or shot by the Daofei. I sneak the Bandit into that position over the course of a few orders, forcing the Daofei to reveal and successfully discover the Bandit on the way. I take some pains to avoid LoF and manage to snag the box and spend a ton of my orders dashing the Bandit all the way to the backfield, protected by Lupe, the Intruder, a Moran in suppression, and the remaining flash pulse bot.
 I break the Haris and try to land eclipse smoke to block LoF from the Zuyong to my Jaguar CR so I can take advantage of the link burst bonus to try and glue the now-revealed Daofei. Nick reveals a Ninja KHD, which is just out of my Moran’s repeater range, and shoots at Massacre, but I pass both ARM rolls. I force the Ninja prone with the Alguacil link, and try to land some more eclipse smoke. Of course, I fail miserably, getting flash pulsed a bunch by the aggravating FO near where the Shaolin started, the one that the HMG forced back into cover.
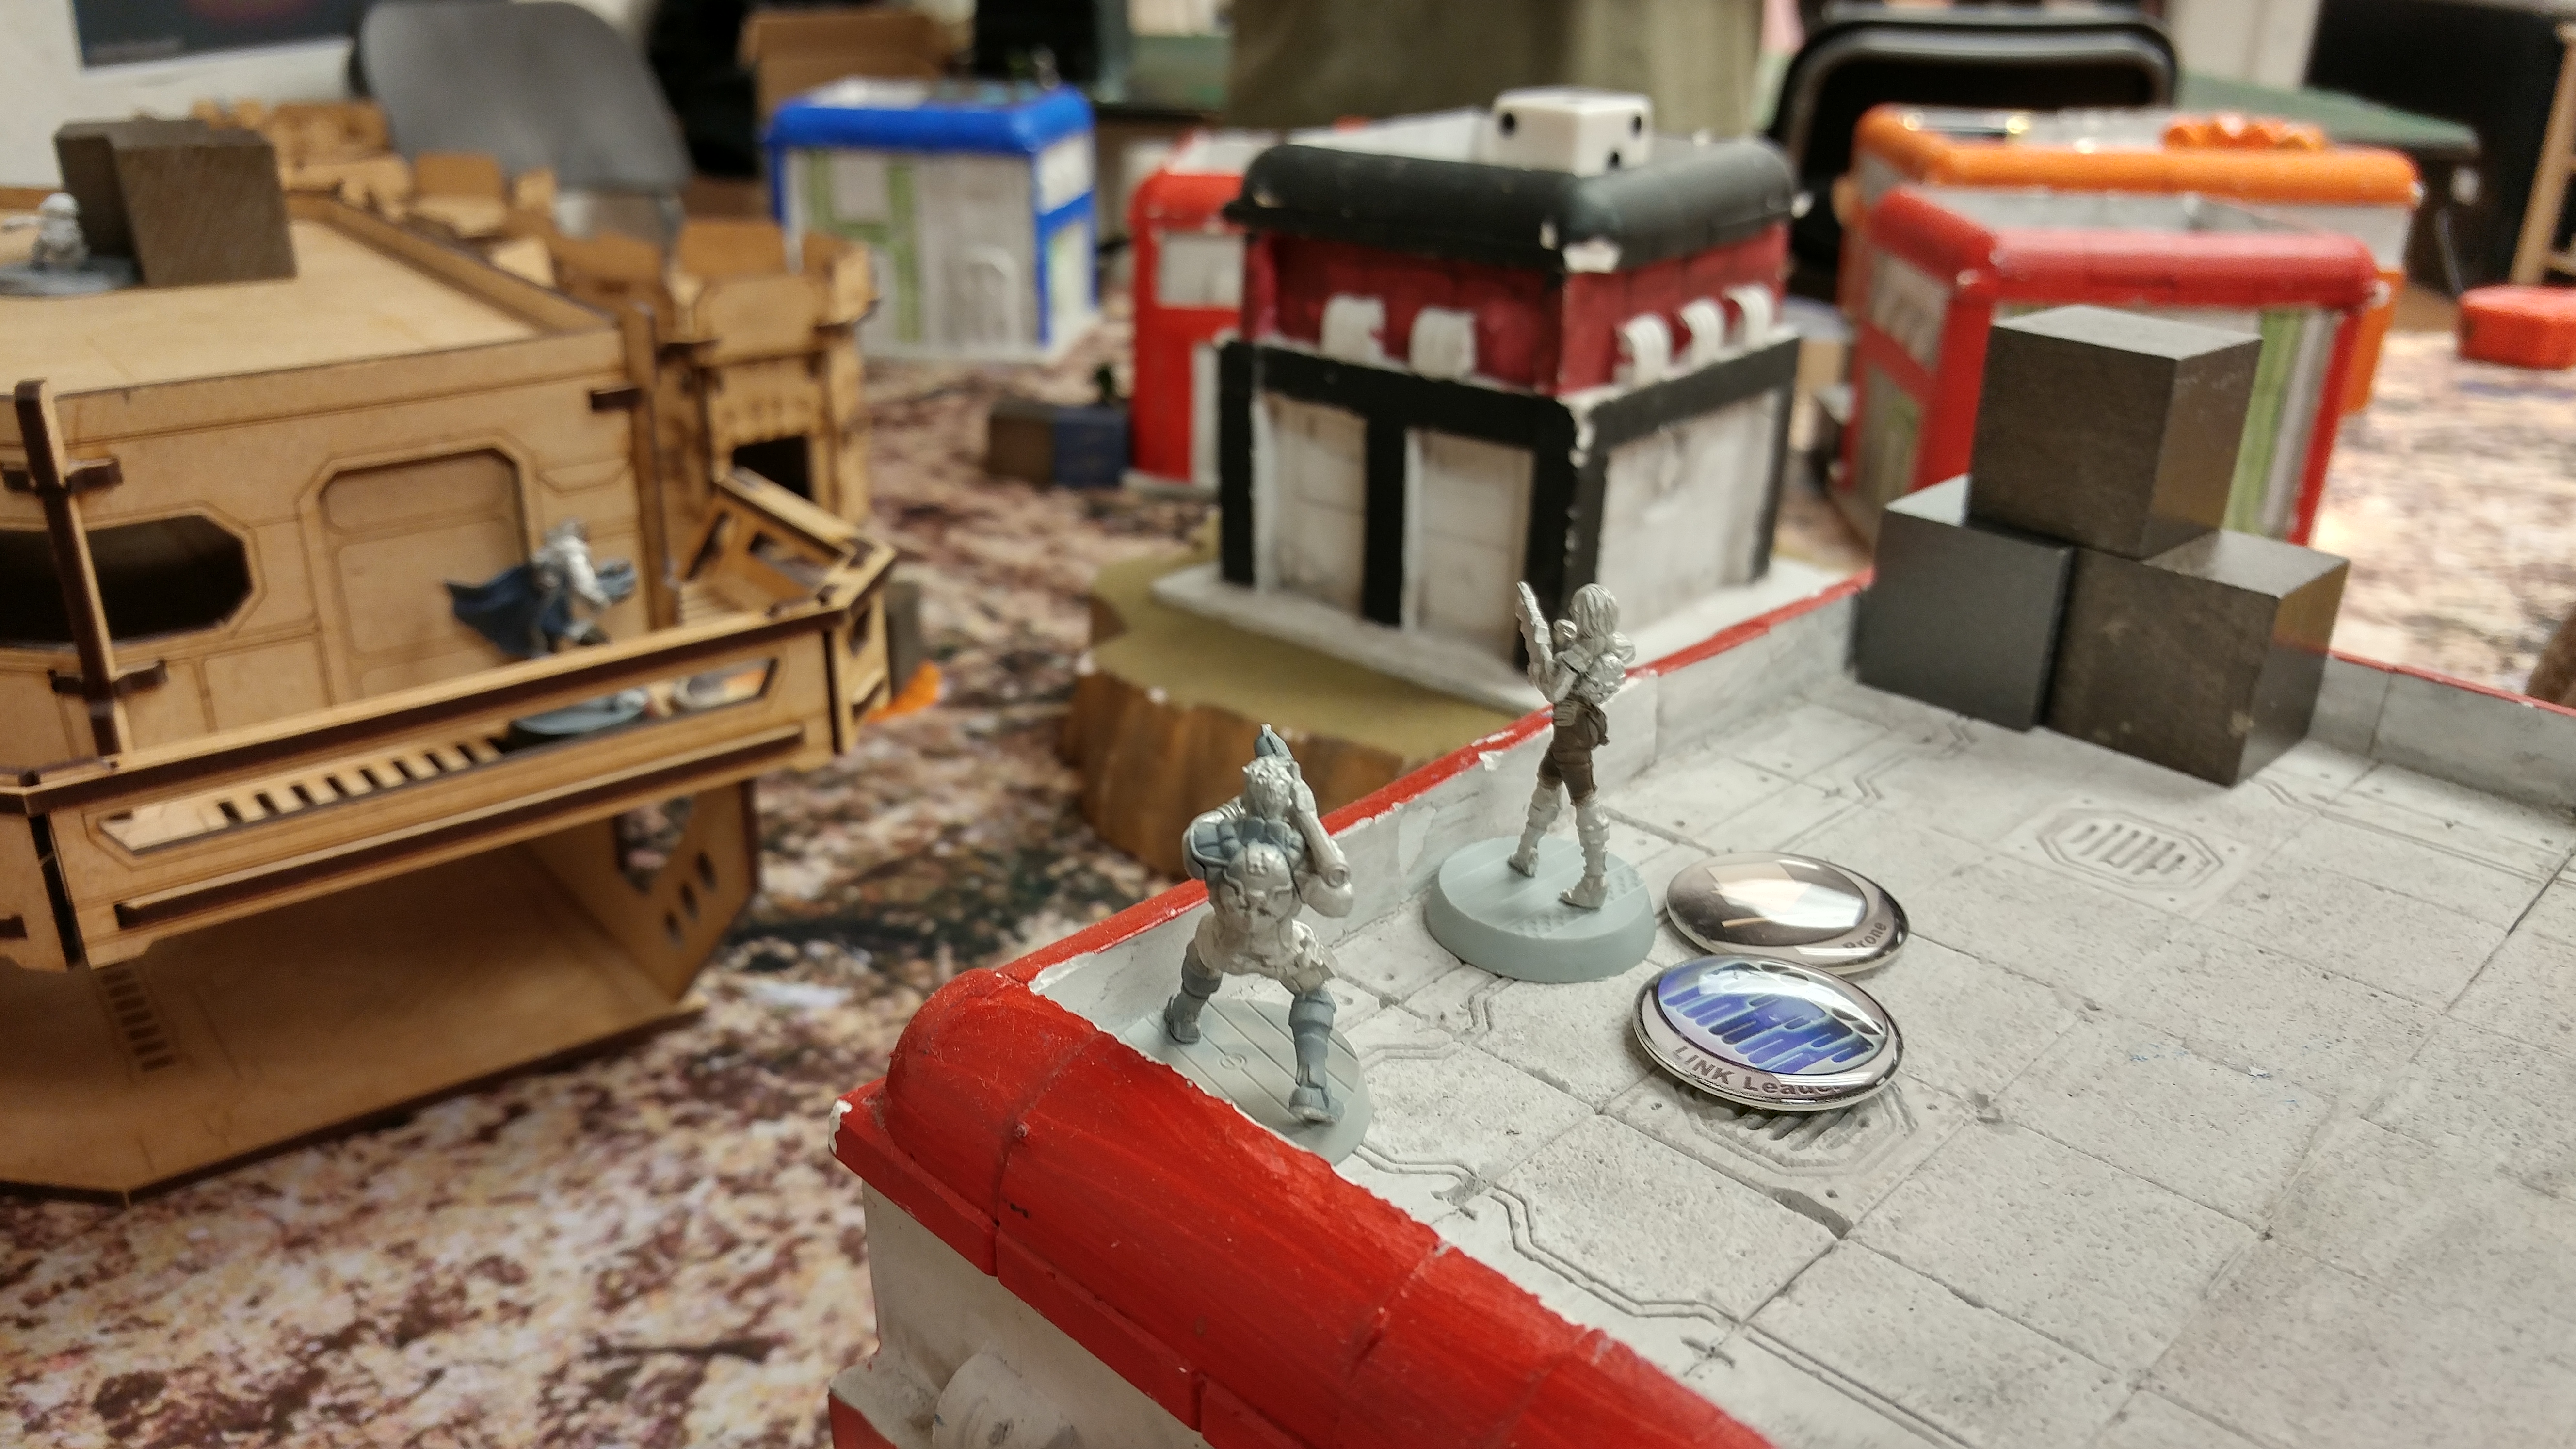
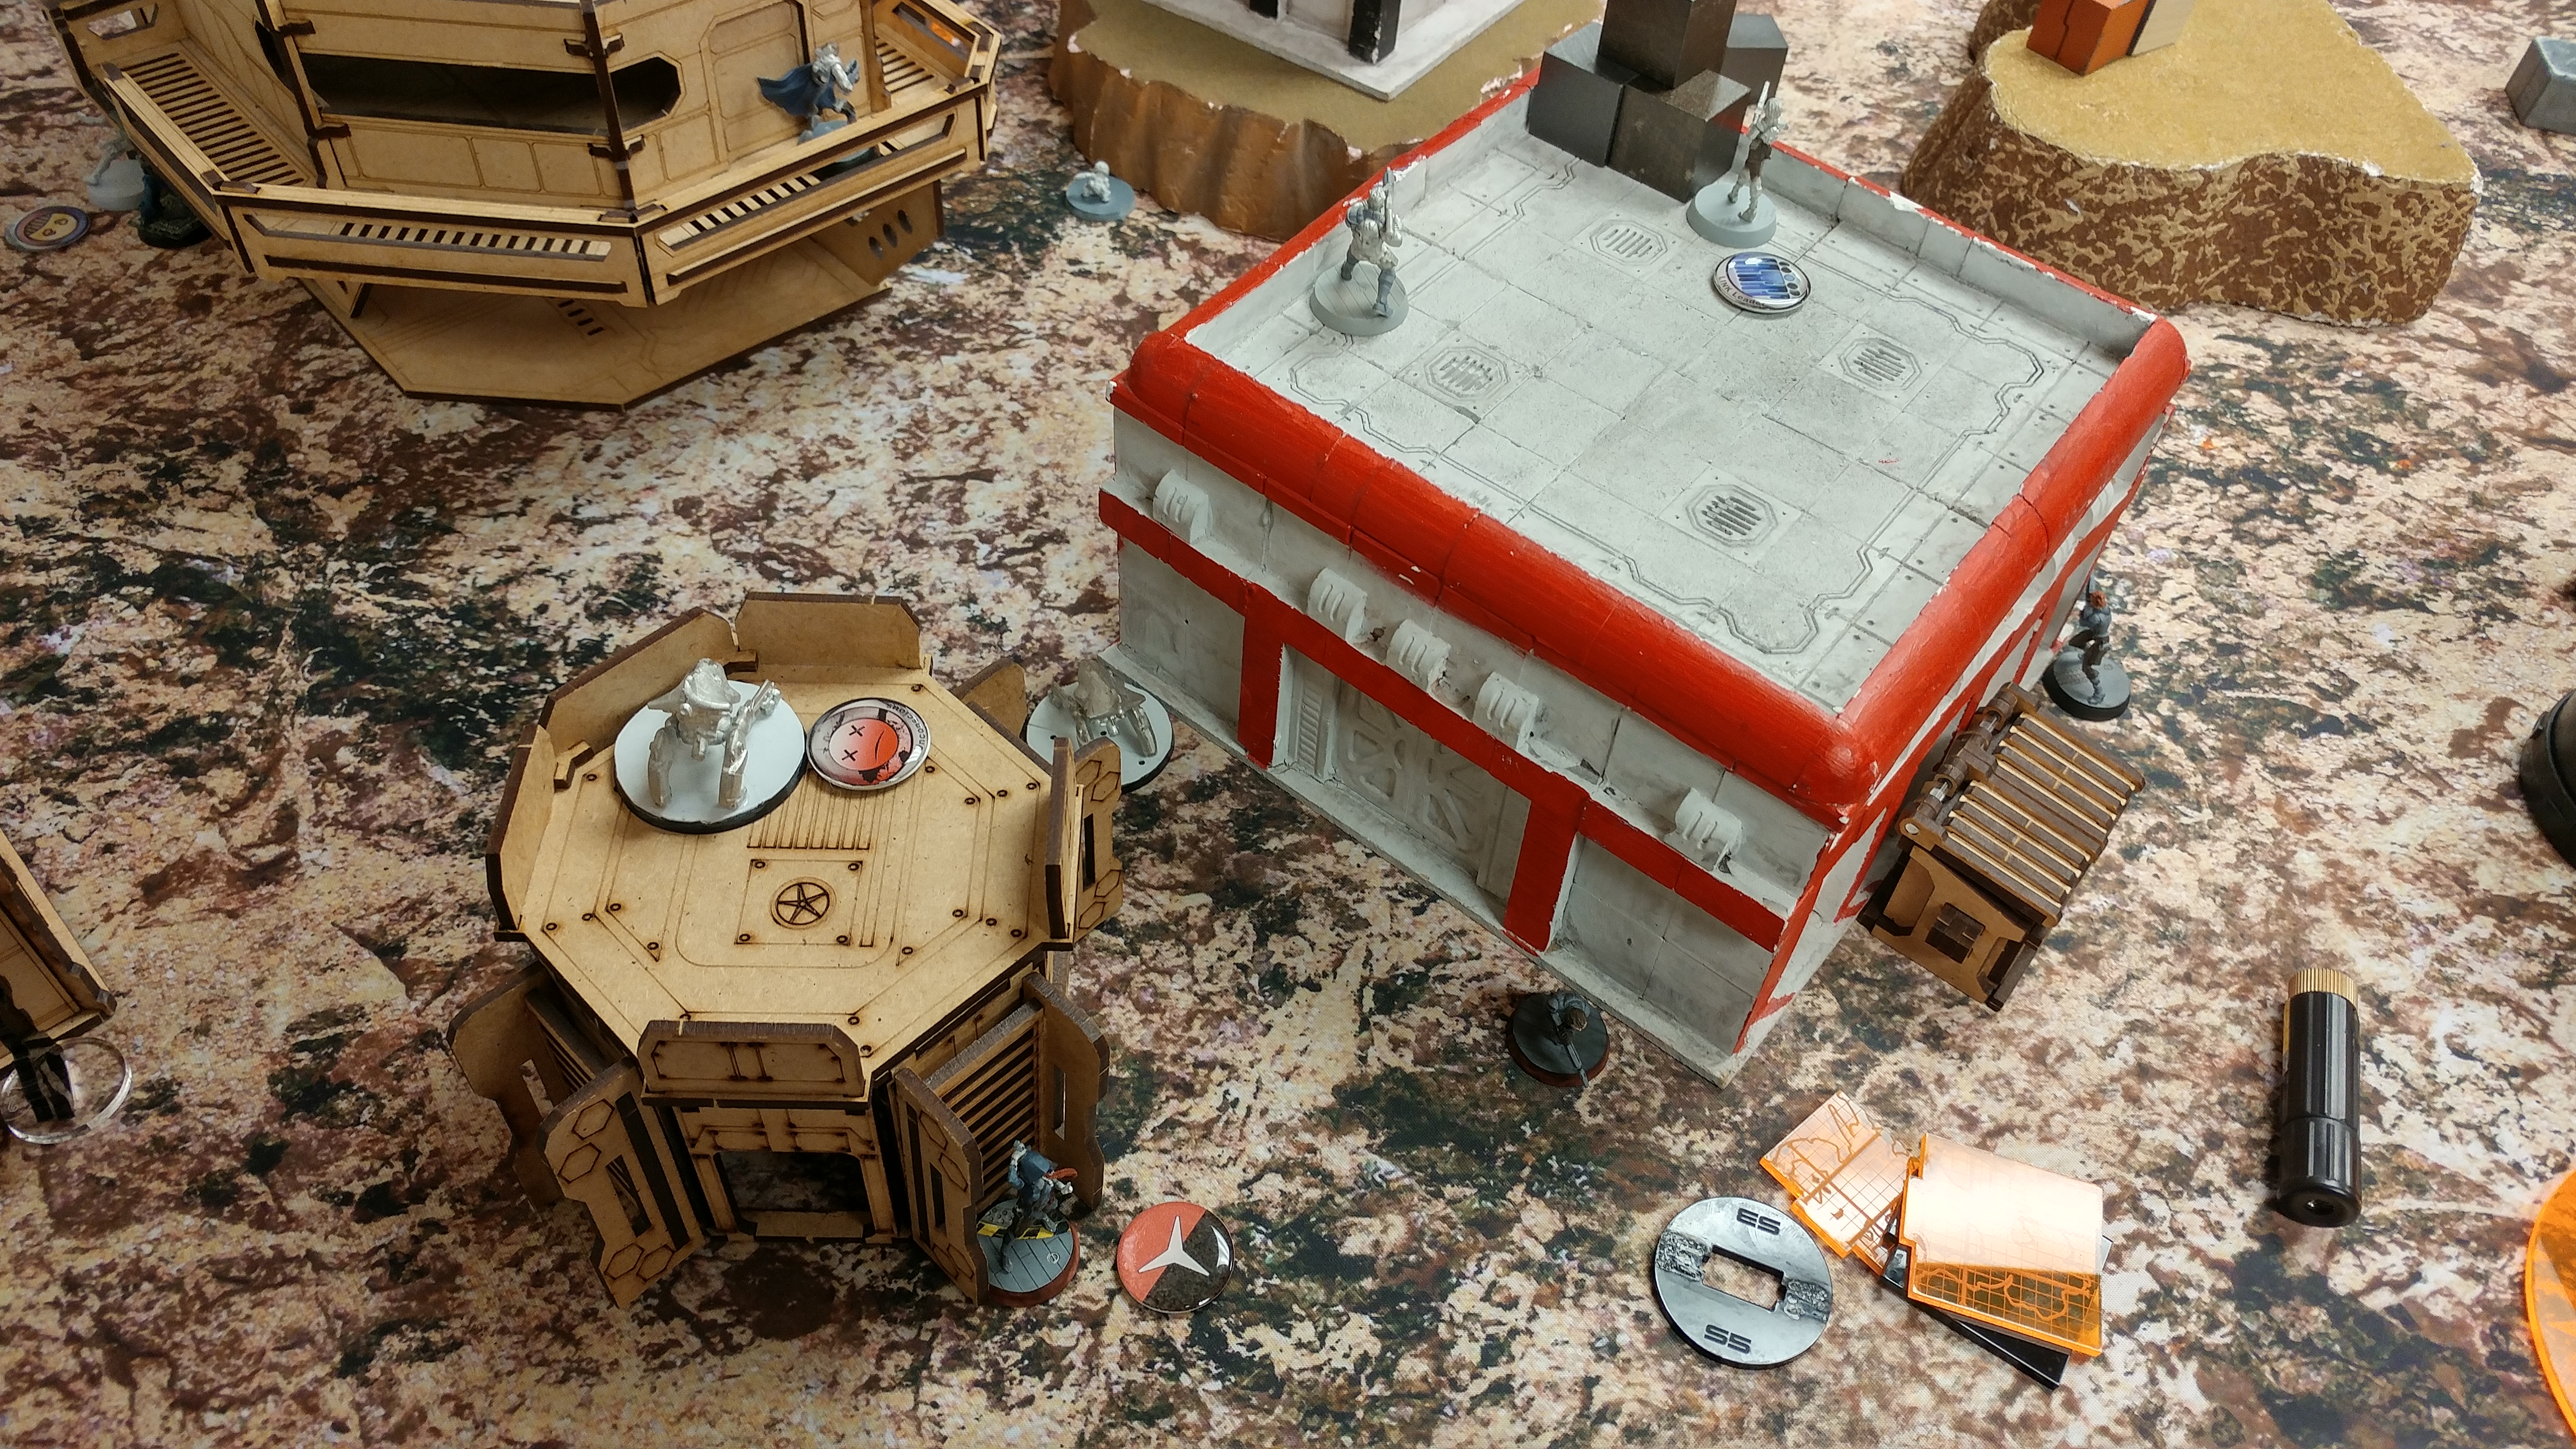
I try to remove the Zuyong by dropping in a Hellcat HMG and gunning it down, but it passes ARM and I don’t have any more orders in that group. I give up and reform the Haris, running the Jaguar Panzerfaust into LoF of the Daofei, hanging the Jaguar CR out to dry against the Zuyong’s suppression. It pays off, as I glue the Daofei but lose the Jaguar CR to the Zuyong’s suppression.
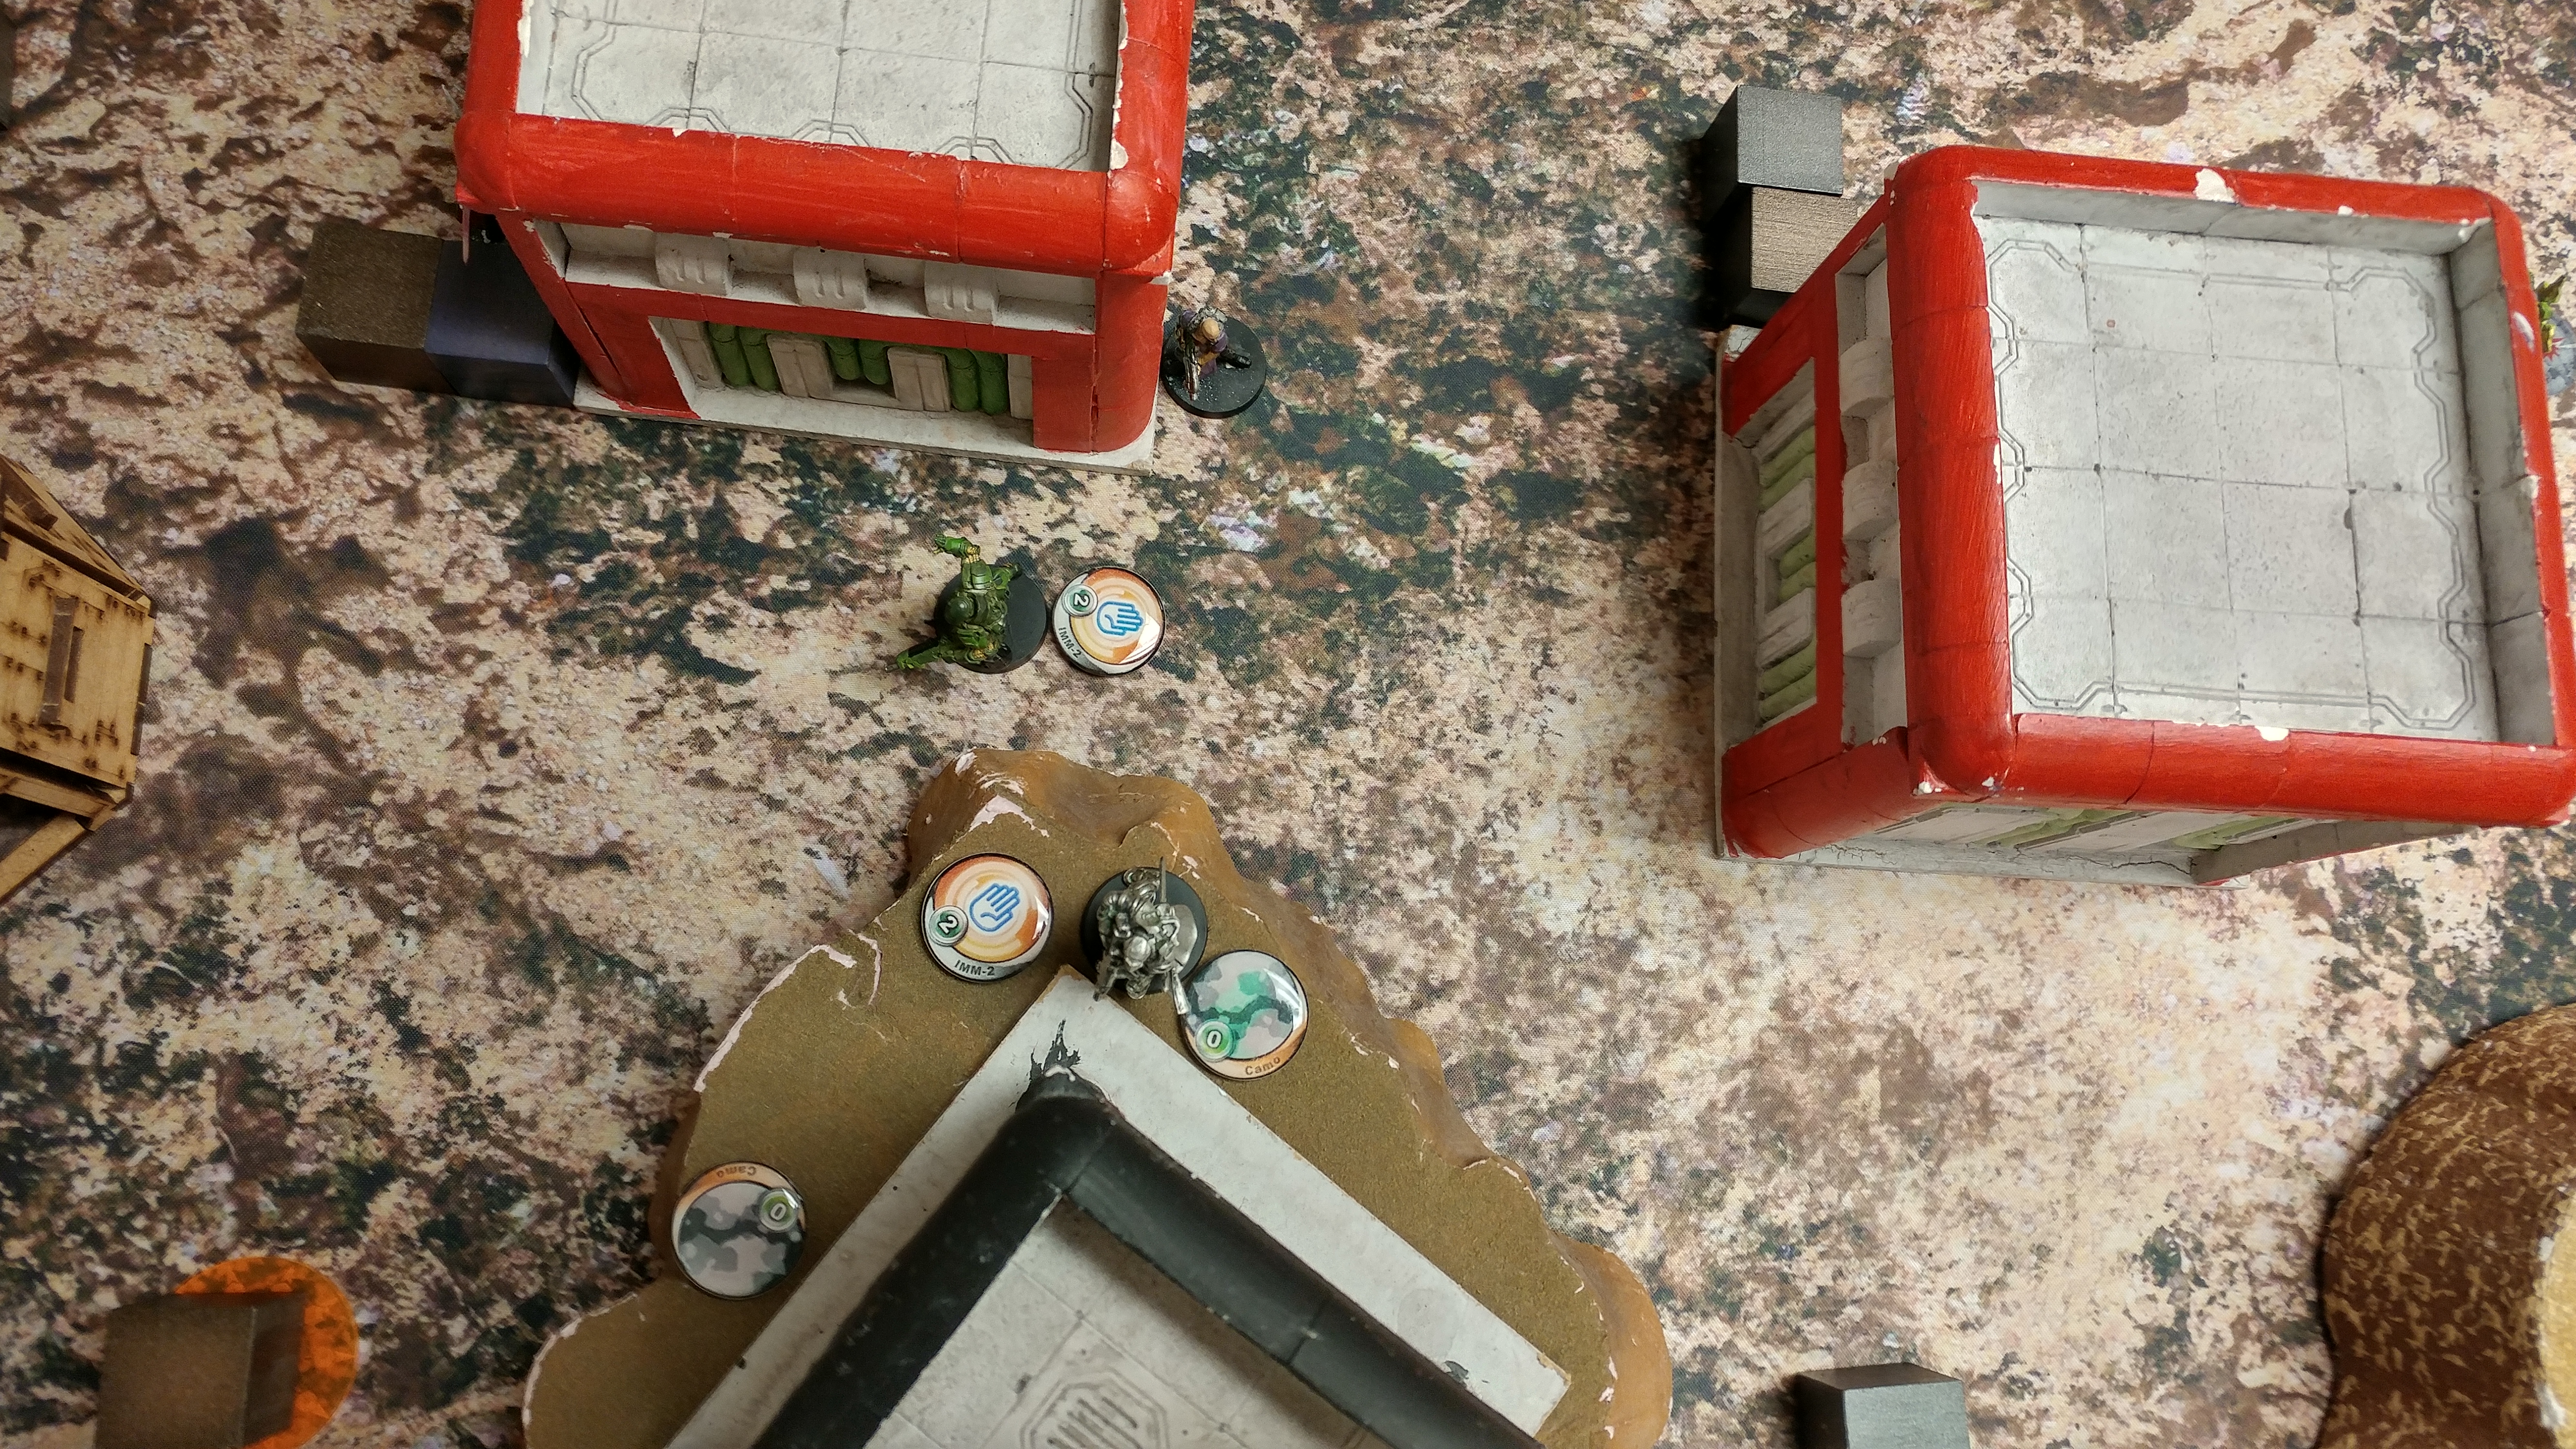
 That blasted FO also flash pulses my Jaguar Panzerfaust as well as Massacre when I try to take it out, but at least I don’t lose them. It was a pretty good firelane, as you can see here:
Turn 3
Top of Turn 3 – Yu Jing
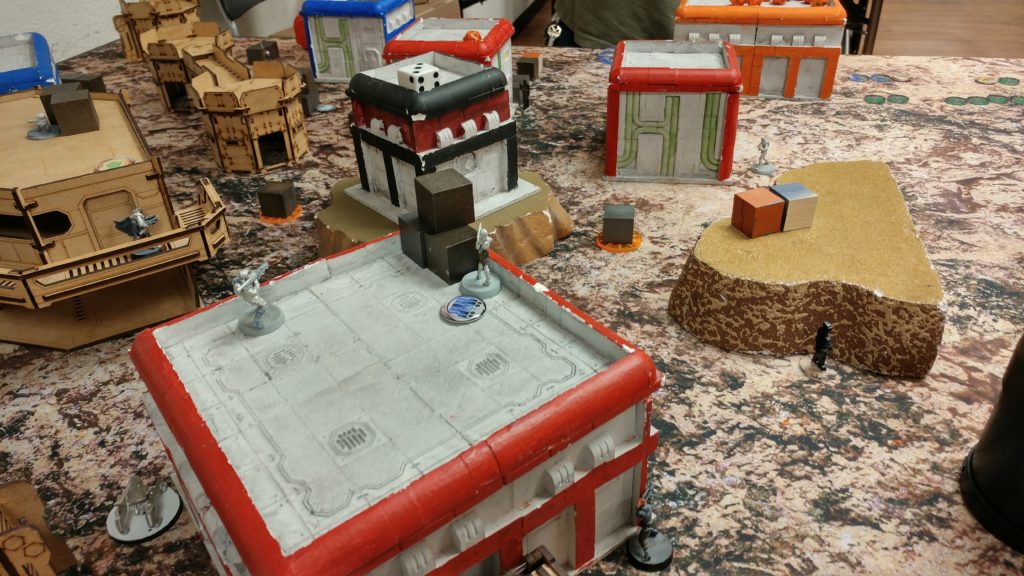
The Shaolin advance again, but the remnants of my Haris don’t really do anything effective against them. Nick coordinated orders out the Guilang and the FO on the right to try and gun down my Alguacil HMG. I elect to take normal rolls from the FO’s combi rifle and face to face with the Guilang. A combi shot sneaks through and drops the Alguacil, but at least I take out the Guilang MSR. Somewhere in here I lose an Alguacil rifle too, but I forget to what. Probably the Zuyong?
 Speaking of the Zuyong, Nick needs to get a box so he bum-rushes the Zuyong up the field to get to the center box, but my Jaguar glues him! Success!
 One of his last few FO’s tries to make it, but the Moran in suppression finishes him off, and Nick throws in the towel as he’s out of orders.
7-0 Corregidor Victory!
Big thanks to Nick for a fun and challenging game, and for the opportunity to play a force I don’t get to see very often. I look forward to throwing down against his Yu Jing again!
Notes
- I’ve often claimed that the best link team bonus is the +1 Burst… but SSL2 is really, really strong too. For a long time people in our meta have been playing links wrong, i.e. not delaying ARO until the second short skill is declared. That’s very powerful.
- Also, ignoring the MSV2 + smoke trick is pretty baller too. I got lucky by pasting the Hsien, but that’s really the whole point of a linked ML, isn’t it? Lupe would’ve also been a bad target, but Nick might’ve been able to be in cover for that one, so who knows.
- I hung the Tomcat out to dry, but kinda intentionally? Forcing Nick to spend command tokens in his Loss of Lieutenant turn was really powerful, even though it did set him up to take out the Algaucil HMG later. I suppose he could’ve coordinated them that turn from the positions they were in, but it would’ve meant a lot more AROs than just the HMG based on positioning.
- I was pretty happy with my deployment this game, at least of the Alguacil link, the bots, and even the Haris.
- A Moran in suppression covering an objective from an elevated position is a royal pain to dislodge. I should do that to people more often.
- I’m glad I didn’t try to mine clear with the Koalas, I think just spending the orders to get the Bandit in the right position was far more efficient (and meant the Daofei couldn’t get cute and just roll up the board unopposed).
- I was less happy with the way I handled the Haris team though. I’ve been deploying them at their maximum distance from one another, and that’s causing lots of issues because it exposes the inactive members of the fireteam to AROs. I think the right answer is to make more stuff prone if I’m doing this, to prevent this particular issue.