
Optically Disrupted Wall
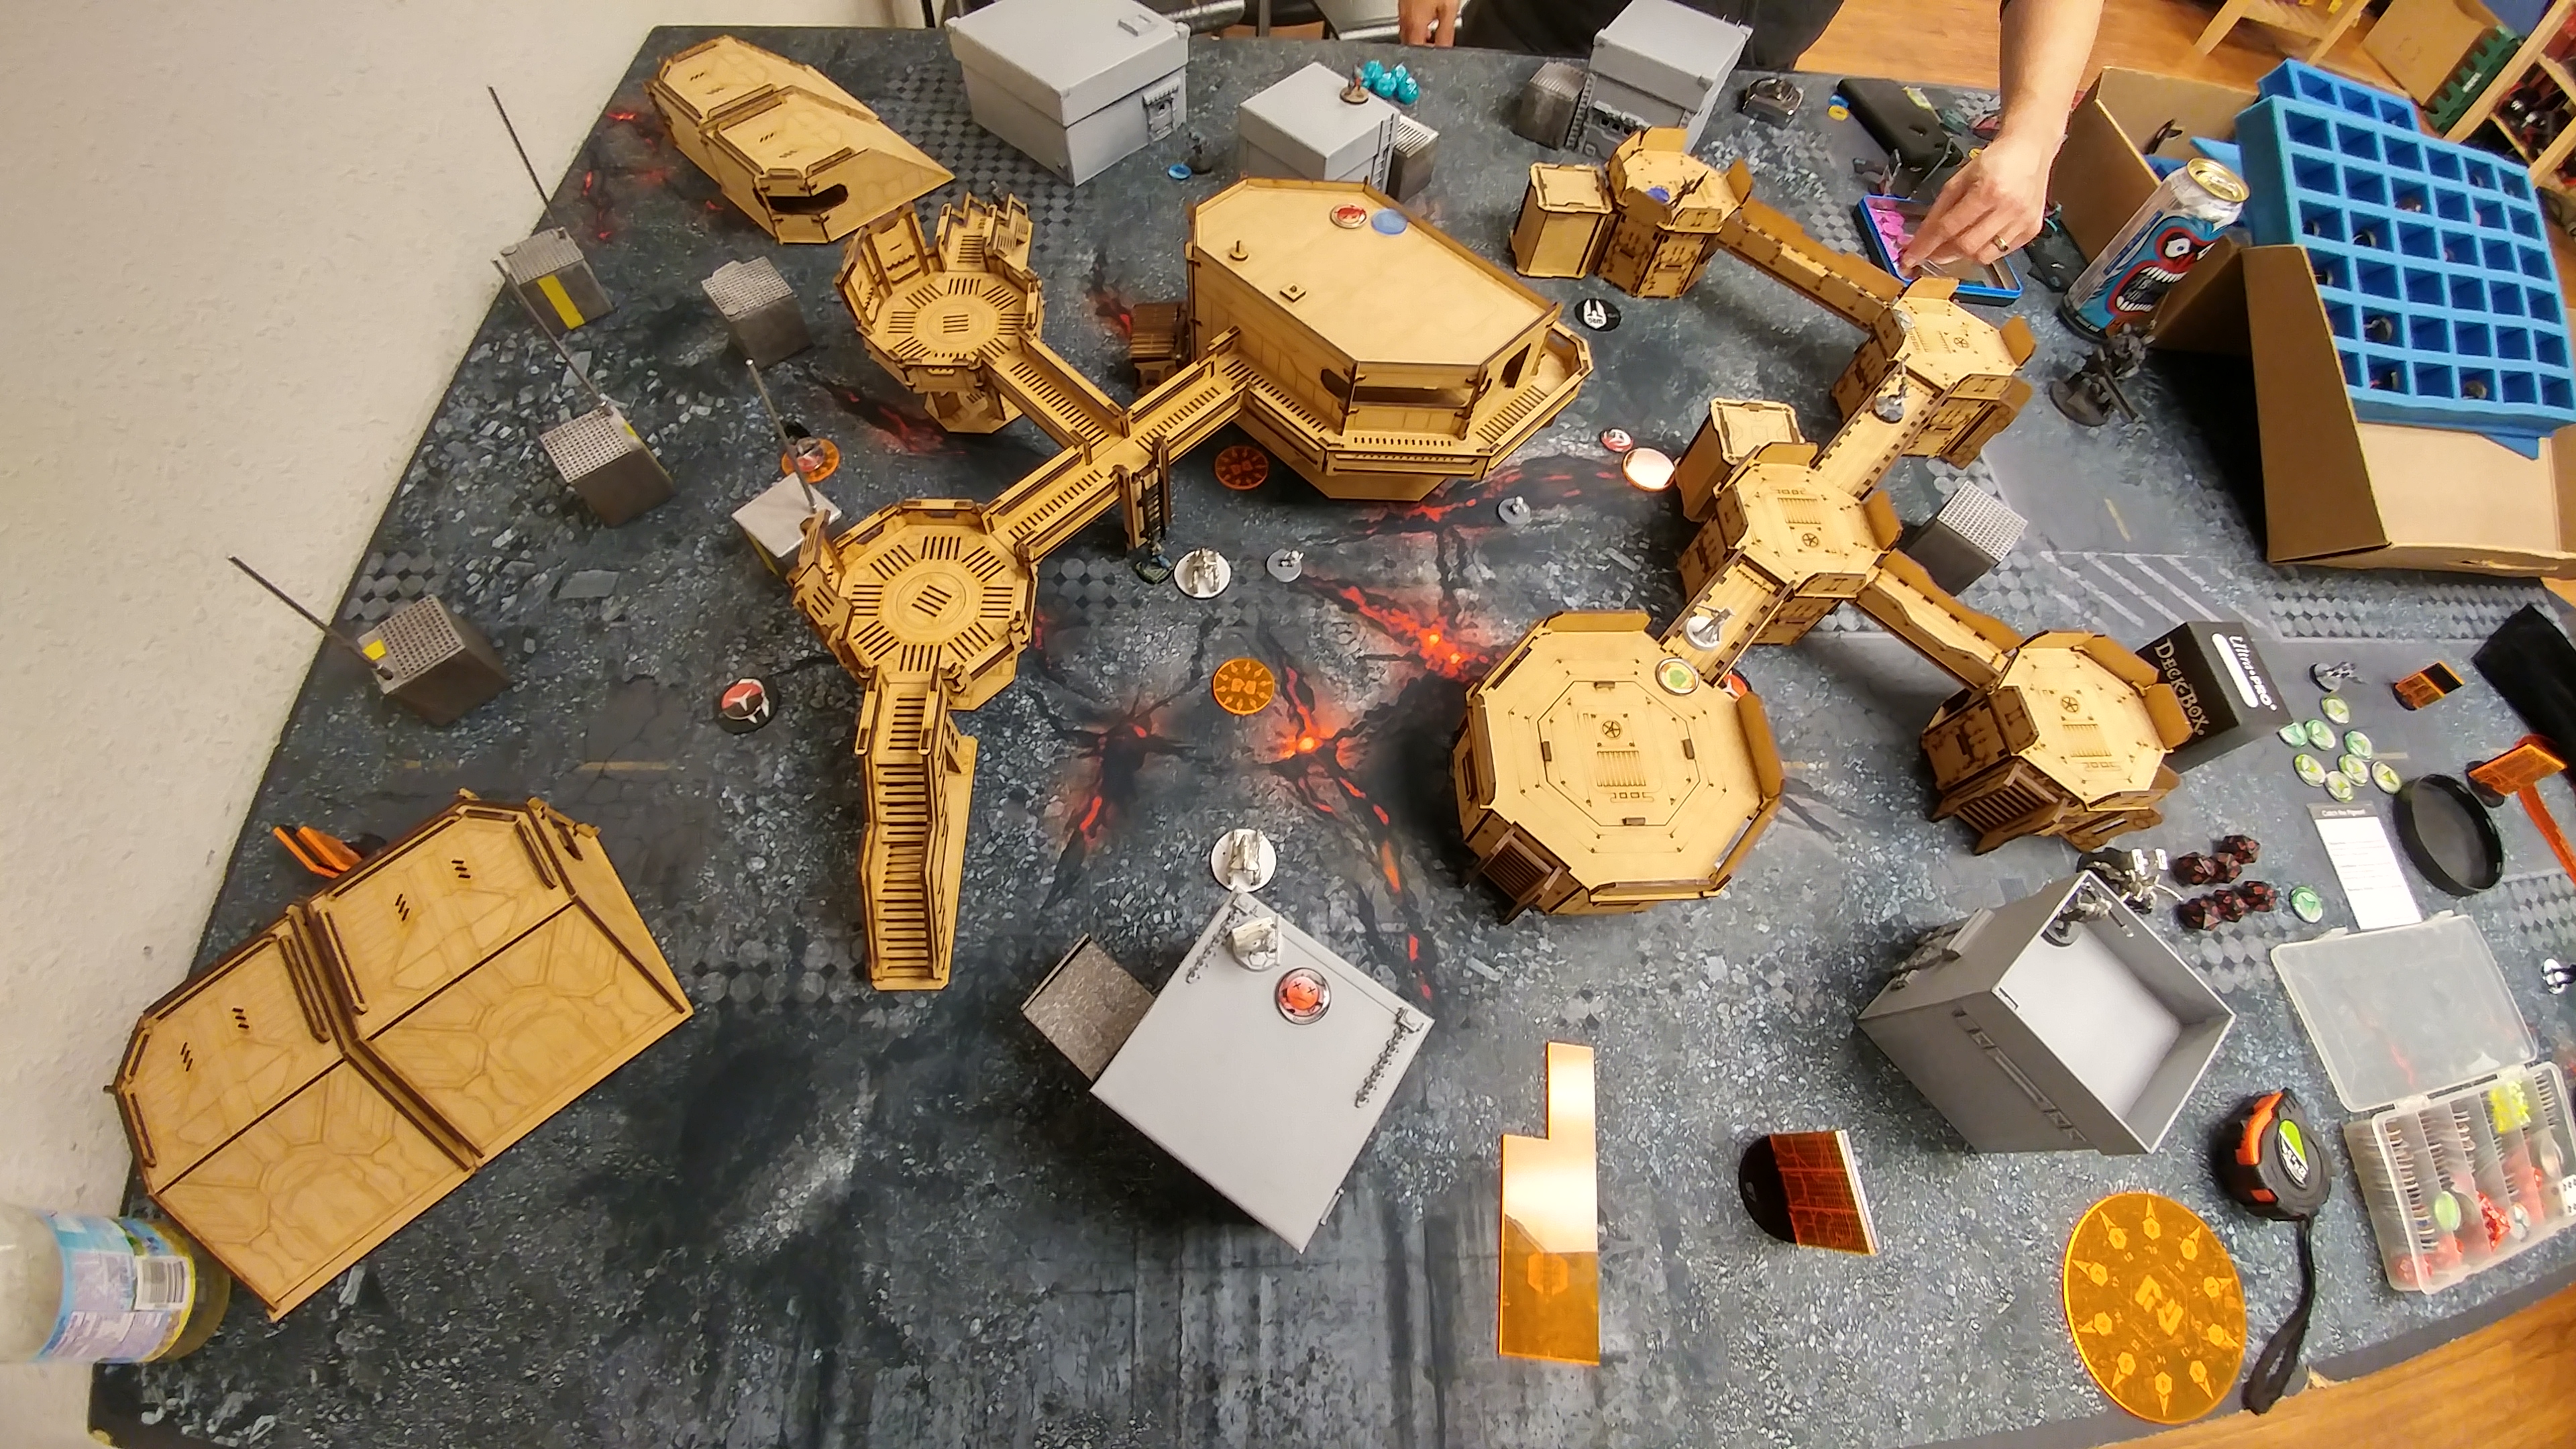
So I haven’t played Comms Center before, and both Nate and I were out of practice after a busy holiday season. We figured we’d have a friendly practice game of Comms Center. I had a few minutes to set up the board while Nate drove over, and I got a little carried away. I built out a catwalk system and put in some Dragon’s Teeth to represent a base fortified against armor.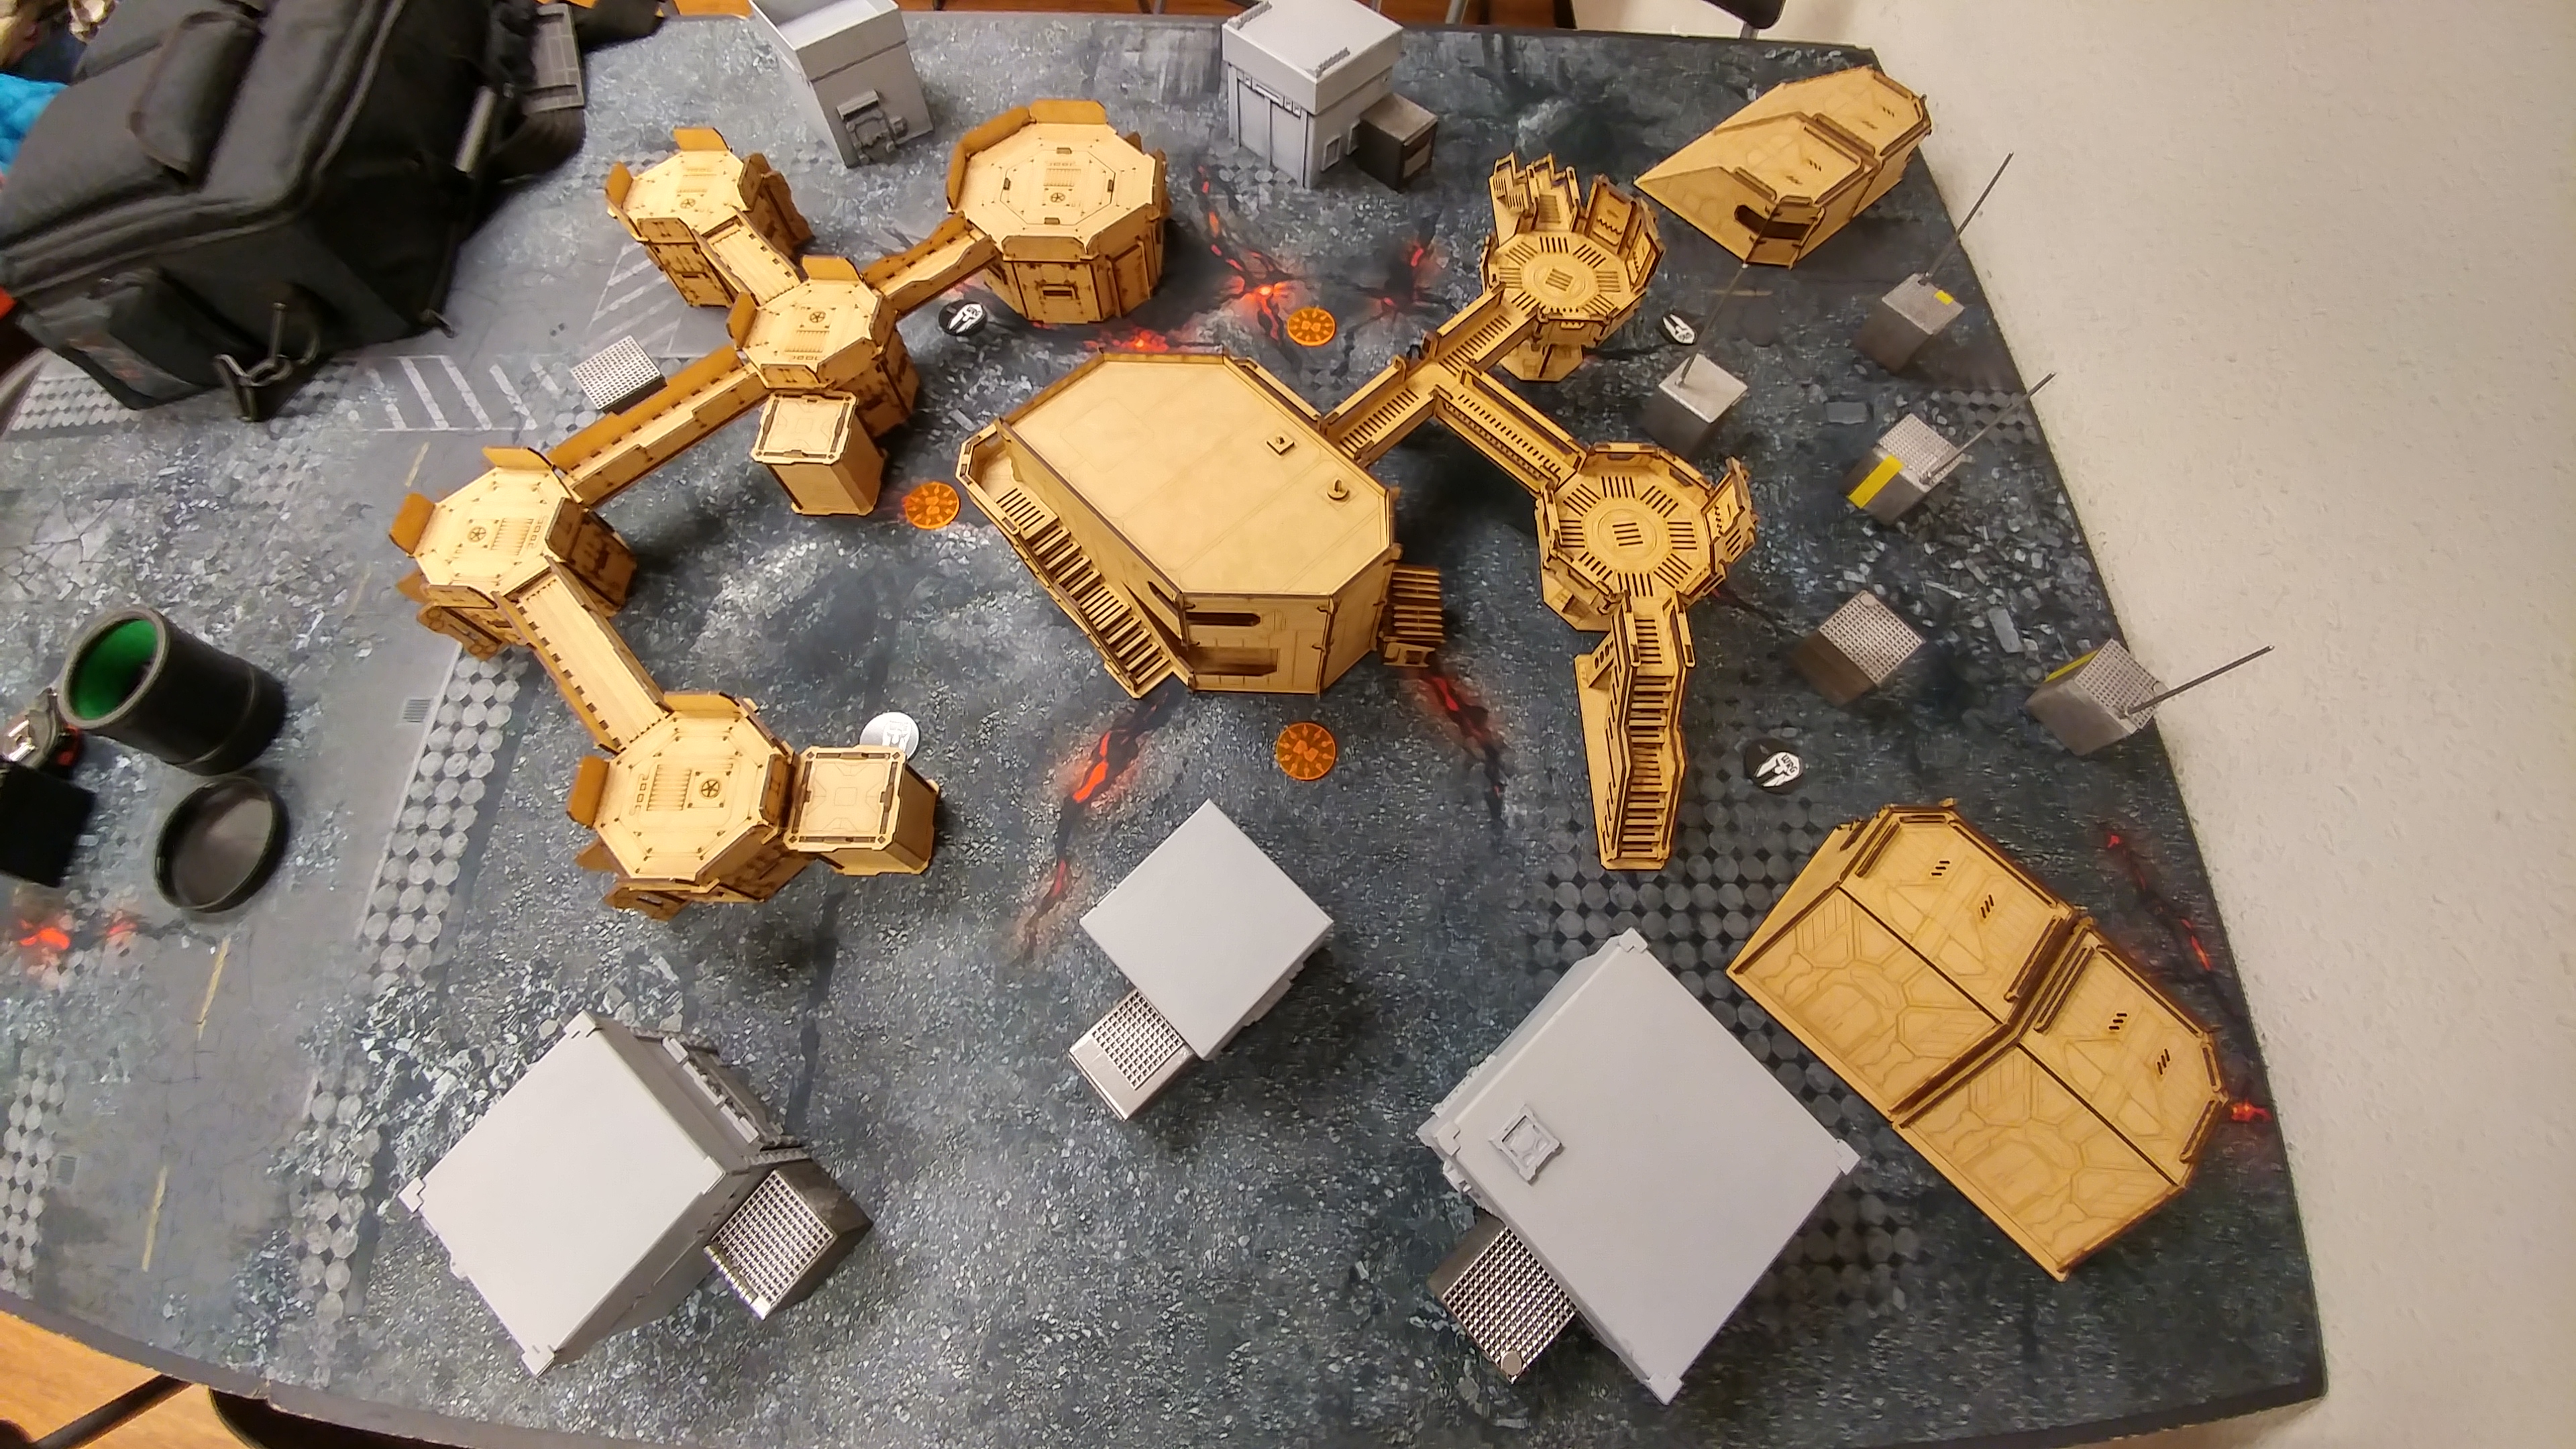 I really like the Warsen.al Comanche terrain, especially the armored plates that are on the octagons. It’s pretty cool stuff. The other catwalk terrain is pretty cool too, but it doesn’t let you put in catwalks on rotationally adjacent octagon faces, or at least I haven’t figured out how it’s supposed to work. Putting the Comanche barracks in the center, along with the catwalks, did a great job of breaking up the board. The diagonal firelanes were pretty big, but I figured Nate might bring his new Szalamandra and need some room to maneuver. It turned out to be pretty relevant.
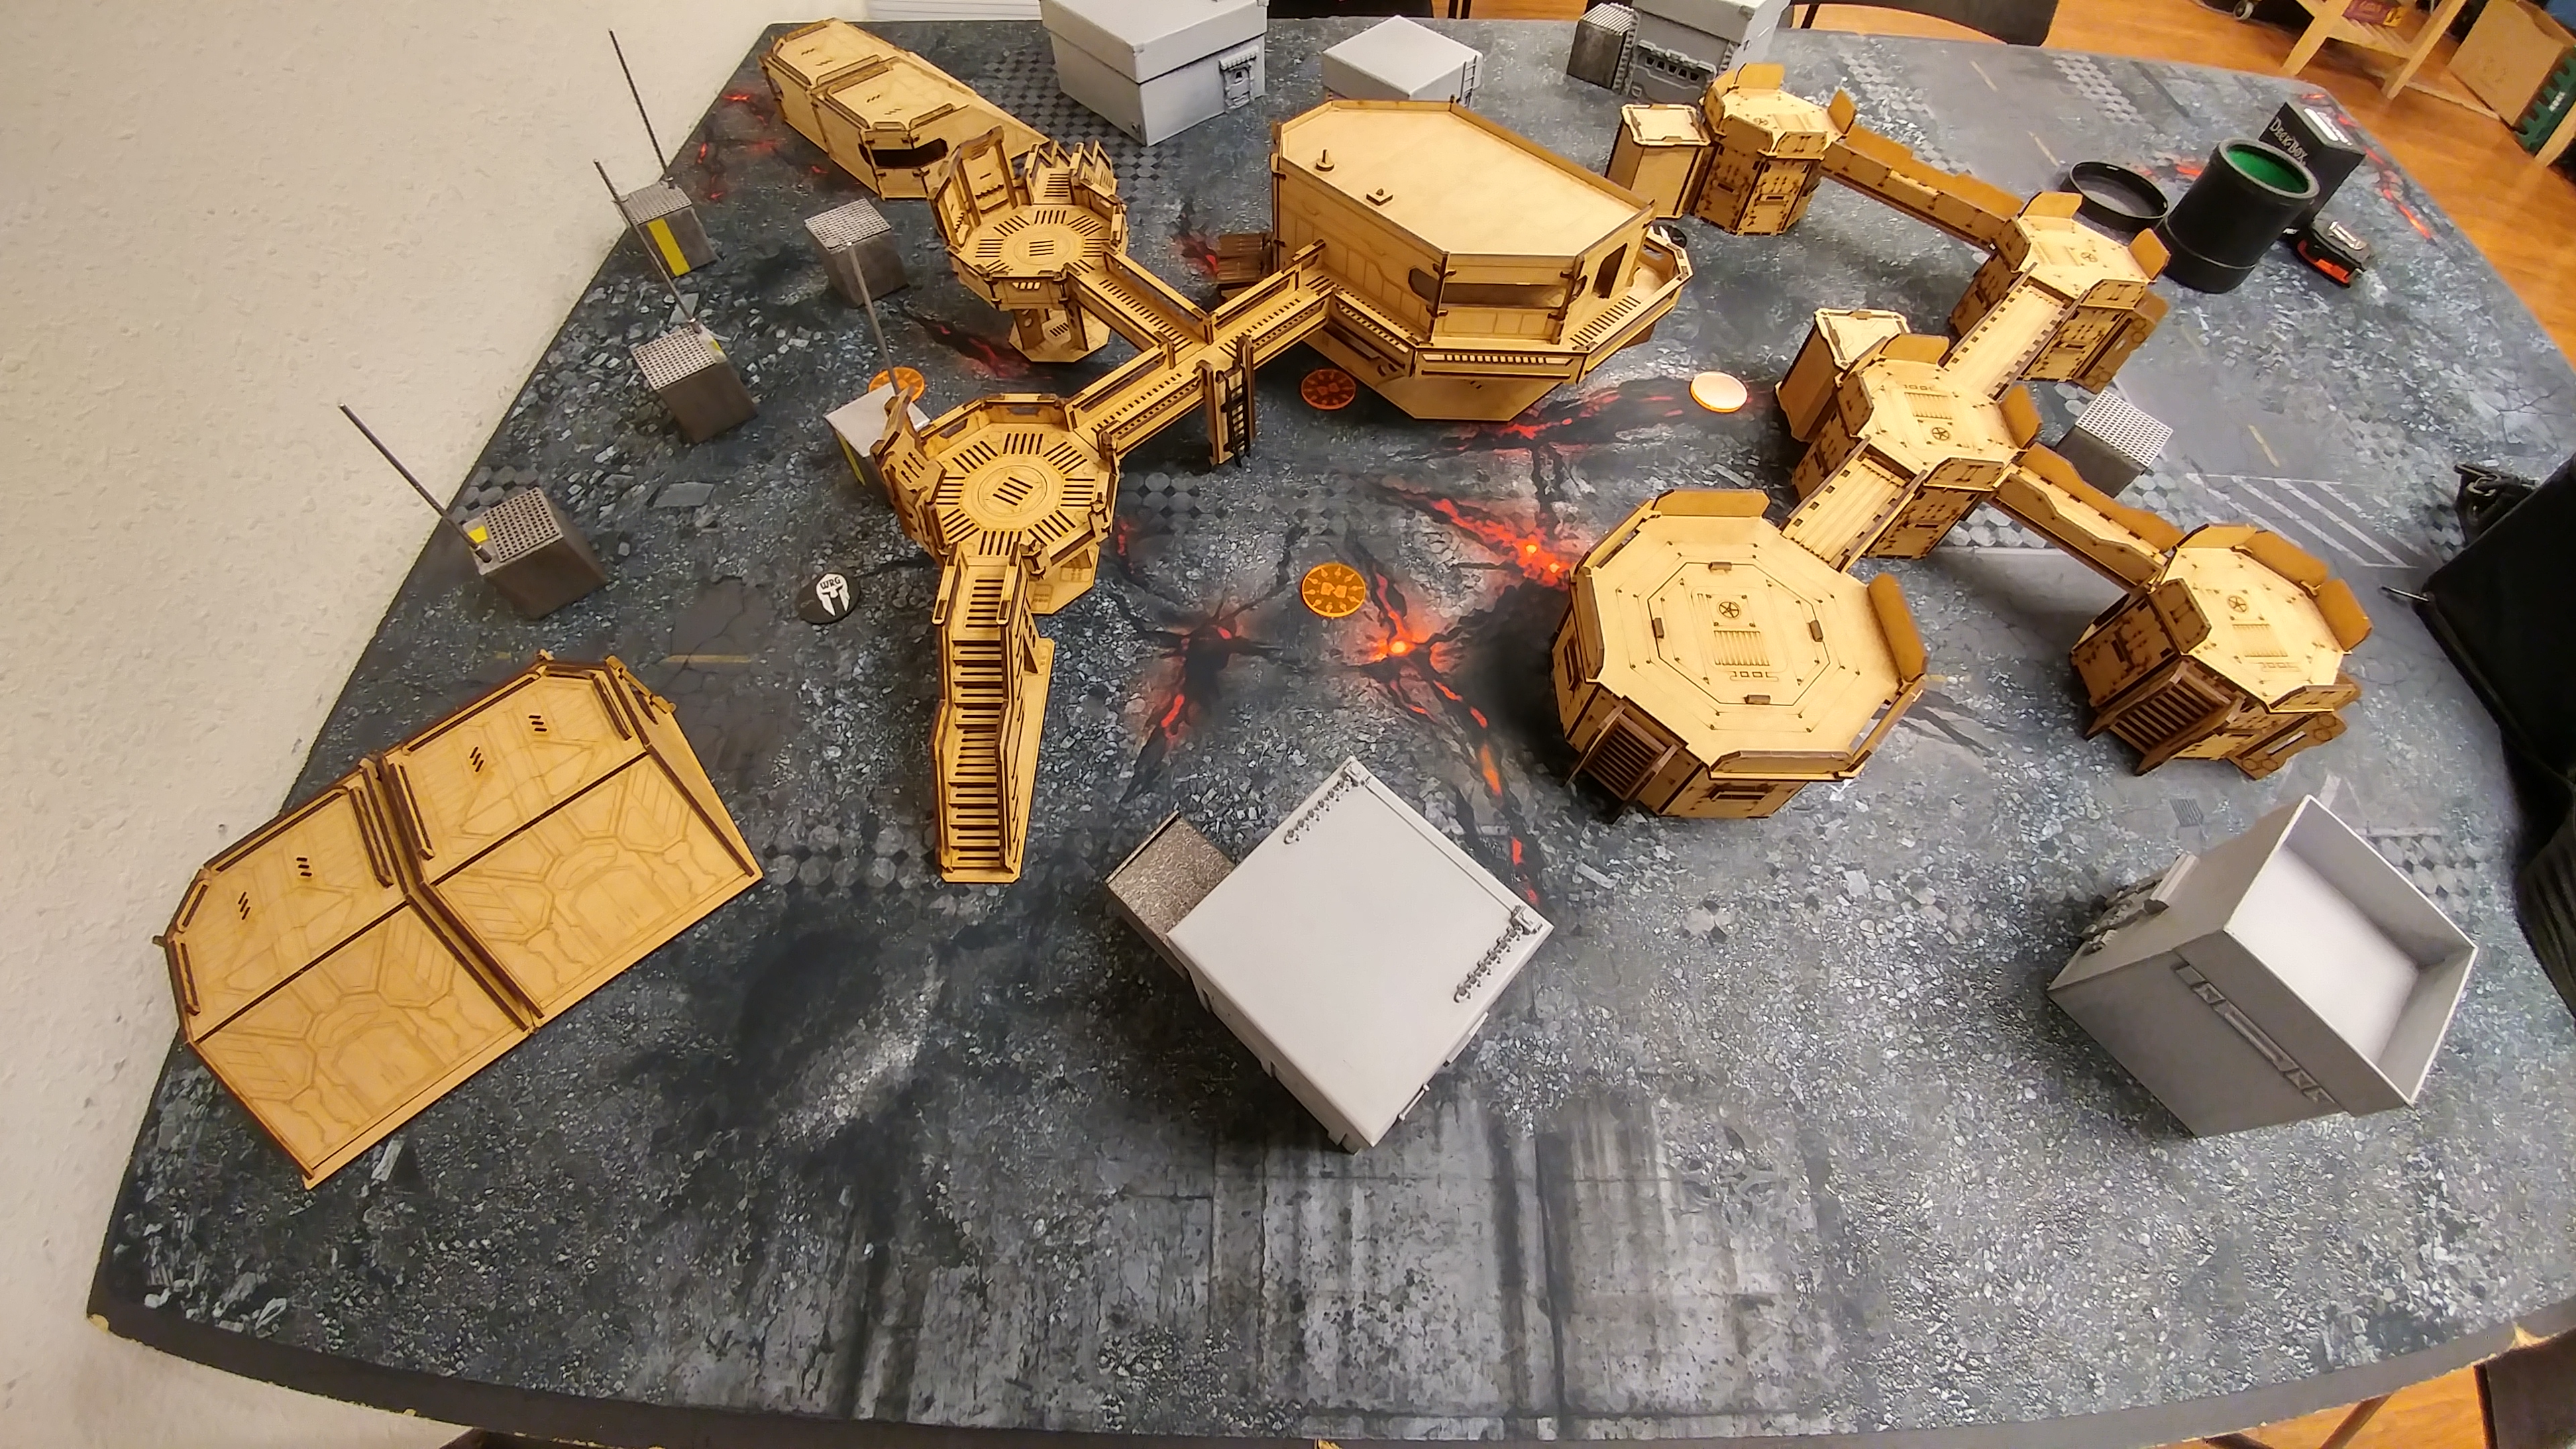 I really liked the board, even though it was pretty open. I figured both of us were playing Nomads with access to Morlocks so we’d make do if it came down to it. I won the rolloff and elected to go first. I think that my playstyle is pretty tied to alpha striking and disrupting these days, so I think I’ll need to start choosing deployment for a few games so I don’t lose the ability to deploy properly if I’m going second.
Overview
- Mission: Comms Center
- Forces: Nomads versus Nomads (300)
- Deploy First: Nomads (OpFor)
- First Turn: Nomads
[img]https://assets.infinitythegame.net/infinityarmy/img/_logosweb/logo_501.png[/img][b] Comms Center[/b]
[b]GROUP 1 | [/b][img]https://assets.infinitythegame.net/infinityarmy/img/_logosweb/orden_regular.png[/img]10
[img]https://assets.infinitythegame.net/infinityarmy/img/_logosweb/501/logo_40.png[/img] [b]RIOT GRRL[/b] Missile Launcher / Pistol, Knife. (2 | [b]33[/b])
[img]https://assets.infinitythegame.net/infinityarmy/img/_logosweb/501/logo_40.png[/img] [b]RIOT GRRL (Specialist Operative)[/b] Combi Rifle, Blitzen, Stun Grenades / Pistol, Knife. (0 | [b]30[/b])
[img]https://assets.infinitythegame.net/infinityarmy/img/_logosweb/501/logo_10.png[/img] [b]ZERO (Forward Observer)[/b] Combi Rifle, Antipersonnel Mines / Pistol, Knife. (0 | [b]19[/b])
[img]https://assets.infinitythegame.net/infinityarmy/img/_logosweb/501/logo_10.png[/img] [b]ZERO Hacker (Assault Hacking Device)[/b] Combi Rifle, Antipersonnel Mines / Pistol, Knife. (0.5 | [b]24[/b])
[img]https://assets.infinitythegame.net/infinityarmy/img/_logosweb/501/logo_21.png[/img] [b]TRANSDUCTOR ZOND[/b] Flash Pulse, Sniffer / Electric Pulse. (0 | [b]8[/b])
[img]https://assets.infinitythegame.net/infinityarmy/img/_logosweb/501/logo_21.png[/img] [b]TRANSDUCTOR ZOND[/b] Flash Pulse, Sniffer / Electric Pulse. (0 | [b]8[/b])
[img]https://assets.infinitythegame.net/infinityarmy/img/_logosweb/501/logo_33.png[/img] [b]LUNOKHOD[/b] Heavy Shotgun, Akrylat-Kanone, D-Charges, CrazyKoalas (2) / Electric Pulse. (0 | [b]24[/b])
[img]https://assets.infinitythegame.net/infinityarmy/img/_logosweb/501/logo_35.png[/img] [b]SALYUT Hacker (EVO Hacking Device)[/b] Electric Pulse. (0.5 | [b]25[/b])
[img]https://assets.infinitythegame.net/infinityarmy/img/_logosweb/501/logo_17.png[/img] [b]STEMPLER ZOND[/b] Combi Rifle, Sniffer / Electric Pulse. (0 | [b]17[/b])
[img]https://assets.infinitythegame.net/infinityarmy/img/_logosweb/501/logo_5.png[/img] [b]REVEREND MOIRA[/b] HMG / Pistol, Shock CCW. (1.5 | [b]34[/b])[b]GROUP 2 | [/b][img]https://assets.infinitythegame.net/infinityarmy/img/_logosweb/orden_regular.png[/img]2 [img]https://assets.infinitythegame.net/infinityarmy/img/_logosweb/orden_irregular.png[/img]2 [img]https://assets.infinitythegame.net/infinityarmy/img/_logosweb/orden_impetuosa.png[/img]2
[img]https://assets.infinitythegame.net/infinityarmy/img/_logosweb/501/logo_49.png[/img] [b]TASKMASTER Lieutenant[/b] Red Fury, Pulzar, CrazyKoalas + TinBot A (Deflector L1) / Heavy Pistol, DA CCW. (1 | [b]53[/b])
[img]https://assets.infinitythegame.net/infinityarmy/img/_logosweb/501/logo_13.png[/img] [b]JAGUAR[/b] Adhesive Launcher, Panzerfaust / Pistol, DA CCW. (0.5 | [b]13[/b])
[img]https://assets.infinitythegame.net/infinityarmy/img/_logosweb/501/logo_12.png[/img] [b]MORLOCK[/b] Chain Rifle, Smoke Grenades / Pistol, E/M CCW. (0 | [b]6[/b])
[img]https://assets.infinitythegame.net/infinityarmy/img/_logosweb/501/logo_12.png[/img] [b]MORLOCK[/b] Chain Rifle, Smoke Grenades / Pistol, E/M CCW. (0 | [b]6[/b])
[b] 6 SWC | 300 Points |[/b] Open in Infinity Army
[img]https://assets.infinitythegame.net/infinityarmy/img/_logosweb/logo_501.png[/img][b] Nomads[/b]
[b]GROUP 1 | [/b][img]https://assets.infinitythegame.net/infinityarmy/img/_logosweb/orden_regular.png[/img]10
[img]https://assets.infinitythegame.net/infinityarmy/img/_logosweb/501/logo_49.png[/img] [b]TASKMASTER Lieutenant[/b] Red Fury, Pulzar, CrazyKoalas + TinBot A (Deflector L1) / Heavy Pistol, DA CCW. (1 | [b]53[/b])
[img]https://assets.infinitythegame.net/infinityarmy/img/_logosweb/501/logo_56.png[/img] [b]KRIZA BORAC[/b] HMG / Heavy Pistol, CC Weapon. (2 | [b]54[/b])
[img]https://assets.infinitythegame.net/infinityarmy/img/_logosweb/501/logo_16.png[/img] [b]INTERVENTOR Hacker (Hacking Device Plus)[/b] Boarding Shotgun, 1 FastPanda / Pistol, Knife. (0.5 | [b]26[/b])
[img]https://assets.infinitythegame.net/infinityarmy/img/_logosweb/501/logo_14.png[/img] [b]DAKTARI[/b] Combi Rifle / Pistol, Knife. (0 | [b]14[/b])
[img]https://assets.infinitythegame.net/infinityarmy/img/_logosweb/501/logo_21.png[/img] [b]TRANSDUCTOR ZOND[/b] Flash Pulse, Sniffer / Electric Pulse. (0 | [b]8[/b])
[img]https://assets.infinitythegame.net/infinityarmy/img/_logosweb/501/logo_21.png[/img] [b]TRANSDUCTOR ZOND[/b] Flash Pulse, Sniffer / Electric Pulse. (0 | [b]8[/b])
[img]https://assets.infinitythegame.net/infinityarmy/img/_logosweb/501/logo_10.png[/img] [b]ZERO Hacker (Killer Hacking Device)[/b] Combi Rifle, Antipersonnel Mines / Pistol, Knife. (0 | [b]21[/b])
[img]https://assets.infinitythegame.net/infinityarmy/img/_logosweb/501/logo_26.png[/img] [b]PROWLER[/b] Spitfire, D-Charges / Pistol, CCW. (2 | [b]36[/b])
[img]https://assets.infinitythegame.net/infinityarmy/img/_logosweb/501/logo_30.png[/img] [b]MORAN (Forward Observer)[/b] Combi Rifle, CrazyKoalas (2) / Pistol, Knife. (0.5 | [b]22[/b])
[img]https://assets.infinitythegame.net/infinityarmy/img/_logosweb/501/logo_35.png[/img] [b]SALYUT (Minesweeper, Repeater)[/b] Electric Pulse. (0 | [b]8[/b])[b]GROUP 2 | [/b][img]https://assets.infinitythegame.net/infinityarmy/img/_logosweb/orden_regular.png[/img]1 [img]https://assets.infinitythegame.net/infinityarmy/img/_logosweb/orden_irregular.png[/img]3 [img]https://assets.infinitythegame.net/infinityarmy/img/_logosweb/orden_impetuosa.png[/img]3
[img]https://assets.infinitythegame.net/infinityarmy/img/_logosweb/501/logo_12.png[/img] [b]MORLOCK[/b] Chain Rifle, Smoke Grenades / Assault Pistol, AP CCW. (0 | [b]8[/b])
[img]https://assets.infinitythegame.net/infinityarmy/img/_logosweb/501/logo_12.png[/img] [b]MORLOCK[/b] Chain Rifle, Smoke Grenades / Pistol, E/M CCW. (0 | [b]6[/b])
[img]https://assets.infinitythegame.net/infinityarmy/img/_logosweb/501/logo_12.png[/img] [b]MORLOCK[/b] Chain Rifle, Smoke Grenades / Pistol, E/M CCW. (0 | [b]6[/b])
[img]https://assets.infinitythegame.net/infinityarmy/img/_logosweb/501/logo_36.png[/img] [b]CARLOTA KOWALSKY[/b] Combi Rifle + Light Flamethrower, Adhesive Launcher, D-Charges / Pistol, Knife. (0 | [b]30[/b])
[b] 6 SWC | 300 Points |[/b] Open in Infinity Army
Deployment
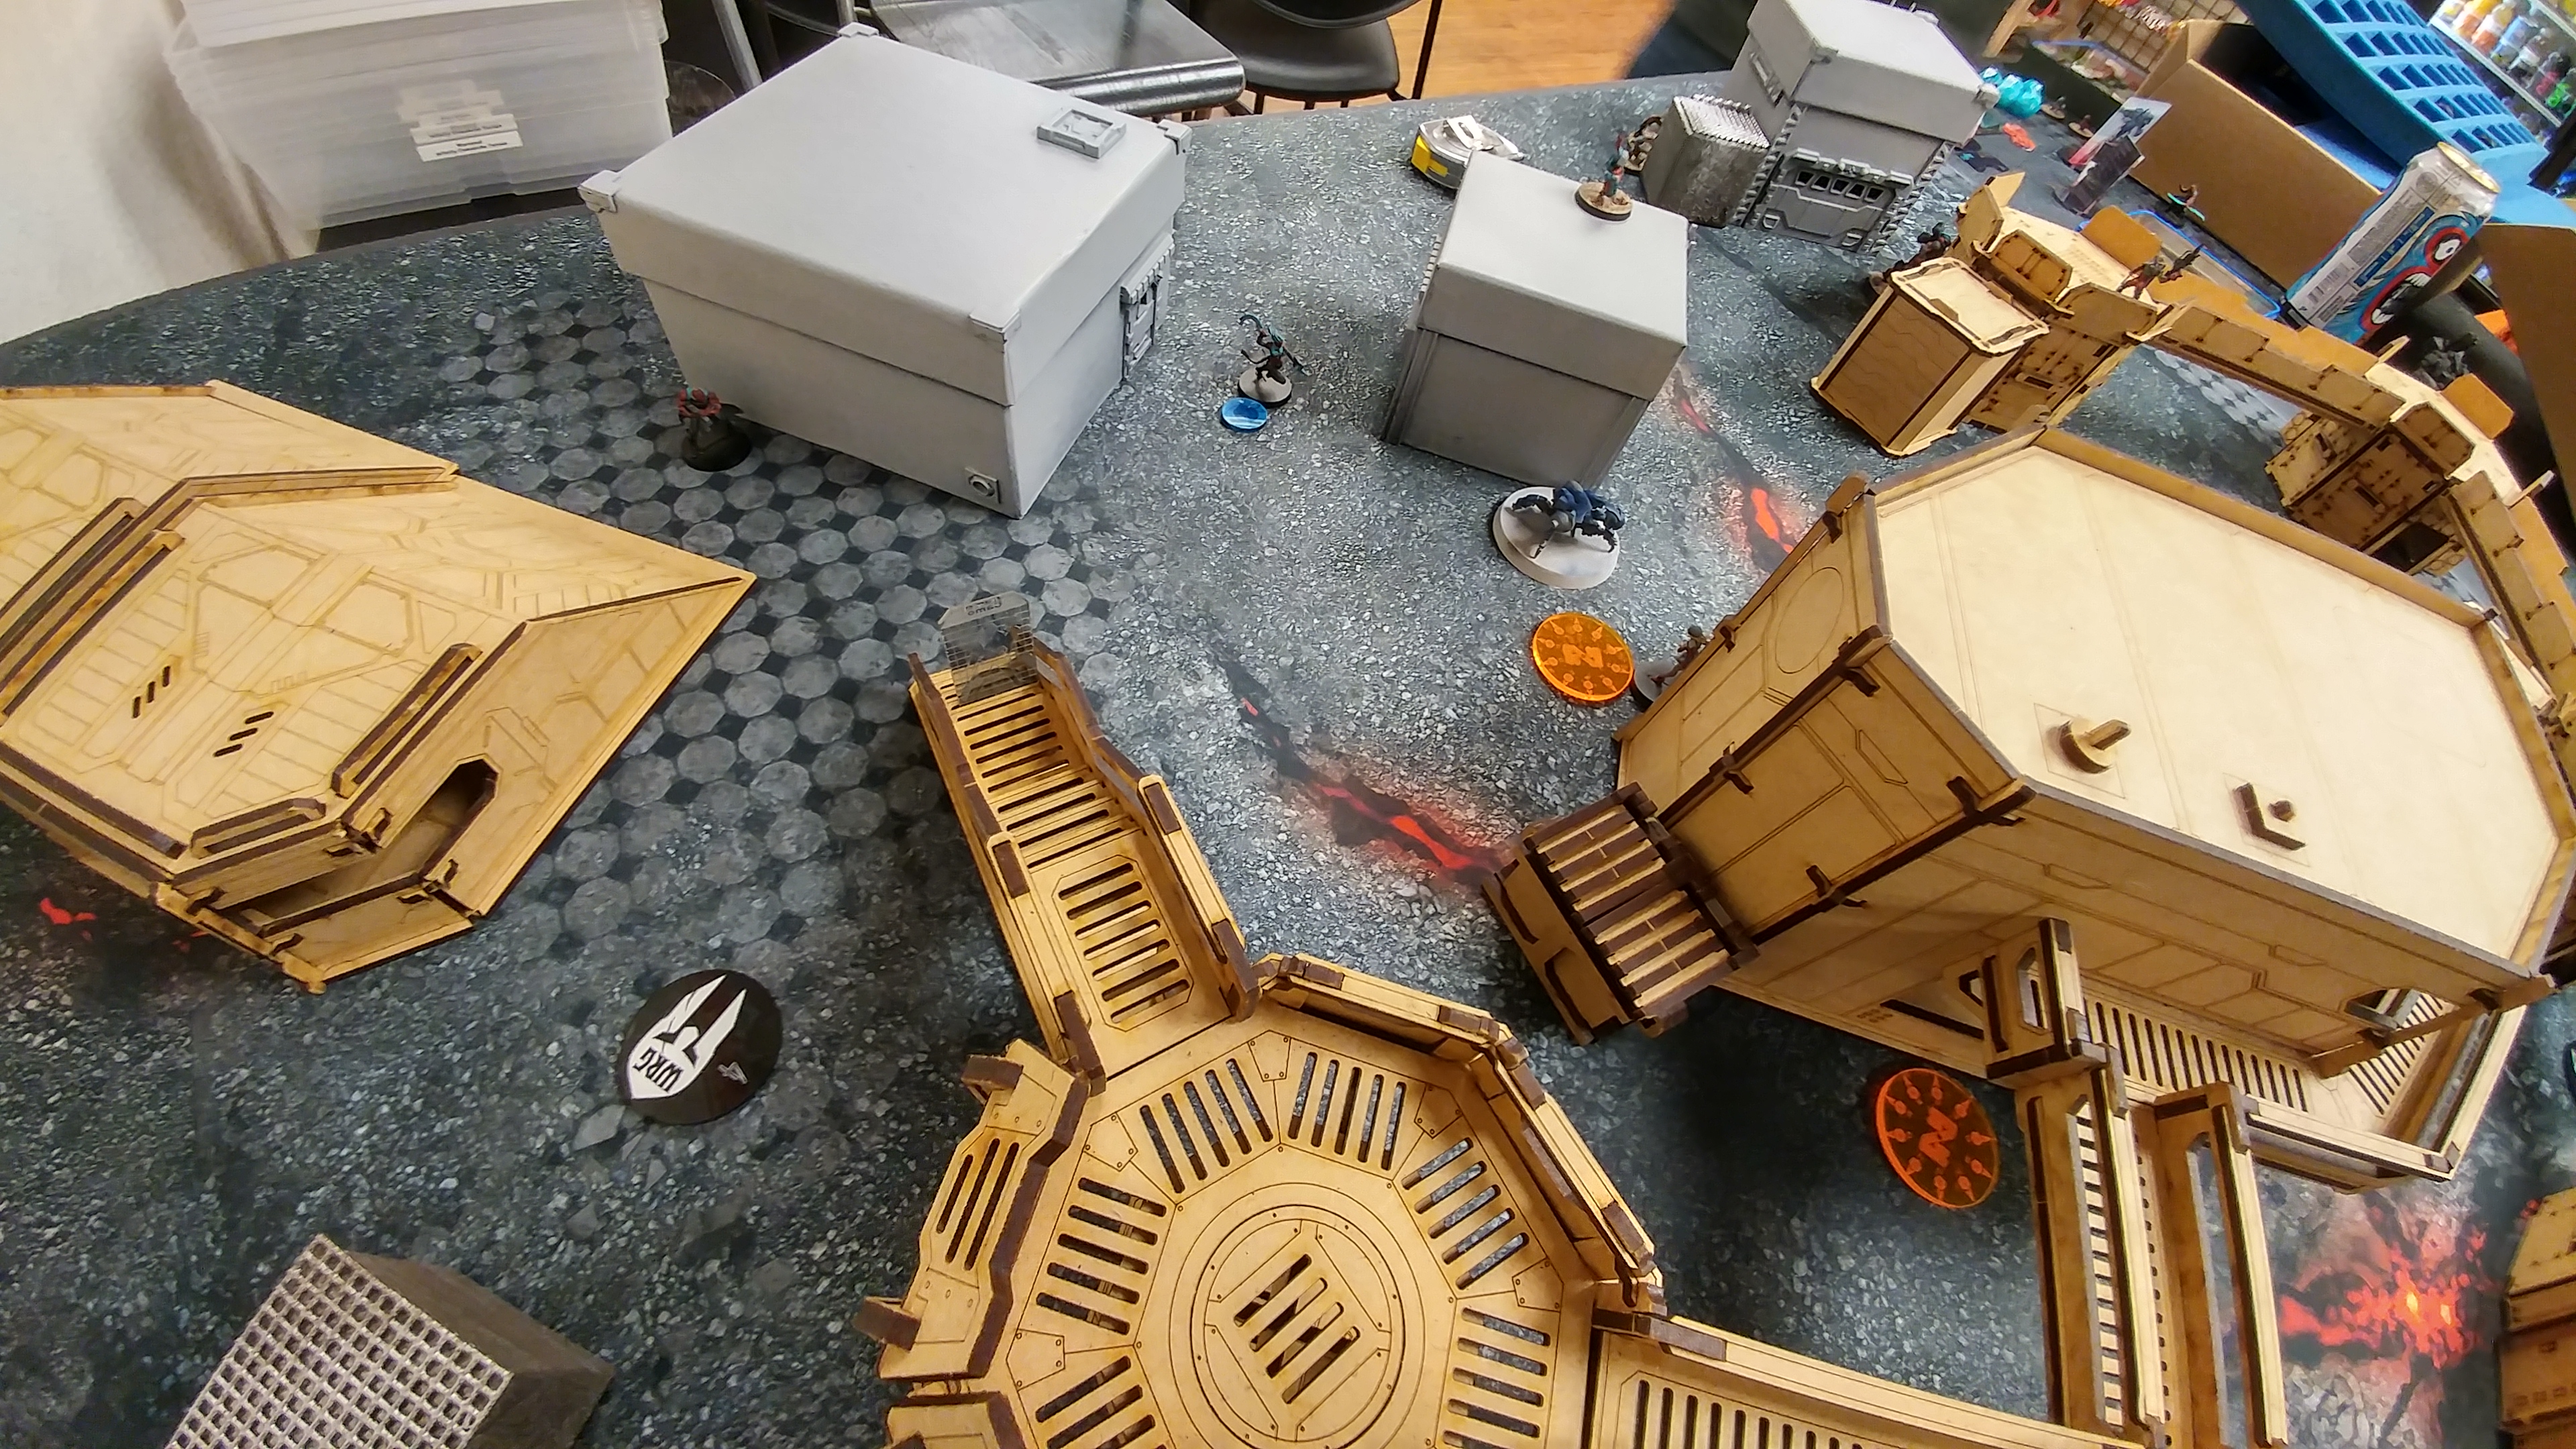
I didn’t know what was coming up, so I just settled for a balanced deployment. I used my Riot Grrl ML to over the longest diagonal firelane, and then put my Zeros up at the edge of the exclusion zone. My Zero FO was positioned on the left to push buttons, and the Zero AHD was on the catwalk to the right, figuring I could race it up to handle any hackable things on that side of the field.
I put my two flash pulse bots in the center, ready to race up the center should I need it, as well as cover the diagonal firelane. I tucked my Lunokhod on the left, ready to race it up the field and attack the left flank. To back up the ‘bot, I plunked down a Morlock (8-4 MOV, my favorite!) on the left. To cover the right, I put down a Riot Grrl Specialist Operative and a Stempler Zond, also backed up by a Morlock (Super Jump). I figured I’d make my Taskmaster Lieutenant my DataTracker, so I put him in the middle of my deployment zone to best be able to respond to Nate’s HVT deployment. With that, it was Nate’s turn.
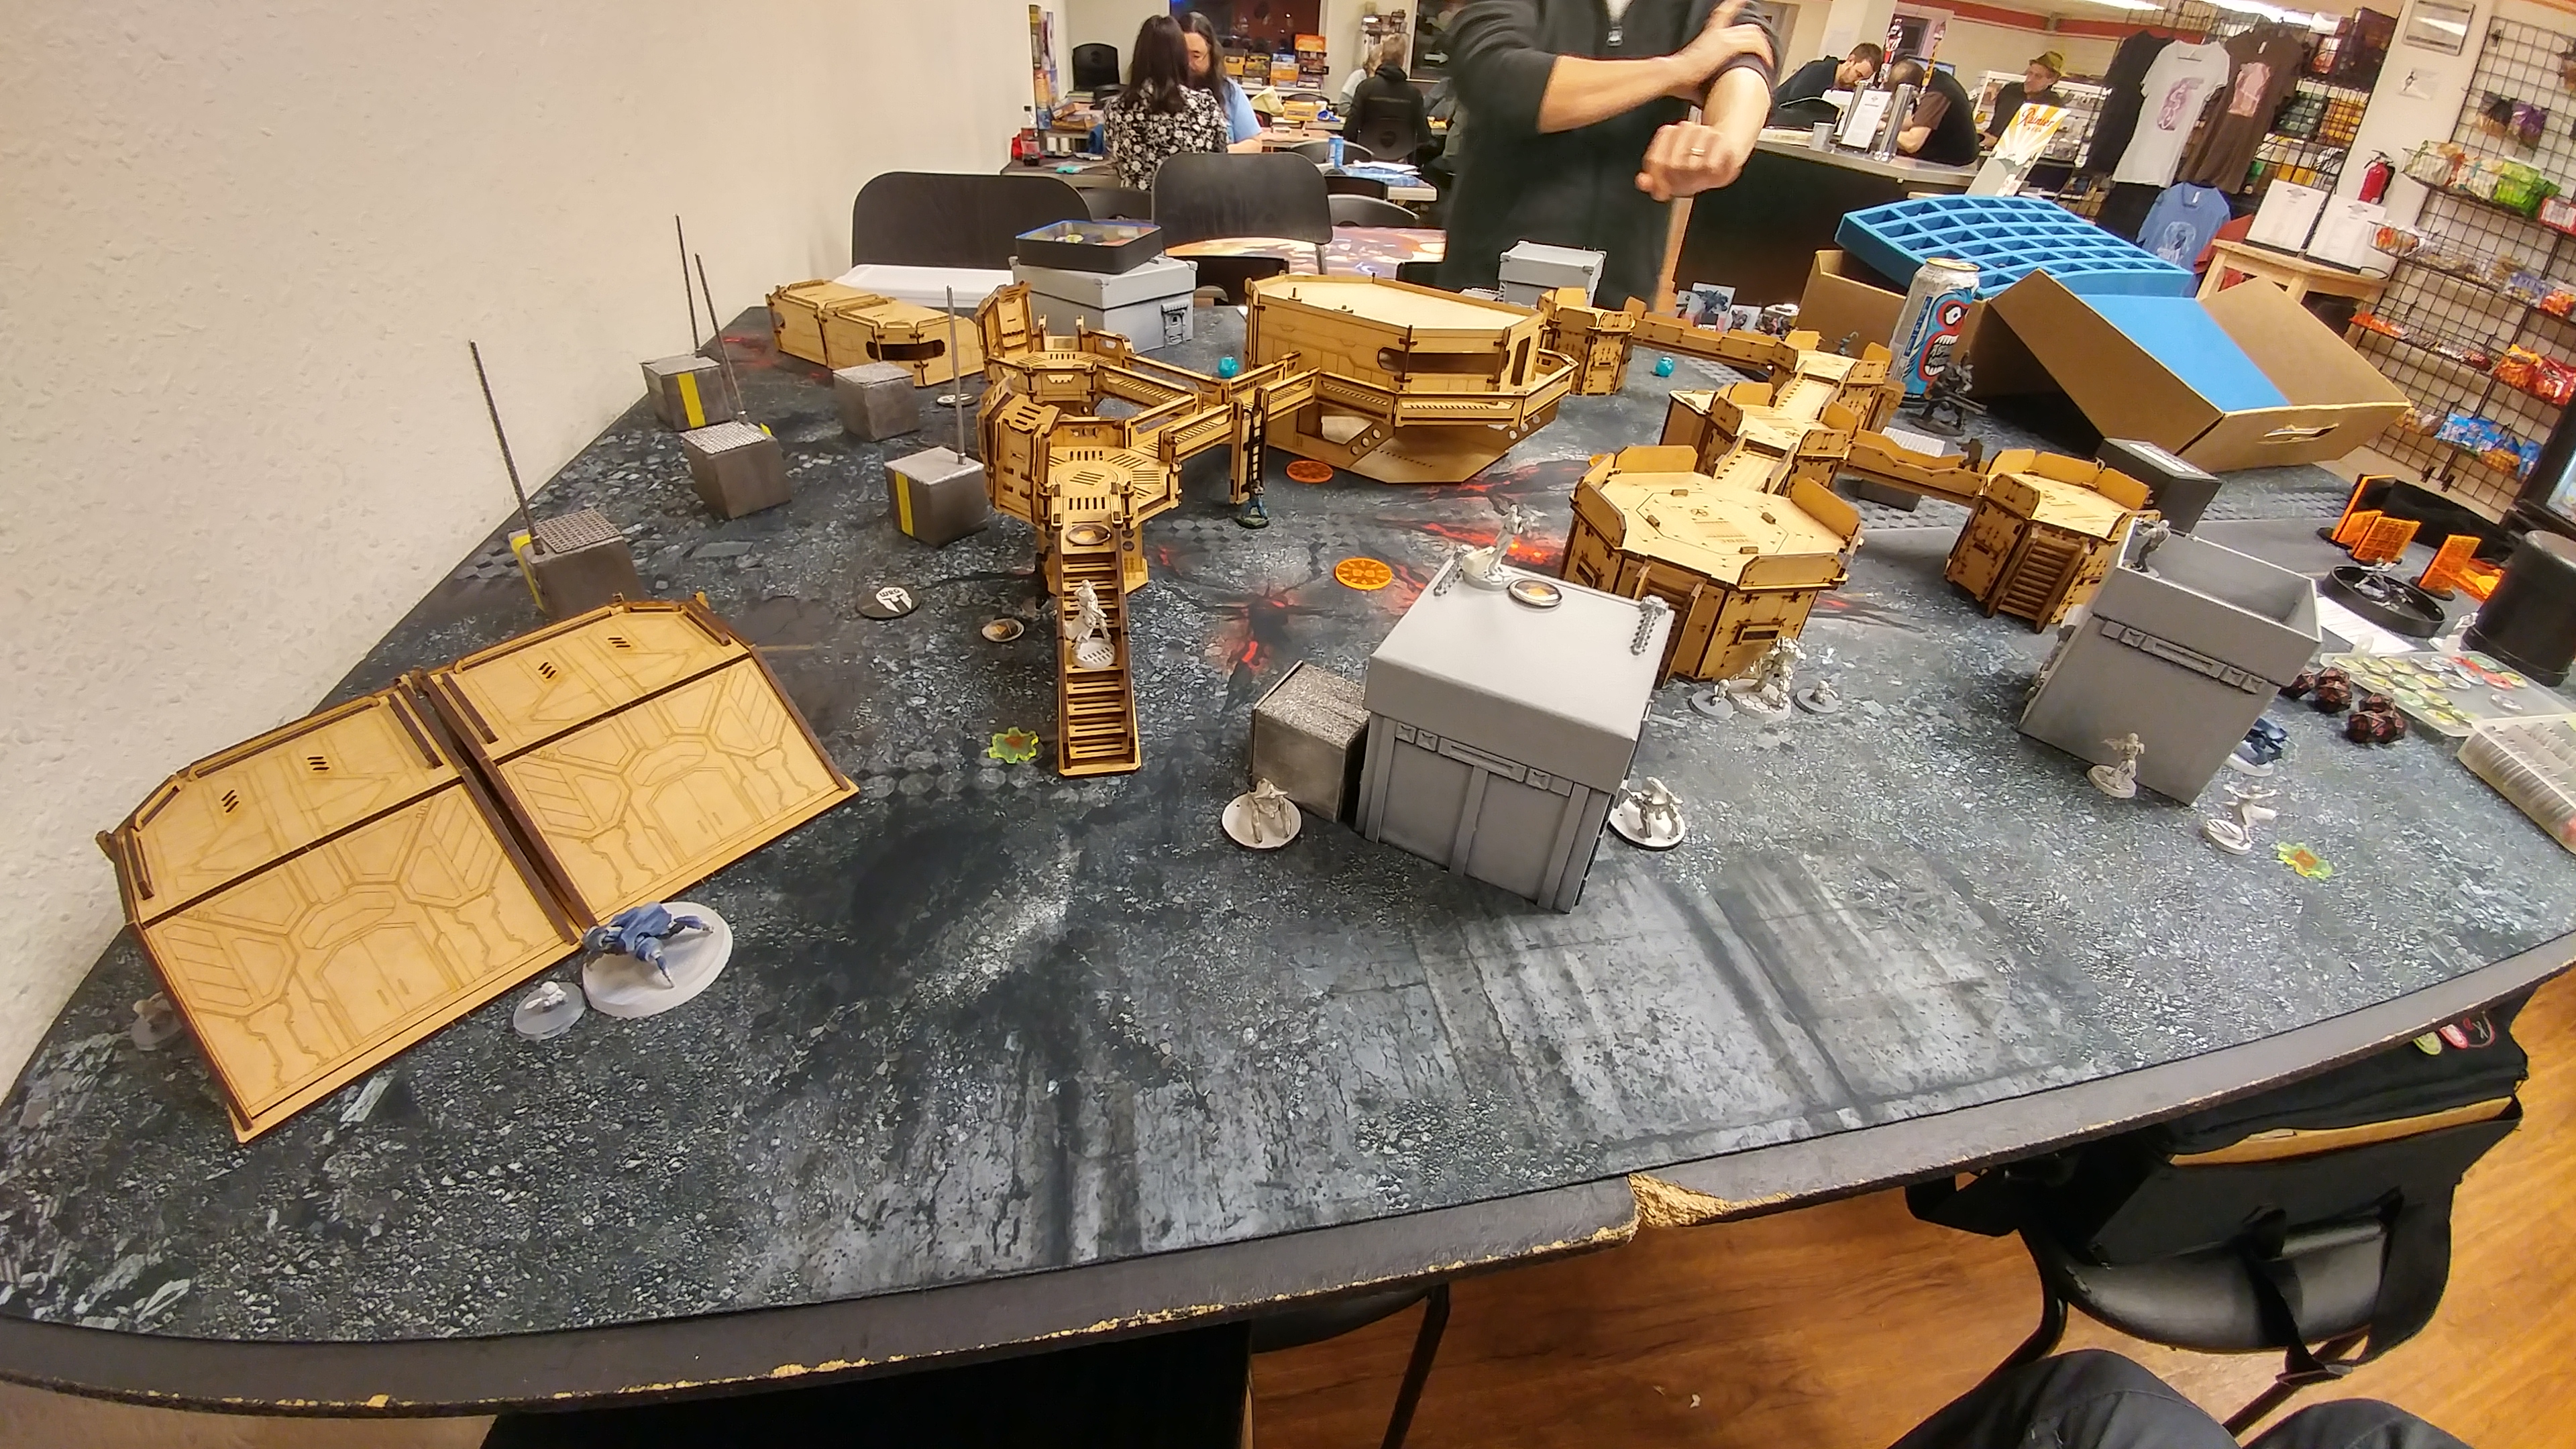 Nate carefully covered the left side of his deployment zone with a Moran, just at the edge of the exclusion zone, and his attendant Crazy Koalas. His left backfield also included a flash pulse bot, Daktari, Morlock, and baggage bot. The right side had another flash pulse bot, two Morlocks, his Interventor, a Prowler, and a Zero KHD. He put his own Taskmaster Lieutenant in the middle, putting its Crazy Koalas at max range to cover as much of his deployment zone as possible. His HVT was just outside the Comanche barracks, and mine was just under the Comanche catwalks.
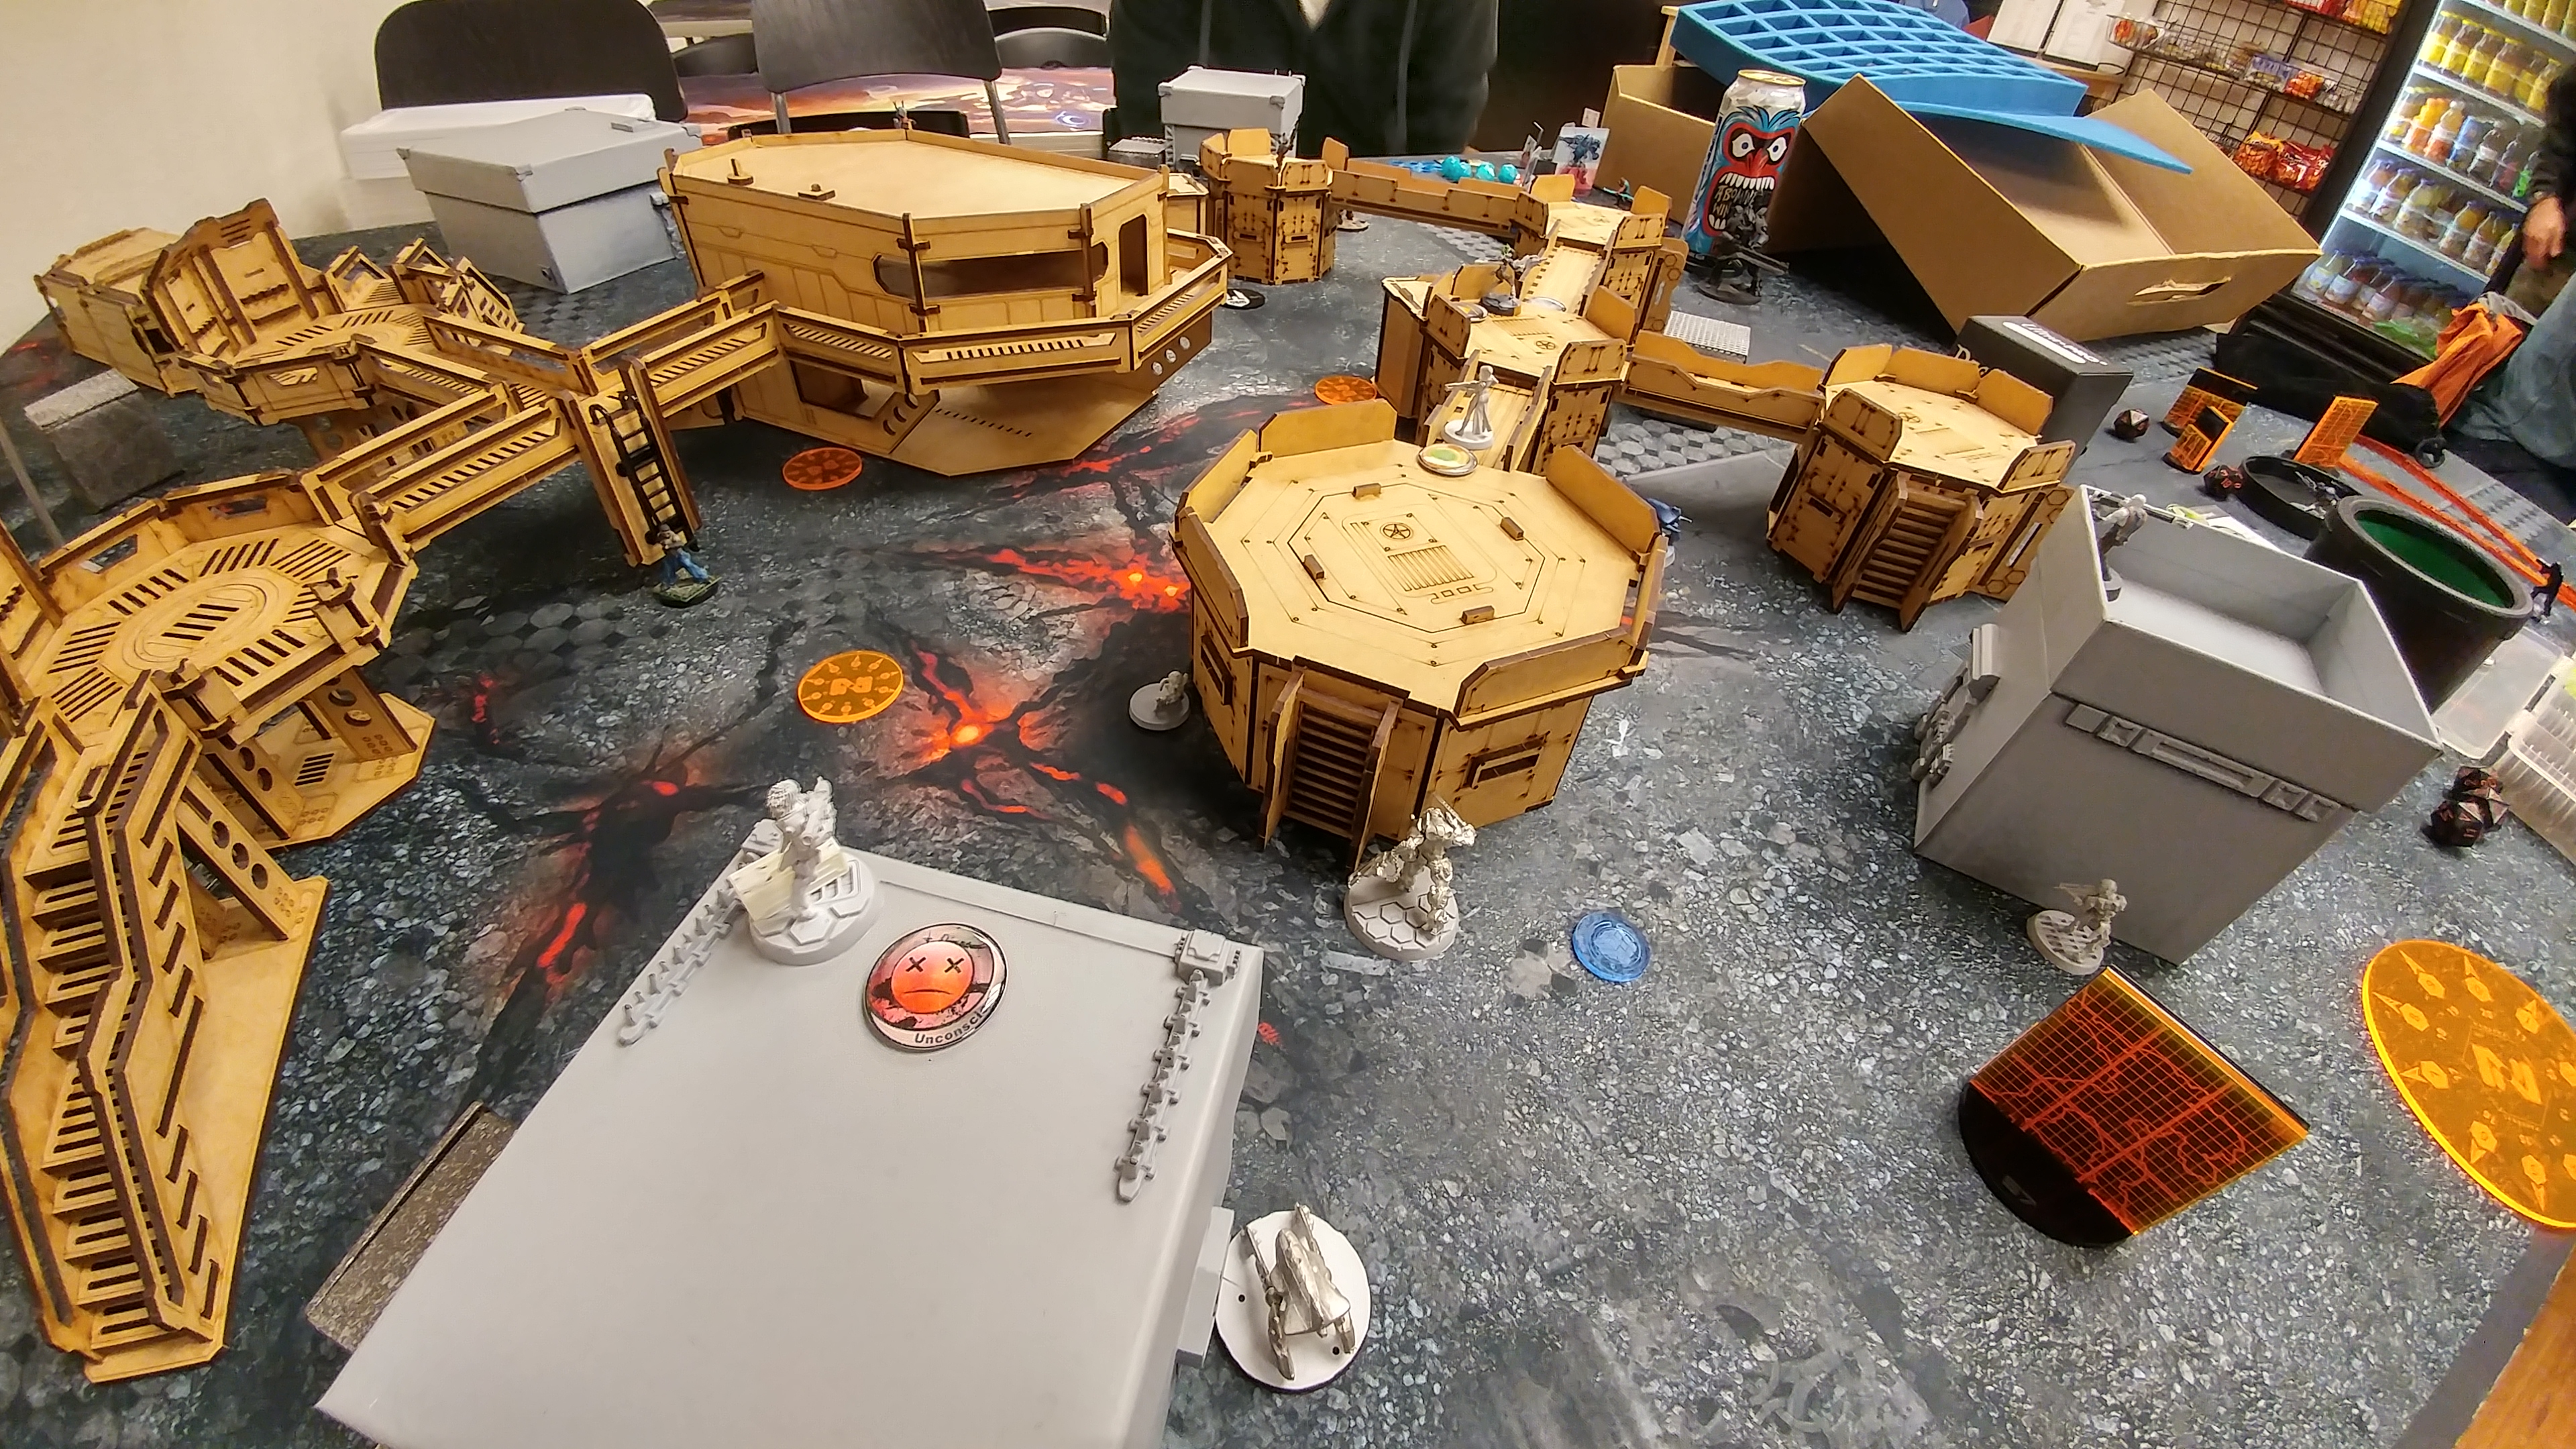
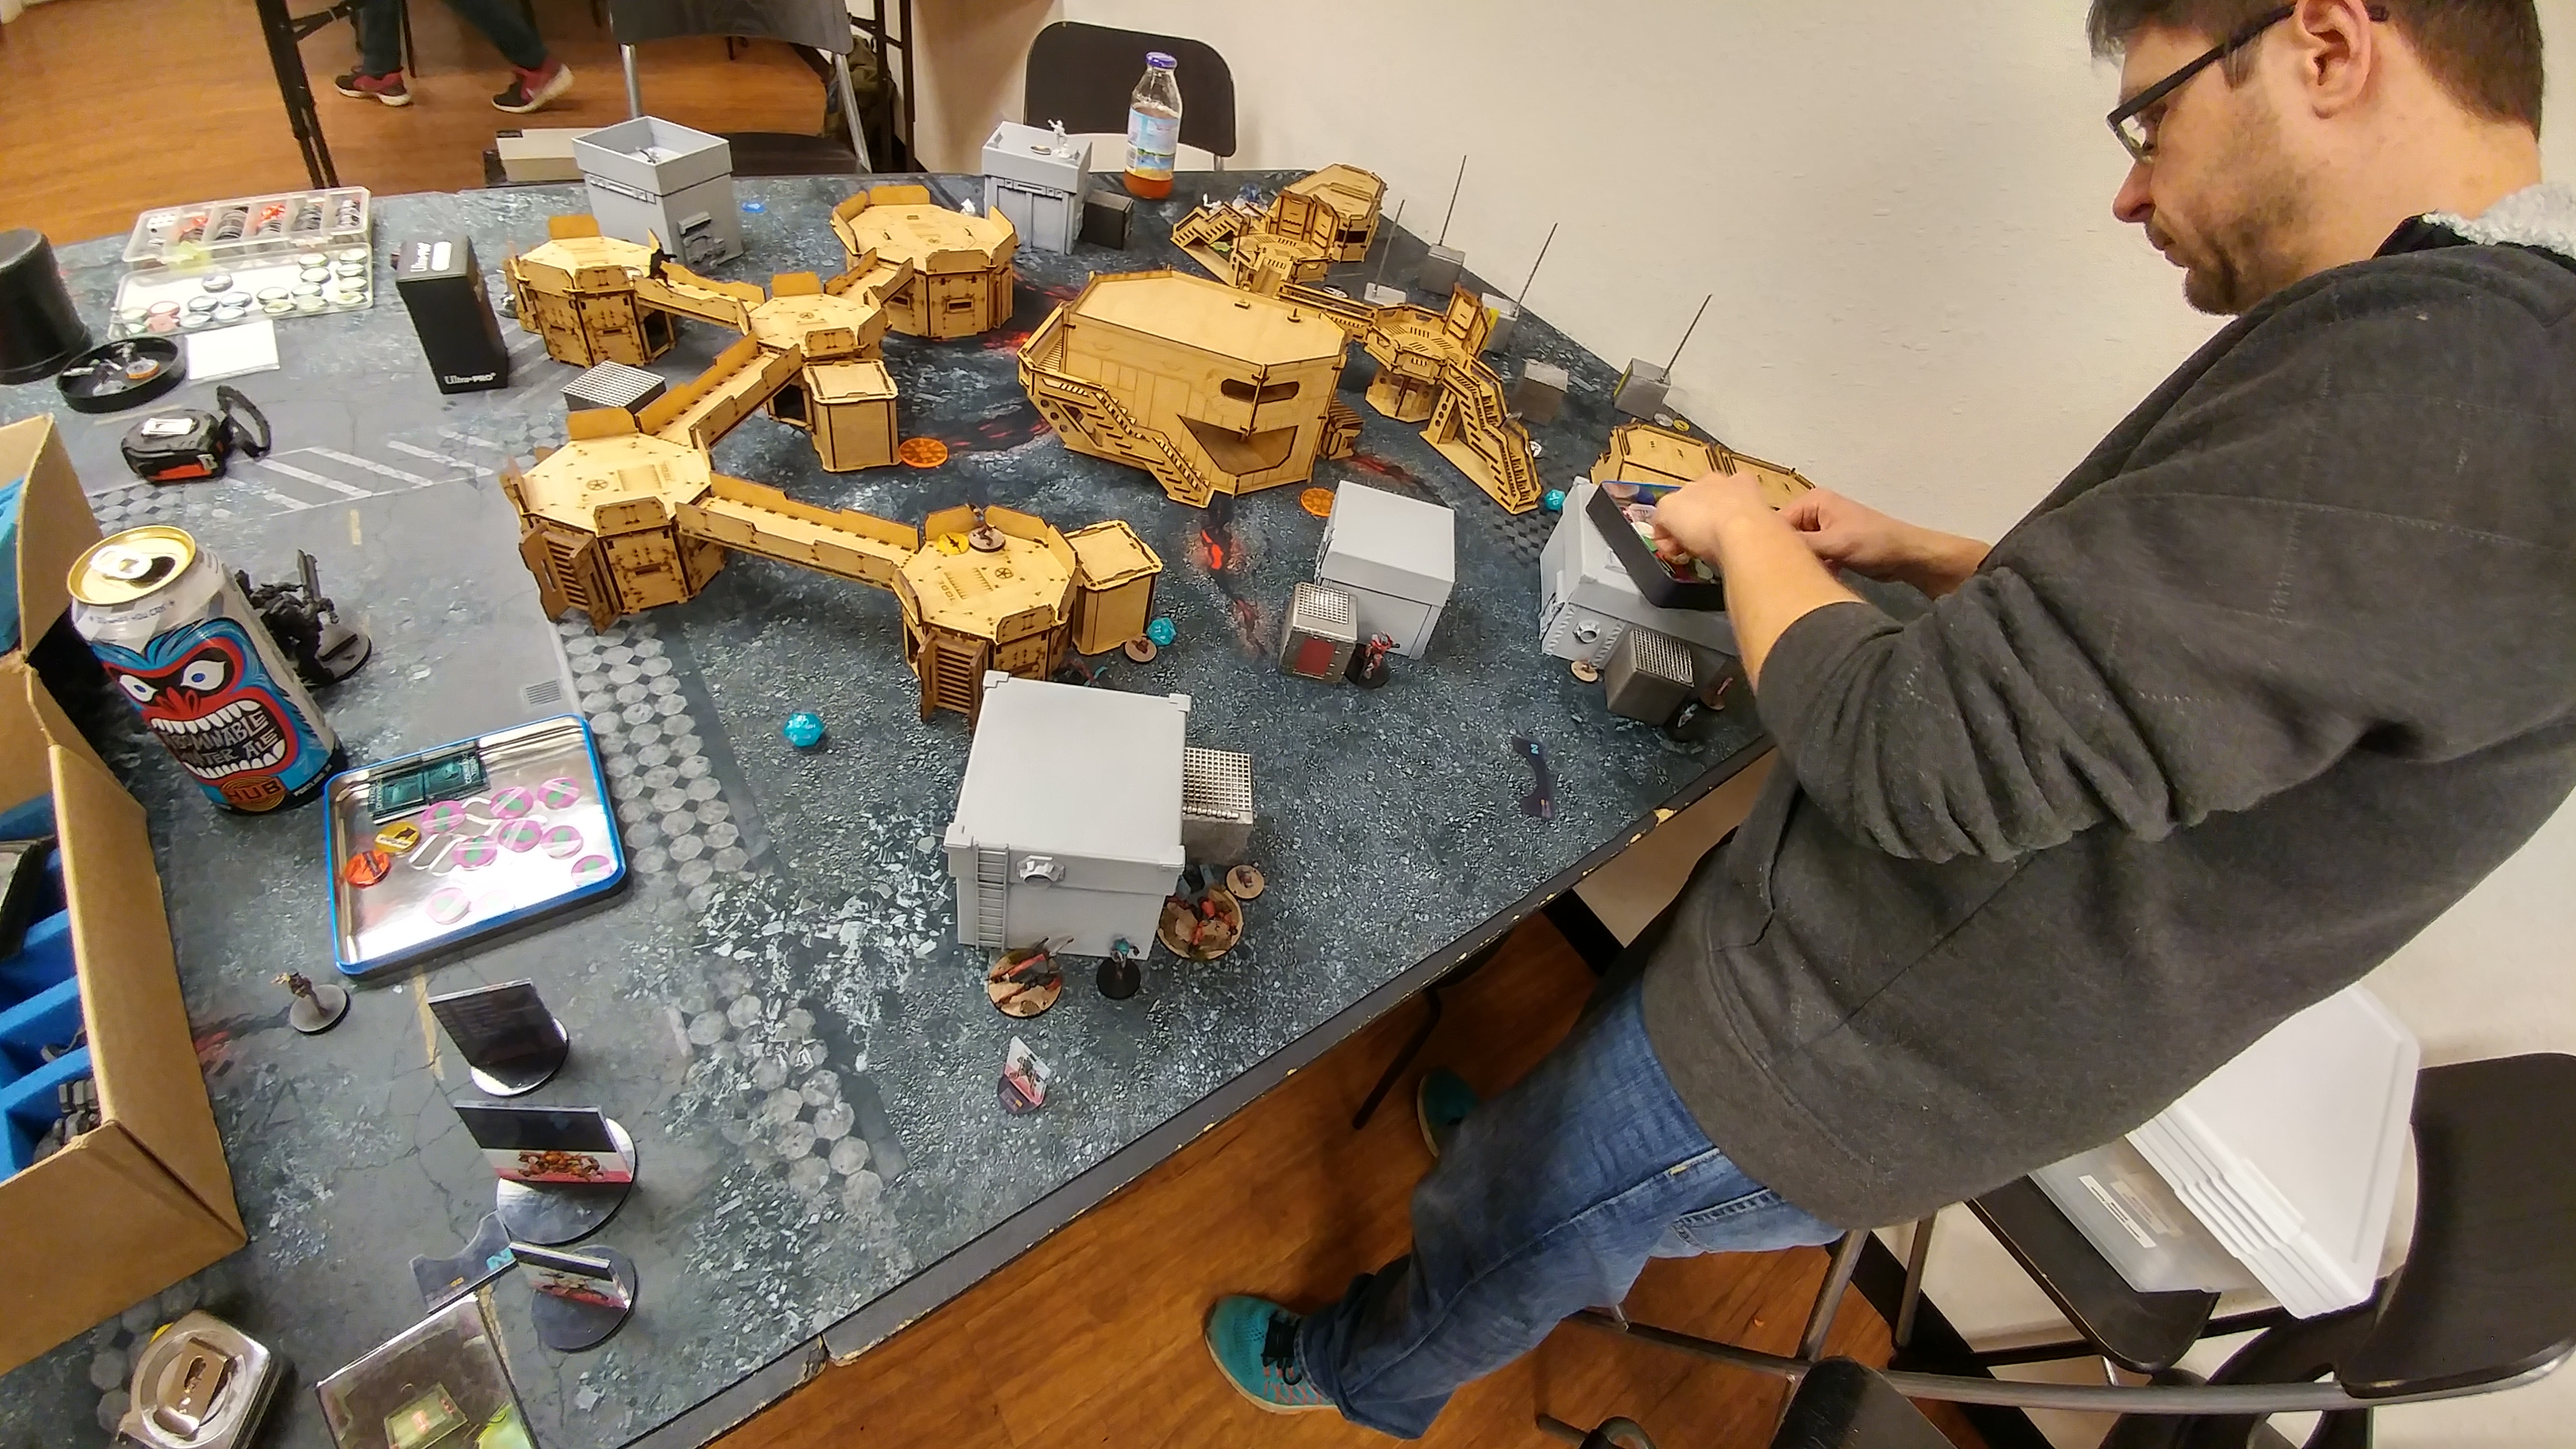 I pulled my Moria HMG out of reserve and put her prone on the edge of the nearest catwalk, which was just within my deployment zone.
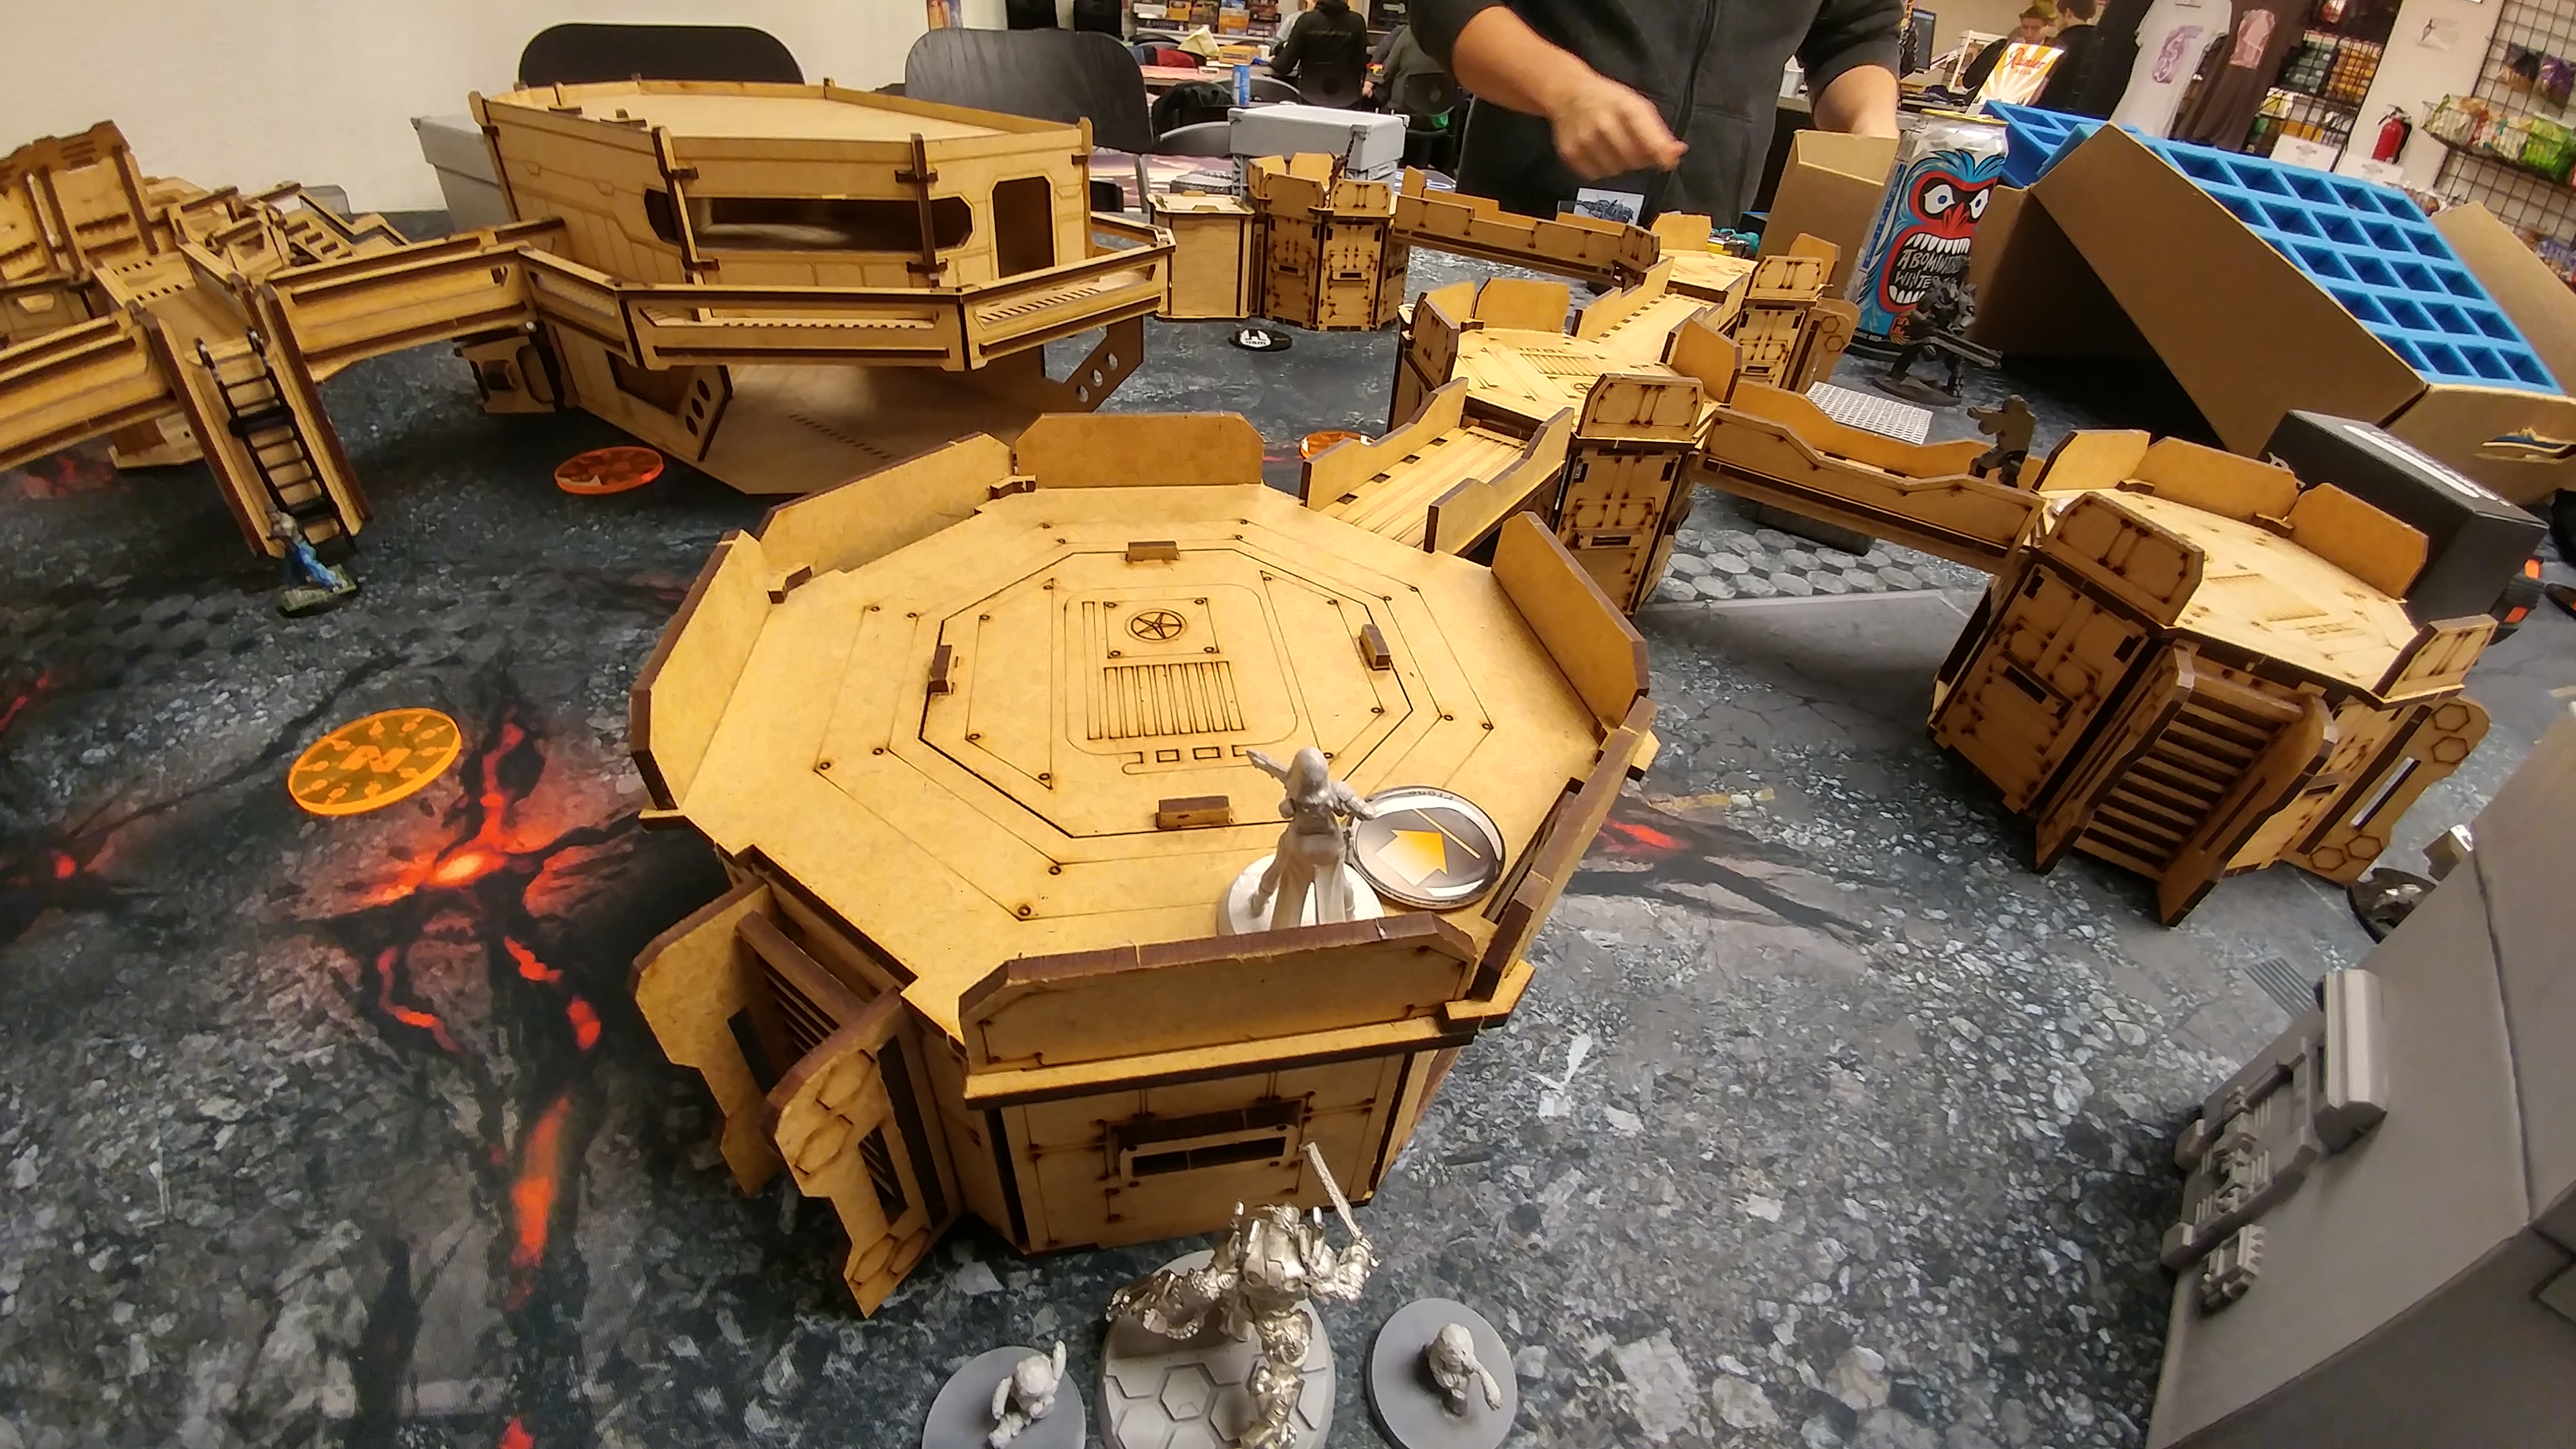 Nate peered about as he carefully selected a spot for his Kriza Borac, and settled on a spot near his Daktari, so the gunfighter would be covered by a web of Koalas and the Moran’s repeater.
Turn 1
Top of Turn 1 – Nomads
Nate basically didn’t leave anything out to ARO, but there were enough Koalas and repeaters out that breaking into his deployment zone would be difficult. He also had covered his board edges with flash pulse bots to discourage AD troops. I walked over to his side of the table and analyzed his positioning. I could easily get the Lunokhod in position to take out Nate’s HVT, but I need to get my Taskmaster to do it for the extra points. I can’t just let the HVT stun pistol my Lunokhod as I advance it, so I need to get my left Morlock in position to cover the Lunokhod… which I guess can cause some trouble.
I see a narrow corridor where I can avoid the Koalas and get into 8″ of Nate’s Taskmaster, which I suspect is his Lieutenant. The only other option is his Kriza. So I commit to this plan, figuring at least I’ll get a Lunokhod into his backfield and then throw up Overclock on my EVO. With my plan of action settled, I begin execution. My Super-Jump Morlock scoots up on the right, and the 8-4 Morlock goes the full 10″ up the catwalk system on the left. To buy some order efficiency, I coordinated order the Lunokhod, Stempler, Zero AHD, and Moira HMG up the field. My 8-4 Morlock tries to cover the HVT with smoke, but fails his roll on a 17. Sigh. I move the Lunokhod up and draw line of fire to one of the Moran’s Koalas. This lets me drop a shotgun template on the Koala, the Morlock there, and clip the back of the Kriza’s base with the template. Nate shoots back with the Morlock, but misses. I make one of the shotgun rolls, scrapping the Koala and sending the Morlock dogged. The Kriza, of course, passes ARM like a boss.
Now that I’ve cleared things out a bit, I attempt another smoke throw with the 8-4 Morlock, this time sticking the landing. I sweep out one of the Taskmaster’s Koalas with the Lunokhod’s Koalas, and pass ARM on my Koala! Hooray! Now the Taskmaster is in ZoC of my Lunokhod, so I scoot the Zero AHD into cover and start hacking. I fail both Oblivion and Basilisk on the Taskmaster. Nate wonders why I chose Basilisk for my second order, but I don’t have a great answer for him. Definitely should’ve kept trying Oblivion. That TinBot really makes a big difference, and I totally forgot that it was even there!
I figure I need a way to handle the Moran, and I think I can do a better job of that with the Morlock, so with my last order in combat group two, I jump it up to the catwalk. I shuffle the Taskmaster’s Koalas forward with an order, and then turn on EVO: Overlock with the Lunokhod right outside of Nate’s deployment zone. The Lunokhod is pushed too far forward, but I’m hoping that it will be enough of a thorn in Nate’s side to buy me some orders. I definitely feel like it’s overexposed, but I hope for the best. To finish the turn, I throw the Moira into suppression on her catwalk…
Bottom of Turn 1 – Nomads (OpFor)
Nate’s dogged Morlock expires, and the other two run forward. The first Morlock comes around the corner and clears both Crazy Koalas, just tanking them. My Morlock can’t scratch the paint either. The second one gets pasted by the Lunokhod but pistols down my 8-4 Morlock. Boo!
 As I had feared, the Lunokhod is too far forward, and the Prowler makes short work of it, spending two orders to sneak behind it and take it out. Now that the immediate threat is dealt with, Nate is free to start probing my defense. The Kriza comes around the corner and starts exchanging fire with my Riot Grrl. Nate crits, but so do I. This blows the nearby Crazy Koala into scrap, but the Kriza is unscathed. A few orders later, I’ve got an unconscious Riot Grrl on a roof.
 Nate continues picking apart my forces, dropping the Morlock next, followed by the Stempler. My ‘bot gets lucky though, and shaves a wound off the Kriza with a crit before getting blown off the table. With me down a Stempler, a Morlock, a Lunokhod, and a Riot Grrl, the Kriza has done his job and retreats into full cover before going into suppression along with the Daktari, Taskmaster, and Moran.
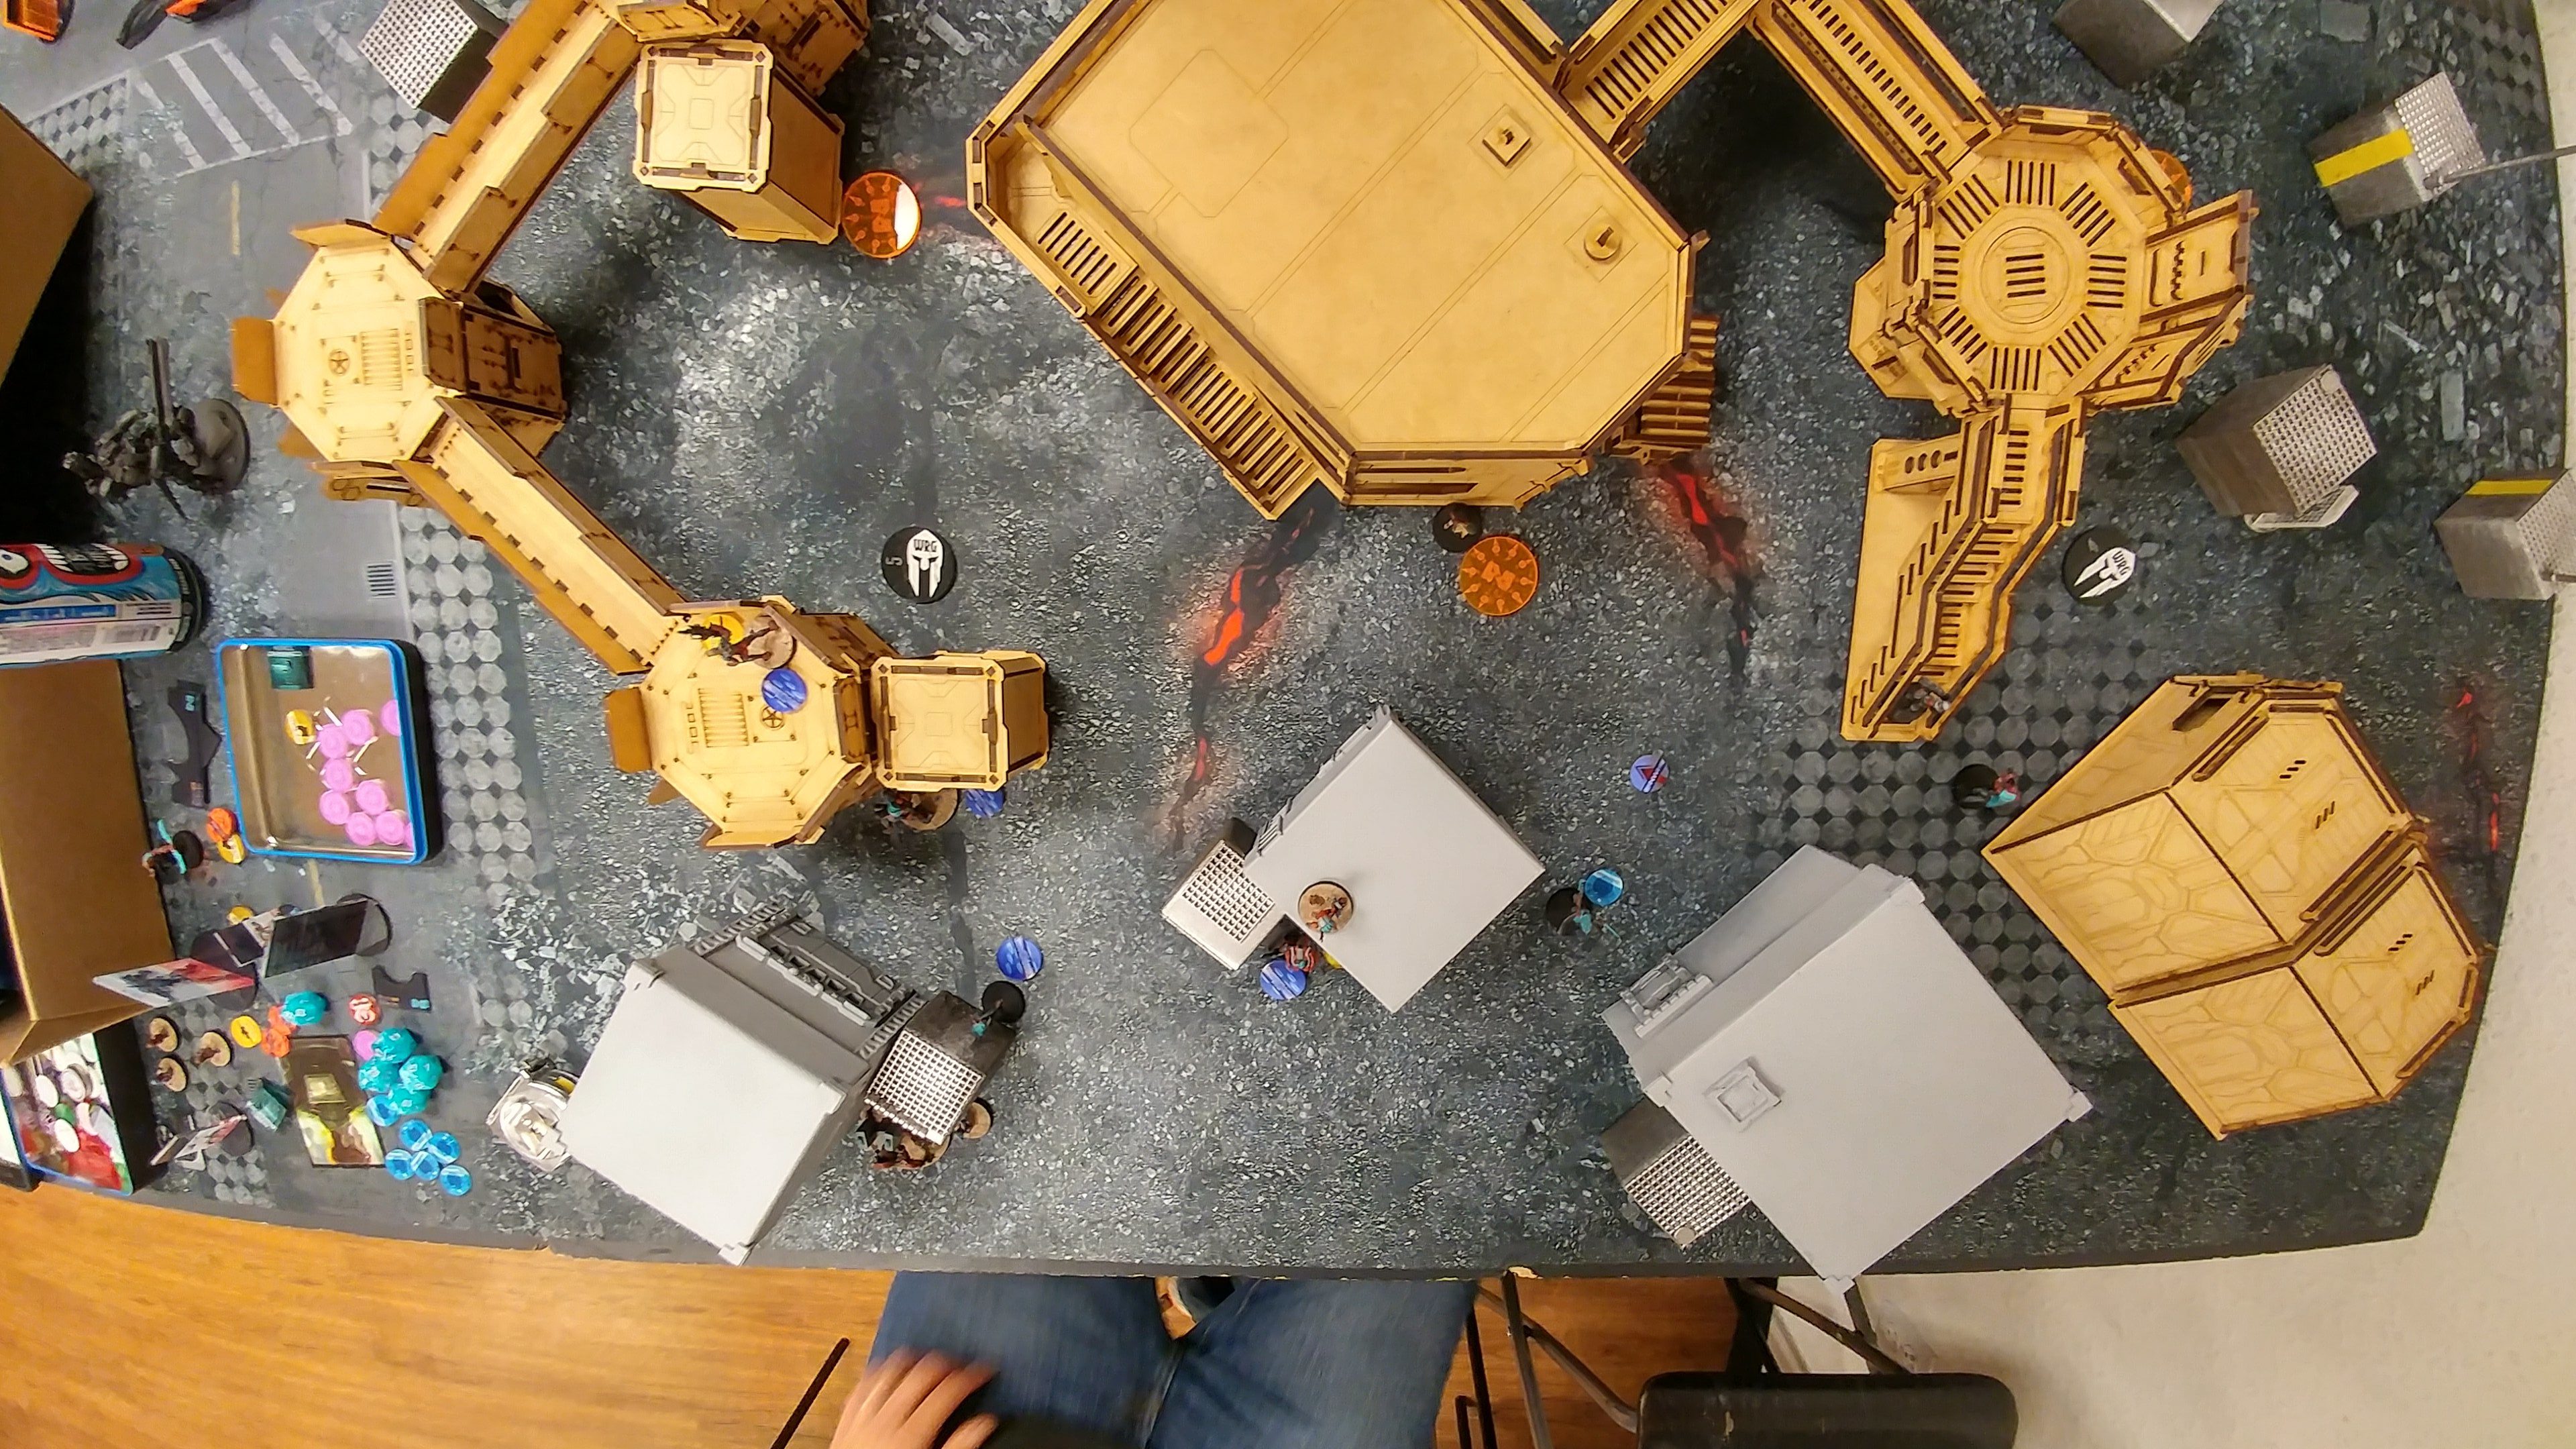
Turn 2
Top of Turn 2 – Nomads
I leverage the Taskmaster’s Free Agent and spend a token to move both him and my Jaguar into the first combat group. I took a bit of a beating last turn, and Nate has castled up in his deployment zone. I briefly consider aggressively pushing my Lieutenant up to take out Nate’s HVT and then start causing trouble in his deployment zone, but I re-evaluate quickly. It’s not worth it. I need to establish board control. I coordinated order up my Zeros, the remaining Riot Grrl, and a Transductor Zond. Nate drops smoke with his remaining Morlock, covering the Morlock and his Prowler to protect both troopers. The Zeros are in good position to drop mines, so I do so. The Zero AHD covers the Morlock’s approach with a mine, and the Zero FO covers Nate’s KHD Zero’s approach.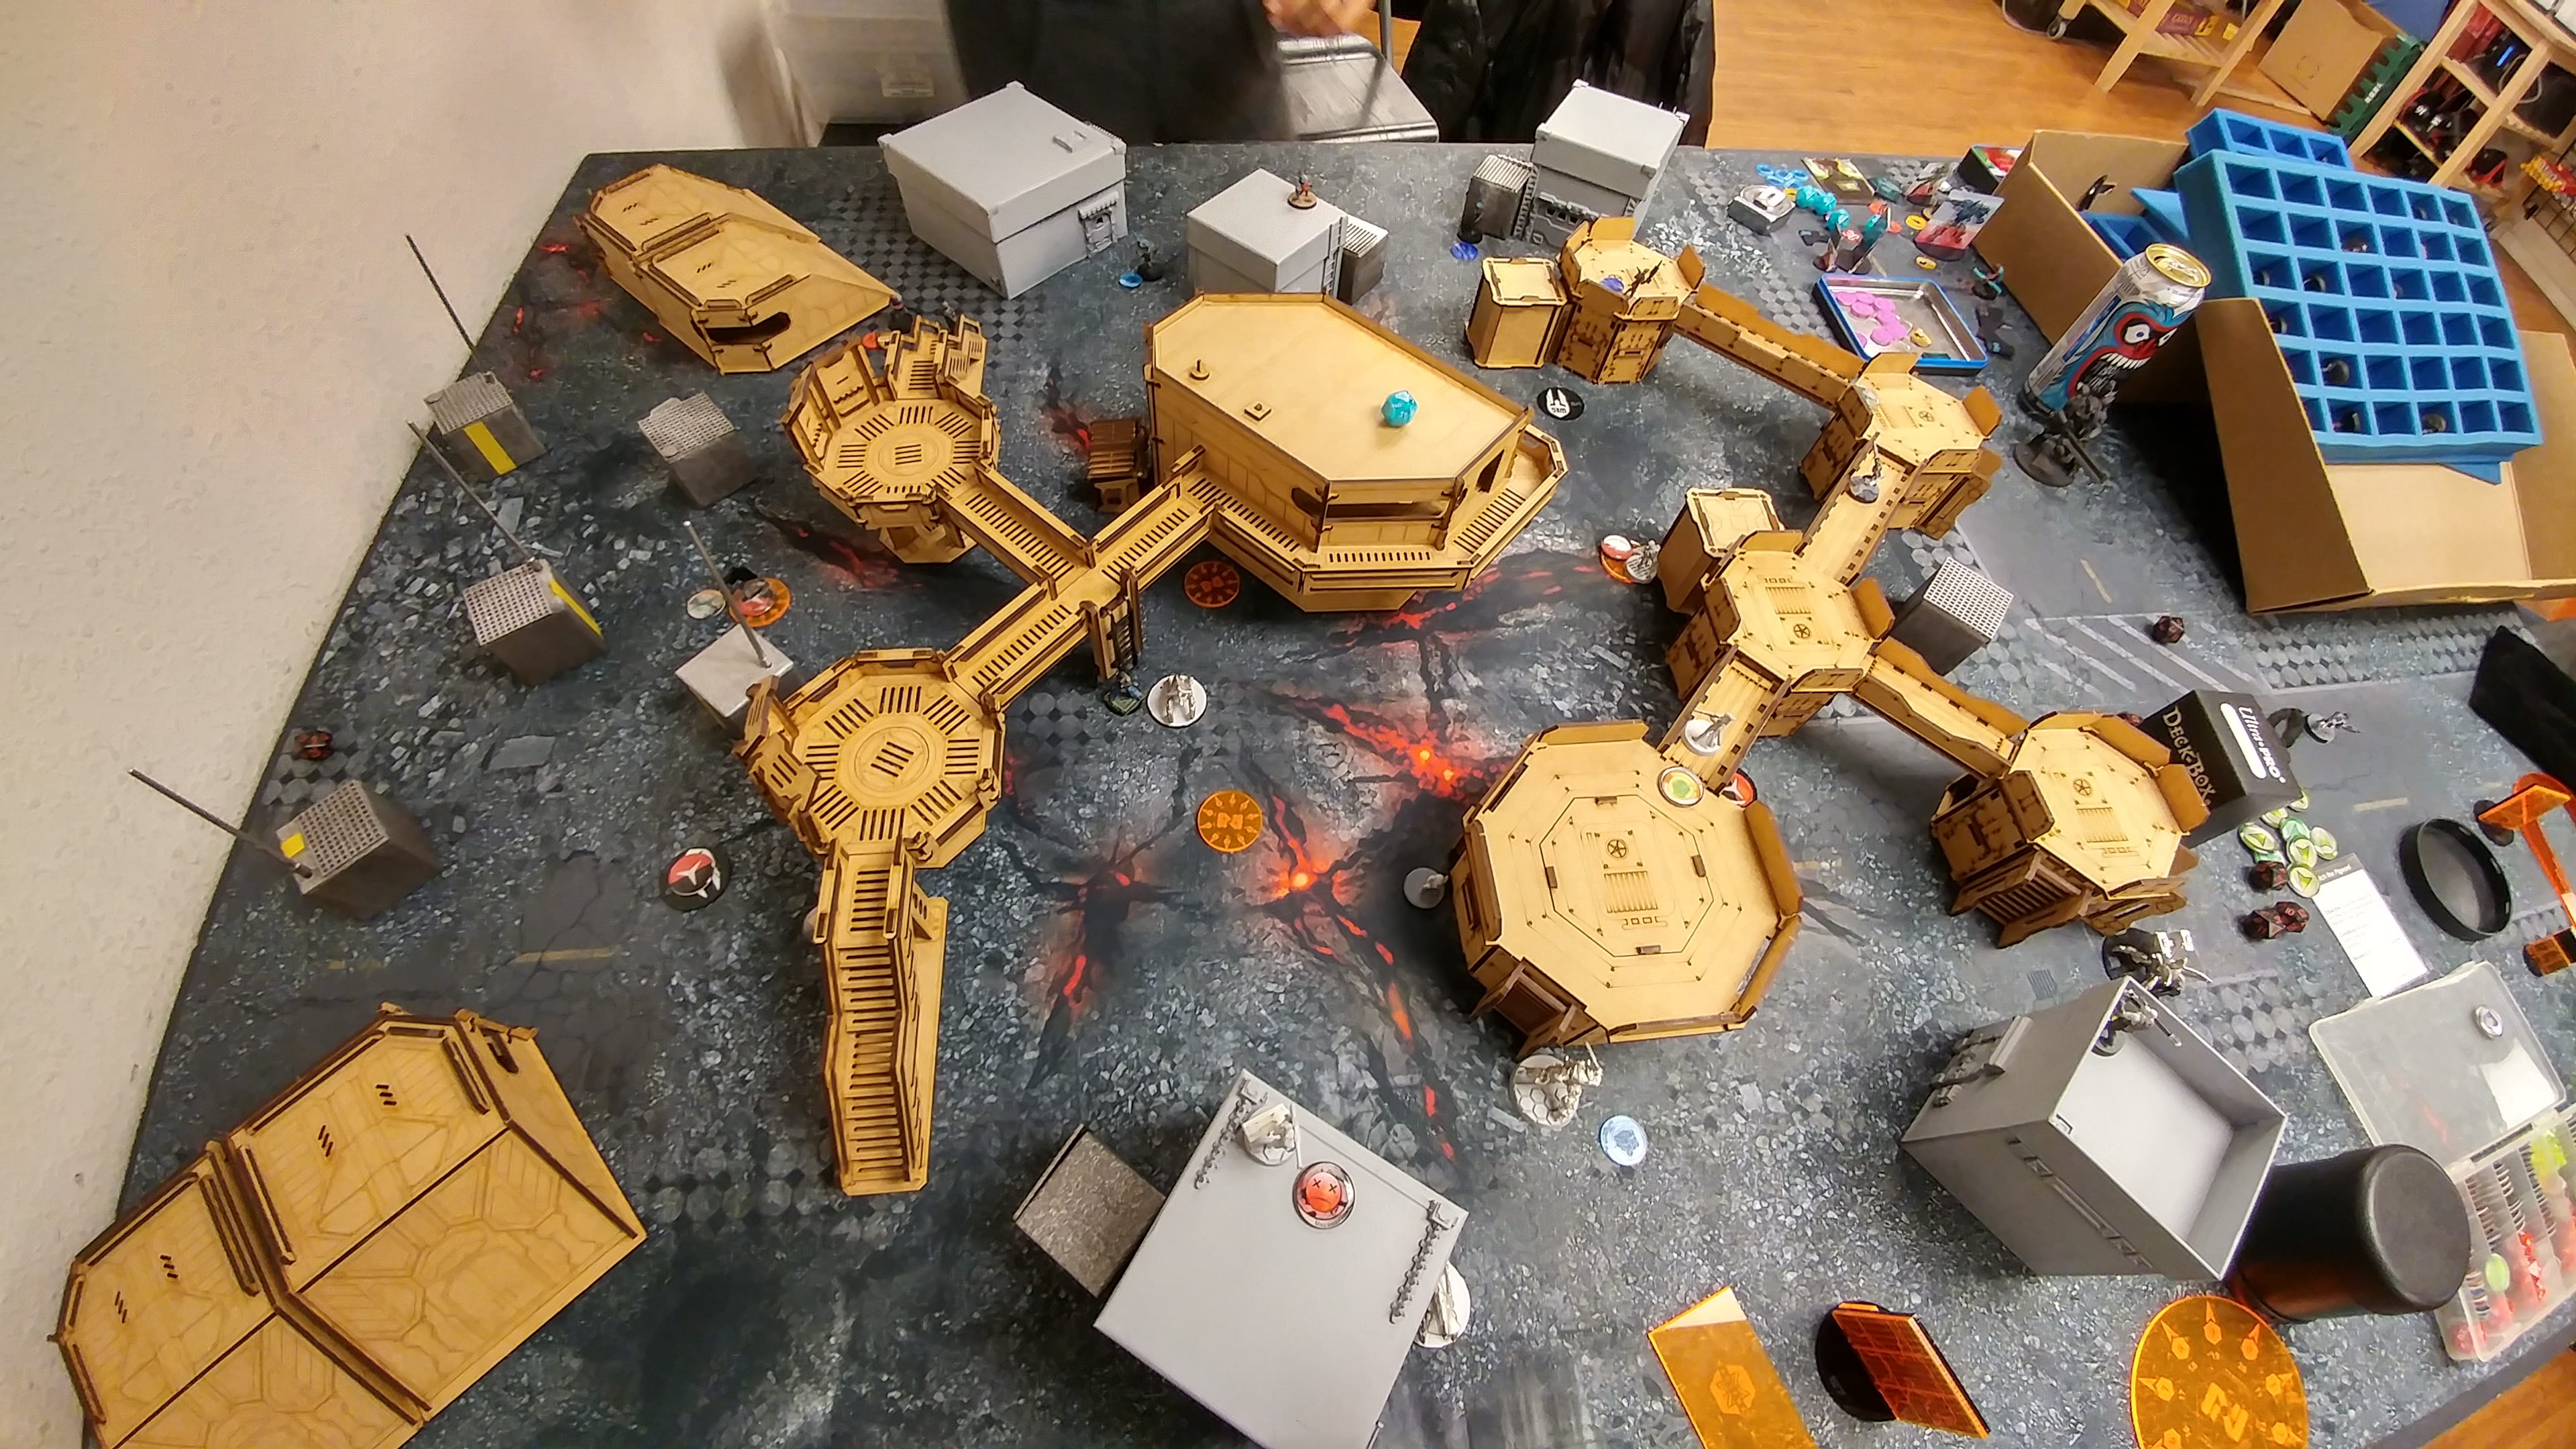
The Zero FO and Riot Grrl spend three orders each to push the two nearest left and right buttons. With that I’m basically out of orders, so I just shift the Taskmaster to cover the Prowler, just in case, and then recamo the Zero FO, who is now sitting atop the central left objective.
Bottom of Turn 2 – Nomads (OpFor)
Nate’s remaining Morlock advances into the center and eats a faceful of flash pulse. The poor Morlock stumbles around drunkenly, wandering into my Zero FO’s mine, but the anti-personnel shrapnel just bounces off his armor. Now that I’ve got some objectives secured, Nate would really like to grab some of his own. The only problem is that I’ve got a Moira HMG in suppression watching the most natural approach for his specialists.
Kriza Boracs, Special Crisis Unit – HMG
37.08% —Kriza Boracs, Special Crisis Unit inflicts 1 or more wounds on Reverend Moiras (Unconscious)
08.09% —Kriza Boracs, Special Crisis Unit inflicts 2 or more wounds on Reverend Moiras (Dead)
48.35% –Neither player succeeds
14.57% —Reverend Moiras inflicts 1 or more wounds on Kriza Boracs, Special Crisis Unit (1 W)
01.06% —Reverend Moiras inflicts 2 or more wounds on Kriza Boracs, Special Crisis Unit (Unconscious)
00.03% —Reverend Moiras inflicts 3 or more wounds on Kriza Boracs, Special Crisis Unit (Dead)
Reverend Moiras – HMG
My Stempler has already shaved a wound off of the Kriza, so I just need to do one more. We do the math, and I’ve got 3 dice on 3’s and Nate’s got 5 dice on 4’s, thanks to Full Auto and ODD, respectively. Nate commits to removing my Moira, throwing essentially the rest of his order pool into his Kriza. We both crit at one point, but I sneak 2 more crits through on two different orders, forcing Nate to bring his Daktari up to heal his Kriza twice. The odds are definitely in Nate’s favor, but my Moria’s ODD is in my favor… ehh? ehhh?? Okay that was a bad joke.
Turn 3
Top of Turn 3 – Nomads
Well, I’ve got 4 consoles/antennas/whatever they’re called in this scenario flipped. Now I just need to go get the HVT. I spend two orders trading fire with Nate’s Prowler from cover, from outside of 24″. Can’t seem to drop him and take a crit for my trouble. Uh oh. Whelp, it’s make or break time. I don’t think I have the orders to keep fighting it out with the Prowler, so I give up and just run my Taskmaster into the first floor of the Comanche barracks. I can see the HVT now, and of course Nate is going to take a potshot at me with his Prowler on the way in… so now I’m faced with the question: do I attempt to take out the Prowler and maybe get crit again, or do I throw all the dice at the HVT and hope to kill it for the points?
Nate waits patiently as I agonize over this decision… I could split burst, but then I could get killed and accomplish nothing… I’m taking too much time, so I just flip my Taskmaster’s Lieutenant order for luck, push him up and throw all 4 dice at the Prowler. Nate wins the F2F! Uh oh. I pick up a die and roll it, and the Prowler’s Spitfire bullet rattles off my Taskmaster’s armor. PHEW! Now that I’m in the building, Nate’s Prowler doesn’t have LoF to me anymore, so I’m free to just Pulzar the HVT in the back. One failed dodge and a failed armor roll later, I’m up three points. I get greedy and try to take out Nate’s Kriza, who is visible from the little window on the first floor of the barracks, but the my Taskmaster is quickly taken out by the Tunguskan gunfighter.
 With the Kriza still up, I know what’s coming, so I move the Riot Grrl directly under the Moria so Nate can’t slice the pie and take them on one-by-one.
 With that, I pass the turn and hope that I have enough of an ARO net to keep Nate away from the objectives and away from my HVT.
Bottom of Turn 3 – Nomads (OpFor)
Well, there’s still a live OpFor Morlock on the table, so it runs up the table. It’s now right next to my Zero FO, and Nate declares that he’s doing an Intuitive Attack. I drop a mine in response, seeing that the Morlock is out of orders and the mine is in prime position to take out Nate’s camo token if it comes around the corner. Thankfully, the Morlock fails his WIP roll and my Zero waves sheepishly at him.
 As I feared, the Kriza advances, dumping all 5 shots against the Riot Grrl’s Blitzen, ignoring my Moria entirely. The dice now are in Nate’s favor, and he plinks a wound off the Riot Grrl and forces her into cover, all while my Moria fires ineffectually in the Kriza’s direction, in spite not being affected by Full Auto this time. The Kriza rolls into the open and keeps blasting away, face to facing against my Zero AHD, my Jaguar Panzerfaust, and the Moira. The Optically Disrupted Wall finally goes down for the count, but I land a Panzerfaust and knock the Kriza down for the 3rd time this game. Nate’s Daktari heroically sacrifices herself to my Zero’s combi rifle to pick up the Kriza again, who takes out my Zero, the Riot Grrl, and a Transductor zone on the way to taking out my HVT with his last order. What a beast! Even though Nate’s killed more specialists, having 4 flipped antennas to his 0 puts the win in my column.
7-5 Nomad Victory!
Notes
- Nate and I talked at length about what other options he had to dislodge my Moria.
- Moving the Kriza backwards, putting him out of 24″ and thus forcing me to break suppression.
- Moving the Prowler forwards and using it to attack my Moria from the side. Similar odds, but he could eventually get into my back arc.
- Throwing smoke, but his Morlock was on the wrong side.
- All in all, the Kriza ended up being a pretty good option.
- My Jaguar was in a terrible position all game. The catwalks and stuff just totally blocked his view of everything the whole game except for a small window where could see the Kriza at the end of the game. Worked out, was still alive at the end to do something, but could’ve used him more.
- Holy moley. ODD in suppression with no visors on the table is pretty tough to deal with. I think I’ll take a Moira MULTI Rifle + E/M LGL more often for the SWC discount and flexibility.
- I aggressively use command tokens, which can lead to problems if I need to swap people out of combat groups before swapping someone else in. The Taskmaster’s Free Agent helps with this, of course, but it can be a real problem.
- I’m doing a bad job with coordinated orders. I use them a lot to advance stuff around, but often leave guys just hanging out in the middle of nowhere.
- I did a good job of keeping my cool and taking objectives in Turn 2. No need to aggressively be out for blood to get revenge for the Kriza taking out a bunch of my guys.
- I’ve played a few games with the Stempler since this game and it dies. A lot. Not sure what’s up with that.
- The humble Transductor Zond continues to be amazing.
- Most of this game for me was about containment. Nate doesn’t really make mistakes. He sometimes will miss an opportunity or an option, but he doesn’t really make bad calls. And he rarely misses things either. So you really have got to be on your A-game, and plug up as many holes as possible. His Prowler was a huge nuisance all game, and of course his Kriza (in spite of its bad dice luck) is always a PITA.