Adepticon 2018 Biotechvore Showdown
First off, found the sweet title image courtesy of Shimmering Sword‘s DeviantArt. The Biotechvore Showdown was the actual event that I had signed up for, thought about, and brought lists for, so I was hoping to do reasonably well. I hung around to watch the Aristeia! tournament which started an hour before the Biotechvore Showdown. Before long, Scott announced that pairings were up and I found myself paired off against Chris, a delightful fellow from Wisconsin. He told me that he was there with his 20-something son, and they played each other a lot. Things to look forward to in my own life!
We chatted a bit to calm the pre-tournament jitters, and I saw a pile of beautifully painted Bakunin in a nice white and blue scheme across the table. Nomad versus Nomad! I’ve never faced a full on Bakunin force across the table, so I was excited to throw down. Chris primarily plays Bakunin, it seemed, so he wasn’t too familiar with Corregidor, but he grinned and shrugged gamely. We rolled off and I took first turn, figuring I would want to box him in, especially since I saw a TAG on his display board. With that, I started deploying models.
Overview
- Mission: Biotechvore
- Forces: Jurisdictional Command of Corregidor versus Jurisdictional Command of Bakunin (300)
- Deploy First: Jurisdictional Command of Corregidor
- First Turn: Jurisdictional Command of Corregidor
[img]https://assets.infinitythegame.net/infinityarmy/img/_logosweb/logo_502.png[/img][b] Biotechvore 2[/b]
[img]https://assets.infinitythegame.net/infinityarmy/img/_logosweb/502/logo_6.png[/img] [b]MOBILE BRIGADA Lieutenant[/b] MULTI Rifle + Light Flamethrower / Pistol, Knife. (0 | [b]39[/b])
[img]https://assets.infinitythegame.net/infinityarmy/img/_logosweb/502/logo_6.png[/img] [b]MOBILE BRIGADA[/b] Missile Launcher / Pistol, Knife. (2 | [b]40[/b])
[img]https://assets.infinitythegame.net/infinityarmy/img/_logosweb/502/logo_6.png[/img] [b]MOBILE BRIGADA[/b] HMG / Pistol, Knife. (2 | [b]42[/b])
[img]https://assets.infinitythegame.net/infinityarmy/img/_logosweb/502/logo_6.png[/img] [b]MOBILE BRIGADA[/b] Combi Rifle + 1 TinBot B (Deflector L2) / Pistol, Knife. (0.5 | [b]37[/b])
[img]https://assets.infinitythegame.net/infinityarmy/img/_logosweb/502/logo_6.png[/img] [b]MOBILE BRIGADA[/b] Boarding Shotgun / Pistol, Knife. (0 | [b]33[/b])[img]https://assets.infinitythegame.net/infinityarmy/img/_logosweb/502/logo_25.png[/img] [b]SEÑOR MASSACRE (Fireteam: Haris)[/b] Breaker Combi Rifle, E/M Grenades, Eclipse Grenades / Pistol, AP CCW, E/M CCW. (0.5 | [b]30[/b])
[img]https://assets.infinitythegame.net/infinityarmy/img/_logosweb/502/logo_11.png[/img] [b]JAGUAR[/b] Chain Rifle, Smoke Grenades / Pistol, DA CCW. (0 | [b]10[/b])
[img]https://assets.infinitythegame.net/infinityarmy/img/_logosweb/502/logo_11.png[/img] [b]JAGUAR[/b] Chain Rifle, Smoke Grenades / Pistol, DA CCW. (0 | [b]10[/b])[img]https://assets.infinitythegame.net/infinityarmy/img/_logosweb/502/logo_9.png[/img] [b]BANDIT Hacker (Assault Hacking Device)[/b] Light Shotgun, Adhesive Launcher / Pistol, DA CCW. (0.5 | [b]28[/b])
[img]https://assets.infinitythegame.net/infinityarmy/img/_logosweb/502/logo_26.png[/img] [b]McMURROUGH[/b] 2 Chain Rifles, Grenades, Smoke Grenades / Templar CCW (AP + DA). (0 | [b]31[/b])
[img]https://assets.infinitythegame.net/infinityarmy/img/_logosweb/orden_regular.png[/img]8 [img]https://assets.infinitythegame.net/infinityarmy/img/_logosweb/orden_irregular.png[/img]2 [img]https://assets.infinitythegame.net/infinityarmy/img/_logosweb/orden_impetuosa.png[/img]1 [b]| 5.5 SWC | 300 Points |[/b] Open in Infinity Army
[img]https://assets.infinitythegame.net/infinityarmy/img/_logosweb/logo_503.png[/img][b] Jurisdictional Command of Bakunin[/b]
[img]https://assets.infinitythegame.net/infinityarmy/img/_logosweb/503/logo_1.png[/img] [b]MODERATOR Lieutenant[/b] Combi Rifle / Pistol, Electric Pulse. (0 | [b]9[/b])
[img]https://assets.infinitythegame.net/infinityarmy/img/_logosweb/503/logo_1.png[/img] [b]MODERATOR[/b] Combi Rifle / Pistol, Electric Pulse. (0 | [b]9[/b])
[img]https://assets.infinitythegame.net/infinityarmy/img/_logosweb/503/logo_1.png[/img] [b]MODERATOR Hacker (Hacking Device)[/b] Combi Rifle / Pistol, Electric Pulse. (0.5 | [b]17[/b])[img]https://assets.infinitythegame.net/infinityarmy/img/_logosweb/503/logo_2.png[/img] [b]REVEREND MOIRA[/b] MULTI Rifle / Pistol, Shock CCW. (0 | [b]30[/b])
[img]https://assets.infinitythegame.net/infinityarmy/img/_logosweb/503/logo_2.png[/img] [b]REVEREND MOIRA[/b] Combi Rifle + E/Mitter / Pistol, Shock CCW. (0 | [b]28[/b])
[img]https://assets.infinitythegame.net/infinityarmy/img/_logosweb/503/logo_2.png[/img] [b]REVEREND MOIRA[/b] HMG / Pistol, Shock CCW. (1.5 | [b]34[/b])
[img]https://assets.infinitythegame.net/infinityarmy/img/_logosweb/503/logo_2.png[/img] [b]REVEREND MOIRA[/b] MULTI Sniper Rifle / Pistol, Shock CCW. (1.5 | [b]34[/b])
[img]https://assets.infinitythegame.net/infinityarmy/img/_logosweb/503/logo_4.png[/img] [b]REVEREND HEALER[/b] Boarding Shotgun, Nanopulser / Pistol, EXP CCW. (0 | [b]32[/b])[img]https://assets.infinitythegame.net/infinityarmy/img/_logosweb/503/logo_9.png[/img] [b]ZERO (Deployable Repeater)[/b] Combi Rifle, E/Mauler / Pistol, Knife. (0 | [b]19[/b])
[img]https://assets.infinitythegame.net/infinityarmy/img/_logosweb/503/logo_8.png[/img] [b]LIZARD[/b] MULTI HMG, Heavy Grenade Launcher / . (2.5 | [b]87[/b])
[img]https://assets.infinitythegame.net/infinityarmy/img/_logosweb/sep.gif[/img] [img]https://assets.infinitythegame.net/infinityarmy/img/_logosweb/503/logo_8.png[/img] [b]LIZARD PILOT[/b] Submachine Gun / Pistol, Knife. ([b][/b])
[img]https://assets.infinitythegame.net/infinityarmy/img/_logosweb/orden_regular.png[/img]10 [b]| 6 SWC | 299 Points |[/b] Open in Infinity Army
Deployment
First off, I just want to take a second to note that the terrain at Adepticon 2018 was really quite impressive. Since there weren’t a ton of people looking to play Biotechvore, we had our pick of tables and chose the left side of this double-wide table. It looks so cool, doesn’t it?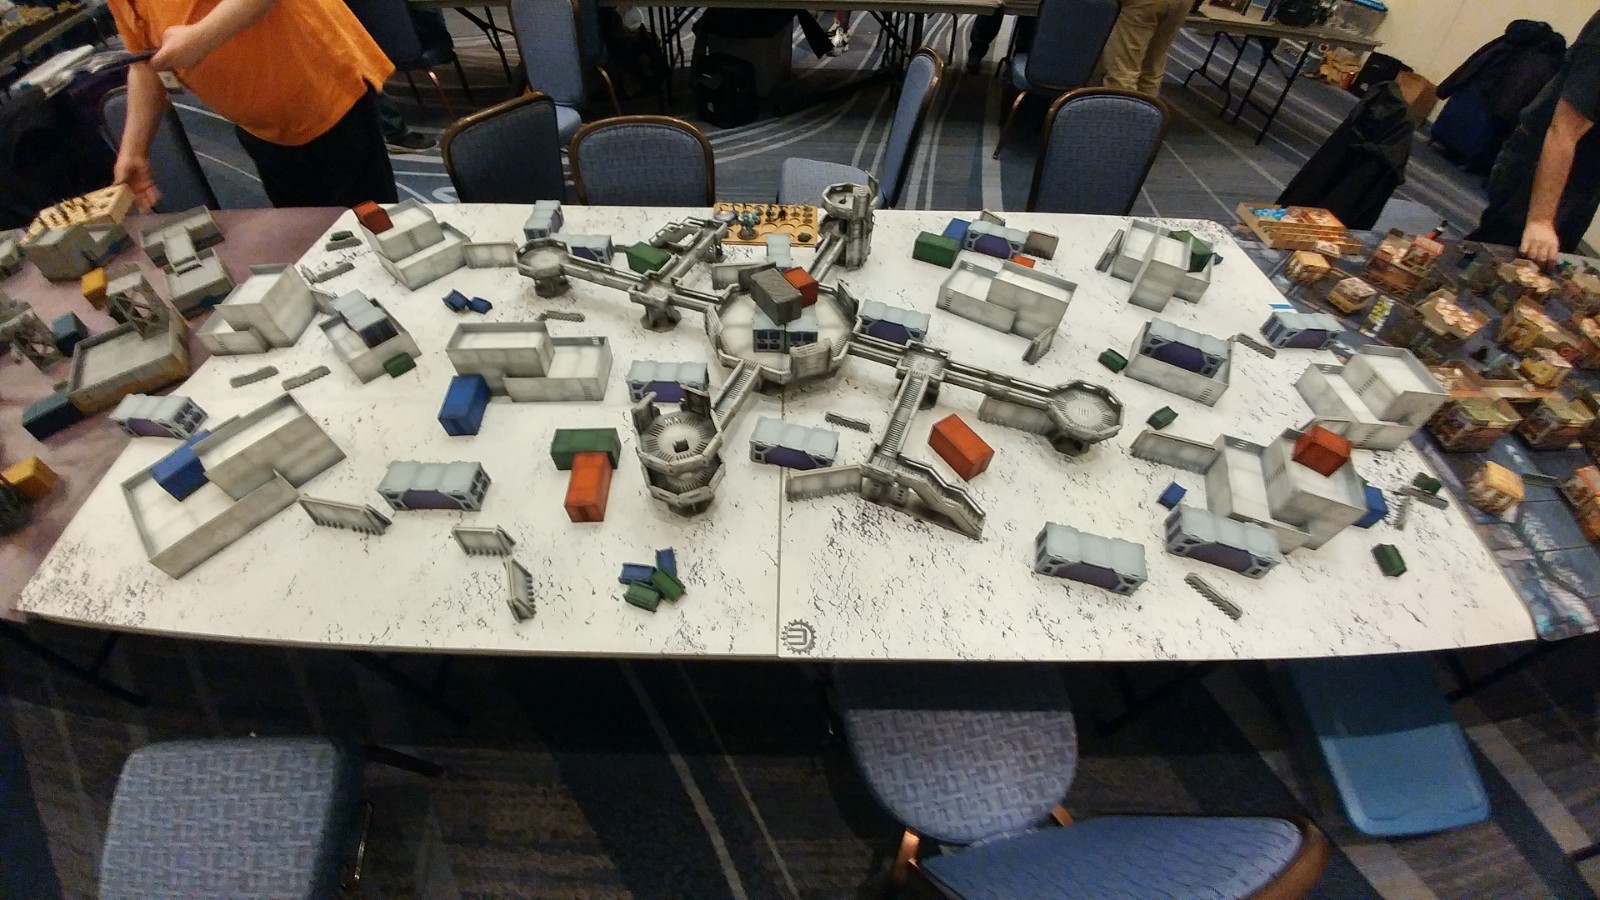 I had to deploy first and I saw a good spot on the right side of the table where I would have plenty of space to put down my guys and have good lanes of advance that were blocked by terrain. I just threw the entire Brigada link right at the edge of the deployment zone, marked by my d20, then ensured that I would get them up the board put putting not one, not two, but four smoke sources right next to them.
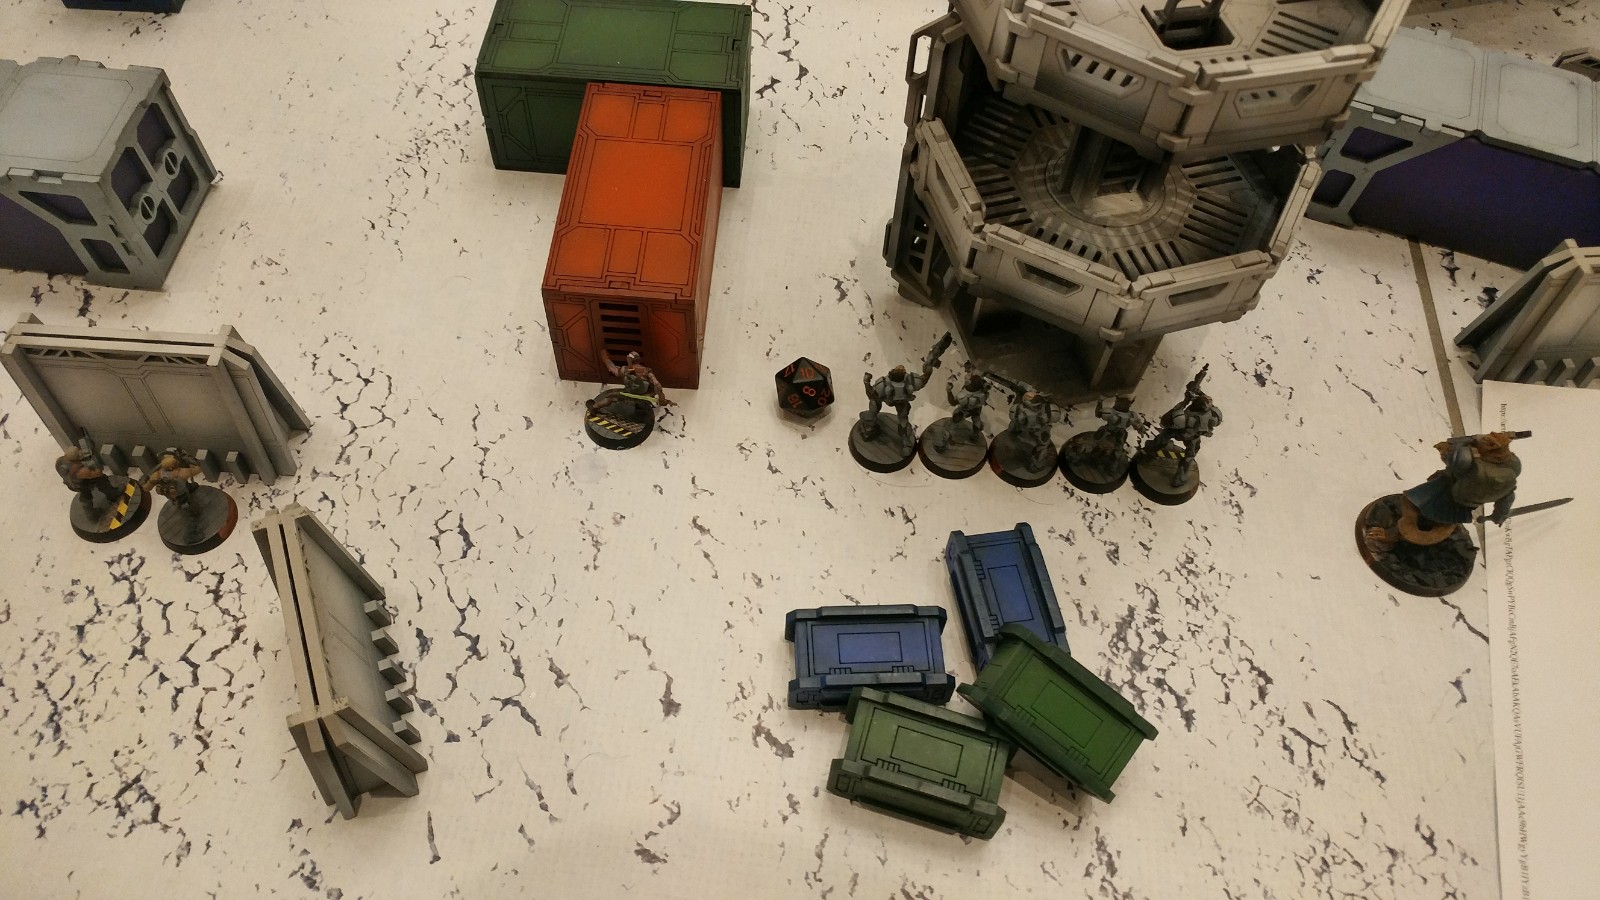 I held my Bandit AHD in reserve, figuring I’d use it counter-deploy the Lizard. Chris doesn’t like the Lizard model (I mean, who does? I certainly don’t), so he proxied with an Iguana, which is totally something that I should do at some point. Chris lined up his Moira link team behind a shipping container with everyone hidden except the MSR and the HMG. The former watched the lane my Mobile Brigada would have to advance up and the latter covered my Jaguar’s advance. A pair of Moderators went down behind some partial cover on the right side of the table and the third Moderator (the hacker) came down on my left, next to the Lizard.
I chose a suitable building directly in the path of the Lizard’s easiest advancement route and rolled a 5 to stick the landing for my Bandit AHD! She lay prone on the roof, thumb on the button of her hacking device, ready to go. Chris attempted to infiltrate his Zero in the way of my Mobile Brigada, but failed the roll. Thank heavens he failed, because it was a DepRep Zero with E/Maulers! That would’ve been really ugly. I would’ve had to get it out of there with McMurrough. After plunking down his Zero against his left table edge, behind a building, we shook hands and started rolling dice!
Turn 1
Top of Turn 1 – Corregidor
McMurrough does his thing and makes it up the board, throwing some smoke to cover the Brigada as he does so. He’s now within a full-order move of making it out of the death zone. Leveraging his smoke, I push the Mobile Brigada link up to a building in the midfield, scooting them into positions where they’ll cover the approach of the Moira as I do so. There’s a ladder on my side of the building that’s not covered by smoke, so after HMGing down an exposed Moderator, I activate the Massacre Haris and have him chuck a pair of eclipse grenades to the top of the ladder. This lets my Brigada really get settled and gets my Mobile Brigada Lt and ML on the roof. I full-order super-jump McMurrough out of the death zone and onto the big Comanche platform thing on the right (you can just see the corner of his base in the picture below on the right).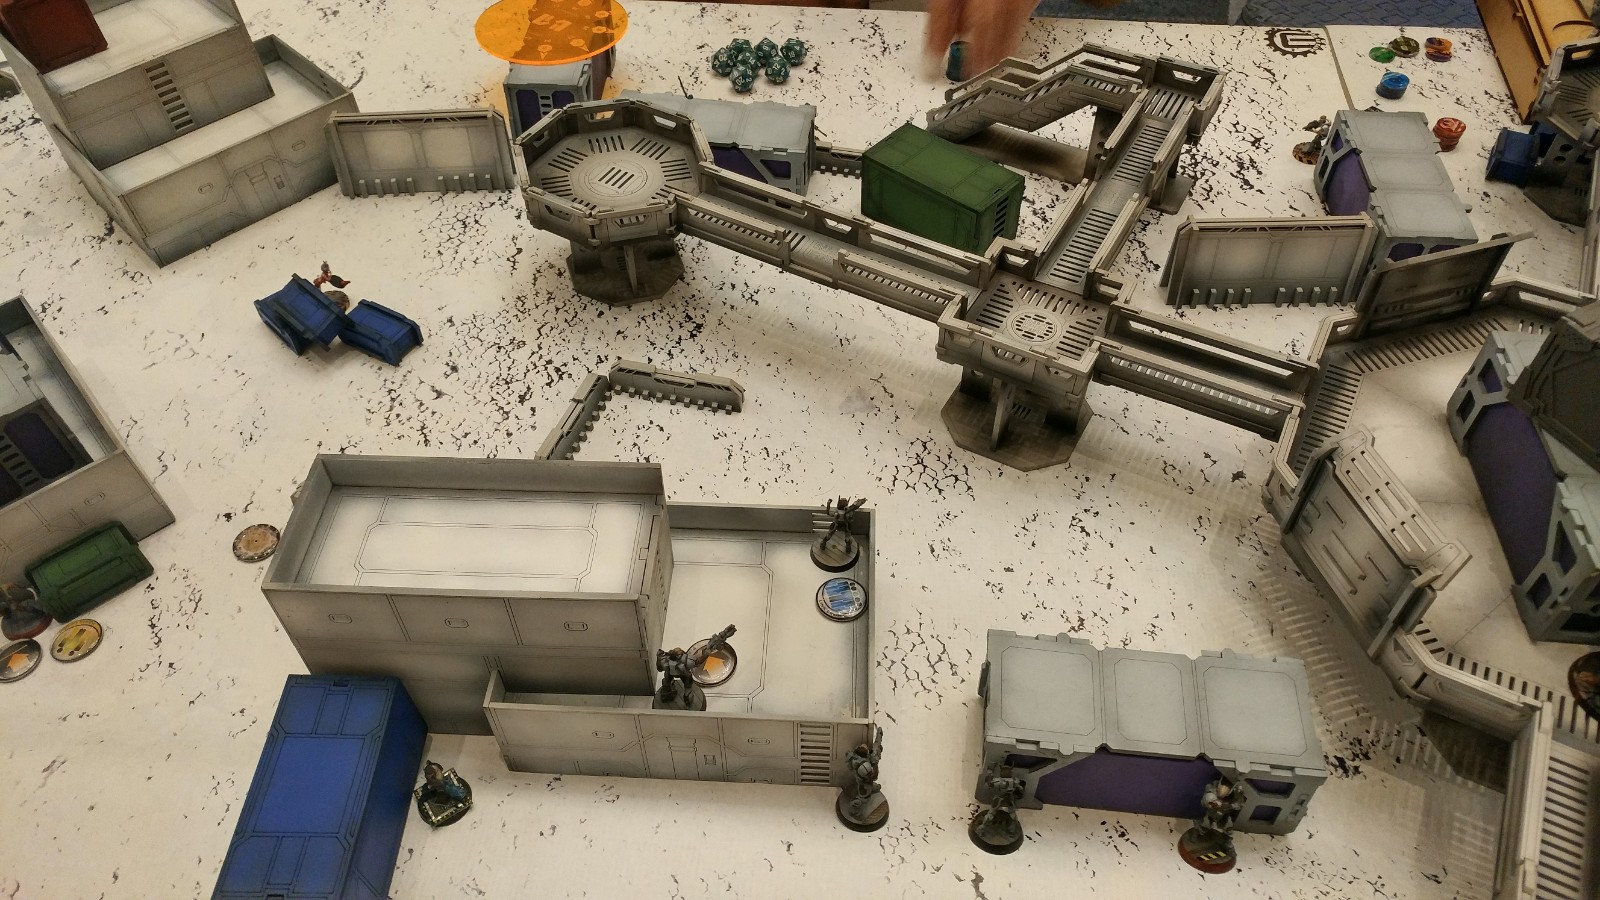 I use smoke to settle the Massacre Haris into cover, protecting my left flank and closer to the Lizard in case I have to go CC it with Massacre. I flip a command token and spend the Bandit’s order to stand my Mobile Brigada ML up to take a shot at the exposed Moira MSR, catching the Reverend Healer in the blast. Our face to face rolls bounce off one another, but I catch the Healer flat-footed and she has to take some ARM rolls. Chris shows me a trio of 14’s! Wow!
We measure the death zone, and I’ve got everyone out of the zone. PHEW!
Top of Turn 1 – Bakunin
Chris’s MSR Moira is now in full view of my TinBot Brigada and my Brigada ML. He activates the link and splits burst between them to try and break his way out of my containment. The MSR DA round bounces off my ARM 7 TinBot Brigada, and my missile blows both the Reverend Healer and the Moira MSR off the table. Chris keeps a level head and tries to punch out with his TAG, moving it up and into view of one of my Jaguars. I throw smoke to protect them, and beat out the HMG fire with some lucky rolls. The Lizard comes up a little further to see my ML Brigada, which puts him right into the zone of control of my AHD Bandit. Chris dumps all four dice into the ML Brigada and lets me take my possession roll uncontested, which is a really tough choice if I’ve ever seen one!
Much dice rolling later, I save a hit or two on the Brigada ML and elect to stay standing thanks to V:Courage, and I’m in possession of a shiny new Lizard TAG, in spite of an attempt to re-possess the TAG with the Moderator Hacker. Now dangerously low on orders, Chris tries to get his Moira out of the death zone, gunning down my ML Brigada with his HMG Moira in the process.
We measure the death zone on Chris’s side, and only the HMG Moira is out. He loses the other two Moira, the Moderator hacker, and the Zero, but has a bog-standard Moderator (Lieutenant?) still standing on his side. BTS 3 is sometimes relevant on those guys! What’s interesting is that the Lizard is still in the zone, but it’s possessed… unsure of how to handle this, we go bother Scott the TO and he (after discussing it with Tim I think) rules that since the TAG is currently mine and it’s Chris’s turn, it doesn’t have to make BTS saves against the biotechvore death cloud. That works for me!
Turn 2
Top of Turn 2 – Corregidor
McMurrough beelines towards the remaining Moderator and tries to smoke out the Moira HMG’s return fire. He fails and takes a wound, but this is fine because I spend the rest of my orders gunning down Chris’s Moira and remaining Moderator with the Lizard and getting something in position to secure Chris’s HVT. I didn’t take much in the way of specialists so I can only really get one classified and that’s Secure the HVT.
9-0 Corregidor Victory! 260-0 points remaining.
Two other people at the tournament were able to get their second classifieds done, so they 10-0’ed their opponents, giving me third place. I’ll take it! First time at Adepticon and I got a (literally) bronze-colored medal! Woo hoo! A big thank you to Chris for being such a gentleman during the entire game. Basically none of the important dice rolls went his way and it can be really frustrating when that happens. He kept smiling through the whole thing and we had a great conversation afterwards as we were packing up. Looking forward to seeing him across the table again next year!
 Notes
Notes

- Well, it appears that this is the correct list for Biotechvore.
- 4 smoke sources, one of which is eclipse.
- 11 orders to get two links and McMurrough out of the zone
- PH 10 roll to get the Bandit out for “free”
- HMG to fight your way out
- ML to keep them locked in
- Seeing my opponent’s list, I’m really happy I chose a 5-man core + Haris. The order efficiency really paid off.
- I definitely think that my list has a lot of the right tools to handle most problems. If the Moira had continued being annoying I would’ve just gotten McMurrough in there to handle them. Some spec-fired grenades would’ve sorted that right out.
- I did super luck out at snagging the Lizard turn 1 though. I’d have had to get Massacre into close combat to drop it, otherwise. Doable, but I don’t have time or orders to really futz with that and/or also smash a ODD link team.
- I’m a little sad that the ML rangebands suck so bad once you’re in midfield. Being at 0 range really hurt against the Moiras’ ODD! Nevertheless, it worked out. I’m not sure if I could’ve done a significantly better job of positioning it without introducing a lot more risk to my forces. Perhaps I could’ve put it on the catwalk on the right of the board and advanced that way, but that would’ve required some additional smoke from the Jaguar Haris.
- I deployed really strong on the right side, and I’m glad I did. Everyone is just so focused on getting out of the deployment zone that you can afford to do weird things like that.
- Bottom line, I brought the a reasonable list, kept focused on the mission, and the dice rolls went my way.