
Interplanetary January Tournament Report
First tournament of the decade, so we pulled out the good tables and ratcheted things up with a 400 point Tactical Window list tournament. The scenarios? Capture and Protect, Countermeasures, and Looting and Sabotaging. Woof!
Game 1 – Mowang Hunter
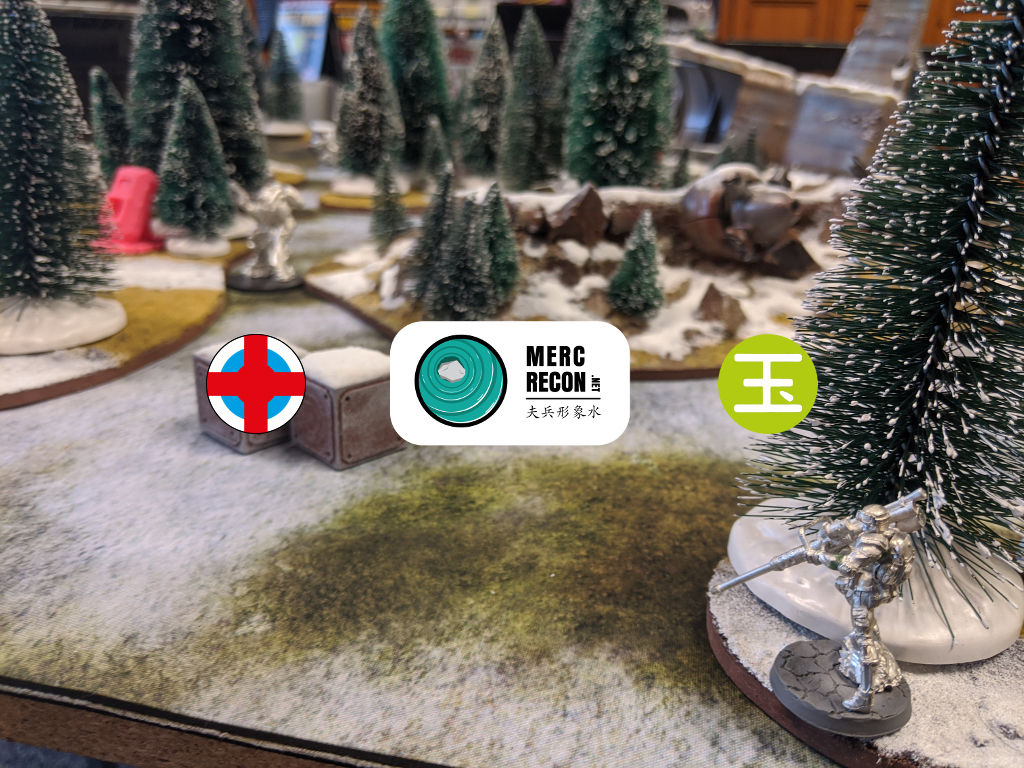
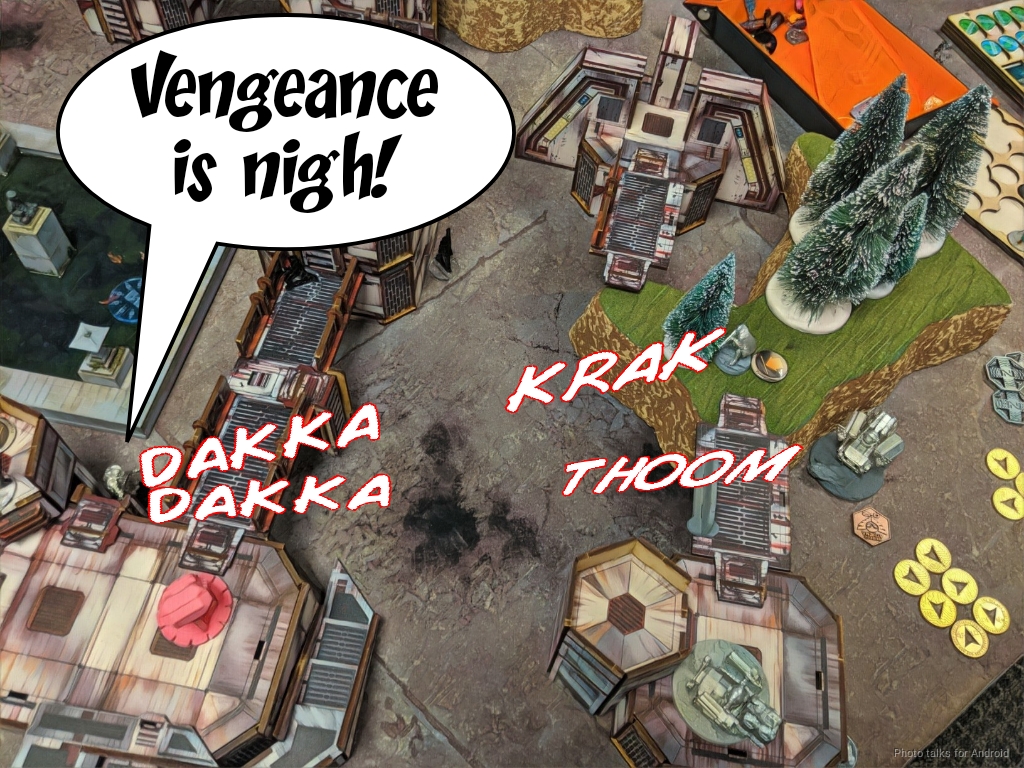
Game one was versus James (RomanLegion) on the plane crash table. All the MDF-based areas are considered difficult terrain and forest (low-vis + saturation). It creates a lot of problems if you aren’t packing MSV or multiterrain.
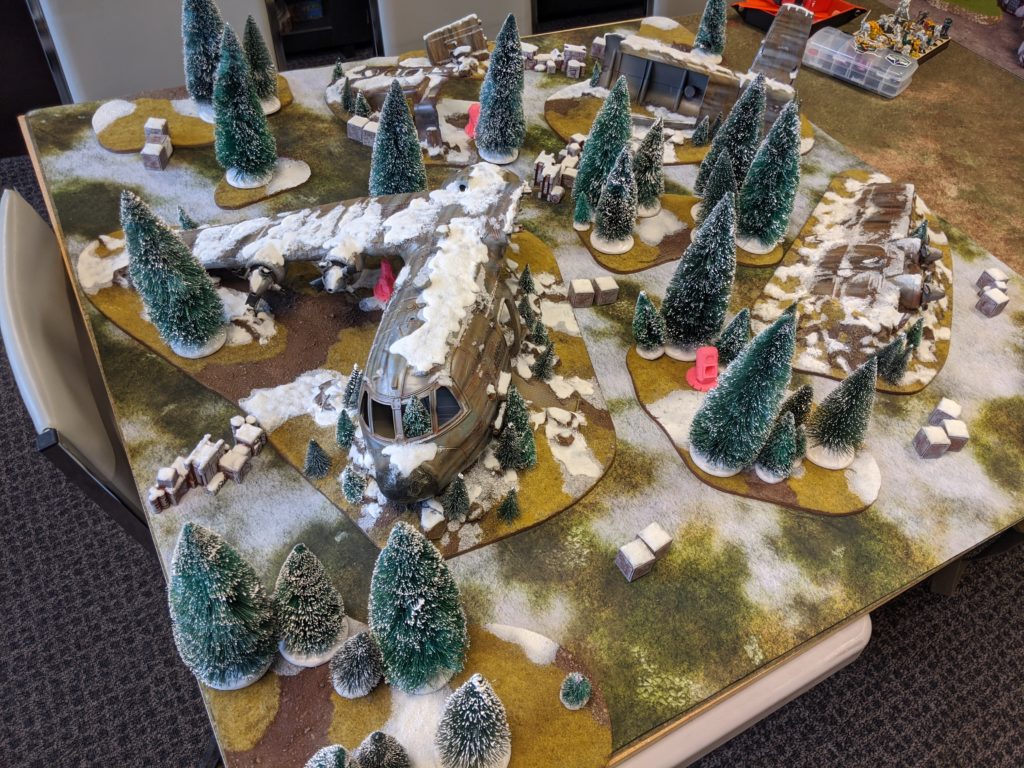
I put both Beacons in a terrain zone during table setup to make things more difficult as well as interesting.
Overview
- Mission: Capture and Protect
- Forces: Ariadna versus Yu Jing (400, Tactical Window)
- Deploy First: Yu Jing
- First Turn: Yu Jing
Do Stuff
GROUP 1 |7
1
1
GROUP 2 |
COLONEL VORONIN Lieutenant Rifle / Assault Pistol, AP CC Weapon. (0 | 21)
TANKHUNTER Portable Autocannon, D-Charges / Pistol, Knife. (1.5 | 34)
CHASSEUR (Minelayer) Rifle, Light Flamethrower, Antipersonnel Mines / Pistol, Knife. (0.5 | 20)
EQUIPE MIRAGE-5 . (2 | 71)

DUROC 2 Chain Rifles, Grenades, Smoke Grenades / AP CC Weapon. (34)
DYNAMO (Forward Observer) Rifle / Assault Pistol, CC Weapon. (0.5 | 29)
DOZER (Traktor Mul Control Device) Rifle, D-Charges / Pistol, Knife. (0 | 14)
TRAKTOR MUL (Total Reaction) Uragan MRL / Electric Pulse. (1 | 18)
SCOUT (Forward Observer) Ojotnik, D-Charges, Antipersonnel Mines / Pistol, Knife. (0 | 30)
FRONTOVIK Engineer T2 Rifle, Light Rocket Launcher, D-Charges / Assault Pistol, Knife. (0.5 | 33)
ISOBEL McGREGOR T2 Rifle, Flash Pulse, D-Charges, E/Mauler / Pistol, Knife. (0.5 | 26)
BRISCARD Paramedic (Medikit) Marksman Rifle / Assault Pistol, Knife. (0 | 26)
UXÍA McNEILL (Covert Action) (CH: Limited Camouflage, Superior Infiltration, Specialist Operative) Boarding Shotgun, D-Charges, Smoke Grenades / 2 Assault Pistols, AP CCW, Knife. (0 | 27)
7.5 SWC | 398 Points | Open in Infinity Army
I took my Countermeasures list for this mission, primarily because I have a bunch of smoke sources in it and fast moving troopers. Plus, who doesn’t want Margot and Duroc in their list? I’m also putting my money where my mouth is and I’m taking part in the latest Bromad Academy mission on not taking burst 4 or greater weapons.
It didn’t really miss an HMG, to be honest, but there are definitely some changes I’m considering to the list which I’ll talk about later.
Game 1 – James
GROUP 1 |GROUP 2 |
QIANG GĀO (Lieutenant L2) HMG, Nanopulser / 2 x Breaker Pistol, Knife. (1 | 43)
CELESTIAL GUARD Hacker (Hacking Device) Combi Rifle / Pistol, Knife. (0.5 | 21)
TIGER SOLDIER Combi Rifle + Light Flamethrower / Pistol, Knife. (0 | 27)
LIÚ XĪNG Hacker (Assault Hacking Device) Boarding Shotgun / Pistol, CC Weapon. (0.5 | 38)
MECH-ENGINEER Combi Rifle, D-Charges / Pistol, Knife. (0 | 15)
YÁOZĂO Electric Pulse. (0 | 3)
HÚLÁNG (Fireteam: Duo) 2 Submachine Gun, E/M Grenades, D-Charges / Pistol, Monofilament CC Weapon, Knife. (0 | 41)
MÓWÁNG (NCO) Red Fury, Akrylat-Kanone / Heavy Pistol, Knife. (1 | 52)
RUI SHI Spitfire / Electric Pulse. (1 | 20)
HÙSÒNG Yaókòng HMG / Electric Pulse. (1 | 25)
KUANG SHI Chain Rifle / Pistol, Knife. (0 | 5)
PHEASANT IMPERIAL AGENT (Chain of Command, X Visor) Combi Rifle + E/Mitter, MadTraps / Pistol, DA CC Weapon. (0 | 36)
6.5 SWC | 399 Points | Open in Infinity Army
James brought a pretty eclectic selection of stuff, including the new Qiang Gao and a triple AD list, which wasn’t very fun for me! Thankfully, Chasseurs are stupid good.
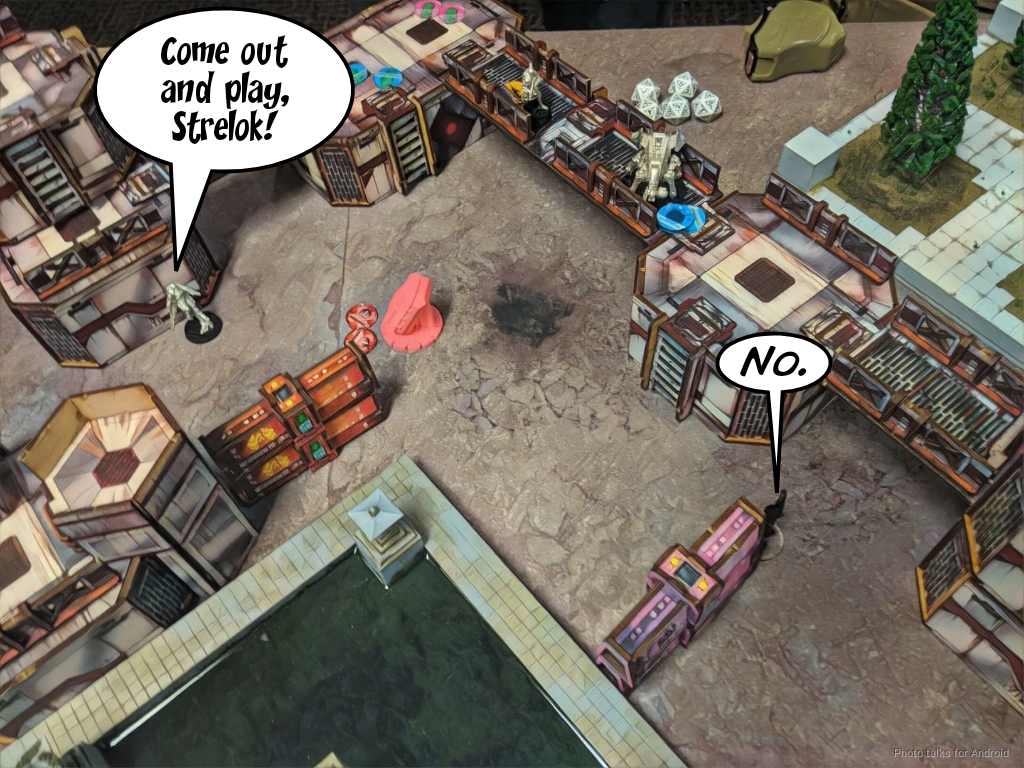
Deployment
I won the roll off and picked side because I thought I had a more defensible beacon. James sort of just shook everything out over his deployment zone. A Kuang Shi and TR bot for each flank, covered by a Yaozao attached to a Mech Engineer. To guard his Beacon, he put down a Pheasant with MadTraps and a pair of Celestial Guard.
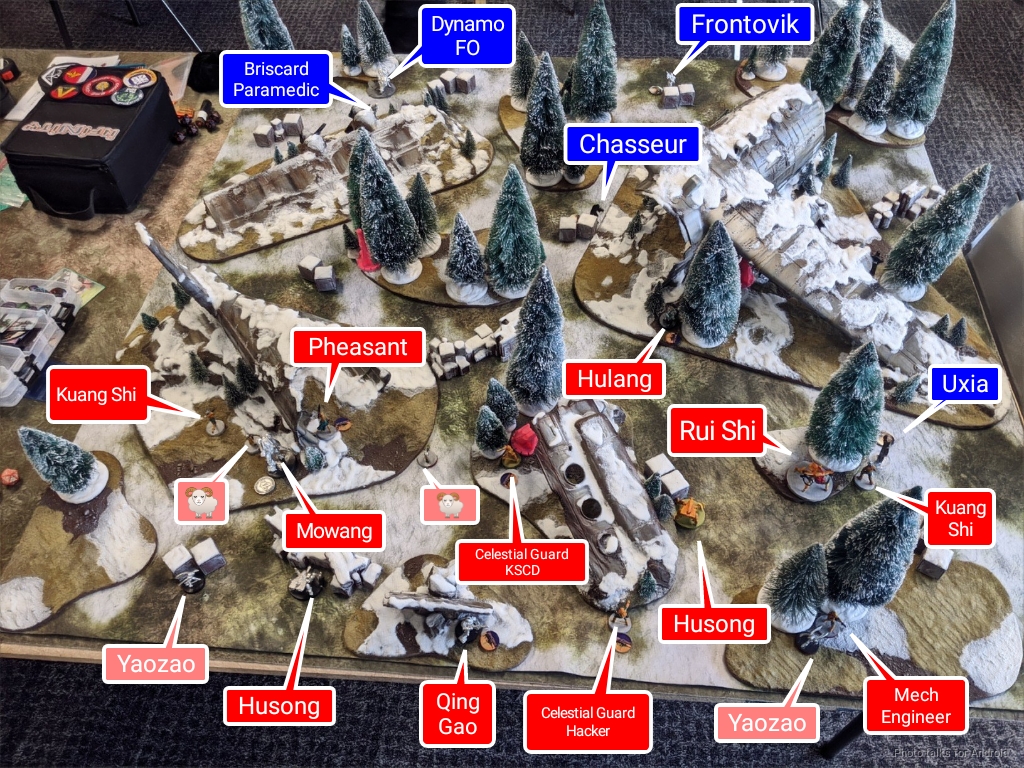
His three strikers, Qing Gao, the Hulang, and the Mowang were clustered near the center, with a Liu Xing and two Tigers circling in the dropship above. My deployment was mostly centered around countering the Hulang. I covered it with a Tankhunter, a Briscard, two Chasseurs, a mine, and then covered likely approaches with an Uragan.
I set up my Dynamos to cover the flank and my backfield, along with my Engineers. Isobel covered the objective with her flash pulse and T2 rifle, and then the Scout hung out near the center to be able to make a run forward. Voronin took a nap on his lawn chair all the way in the back.
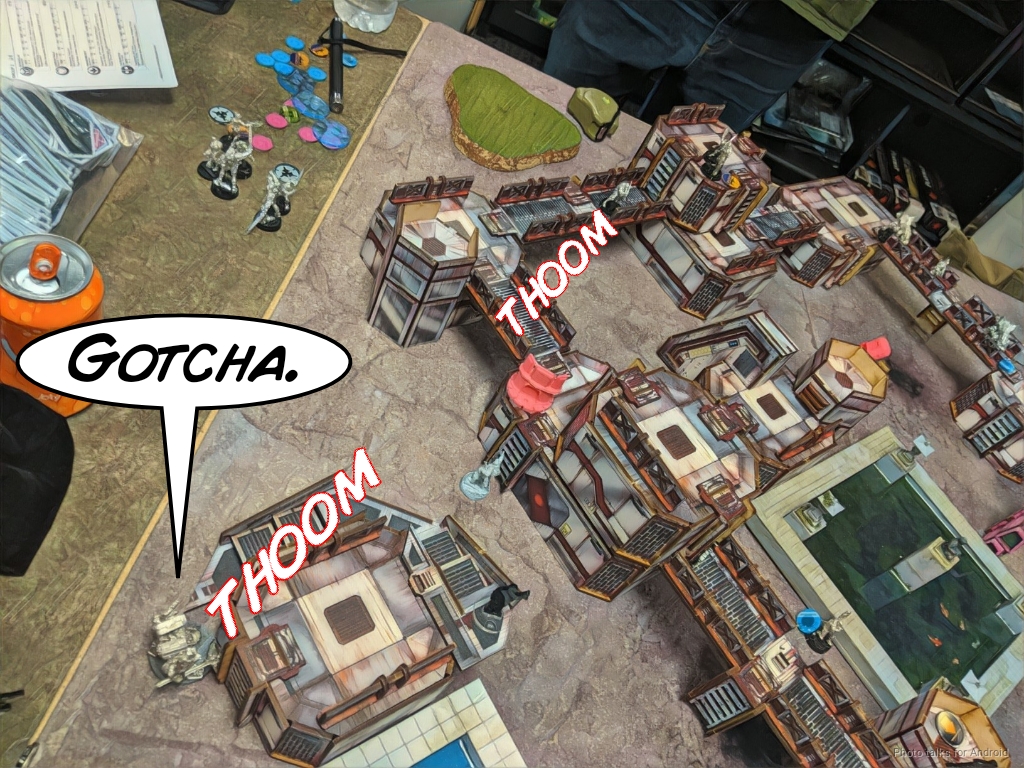
James dropped the Rui Shi on my left, next to a Kuang Shi and a Husong. My first thought was to infiltrate Uxia next to them to cover them all with a shotgun, so against my better judgement that’s exactly what I did.
Turn 1
Top of 1 – Yu Jing
The Kuang Shi activated, and I could cover both the Rui Shi and the Husong with the template it generated, so that’s exactly what I did against the Kuang Shi’s pistol shots.
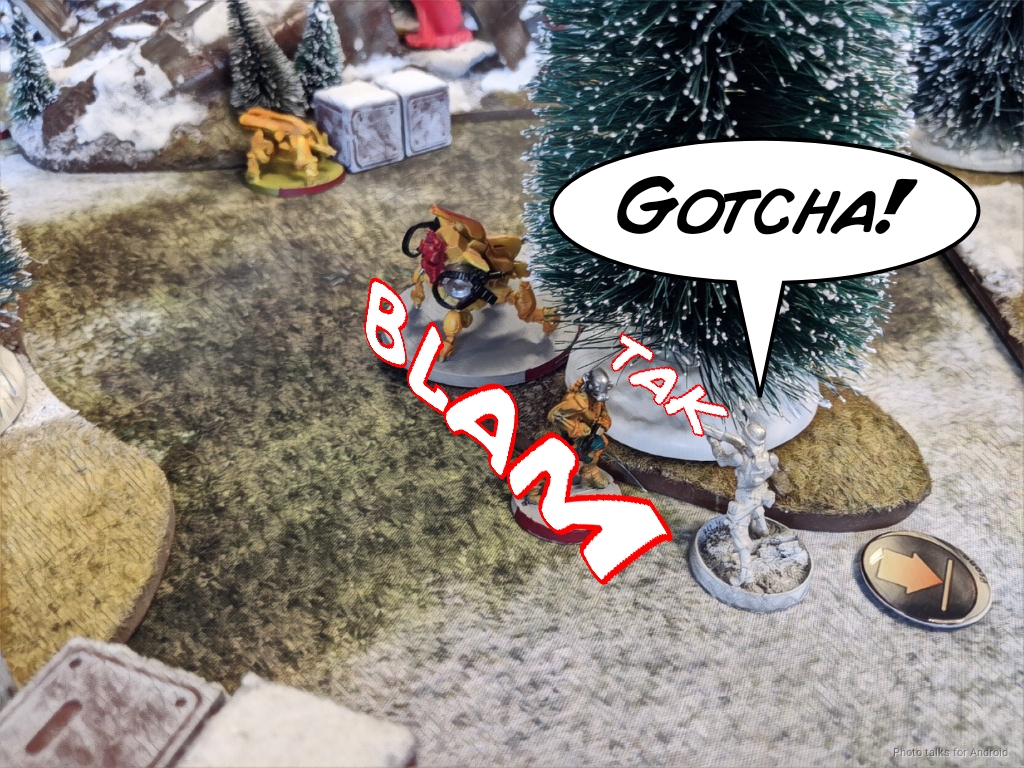
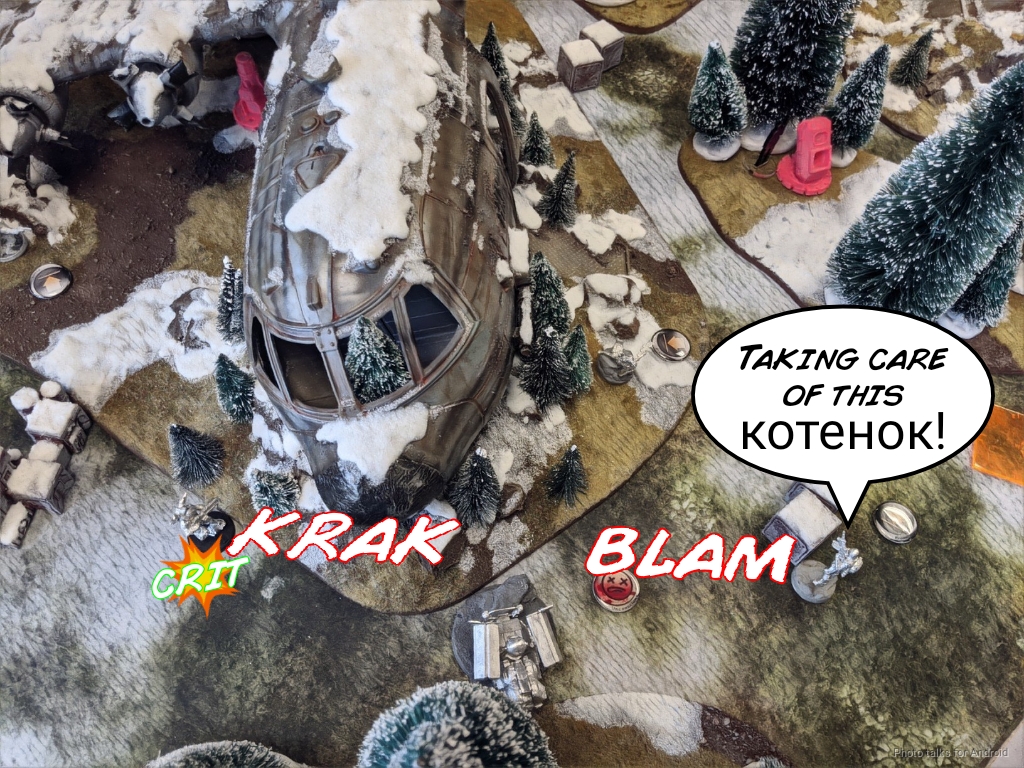
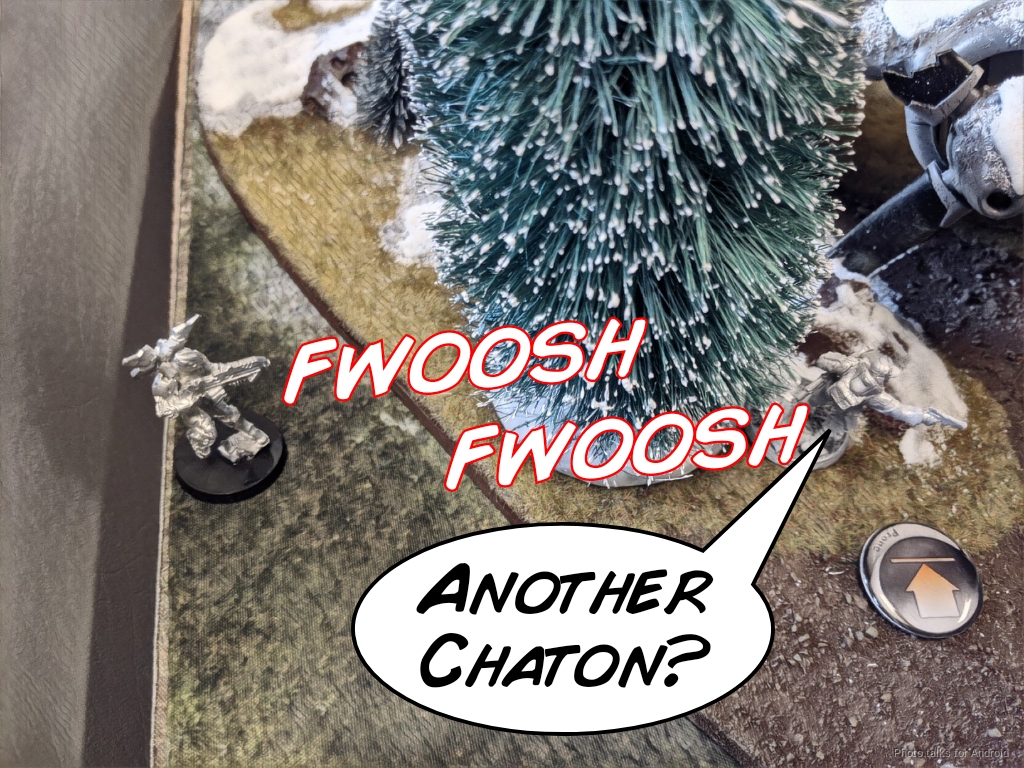
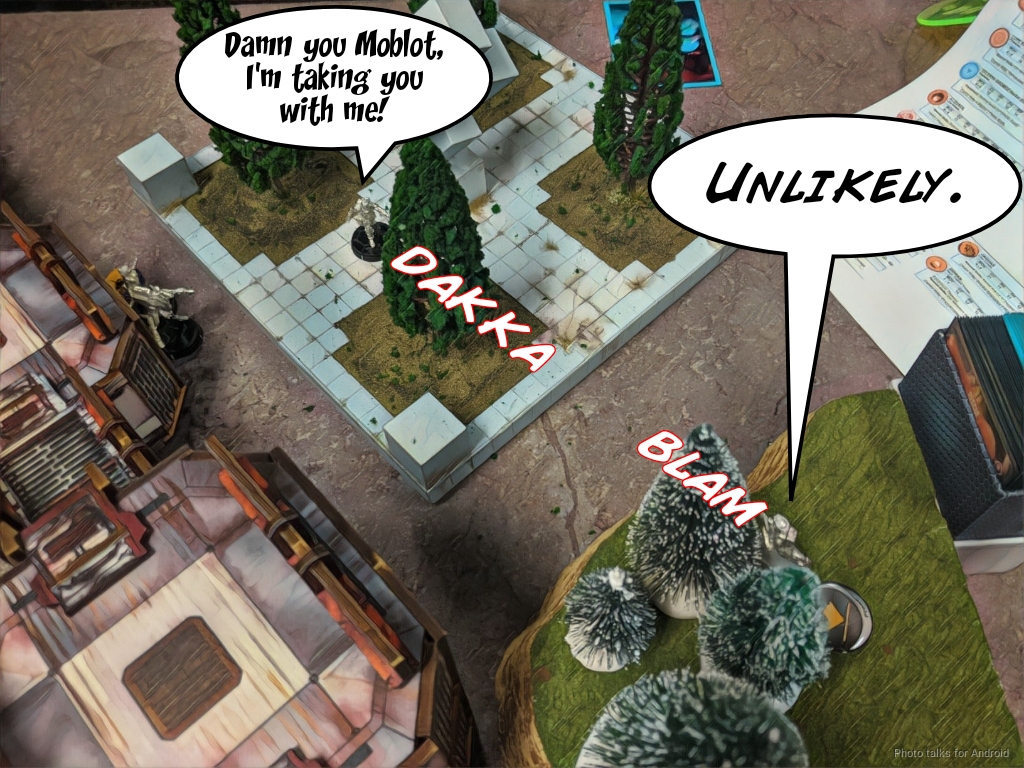
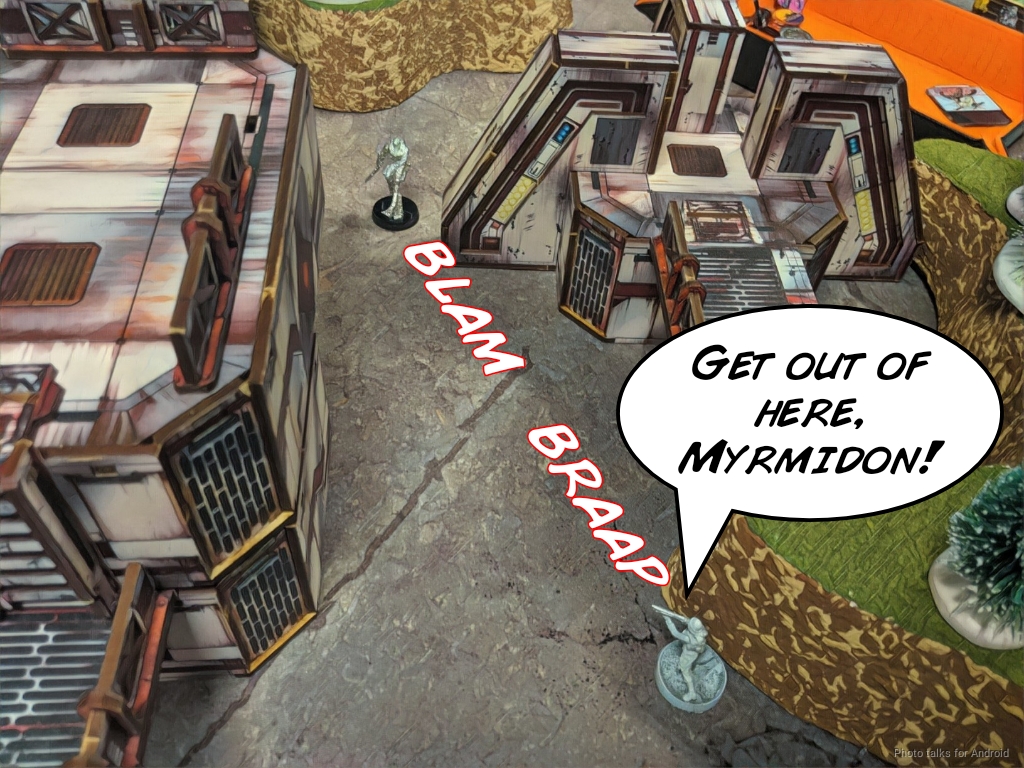
Sadly, the Husong passed its ARM save, but neither the Rui Shi nor the Kuang Shi did. James remembered that Kuang Shi can explode, so that’s what he did. I rolled a 1 on Uxia’s ARM save, so she got taken out.
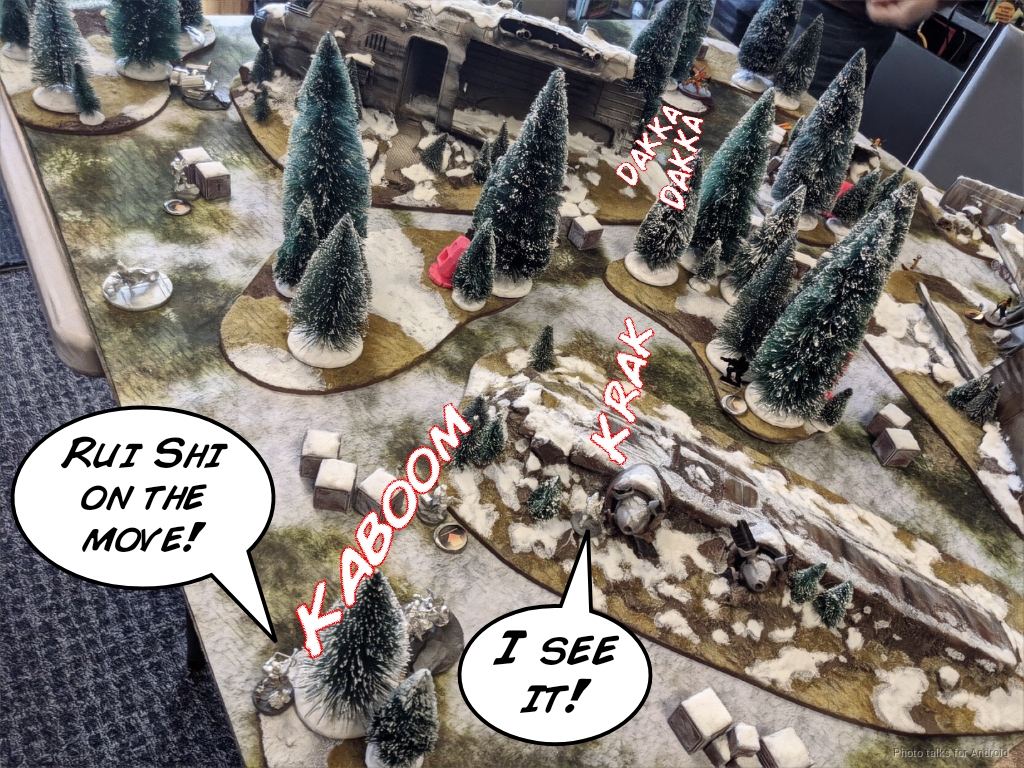
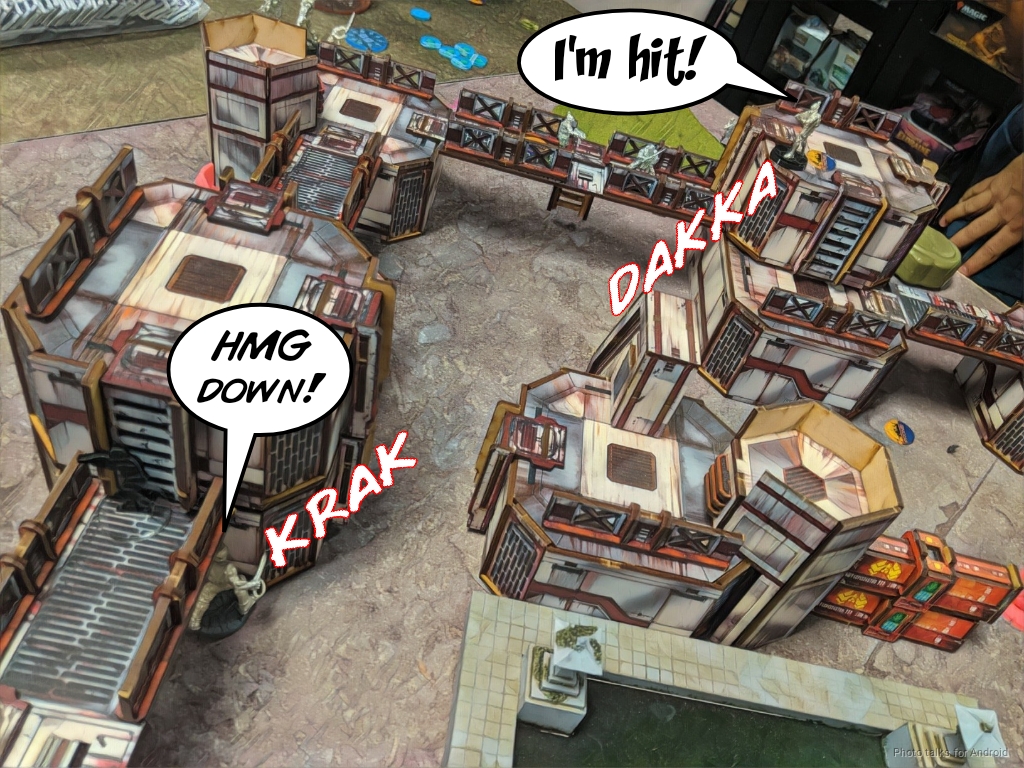
James then walked a Yaozao towards the Rui Shi and I revealed the Tankhunter to take a shot along with the Briscard, but I missed. After it got picked up, James buffed the Rui Shi and started blasting away at the Tankhunter and the Briscard. Thanks to the saturation zone this didn’t work very well, and although I lost the Briscard the Tankhunter put the Rui Shi down for the count again as it broke line of fire.
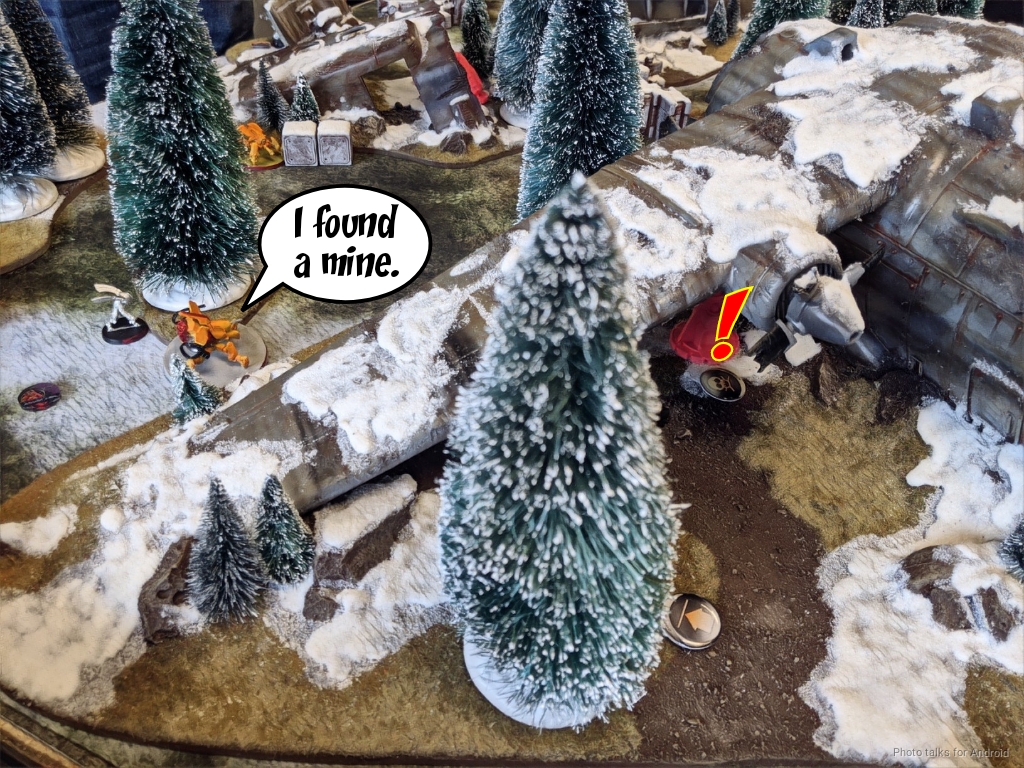
James picked it up again, and then starting moving on my Chasseur on the left, discovering his mine first.
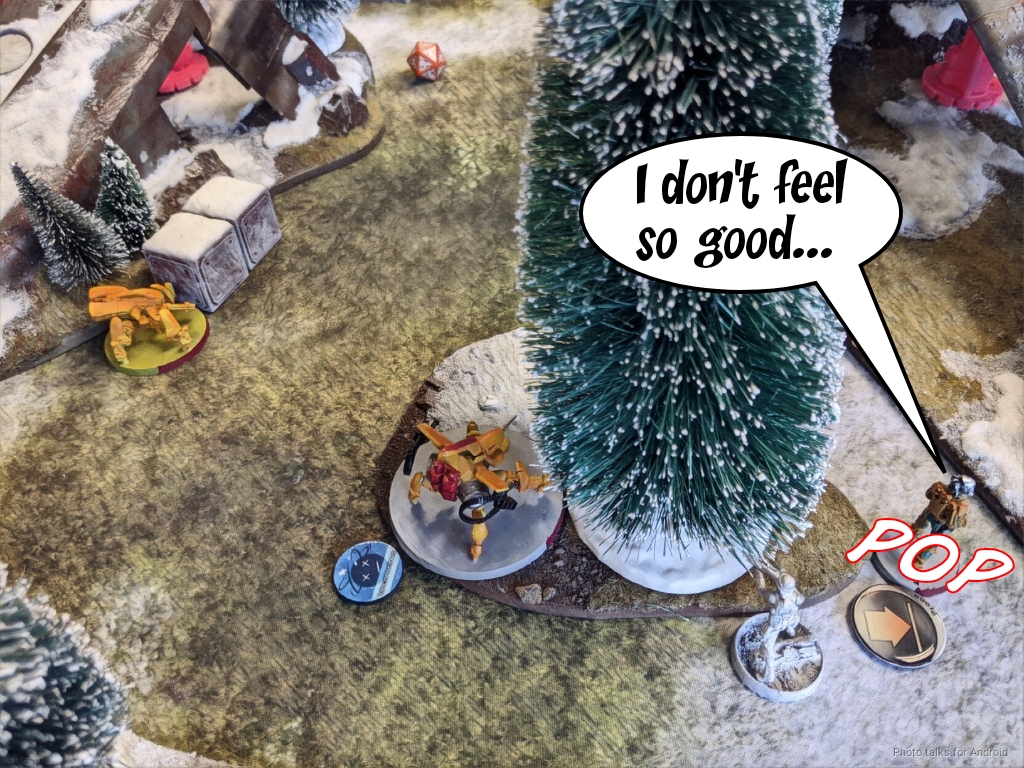
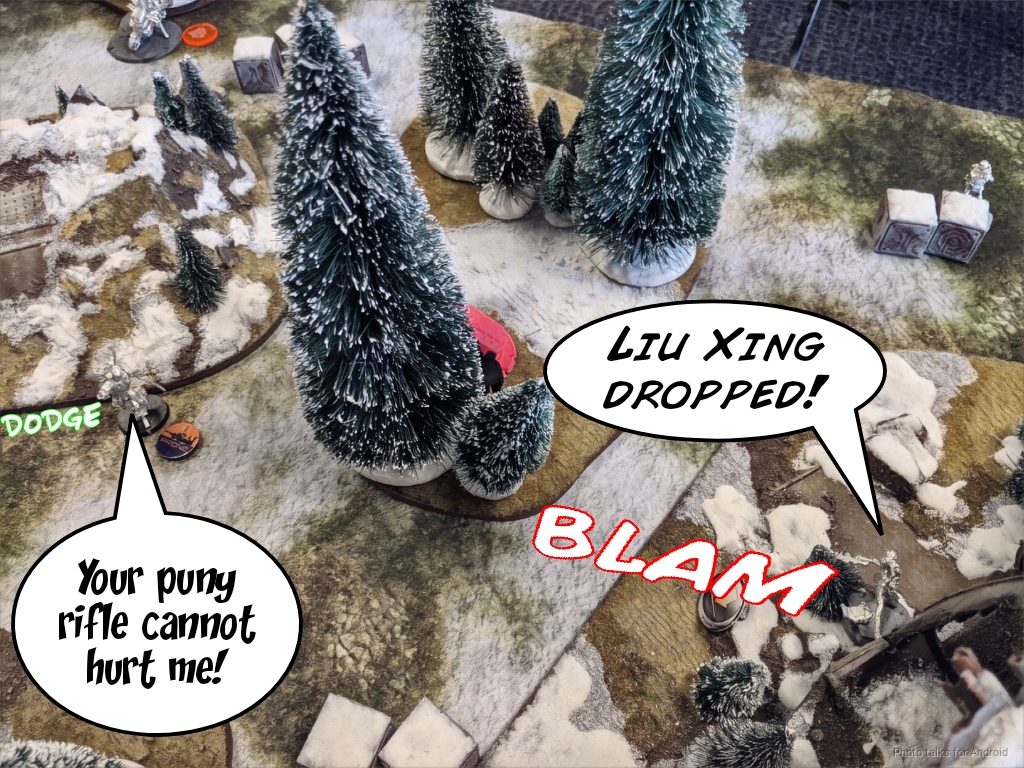
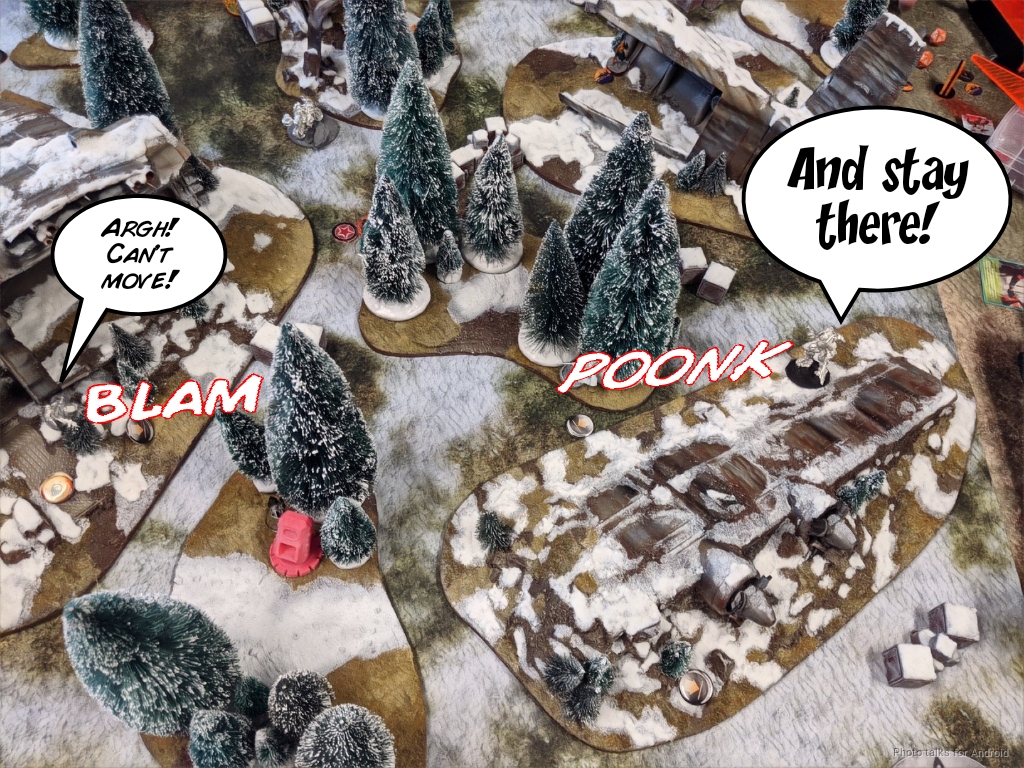
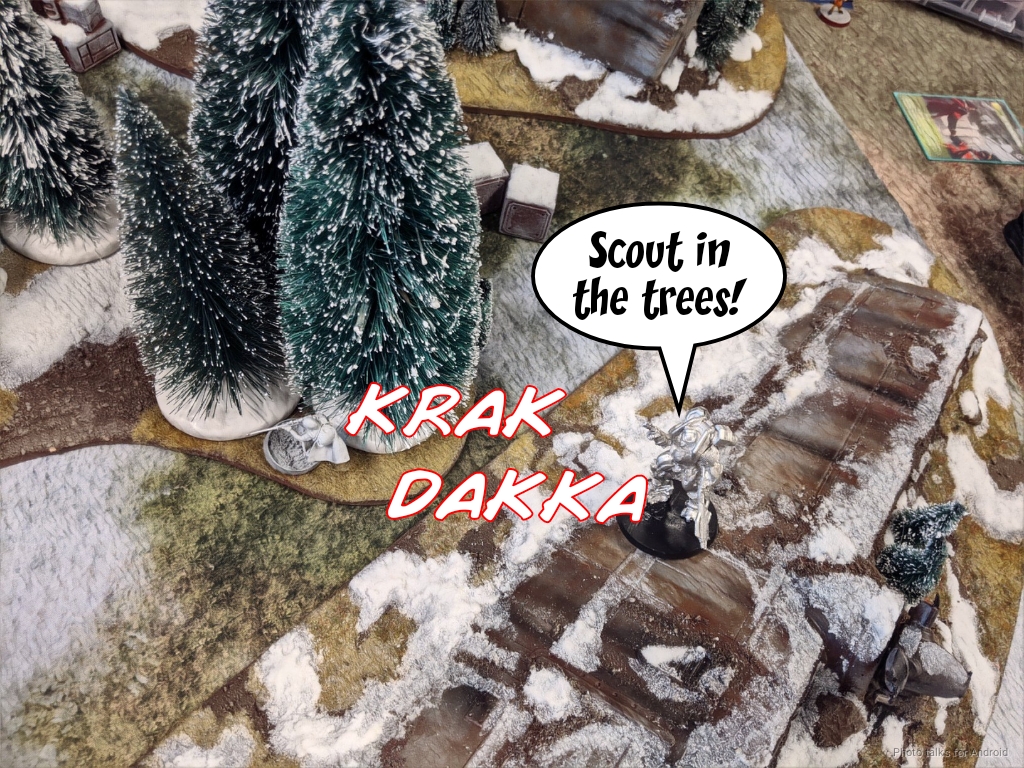
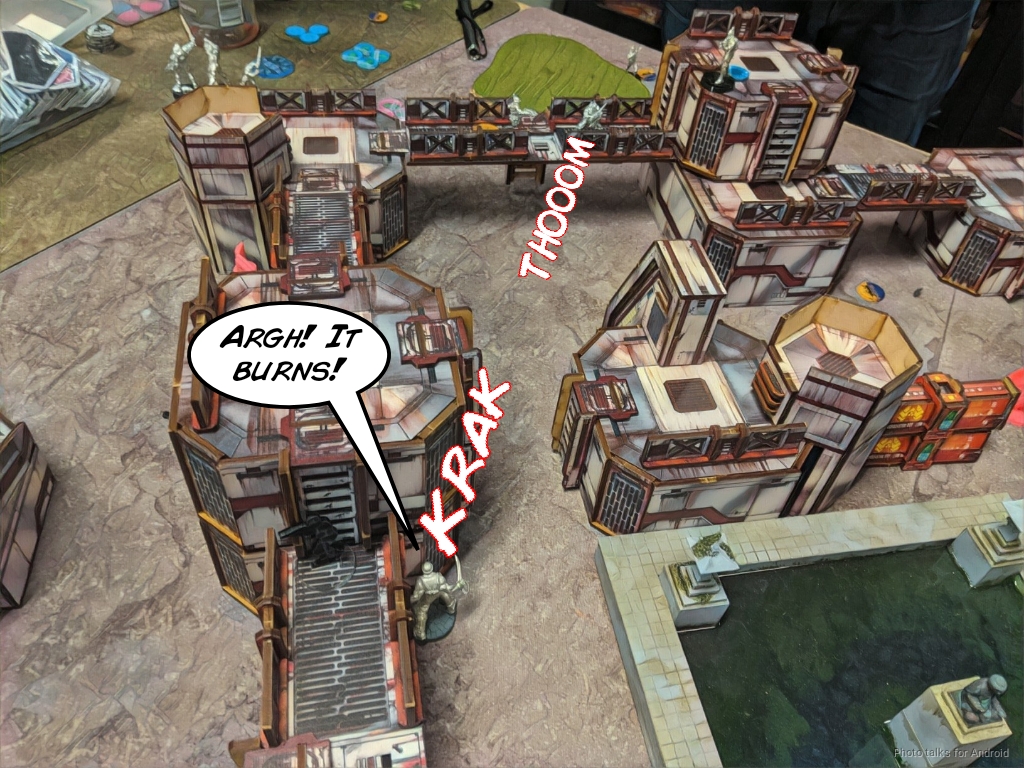
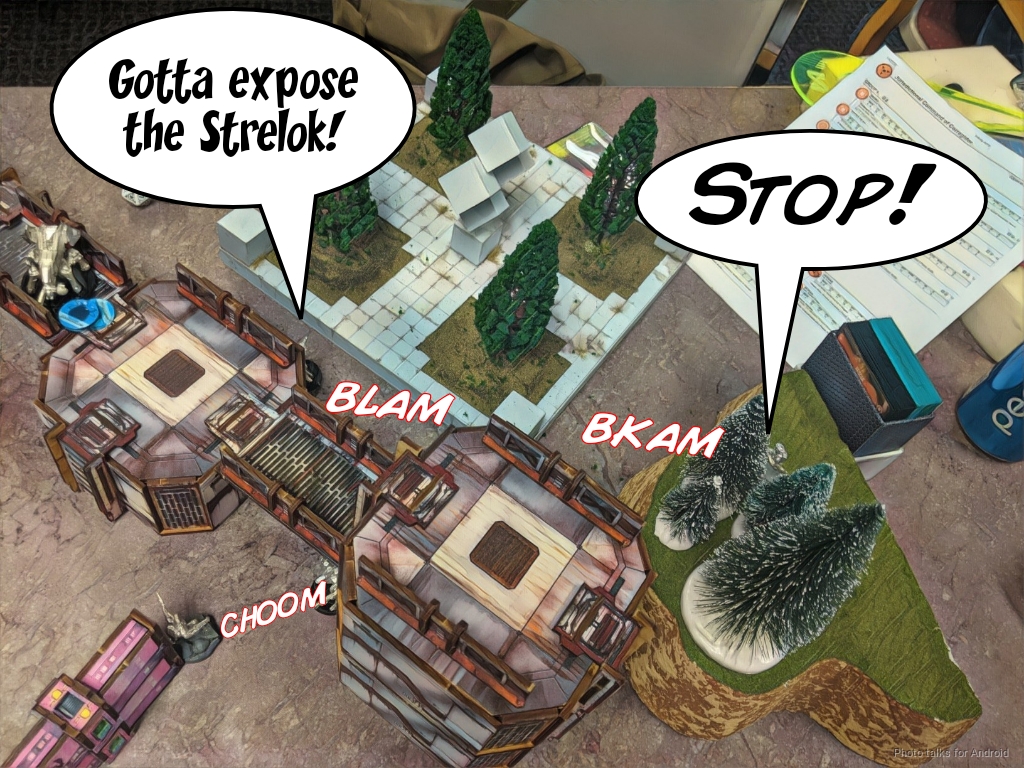
James wanted to get his Hulang unstuck next, so he tried dropping in a Liu Xing on my Tankhunter. Isobel successfully hacked the transport aircraft, so the Liu Xing deviated next to my other Chasseur and Scout. I had a huge moment of hesitation, and eventually decided to reveal the Chasseur but not the scout, flamethrowering the Liu Xing.
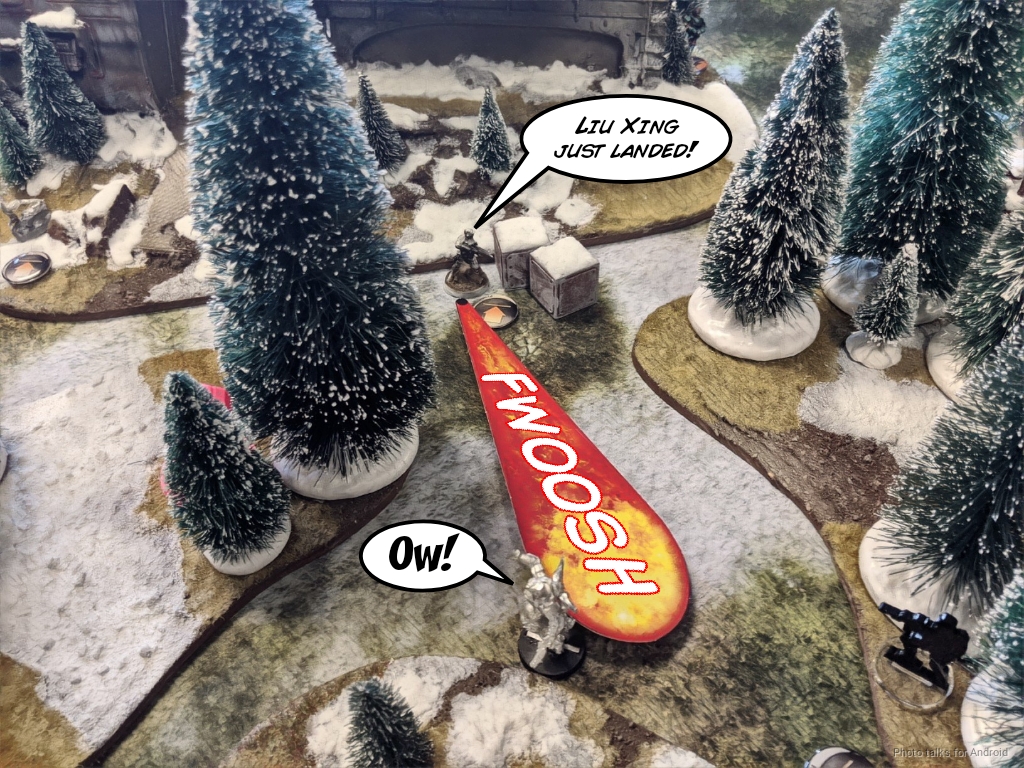
Sadly, the Liu Xing passed its ARM save and then shotgunned the Chasseur off the table, passing another ARM save against a second flamethrower hit. With the Liu Xing sort of out of position now, James returned his attention to the Rui Shi on the other side of the plane. He drove it up the wing of the plane to see my Uragan, to within 8″ of my Chasseur’s camo token. I delayed, forcing him to take the shots at the Uragan, dropping it unconscious.
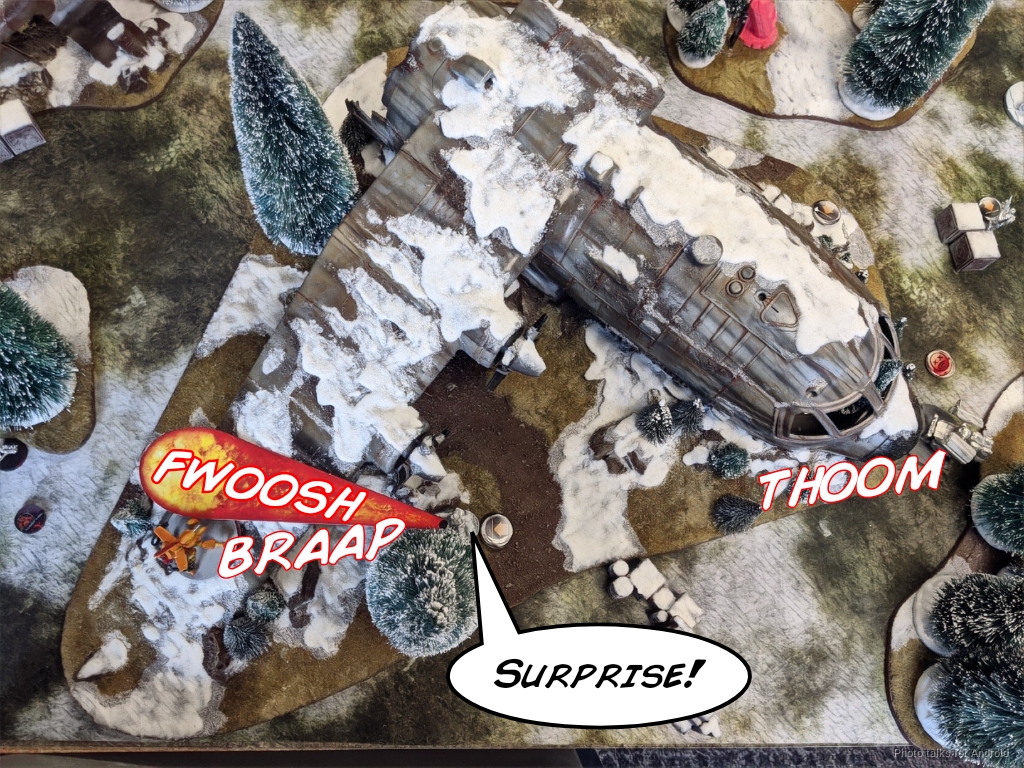
Thankfully, this time the flamethrower worked, burning the Rui Shi off the table. With the Uragan down, James walked a Tiger Soldier outside of 8″ of my Chasseur and behind it. I attempted to land a mine from the nearby Dynamo paramedic, but failed. I lost the Dynamo shortly therafter to rifle fire from the Tiger, and then we had a bit of stalemate with the Tiger blasting away at the Chasseur. Thanks to the low-vis zone and some great ARM rolls from me, my Chasseur survives.
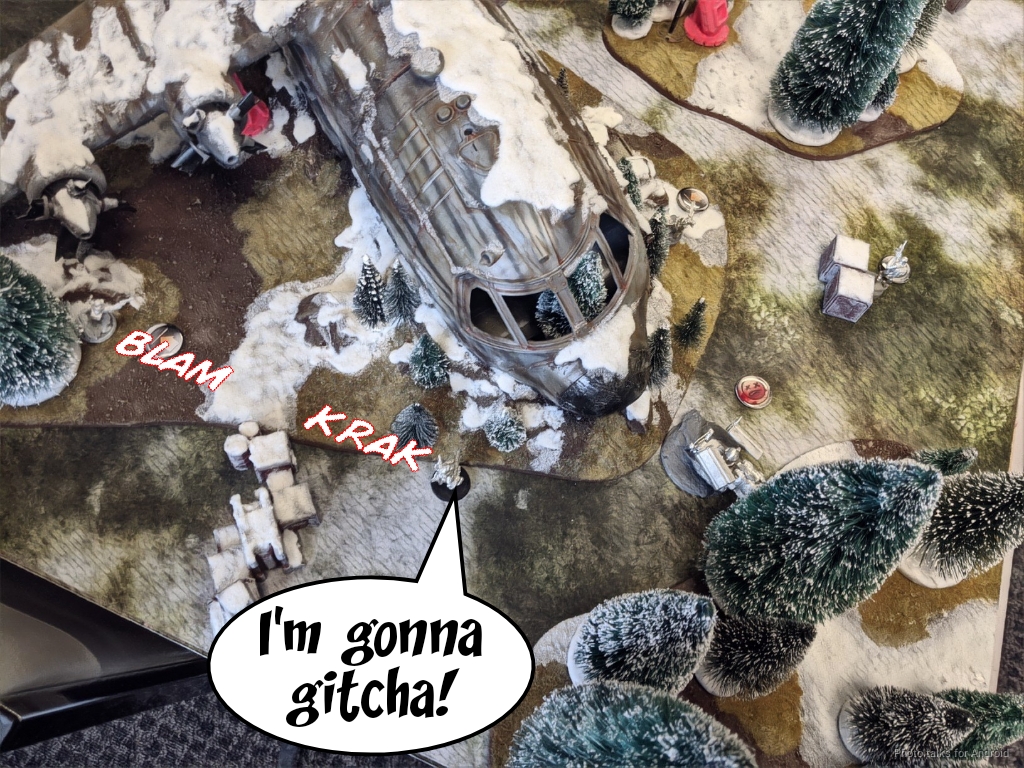
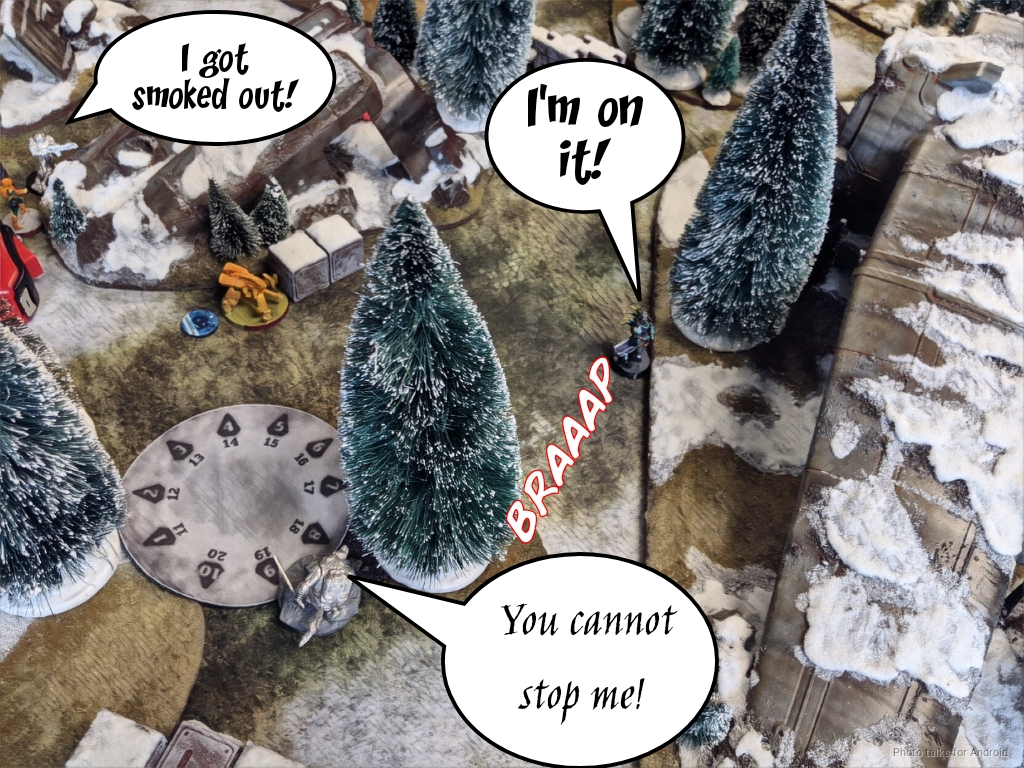
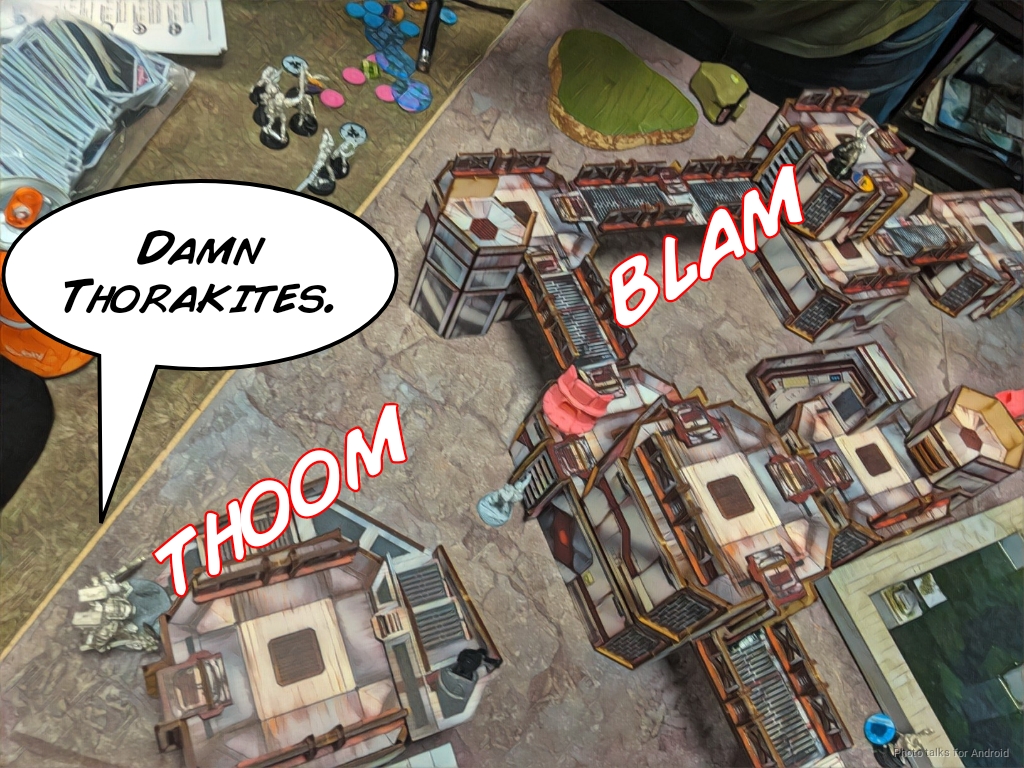
Bottom of 1 – Ariadna
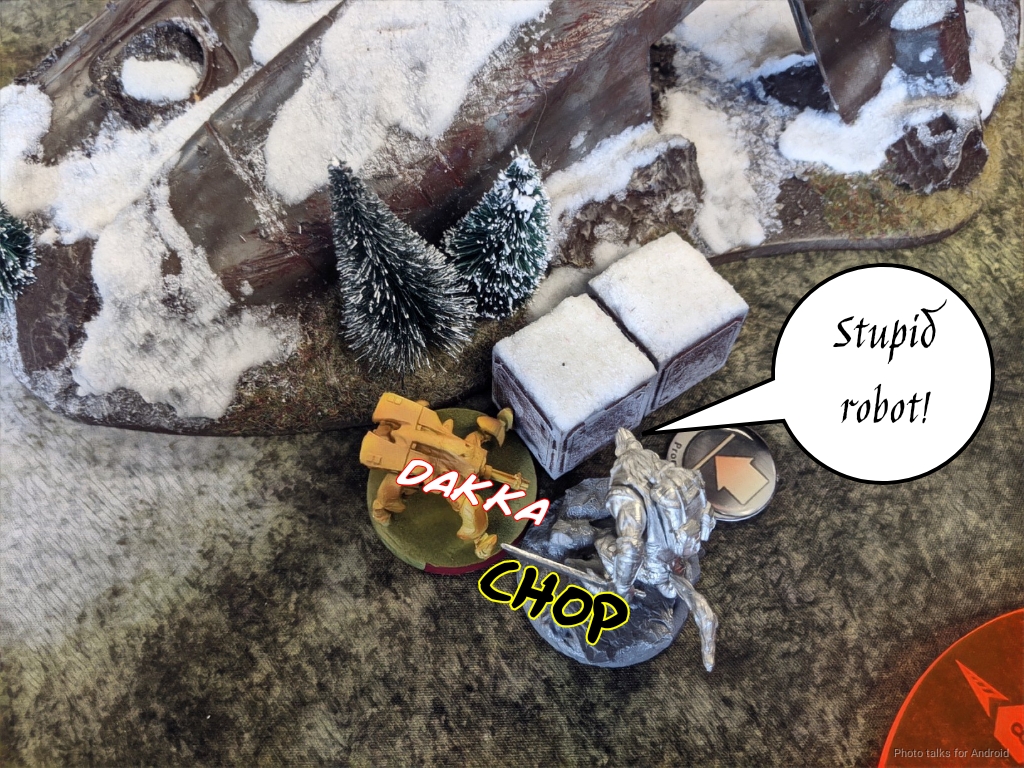
I bring on Duroc near where the Rui Shi’s smoking wreck is, and then attempt to make a run on the central objective, breaking LoF to a Celestial Guard with some smoke and blocking the TR bot as well. The Yaozao tries to dodge closer, so when I activate again it tries to engage so I double chain rifle it. It fails the dodge and the chain rifles drop it.
Now that I’ve spent the impetuous and irregular orders, I throw a handful of T2 dice at the Tiger Soldier with my Frontovik and crit it, taking it off the table.
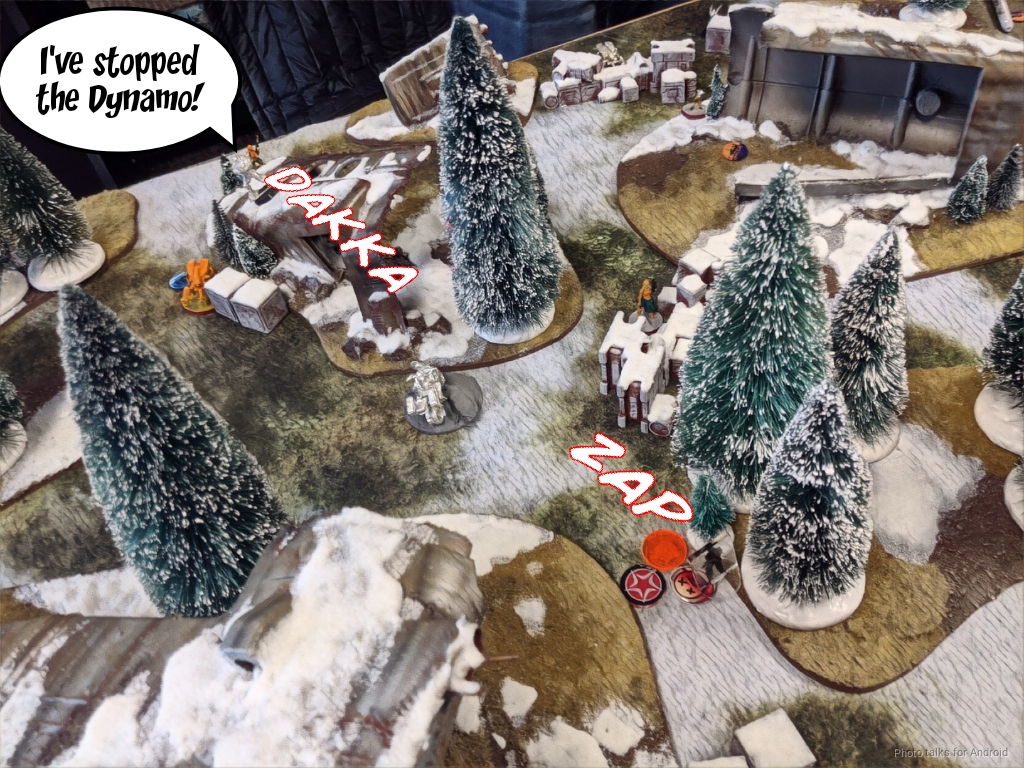
Buoyed by my success, I send in Isobel with her T2 rifle and take the Liu Xing off the table as well, clearing my deployment zone of Yu Jing airborne troops.
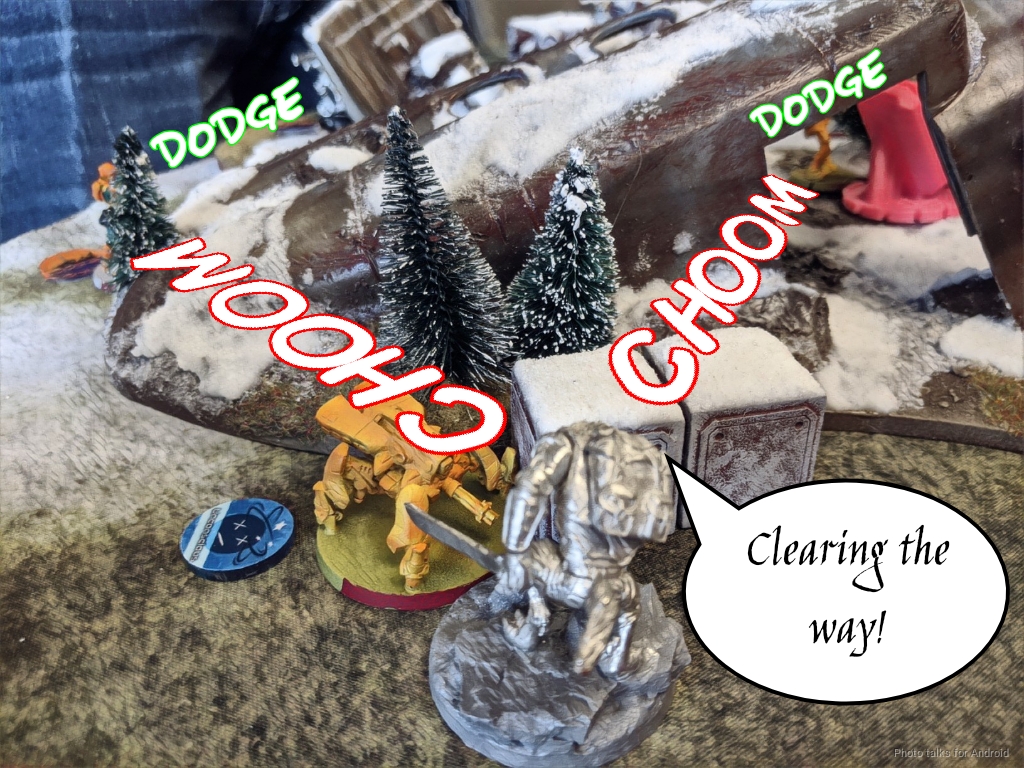
I don’t have enough orders to get to the Beacon, so I decide to do some damage and fade away. I get Duroc into base to base with the Husong, knocking it out…
then chain rifle both of the Celestial Guards into unconsciousness.
I retreat Duroc to behind a tree, and pass the turn after climbing my Dozer up to where the Briscard was.
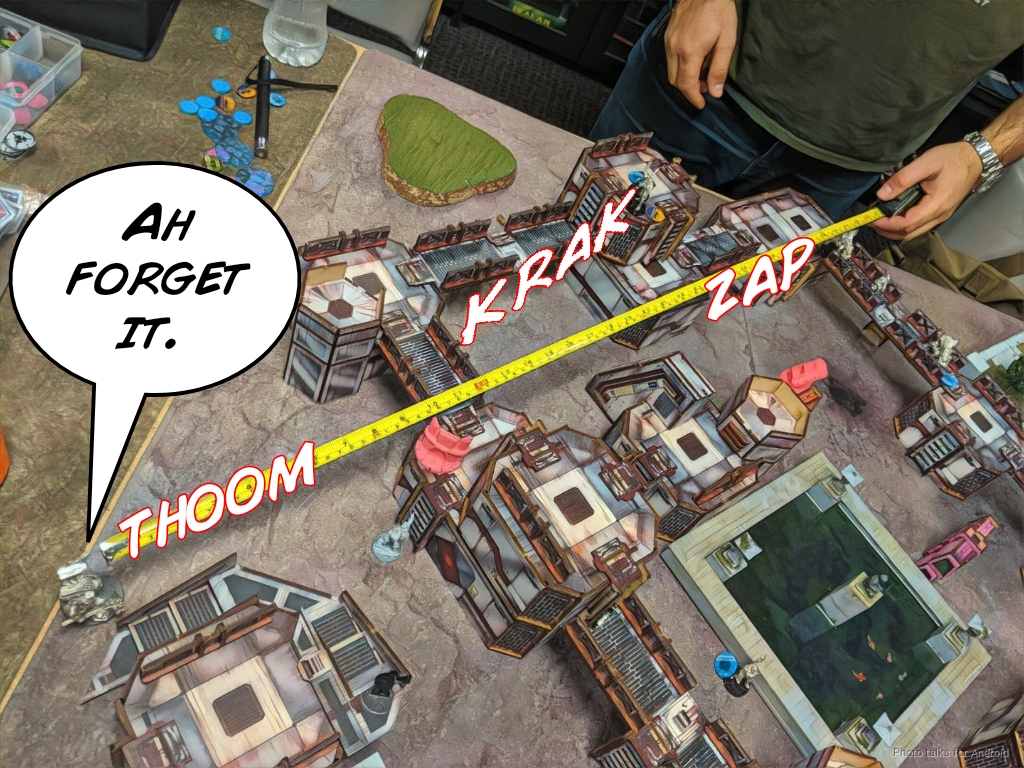
Turn 2
Top of 2 – Yu Jing
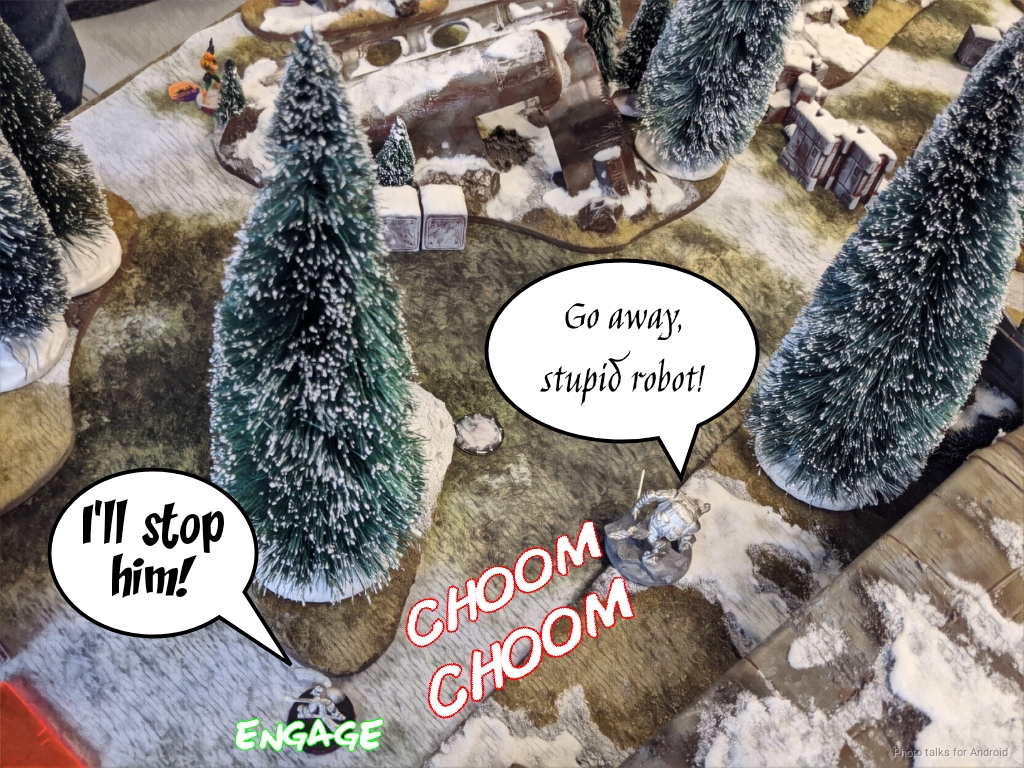
James decides he absolutely must kill all my Chasseurs, so he brings in a Tiger Solder behind it. SSL1 lets us trade flamethrower shots and we both go down.
James sends in Qing Gao to take on Duroc, but I smoke him out. The Hulang has more luck, doing a wound and forcing me into the smoke where the Hulang can tie me up in close combat. Unfortunately the Tank Hunter whiffed his shot on the Hulang when it stood up.
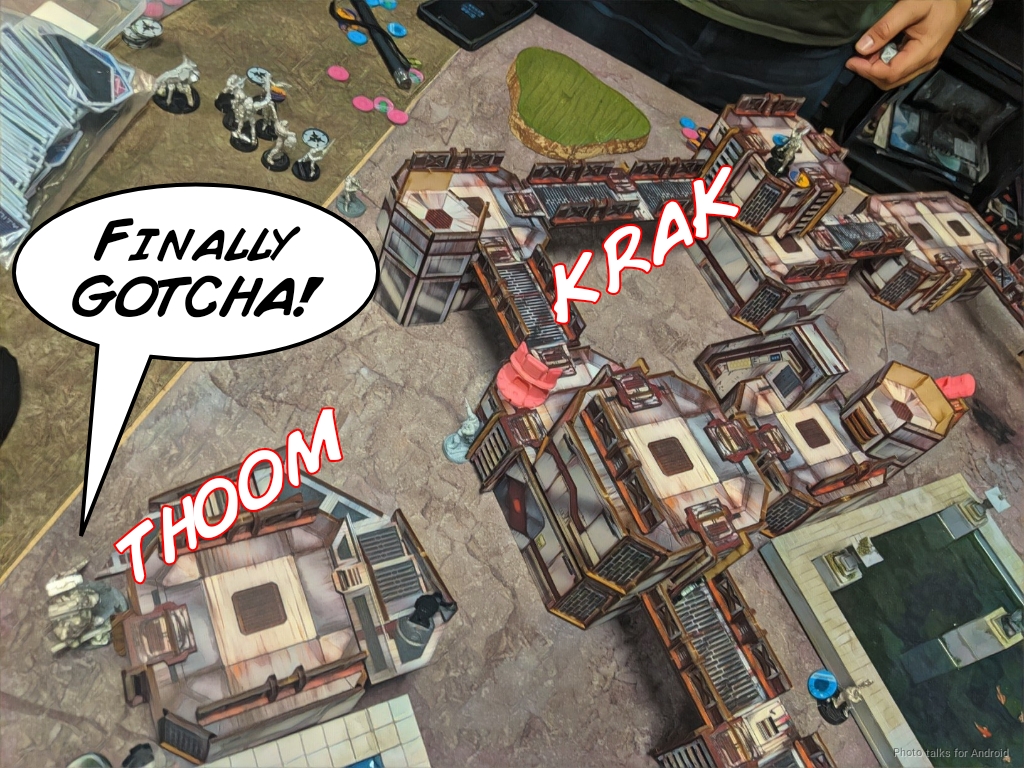
James rolls his remaining Kuang Shi forward, but I successfully take it out with the Dozer, tanking the chain rifle shot and going prone to preserve the order.
The Kuang Shi spends his last order discovering the Scout, which is a bit of a bummer, while the Mowang shifts forward a little.
Bottom of 2 – Ariadna
I dump everything but the Dozer into the first pool to get more orders, then have a really awkward run across rough terrain with the Dynamo FO, throwing smoke where I need it. Between the smoke and the terrain, I don’t have enough orders to get the Dynamo to safety. The Dozer came through for me though, shooting a MadTrap out of the way of the Dynamo.
Turn 3
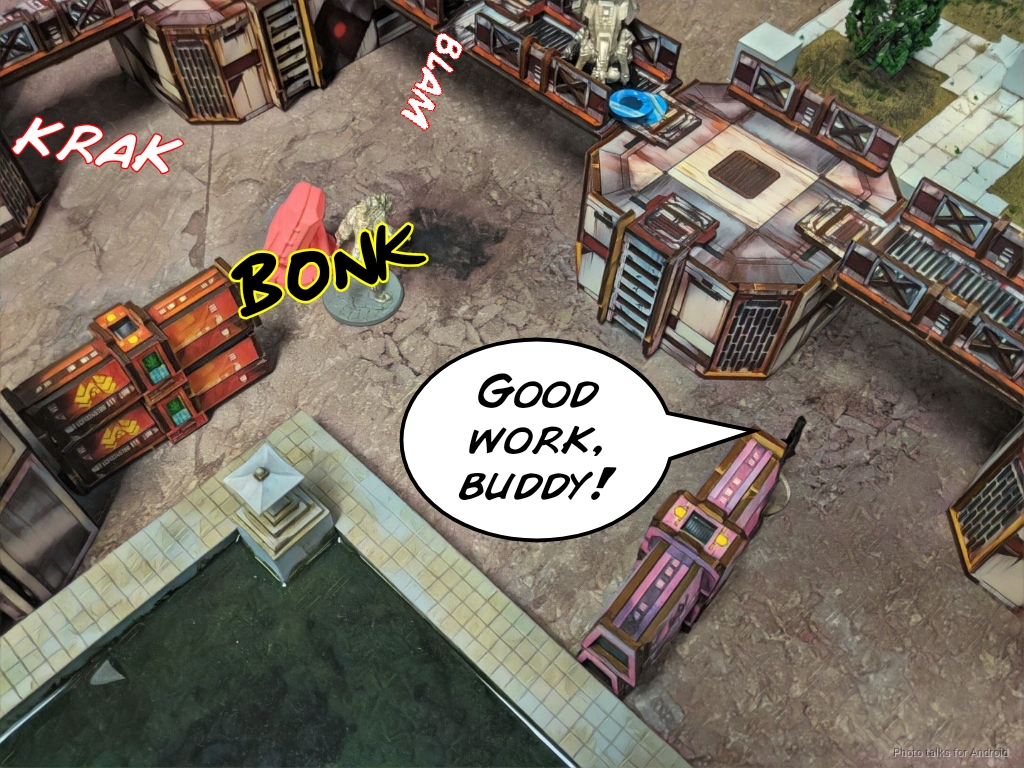
Top of 3 – Yu Jing
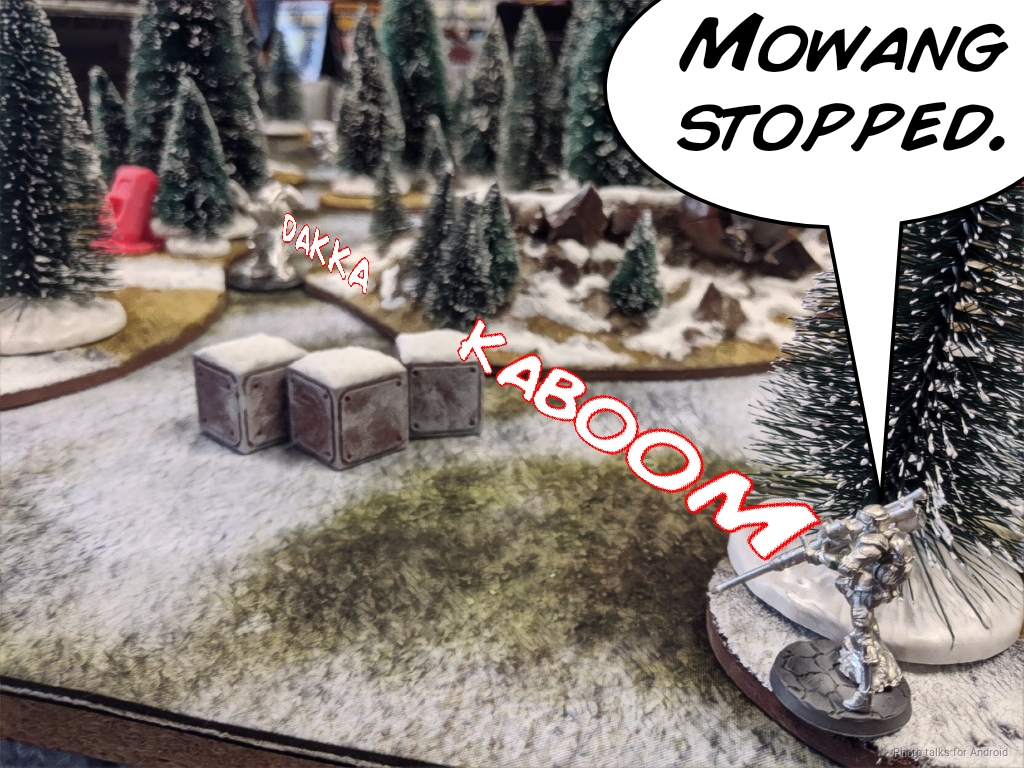
James is running on fumes too in terms of orders, so he just goes for it with the Mowang. Isobel gets glued by the Mowang from outside of 24″, which was a good play on rangebands.
The Mowang downs the scout as well–turns out Scouts aren’t terribly good at within 8″ if they don’t have boarding shotguns…
But when the Mowang tangles with the Tankhunter, my Tankhunter comes through for me and stops it cold by one-shotting it only 4″ from the Beacon.
James has one more order, which he uses to drop the Dynamo. I go dogged and fail guts further away to make things easier for me on my last turn.
James hops a TR bot up on to a pile of boxes to make things more difficult for me, and then passes turn.
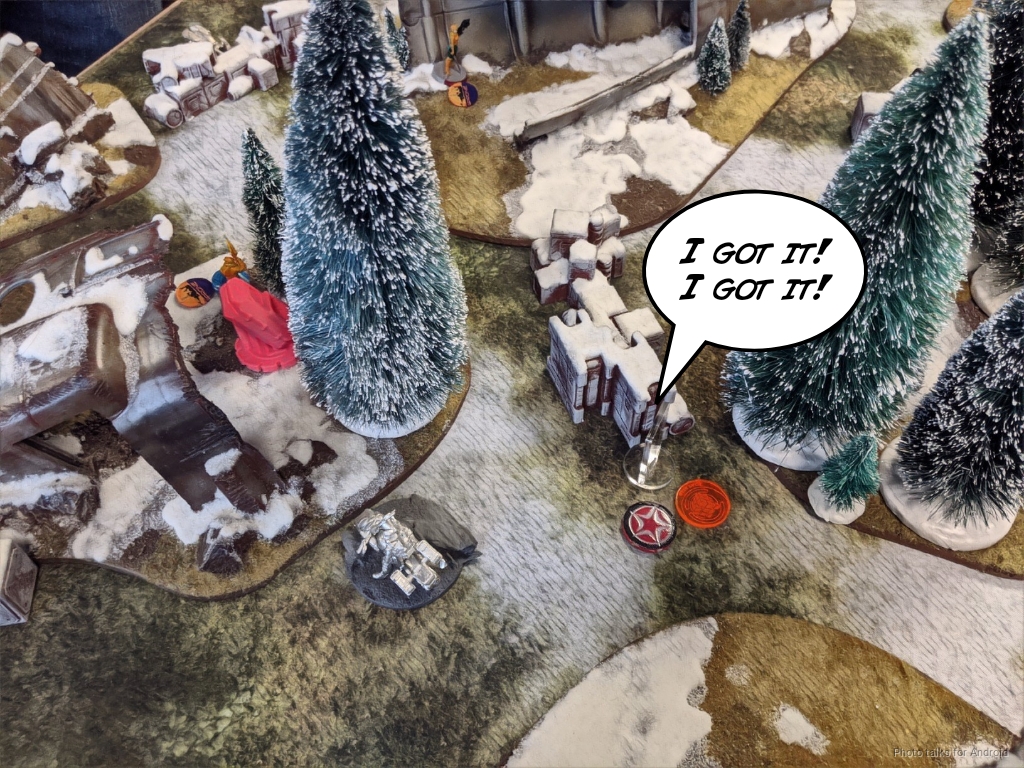
Bottom of 3 – Arianda
We started the turn by assuming that I was winning 3-0, since I at one point had grabbed Jame’s beacon. To make it a 5-0 major, I go for the 2-point classified, Test Run. I have to gun down the TR bot with the Tankhunter first to clear a path, but then I fail my WIP roll.
Later, we determine that it’s a 3-3 tie, which is a little bit of a bummer, since I could’ve brought on Margot with barely enough orders to grab the beacon from the Dynamo’s corpse. Ah well.
3-3 Tie!
Post Game Analysis
Well, clear that we needed to really pay attention to the scoring before starting my last turn. No big deal, it’s a friendly tournament and we were already overtime and late for the group lunch. Also, James has progressed a lot since he first started playing!
I’m very impressed with the Tankhunter Autocannon’s performance. I do think that it would be worth taking the missile launcher from time to time if I’m using it in an ARO role for the better rangebands, especially if I’m sticking it on essentially my back table edge. I also think his performance was a bit of a fluke as well, and the table introduces a lot of changes to normal play thanks to all the saturation/low-vis zones. Getting to zero out TR Bots is quite fun though.
I did feel a little lacking in terms of long range weaponry, but I never found a good time to bring on Margot. I think that is probably what cost me the game. The Dynamos are fine, I think I just rolled like crap this game and didn’t develop their positioning well. I think two is a bit much for this scenario. I would’ve loved to have another camo infiltrator instead of a Dynamo.
Chasseurs did exactly what they were supposed to–speedbump James in the midfield. They did a great job of that, even taking out a Rui Shi (for the 3rd time). I’m not sure I should’ve sacrificed Uxia to take out the Rui Shi, but it did totally blunt James’s attack. In fact, he killed his own Rui Shi for the cost of a ton of orders healing, buffing, and moving it around. It cost me Uxia and the Uragan, which set me up for a classified anyway, so I guess in the end it was totally worth it.
I’m not entirely sure why James spent so much time going after my camo troopers, he spent a lot of time talking about it during the game. I suspect it was to make it hard for me to get the beacon, which I suppose paid off in the long run, but I think it was a bit of a waste of time, especially since he basically burned 3 AD troops to do so.
Speaking of which, I gotta give a shoutout to Isobel! She came through for me, hacking the Liu Xing’s drop as well as taking it out with her T2 rifle. I think she rarely sees table time globally, and I think she’s a hidden gem for light duty deployment zone cleaning and late game button pushing. Plus her utility is pretty decent. T2 Rifles are so scary to heavy infantry that she has to be respected.
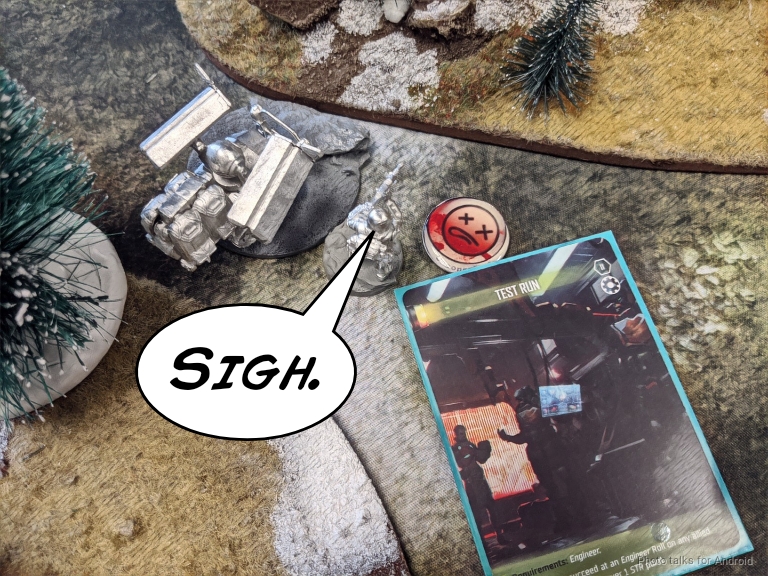
In any case, I’m pretty happy with the performance of the list and my piloting of it on the day. It wasn’t until the last turn that I wished I had more long range guns to take on Qing Gao,or just pieces on the table, and I think that’s mostly reflective of the absolute slugfest this game was. What was actually pretty funny was once the Hulang got into base combat with Duroc, with MA3 versus MA1, the Hulang actually won something like 5 CC face to face rolls, but Duroc kept passing his monofilament save on a 12 (thanks to Total Immunity). I basically rolled five 12’s in a row for ARM saves. Very entertaining, but annoying because I really needed Duroc to be able to go and get the objective!
I think that a Strelok K-9 is probably a better box grabber in this scenario than the Dynamo, although it doesn’t come with smoke. Anyway. To sum things up:
- Positioning – I was happy with this until the last turn when all of my advanced pieces were dead. I think I should’ve saved an order to throw the Scout back into camo. That would’ve won me the game. One mistake was that I didn’t get my Dynamo advanced on Turn 1, which would’ve helped immensely. I had the DataTracker order to do it as well. Bummer.
- Playing to the Objective – I set up on Turn 1 pretty well with my Duroc run, but then I stalled out pretty badly trying to get the Dynamo to the box. Perhaps I should’ve brought on Margot near Duroc and the Hulang at the bottom of 2. I think Qing Gao was in a bad place for me to do that, or I would’ve had to fight my way through him. That probably would’ve been good though, as that means James would’ve been in Loss of Lieutenant on Turn 3, which would’ve meant more of my stuff would’ve been alive.
I think I just got too gun shy with Margot, and that really made things difficult for me later. I also wish I had a SAS CRAP or something instead of the second Dynamo. It would’ve made an excellent corner guard and objective grabber. I might even consider throwing it over the centerline. Ariadna PH is high enough and I have enough bodies that it’s fine for me to make the attempt.
James did a great job. I think I just had far superior board control and that was enough to blunt the force of the fist of Yu Jing. It’s hard to chew through so many camo tokens, and I think James did the right thing by not panicking and just systematically probing in the right places. It’s super important to remember that Chasseurs have SSL1, which tripped him up on more than one occasion. God I love Chasseurs. Alright, enough rambling. On to the next games!
Game 2 – Countermeasures
We had a 11 players, and Adam took the Bye the first game, so it was my turn for game two. I was out late with the better half and friends the night before, so the break was very welcome. I spent it watching some games, doing TO stuff like answering questions and reminding people of rules, and working on photo editing for game 1 while being a hipster with a latte.
Game 3 – Uragan Heel
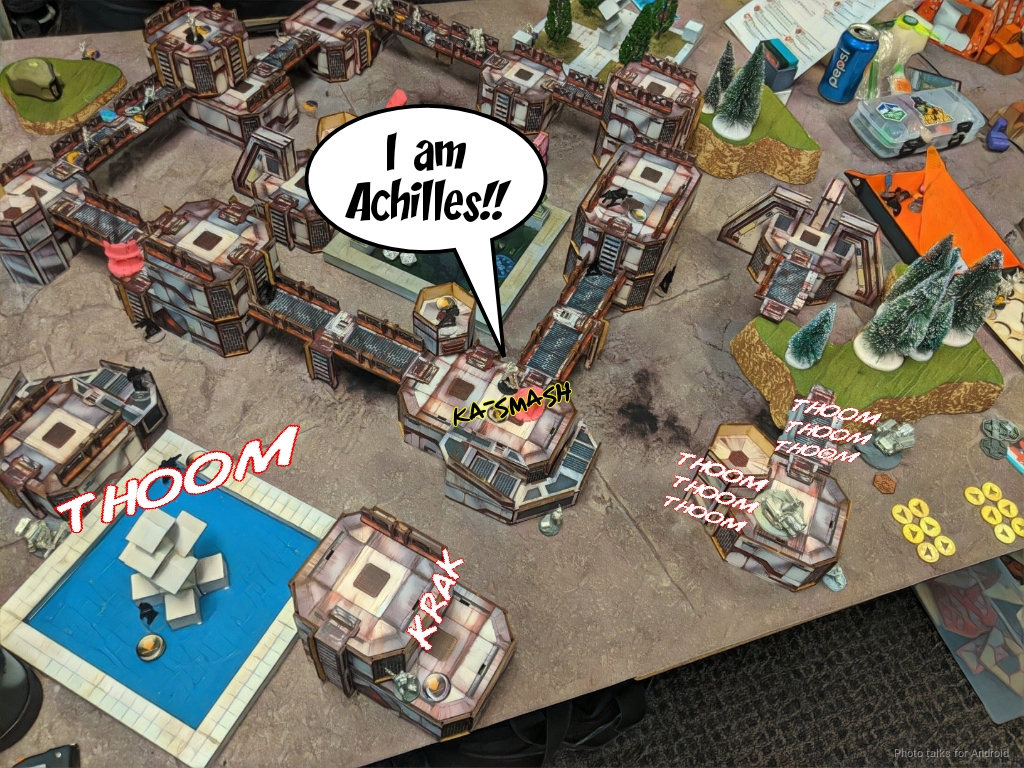
Game three rolled around, and one of our players decided to sit it out so Adam and I paired up to not pollute the standings (and also to have a hilarious game). I put together a table full of little parks in a weird… industrial… park. I dunno.
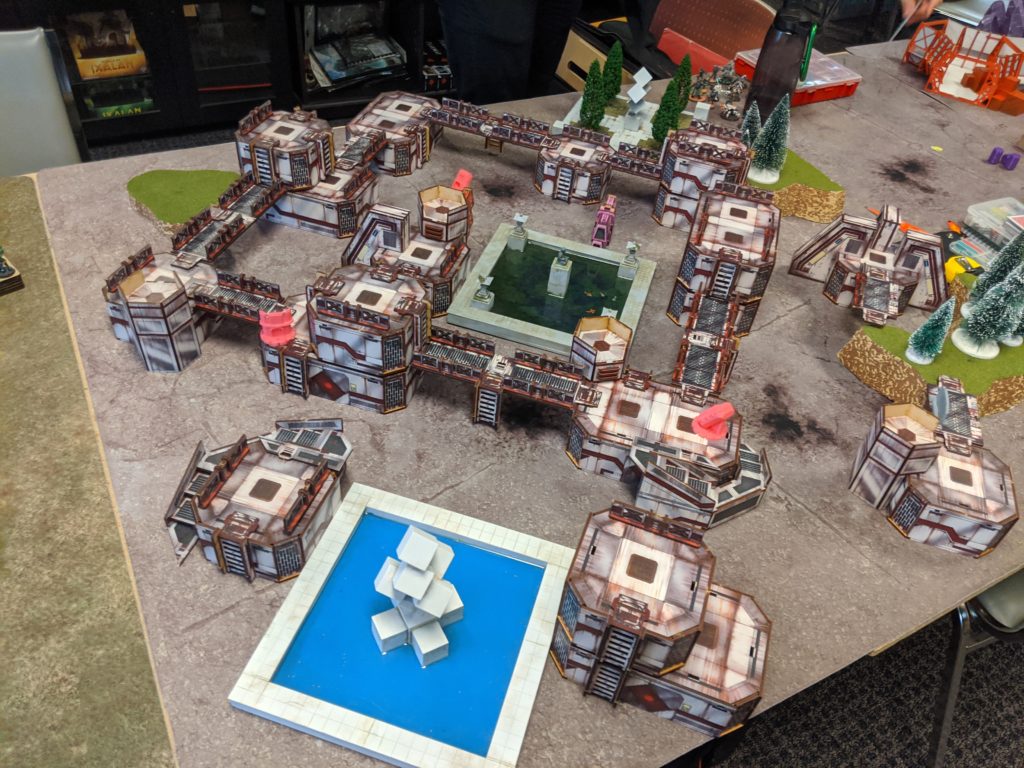
I won the rolloff and chose the side with the AC2 on the roof of a building, making it much harder to get to.
Overview
- Mission: Looting and Sabotaging
- Forces: Ariadna versus Steel Phalanx (400, Tactical Window)
- Deploy First: Steel Phalanx
- First Turn: Steel Phalanx
GROUP 1 |GROUP 2 |
VASSILY Lieutenant (Forward Observer) T2 Marksman Rifle, Akrylat-Kanone, D-Charges / Heavy Pistol, Knife. (0 | 35)
‘FIRSTSTRIKE’ DONN T2 Rifle, Grenade / Heavy Pistol, AP CC Weapon, T2 CC Weapon. (0 | 35)
SPETSNAZ (CH: Mimetism, AD: Parachutist) Boarding Shotgun, Grenades / Pistol, AP CCW, Knife. (0 | 33)
STRELOK K-9 Submachine Gun, Chain-colt, Antipersonnel Mines + 1 K-9 Antipode / Pistol, Knife. (1 | 24)
MOBLOT (Infiltration) Rifle, Light Shotgun E/Mauler / Pistol, Knife. (0 | 26)
LOUP-GAROU Viral Rifle, Stun Grenades / Pistol, Knife. (0 | 21)
PAVEL McMANNUS Ojotnik, Chain-colt, Antipersonnel Mines / Pistol, T2 CCW, Knife. (0 | 31)
RATNIK Heavy Rocket Launcher, Heavy Shotgun / Heavy Pistol, Trench-hammer, Knife. (2 | 44)
7.5 SWC | 400 Points | Open in Infinity Army
Uxia was plan A, followed by Cadin, the Strelok, and and Pavel. Plan F is to get Vassily into base to base, or use the Ratnik. The rest is basically support to get stuff there. I’m particularly amused by the double Uragan, which I’m really starting to like.
Steel Phalanx
GROUP 1 |
ACHILLES Spitfire, Nanopulser / Pistol, EXP CCW. (2.5 | 75)
MYRMIDON OFFICER Lieutenant Boarding Shotgun, Nanopulser, Eclipse Grenades / Pistol, AP CCW. (0.5 | 30)
EUDOROS Mk12, Nanopulser, Eclipse Grenades / Pistol, DA CCW. (0 | 40)
MYRMIDON Chain Rifle, Nanopulser, Smoke Grenades / Pistol, AP CCW. (0 | 16)
GROUP 2 |
NETROD Electric Pulse. (0 | 4)
SCYLLA Hacker (Killer Hacking Device UPGRADE: Maestro) Boarding Shotgun, Nanopulser + 1 Devabot Charybdis / Pistol, E/M CC Weapon. (0.5 | 27)
PATROCLUS (ODD: Optical Disruptor) Spitfire, Nanopulser, Smoke Grenades / Pistol, EXP CCW. (1.5 | 57)
THORAKITES HMG, Nanopulser / Pistol, Knife. (1.5 | 22)
THRASYMEDES (Fireteam: Enomotarchos) Submachine gun, Light Rocket Launcher, Nanopulser, Stun Grenades / Pistol, Shock CCW. (0.5 | 30)
DACTYL Doctor (MediKit) Combi Rifle, Adhesive-Launcher, Nimbus Grenades / 2 Breaker Pistols, Knife. (0 | 23)
YUDBOT Electric Pulse. (0 | 3)
LAMEDH Rebot Flash Pulse, Sniffer / Electric Pulse. (0 | 8)
7.5 SWC | 400 Points | Open in Infinity Army
Adam brought two Achilles and Steel goodstuff. He brought a Dactyl support package with two flash pulse bots to keep his stuff running and to keep me off the AC2. All the ODD would prove to be a pain in the butt too.
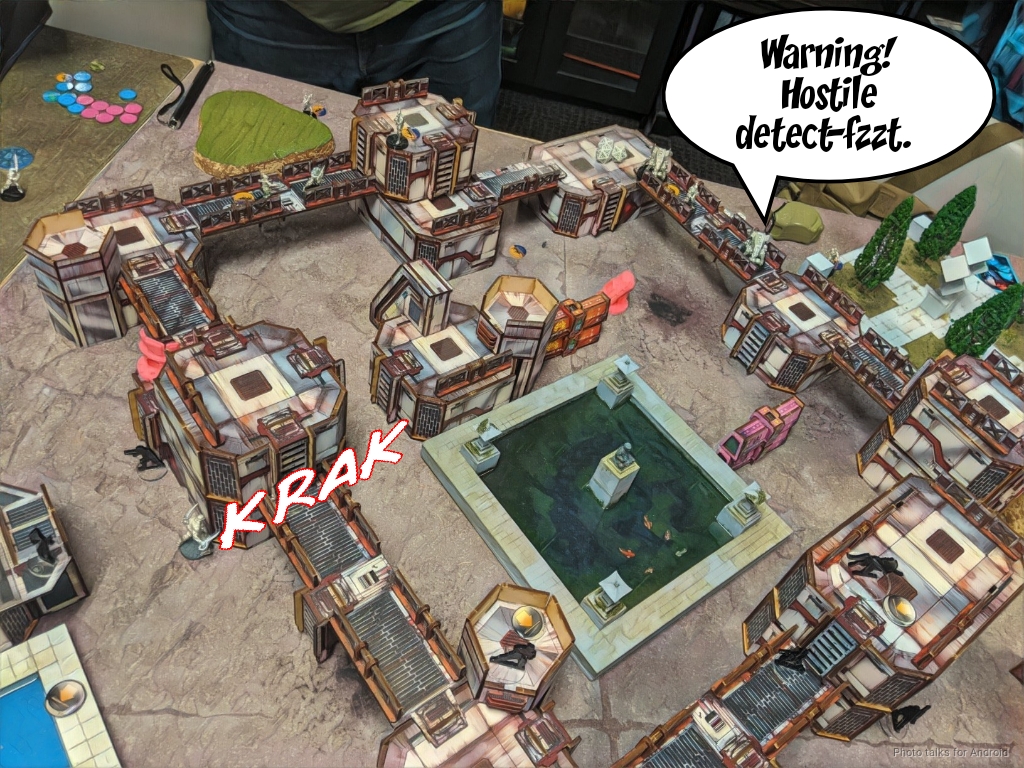
Deployment
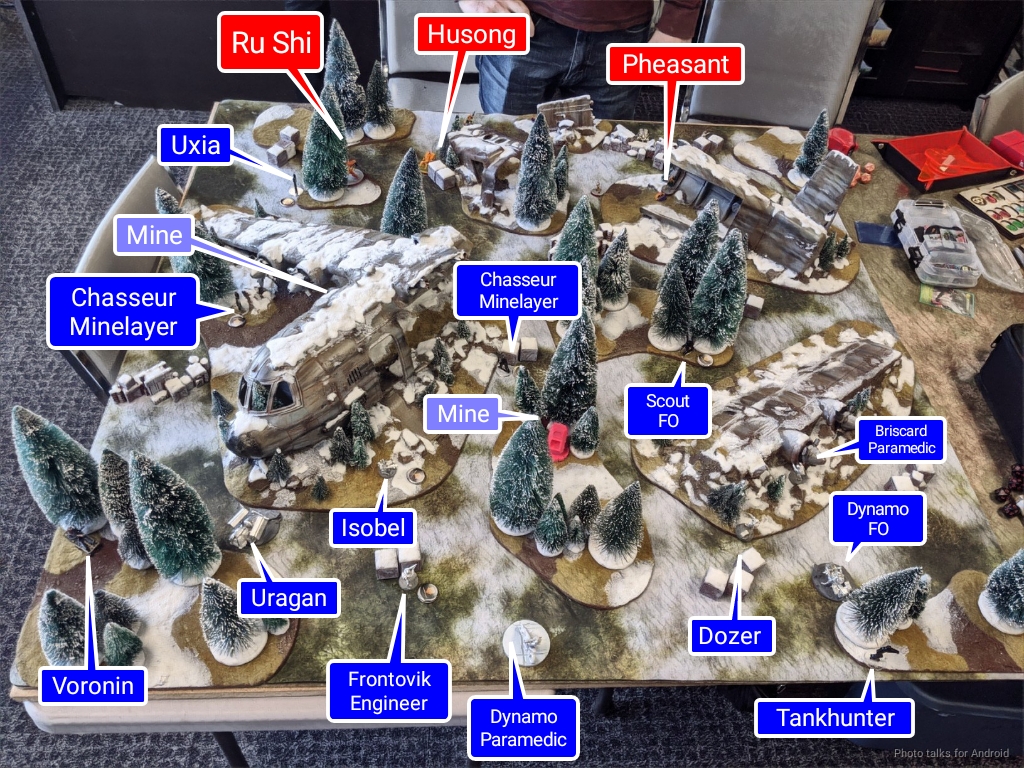
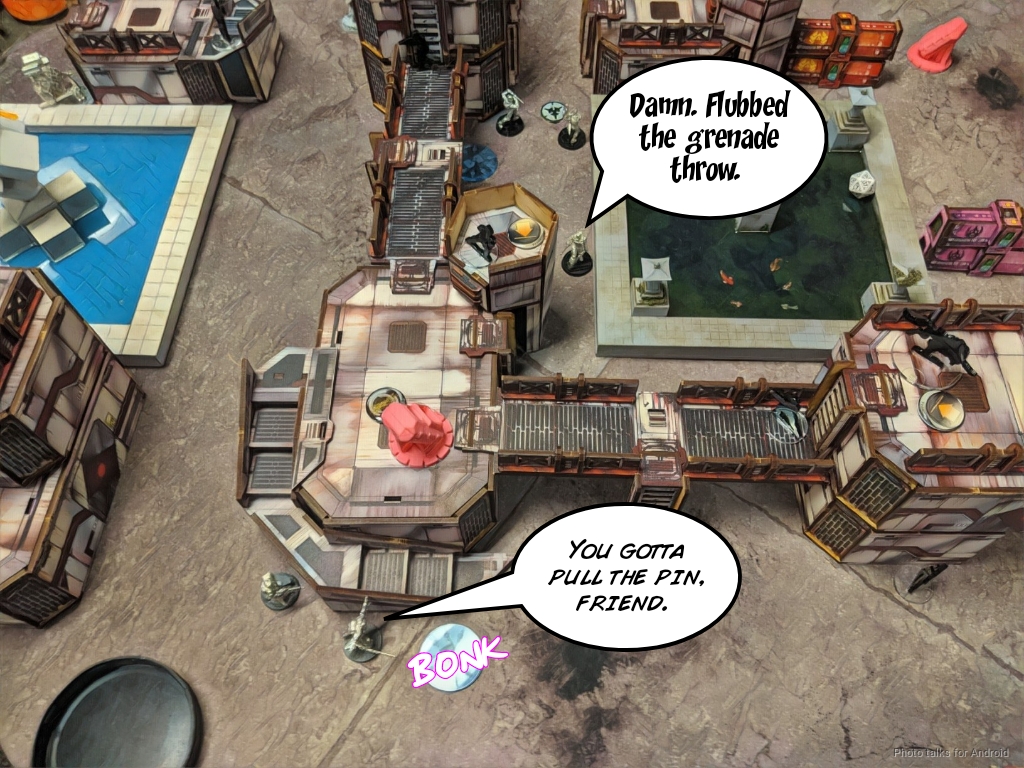
I made Adam deploy first, so he took the first turn. The Thorakites went up on catwalks and the roof to make things worse for me, along with pair of Lamdeh. The Myrmidons tucked themselves in behind the buildings the Thorakites were on with some Yudbots.
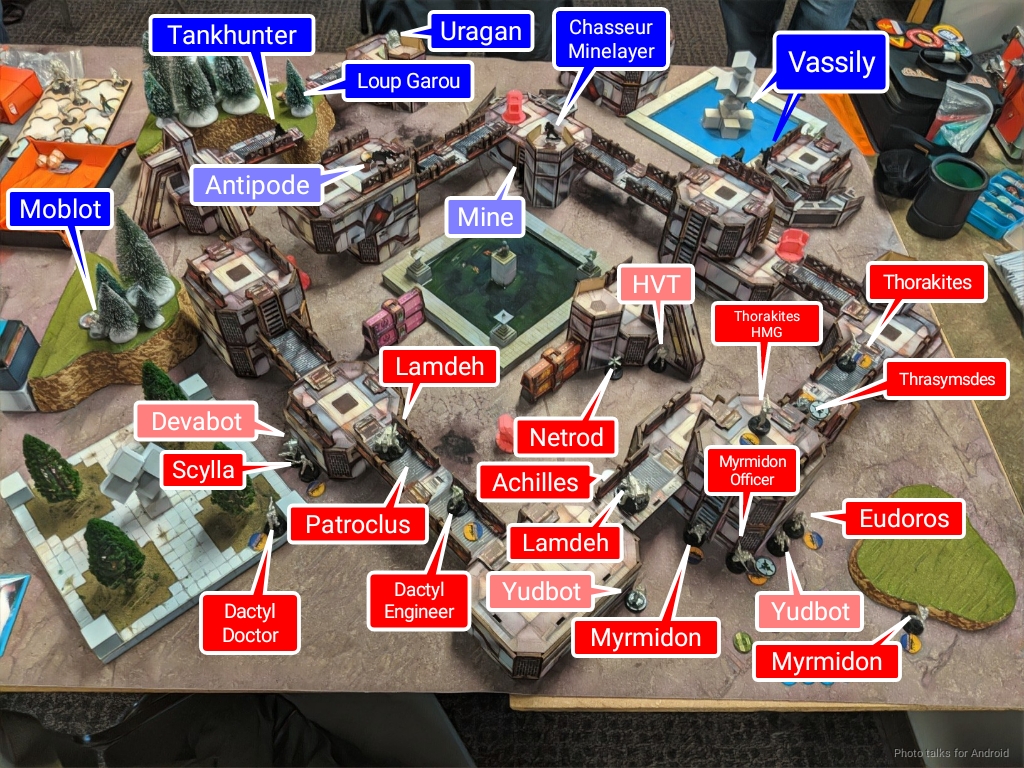
The Dactyls went on the left along with Scylla, and then Patroclus came down nearby disguised as Achilles. I carefully eyeballed some spots to cover my AC2. One Uragan and a Loup Garou covered the ladder to get up to the AC2, the other Uragan covered the catwalk and the AC2 itself, and the Ratnik and Tankhunter covered approaches to the AC2 and the AC2 itself.
I blocked the ladder to the AC2 with a mine, and then covered the AC2 with a Chasseur. The other Chasseur covered my left flank and I blocked another ladder down to the catwalk with another mine. I actually threw a Moblot over the centerline prone inside a forest (low-vis + saturation) to cover Scylla with a shotgun and rifle, and then I struggled to place Vassily and the Strelok. Eventually I settled on putting Vassily on the left to take advantage of his ambush camo and the Strelok on the right with the Antipode on the roof and the ambush camo to feint an ARO.

Adam then put down the real Achilles, and I attempted to land Uxia on a rooftop near the AC2. Of course, I failed, so Adam gloated for awhile.
Turn 1
Top of 1 – Steel Phalanx
Adam started things off by running Patroclus forward to make a play for the AC2. I waffle for a bit and then decide to reveal the Tankhunter. The first exchange results in spitfire round bouncing off the Tankhunter’s armor…
and then Patroclus double-crits the Tankhunter off the table.
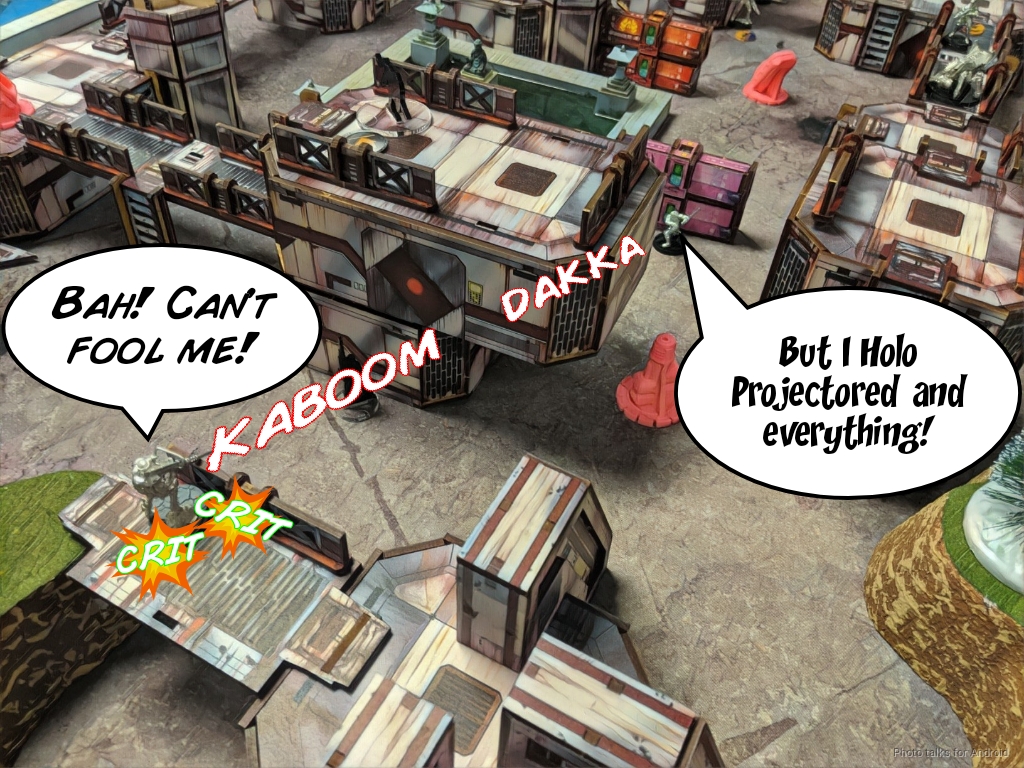
Patroclus comes with smoke so he blocks the Ratnik’s line of fire with some smoke, dodges the mine, and makes his way to the ladder up to the AC2.

Adam is running out of orders in Patroclus’ pool, so he makes a break for it and tries to face to face the Uragan… which crits him off the table. That AP+Shock template is no joke! I had eyeballed the distance perfectly, the ladder was just inside 16″.
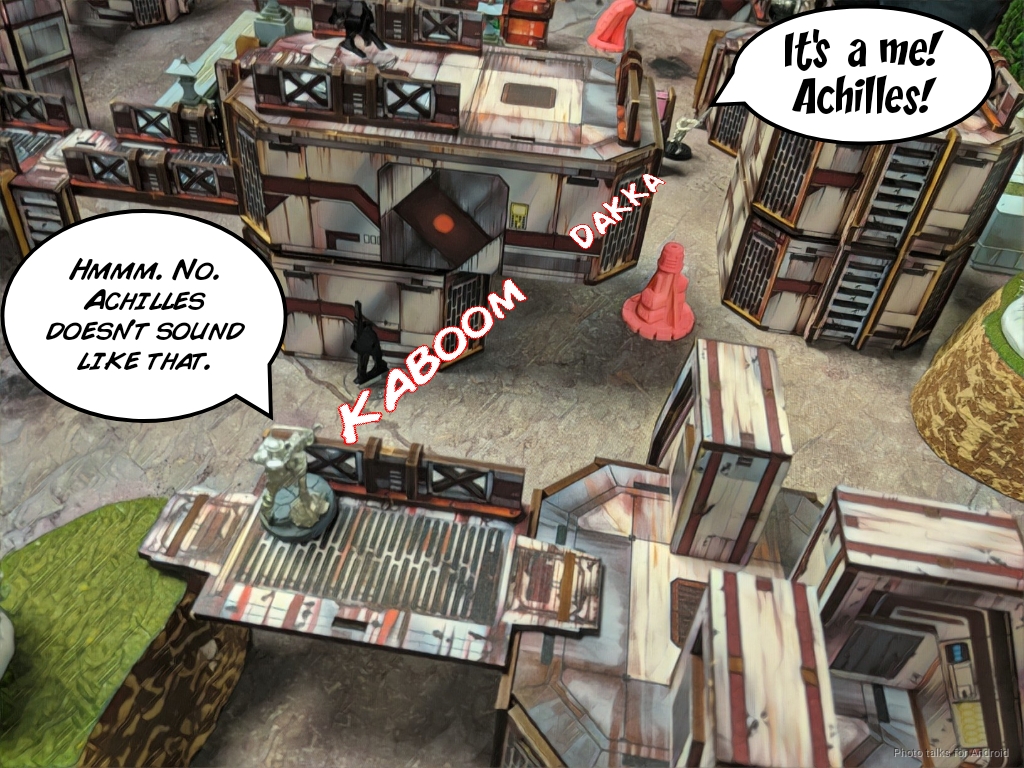
Adam’s got a whole second pool to go, so he sends in the real Achilles to avenge Patroclus. He actually splits burst between the Ratnik, the Loup Garou, and the Uragan on the way in.
The Loup Garou manages to shave not one but TWO wounds off Achilles, and while the Ratnik and the Uragan lose their face to face rolls they both pass ARM. That play got Achilles out of line of fire from the Ratnik, and he drops the Loup Garou on his way up the ladder, surviving all of the fire from the Uragan.
Then comes Achilles’ moment in the sun… except the sun is blotted out with rocket fire from both Uragans, the Ratnik, and even some T2 rifle fire from Cadin. He manages to crit the AC2 twice, but I make enough ARM saves to limit the damage to 3 structure.
Achilles disappears in a hail of fire, and Adam passes turn after shifting the Thorakites into defensive positions.
Bottom of 1 – Ariadna
I have no idea what to do. I don’t think I have enough killing power in the right position and enough AC2-killing power in the right place to get the job done in a single turn. I had originally planned to bring in the Spetsnaz to go on a killing spree in my first turn, but I would have had to engage Eudoros at 16″. Even with cover and mimetism and the shotgun template covering the Myrmidon officer, a Yudbot, and a Myrmidon, I didn’t think two on 6’s versus two on 10s was great odds.
| 17.74 | 44.42 | 37.84 |
Adrift, I anchored myself in playing to the objective. I needed to get to the AC2, and in order to do that, I needed to clear out Adam’s ARO net, and also degrade his forces such that I would have some breathing room to get to the AC2 in later turns.
My tool of choice for the moment was Pavel. I start by taking out a Lamdeh as it attempts a discover on Pavel as he climbs out of the fountain he was in.
I know Scylla is a real threat, and Adam will use her to damage my order pool, so I take her down with the Moblot’s rifle.
The Thorakites HMG needs to go as well, so Pavel drops him.
I keep pushing, but even with the link broken, Thrasymedes’ ODD protects him from Pavel’s Ojotnik and I lose the face to face with Pavel burning off the table from Thrasymedes’ LRL.
| 22.38 | 53.82 | 23.79 |
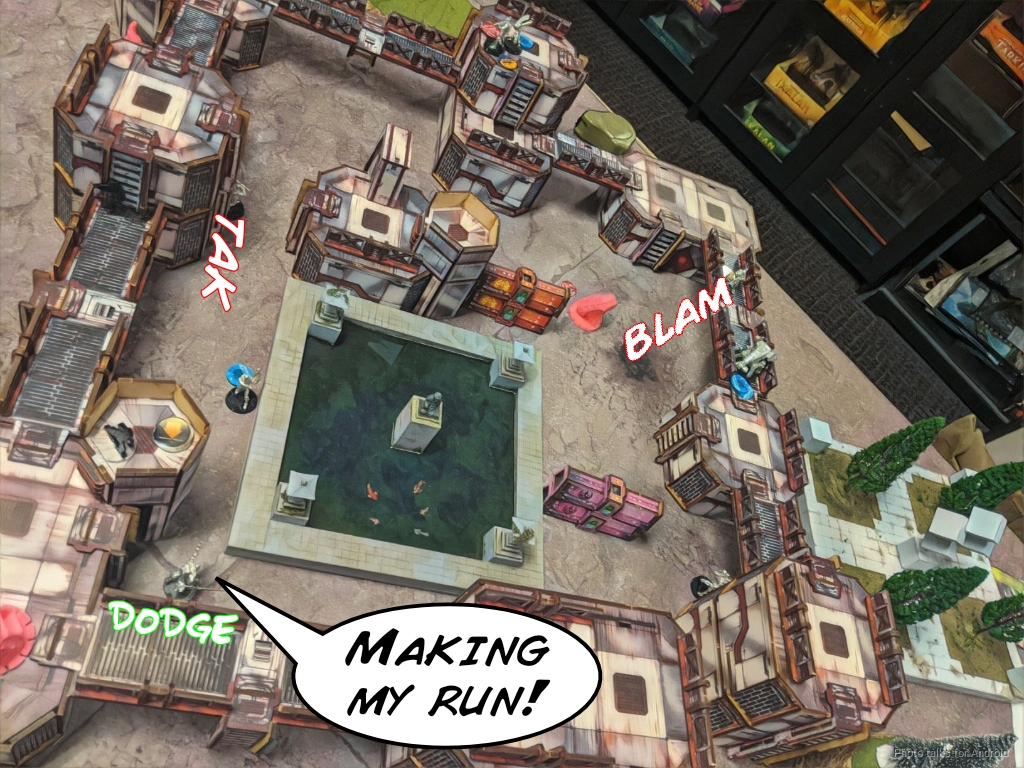
I put some points on the board by using my Chasseur on the left to grab something out of the nearest Panoply. Cadin is my heaviest hitter for the AC2 with Uxia out of the picture on my back table edge, so I spend some orders moving him off his roof and forward to set him up to make a run for the AC2 later.
Turn 2
Top of 2 – Steel Phalanx
Adam decides he wants to try and repair the Lamdeh I took out as well as Doctor up some of his troops, so he starts by running the Dactyl Doctor forward, trading shots with the Moblot on the way. The first round bounces off the Dactyl’s armor…
but the second as the Dactyl picks up Scylla sends the Dactyl dogged. Adam fails a ton of WIP rolls on this, blowing up all his command tokens to finally fix Scylla. He spends another order on the Dactyl, using a Yudbot to pick up the downed Thorakites HMG that I didn’t shock off the table because stupid Pavel doesn’t have MML1 like real Scouts. Bah! The Moblot fires again, but the round bounces off the Dactyl’s armor.
Since the Dactyl is dogged and the Moblot is a real nuisance, Adam tries to take my Moblot out with his Dactyl, but BS13 is no joke and I get rid of the Dactyl with a headshot.
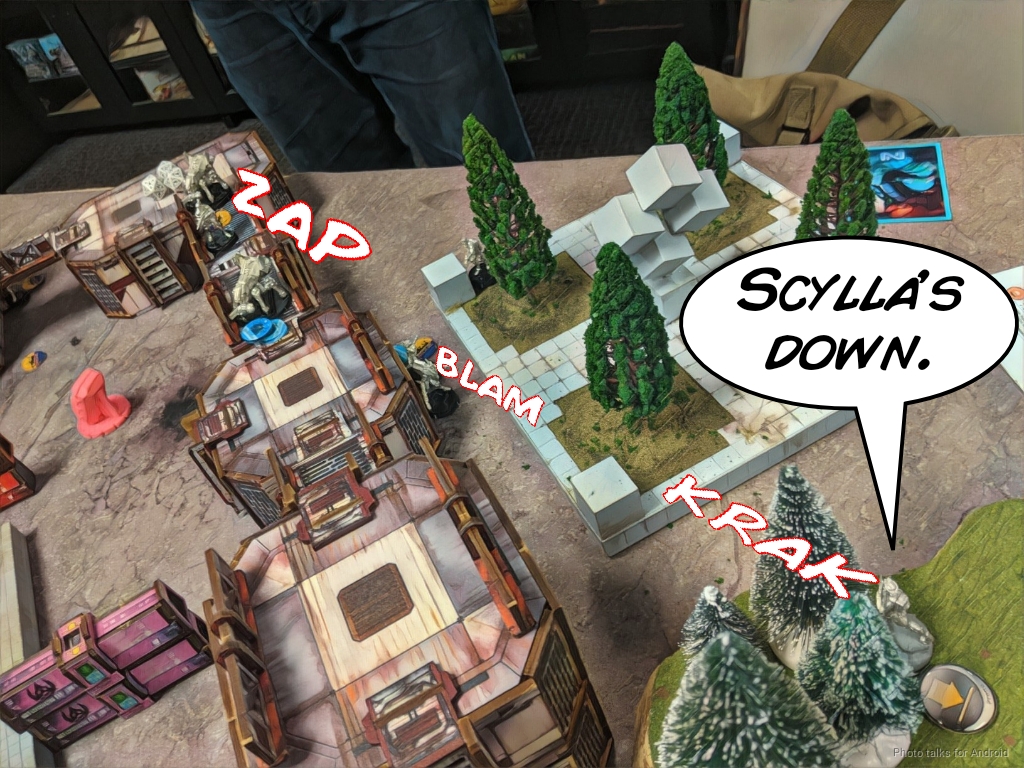
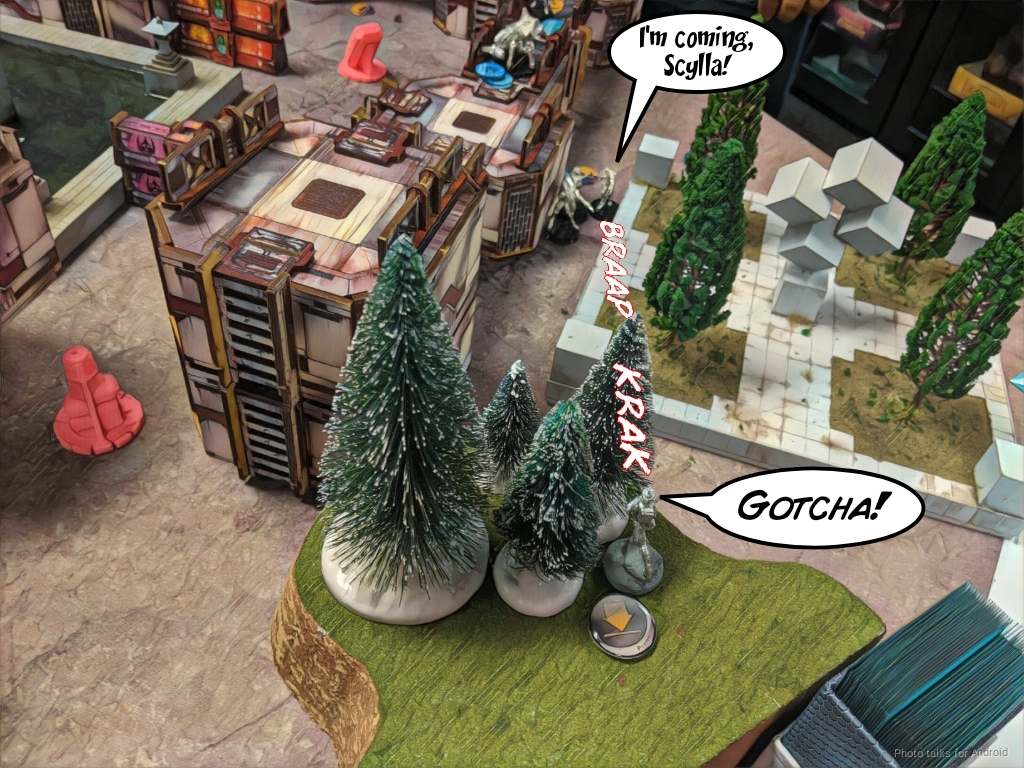
Well, Eudoros has orders in his pool and a score to settle now that Achilles and Patroclus are dead. He makes his was forward, setting up some to protect him from the Ratnik… but when he tries to block the Uragan his smoke throw fizzles as it was outside of 16″.
Adam goes for broke and runs Eudoros forward to try and finish off my AC2, but my Uragan (the same one that killed Patroclus and participated in pasting Achilles) crits Eudrous off the table on his way up the ladder.
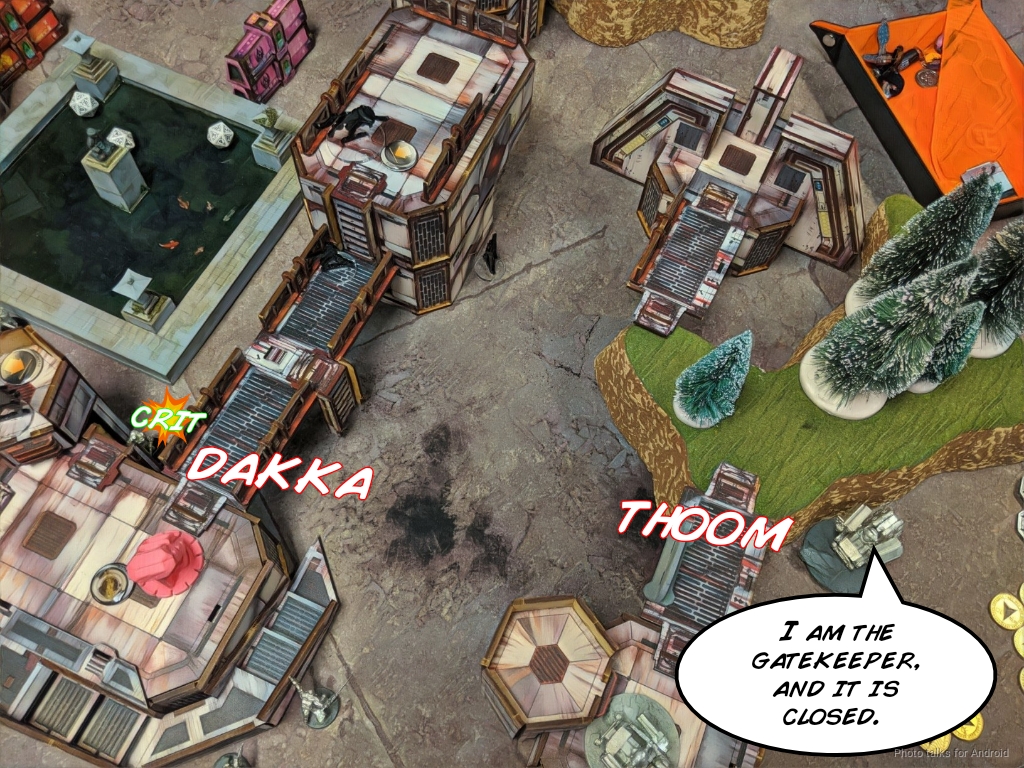
Adam spends his last order rescuing one of his Myrmidons from certain death at the hands of my Ratnik (primarily because they’re bunched up and in the open), and then passes turn, grumbling about crits under his breath.
Bottom of 2 – Ariadna
As advertised, the Ratnik takes out the Myrmidon that Adam left in the open, then drops an HRL template on Thrasymedes and the nearby Thorakites.
Thrasymedes survives, but the Thorakites doesn’t. A few rockets later, the Ratnik has shrugged off a rocket to the face and Thrasymedes is a charred corpse.
I try to take out the HMG (again), this time with the Ratnik, but succeed only in proving that ARM9 is amazing.
I really need to get rid of the second Lamdeh so I can make an attack run, so I burn it off the table with the Ratnik, tanking an HMG round from the Thorakites as I dance around in the open. Ratniks are BOSS!
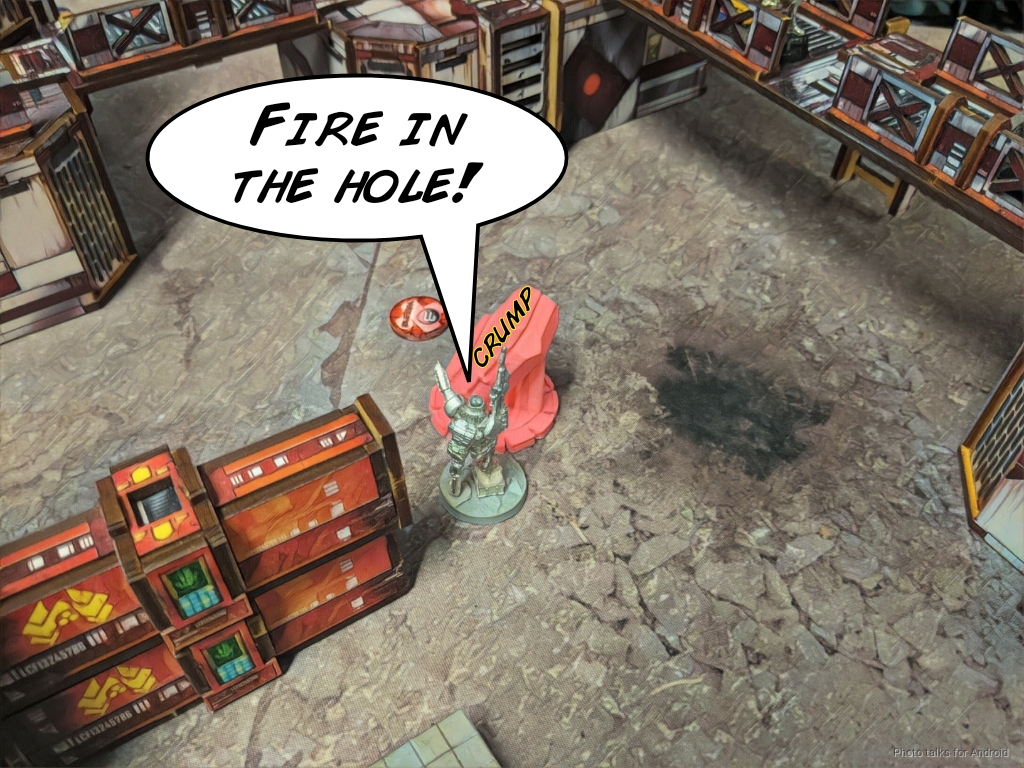
I have a window of sorts, so I send in the Strelok and his antipode buddy. The Antipode gets discovered and shot off the table but not before putting two wounds on the AC2 thanks to his Trench Hammer.
With that I’m out of orders, so I use my lieutenant order to prep Vassily for a Turn 3 break if I need it, and bring in the Spetsnaz for the extra order on Turn 3.
Turn 3
Top of 3 – Steel Phalanx
We calculate Adam’s remaining points, and he’s got 101, literally one point away from retreat. I let my stomach crawl out of the pit it was in, and then watch Adam make his final plays. He just wants to set up AROs on the AC2 and get something in range to Secure my HVT, so he sends in his trusty Myrmidon Officer. He tries to discover the Strelok, but fails, so…
Scylla has to do his dirty work. The Moblot takes out the Devabot but is flamed off the table in the process…
and I got baited out of camo so Adam trades Scylla for the Strelok. Strelok dies to shotgun, Scylla to Chain-Colt.
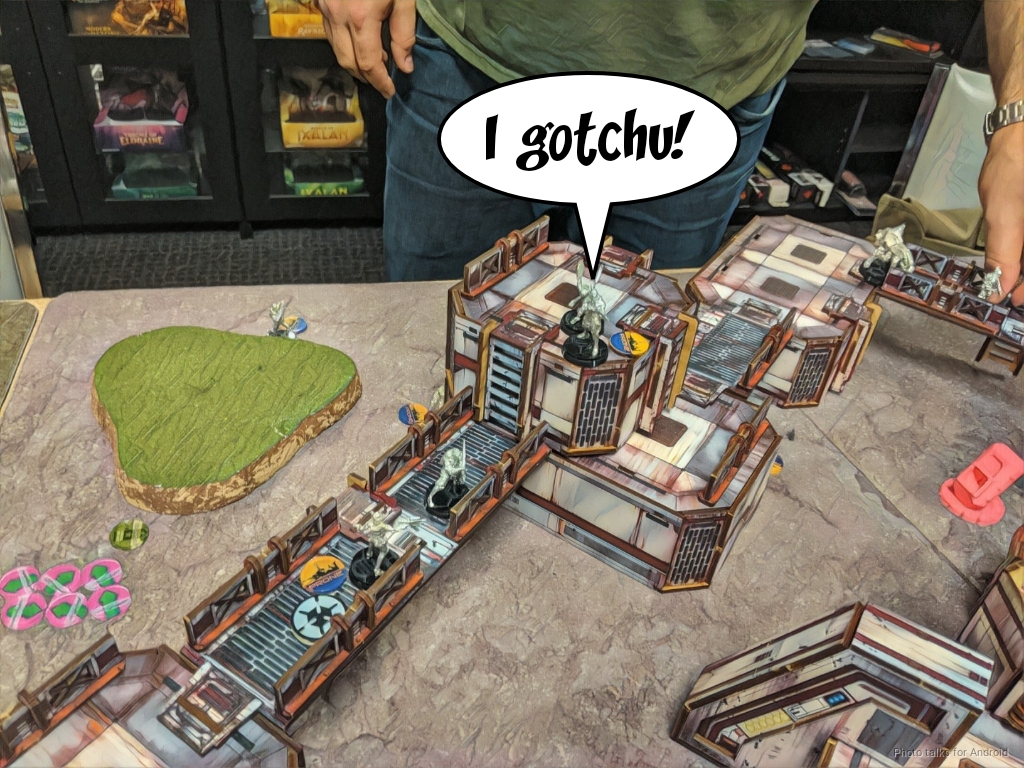
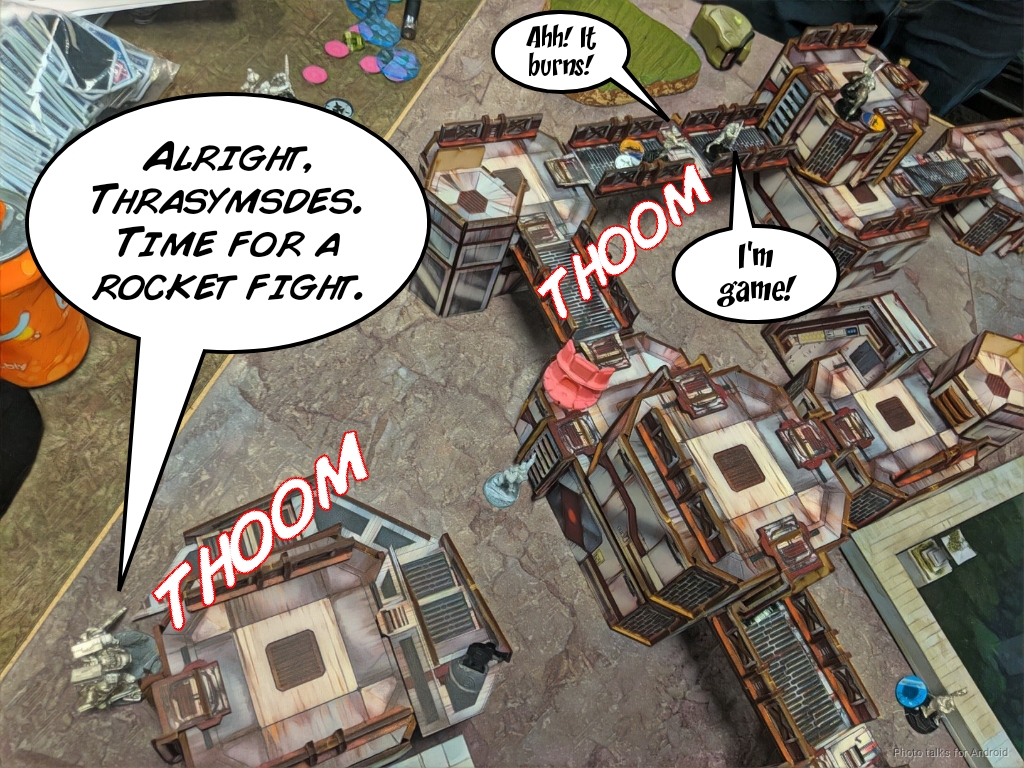
The way open, Adam dives the Myrmidon Officer down my right flank and into view of Cadin, who can’t see through the ODD to wound the Myrmidon Officer. Importantly, the Myrmidon Officer grabbed an HMG out of the Panoply on the way in.
Bottom of 3 – Ariadna
I’ve got to Secure the HVT (or do Net Undermine) and finish off Adam’s AC2 this turn. I dump the Dozer and the two Uragan into Group 1 to power Cadin, and let the Ratnik clear the way. I finally drop the Thorakites HMG, which gives me enough orders to…
fail to kill the Myrmidon Offier with Uxia’s Assault Pistols. Instead, I lose her to a boarding shotgun blast.
Cadin is pinned down by the Myrmidon Officer, so after wasting an order and a wound trying to T2 rifle him off the table I start my run. I fail my dodge and Cadin goes down to pistol fire from the Myrmidon, HMG fire from the Myrmidon Officer, and a combi shot from the Dactyl Engineer.
I’m pretty disheartened, but I do some thinking and then decide to make a run for it with Vassily. Thankfully neither the Myrmidon nor the Dactyl discover him, and I get two attempts to D-Charge the AC2. I fail one CC roll and pass the other, but Adam makes 2/3 saves…
bringing it to a tie game, because Vassily is also Securing Adam’s HVT.
3-3 Tie!
Post Game Analysis
I was terrified of Achilles and all of the ODD nonsense that Adam was bringing on the other side of the table. I didn’t feel confident or prepared for the raw thrusting power of that Steel Phall-uh.. Phalanx, and so I deployed very carefully to engage things within the good rangebands of my TR bots and other troops. Boy, did it pay off. TR bots are basically crit seekers, and I rolled crits on two NWI non-shock-immune models with Shock ammo. Also, Loup Garou in ARO are no joke either!
Joking aside–I don’t often get to face ALEPH on the table. They are I think my least favorite matchup because of all the gross stuff they can bring, and also due to the anxiety that comes with the unfamilarity. It’s really easy to succumb to this anxiety and make bad decisions, especially since I know Adam understands Steel well and is a very aggressive player. We also had an audience for our game as well–you think it doesn’t matter but it does. I could’ve gone into full on panic mode, but I took a deep breath, and remembered my own Bromad Academy mission: stick to positioning and the objectives.
I set myself up to protect my AC2 smashing pieces and protect my own AC2, abused mine placement and ambush camo to prevent Adam from moving up ladders I didn’t want him to, and most importantly—spent a lot of time during my own deployment talking to Adam about what his HMG could see and couldn’t see. I even asked him to place S2 templates in a bunch of places to find out what could see my Uragans and what couldn’t.
I’m actually quite pleased with and proud of my deployment. It was a challenging bowl-shaped table, and I basically let Adam have his table half uncontested. Once he crossed to my side of the table, he had to deal with my Uragan + Loup Garou + Ratnik fort though, and all in good rangebands for my guys, in cover, and invisible to the HMG Thorakites which Adam was hoping to use to clear the way for Achilles and Patroclus.
The Moblot was another standout piece. I didn’t mind the risk of throwing it over the centerline, especially with the magnificent payoff it gave me. It basically ate an entire order pool worth of orders and cost Adam his Doctor. More importantly, it cost him the ability to easily pick up the Lamdeh, who were really cramping my style.
One minor point–I wish I hadn’t revealed the Tankhunter when I did. In retrospect, I would’ve preferred to do it when Patroclus was walking up the ladder, I think that would’ve been much more annoying for Adam, and that would’ve meant I had the Tankhunter up on my turn to do some ARO piece hunting of my own.
I’m enjoying the Ratnik HRL as well. It’s no Vet Kazak AP HMG, but it still hits like a truck and is freaking impossible to dislodge with that ARM 9 while in cover. I’ve played two games with it now, and it essentially survived both games (I lost it to a Gamma HMG in the first game, but I don’t really count that because I left it standing in the open like an idiot). The HRL is punishing enough in the active turn, and I feel very comfortable leaving it out to ARO–just not to my opponent’s side of the table.
I really want to discuss my deployment some more. Let’s look specifically at the two Uragans, the Ratnik, and the Tankhunter.
The Uragans are completely invisible to Adam’s side of the table. The Uragan on the right is shielded by the hill and the one of the left is shielded by the tower it’s touching as well as the tall building the Antipode is sitting on. To engage them, Adam has to get to basically where the mine is guarding the ladder up to the AC2 or get onto the catwalk near Pavel. In either case, the Uragans are supported by some combination of the Ratnik, the Loup Garou, and the Tankhunter.
The Ratnik can see basically the entire center of the table minus a small sliver blocked by a ladder, but is completely invisible to anything on Adam’s side of the table. Whatever comes across that centerline is going to have to over-extend itself unsupported and avoid an HRL template. The Tankhunter is a little less well positioned, mostly due to table-forced compromises, but had camo to protect it. I timed the reveal poorly–that was a play mistake and not a positioning one. Were it still alive, It could’ve seen the AC2, the ladder, as well as a good swath of the table, especially the portion of the table that Achilles would’ve had to cross.
This deployment style does give Adam a chance to get a multi-wound model up the ladder to get one swing in if the rolls go his way, but that’s it. You get one swing, and then artillery, the king of the battlefield, will turn you into a grease stain in a shell crater. I’m not convinced that this is the right way to do things, but the AC2 is so survivable (Achilles did his best, crit twice, and only did 3 total wounds) that I think it’s servicable.
Losing Uxia as an attack vector due to a bad superior infiltration roll definitely ruined things for me. I had planned to NOT roll for it, but there wasn’t really any spot on my side of the table far advanced and safe enough to be worthwhile, so I risked a safe spot on a tower right under the bubble marked “Achilles” in the deployment picture above. Had she been there I would’ve easily taken the AC2 down with the Strelok–spec-fire some smoke and then swing away with the Trench Hammer.
Cadin I think is a bit of a trap. It’s such a huge ask to get him from your deployment zone to the enemy AC2. That’s at least 24″ of movement through a hellscape of ARO fire with no smoke and a rifle. I think infiltrating D-Charges (of which Ariadna has plenty) is a more reliable option, even though Cadin’s statline and AP+T2 CCW are so appealing. You really have to devote a ton of resources to getting him up the field, and I don’t think the list can support that effectively, especially with all the beefcakes that you’re going to see at 400 points.
Also, I’m pretty convinced that D-Charges are the way to go on the AC2. Every army has them, and there are enough things with decent enough CC and D-Charges that I think it can be done. They key here is you really need an AP anti-material weapon to get through that ARM 8. It’s so dumb.
Let’s sum things up again:
- Positioning – GREAT. Really pleased with my deployment. I think I could’ve advanced Vassily a little more with his Lt order but I won’t worry about it. Cadin should’ve started somewhere else. Maybe standing in the way of the AC2? The Uragan has a hit mode, so that would be okay…
- Playing to the Objective – Part of this is knowing what your best chance of success is. I threaded the needle with the Antipode and Vassily to get this done, but I think I should’ve given up on Cadin earlier, or deployed him on a flank. Maybe if I had put him where Vassily was, standing, to help in ARO duty. It’s quite likely that he would survive one round of shooting.
Some minor mistakes related to the Tankhunter reveal, not running Vassily up earlier instead of faffing about with Cadin, and I think I should’ve tried harder to find a good spot for Uxia. In any case, this was a brutal game against Adam. Steel is quite powerful–that ODD basically negated my Spetsnaz passively, reducing him to a 33 point order on turn 3. Boo.
Thanks to everyone who came out to make it such a great tournament and to Glimpses of Wonder and Warfare for hosting! Check them out below!

Duroc can´t pass his ARM roll against Hulang monofilament on 12, he has to roll 13+
He can, thanks to Total Immunity. Total Immunity turns monofilament into Normal ammo with DMG 12, lets me choose to take it against ARM or BTS (clearly choose ARM), so I pass all of my ARM rolls.
My bad, forget to check his profile. My apologies
No worries! I really appreciate that you commented because it means you actually read the battle report and are trying to make me a better player.
I’ve got a good grasp of the rules but sometimes I or my opponent makes a mistake. I want to make sure I give people the cleanest game possible, so thank you for writing in with a correction, even if it wasn’t a mistake in this case.
I’ve actually added a note to the passage about rolling a 12 to remind other readers about Duroc’s Total Immunity, I’m sure you’re not the only one who missed that.
Thanks for the nice write up. I have been thinking about this game a lot. So why I was focusing on my right was the plane gave me a lot of cover and easy walk on for my ad troops. Where as my left was to open and no good cover. My 2 mistakes was 1. not utilizing smoke, I placed my launcher in the center to be able to utilize either side I should have put her on left or right to help the ad troops get on the board. My other was I should have use the hulang to clear the mine and troop on my right.
I was wondering what kind of plane was used for this? I currently run TAK Ariadna and would love to get a blown up plane for my army base.
It’s a GI Joe Cobra Transport Aircraft, if memory serves.