Filed in Triplicate
I arrived at game night with four lists crammed into my tiny Beta Bag. Two 150 point Recon+ lists in case our newest player had finished assembling his minis, and two ISS lists, one for Supplies and the other for The Armory. I figured I could cover Supremacy with either list, but I had definitely not planned on playing Show of Force!
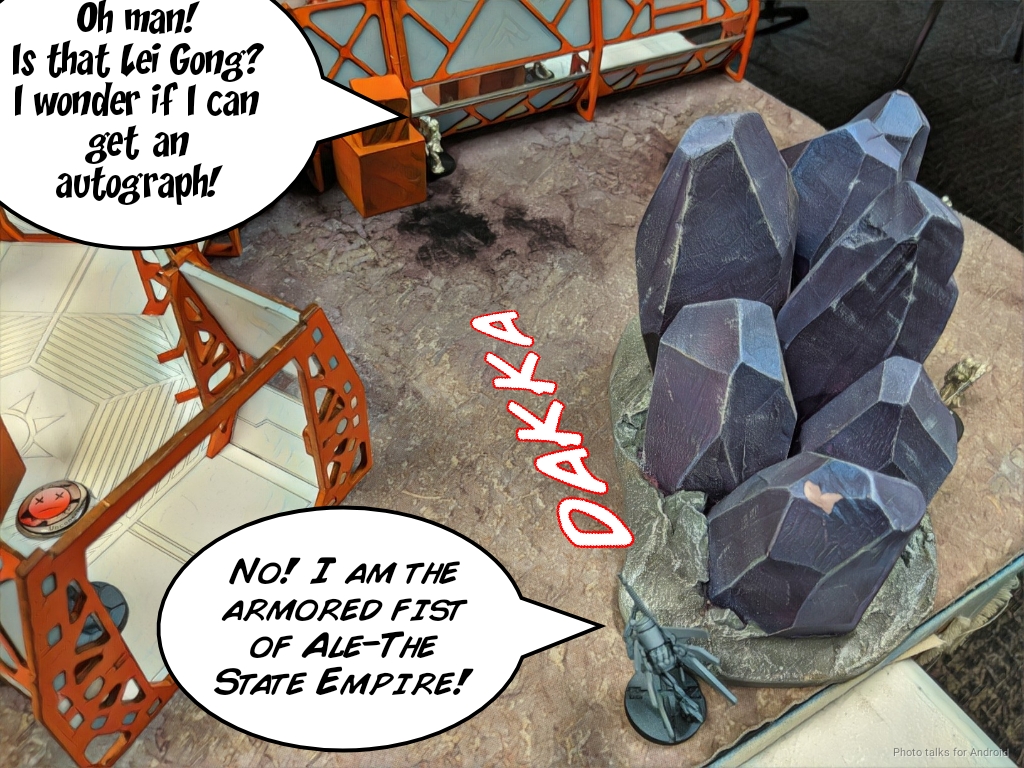
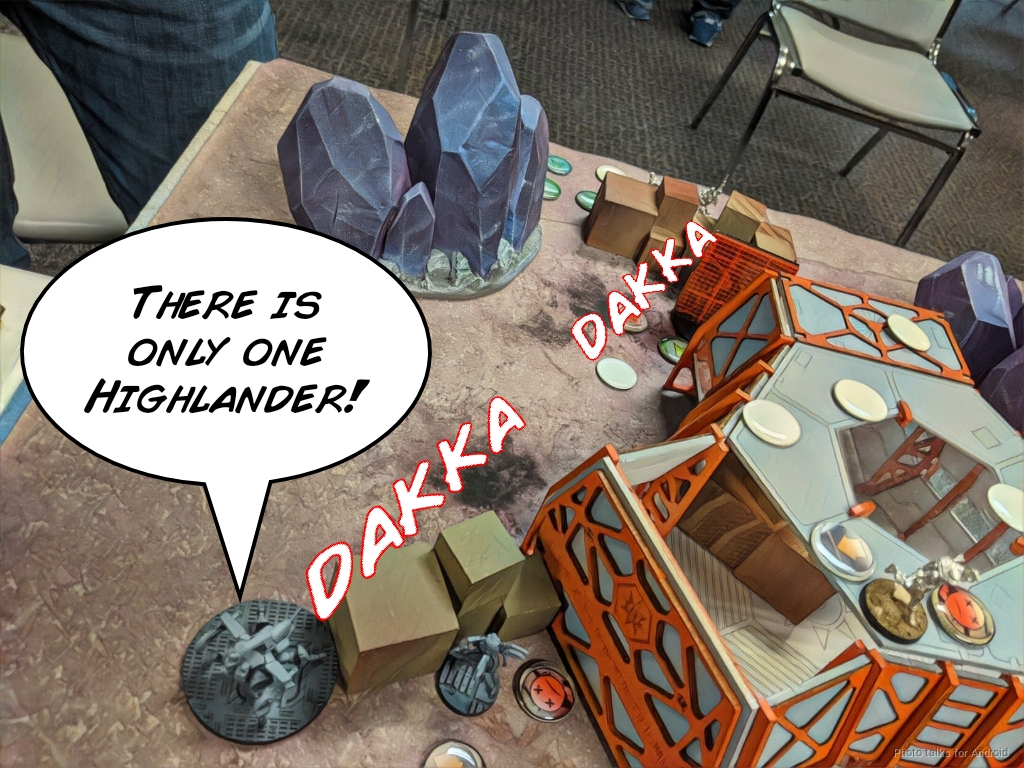
Jordan (sprocketgx) really wanted to practice with a TAG. He’s debating what army to take to Rose City Raid and wanted to see what it was like running Scarface out of Caledonia (Soldiers of Fortune is live at Rose City Raid 2020). The store had recently undergone a reorganization, so all our terrain was in a different spot. The box of our Apollo Station test cuts was on the top of the pile, so that’s what we ended up playing. If you’re interested in the table, you can pick it up it up from Muse on Minis.
I want to do a bit of a deeper dive on how terrain affects the game in this battle report, particularly because Apollo Station is really a unique table experience. Let’s take a quick look at the table right after deployment from both vantage points:
I’m going to claim that there are basically three, maybe even four tables here:
- Inside – Unless you play with destructible walls, the inside of the station corridors are very much isolated from the rest of the table. Of course, you can easily just walk through the doors, but door placement is pretty key–you might have to traverse quite a bit of corridor before you get to a door! The engagement distances are also usually pretty short in the corridors–usually under 16″ and often in 8″.
- Outside – This is basically like other Infinity tables. There’s rocks (crystals in this case), buildings (the station itself), and random scatter. Depending on how you set up the corridors, you can bisect the table into two outside tables. I intentionally did that this game–you can see there really isn’t a way to get between the left and right sides of the tables that doesn’t involve climbing over the station corridors or going through the corridors themselves. This is why I said there’s maybe even four tables.
- Station Roof – The roof is not like the roof of other buildings. There is NO cover, by design. The only LoF blocking elements are the tall crystals, which are their own scenery elements and do not grant cover to you on the roof. The corridors are wide enough that you can more or less choose to be seen (or not) by forces on the ground, which lets you use them as a highway of sorts between parts of the table (there are plenty of ladders for up to 40mm bases all around the sides). However, if you stay up on the roof, you’re very vulnerable in the reactive turn to models that climb up to engage you.
There are a number of key takeaways, I think:
- Increased Deployment Complexity – The tradeoffs of choosing different positions in deployment are even more pronounced. Do you deploy deep in the corridor system, away from any doors? That means you’ll basically be stuck inside for the whole game, and vice versa if you choose to deploy outside away from a door.
- Mobility is Key – Sometimes you really need to get in or out of the corridor system, which may involve backtracking and wasting movement just to get to a door. This can be a massive drain on your order pool. Even climbing up/down the ladders costs an entire short skill for most troopers.
- Decreased Board Control – Your usual board control tricks are much less useful. Chain Rifles don’t go through walls, so you can’t defend the outside of the station if your Kuang Shi are inside! Mines have the same problem–only MadTraps/Koalas/SymbioBugs and hacking/Pheroware don’t suffer from these issues. You end up having to give up on controlling some part of the board, be it outside or inside.
- Material Preservation – Since you can’t easily transition from section to section of the table, losses in sections of the table are strongly felt. In other words, if you only have one model inside of the corridors, and that model dies, you can’t easily replace that model by shuttling in something from the outside of the corridors. On a more traditional table, you can just walk to where you need to go in more or less a straight line. Not so with this table. You’re therefore encouraged to keep stuff alive. Losing orders sucks, but losing orders when movement costs more orders than normal is even worse.
Okay, that’s probably enough exposition. Let’s get on with it.
Overview
- Mission: Show of Force
- Forces: Imperial Service versus Caledonian Highlander Army (300)
- Deploy First: ISS
- First Turn: ISS
Supplies
GROUP 1 |9
GROUP 2 |
ZHÀNYING Lieutenant (Sensor) Breaker Combi Rifle, Nimbus Grenades / Pistol, Electric Pulse. (0 | 26)
KǍNRÈN Combi Rifle, Chain-colt, MadTraps / Pistol, Monofilament CC Weapon, Knife. (0 | 28)
MAJOR LUNAH Viral Sniper / Pistol, Knife. (1.5 | 29)
NINJA Hacker (Killer Hacking Device) Tactical Bow / Pistol, DA CCW, Knife. (0 | 29)
GARUDA Tacbot Spitfire / Electric Pulse. (1.5 | 28)
SOPHOTECT Combi Rifle, D-Charges / Pistol, Knife. (0 | 31)
YUDBOT Electric Pulse. (0 | 3)
PANGGULING Hacker (EVO Hacking Device) Electric Pulse. (0.5 | 25)
DAKINI Tacbot Paramedic (MediKit) Combi Rifle / Electric Pulse. (0 | 15)
5
CELESTIAL GUARD (Kuang Shi Control Device) Combi Rifle + Light Smoke Grenade Launcher / Pistol, Knife. (0.5 | 13)
KUANG SHI Chain Rifle / Pistol, Knife. (0 | 5)
RUI SHI Spitfire / Electric Pulse. (1 | 20)
5 SWC | 299 | Open in Infinity Army
As I said before, I was totally unprepared for Show of Force. I decided to take my Supplies list because it has a Garuda to go hunting box carriers and I figured I might need an assassin. That and I had some limited board control thanks to the Kanrens. I had no idea what Jordan was bringing, but I figured I’d probably have to deal with Caterans, SAS, and Uxia so I was happy that I had brought the sniffer Kanren. Gotta a hipster profile in every list, after all, amirite?
Caledonian Highlander Army
GROUP 1 |5
GROUP 2 |
WALLACE Lieutenant Combi Rifle + Light Flamethrower, Smoke Grenades / Pistol, EXP CCW. (0 | 35)
UXÍA McNEILL (Covert Action) (CH: Limited Camouflage, Superior Infiltration, Specialist Operative) Boarding Shotgun, D-Charges, Smoke Grenades / 2 Assault Pistols, AP CCW, Knife. (0 | 27)
112 (Motorized) Light Shotgun / Pistol, CCW. (1 | 20)
HIGHLANDER Chain Rifle, Smoke Grenades / Pistol, AP CCW. (0 | 6)
CATERAN T2 Sniper Rifle / Pistol, AP CCW. (1 | 24)
HIGHLANDER GREY AP HMG, Smoke Grenades / Pistol, CCW. (1.5 | 34)
VOLUNTEER Chain Rifle, Light Shotgun / Pistol, Knife. (0 | 6)
SCARFACE & CORDELIA TURNER . (1.5 | 72)

SCARFACE Light Shotgun / Pistol, CCW. ()
CORDELIA TURNER Combi Rifle, Chain-colt, D-Charges / Pistol, Knife. (0 | 17)
WARCOR (360º Visor) Flash Pulse / Stun Pistol, Knife. (0 | 3)
McMURROUGH 2 Chain Rifles, Grenades, Smoke Grenades / Templar CCW (AP + DA). (0 | 32)
6 SWC | 299 | Open in Infinity Army
Jordan brought a pretty normal CHA list. Volunteers to power an AP HMG Grey, a Cateran, and Wallace + Galwegans to power Uxia. The departure was the addition of Scarface for the purposes of the mission.
Deployment
Inspired by a recent game of James’ on a different configuration of this table, I’m going to frame the rest of the report using the different regions of the table to break up the action. If you’re interested in his report, you can find it here:
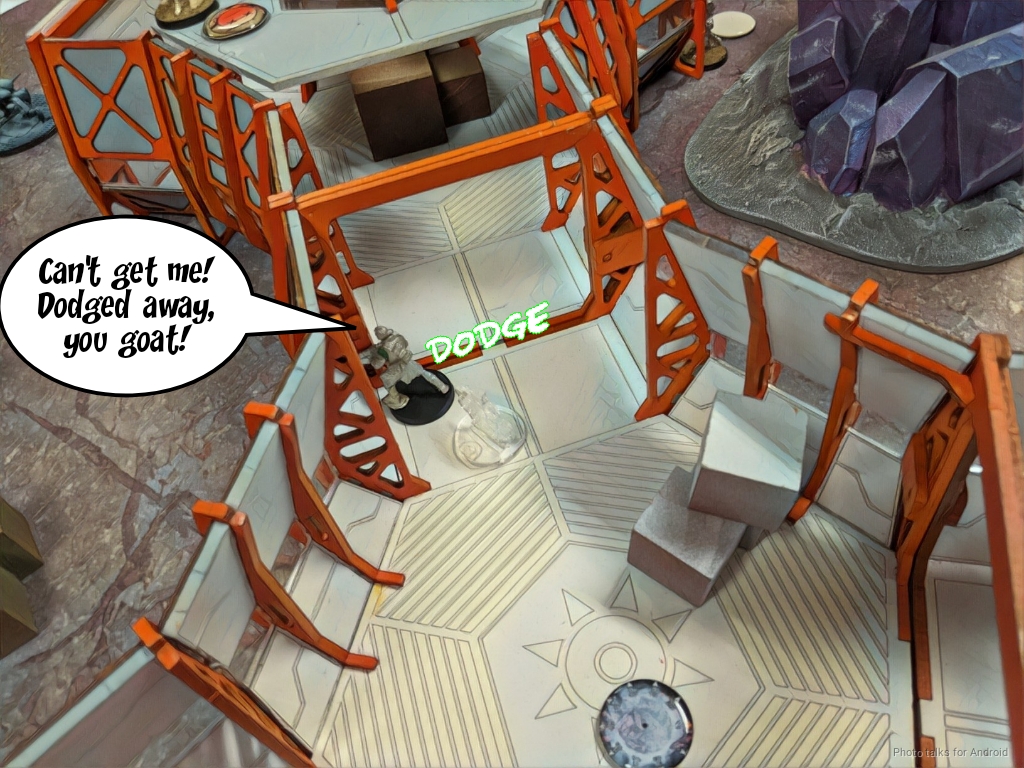
Alright, here we go. On the inside, I put the Kanren sniffer, because the Boarding Shotgun is the correct profile for the rangebands that I’ll see in the corridors. I stuck a pair of Kuang Shi inside the corridors as well to chain rifle or pistol stuff.
There was also a long range sliver of a firelane in the corridors diagonally from where Lunah is in the picture more or less towards the 112 in the picture below. This is why I put Lunah where she was, to give her the flexibility of being near a door while still covering a long, relevant firelane.
It’s worth noting that the firelanes inside the corridor are very narrow, which makes Cautious Move a very relevant skill to remember. You can make it safely up the corridors if you’re careful, but it does cost orders. The Ninja was my ace in the hole for Turn 3 to secure the objective, so she went right next to it.
Outside the corridors on the left, I put the other Kanren. There’s a lot of ground to cover here, so I needed the MadTraps to help. There was a reasonable spot for the Sophotect, so that’s where she went (I use a metal Parvati because I like it better). To balance the deployment (and because the Rui Shi was my reserve and I wasn’t sure where it would go) I put the Sophotect’s bot on the right side.
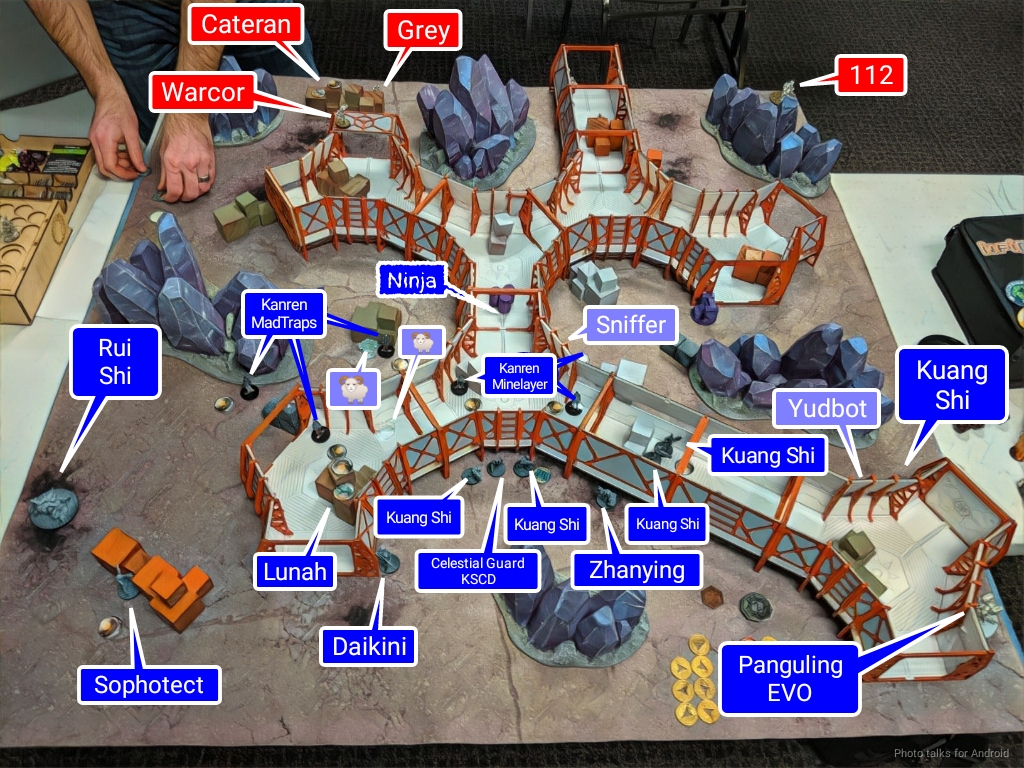
The EVO just went in the safest possible place because it’s got a big base and basically isn’t going to move all game. I put the 5th Kuang Shi on the right, by itself, figuring I could use it to move up on the right and cause some trouble with its impetuous order.
The other Kuang Shi and the Controller went right next to a ladder near the center of my deployment zone. I did this to keep them close to the other two Kuang Shi and have an easy way to get smoke to either side of the table on the outside–sadly, there was basically no way for me to get smoke into the inside of the corridors. The Daikini and Zhanying just went somewhere convenient, near ladders to keep them mobile.
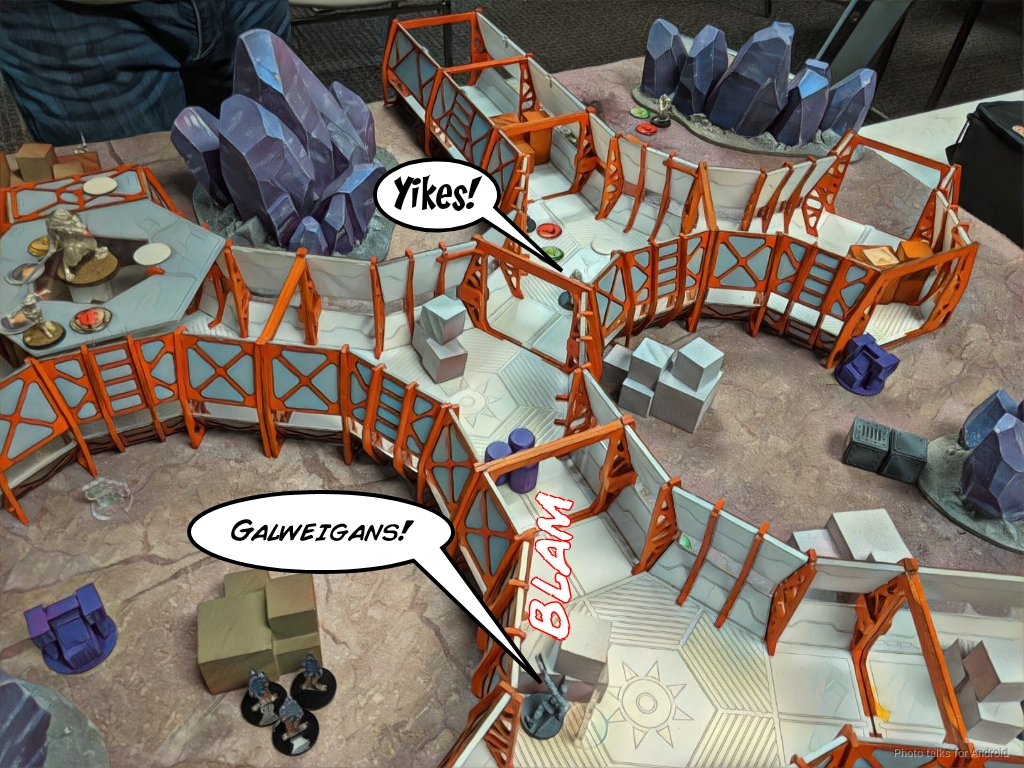
With that, it was Jordan’s turn to deploy. He divided his Galwegians between the inside and outside of the corridors, much like I had done with my Kuang Shi. The ones outside the corridors guarded Wallace on the left, who was also protected by a 112.
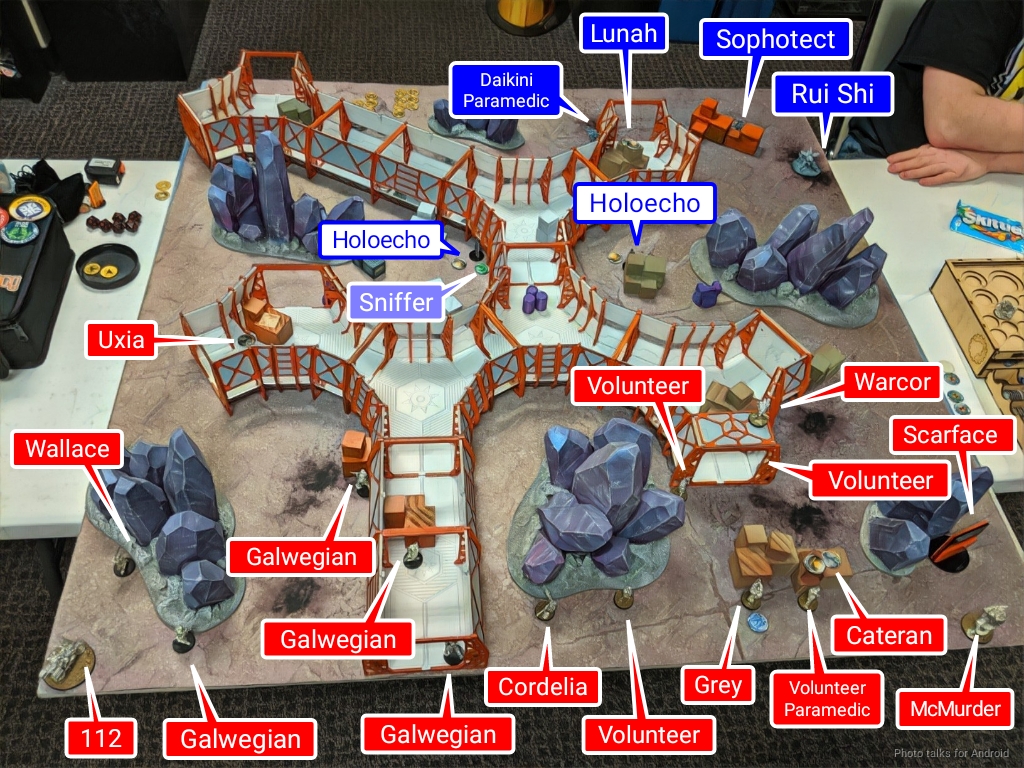
The other side of the table were all of his big guns: Scarface, the Volunteer link, and McMurrough. Cordelia lurked nearby to help her brother out. I decided that I would bring the Garuda in on my right to hunt down Wallace, which meant the Rui Shi could be on my left to go after all of the stuff on that side, especially McMurrough.
Jordan’s reserve was Uxia, pushed up on his side of the centerline to pretend to be a SAS CRAP and further screen Wallace.
Turn 1
Top of 1 – ISS
To win the game, I have to prevent Jordan from getting Scarface to the center objective and murder more stuff than he does. I decide to ignore Scarface because he’s hard to get to at the moment and I have two more turns to worry about him. I don’t have a TAG or heavyweight model in my list, and I sort of just throw the DataTracker at the Sophotect because… I dunno. She’s fast? Whatever, one point isn’t going to matter, and besides I’ve got a few immediate problems to consider.
- Wallace – I think I can kill him with the Garuda. I have enough orders, especially because Jordan knee-jerk took orders from the Rui Shi (not a bad idea, but definitely what I wanted him to do).
- McMurrough – I can’t let Jordan keep McMurrough alive for long. I at least have to pin McMurrough somehow or I’m going to be in big trouble. Super Jump basically gets around most of mobility issues on this table, at least between the areas outside and the roof, and I have a lot of material there.
- Galwegians – I need to make it hard for them to advance and start chain rifling things.
My proposed solution is to kill Wallace. This flips all the Galwegians irregular, limiting their movement, and also dramatically reduces McMurrough’s order pool, and Scarface’s for that matter.
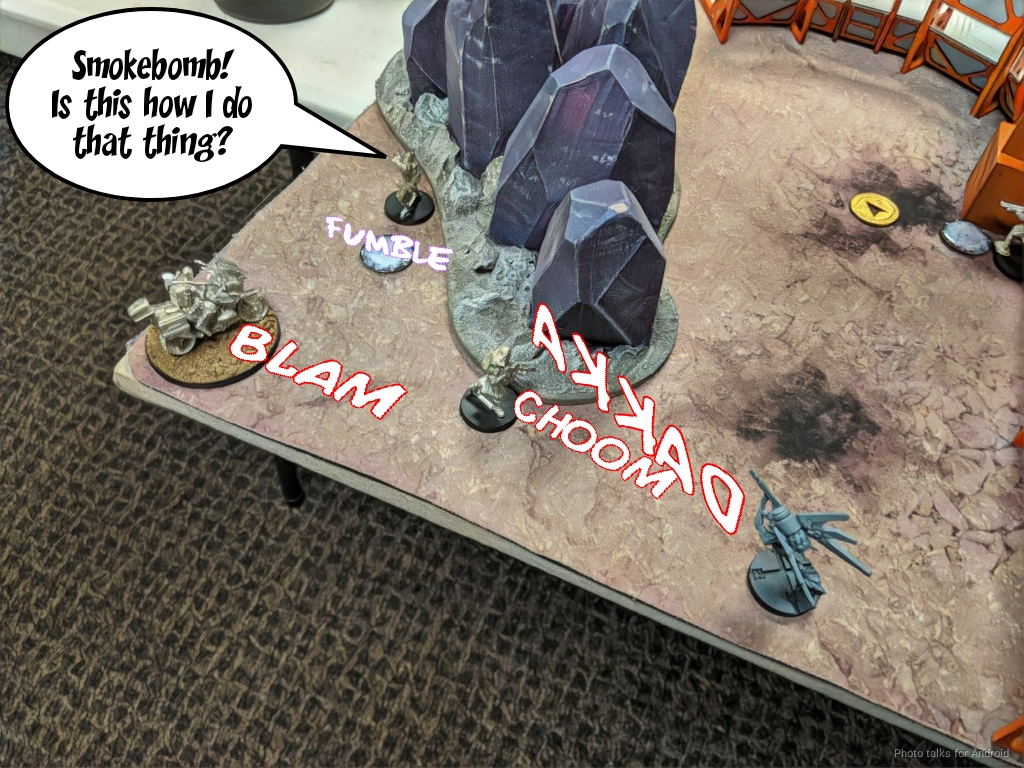
I decide to send in the lone, impetuous Kuang Shi to clear the way for the Garuda. Jordan doesn’t realize it, but his placement of Uxia was really effective at slowing me down. I use a coordinated order to move the Kuang Shi to the other side of the wall from Uxia and to get the Rui Shi in position to attack McMurrough. Next order, I walk the Kuang Shi around the corner to see Uxia. Jordan declines to ARO, but I fail my discover.
McMurrough is high on my priority list still, so throw one order at the Rui Shi to see if I can get some wounds on McMurrough against his dodge. Sadly, we both roll the same number and nothing happens.

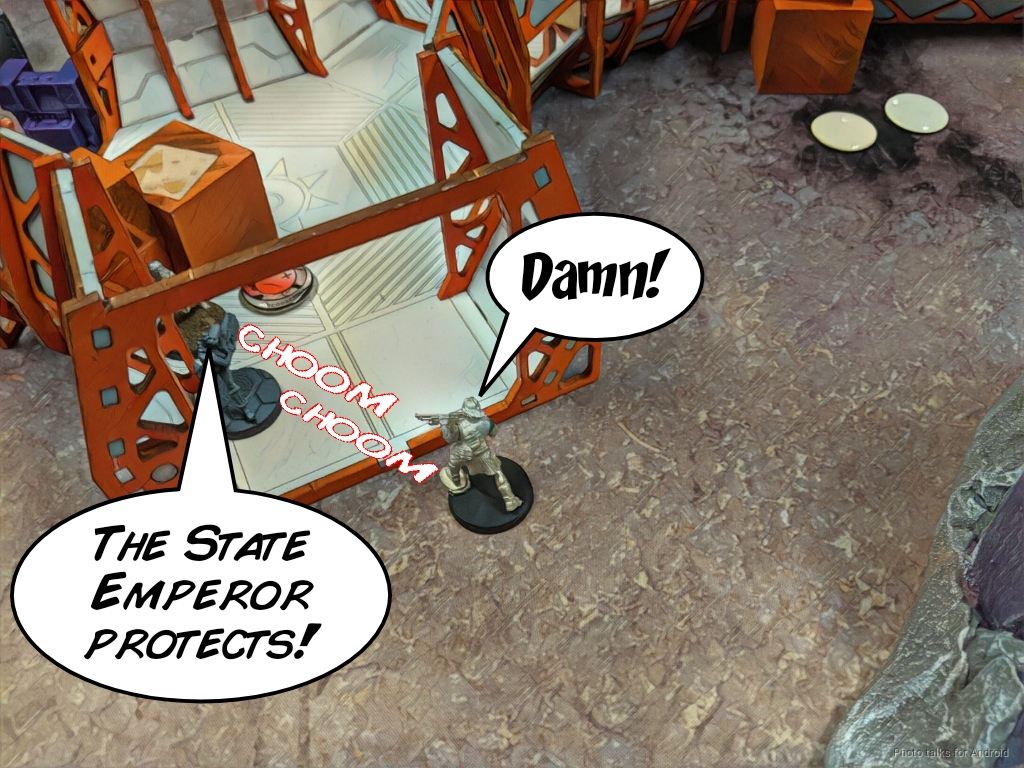
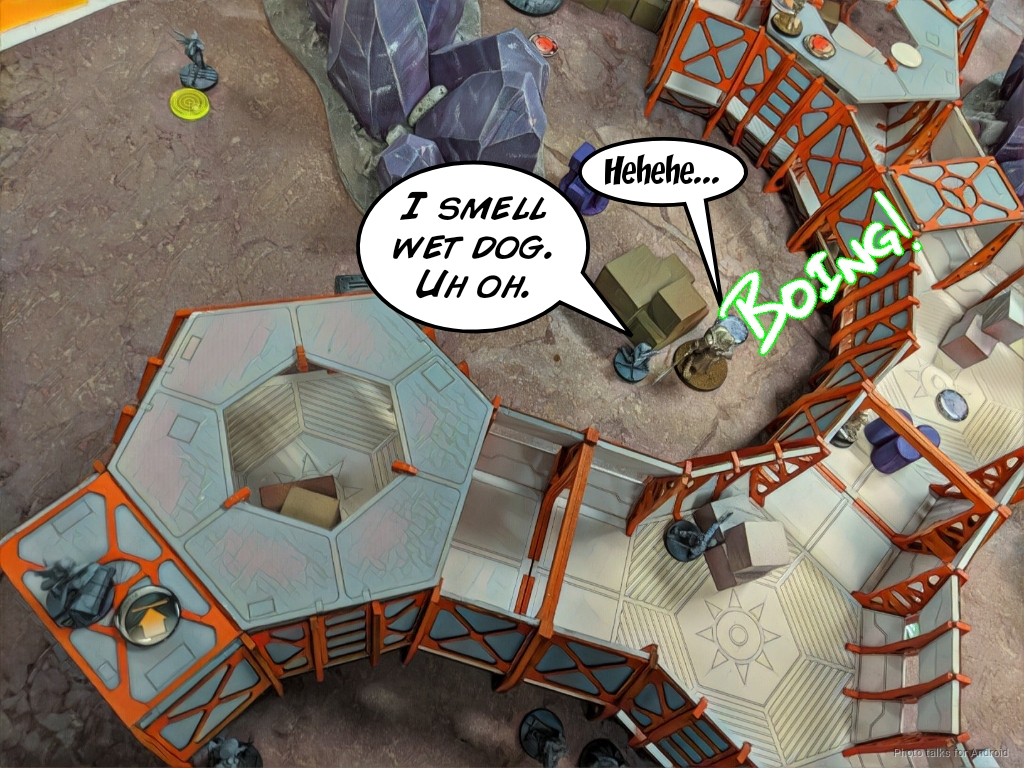
Okay. Back to Uxia. She has to go. Now. I try an intuitive attack on Uxia with the Kuang Shi. This time, Jordan decides to engage, but again we roll the same number. I spend another order, Jordan attempts an engage again, but my pistol shots KO Uxia.
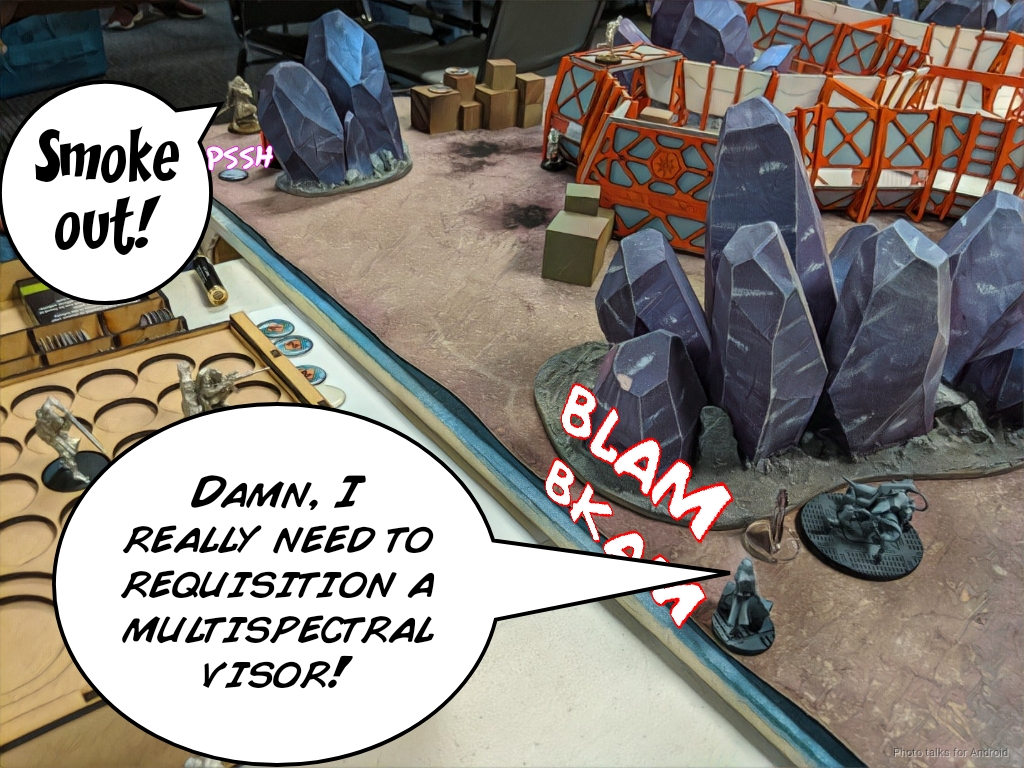
The way is clear for the Garuda! I bring it on and force the one Galwegian I can see easily to land smoke.
I don’t really see a way to not catch a chain rifle from the remaining Galwegian guarding Wallace, so I decide to not worry about it and just sacrifice the Garuda to take out Wallace. I lose the Garuda to the 112’s shotgun (the chain rifle bounced off), and I beat Wallace’s smoke on a 1 with 4 hits and shoot him off the table. Roughly a 25% chance to get smoked out and a 25% chance to shoot him off the table. I’ll take it.
I’ve got a few orders left in my first pool, which are just enough to hop Lunah off her perch and take a shot at McMurrough, who smokes her out.
Most of Jordan’s stuff is outside at the moment, hence the focus on the outside problems. There are still two very dangerous Galwegians inside, but…
Bottom of 1 – CHA
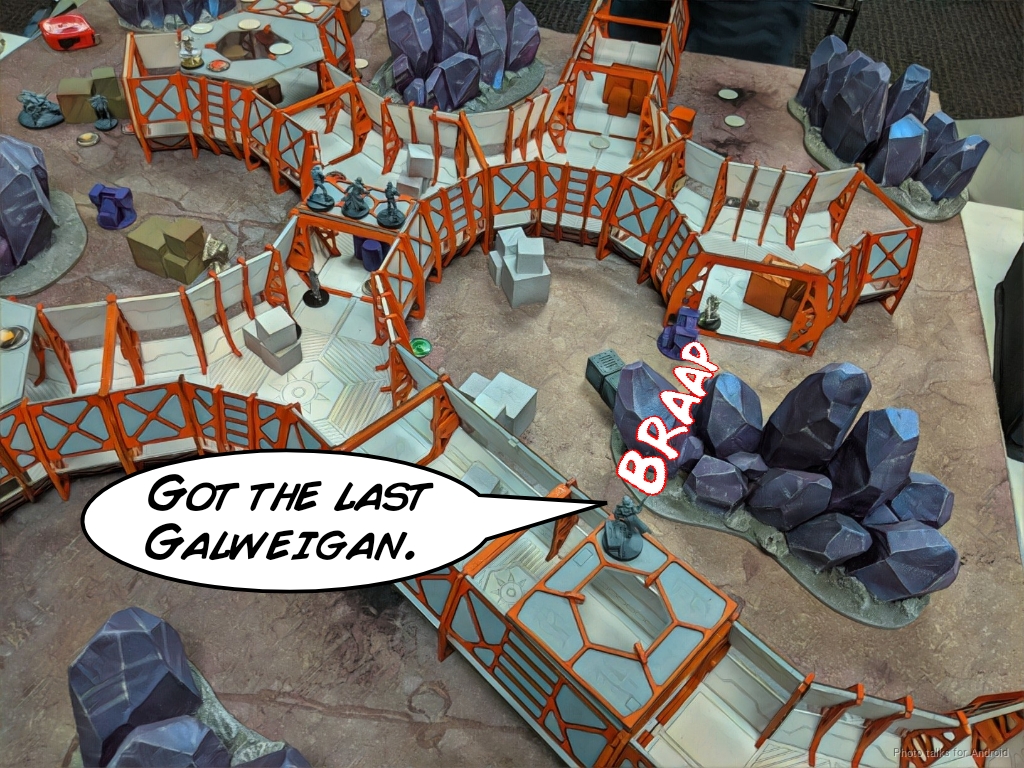
I had guessed correctly and Wallace was Jordan’s lieutenant. Not really a difficult guess, especially since I don’t think there’s another legal Lt option on the table that I can see. Even though he’s in Loss of Lieutenant, the Galwegians are still going to be impetuous. I take a potshot at one of them with the Kuang Shi that killed Uxia as it moves up, but nothing happens. McMurrough wisely doesn’t advance in front of Lunah.
One of the Galwegians gets close enough to have a chain rifle fight with my Kuang Shi and goes dogged while I roll a 19 on ARM. Kewl.
The Galwegian rolls in a Berserks my Kuang Shi. I take the wound and chain rifle the Galwegian off the table. There are still Galwegians on the table nearby so I decide to have the Kuang Shi go dogged.
Scarface KOs Lunah easily, which I expected. I was lucky and he didn’t outright kill her.
With Lunah down, McMurrough can move, so he super jumps to the rooftop to advance up the board some. I think this was a mistake, but Jordan didn’t think had any threats capable of taking McMurrough out on the roof.

Turn 2
Top of 2 – ISS
Okay. Jordan hasn’t really committed Scarface at this point and hasn’t really developed his position other than to soft commit McMurrough to the outside instead of the corridors. With Wallace gone and Scarface tucked away, my objective is simply to burn down as many orders as I can this turn. I don’t have much fear of putting Jordan in retreat so the gloves are off.
Ordinarily I’m not so gung ho about straight up stacking bodies, but it’s a literal mission objective this time, and it is in alignment with the other key mission objective–deny Jordan the ability to get Scarface to the central objective.
I start things off by taking out Jordan’s Warcor with my Kanren Counter Insurgency Group agent. Absolutely no social commentary here whatsoever. Nope. This does remove all AROs on that side so…
Since Lunah’s not straight up dead, I can pick her up with the Sophotect and climb her up to take a shot at McMurrough. He smokes Lunah out for a second time. Sigh.
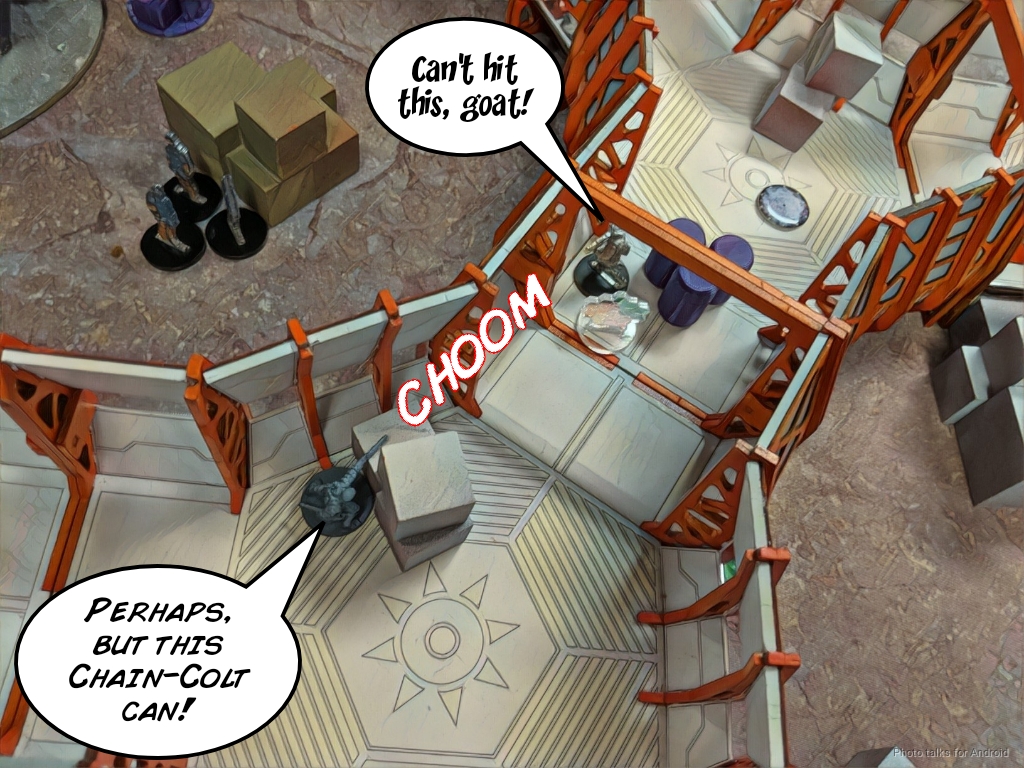
I decide to stop messing around and send in the Rui Shi to remove orders. I don’t bother buffing it because I can easily get stuff out of cover and I don’t have the orders to spend on buffing stuff thanks to getting Lunah into position. I don’t see it as a requirement to buff the Rui Shi–it’s a freaking BS 12 MSV2 Spitfire, after all.
I start off by discovering then Crit+Hitting the Cateran off the table.
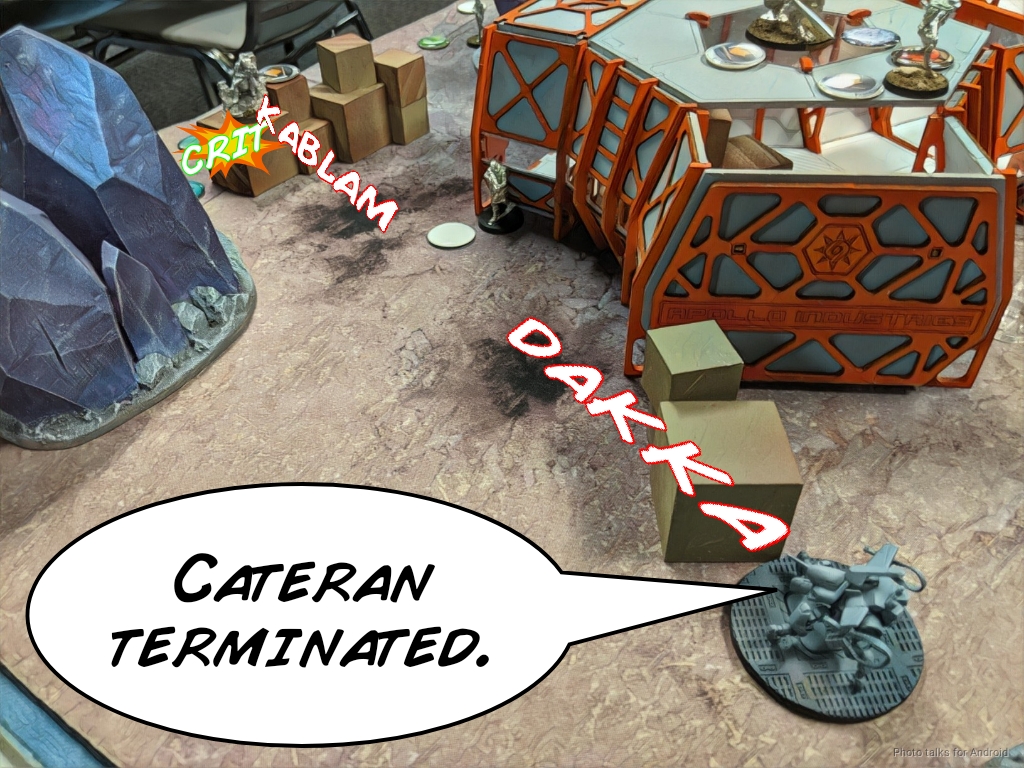
I take out three more orders after that, starting with the nearby Volunteer. This also drops the +3 BS in the link, which is great news.
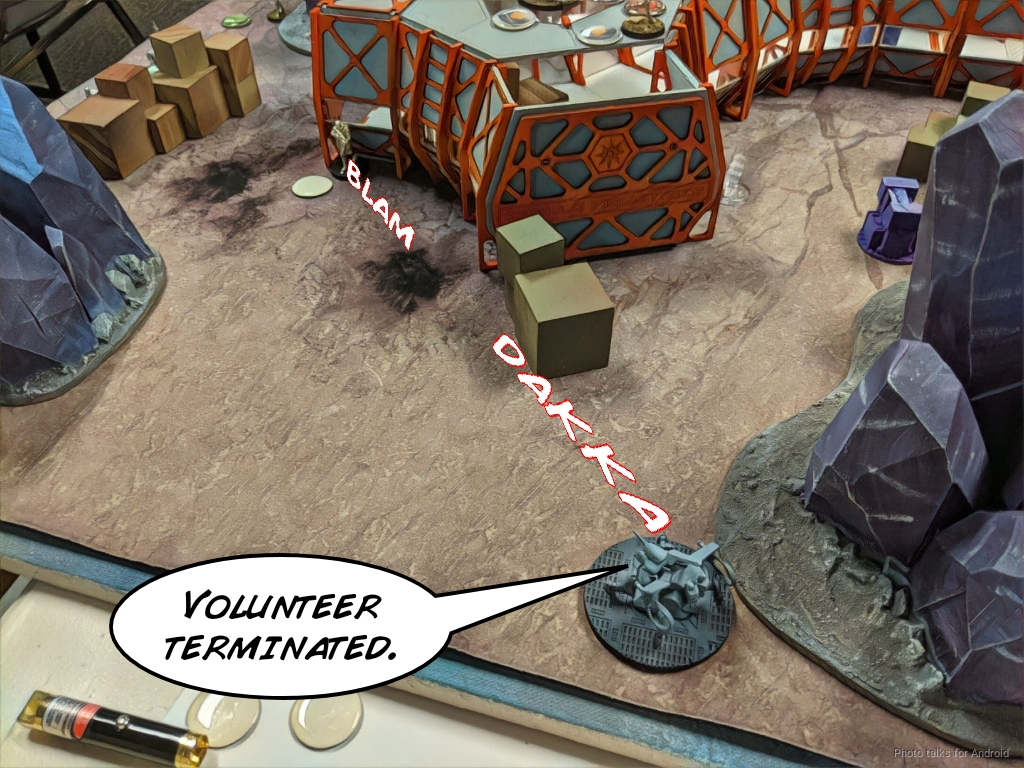
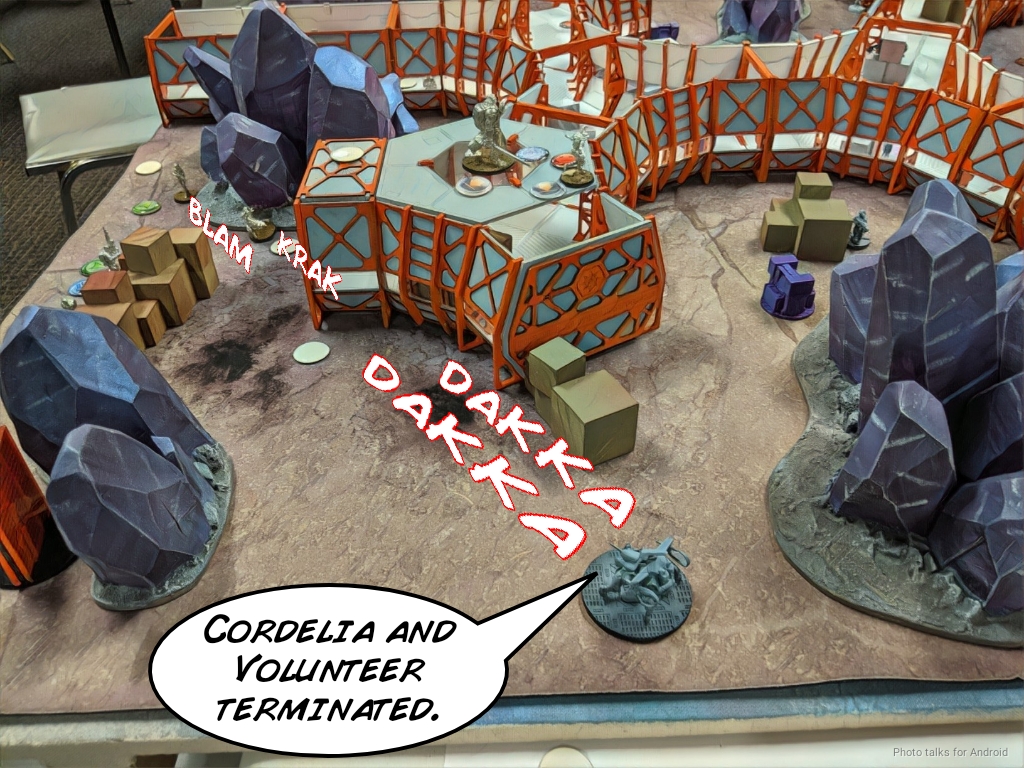
I move out and back to cover to catch Cordelia and another Volunteer in my sights and take them both out with a quick and dirty split burst.
I use some coordinated orders to shift Lunah back and prone to protect her from Scarface, move the Kanrens around, and move the MadTraps into better positions to cover McMurrough. I don’t know who Jordan’s new lieutenant is. I suspect either the AP HMG Grey or Scarface. Of note is me standing the Kanren BSG up to ARO the Galwegians.
Bottom of 2 – CHA
The Galwegians continue to move up, and my Kanren BSG reveals itself only to whiff a shot.
Jordan decides he wants to clear out my MadTraps and manages to do one by dodging a Galwegian in some smoke. He needs to clear the MadTraps to unpin McMurrough as well as to get Scarface to the center, so this is a good plan.
The other Galwegian move-moves into the Kanren’s chain colt and a MadTrap and fails both saves. Doesn’t matter though, the MadTrap is gone, which is what Jordan wanted.
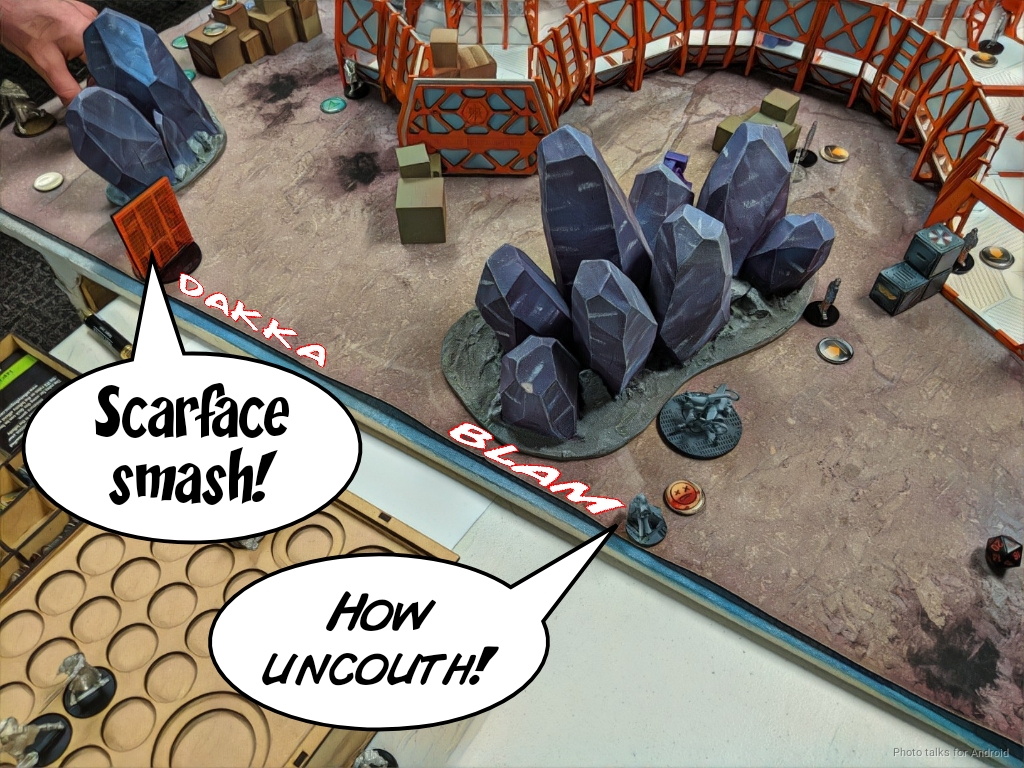
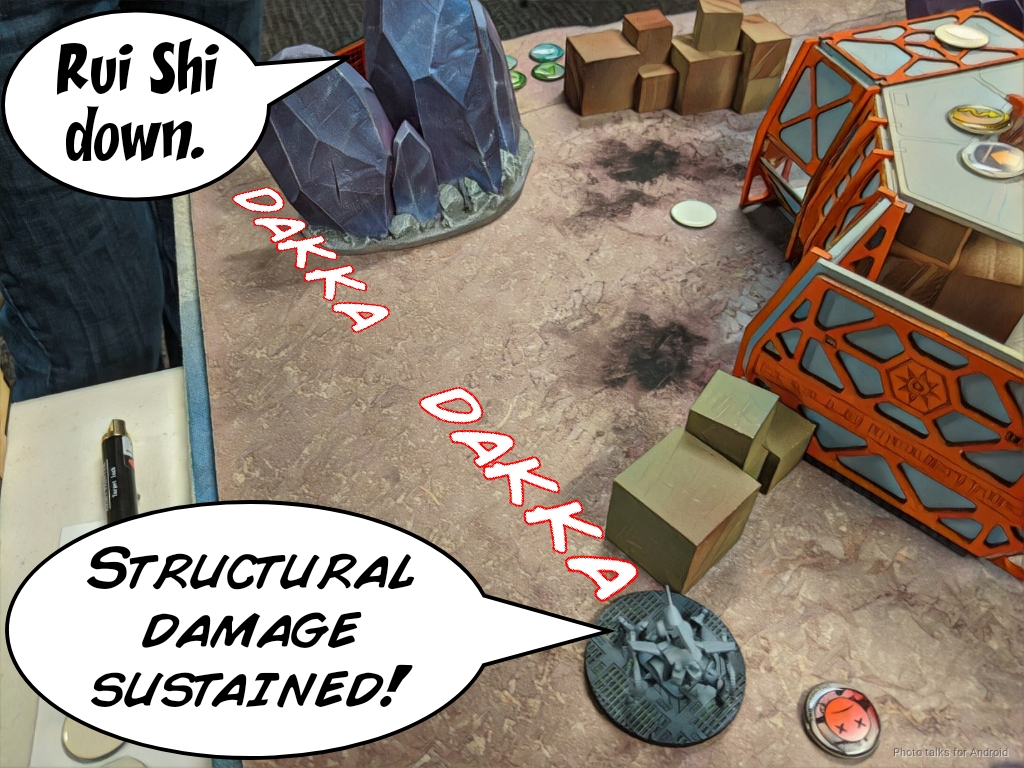
Scarface takes down my Rui Shi before shifting towards the center of the board closer to the objective.
Jordan decides he wants to extricate McMurrough from his predicament and does so by successfully smoking out my Kanren and Lunah. Again. What. The. Hell. BAH.
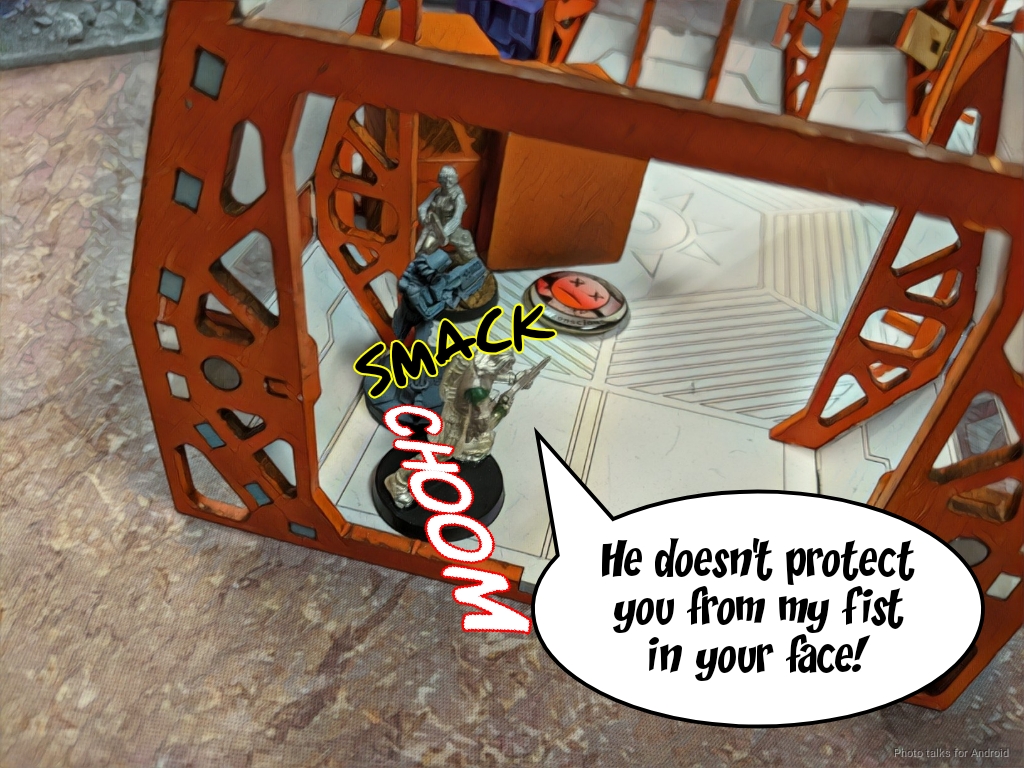
Covered by smoke, McMurder hops off his perch and makes his way towards the Kanren.
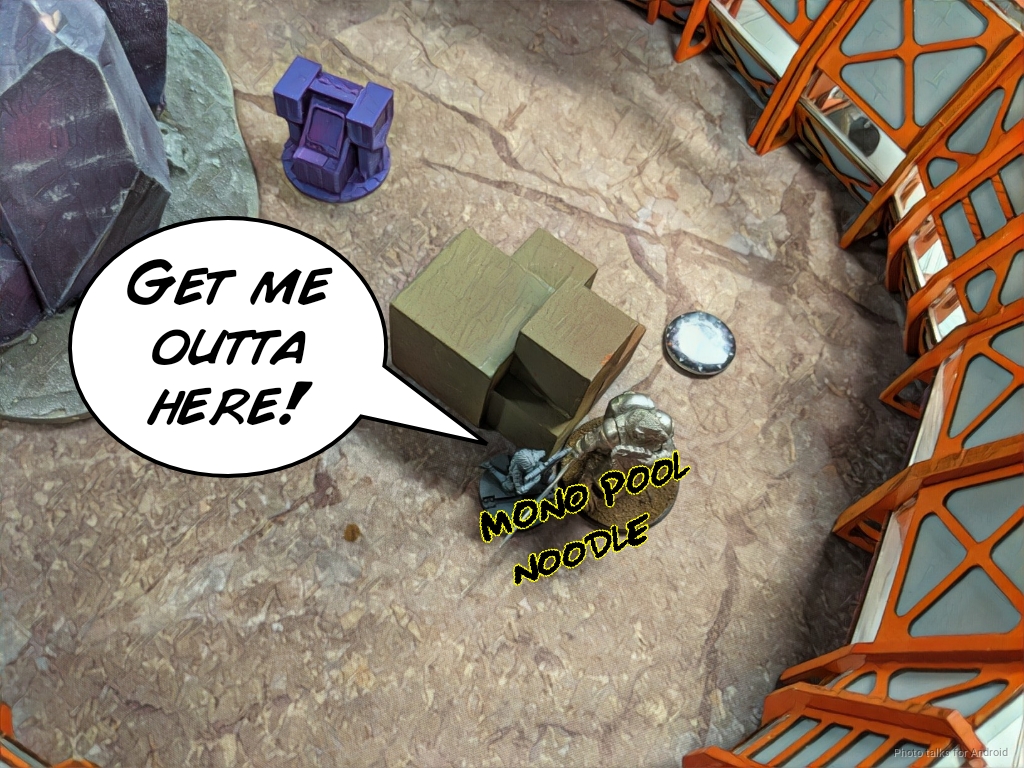
I win the first CC face to face roll, ineffectively whapping McMurder in the face with my damage 12 monofilament pool noodle of doom… but my luck doesn’t hold for the second roll and the Kanren explodes thanks to McMurder’s Templar CCW. Monofilament is about as effective as a rolled up newspaper against dogfaces.
Turn 3
Top of 3 – ISS
Lots to do this turn:
- Secure the central objective – Always look for that major victory!
- McMurrough – I theoretically could ignore him now, because Jordan is low enough on orders that he can’t both enough stuff and secure the central objective, but…
- Scarface – My best tool for killing Scarface is my downed Rui Shi and McMurrough is in the way of the Sophotect. I can’t go the easy way around the board edge because Scarface can see that and I don’t think the Sophotect is going to survive a Panzerfaust.
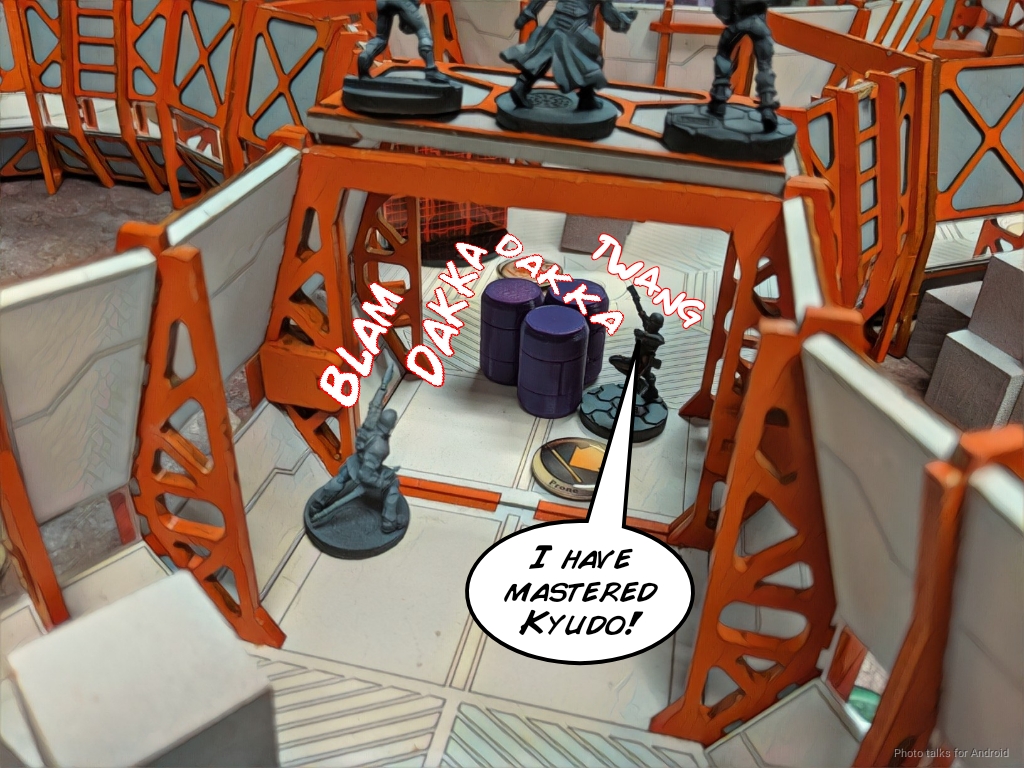
I start by getting Lunah into view of McMurder and finally land two Viral hits, taking him down. I move the Kuang Shi core up, two on the roof with the controller and two in the corridors to clear out the Galwegian in the corridor. The problem is Scarface can see this. He Panzerfausts both Kuang Shi off the table in ARO, but not before I can send the last Galwegian dogged with a pistol shot.
Okay, time to deal with the TAG. I pick up the Rui Shi now that McMurrough is dead, then start blasting away. I do one wound, then we both crit each other for the next two orders. I don’t have the orders to keep trying, and I have to get the rest of my tasks done!
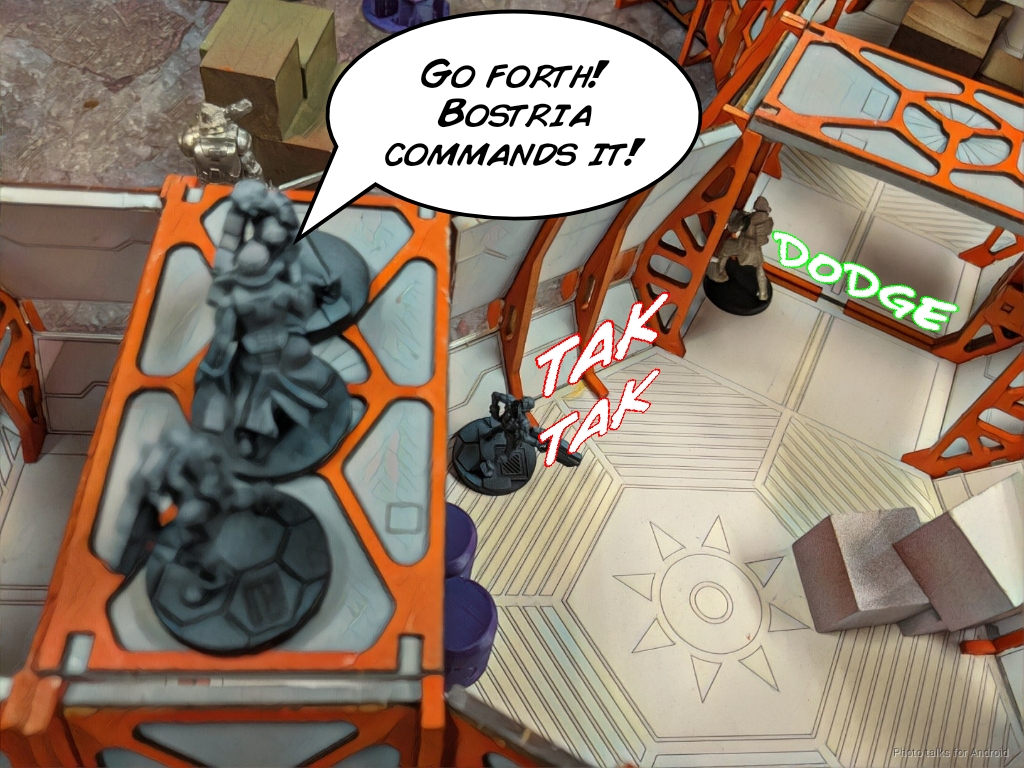
I reveal the Ninja and walk it out of line of fire of everything. Jordan discovers it with the Galwegian, and then I do some more coordinated orders to get the Ninja into base to base with the central objective (she was right there but I have to break camo to secure things) and to move everything into better positions to defend the central objective.
Of note is the single remaining Galwegian on my right, which is a quick two orders away from chain rifling the Ninja in the back. One of those coordinated orders got my Zhanying Lt up to the roof, and I gun down the Galwegian with his breaker combi.
I’ve got one more order left in my first pool and nothing really to spend it on other than buffing the Rui Shi to have burst two with the EVO. Yay! The EVO was relevant this game!
Bottom of 3 – CHA
Jordan decides he doesn’t want to use Scarface’s frenzy order, as that would bring him more outside and farther away from the objective inside the corridor. Instead, he activates the remnants of his Grey/Volunteer link and starts shooting at the Rui Shi. I manage to do a wound with the Rui Shi (thanks burst 2), but the Grey just goes dogged and finishes it off. This does drain precious orders though!
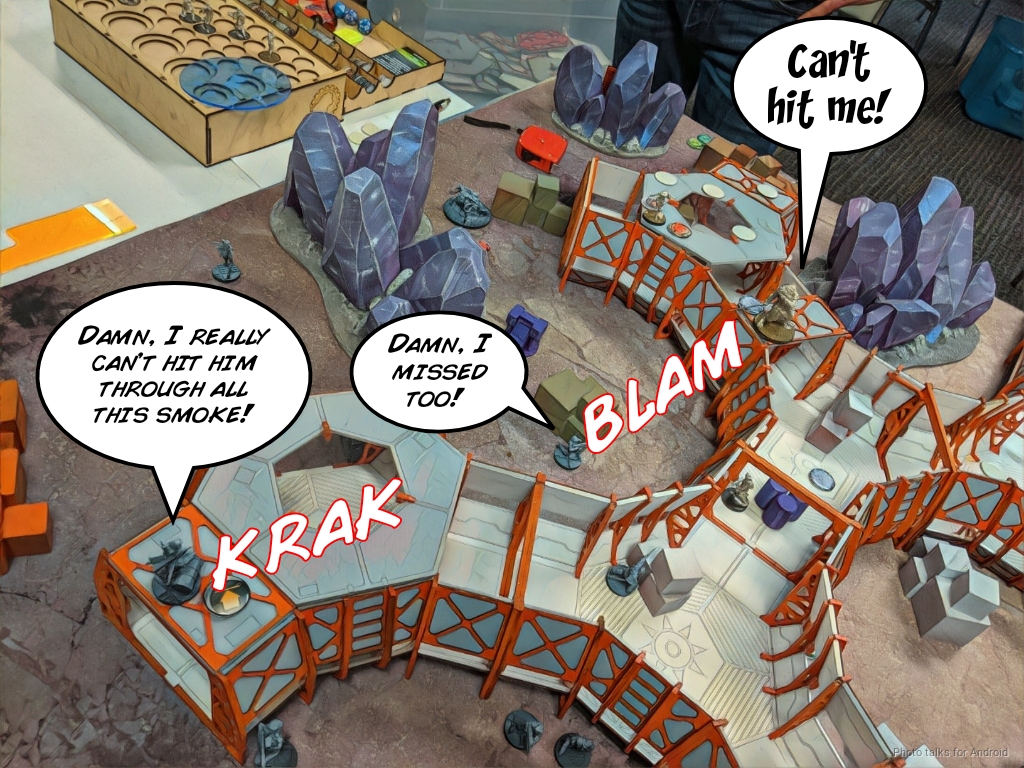
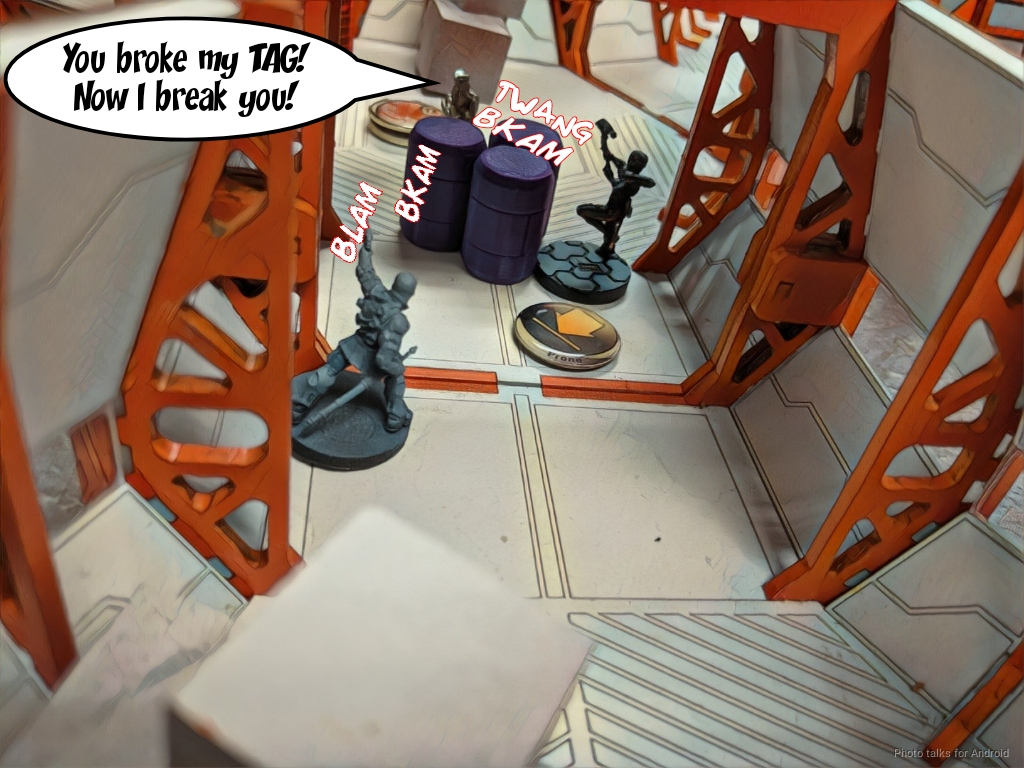
Scarface makes his attack run, shooting at the Ninja now that he’s moved up and can see the edge of her base behind the central objective. Thanks to TO camo, I manage to beat his roll and cause a wound with the Ninja’s humble Tactical Bow.
Scarface keeps coming, one wound left. He splits burst against the Kanren (1) and Ninja (3). I whiff with the bow, but Scarface rolls three misses as well. The Kanren plants an AP shotgun slug in something important and the TAG is stopped.
Jordan has more orders so he climbs the actual Scarface out and into base to base with the central objective, splitting burst with his LSG. The Ninja comes through for me again and Joe “Scarface” Turner discovers he’s got an arrow in his gut as the world fades to black…
6-0 Imperial Service Victory! 228 to 36 VP remaining.
Post Game Analysis
What a game. I didn’t have enough force projection on the left especially with all the orders that I threw at McMurrough while failing to kill or even wound him repeatedly. I really needed to get rid of Scarface earlier. I had quite decent odds to do it at the top of three with the Rui Shi:
| 65.63 | 25.35 | 9.02 |
29.43% to do two wounds, 7.67% to do three! Ah well. Three orders, one wound. Good thing my Ninja has mastered Kyūdō! I’ve hopefully done enough to discuss my reasoning and prioritization of things during the report itself, especially with regard to playing with a list that isn’t designed foor the mission. So, all of that said, I’m going to discuss things from Jordan’s prospective here.
I think Jordan made a few key mistakes:
- McMurrough – McMurder should have gone into the corridors to clear the way for Scarface. There was no need to have him on the outside–Scarface or the link could have handled any problems. Just stick him in there turn 1 & 2, let me waste my time to set up in there at the top of 3, then problem solve with Chain Rifles.
- Killing the Kanren – Why? This ties in with my earlier point about McMurrough being inside, but I wouldn’t have bothered with any of the other available tools there (TAG or link). The Kanren really wasn’t a threat. I suppose if I had gotten real cheeky I could’ve gotten smoke down and tried to Mono CCW Scarface, but the odds are pretty rubbish. 38.05% to lightsaber Scarface versus 25.75% to get punched in the face by a TAG? No thanks. Yes, it removes an order, but I have more or less a full pool. One order’s not going to do anything to my Turn 3 plan.
- Smoke – I only have the Rui Shi to see through Smoke and between the 112, the Galwegians, and the Grey, there was plenty of smoke on the table. I didn’t really think about it at the time–it’s hard to play two games at once and part of the reason I do these reports is so I can play the game from my opponent’s perspective later without stress. Anyway, I would’ve mentioned it had I thought about it, but there was a path to getting Scarface to the objective using smoke and without having to deal with the Ninja or the Kanren. You still have to kill the Ninja to get the win, which is perhaps why Jordan didn’t do it, but you can at least deny me 3 points and the major.
The key mistake was McMurrough being outside and not inside. That’s why I named this battle report “Filed in Triplicate” because of the “three tables.” McMurrough was basically on the “wrong” table to be effective at winning the game. I don’t think Jordan had a hope of killing more–he could have had a 7-3 win. All he had to do was throw smoke onto the objective, use McMurrough to intuitive attack the Ninja through the smoke, and finally get Scarface into base to base.
Of course, as I always suggest, we have to remember and reflect upon what we did well after each game! Otherwise, how will we remember to do it the next time?
- Loss of Lieutenant Recovery – Losing Wallace suuucks. I think Jordan did a great job throughout the game of handling this. He leveraged the Galwegians quite well still. I do think that suiciding the one in to clear the MadTrap was a bit of a waste, but oh well. Using Scarface to kill Lunah in the LoL turn was good too.
- Carefully Shepherding Scarface – Jordan knows that if he leaves Scarface out, I’ll do my best to kill it. He did a great job of keeping Scarface hidden until the bottom of 2. I tried killing him at the top of 3, super hard, but dice are dice. That was my one active turn window, basically.
As I’m writing this, I realized I could’ve used (abused?) the spec-fire rules to spec-fire some smoke onto the central objective. Yes, the grenade would have to roll backwards, fall off the roof, go through a door, and then roll its way up. Very, very silly, but I guess we can think of it like those seeker mines from Tom Clancy’s The Division. I didn’t think about it at the time because it’s not intuitive.
Anyway. Very tight game, could’ve ended with a win for Jordan if everything went well for him on the last turn. Just goes to show you the power of going second.