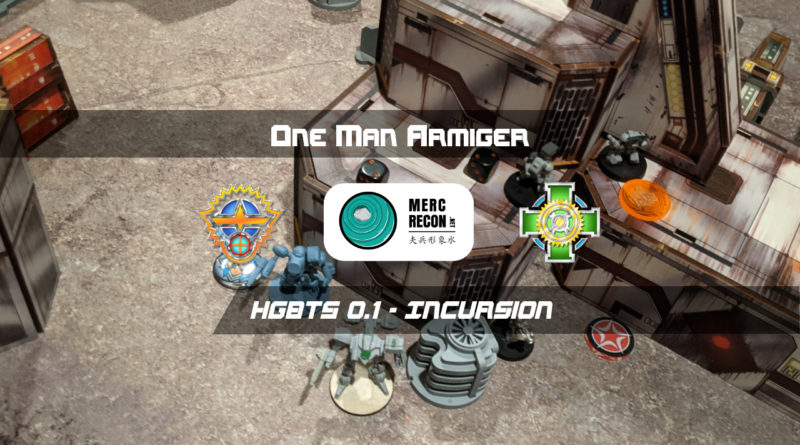
One Man Armiger
Adam and I are still testing away on the tournament rules system we’ve developed with Nick, the Heavy Gear Blitz! Tournament System:
We’re following along with the Lumbering Sprocket playtest mission here:
It seems that most people have been playing at 100TV, based on their responses to the mission so far. I’m convinced that 150TV “feels right” for list building, but there’s definitely a play speed issue for tournaments, which means that the missions should work at 100TV and be balanced for them as well. Even if veterans can play a 150TV game in 2 hours, that doesn’t mean that newbies can play at that speed. To enable 3 round single-day tournaments that remain fun instead of being slogs, we’re considering recommending that metas with newer or returning players play HGBTS at 100TV instead of 150TV. Once the play group is more experienced and plays faster, the move to 150TV can take place.
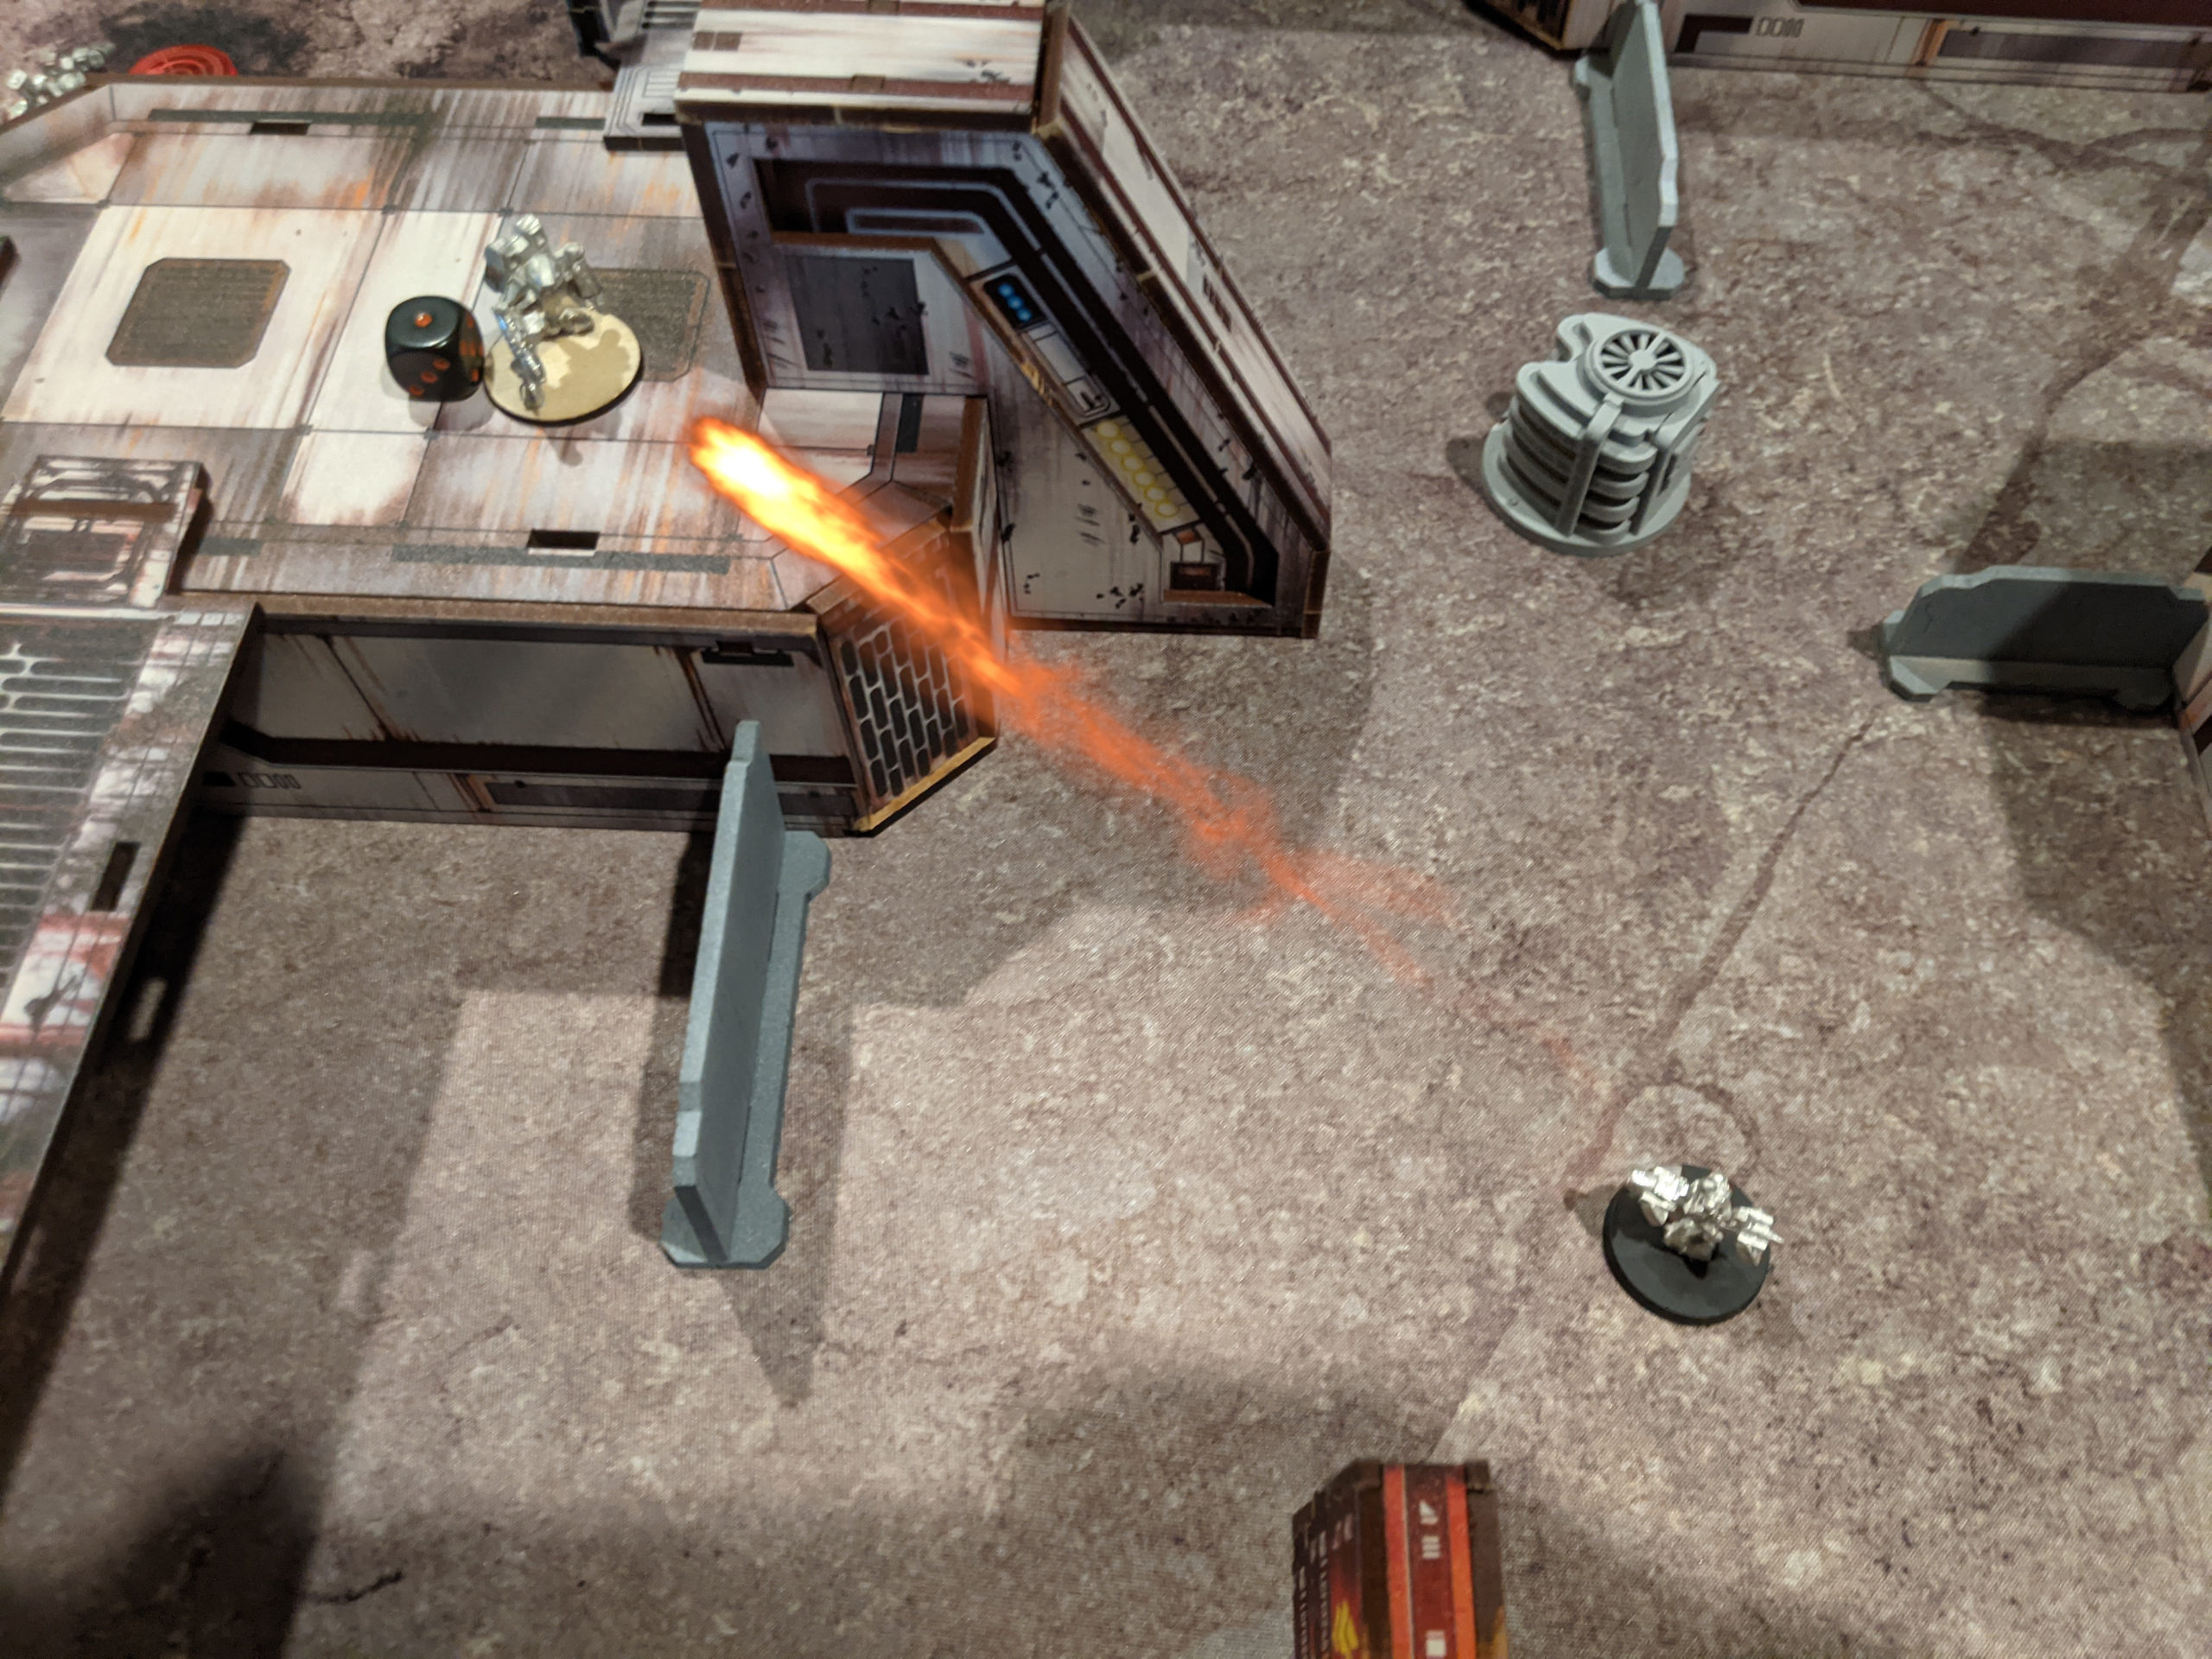
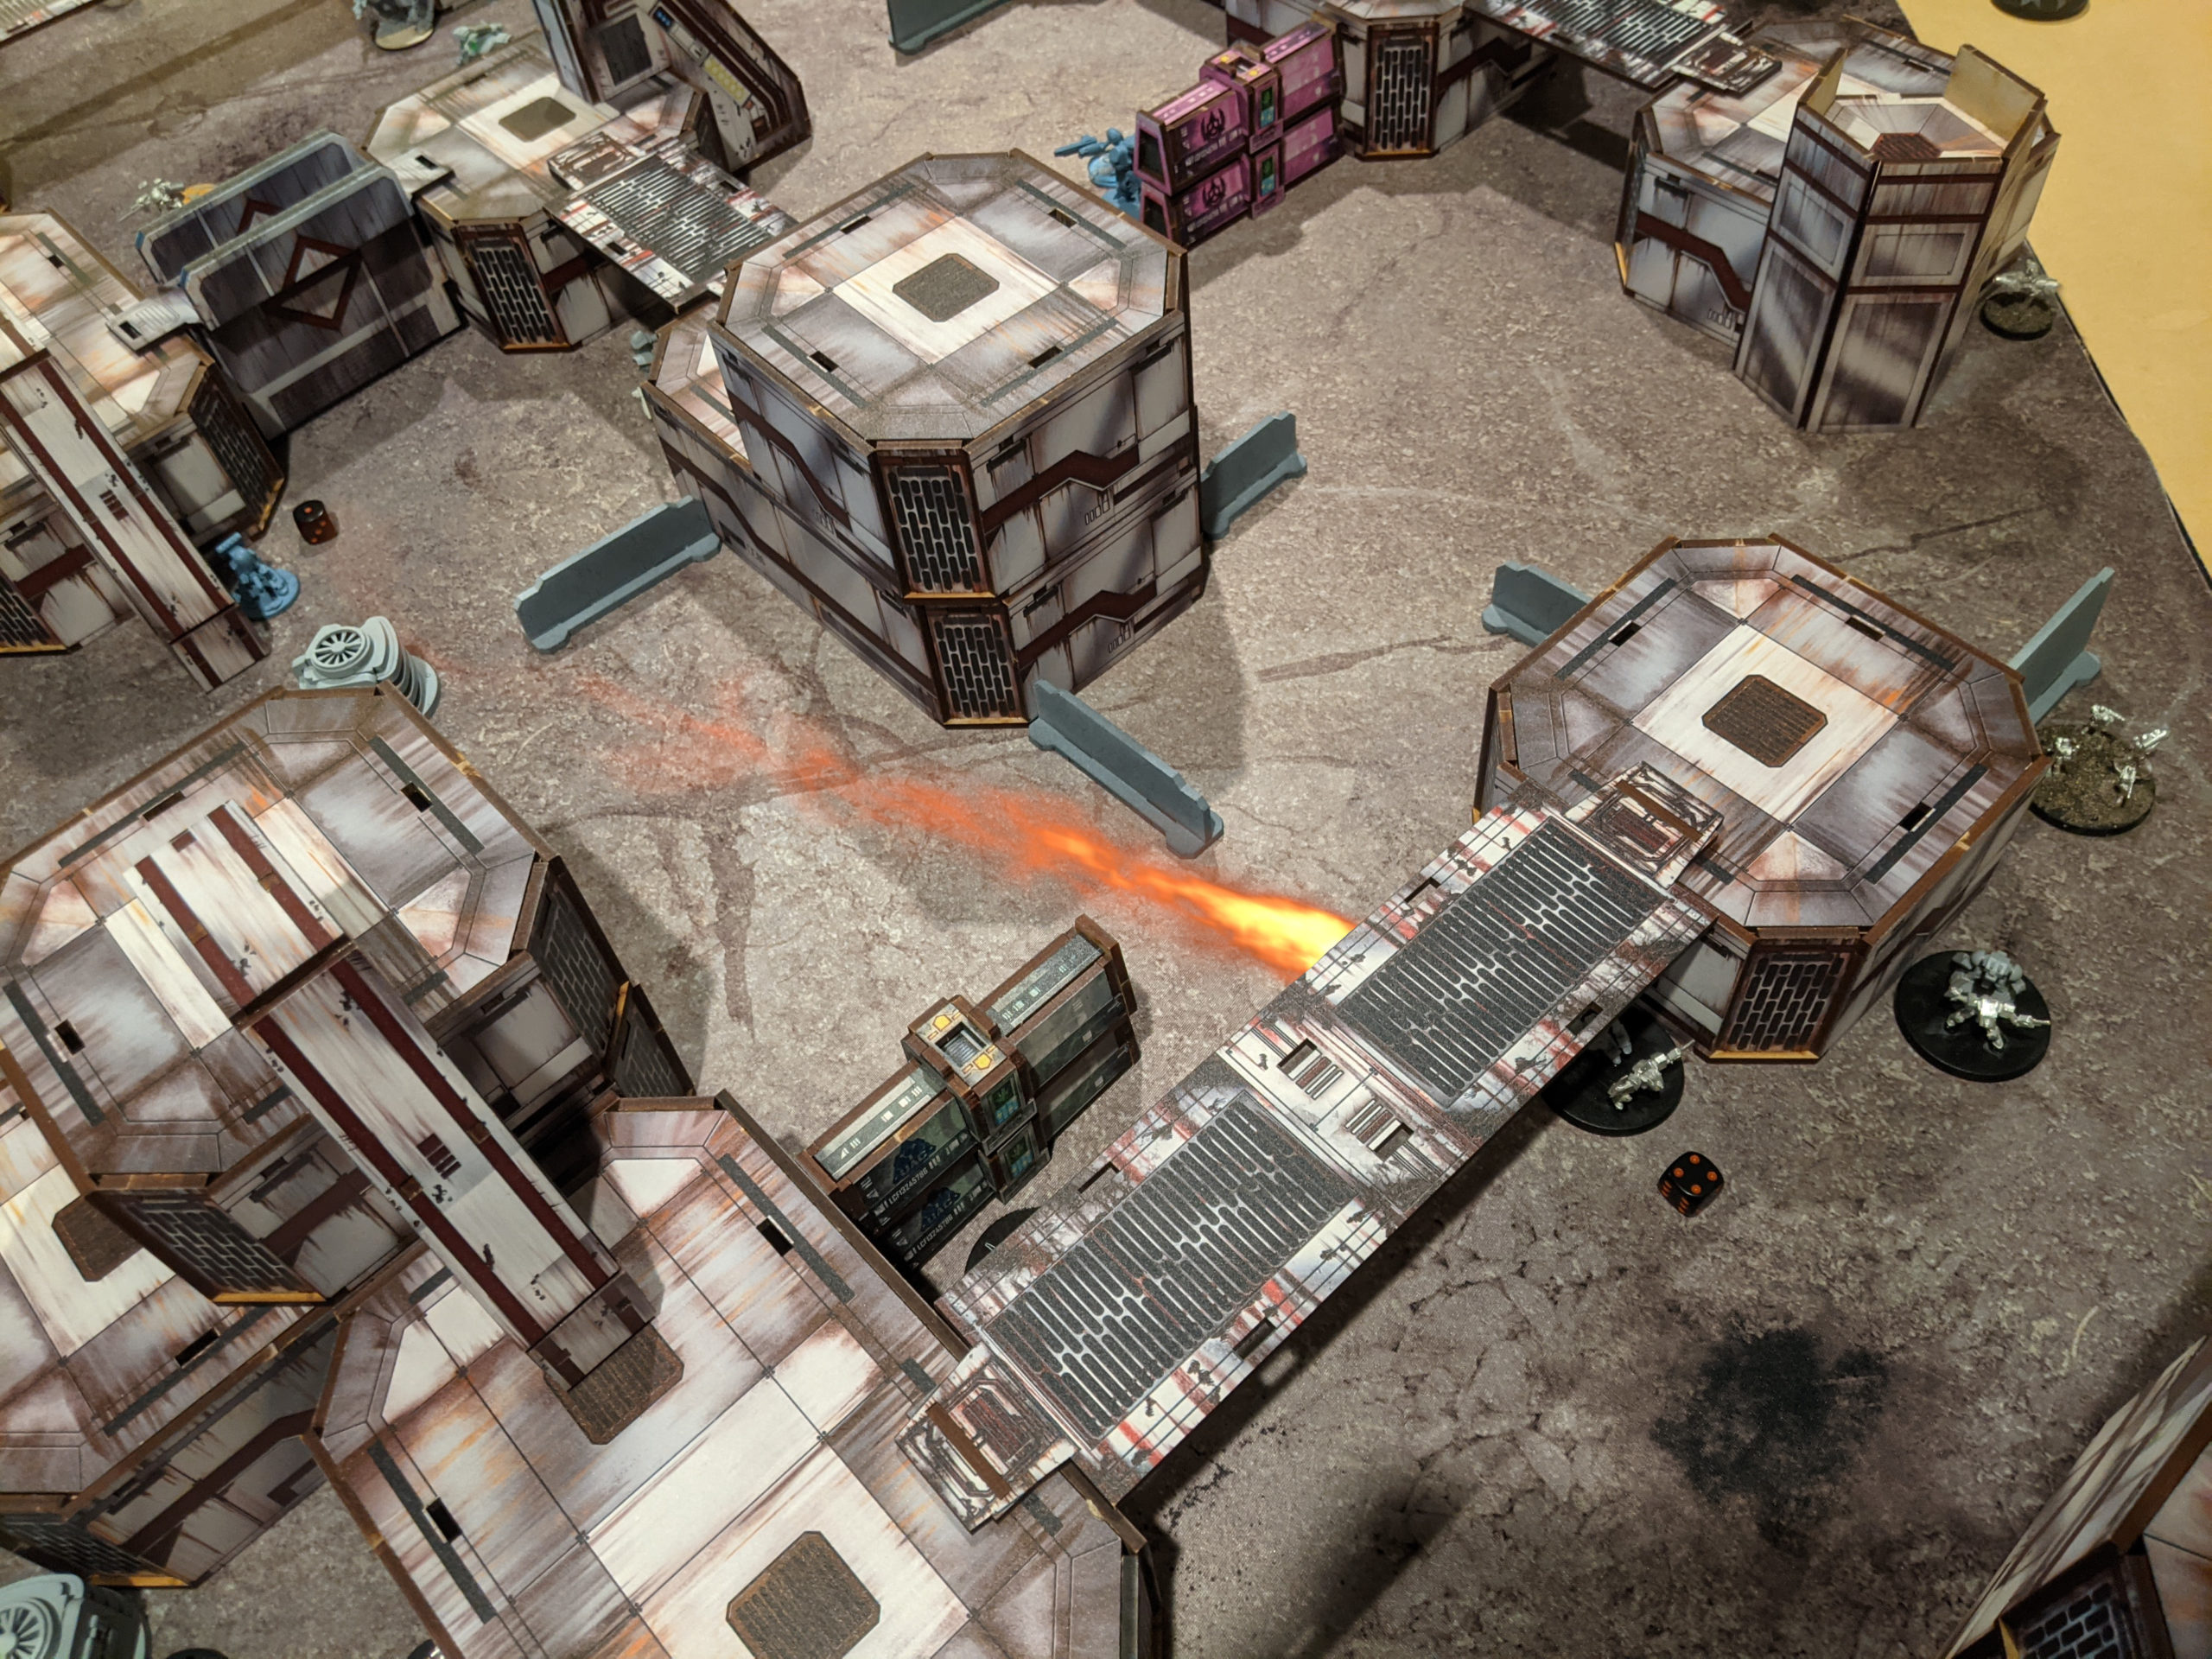
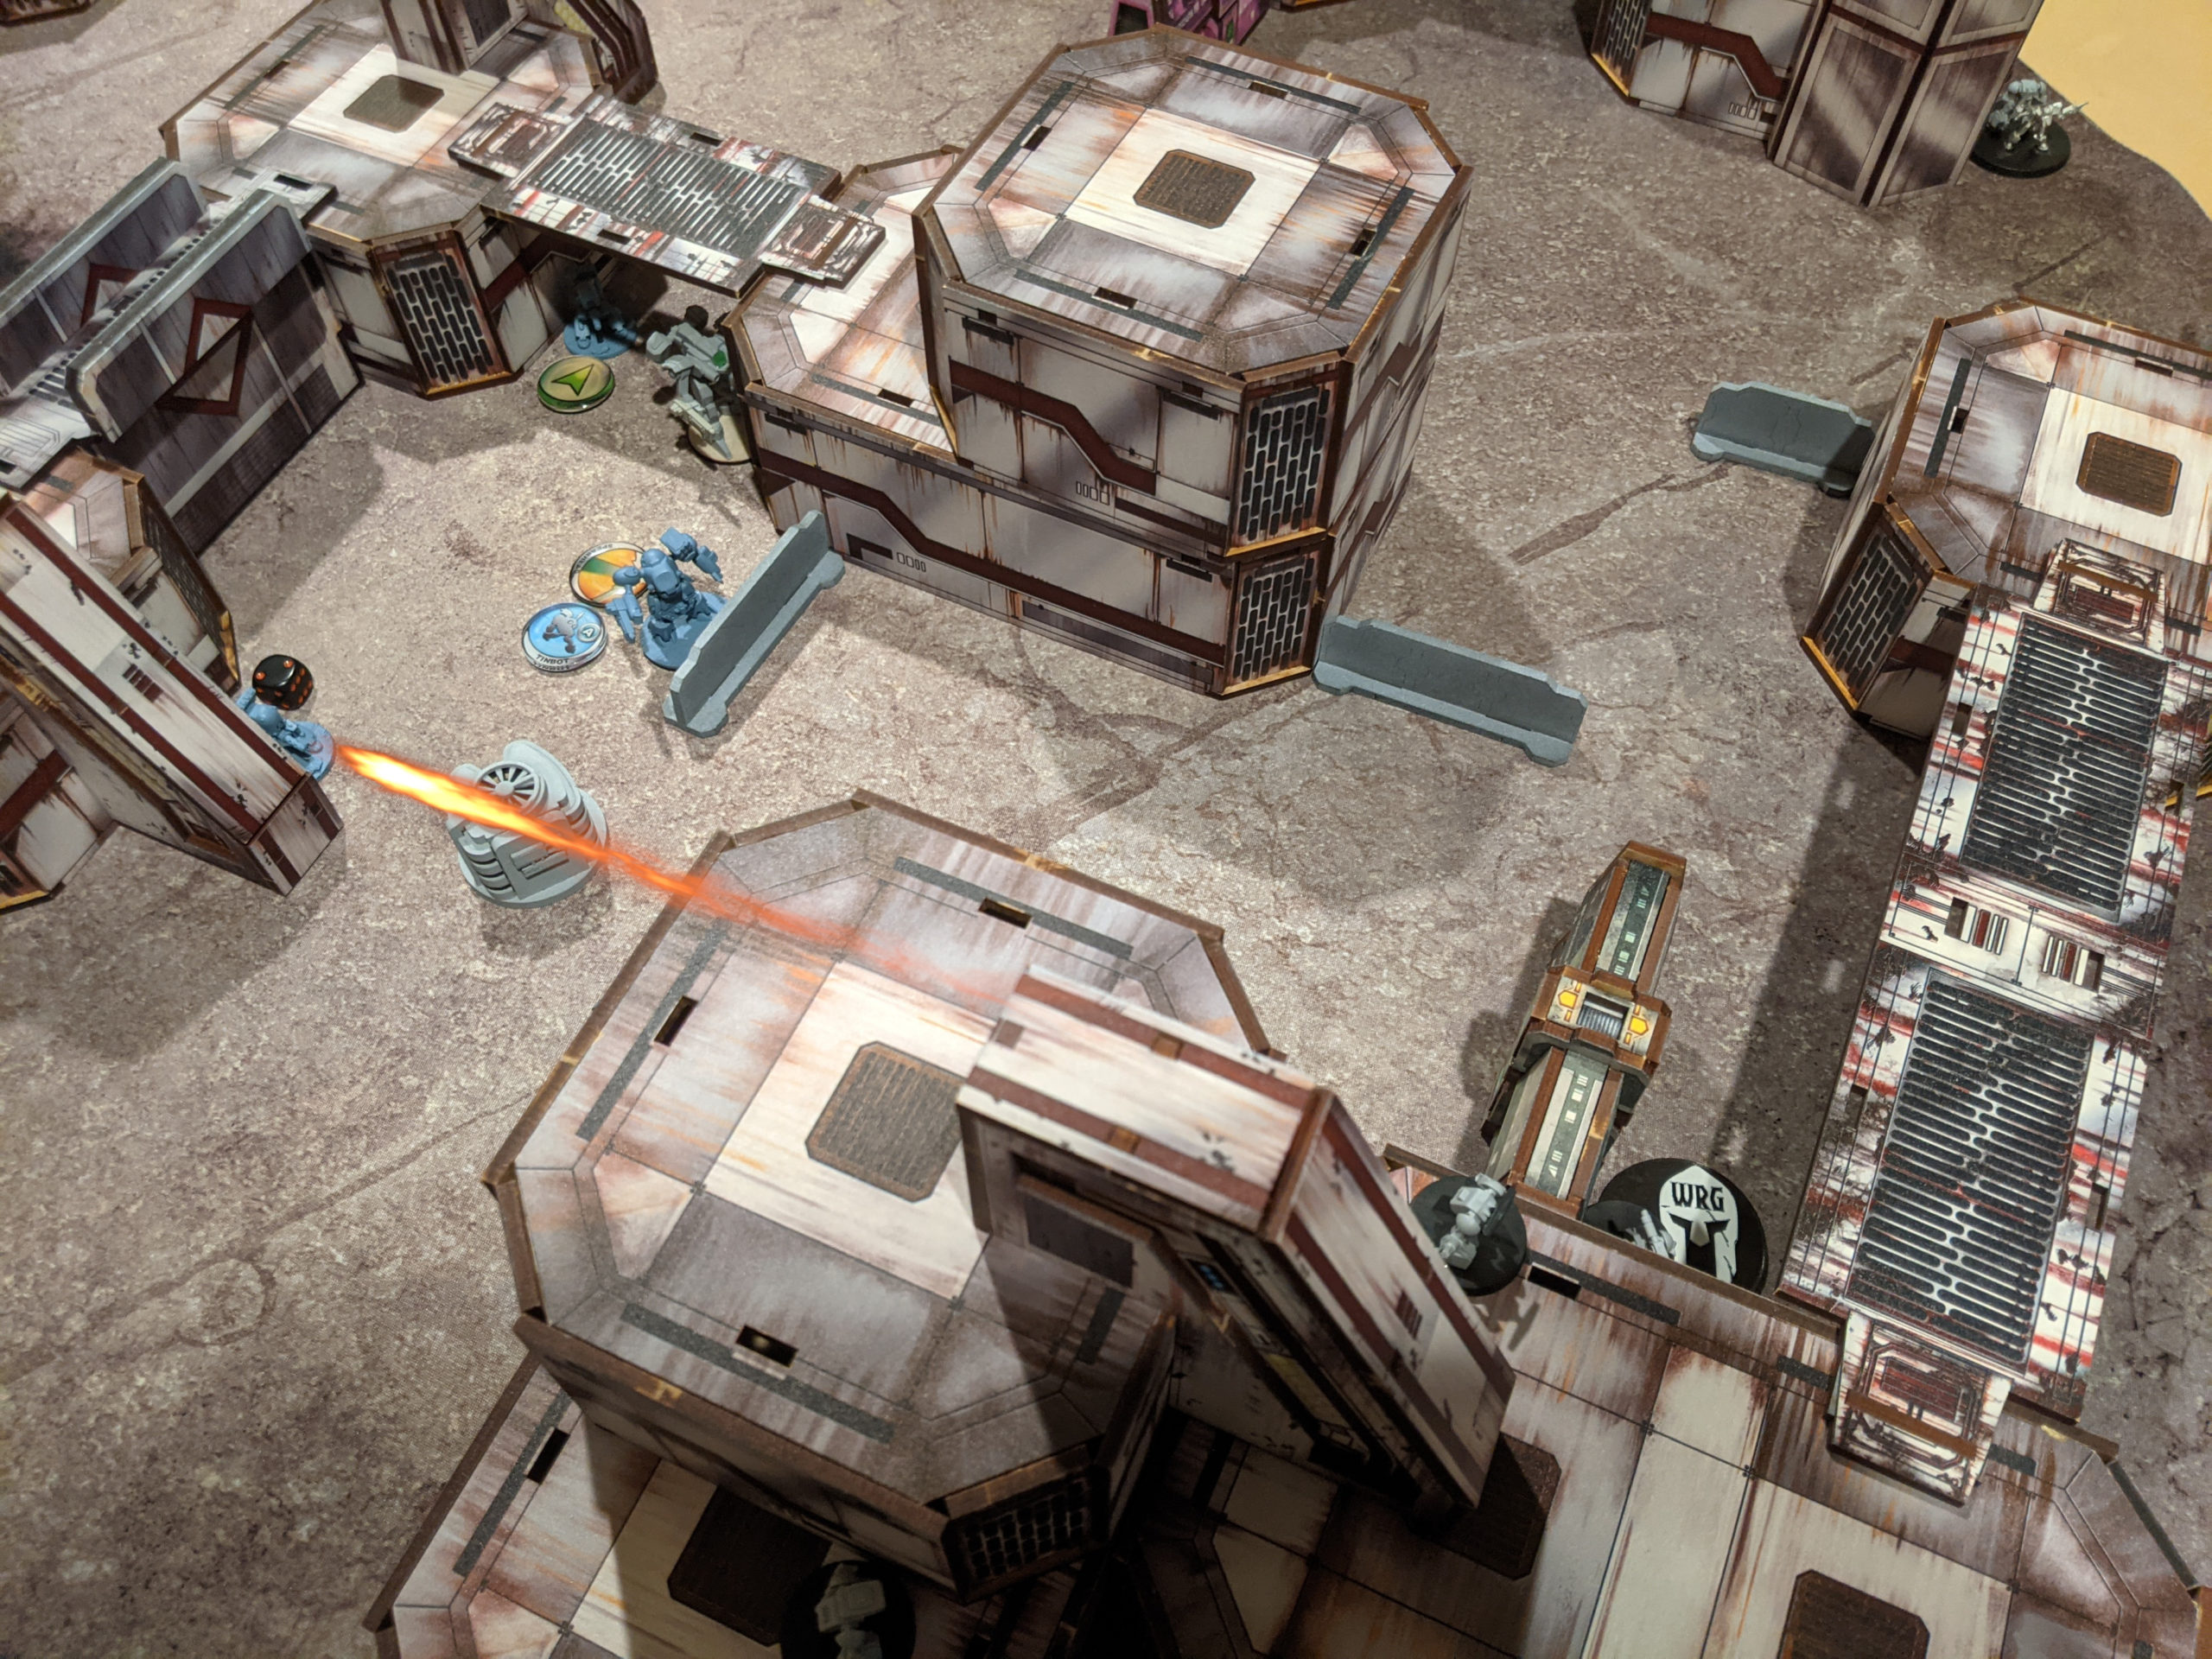
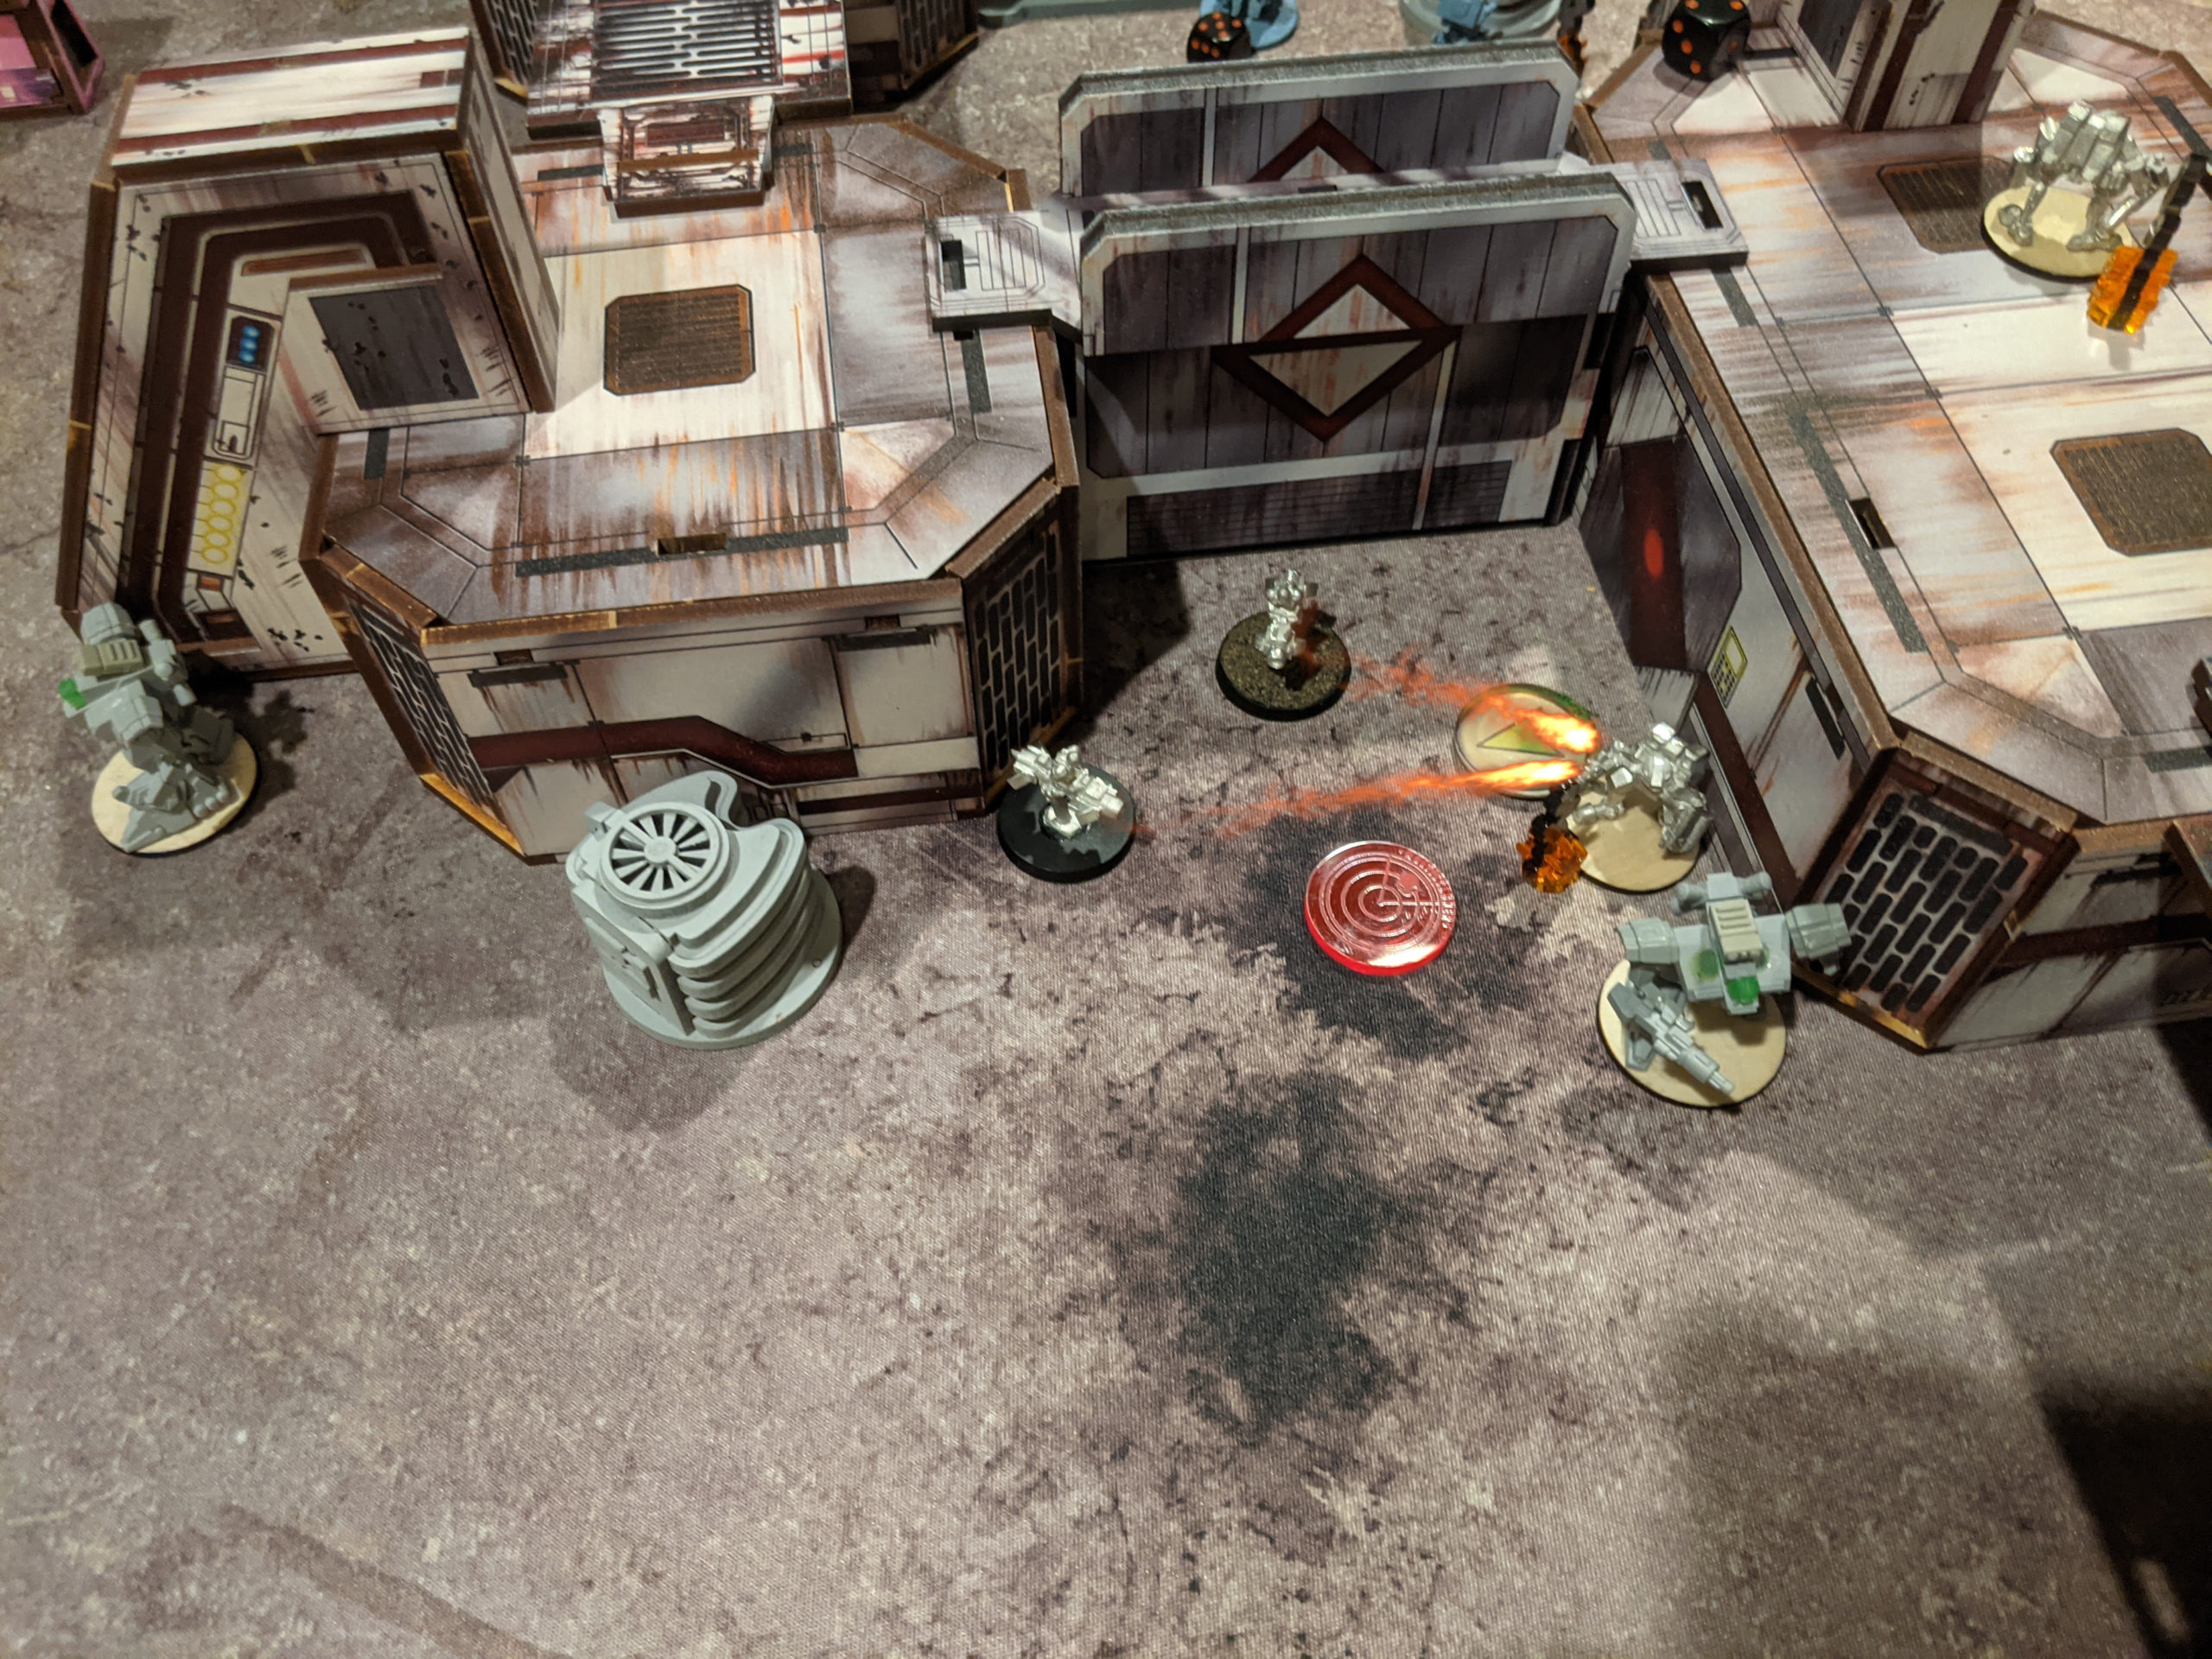
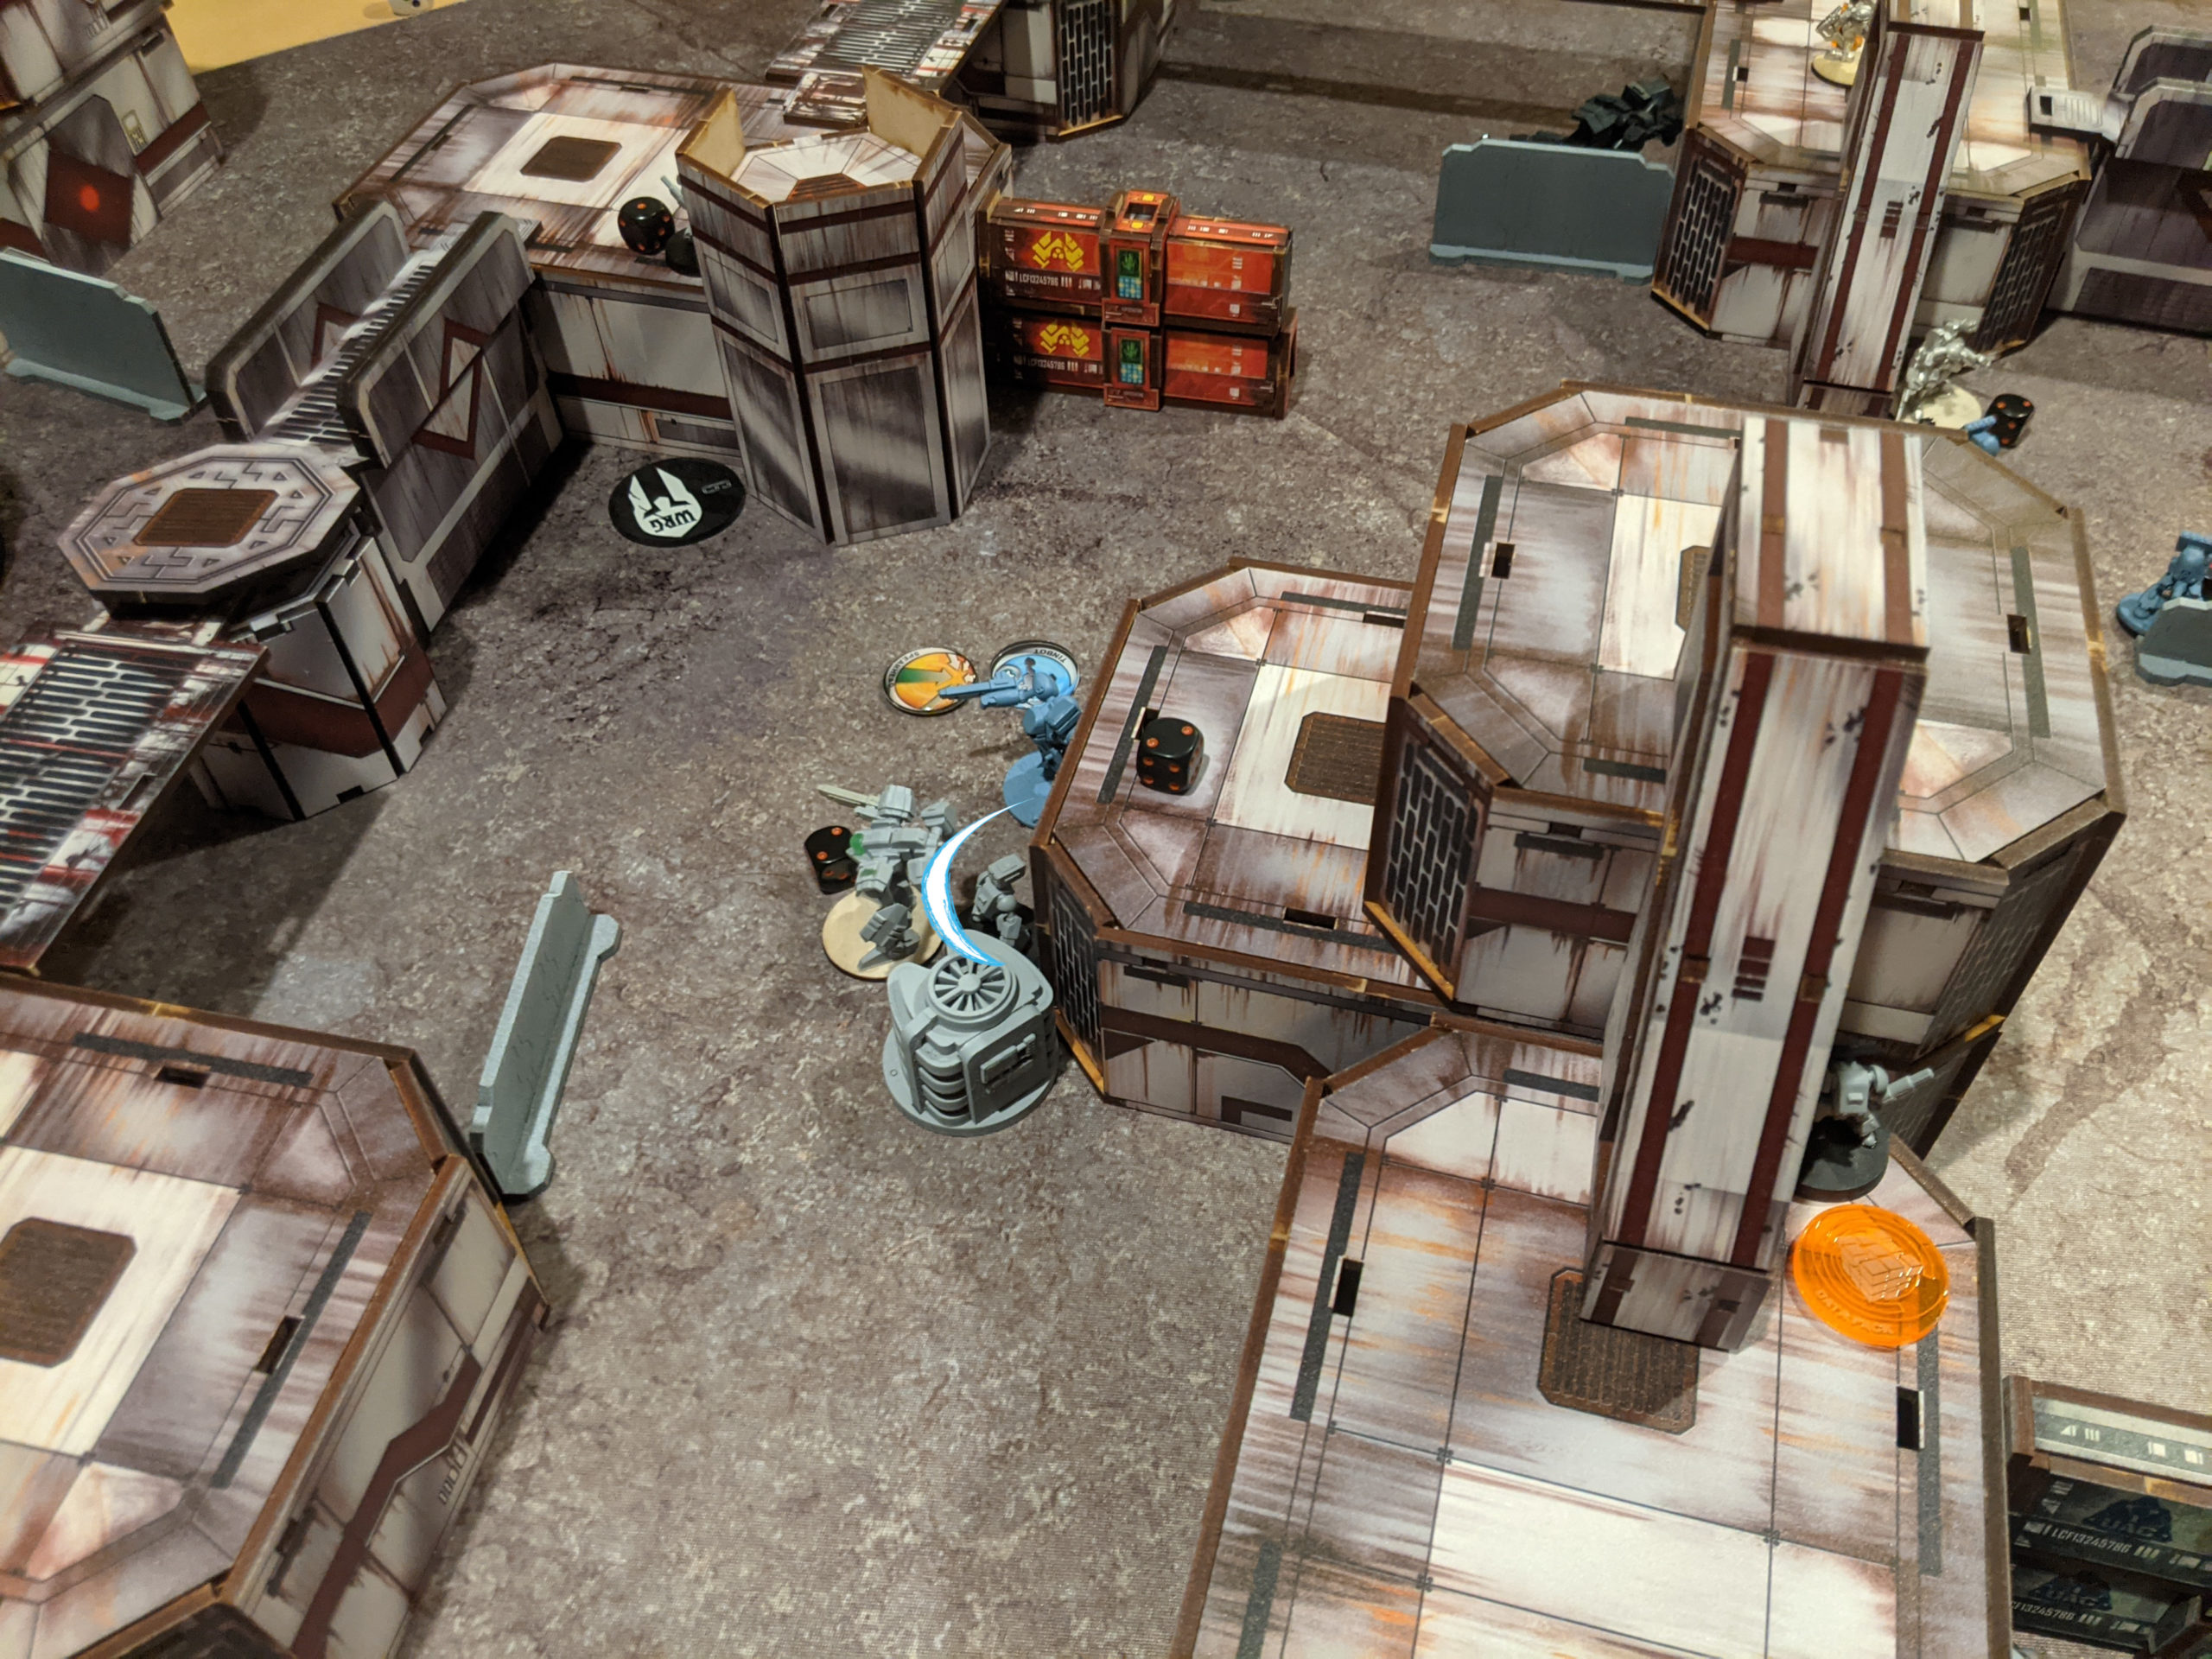
One of the nice things about 100TV is that it’s played on a 4×4 table, which is just easier to transport and store. It also means I can use my Infinity tables! Adam and I have also been thinking about Jetpacks, but they’re mostly useless on Adam’s table. To really give Jetpacks a proper test, I put down my mostly scale agnostic copy of the Strompost Alpha table from Muse on Minis.
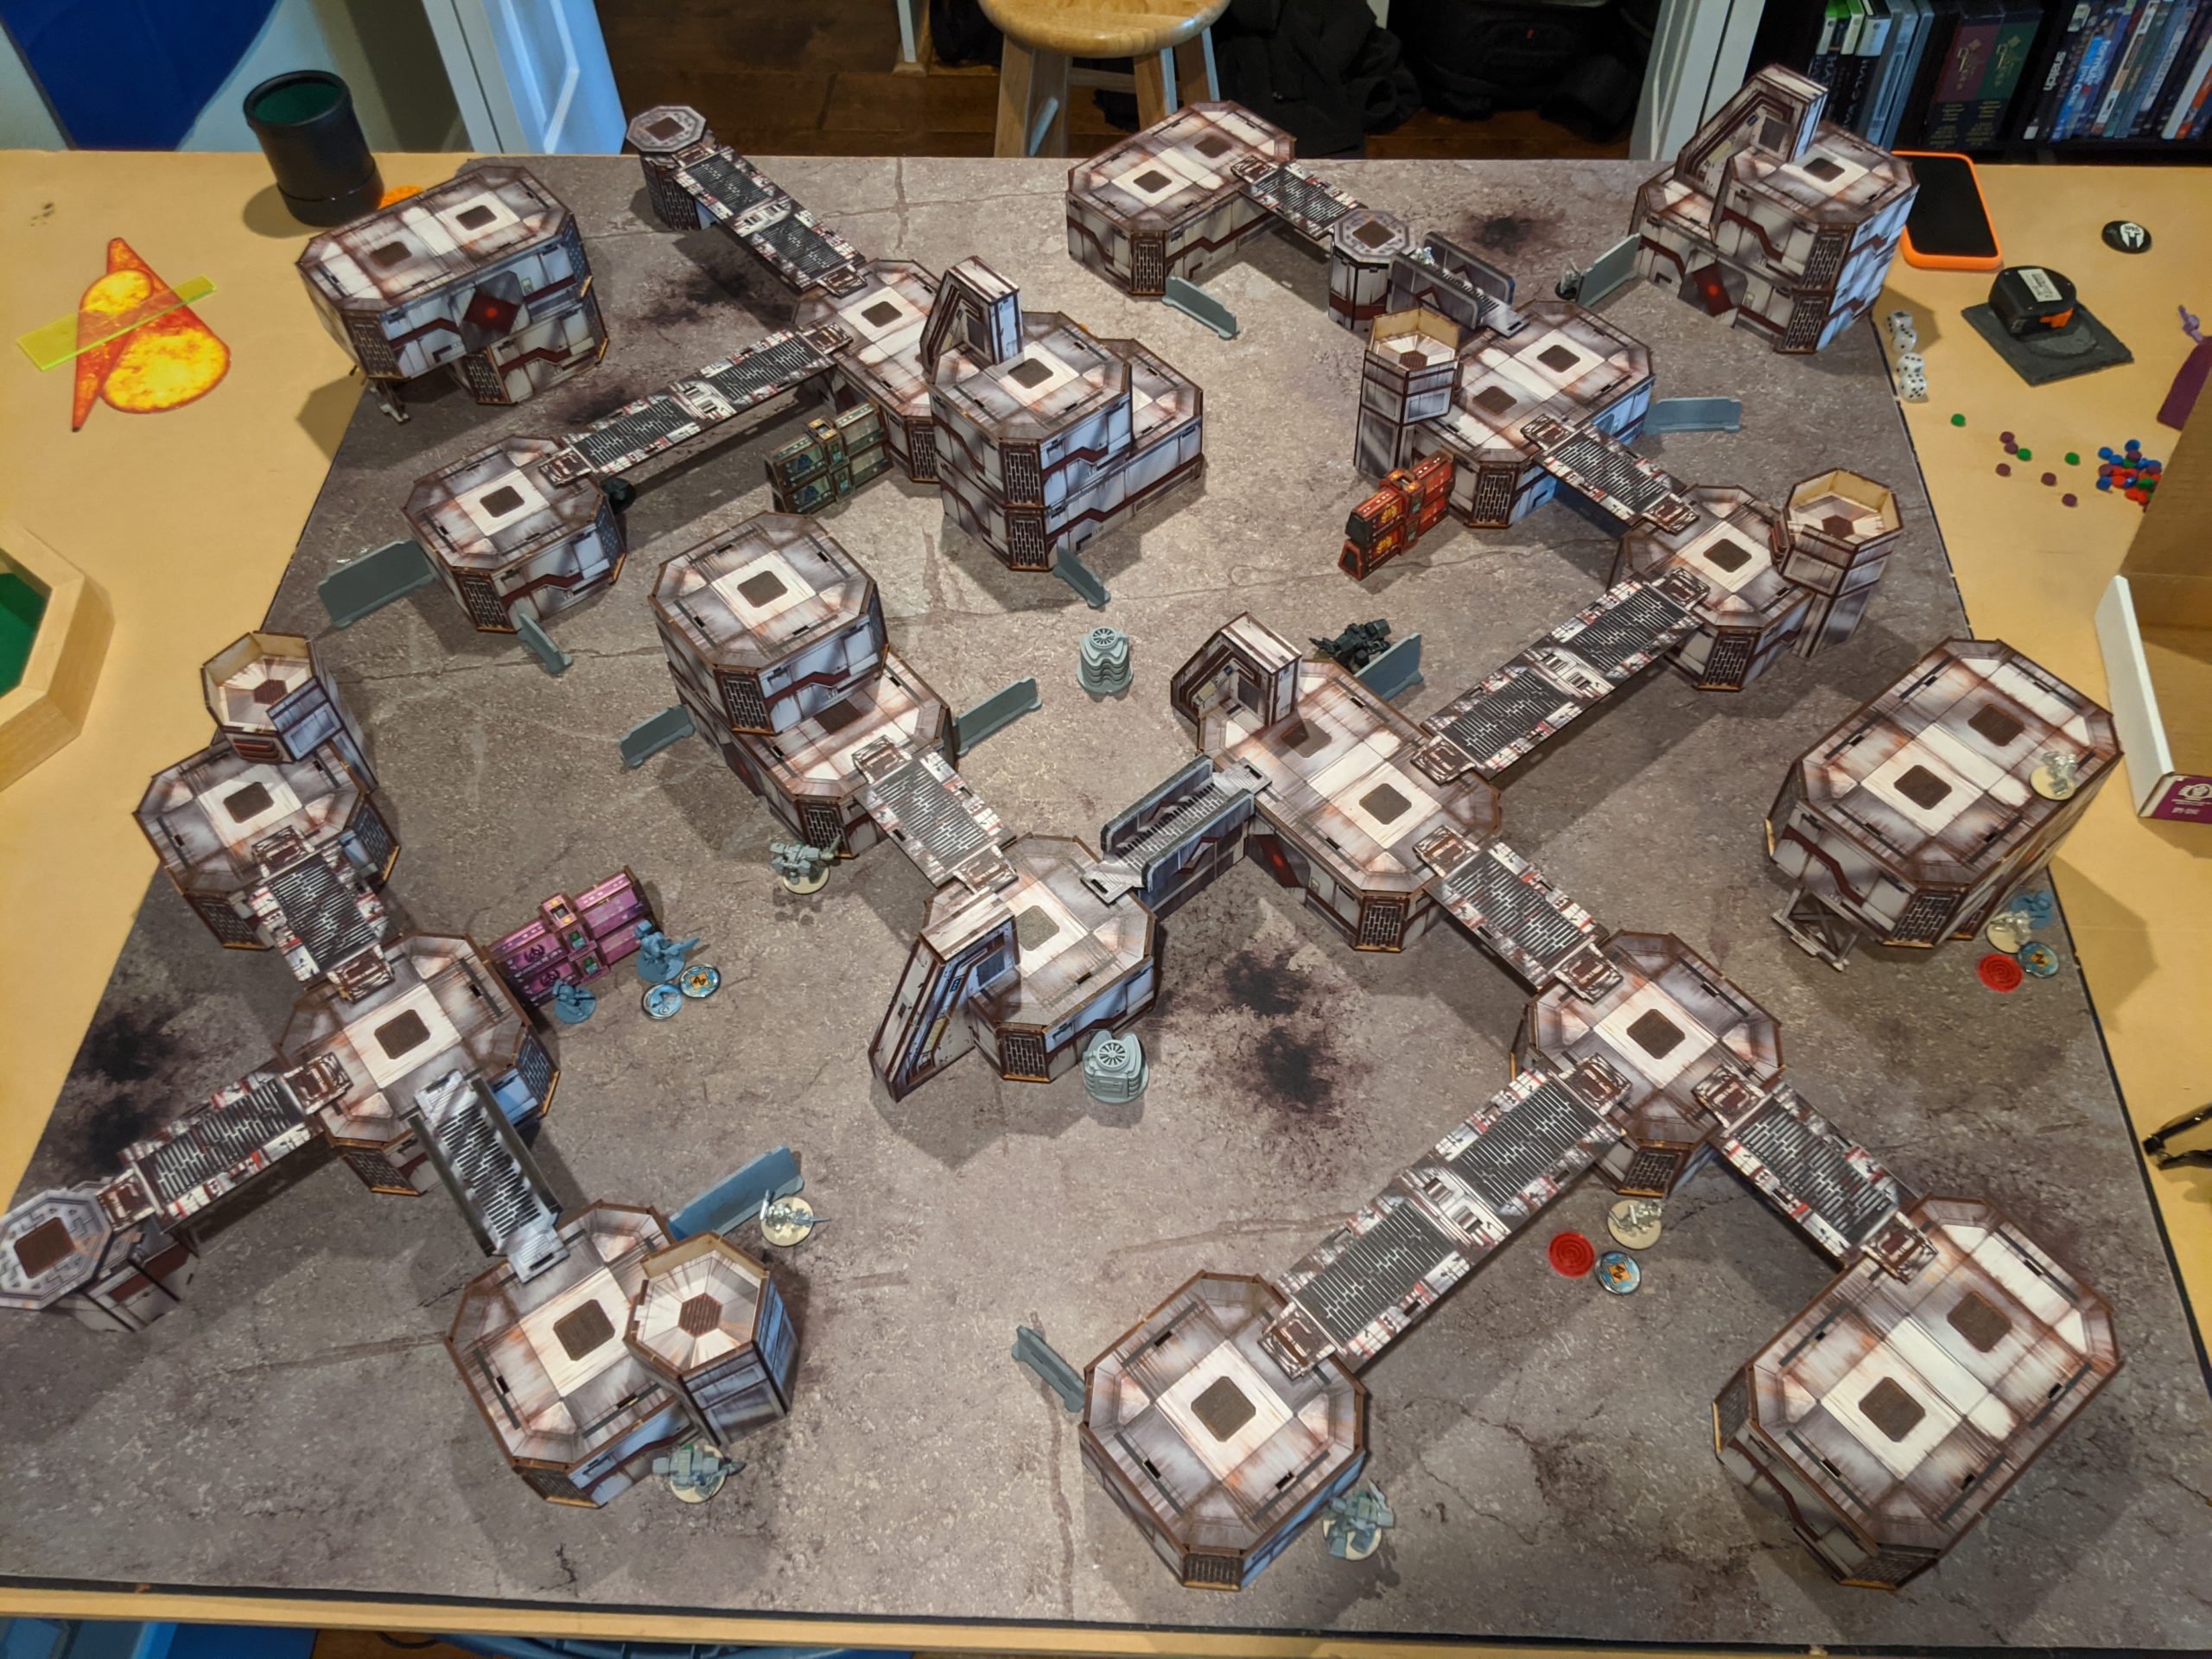
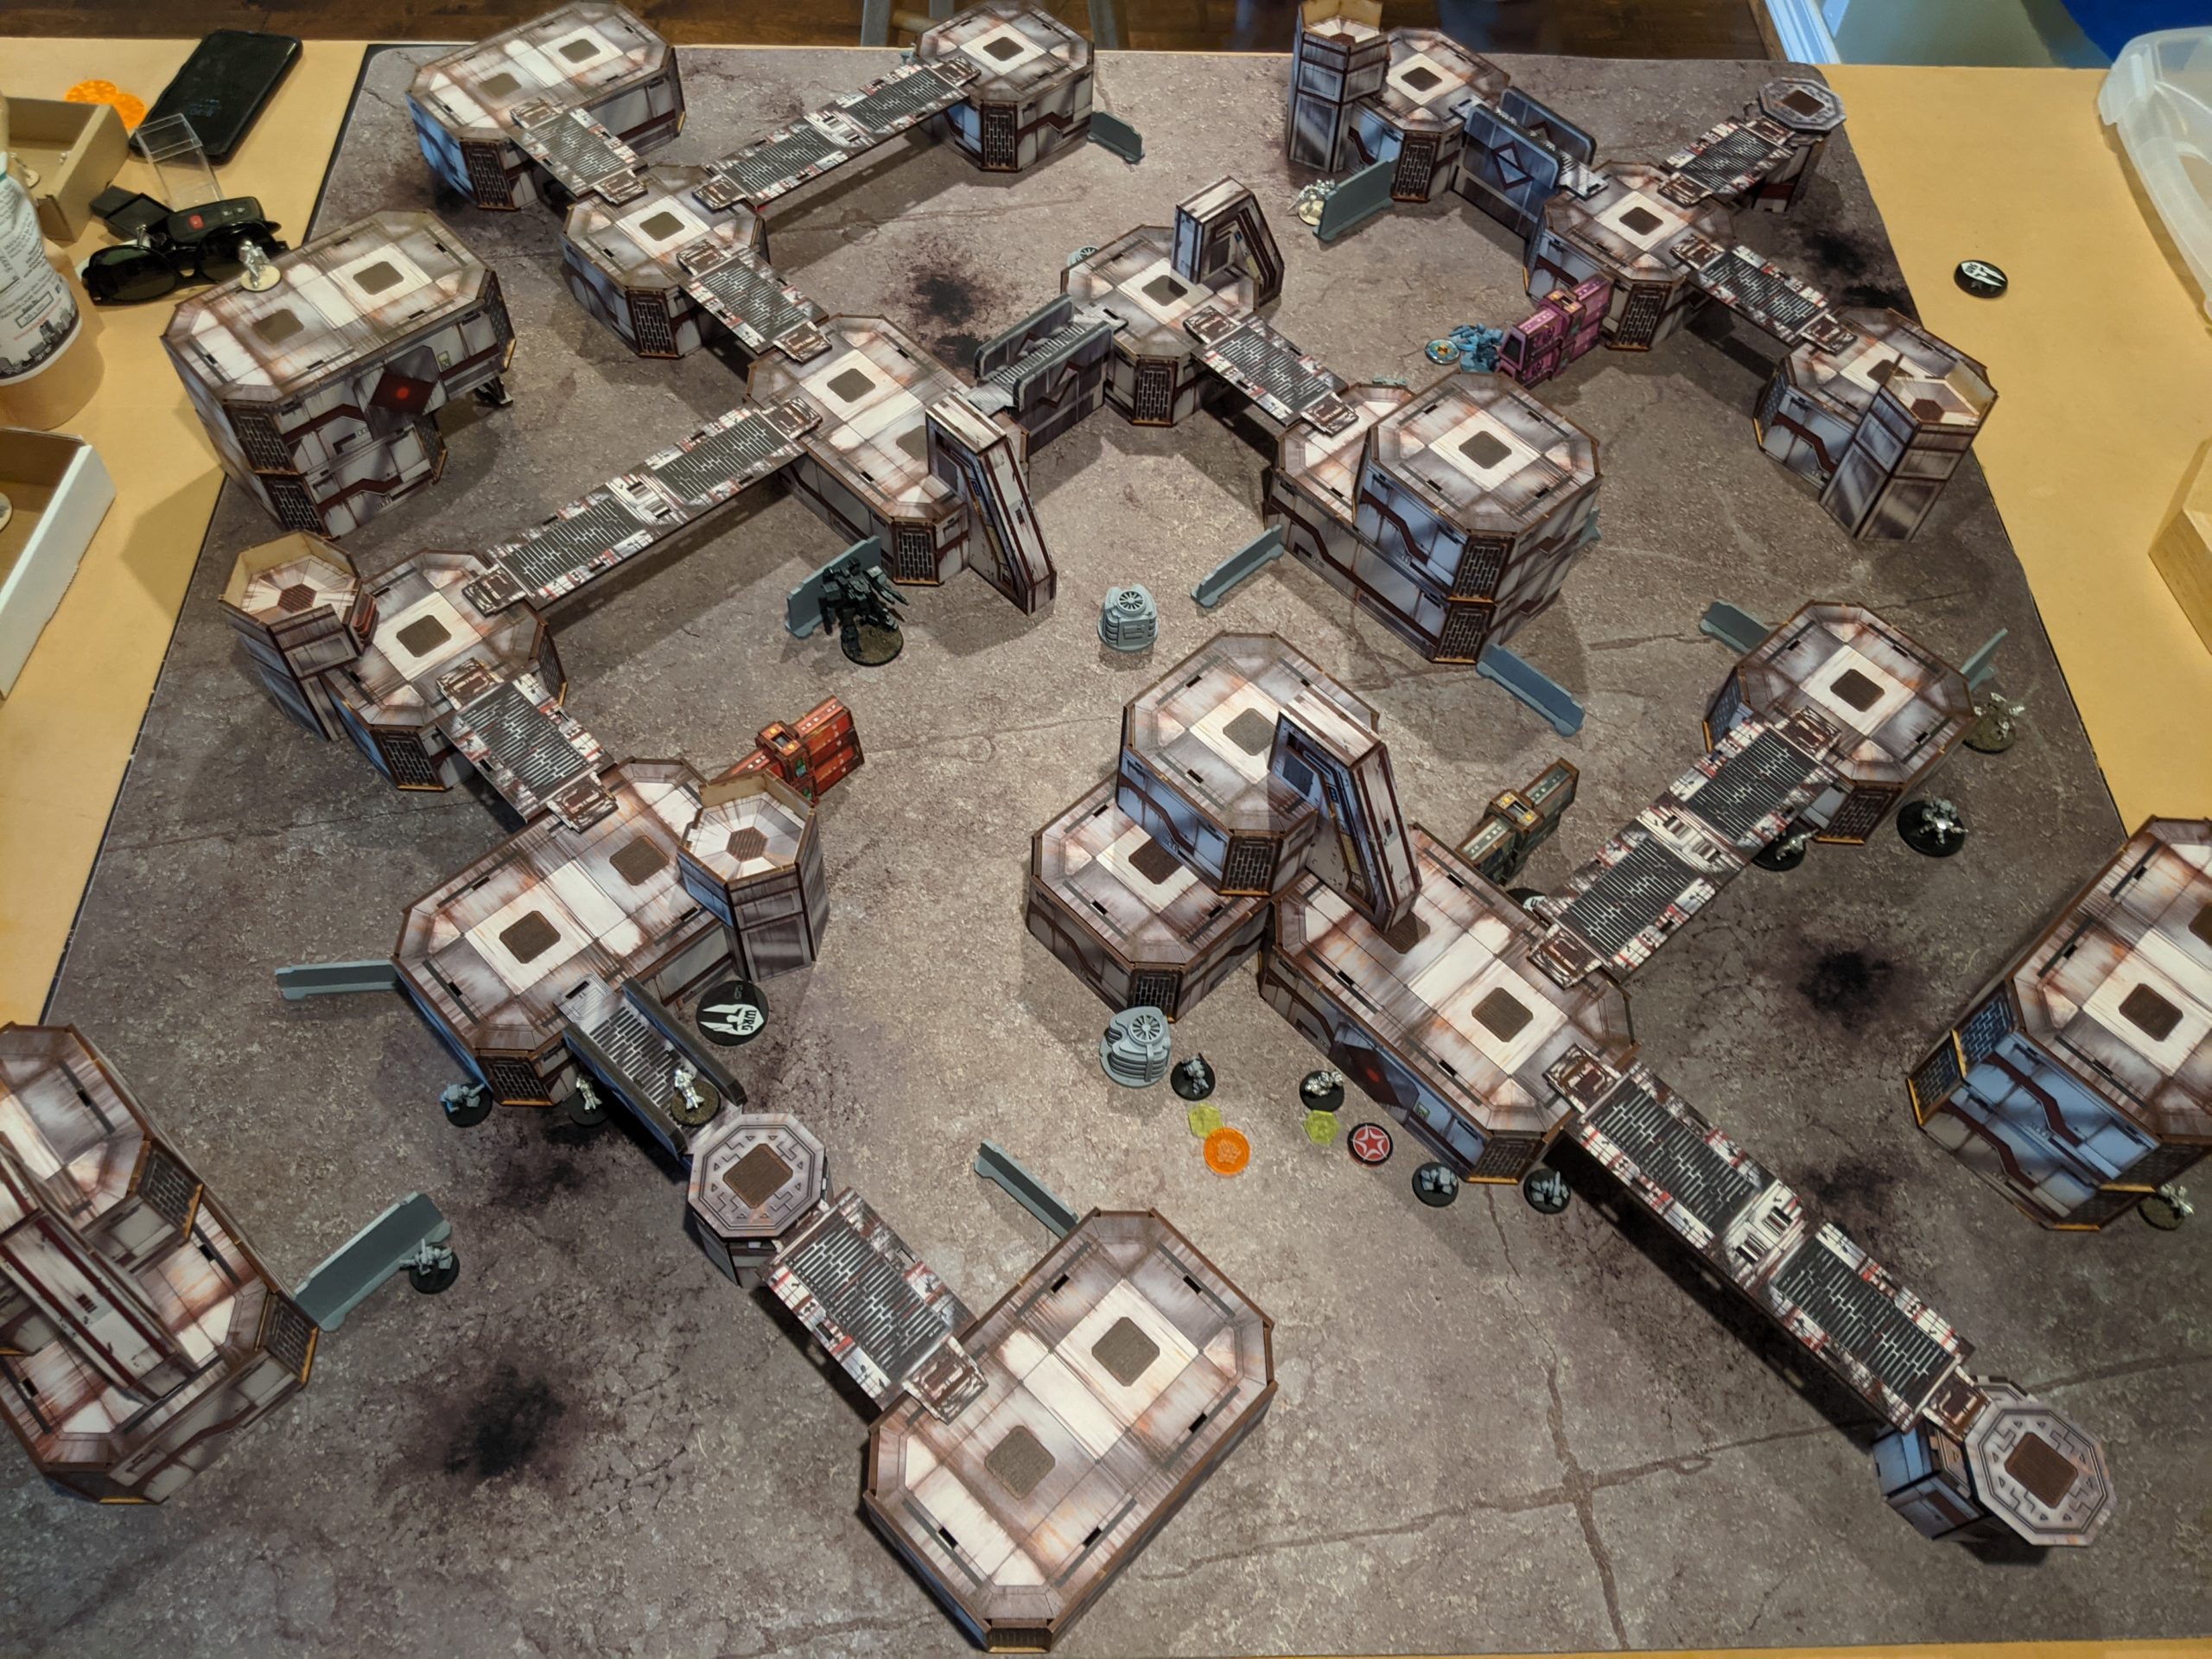
The table was probably a little dense, and we considered all buildings to be heavy cover (i.e. no sensor). All the scatter was medium. I think in the future it would be interesting to make the grey walls light cover.
Overview
This month’s Lumbering Sprocket mission calls for playtesting of High Ground, Incursion, and Sector Control. The mission that we were missing between the two of us was Incursion, so we decided to give that a go. If you’re interested in how our other games went, you can check here:
We went with the same matchup as our previous game, mostly for fun.
- Mission: Incursion (HGBTS 0.1)
- Forces: CEF versus Utopia
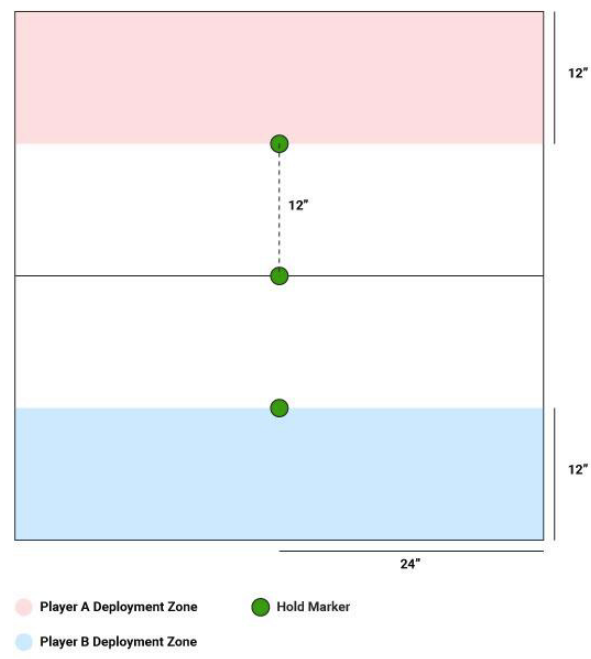
Incursion is basically Seize the Antennas from Infinity, with a line of hold/capture objectives across the midline of the table running from one player’s deployment zone to the other. The objective is to have more models within 4″ and LoS of the marker at the end of the game. Each marker is worth 1 point, except the farthest marker from you, which is worth two points. The same is true for your opponent.
Incursion encourages speedy, durable units and mid to late game aggression. Midfield control is also very important to protect your hold marker. I decided that I would try spamming FLAIL, just to see what that was like. My list started off with my normal Jetbike spam, and then went into new territory. I’ve been exploring the idea of melee specialists to deal with Adam’s ECM spam, so I took a couple of Morgana FLAILs. To back them up with some teeth at range I threw in a BF2-25 Anti-Tank and a Morgana GREL sniper squad.
| Model | TV | A | Weapons (React) | Weapons (Mounted) | Traits | |
|---|---|---|---|---|---|---|
| CG1 GP |
GREL Hoverbike Squad Jan Upgrade, Single | 5 | 1 | HIW, MIGL, MICW | Agile, Jump Jets:2, Comms | |
| GREL Hoverbike Squad Jan Upgrade, Single | 5 | 1 | HIW, MIGL, MICW | Agile, Jump Jets:2, Comms | ||
| GREL Hoverbike Squad Jan Upgrade, Single | 5 | 1 | HIW, MIGL, MICW | Agile, Jump Jets:2, Comms | ||
| GREL Hoverbike Squad Jan Upgrade, Single | 5 | 1 | HIW, MIGL, MICW | Agile, Jump Jets:2, Comms | ||
| CG2 SO |
BF2-25 Anti-Tank MRL Upgrade | 13 | 1 | LCW, MRL | LATM (LA:2) | Hands, Agile, Airdrop, ANN, Stealth (Aux), Jetpack:6 (Aux) |
| Morgana GREL Sniper Squad | 6 | 1 | MIW, MICW | HIR (Silent) | Agile, Brawl:1, Stealth | |
| Morgana FLAIL Squad | 7 | 1 | HMG, HICW (AP:1) | Agile, Brawl:1, Stealth, Jetpack:4 | ||
| Morgana FLAIL Squad | 7 | 1 | HMG, HICW (AP:1) | Agile, Brawl:1, Stealth, Jetpack:4 | ||
| CG3 SK |
Command FLAIL Squad Single | 5 | 1 | HMG, MICW | Comms, SatUp, Jetpack:4 | |
| FLAIL Squad Single | 5 | 1 | HMG, MICW | HIL | Jetpack:4 | |
| FLAIL Squad Single | 5 | 1 | HMG, MICW | HIL | Jetpack:4 | |
| FLAIL Anti-Tank Squad Single | 6 | 1 | HMG, MICW | HAVM (AP:2) | Jetpack:4 | |
| FLAIL Anti-Tank Squad Single | 6 | 1 | HMG, MICW | HAVM (AP:2) | Jetpack:4 | |
| CG4 SK |
BF2-19 Assault Mobility Pack | 16 | 1 | MRL, MCW | MRP, LATM | Hands, ANN, Shield, React+, Airdrop, Jetpack:5 (Aux) |
| + Duelist for non-vet | 2 | Vet, SP:1, Duelist | ||||
| + Duelist: Push the Envelope | 1 | Agile | ||||
| + Vet: Trick Shot | 1 | TrickShot | ||||
| Total | 100 | 14 |
Then came my FLAIL spam squad, with two HIL, two HAVM, and one Command FLAIL. I figured the HIL would be great against Adam’s N-KIDU and the HAVM would help me tackle gears and Armigers. The list is rounded out by a Independent Operator BF2-19 Duelist, mostly because I wanted to force myself to take one and see what it was like.
Adam’s been investigating Frames as N-KIDU in his Utopia sublist. His first combat group is quite survivable thanks to a BF2-25 Assault bodyguard for the Armiger. Anything I shoot at the Armiger, if that BF2-25 is within 3″, Adam can choose to take the hit on the Frame instead thanks to the Decoy rule. While the BF2-25 is significantly more expensive than a normal N-KIDU, it brings Agile, Shield, and AR7 to the table, making it quite hard to damage overall. This makes the Reece Armiger effectively invulnerable until you destroy the BF2-25, which is in and of itself quite difficult already–and that’s not taking into account the Armiger’s ECM+!
Adam’s convinced me of the utility and striking power to cost ratio of the F6-16 Anti-Tank, so it didn’t surprise me to see two of them in his list backing up a pair of Man at Arms APEs with medium rifles.
| Model | TV | A | Weapons (React) | Weapons (Mounted) | Traits | |
|---|---|---|---|---|---|---|
| CG1 RC |
BF2-25 Assault | 13 | 1 | LLC, LCW | Hands, Agile, Airdrop, ANN, Stealth (Aux), Jetpack:6 (Aux), Shield | |
| + OUF: NAI Experiments | -1 | Conscript | ||||
| Recce N-KIDU Rocket | 5 | 1 | HMG (Silent), LRP | Conscript, Comms, Stealth, TD | ||
| Recce N-KIDU Rocket | 5 | 1 | HMG (Silent), LRP | Conscript, Comms, Stealth, TD | ||
| Recce Armiger | 14 | 1 | LLC (Silent), LVB | MRP, MHG, LAPGL | Hands, Agile, ECM+, ECCM, Sensors:24, Stealth, Comms (Aux) | |
| + Veteran | 2 | Vet, SP:1 | ||||
| CG2 GP |
F6-16 Anti-Tank | 10 | 1 | LPA, LCW | LATM (LA:2) | Hands |
| + OUF: NAI Experiments | -1 | Conscript | ||||
| F6-16 Anti-Tank | 10 | 1 | LPA, LCW | LATM (LA:2) | Hands | |
| + OUF: NAI Experiments | -1 | Conscript | ||||
| Man at Arms APE | 9 | 1 | MRF, LVB | MRP, LHG, LAPGL | Hands, Jetpack:8 (Aux) | |
| Man at Arms APE | 9 | 1 | MRF, LVB | MRP, LHG, LAPGL | Hands, Jetpack:8 (Aux) | |
| CG3 SO |
ECM Recce N-KIDU | 4 | 1 | HIL (Silent) | Conscript, ECM, ECCM, Stealth | |
| ECM Recce N-KIDU | 4 | 1 | HIL (Silent) | Conscript, ECM, ECCM, Stealth | ||
| Ignus APE Eden Wizard, Special Operations | 9 | 1 | MFL, LRP, LVB | LHG, LAPGL | Hands, Jetpack:8 (Aux), ECM (Aux), ECCM (Aux), Airdrop, Stealth (Aux) | |
| Ignus APE Eden Wizard, Special Operations | 9 | 1 | MFL, LRP, LVB | LHG, LAPGL | Hands, Jetpack:8 (Aux), ECM (Aux), ECCM (Aux), Airdrop, Stealth (Aux) | |
| Total | 100 | 12 |
His list is rounded out by a pair of Ignus Wizard APEs, which are pretty funny. Adam knows to expect a bunch of Infantry from me, so this was his answer.
Deployment
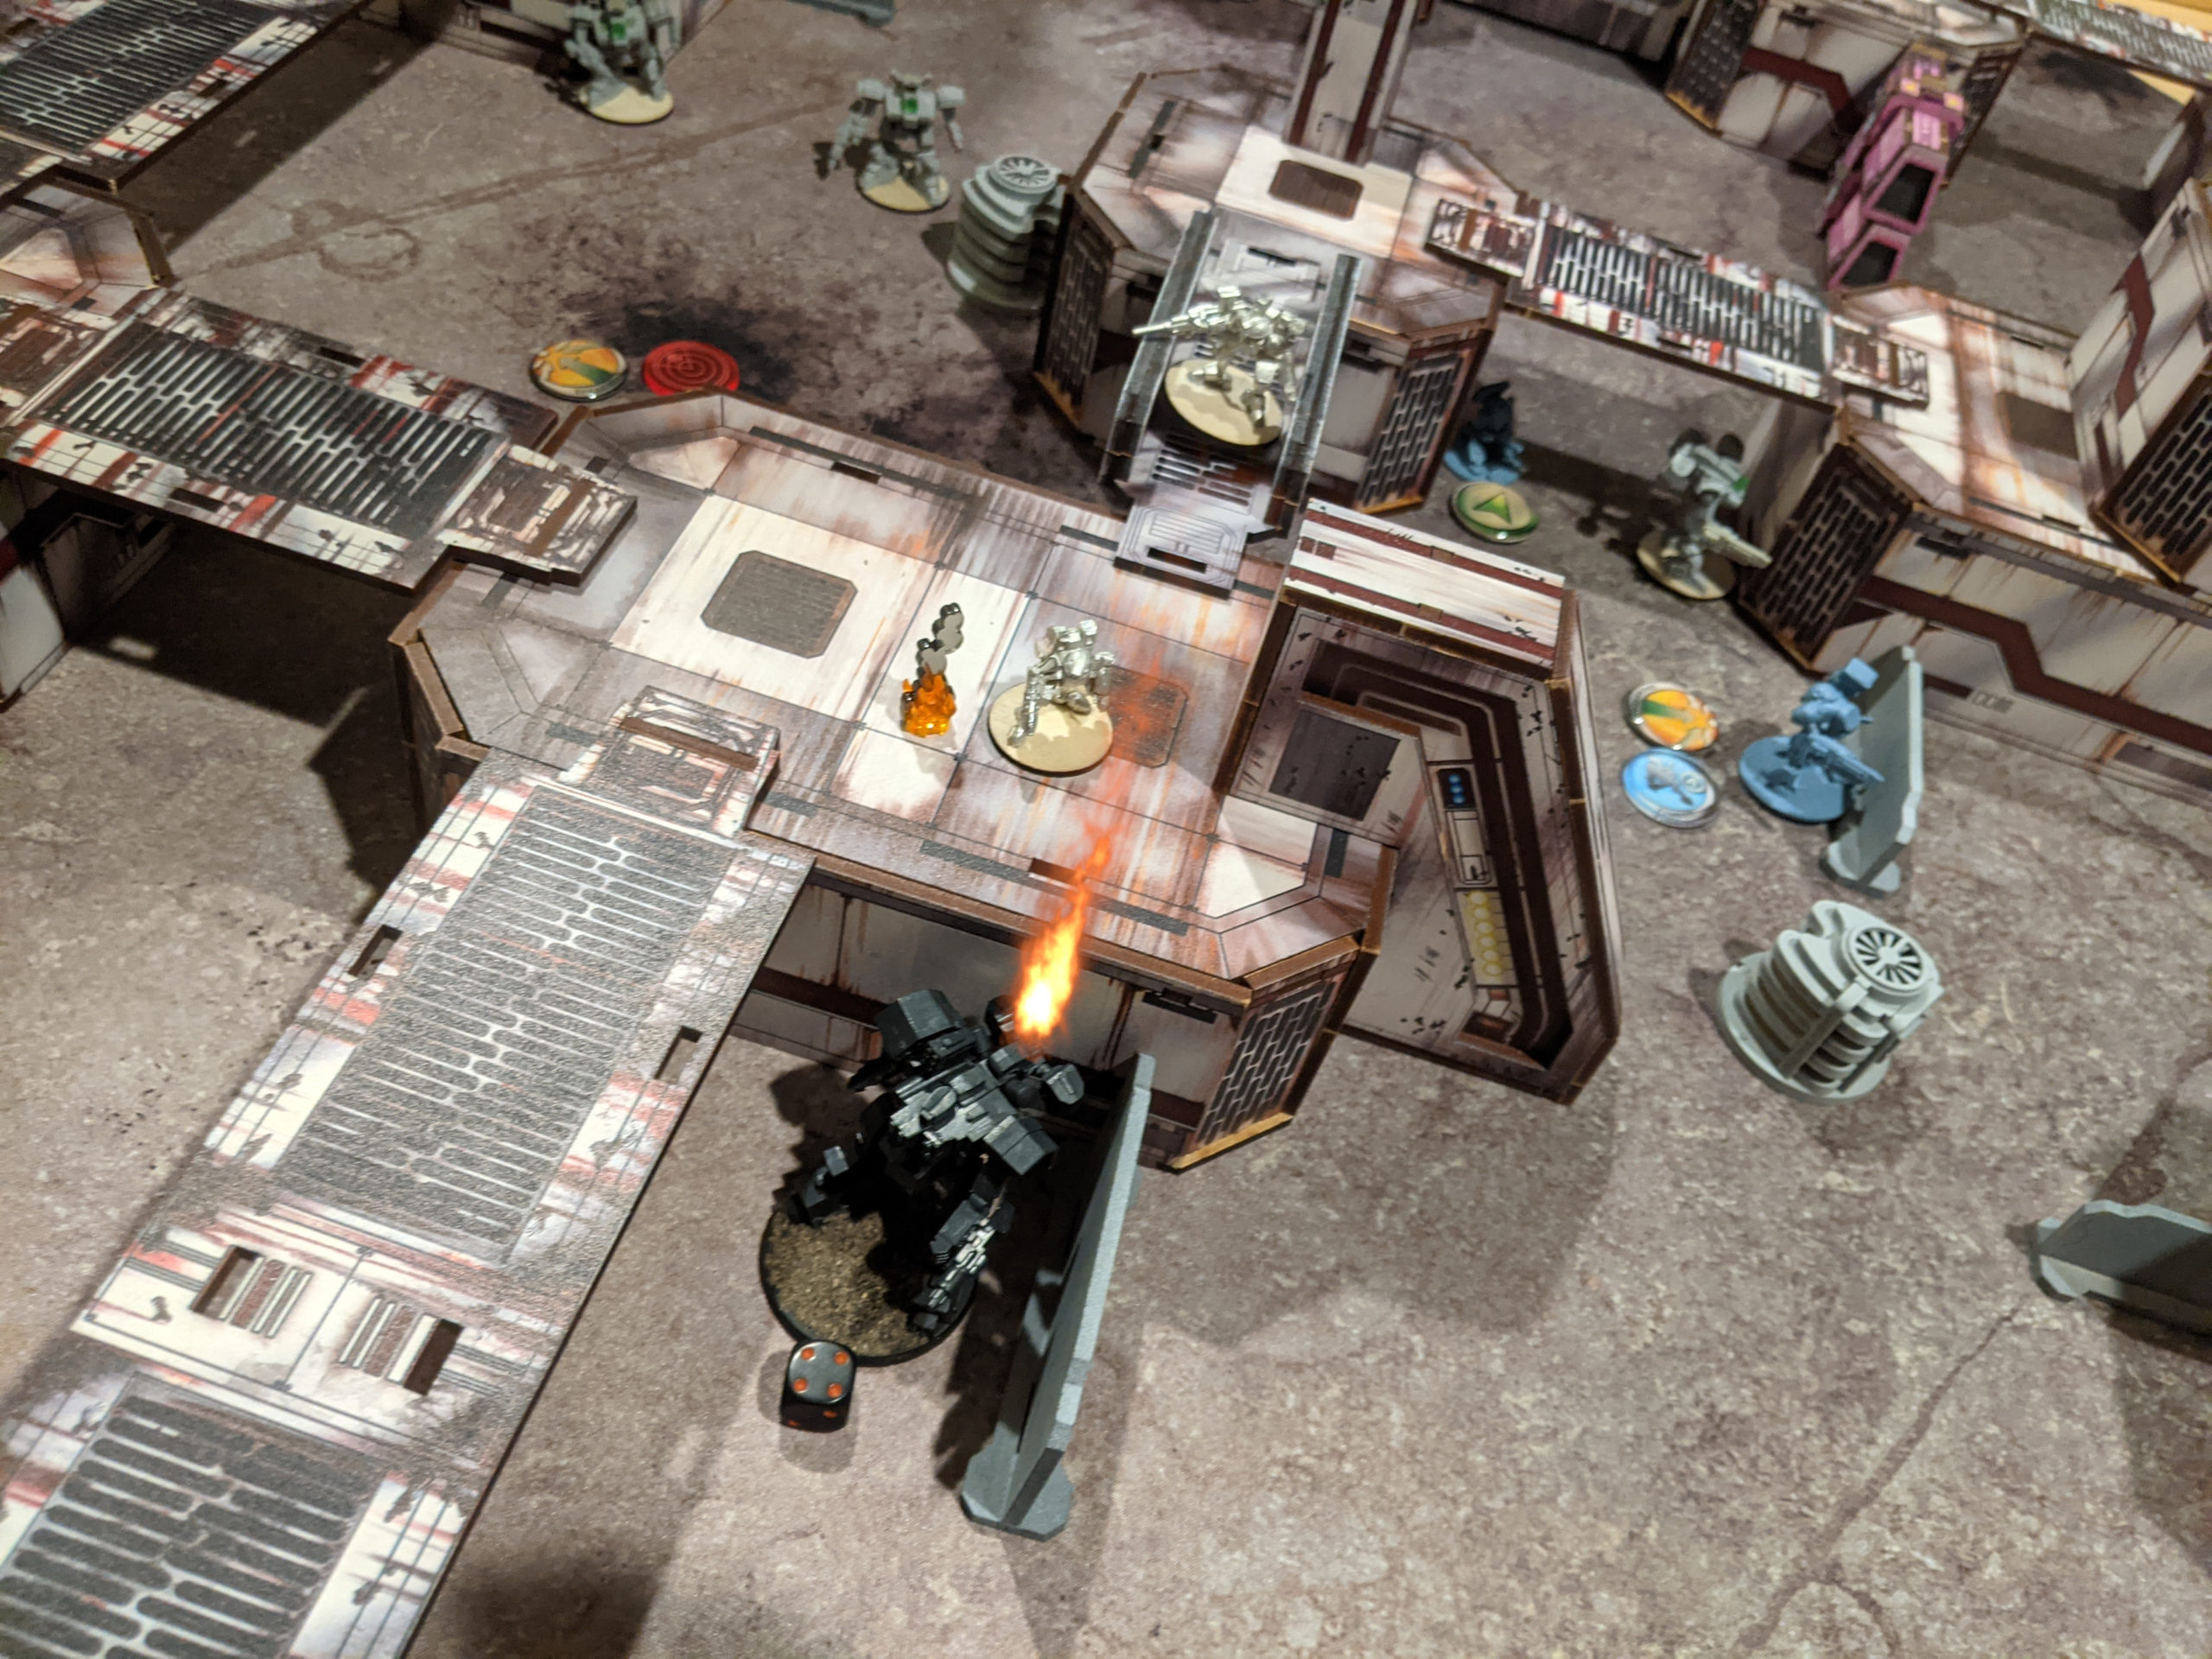
Adam won the roll off and had me deploy first. My immediate response was to just place all my Hoverbikes. Placing them basically gives my opponent no information, as they can be anywhere inside a 24″ bubble after their first move. Adam put down Arimger squad next, castled up on his left.
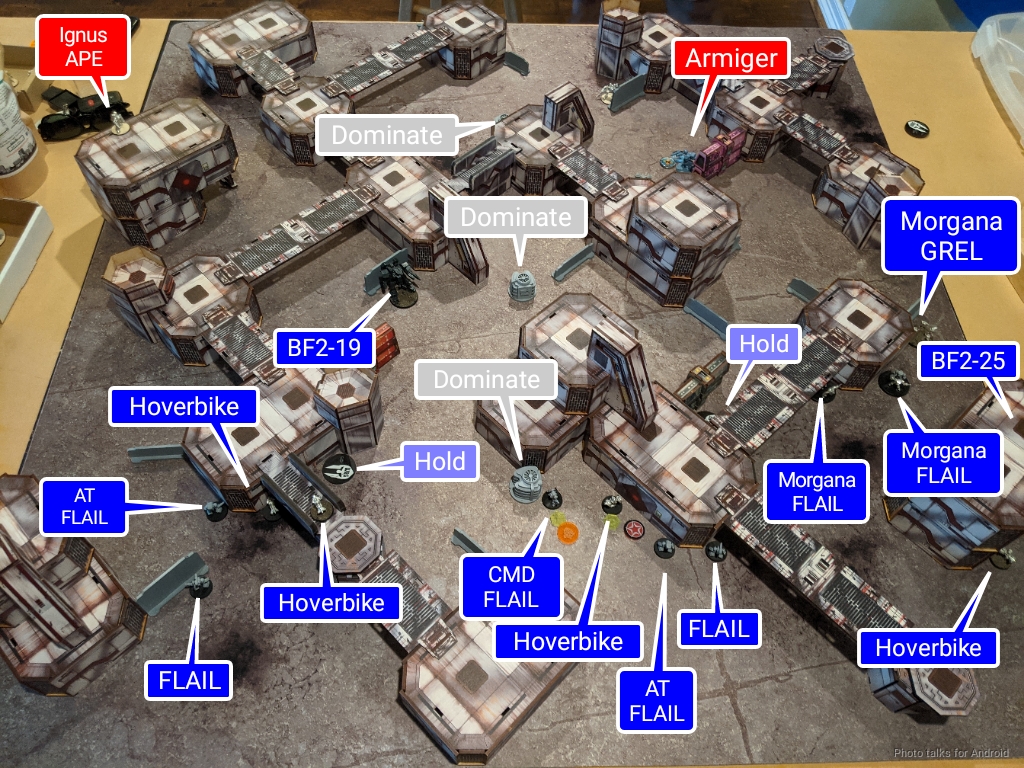
I airdropped my Duelist in successfully a bit away from his Armiger squad and overlooking the central objective, again to keep him guessing as to where my FLAILs and Morganas were going to go. Adam’s next deployment was his Rifle squad, in the back to provide long-range fire support.
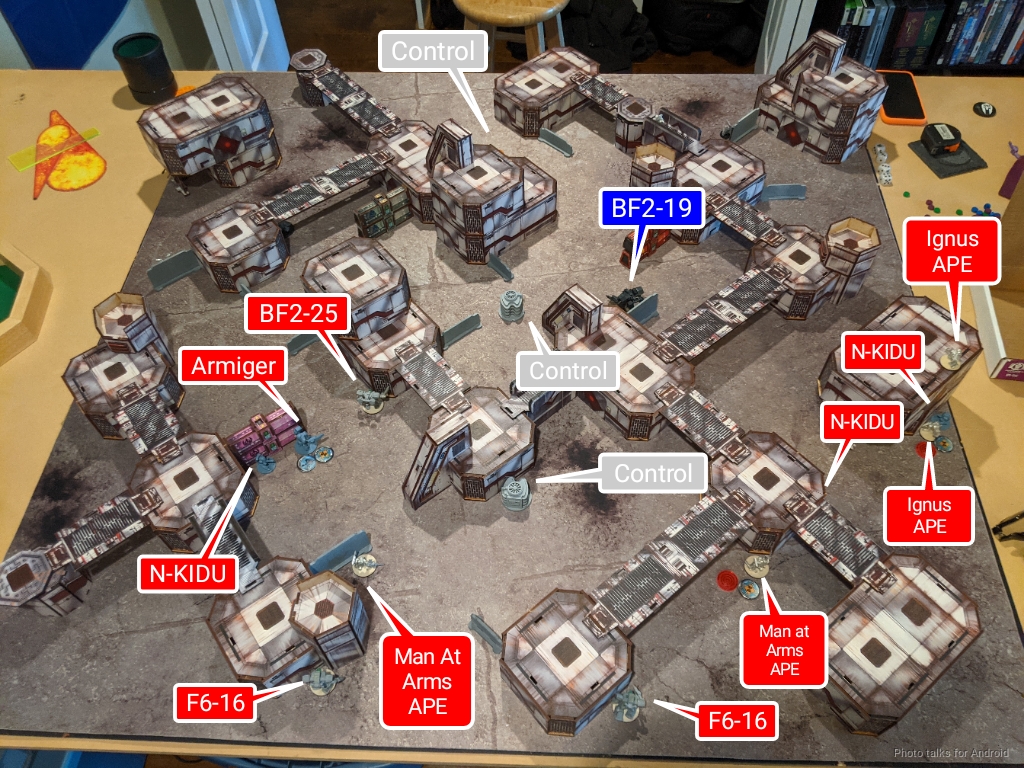
I put down my FLAIL next, just scattering them about, and then Adam deployed his SO squad with Flamers. I didn’t want my Morgana anywhere near that, and I figured I’d want them near the Armiger anyway, so they went over there.
Objectives
In addition to the 4 points from the Incursion mission, Adam and I chose the following secondary objectives:
- CEF
- Assassinate (Ignus and Man at Arms)
- Break the Line
- Hold
- Utopia
- Assassinate (BF2-25 and Hoverbike)
- Break the Line
- Detailed Scan (Command FLAIL)
FIGHT!
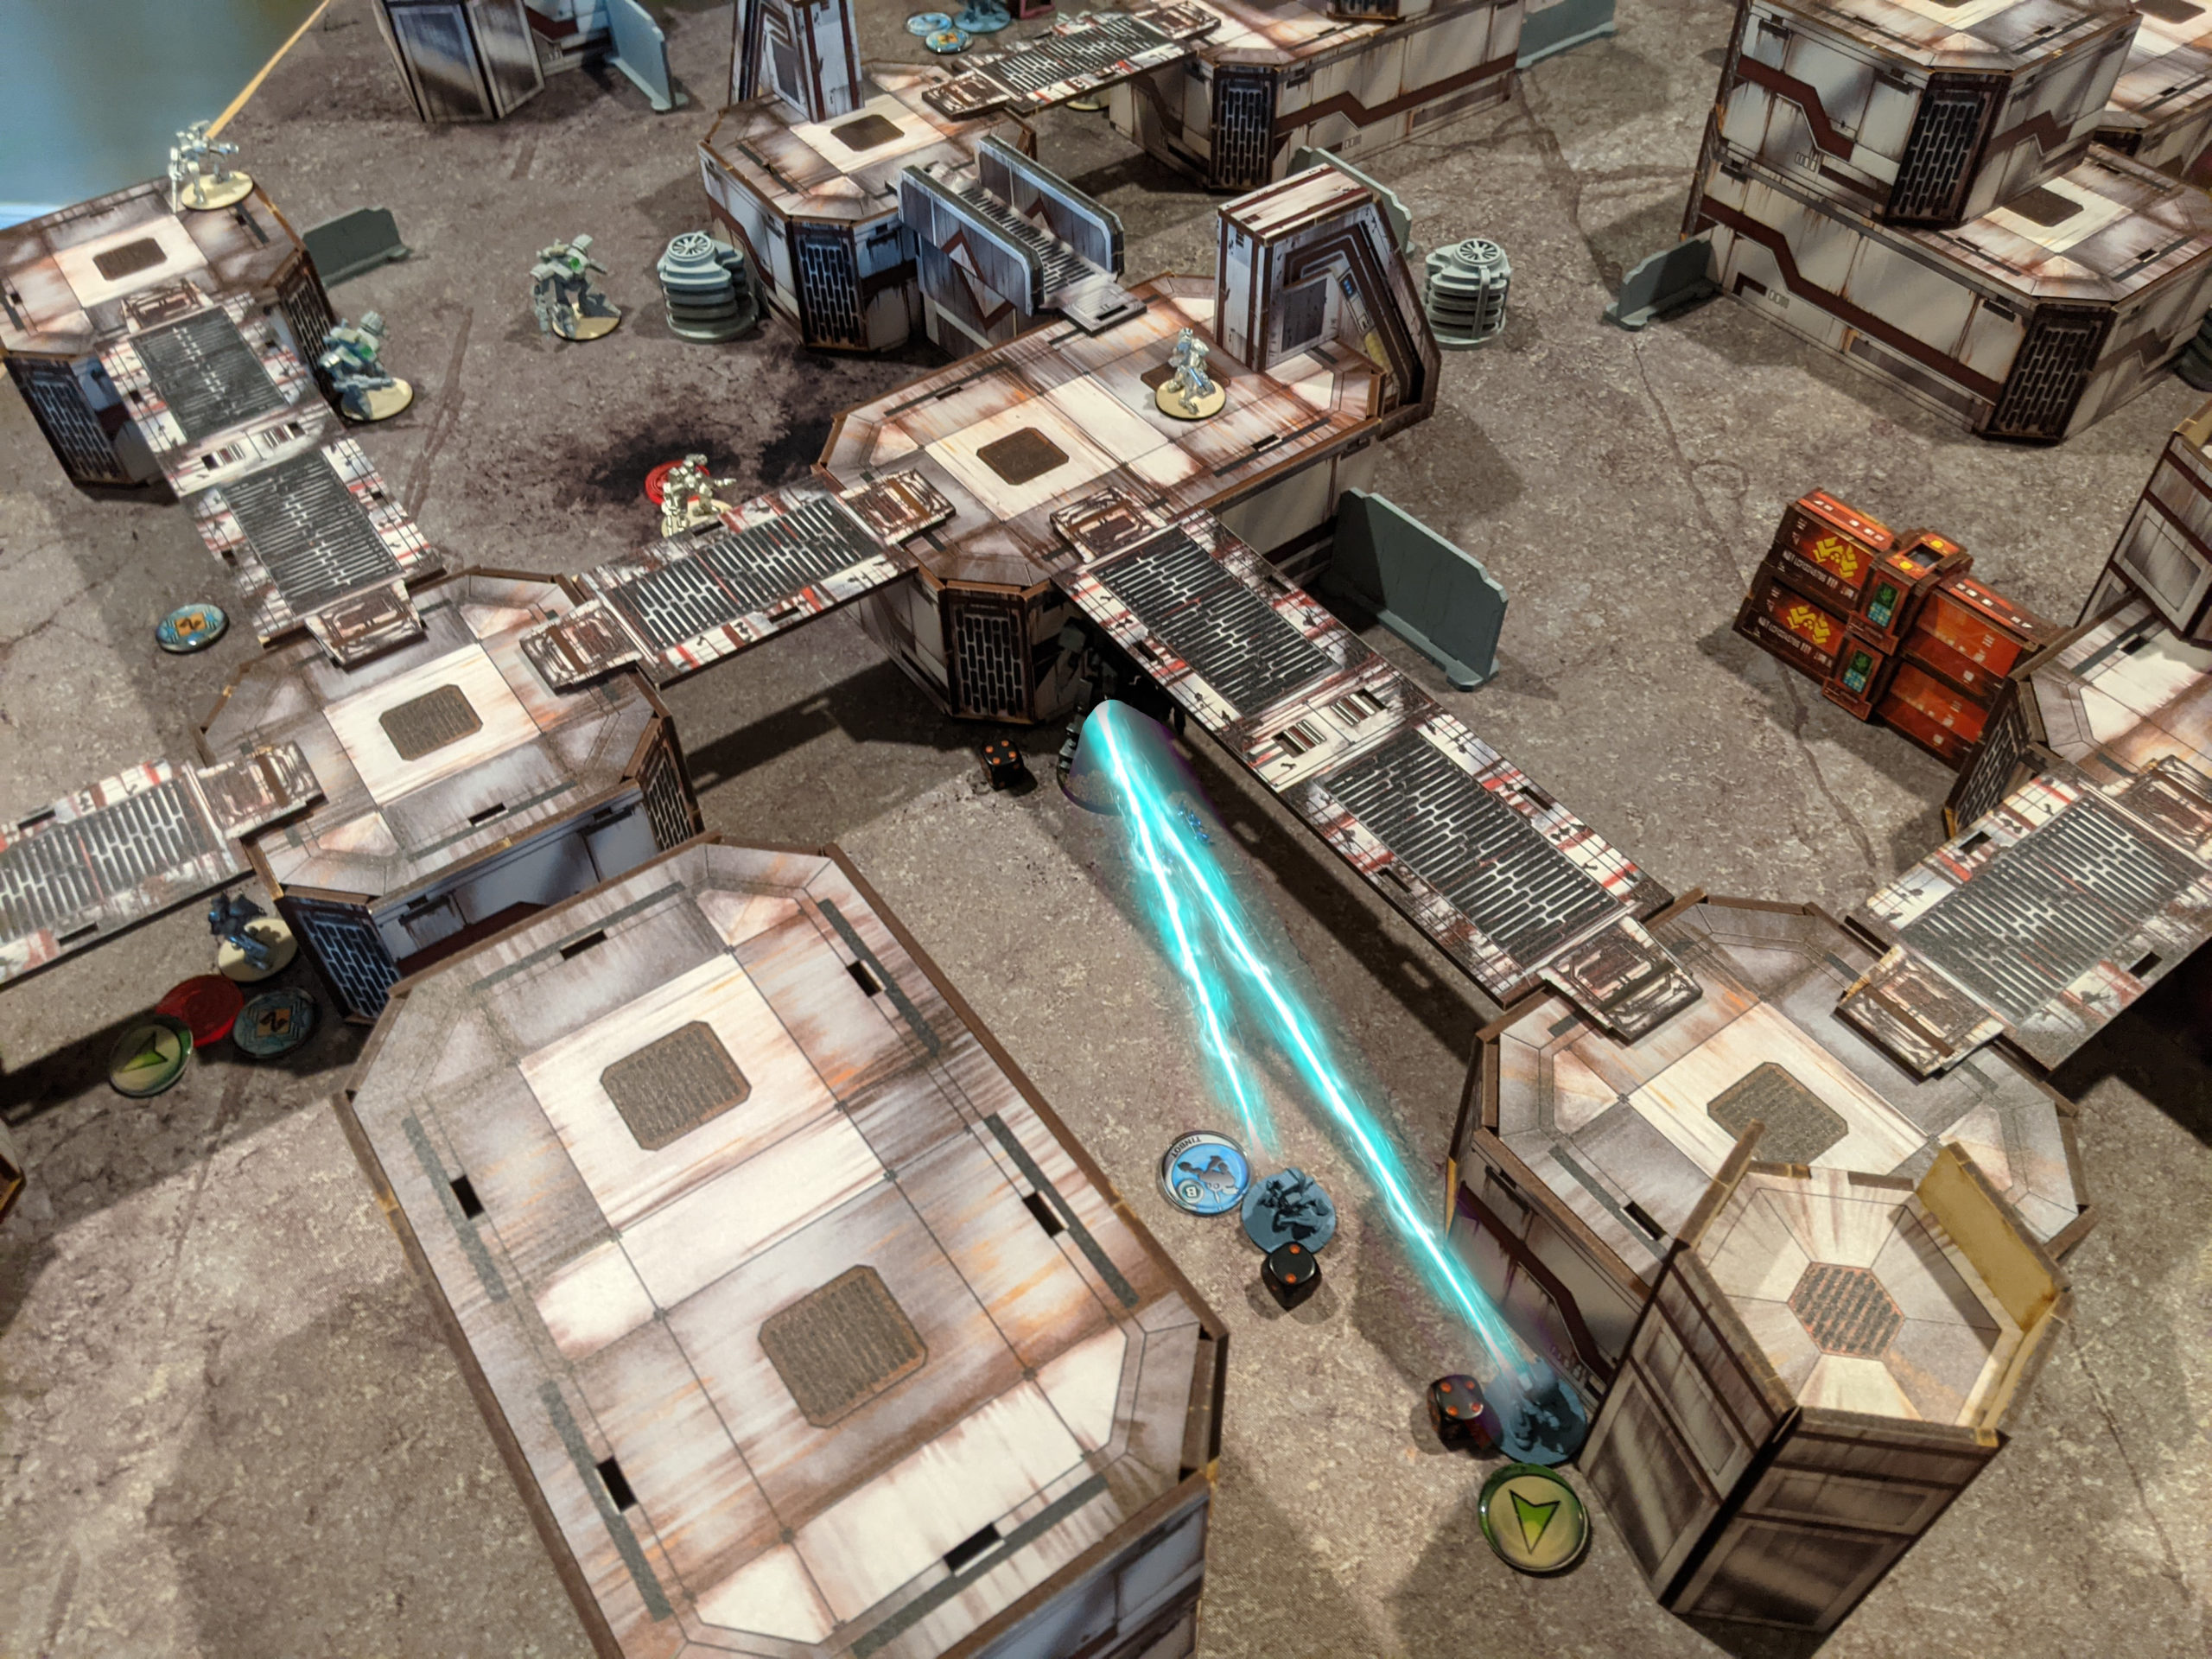
Adam won Initative and started off by ECMing my Duelist through the grey wall, then attacking it with a Golem from behind. Rude.

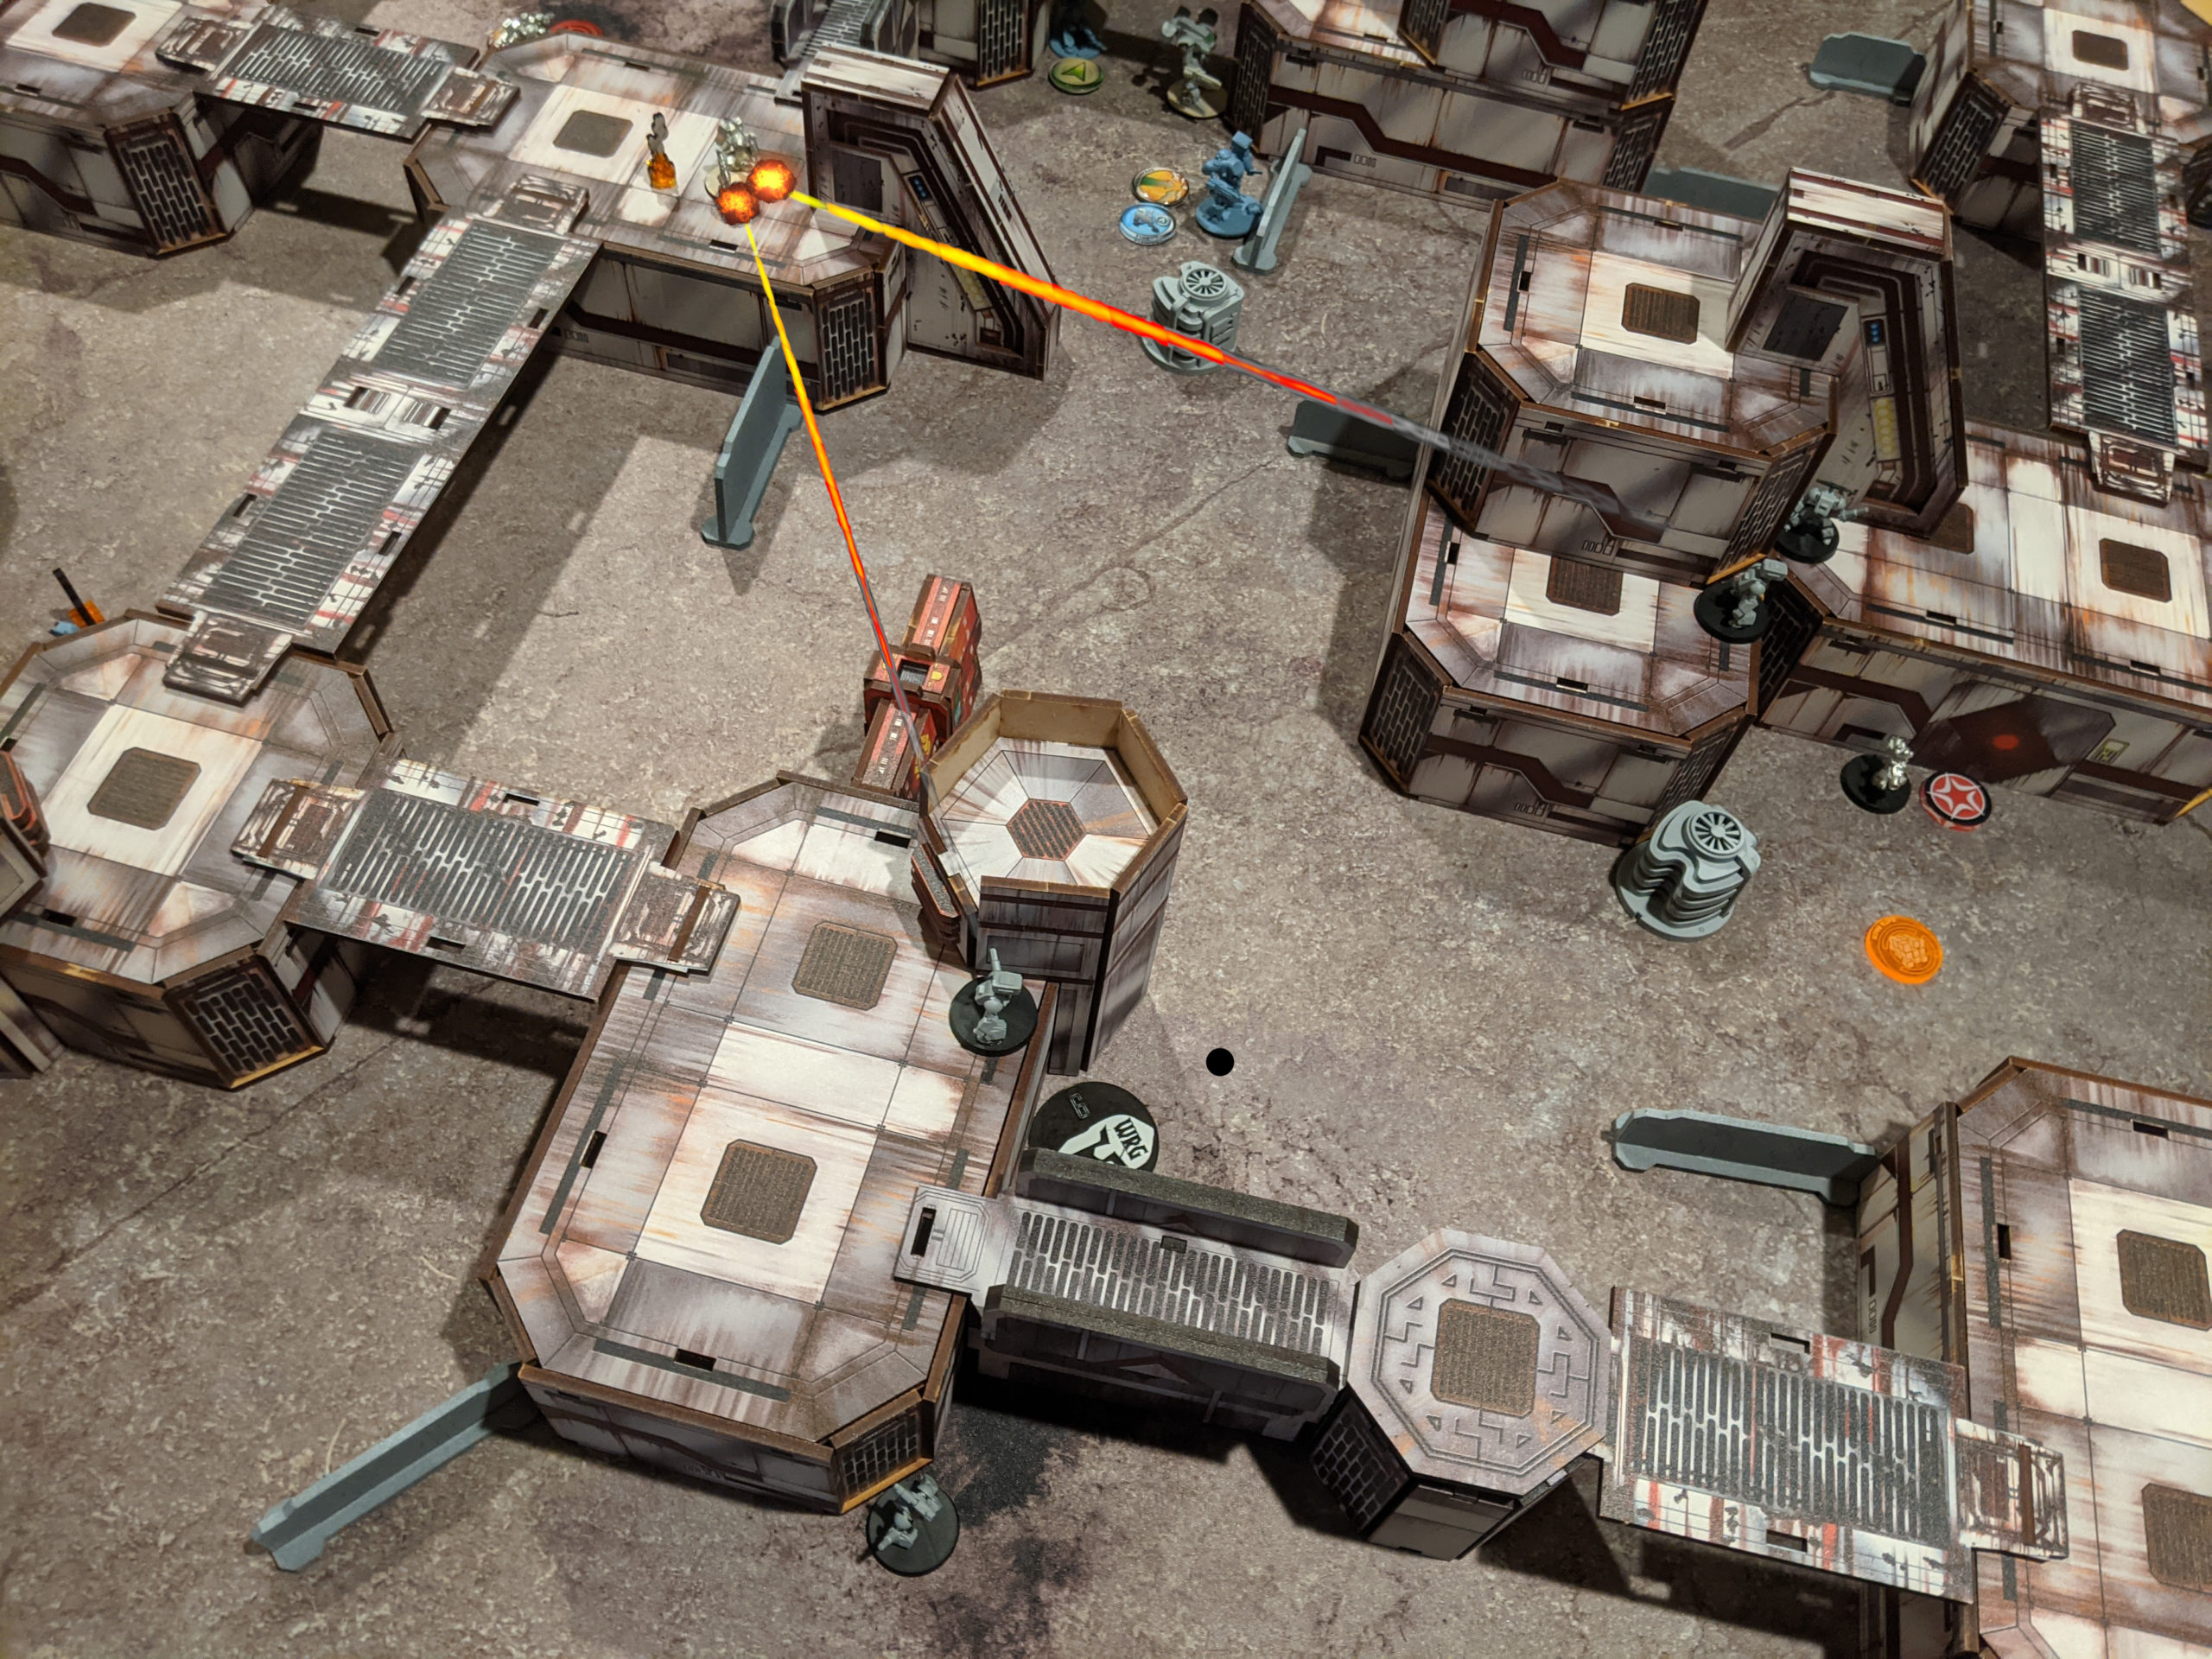
He advanced two of his little N-KIDUs a bit too close, so I crippled one and put two points of damage on another with a Trick Shot from my MRL. Getting to a point where I could see them both out of cover meant that I exposed my Duelist to some rifle fire from his long range support squad, and my poor Duelist was crippled for real, not just Haywired.
I sent my bikes in next, dropping enough grenades on the two damaged N-KIDU till they were destroyed.
It took two bikes, but it was worth it.
I managed to put one point of damage on one of the Ignus Golems, but wasn’t able to do much else with my CGL bike. I didn’t want to leave this particular bike out, since it was an Assassinate target, so I zoomed it back to the safety of my deployment zone after taking my shot.
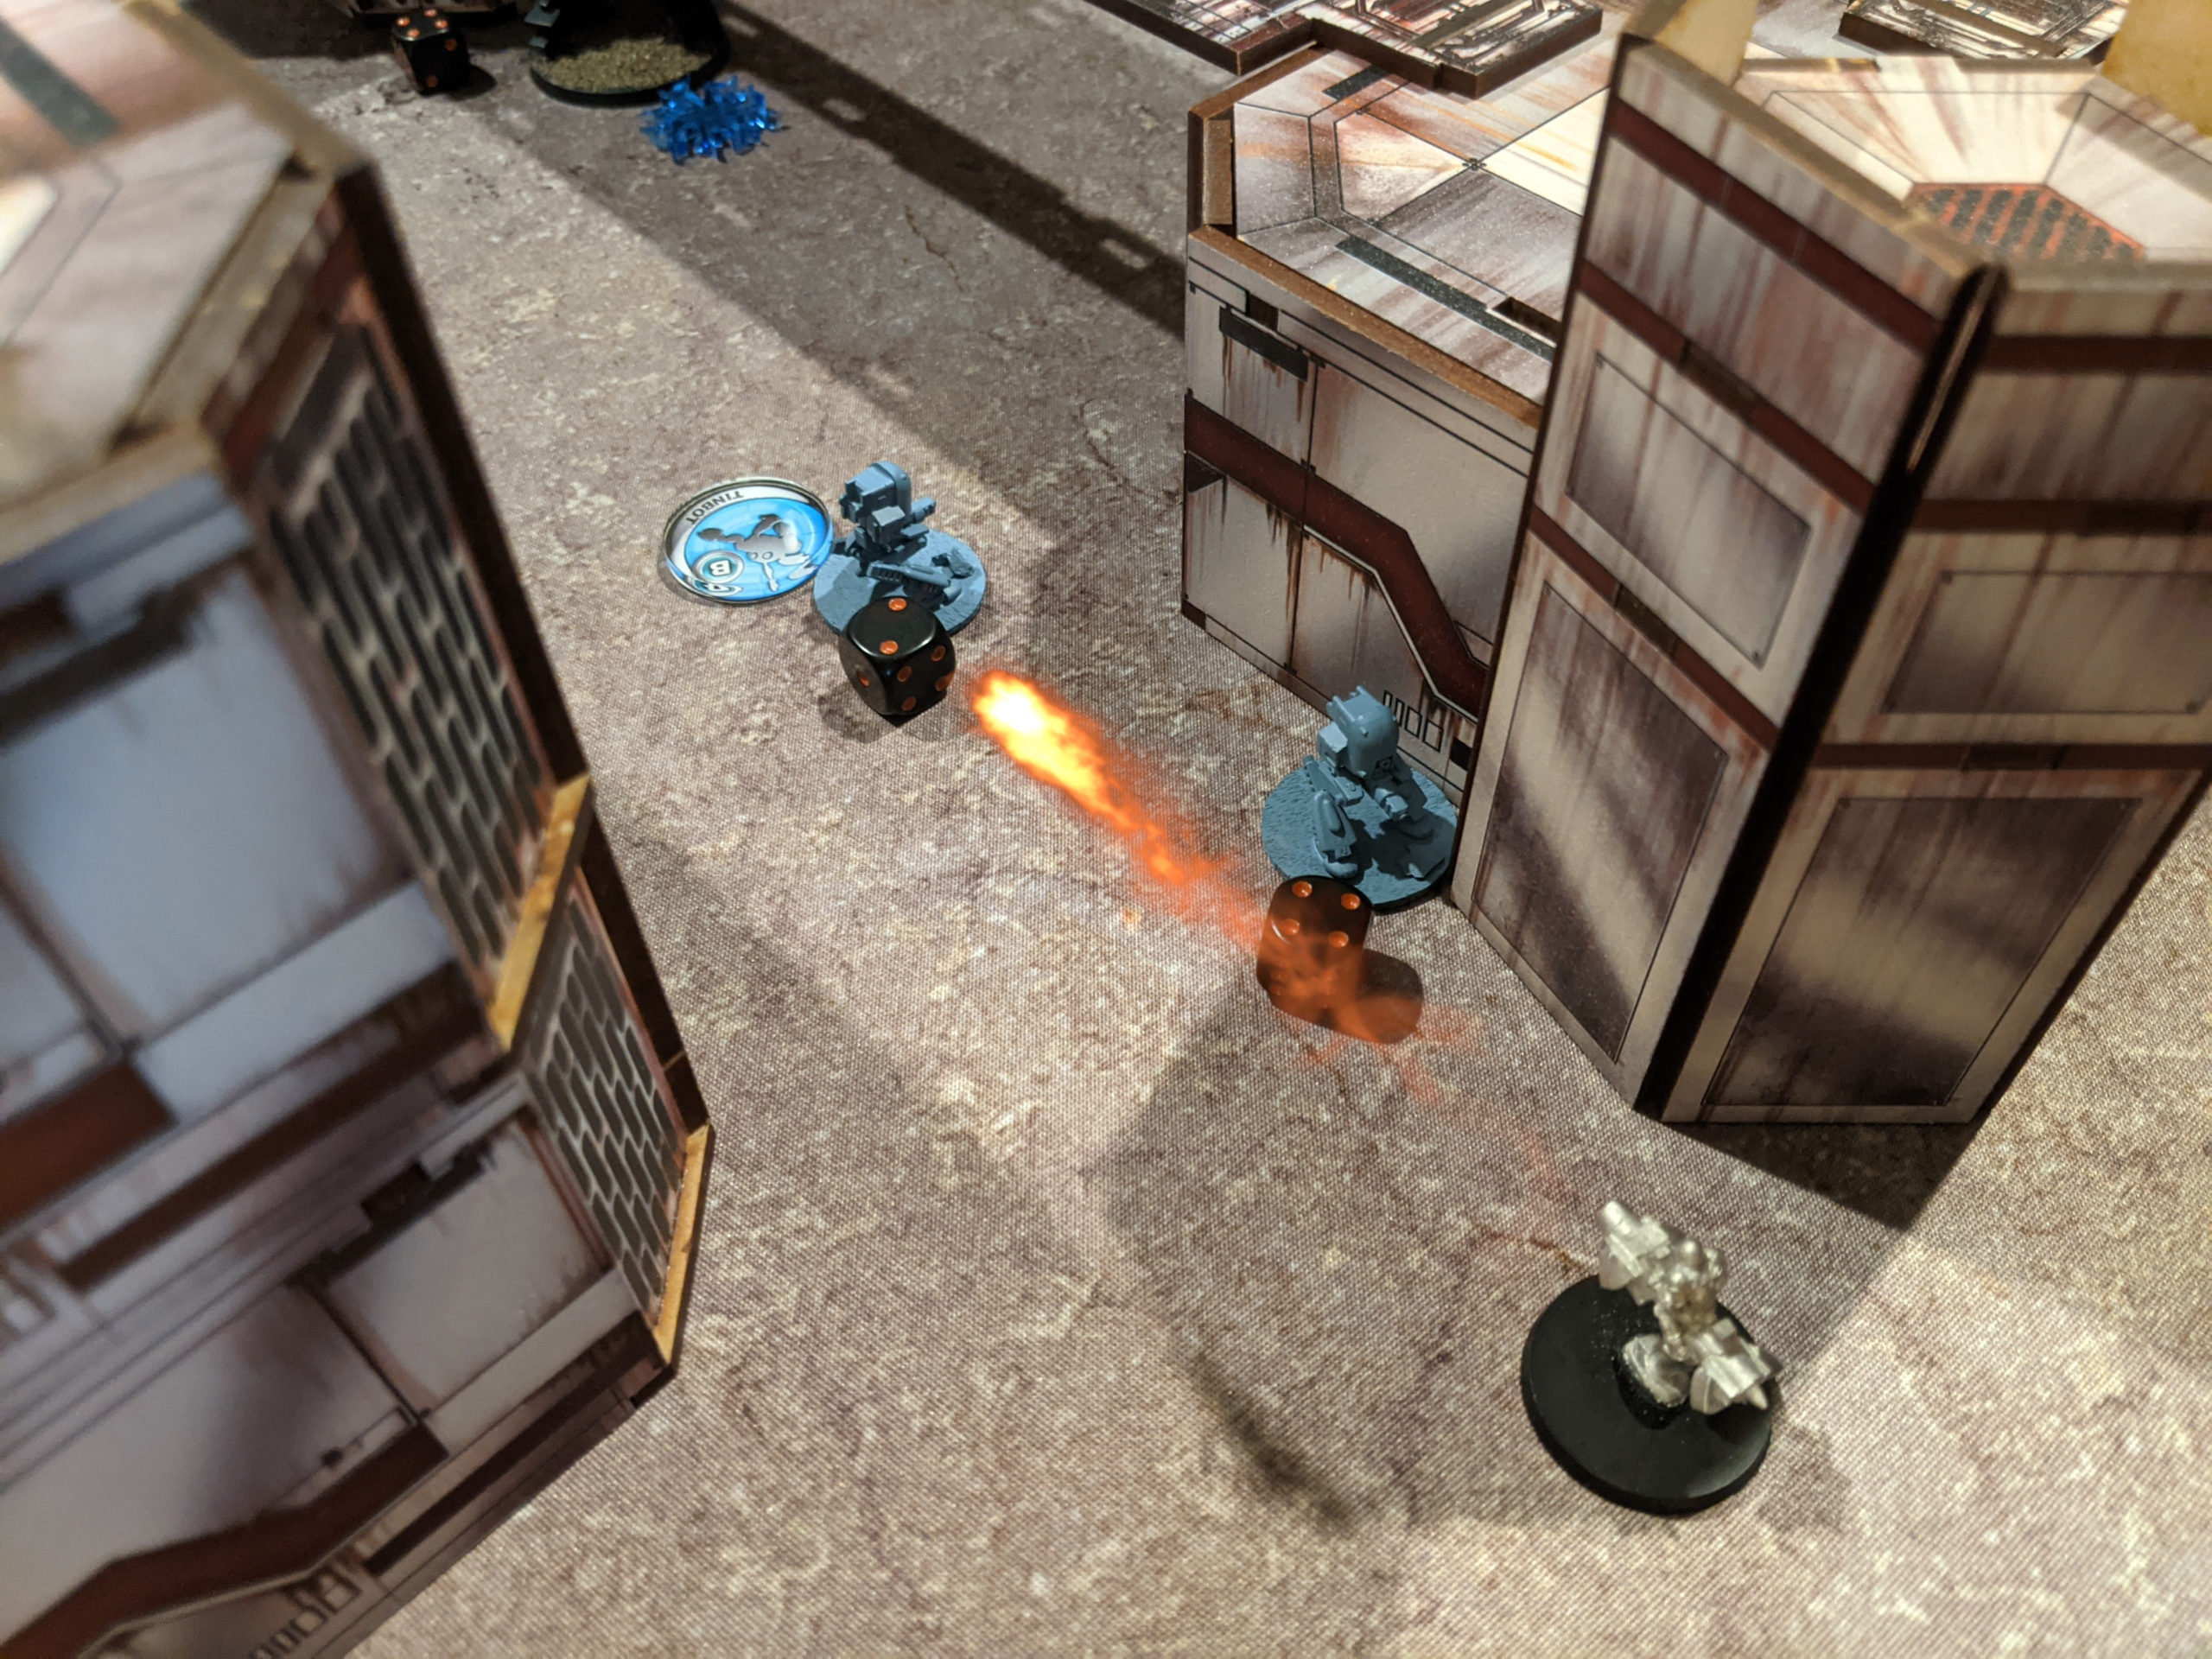
I wasn’t expecting a from-downtown HMG shot on one of my Morgana FLAIL squads, and I got it shot off the table by an N-KIDU’s HMG with some support from the BF2-25.
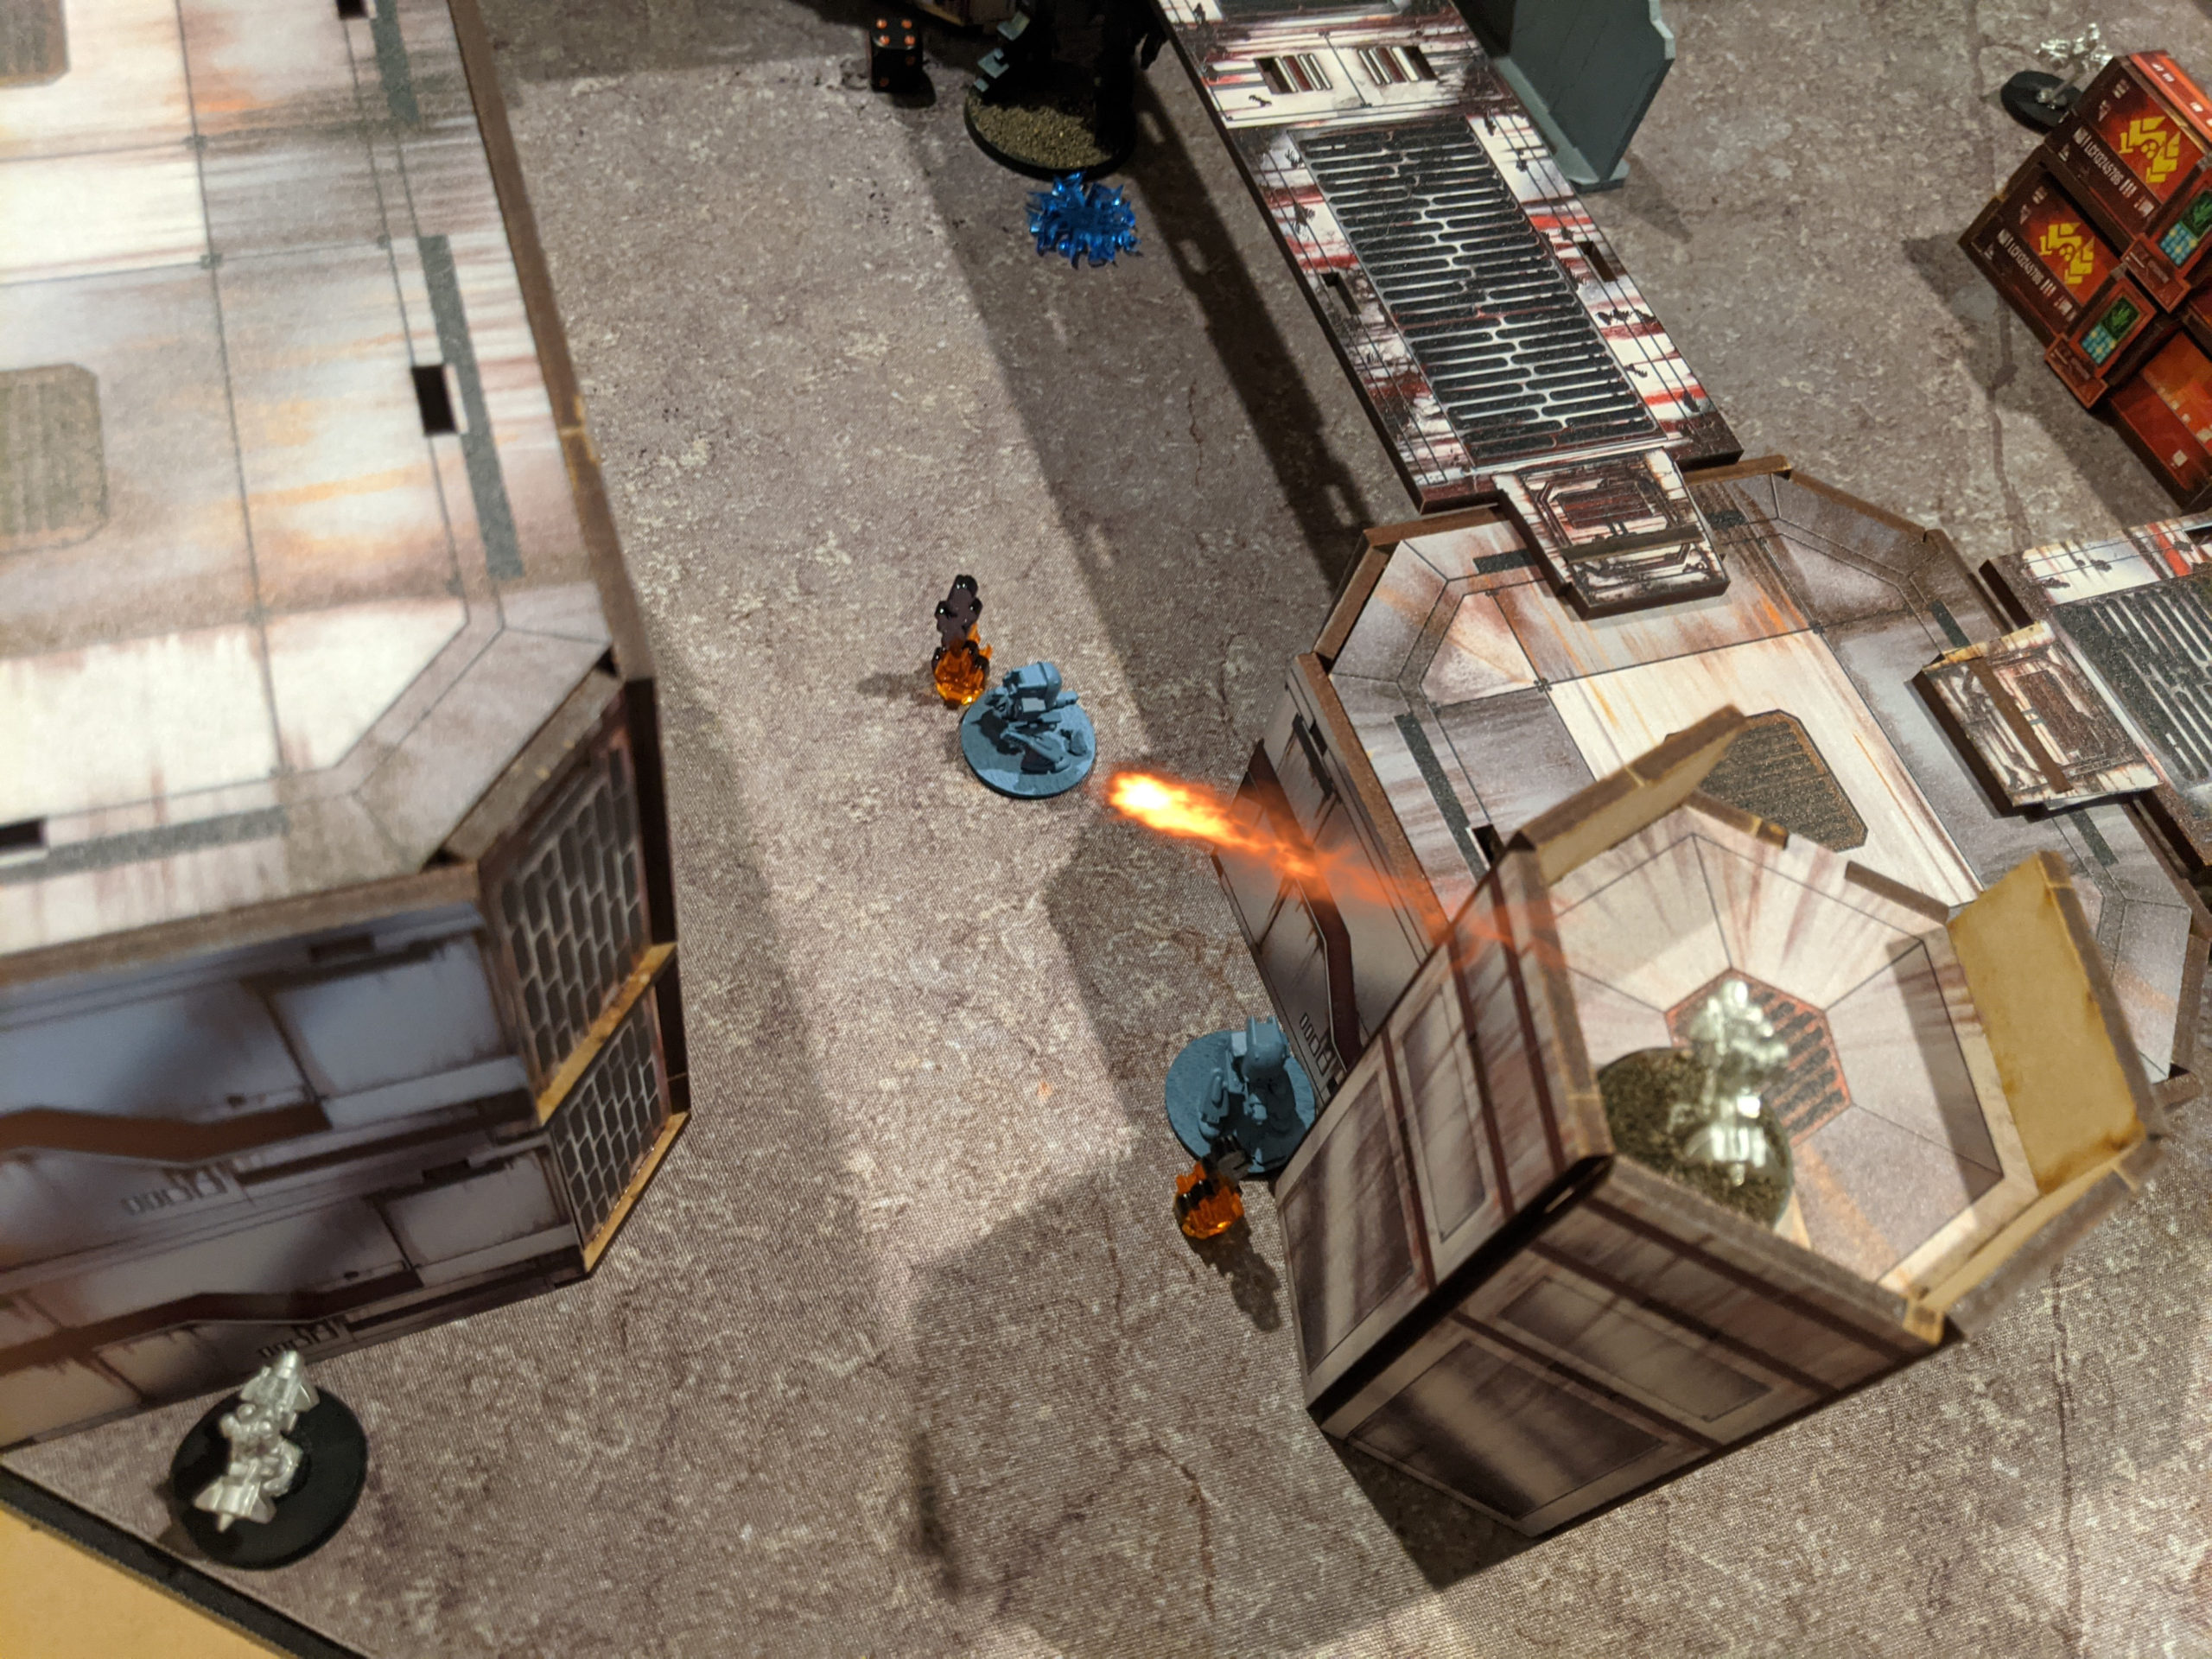
The Ignus Golem on the roof was really threatening my FLAILs so I let him have it (literally) with my two HAVM FLAILs and dropped it.
One of my HIL FLAILs chewed up the N-KIDU that had taken out their Morgana bretheren as well.
The Golems kept advancing, using their Jetpack: 8 to get up the table and onto the rooftops quickly. I returned fire from my BF2-19 on one, nearly crippling it with MRL fire. The other got into position and threw a hand grenade onto my Duelist from behind, wrecking it.
I did some dancing around with my FLAIL squad and shot at the Armiger a lot, allowing Adam to tank a bunch of hits on the BF2-25 safely. I was quite aware at the time that this was a bad idea, I just wanted to see how bad of an idea it was, if that makes any sense. In other words, how OP is this BF2-25 nonsense? The answer is pretty OP. I was only able to do two damage to it over a bunch of activations across two combat groups–I think I shot at it with the BF2-25’s group as well. I ended up throwing one last activation of the Command FLAIL into shooting the HMG-armed N-KIDU and barely did any more damage. I did, however, move the Morgana FLAIL up to attack on the next turn.
In any case, it was time to focus on the objectives, so I got a bike into Break the Line scoring position and got another behind the CGL that the BF2-19 almost crippled and put it one wound away from death.
I Jetpack boosted the Morgana FLAIL that I snuck into position on my last turn behind my other Assassinate target and put 5 wounds on it. I’ll take it!

Adam then dove his Armiger squad onto the Incursion objective nearest me, setting off all my alarm bells. He shot one of my FLAILs off a Hold Objective too–lasers against single FLAILs pretty reliably kill them. Things weren’t looking good!
I made a big mistake and attempted to shoot the Armiger/BF2-25 pair from behind with my Hoverbike CGL. This meant I ran out of movement to get out of striking range of some of his units. I should’ve just ran away to the corner of the table to deny the Assassinate point. In any case, I finish off the Ignus Golem CGL with a pair of Hoverbikes, but I don’t have an answer for the two F6-16 Anti-Tanks, who just shoot my bikes off the table to secure Adam’s nearest Incursion objective.
I’ve got a damaged FLAIL on my Hold objective, a damaged FLAIL on my nearest Incursion objective, and a Command FLAIL that I need to prevent Adam from scanning. I figure my best plan is to hit the BF2-25 in the butt with my damaged FLAIL. If I can do one more point of damage I’ll cripple it and improve my chances of survival. It doesn’t go well, nor does my attempt to shoot the BF2-25 with my Command FLAIL’s HMG.
Adam swings his Armiger around the corner, leaving the BF2-25 alone with the FLAILs to contest my nearest Incursion objective. He then runs it to the central objective after successfully Detailed Scanning my Command FLAIL, but the BF2-25 fails to kill my poor FLAIL! That’s huge! It’s down to my last activation on the Morgana CG.
My Morgana FLAIL finish off the Golem–which was trapped there because its Jetpack is Aux and then contest the central objective. I snipe one of the N-KIDU off the objective, leaving my Morgana facing off against a Golem and the Armiger on the central objective.
The Golem has a point on it, so I top-speed the BF2-25 and dump a laser into it, but ECM saves it from death.
With that, I’ve got:
- 2 Break the Line
- 2 Hold
- 2 Assassinate
- 0 Incursion
Adam’s got
- 2 Break the Line
- 1 Assassinate
- 1 Detailed Scan
- 1 Incursion
making it a
6-5 CEF Victory!
Post Game Analysis
Well, I definitely didn’t have enough guns or hacking on the table, but I was very happy with the results of my FLAIL on a Jetpack friendly table experiment. There were a few big takeaways for me. Hoverbikes continue to be great, but they are significantly more squishy than before the vehicle change. It was pretty obvious the first game with them after the change, but it isn’t until you want them to survive because you need them to take an objective that you end up really noticing.
FLAILs put a decent amount of damage out, but even the HAVM aren’t quite consistent enough to take down a gear. I failed a Let Them Have It! at least once, which really limited the maneuverability on my FLAILs due to wanting more dice. So FLAILs are in an interesting place. They cost as much as a line gear, have a way less powerful primary gun against AR 6 and up targets, but have a slightly higher AP rocket pack. They are significantly more survivable though, thanks to being infantry. I will also say that I really notice the lack of Agile on the normal FLAILs and wish I could take Morgana FLAIL with HAVM, but that might be too much, haha!
I’m a little disappointed in Morgana FLAIL and their ability to tackle AR 7 things. If we look at a 4d6 on 4+ versus 2d6 on 4+ Morgana FLAIL stabbing an Armiger in the butt scenario:
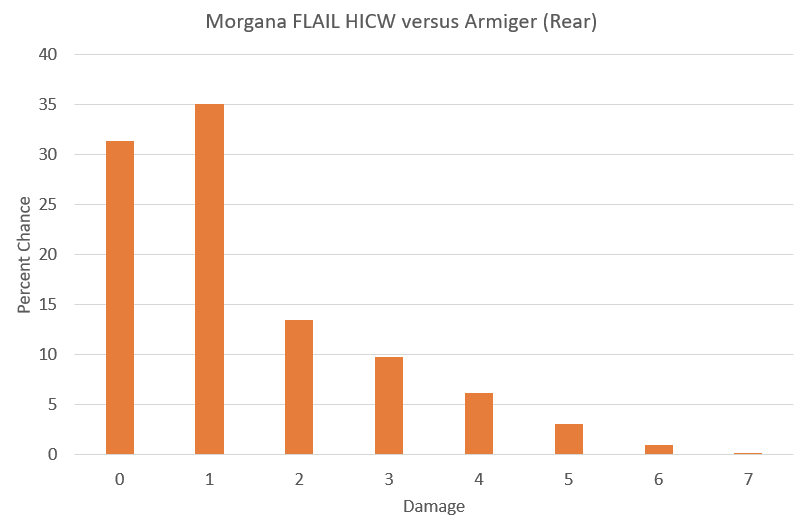
It’s actually quite likely to do no damage at all, thanks to the Armiger having Agile. There’s roughly a 10% chance you’ll cripple the Armiger and only a 1% chance you’ll kill it. I suppose the balance argument here would be that the FLAILs will take 1-3 activations to kill depending on if you have AI guns or not, so you might be able to attack the Armiger again on the following turn. The FLAILs fare much better against a light recon gear. Even a PI 3+ with Agile 3/3 gear is looking at a 46% chance to get crippled if a Morgana gets behind it and 9% chance to just be straight up dead.
That was actually a big sore spot for me–I just had no idea how I might tackle the Armiger’s CG with the tools at my disposal. ECM+ has been a real bane for me, often turning activations into wasted effort, and I was hoping to just sidestep it entirely by making use of melee weapons. CEF isn’t exactly a melee faction, so having the best melee option turn out to be a bust was disappointing. I thought about taking a Peregrine with MRPs and after some theorycrafting with friends I am going to try it next game. The general idea is to LTHI an Elevated, top-speeding Peregrine into range and fire away with the MRL and MRP, targeting at least the Armiger + the BF2-25. This would hopefully force my opponent to make the difficult decision to take both hits on the BF2-25 or to split the hits.
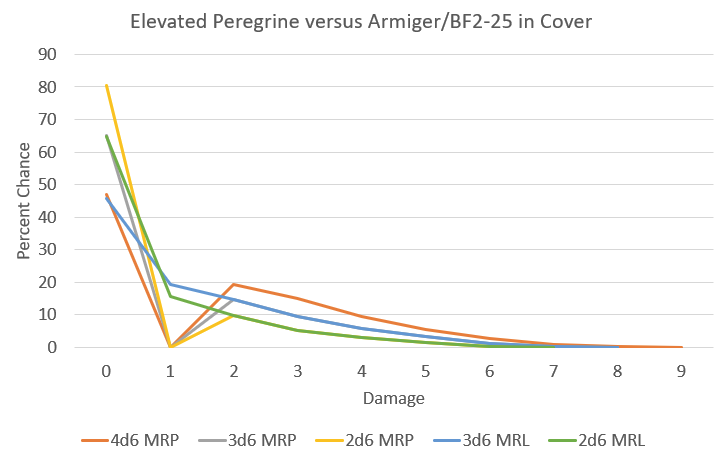
Interestingly, the MRL and MRP have similar chances to miss, thanks to the +1 R from Advanced! It’s clear that overall, the MRP is more likely to do damage, which is borne out by the average damage numbers for each scenario below:
| Scenario | Mean Damage |
|---|---|
| 4d6 MRP | 1.73 |
| 3d6 MRP | 1.36 |
| 2d6 MRP | 0.56 |
| 3d6 MRL | 1.26 |
| 2d6 MRL | 0.71 |
The question remains, should I focus one weapon or fire both? Assuming my opponent takes both hits on the BF2-25:
| Scenario | Average Damage | State |
|---|---|---|
| Focusing MRP | 3.09 | Crippled |
| Focusing MRL | 2.52 | Nominal |
| MRP & MRL | 3.34 | Crippled |
Not a perfect statistical experiment, but this is enough to offer some guidance. The outcomes are so close that it really comes down to if you’re catching anything else in the AE of the MRP, in which case the overall damage output goes up for Focusing the MRP as you’ll get extra dice on the other targets as well. Still, all of these options are better than the 1.38 average damage on the Morgana going after the Armiger.
Math tangent aside, I’m pretty pleased overall with how the mission worked out. It ticked all boxes: forced us to interact, forced us to leave positions and maneuver so we didn’t stagnate, rewarded careful consideration on order of activation, and so on. I don’t think I made any particularly egregious mistakes this game, other than bothering to go after the Armiger’s group at all–you’ll note that I avoided selecting it as an Assassinate target! But, as I said before, I was trying to explore the Decoy and ECM+ mechanics combined, just to get a feel for how it was on the table.
100TV felt a little underpowered, but the game was no less enjoyable. I think were I to try this again, I probably would take something like this, which is really starting to feel like a hyper-optimized Infinity list that fits someone’s playstyle very tightly to me:
| Name | TV | A | Weapons | Traits | |
|---|---|---|---|---|---|
| CG1 SK |
F6-16 Anti-Tank Command | 11 | 1 | »LPA, »LCW, LATM(LA:2) | Hands, Comms, SatUp, ECCM ((Aux)), CGL, IS:5+, CP:1, Rank:2 |
| Morgana FLAIL Squad | 7 | 1 | »HMG, »HICW(AP:1) | Agile, Brawl:1, Stealth, Jetpack:4 | |
| Peregrine Gunship | 16 | 2 | »MRL(AA), MRP(Link) | Agile, VTOL | |
| CG2 GP |
GREL Hoverbike Squad Jan,Single | 5 | 1 | »HIW, »MIGL, »MICW | Agile, Jump Jets:2, Comms, SatUp, CGL, IS:5+, CP:1, Rank:2 |
| GREL Hoverbike Squad Jan,Single | 5 | 1 | »HIW, »MIGL, »MICW | Agile, JumpJets:2, Comms, SatUp | |
| GREL Hoverbike Squad Jan,Single | 5 | 1 | »HIW, »MIGL, »MICW | Agile, JumpJets:2, Comms, SatUp | |
| GREL Hoverbike Squad Jan,Single | 5 | 1 | »HIW, »MIGL, »MICW | Agile, JumpJets:2, Comms, SatUp | |
| CG3 RC |
HC-3 | 14 | 2 | »LLC, LRP | Agile, Airdrop, TD, Comms, SatUp, Vuln:H, ECM+, ECCM, Sensors:36, Jump Jets:4 ((Aux)), CGL, IS:5+, CP:1, Rank:2 |
| LHT-67 Assault | 15 | 2 | »MFC(T,Link), MRL(T) | Agile, Airdrop, JumpJets:3 (Aux), Sensors:24, TD | |
| CG4 SK |
BF2-19 | 17 | 1 | »MLC, »MCW, MRP, LATM | Hands, ANN, ECM ((Aux)), React+, Vet, SP:1, Duelist |
| Total | 100 | 13 |
It has access to a lot of different tools, and much more ECM than the other options. I think I might try this at some point. It’s missing the FLAIL spam that I was really enjoying, but it probably covers a lot more ground. Having access to ECM is fairly important, and I think having 4 combat groups in 100TV is super important to allow bikes to swoop in on objectives on the last turn. Lots of unfinished thoughts floating around right now, but HGBTS is working at both 150TV and 100TV, which is what we were after in this test!