
Laser Bikes
Time for another Heavy Gear game! This time, Adam and I are doing some 3.1 testing! We broke out the model railroad buildings, cracked some beers, and got to work.
Overview
- Mission: Supply Drop
- Forces: Peace River versus North (125TV, 3 CG Limit)
We’ve had a lot of concerns about the Supply Raid HGBTS mission, in that having all the markers on the table at game start lead to some issues with game pacing. Unlike the Infinity version of Supplies, once you drop the supply marker you can’t pick it back up. It was therefore possible to rush the objectives turn 1 and deny your opponent any, even if they killed your supply carrier.
We created a new mission, Supply Drop, which just randomly determines which of the 3 markers had supplies to pick up at the beginning of each turn, so there could be a total of 4 throughout the game, assuming you picked at least one up in the first three turns. I decided to try out a new 3.1 Peace River sublist which lets you take one Black Talon model per CG, upgrade infantry weapons to laser weapons, lets you change one SK group to SO, and lets you ignore role caps for models with Advanced or Guided weapons in one CG.
We decided to play at 125 TV with a 3 CG limit to try out that point in the game space as a potential option for HGBTS.
I called my list Laser Bikes, because I gave the Spitz some LIW lazors (basically adds Advanced). I never intended to use the LIW (LIGL, as we know, is all that matters), but I wanted to make the Spitz RC+ instead of RC. Of course, thanks to the Raven, I could’ve taken two Spitz and the Raven as the primary RC subgroup with the other two Spitz as GP+ in the secondary… but that’s what you get for being away from the game for awhile. All this really means is I would’ve had a few extra TV to spend on vet upgrades for the Black Talons. Sad, but no big deal.
In any case, I’ve long been enamored with the Lambda Vulture. It’s such a jerk, and now I can pair it with a pile of infantry with lasers. I took 2IC on one of the Infantry to let me airdrop in two places. I was pretty confident in the ability of the laser infantry to shred anything AR6 or lower and the Vulture would handle anything else.
| Name | TV | A | Weapons | Traits | |
|---|---|---|---|---|---|
| CG1 GP |
Lambda Vulture | 21 | 2 | »LFG(Precise), »MVB(Reach:1), MRP, MGM, MFC, MAPGL | Hands, Airdrop, Vet, Stealth, Jetpack:4, CGL |
| Sniper Team Paratrooper | 6 | 1 | »LIW, »LICW, MIR(Silent,Advanced) | Airdrop, 2iC | |
| Sniper Team Paratrooper | 5 | 1 | »LIW, »LICW, MIR(Silent,Advanced) | Airdrop | |
| Assault Team Paratrooper,Squad | 6 | 1 | »LIW, »LICW, HIS(Burst:1,Advanced) | Airdrop | |
| Assault Team Paratrooper,Squad | 6 | 1 | »LIW, »LICW, HIS(Burst:1,Advanced) | Airdrop | |
| CG2 SO |
Nu Owl Iota | 18 | 2 | »MRL, »LVB(Precise,Reach:1), LAPGL, LAPR | Hands, Airdrop, SP:+1, ECM, ECCM, Comms, SatUp, Jetpack:6, Stealth, Vet, CGL, FL |
| Gladiator Melee Specialist | 12 | 1 | »MAC(Link), »LSG, »MVB, LAPGL | Hands, Agile, Brawl:2, Shield | |
| Gladiator Melee Specialist | 12 | 1 | »MAC(Link), »LSG, »MVB, LAPGL | Hands, Agile, Brawl:2, Shield | |
| CG3 RC |
Alpha Raven | 16 | 2 | »MRF(Silent), »LVB, LRP | Hands, Agile, Vet, Airdrop, Comms, TD, ECM+, ECCM, Sensors:24 ((Aux)), Jetpack:6, Stealth, CGL, Duelist |
| Spitz Monowheel Team | 5 | 1 | »LIW, »LIGL, »LICW | Agile | |
| Spitz Monowheel Team | 6 | 1 | »LIW(Advanced), »LIGL, »LICW | Agile | |
| Spitz Monowheel Team | 6 | 1 | »LIW(Advanced), »LIGL, »LICW | Agile | |
| Spitz Monowheel Team | 6 | 1 | »LIW(Advanced), »LIGL, »LICW | Agile | |
| Total | 125 | 16 |
The next group was my objective grabbers, a pair of Gladiators led by an Owl. I figured if you try to approach them to steal the box you’re going to get smacked in the face with a Brawl: 2 MVB or just gunned down by their “MRC.” Finally, I try to never leave home without some sort of bike, and I wanted a Raven, because I think they’re awesome. Makes for a good CG filler for “cheap” (didn’t expect to say that about a BT) and gives you some killer EW options.
Adam’s back to his North these days, playing Western Frontier Protectorate. The key thing to remember is that he doesn’t have to airdrop in coherency, which is great. He took two SK squads, which is fine, I guess, but definitely limited his objective selection options.
I’m not a huge fan of the list, mostly due to playstyle mismatch. There’s a fair amount of lower armor things in his list, along with a distinct lack of ECM to protect them. Most everything in here hits like a truck but it has to see a target to hit a target. I’m happy dancing around behind cover and not exposing my stuff to shots.
There’s a pair of Klemm that can fire some ATMs off of the Bobcat’s forward observation, but I’ve got Stealth on all the stuff that Adam would want to do that to, so I’ve got time to kill the Bobcats.
| Name | TV | A | Weapons | Traits | |
|---|---|---|---|---|---|
| CG1 SK |
Bobcat | 8 | 1 | »LSMG, »LVB, LRP | Hands, Brawl:-1, TD, Comms, ECCM (Aux), Sensors:24 |
| Klemm | 13 | 1 | »MAC(T,Auto), MATM(T), MAPGL | Offroad, Smoke | |
| Klemm | 13 | 1 | »MAC(T,Auto), MATM(T), MAPGL | Offroad, Smoke | |
| Chaingun Razorback | 13 | 1 | »HRC, »LSMG, »LSG, MAR, LMG, LAPGL | Hands | |
| Chaingun Razorback | 13 | 1 | »HRC, »LSMG, »LSG, MAR, LMG, LAPGL | Hands | |
| CG2 SK |
Hunter Commando | 11 | 1 | »LBZ, »LSG, MRP | Hands, Airdrop, Vet, Field Armor, Sensors:24, Duelist, Agile |
| Tank Hunter Dingo | 9 | 1 | »LFG, »MSG, MRP(Link), HMG(Link) | Hands, Airdrop, Brawl:1 | |
| Killer Koala Command | 11 | 1 | »HAC(Combo), »MFL(Combo), »MSG, MAPR(Link,Fire:1), HMG(Link) | Hands, Airdrop, Brawl:1, Comms, SatUp, ECCM | |
| Leopard Grenadier | 9 | 1 | »MAC(Combo), »LGL(Combo), »LCW, LRP, MHG, MSG | Hands, Agile, Airdrop, Climber | |
| CG3 RC |
Bobcat | 8 | 1 | »LSMG, »LVB, LRP | Hands, Brawl:-1, TD, Comms, ECCM (Aux), Sensors:24 |
| Stripped-Down Assault Hunter | 7 | 1 | »MSC(Precise), »LVB, LAPGL, LHG | Hands | |
| Stripped-Down Assault Hunter | 7 | 1 | »MSC(Precise), »LVB, LAPGL, LHG | Hands | |
| Recon Team | 3 | 1 | »LIW, »LICW | TD | |
| Total | 125 | 13 |
Really I think the effectiveness of the list would come down to deployment.
Deployment
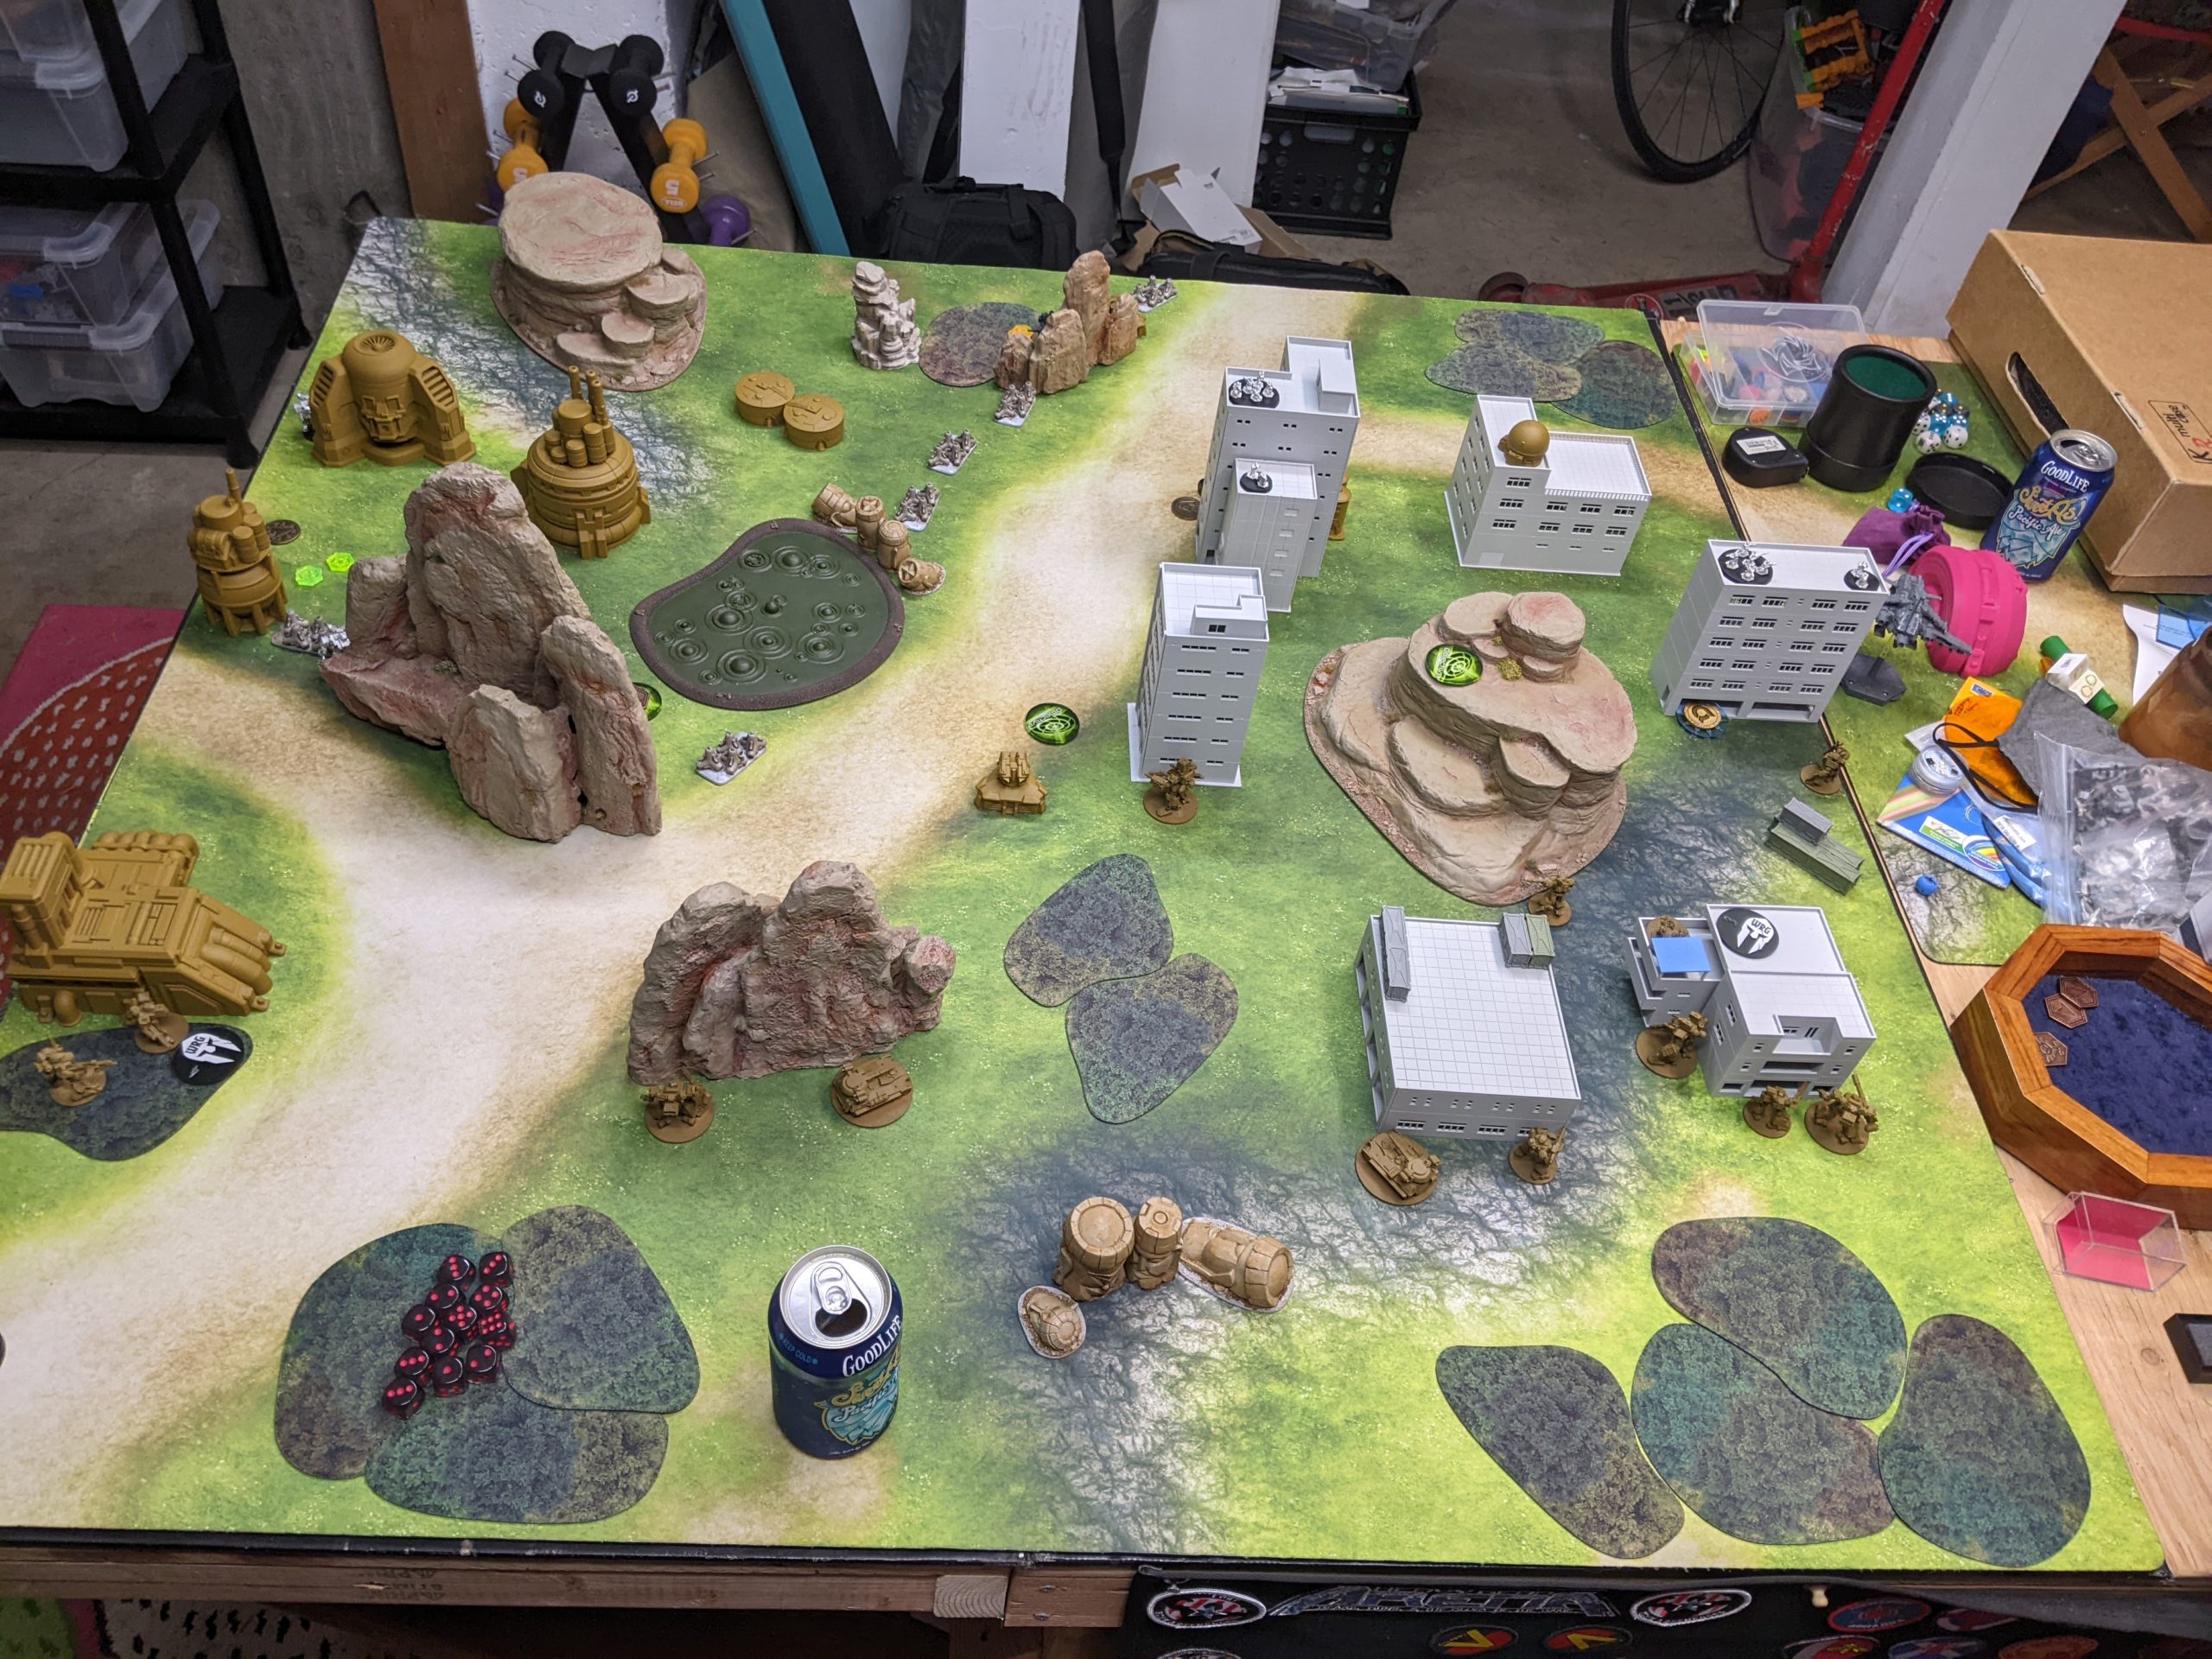
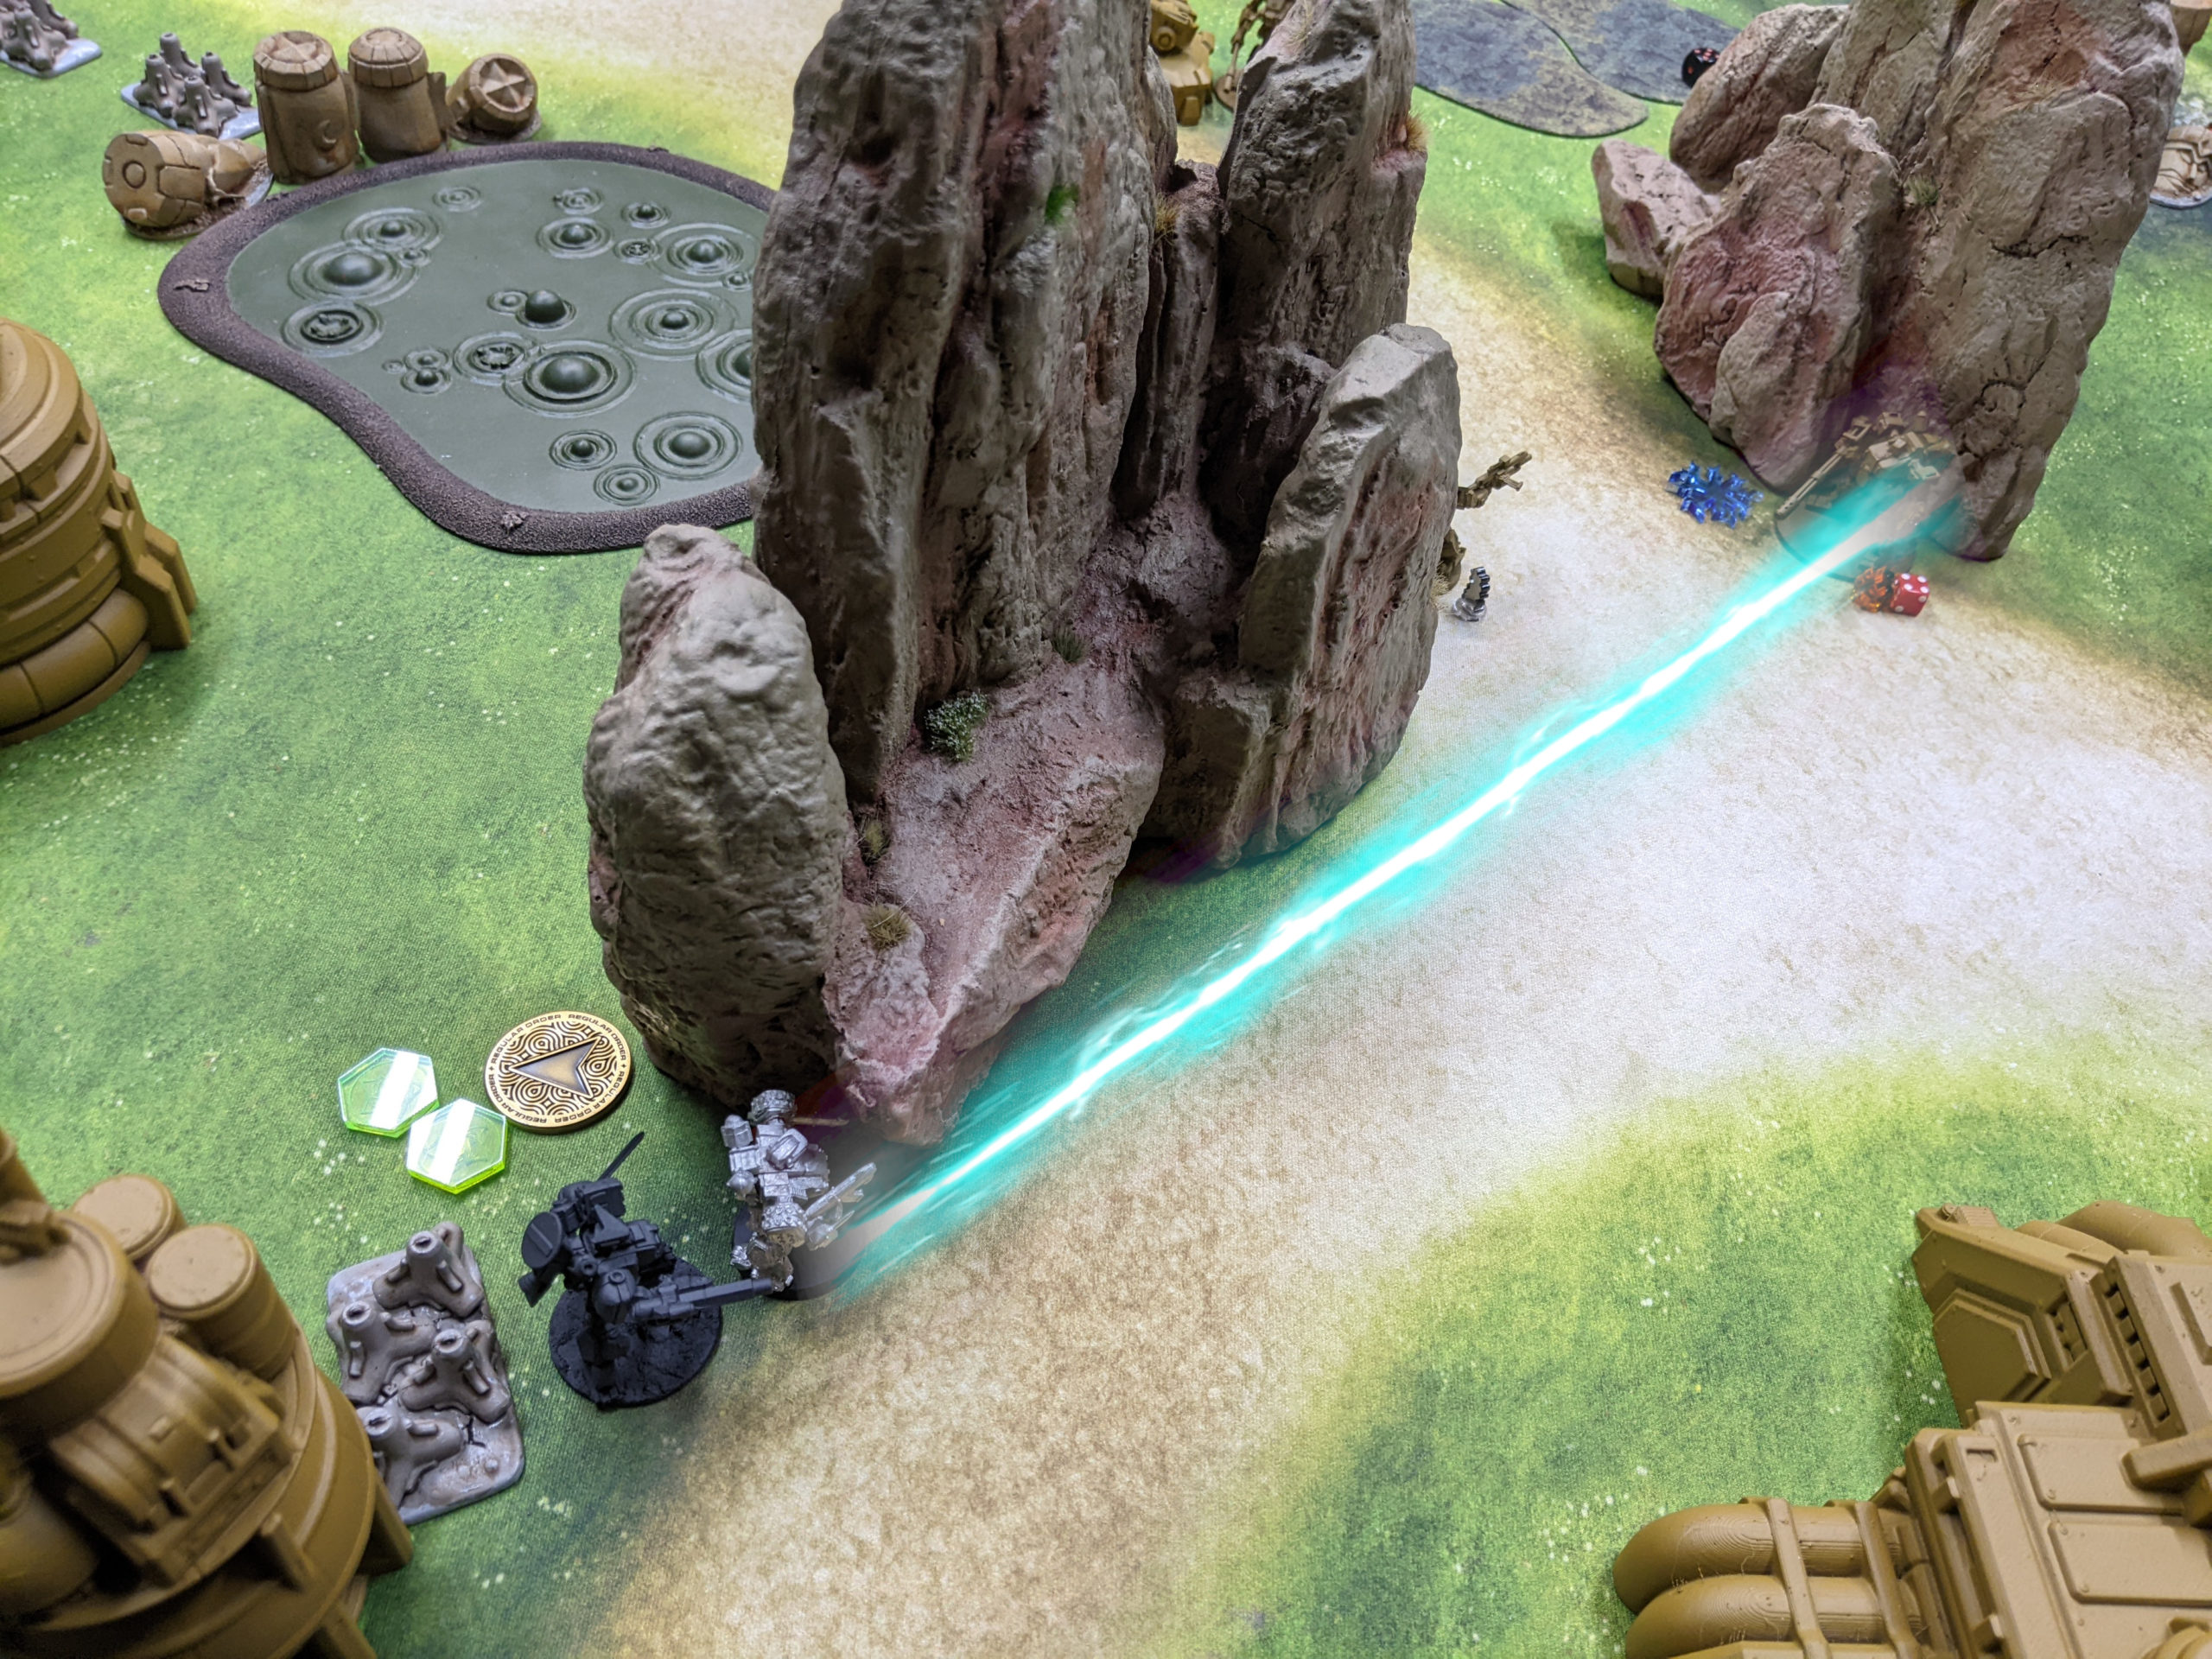
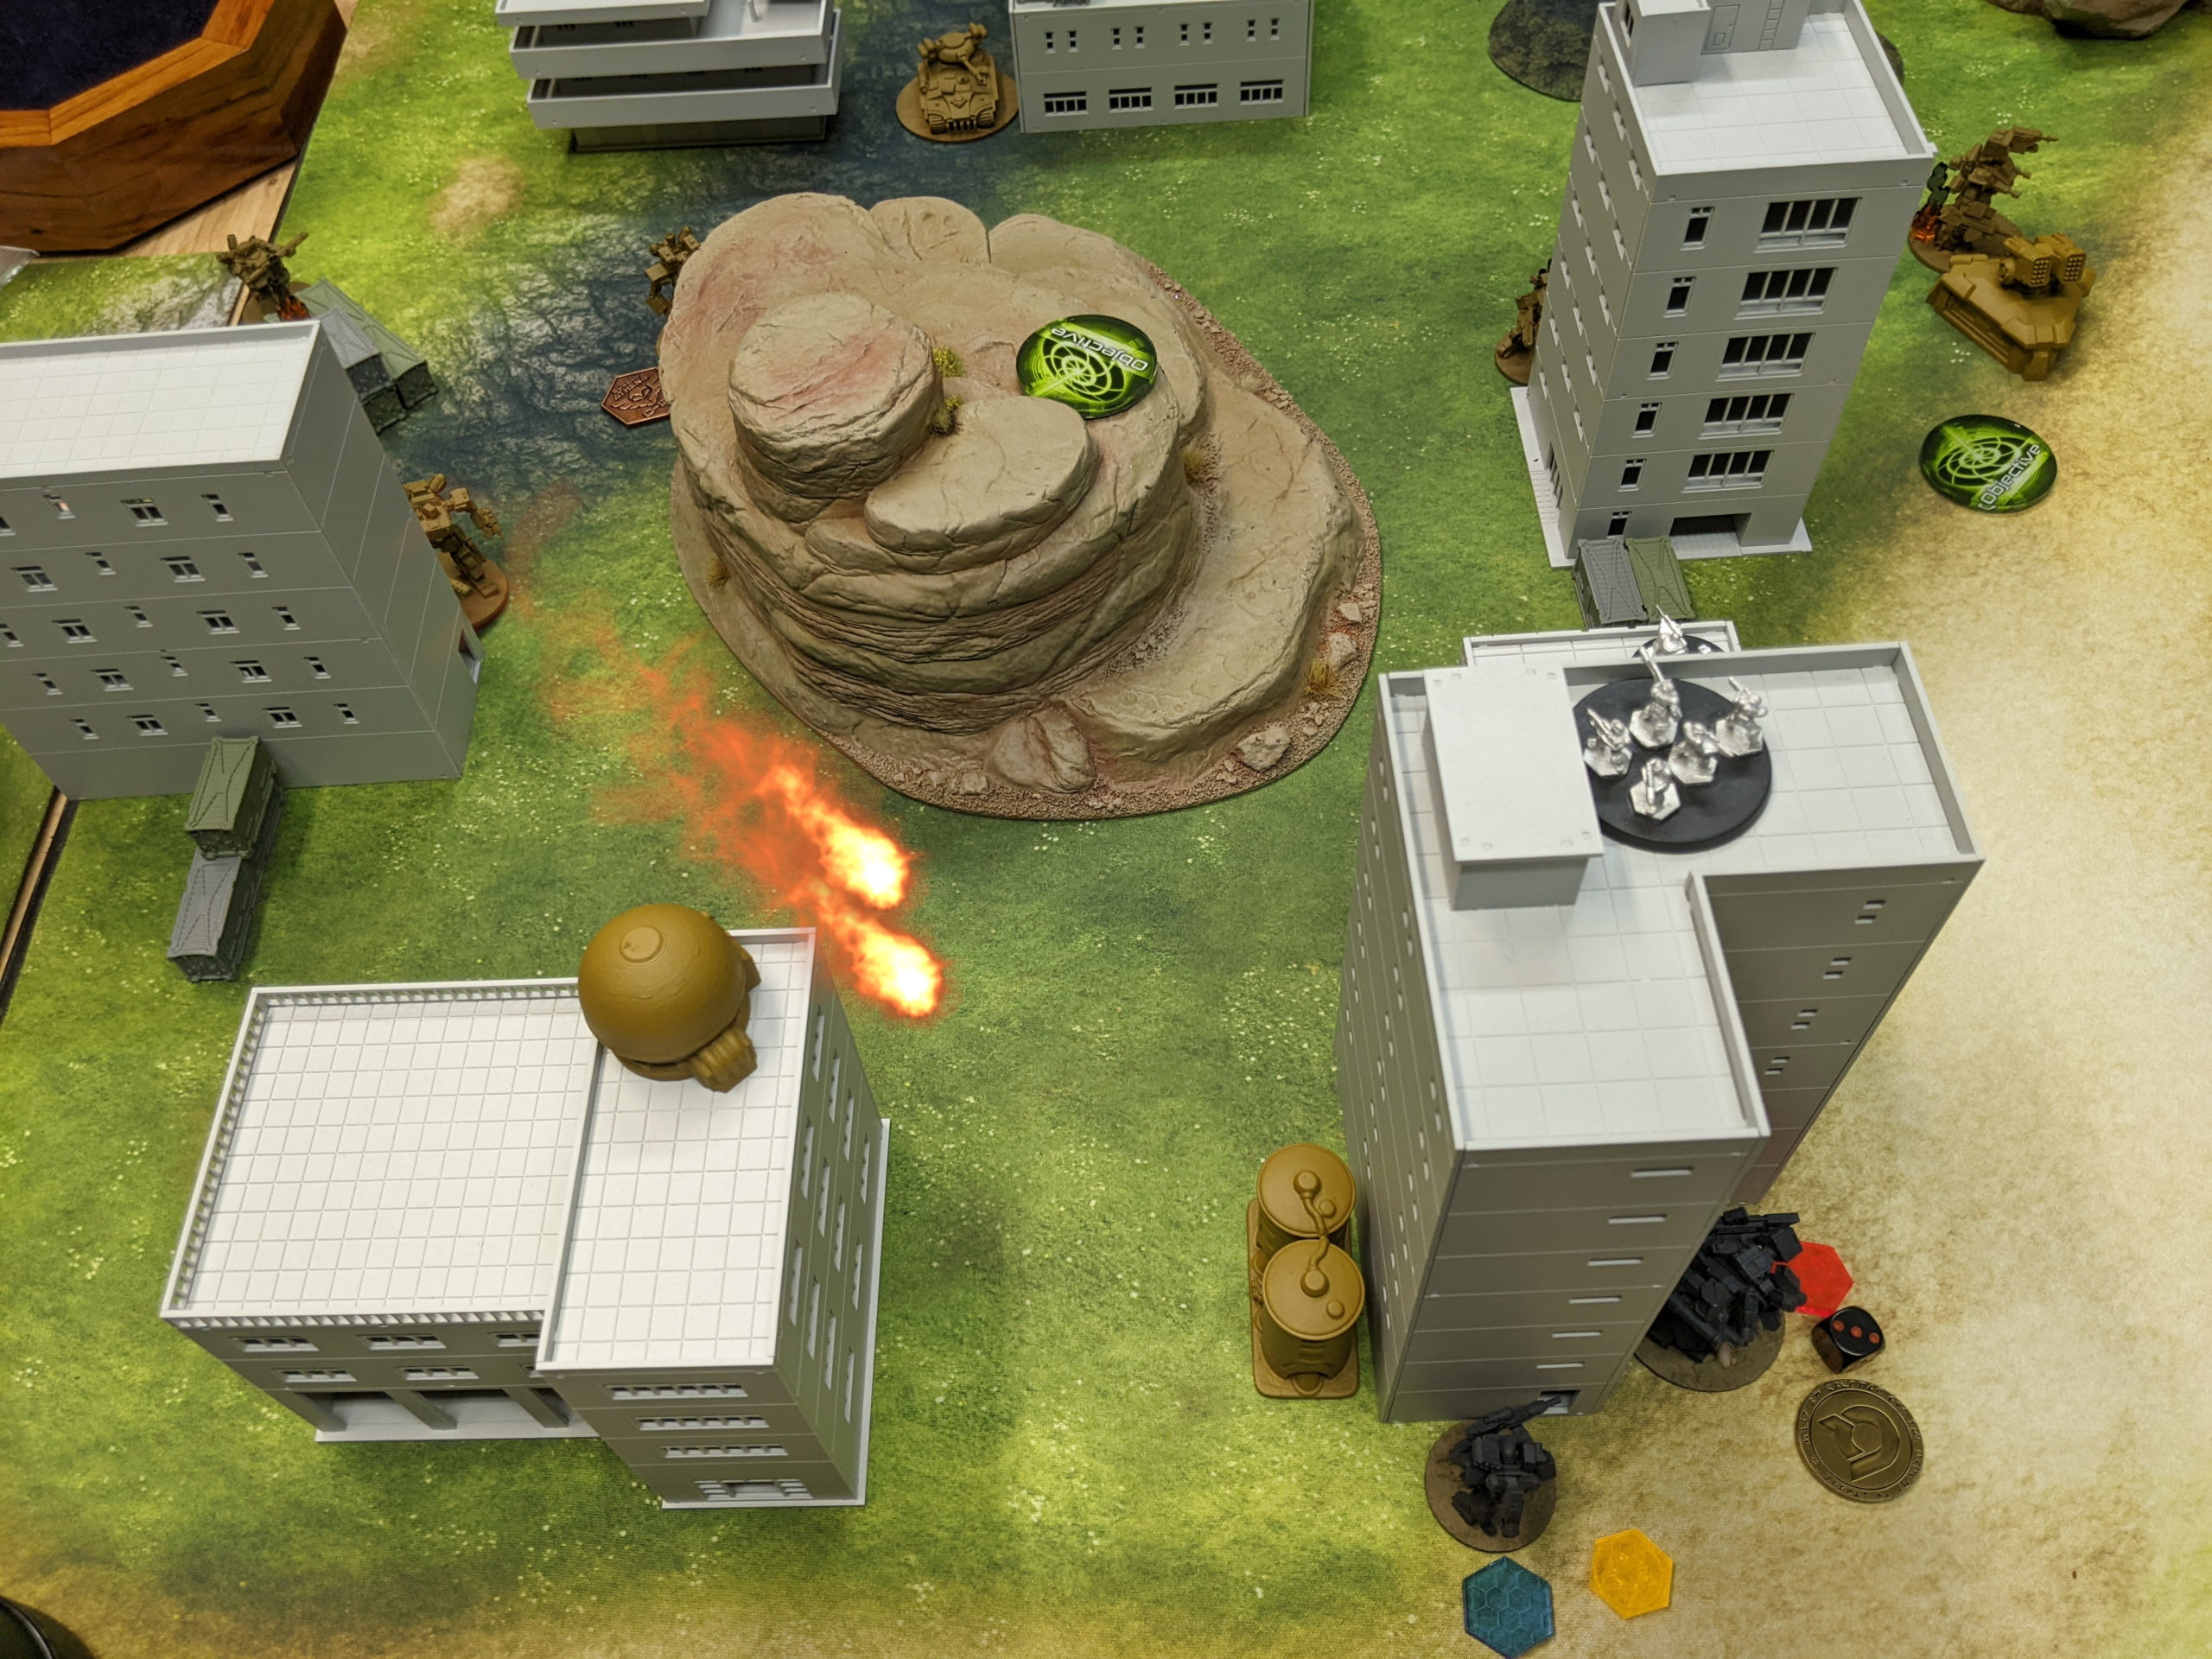
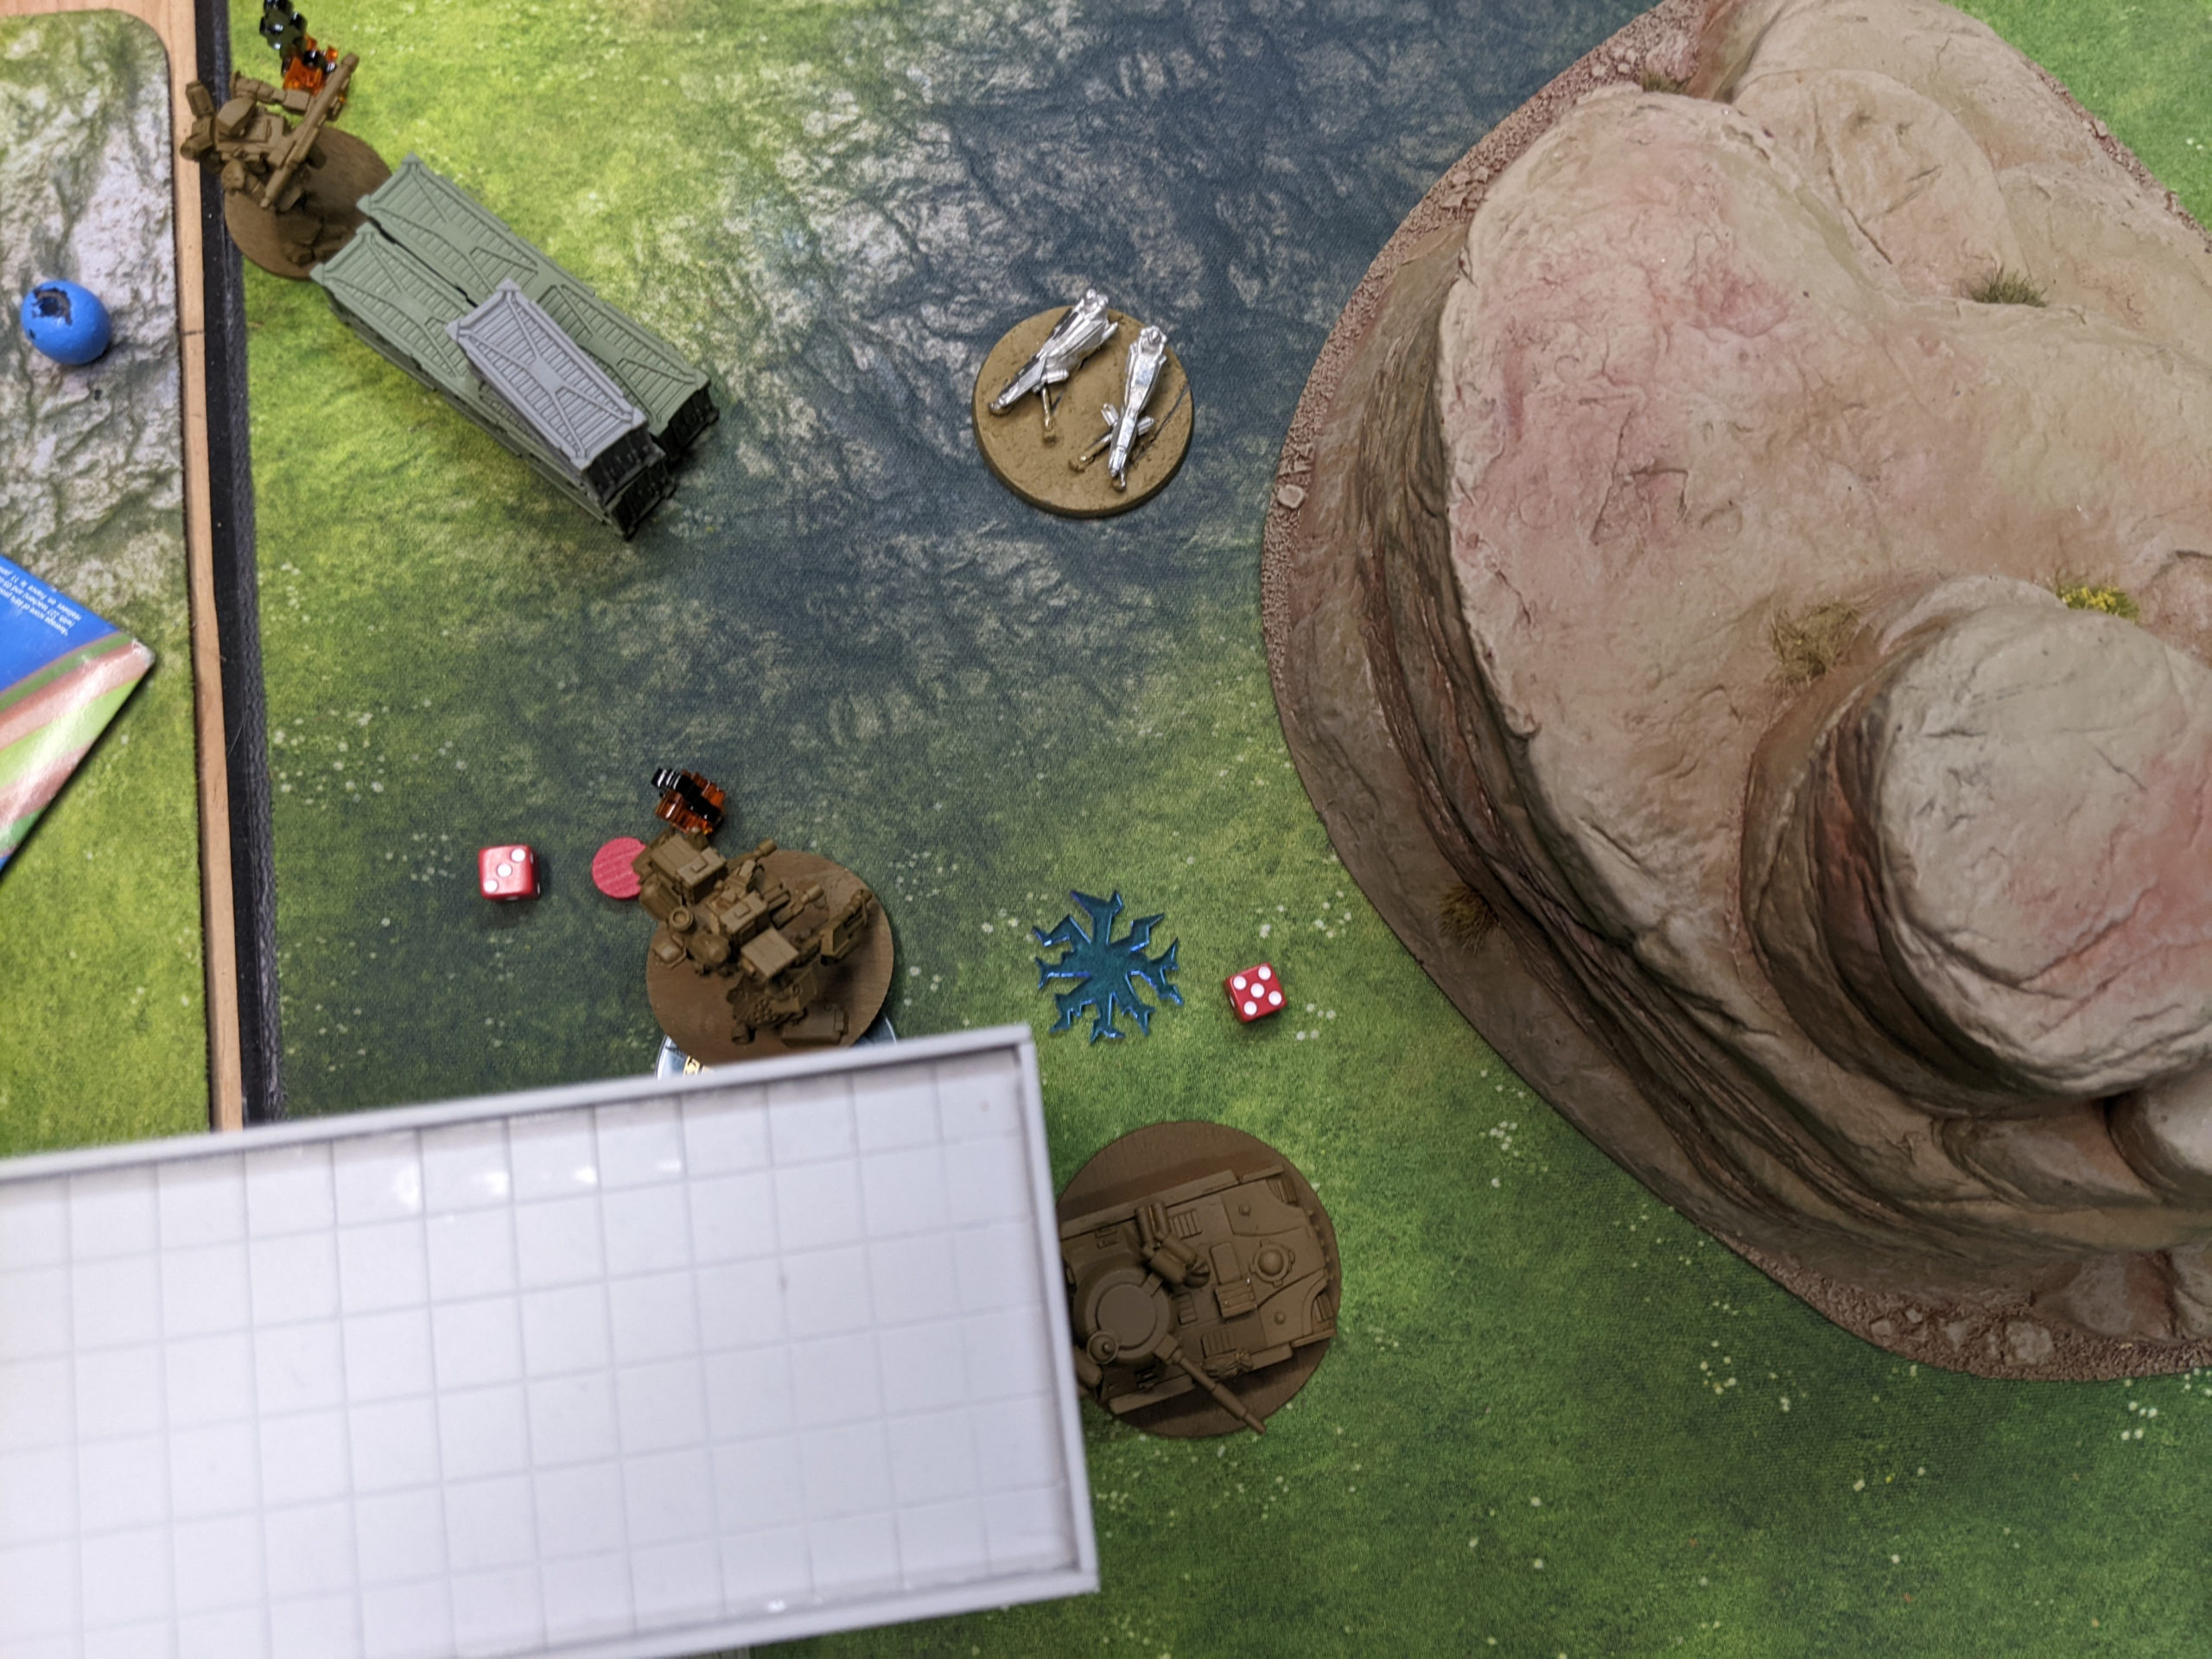
Adam won the rolloff and picked table edge. We’re using the HGBTS initiative based deployment, which meant he’d be deploying and choosing objectives first. He put down his Klemms first in cover. I gave away as little information as possible by deploying my Spitz and Raven next, just scattering them across the table and putting the Raven in the middle.
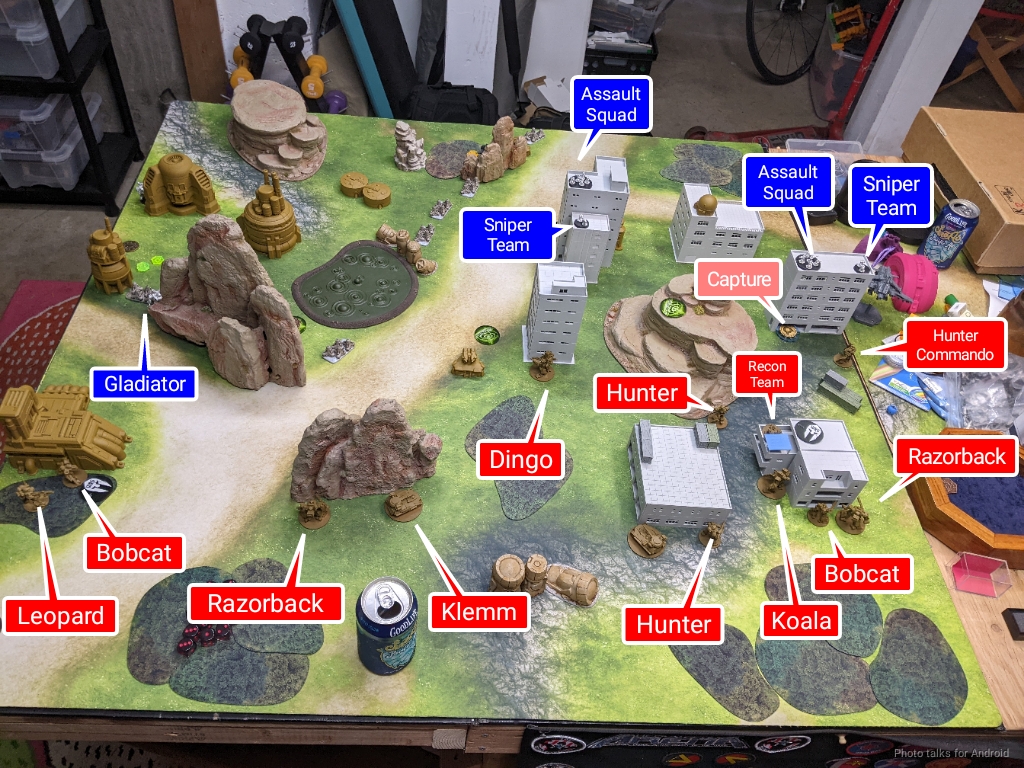
Adam deployed his non-airdrop SK squad next, skewing most of them to the right. I responded by placing my Owl and Gladiators far up on my right using the Special Operations deployment.
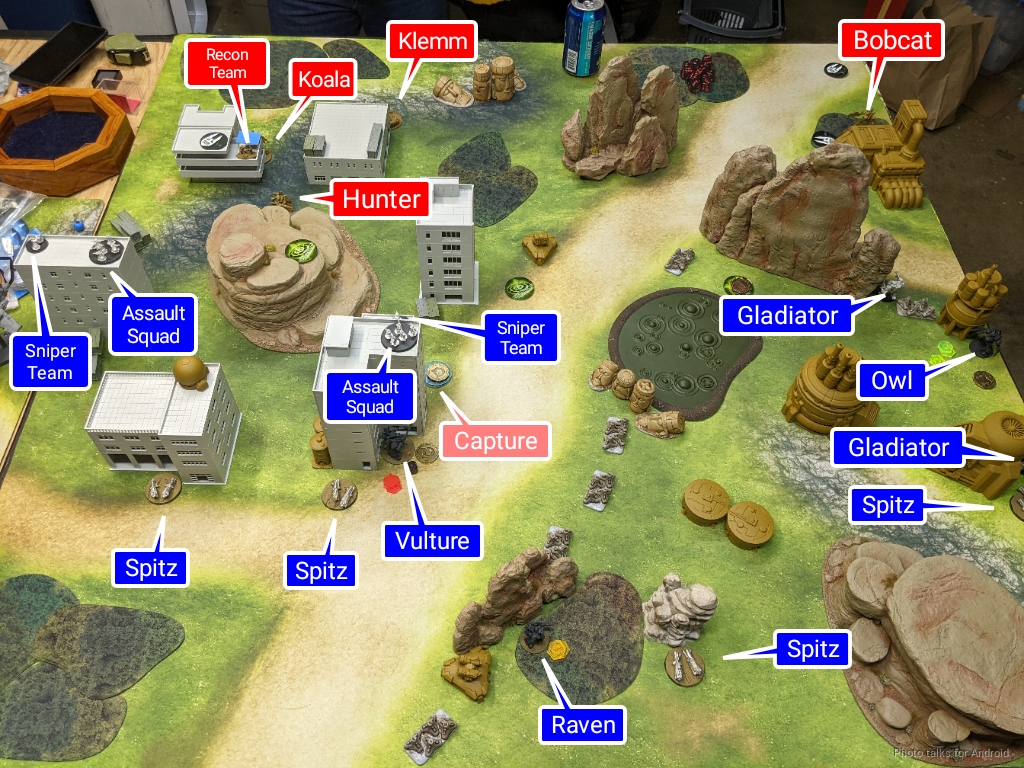
Adam dropped in his airdrop squad, spreading them out across the whole table thanks to the WFP Drop Bears rule. He basically has a denied flank, with most of his forces spread out on his right. A Leopard and Bobcat, along with a single Razorback were most of his presence on the left, meaning I had less to chew through to clear that flank.
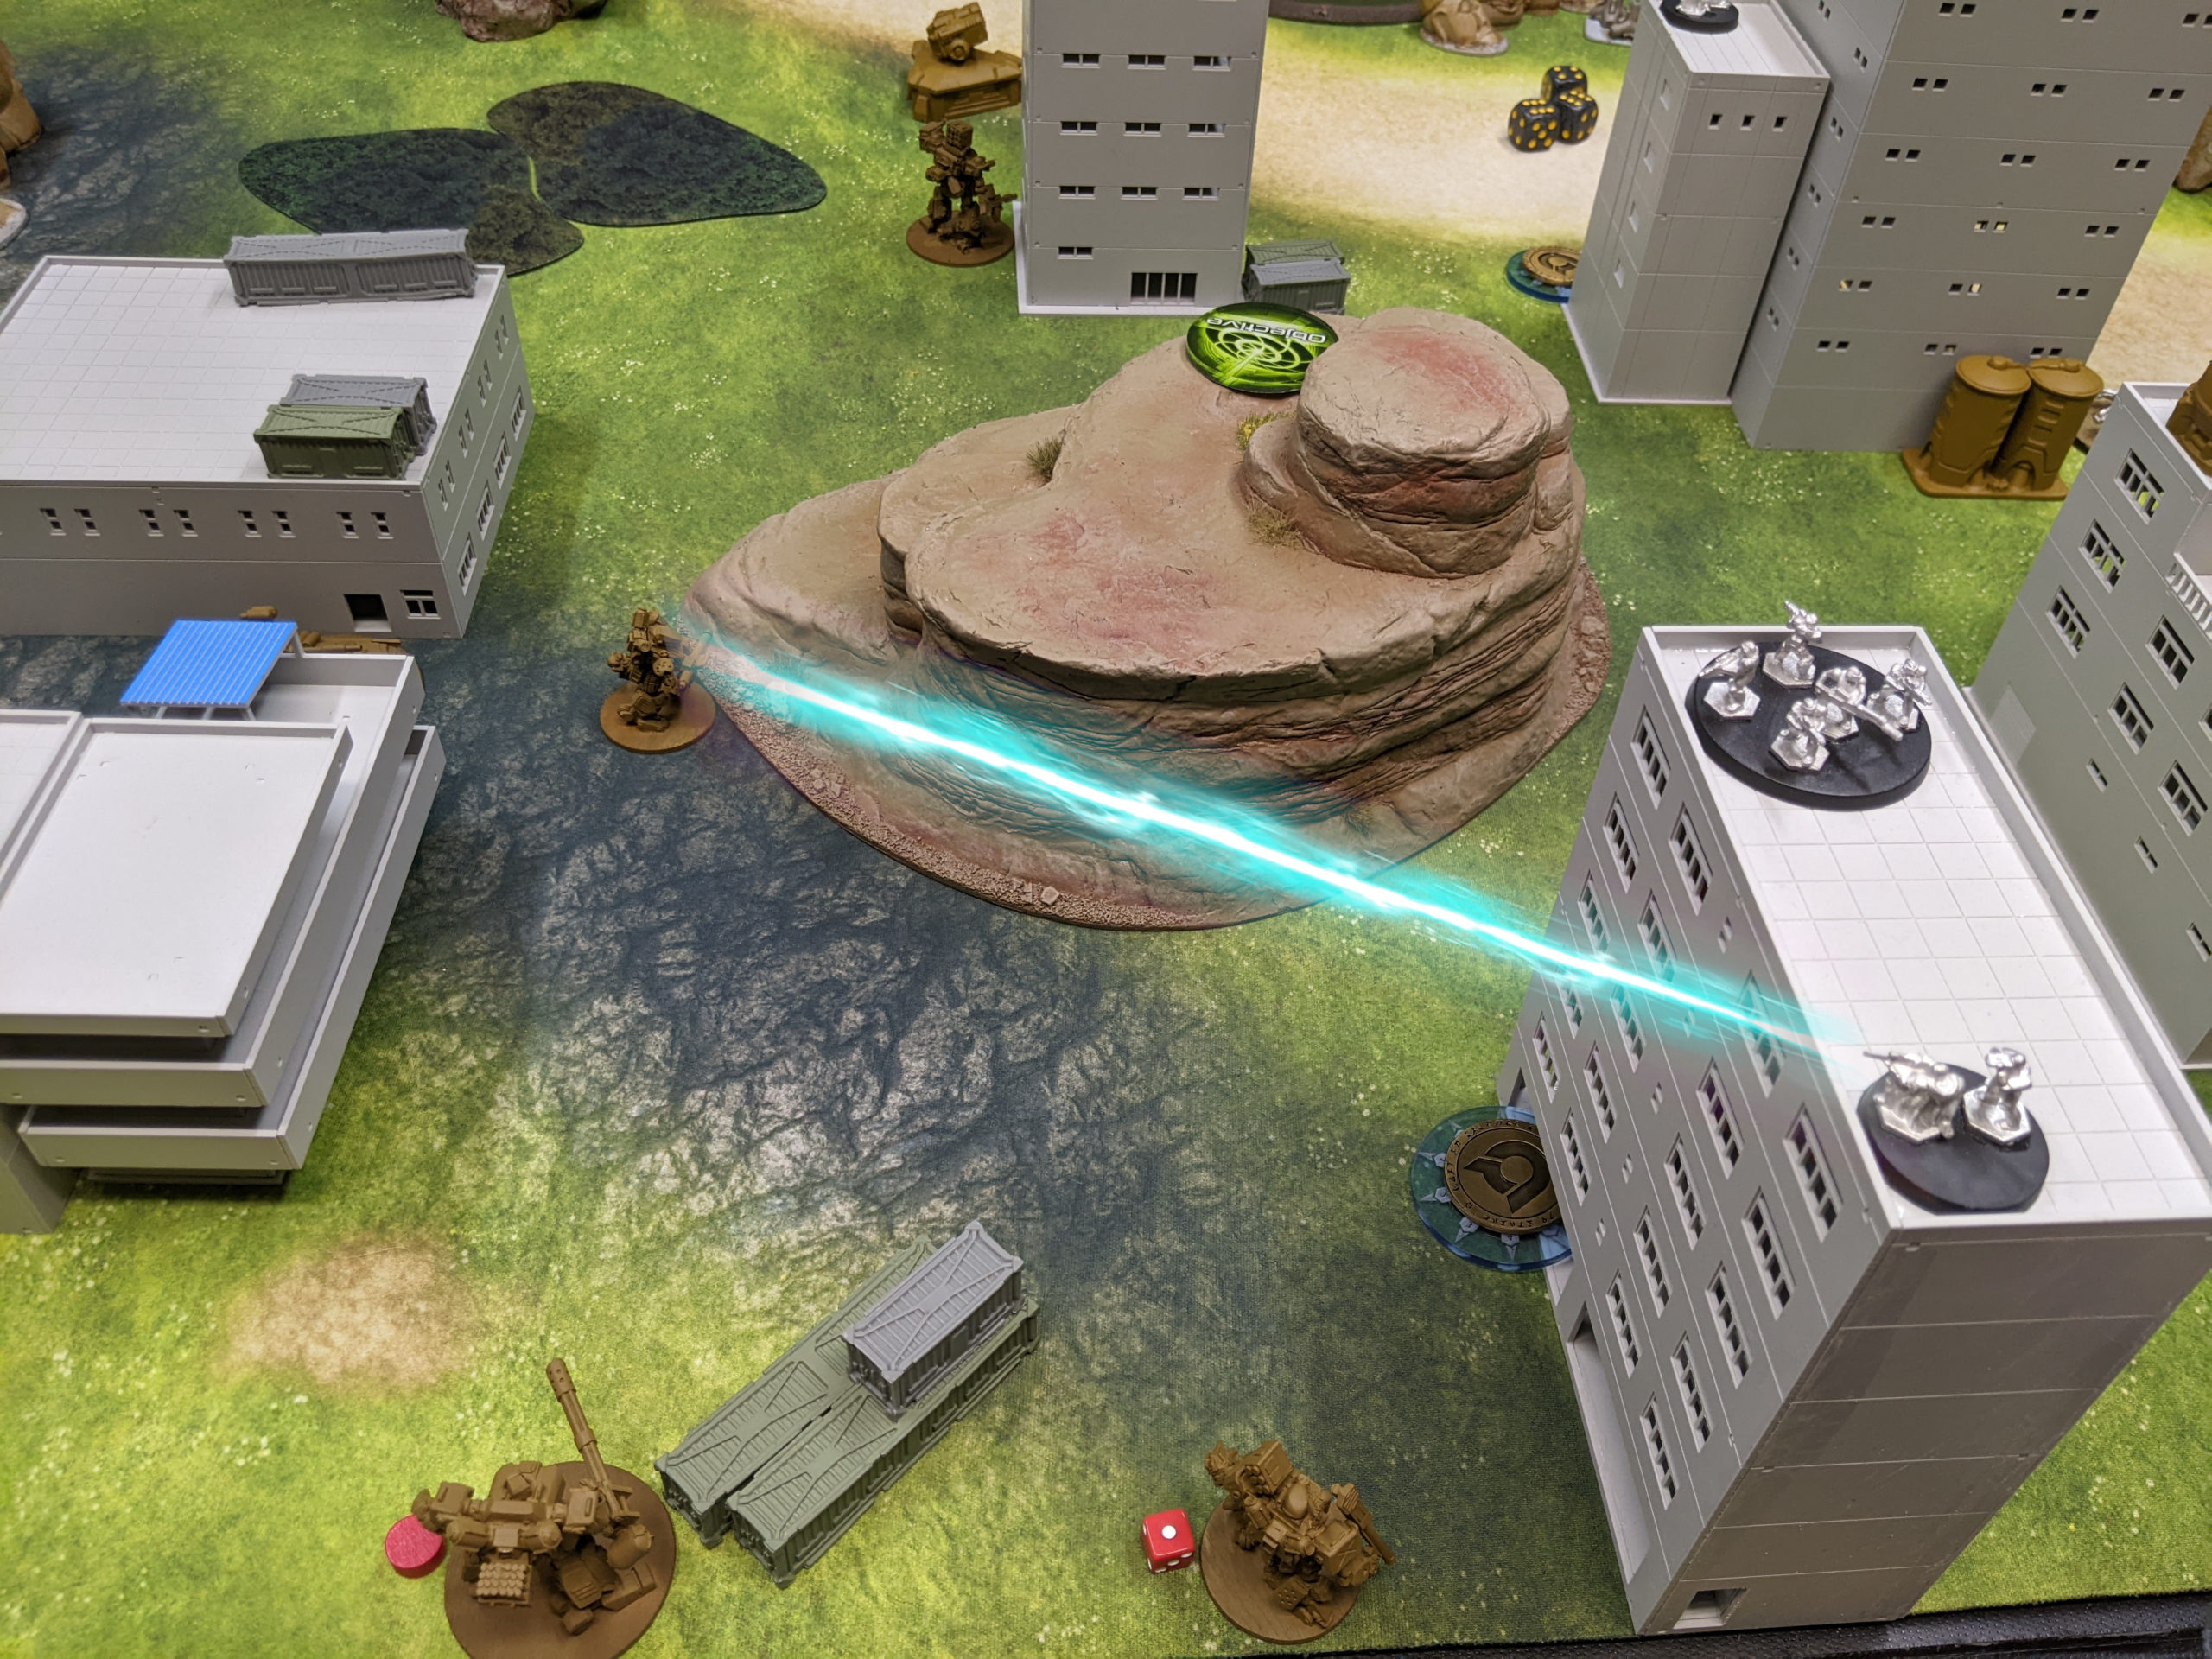
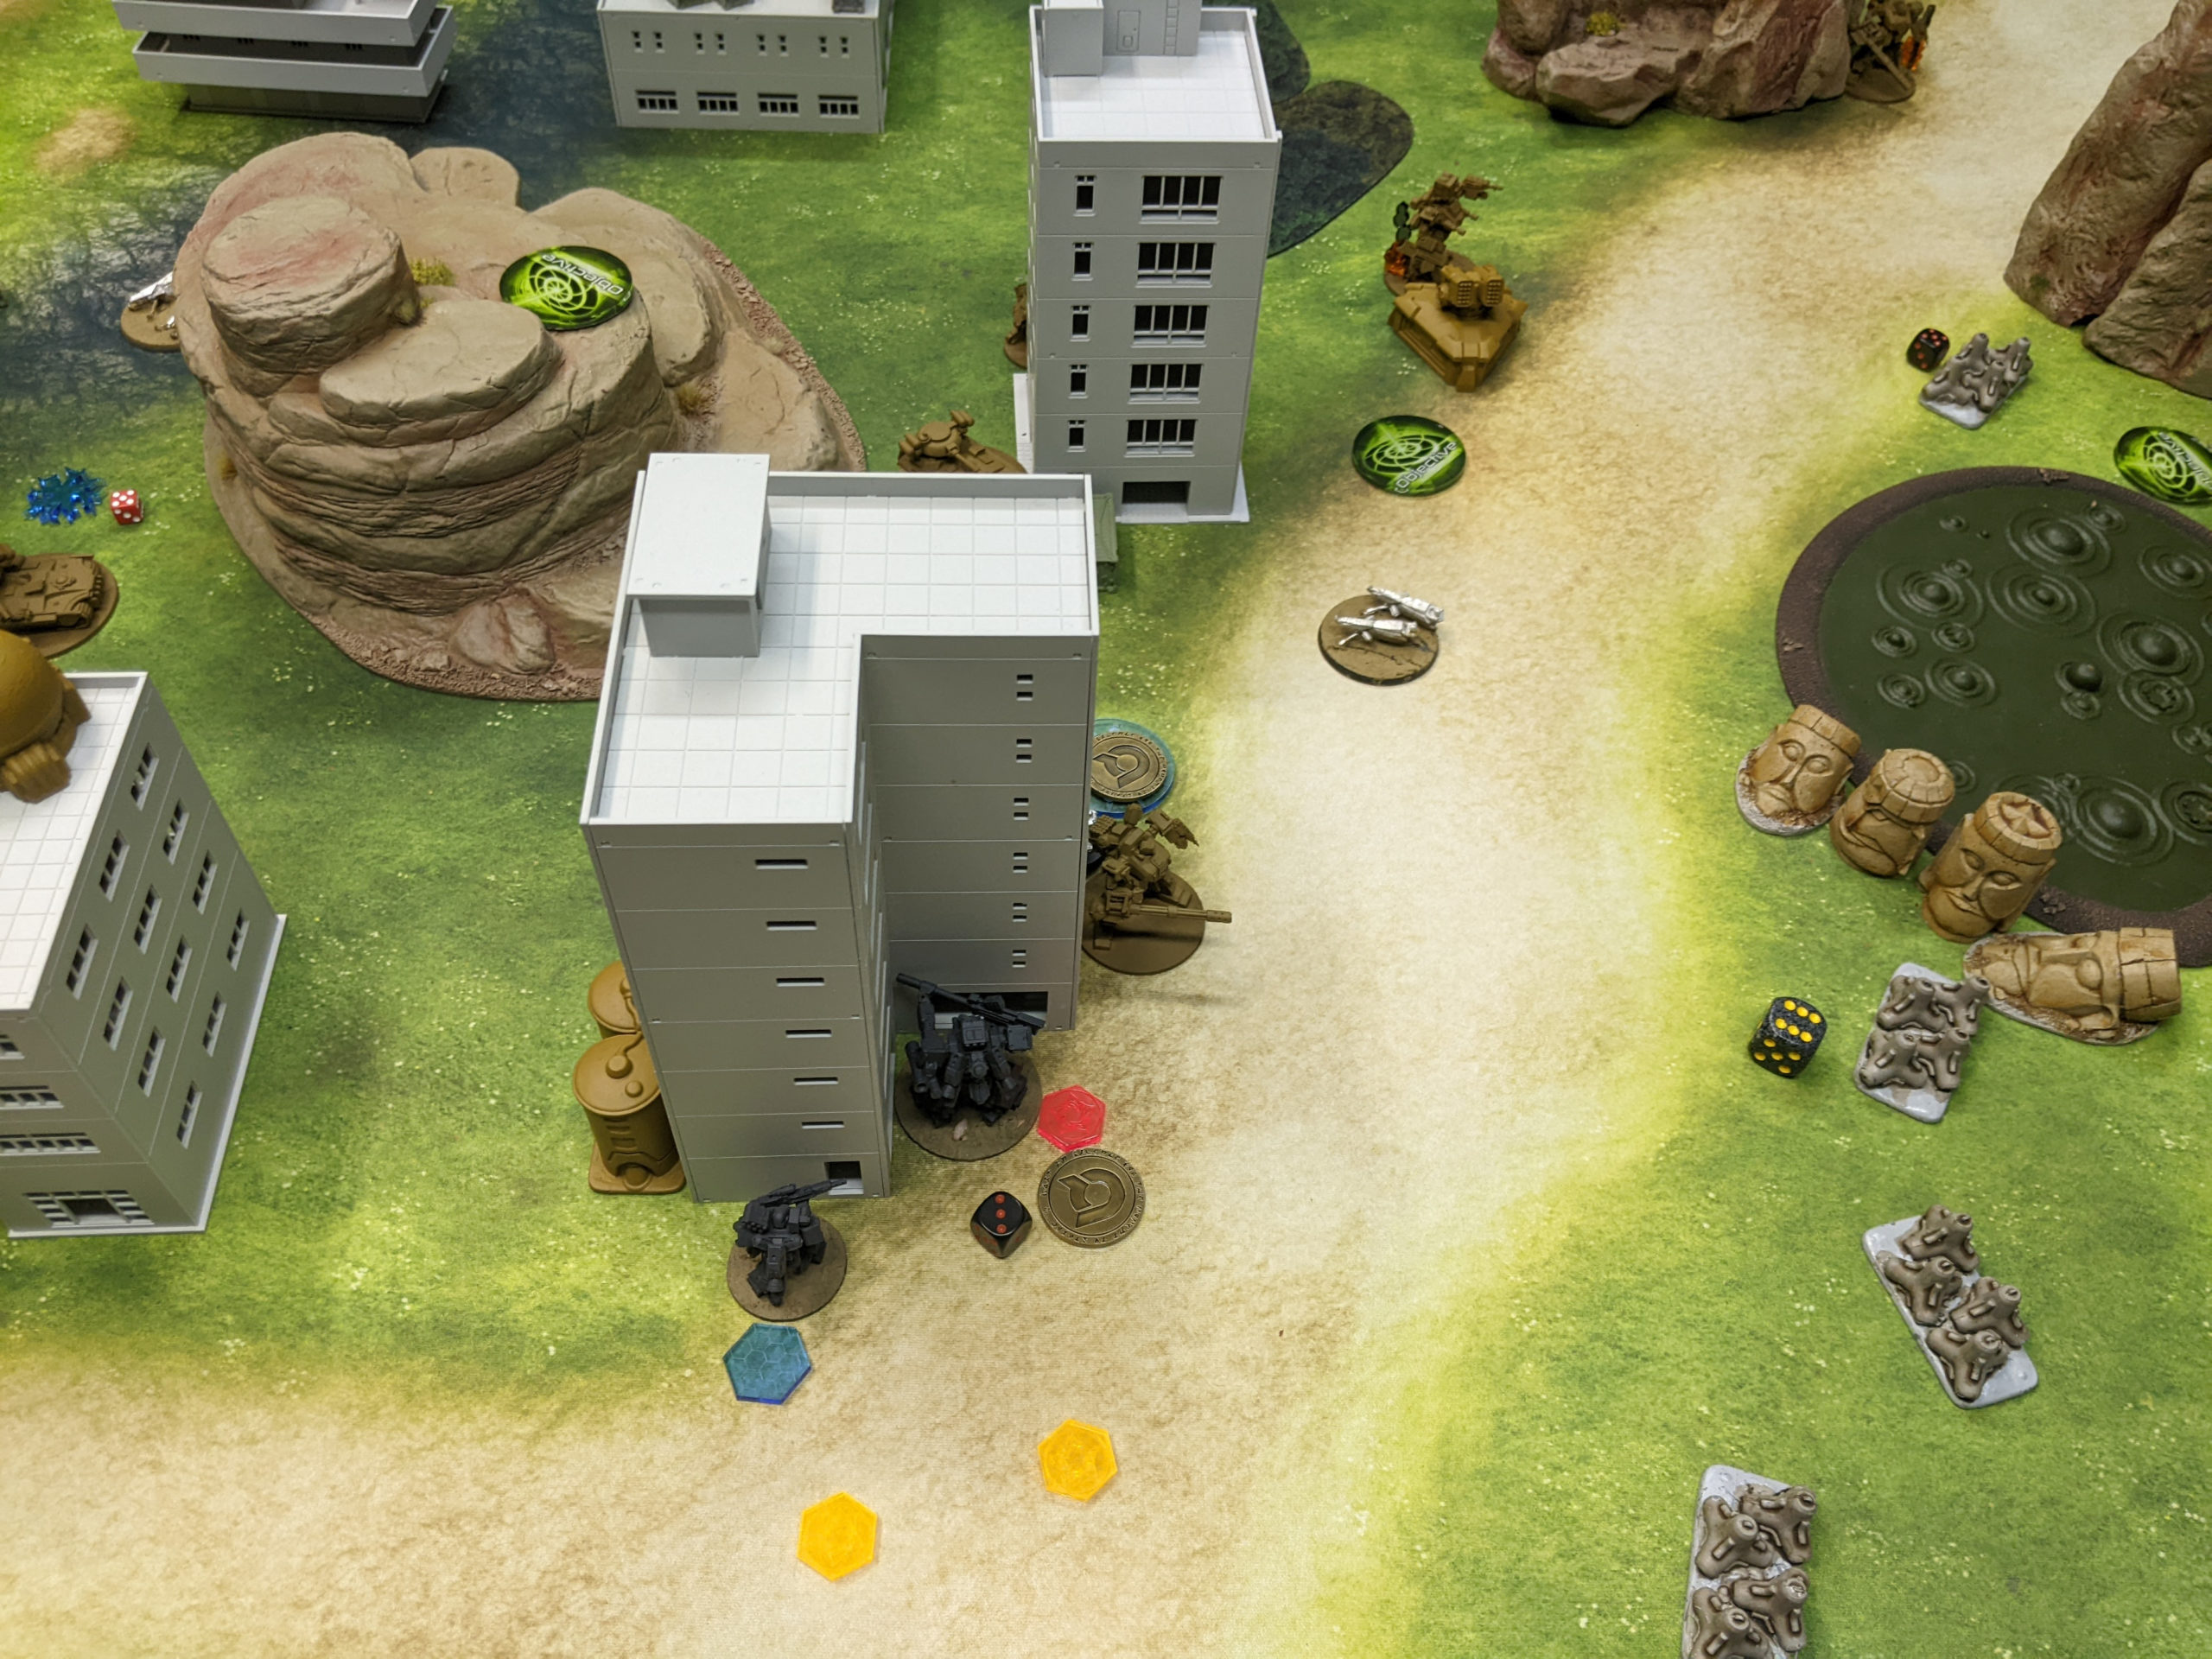
I decided to post my infantry on the rooftops–they’re exposed but hard to kill, and they can see most of the table. Most importantly, they could see Adam’s Recon team, which was commanding his last CG. The Vulture had to be nearby, which meant it was at the base of a building. Of course, I rolled a pass on all the airdrop rolls except for the Vulture’s. BAH.
Objectives
- North
- Capture
- Pave the Way
- Peace River
- Assassinate
- Break the Line
Adam chose Capture, intending to push into my half of the table aggressively with all his Hunters and airdrop units. Both of his Capture markers were on my left, in areas he was already mostly controlling, so this was going to be tough for me!
I chose Assassinate, figuring the Recon Team CGL being in view of 4 of my infantry at start was a pretty good deal. My other target was a Bobcat near my Gladiators, which I felt pretty confident about.
Adam then chose Pave the Way, picking the Owl/Gladiator squad and the infantry/Vulture squad. Finally, I took Break the Line as an easy way to get some usefulness out of my Spitz.
Fight!
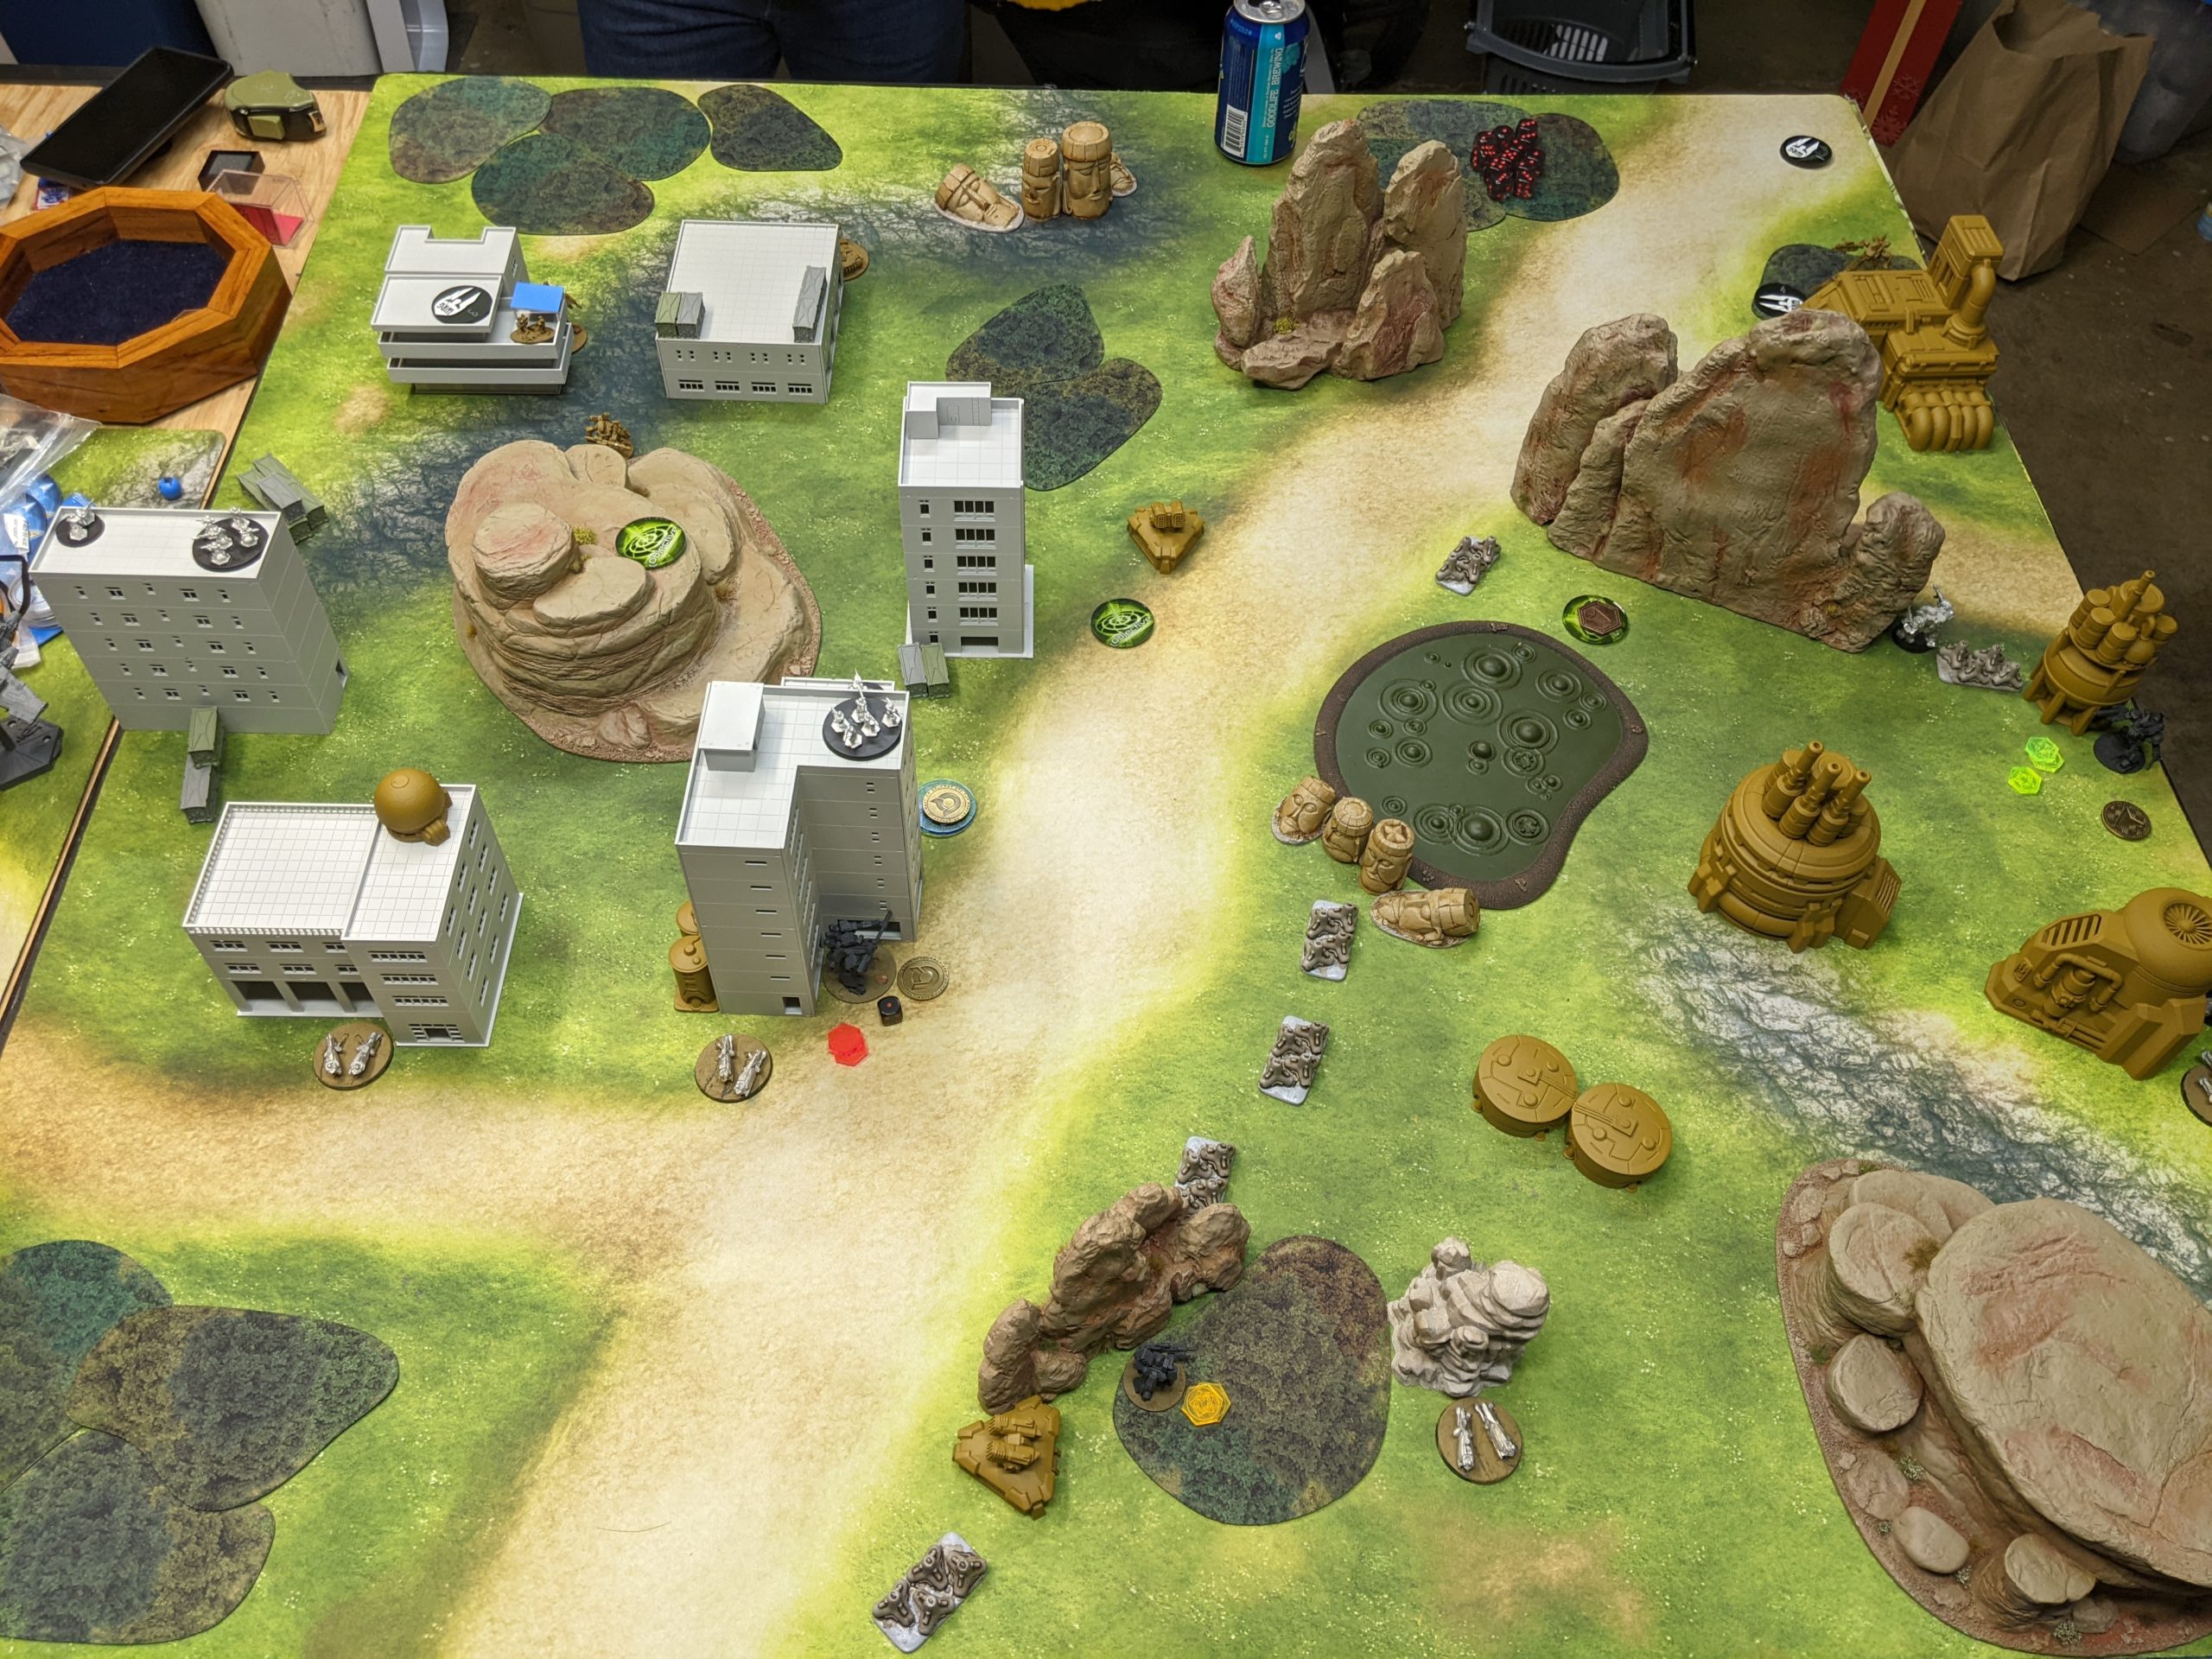
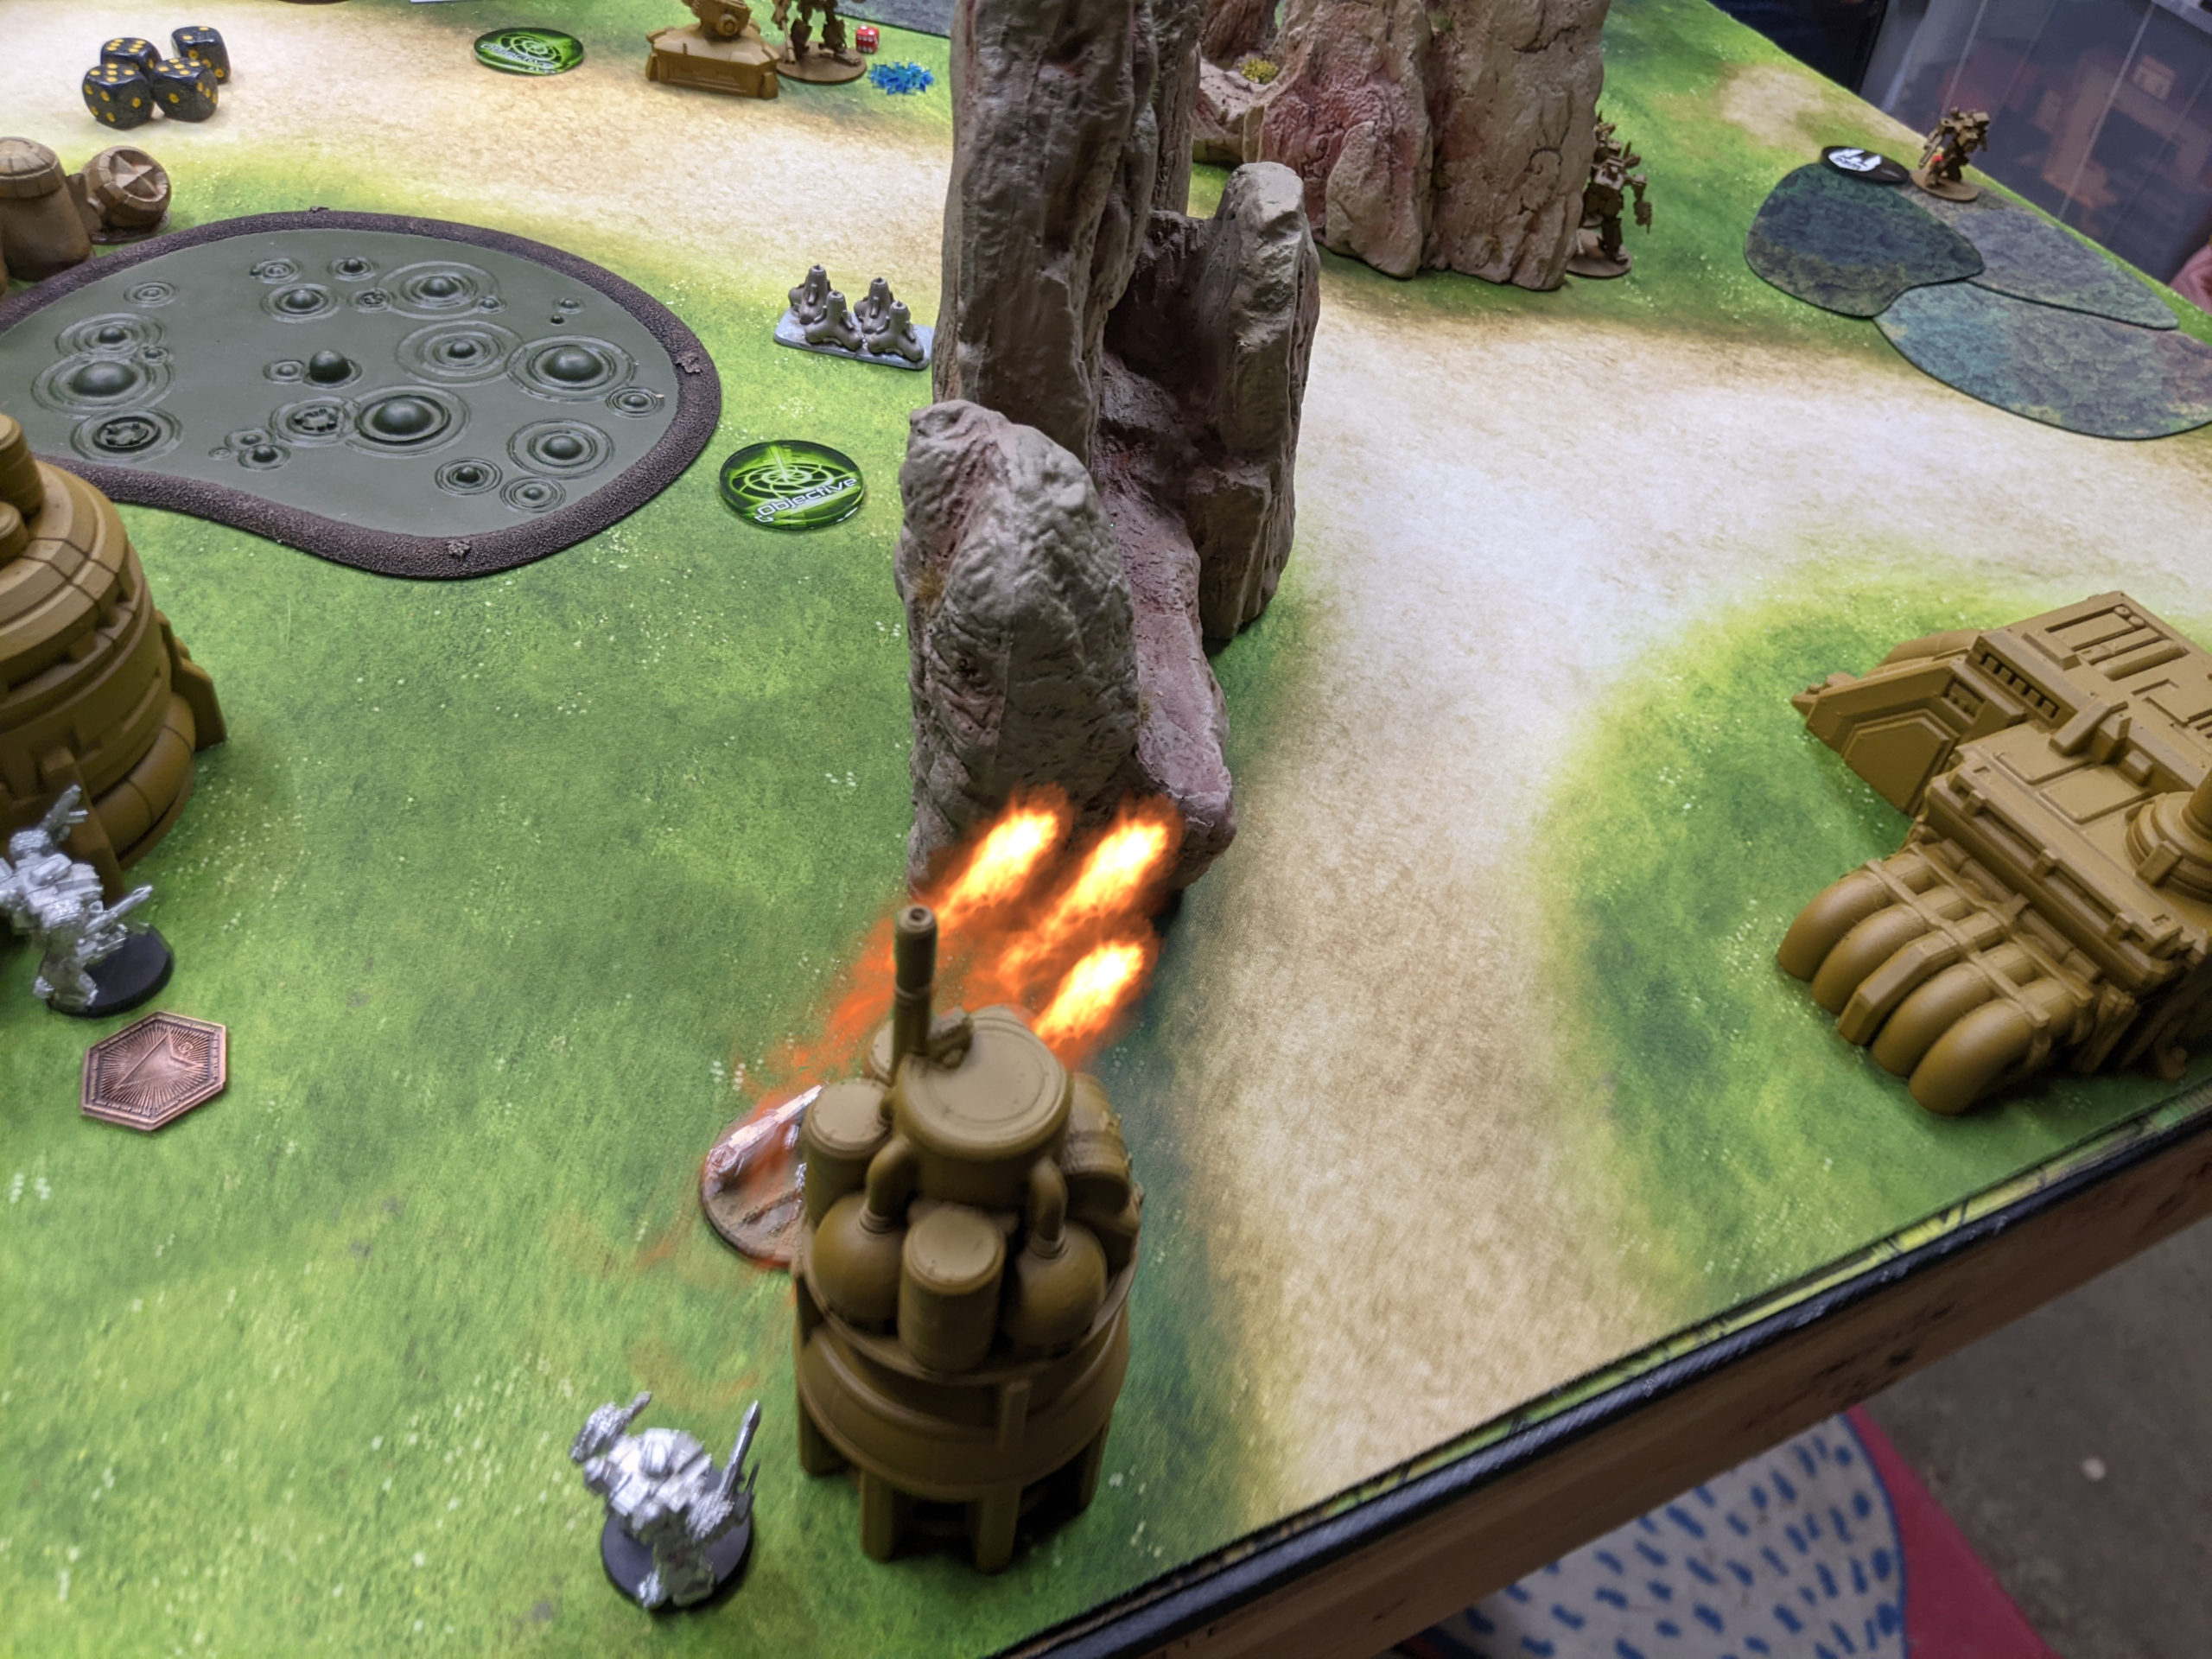
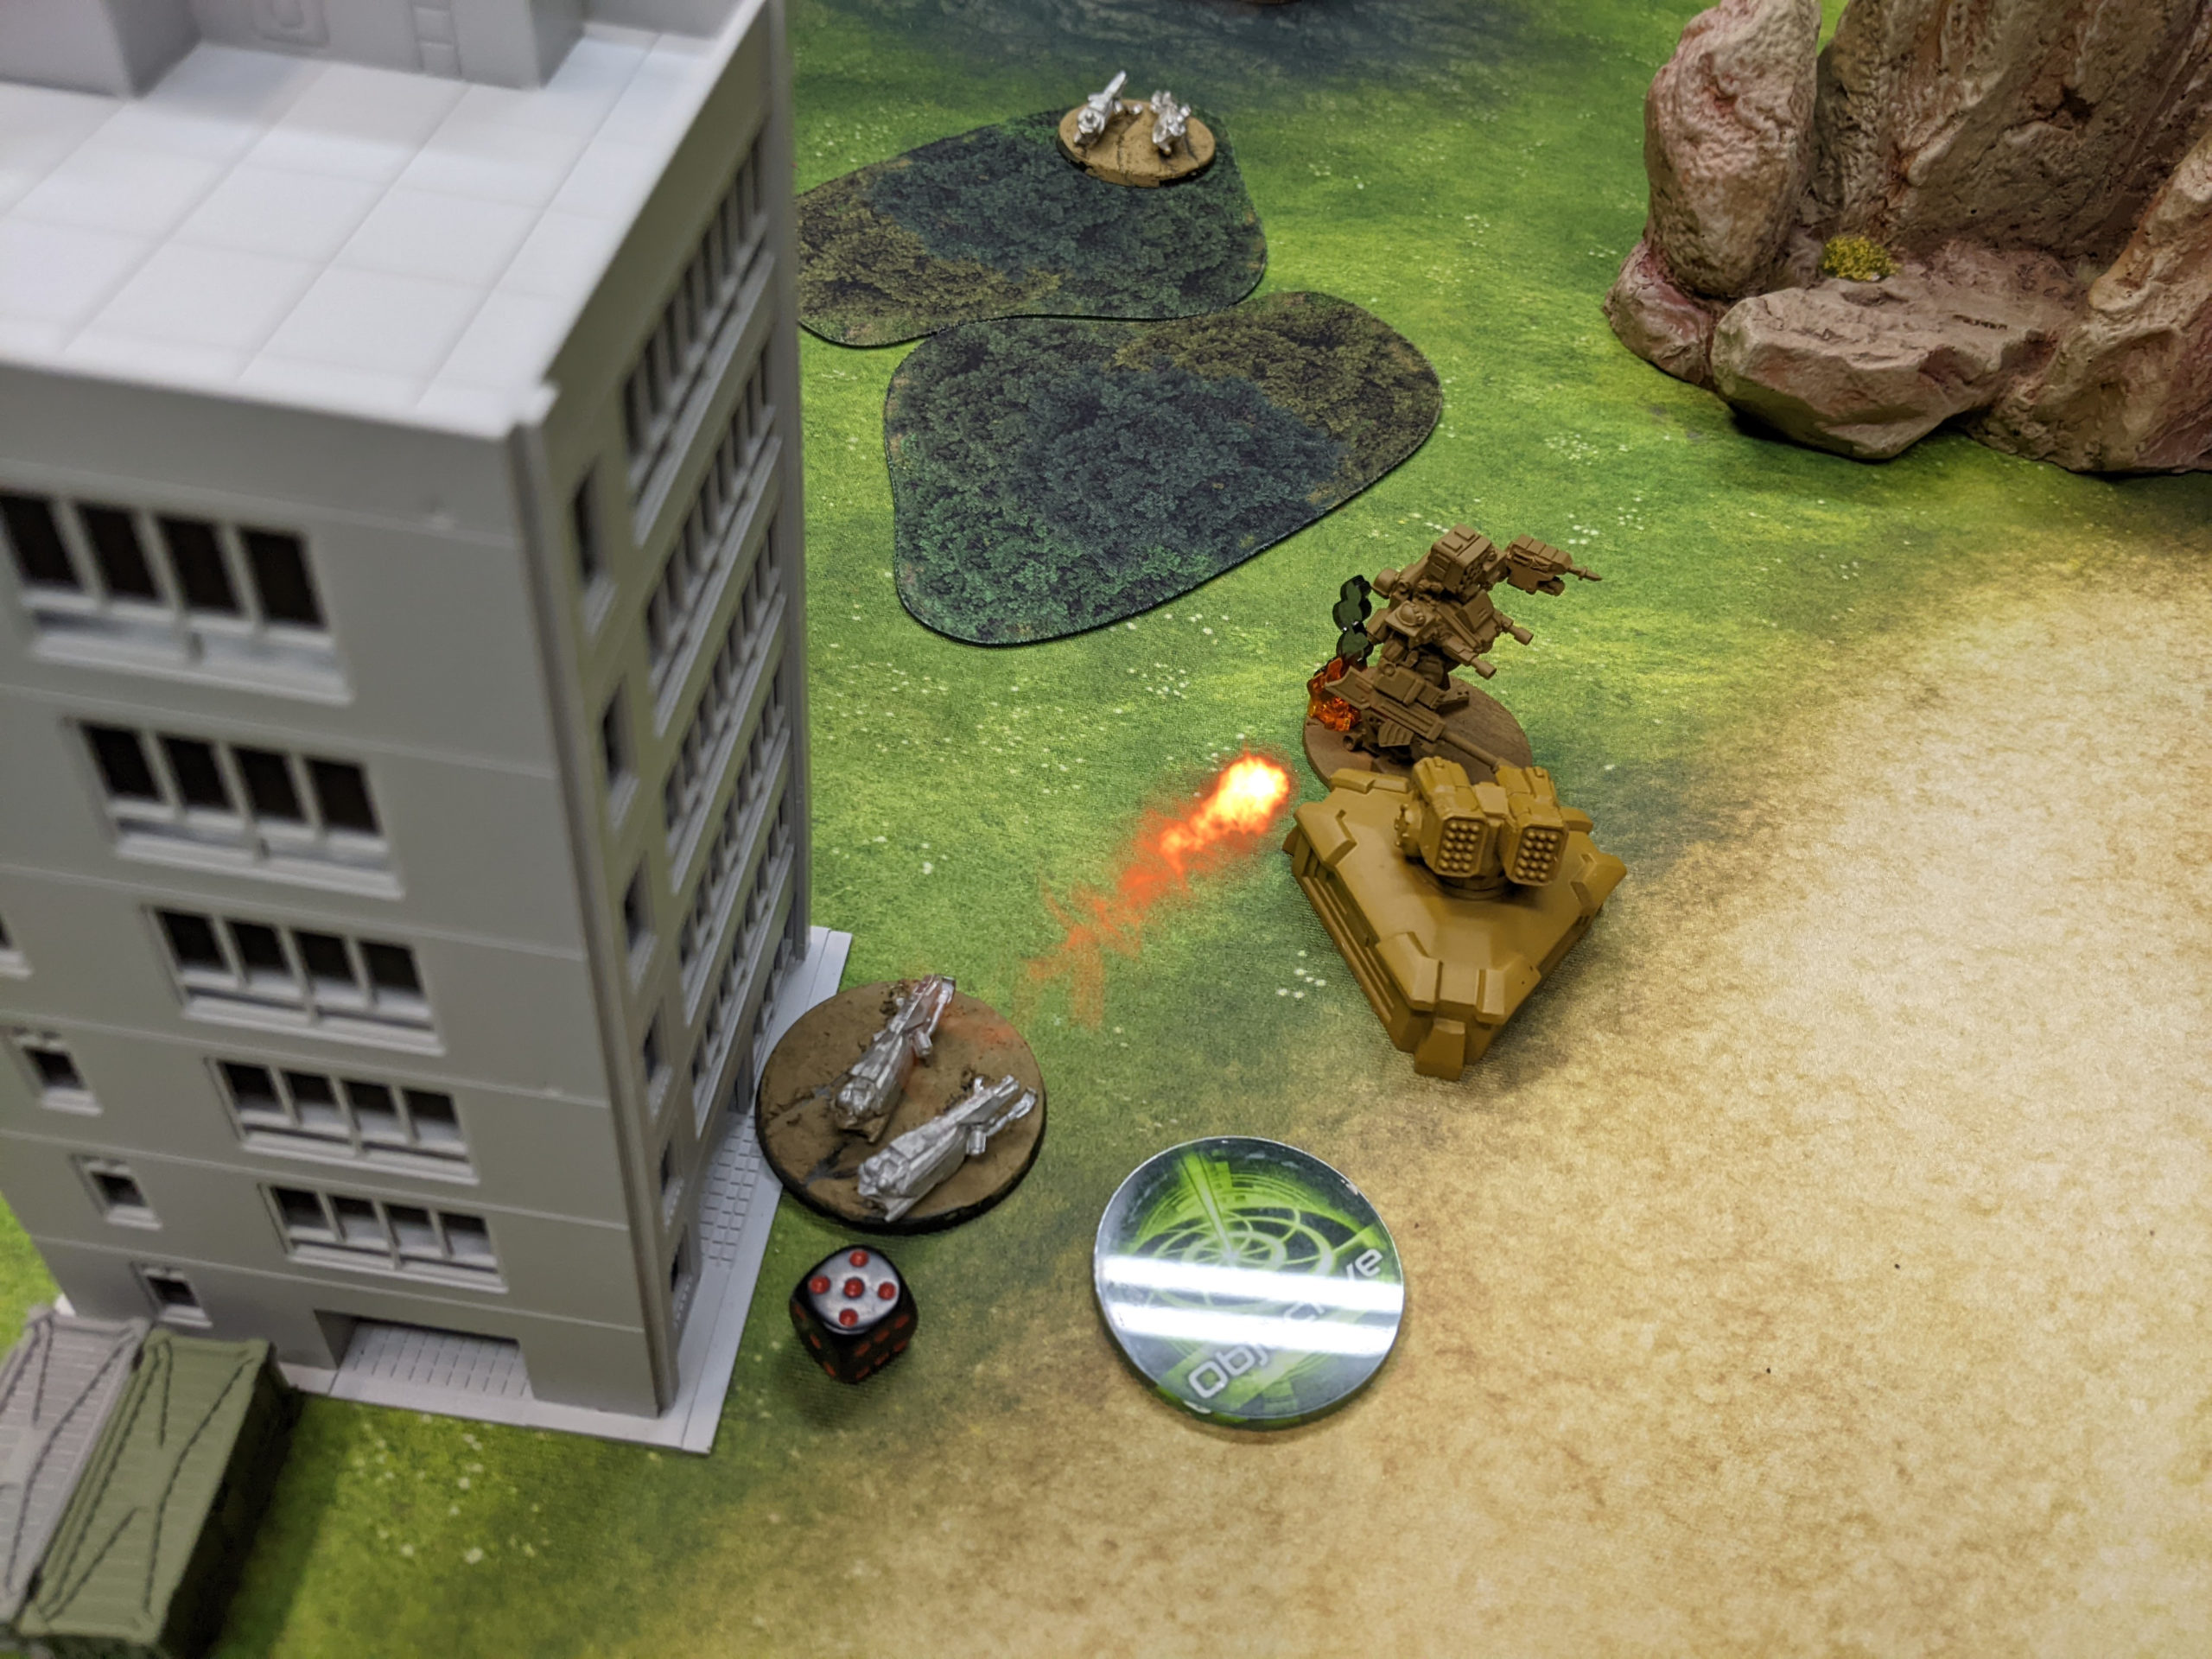
The first objective landed on my right, next to my Gladiators. Adam won initiative and started things off by repositioning his Razorbacks and trying to down one of my Gladiators. I popped ECM on the Owl and easily avoided the fire.
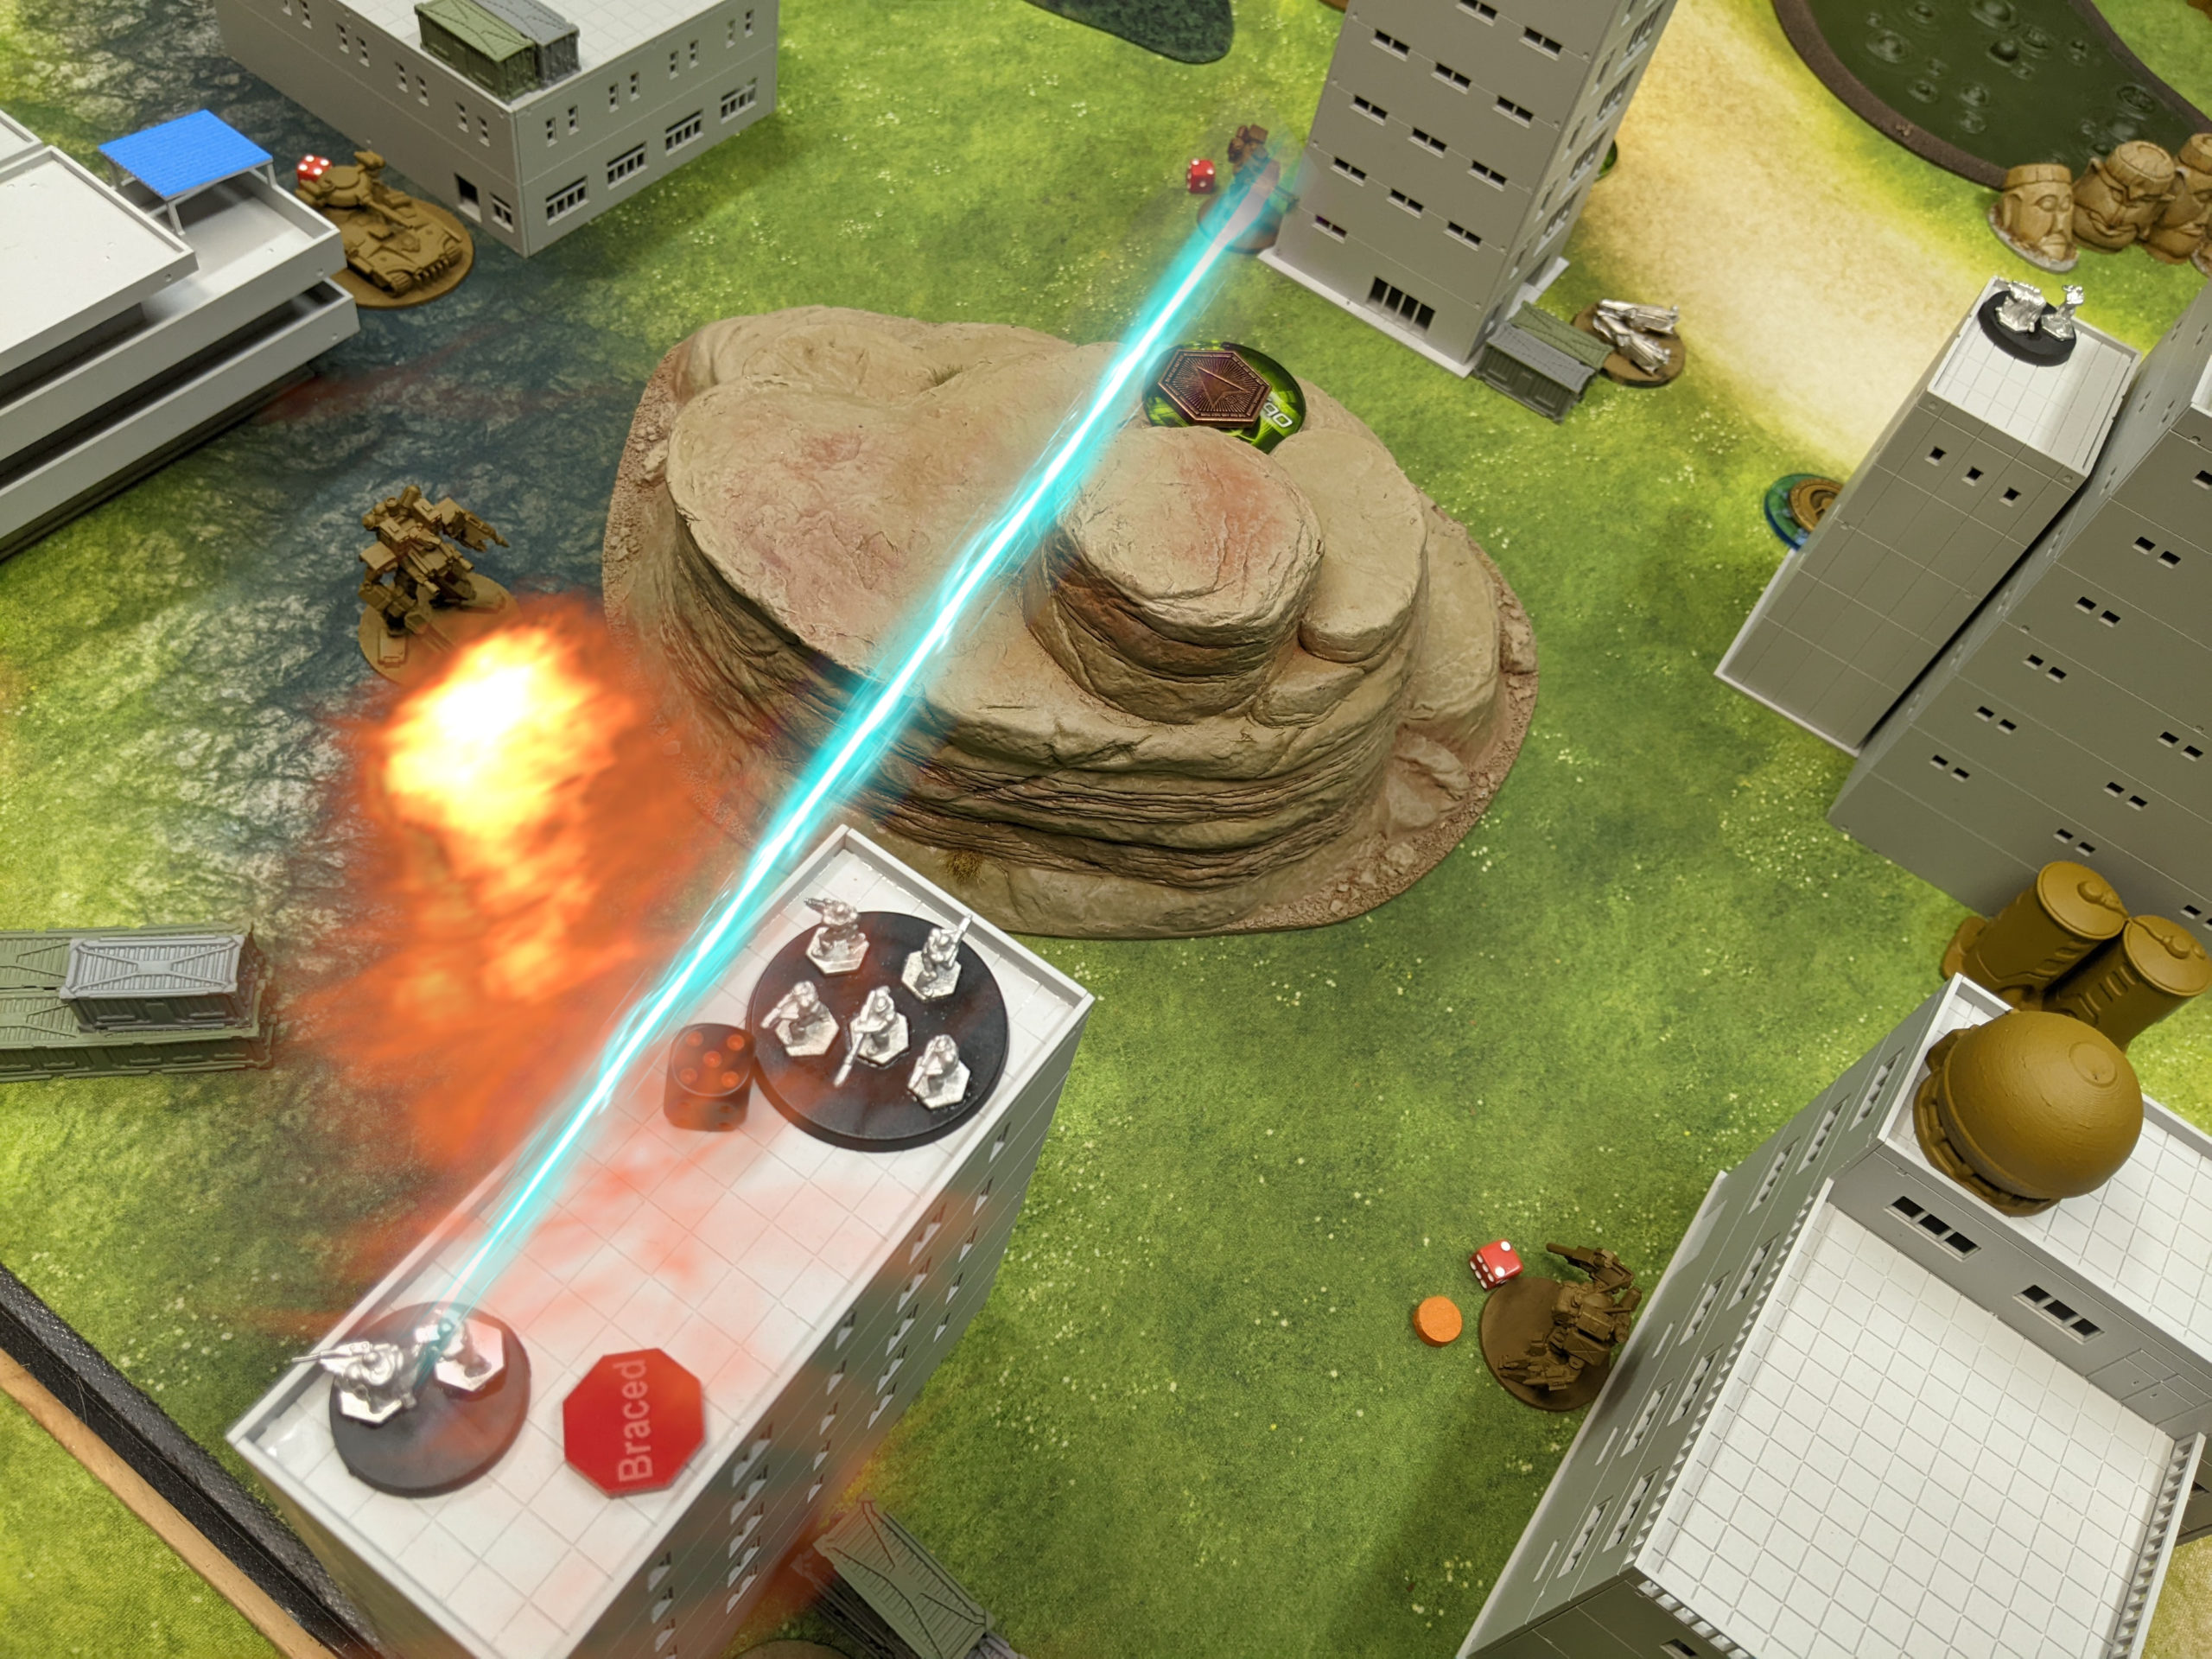
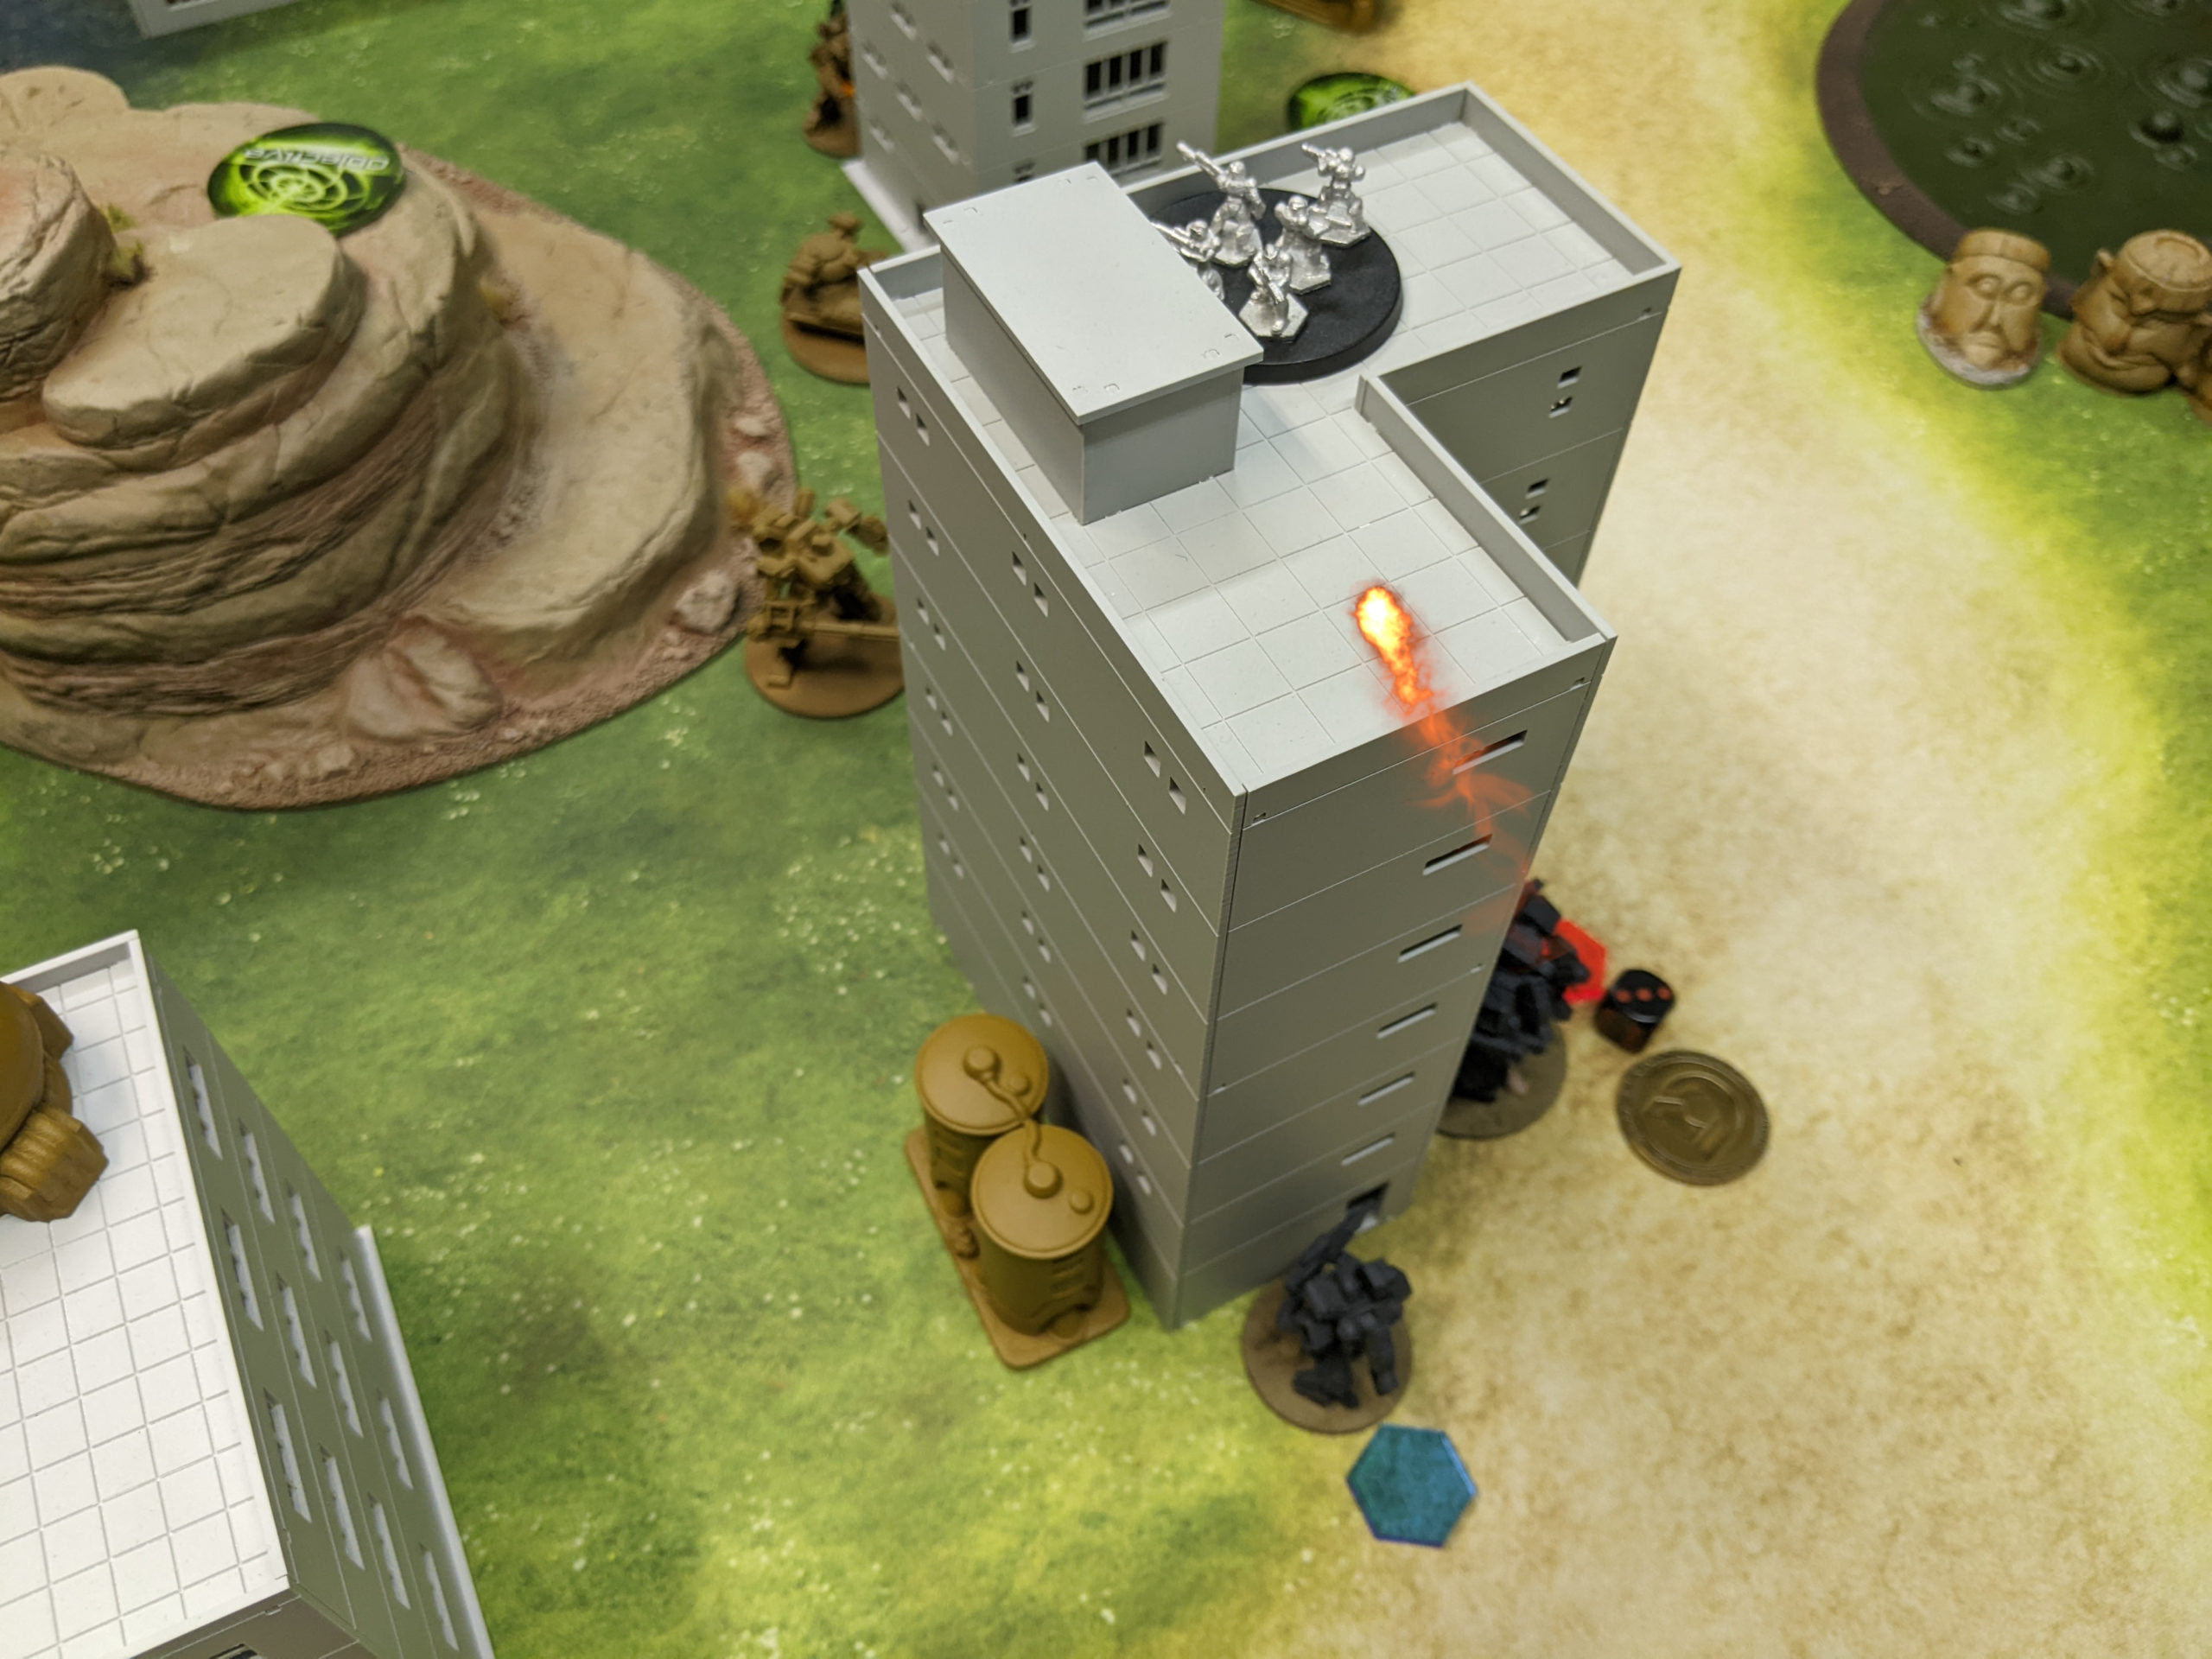
Unwilling to give Adam the opportunity to hide his Recon Team, I activated my Infantry/Vulture squad next. My first activation saw the Sniper Team just obliterate Adam’s Recon Team, netting me one point. 3d6+2 with the elevation gunnery bonus is BRUTAL. The Assault Squad didn’t do much against the Assault Hunter.
The Hunter Commando fared a little worse but only took 1 damage from my other Assault Squad.
My other Sniper Team came through though and did 5 points of damage to the Assault Hunter. Not too shabby!
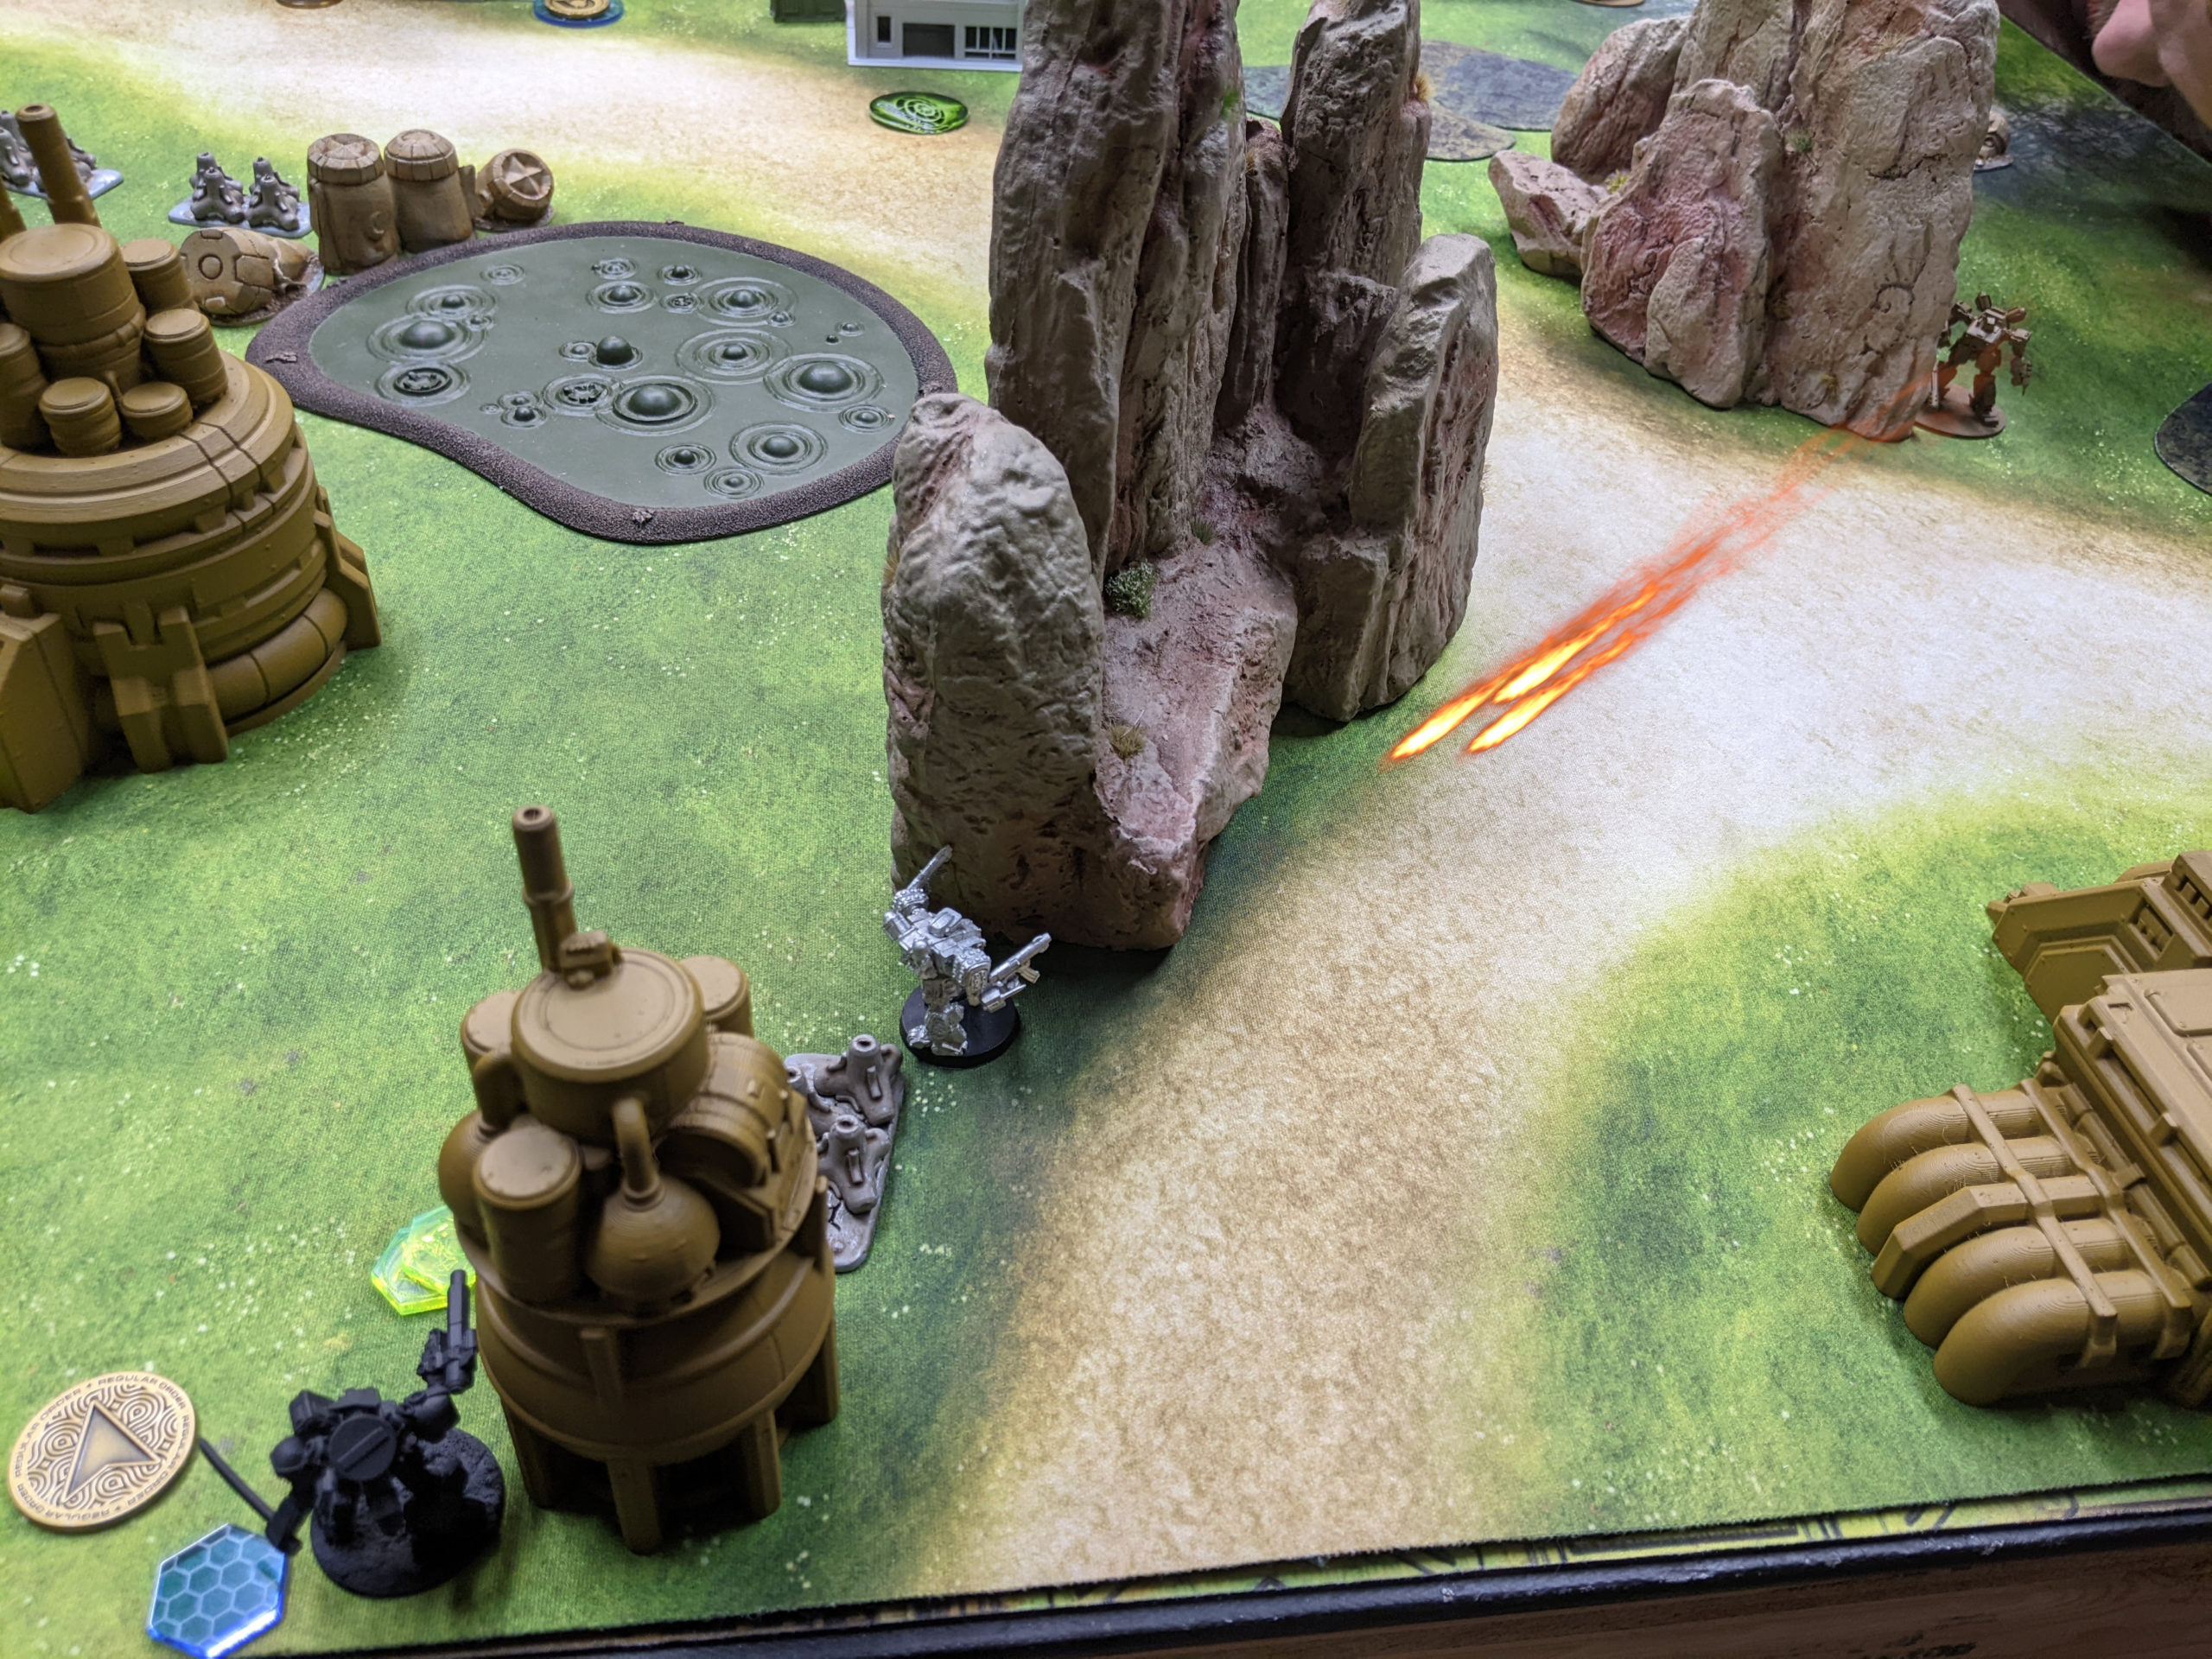
With the Hunter at one point remaining, I used the Vulture’s LFG on the nearby Klemm, doing 4 points to the Klemm and overkilling the poor Hunter off the table.
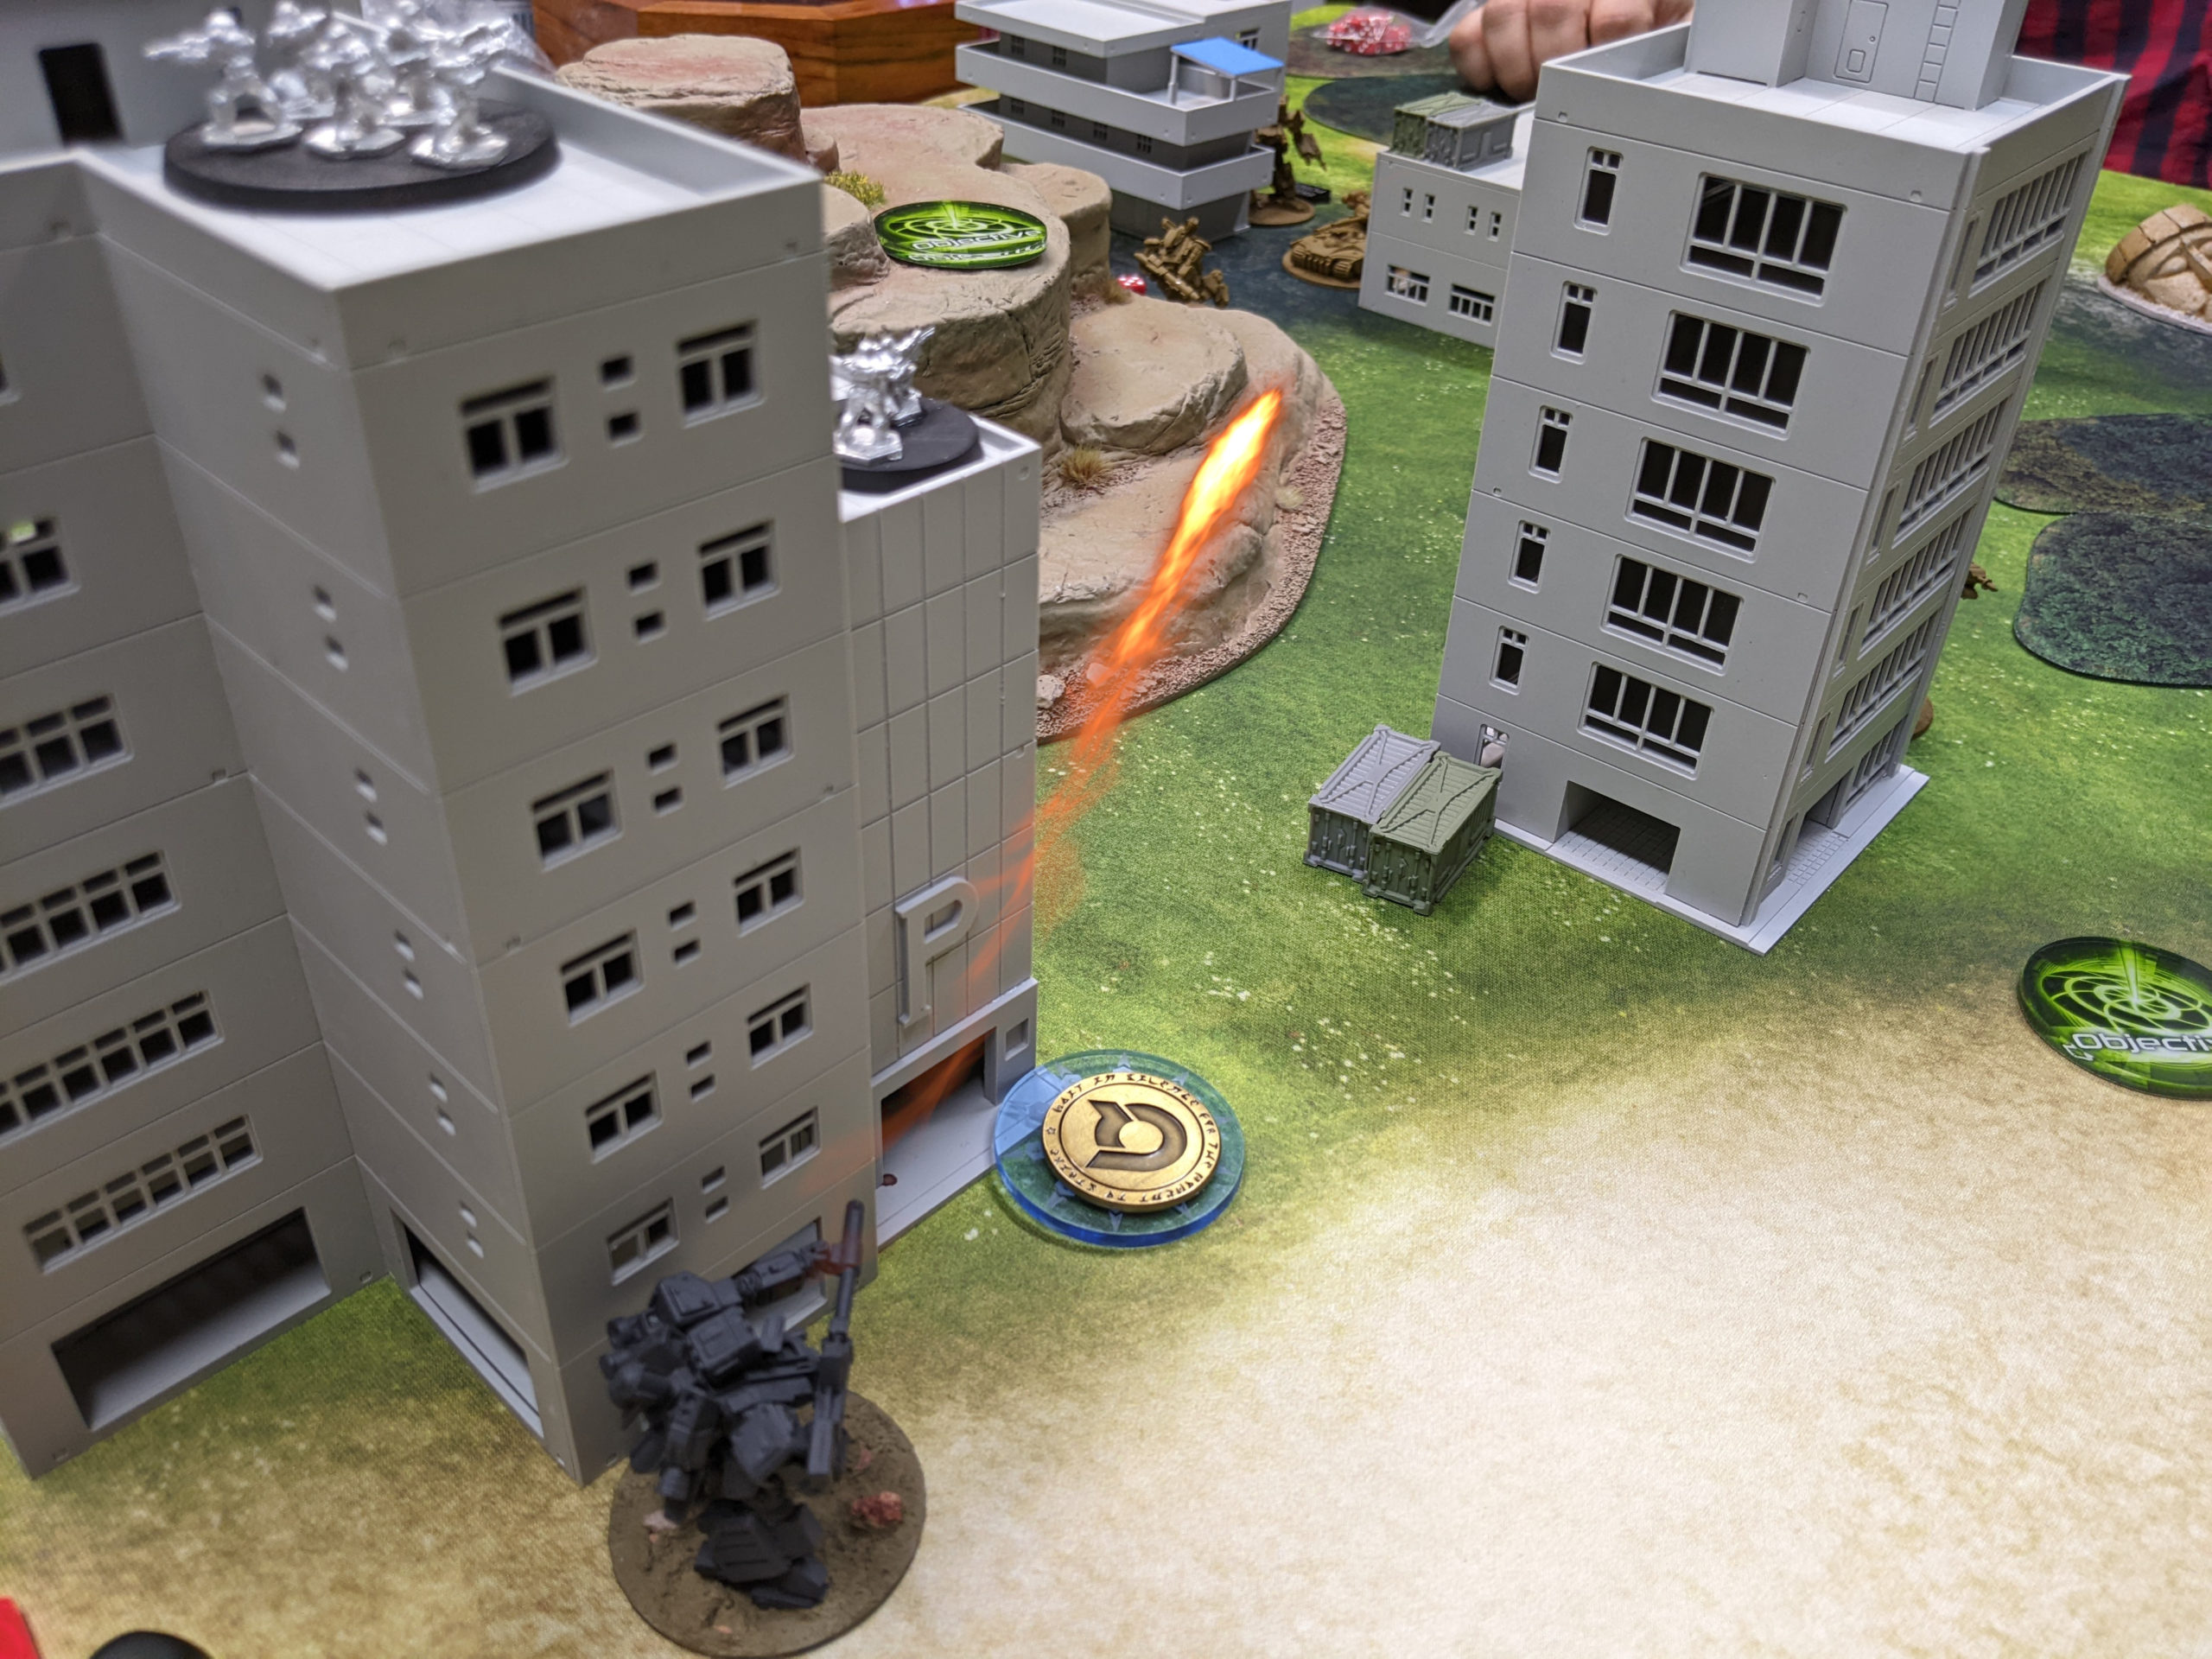
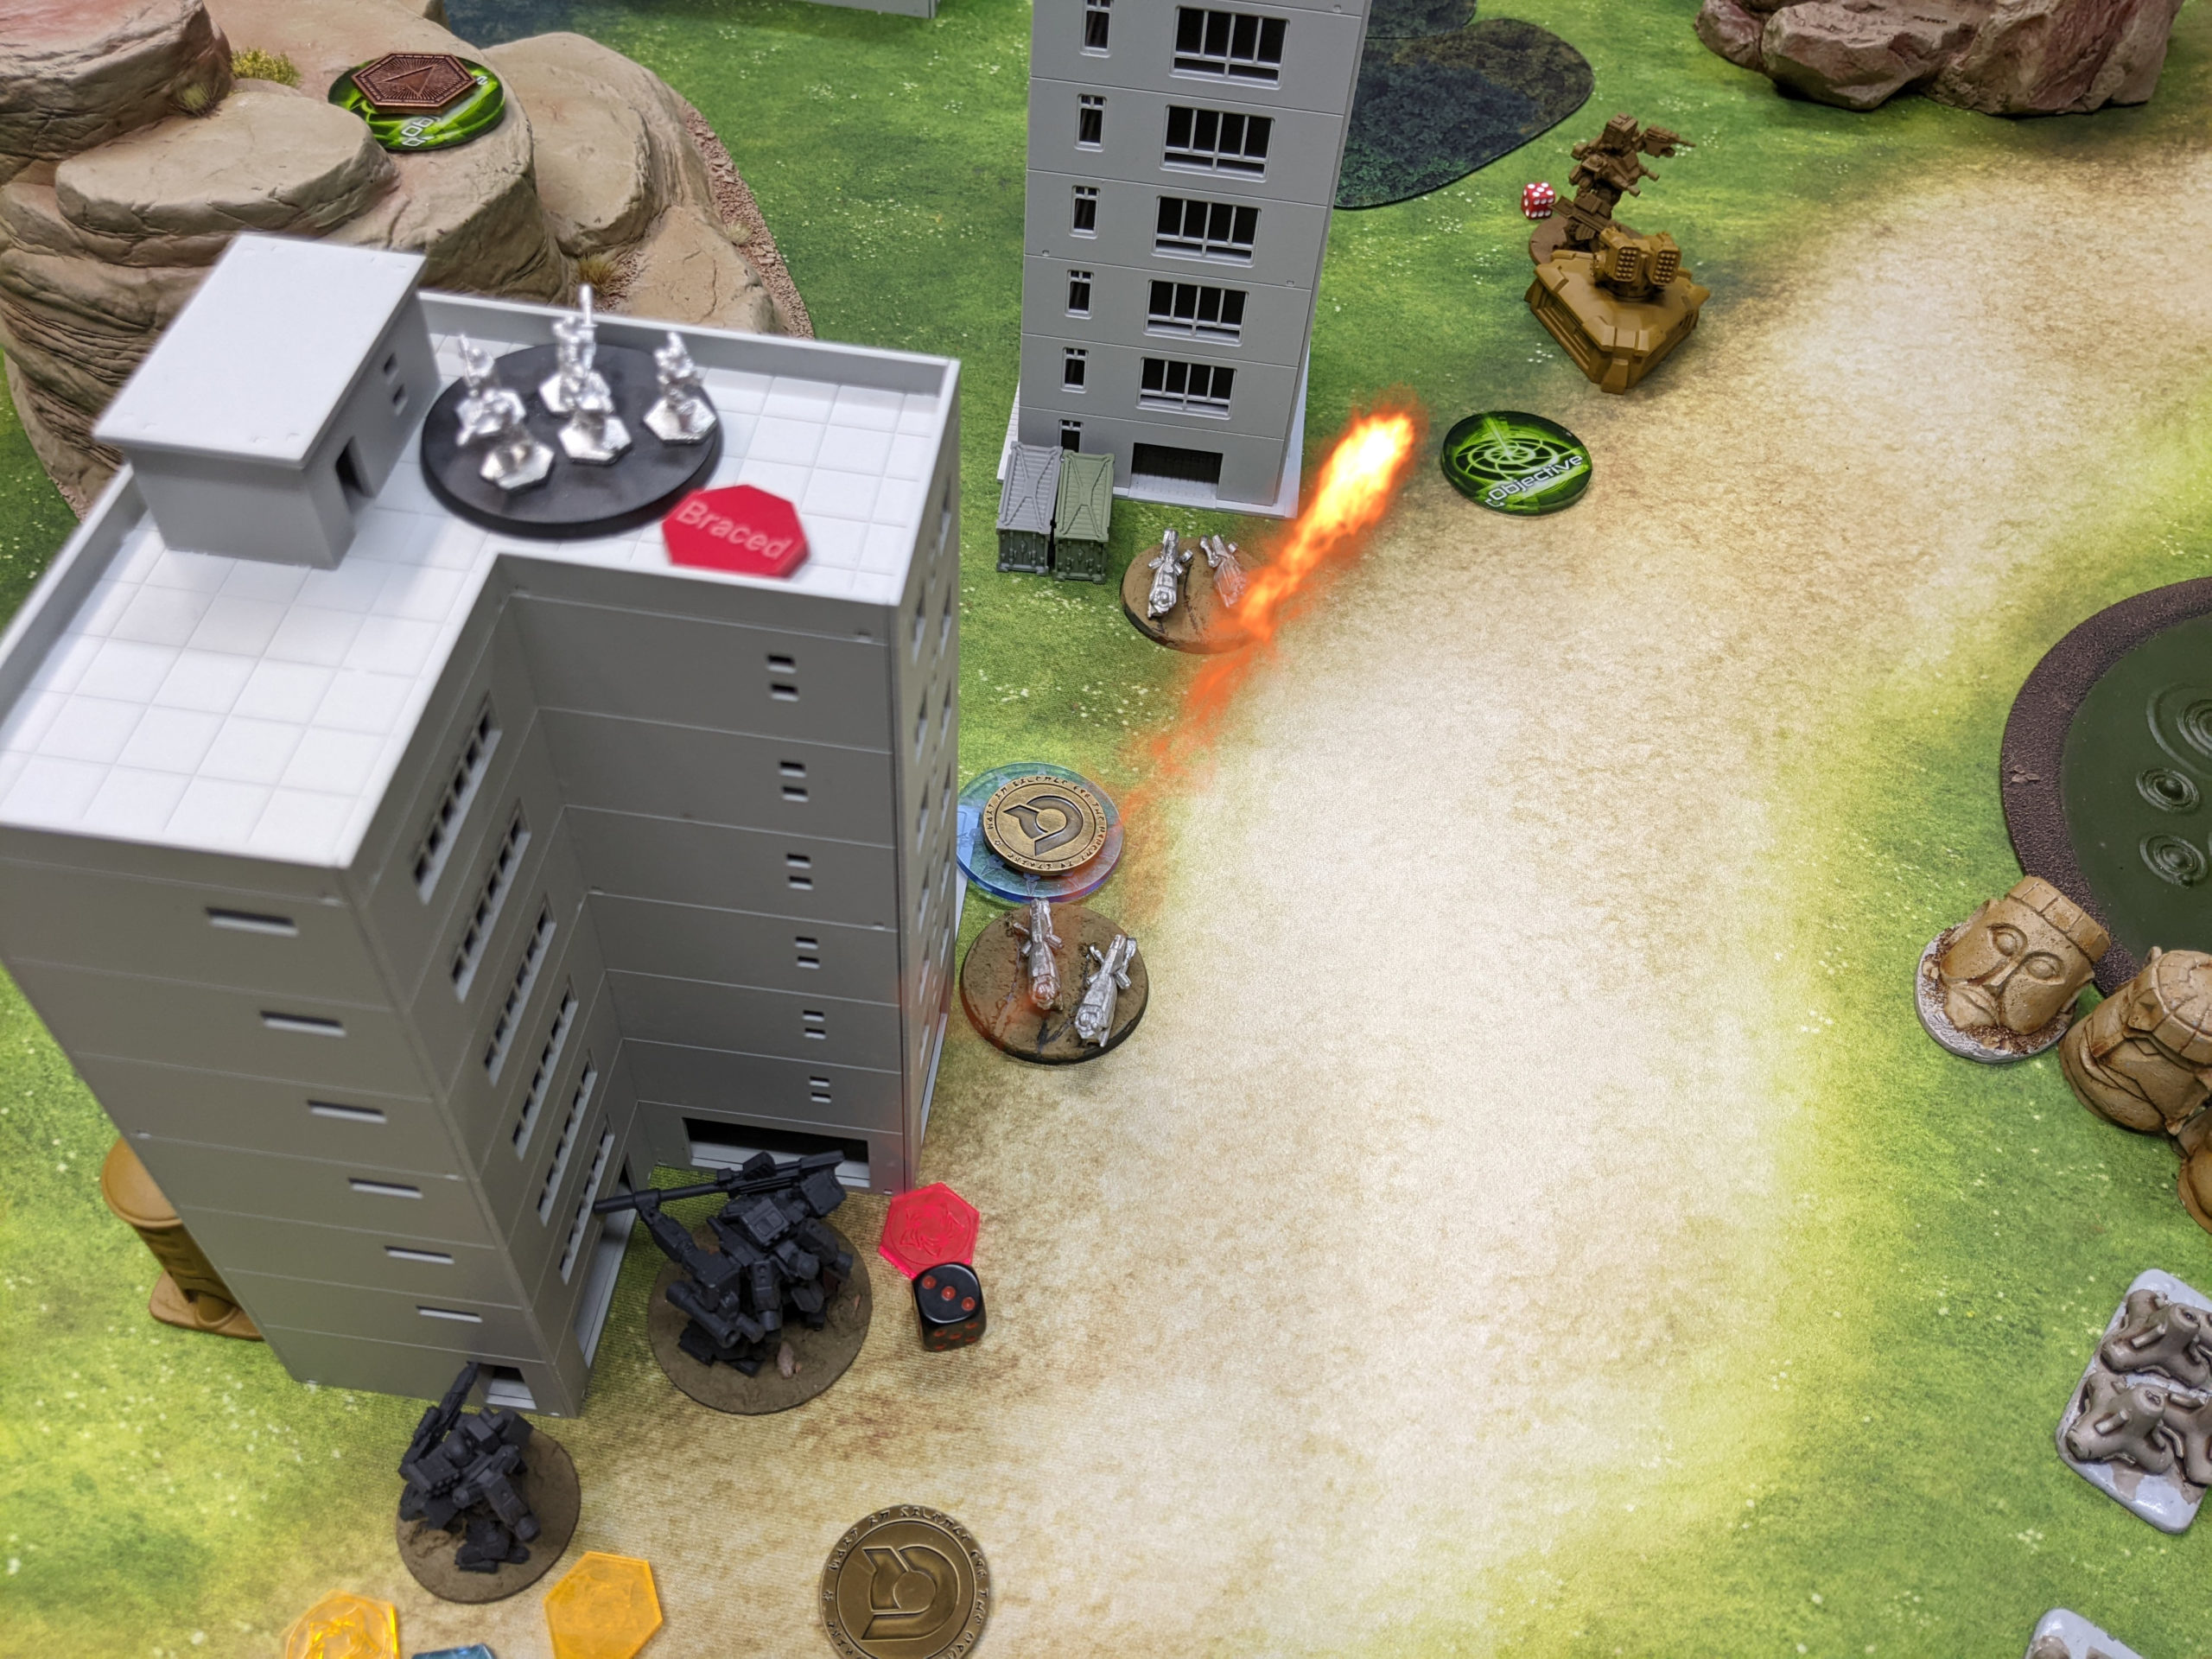
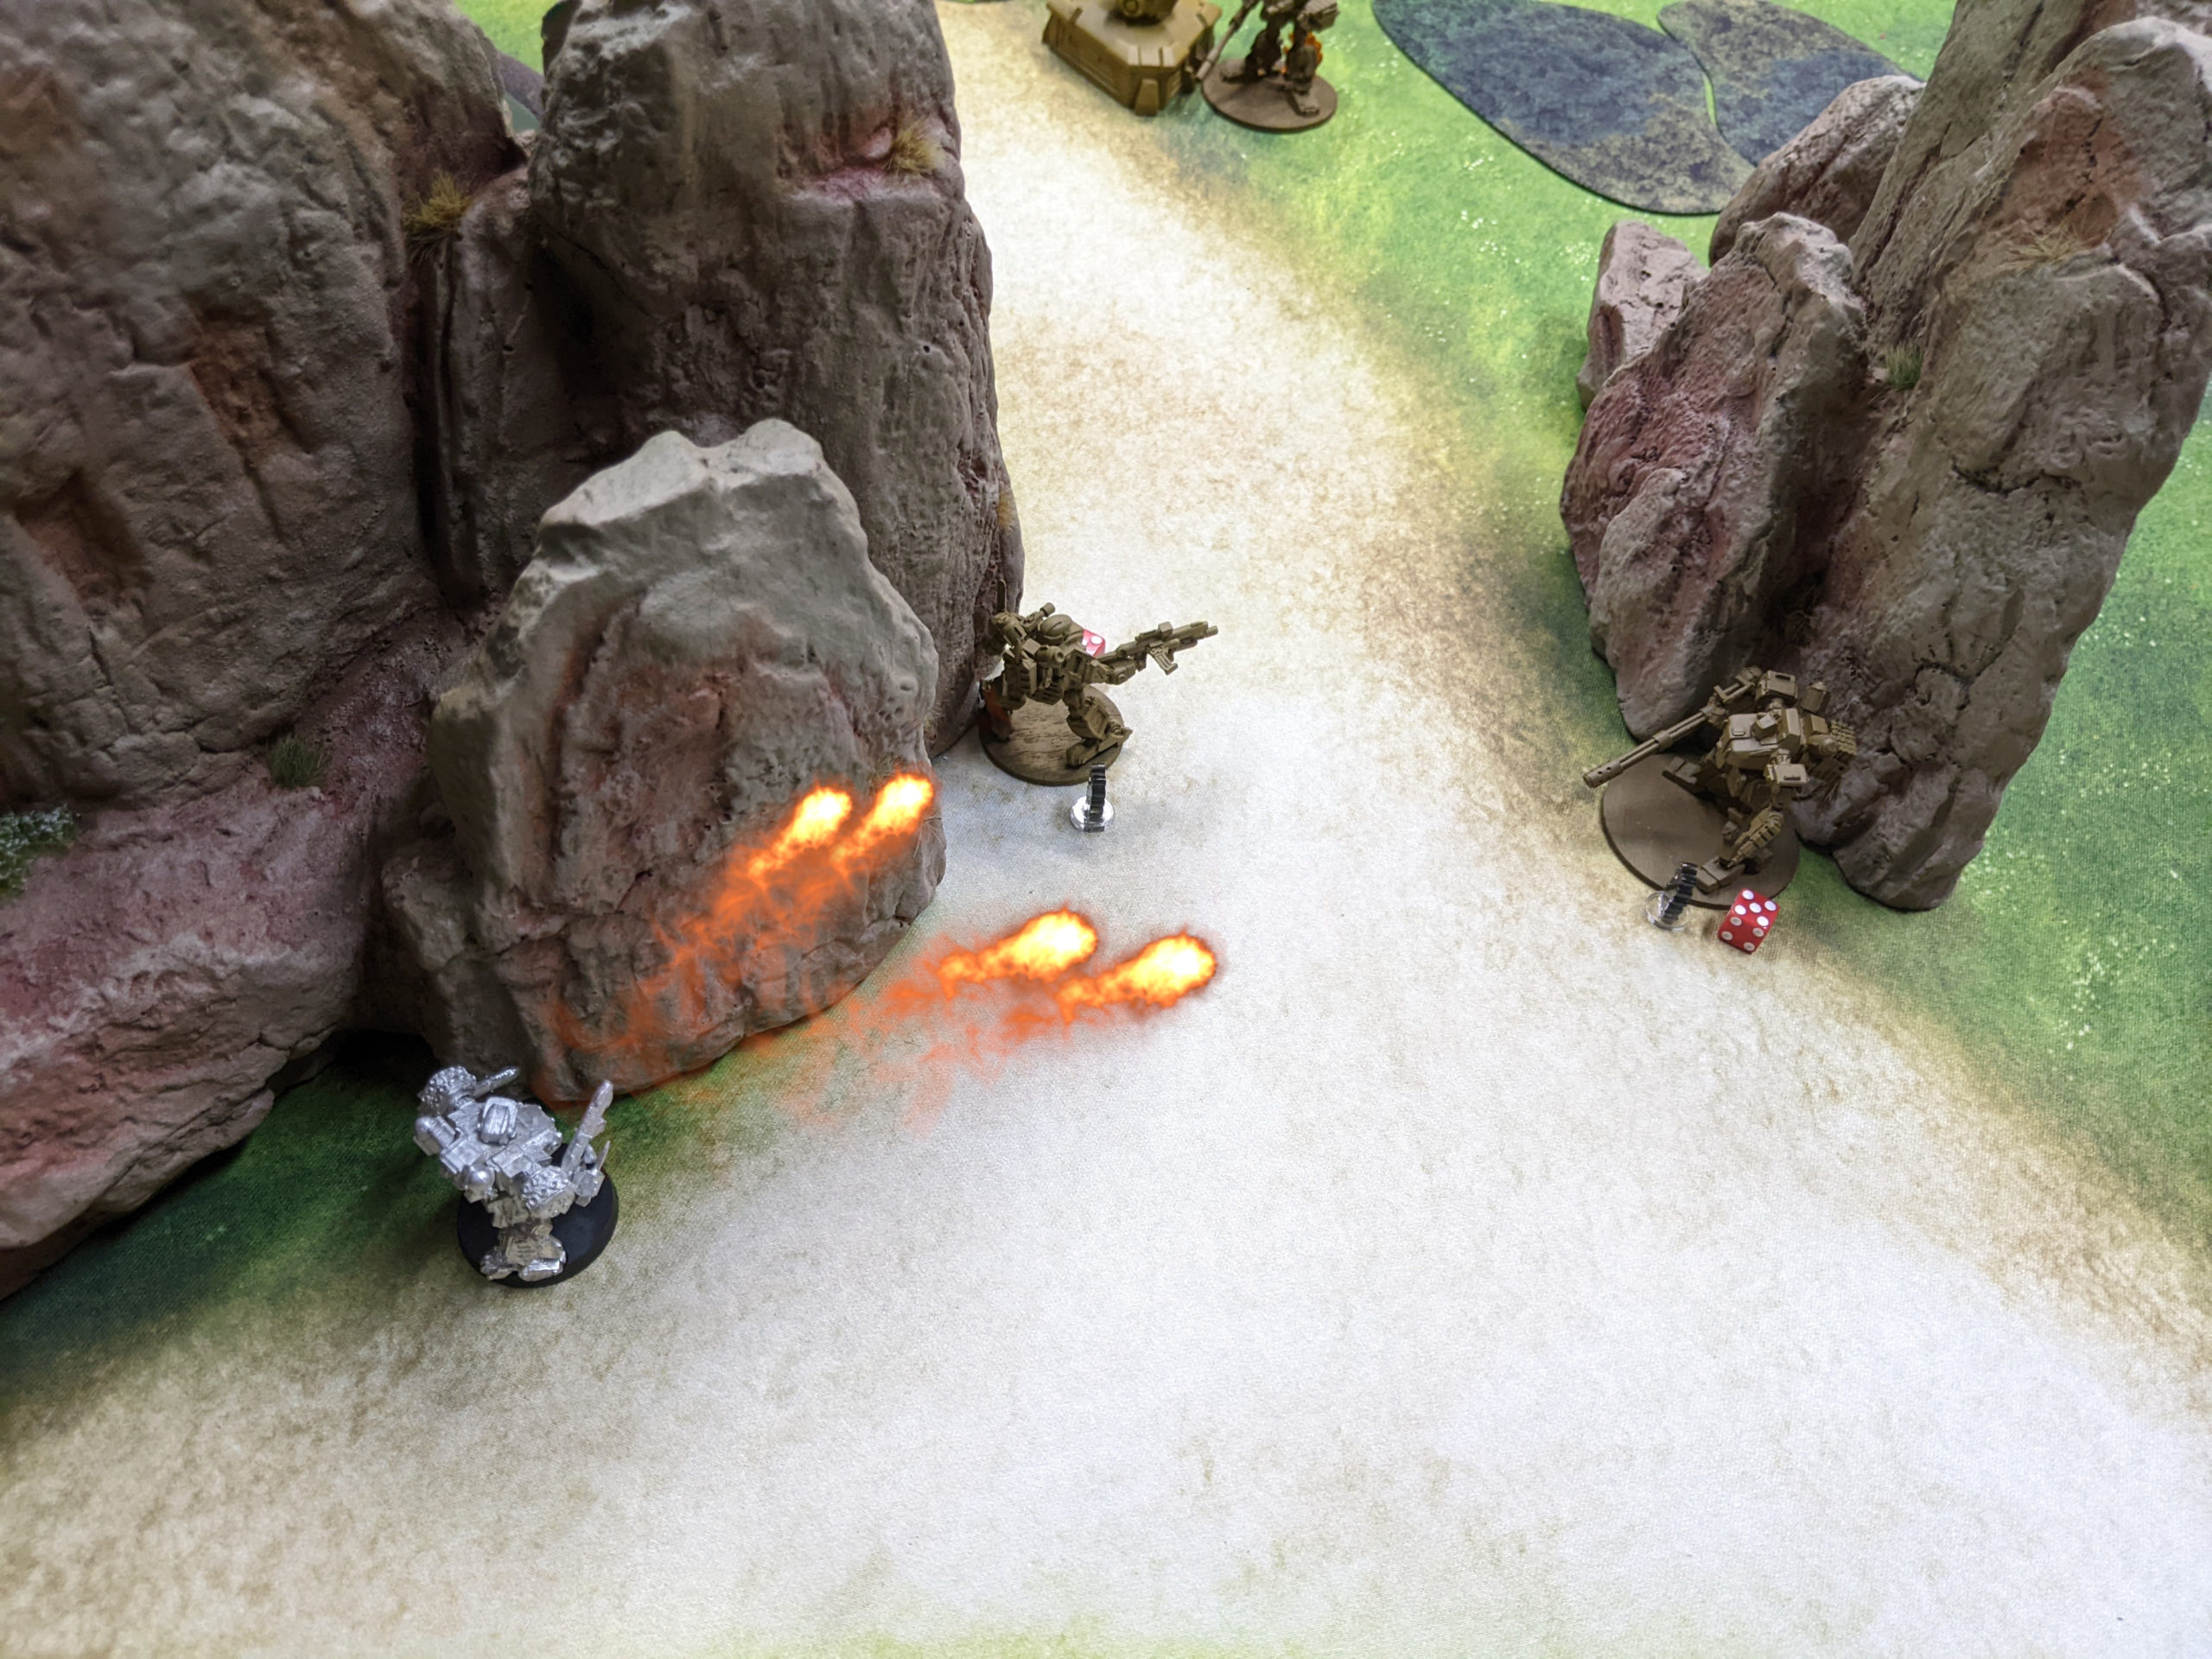
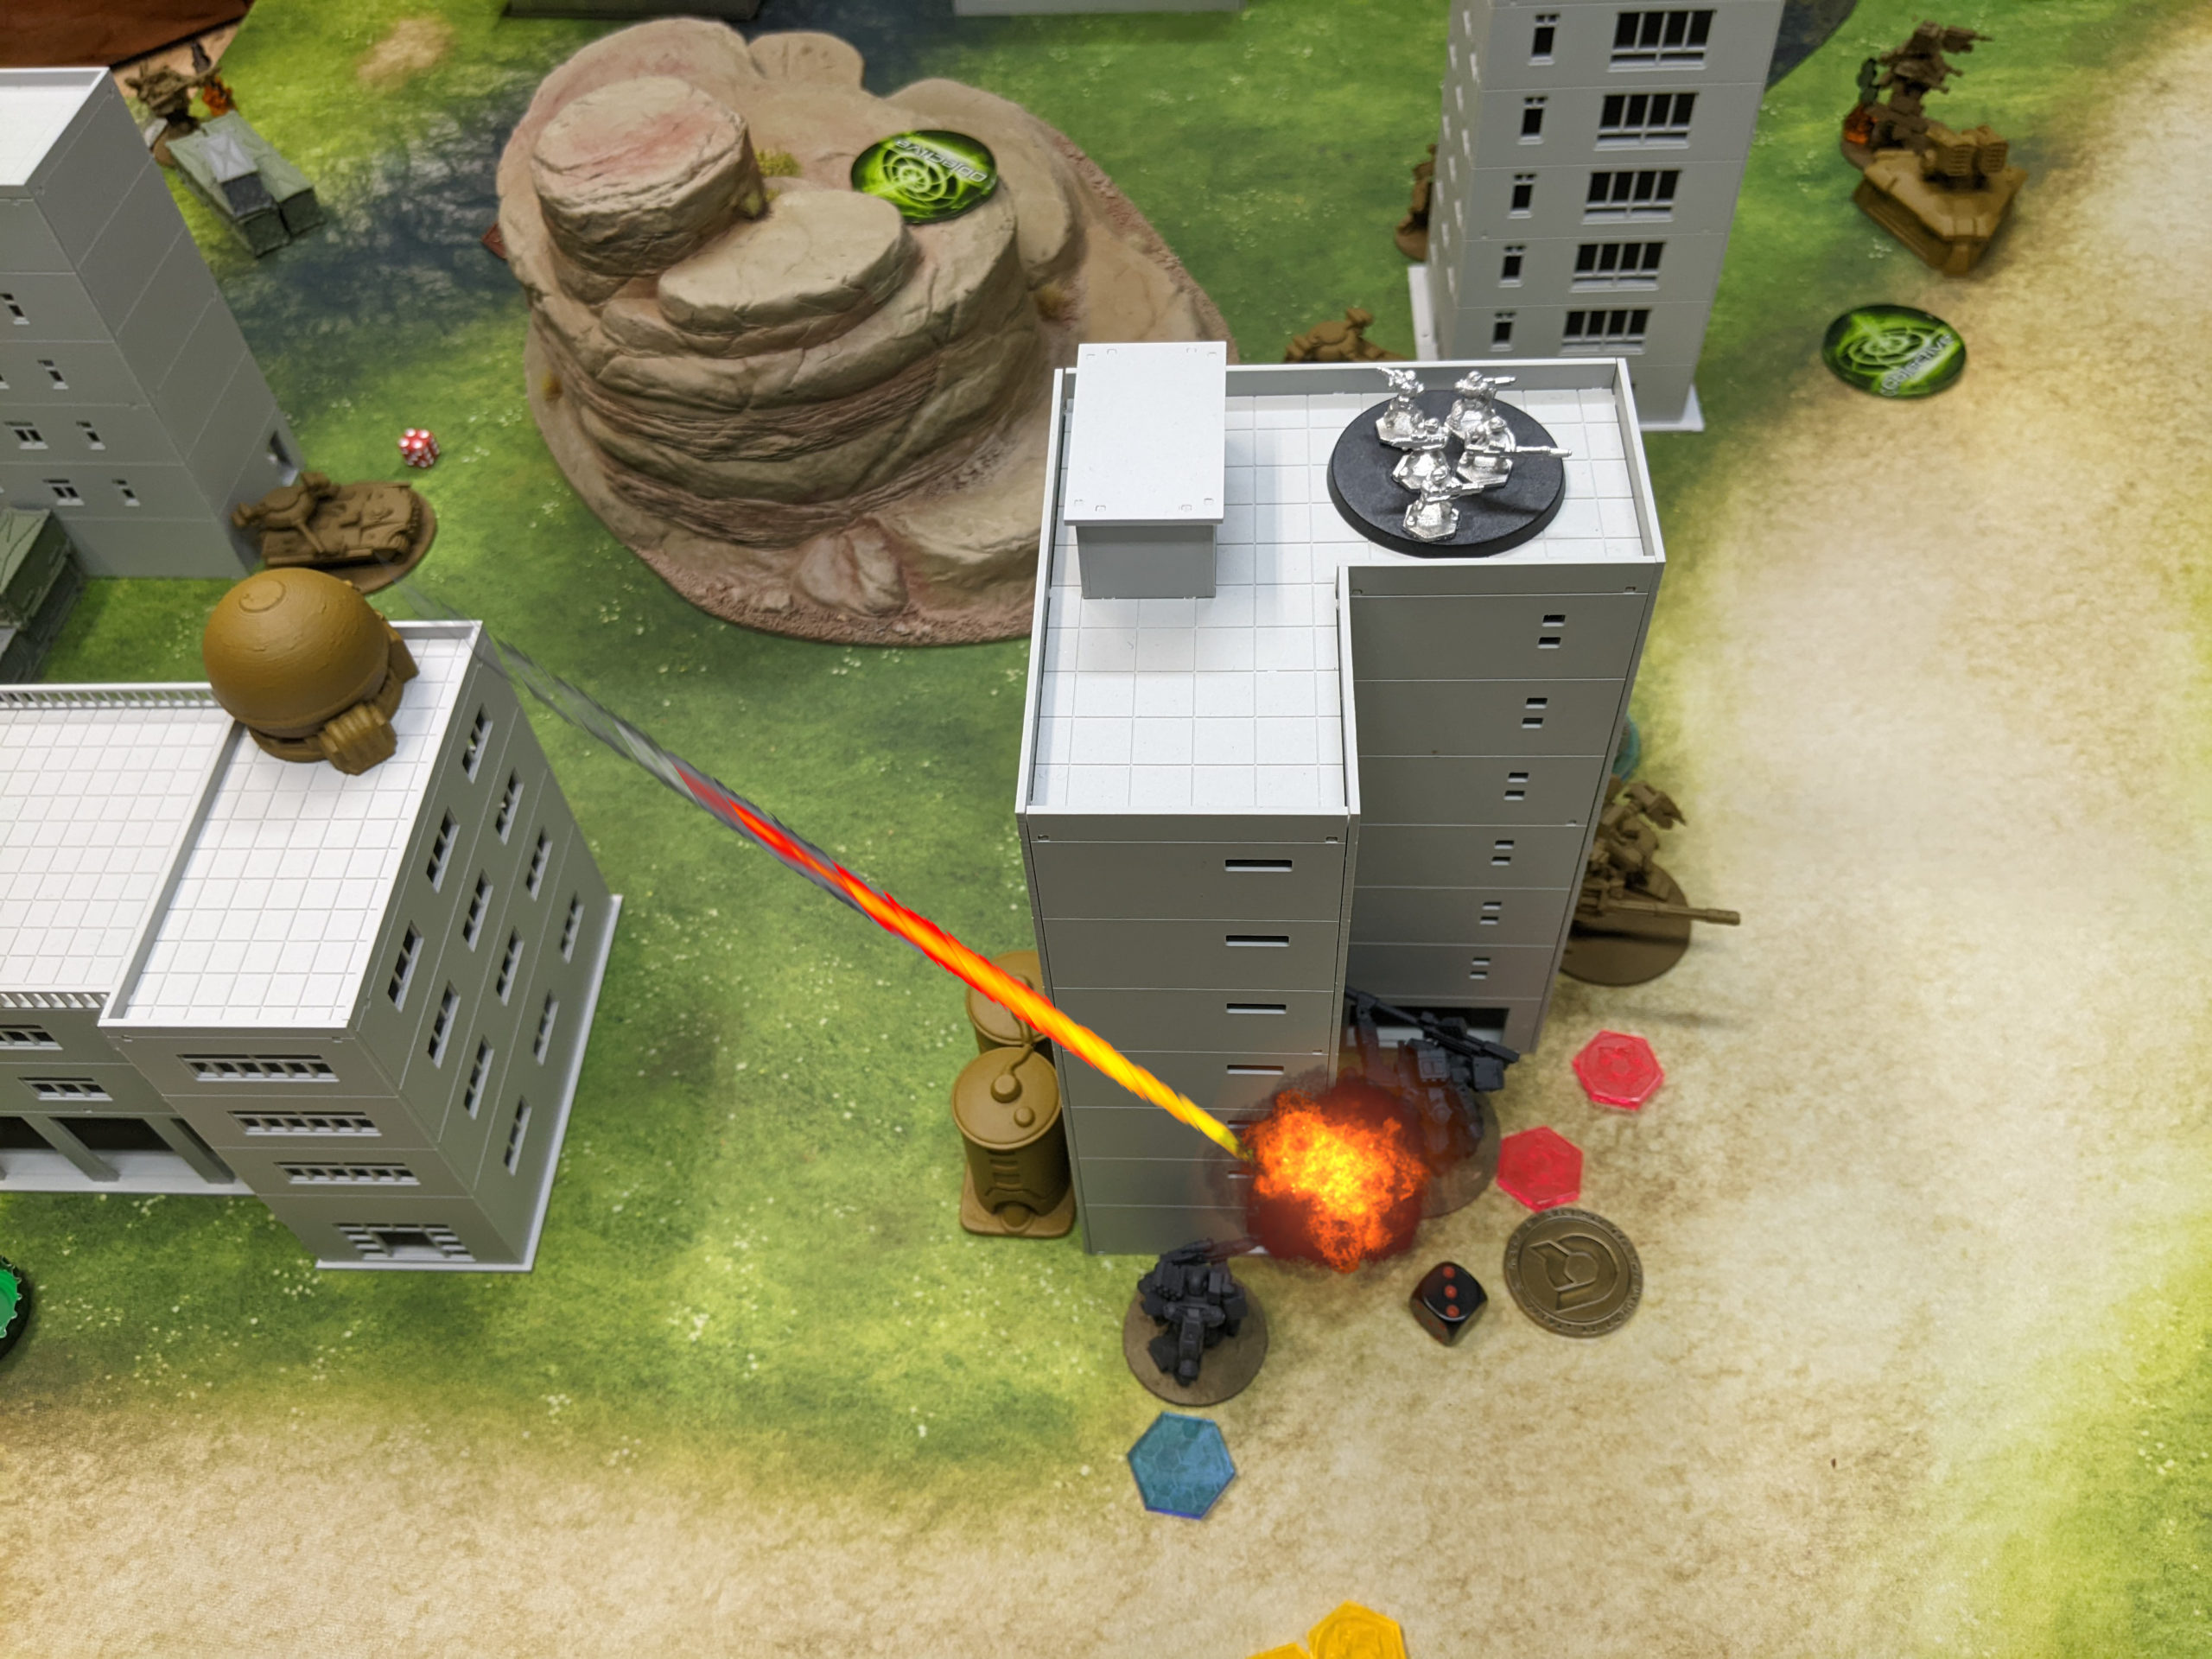
Adam’s counterstroke was pretty brutal though, he walked a Killer Koala up and flamethrowered my two infantry units. Thankfully my Sniper Team was unscathed, but the Assault Squad took 5 damage. The rest of Adam’s airdrop squad pushed forward. Particularly problematic was the Hunter Commando, which was positioning itself to go after my Vulture with its bazooka. The Tankhunter Dingo went after my Vulture, crippling it.
I responded by dropping some LIGL on the Hunter Commando, doing an additional point of damage and advancing my Spitz into the midfiled.

The Raven then hacked the Dingo and forward observed a mortar from the Vulture onto it, doing a little damage.
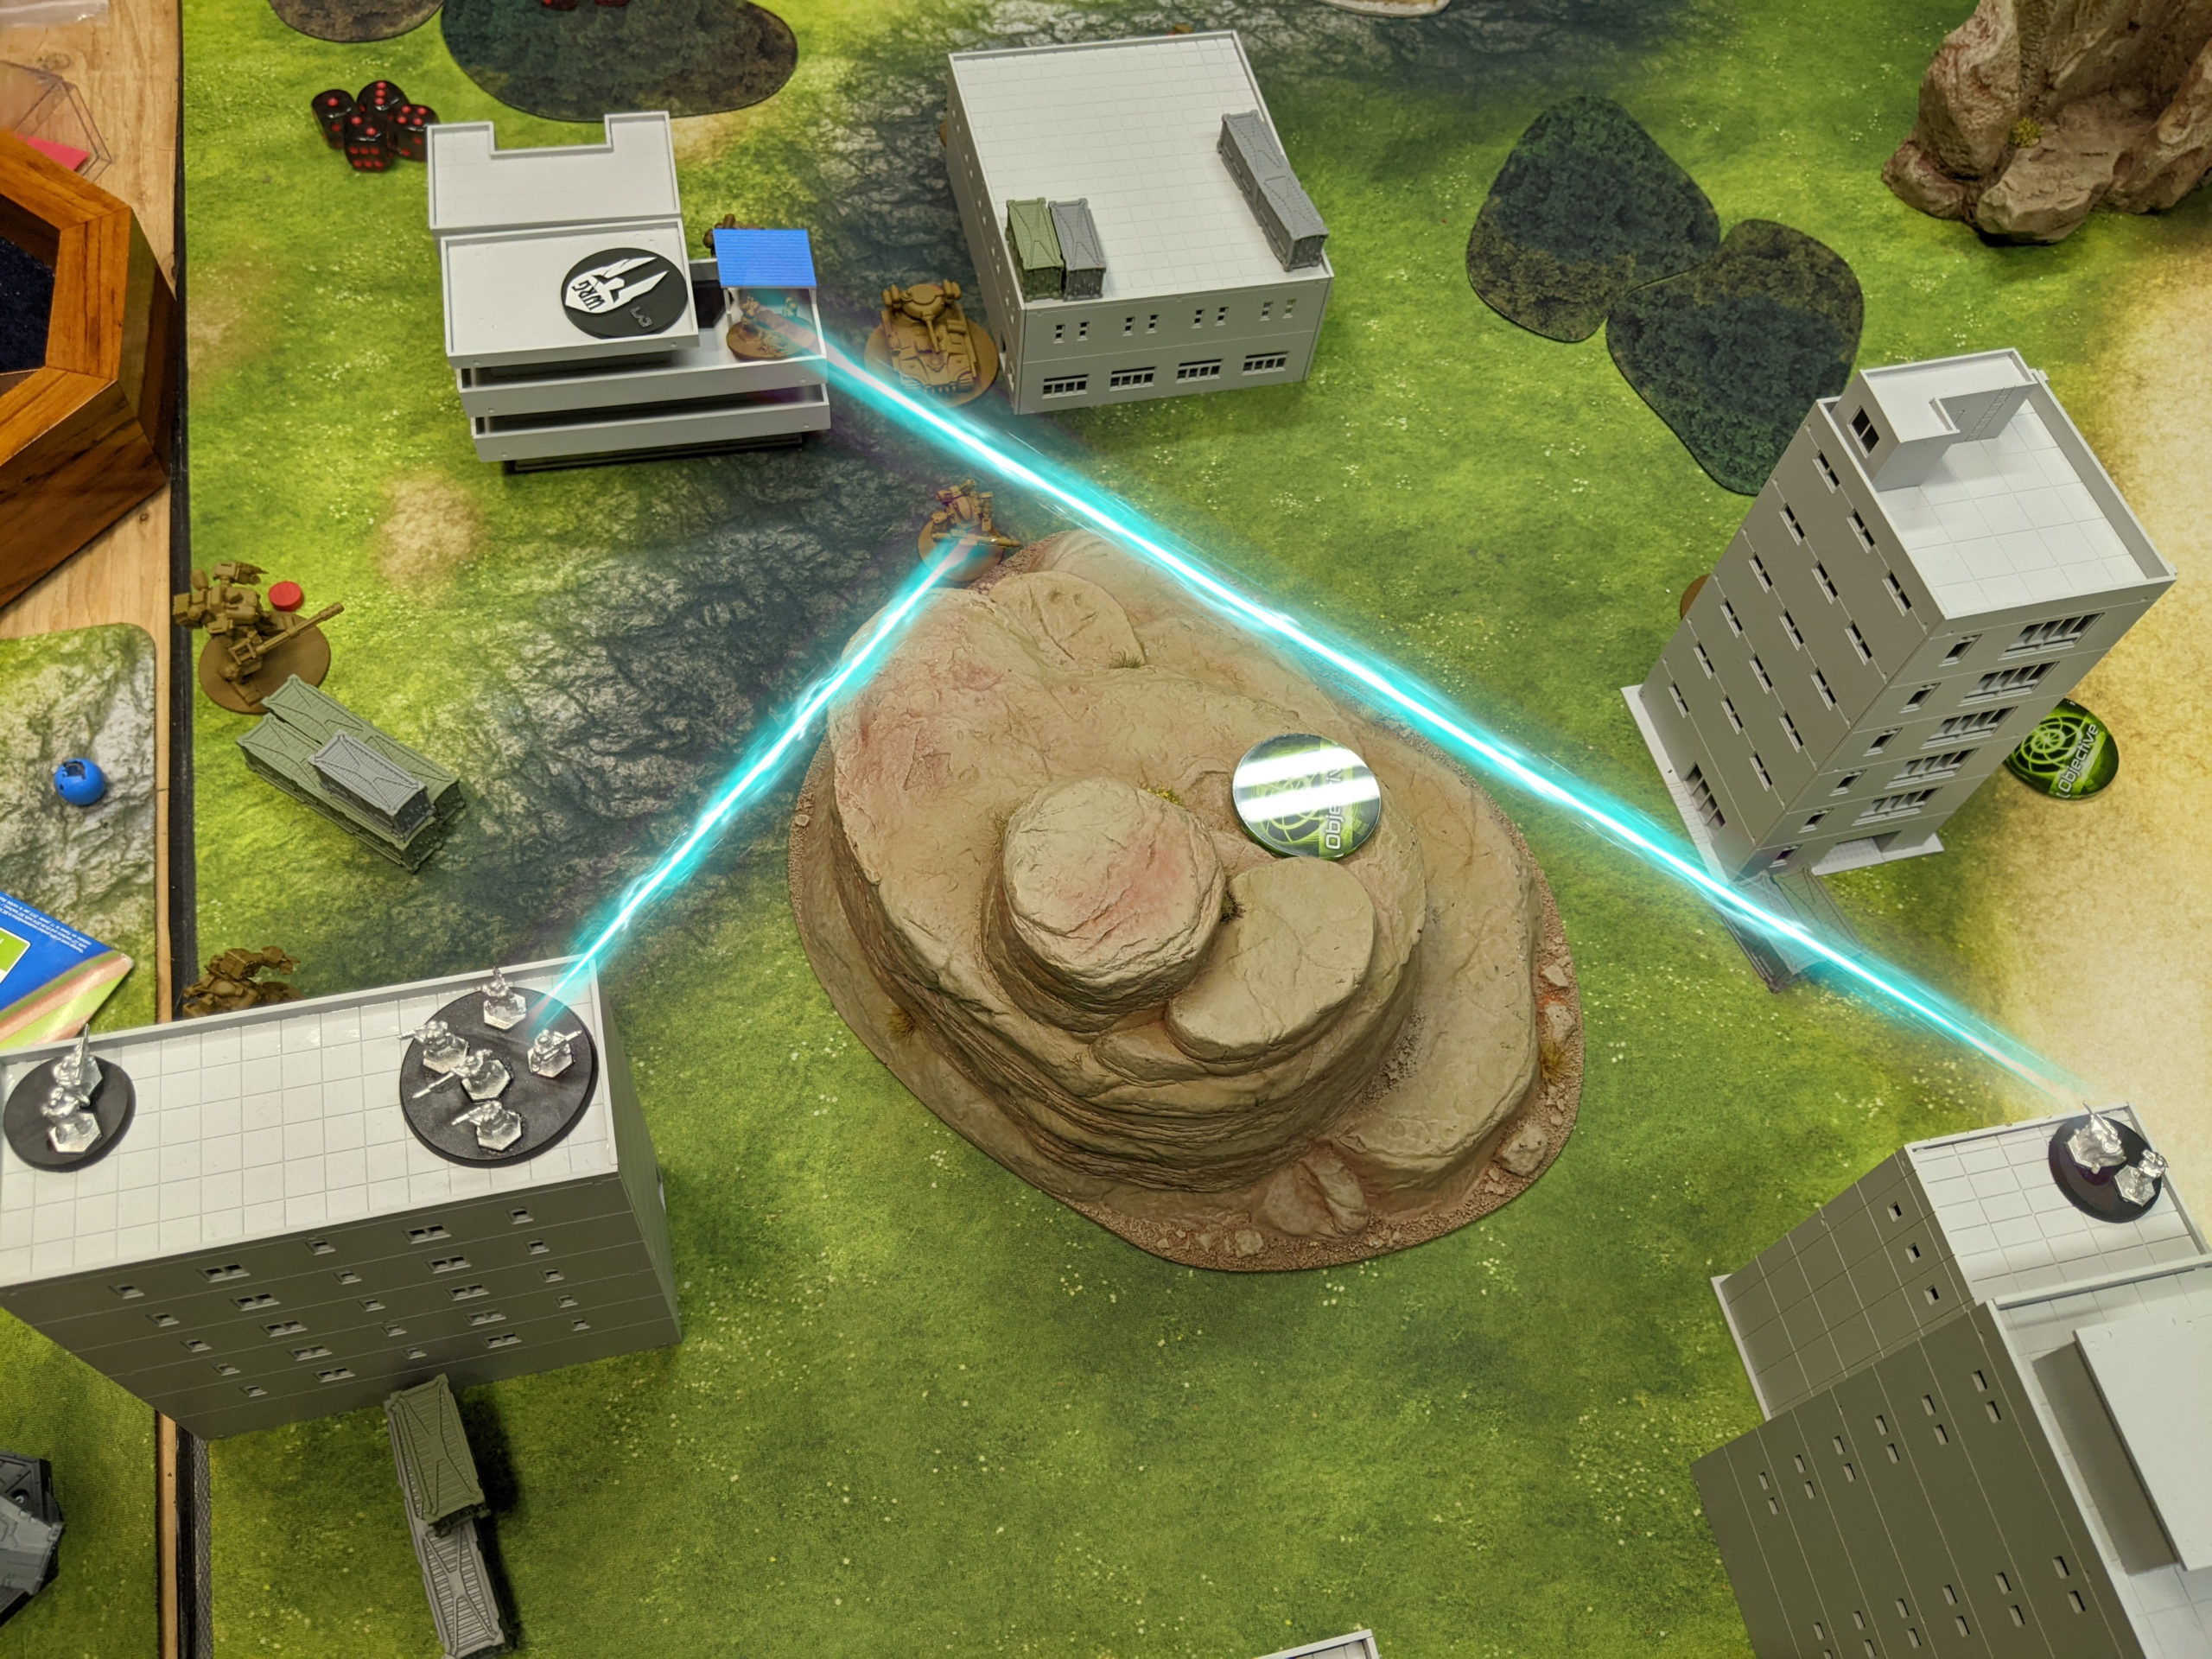
One Gladiator managed to put the hurt on Adam’s Bobcat CGL, getting me close to a second Assassinate point, and I grabbed the objective with the other Gladiator before the turn was over.
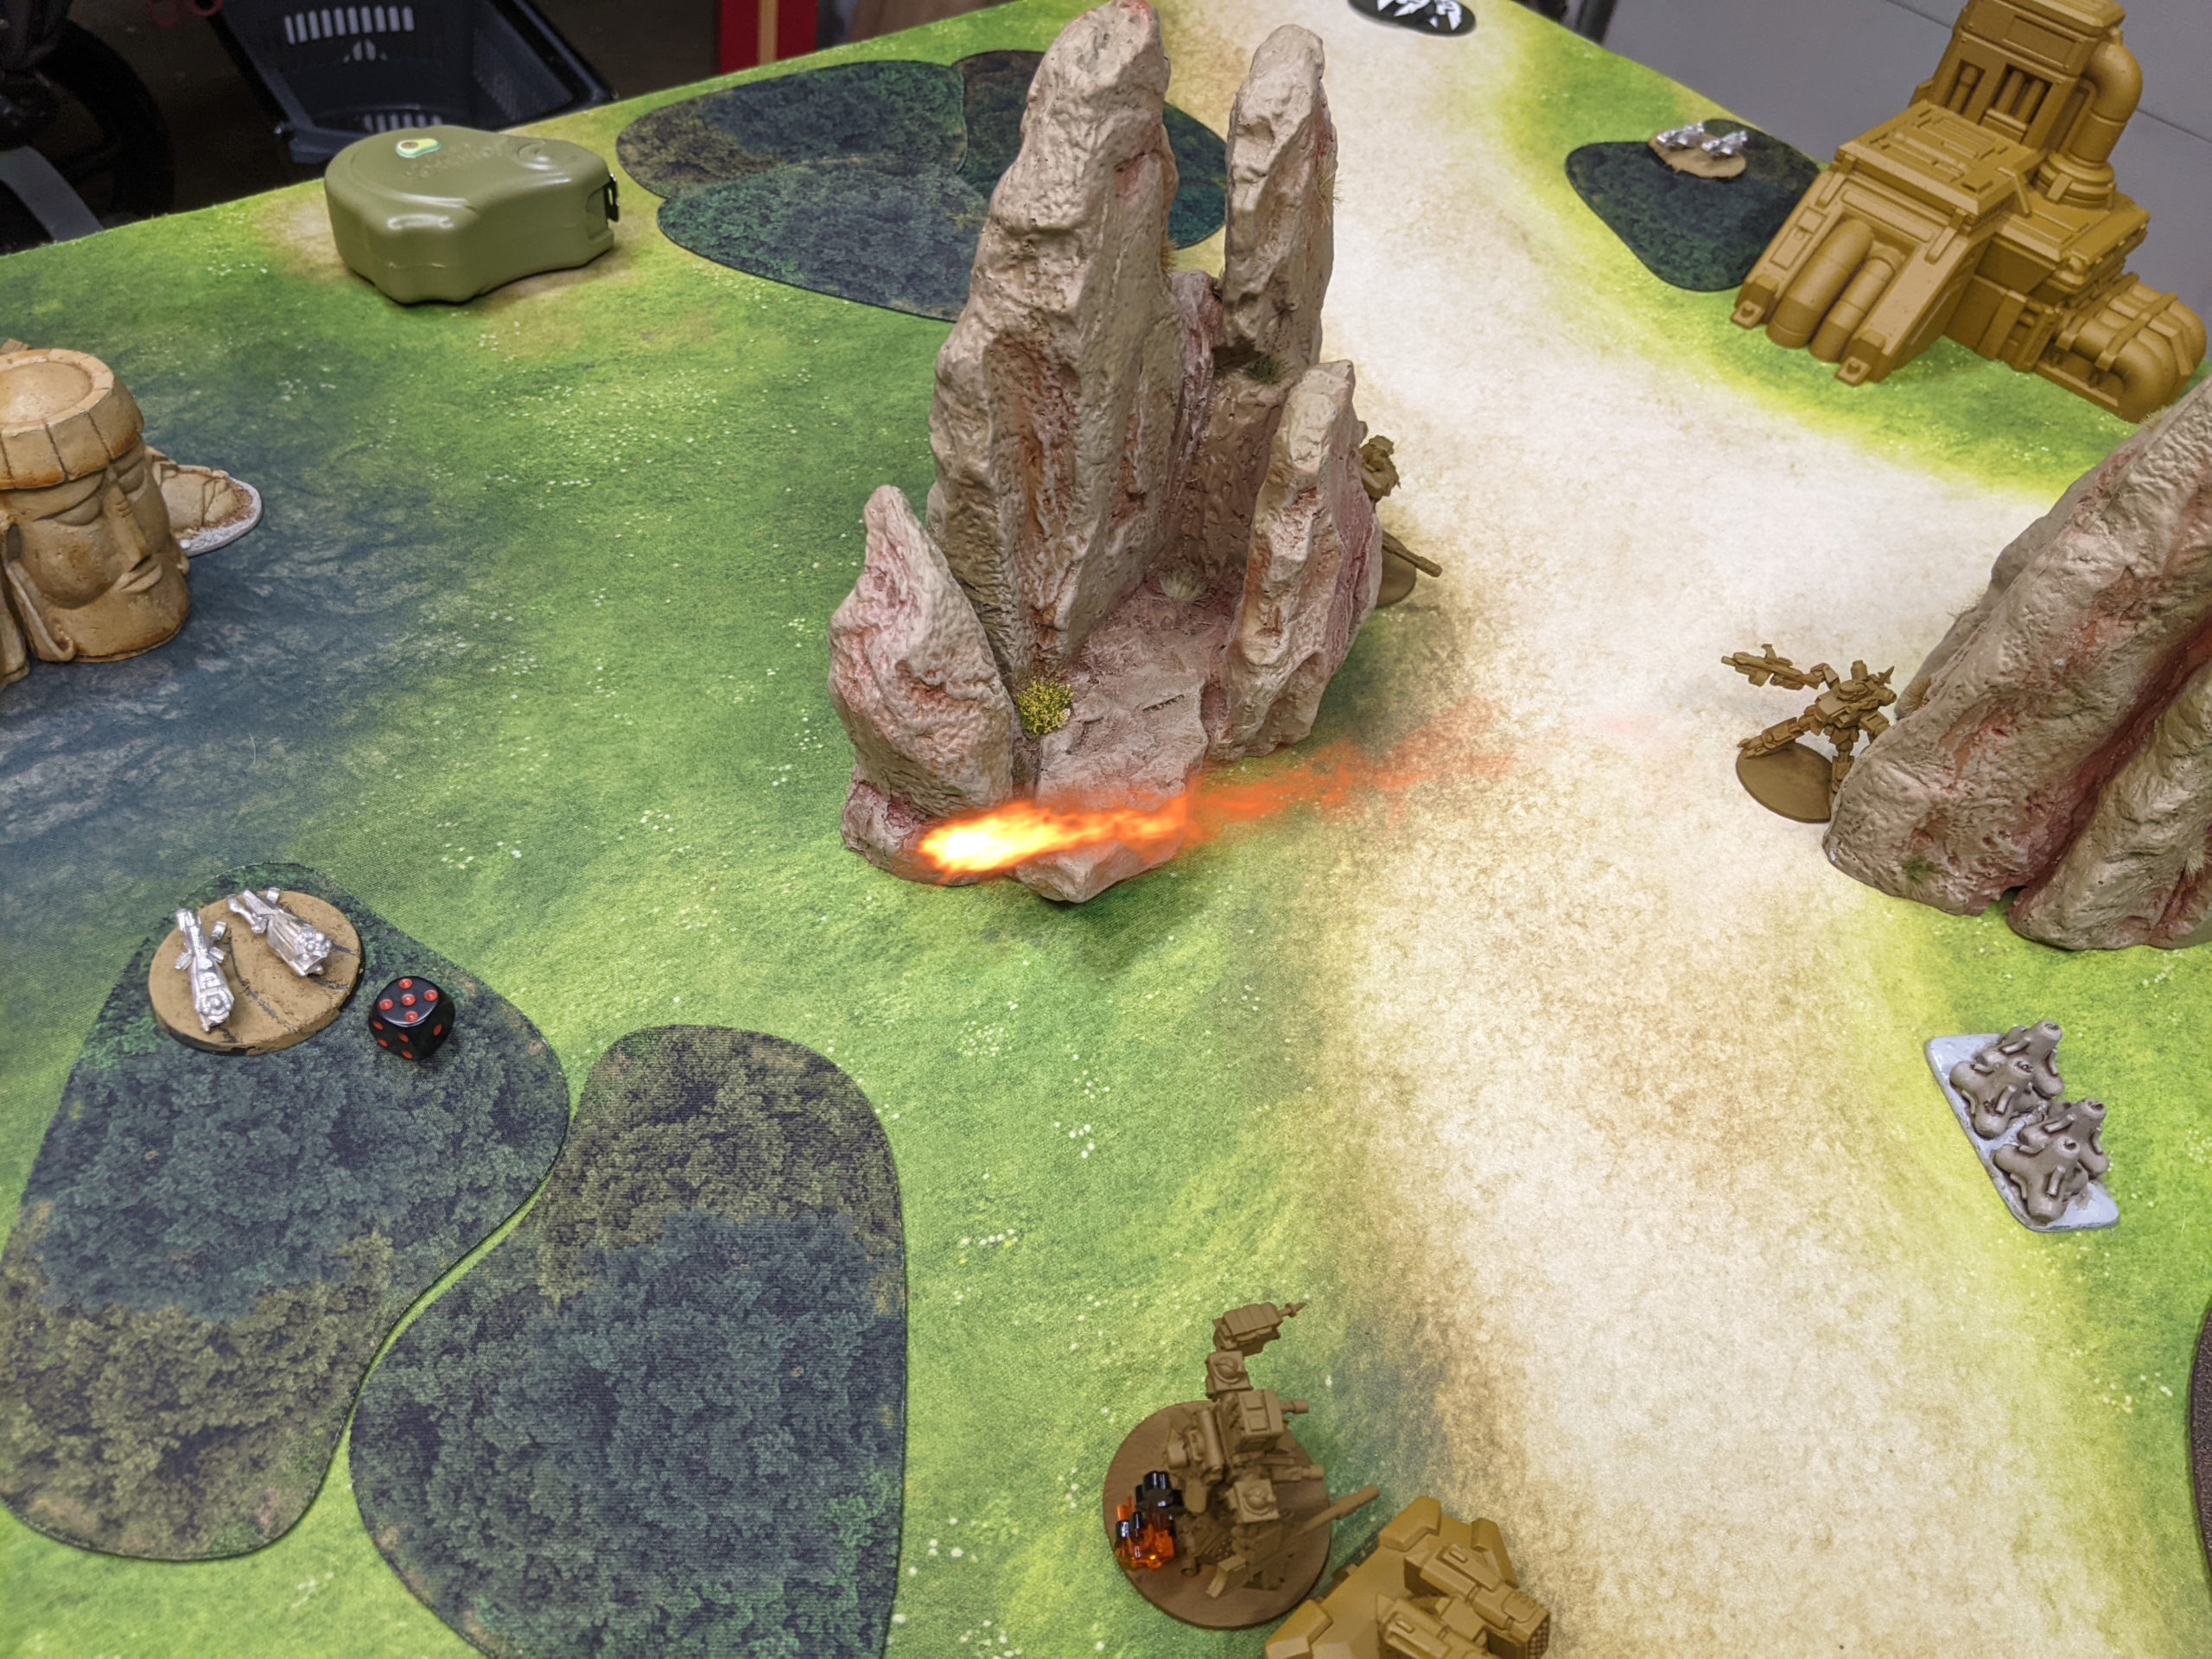
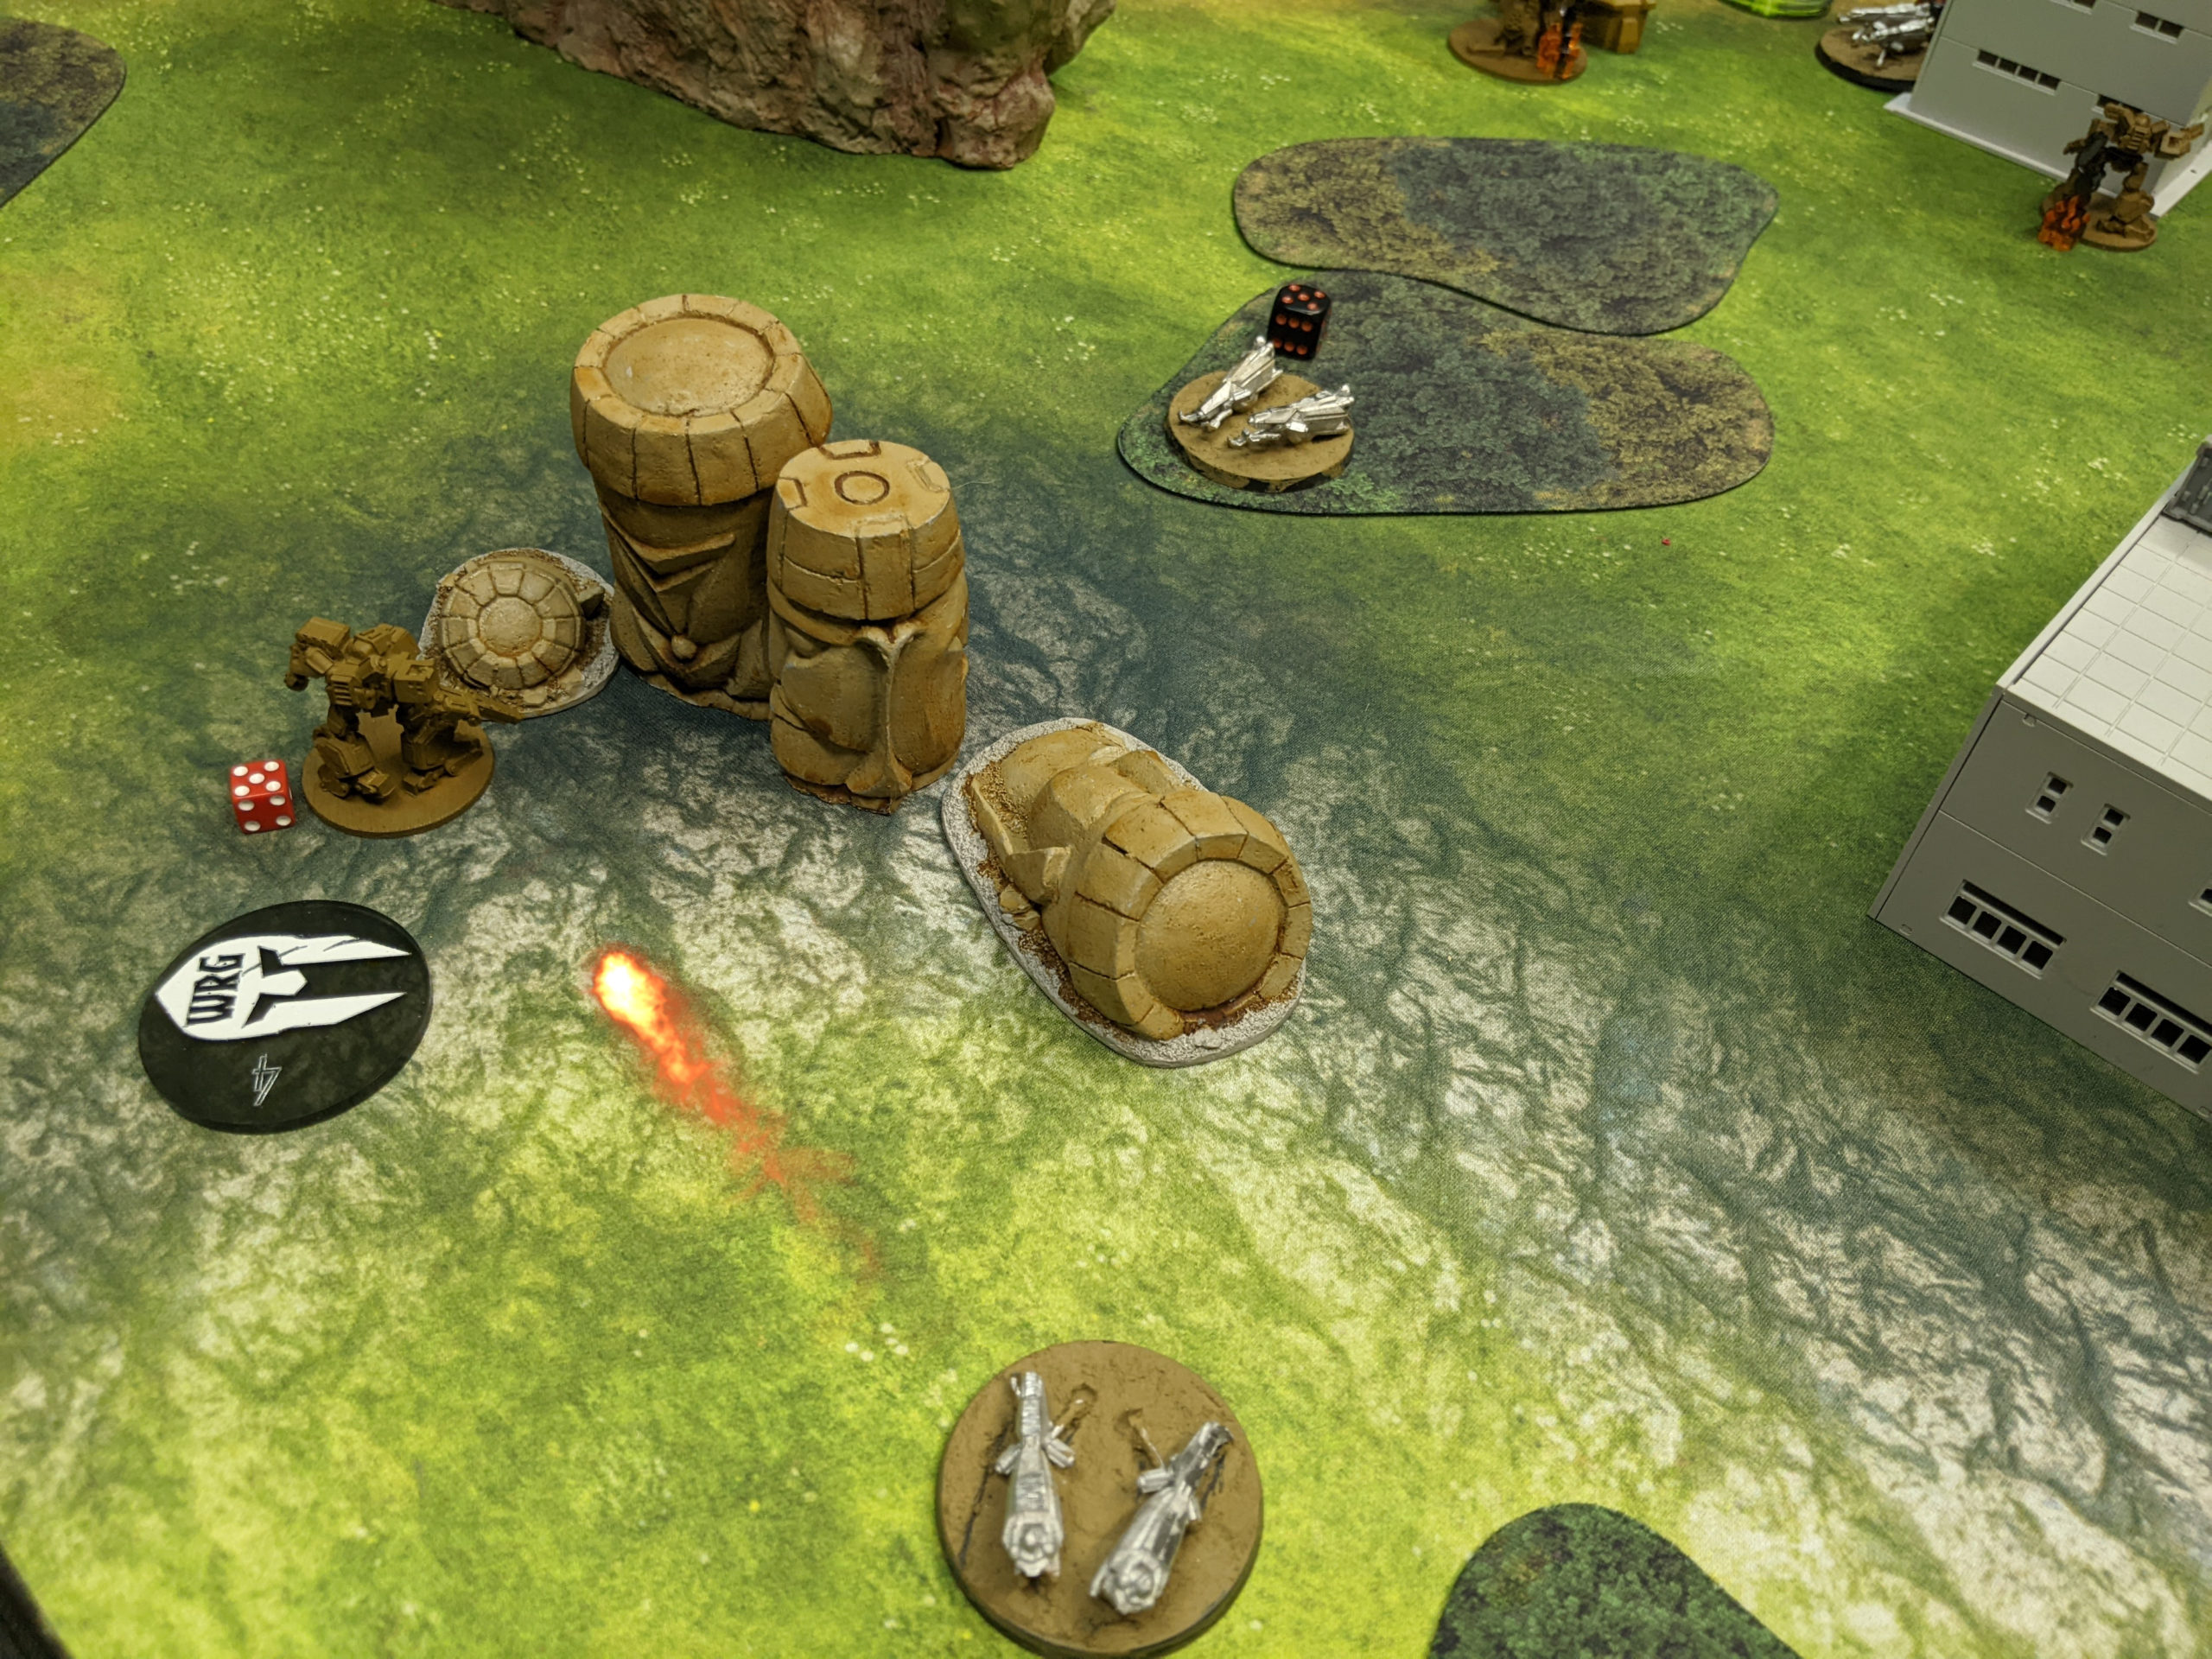
The next objective dropped on the hill on my left, right in Adam’s largest concentration of forces. He had a Bobcat nearby to grab it, as well as his Killer Koala. I won initiative and decided to try and kill the Bobcat with my Infantry. Unfortunately, they were in range of the Killer Koala’s flamethrower still. I decided to go for it anyway, but failed a LTHI on the Vulture so had to brace the Sniper Team. I lost both the Sniper Team and the as-yet-unactivated damaged Assault Squad, but managed to put two points on the Bobcat and forced the Koala to spend its order.
The last two Infantry finished off the Bobcat, and now there Adam didn’t have any gears that could pick up the objective and not just be standing in the open on the hill. I didn’t have anything that could grab the objective safely either, but at least this guaranteed that the next objective to drop would be 50-50 right next to my Owl/Gladiator squad. The Vulture focused and almost finished off the Dingo with its LFG.
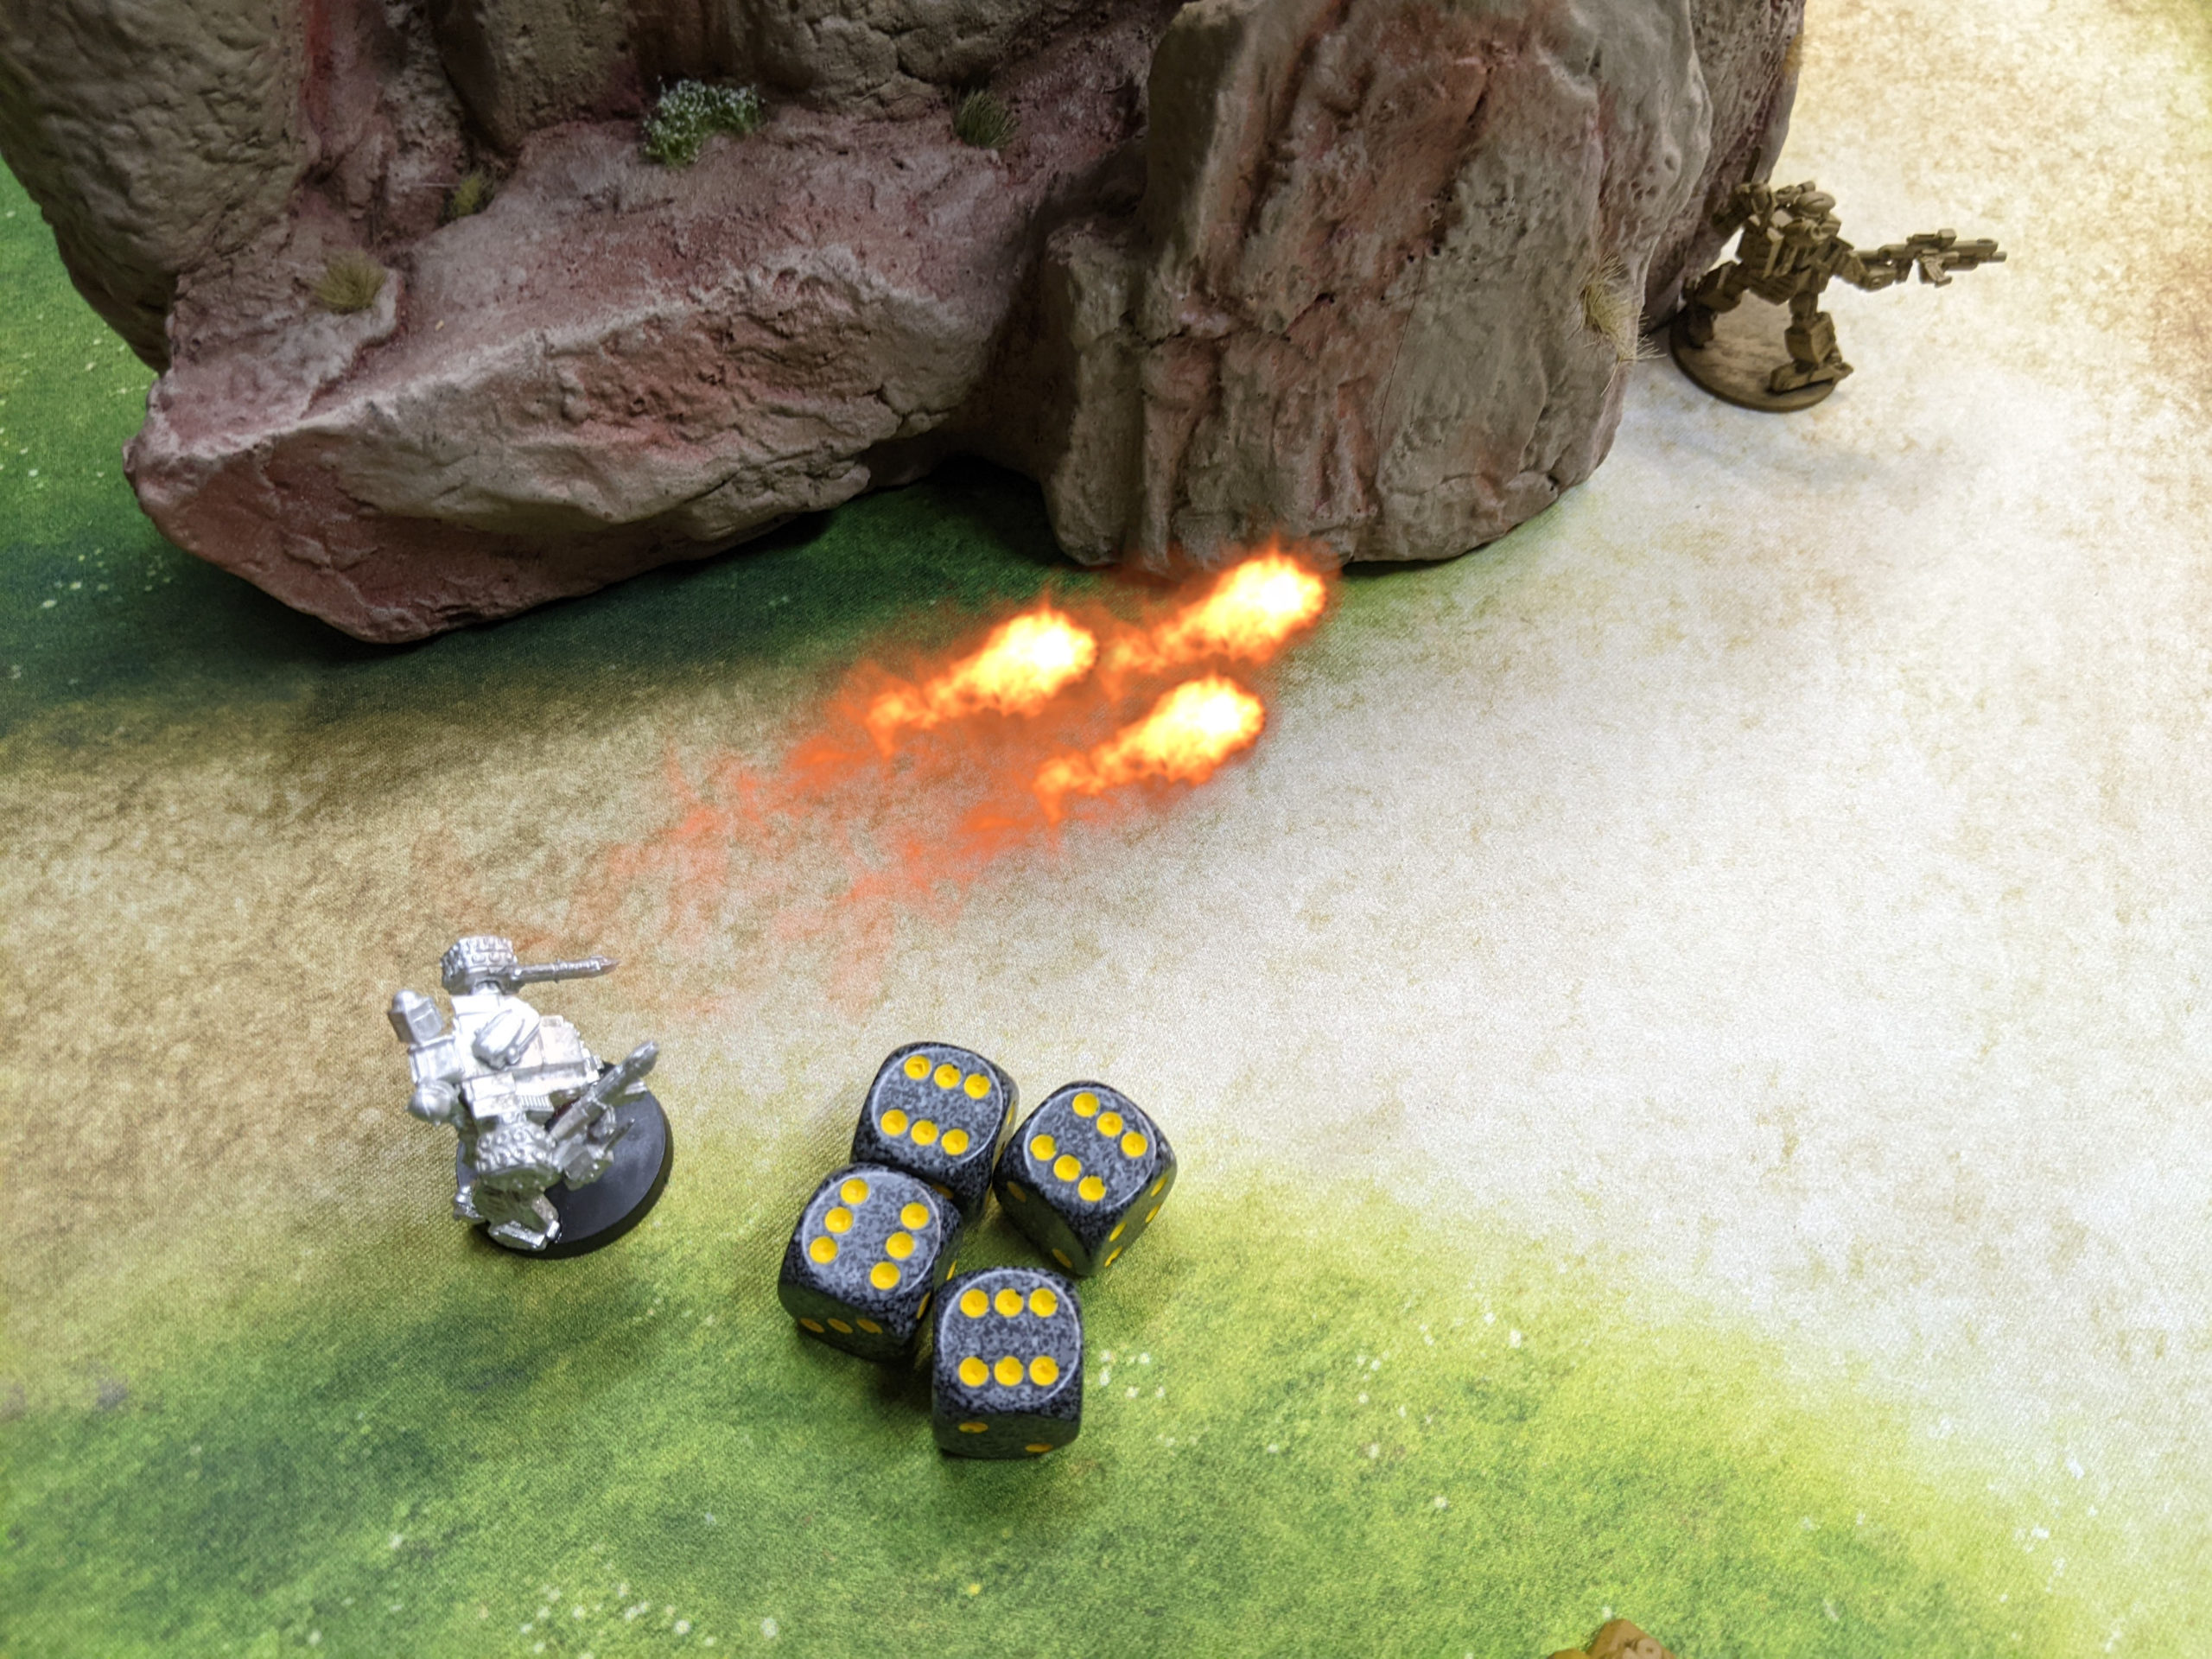
Adam shifted his damaged Bobcat CGL away from my Gladiators to try and deny me a point. On my next activation, I chose to keep pressing with the Spitz, ineffectually attacking a Hunter while trying to get Break the Line. I took some fire from a Klemm’s auto turret but rolled well.
One of my Spitz had taken damage from I think the Leopard earlier, but LIGL are dangerous and I finished off the Dingo with the crippled Spitz, pushing the other two into Adam’s deployment zone for a guaranteed single Break the Line point.
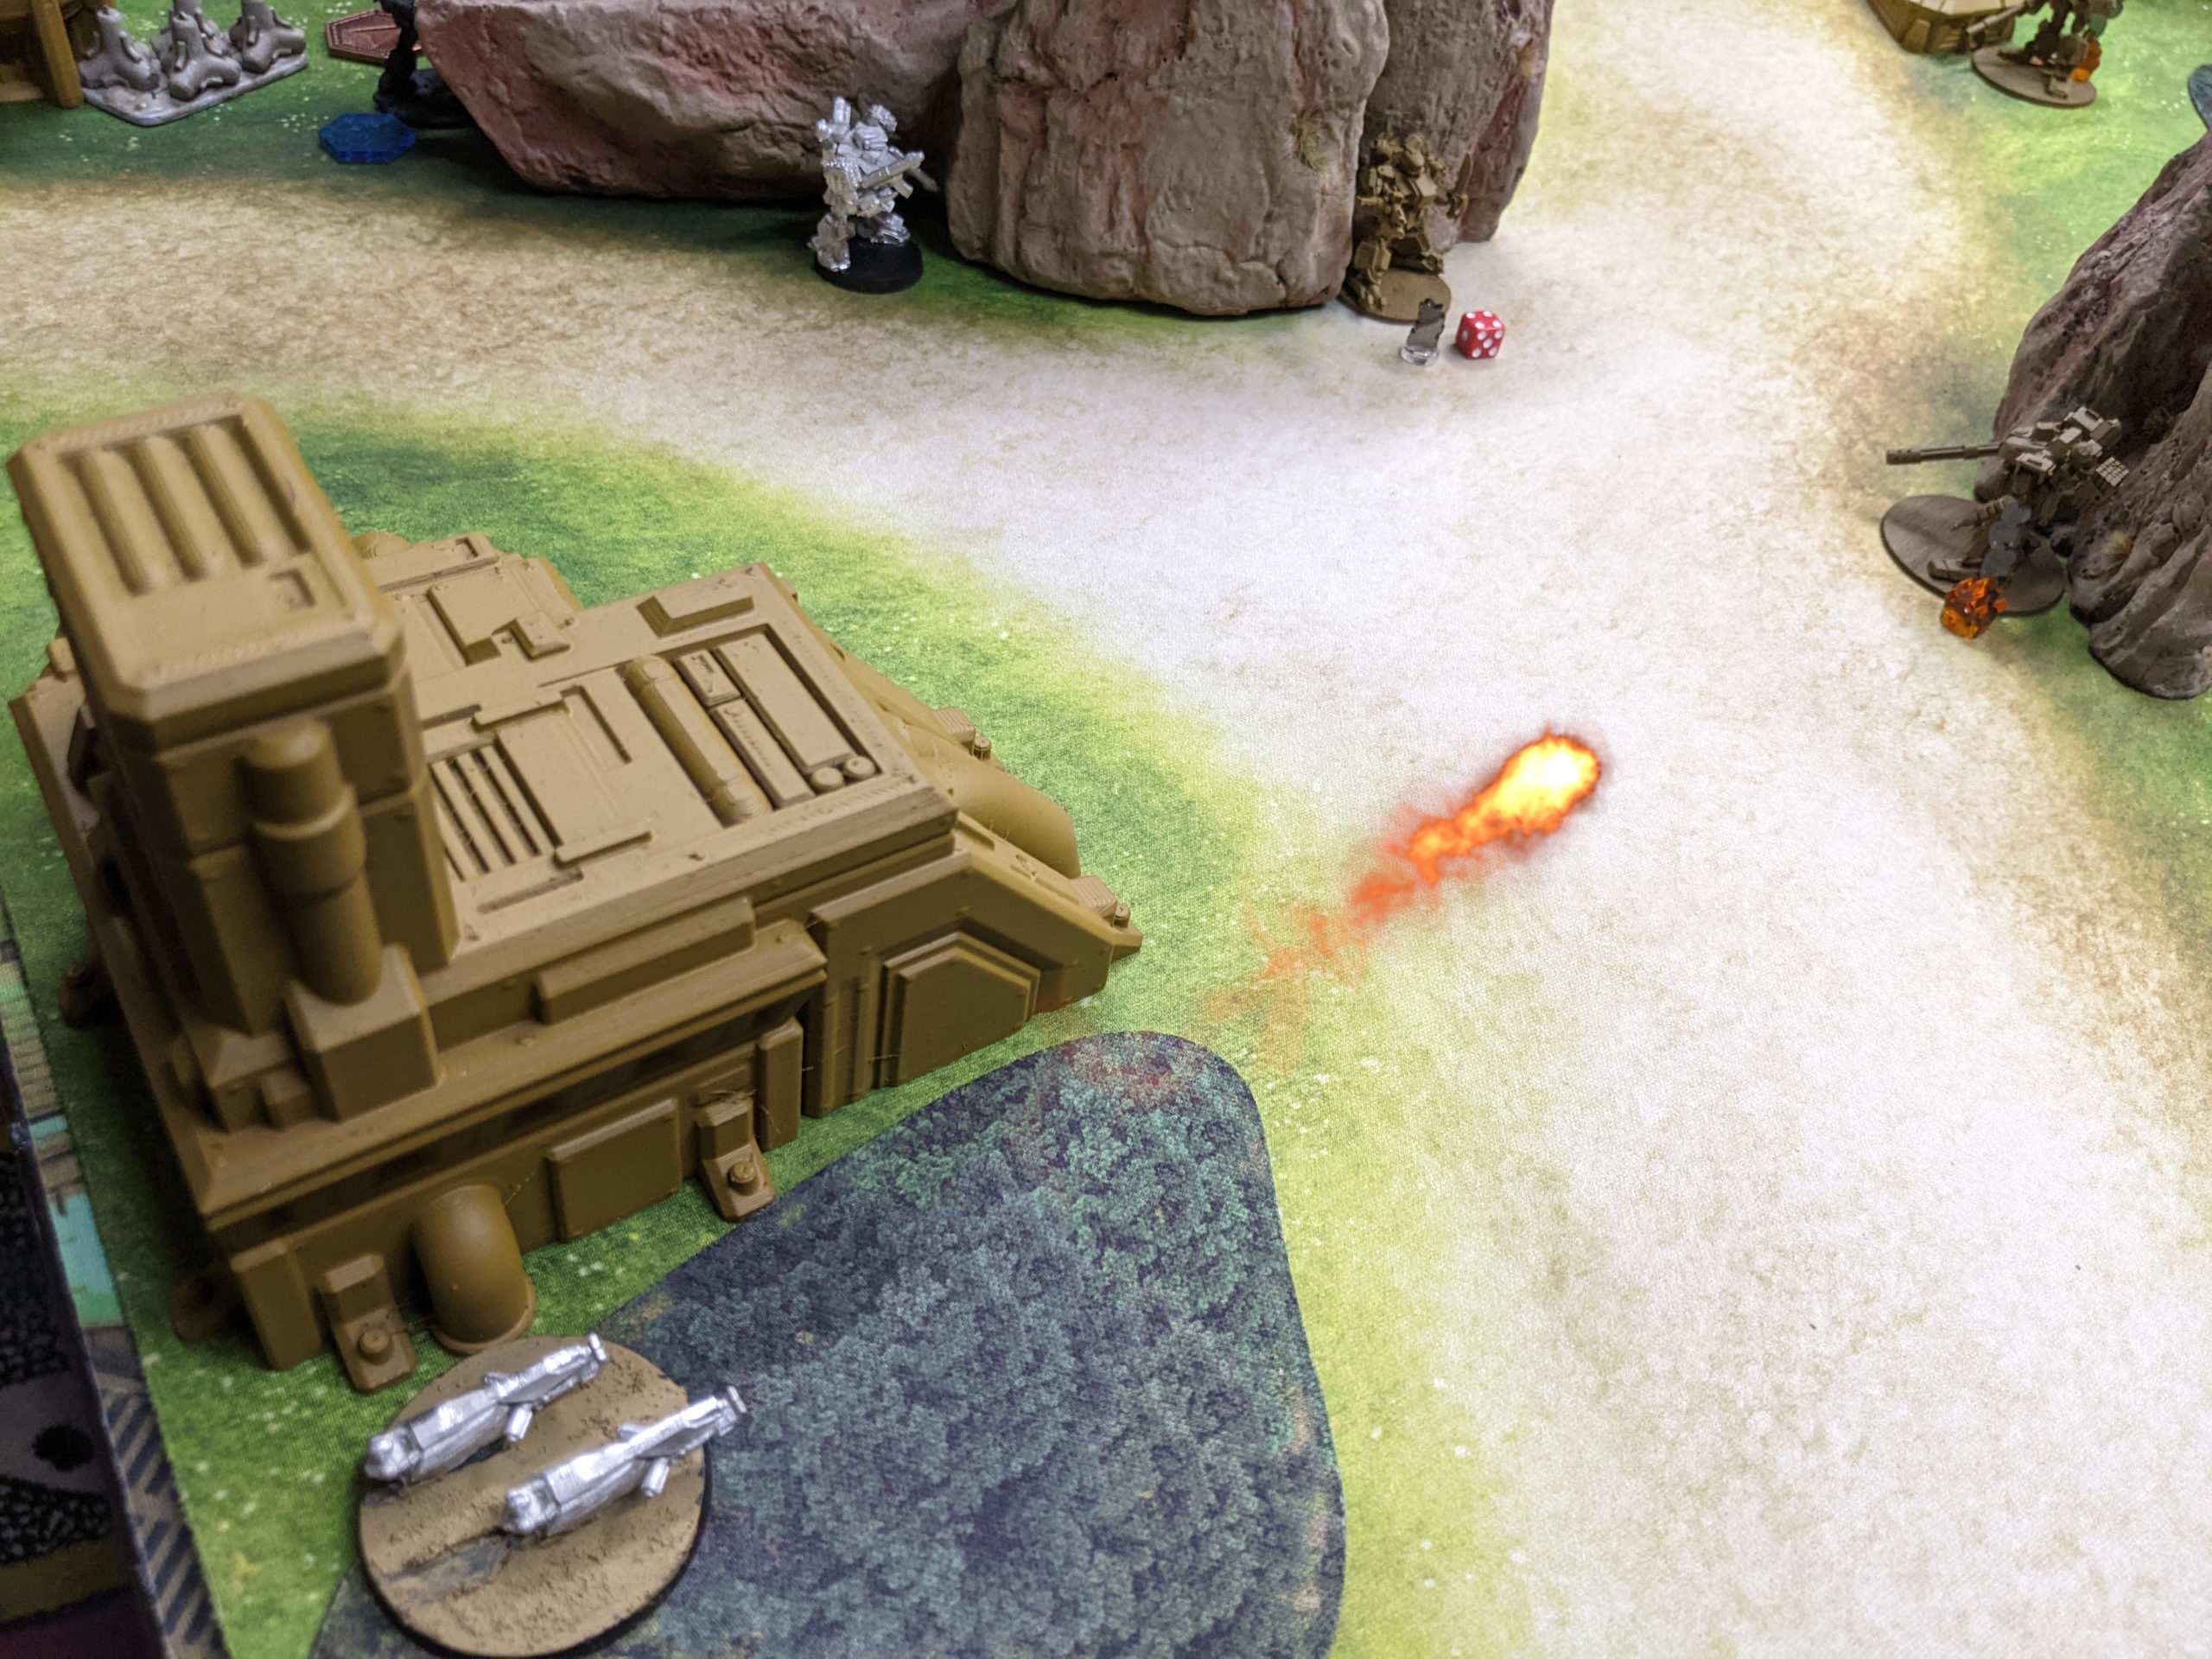
I then hacked and rocket-podded the Hunter Commando, saving my poor Vulture from a bad case of Bazooka-in-the-butt.

The Leopard crippled another Spitz, but the damage was already done.
I retaliated by crippling the Leopard with some shots into its rear with my Gladiator, rolling quad 6’s! I’ll take it!
The other Gladiator put the hurt on the Razorback nearby…
and I pushed it into crippled with the Owl’s MRL.
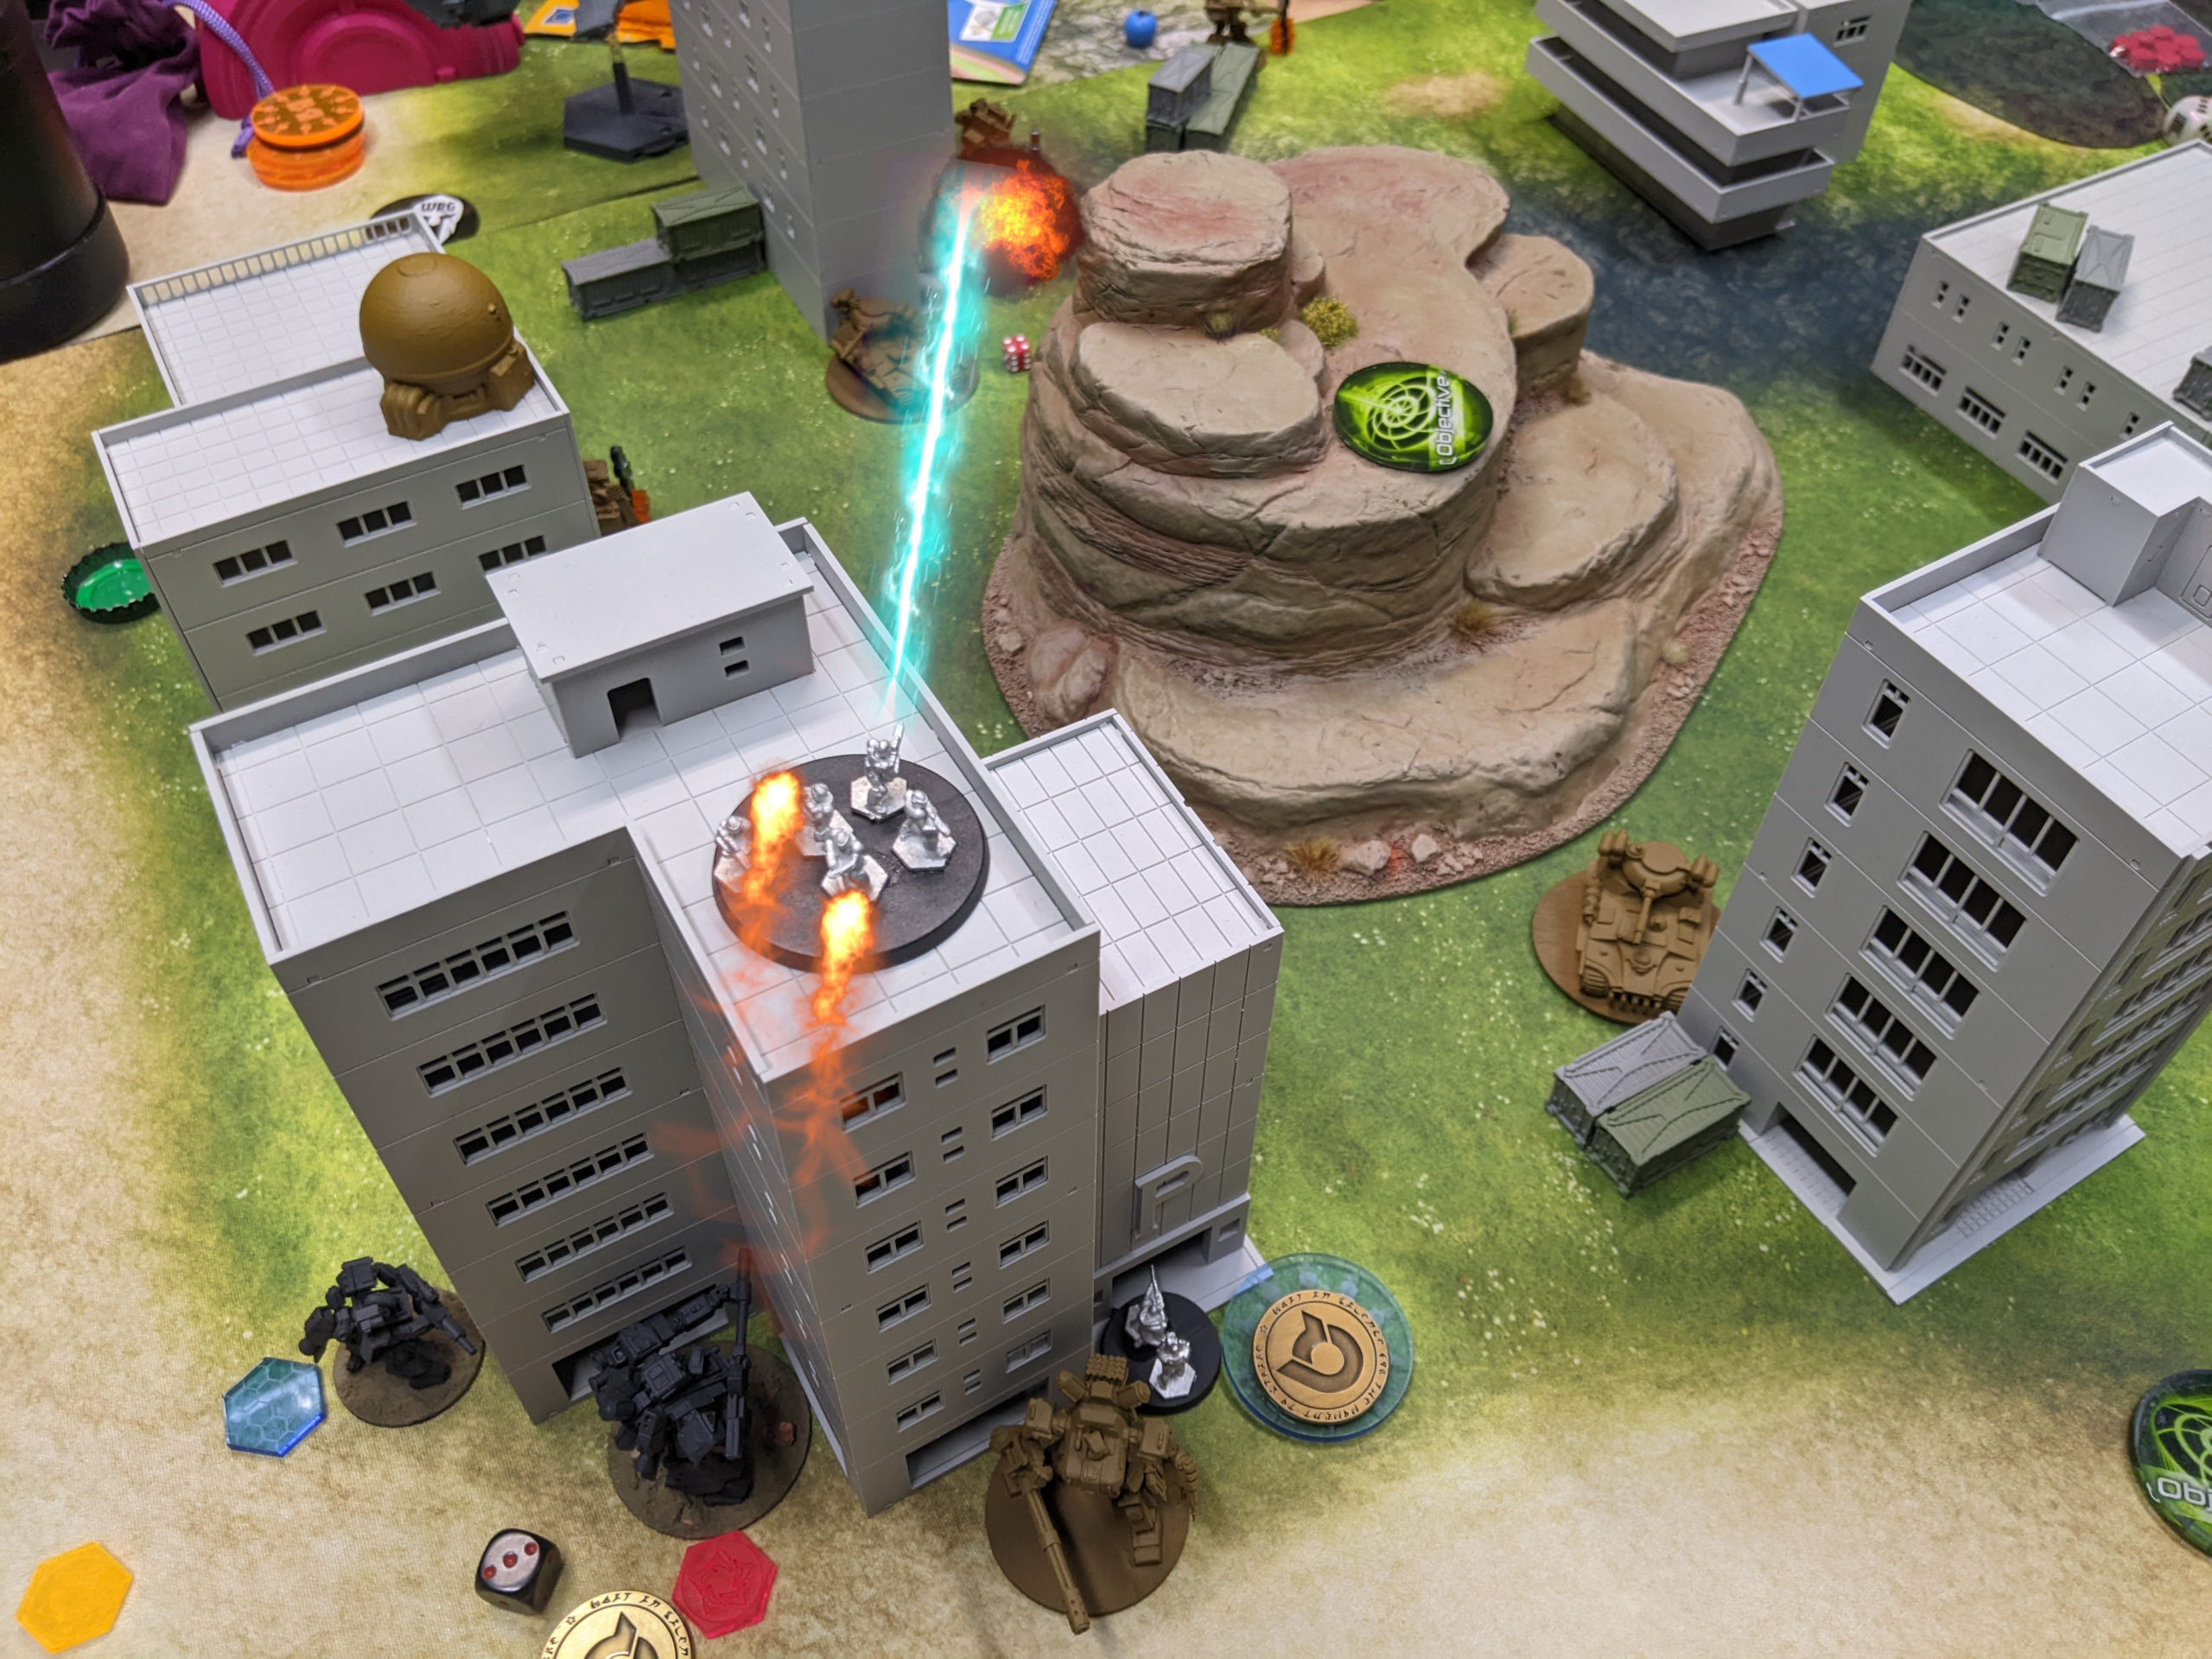
The next objective dropped right next to my Owl, and I won initiative so I capitalized on the situation. Shockingly, even with both the Razorback and the Leopard crippled, splitting burst on the nearby Gladiator failed to finish either off. I settled for grabbing the objective with the Owl.
Adam tried to fight back with the Leopard, but failed to do any real damage. His Koala was able to abscond with the objective on the hill though. I finished off the Bobcat CGL with a Spitz, netting both Break the Line (eventually) and my last Assassinate point.
One of my other Spitz was able to take down the Razorback near the Leopard…
The remaining Razorback tried to take out my Raven without any success.
I retaliated with the Vulture’s mortar, without success.
The Klemm failed to take out the Vulture with an indirect ATM.
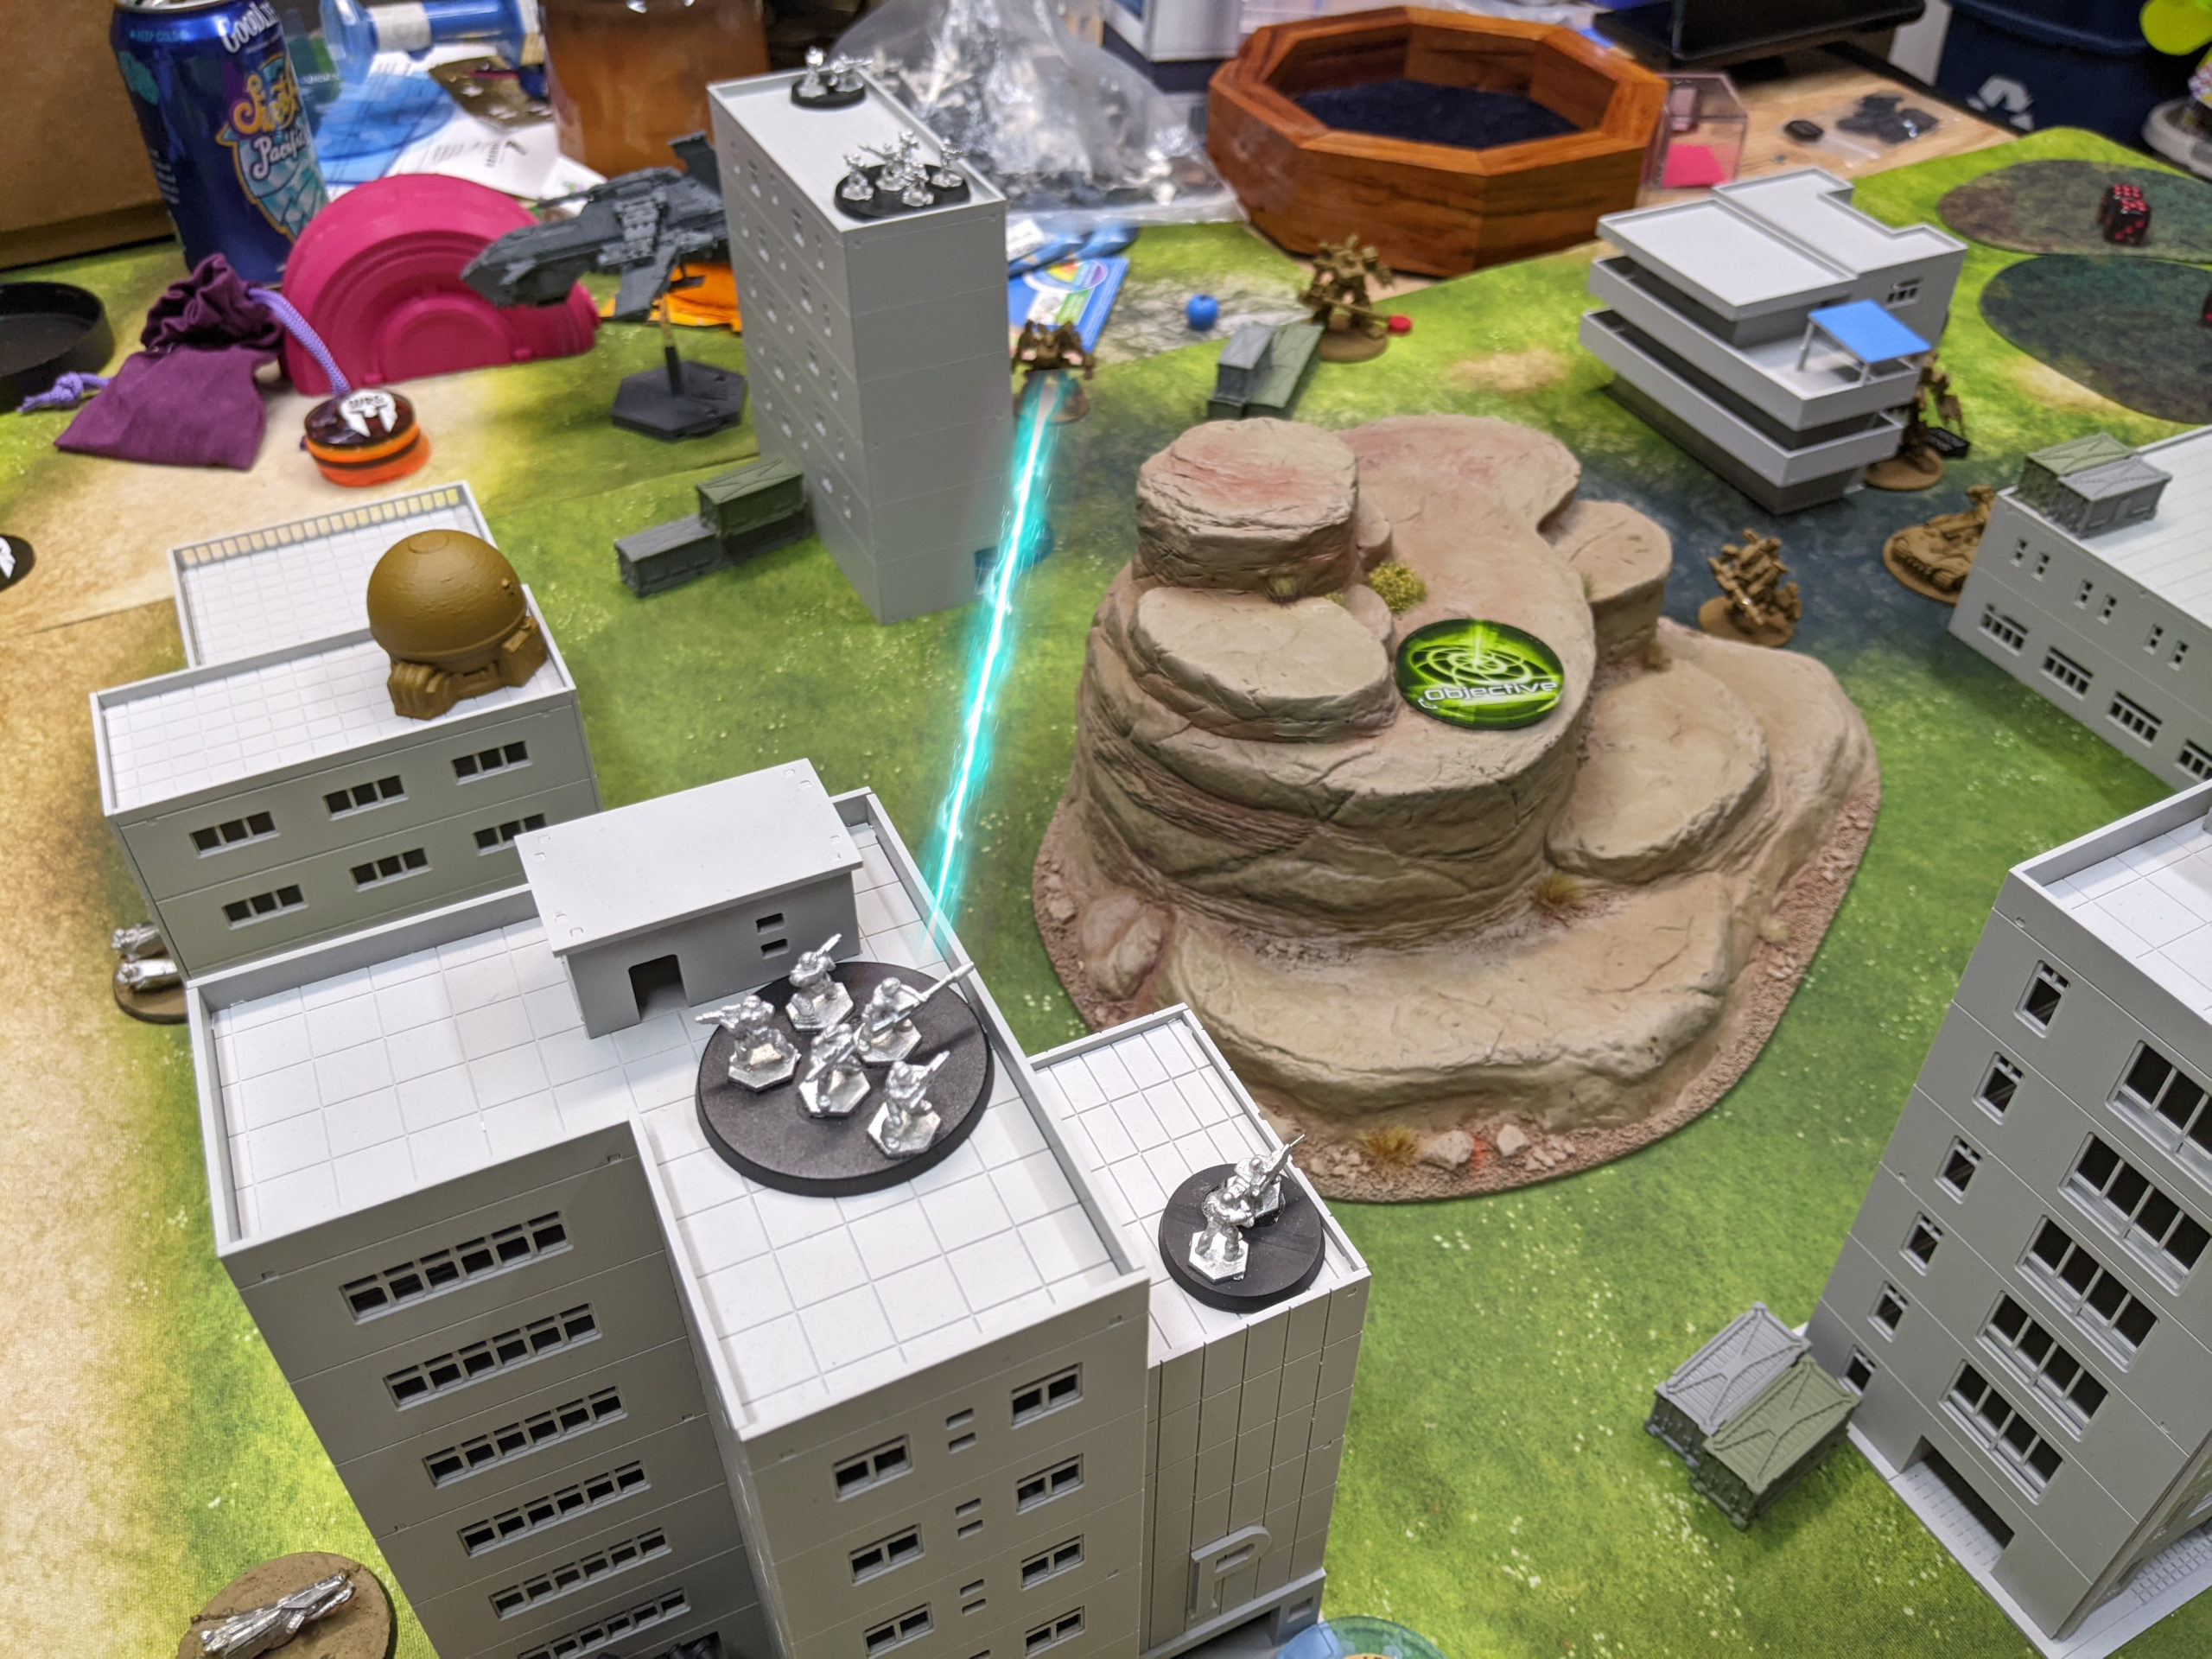
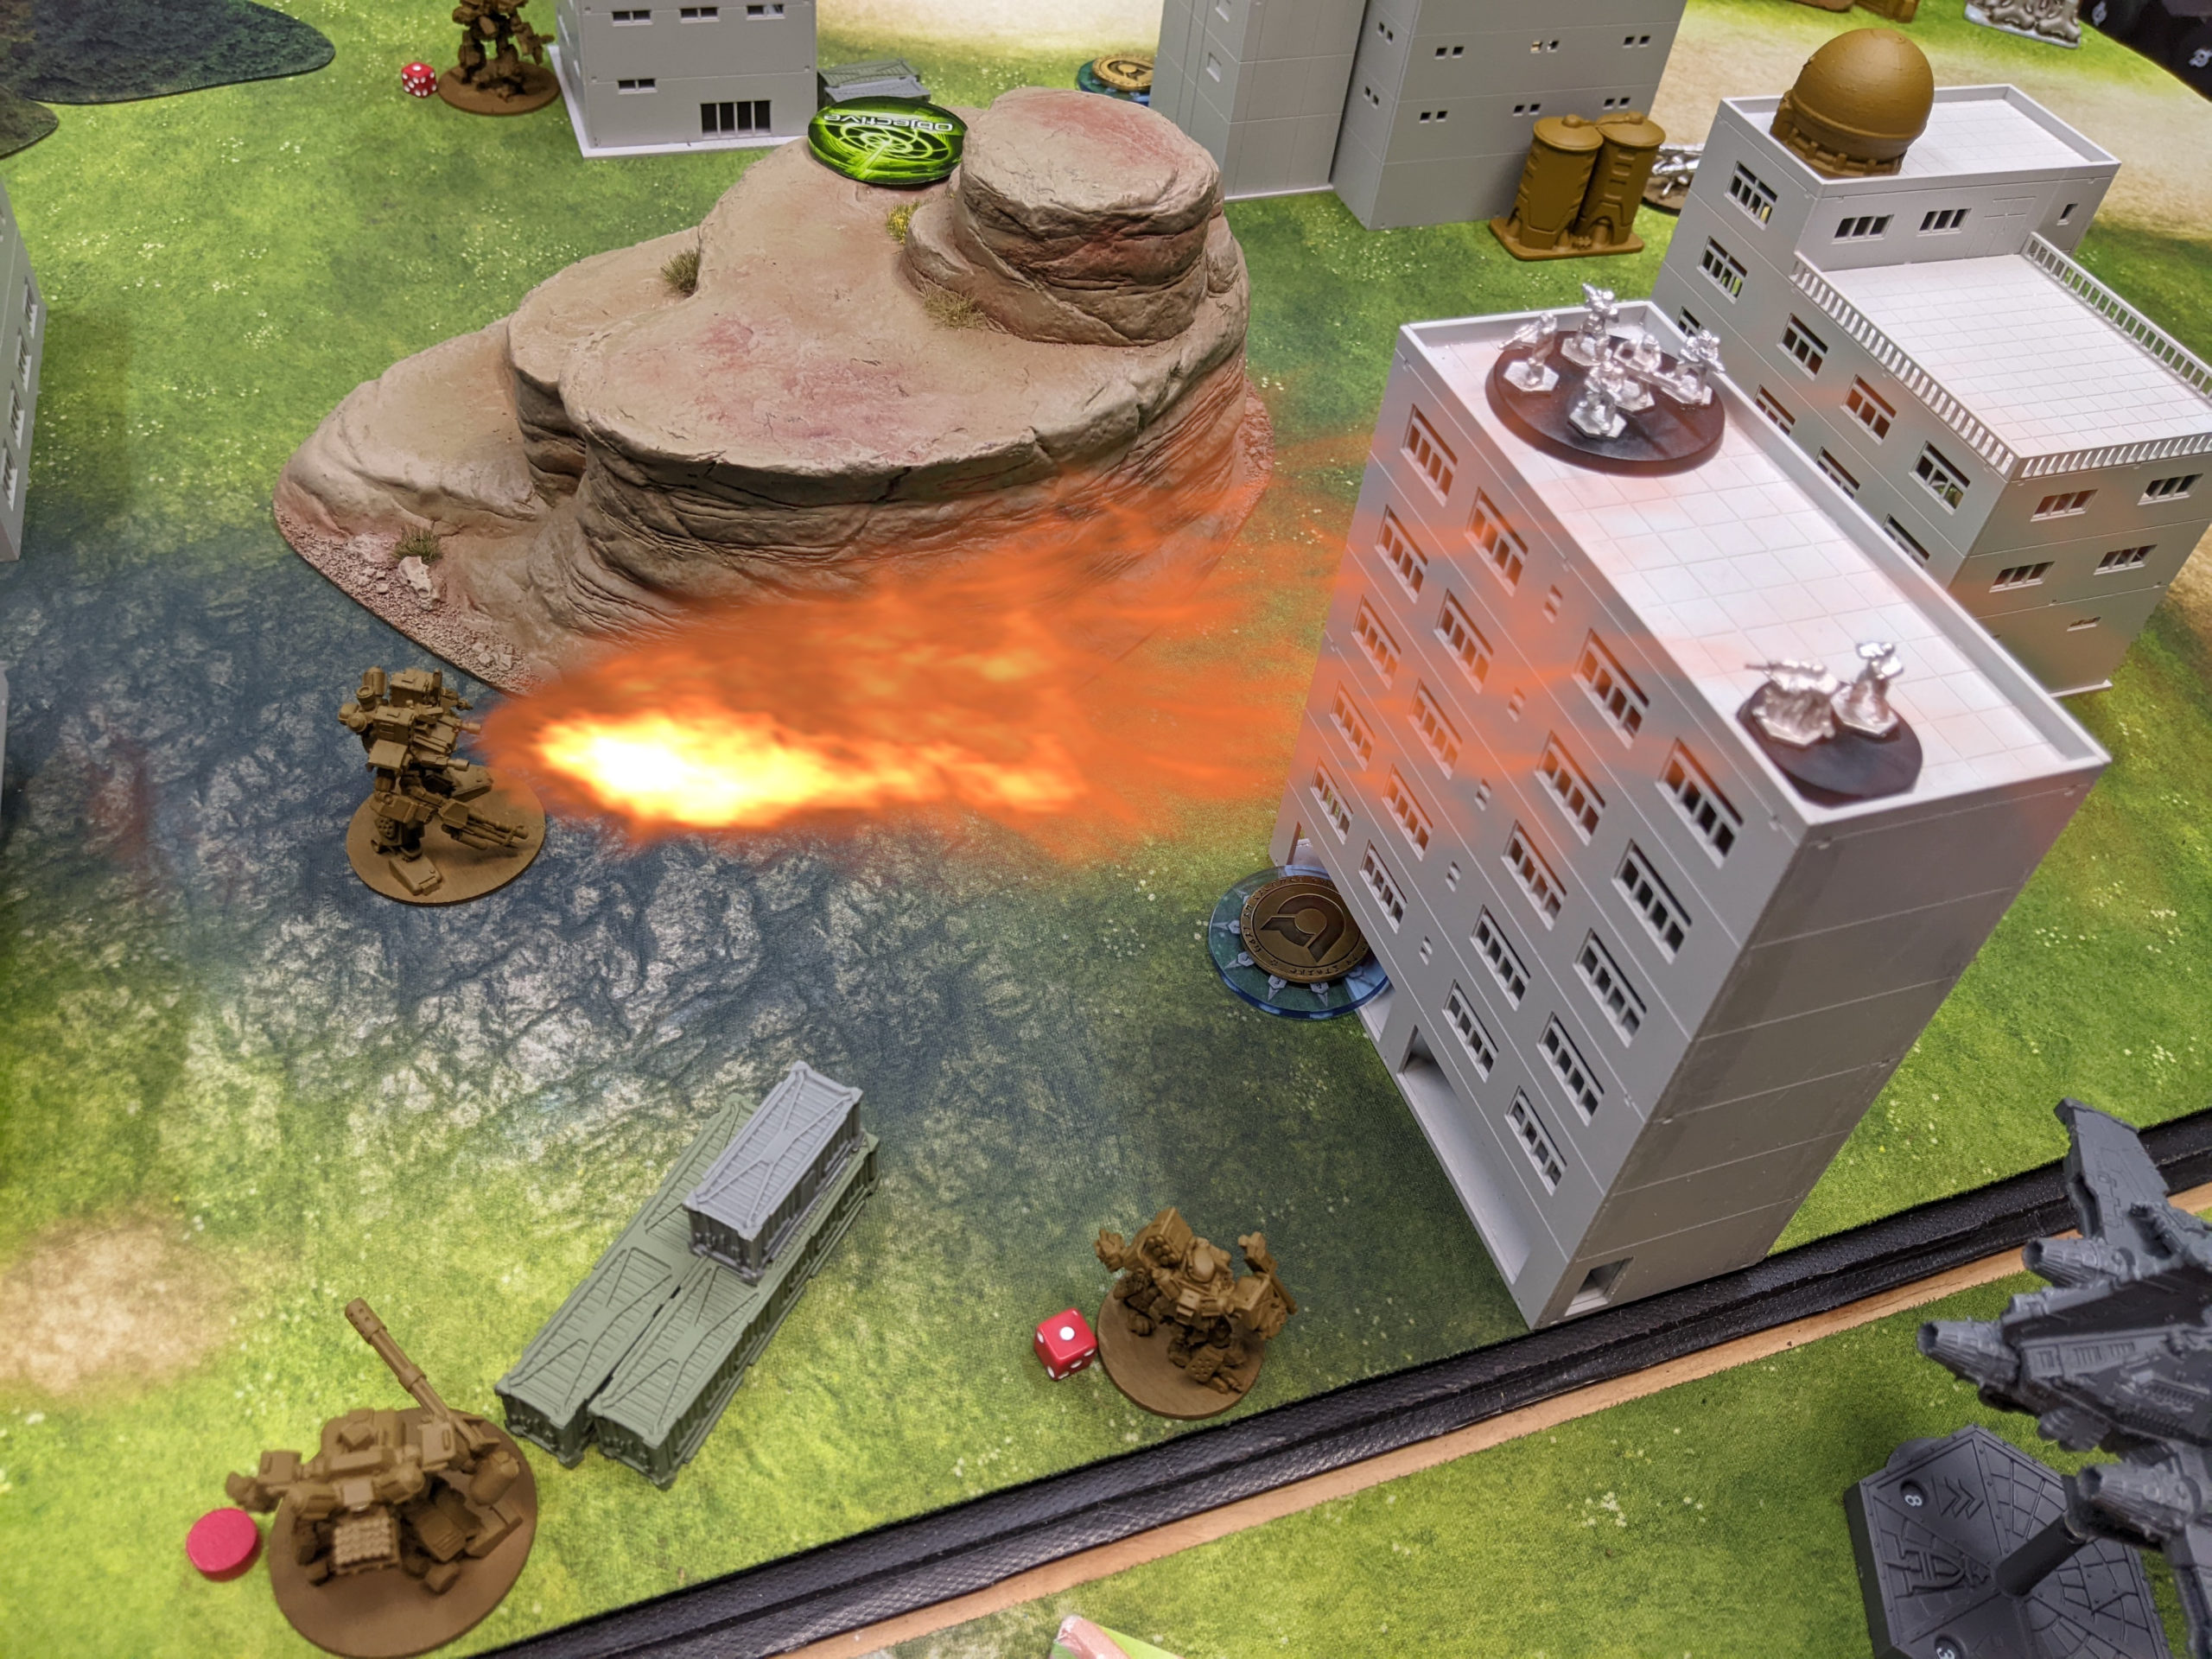
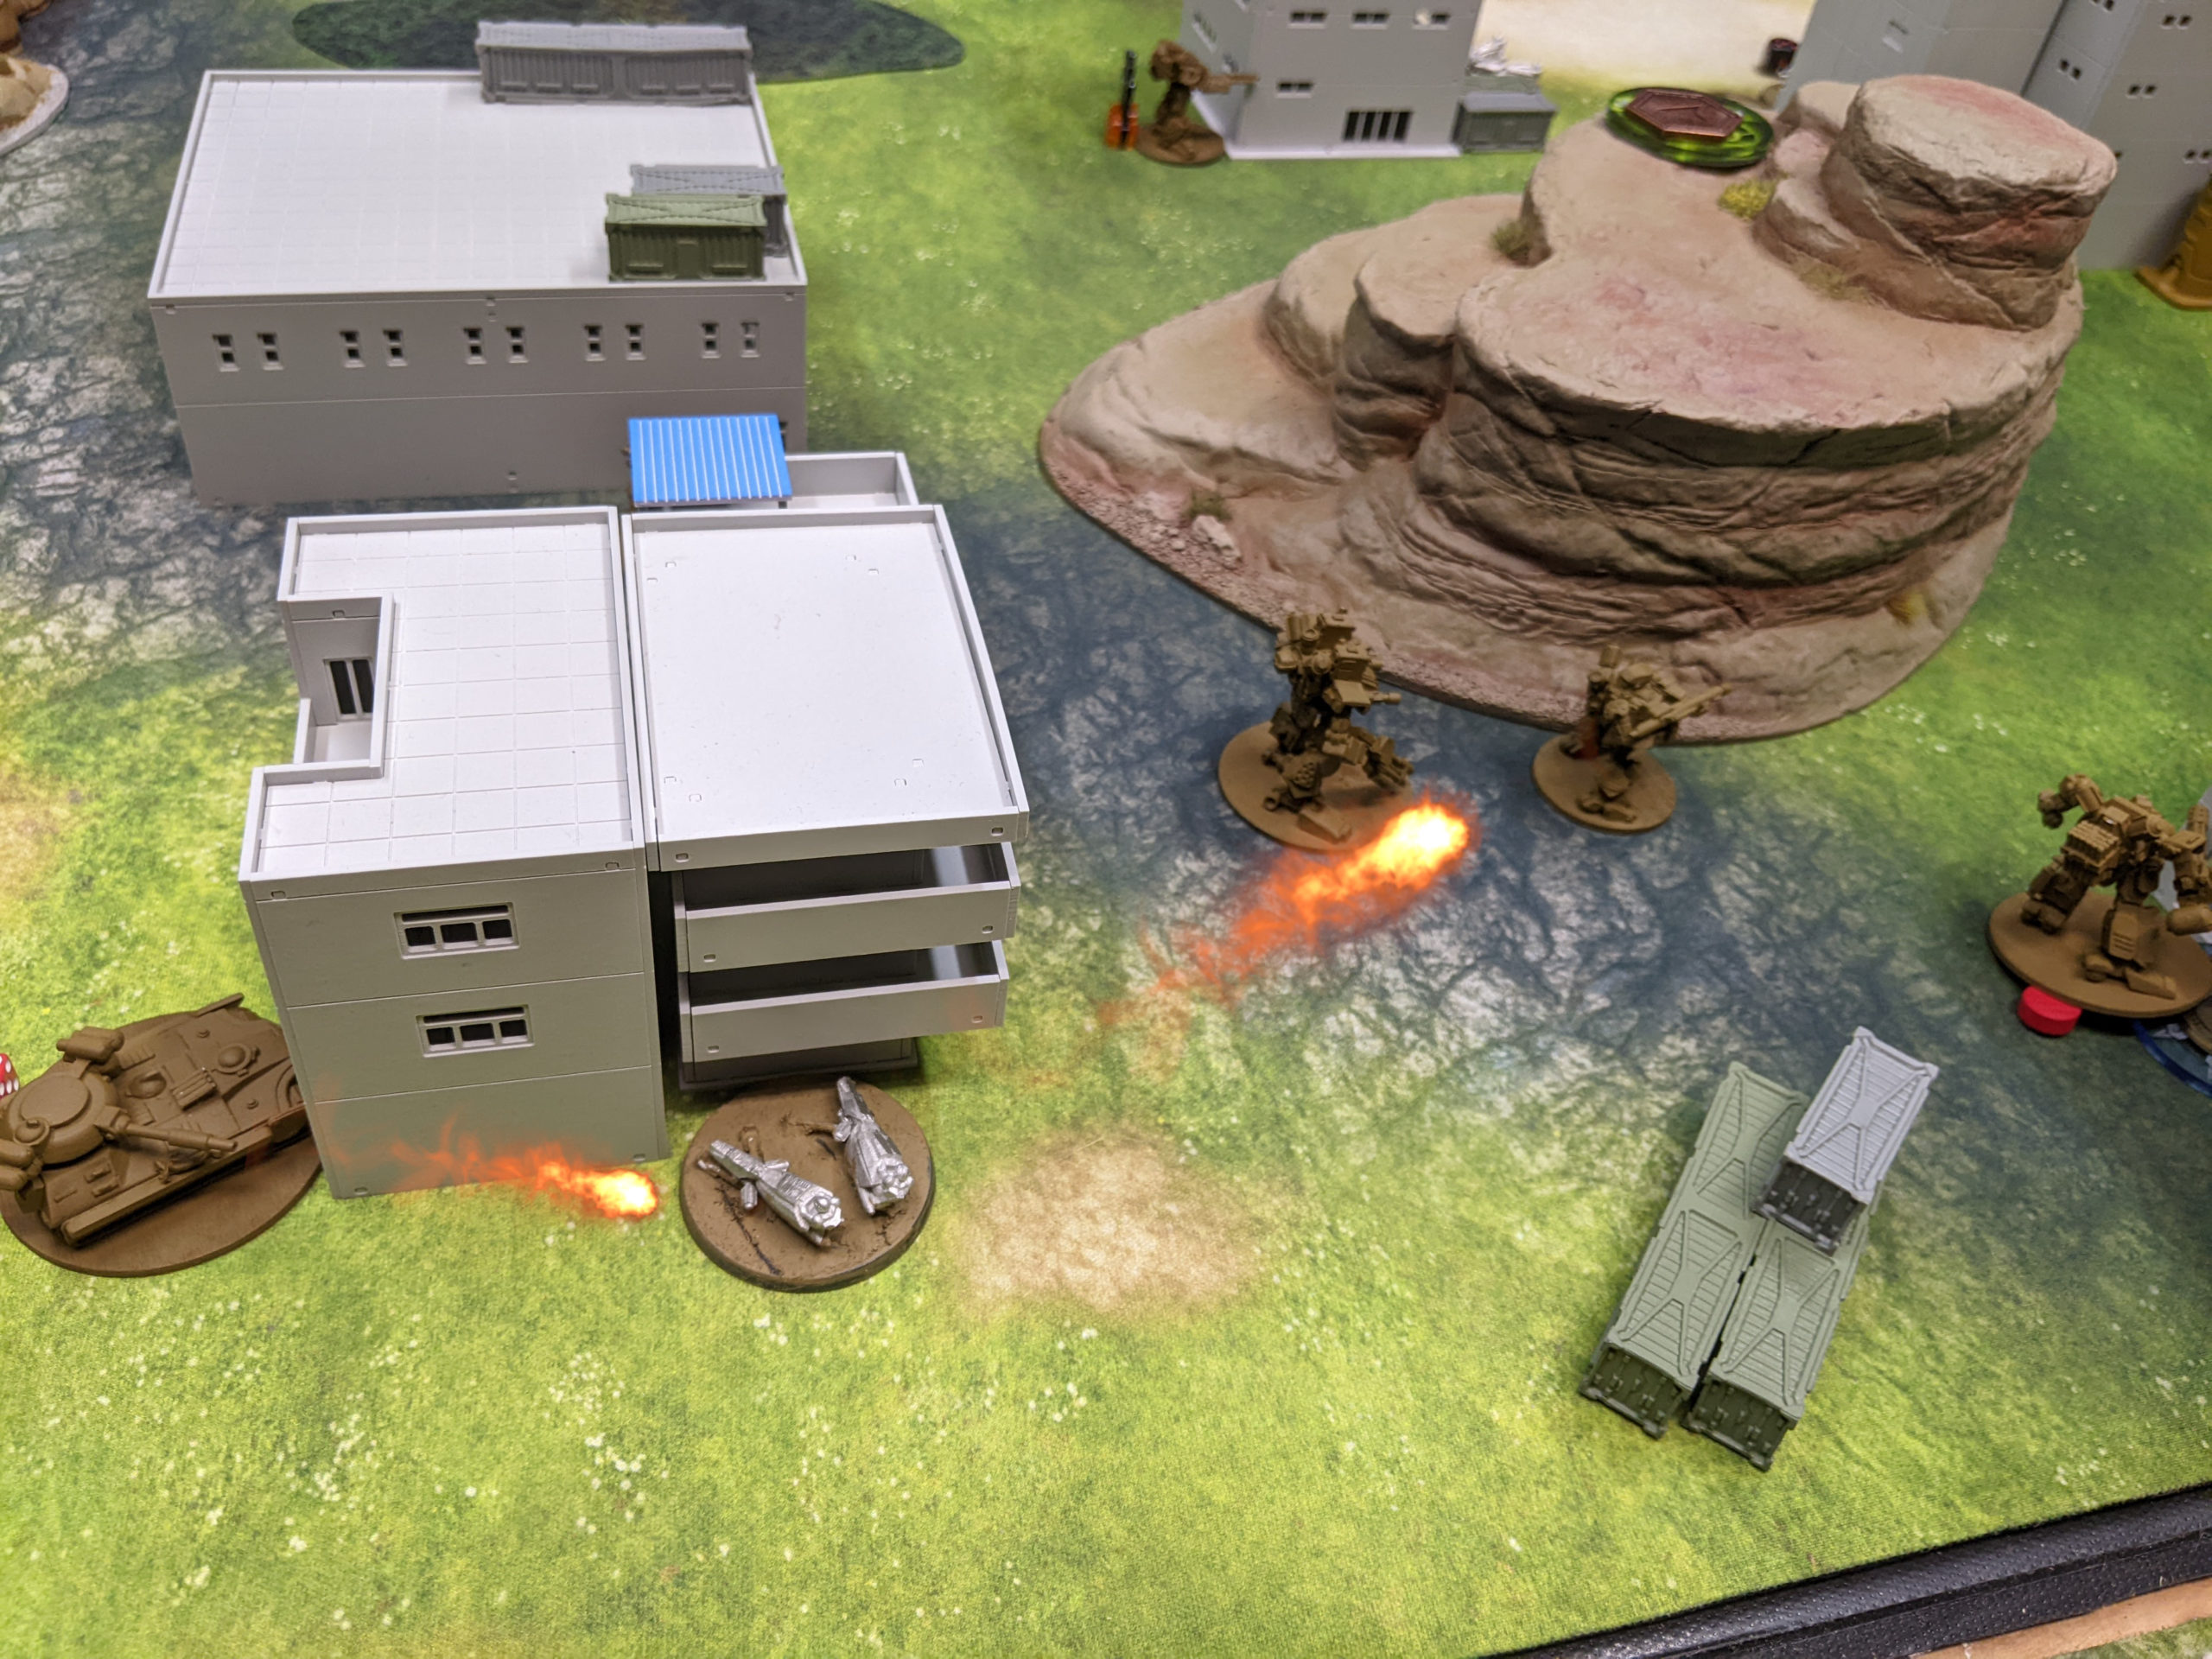
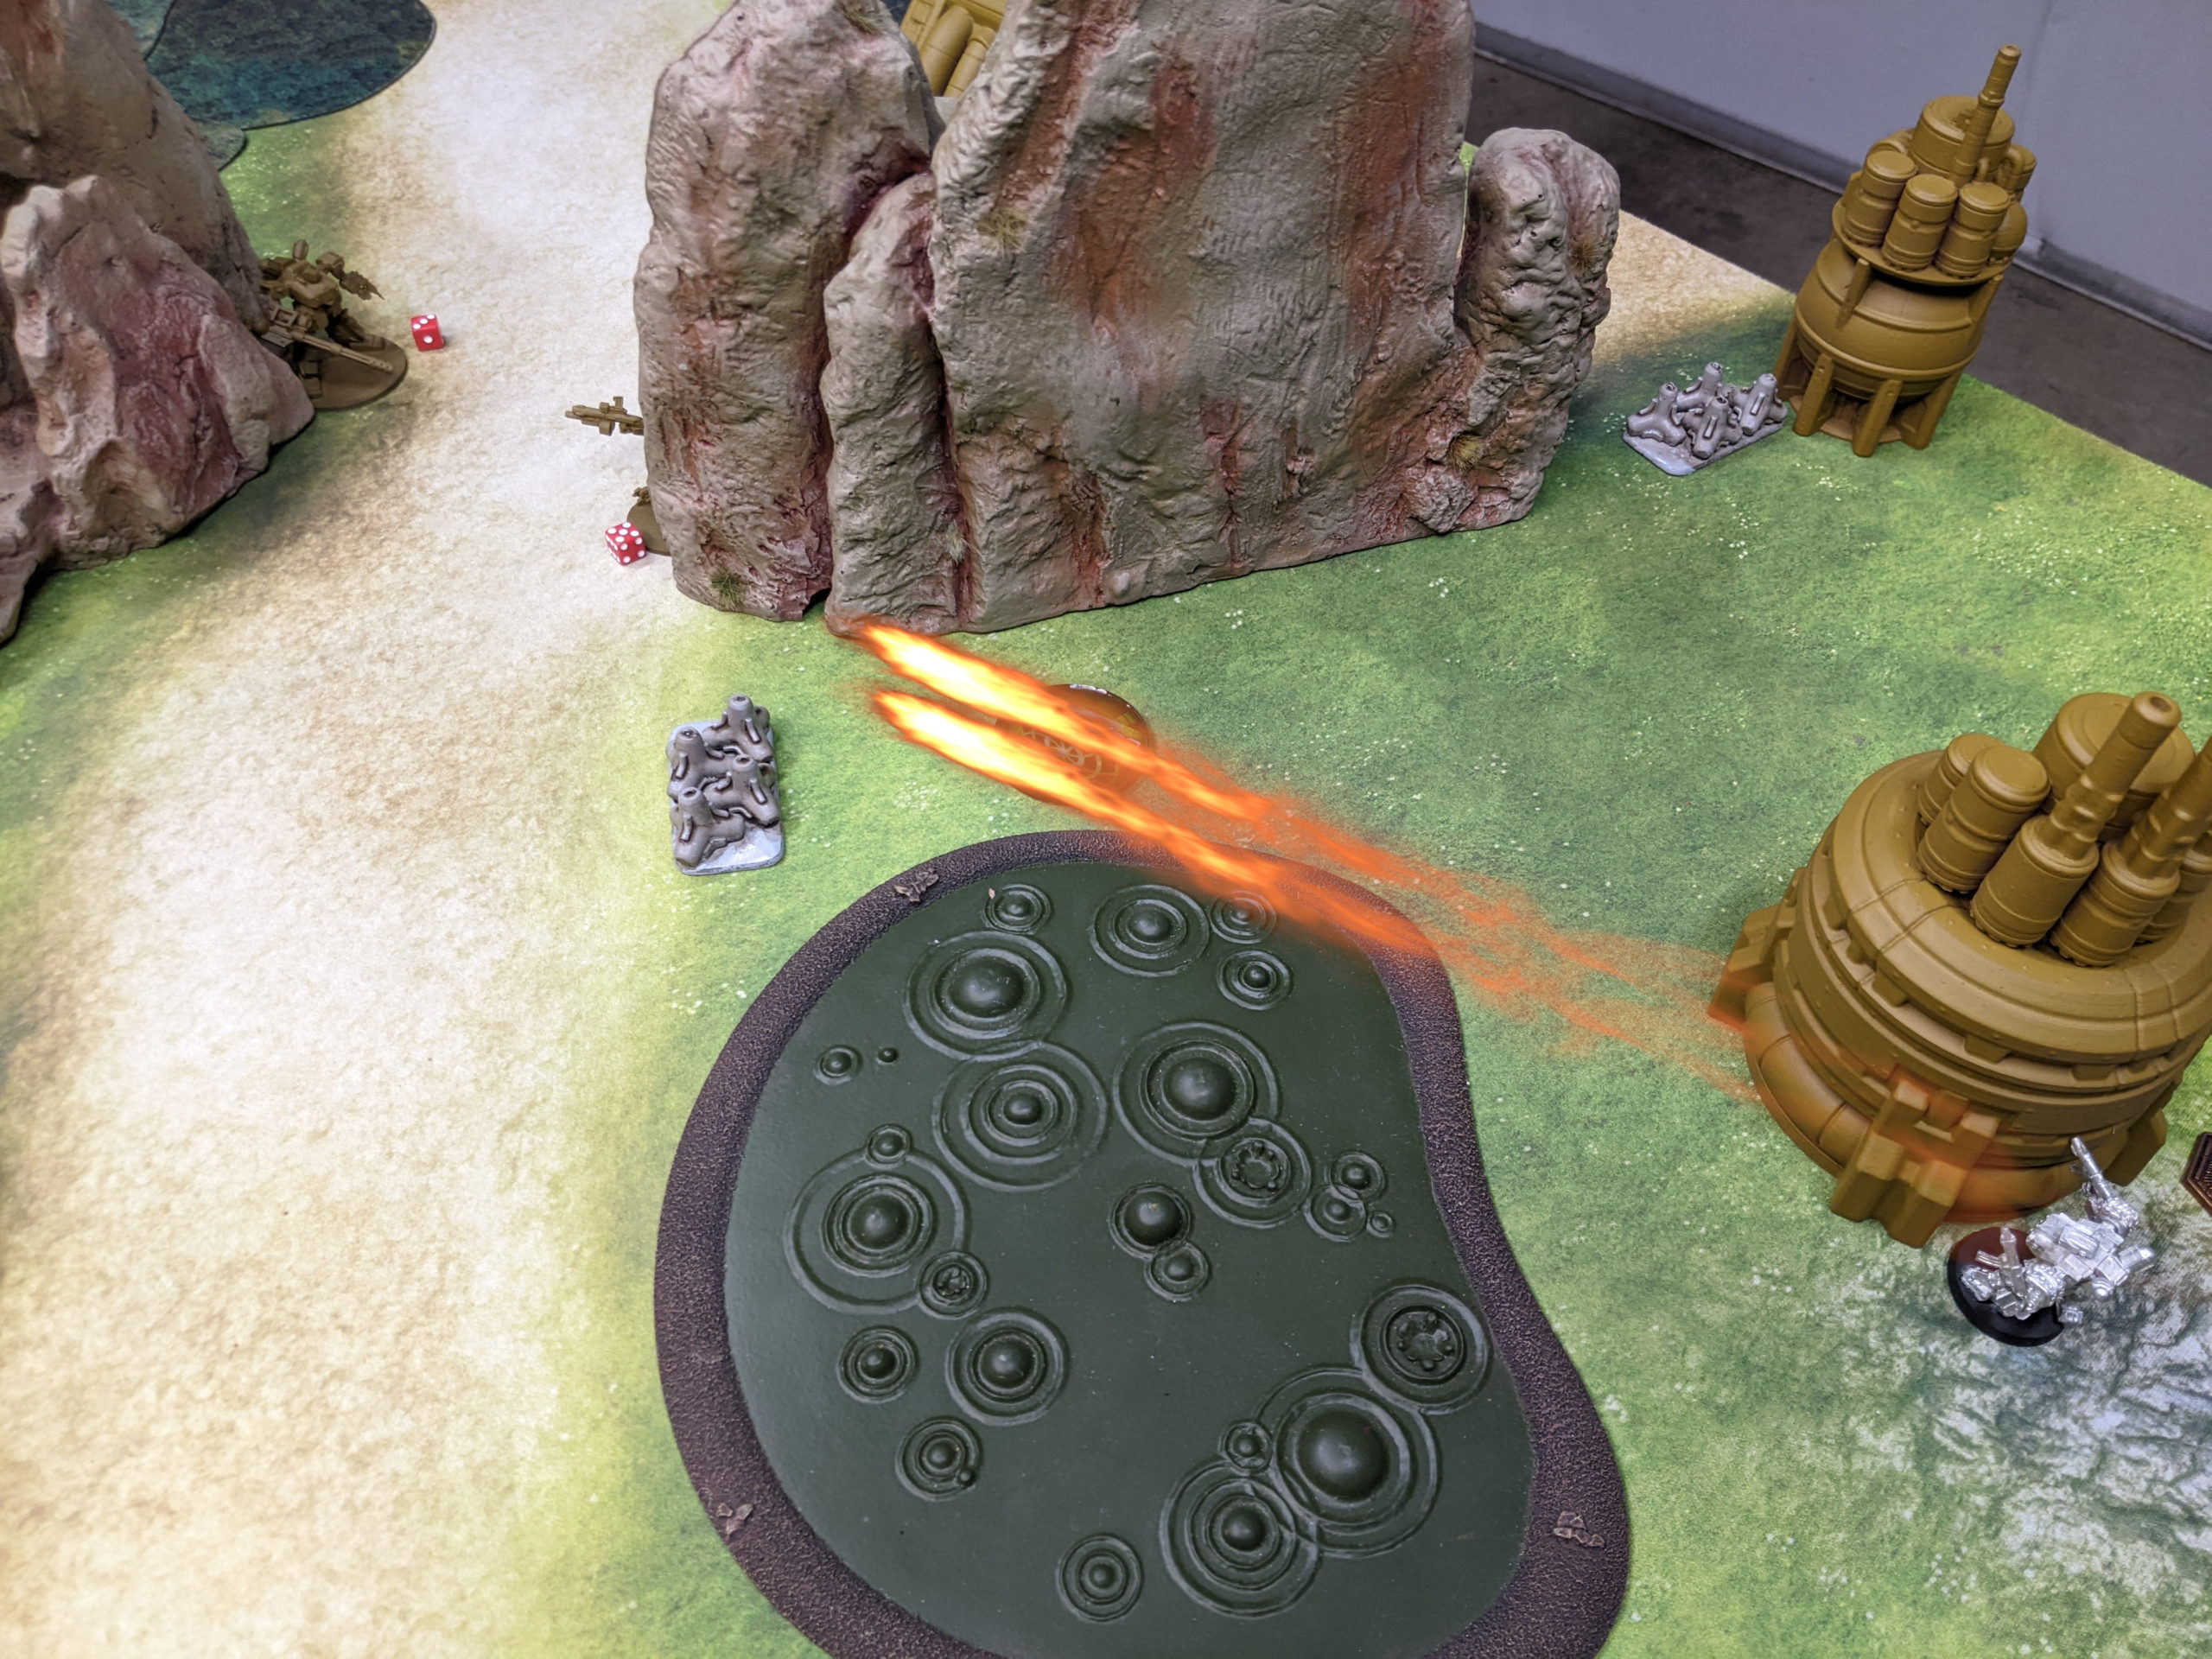
Finally, the last turn rolled around, with the last objective falling near my Gladiator/Owl squad. Adam set up holdings his Capture objectives. I denied him one by taking out one of his Koalas with LFG and mortar fire from the Vulture and some laser fire from the Assault Squad. This also caused him to drop his only box. The other capture objective was denied by moving my Sniper Team off the roof.
I sealed the deal by rocketing some Spitz in, first by the Koala…
And then by the Razorback.
When the smoke cleared, it was a
9-0 Peace River Victory!
Post Game Analysis
So I was talking to Adam at length after this game over the remnants of our beers. One thing that I should mention off the bat is that his dice in defense weren’t very good, so there’s a little bit of bad luck at work here. His offensive dice were average, but I denied him a lot of shots, so that turns into “meh” offensive dice.
The dice problem was exacerbated because I was forcing him to use Evade (spending an action on single-action models) by taking out his CGLs early. Losing that Recon team meant the two Assault Hunters were spending their orders to try and evade my MIR lasers over the course of the game instead of shooting at me with Precise Snub Cannons. When I took out the other Bobcat, that helped me keep my Vulture alive when a Razorback came knocking on my door.
Assassinate was therefore a really strong choice for me, especially because Adam left his Recon Team out for me to shoot at with the correct tool to remove it. The fact that he had enough low-AR things around for me to kill with LIGL from the Spitz was also relevant. Even higher AR things are at risk because I’m not really paying much of an opportunity cost to take a random LIGL shot at them to get some AP:1 chip damage. I can just do it on the way with my 22″ of movement. Bonkers.
I gotta say that pulling BT into PR makes for a pretty significant power boost. In addition to getting some extremely high quality gears, it also turns off Adam’s typical TD + ATM setup, because of Stealth. The only other targets really worth shooting are Gladiators, and they’re covered by PI 3+, Shields, Agile, and ECM from the Owl. Really just a non-starter.
I think the other thing that gave me an edge was Adam’s tendency to split up his combat group members around the table. I think a lack of ECM encouraged this, and while it looks good from a board coverage perspective, it does mean you only have one shot sometimes. For example, Adam’s Razorbacks were on opposite sides of the table. If one shoots at one of my models and misses, the other can’t try again. Since it takes an average of 2 successful hits to kill most things in this game, this means it might take all four turns of shooting at my forces with multiple different elements of different combat groups. While the end result is the same, i.e. my model is dead, the fact that it’s not dead in a single combat group activation allows me to retain and extract utility.
Compare this to my deployment, where I was able to shoot at the same model again with a different infantry model, and finish off the damaged hunter with the LFG’s blast. Even though Adam was able to damage my Vulture with some shooting, he only really got one chance before I was able to remove the offending model because I was able to stack activations in a more efficient way due to group clustering.
I still have the same board control spatially, i.e. we both have a similar distribution of models around the table, I have a dense spatiotemporal concentration of units. I can activate a bunch of units simultaneously in the same place and get more opportunities to roll dice, increasing my likelihood of a success. Adam gets to affect more of the table in a single CG activation, but I think this is less good. You end up anemically going after stuff, and then you break support links from other units because they cannot advance simultaneously with you. For example, Adam had a Razorback near a Leopard in two different groups. If he rushes the Razorback somewhere, the Leopard may not be able to watch the Razorback’s, well, back.
It’s also worth mentioning that 3/4 of the dropped supplies were right next to the group that I had designated to retrieve them, and away from the bulk of Adam’s forces. We’ve made changes to the mission such that at the top of turn 1, a direction of deployment of supplies, e.g. left to right, will be randomly determined, and on turns 2-4 supplies will be dropped in that direction, e.g. left, middle, right. This will allow players to reposition based on new information at the top of 1 and plan attack/defense tactics to retrieve or deny the retrieval of supplies. It also makes initiative slightly less important as you have time to respond and set up defenses before supplies arrive.
I think the amount of damage output from bikes and infantry is quite asymmetric to the amount of damage input it requires to remove them, which is something that I’ve built my entire Heavy Gear playstyle around. As I continue to explore the 3.1 ruleset, I’m looking for ways to counter my opponent’s infantry while still leveraging my own.
I’m trying to take a more abstract approach to gaming now, because I’ve started playing more (and more different) games. Abstraction is necessary to take learnings between games, as well as to apply to the Jovian Wars design process. It’s been an interesting exercise as of late. Hopefully it’s coming across in my writing. Lots of stuff going on that’s making me pretty tired, so I think the writing clarity has suffered a bit. Anyway, thanks for reading.
Came here because you were recommended on the Infinity discord. Pleasantly surprised to see a heavy gear batrep