
Warcors and Wildcats
Well, if nothing else, the Durgama campaign and all the Rose City Raid practice games have gotten me excited about tournament practice and play again. Or maybe it’s the fact that I’m back to Nomads and really racking up the game count with them. I’m really enjoying playing my home faction again and exploring the sectorials post fireteam changes.
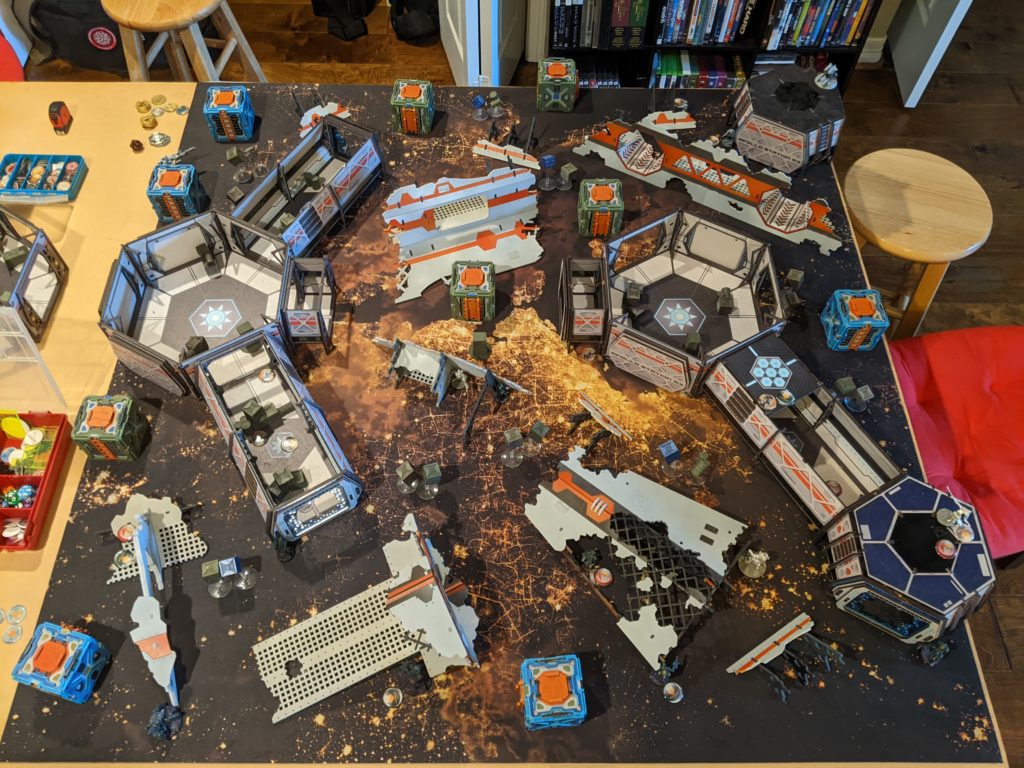
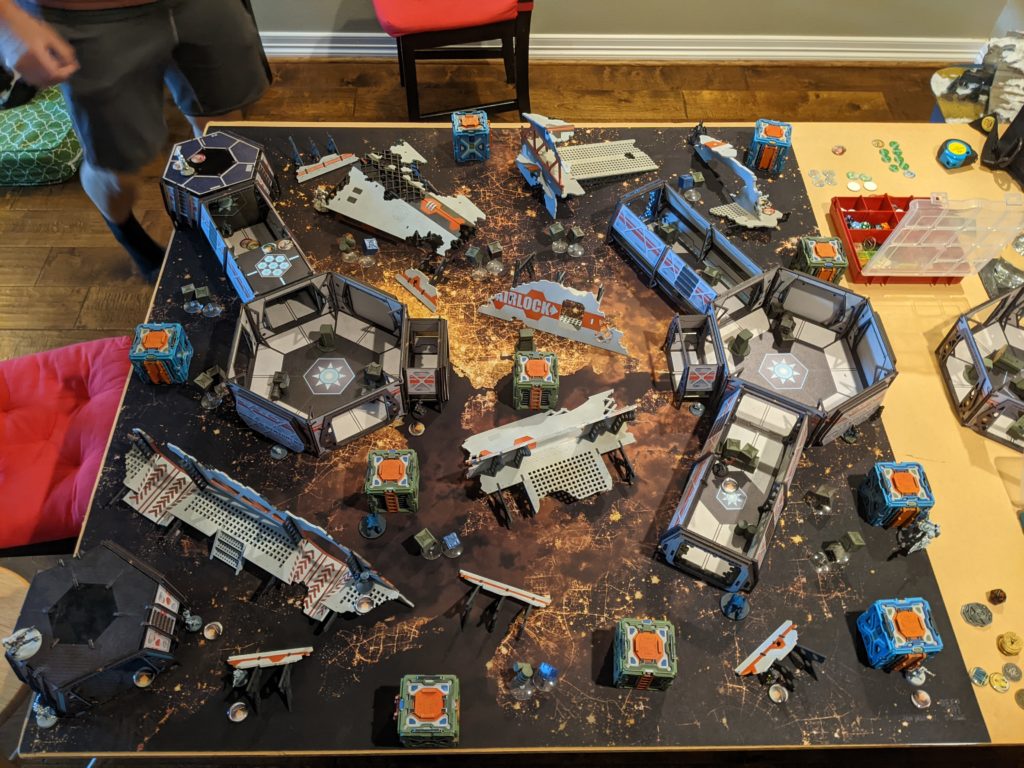
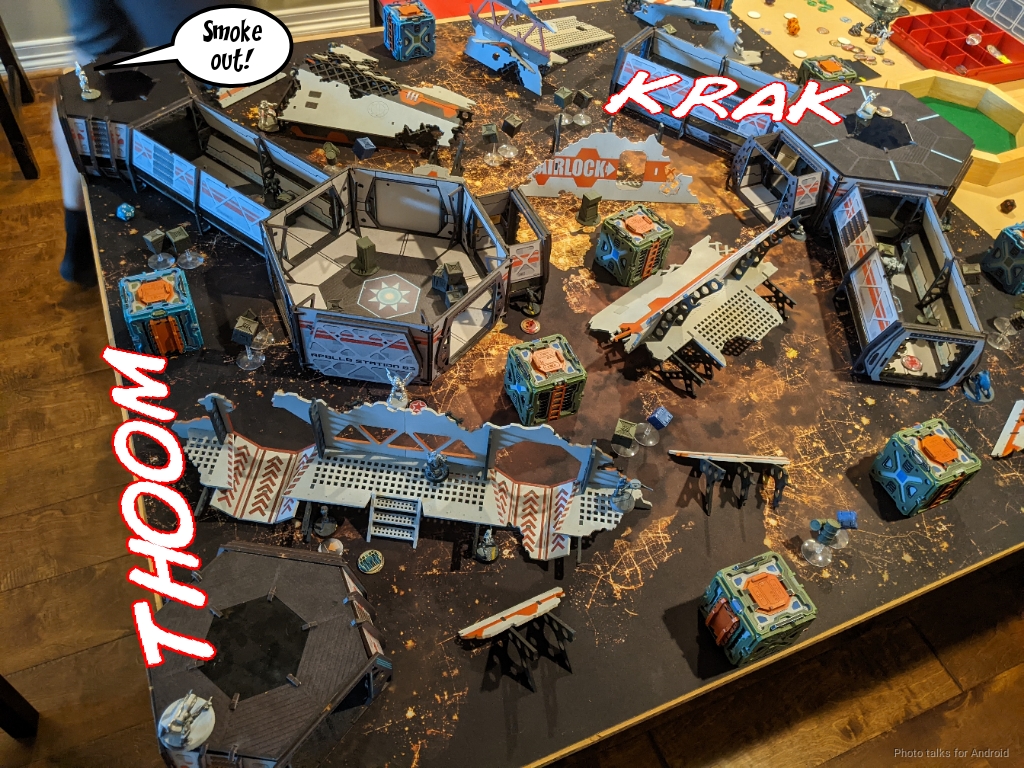
Erik requested the space station table, so that’s what he got. I’m glad to have “solved” the table setup problem over the past few games then getting it battle tested at RCR. Now I’m exploring minor changes to make things interesting.
Overview
- Mission: ITS13 Supplies (300)
- Forces: Jurisdictional Command of Corregidor versus Combined Army
- Deploy First: Combined Army
- First Turn: Combined Army
We’re prepping for a Supplies, Supremacy, Firefight tournament coming up in September, so we decided to play Supplies. Not the most challenging mission lineup, but a welcome break after RCR. I decided to play Corregidor since I’ve played the other two Nomad sectorials recently and wanted to go all the way back to where I started Infinity.
Supplies and Supremacy demand midfield board presence, which in my mind means 2x Morans, 2x hackers, and a Vertigo Zond. I took Jazz and an Alguacil hacker, the first for obvious reasons and the second for cost and linkability. I knew I wanted to try out the Gecko Haris, so that made it in as well. I do miss the ability to take an Evader with a Gecko, but a Wildcat engineer is a more than adequate replacement. Jazz needed a home too, so she ended up in the Haris.
Supplies & Supremacy
GROUP 1
7
WILDCAT (Lieutenant) Combi Rifle, Light Flamethrower, D-Charges / Pistol, CC Weapon. (0 | 24)
ALGUACIL (Paramedic) Combi Rifle ( | MediKit) / Pistol, CC Weapon. (0 | 12)
EVADER (Engineer) AP Spitfire, D-Charges ( | GizmoKit, TinBot: Firewall [-3]) / Pistol, CC Weapon. (1.5 | 34)
GROUP 2
MORAN (Repeater) Boarding Shotgun, Flash Pulse, Crazykoala ( ) / Pistol, CC Weapon. (0.5 | 17)
SOMBRA (Hacker, Killer Hacking Device) MULTI Rifle, Light Shotgun ( ) / Pistol, CC Weapon. (0 | 41)
2
TRANSDUCTOR ZOND Flash Pulse / PARA CC Weapon(-3). (0 | 7)
GECKO MULTI Marksman Rifle(+1B), Chain Rifle, Panzerfaust / CC Weapon. (1 | 56)
GECKO PILOT Combi Rifle / Assault Pistol(+1B), CC Weapon. (0 | 0)
JAZZ FTO undefined / undefined. (0.5 | 22)
VERTIGO ZOND Missile Launcher / PARA CC Weapon(-3). (1.5 | 17)
WARCOR (360º Visor) Flash Pulse ( ) / Stun Pistol, PARA CC Weapon(-3). (0 | 3)
6 SWC | 300 Points Open in Infinity Army
The Alguacil Hacker wants sixth sense, and I want some way of protecting my Lieutenant, so that was the link archetype I chose. I managed to find points for a Wildcat Lt and an Alguacil Paramedic. I had some trouble selecting the fourth link slot, and ended up going with an AP Spitfire Evader engineer to have a gun as well as an engineer for the Vertigo Zond who is so integral to the plan.
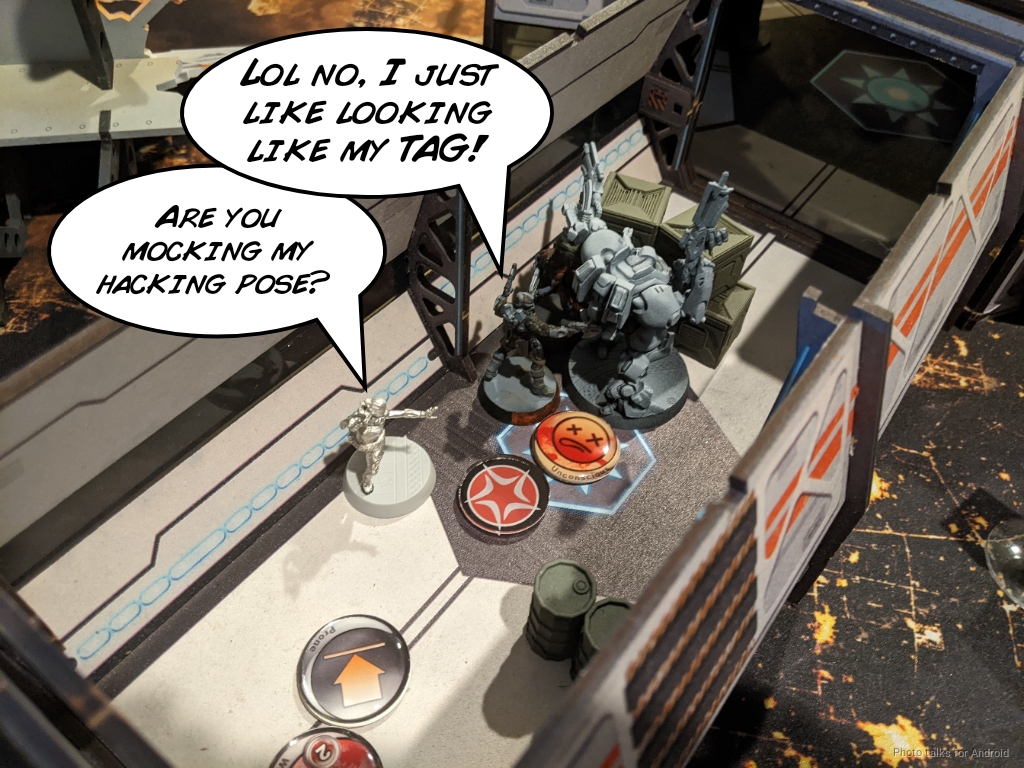
Finally, I’ve really been wanting to try out the Sombra. I had originally thought to take the Specialist Operative version to get AP mines, but I had the points for the KHD so that’s what I took. The rest of the list is orders, including the Warcor. I’ve discovered that I generally can be careful enough with my links and other units that I can reliably just spend 3 command tokens flipping the Warcor’s order regular every turn, so having a “3 point regular order” is pretty affordable.
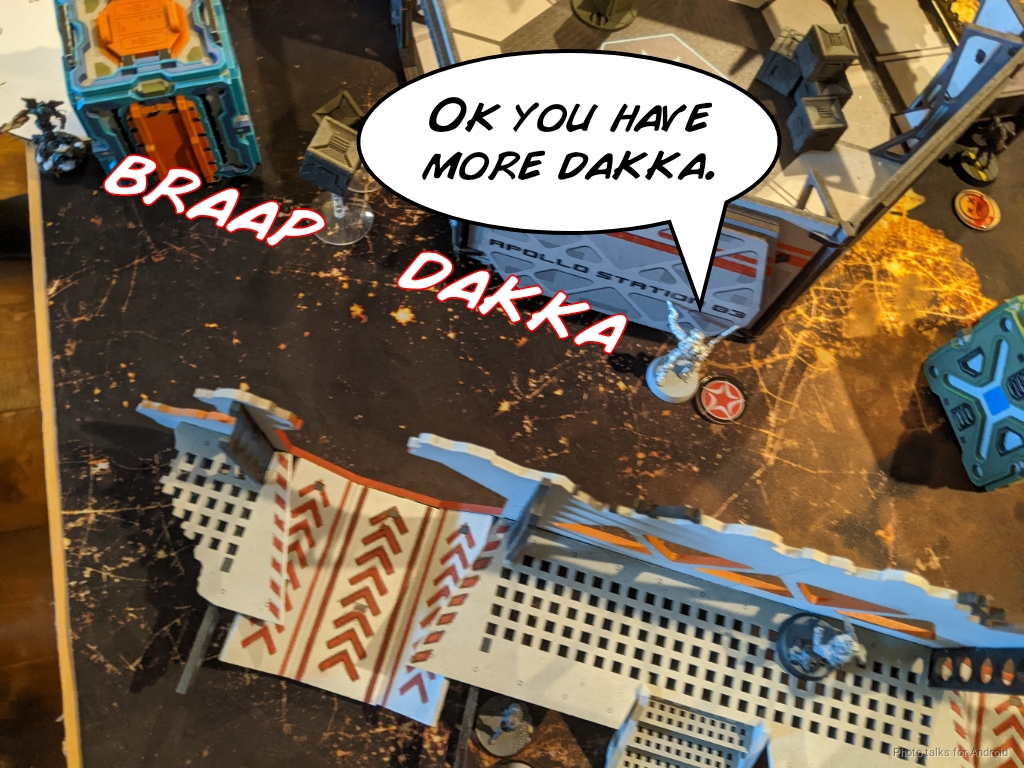
Erik’s been feeling a little undergunned recently, so he fixed that with a Sogorat AP HMG. He’s of the opinion that the 18 point Oznat is a compelling choice versus a 14 point Daturazi. The extra 2″ of move and the fire damage on the template with the AP slug is interesting, but personally I’m into the mimetism as being the more relevant stat. It’s definitely a viable option though.
Moneymaker v 2
GROUP 12
1
GROUP 2
KO DALI (Parachutist, Combat Jump) Combi Rifle, Nanopulser, D-Charges / Assault Pistol(+1B), AP CC Weapon. (0 | 39)
KAITOK Chain Rifle(+2B), Flammenspeer / Heavy Pistol(+1B), CC Weapon. (0 | 22)
IKADRON (Baggage, Repeater) Light Flamethrower(+1B), Flash Pulse / Pistol, PARA CC Weapon(-3). (0 | 9)
RINDAK (Paramedic, Forward Deployment [+8″]) Submachine Gun, Flash Pulse(+1B) / Heavy Pistol, PARA CC Weapon. (0 | 31)
SOGARAT (Lieutenant) AP Heavy Machine Gun, Pulzar / Heavy Pistol, DA CC Weapon. (1.5 | 56)
R-DRONE Flash Pulse / PARA CC Weapon(-3). (0 | 7)
LIBERTO (Minelayer) Light Shotgun, Shock Mines / Pistol, CC Weapon. (1 | 8)
TAIGHA Chain-colt / AP + Shock CC Weapon. (0 | 5)
CALIBAN (Forward Observer) Boarding Shotgun, D-Charges, Flash Pulse / Pistol, CC Weapon. (0 | 28)
OZNAT FTO Vulkan Shotgun, Smoke Grenades / Heavy Pistol, DA CC Weapon. (0 | 18)
Bit (Hacker [UPGRADE: Oblivion, UPGRADE: Trinity]) Submachine Gun, Pitcher ( | Deployable Repeater) / Pistol, CC Weapon. (0.5 | 20)
SHROUDED MULTI Sniper Rifle / Pistol, CC Weapon. (1.5 | 25)
4.5 SWC | 300 Points Open in Infinity Army
He’s also really into the Kaitok chain rifle profile, which I can understand. The Shrouded MSR is also a pretty interesting and fun choice. The Rindak is also very fun and gives some much-needed midfield presence to back up the Taigha that will be running around as well.
Deployment
I won the rolloff and selected the side that I thought had better TAG hiding spots. Since he’s playing vanilla Combined, he has a lot of freedom in his deployment structure. After scattering warbands around like candy, the Rindak went in the middle of the table to go after the central objective. I think Erik was pretty concerned about my advancing through the tunnel system on the left so he discouraged that with a Libertos and Bit & Kiss (who I’m now realizing didn’t get annotated into this photo).
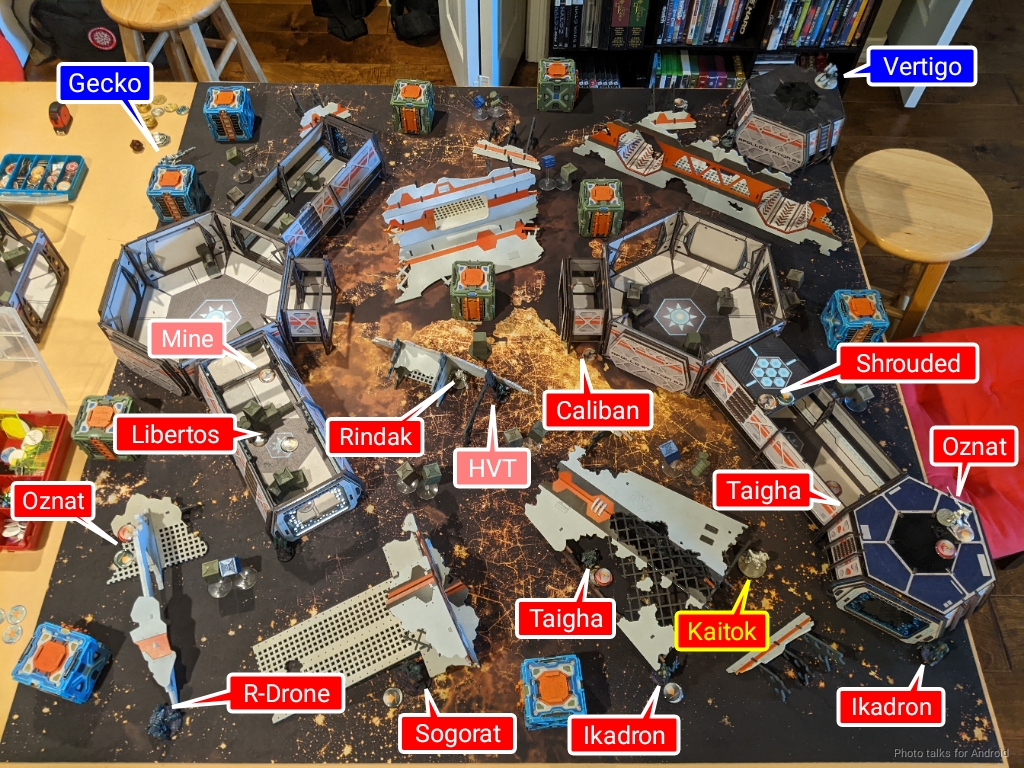
He hid the Ikadrons on the right and the R-Drone on the left, trying to protect against airborne deployment troops. The Caliban was centrally located to help the Rindak out, and the Shrouded went on the rooftops to project power onto the table if he needed it.
Say what you will about Combined Army and the use of Taigha, but all warbands generally force your opponent to not fully null deploy. You cannot allow a warband to move unopposed on the table, so you have to leave a few things out. This generally means your opponent then shoot all the things you left out, so there’s a delicate balance of setting up AROs on the warbands without granting shots to everyone. I think this table is a pretty well suited set of terrain for that, there are a lot of keyholes in and out of the corridor systems without exposing yourself to the full table.
I also have the benefit of having Morans, which help me immensely in controlling the center of the table. They don’t generally stop anything, but they’re usually at least a half order tax to get a dodge in there. Paired with the Vertigo and the hackers it turns into more of an order tax for the box carriers, if I can get the Morans positioned correctly. In any case, due to the general shape of the table and my concern about stuff advancing in the corridors unchecked, I opted to push the Morans away from the center and instead towards the side objectives. There just wasn’t a good spot in the middle that I thought would be mostly safe and give me the value that I wanted–not that the spots I chose were particularly safe.
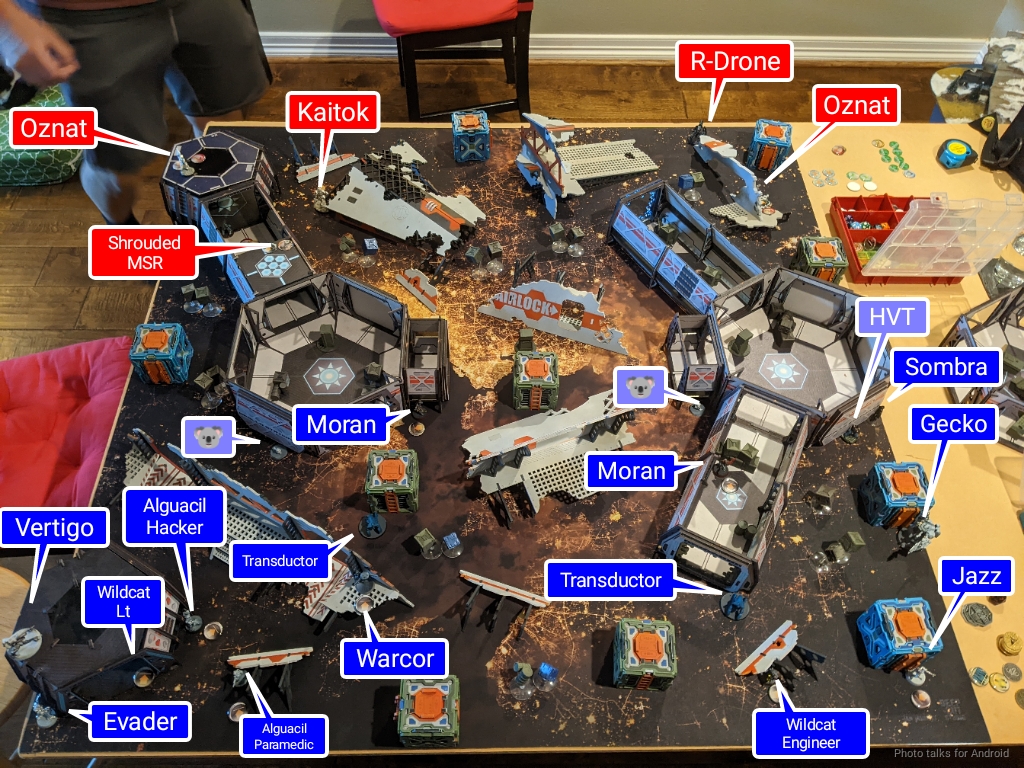
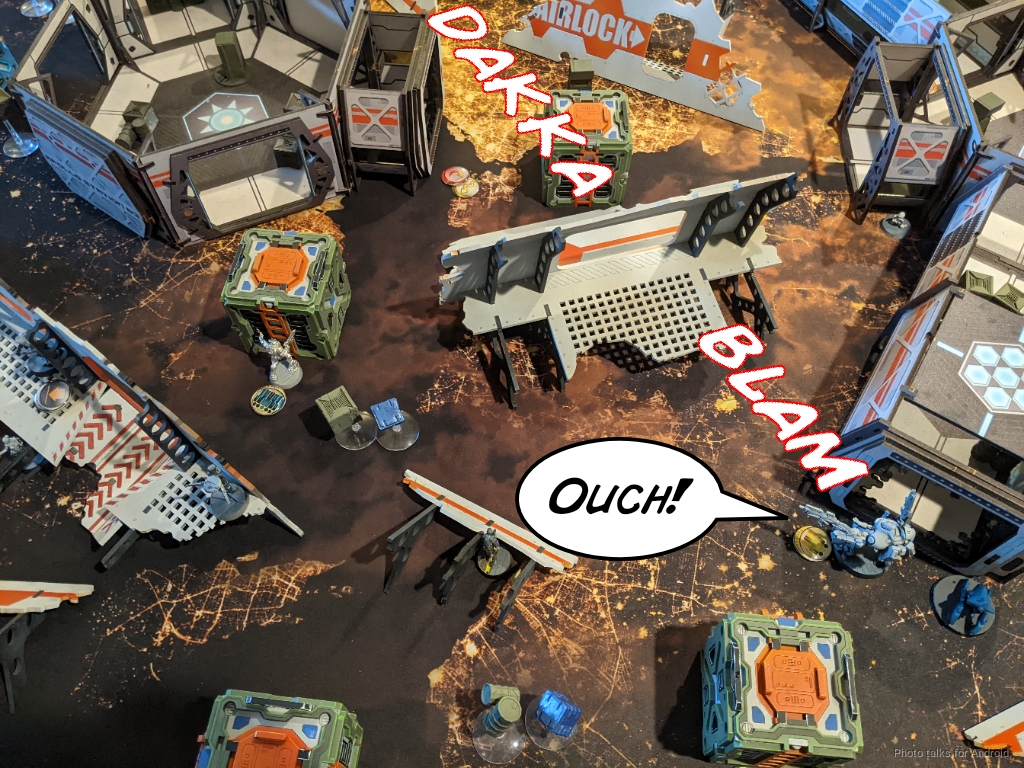
With the Morans down, I positioned the Transductors to flash pulse into the corridors as well as parts of my backfield. They also provided some additional repeater coverage into my DZ should I need it. I decided that the Gecko could fit all the way on the right, so I set up Jazz and the Wildcat engineer on that side and held the Gecko in reserve.
I thought briefly about hiding the Vertigo in the building on the left, but I decided that I wanted to have shots on the Oznat on the roof on my left. I wasn’t expecting a Shrouded MSR, just a normal Shrouded, so I was comfortable with the estimated order tax there. I probably would have reconsidered my choice otherwise. The Vertigo gives me some teeth for my Spotlight rolls from Jazz and the Alguacil, so I do kinda want it alive. That said, having a durable and hard to remove missile ARO is reasonable. It’s a bit more risky on this table, because when I go prone when unconscious, I’m still visible, but I decided it was a reasonable risk. If Erik spent 2-3 orders trying to take it out on the first turn, even if he removed it from the table, that would still be a reasonable situation for me to be in. The Shrouded MSR does change the calculus a bit though, as I said.
Given that my plan was to pick the Vertigo back up if necessary, the Evader went behind the building, and then I just found sensible places for the rest of the link. I’ve been using the Warcor a lot to cover my back table edge against Rasyats and the like–I don’t think it’s generally worthwhile trying to hold a fire lane, and I shockingly actually want its order in most cases so throwing it away isn’t always helpful.
I put the Sombra all the way on the right to screen the Gecko in case Bit decided to get cute, and then Erik dropped his reserve, which was the Sogorat. A big gun is concerning, but the positioning all the way in the back of his deployment zone was less so. I dropped the Gecko in the spot I had chosen behind the box on the right, far enough away from Taigha and/or other threats that I thought it safe.
Turn 1
Top of 1 – Combined Army
My objective for the first turn is to drain orders and momentum from Erik. I don’t necessarily have to keep all my stuff alive, although that’d be nice. When leaving things out to ARO warbands, you just have to assume that the reserve drop will probably be capable of killing your model. I tried to capitalize on Remote Presence models for that, given my two engineers, but Erik is also happy to double-tap something, so we’ll see.
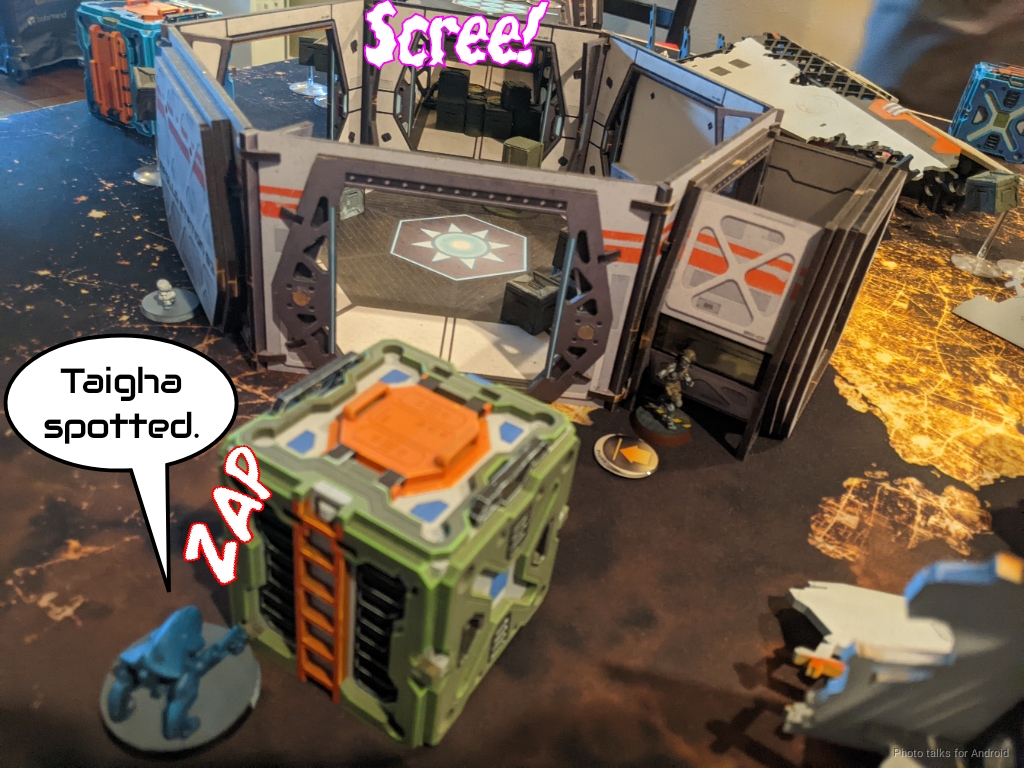
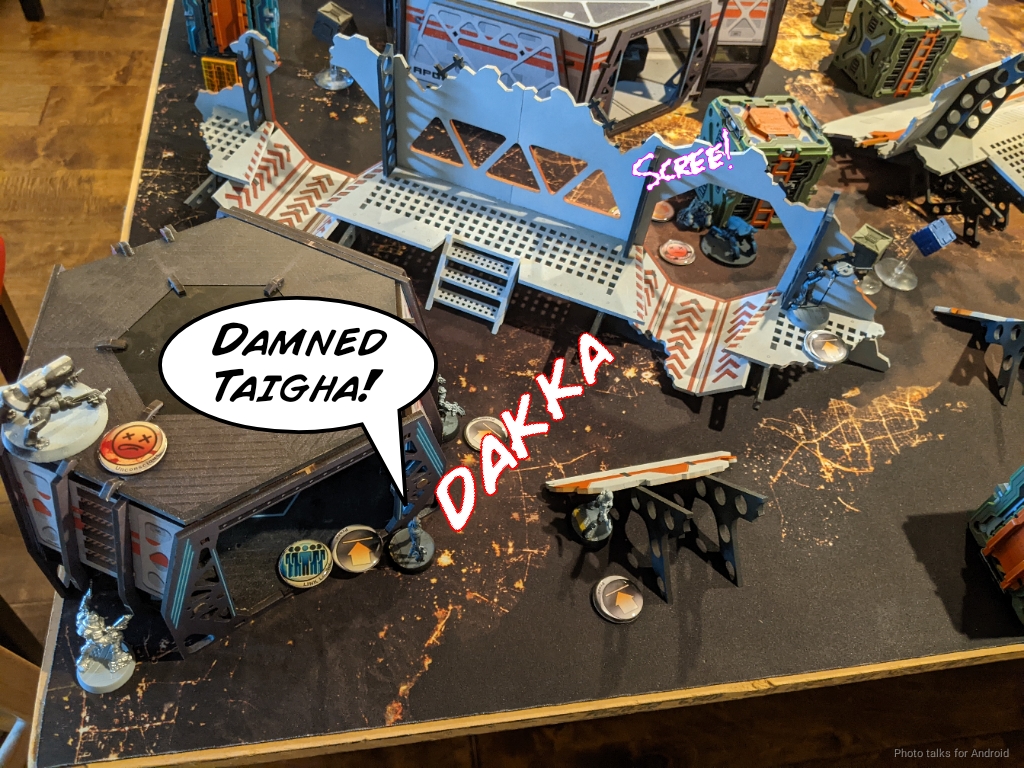
In any case, I docked him two orders from the second pool–not because I was afraid of the stuff in there specifically, but more because it would represent a larger percentage loss of orders even if he had Counterintelligence on the table. The Taigha started things off, as they are wont to do, and started passing face to face rolls against flash pulses. It’s only a 2″ tax, but hey, if we’re measuring, every 2″ counts!
Erik canceled both Oznat’s impetuous orders. One was because it was being watched by the missile bot, and the other was because he was using as a guard against AD. In a list with two Ikadron and an R-Drone, I think that the Ikadrons could have been used to defend against AD instead, freeing up the 18 point models to do work. If the entire point of taking the Oznat over the Daturazi is that extra 2″ of movement, you should be finding every opportunity to do so, in my opinion. Otherwise, you can save 4 points and get yourself another Imetron.
With the impetuous phase over, I kept the tax going by forcing the Taigha to clear a Koala with a dodge.
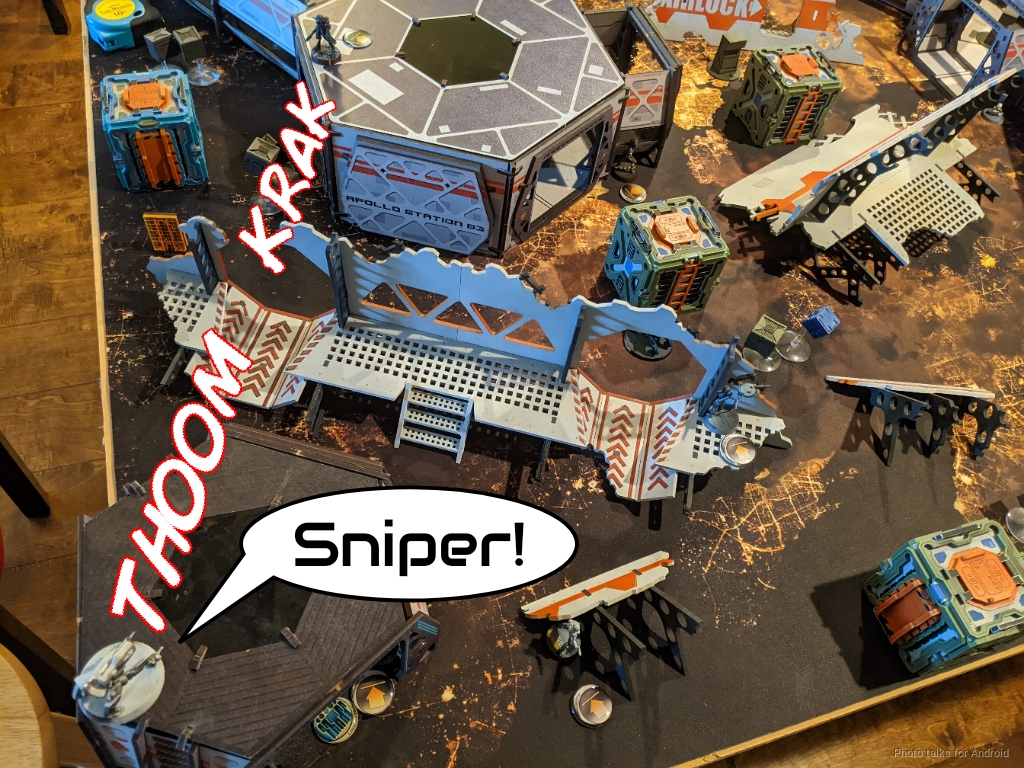
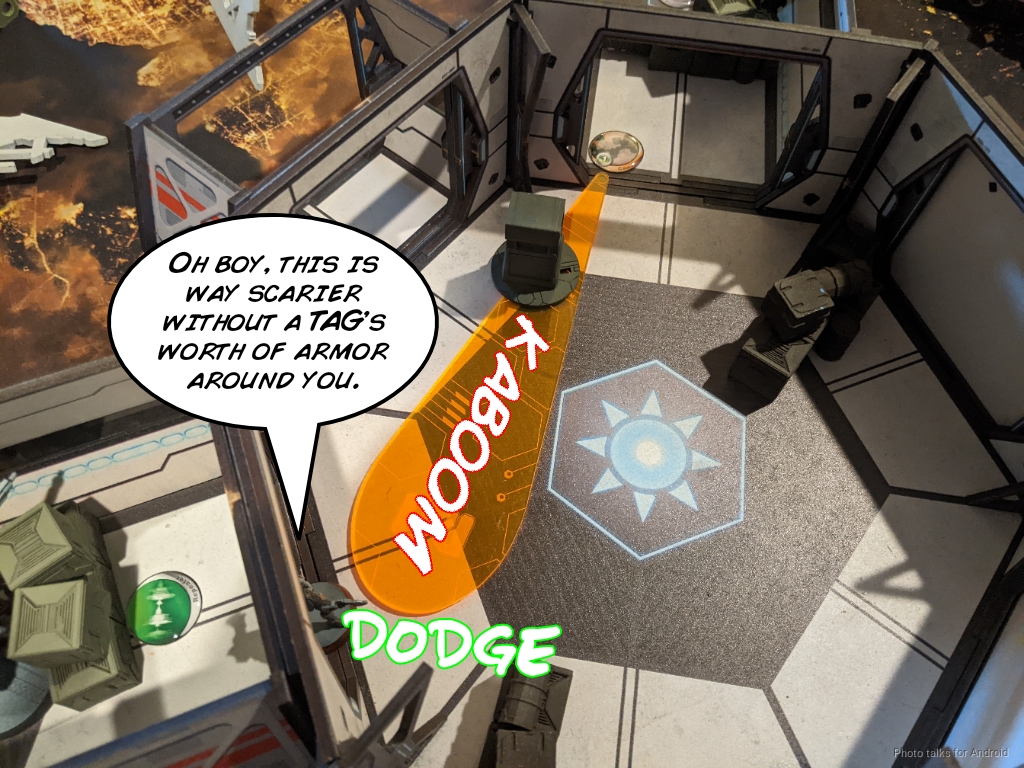
What I was not expecting was for the Shrouded MSR to reveal and take out my Vertigo Zond. I thought something would, but that was unexpectedly efficient.
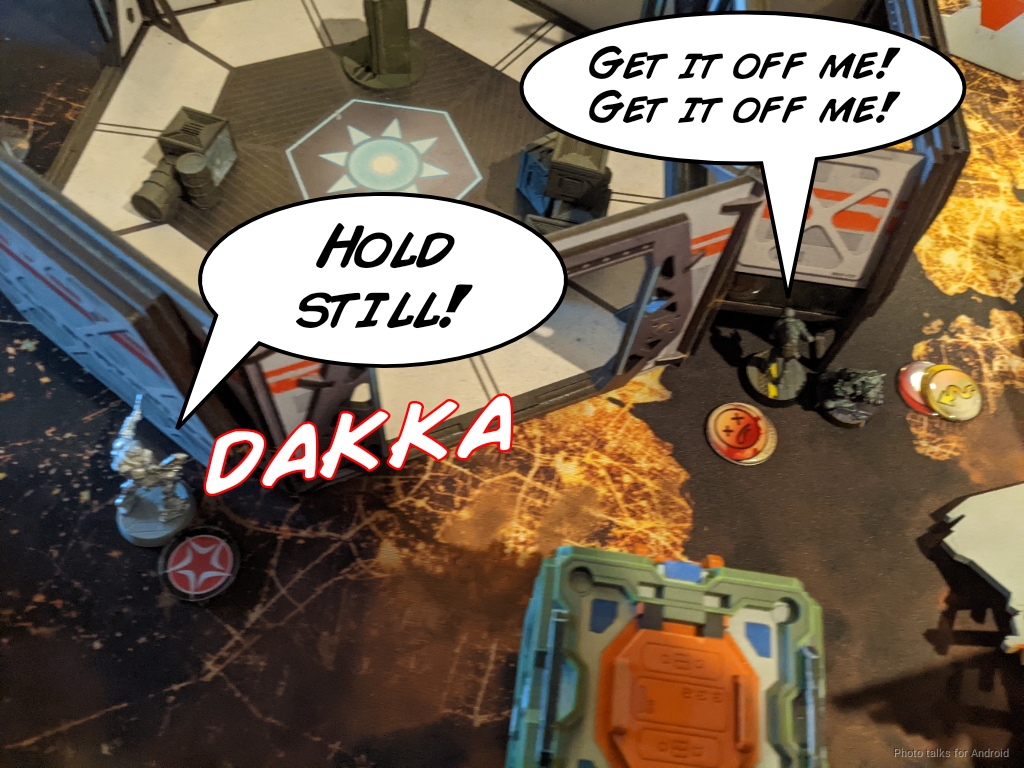
With the missile bot down, this left room for the Taigha to go eat the Moran by second skill moving into base combat after forcing a dodge. The Taigha then went after the Transductor and took it out.
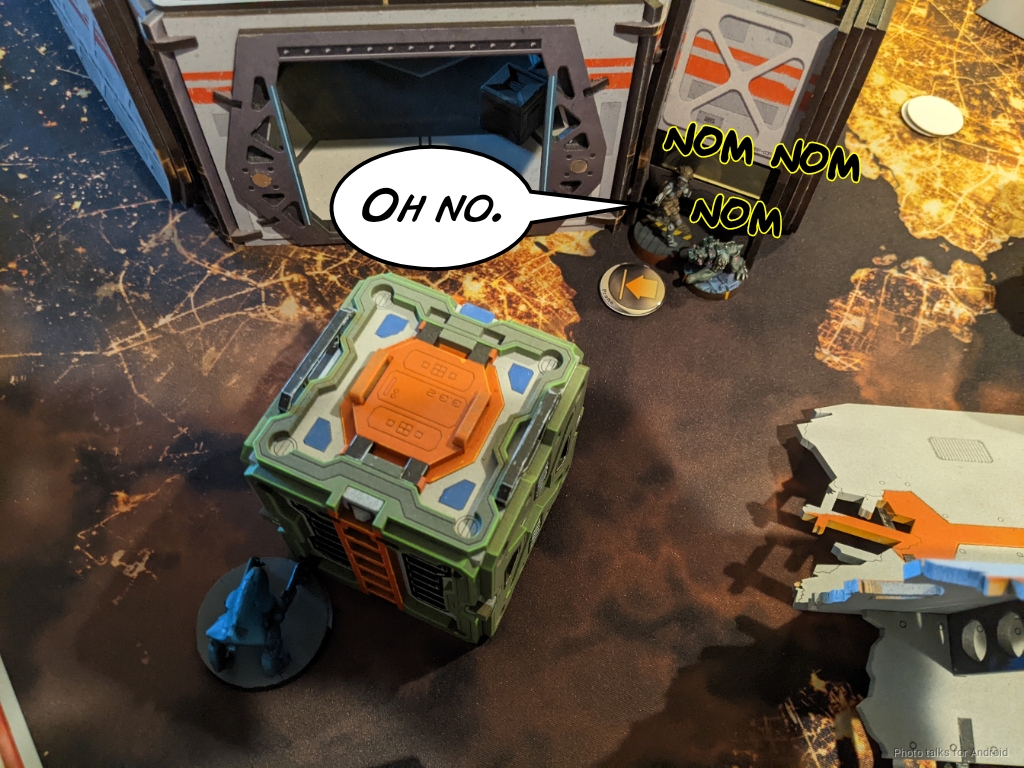
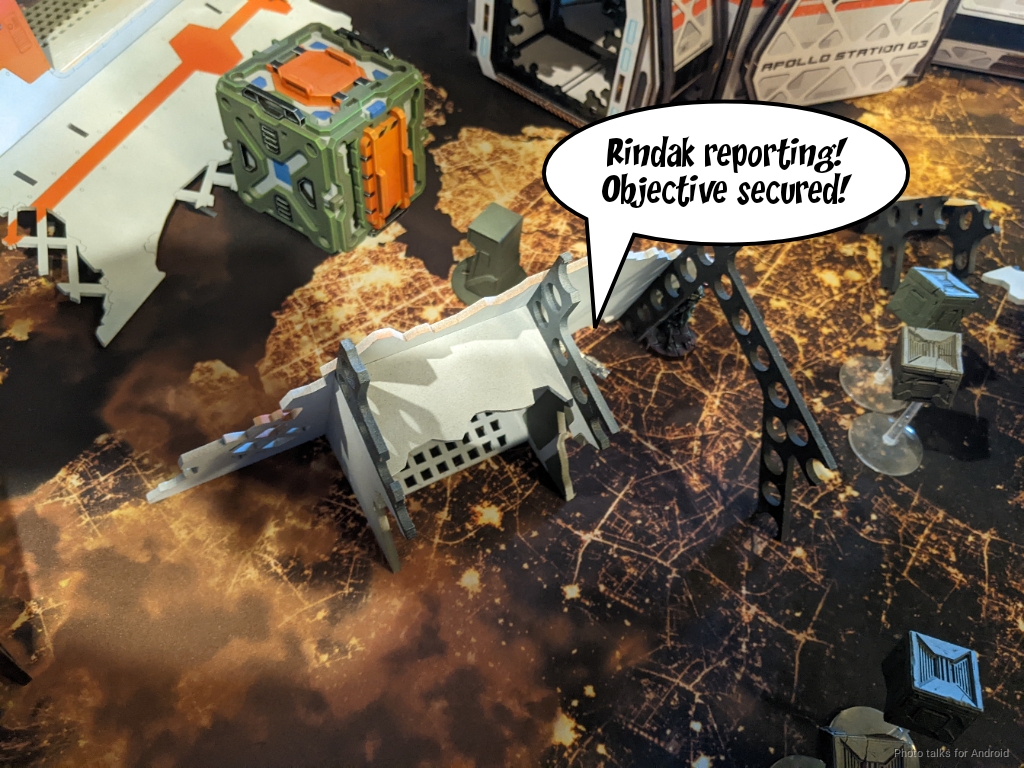
The Rindak grabbed the central objective and ran away to its original location behind the damaged airlock wall.
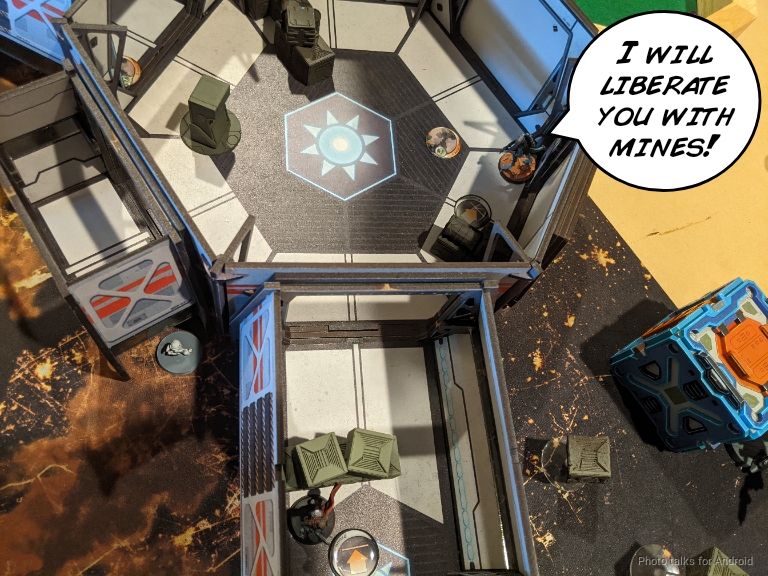
Then Erik added some more mine coverage in the right room, barely missing getting hit by the Koala while doing so. I’m not sure I like this play. It feels like an over-investment. There’s already a mine there, and I could potentially trigger both depending on my approach path. If I’m clearing mines, I’m comfortable losing the piece, so a second mine might not change the math enough for me. Potentially if I’m trying to tank it with the TAG, which is what I think Erik was thinking about. Just going after the Moran might have been more effective, but I think he was down to just the Libertos’ order by itself at this point.
In any case, he passed turn at this point. It may sound like I’m being very critical of his play here, and I think that’s accurate and intentional. We’ve been swapping notes back and forth on all the games we’ve played, and this is all stuff I’m comfortable saying to his face. He’s also mature enough to take this sort of discussion as intended, which is for both of us to improve our game through the shared experience of dissecting the decisions we made. It’s one of the reasons he’s continued to be one of my favorite opponents and great friends over the years.
Bottom of 1 – Corregidor
So at this point I’ve lost three orders, two to a Taigha, one to a Shrouded MSR. That’s a pretty reasonable first turn for Erik. There’s also a Taigha right in my face that I now have to deal with. He’s put me in a difficult position. I don’t think I can safely grab the boxes this turn, given all the stuff he’s put in the way, so what I have to do is to make it difficult for him to do that on his second turn while stabilizing my board position and potentially picking up my downed units.
So things I’d like to accomplish this turn, in no particular order of importance:
- Kill the Taigha
- Kill the Shrouded MSR
- Develop the TAG
- Develop my Alguacil link and try to get a classified, potentially
- Pick up any downed units with the Evader that I can
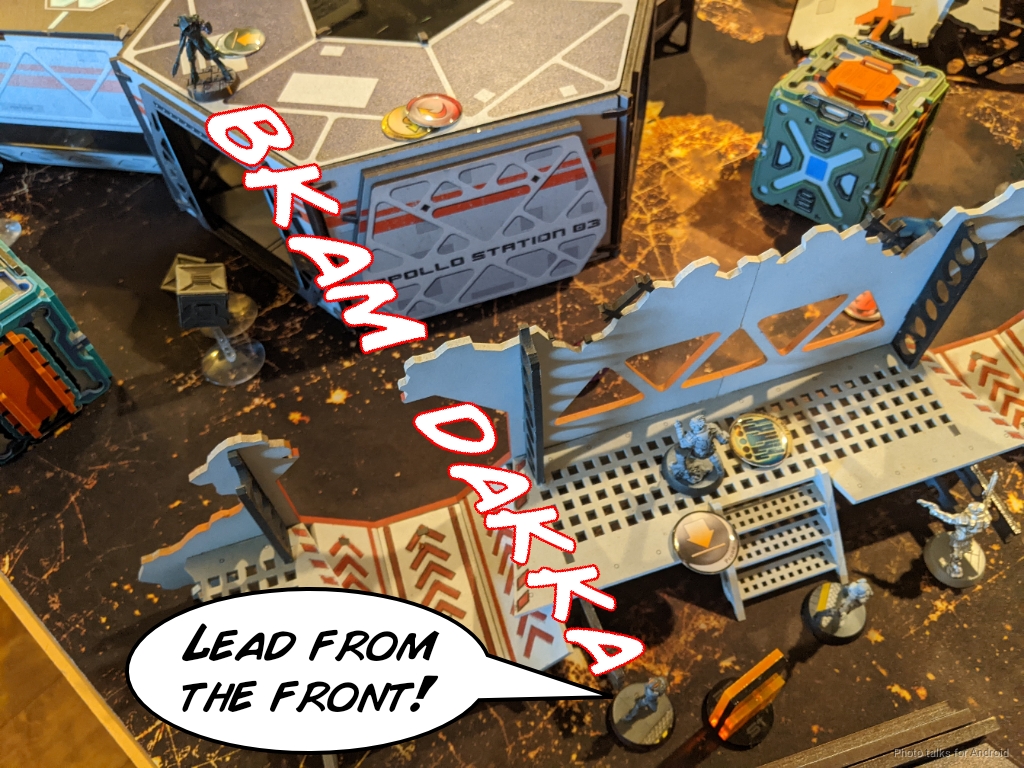
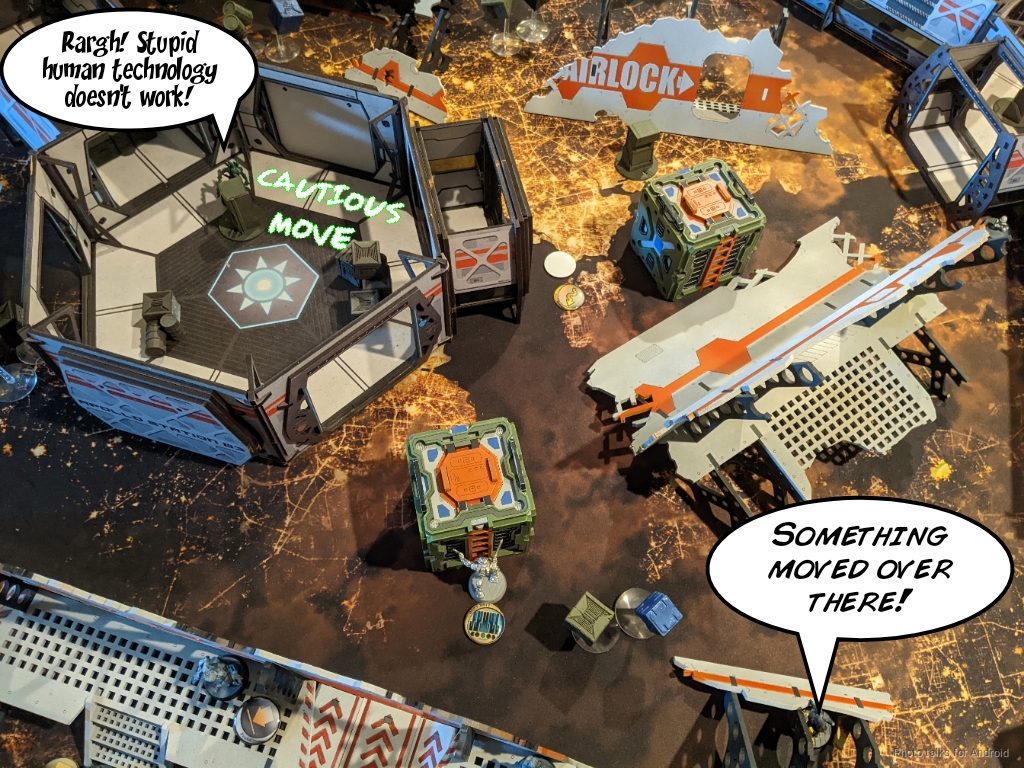
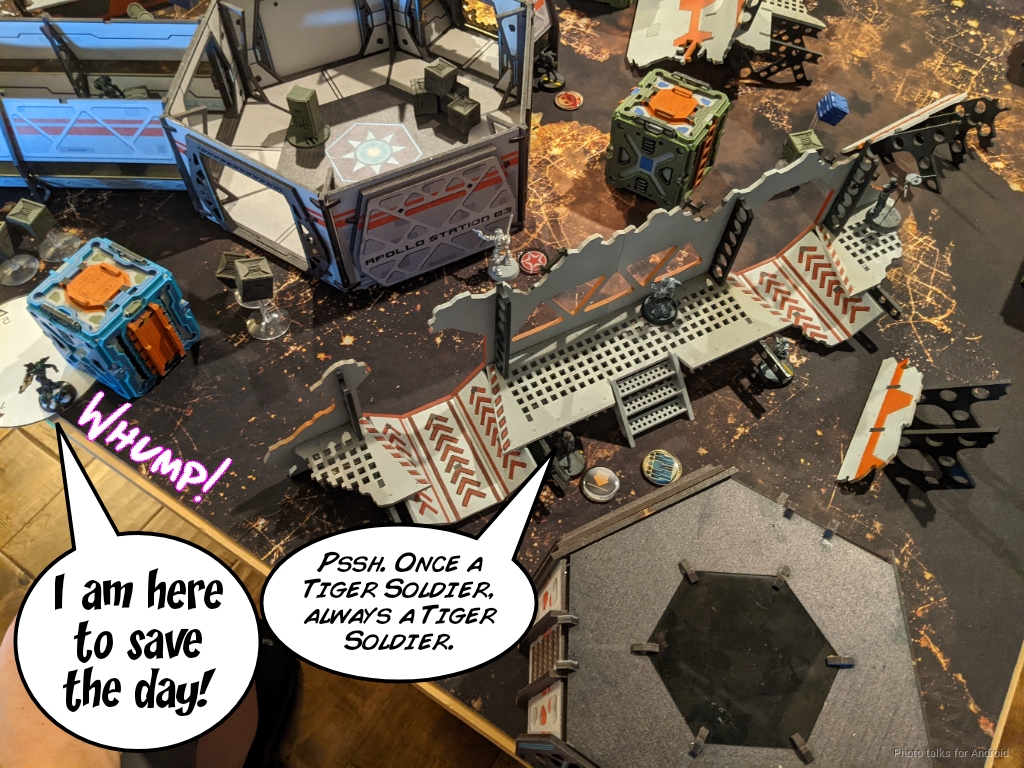
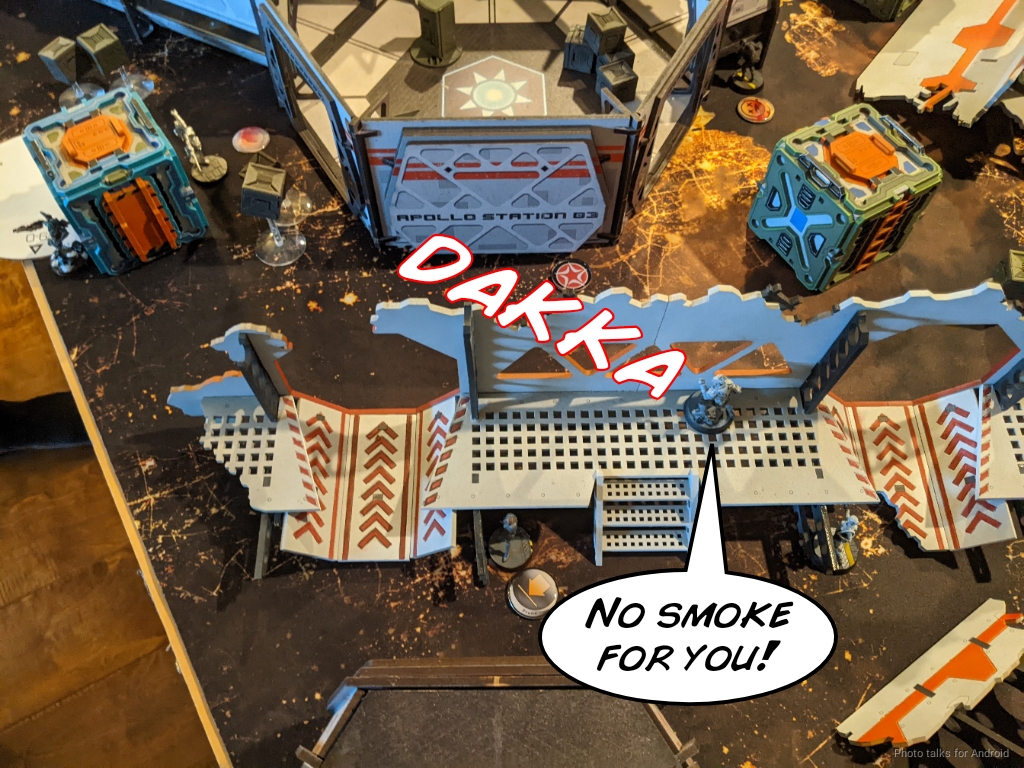
The things that I absolutely have to do are killing the Taigha and the Shrouded. They’re too close to my deployment zone and vulnerable units, especially my lieutenant. I start things off by sending my Wildcat Lieutenant after the Taigha. I hadn’t intended on using it at all–I only really took it because it’s the cheapest SWC-less lieutenant option in Corregidor, but a BS13 MSV1 combi will get work done. The fight against the Taigha is also safe, I’m only fighting against its dodge. If it dodges closer to threaten the chain colt, I can take it on with elements of my list on the right side of the table in the other order pool, so I’m not concerned.
It takes only one order, thankfully. The reason I didn’t use the Evader was because it was busy getting in position to pick the Vertigo back up, which it did quickly. Then I sent the Wildcat Lieutenant after the Shrouded MSR well within 16″. I was a little concerned about this, as it’s not risk-free, but I figured I was pretty unlikely to take a wound, and there was a Paramedic nearby.
| 69.50 | 24.00 | 6.50 |
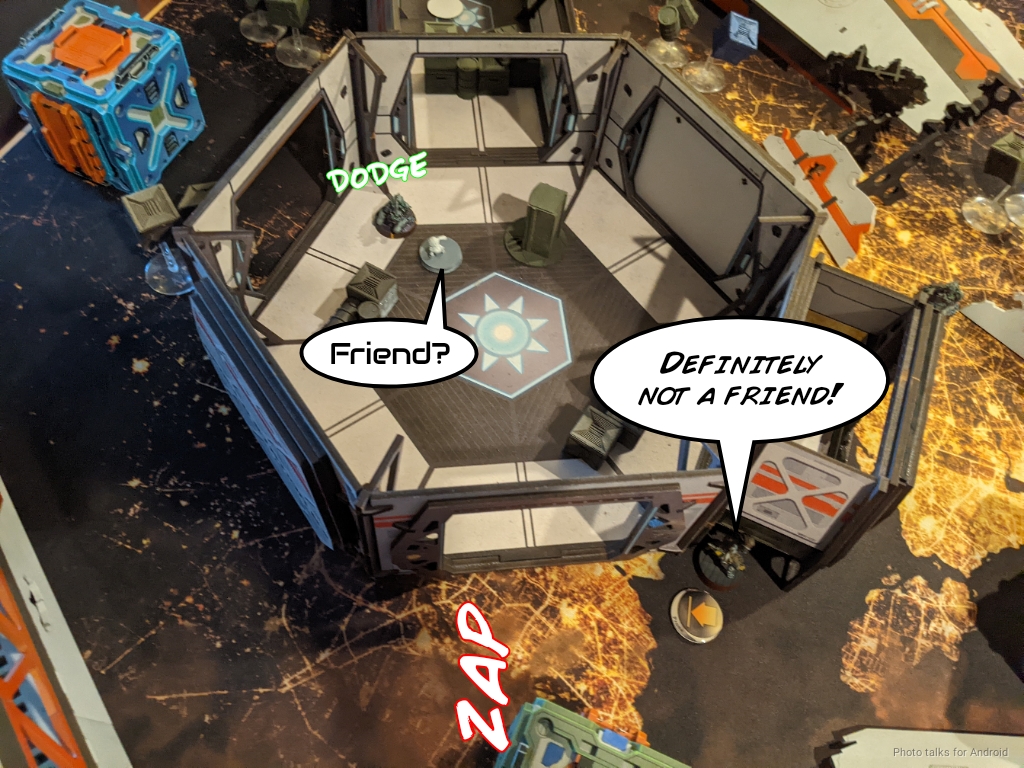
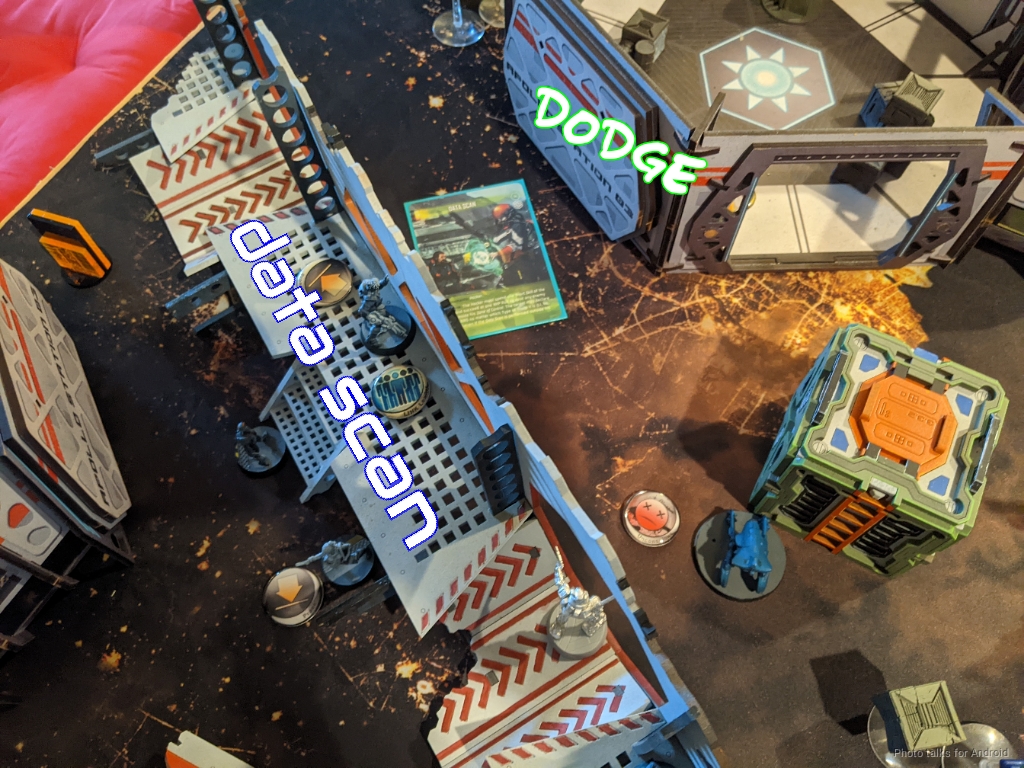
It goes as expected, and I take the Shrouded out. This lets me safely get Data Scan against the remaining Taigha in the building, who dodged to get movement instead of resetting. I think this was reasonable, but when the hacker is the link team leader it might not be entirely advisable? Still, getting a chain colt into LoF of a link is good, so I think this is fine.
It does let me fight the Taigha with the Evader though. The Taigha dodges to safety and I fail to pick up the Transductor, wasting one all important command token before I stop trying. This was a difficult decision for me, but I wanted the option for a guaranteed order from the Warcor instead of the potential of failing another WIP roll to repair the Transductor, especially given that I was out of orders in that pool at this point.
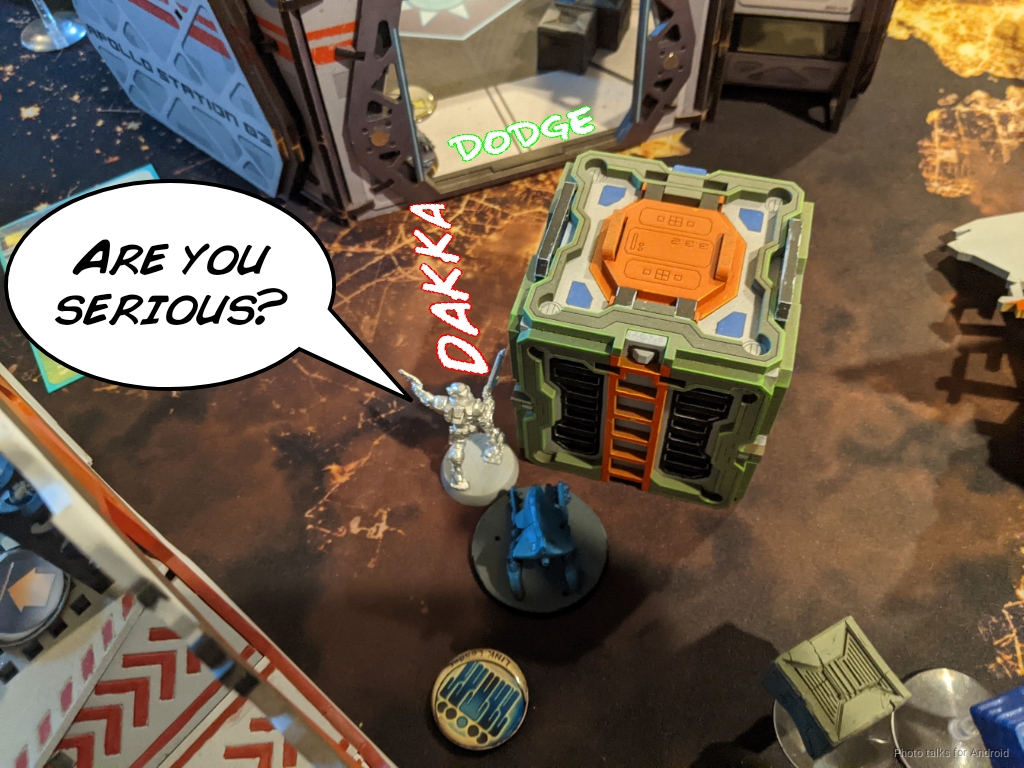
I can’t see the Taigha anymore with the Evader, and I’m out of orders anyway. There is, however a spot where I can see the Taigha with the TAG. I get sloppy and just climb the TAG up onto the roof, exposing it to the Kaitok. I should’ve asked for LoF checks before doing this, but I decide to give the Taigha a free dodge–it won’t be able to get out of LoF in one dodge, and dump both Panzerfausts at the Kaitok. I win the face to face outside 32″ and obliterate the Kaitok with a DAM 16 AP+EXP tankfist to the face.
I then turn my attention to the Taigha, but it dodges out of LoF against the Gecko while I climb the Gecko back down to safety… or so I thought.
Turn 2
Top of 2 – Combined Army
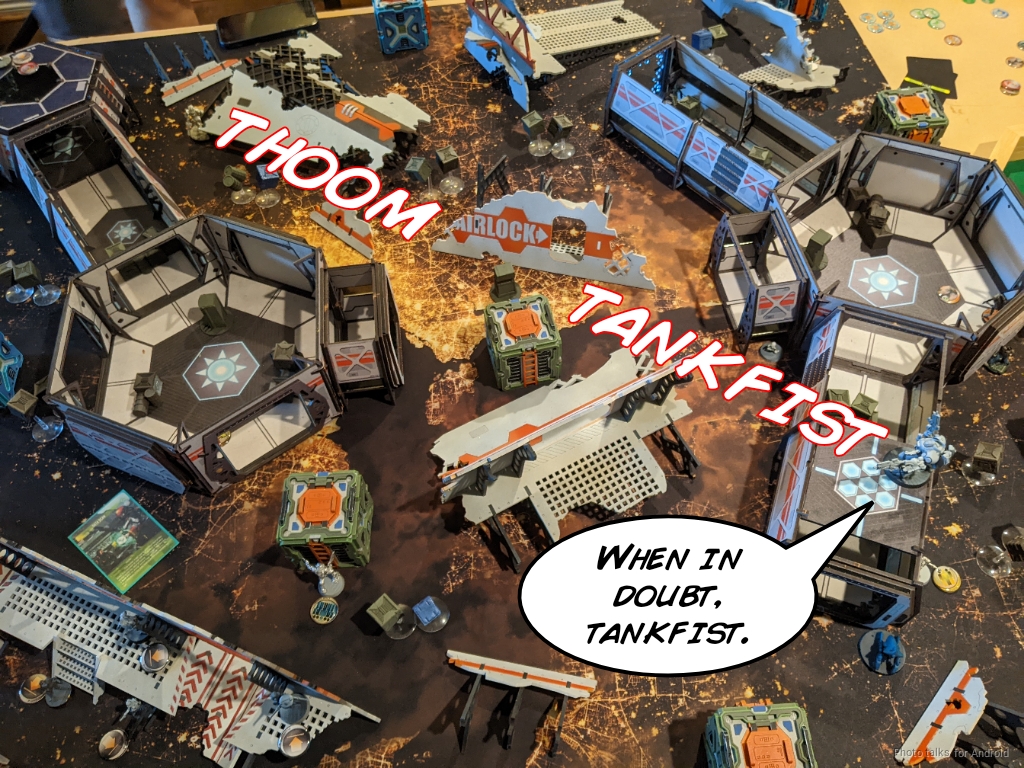
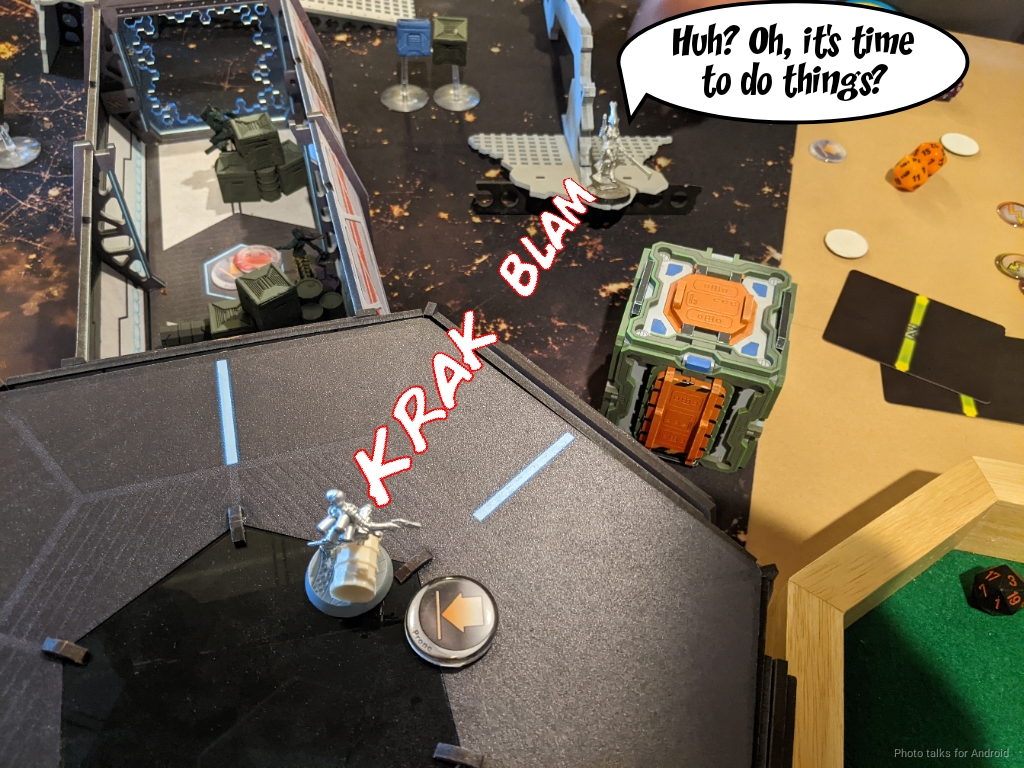
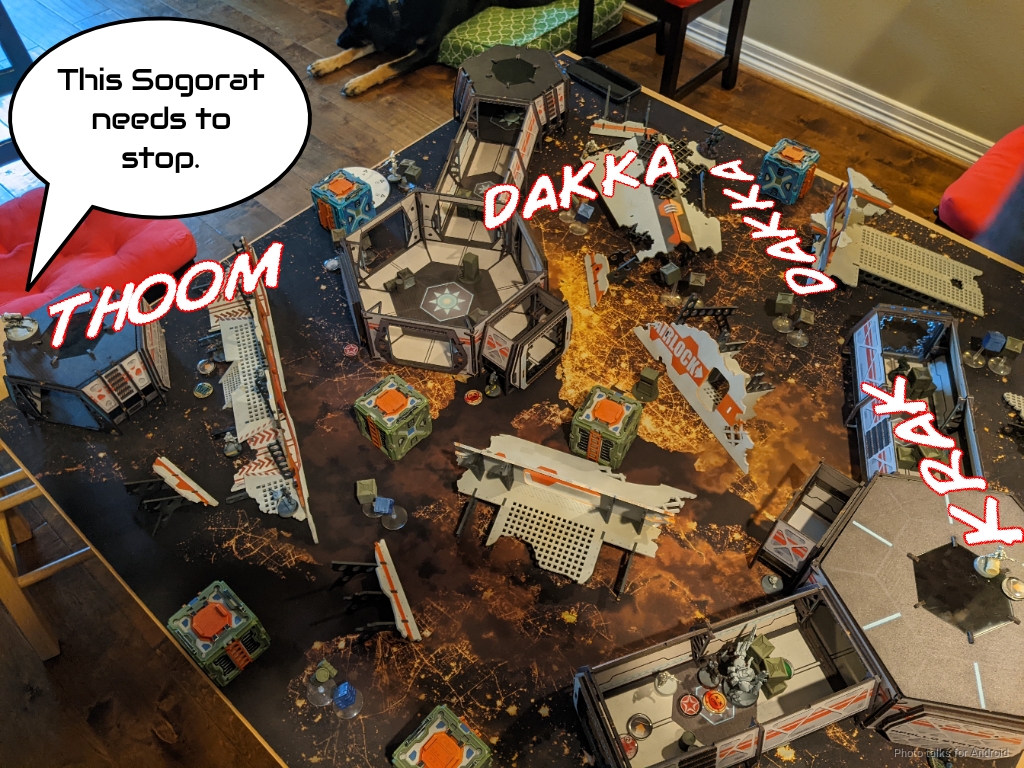
I was reasonably confident that the Gecko could control the corridor by itself, but I was unprepared for a firing line to open up to an advancing Sogorat AP HMG which did a whopping two wounds to my Gecko in one order. I quickly failed guts into the corridor to stem the bleeding.
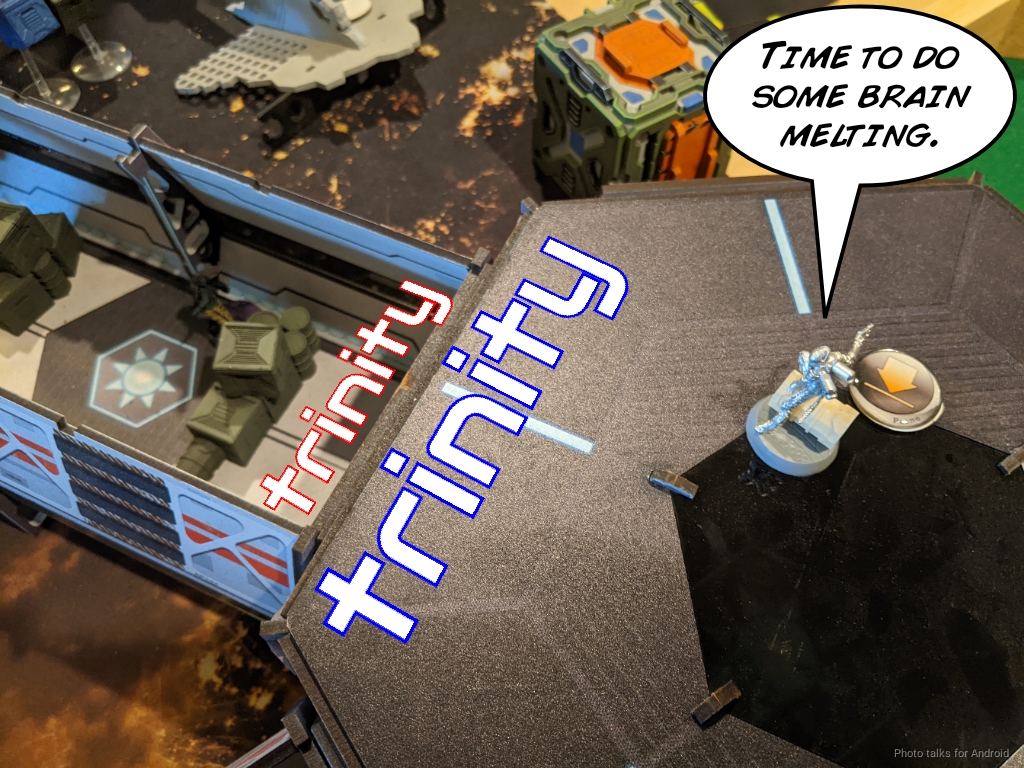
Bit decided now was the time to make her move and set up a pitcher. Thankfully the repeater was in range of both the Gecko and the Sombra, so I force the Trinity. I figure the Sombra has a high enough BTS that I’ll probably be okay. Thankfully this the last order in that pool for Erik and we tie the face to face.

One of the things that I did on the previous turn while moving the Gecko around was set up a line of fire on the left objective with the Wildcat engineer, which comes in handy now. I force a cautious move on the Caliban FO, and then it fails its WIP roll on the objective twice before retreating into camo state.
Erik spends the rest of his orders retreating the Rindak to his DZ, now that the TAG isn’t watching it.
Bottom of 2 – Corregidor
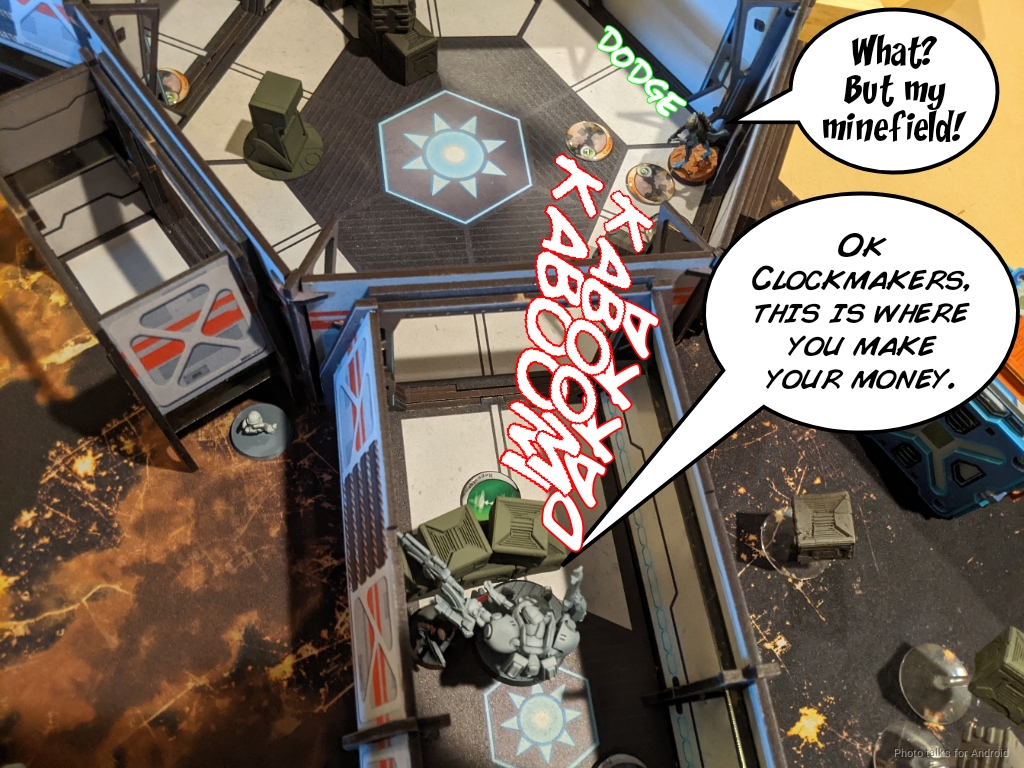
Okay, things are going pretty well for me here. My TAG is pretty damaged, but I haven’t lost any units and I have some options now. I have enough orders and tools in both pools to get units to the remaining objectives. I can’t move the Gecko until Bit is gone, and I really don’t want to have to fight her through the repeater even on Burst 3. I decide to just make my way onto the roof and get in 8″. Easy, thanks to the Sombra’s Climbing+ and stealth. I get a single wound through, but that’s all I need.
This lets the Gecko advance, clear the mines (oh, the Libertos also dropped ANOTHER mine on Erik’s turn), and take out the Libertos. Unfortunately, the mines do the final wound to the Gecko and it goes unconscious.
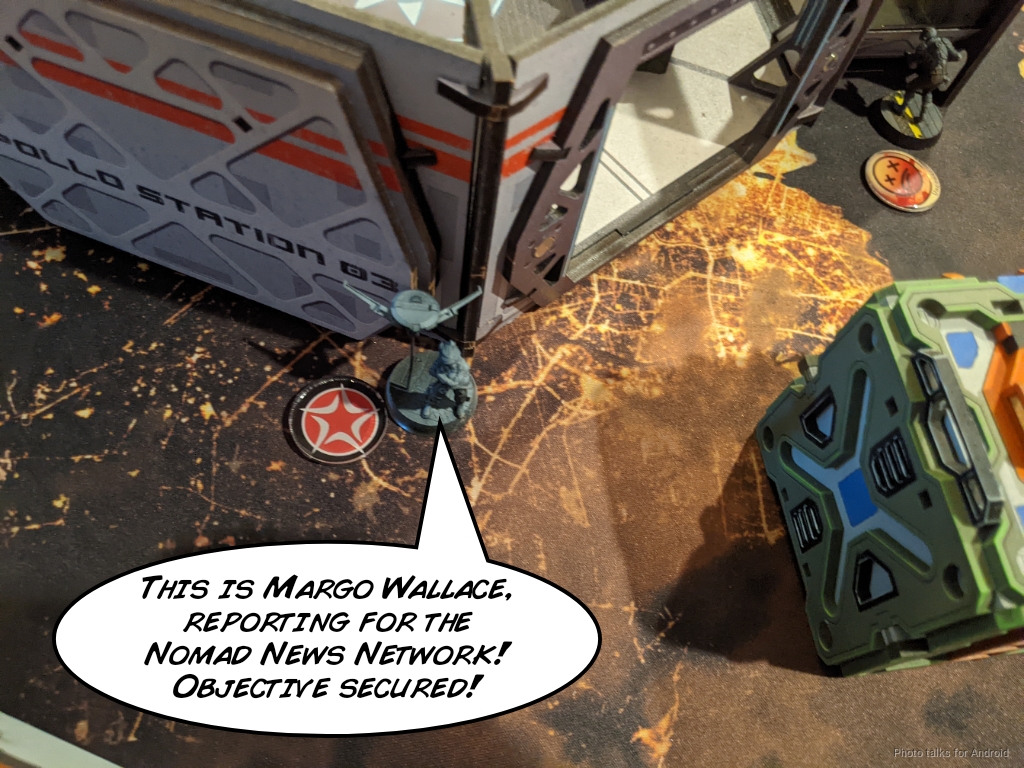
I hop the pilot out, dodge clear the last mine, and steal the objective.
As I was doing all those schenanigans with the TAG (although not while the pilot was doing its thing), I had been moving the Wildcat engineer towards the Caliban on the left. The remaining Taigha was in the perfect position to allow me to drop a template on the Caliban in camo state. I force the dodge on the Caliban, and the Taigha chain colts. I decide that the Taigha can do whatever it wants, I just need to get rid of Erik’s specialists, and dump all three shots into the Caliban, taking it off the table.

I figure I can send the Evader in to take care of the Taigha and the objective. As I do so, the Taigha dodges into base to base with the Wildcat, who had survived the chain colt and failed guts around the corner. I grab the objective, again using these orders to move my link around into more defensive positions, then shoot the Taigha off the Wildcat, unfortunately KOing the Wildcat in the process. I’m not sure I like this play in retrospect, but it was high burst and not unreasonable.
In any case, the Gecko pilot retreats behind the Moran and bunches up with Jazz in the corridor. Thankfully at this point the only templates really left to Erik are the Ikadrons and the Oznats. The Ikadrons are too far away, and I have stuff watching the Oznats.
Turn 3
Top of 3 – Combined Army
Erik finally activates the Oznat that had been guarding against AD. The Sombra drops it with a DA round from her MULTI rifle.
The other Oznat survives by matching the roll of the Vertigo Zond, and the Sombra is far enough away that I’m rolling on crap numbers.
Eventually the Oznat gets off the roof and gets smoke down, which means it’s Ko Dali time!
Ko Dali easily takes down my Evader, who had to leave the link to get the objective.
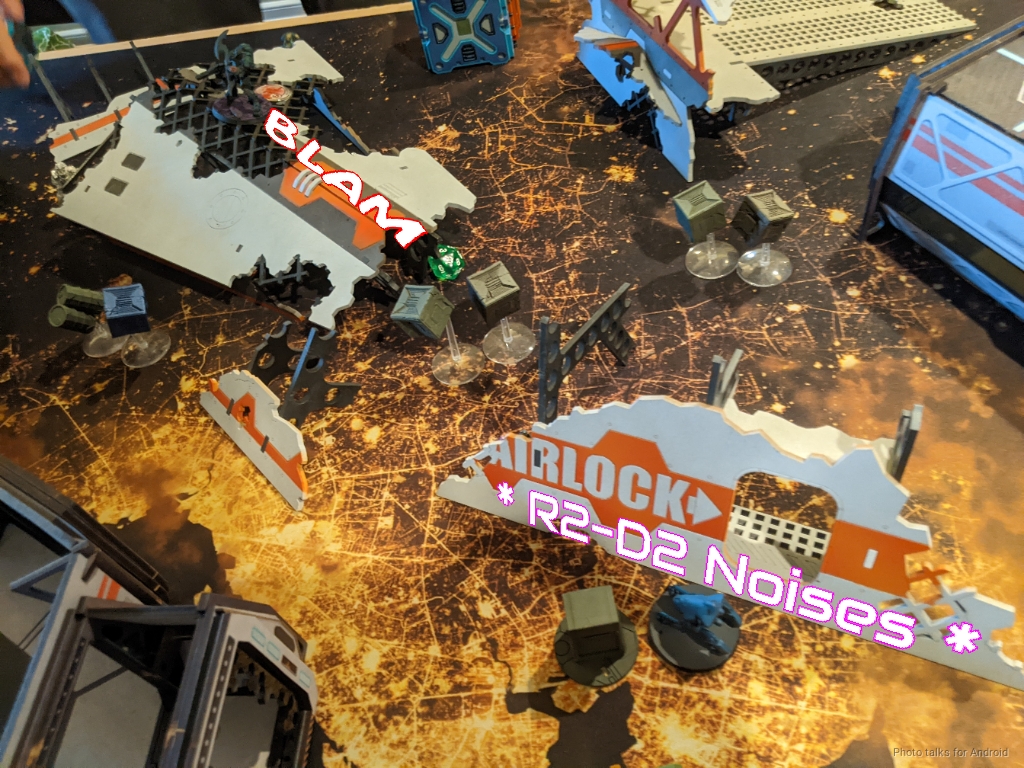
Erik really wants to get Ko Dali to the objective, so he tries to get more smoke down with the Oznat, but my Alguacil Hacker meets the smoke roll with some combi rifle fire. He figures he can take the Alguacil but is iffy about the Vertigo, so he sends in his Sogorat, downing the ‘Zond. I do manage to do a wound with DA ammo from the Sombra though.
The Oznat tries again, but my Alguacil hacker takes it out.
With that, he’s out of options.
Bottom of 3 – Corregidor
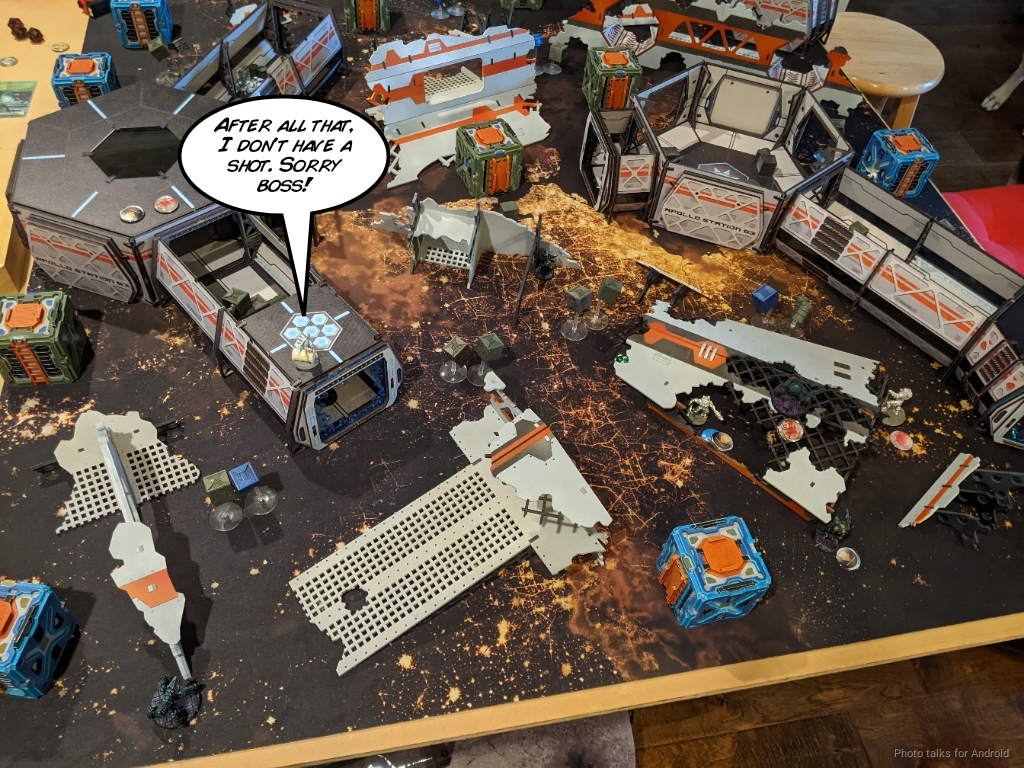
Ko Dali is watching my Alguaciles, so I can’t move them without starting a fight. I could break the Wildcat out of the link and try to Lieutenant order her off the table, but I notice that the Warcor’s path to the objective is out of LoF of everything, so I just snag the objective the easy and completely safe way.
I spend entirely too many orders dodging the Sombra forward against the Sogorat and R-Drone, only to discover that there’s absolutely no way for me to see the Rindak from the roof. I should’ve asked. Ah well.
I’ve got a few orders left to throw on a Transductor, so I try to secure the HVT to get my second classified but the Sogorat takes it out.
6-2 Jurisdictional Command of Corregidor Victory!
Post Game Analysis
I did a lot of discussion of the game and decision making in the meat of the battle report, so I won’t cover most of that again here. Instead, I’ll talk about some big picture items. First and foremost, I think I made some mistakes by not checking LoF before committing to orders. That’s just sloppy and suboptimal, but that’s sort of the downside to going out for tamales and beer before the game with a good friend! That’s one thing I think I could improve on for sure.
The other thing is that I felt a little undergunned in this list outside of 24″. The Gecko and the Evader are more than capable of handling mid-range threats, but once the Panzerfausts are exhausted I’m in trouble. I think I need to find a way to work in an Intruder MSR or some sort of AD troop into the list. I suppose I could replace the Evader with an Alguacil HMG or MSR, which feels bad because I’m dropping a two-wound engineer, but that would probably let me fit a Clockmaker with bots or maybe even Carlota/Moriarty instead. I’d have to drop the Wildcat engineer, but there are plenty of excellent options to go into the Gecko’s Haris.
I’m also probably responding to the game and table too much, especially since this list is also supposed to cover Supremacy… but now that I think about it I think my other list for the tournament covers Supremacy better, probably:
GROUP 1
LOBO (NCO) Red Fury, Flash Pulse(+1B) / Breaker Pistol, PARA CC Weapon(-6). (1 | 33)
DIABLO Light Shotgun / Pistol, Shock CC Weapon, Trench-Hammer. (0 | 15)
JAGUAR Adhesive Launcher, Panzerfaust / Pistol, DA CC Weapon. (0 | 11)
GROUP 2
CARLOTA KOWALSKY Breaker Combi Rifle, Light Flamethrower, Adhesive Launcher(+1B), D-Charges / Pistol, CC Weapon. (0 | 34)
MORIARTY PARA CC Weapon(-3). (0 | 4)
TOMCAT (Doctor) Combi Rifle, Light Flamethrower ( | MediKit) / Pistol, CC Weapon. (0 | 22)
SEÑOR MASSACRE Boarding Shotgun, Eclipse Grenades, E/M Grenades / Pistol, E/M CC Weapon, Shock CC Weapon. (0 | 26)
DIGGER Chain Rifle(+1B), Grenades / Pistol, AP CC Weapon(+1B). (0 | 14)
HELLCAT (Hacker, Hacking Device) Combi Rifle ( ) / Pistol, CC Weapon. (0.5 | 29)
5 SWC | 300 Points Open in Infinity Army
More on that list in the next battle report! I will say that I think Erik is really narrowing in on his preferred Combined Army playstyle. I want to discuss that a little more and to provide an empathetic take on what it’s like to be a player learning a new faction and watching your winrate drop. Erik is a very good player and has always provided a pretty solid competitive challenge when I play him. He does this because he laser focuses on getting points on the scoreboard, generally doesn’t get distracted, and uses tools efficiently to accomplish his aims.
However, he’s started a completely new and foreign faction. Combined has lots of Human Sphere analogues, but it’s an alien army and is supposed to be feel alien and different! As a result, the usual tools he’s looking for and used to using are either missing or sufficiently different to require additional cognitive load when using them. Furthermore, it’s just fun to try new things out in a faction. That often means you’re making potentially suboptimal decisions to play with a unit you like or are excited by. Here’s an example of when I did it:
What this results in, especially in a vanilla list, is what looks like unfocused play. There’s some unnecessary piece development to “try it out,” or perhaps some overly cautious retreating to be able to continue to use a unit later. Said differently, the focus is actually on learning the tools and less on winning the game. Winning the game is still the primary usage case and context, but getting practice in using news tools and slotting them into your playstyle is also a very valid way of improving at the game.
What I’m trying to say is that if you’re a player learning a new faction, and you’re getting frustrated because your winrate drops, that’s normal. Enjoy the exploration process, look for small improvements and development opportunities instead of raw win percentage. Alright, I’ll get off the soapbox. Thanks for reading, and thanks to Erik for a great game!
Pingback: Perfidious Parachutists – MERC Recon