
Gluttonous Caliban
I haven’t played Jordan (sprocketgx) in over 2 years, thanks to COVID. With everything more or less back to pre-COVID state at the game store, we’ve been doing game night again, so I took the opportunity to challenge him and his USARF to a game. Makes me nostalgic to be playing on our mismash of store terrain. I should probably figure out a way to hit the MDF with some rattle cans at some point…
Overview
- Mission: Firefight
- Forces: Combined Army versus USAriadna Ranger Force
- Deploy First: USARF
- First Turn: USARF
We rolled up Firefight. I’ve been toying around with Anathematic lists. Because I can’t really make a sane Avatar + Anathematic list, this is what I ended up with:
Santa’s Coming to Town 2.5
GROUP 1
10
2
GROUP 2
ANATHEMATIC (Lieutenant, Hacker, Hacking Device [UPGRADE: Trinity (+1B)]) Plasma Rifle, Nanopulser ( ) / Pistol, Shock CC Weapon. (0.5 | 76)
OVERDRON Plasma Sniper Rifle(+1B) / Shock CC Weapon. (1.5 | 58)
STALDRON Flash Pulse / CC Weapon. (0 | 0)
XEODRON K1 Marksman Rifle, Blitzen / Heavy Pistol, Shock CC Weapon. (0 | 53)
STALDRON Flash Pulse / CC Weapon. (0 | 0)
IKADRON (Baggage, Repeater) Light Flamethrower(+1B), Flash Pulse / Pistol, PARA CC Weapon(-3). (0 | 9)
R-DRONE Flash Pulse / PARA CC Weapon(-3). (0 | 7)
ÍMETRON . (0 | 6)
CALIBAN (Multispectral Visor L1) Spitfire, D-Charges ( ) / Pistol, CC Weapon. (1.5 | 38)
Bit (Hacker [UPGRADE: Oblivion, UPGRADE: Trinity]) Submachine Gun, Pitcher ( | Deployable Repeater) / Pistol, CC Weapon. (0.5 | 20)
4
TAIGHA Chain-colt / AP + Shock CC Weapon. (0 | 5)
4 SWC | 300 Points | Open in Infinity Army
I think my rule for playing Combined just to keep myself sane will be at least one TAG and at least one aspect. It was just absolute madness to try and fit the Avatar and the Anathematic and not just have to play the perfect game. I may still try it sometime, but not while I’m figuring it all out. Sidegrading to the Anathematic from the Avatar lets me upgrade the Overdron to the plasma sniper profile, which I’m pretty excited about, and I kept the Xeodron in the list. The secret tech this time was a Caliban MSV1 Spitfire. I’m a huge fan of that profile, it just does so much work.
Jordan’s list was focused around a Marauder core with the Unknown Ranger and both big guns. His Lieutenant was the Ohio with flamethrowers, and he packed a bunch more fire templates into his list with four grunt infiltrators. Jordan’s also a big fan of paramedics with Ariadnan high PH, so one of the Marauders was a paramedic.
Tactical vz
GROUP 1
MINUTEMAN (Lieutenant [+1 Command Token]) Rifle, Light Flamethrower(+1B) / Heavy Pistol, AP CC Weapon. (0 | 24)
MARAUDER (Multispectral Visor L1) Sniper Rifle(+1B) ( ) / Heavy Pistol, CC Weapon. (0.5 | 32)
UNKNOWN RANGER AP Spitfire, Chain-colt / Heavy Pistol, T2 CC Weapon. (1 | 47)
GROUP 2
GRUNT (Infiltration) Heavy Flamethrower, Light Shotgun / Pistol, CC Weapon. (0.5 | 11)
FOXTROT (Forward Observer) Rifle, Flash Pulse, Shock Mines / Pistol, CC Weapon. (0 | 18)
HARDCASE FRONTIERSMAN Tactical Bow, Light Shotgun / Pistol, CC Weapon. (0 | 12)
112 MOTORIZED Light Shotgun / Pistol, CC Weapon. (0 | 18)
VAN ZANT AP Rifle / Heavy Pistol, AP CC Weapon. (0 | 34)
5 SWC | 300 Points | Open in Infinity Army
He even threw in a motorized 112 as an extra bit of pick-em-up goodness. A Hardcase and Foxtrot rounded out his midfield.
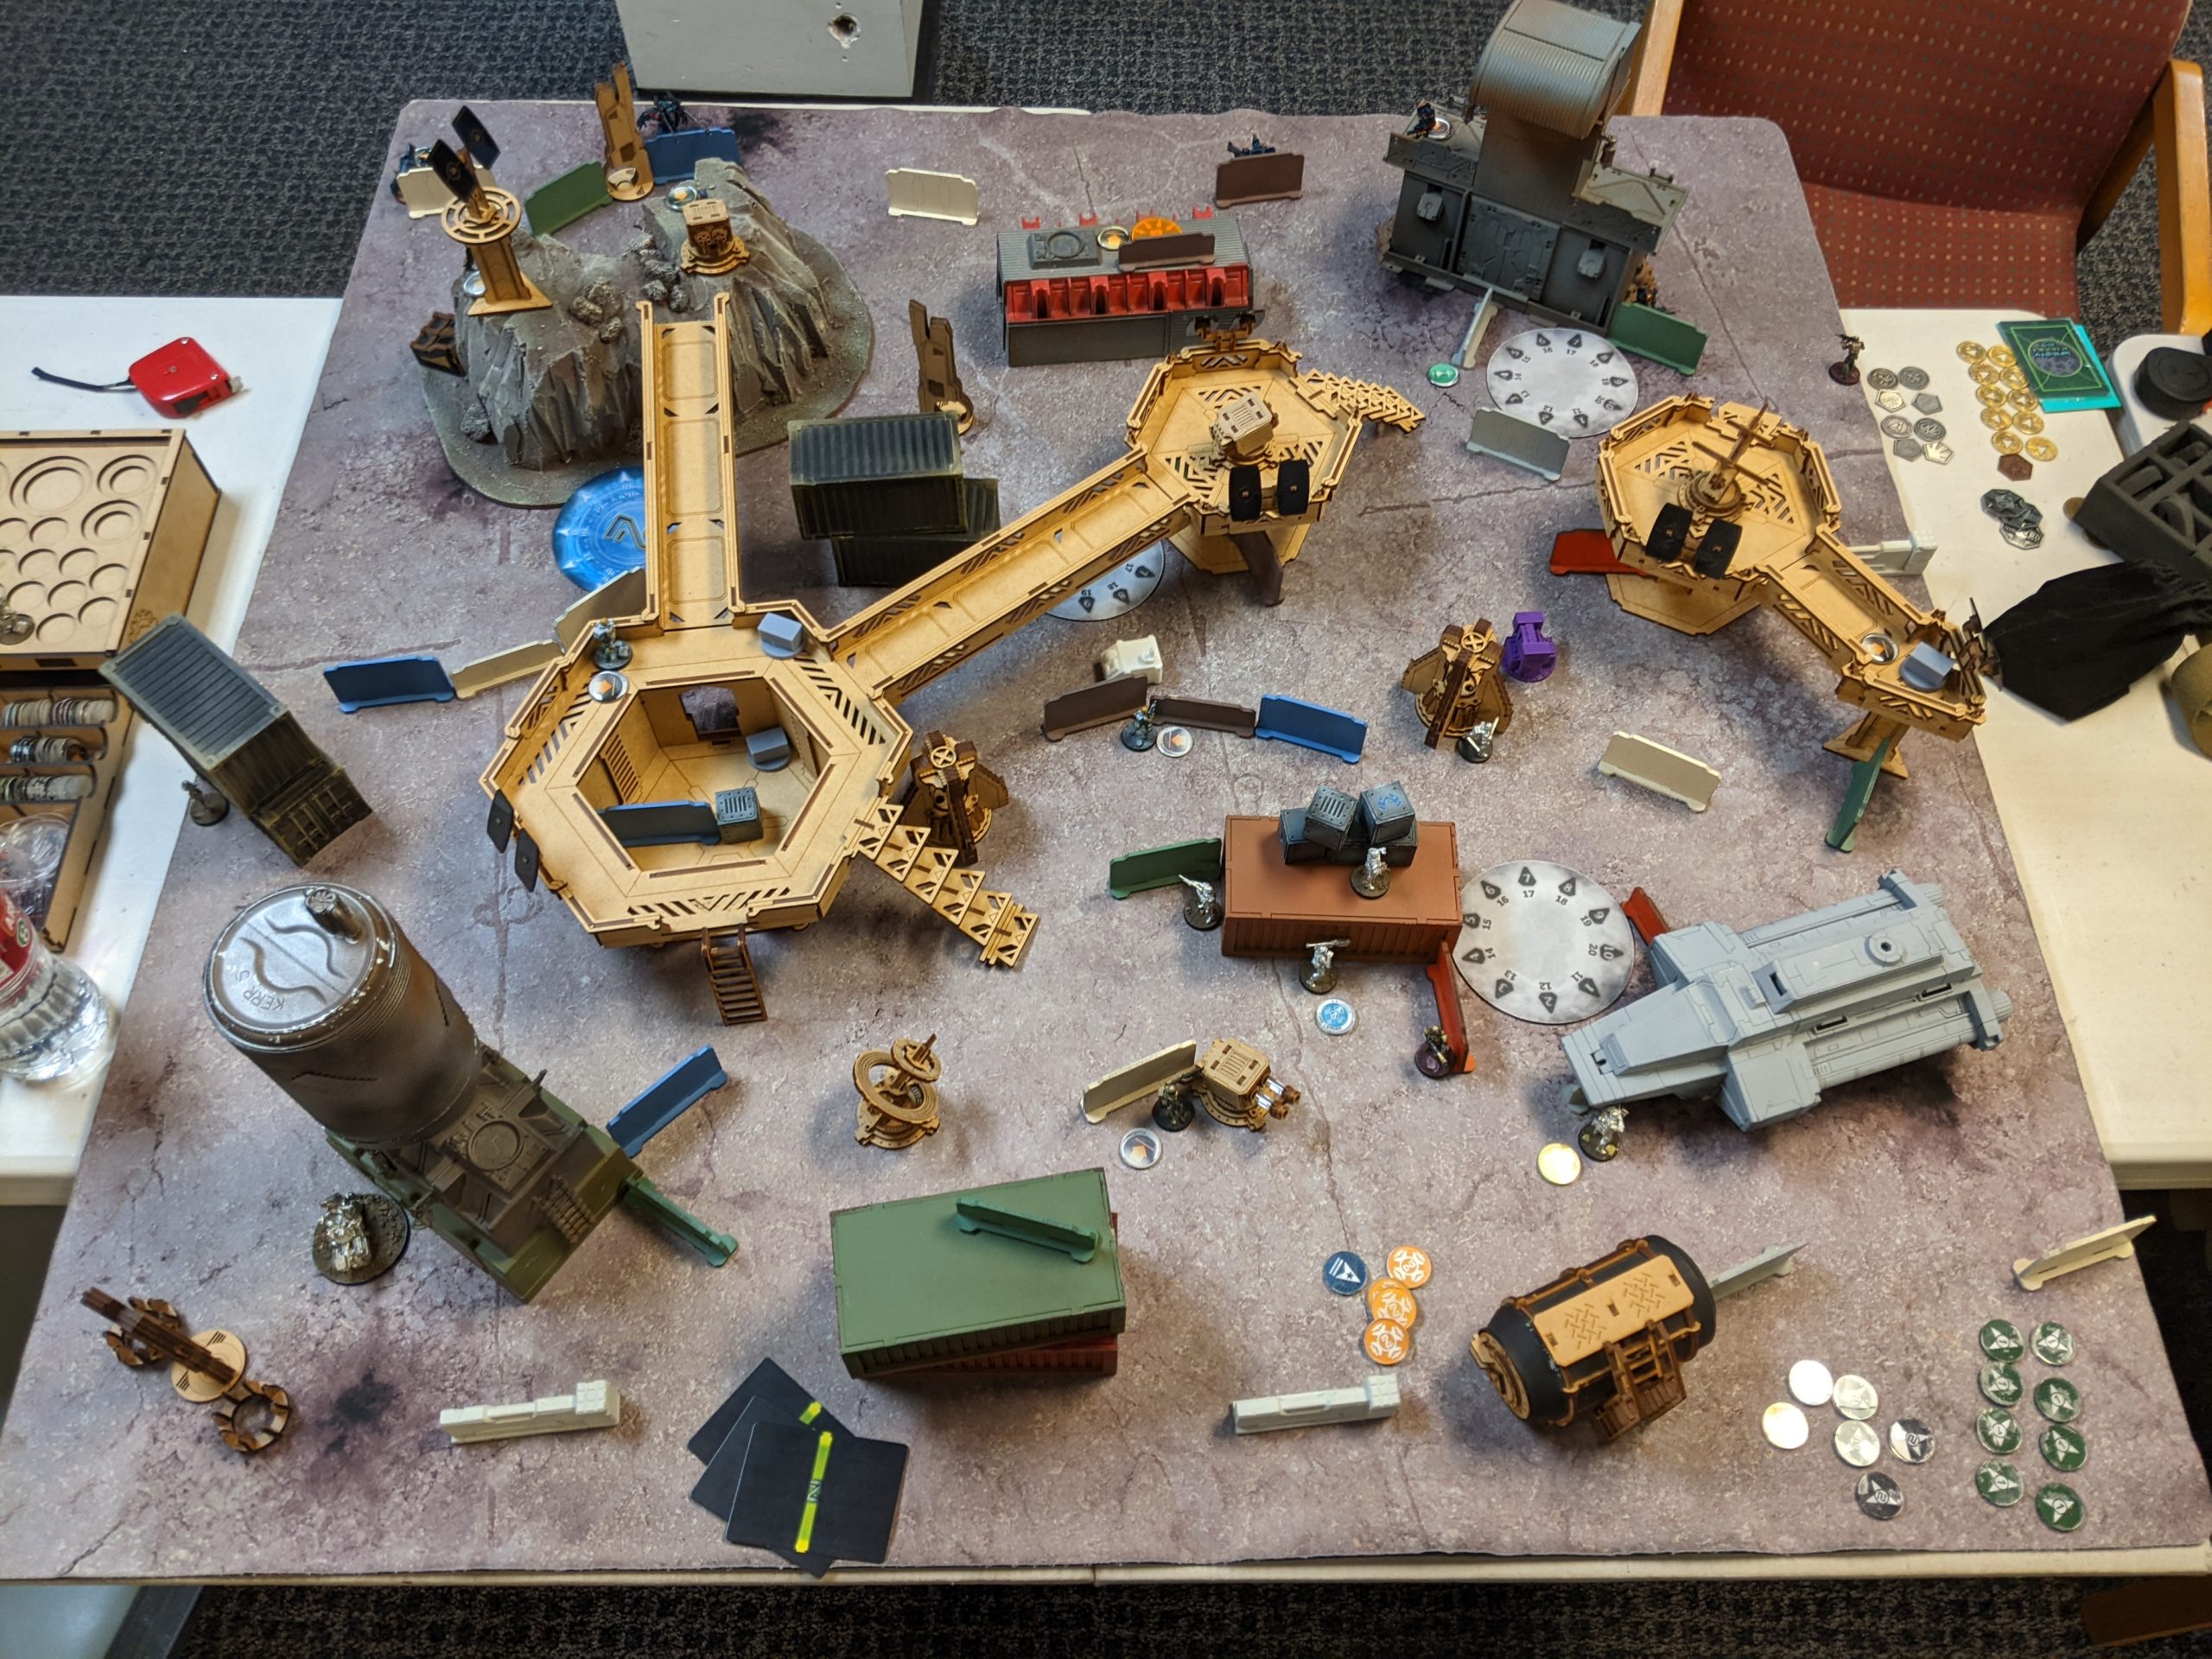
Deployment
I won the rolloff and elected to take the side that I thought had better hiding spots for my TAGs as well as good lines of fire to where I thought his links might end up. Jordan went first, which is usually what USARF wants to do anyway. He started off by placing his Marauder link in a blob around some shipping containers, with the sniper up on the container to get some elevation. The shorter ranged Marauders were corner guarding and the HRL was “in reserve” in the sense that it wasn’t looking at anything but was ready to pop out and do some damage, much like the Unknown Ranger nearby.
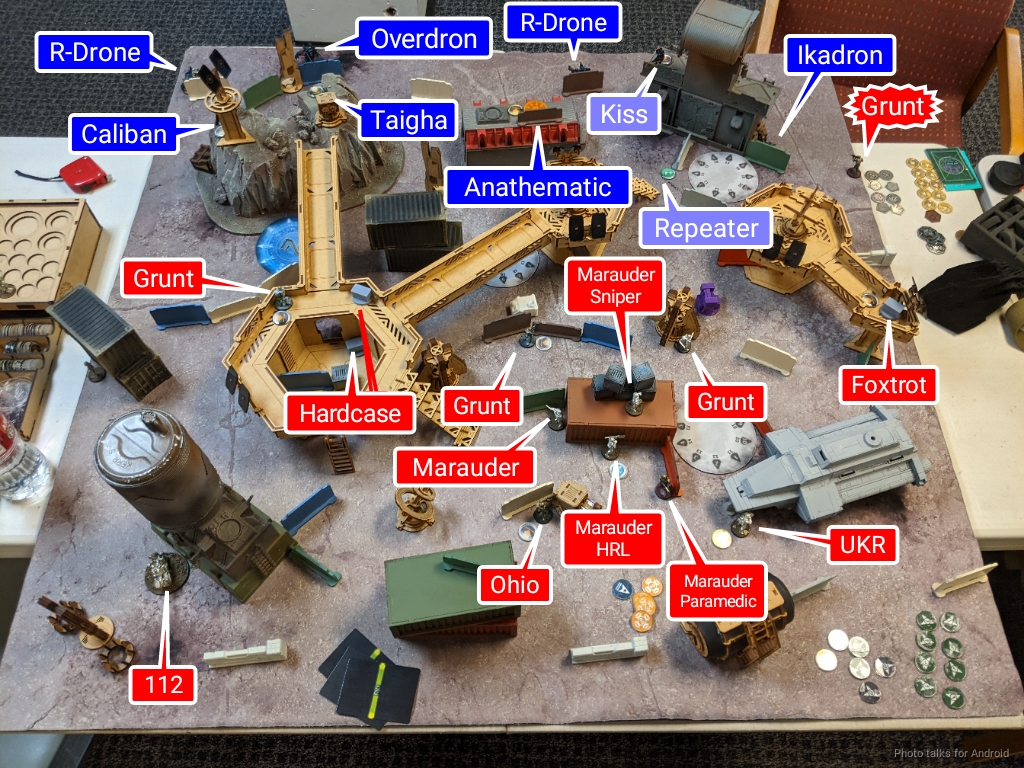
With all those units down, the Ohio went as far forward as possible, trying to be in coherency if the needed to join the link (the core started off with all the Marauders and the UKR). The 112 went all the way on the left. Now that I’m looking at it, it does seem a little puzzling for it to be off by itself so far away, but I imagine if I left a hole on that side it could have attempted to do some damage.
Jordan put down two of his Grunt infiltrators basically right on the midline, witht he 3rd on the catwalk system supporting the Hardcase. I think he wanted to use the catwalk system to deliver the Grunt into my deployment zone, which was a pretty scary prospect. The Foxtrot went all the way on his right, presumably to just have some board presence over there.
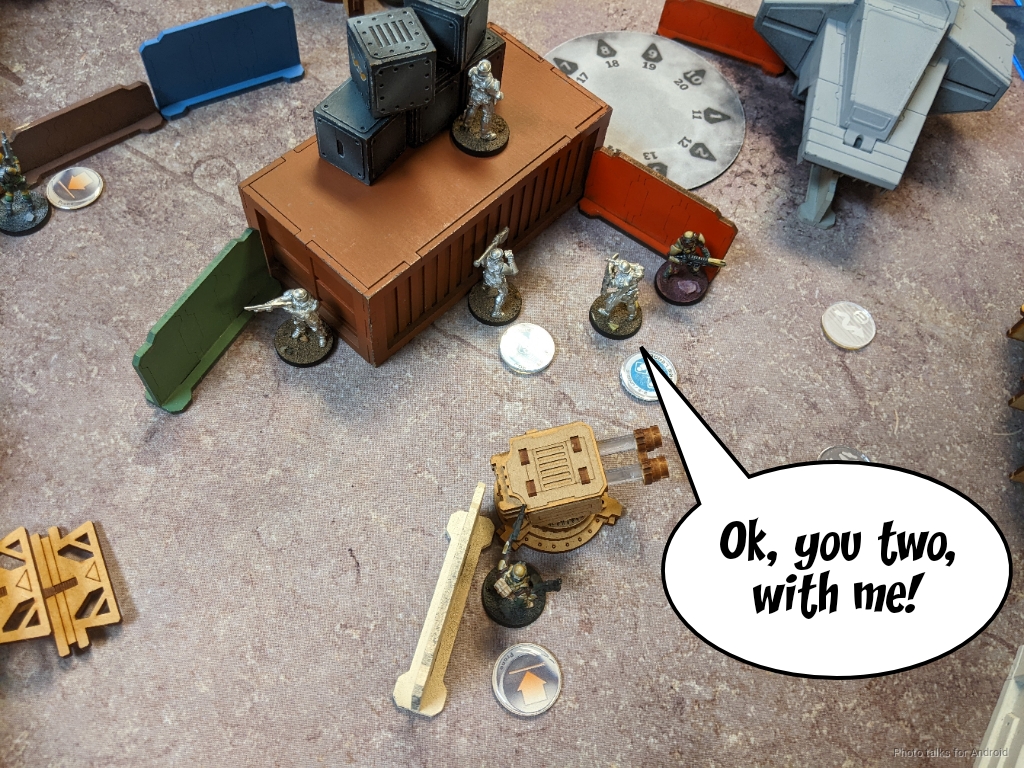
He also placed his blizzard templates to try and control my paths out of my deployment zone. With that, my turn to deploy came around. I had some trouble deciding what to hold in reserve, but ended up deciding on the Caliban. I was debating keeping my Anathematic hidden, but was definitely too scared to be in LoL on the first turn if I didn’t get a chance to reveal it. I was also very concerned about Van Zant. To address this concern, I put the Anathematic prone on a building behind a low wall on the roof. This allowed me to cover essentially the entire back table edge with a plasma rifle. I hadn’t considered this when choosing table side, but it turns out a wide-open back table edge is excellent for defending against Van Zant! How fortuitous!
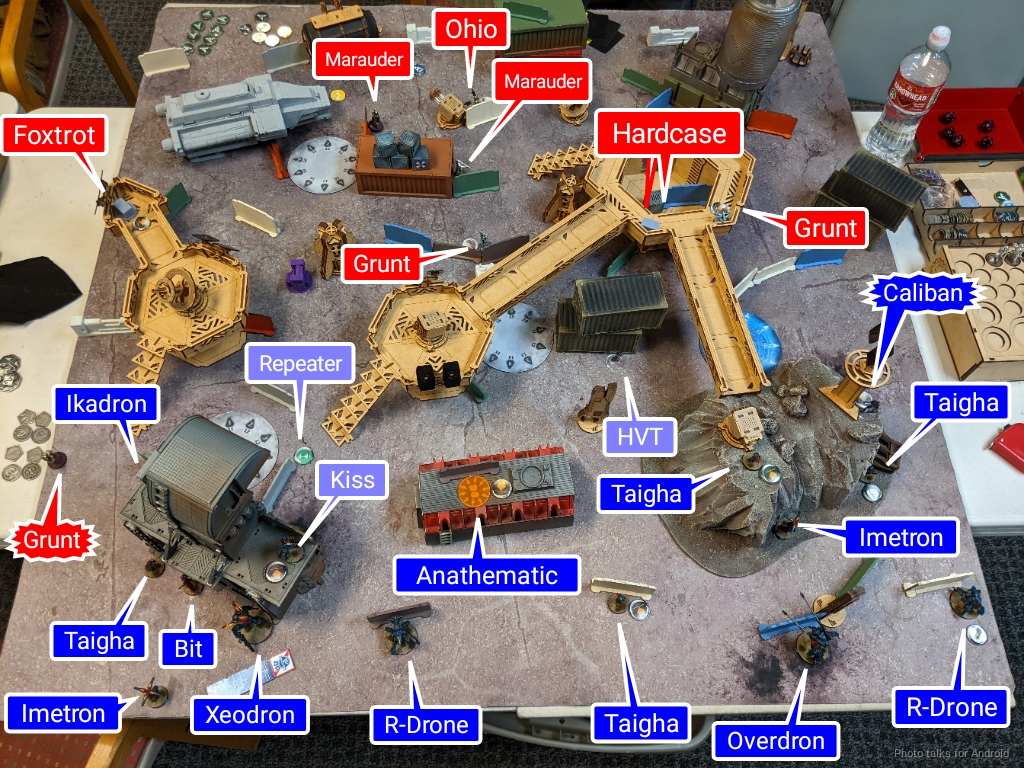
To add to the defensive net, I positioned my Taigha to either cover the back table edge or the sides of my deployment zone, along with the Ikadron. I was pretty concerned that there’d be a Grunt marching up the catwalk to the rock formation on my right, so I covered the approach with Kiss’s ADHL, a Xeodron, and a Taigha speedbump. I figured if he was going to crawl his way into my deployment zone expending a ton of orders to do so I’d let him.
The Imetrons didn’t have a great place to be so I just decided to try and land them behind some big pieces of terrain. One failed its roll and ended up on my back table edge in the shadow of the building on the left. I figured with Bit, a Taigha, an Ikadron, and the Xeodron there, it’d be reasonably safe. The Xeodron was turned pretty aggressively to the right to add another shot on Van Zant if he came in on the middle part of the table edge. The R-Drones covered either the table edges or the approach of the 112. Finally, I stuck the Overdron in a position where it could watch the link’s approach if they started to get aggressive. I also used the blizzard zones to directly contest the link’s shooting. Both TAGs were in a position where they could guts into total cover if sad things happened.
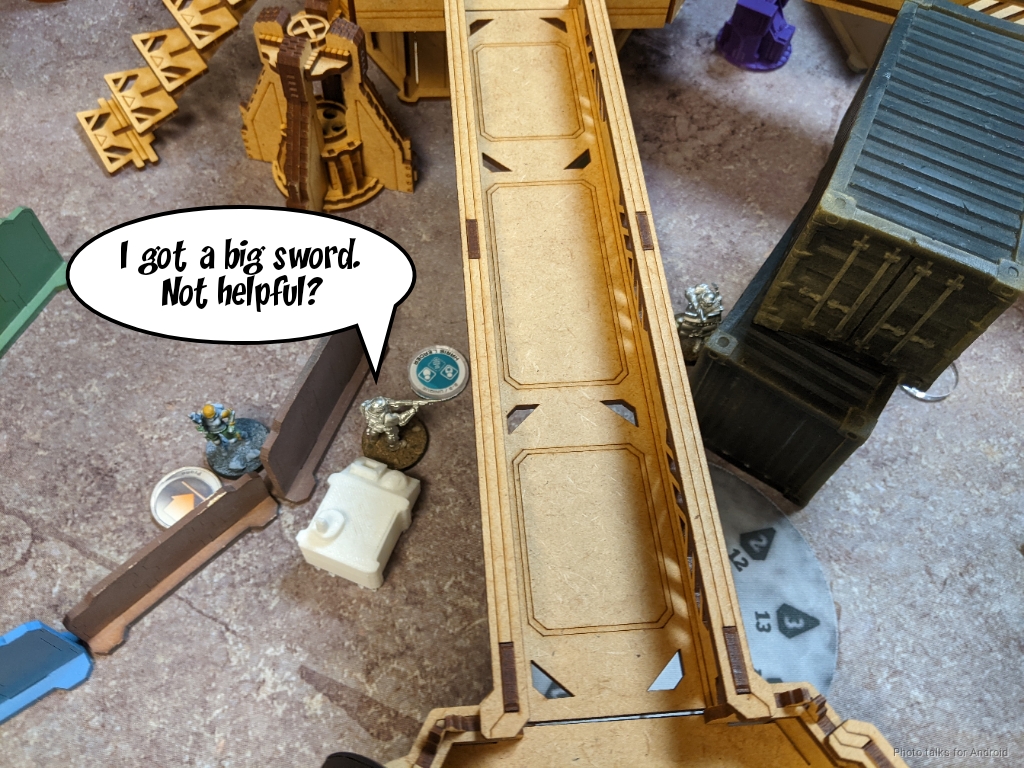
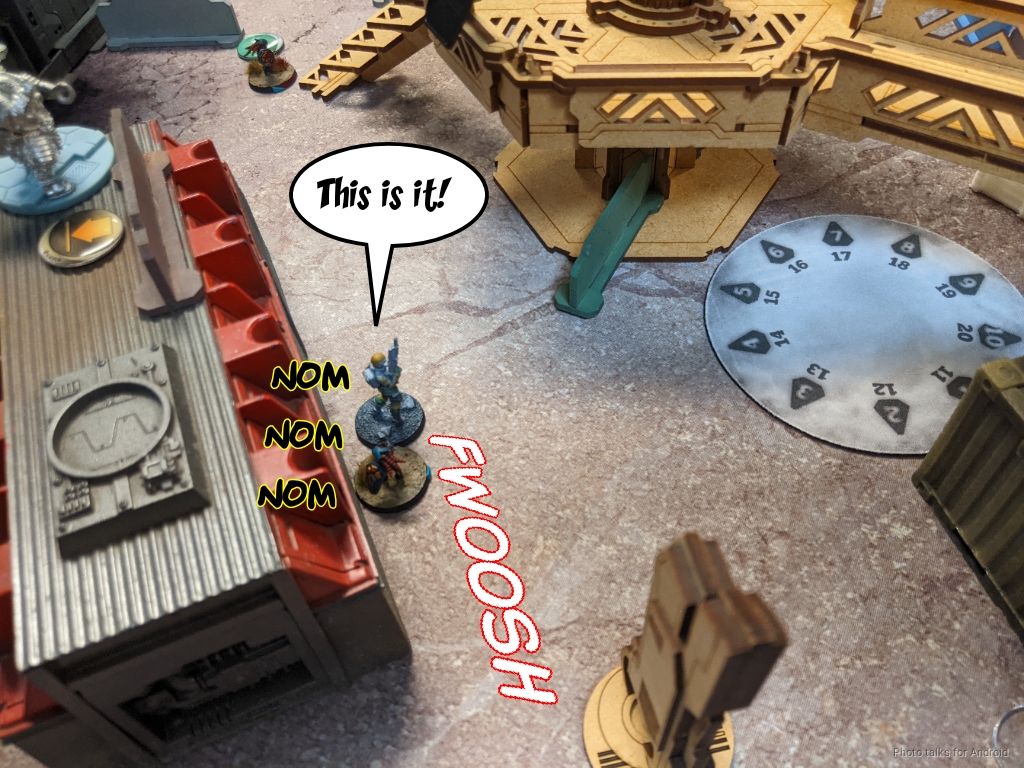
At this point, Jordan drops a 4th Grunt infiltrator on my side of the table threatening a bunch of my orders on the left. Not great. I waffle for awhile trying to decide where to put the Caliban. I hadn’t really looked at the midfield when choosing table side, and Jordan’s options are definitely better than mine. I opt to just put the Caliban up on the rock formation with the Taigha. There’s two things there for it to eat, and a Taigha, Kiss, and the Xeodron to help him fight up there if it ends up coming to that. There were just so many flame templates on the ground floor that I didn’t want to risk a 38 point model.
Turn 1
Top of 1 – USARF
I dock Jordan two orders on his smaller pool–I think this is generally the correct play, because it is a larger percentage of orders, and people tend to construct their second pool to do one, maybe two things on the first turn, and almost halving most people’s pools generally denies them this option. It’s particularly punishing if they have irregular troops in there.
Jordan does the correct thing against my list and tries to attack my order pool, going after my defenseless Imetrons. Rude! He pushes the Grunt forward. I respond with dodges from everything except the Ikadron, which flamethrowers. The Grunt dodges forward to see the Xeodron, avoiding getting roasted. I dodge everything into less template-able positions and get the Taigha ready to dodge into CC.
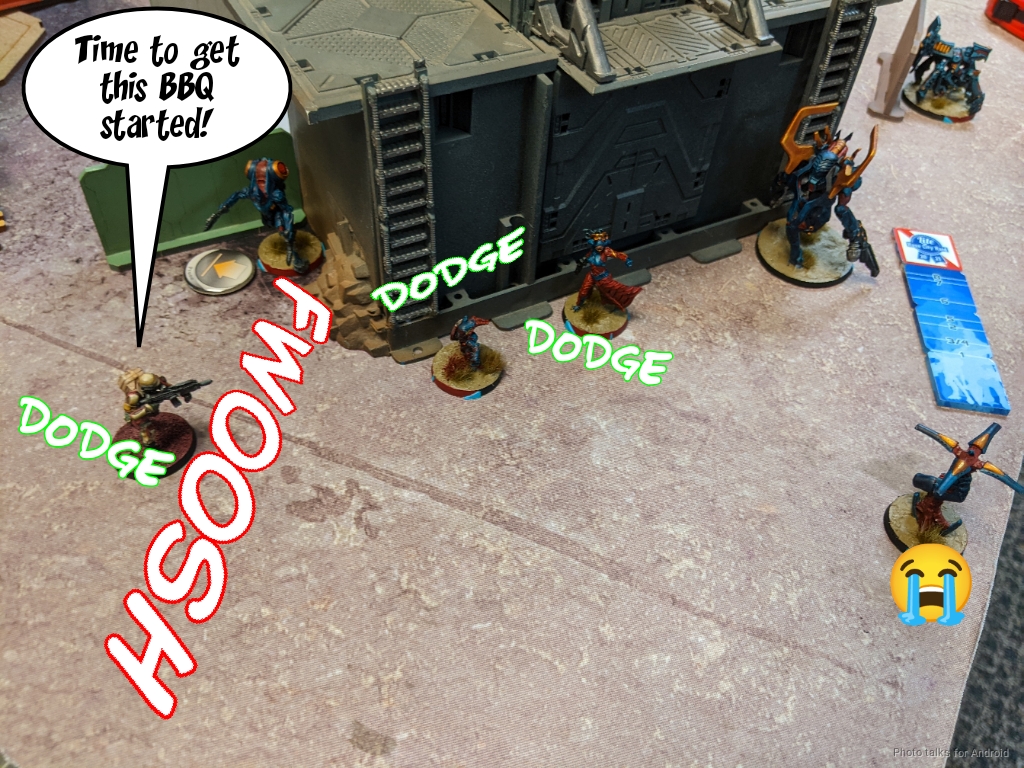
The Grunt activates again, covering the Xedron, Bit, and the Imetron with a template while the Ikadron tries to roast the Grunt again.
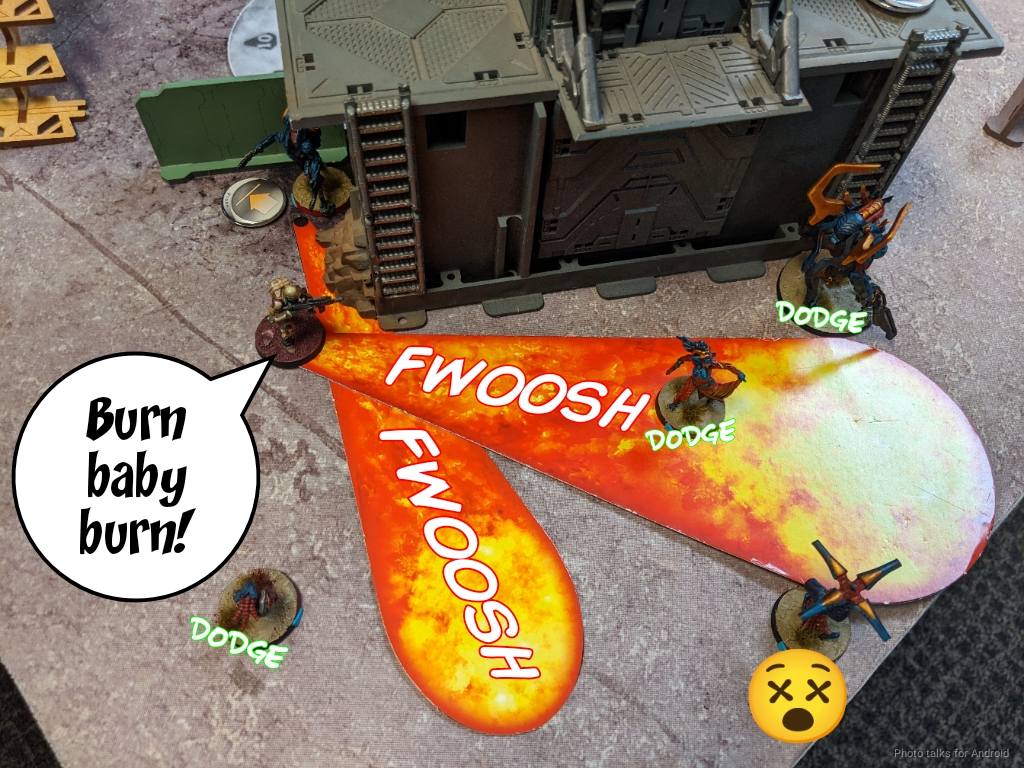
I lose the Imetron and the Xeodron takes two wounds. Bit, thankfully, dodges, as does the Taigha–into close combat. The Grunt passes its ARM save against the Ikadron’s flamethrower, sadly. I decide to turn the Xeodron around to see the Grunt in case Jordan decides to fight the Taigha and somehow win.
With the Xeodron no longer looking at the back table edge, Jordan makes a bold move and brings on Van Zant behind the Overdron, which fails its dodge. I reveal the Anathematic to plasma it, flash pulse with a R-Drone, and fire Kiss’s ADHL. I’m in bad range for everything except the flash pulse, so there’s a real chance I miss this and end up in a world of hurt.

Thankfully, Kiss glues Van Zant successfully, with both the Anathematic and the R-Drone missing. I could’ve dodged the Taigha, but I was concerned about it getting shot up on the way in by the link if I exposed it. Looking back it now, that probably wasn’t a big concern. In any case, I think Jordan took a very big and probably miscalculated risk here. Waiting till Turn 2 when my defensive net starts to unravel as the Taigha move is safer, even though the Overdone gets to be alive. In any case, Van Zant’s potential steamrolling of my deployment zone is stopped in its tracks. I’ve been pretty lucky so far, but I’m also pretty happy with my ARO choices. They seem pretty optimal, in spite of me not really adequately preparing for a Grunt infiltrator attack.
Jordan chooses this moment to restructure his links. He breaks the core, uses the UKR’s tac aware order to move into the center of the link blob, and then reforms two links: Marauder BSG, Marauder Paramedic, UKR and the Marauder HRL, sniper, and the Ohio. I am absolutely thrilled to see this, because it’s incredibly expensive. It costs a tac aware order and two command tokens to accomplish, and now sixth sense is offline, making the Overdron very very dangerous. The smaller links I do think are a good idea in general though, it lets Jordan strike out in multiple directions from his deployment zone as well as retaining the burst bonus on his heavy weapons. I think it’s reasonable to do this swap because it does offer some benefits, but probably not while Albedo is still active.
With his two primary attack vectors stalled out, Jordan reverts to objective play and sets about grabbing stuff out of the panoplies. He has to go through the Xeodron first, and the UKR forces it into cover. Thank goodness for Bioimmunity effectively negating AP on the spitfire!

The Marauder BSG grabs a DA CCW, and the Marauders and the UKR settle in behind the shipping containers at the right of this image to await the next turn.
Jordan then advances one of his Grunts to the other Panoply and grabs a MSR out of it. Not bad! The Grunt on the catwalk advances, which is pretty dangerous as it brings it closer to the Taigha. Just a quick thought on the Panoplies in this mission. Getting points is good, but I think the Panoply play is generally either a mistake or something that people tend to over-invest in. If you get a single item out the Panoply on your way to somewhere that you need to be, that’s enough. I have to get two things out of Panoplies to beat you for that single objective point, which I’m probably not going to waste my time doing, meaning it’s almost guaranteed. Getting the second item with another unit basically ensures I’m not going to bother.
You can get some fun stuff out of the Panoply, and sometimes it’s very relevant, but I think if you’re just doing it as an order sink to “get points” and “do something productive” you should probably be develping your board position instead. If you’re going for the Panoply play, that almost suggests that you’re trying to play for the tie or at least prepare a tiebreaker. I think it’s generally not worth the time, and if you do it, only do it once, that’s probably enough, especially on the first turn!
Bottom of 1 – Combined Army
I’ve got a bunch of Taigha to move around. I cancel the impetuous orders on the ones that Van Zant can see–they’re too far to move into base to base on their impetuous orders and I’m not interested in letting Van Zant attempt to break his Immobilized state. The Taigha on the catwalk dodges towards the Grunt while evading its shotgun fire but is just outside of base contact.
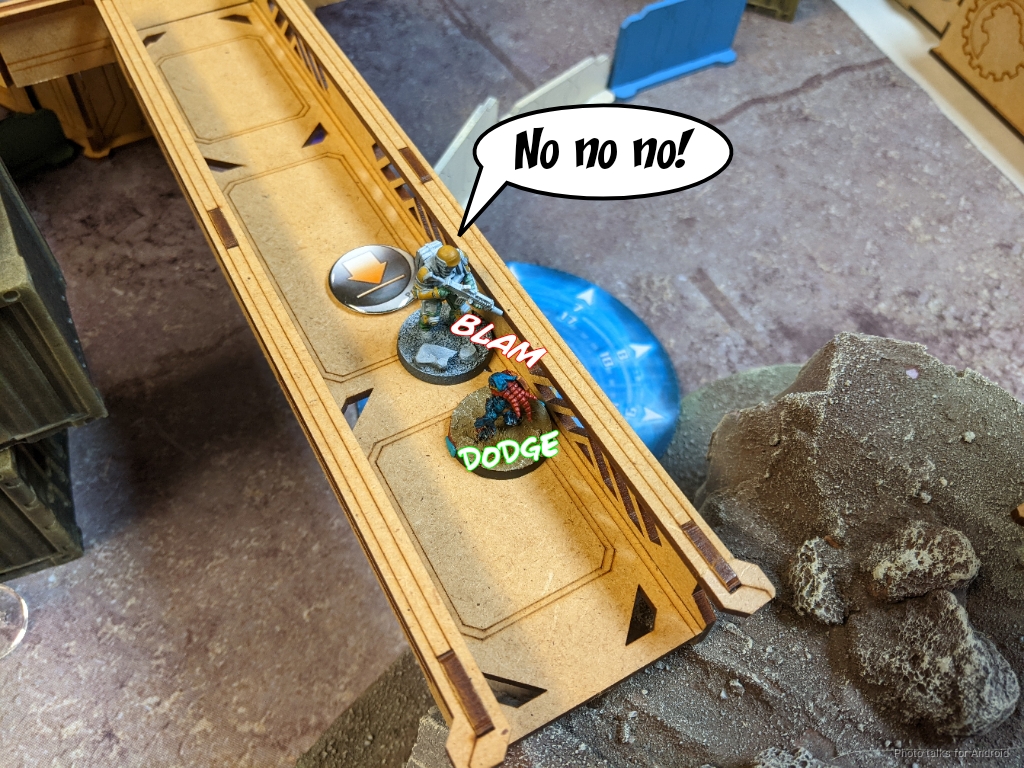
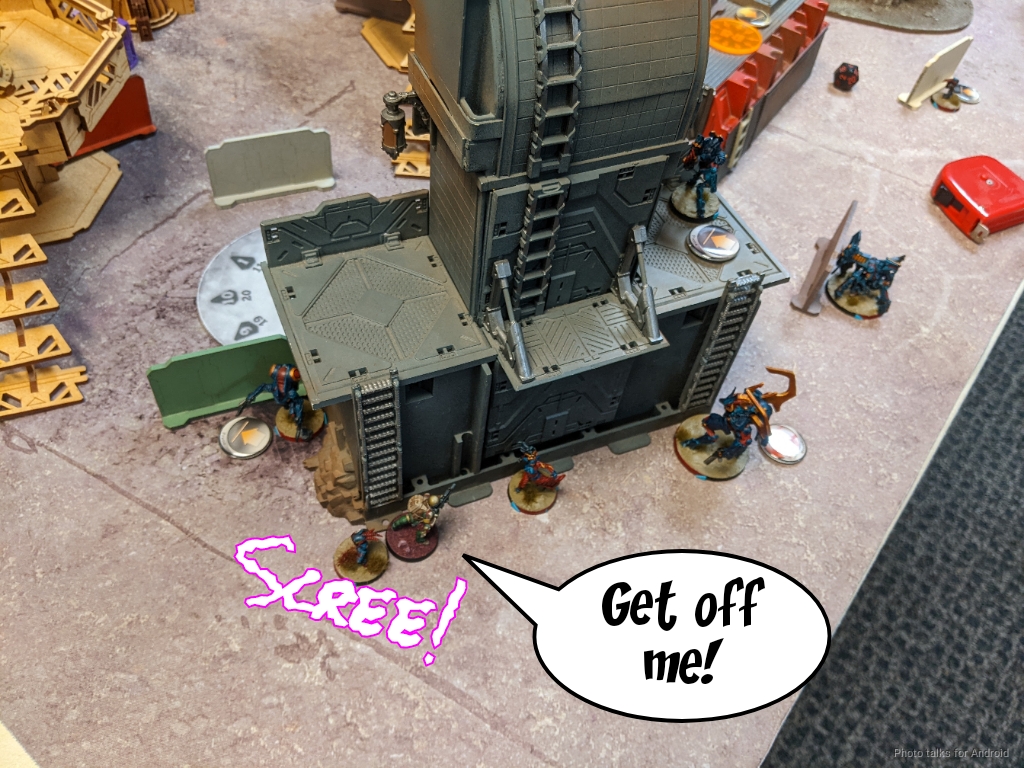
The other Taigha eats the Grunt that flamethrowered everything at the top of 1, critting it off the table. Okay, that threat is gone at least.
I manage to take down the Grunt on the catwalk with a Berserk, but I lose the Taigha to a flamethrower hit.
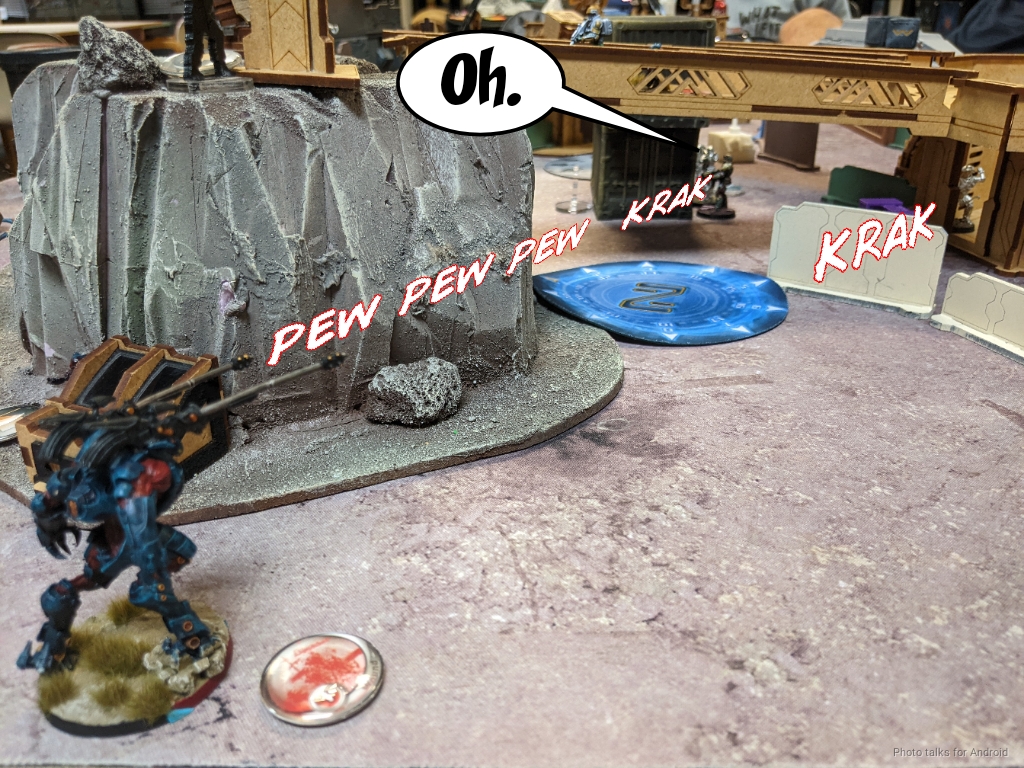
Now that impetuous moves are over, the Taigha that can see Van Zant is within 12″, so I can Berserk into him, shocking him off the table. Yummy Van Zant!

The Grunt that got the sniper rifle is a little too close for comfort, so I plasma it unconscious with my Lieutenant order.
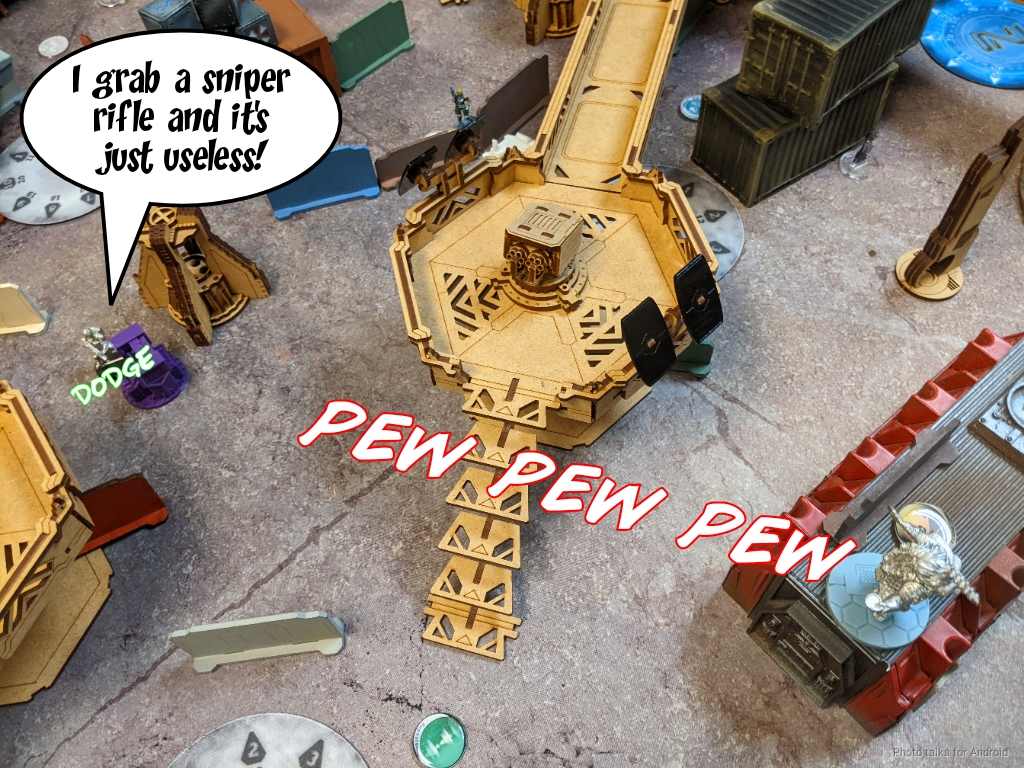
The Marauders and the Unknown Ranger are all bunched up, which means it’s time to plasma template them with the Overdron. The Tac Aware order buys me 8″ of movement, and then I spend 1 more order getting to just out of LoF of the Marauders. The Hardcase can see but declines to ARO. I throw a discover but whiff.
I move out of cover and into LoF of the Marauder paramedic. This baits out an ARO from the nearby Hardcase, which actually does a wound to the Overdron, but I sneak a single plasma hit through the Blizzard zone and template both Marauders and the Unknown Ranger. Unfortunately, all three fail both their ARM and BTS save and are melted off the table. OUCH.
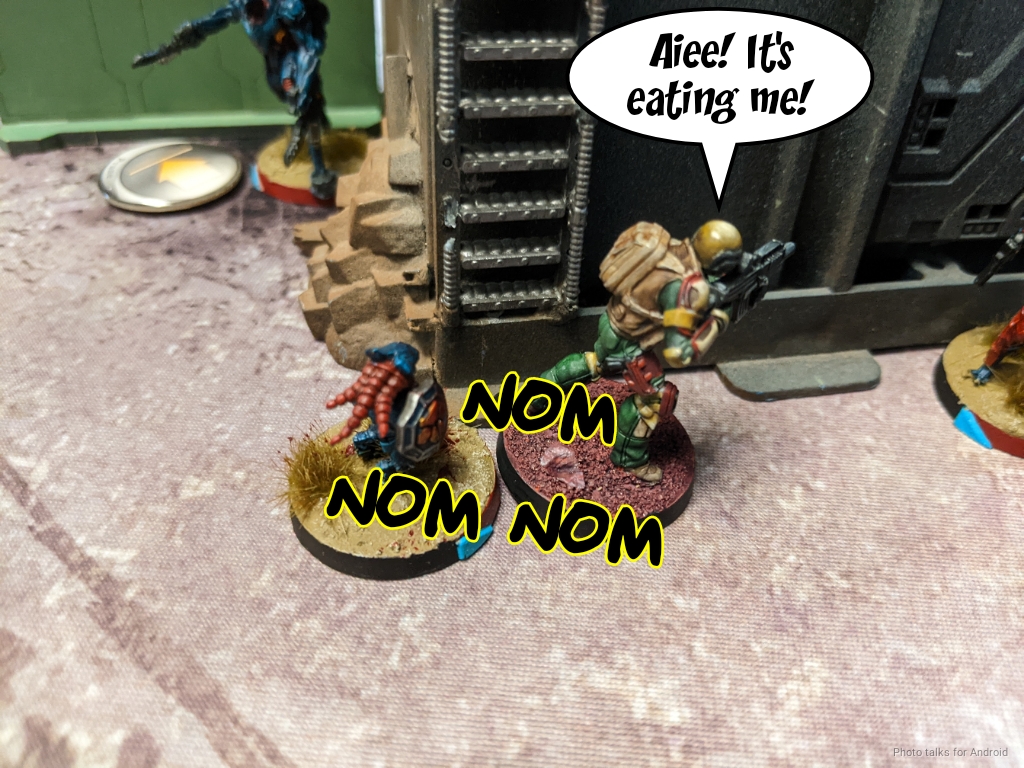
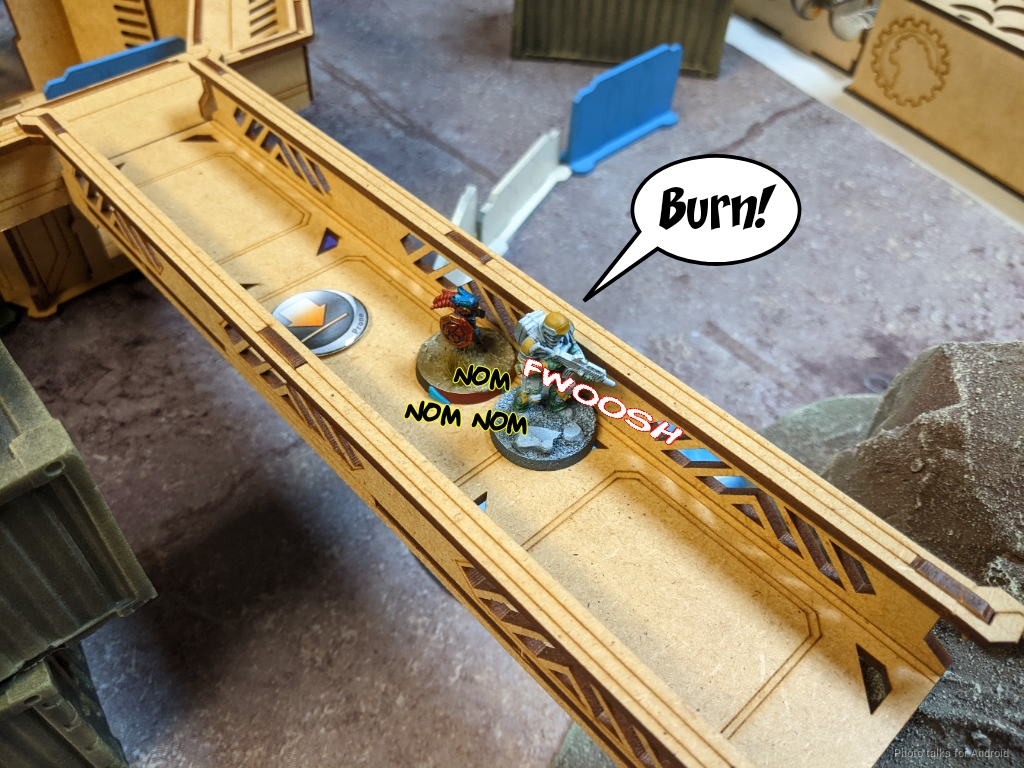
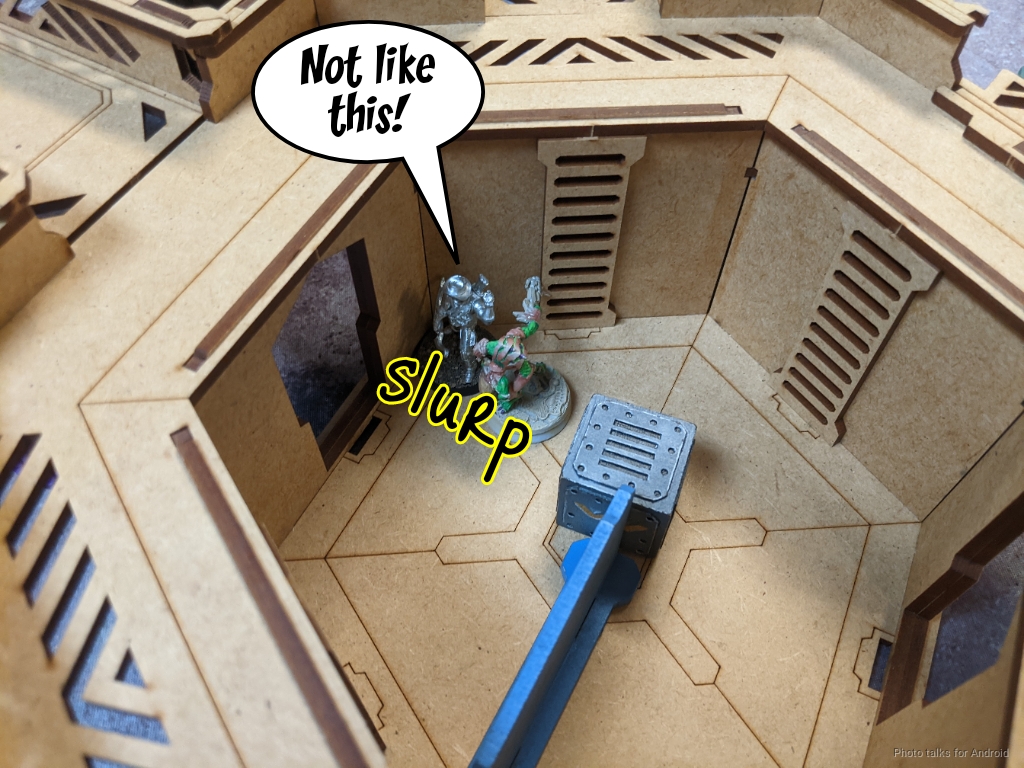
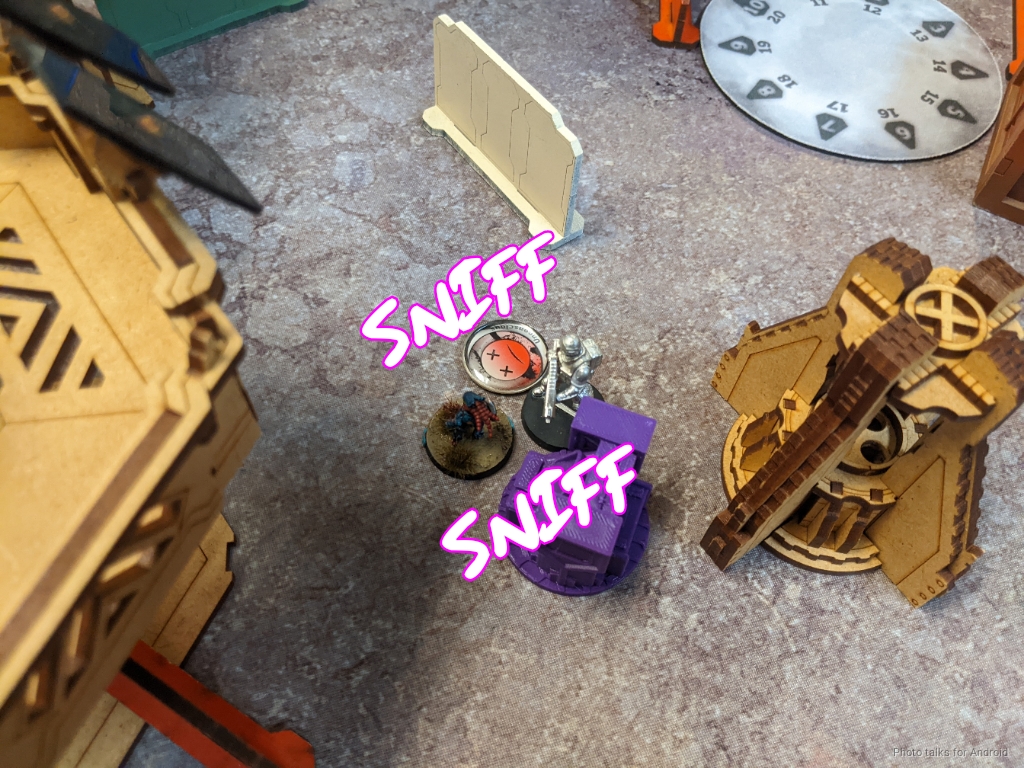
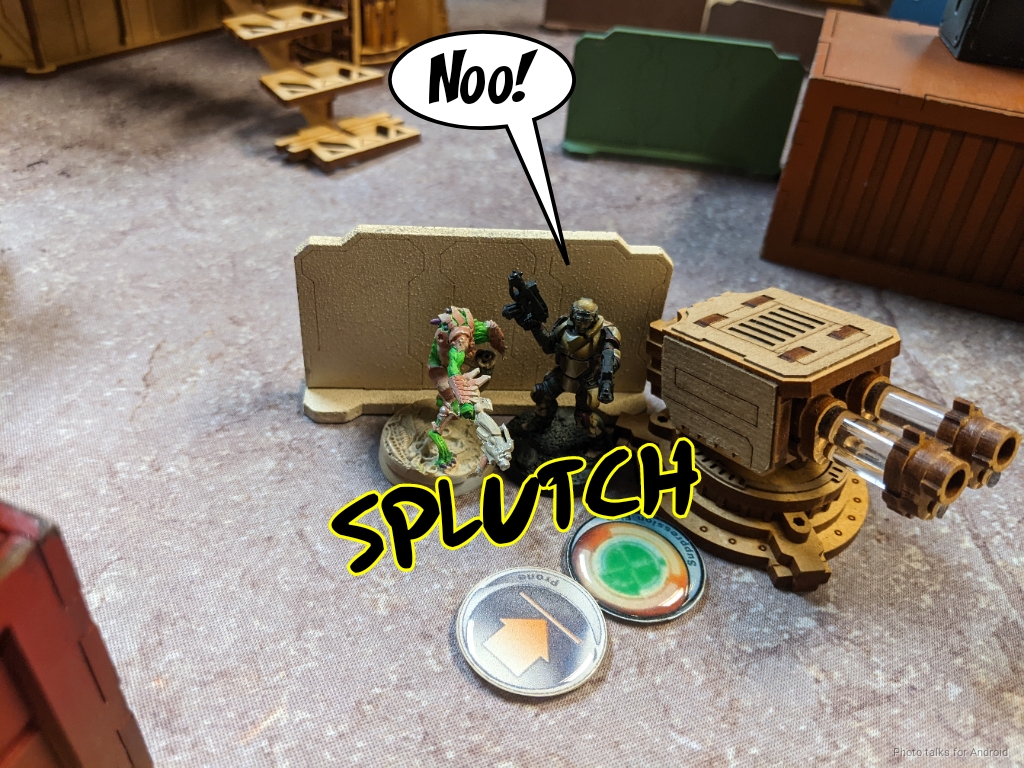
That was actually reasonably order efficient, so I send in the Caliban. I get my free snack from the downed Grunt (thanks Shock immunity!) and then continue on my way.

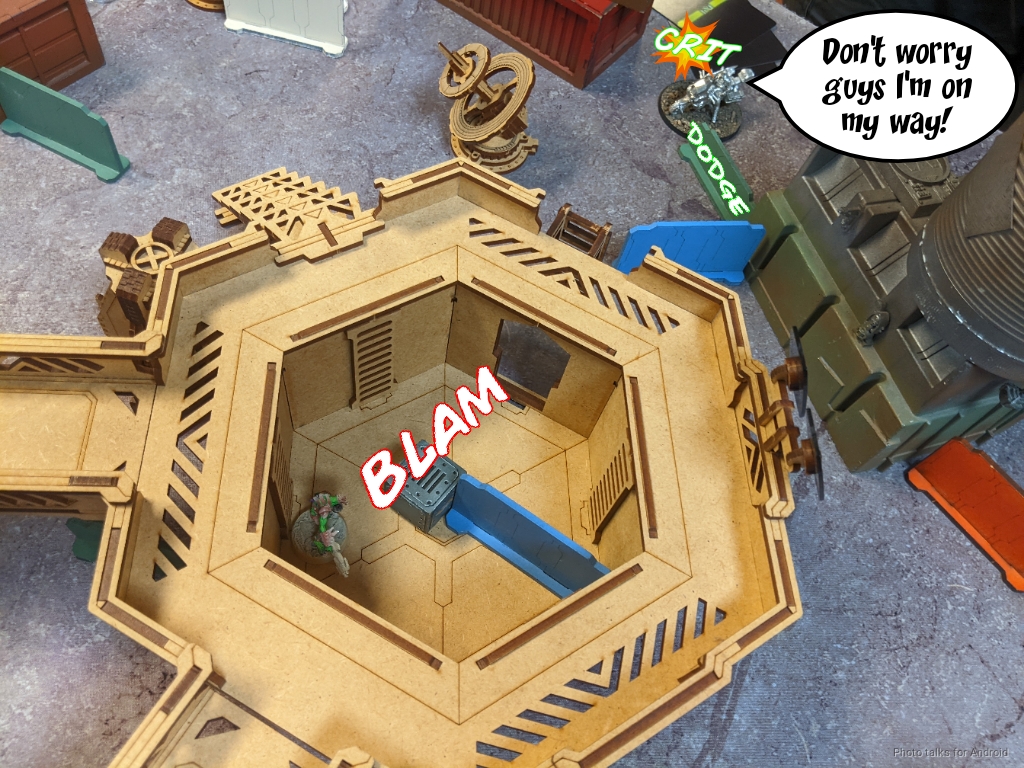
The Marauder sniper can see, but I’ve got two wounds now and a Spitfire, so I’m feeling lucky. The Spitfire downs the sniper with Jordan deciding to go unconscious instead of Dogged to give the 112 a chance at fixing things.
I’ve got just enough orders to stealth into base to base with the Hardcase and eat it too, bringing me to three wounds thanks to a D-Charge fueled protein shake. This also gets me Predator.
I recamo and pass turn.
Turn 2
Top of 2 – USARF
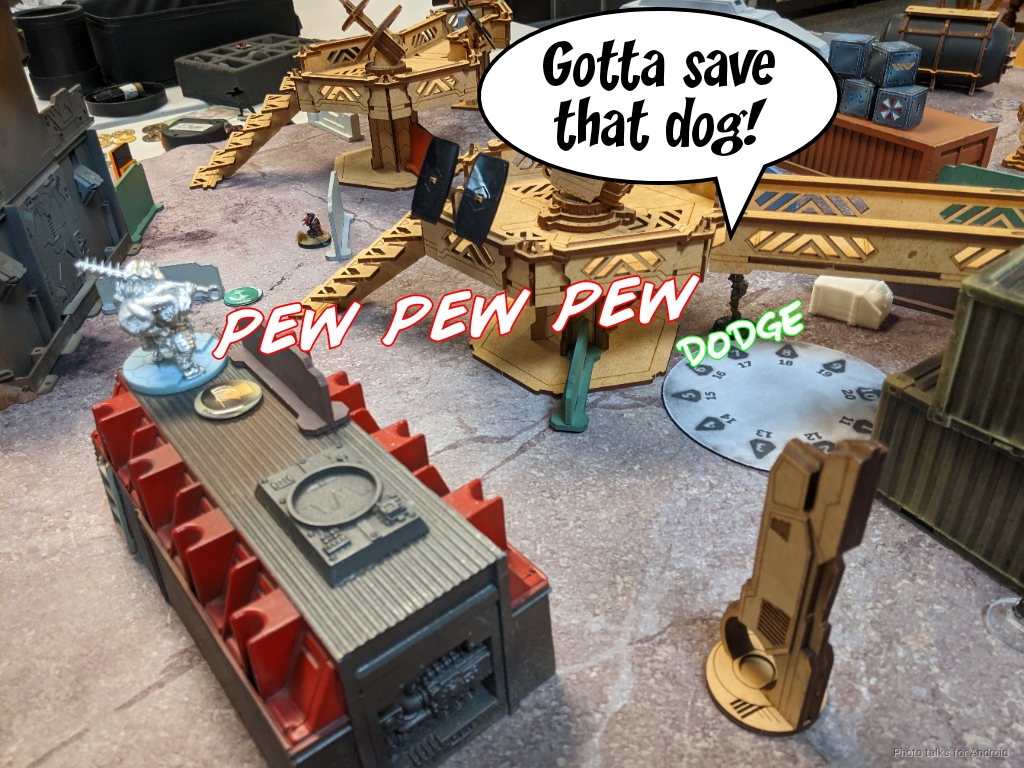
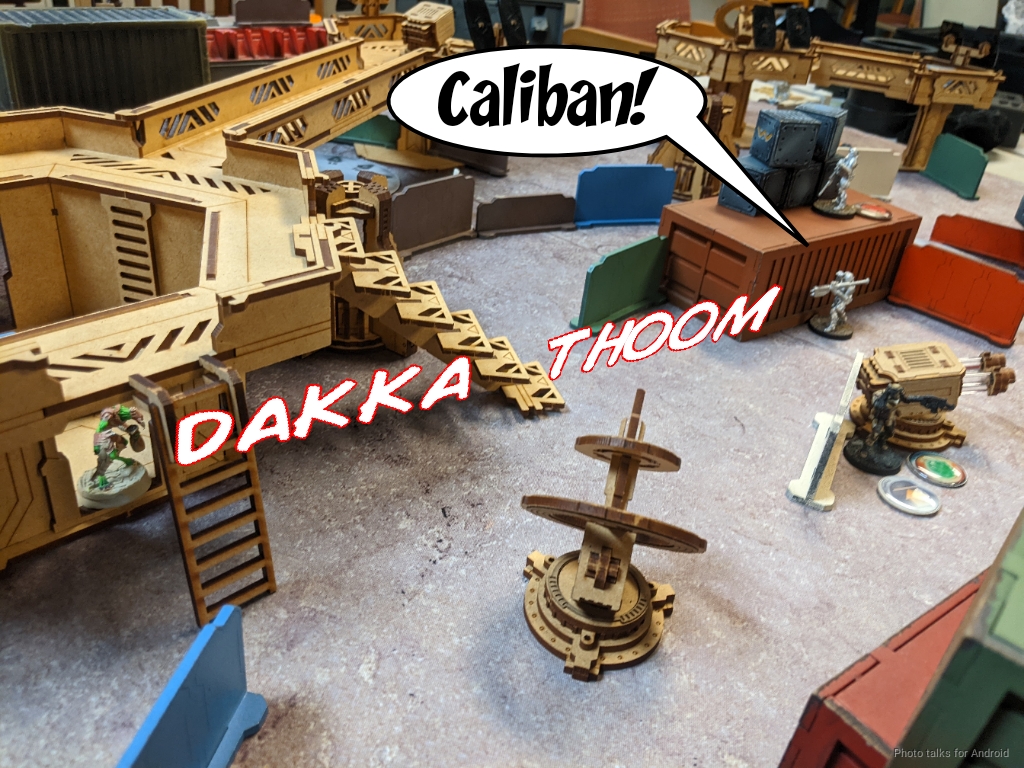
Jordan’s down to the 112, Foxtrot, Marauder HRL, a single infiltrating Grunt, and Ohio now. The 112 tries to make it over to MediKit the Marauder sniper back up, but the Caliban crits it and takes it off the table.
The Grunt infiltrator goes for Follow Up on my HVT, dodging past the Anathematic’s plasma to get into flamethrower range.
I’m not concerned about being in loss of lieutenant thanks to Mnemonica, but I am concerned about giving up the points for lieutenants killed, so I dodge the Anathematic as Jordan attempts and sadly fails Follow Up.

I fail my dodge and Jordan tries again, moving forward and letting a Taigha get dangerously close. I of course fail my dodge again. Going after the Lt kill is tough but not impossible, and I think that probably would have been a better use of Jordan’s orders? At least making one attempt on the Lt and then going for Follow Up.
After throwing his Lt into suppression, Jordan passes turn.
Bottom of 2 – Combined Army
I Berserk the Grunt with one of the Taigha and pass the ARM save on the flamethrower hit.
The other Taigha attempts In Extremis Recovery on the Grunt I plasma’ed on turn 1, but fails.
I send in the Ikadron to do it instead. This has the added benefit of covering the prone Foxtrot with a flash pulse and flamer along with the Taigha’s chain colt.

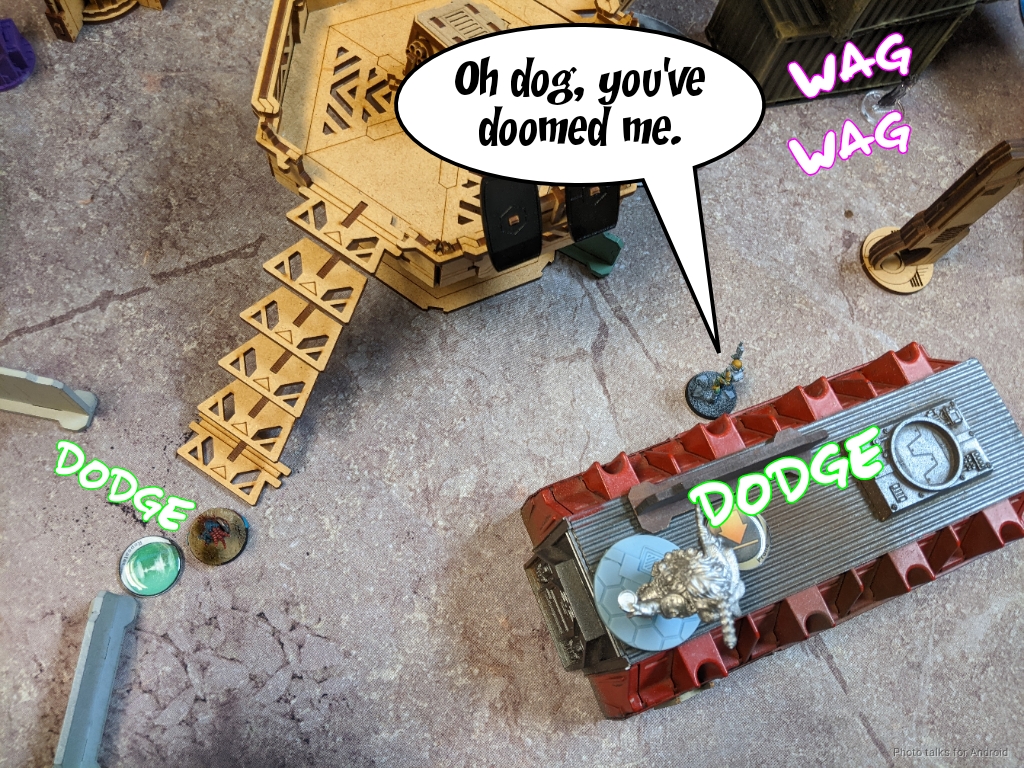
I decide to go for the lieutenant snipe, gunning down the Marauder HRL on the way.
I recamo and make it into view of the Ohio, daring him to break suppression to discover. He declines.
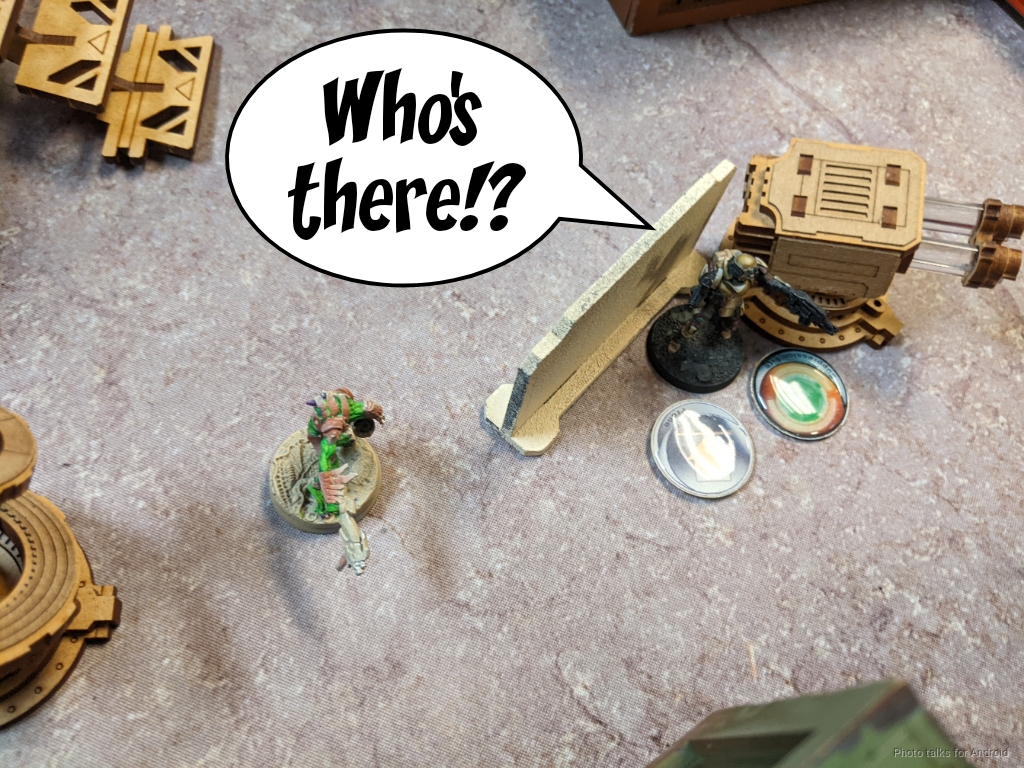
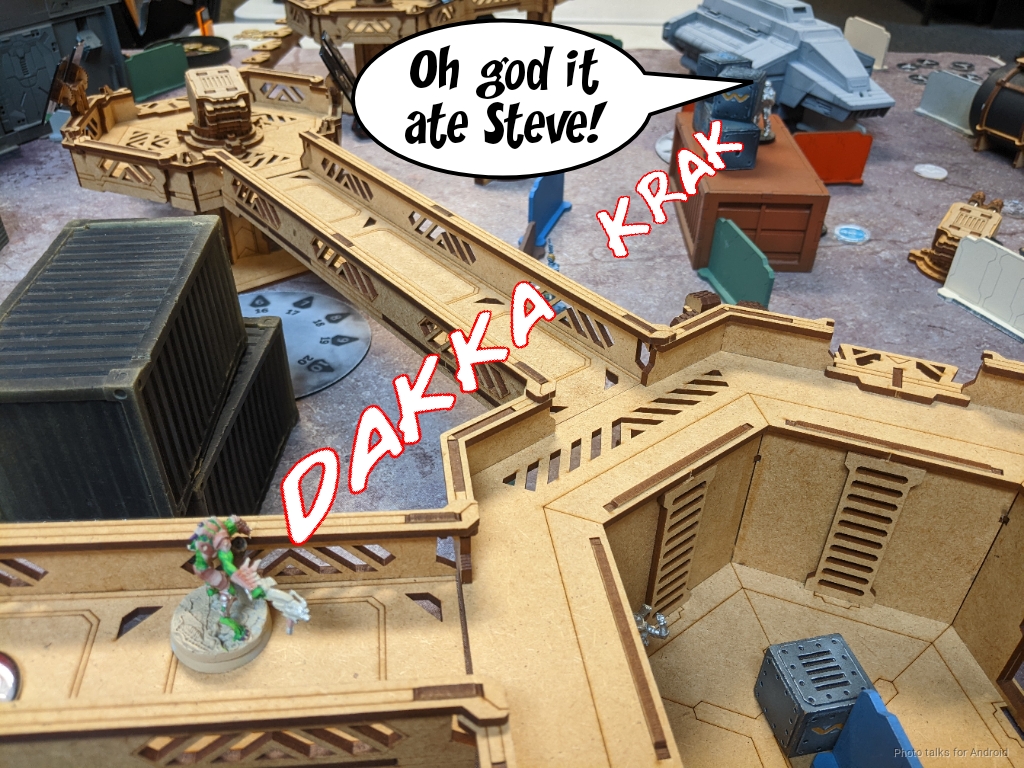
I roll into close combat and D-Charge the Ohio off the table.
I recamo and pass turn with a Taigha within 8″ of Jordan’s HVT.
Turn 3
Top of 3 – USARF
With that, Jordan’s only got the Foxtrot left and declines to spend any orders. I’ve only lost a Taigha and an Imetron, so I’ve definitely got more army points killed. I didn’t pull anything from the panoplies though, so it’s a
9-1 Combined Army Victory!
Post Game Analysis
That was a pretty rough game for Jordan. He took it all in stride and handled it very well. We stuck around for a bit to discuss what happened and what he could’ve done to improve his situation. I hadn’t really put together the action economy versus return on investment on the panoply play at the time, but I think I covered that pretty well earlier in the report. I think the panoply play itself was fine, it was more the slight overextension of the Unknown Ranger’s link team that really caused the issue. I got very lucky with a complete link team melt thanks to the Overdron, but I was prepared to spend more orders to get the same result if I had to.
The Xeodron turned out to be a very expensive order generator this game, I really only used its tac aware order to bounce around behind the building to hide from various threats. The Caliban was absolutely amazing, ending the game in Jordan’s deployment zone with a full 3 wounds. Crazypants. I absolutely got lucky with only losing the Imetron to the Grunt at the beginning of the game, but it did more or less take the Xeodron out of the fight thanks to all the wounds on it.
I think probably the thing to do for Jordan’s first turn would have been to move the link out and up to the catwalk where the Caliban ate the Grunt. That would’ve allowed the UKR to challenge the Xeodron and potentially take it down, and then be there making it difficult for the Taigha and Caliban to advance. Then I have to dig it out very carefully, probably stalling out my turn and disrupting my defensive net. Van Zant comes on at the top of 2 to do damage specifically to my order pool, ignoring the TAGs, and then I’m in a pretty rough position.
Having the albedo to effectively negate all of Jordan’s big guns at the beginning of the game was very strong. That basically negated the whole link for a turn, which was great. The Grunts are very annoying but don’t hit very hard outside of 8-16″ and are pretty order intensive to run. If I can survive one then I’m pretty safe. I think one thing that could have been improved about the run with the Grunt at the beginning would have been to attempt to slice the pie a little more and get more of my orders scalpeled off the table. More order intensive but higher likelihood of success. That also helps weaken the defense against Van Zant by turning Kiss off once Bit dies.
To take a look at the shape of the game, literally, I think at the bottom of one Jordan had overextended the UKR’s link, which actually opened up a lot of attack vectors for me. I had a few Taigha attack runs I could have made or a flank with the Xeodron, but I decided to use the Overdron instead, mostly because I wanted to play with the plasma sniper. It worked out better than I could have hoped for, but I had tons of options. The reason for this is that he had pushed them forward, which opens a larger attack surface from both sides of my deployment zone, so I can choose when, what, and how to interact with them. Spending the orders to retreat them after getting one panoply thing would’ve been good–bunching them up like that with so many templates on my side of the table was needlessly risky.
I’m really convinced that the Overdron is pretty integral to this type of list. There’s just so much MSV1 on the table now that it’s important to have a soft counter like this. I say soft counter because sixth sense still makes it’s pretty difficult to pick part a link team, especially if the only thing visible is the MSV thing with the gun out for ARO. You really need a different attack vector to take out two units to get rid of the sixth sense bonuses.
There’s also the tendency, at least for me, to run only a 4-model team to save on points. I see links primarily as a way of collecting a grab bag of tools, and that generally is counter to having a homogenous link of all the same type of trooper, meaning I won’t get the full +3 BS at 5. So, 4-models is “good enough” but that does make the link overall more fragile because it’s now more susceptible to something like a Speculo, Caliban, or Greif taking out the 4th member and then letting the Overdron get to work.
In some sense, the Xeodron is a good secondary attack vector here, but it’s also pretty risky if your opponent has a hacking net up, hence the Caliban. I really like the Spitfire because it’s essentially a 4th primary gun in the list–but it’s so hard to fit in most of these heavy metal lists. I might have to settle for the engineer profile with the SMG. It’s a very different toolkit, but it does add a Pulzar for when you’ve had some snacks and can afford to just throw templates down instead of taking the face to face.
I don’t think the table was overly open this time around, but I do think that most of the folks in my meta haven’t really seen a lot of TAGs being played, or lots of plasma, so that’s why we’re seeing this strategy pay off for now. We’ll see how long I can keep this up out of Combined, it’s been a blast so far, but I will need to help other players practice, and perhaps it would make more sense to play a more traditional list for that purpose. In any case, thanks to Jordan for a fun game, and thanks for reading!
Pingback: Riot Against the ISS Machine – MERC Recon