Gutsy Gamma
I imagine most folks in the US-based Infinity community are aware that Jeff of Shiv Games fame is now in Salem, Oregon, which is only an hour away from where I live. When one of the pillars of the US Infinity community hosts an inaugural tournament at their new game store location only an hour away from you and you have childcare, you go! Unlike some people *cough* Adam (TheDiceAbide) *cough*. The Vancouver, WA crew (who are two hours away) showed up to represent, and we even had a representative from Seattle! Here’s to Tony (Zhukov2) for getting up at 5AM to make the drive. He even got there early to help set up! What a guy!
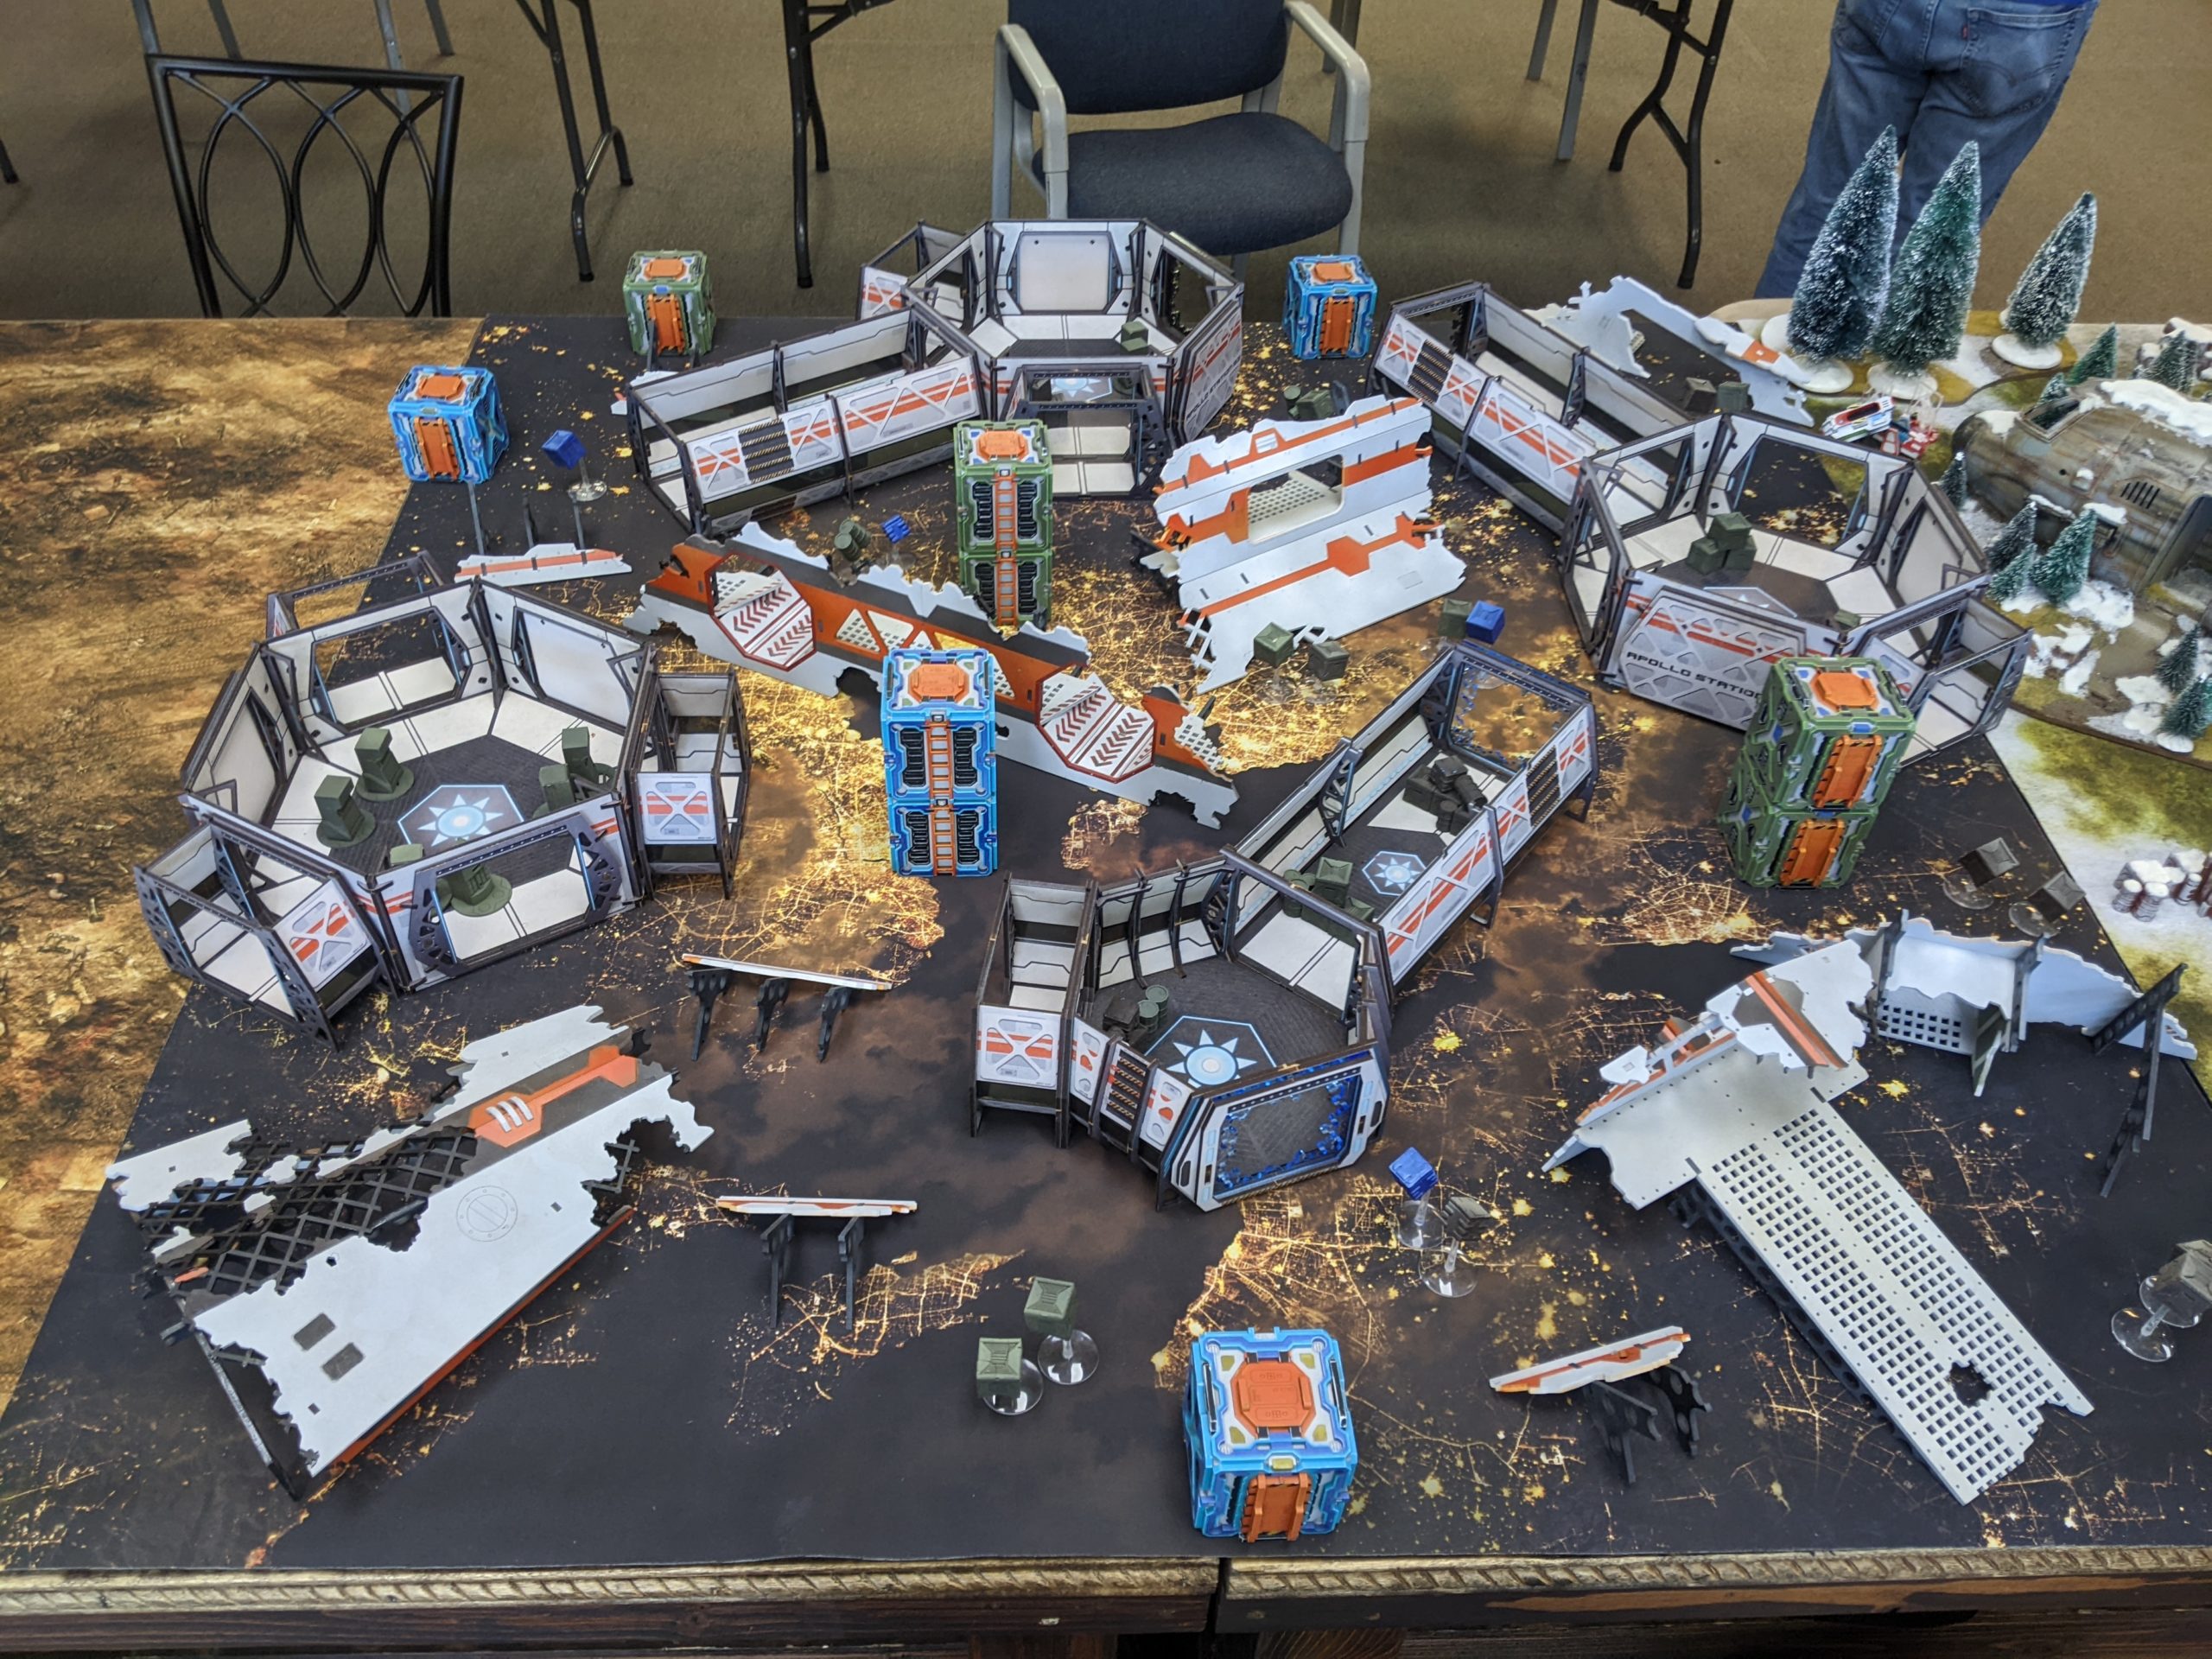
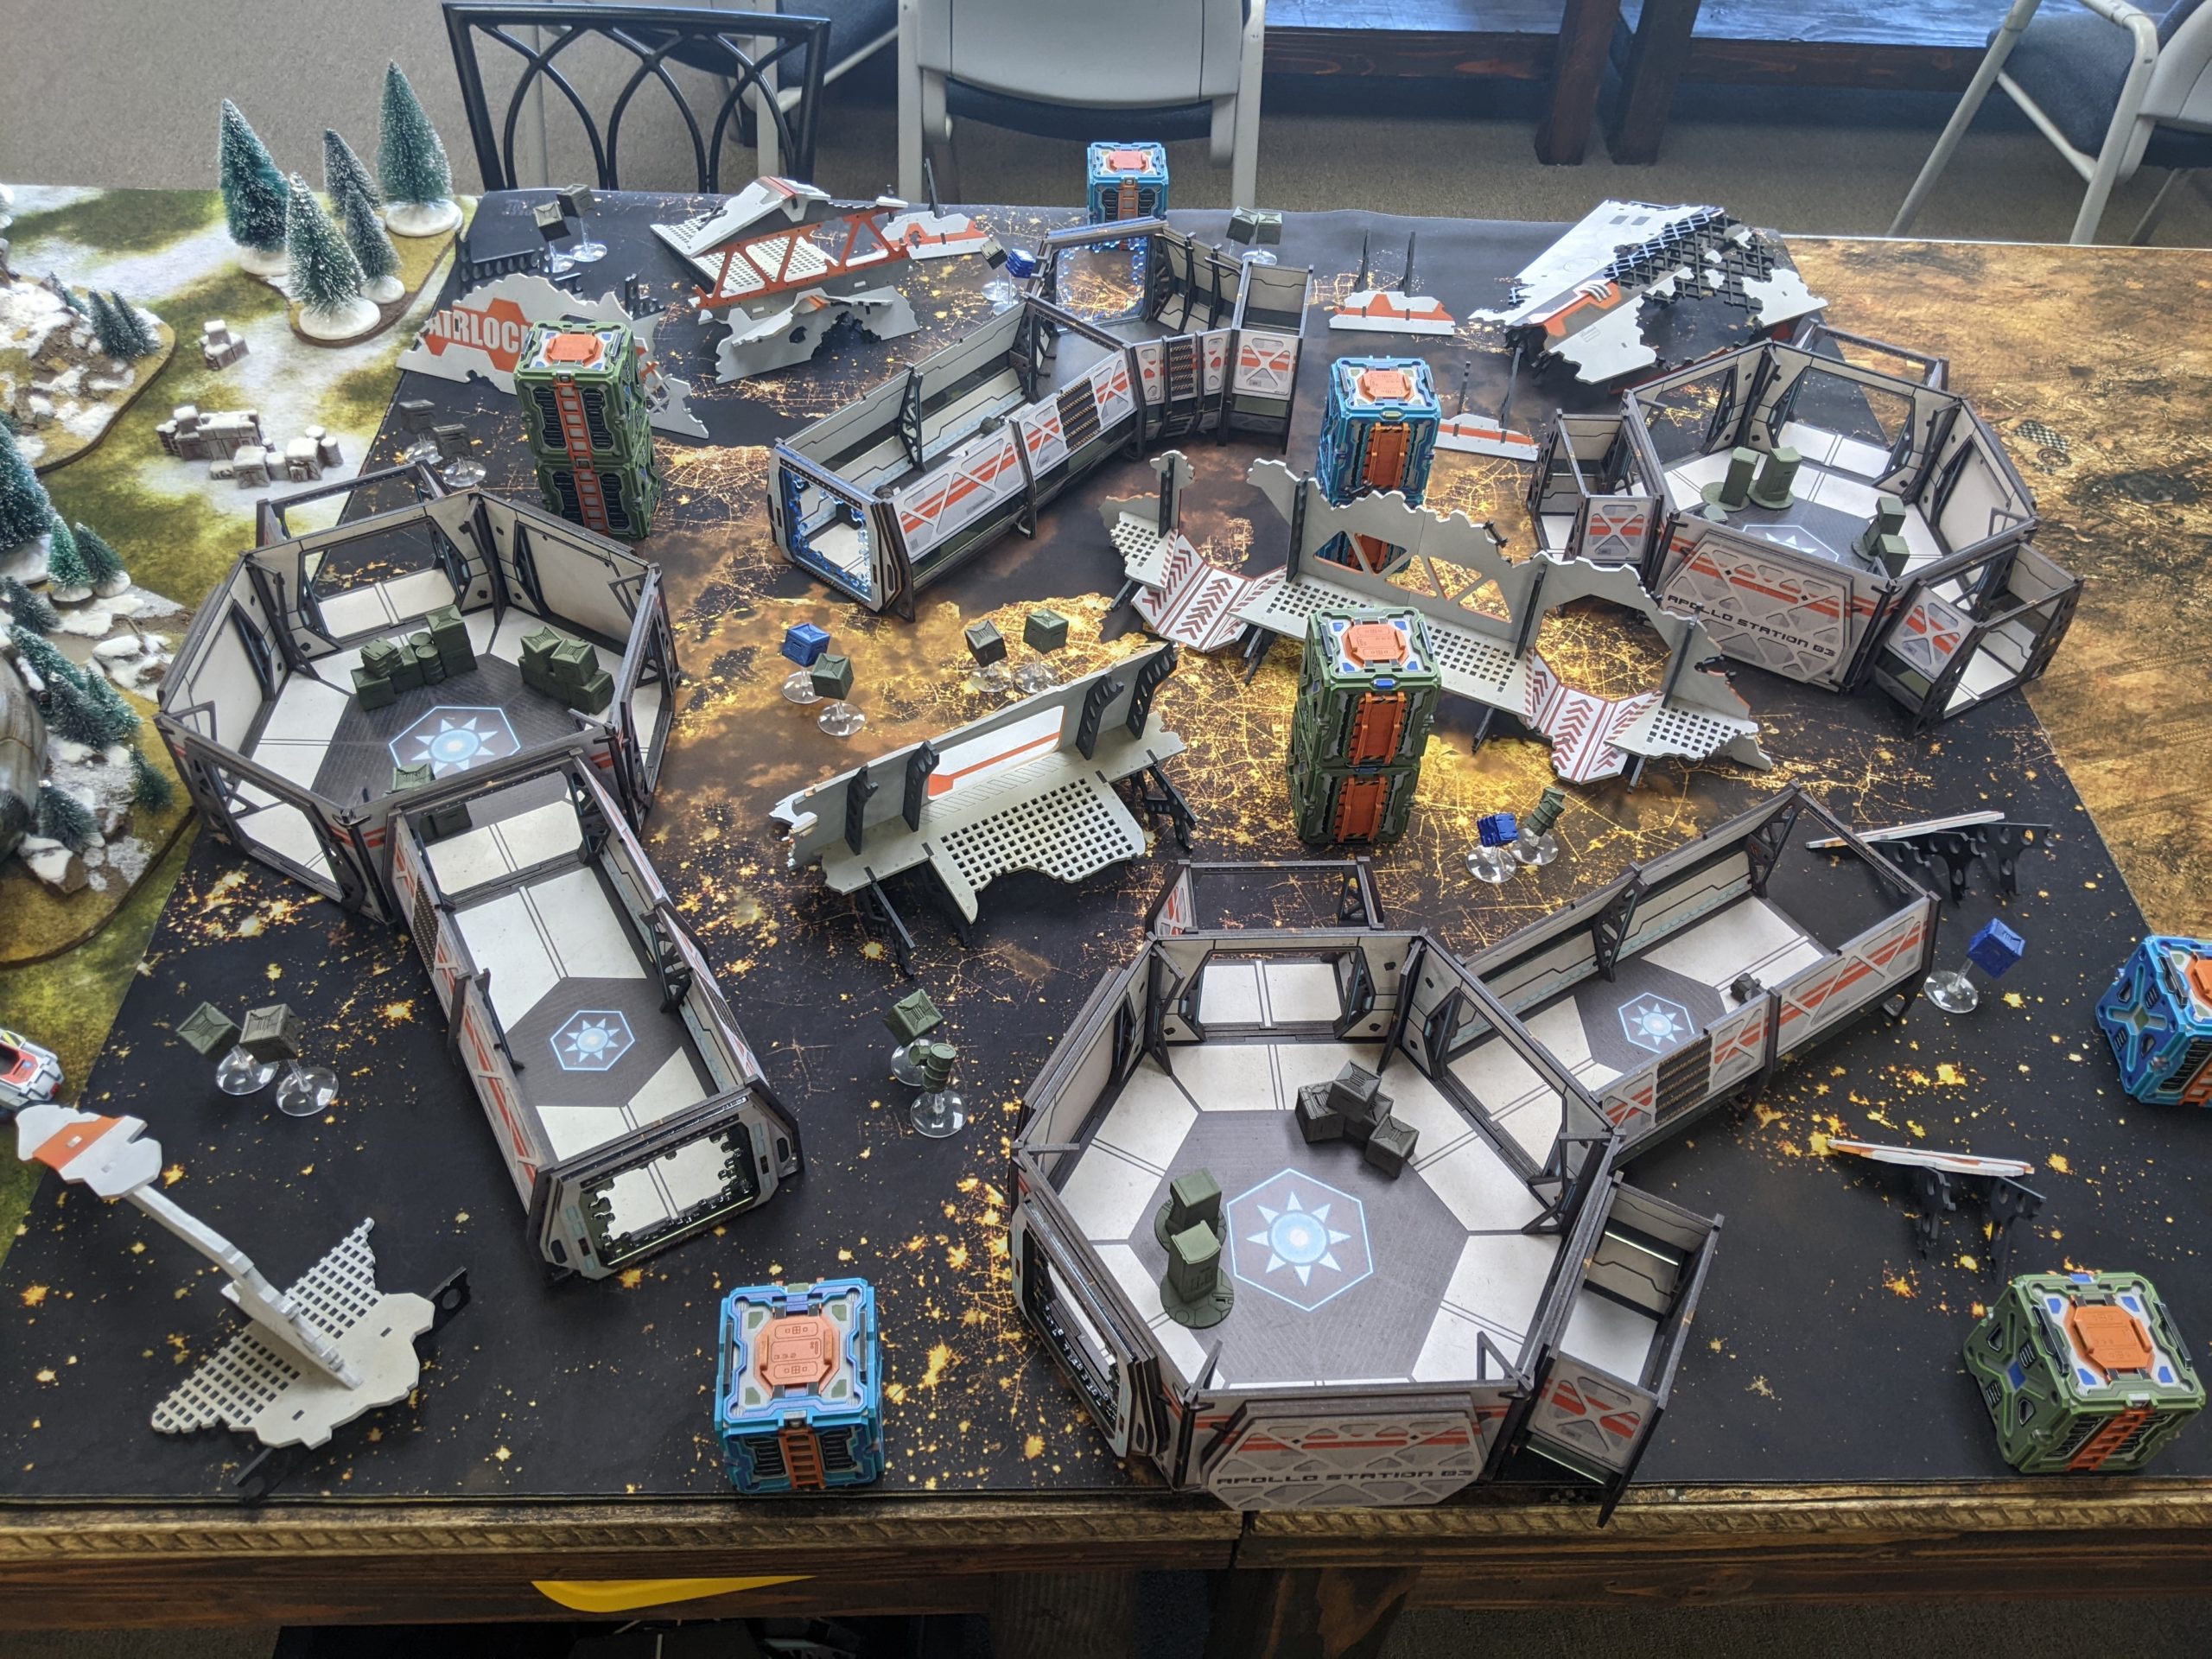
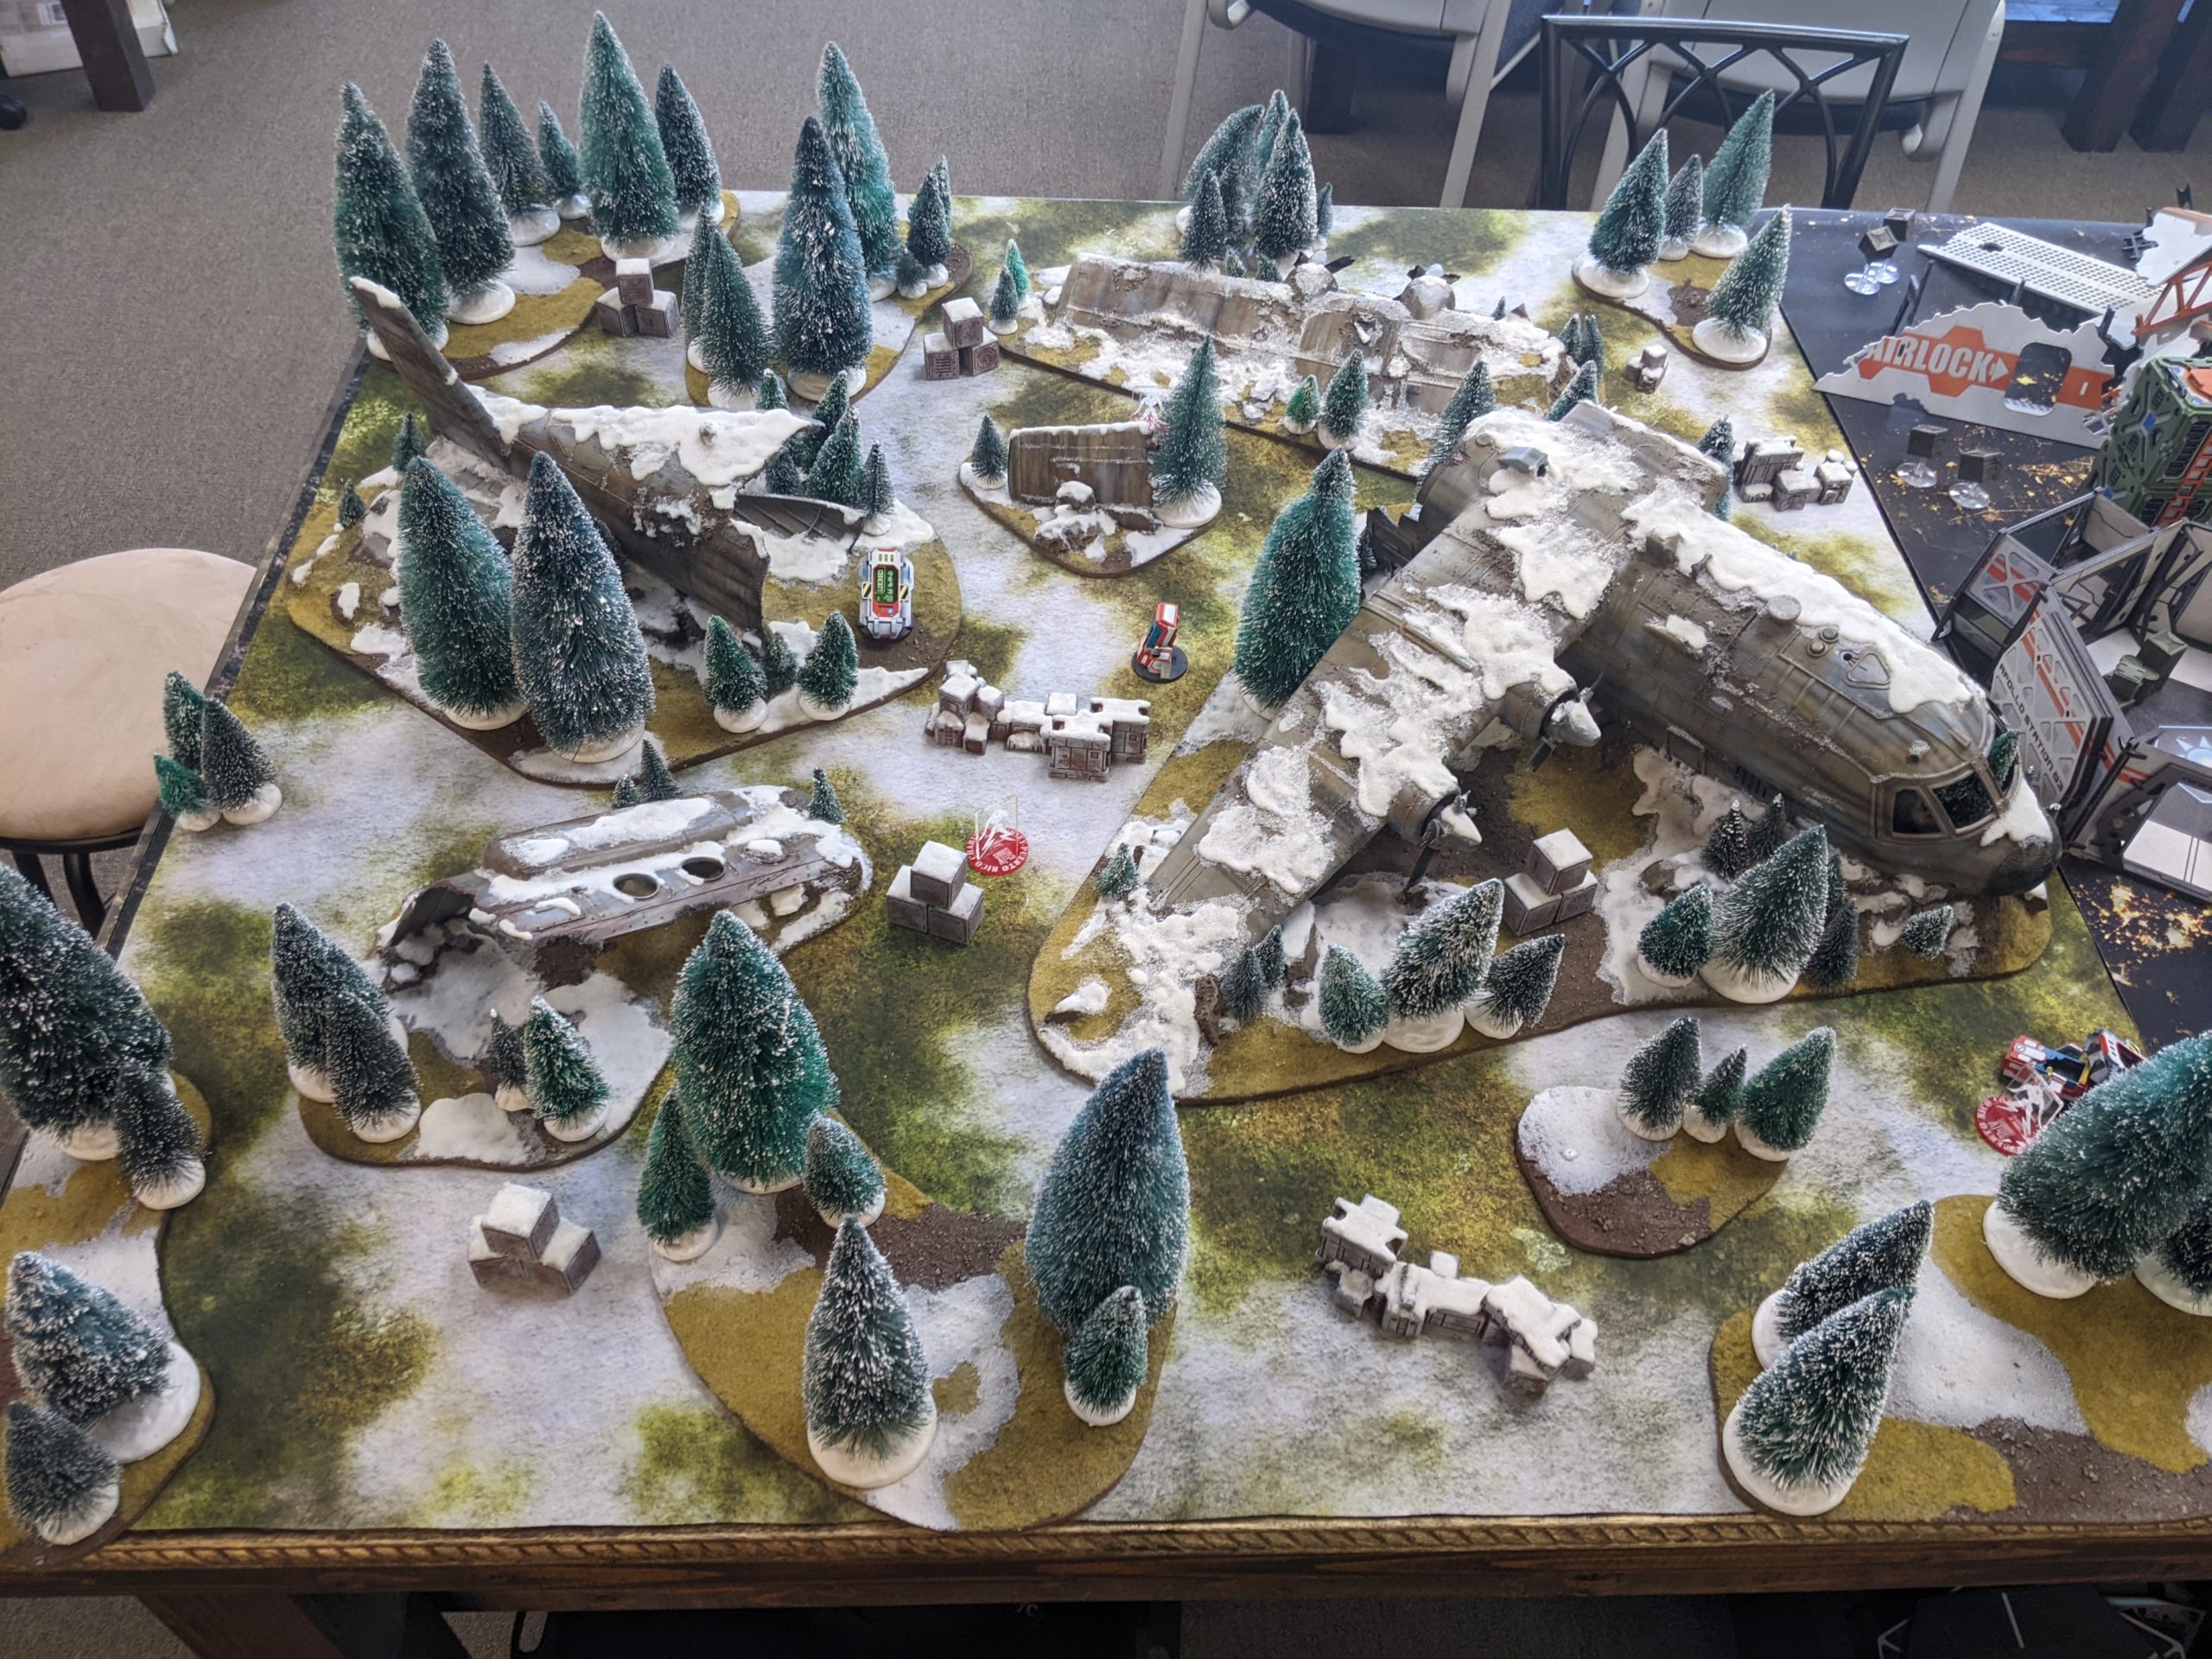
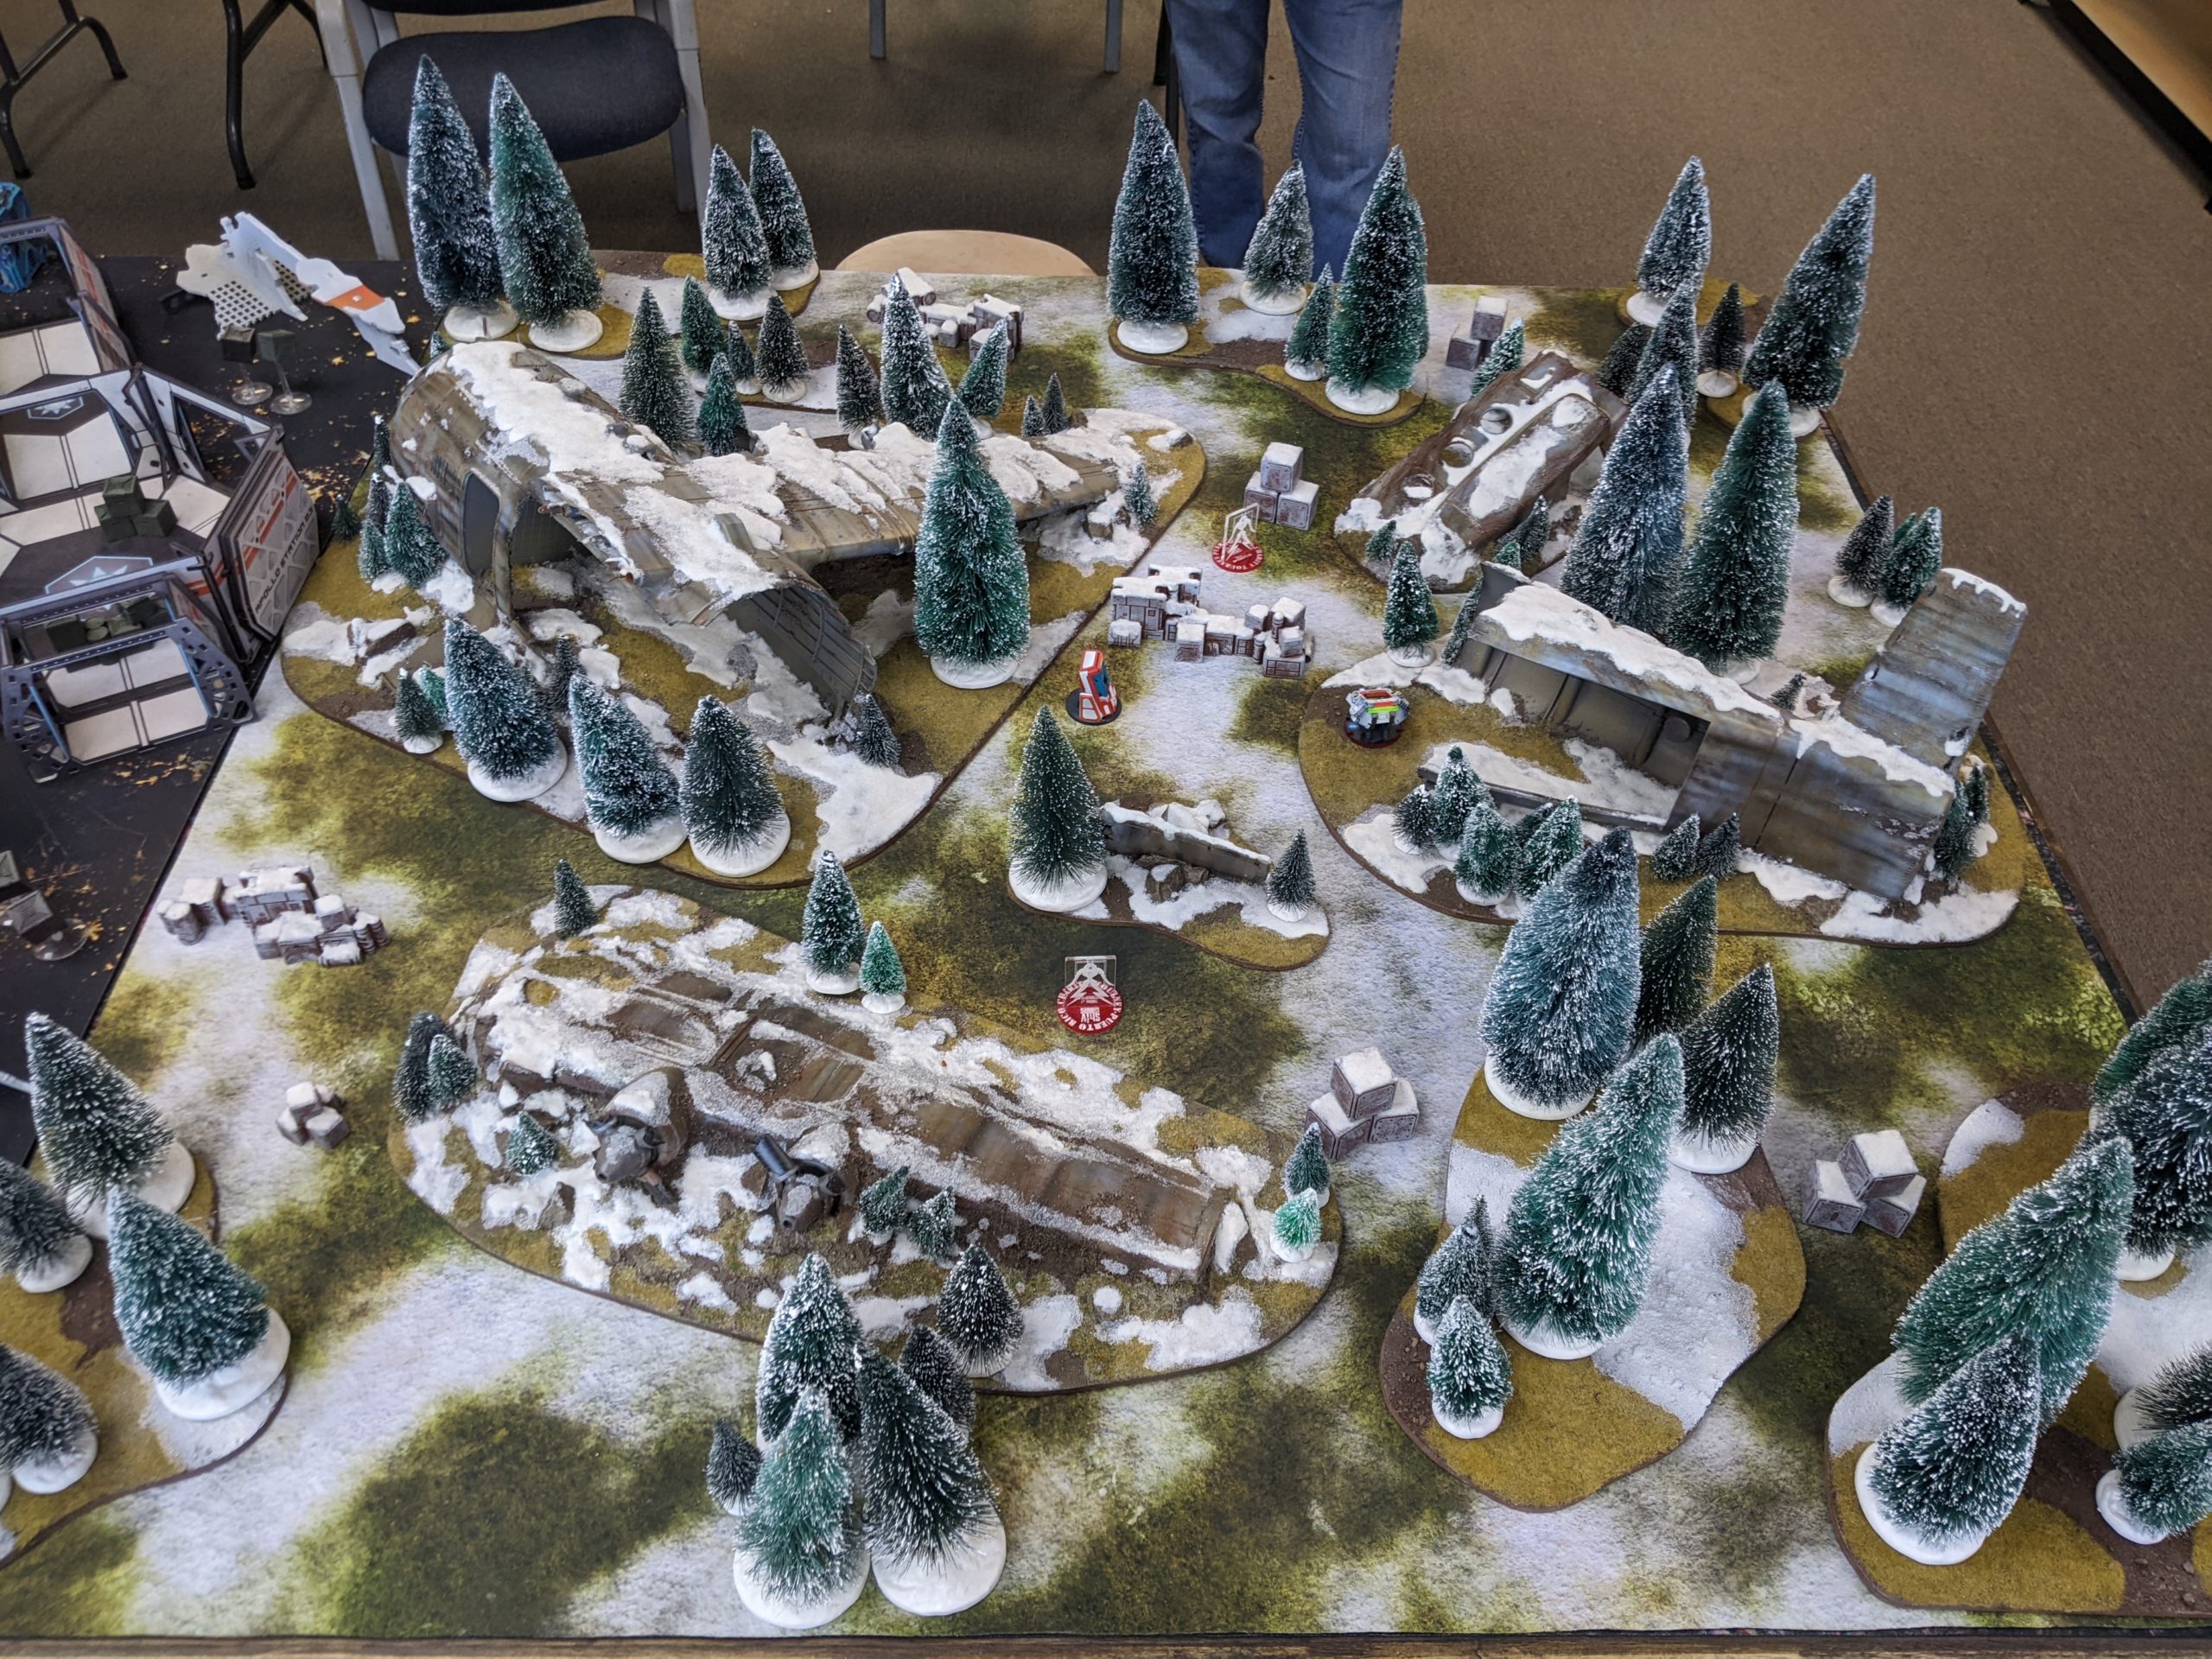
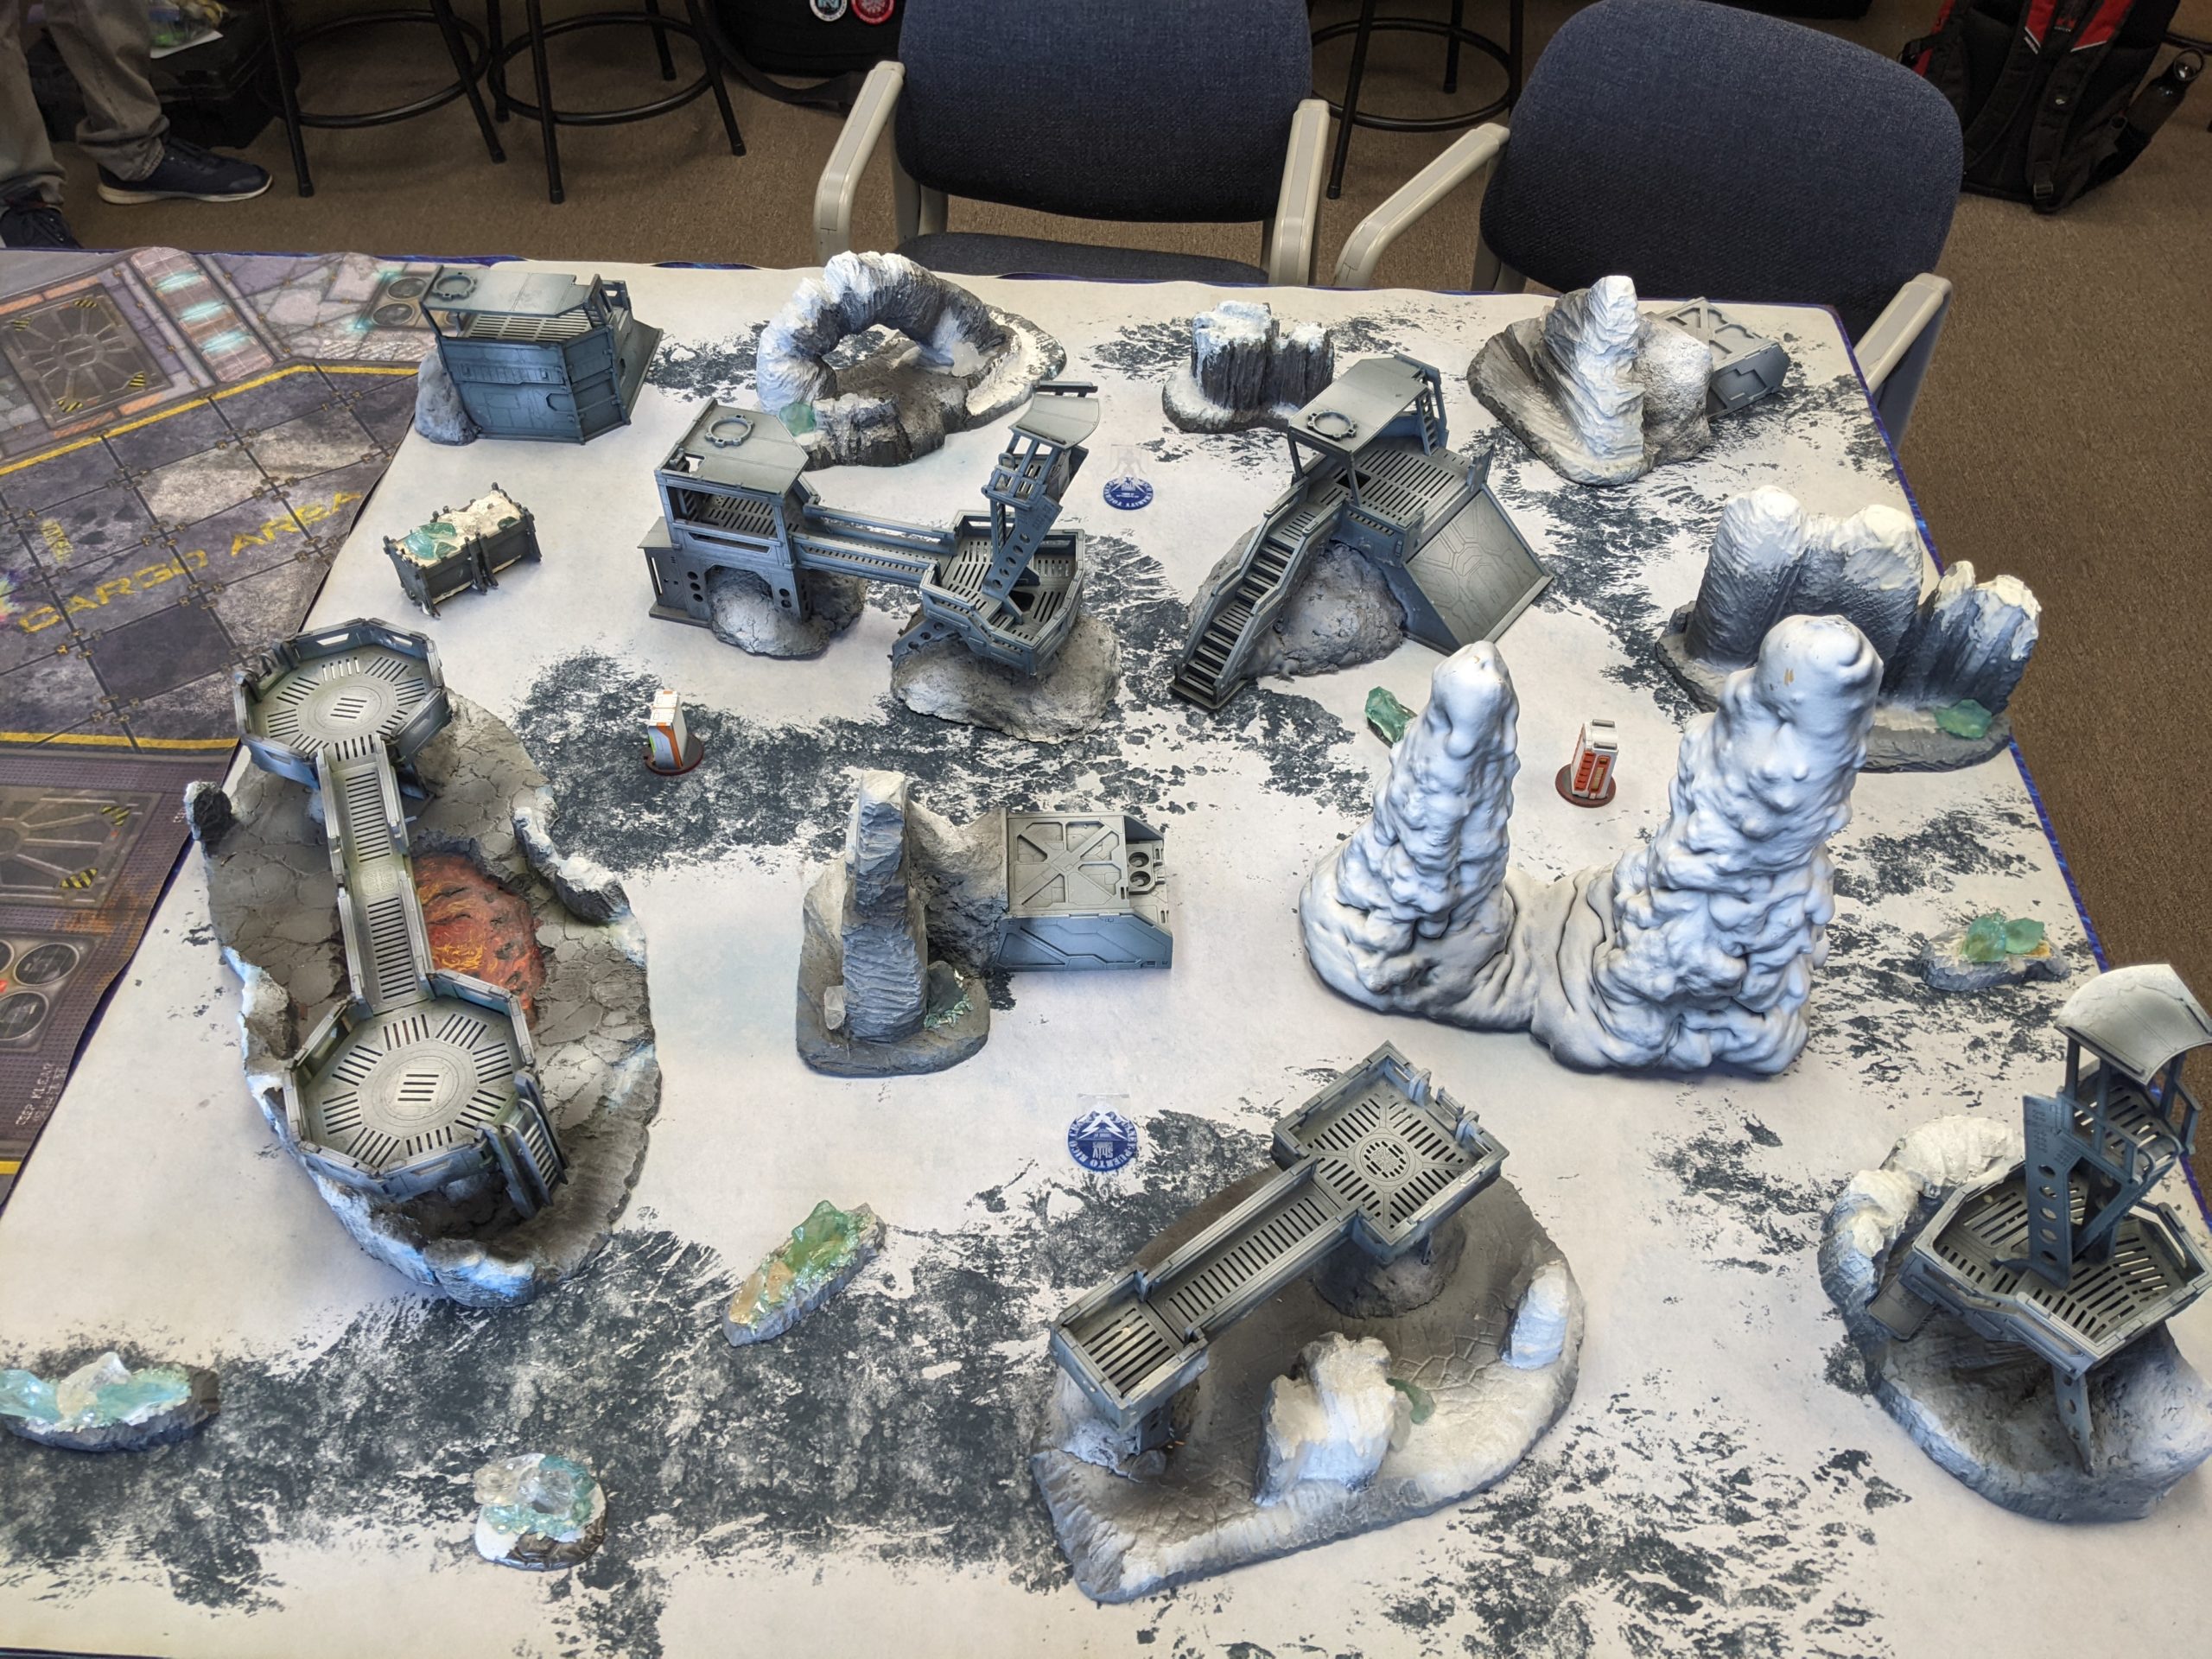
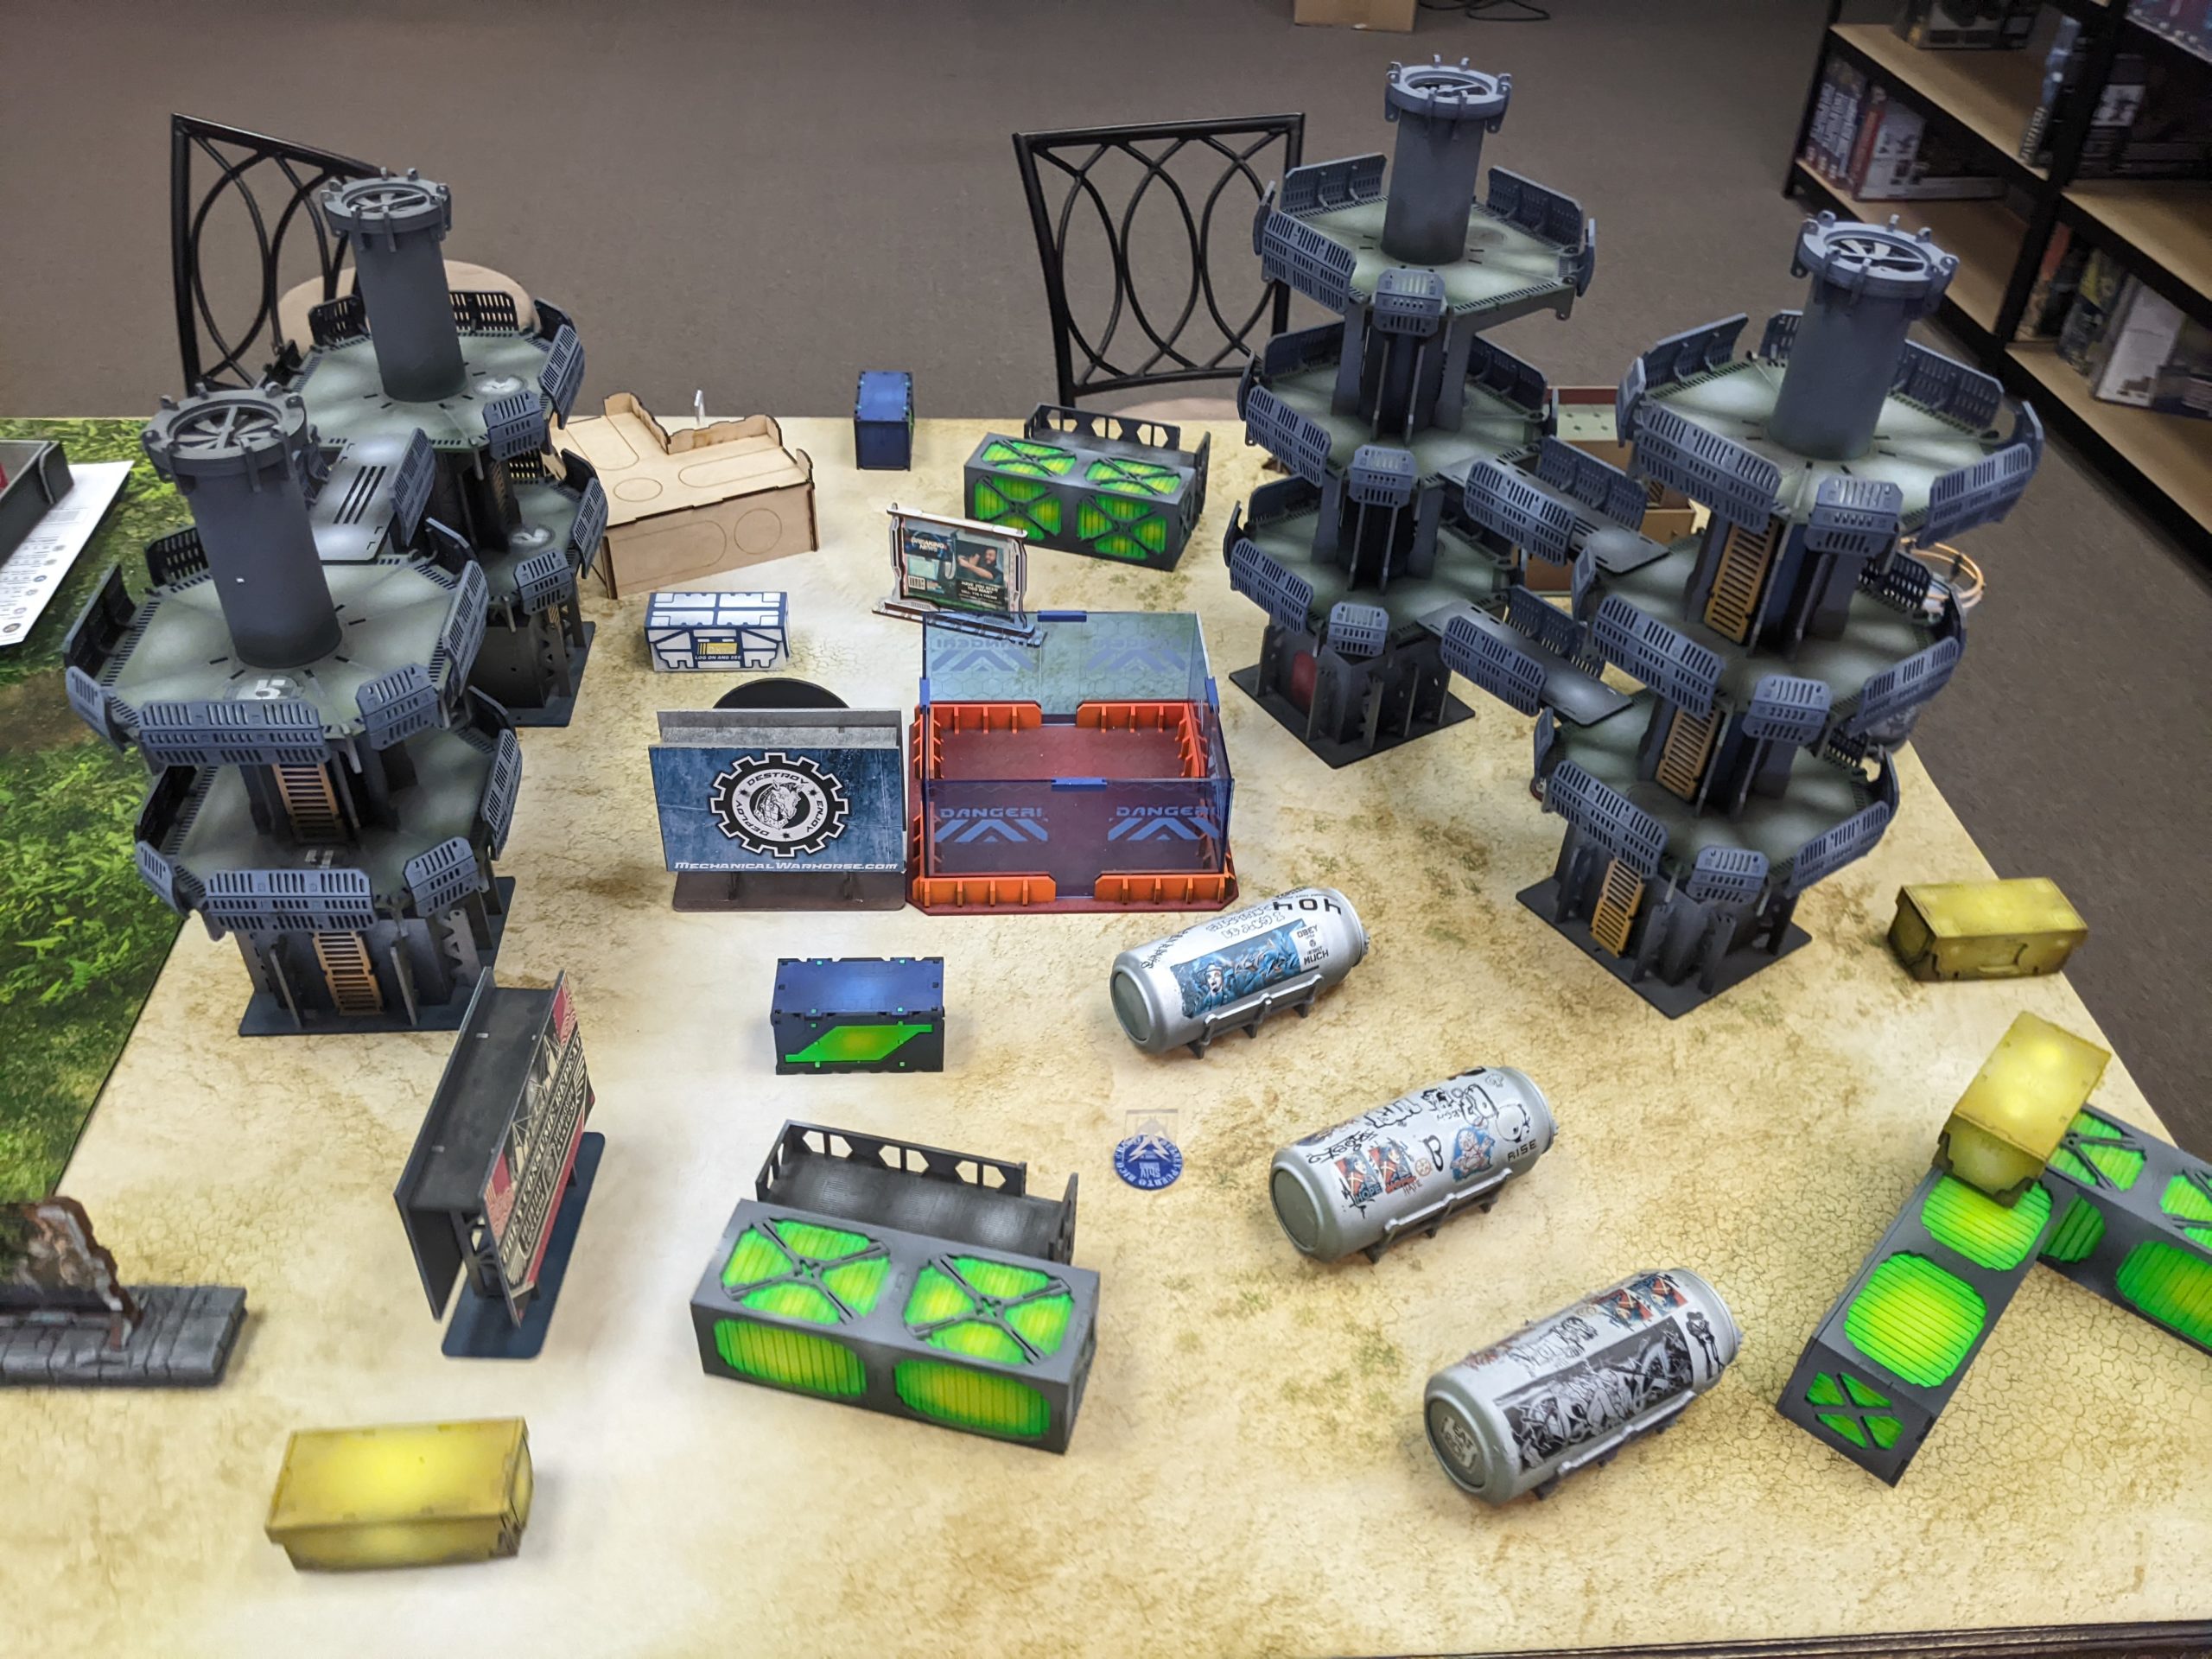
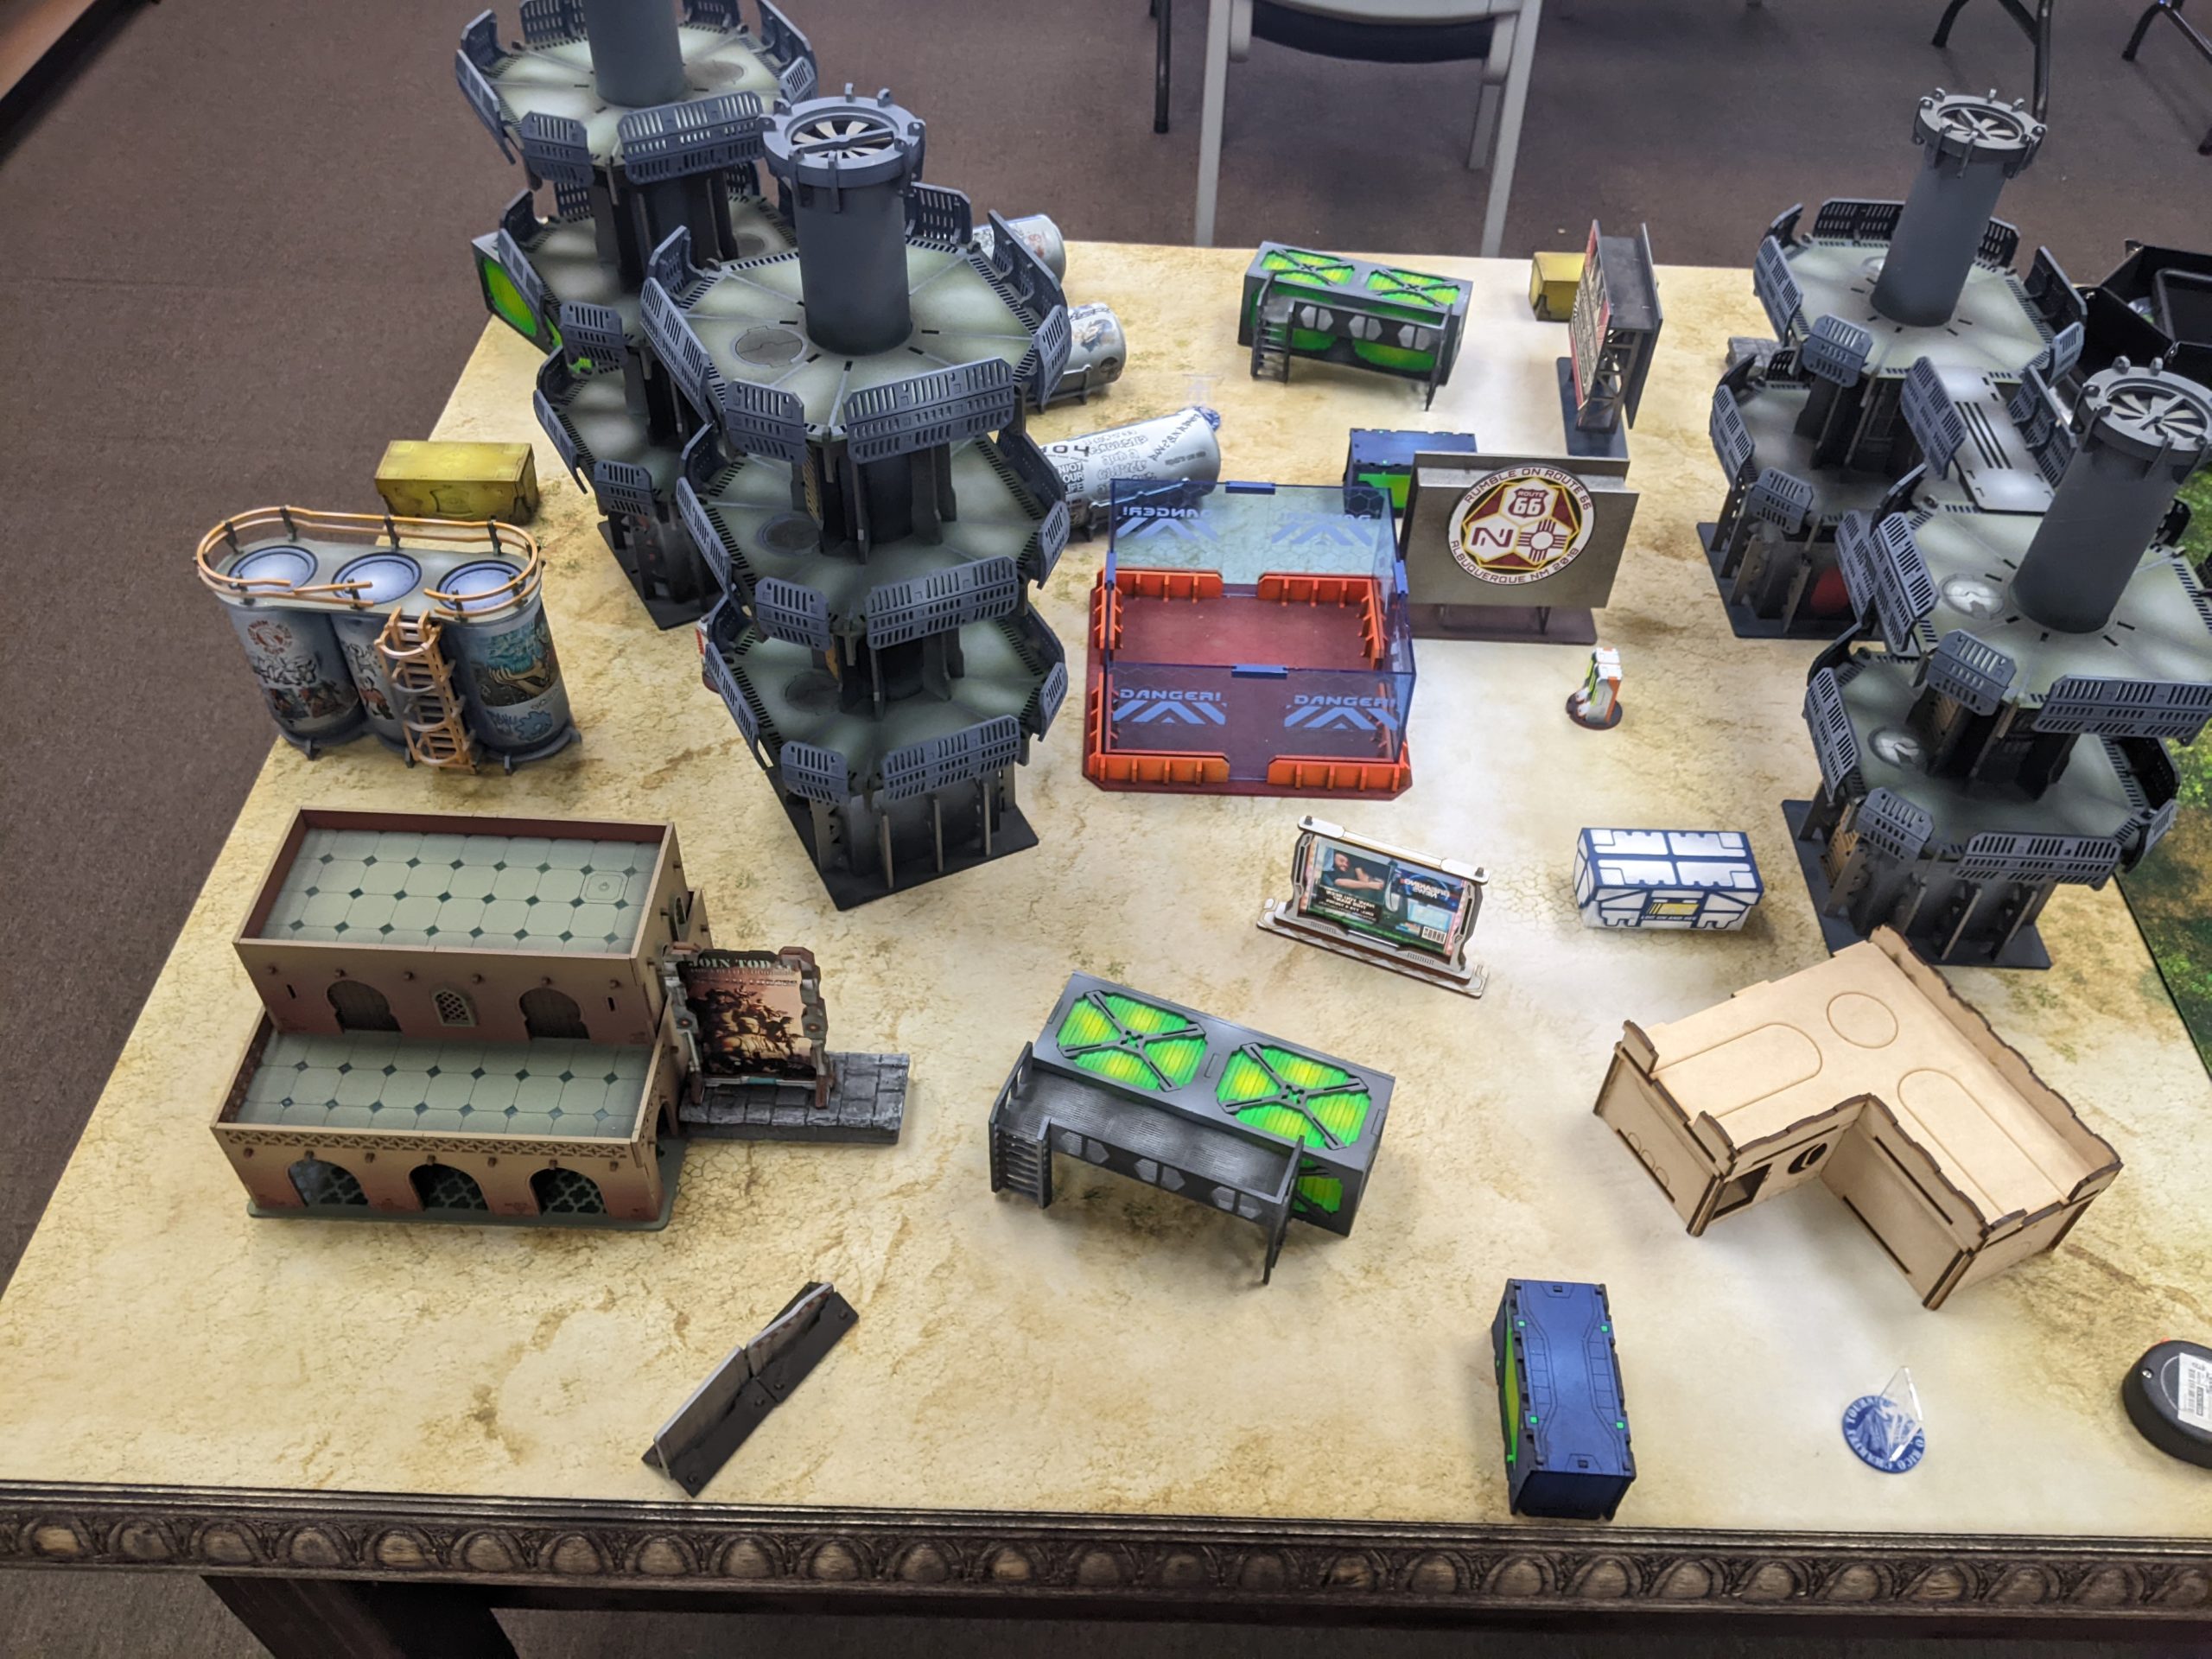
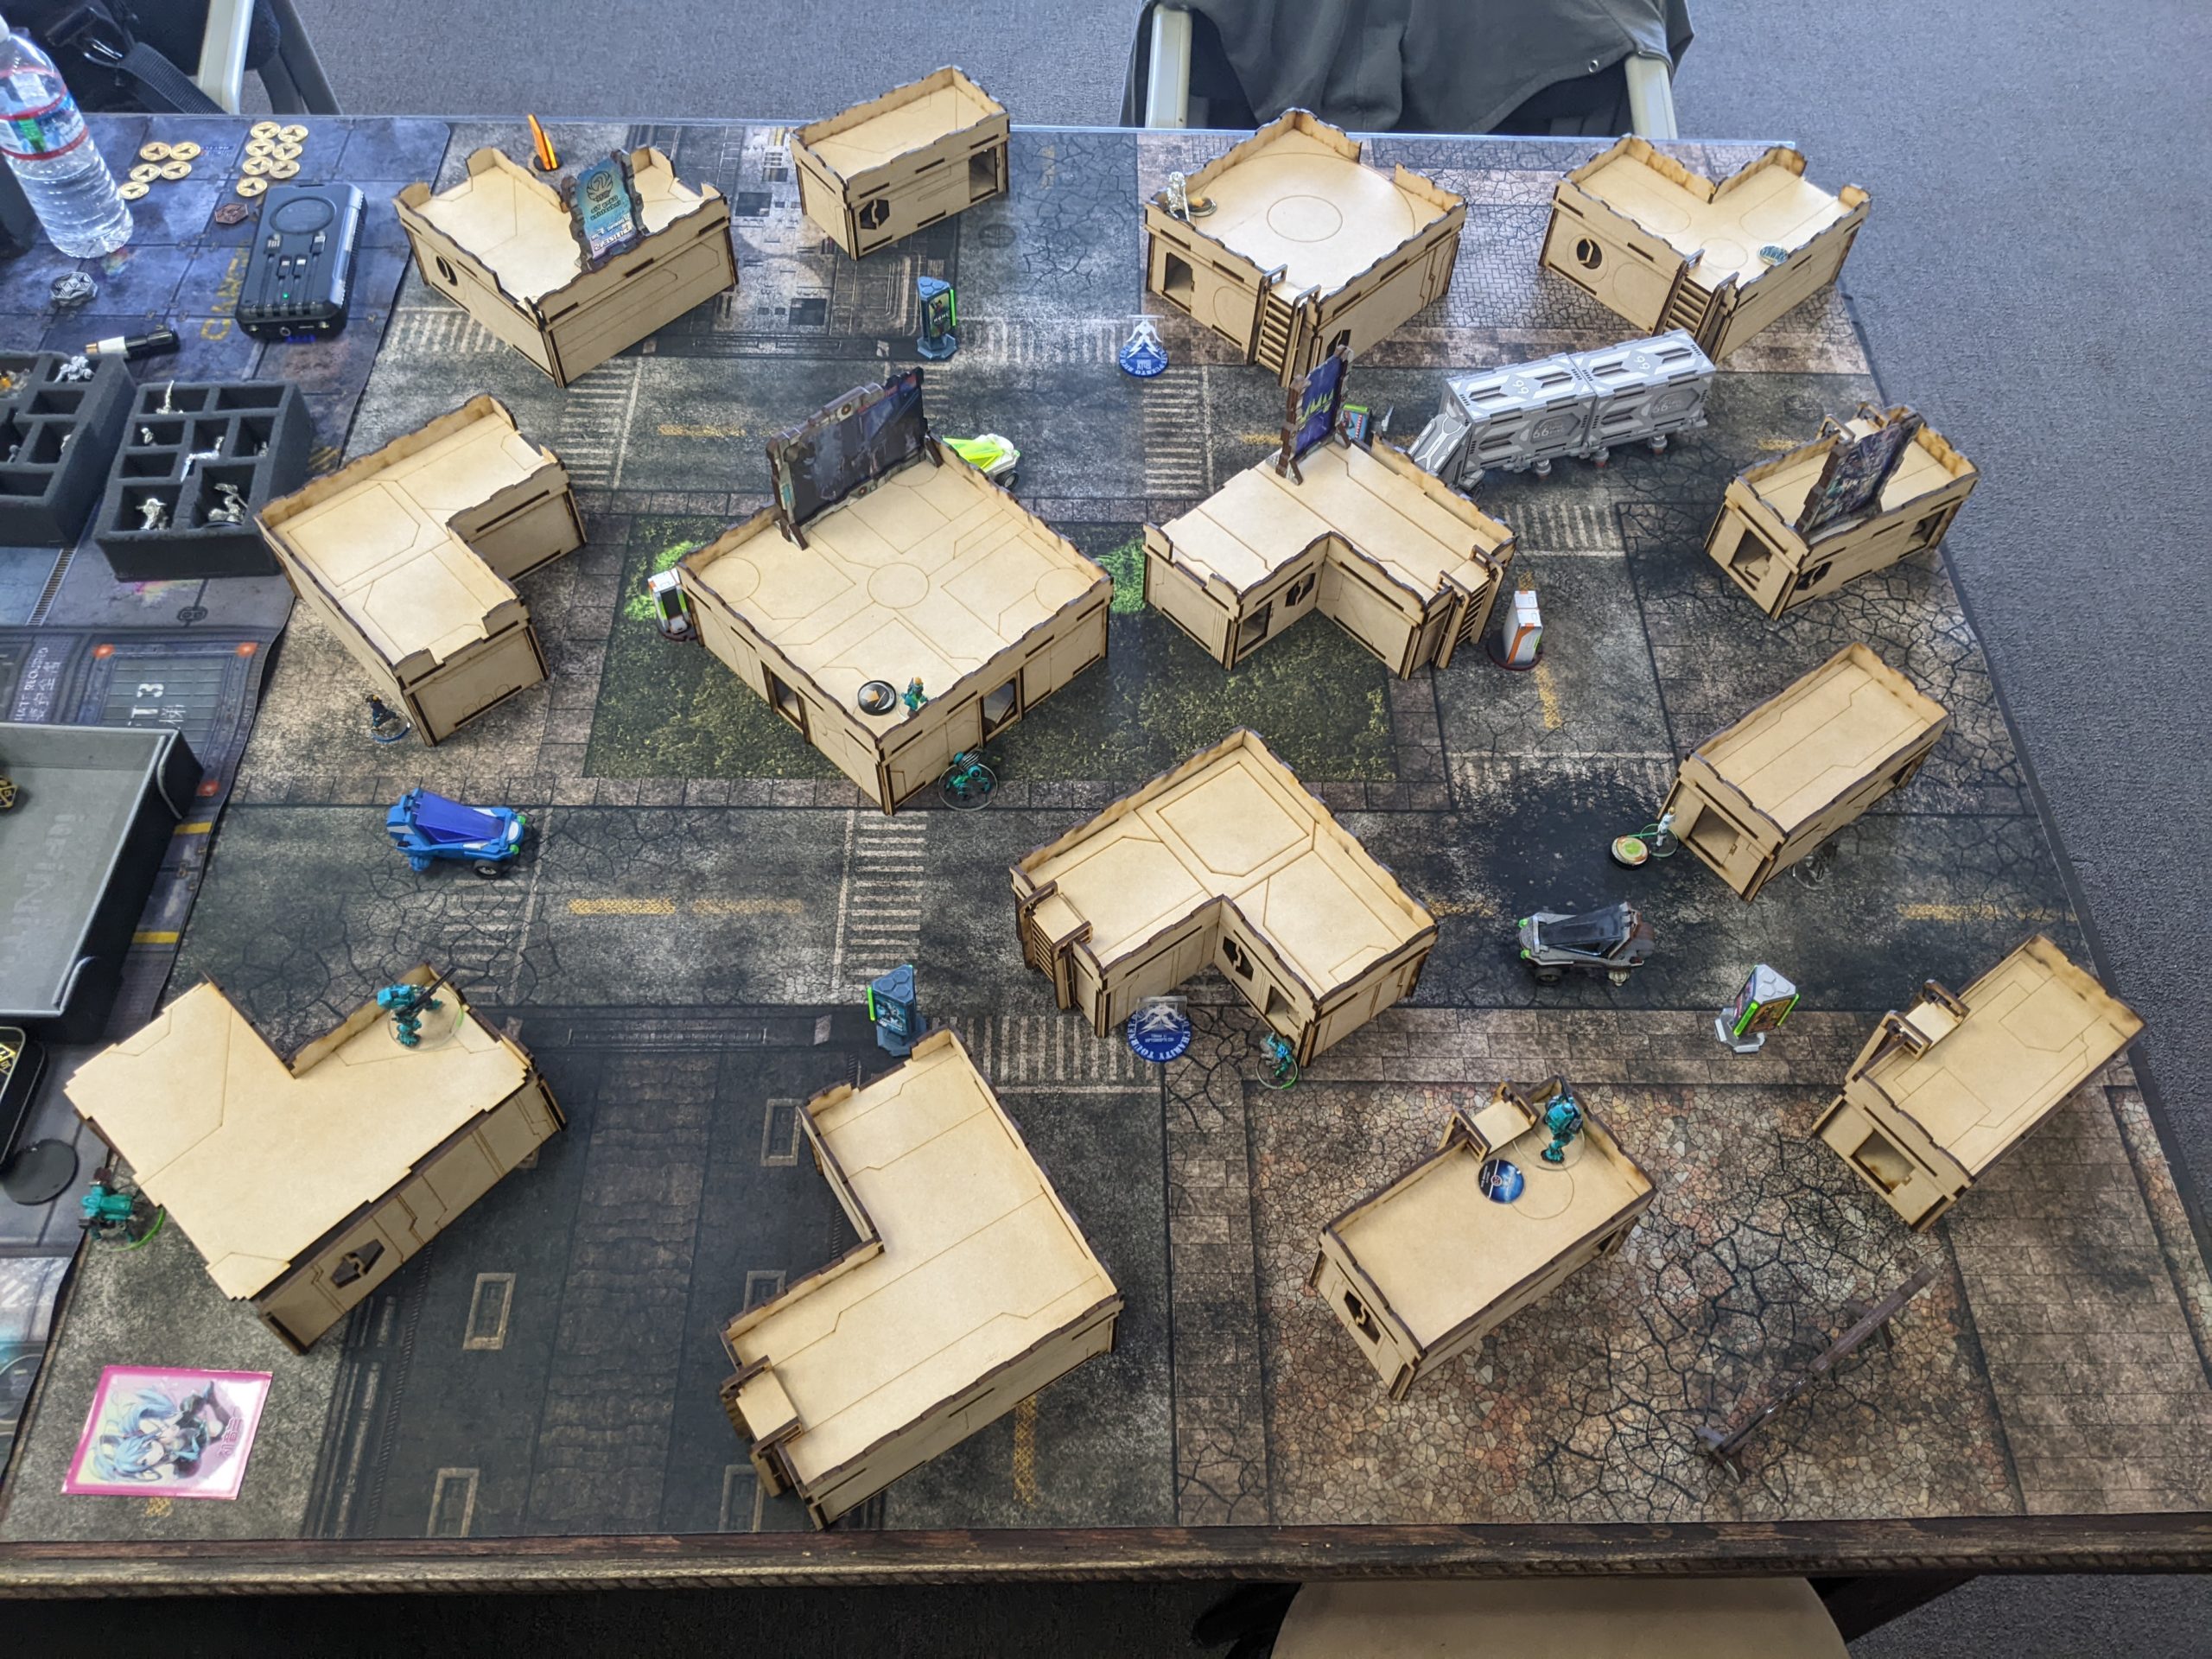
Jeff laid out the following spread of tables for us to enjoy and test our mettle on.
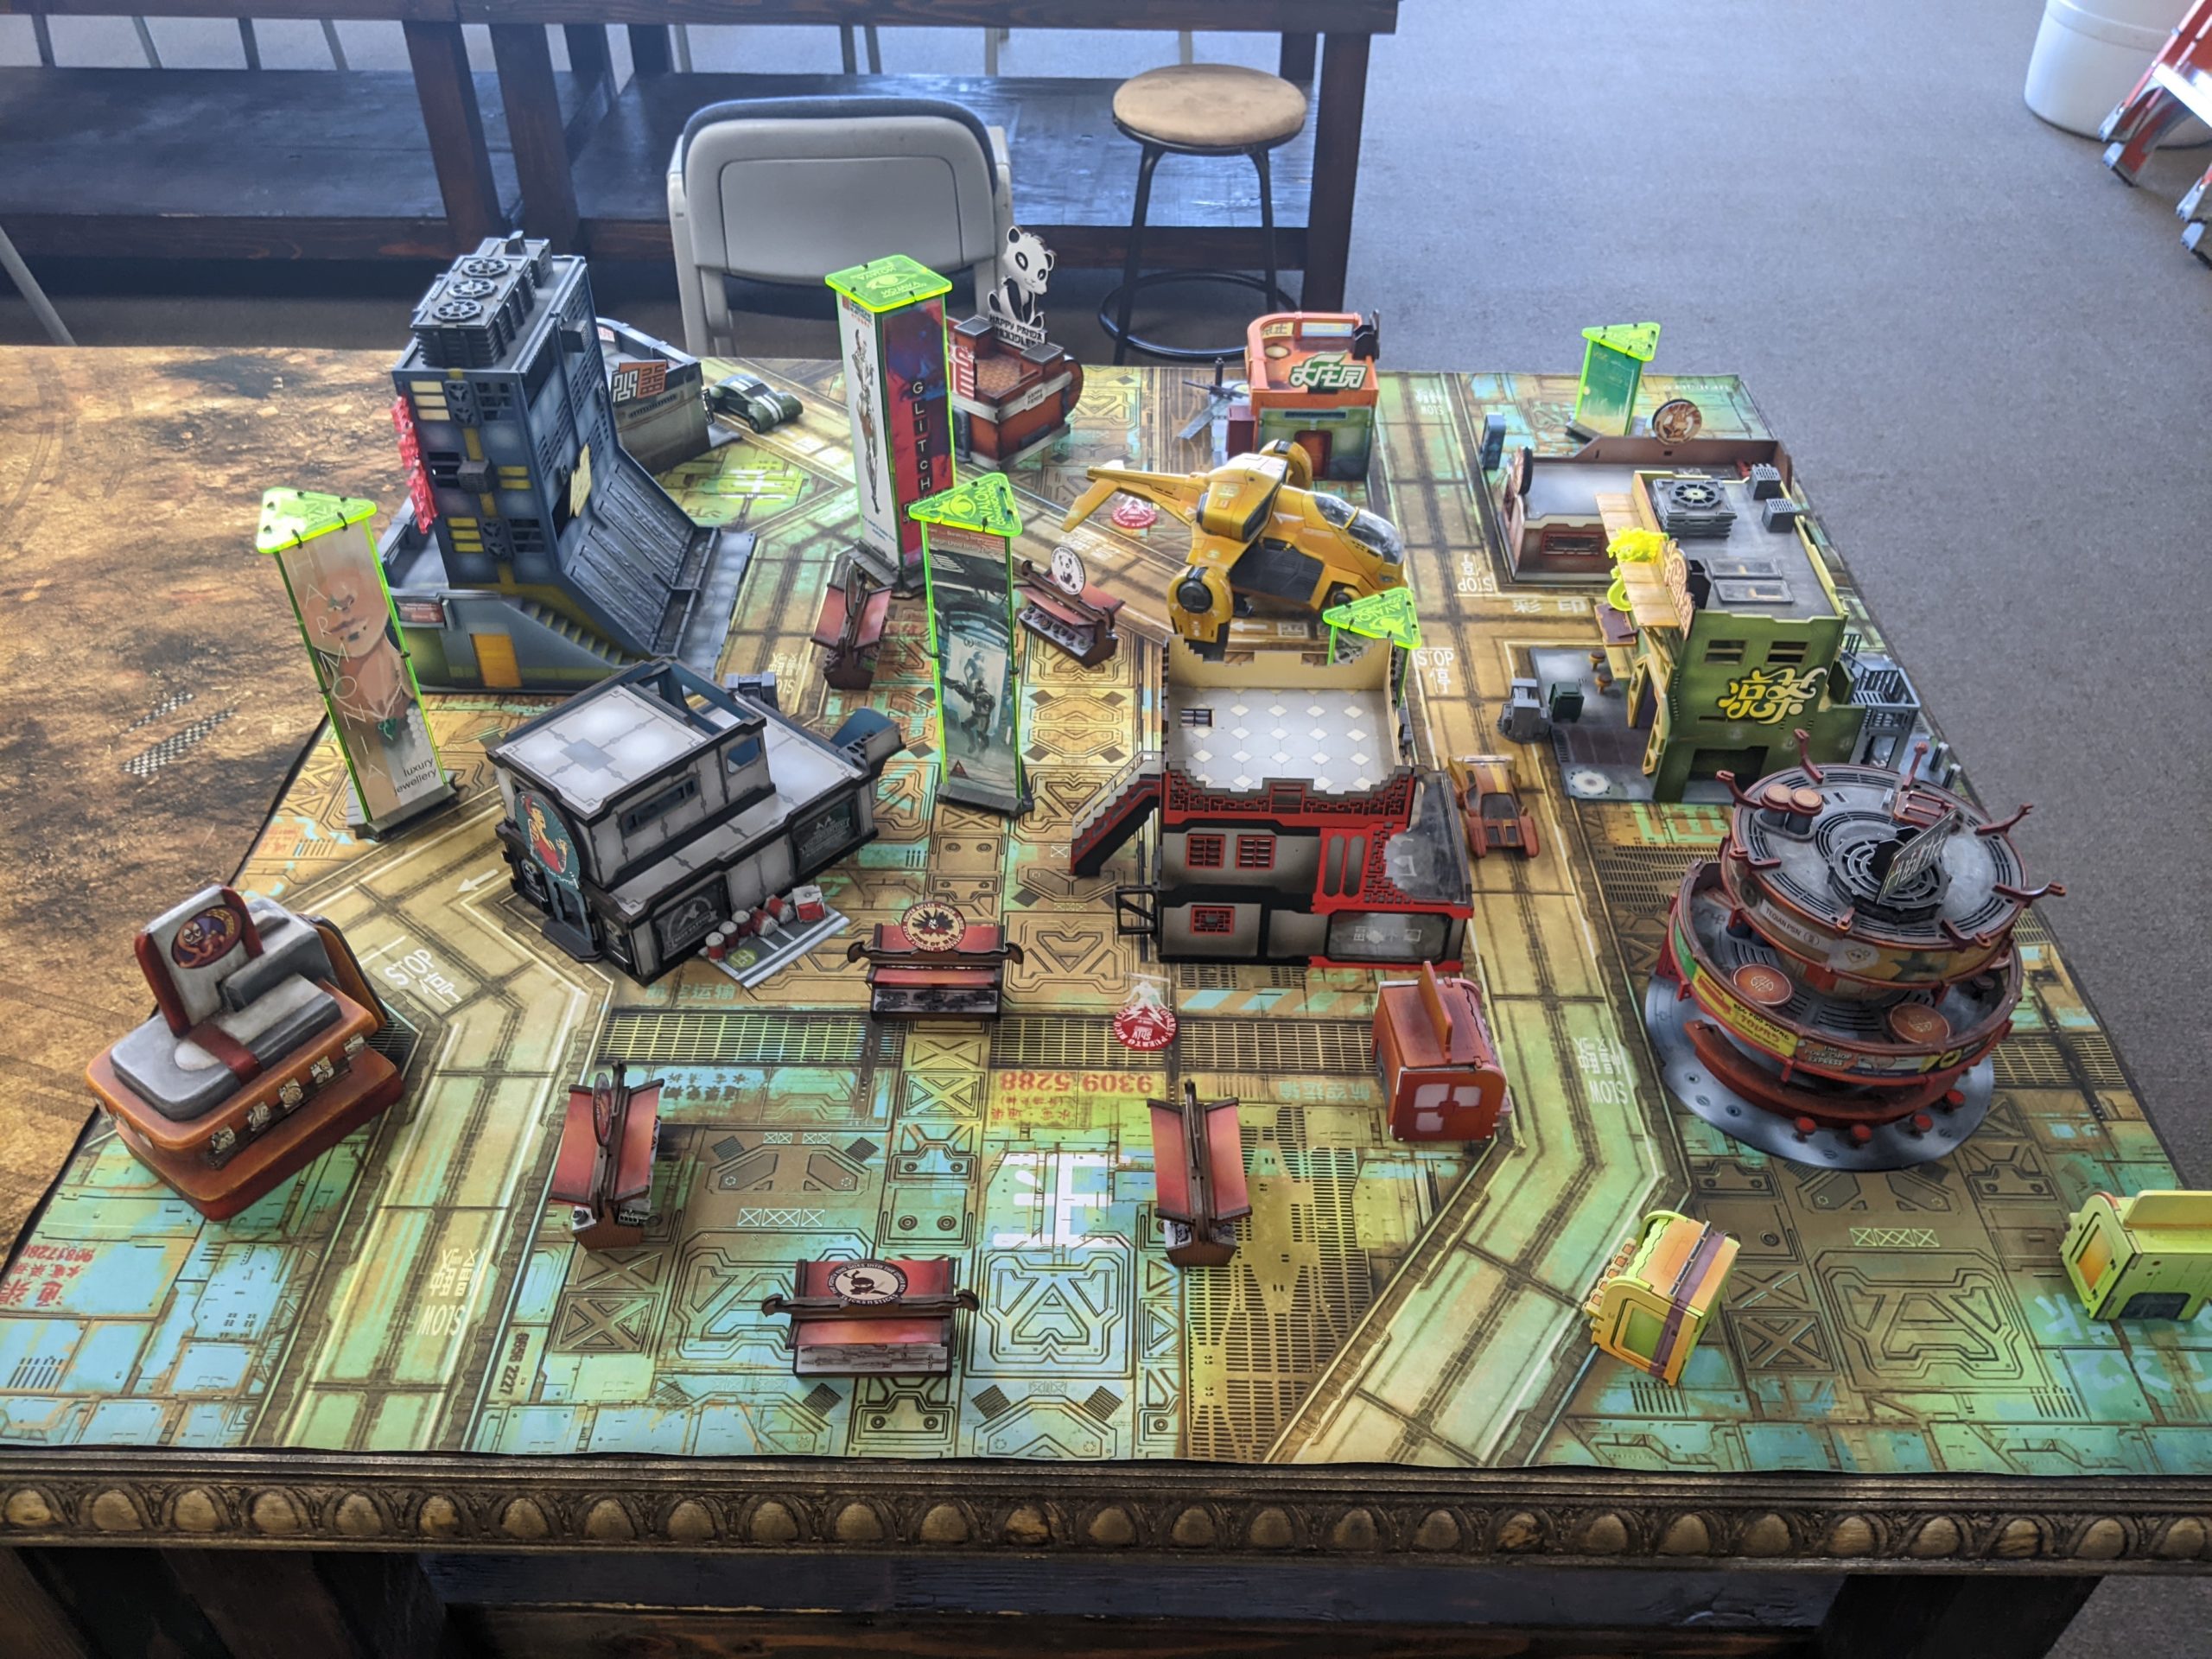
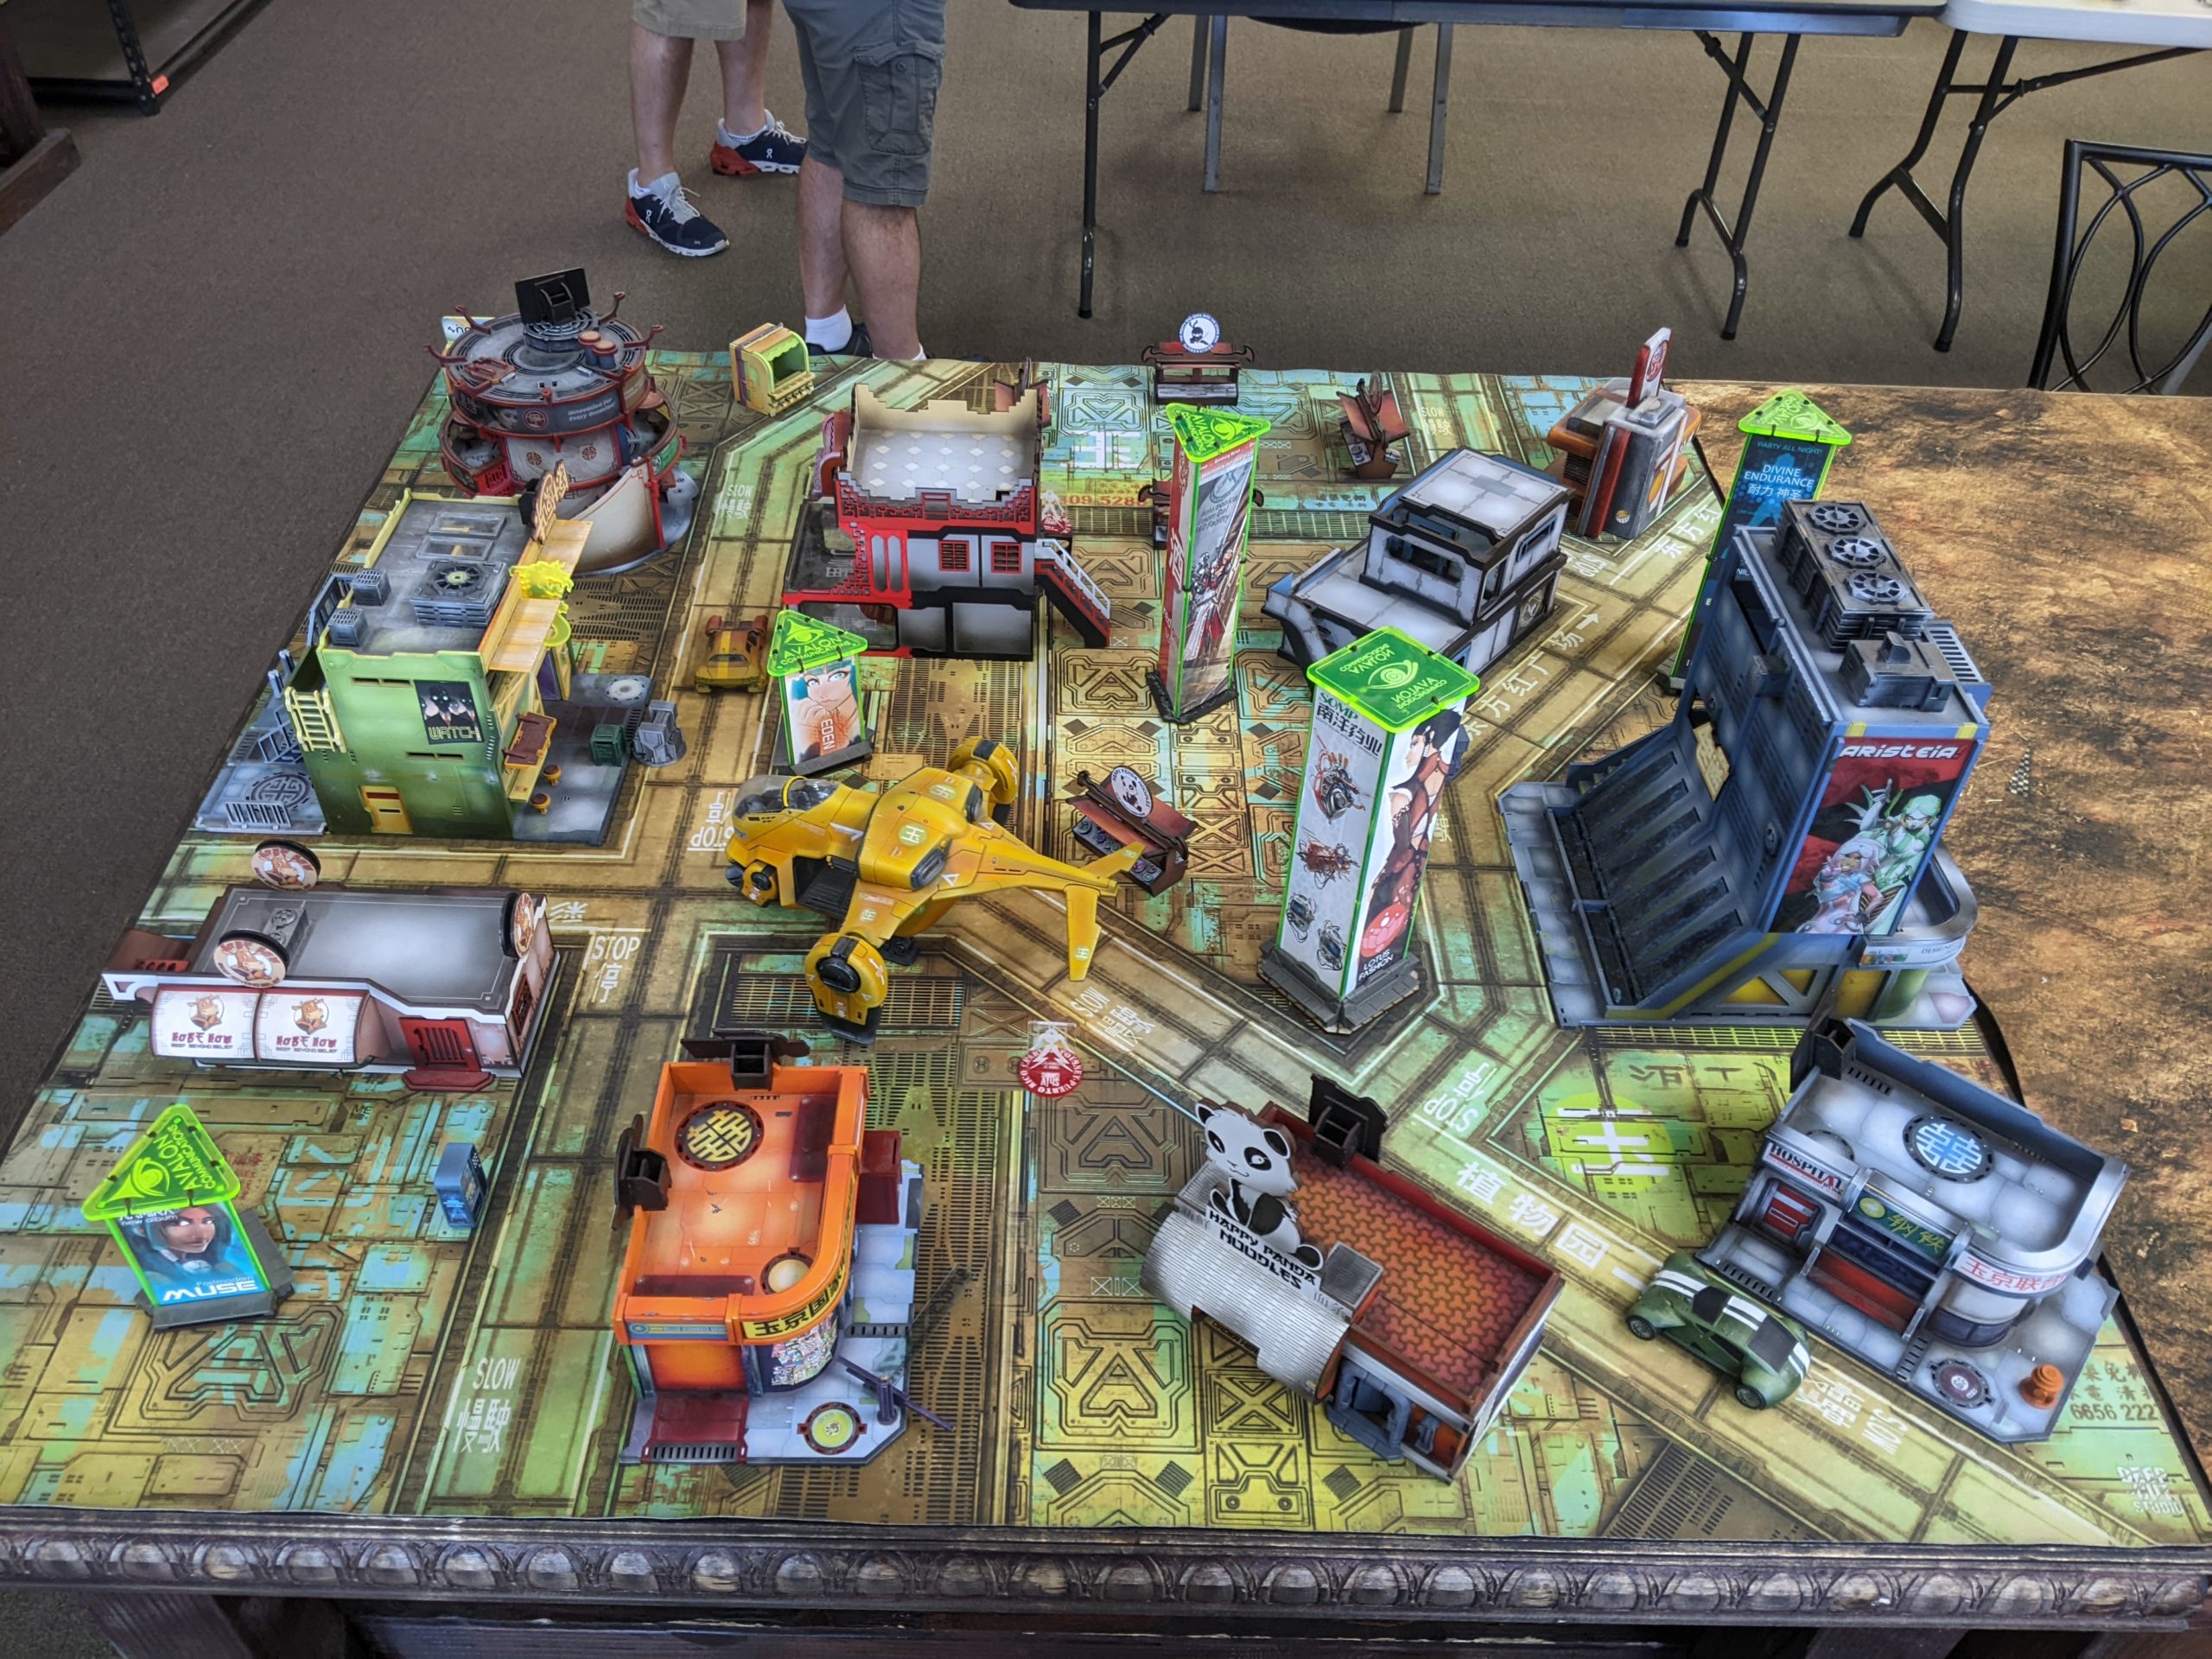

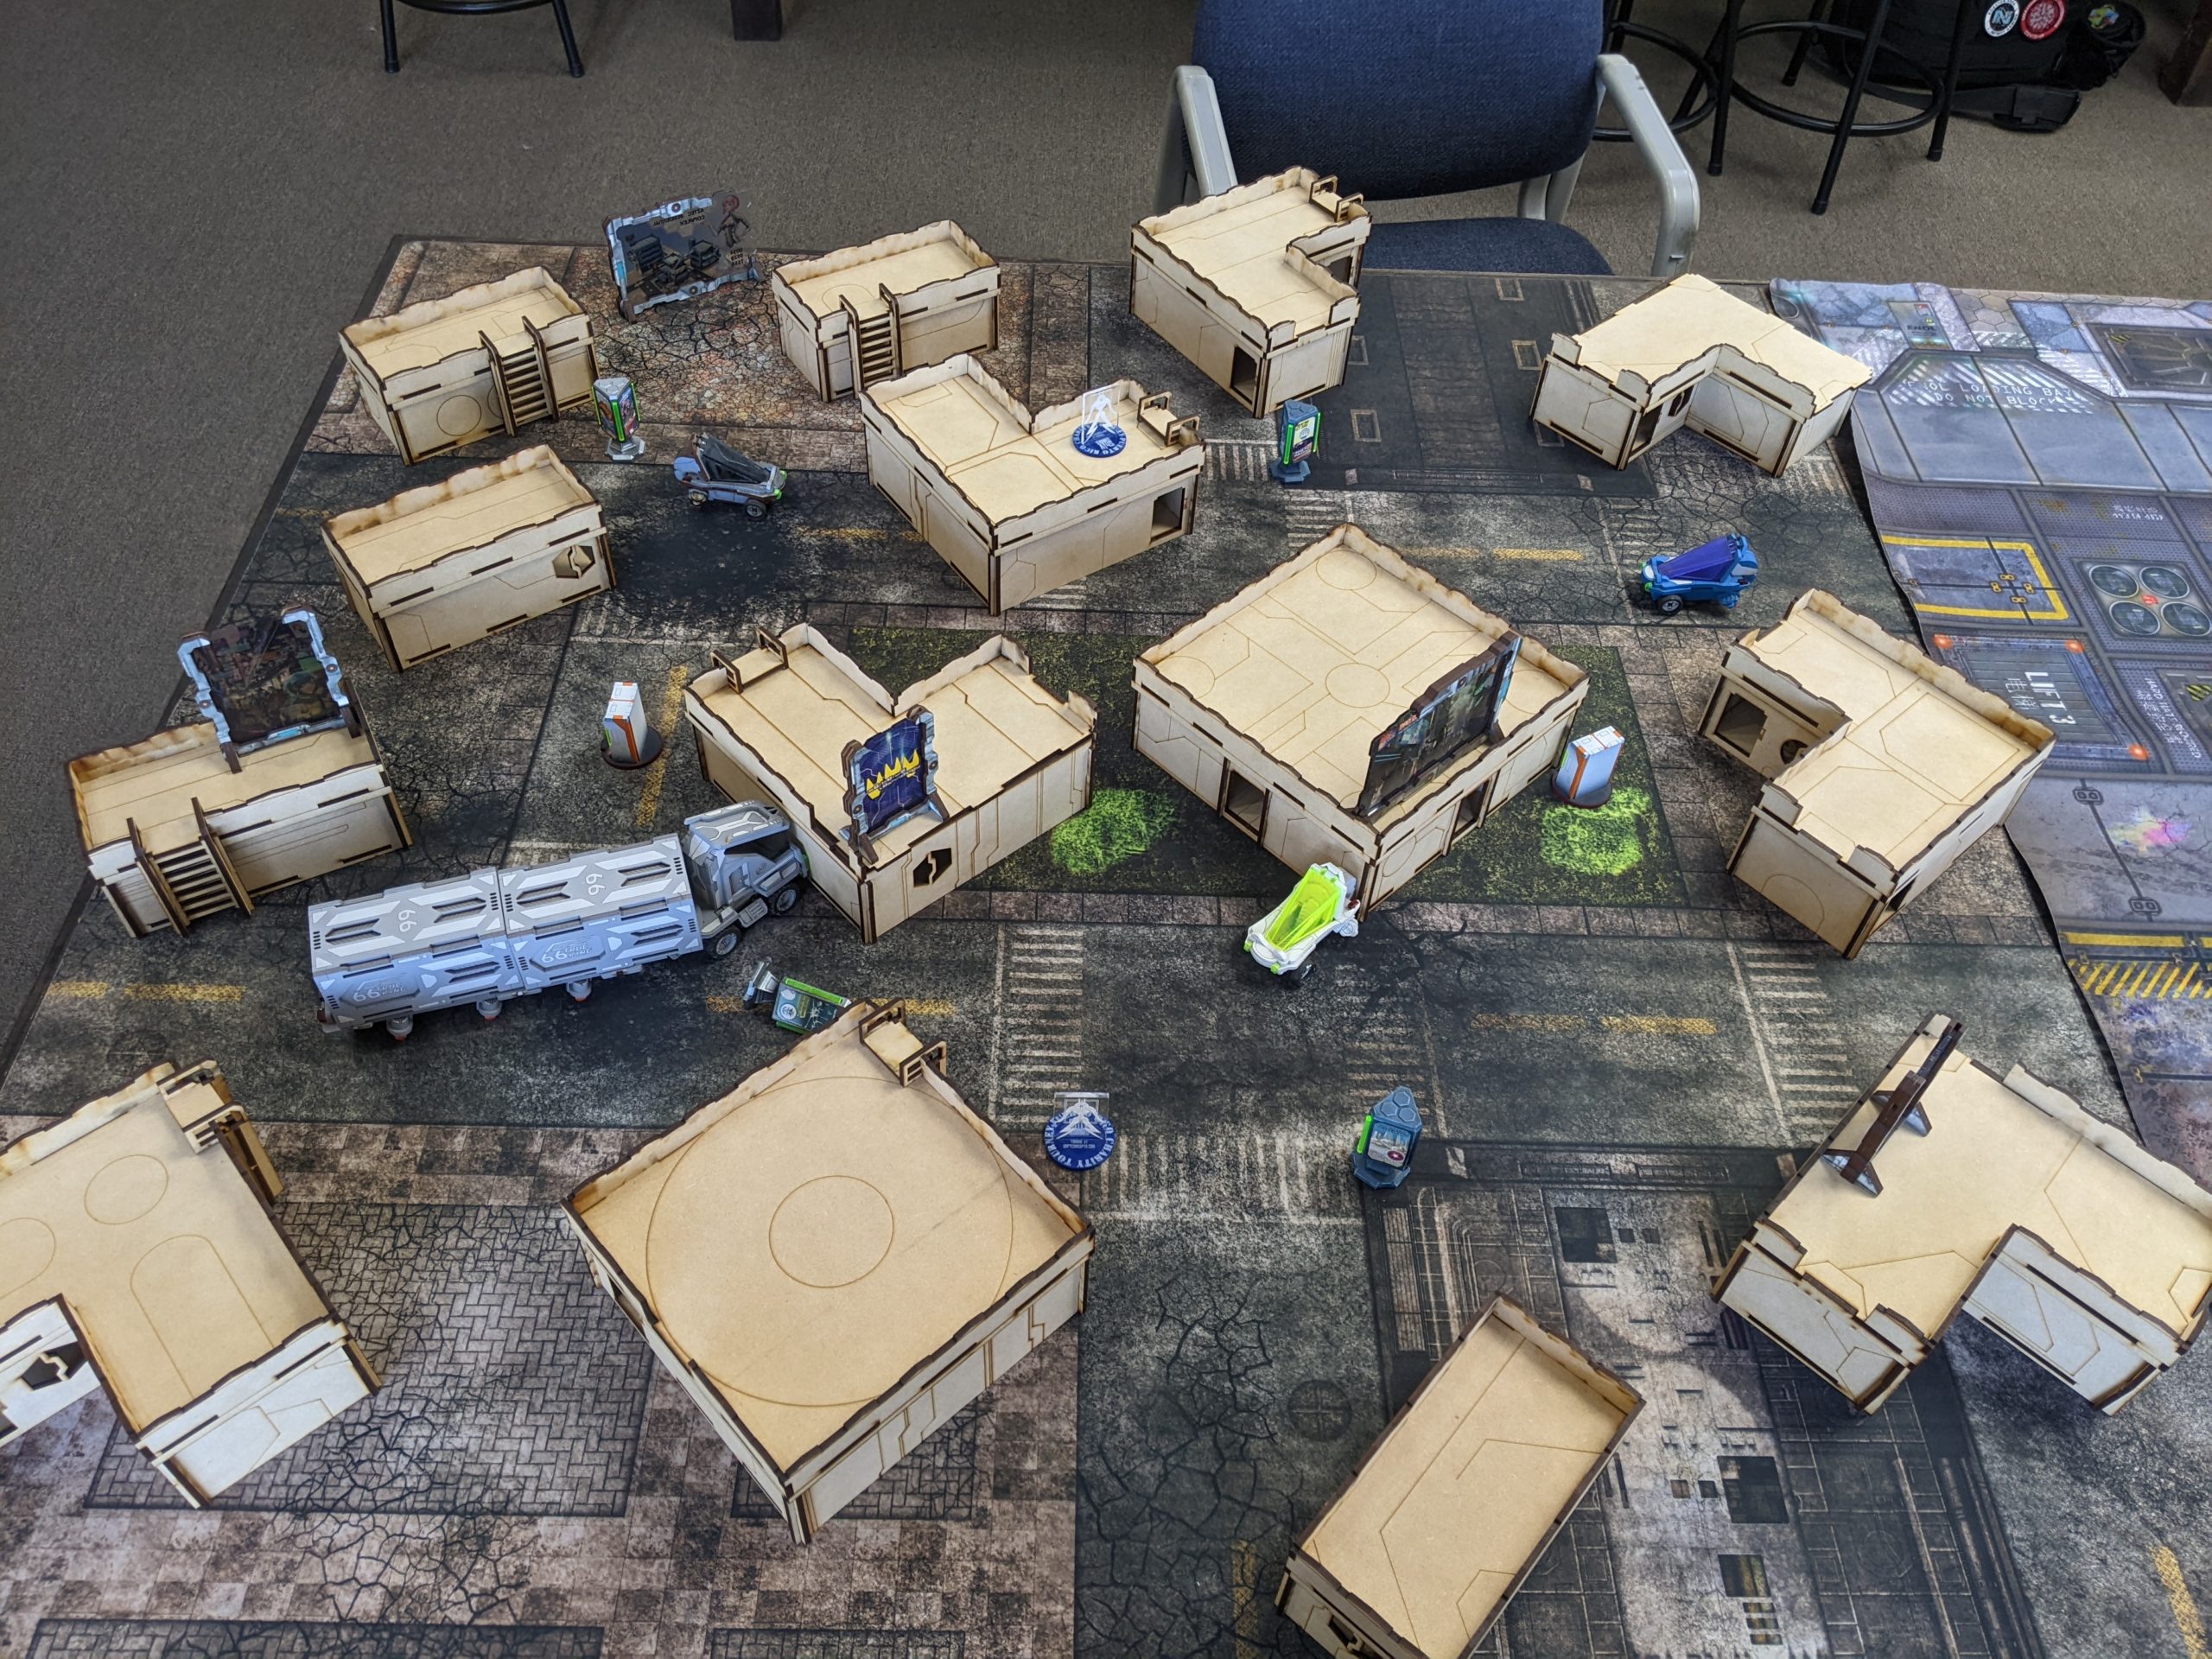
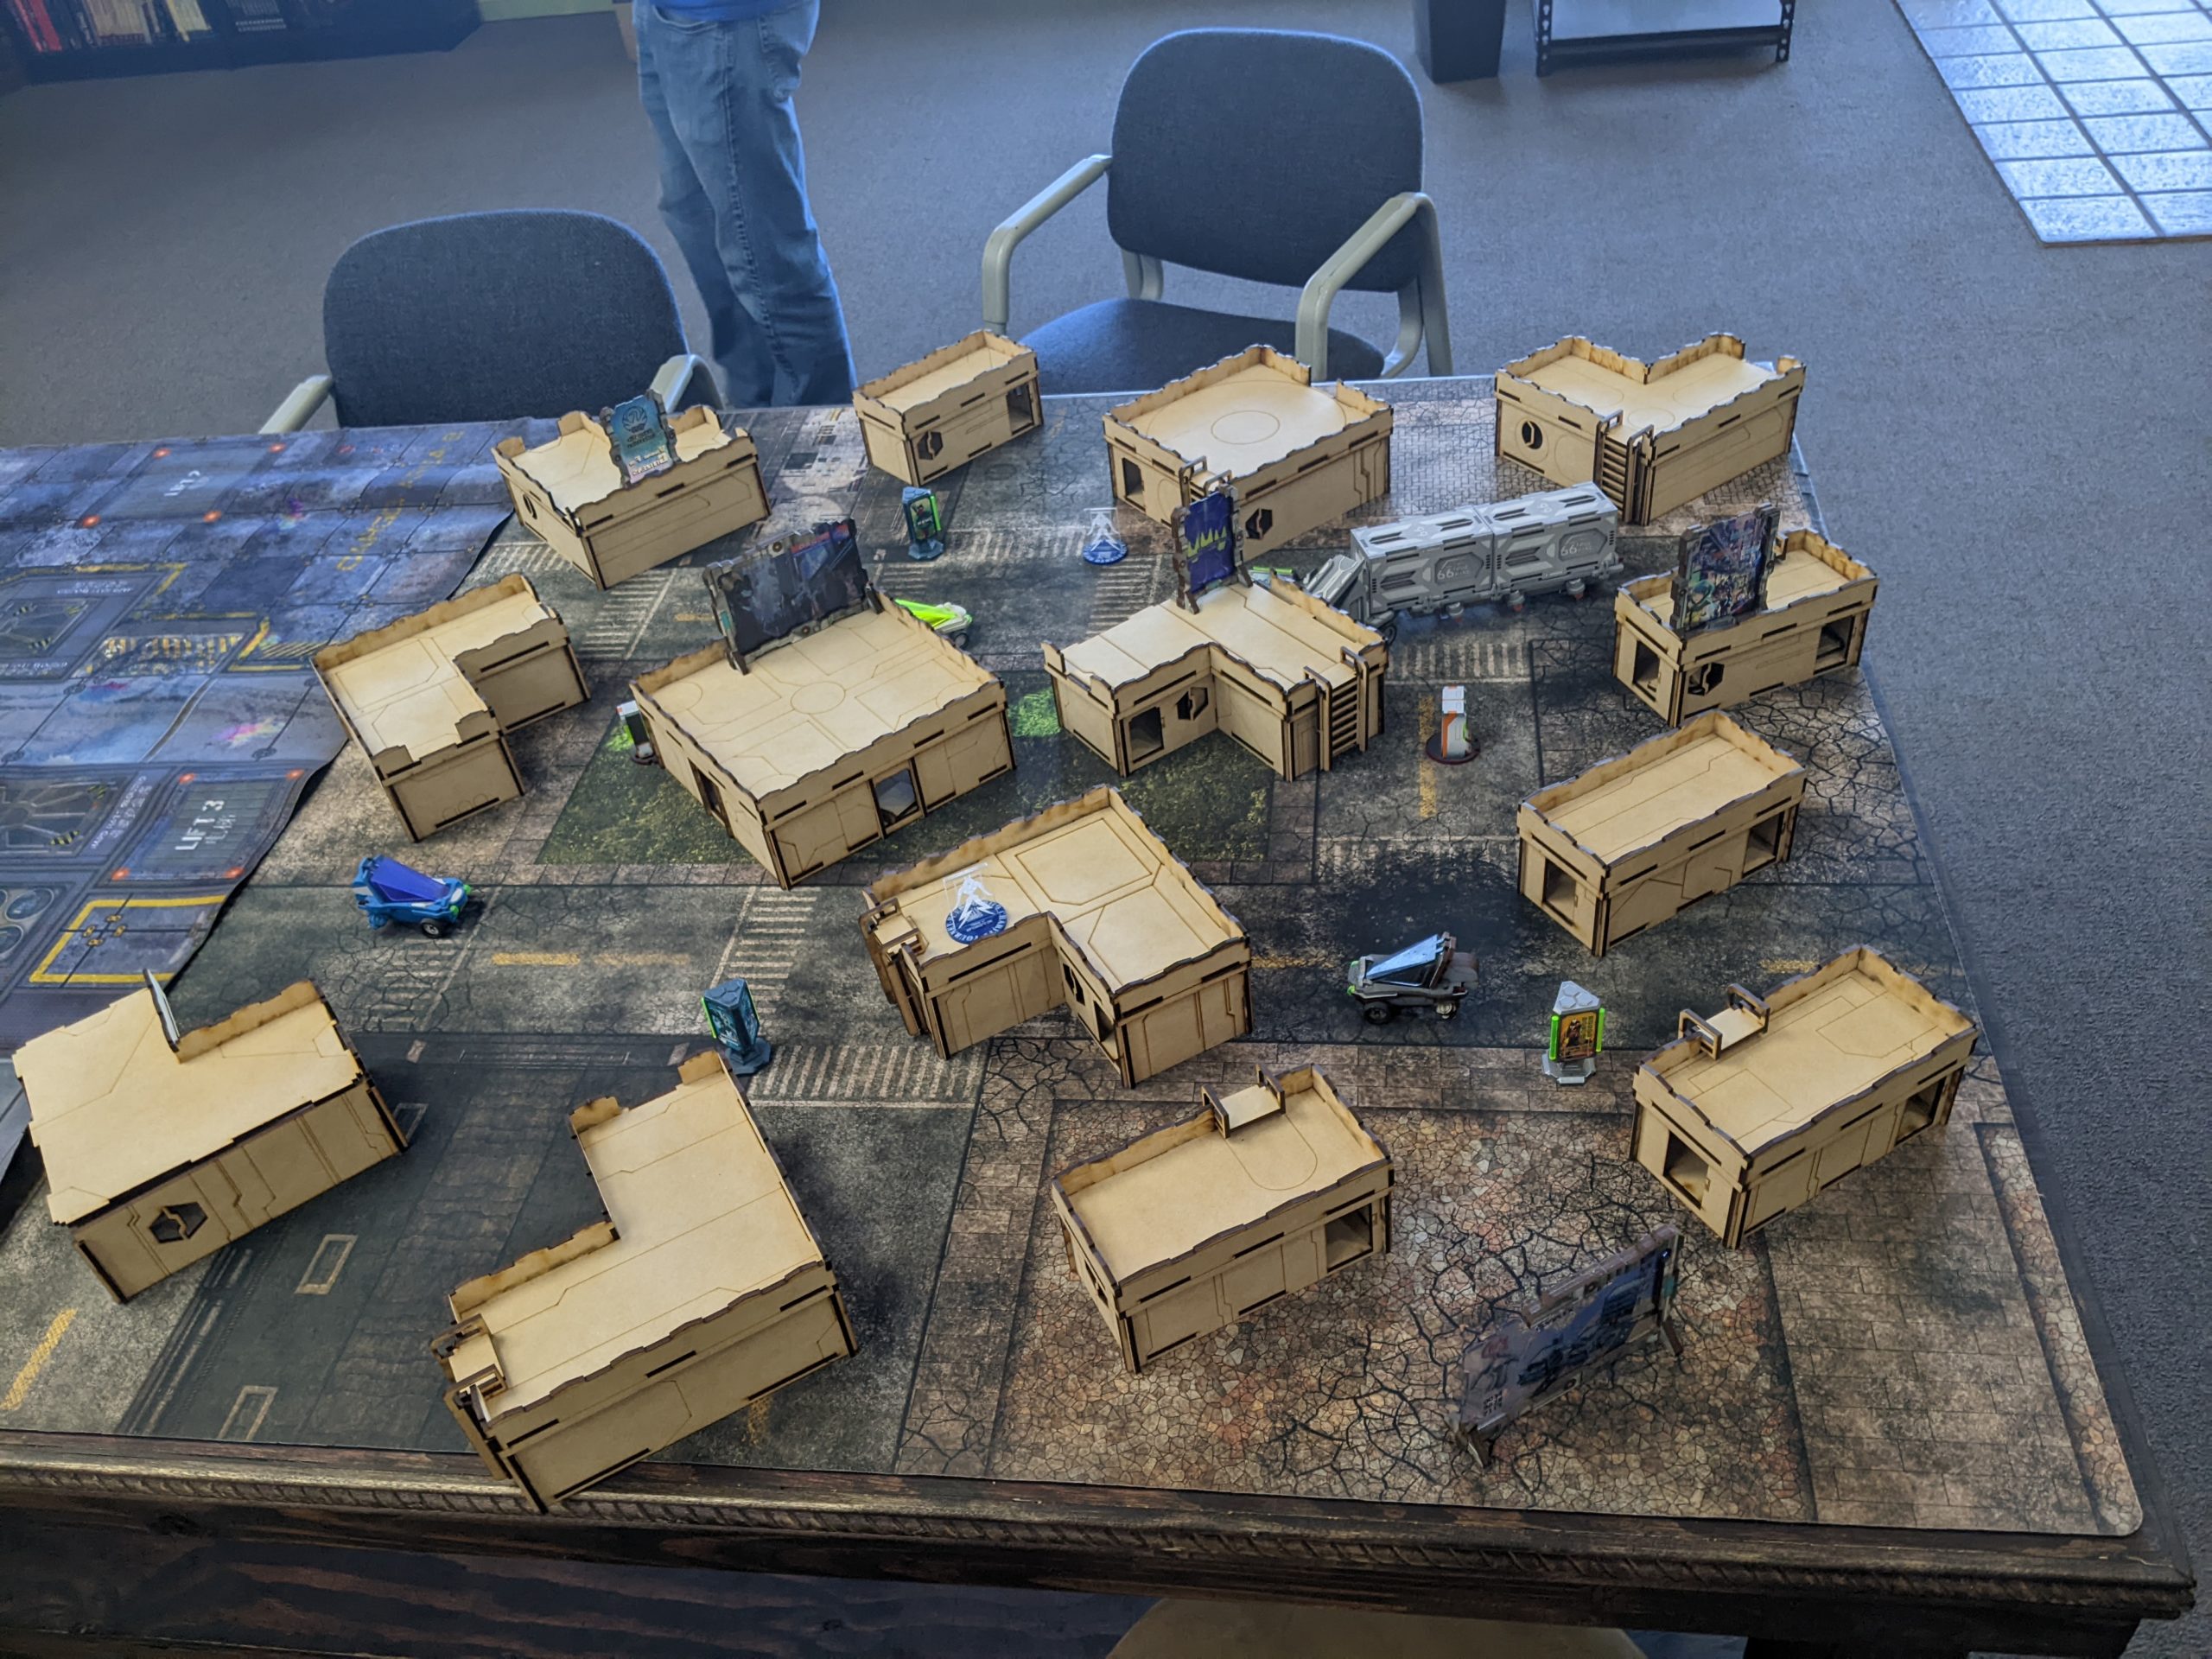
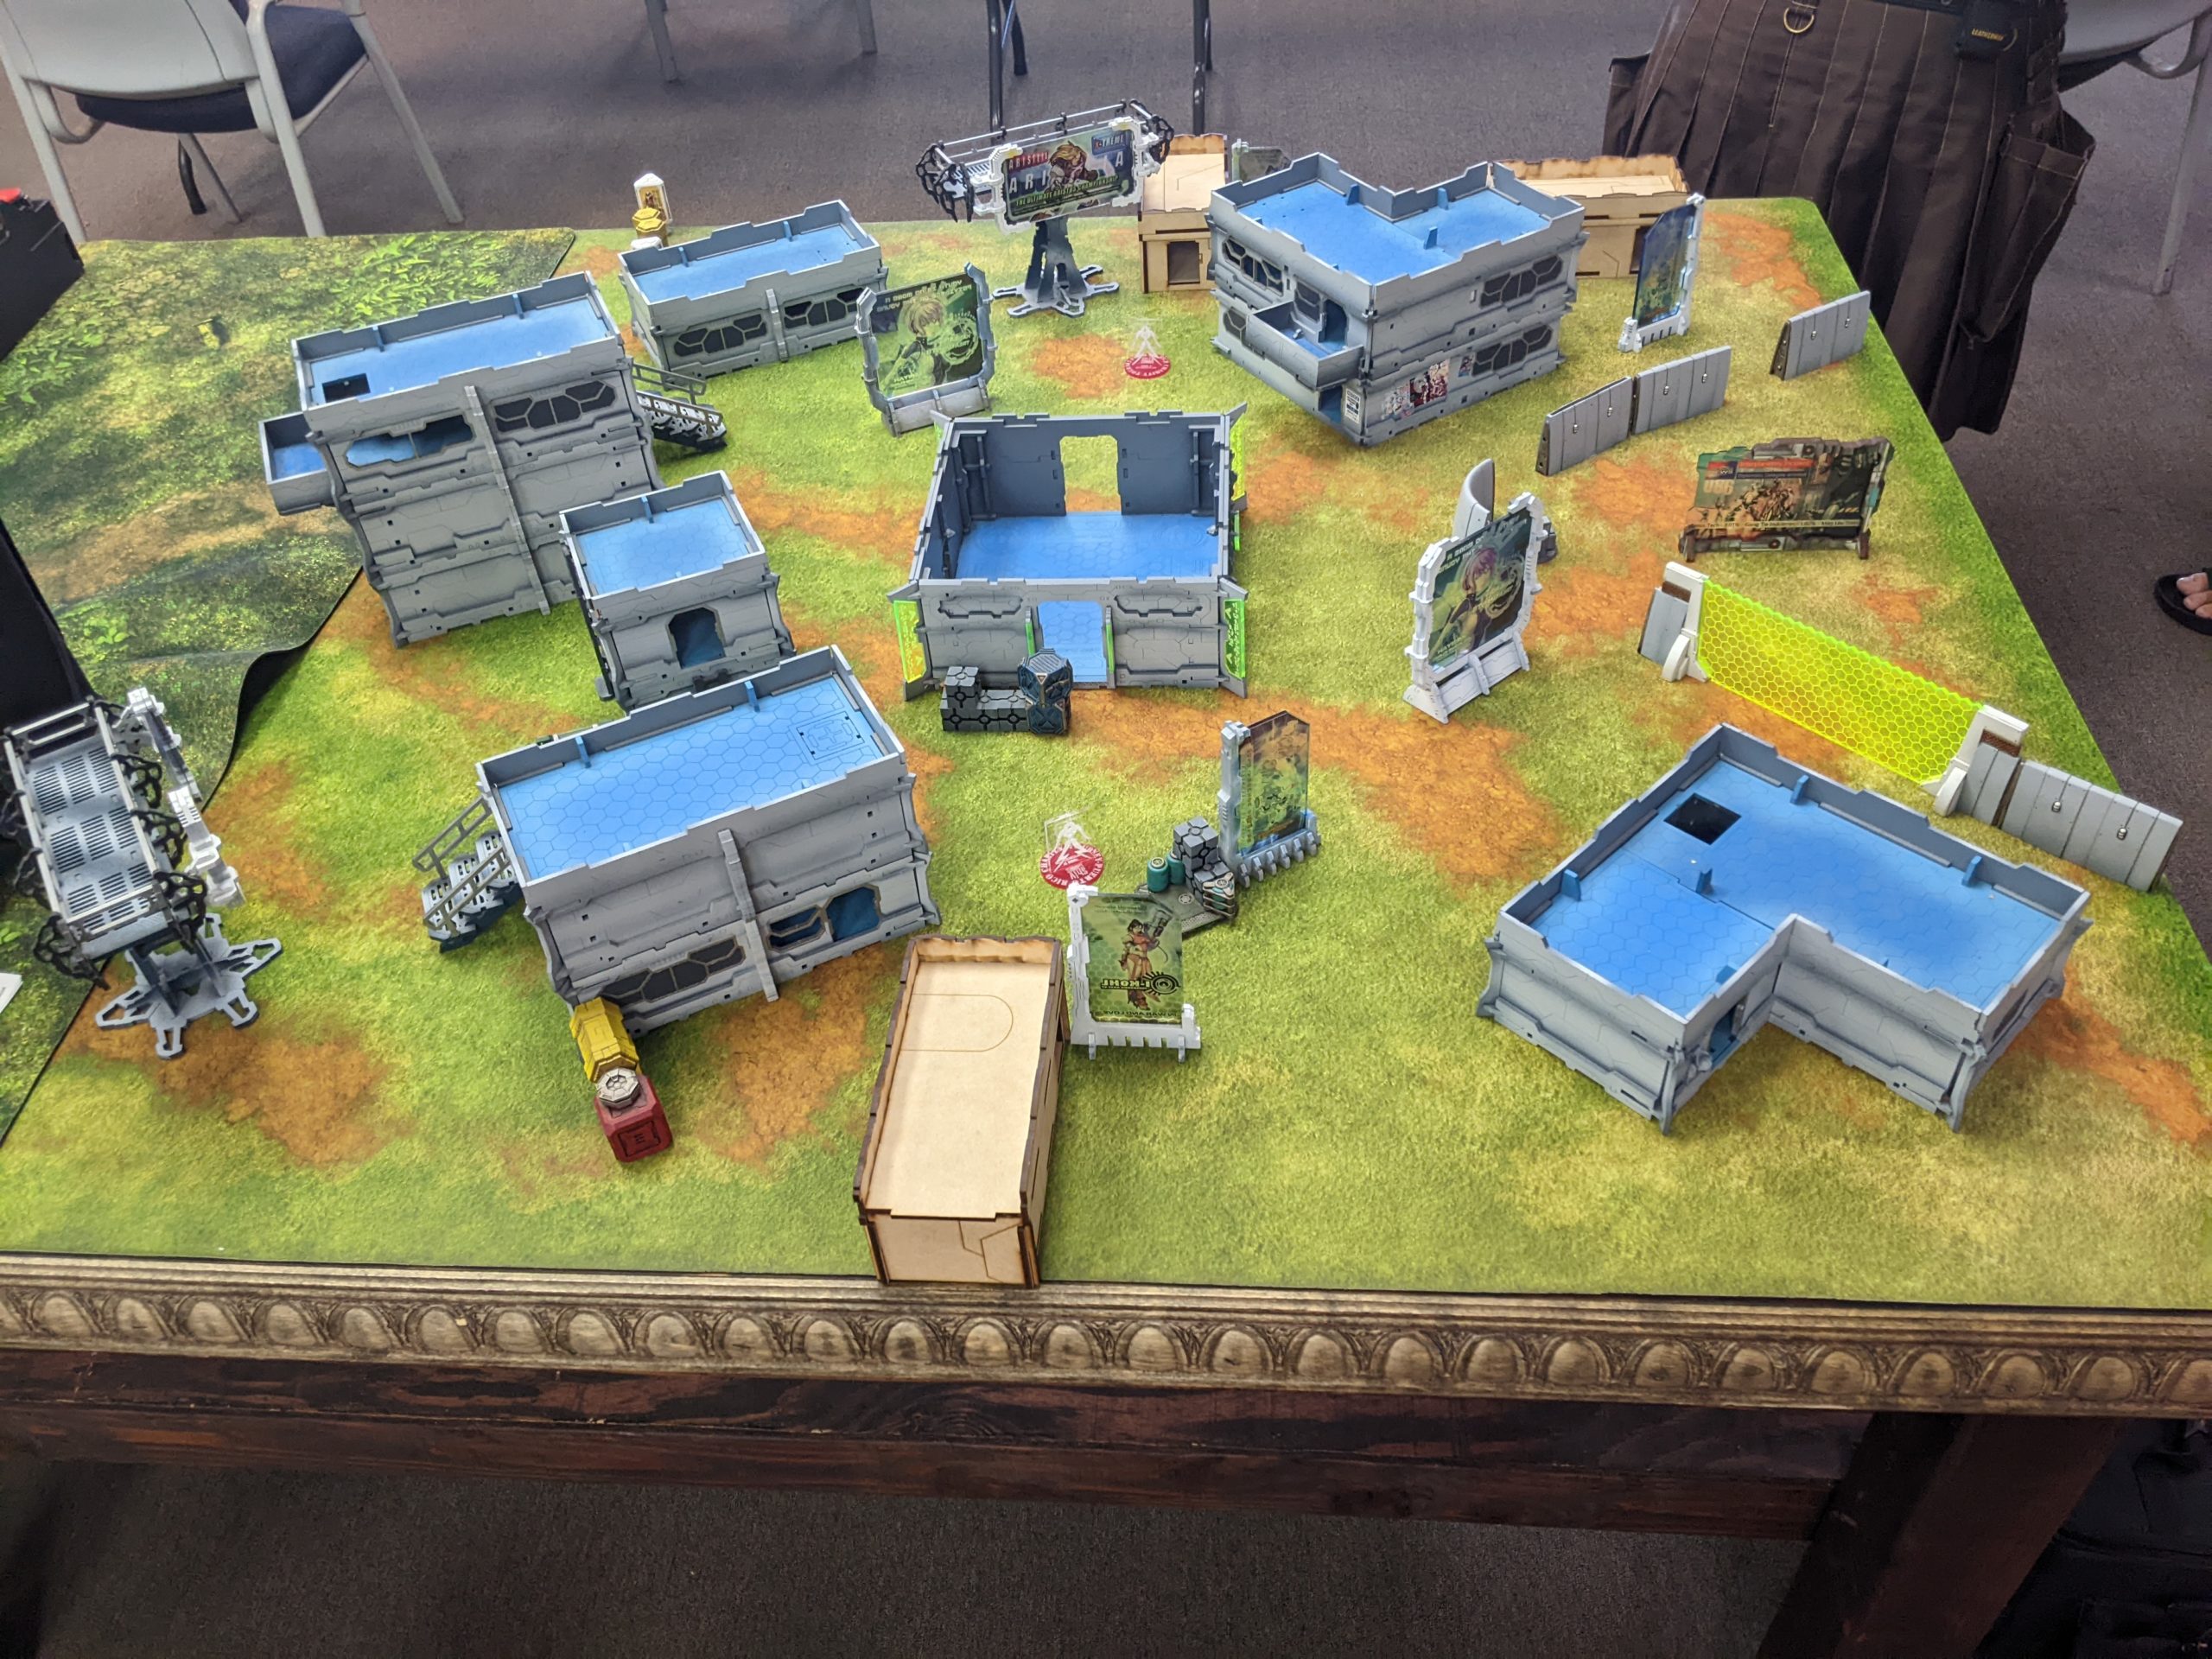
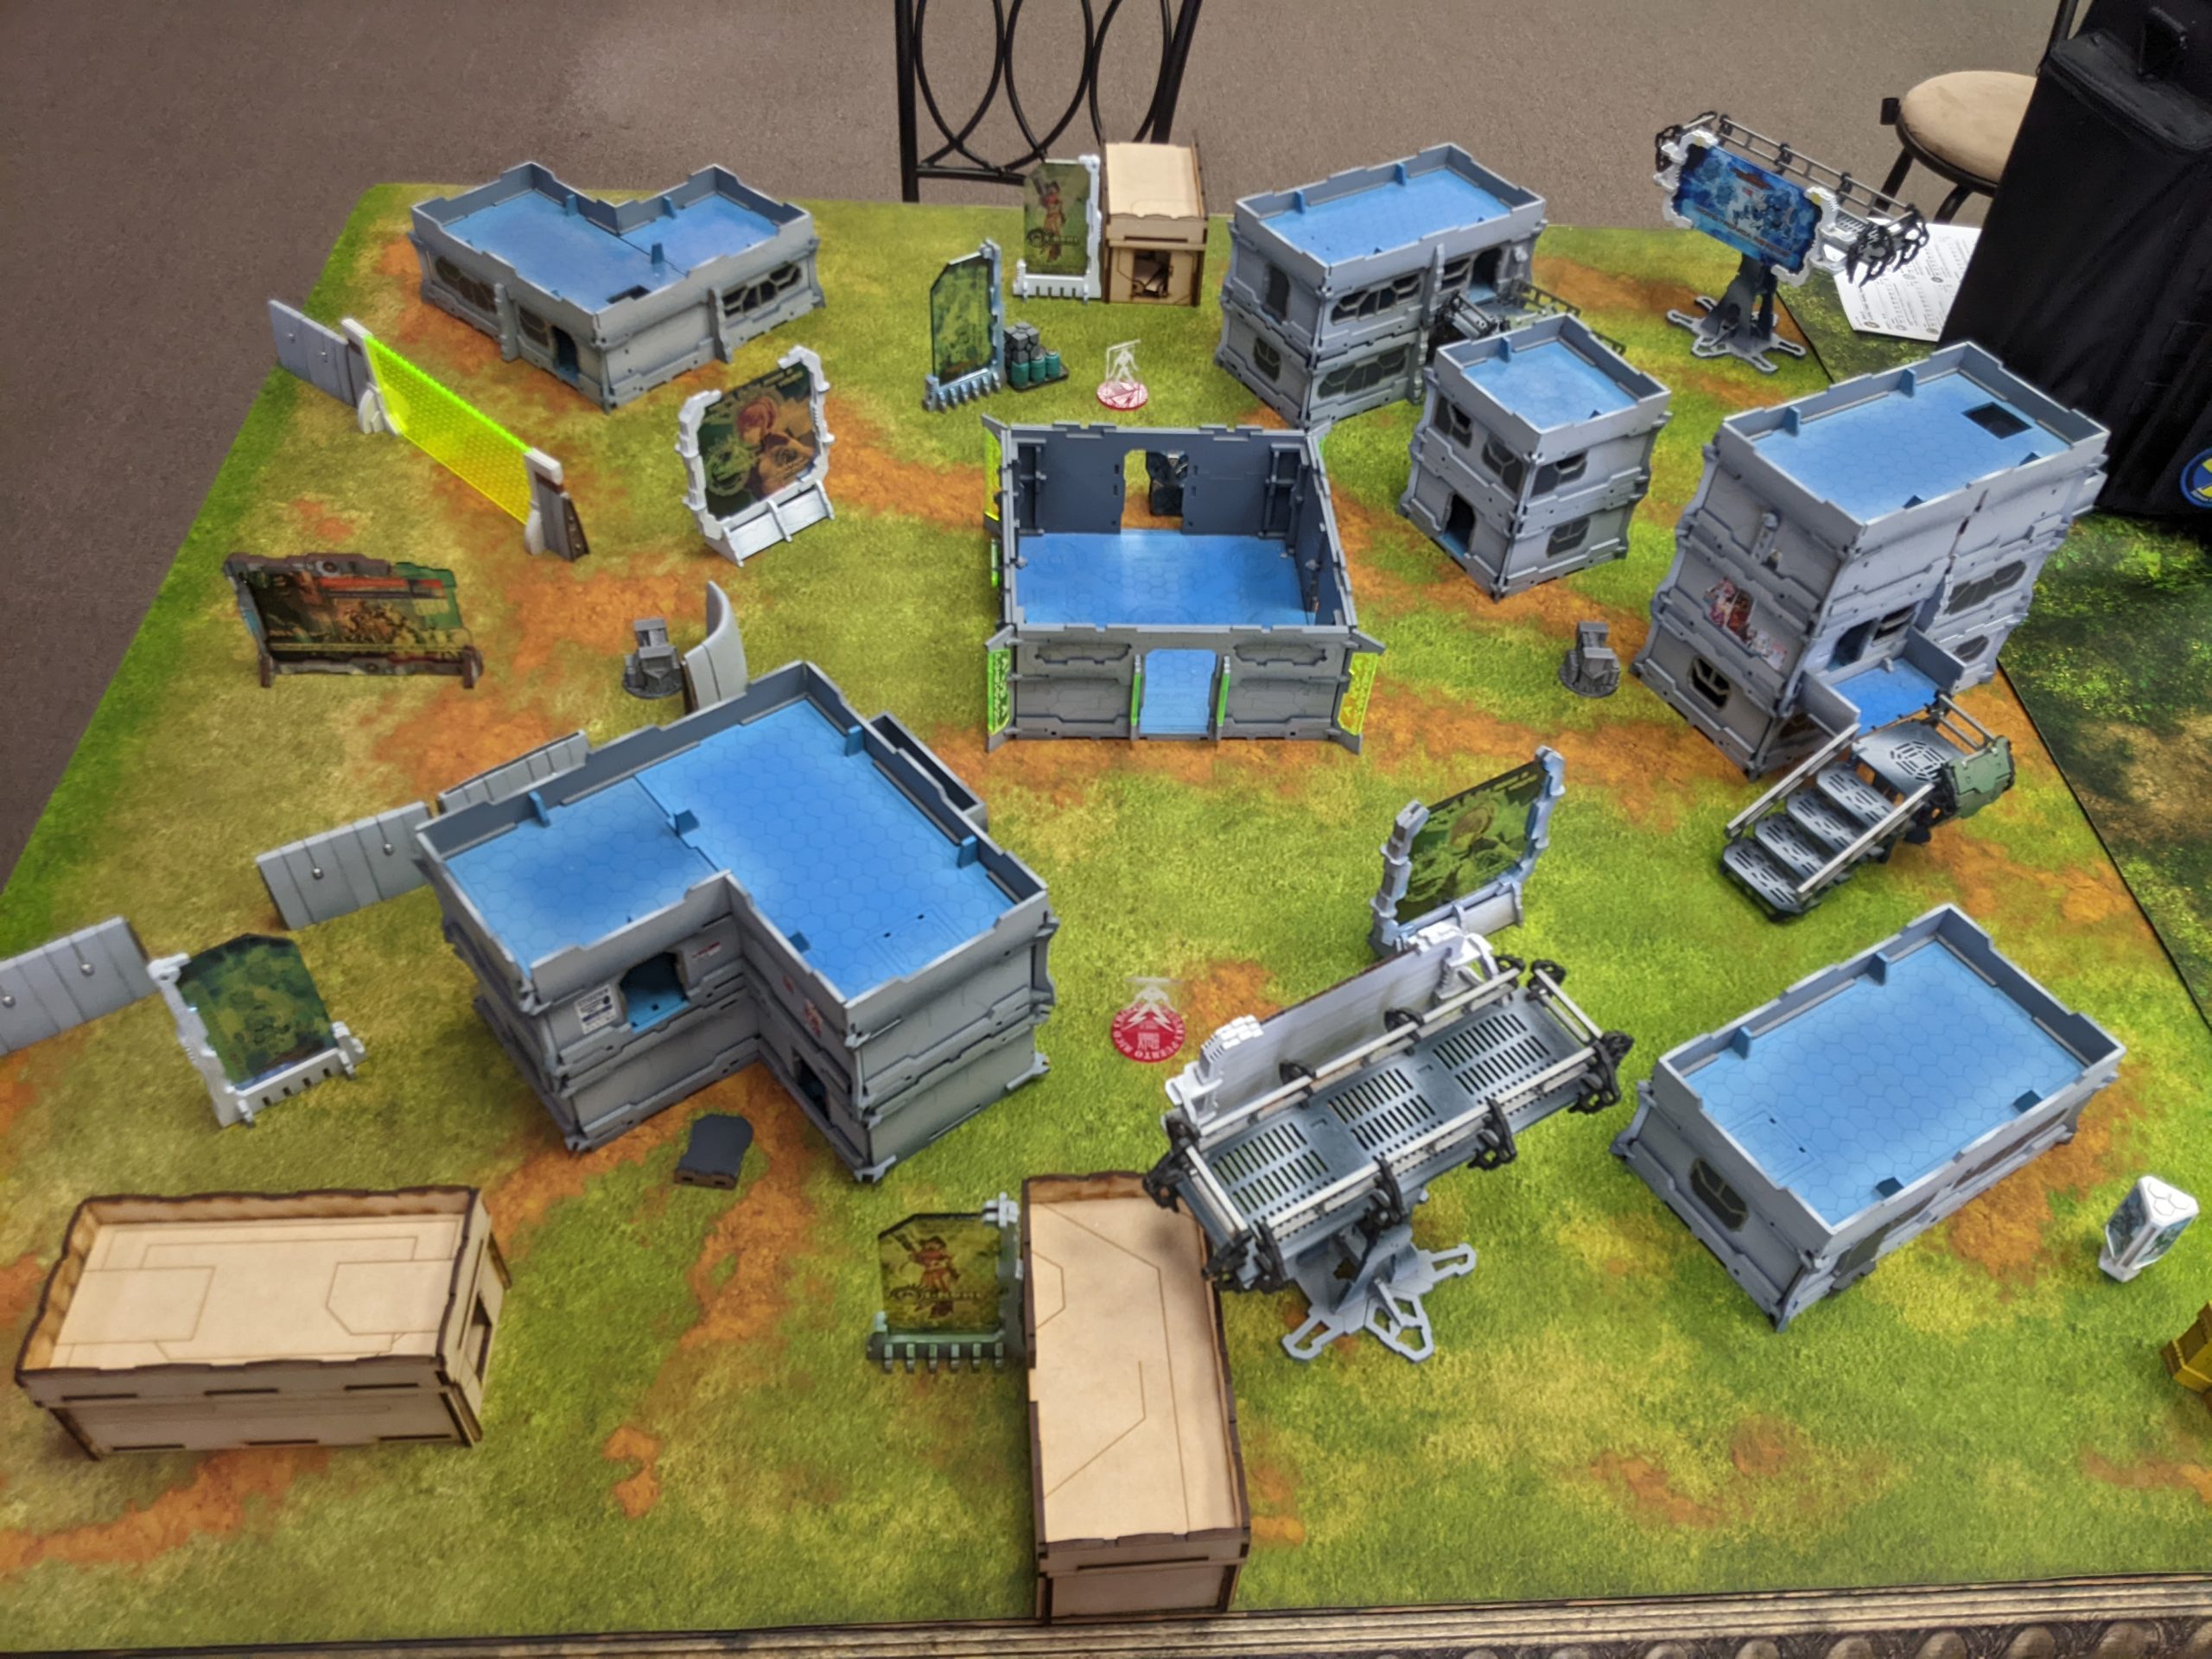
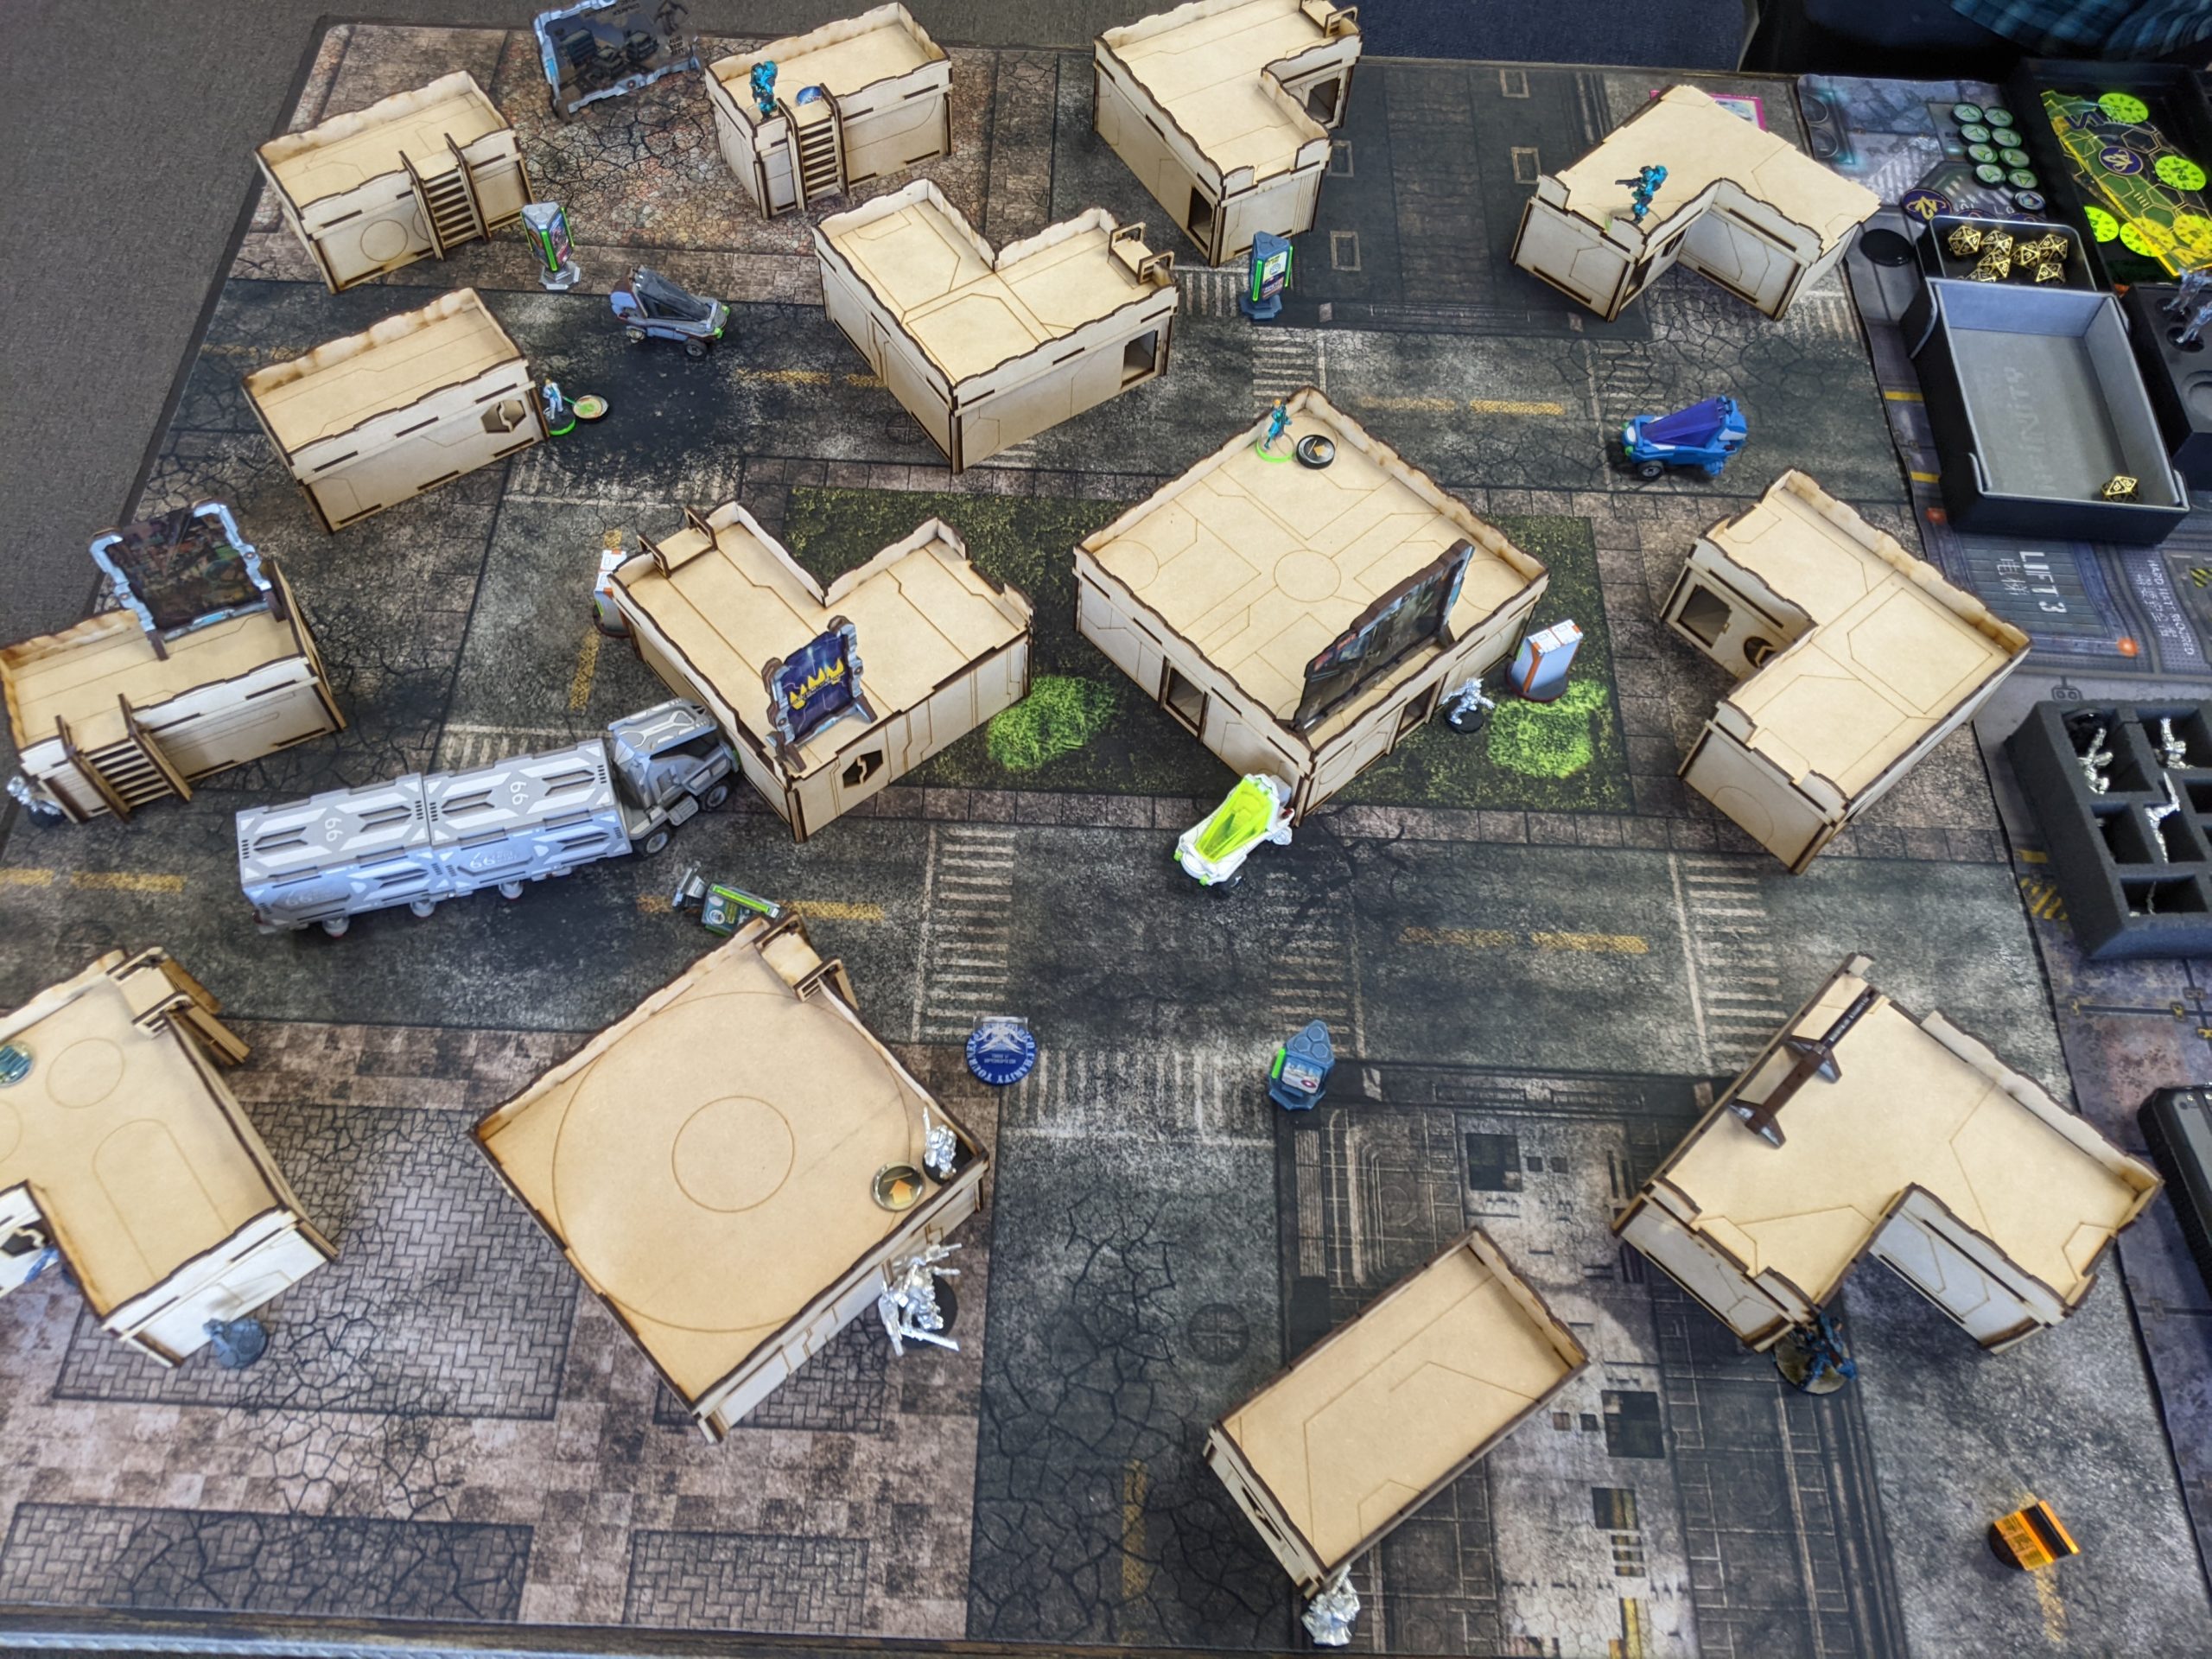
My first round opponent was Joel (Paladin_Eks), who is an all around great guy. He’s always fun to play with, puts beautifully painted models on the table, and always has a good attitude. We played on this table, with lots of playable interiors:
Overview
- Mission: ITS14 Looting and Sabotaging
- Forces: Morat Aggression Force versus O-12 (300)
- Deploy First: MAF
- First Turn: MAF
So I’m a bad person and I took a double Rasyat list to Looting and Sabotaging. The Rasyat are powered by a Gaki core, and then I stuffed the first part of the list full of utility. You always need D-Charges to take on the AC2, so for me, that meant taking a Zerat KHD. The marker state might get me there, and having a Mimetism -6 combi in the midfield is always welcome.
I always tend to over-invest in offense in Looting and Sabotaging, so I threw in a Q-Drone and Kaitok to defend the AC2. Then I took a Yaogat haris with Anyat and a Kurgat to keep the Q-Drone running and to throw Drop Bears everywhere and gum up the works.
Diplomacy!
GROUP 1
7
KORNAK (Lieutenant [+1 Order], Strategos L1) Mk12, Light Flamethrower / Heavy Pistol, DA CC Weapon. (0 | 45)
ANYAT K1 Combi Rifle, Chain-colt, Smoke Grenades, E/M Grenades / CC Weapon, Heavy Pistol. (0 | 24)
YAOGAT MULTI Sniper Rifle(+1B) / Heavy Pistol, CC Weapon. (1.5 | 35)
KURGAT Boarding Shotgun, D-Charges, Drop Bears / Heavy Pistol, CC Weapon. (0 | 23)
GROUP 2
KAITOK Chain Rifle(+2B), Flammenspeer / Heavy Pistol(+1B), CC Weapon. (0 | 22)
Q-DRONE Plasma Rifle / PARA CC Weapon(-3). (1 | 24)
ZERAT (Hacker, Killer Hacking Device) Combi Rifle, Light Flamethrower, D-Charges ( ) / Heavy Pistol, CC Weapon. (0 | 27)
3
4
RASYAT Spitfire, D-Charges, Eclipse Grenades / Heavy Pistol, DA CC Weapon. (1.5 | 37)
OZNAT FTO Combi Rifle, Smoke Grenade Launcher / Shock CC Weapon, Heavy Pistol. (0 | 16)
GAKI AP CC Weapon. (0 | 4)
4 SWC | 299 Points | Open in Infinity Army
Joel made his list before the missions were announced for painting reasons. Jeff was basing the mission list on what Tim (Chainsaw) was going to pick for Arizona Armageddon 2022, and Tim was waiting for ITS14 to drop before making his decisions… so it was a lot of waiting. Joel needed to get his paint on, so he came up with the following:
Joel (Paladin_Eks)
GAMMA (Lieutenant) Feuerbach / Heavy Pistol, CC Weapon. (1.5 | 54)
SIRIUS (Hacker, Hacking Device) Submachine Gun ( ) / Pistol, CC Weapon. (0.5 | 25)
SIRIUSBOT Heavy Riotstopper / PARA CC Weapon(-3). (0 | 5)
CHO (Chain of Command) Combi Rifle, Nanopulser / Pistol, CC Weapon. (0 | 20)
RAZOR (Forward Observer) Boarding Shotgun, Flash Pulse, Shock Mines / Pistol, CC Weapon. (0 | 32)
CASANOVA Submachine Gun, Nanopulser(+1B), E/M Mines / Pistol, Monofilament CC Weapon(-3). (0 | 33)
CYBERGHOSTS (Hacker, Hacking Device Plus) Combi Rifle, Pitcher ( ) / Breaker Pistol, PARA CC Weapon(-3). (0.5 | 21)
DIGGER Chain Rifle(+1B), Grenades / Pistol, AP CC Weapon(+1B). (0 | 14)
MILLICENT Missile Launcher / PARA CC Weapon(-3). (1.5 | 17)
DELTA (Hacker, Hacking Device) Combi Rifle, Light Riotstopper ( ) / Pistol, CC Weapon. (0.5 | 30)
D-Charges are a must, but you can get them from the Panoplies so not having them is less of a big deal. The rest of his list is just a ton of beef with double Gamma and lots of fun O-12 toys. Joel is all in on the guided missile plan with the Cyberghost, Sirius, and Delta though, so I had to watch out for that.
Deployment
I won the rolloff and elected to go first, so Joel had me deploy first. With all the playable interiors, it was easy to hide the Gakis. I left one outside just in case I needed to dodge into base to base with a Delta or something, and then set about deploying the rest of my units. Kornak watched the back table edge for Delta with D-Charges, and the Q-Drone locked down the right side of my deployment zone against drops. The Kurgat and Anyat hid in a building on the left side of my deployment zone to allow them to move without getting shot, and the Yaogat was in reserve along with the Zerat. I put the Kaitok in a position to be a spare tire and/or dodge onto my AC2 to chain rifle things off of it.
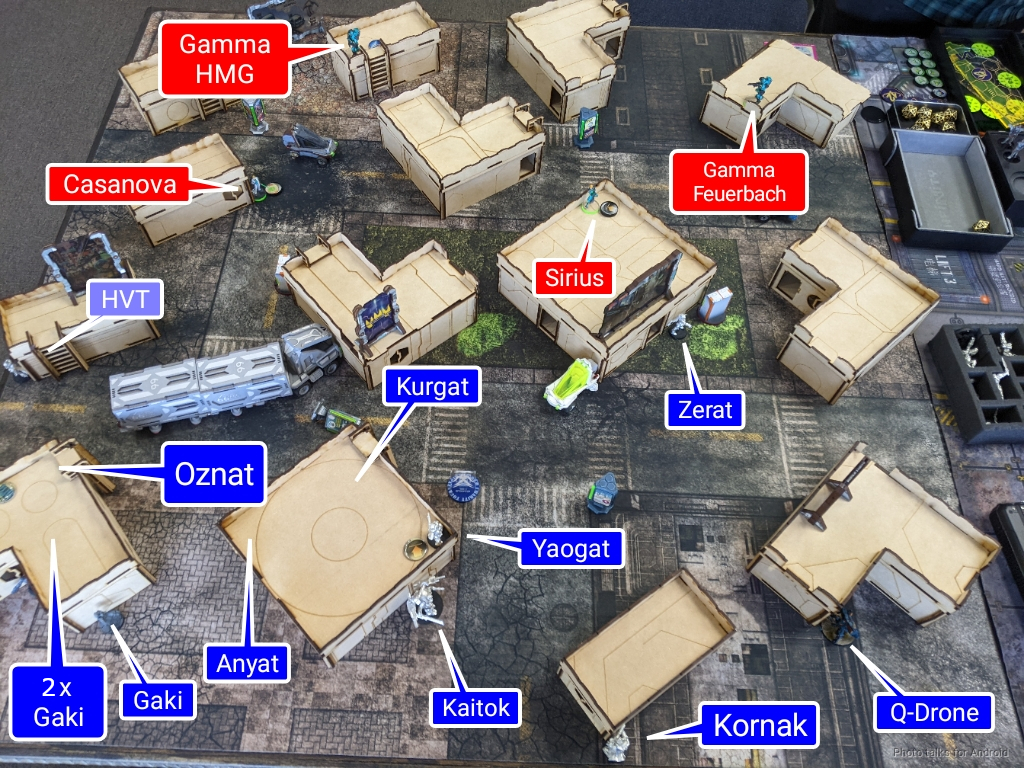
Joel put down a Gamma HMG above a Digger (who also had an HMG) and Cho, disguised as a Kappa. He put his Cyberghost next to the AC2 to hack stuff coming near it, and put the Sirius on a rooftop with the bot below her to hack things near the center of the midfield. The Razor hung out right next to the panoply on Joel’s left, and the Millicent went all the way on his left DZ edge watching his backfield for AD troops on that side.
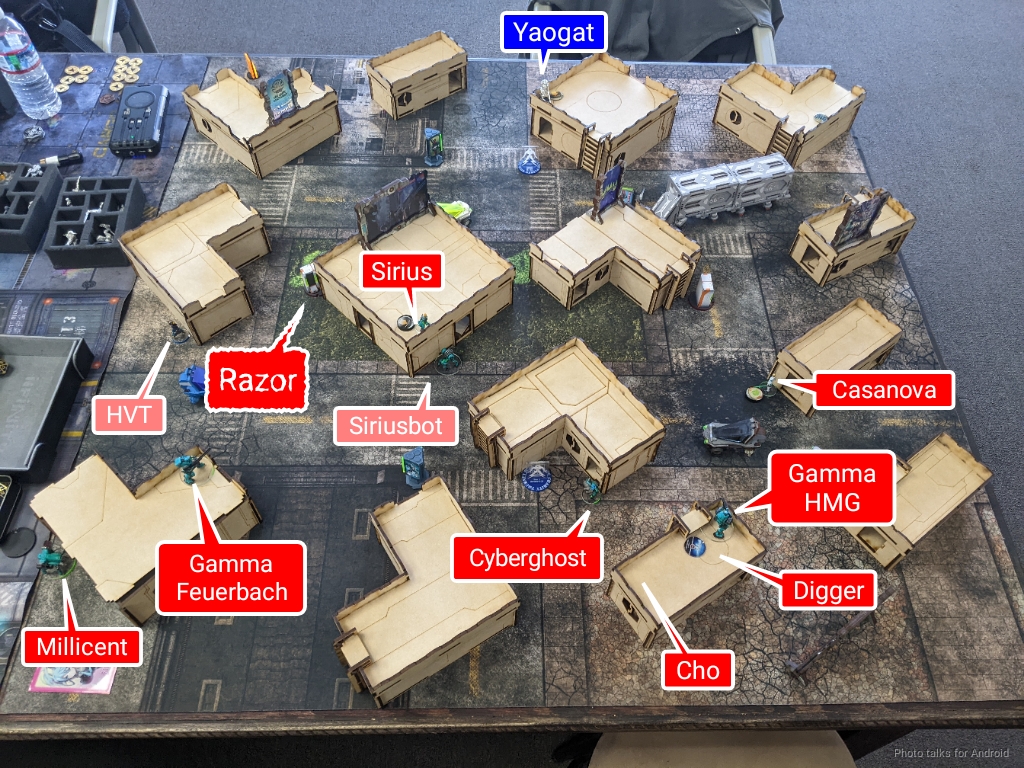
Casanova hung out on the right, and then I put down the Yaogat on the roof above Anyat and the Kurgat and the Zerat near the Sirius in case I needed her. Joel’s second Gamma came out of reserve on a roof. OOF. That’s a lot of beef.
Turn 1
Top of 1 – MAF
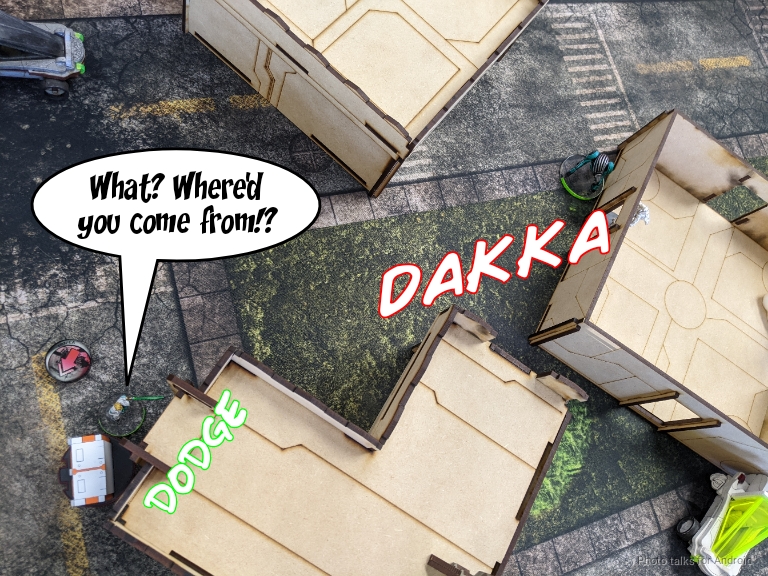
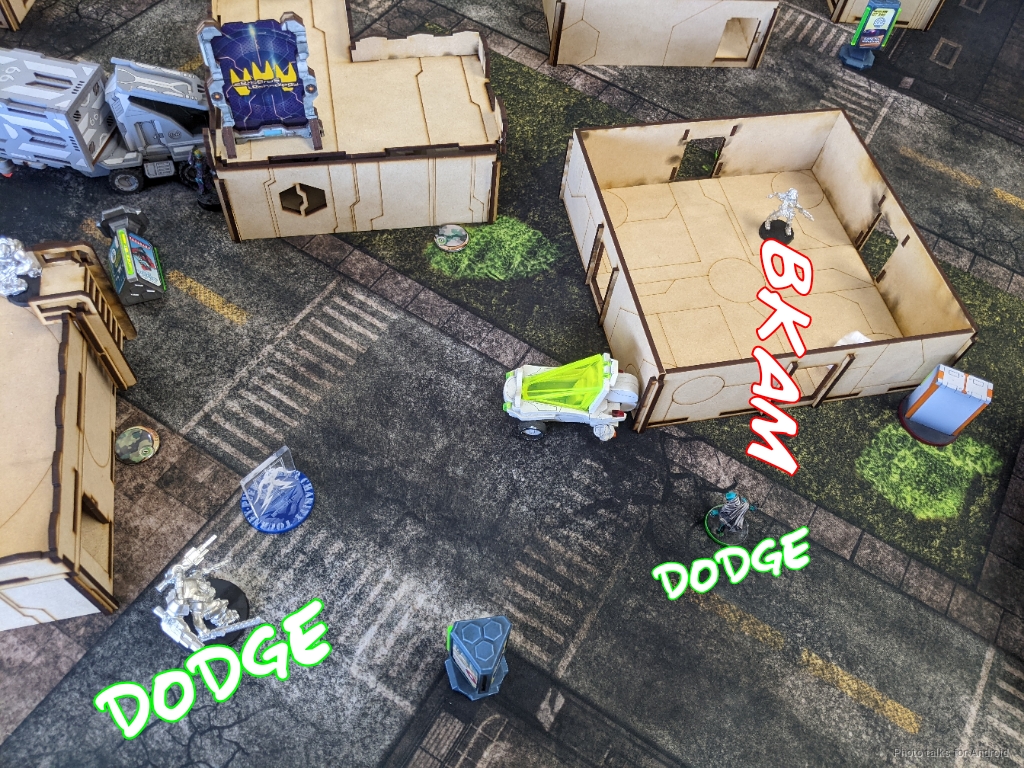
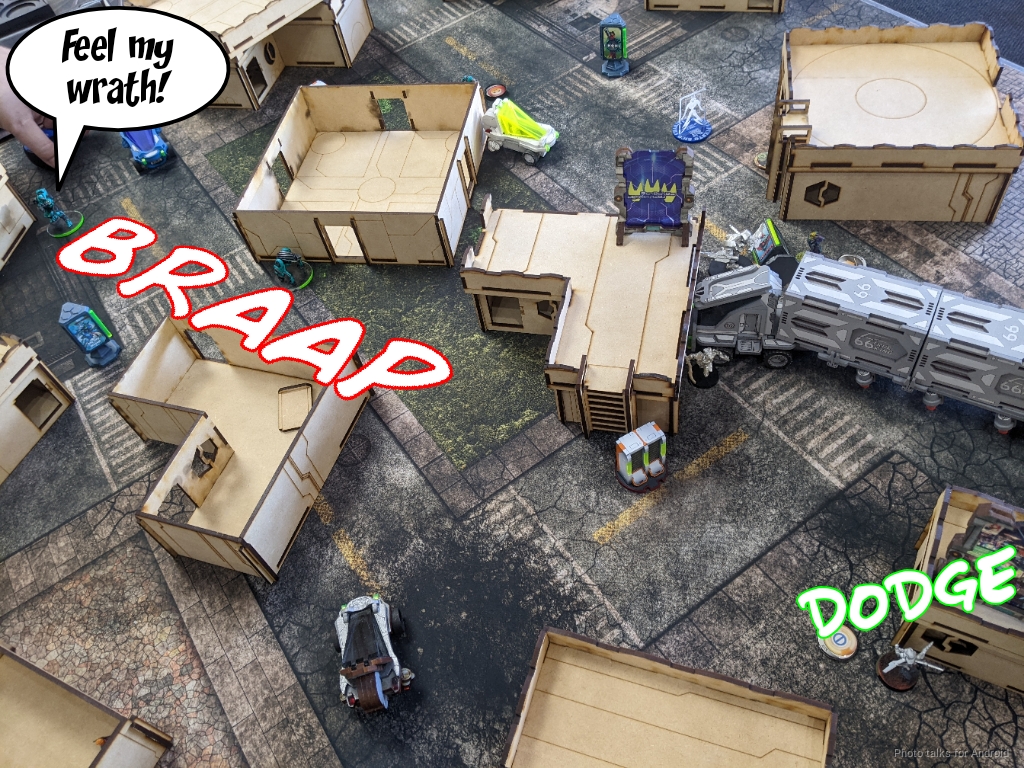
Joel decided to put Casanova in suppression instead of docking me orders, which I think is dangerous in a board state with a Yaogat and smoke in play. In any case, my objective for the turn was to do as much order pool damage as I could, and then maybe deliver one of the Raysat. I do some fancy footwork with Anyat and land smoke in front of the Yaogat and start taking shots. A billboard blocks LoF to Casanova and the Gamma HMG, letting me do isolate just the Sirius and the Gamma Feuerbach. I do a single wound to the Gamma Feuerbach and Joel drops it prone.
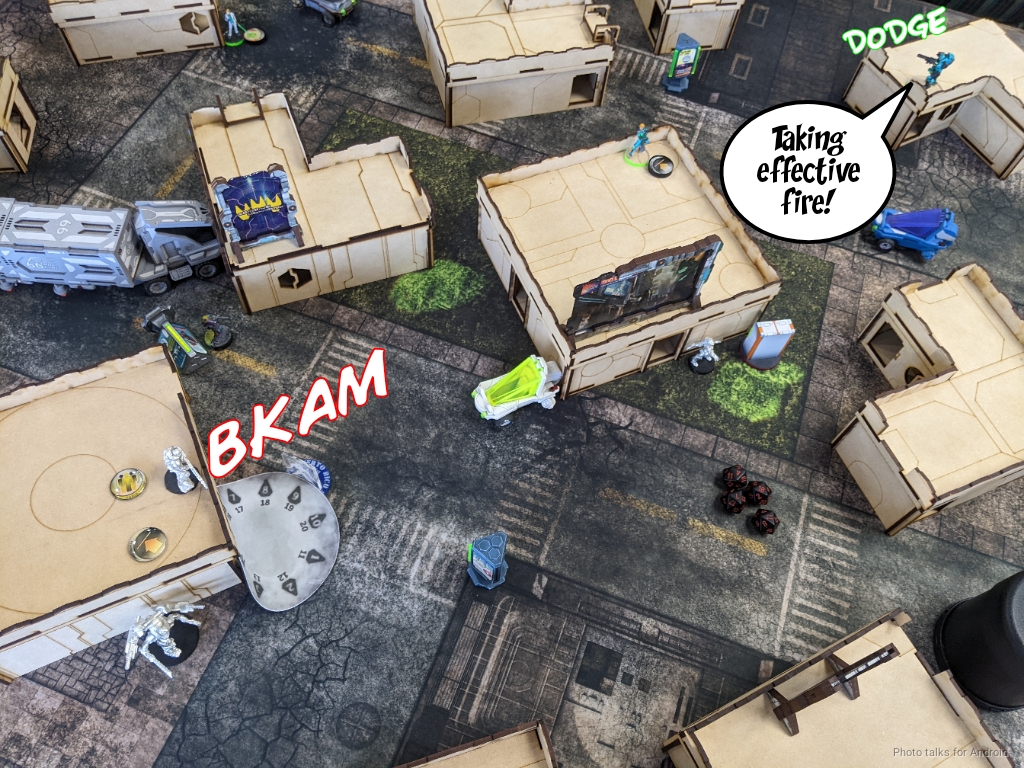
Unfortunately for the Sirius, the building she’s on is big enough and she’s far enough back that I can see her base, so even though she’s prone she dies to the Yaogat.
Anyat sets up more smoke, and the Yaogat puts a wound on Casanova who wisely breaks LoF and hides by going prone.
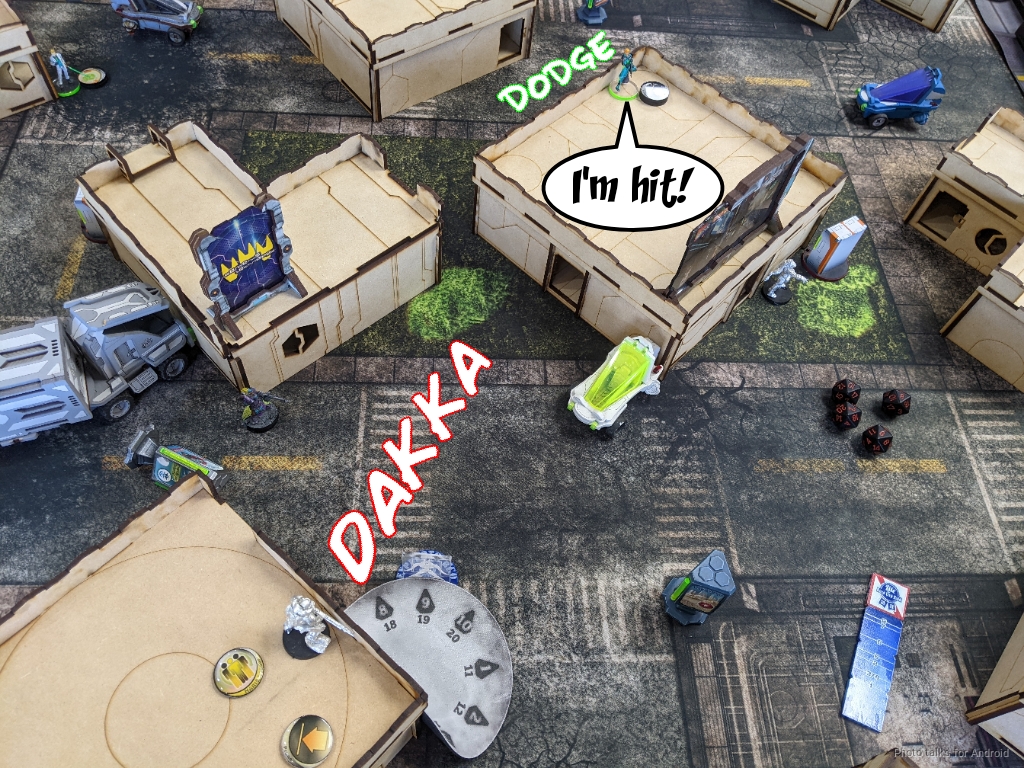
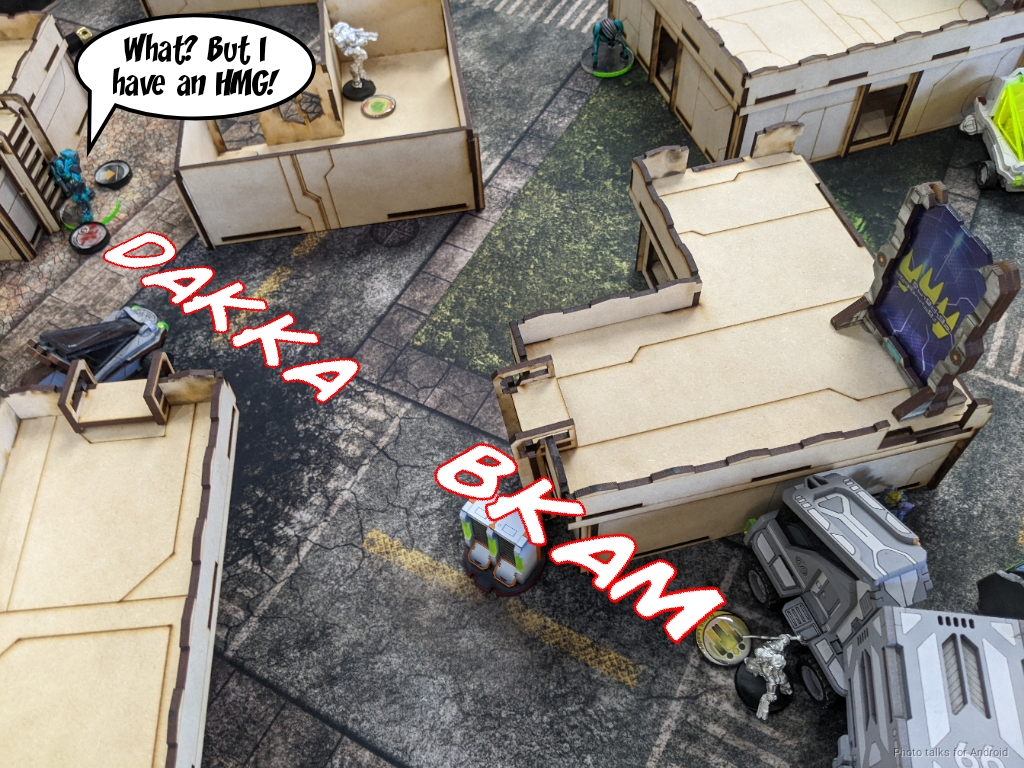
I take a shot at the Gamma HMG and land a whopping two hits and two crits!
Joel passes nine out of the ten saves and goes prone.
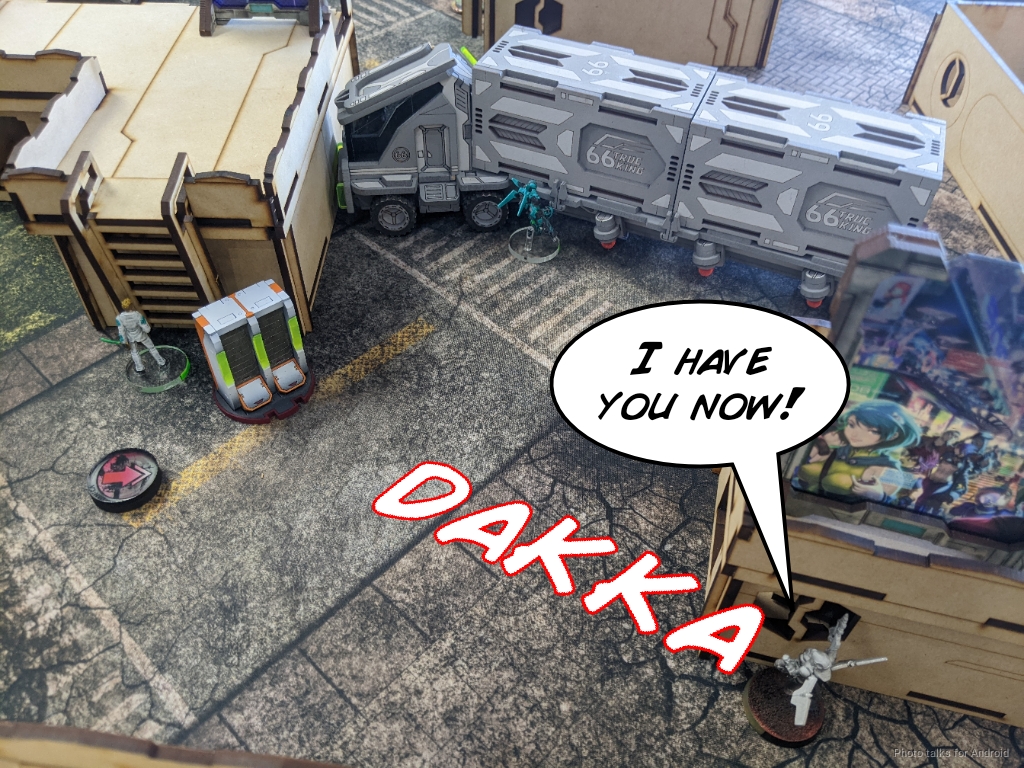
The Kurgat chucks some drop bears around to guard the AC2, and then I drop the Yaogat prone to protect it in my reactive turn. I have enough orders in the second pool to go for the the AC2 with the Rasyat, so I bring one on, gun down the Cyberghost, and make my way to the AC2.
Even with D-Charges, that thing is tough and i only do two wounds to it before running out of orders. That Rasyat is very dead… good thing I have another one!

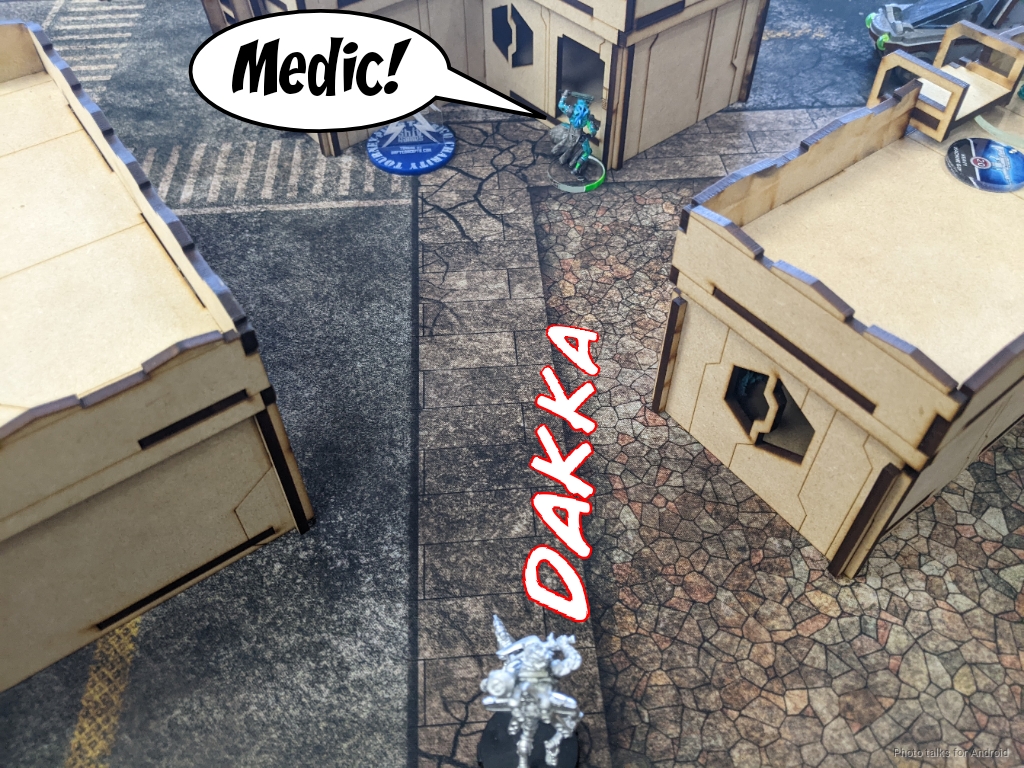
Bottom of 1 – O-12
Joel does the thing his list is designed to do and brings on a Delta hacker and tries to spotlight and remove the Oznat. This would be quite annoying, as that would remove all my orders for the second Rasyat! I’d gain a bunch of impetuous Gaki to problem solve, but I’d be down a lot of orders and have to move the Rasyat into my primary group. Thankfully for me, opposed burst one is very very risky for the active turn player, and Joel burn something like three orders trying to spotlight me and failing before retreating the Delta into a safer position. All his luck was used on passing 9/10 saves on that Gamma, apparently.
Joel obviously can’t let me keep the Rasyat on the AC2, so he guns it down with a heavy pistol against my smoke, and then he passes turn.
Turn 2
Top of 2 – MAF
I’m feeling pretty good about my ability to take down the AC2 with the other Rasyat, so I start pressuring his order pool some more. The Zerat makes a play on taking out Casanova, since he has a chance of picking up D-Charges and making a play on my AC2.
I force Casanova out of LoF of the Zerat, so I bring on my Bashi and shoot Casanova in the back. Of course, he passes ARM. Ugh.
The Delta turns around, but I manage to take Casanova out on the next order, but fail to drop the Delta, who Riotstoppers the Bashi successfully.
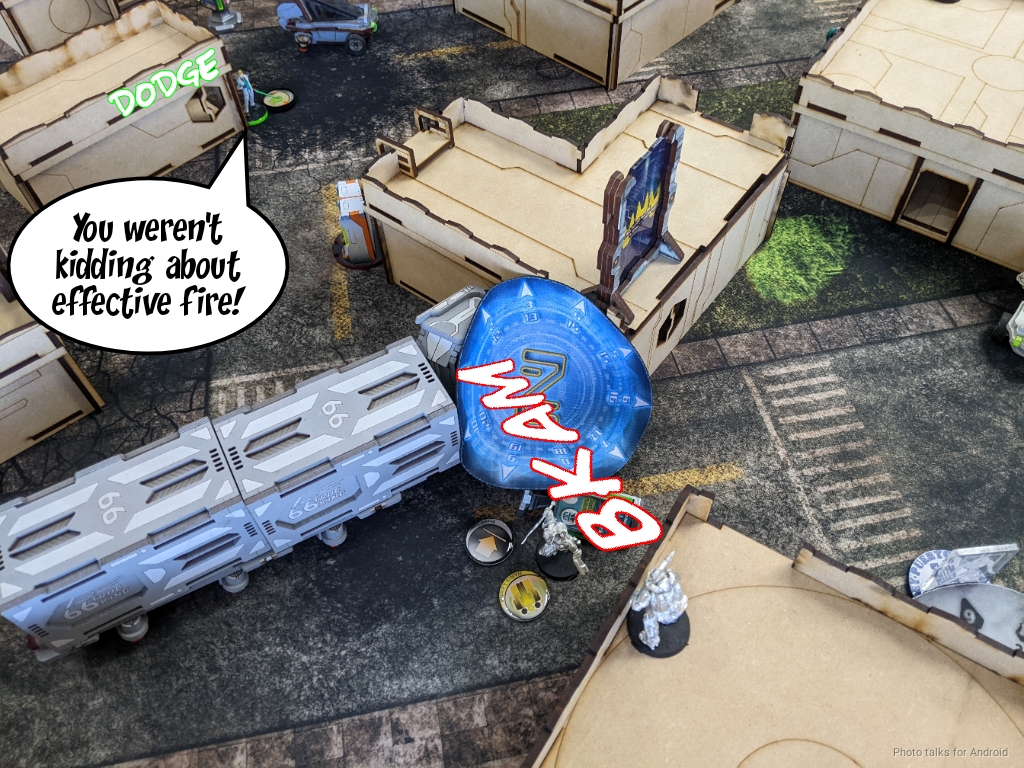
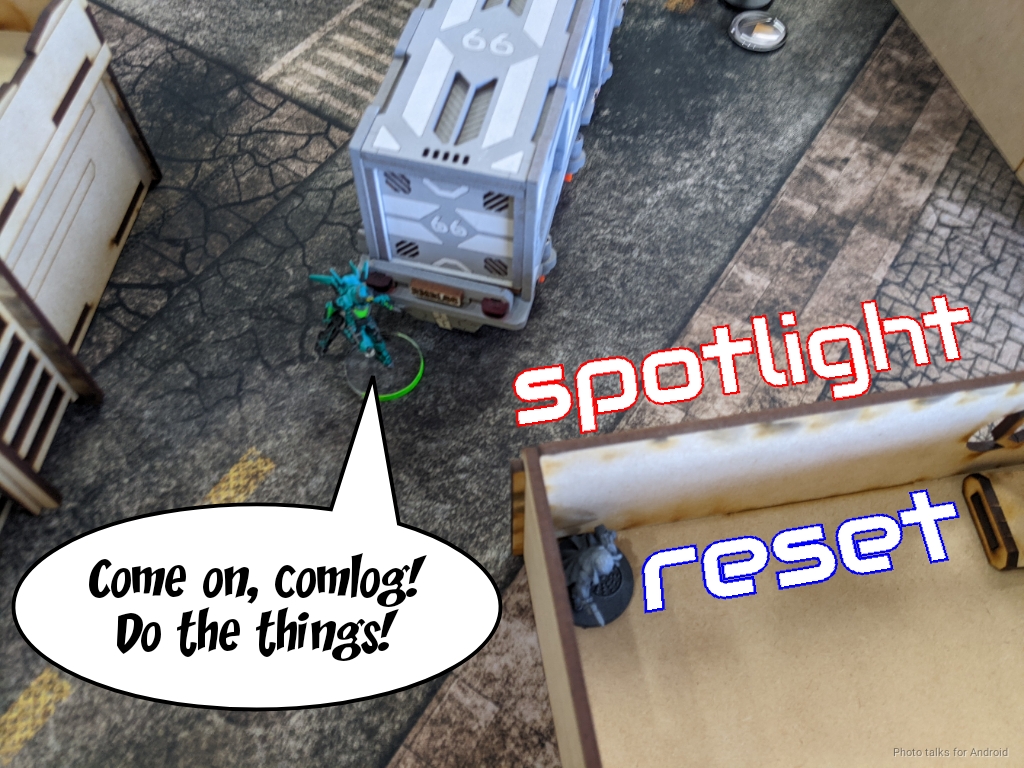
I set up smoke for Anyat to climb up and over the truck, shooting the Delta in the back.
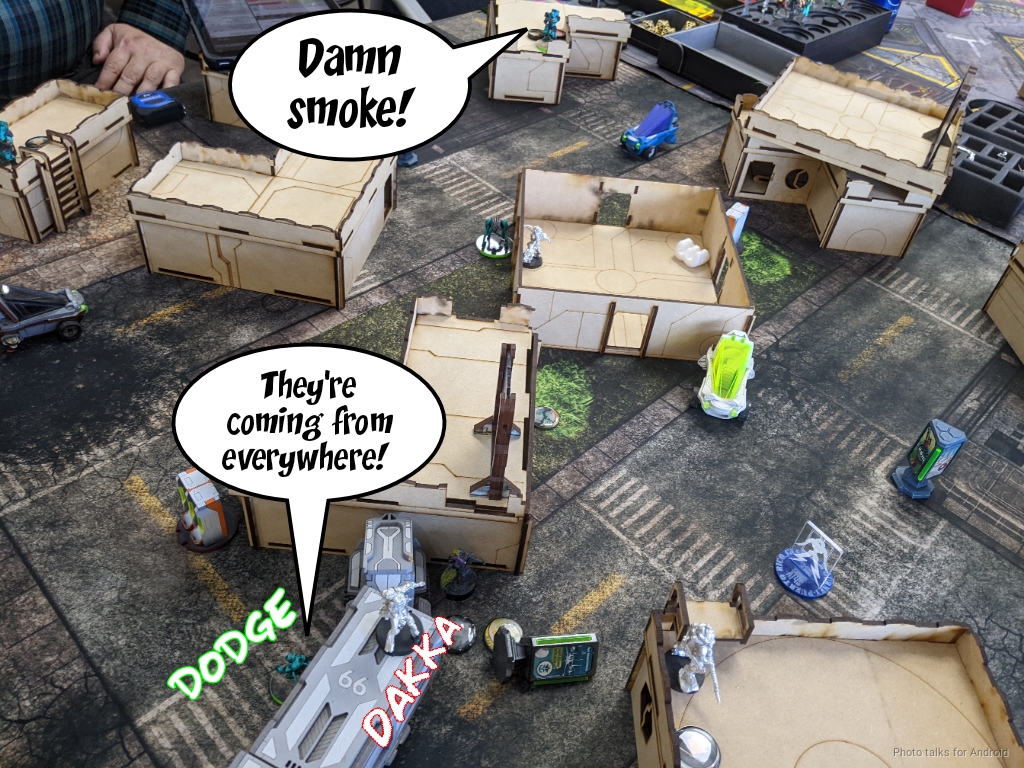
This lets me climb down the other side of the truck to snag Extreme Prejudice.
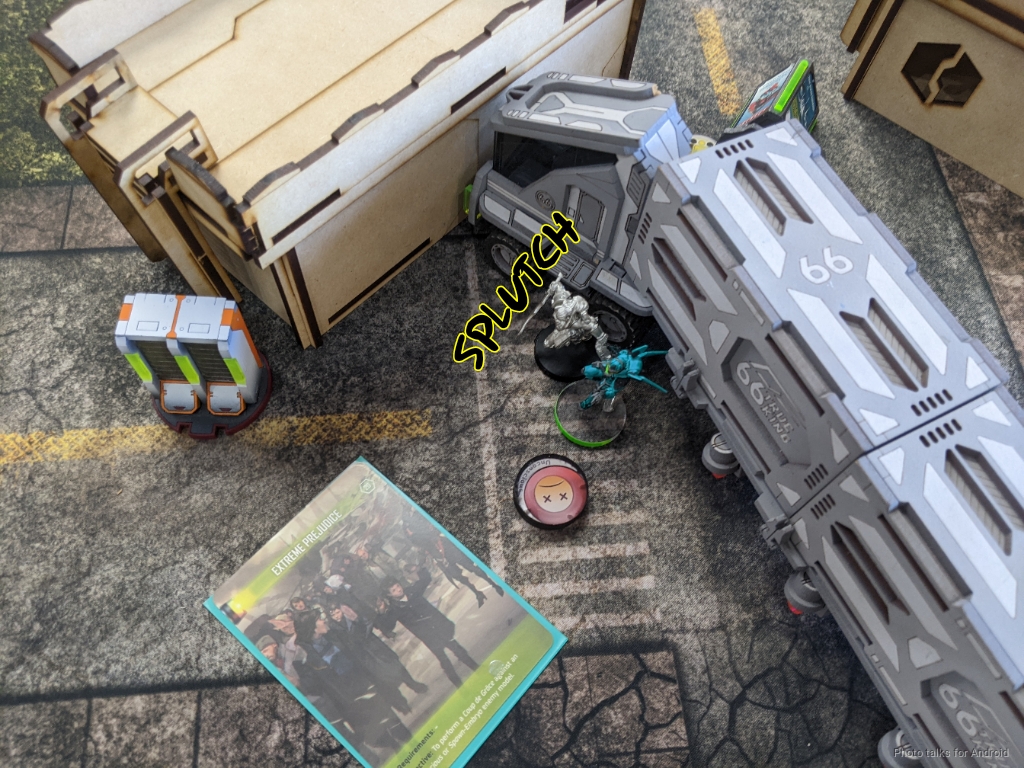
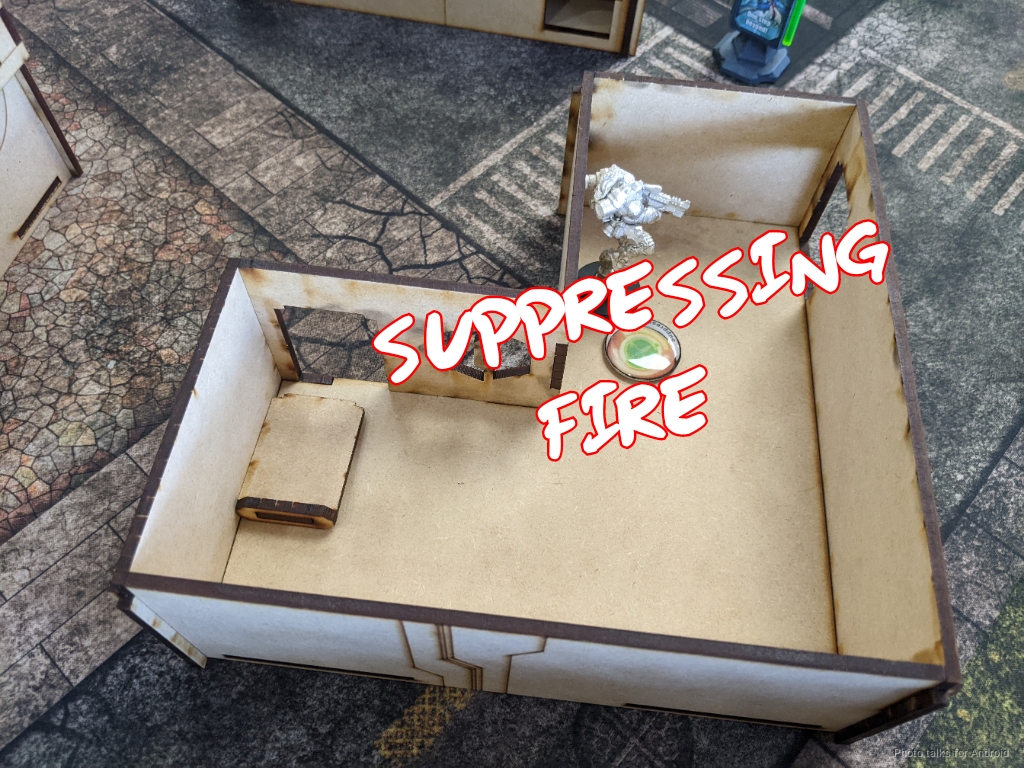
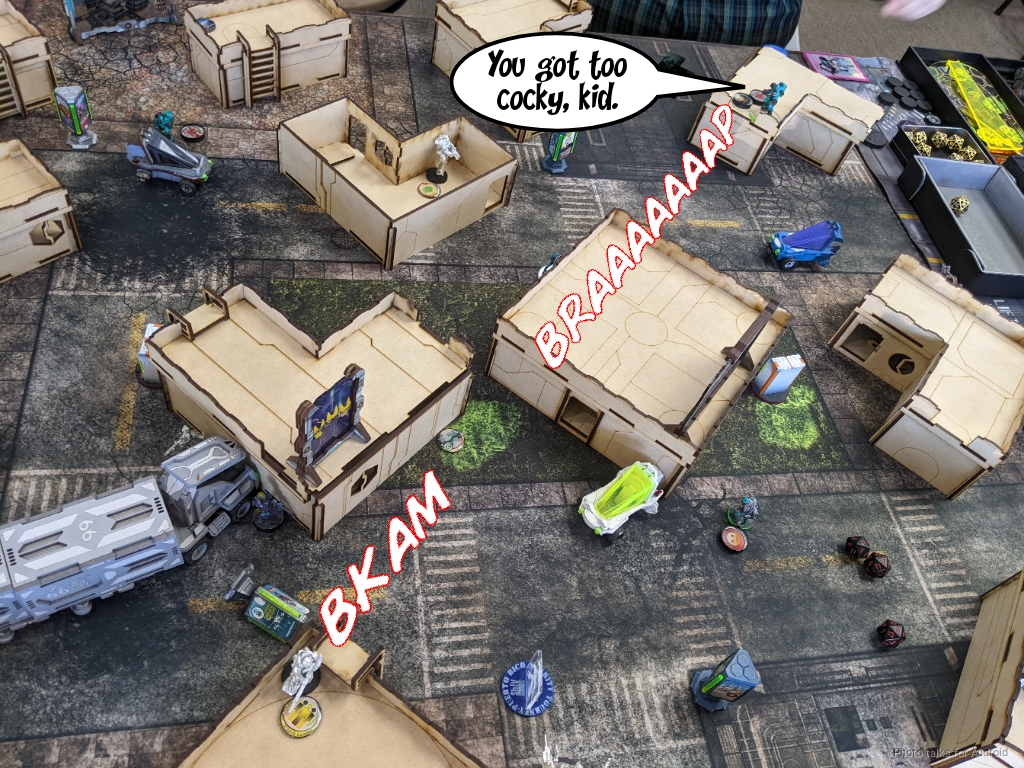
My second Rasyat comes on, blows up the AC2…
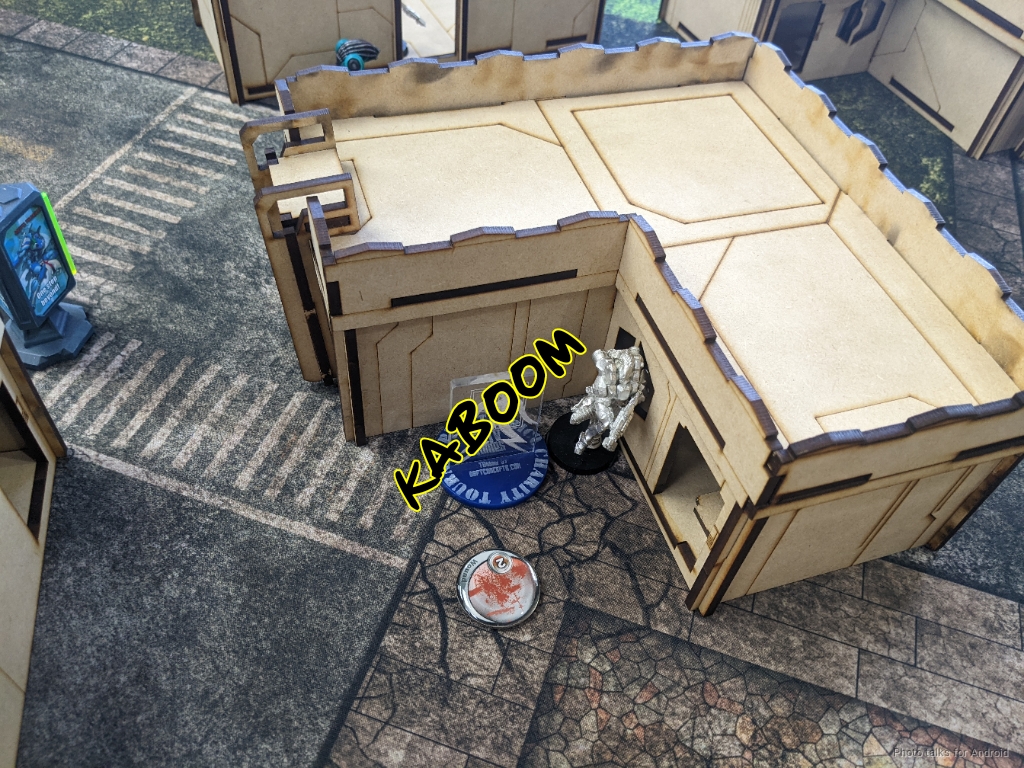
and settles in the nearby building in suppression.
Bottom of 2 – O-12
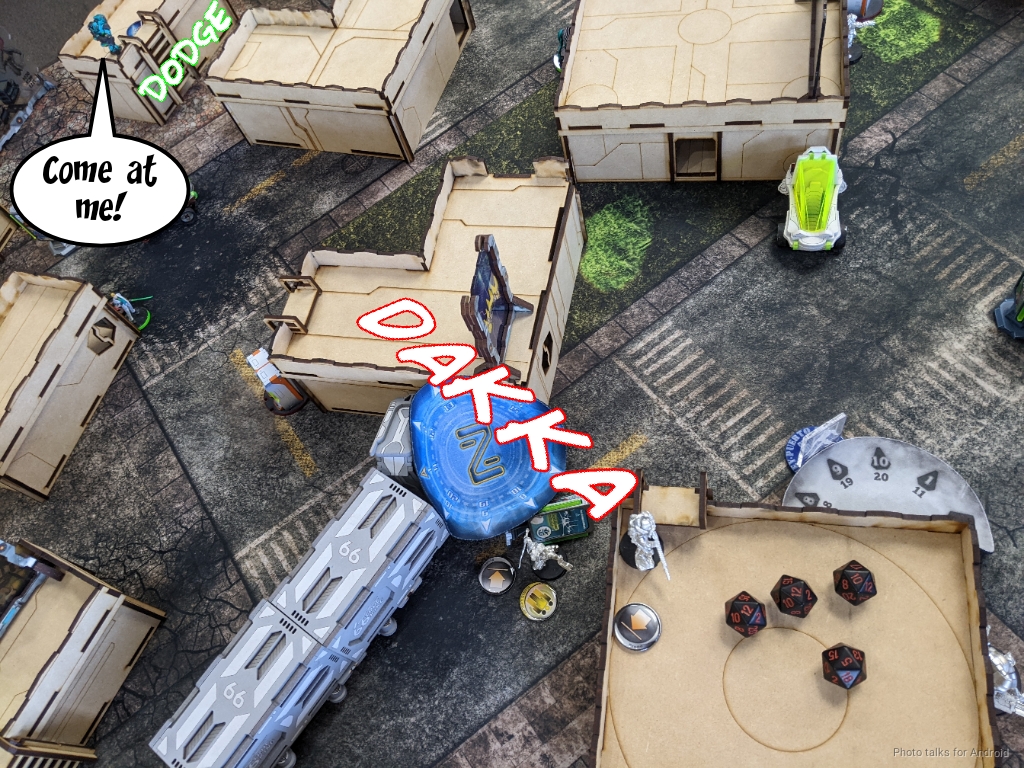
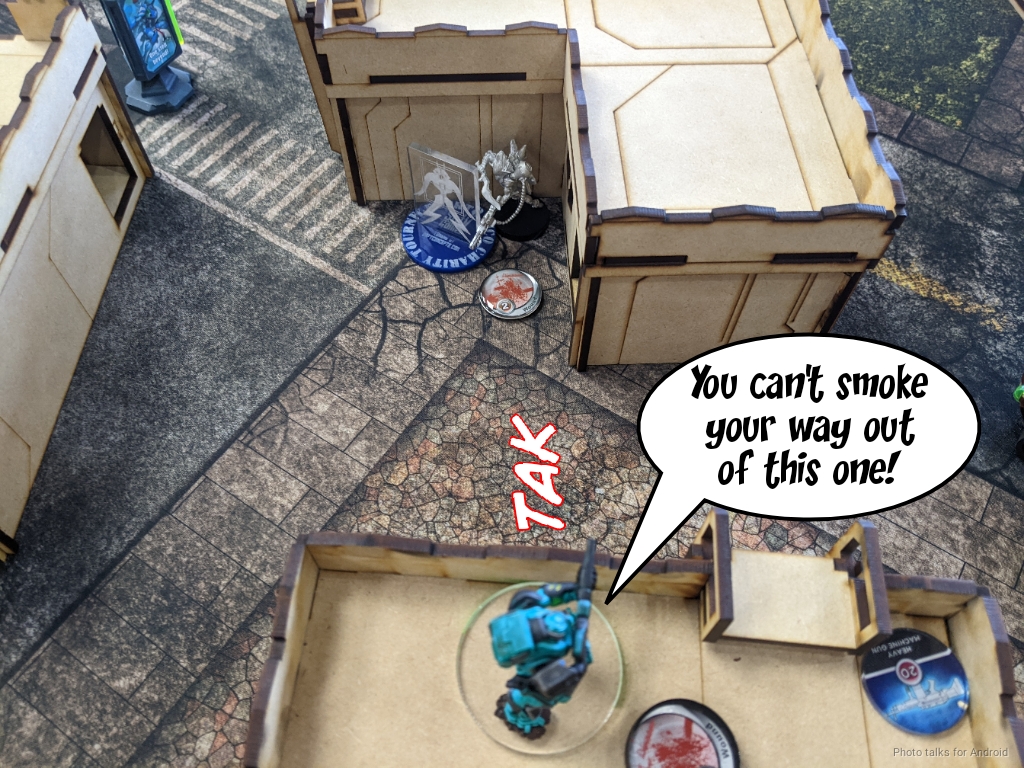
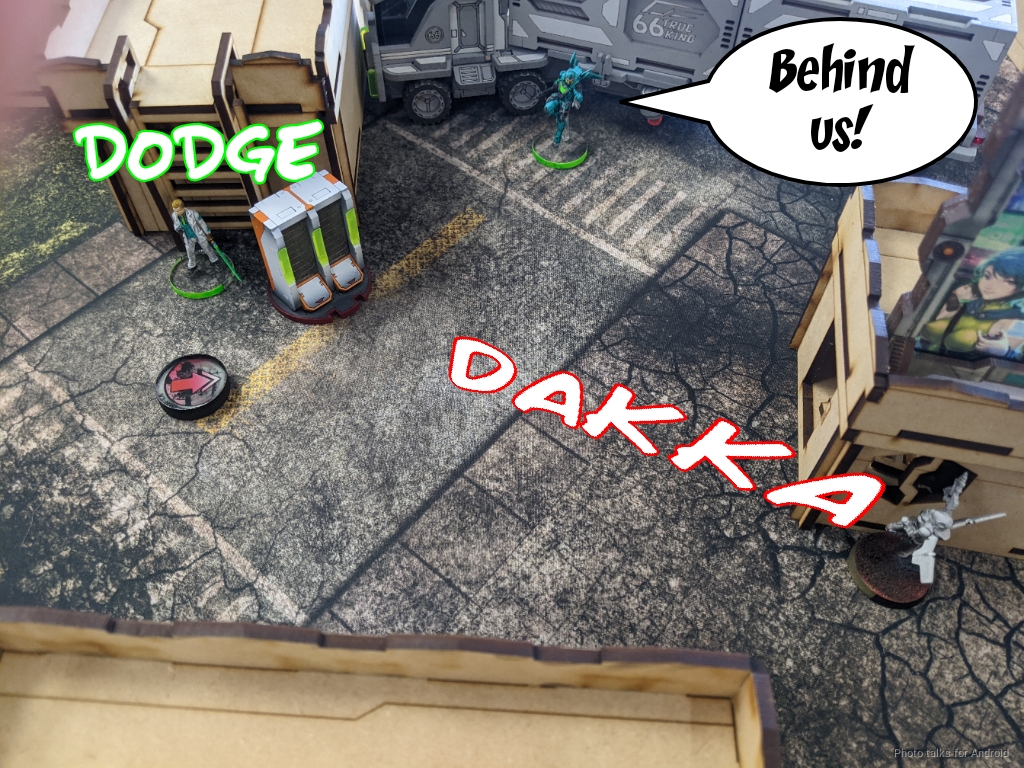
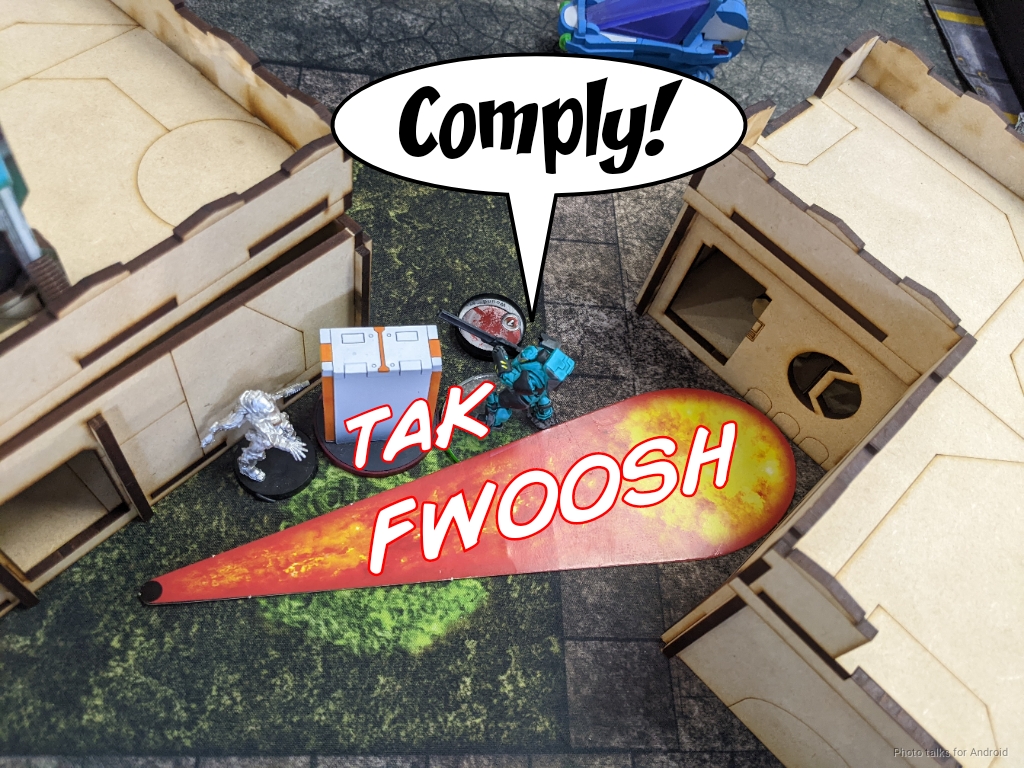
Joel needs to go for a hail mary now, so he reveals the Razor, grabs D-Charges out of the Panoply, and makes his run on my AC2. He dodges past the Zerat and the Kaitok’s first shots…
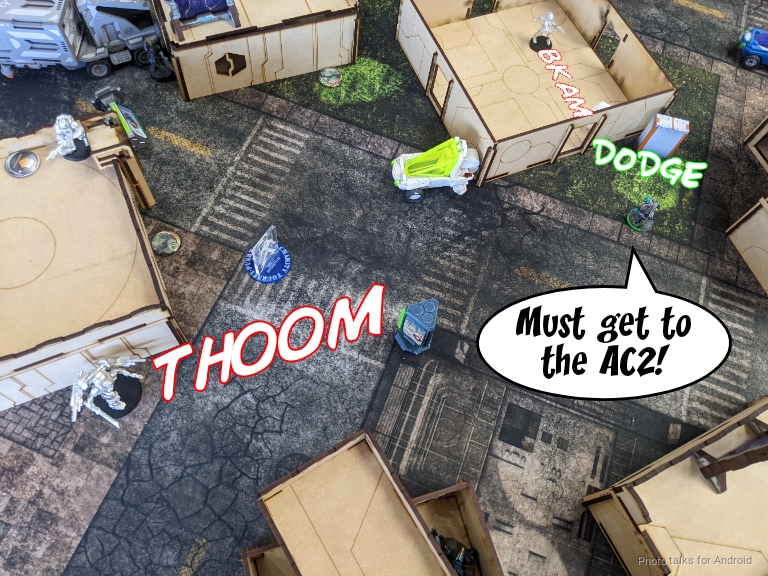
but the Zerat gets him on the next order while the Kaitok dodges into the open to cover the AC2 with its chain rifles.
The Gamma HMG climbs off the roof and tries to kill Anyat, but she miraculously passes ARM and her religious roll and breaks contact.
The Gamma settles into position behind a car, and Joel passes turn.
Turn 3
Top of 3 – MAF
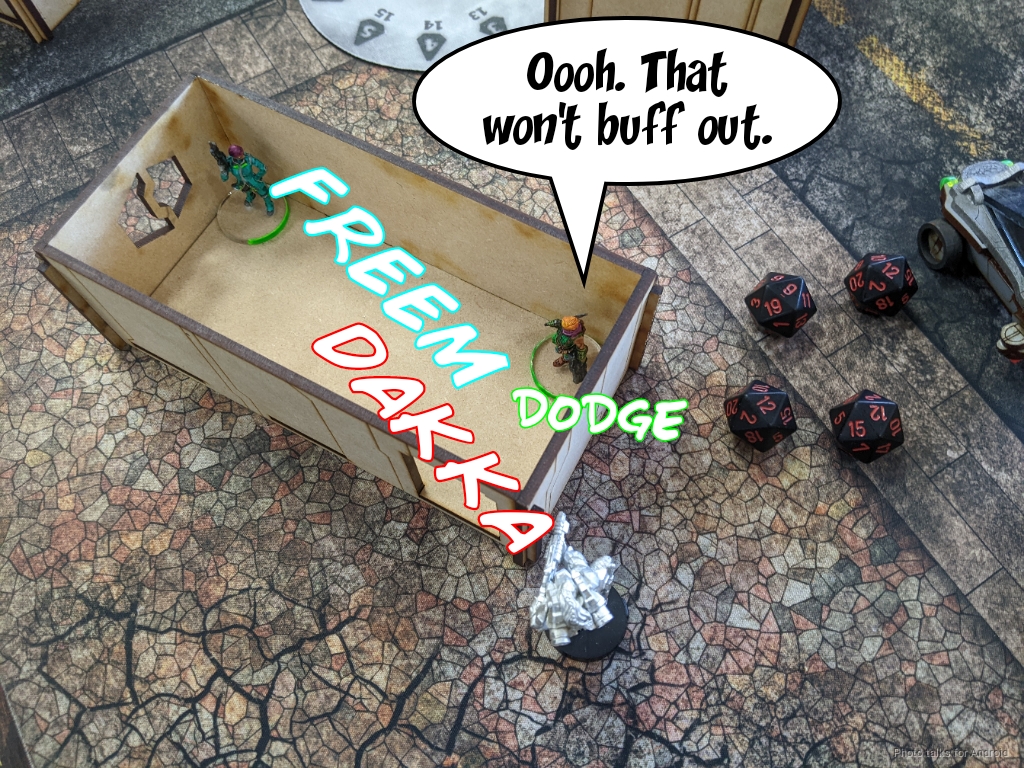
At this point, I just need to grab things out of the Panoplies and kill stuff, so I set about doing that. I get cocky and try to punk the Gamma Feuerbach with the Yaogat without smoke, and am punished by exploded Yaogat.
I move the Kaitok in and reform the link, then Anyat demonstrates why K1 is good and aces the Gamma HMG.

I’m pretty sure the “Kappa” is Joel’s Lieutenant so I bring in the Rasyat. Joel reveals Cho and Nanopulsars me. I decide to just roll for it and hope to pass BTS. I get three crits and a hit, obliterating Cho but I die to the Nanopulsar.
Anyat and the Zerat grab stuff out of the panoplies, and I settle in to see what the bottom of 3 holds.
Bottom of 3 – O-12
The Gamma Feuerbach is the lieutenant! It takes out its frustration on my poor glued Bashi.
Then it kills the Zerat.
Joel brought on his Bashi at some point as well, but I don’t recall what it did exactly. I think it died to a lucky shot from me or something, but I forgot to take a picture and it’s been too long at this point to remember exactly. The Gamma grabs something out of the Panoply, which ties us up on that, making it a
9-0, 164-85 Morat Aggression Force Victory!
Post Game Analysis
Well my list did exactly what it was designed to do. I either killed or forced prone all the AROs with the Yaogat, then brought in the Rasyat. I’m pretty happy with the execution on this game on my end, everything basically went according to plan. Conversely, I think Joel had some weaknesses that I could exploit, namely all the things that were out to ARO and some of the things that weren’t, like the Sirius.
Even if the Sirius wasn’t visible I had an easy attack on her with the Zerat. I just decided to do it more or less risk free with the Yaogat. Regarding the Gamma, ARM 6 is below the ARM 8 threshold for switching to AP mode on the MSR. It’s not a question of preference here, it’s math. Passing 9/10 saves is actually not that crazy, but I’m not really interested in killing the Gamma with the Yaogat, just forcing them prone so the Rasyat can walk on and do its thing. So that worked out perfectly for me.
I’m happy with the redundancy in the list, and I think it would be interesting to swap the Kaitok out for a Dropsuit Taryot, but Tim (Chainsaw) convinced me that it was probably too much AD. In any case, the Yaogat/Anyat pairing is amazingly good and did everything I needed it to do. Anyat is terrifying as well with her K1 basically deleting a Gamma. I did get lucky on the save though against the Gamma in the active turn.
Now, onto the discussion of the guided missile attack on the Oznat. I definitely got lucky there, not disputing that, but I did want to make two points. The first is that I wasn’t fantastically lucky. The Delta (and most hackers) are WIP 13, and most things you might spotlight are also WIP 13. As the defensive player I’m actually more likely to succeed here. This is because if Joel rolls a 14 or above, it doesn’t matter what I roll, the Spotlight still fails! If he rolls a 13 or below, I can potentially beat his roll and he’ll still fail!
| 42.25 | 15.50 | 42.25 |
Therefore, my odds of “winning” the face to face in this scenario are actually 57.75%, almost 60%! So basically any time you’re rolling on equal WIP to land a spotlight, you’re flipping a coin that’s biased in your opponent’s favor. For this reason, sinking orders into spotlight on the active turn is a risky play, not only because something might dodge into view and shoot you on subsequent orders, but also because you’re sinking orders into something that you then have to follow up with additional burst one rolls to get the desired effect.
Let’s look at the statistics on that for a brief moment. The most common guided missile attacks are going to be BS 18 versus a -3 PH dodge. Here’s some odds on an ARM 1 model sweeping across the most common PH 10 to PH 13 values:
| 10 | 11.50 | 11.56 | 76.94 |
| 11 | 13.50 | 11.23 | 75.27 |
| 12 | 15.75 | 10.90 | 73.35 |
| 13 | 18.25 | 10.55 | 71.20 |
Since the “draw” condition for the reactive player is generally favorable, requiring additional order expenditure, the odds of survival are actually as follows:
| PH 10 | PH 11 | PH 12 | PH 13 |
| 23.06% | 24.73% | 26.65% | 28.80% |
This is actually quite reasonable, because on average your opponent will have to spend more than one order trying to spotlight you, and they potentially will have to spend more than one order firing missiles at you! That’s not even counting the orders and resource expenditure it takes to get a repeater or a hacker into position (some armies obviously have an easier time of this than others, and have high WIP hackers to make this more likely).
Where spotlight and the guided missile threat shine are in the missile player’s reactive. Generally the active player will not contest the spotlight as they are busy moving, shooting, and pushing buttons. Then they have to either allow the guided missile attack or spend the resources to move out of repeater range and reset. You can also increase the odds by having multiple hackers who are all declaring spotlight, which helps immensely of course. So to be clear I’m not arguing that guided missiles aren’t effective–far from it. I’m simply making the statement that Joel spending 3 or so orders on trying to spotlight my Oznat and failing to do so is not a statistical aberration. Furthermore, even had he succeeded, I would’ve had almost a 30% chance to survive and drain even more of his precious orders.
Of course, it’s worth mentioning that guided missiles feel really bad, because they break the key promise of Infinity: “It’s always your turn,” and usually one of your cool toys is broken and has to go back into your carrying case or dead pile in ignominious shame. And of course there really isn’t a counter play once the repeater is down and someone’s making Spotlight and BS Attack Guided rolls, you just have to hope for the rolls go go your way. At this point in N4, you’ve probably faced Guided enough to have lost to it and you’ll remember that more than when the it doesn’t go the guided player’s way. It’s not my field but I can imagine the phenomenon where people remember things they have bad feels about more than things they feel good about is a pretty settled bit of research:
Hopefully I’ve convinced you that in spite of the rolls going my way in this game, it’s not unlikely for that to be the case! Now, onto my second point, which revolves around list construction and tool usage. Let’s assume that Joel has a fantastic turn. He succeeds on the the spotlight and then lands a missile, killing the Oznat. Maybe he even does some damage to the rest of my list with more Spotlight/Guided attacks. I did carefully position things to avoid being in blast radius, so he’d have to do this to each model individually. In the ideal scenario it would cost two orders per model to kill them, and he’s down a bunch of orders already due to me murdering things and stuff being off table. In all likelihood, I lose the Oznat and 1-2 more things to a mix of normal shooting and missiles if everything goes quite well for him.
The typical argument against a full Gaki core is that if you go second and the Oznat dies at the top of 1 you’d be down 15 regular orders over the course of the game. Not contesting that, but that is also not a fair representation of the scenario at hand. Yes, you lose 15 regular orders over the course of the game, but you gain 12 impetuous orders and 12 irregular orders over the course of the game (ignoring Gaki attrition). That’s a 9 order increase! Obviously this is a massive oversimplification–you can’t just say impetuous/irregular orders on Gakis are equivalent to regular orders on something else. I’m using hyperbole to make the argument, but the general point stands–those orders aren’t gone they’re just different.
But what about the Rasyats? Well, Kornak has Strategos so I don’t have to spend command tokens to hold two things in reserve, and this list thankfully is pretty light on command token pressure. Spending command tokens to move them into the primary group isn’t a big deal. Yes, I’m increasing pressure on the primary group’s orders, but I can cut some interactions and get some efficiency by doing things like using eclipse smoke to block AROs instead of trying to Yaogat them prone or off the table. So in the ideal scenario for Joel, I’ve suddenly got a pile of Gaki berserking Casanova who was already in NWI, tying up Gamma, hunting the Digger or the “Kappa,” etc. They move so fast that it’s not unreasonable for them to be in or near the enemy deployment zone threatening berserks or explodes.
Then the Rasyats can still do their job and kill the AC2. I think really what the Gaki core creates is a dilemma, not a problem. What do I mean by that? Well, a problem is something like a guided missile list. It’s not really a bad thing for me to kill the missile bot, assuming I didn’t have something more important to do. My opponent doesn’t gain anything by having a dead missile bot, and I certainly gain something. If I solve the problem (assuming I do so with the right prioritization and with efficiency), my situation is monotonically better and my opponent’s is worse.
The Gaki core presents a dilemma, i.e. a tradeoff between two differently poor outcomes (killing the entire core is obviously good, but also good luck with that). In the first scenario where you leave the core alone, I can power something like a Rindak or Bultrak around and murder stuff. Once the rambo piece is dead, I can either move something else into the group, or just rocket the core up to suicide kill something or just do the mission, like I did in this game:
In the second scenario, where you scalpel out the Oznat (easier said than done, as we’ve hopefully established), the new scenario is not clearly better for my opponent. I suddenly have a pile of Gaki that I can missile into things to remove them (and from my recent stints with Taigha this feels very comfortable for me, but now with Explode and Climbing+!), and I can recover by moving any surviving rambo pieces into the first group with Kornak’s extra orders to help mitigate the additional pressure on the order pool.
This does require a specific kind of list construction–you’ll note that I left room in the first group to move the Rasyats over if the Oznat died. I happily concede that the game does get harder for me if the Oznat dies, but that outcome does give me some additional tools to help me problem solve and recover. So in short, I think the better play for Joel is probably to have done the same Guided attack, but on something like Kornak or the Yaogat. Or just snipe Kornak with the Delta’s combi. The idea to damage my pool is good, but I think killing Kornak does more damage. Obviously Morats don’t care about LoL, but I would be losing 3 orders if that happened, which is a big deal for that primary group–I think that hurts more.
Well, at this point I’ve rambled on for quite some time about guided missiles and Morats. I hope this discussion was helpful, and I’ve got some more battle reports to write. Thanks to Joel for a great game and as always, to you for reading.