
Dogs on the Moon
Poor Adam (TheDiceAbide) has either been being a good warcor and getting people into the game or being a good dad and doing family stuff for the last month or so. It made him miss the first Shiv Games tournament in Oregon, and he hasn’t been able to get a game in at the LGS in a few weeks, in spite of being there doing warcor stuff.
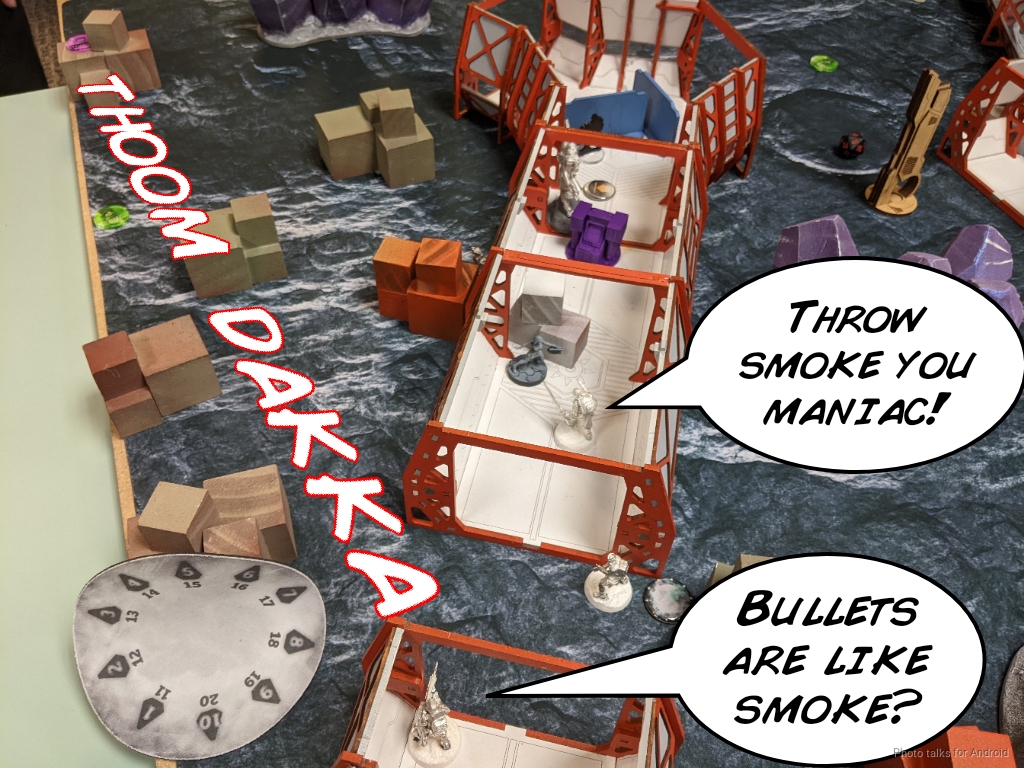
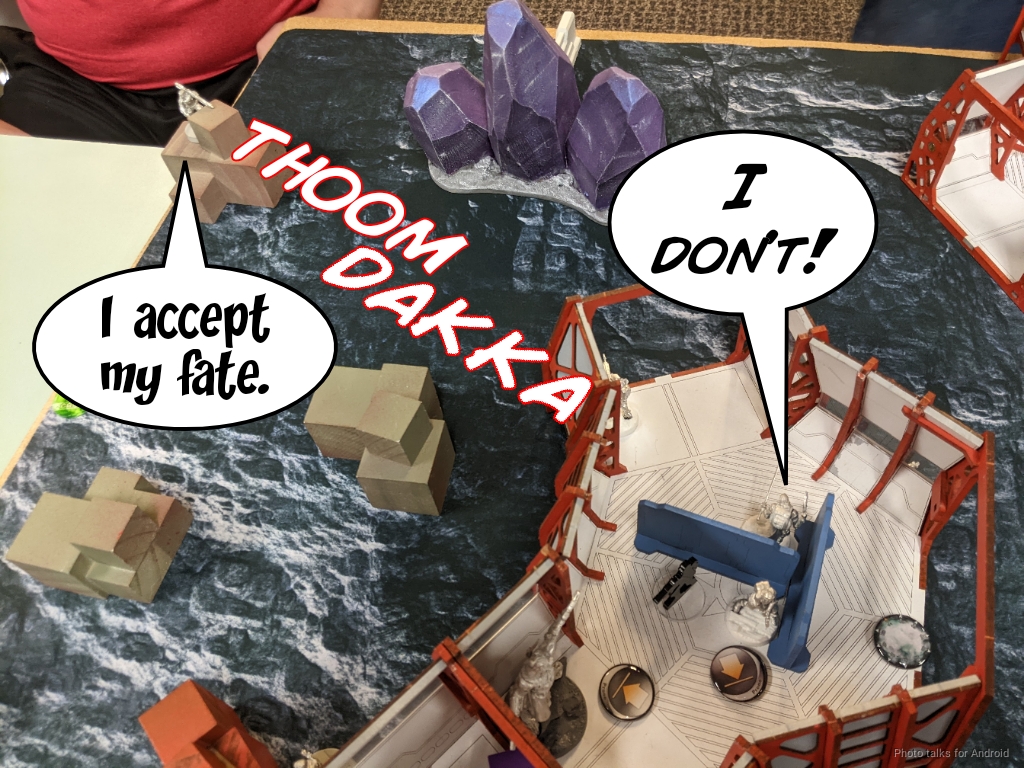
To fix this, we made sure to schedule a game versus one another and I triple checked with my family to make sure I wouldn’t have to cancel at the last minute. The stars all aligned and we made it to the game store with plenty of time for a relaxed game. I broke out the old moon base that we put together with the crystal rocks and all that for RCR a few years ago and set it up for both Unmasking and Decapitation.
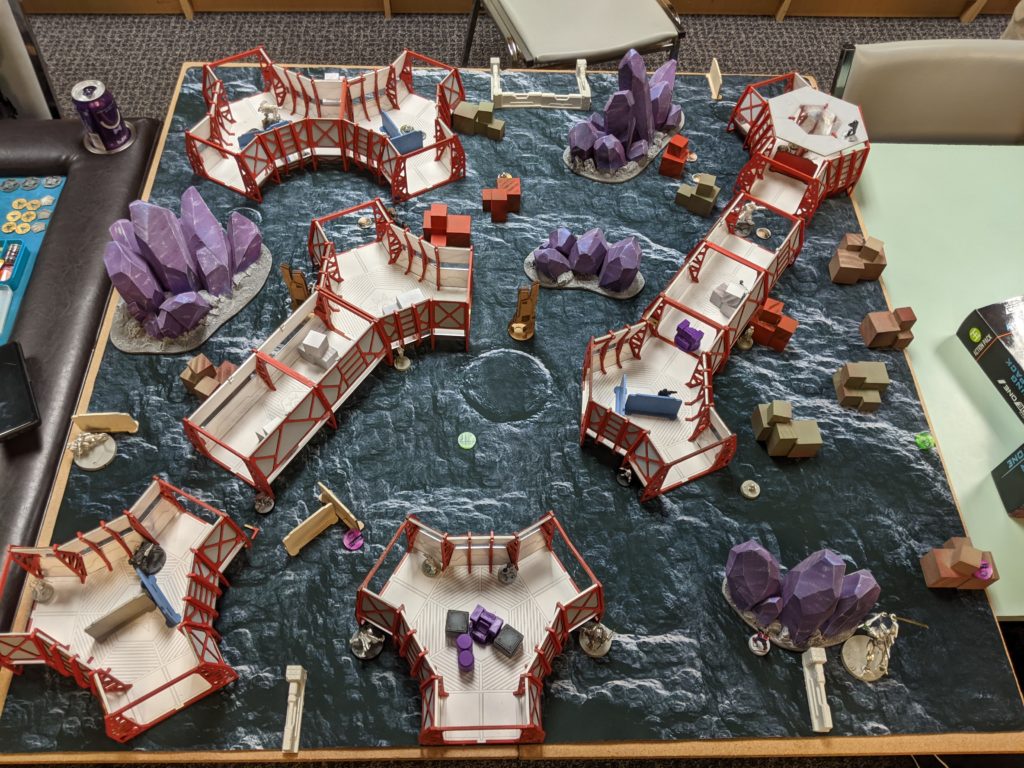
Adam and I always agree to prepare for at least two missions and roll for which mission we’re playing at the table. It keeps things closer to a tournament setting and keeps us on our toes. We ended up rolling Decapitation, so all the consoles would just be cover.
Overview
- Mission: ITS14 Decapitation
- Forces: Caledonian Highlander Army versus Japanese Secessionist Army (300)
- Deploy First: CHA
- First Turn: CHA
I’m back to Caledonia after my brief excursion into Steel last game:
When I was making this list I wanted to keep it pretty similar to the Caledonia list I had played against Erik earlier:
but I had to make some concessions to cover Decapitation. Unlike the game I played against Erik, I knew I’d have to have Wallace in at least a 4-strong link to get sixth sense. That meant I’d have to give up his inspiring leadership coordinated order, and he’d have to be in the primary group. To ensure the same amount of orders, I downgraded one of the Caterans to “just” a sniper rifle and threw a Warcor in there.
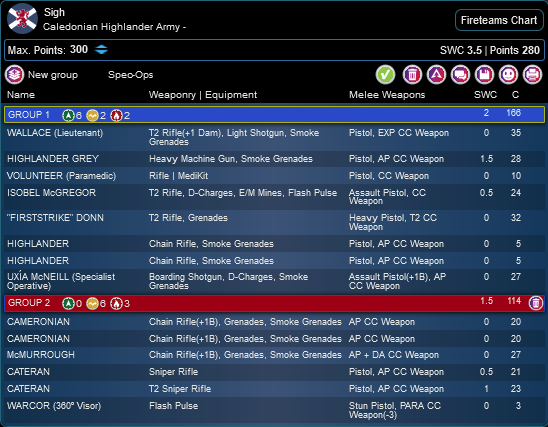
Sigh
GROUP 1
7
2
2
HIGHLANDER GREY Heavy Machine Gun, Smoke Grenades / Pistol, AP CC Weapon. (1.5 | 28)
VOLUNTEER (Paramedic) Rifle ( | MediKit) / Pistol, CC Weapon. (0 | 10)
ISOBEL McGREGOR T2 Rifle, D-Charges, E/M Mines, Flash Pulse / Assault Pistol, CC Weapon. (0.5 | 24)
WALLACE (Lieutenant) T2 Rifle(+1 Dam), Light Shotgun, Smoke Grenades / Pistol, EXP CC Weapon. (0 | 35)
“FIRSTSTRIKE” DONN T2 Rifle, Grenades / Heavy Pistol, T2 CC Weapon. (0 | 32)
HIGHLANDER Chain Rifle, Smoke Grenades / Pistol, AP CC Weapon. (0 | 5)
GROUP 2
UXÍA McNEILL (Specialist Operative) Boarding Shotgun, D-Charges, Smoke Grenades / Assault Pistol(+1B), AP CC Weapon. (0 | 27)
CAMERONIAN Chain Rifle(+1B), Grenades, Smoke Grenades / AP CC Weapon. (0 | 20)
McMURROUGH Chain Rifle(+1B), Grenades, Smoke Grenades / AP + DA CC Weapon. (0 | 27)
CATERAN Sniper Rifle / Pistol, AP CC Weapon. (0.5 | 21)
WARCOR (360º Visor) Flash Pulse ( ) / Stun Pistol, PARA CC Weapon(-3). (0 | 3)
3.5 SWC | 300 Points | Open in Infinity Army
The first group I thought was pretty clever. There’s two possible 4 or 5 strong links in there:
- Volunteer Paramedic, Grey HMG, Grey BSG, Isobel, Wallace (Cadin can be in here too)
- 2x Galwegian, Cadin, Wallace, Isobel
Unfortunately I can’t make Cadin + 2 Galwegian a haris, but I was prepared to have them be solo to get their impetuous orders. The idea here is that I would deploy the links on opposite sides of my deployment zone and hold Wallace in reserve. If Adam had multiple Oniwaban, he’d have to put some in the middle because he wouldn’t be clued into which region Wallace would be in, because he can make a legal link on either side of the table. If I was going second, this would be great, and I figured it would give me some benefits by making it harder for him to backstop his Oniwaban in his deployment.
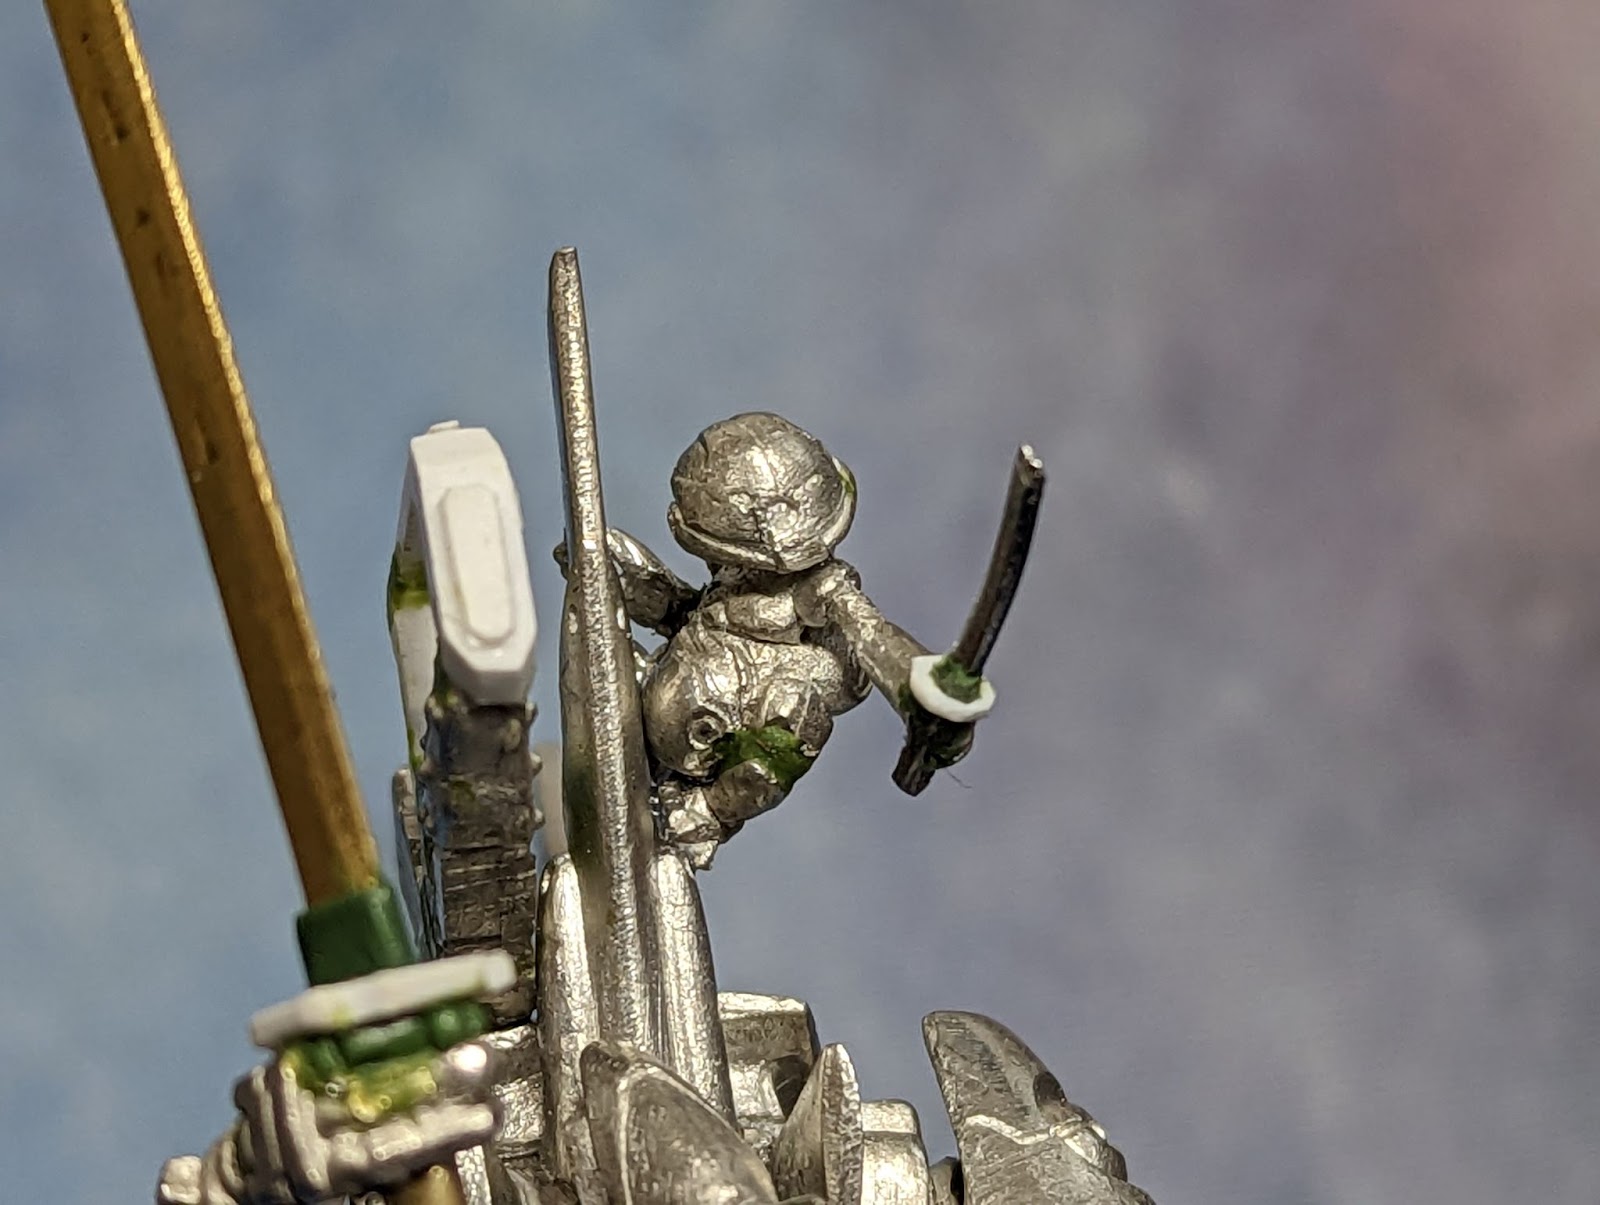
Adam just converted this beautiful O-Yoroi, so he obviously had to put it in a list and on the table:
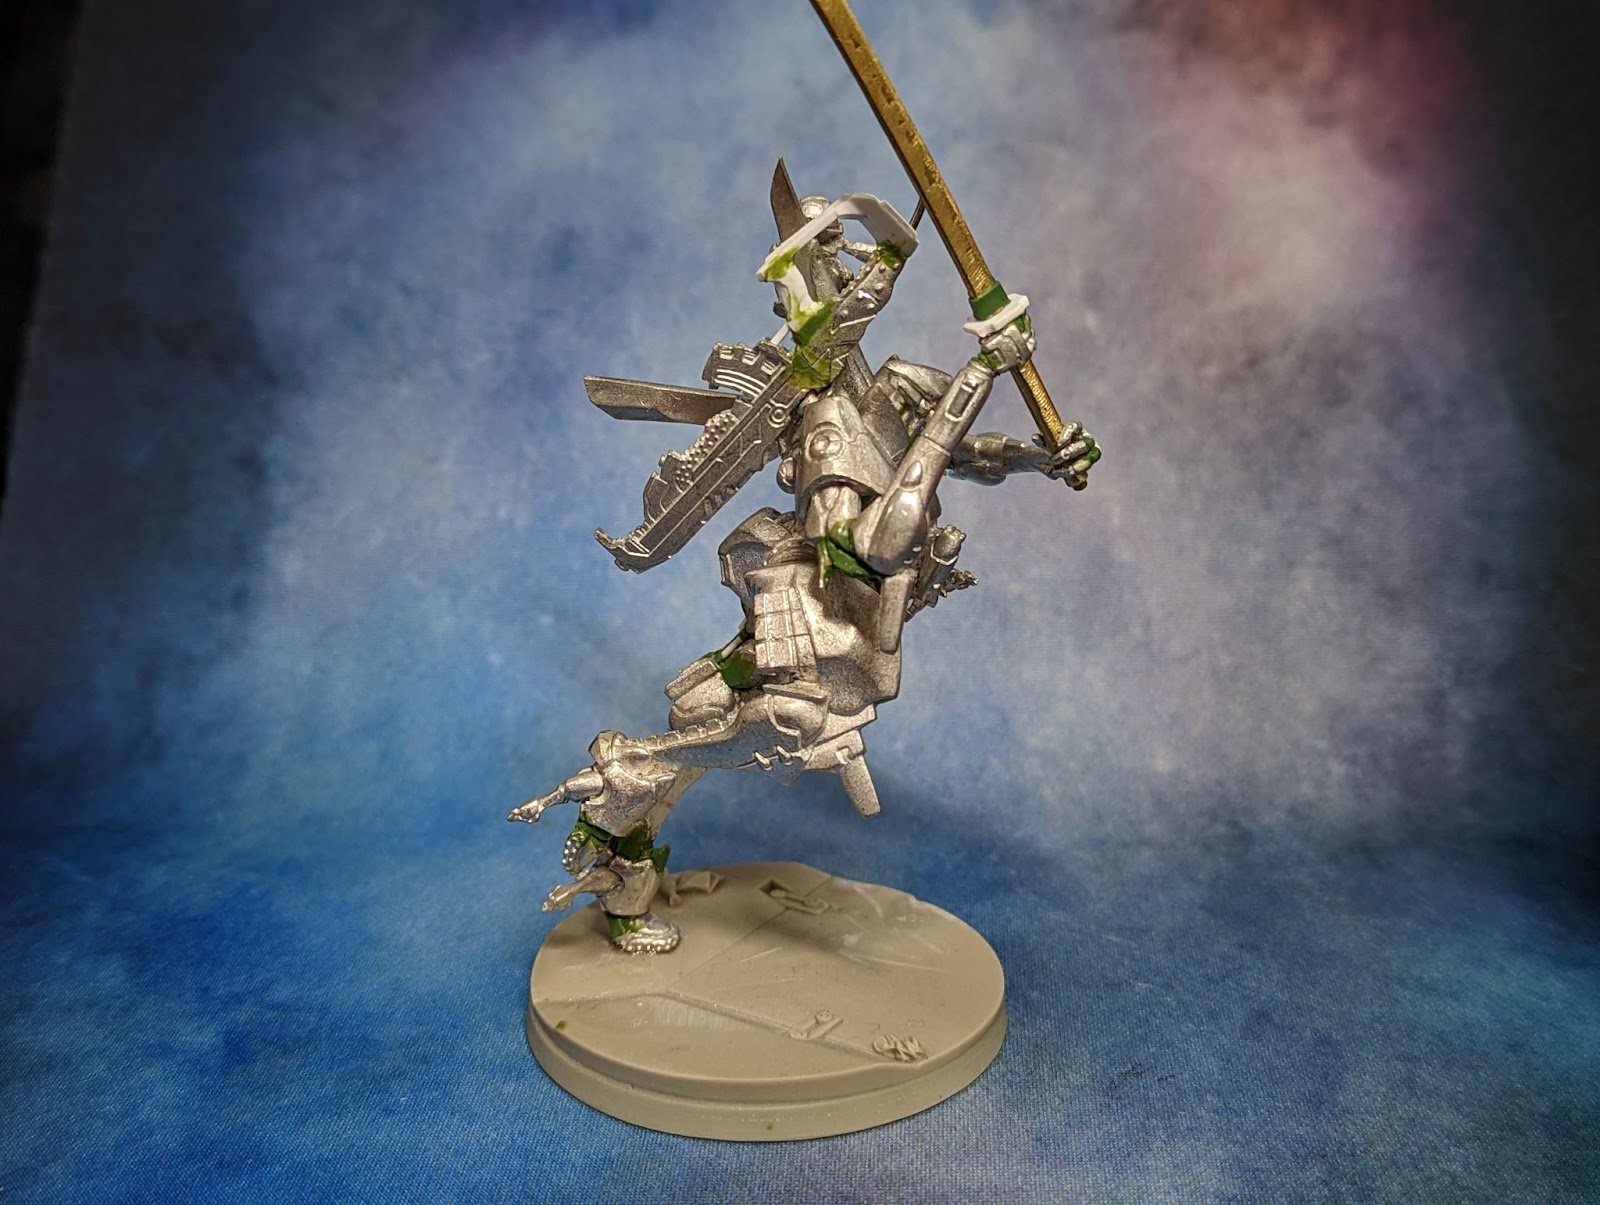
If you want to hear more about how he did it, he talks about it in the most recent episode of Late Night Wargames:
Being Decap, Adam decided to make the O-Yoroi his Lieutenant for maximum #YOLOSWAG. He has the excellent Daiyokai + 2x Keisotsu (one Paramedic) link, and then of course two Ryuken-9 HRLs.
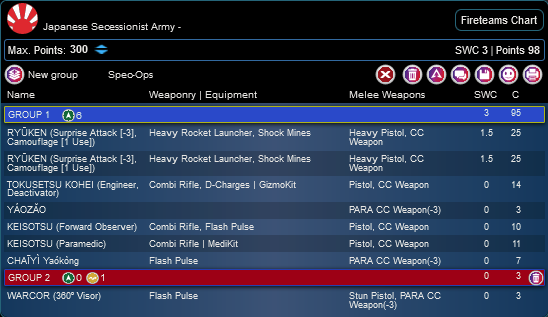
Decap/Unmasking
GROUP 1GROUP 2
O-YOROI (Lieutenant) AP Heavy Machine Gun, Heavy Flamethrower, Crazykoala / EXP CC Weapon. (2 | 75)
O-YOROI PILOT Contender, Flash Pulse / Pistol, CC Weapon. (0 | 0)
WÈIBĪNG Yaókòng Combi Rifle, Flash Pulse / PARA CC Weapon(-3). (0 | 15)
SHINOBU Combi Rifle, Nanopulser, Smoke Grenades / Pistol, Monofilament CC Weapon. (0.5 | 44)
YOJIMBO Contender(+1B), Nanopulser, Smoke Grenades, Crazykoala / Pistol, DA CC Weapon. (0 | 20)
RYŪKEN (Surprise Attack [-3], Camouflage [1 Use]) Heavy Rocket Launcher, Shock Mines / Heavy Pistol, CC Weapon. (1.5 | 25)
TOKUSETSU KOHEI (Engineer, Deactivator) Combi Rifle, D-Charges ( | GizmoKit) / Pistol, CC Weapon. (0 | 14)
YÁOZĂO PARA CC Weapon(-3). (0 | 3)
DAIYŌKAI MULTI Marksman Rifle, Panzerfaust / Pistol, AP + DA CC Weapon. (0 | 48)
KEISOTSU (Forward Observer) Combi Rifle, Flash Pulse / Pistol, CC Weapon. (0 | 10)
CHAĪYÌ Yaókòng Flash Pulse / PARA CC Weapon(-3). (0 | 7)
5.5 SWC | 300 Points | Open in Infinity Army
Having the TAG encourages an engineer, so Adam had one of those as well, and then since the list is meant to cover Decapitation both Yojimbo and Shinobu make the cut (no pun intended).
Deployment
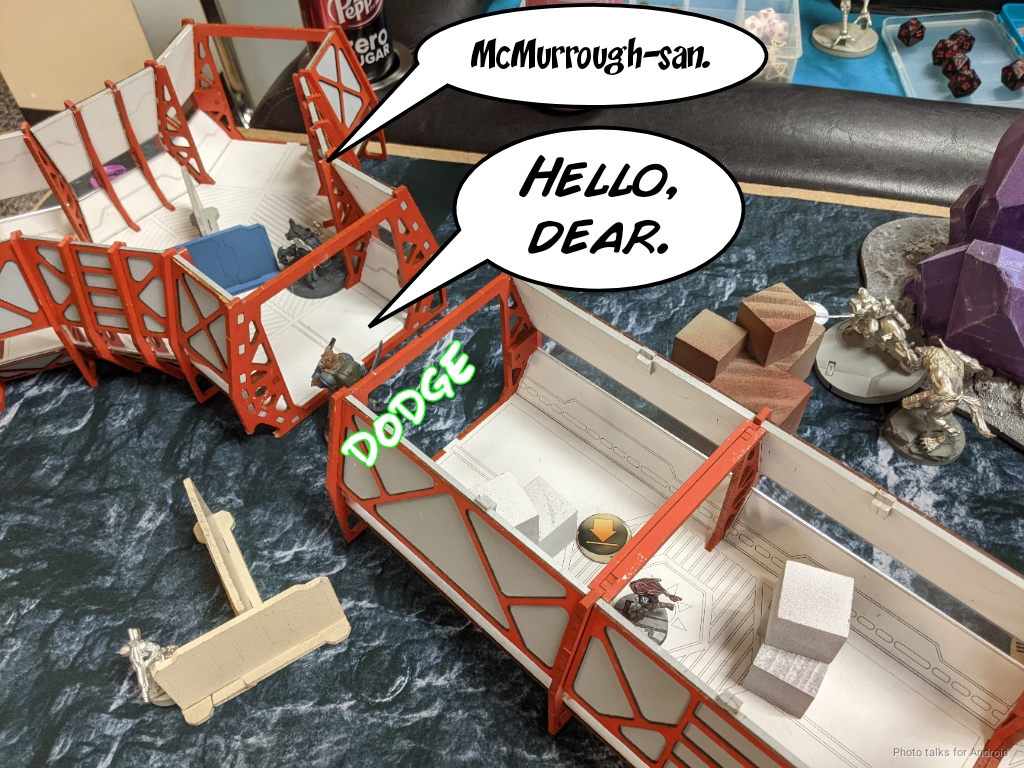
I won the rolloff and elected to go first, so Adam was all too happy to have me deploy first. I actually felt very comfortable going into this deployment because I had a clear plan that I had designed into the list. First I set up the two Greys and Volunteer along with Isobel on the left side in a small building. Then the Galwegians and Cadin went on the right. I had already decided that Wallace was going to be hanging out with them, but I set the Greys up as if they were trying to cover various approaches.
Cadin was set up in such a way to discover anything walking into the room and Galwegians were ready to chain rifle, discover, or dodge into combat with things as well. I then set up my next layer of defense, which were a pair of Cameronians screening the approach to both links. McMurrough went down in the middle of the table as an additional bit of defense and attack. You’ll note that both McMurrough and the Cameronian on the left are going to run into the corridor system as part of their impetuous moves, which dramatically limits the AROs that they’ll face. This is good for me, bad for Adam.
I set up the non-T2 Cateran all the way on the right, watching a lateral firelane. Anything that walked through the center of the table on the way to my deployment zone was either going to get discovered or shot, hopefully both. As a bit of additional insurance, I also put the Warcor there to do the same thing, but centrally located to hopefully get a +3 WIP discover on something within 8″.
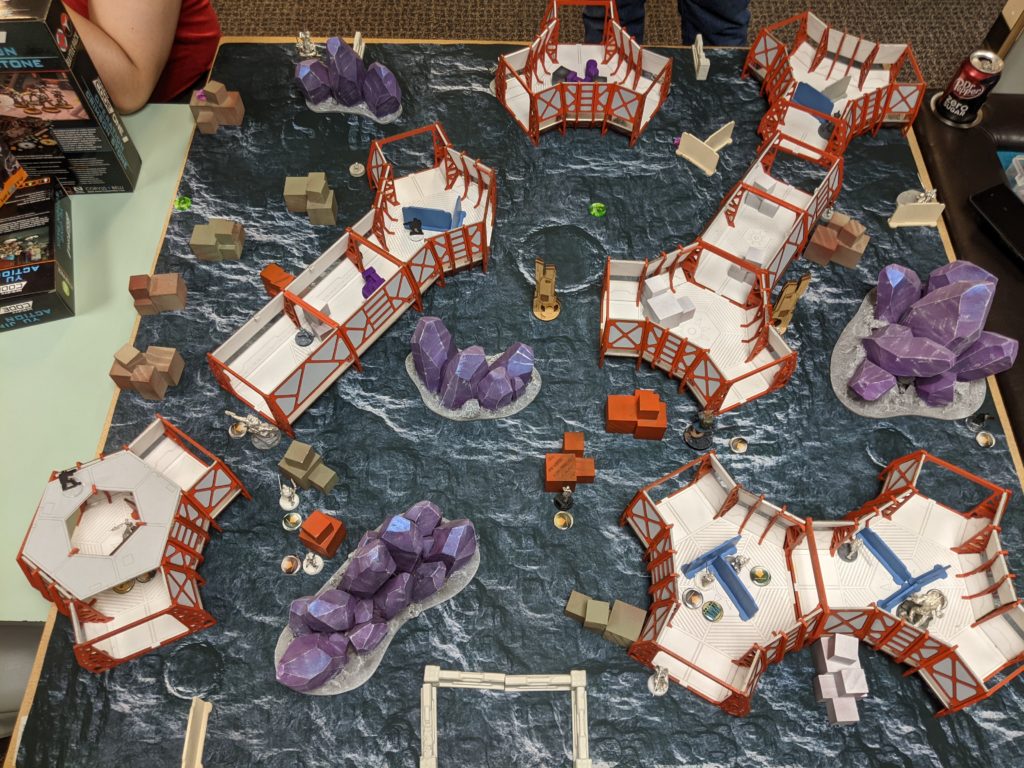
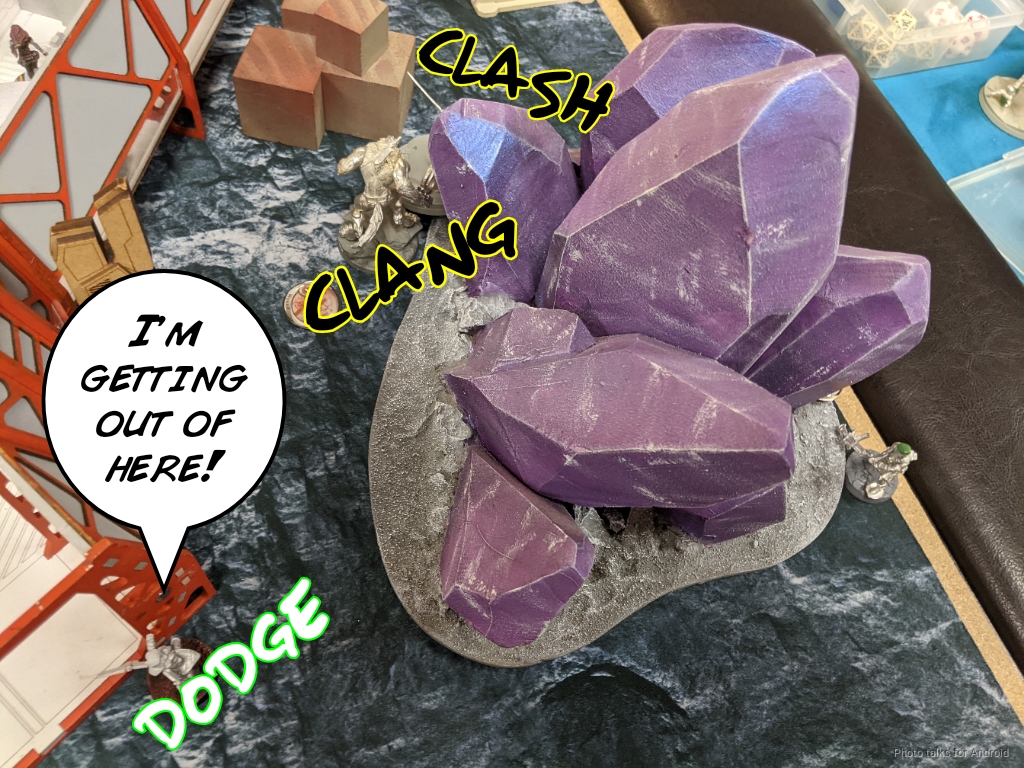
There was a pretty large region of Adam’s deployment zone on my left that I wanted to apply pressure to, so I stuck the T2 Cateran on a roof above the Greys to contest that area. Holding Uxia and Wallace in reserve, I passed deployment over to Adam.
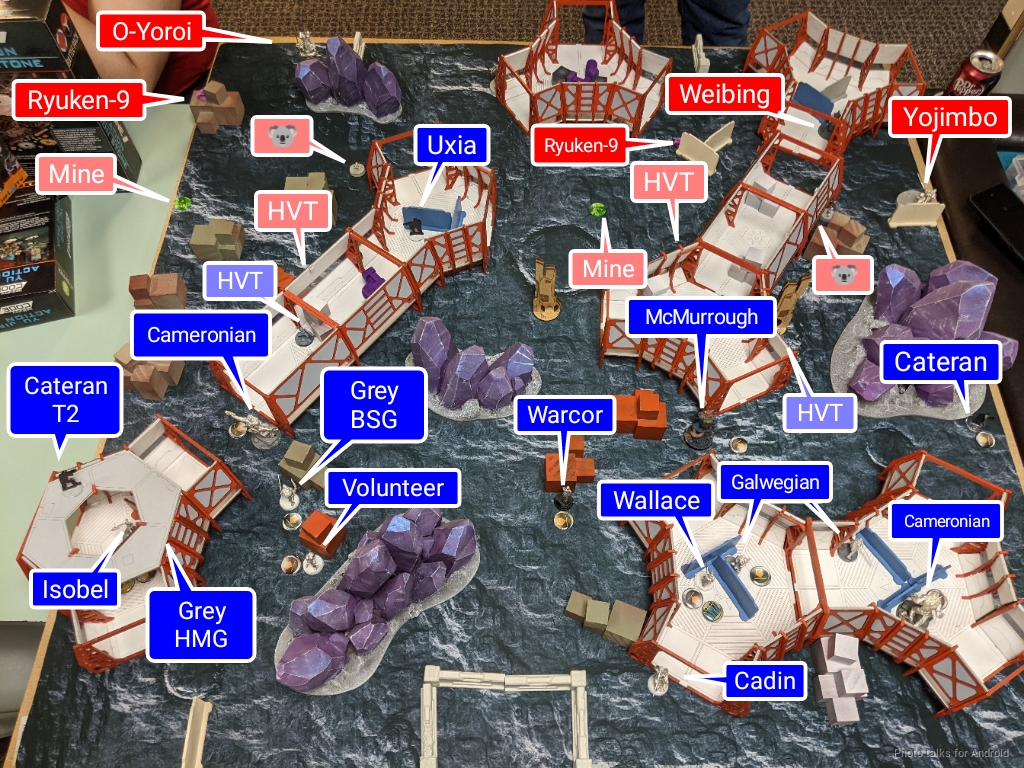
Given that Wallace wasn’t on the table, Adam was forced to hold Shinobu in reserve. This doesn’t protect Wallace, but it does allow me to counter deploy his Lieutenant with my own assassin, Uxia. I’ll take it! In any case, Adam put down a Ryuken-9 HRL covering the large central open area of the table, even putting a mine in the middle of nowhere to really deny that area to me. Fine by me.
The other Ryuken-9 covered my T2 Cateran with an ARO, and strangely put its mine in a spot that is sort of irrelevant to the game. The Daiyokai covered the advance of anything on Adam’s right with its two Keisotsu friends nearby. The Weibing contested McMurrough’s corridor, and the Warcor was deployed pretty similarly to mine, guarding the entrance to Adam’s deployment zone.
A single Chaiyi covered the left side approach from Adam’s perspective, which of course would do nothing against my dogs. Yojimbo took a very advanced position on Adam’s left, and then it was time to deploy his O-Yoroi, which he had hoped to hold in reserve. This is exactly the sort of benefit I wanted out of my list construction and deployment strategy! Both Yojimbo and the O-Yoroi placed their Koalas pretty far forward. I learned later the reason for Adam’s strange mine placement was because he didn’t want me to simultaneously clear a mine and Koala with the same order. I think if he’s trying to do this, the Koala should be immediately adjacent to the Koala carrier, which is really what they’re trying to protect, after all, and the mines can be wherever they need to me.
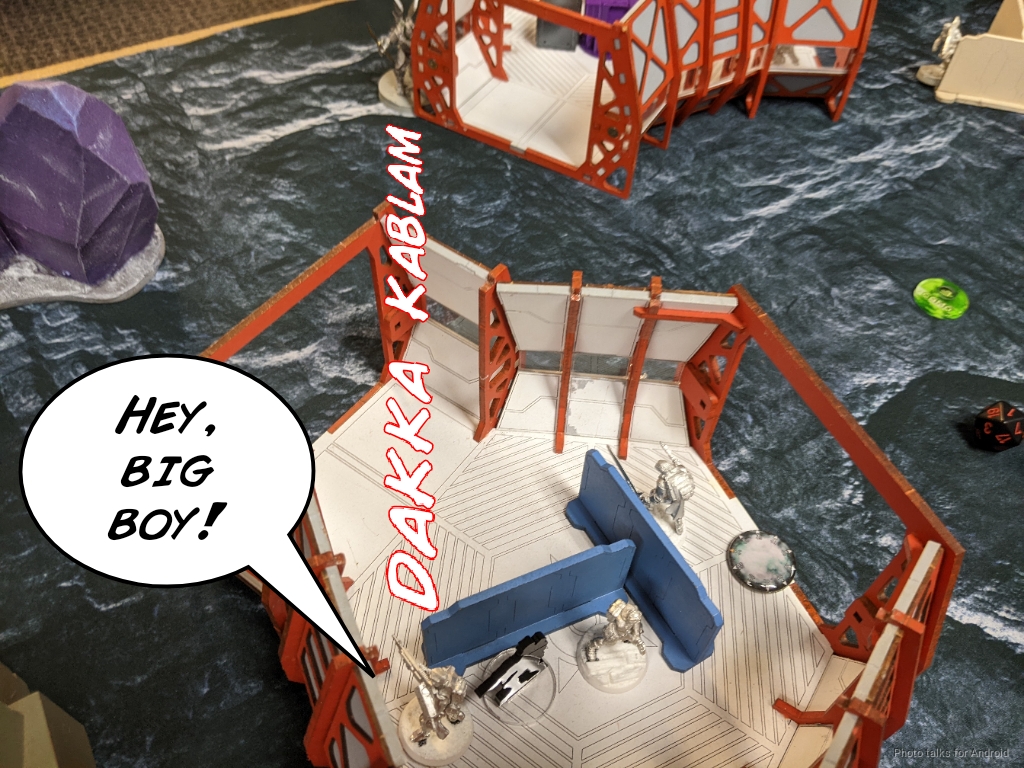
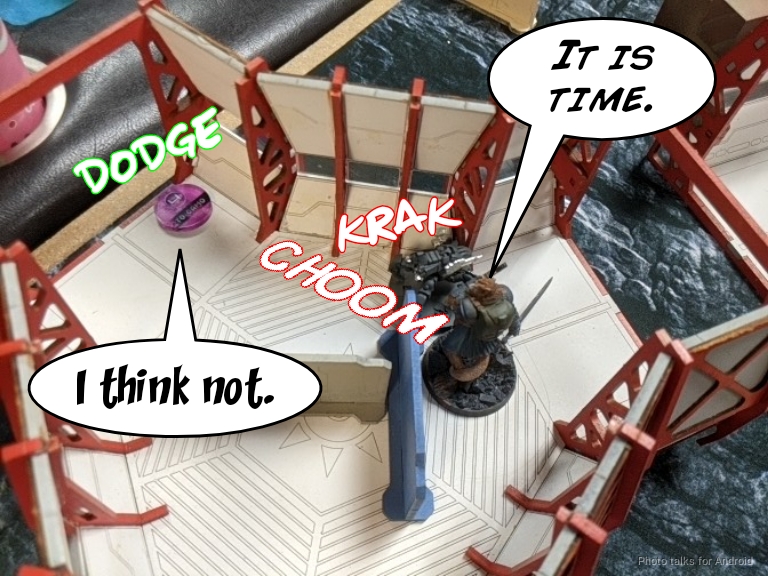
Adam chose to put the O-Yoroi contesting my T2 Cateran. He of course had no idea what that camo token was–it could be a T2 Cateran or a Scots Guard missile. I reminded him that the camo token could be something scary, but he was confident in his ability to make armor saves. I deployed Uxia in the corridors near the O-Yoroi to possibly shotgun it or D-Charge it. Who knows! Wallace went in his Galwegian bunker, and then it was Adam’s turn to roll for Shinobu.
Unfortunately for Adam, he failed the roll and Shinobu ended up in his deployment zone. I think in a situation like this, where I’ve really made it a requirement for him to use Shinobu to kill Wallace, you just play it safe and don’t try to over-infiltrate. I’ve got multiple attack vectors on the O-Yoroi that are all pretty high probability of success, so I can afford to risk a roll on Uxia. If she fails I can always use her to add another bit of defensive layering for Wallace.
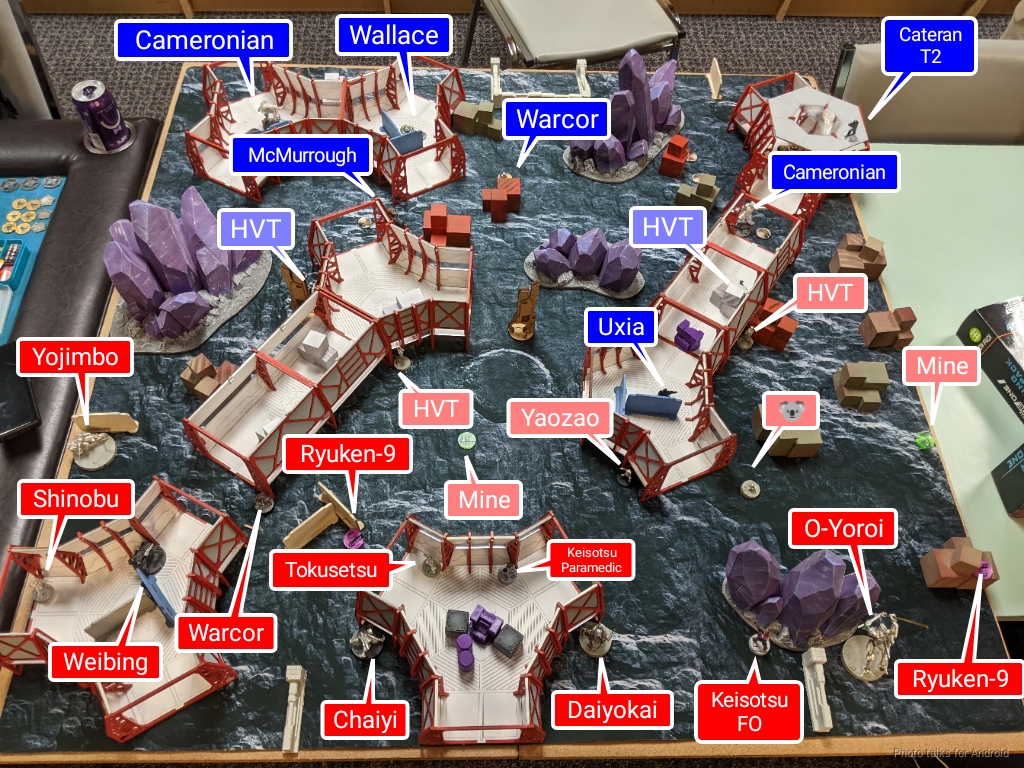
Turn 1
Top of 1 – CHA
Adam wisely takes two orders from the group with the dogs and Caterans. He’s pretty confident in his ability to not die to whatever is under the camo token watching the O-Yoroi, especially with the Ryuken-9 also watching it. Unfortunately for him, I have a Cameronian immediately adjacent, and get some smoke up for free with an impetuous order.
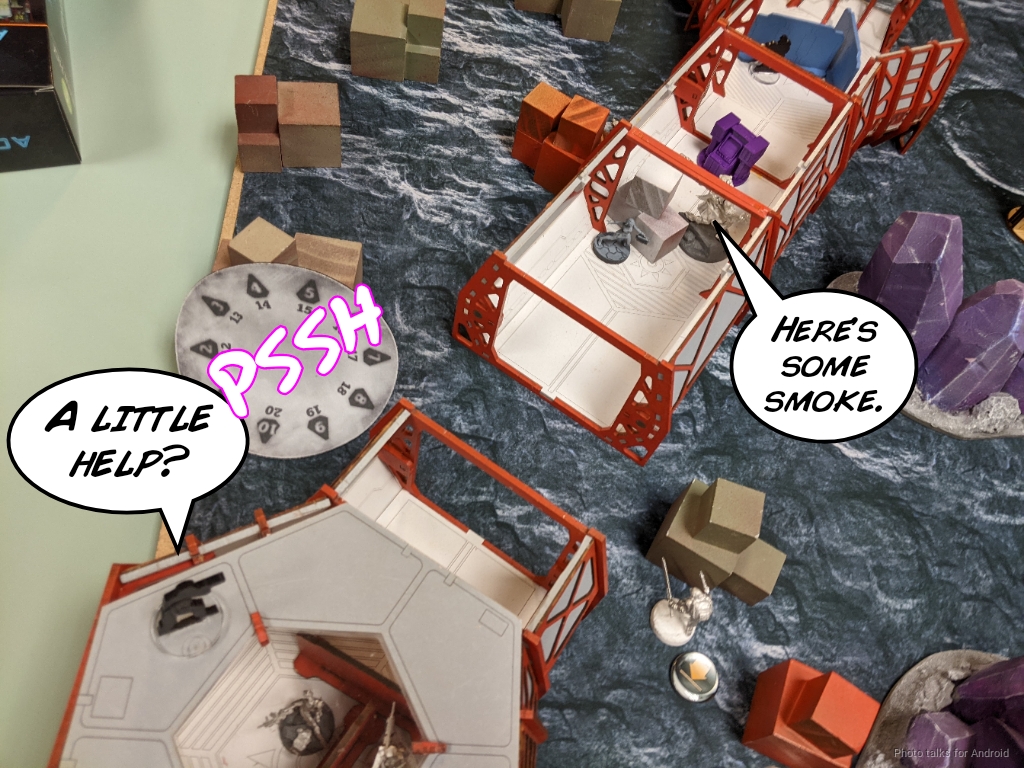
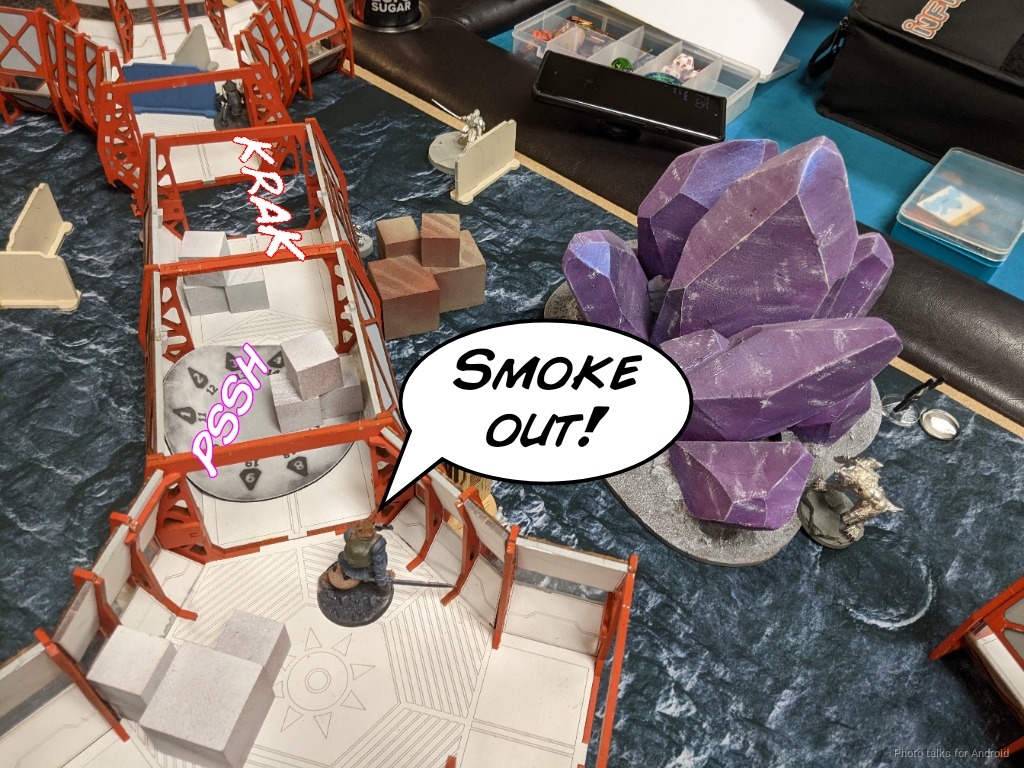
McMurrough lands smoke against the Weibing, and I decide to break my defensive net a little and advance the Cameronian protecting Wallace since Shinobu is more or less out of the fight.
Impetuous orders done, it’s time to see if I can score my first Lieutenant kill. We’re sadly just within 32″ on my first order, but surprise shot has me on 12s and Adam on 8s.
| 24.82 | 60.27 | 14.91 |
These odds are in Adam’s favor in terms of draining orders, but a 25% chance to lose two wounds on your TAG Lieutenant is waaaaay too high. We talked about this at length after the game. It’s basically gambling that he’s going to win, but the thing he’s wagering is significantly more important to him that what I’m wagering. If I lose, I’m down a Cateran. No big deal, I have other tools. If he loses, he’s down a TAG and a Lieutenant. Incredibly risky and frankly unnecessary.
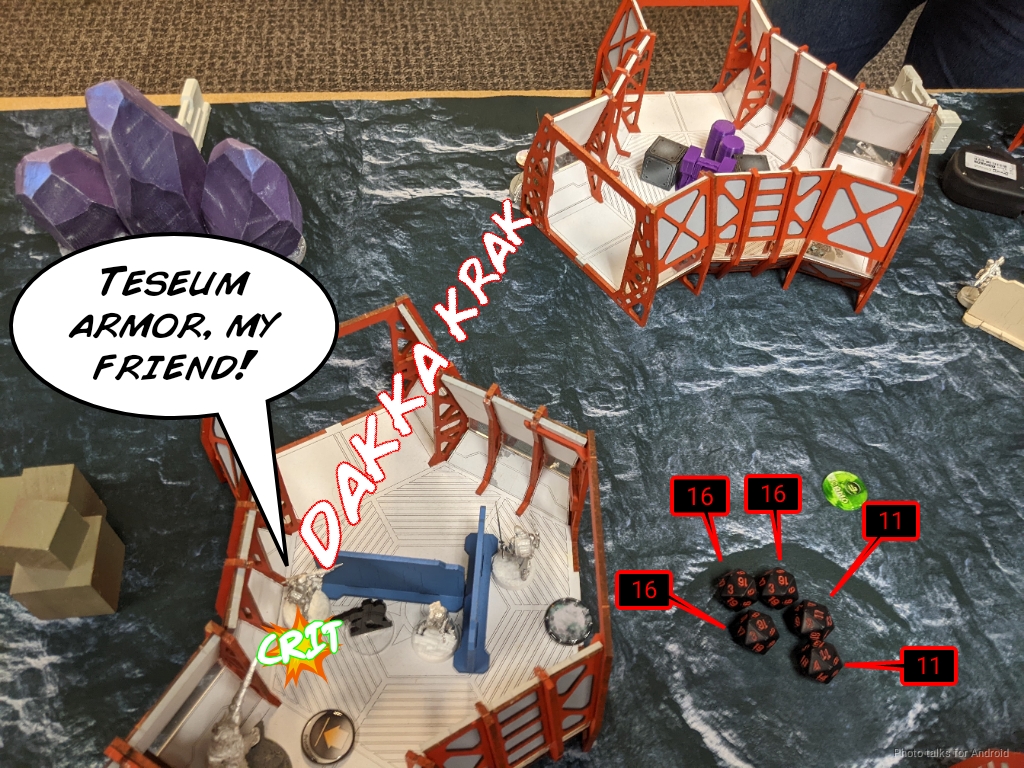
The first roll sees the O-Yoroi pass ARM, building Adam’s confidence in his plan. Without surprise shot, the odds are even more in Adam’s favor, but it’s only 3% less likely for him to lose the O-Yoroi outright.
| 21.79 | 54.09 | 24.13 |
The second order has the dice go my way and Adam takes 2 wounds from a single T2 round.
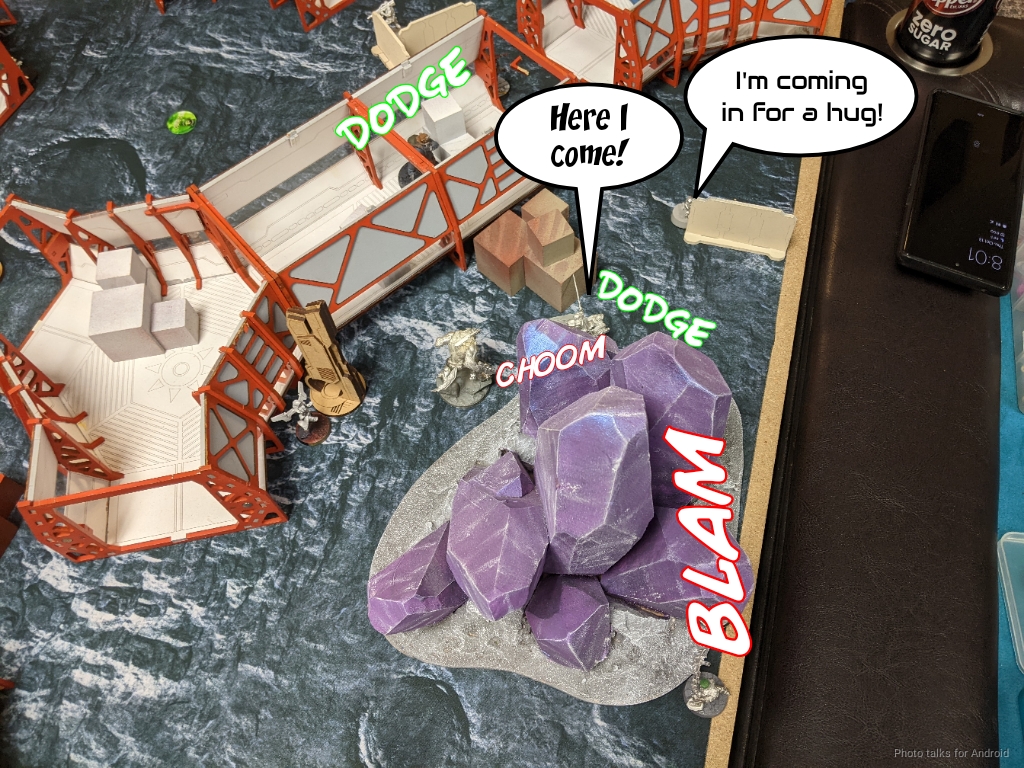
I’ve got two orders left, so I scoot away 2″ prone, getting me out of 32″ if it comes to a fourth order, and I take another shot. The dice choose to reinforce the lesson that putting everything on red in roulette is fun but the house always wins, and the O-Yoroi dies.

I coordinate the last order in that pool between all the dogs and the non-T2 Cateran to move them forward. The Cateran on the right moves to a spot where it can see Yojimbo’s path of advance. One of the Ryuken can see the left Cameronian, so it reveals to take a shot. Yojimbo can see the right Cameronian as well, so he throws out another Koala. McMurrough and the left Cameronian trigger Koalas, and everyone except the Cateran dodges. I clear both Koalas and beat the Ryuken 9’s HRL shot, so we’re golden! Crazy efficient use of 4 orders.
I’ve got a whole order pool to spend on the Highlander Greys now, so I throw some smoke to get the moving and briefly reveal the Grey HMG to the Ryuken-9 on the left. Adam bites and takes the shot, but I’m sure to end out of LoF just in case. I’ve got reasonable odds to drop the Ryuken-9, but I lose the face to face.
| 44.54 | 36.56 | 18.90 |
Thankfully I pass ARM and since I ended out of LoF I can cautious move past this ARO.
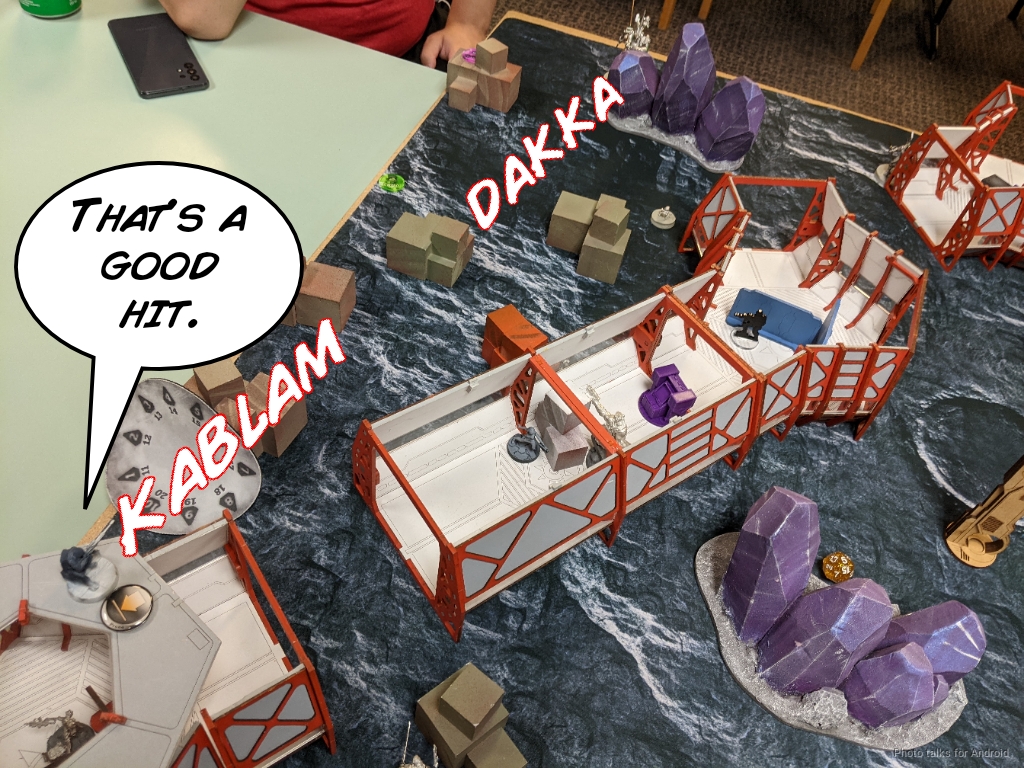
I get all the way to where Uxia is and throw some more smoke to maybe get the Grey BSG into a position to fire T2 slugs at the Daiyokai. I do have the ability to take it on with the Grey HMG, so I’m feeling pretty good about that and start firing. The odds aren’t amazing:
| 32.79 | 37.45 | 29.76 |
but I do put a wound on the Daiyokai in the first round of shooting. Adam can’t improve his cover, so he sticks around.
The second order sees the Daiyokai crit and hit me, but I roll three 16s and two 11s, which is more than enough to save the Grey.
I keep pushing and eventually drop the Daiyokai.
I’ve got one more order in the group and I want to see if I can’t take out the Ryuken-9 on my left. I reveal both Greys out of template range of one another, and Adam takes a shot on the Grey BSG, burning it off the table. This does give me an unopposed roll on 4s, which I sadly don’t make.
I’m down a Highlander Grey, but Adam is a in far worse position.
Bottom of 1 – JSA
Adam takes stock of his list and moves everything except the Warcor into group one with all of his remaining command tokens:

Ordinarly, Adam would be in Loss of Lieutenant, but the mission prevents that. He does have to choose a new Lieutenant during the tactical phase, so he nominates Shinobu.
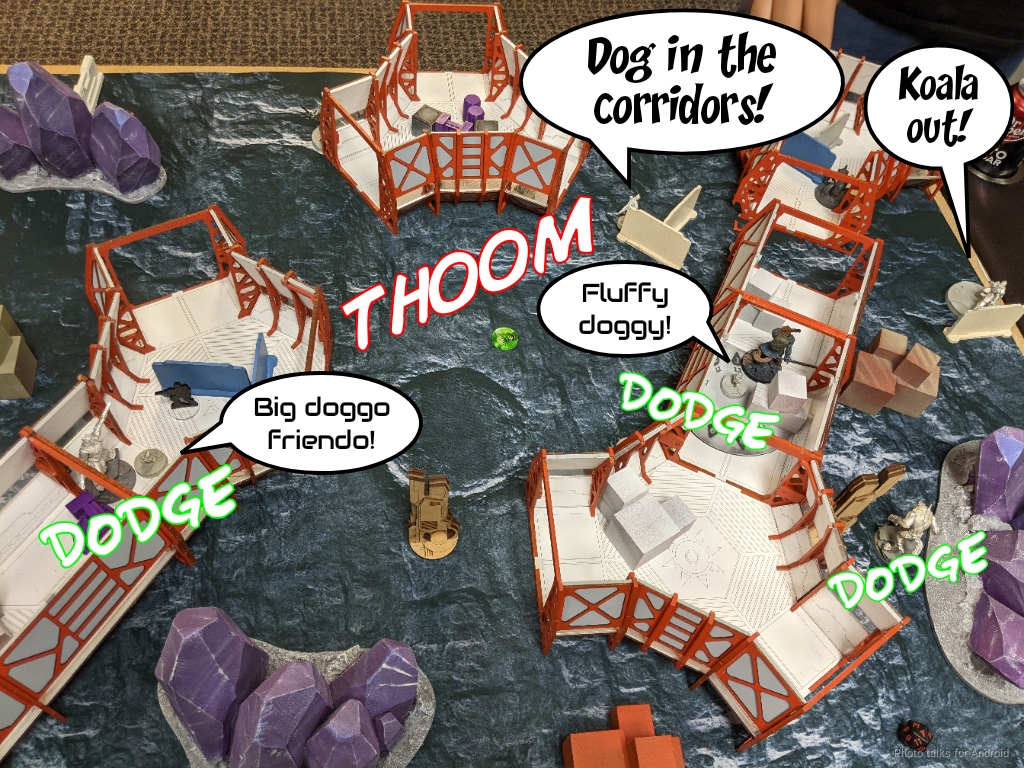
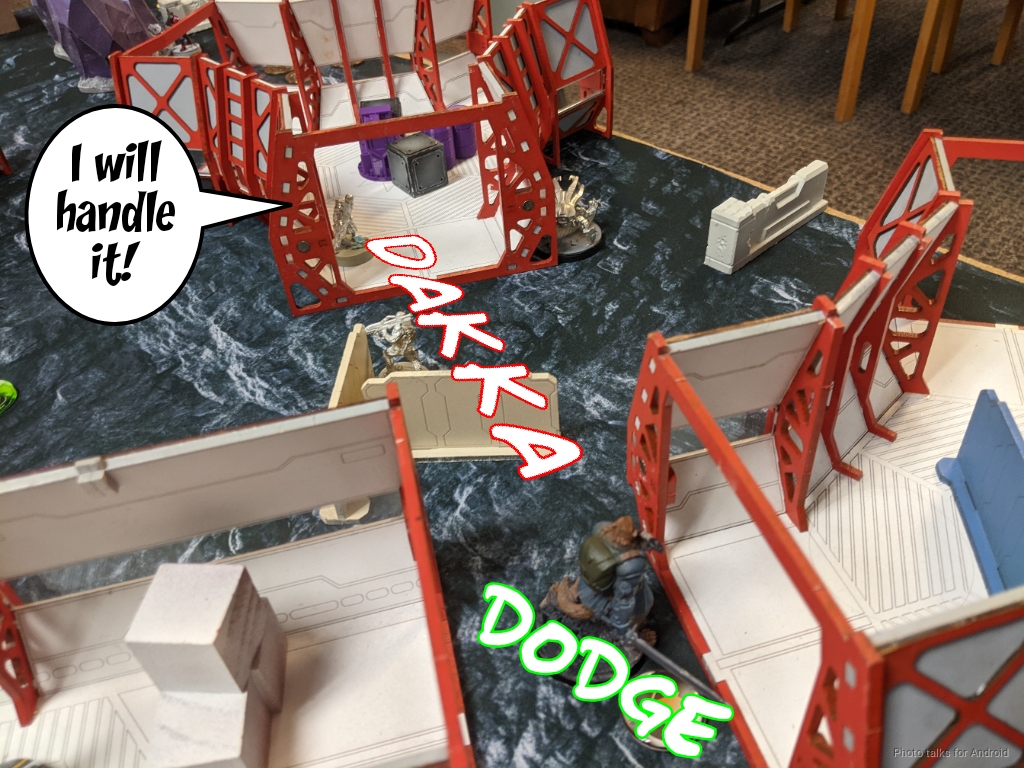
Yojimbo then takes his impetuous move. This is Adam’s only real option to go for Wallace so Adam has to try. I chain rifle with the nearby Cameronian, McMurrough takes a free dodge to clear a Koala, and my Cateran reveals to take a shot at Yojimbo, who dodges. I whiff the sniper shot, but Yojimbo fails his dodge and takes a wound from the chain rifle. McMurrough fails the dodge but tanks the Koala successfully.
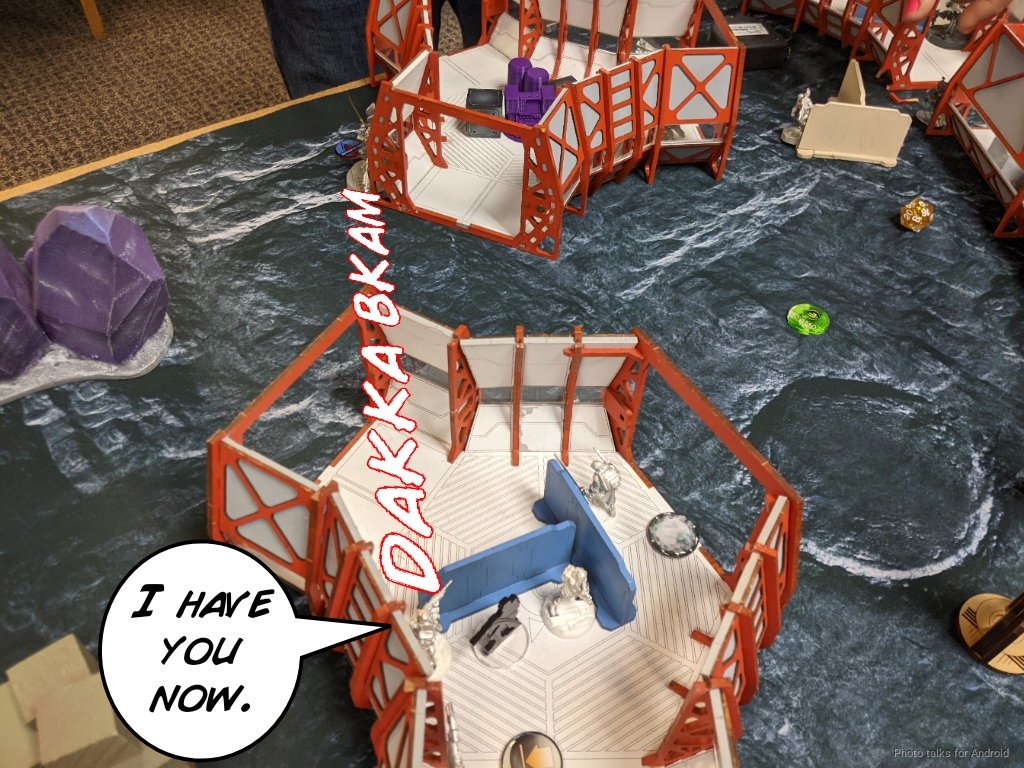
After re-camoing Shinobu with her Lieutenant order, Adam decides to go for a tricksy play and moves the Warcor into base to base with McMurrough. If I CC and the Warcor survives, he can get +1 burst on Shinobu, potentially, so I dodge away, having figured out his plan.
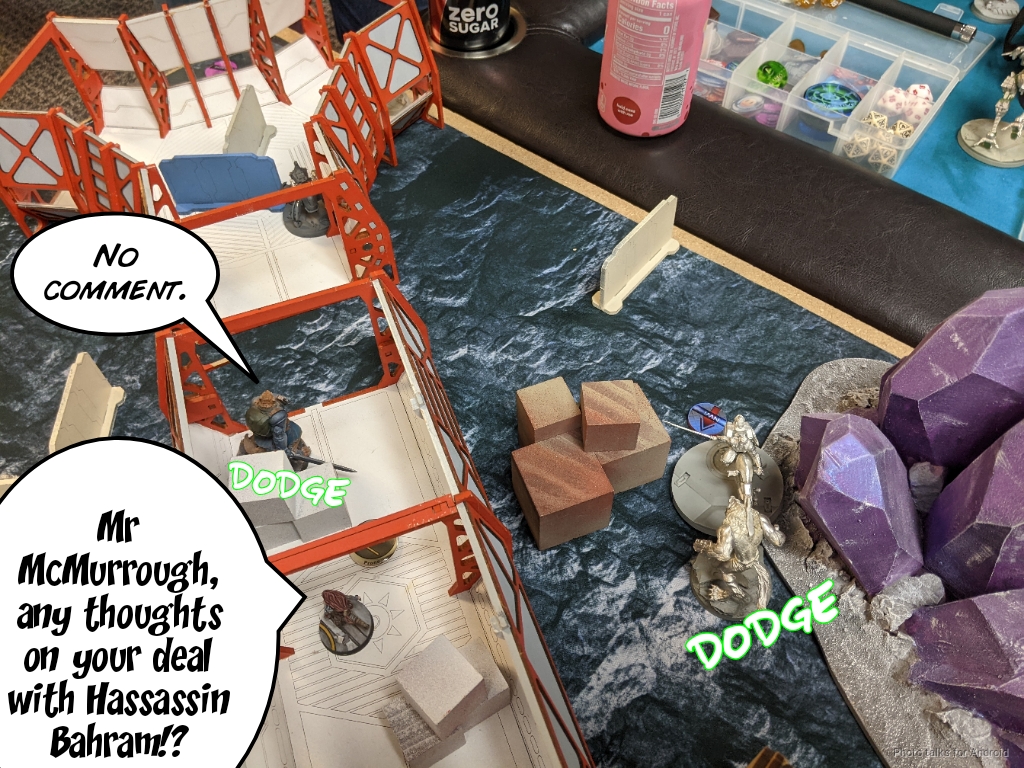
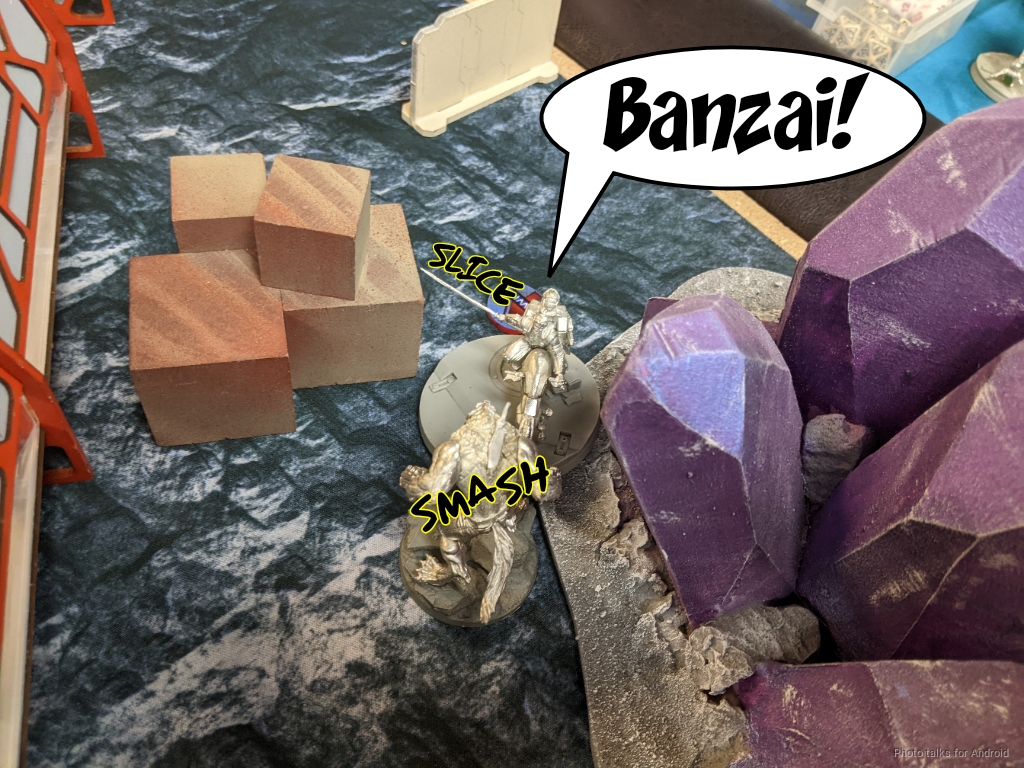
This grants the Cameronian a dodge, so I go into base to base with Yojimbo, unwilling to give Adam and opportunity to do any further nonsense with Yojimbo. Yojimbo gamely tries to fight the Cameronian and lands a hit, but ARM 4 is hard to chew through without the bonuses from martial arts.
This also lets McMurrough dodge forward to cover Shinobu with a chain rifle. She’s in camo, so I have to discover her, but he can no longer try to combi rifle McMurrough with the Weibing.
Instead, he uses one of the Keisotsu. McMurrough takes two hits as I roll a 1 for my smoke, but I pass both ARM saves and go prone.
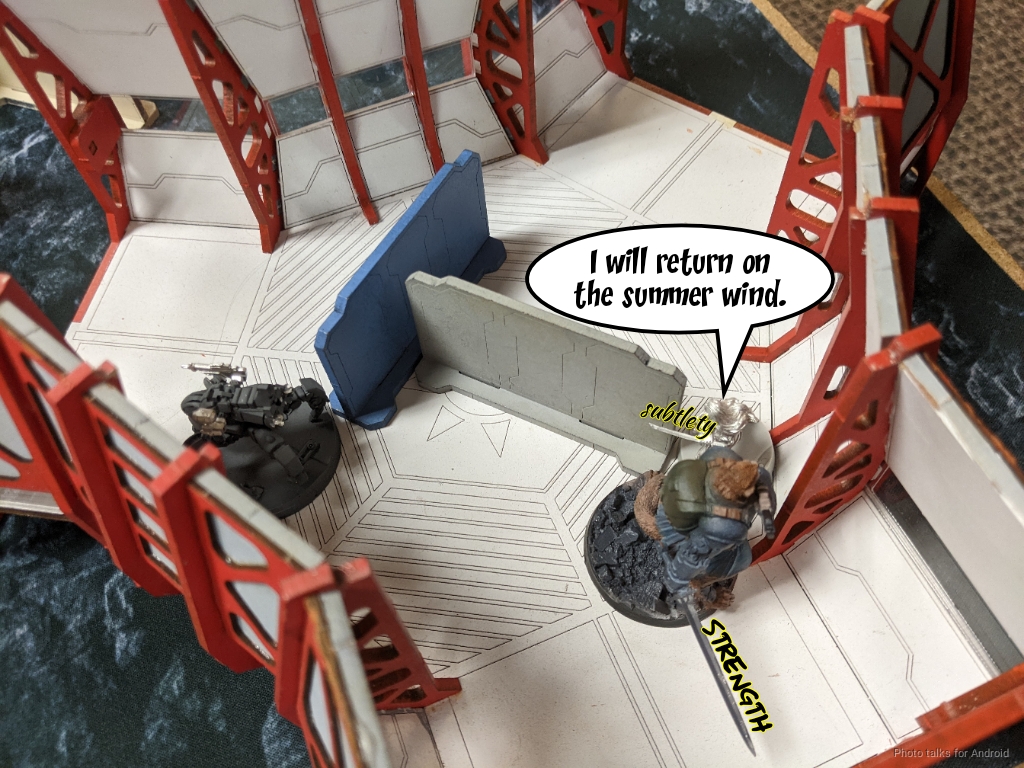
The nearby Ryuken-9 drops a mine and tries to heavy pistol McMurrough, but I dodge further into the building in response. Yojimbo tries to fight his way out of the Cameronian’s embrace, but I beat his roll and Yojimbo is off the table. This whole time I’ve been dodging my nearby designated target away, and I’m almost into the corridor system.
Turn 2
Top of 2 – CHA
I’ve lost nothing except for the Highlander Grey BSG, and as Adam puts it, I basically have more orders now than I did on my first turn.
The obvious happens and McMurrough takes his impetuous move to force a dodge out of Shinobu by double chain rifling her and the Weibing.
The Weibing misses and dies, but Shinobu passes her dodge. I super jump McMurrough over the Weibing’s body and McMurrough’s templar CCW does the rest.
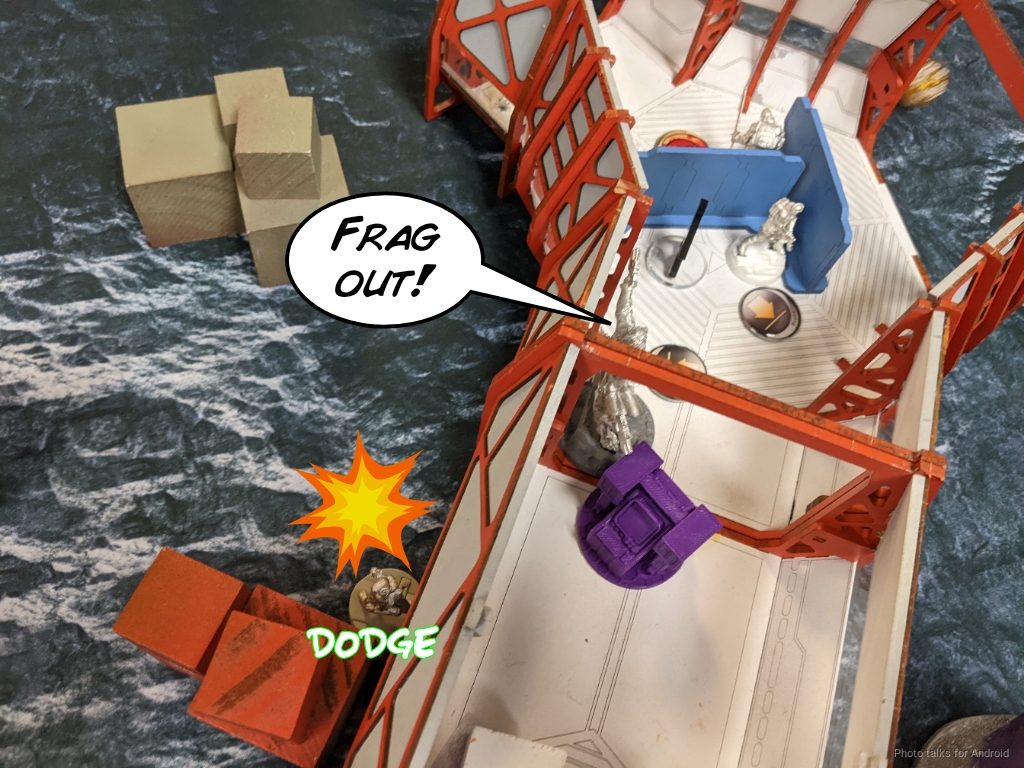
I canceled the leftmost Cameronian’s impetuous order to avoid getting shot by a Ryuken-9. Adam did change the position of the Ryuken-9 when he tried to heavy pistol McMurrough, so I’m safe at the moment but not if I move. I’ve still got plenty of orders to spec-fire grenades onto one of Adam’s Designated Targets. It takes two orders, but that’s that.
My Volunteer Paramedic downs the other Designated Target with a single order.
I’ve got three orders left in my Dog/Cateran group and 8 orders left in my primary group which is more than enough to table Adam over the next two turns if not this turn, given that this is all he has left:
We decide to call it here in the interest of time. As it stands, it’s a
10-0, 280-98 Caledonian Highlander Army Victory!
Post Game Analysis
As we had identified earlier, I think there were a few key mistakes during deployment for Adam:
- Giving me a 25% chance of doing 2 wounds to an O-Yoroi and 4 orders to do it.
- Deploying mines and Koalas in suboptimal places
The dice were obviously unkind to Adam here, what with my Grey passing 5 saves and Shinobu failing her infiltration roll. I think if she had made her roll it would have been a much more even game with a dead Wallace, and that would be a huge disruption for my list. I’m playing a very risky game choosing Wallace as my lieutenant and leaning into an irregular order pool.
I don’t think it would have been crippling–I’m quite comfortable running irregular warbands, especially high quality ones like dog warriors, and 7 regular orders in the first pool is still quite a lot of damage that can be done with Uxia. I still probably win the game but it would have been much harder and the score would have been much closer.
Really the game comes down to the needless risk of leaving the O-Yoroi out to ARO. In Adam’s defense, the only really safe places to put the O-Yoroi would have put it firmly in McMurrough’s sights, and I’m very likely to just Berserk it off the table in two orders. I trade McMurrough to do this, but that’s 100% worth it. Arguably McMurrough is more likely to get the job done, so perhaps this was the best possible option? Hard to say.
I think Adam made a good effort in trying to recover, but three dogs is a lot to contend with especially when my dice are hot. McMurrough is such an amazing upgrade over the regular Cameronians that the loss of NBW is worth it. I think one of the key upgrades is the +2″ dodge and Berserk. Those two things together make him incredibly dangerous, especially with that templar CCW.
This game was also interesting because we had spectators–someone was looking to start Infinity and asked if he could watch. Nathan (Jhokalups) was without an opponent, so he actually narrated the game play by play for the new guy, which was SUPER awesome of him. Seriously, what a kind and thoughtful man. Nathan and I talked afterwards about why my usage of McMurrough worked even though he looked so very overextended. Some of our locals have been trying to use McMurrough and are overextending him and getting into trouble.
I think I absolutely overextended McMurrough and I probably should have lost him to that Keisotu’s combi rifle burst. The difference between other people playing McMurrough and me playing McMurrough in this game has nothing to do with skill or clever play, it’s that I have another dog warrior standing within 8″ of McMurrough out of LoF of anything that can attack McMurrough. I also have a crazy amount of threat saturation elsewhere on the table that’s very aggressively advanced as well.
If you answer McMurrough, you don’t answer the Greys or the other Cameronians. I basically overwhelmed Adam with threats that take multiple orders to remove, forcing him to dilute his efforts. Every order spent fighting with Yojimbo is an order that you’re not spending shooting at McMurrough or trying to take out my Greys. I think Adam shot the Ryuken-9 on my left at the Grey there, but I smoked him out or something. Hard to remember without a picture to remind me.
So basically the reason why McMurrough was successful for me here is I basically cloned him several times. I presented 3-4 McMurrough-like problems to Adam after taking away most of the tools that would be well suited to handling those problems. He was unable to invest the resources into everything, and the dice went my way in enough interactions to result in basically a completely unrecoverable situation, especially if I had finished my second turn.
At first glance, it would appear that there’s been a trend in my recent games, where my opponent makes a (relatively small) mistake and then I exploit/punish it. Add to that at least the perception of hot dice recently, and it’s resulted in some pretty one-sided games. This is a somewhat unsatisfying interpretation of the data to me, because it would suggest that Infinity is a pretty unforgiving game and if you have poor dice and make small mistakes the game just runs away from you.
I’d like to think that at least some of my success is building lists that reduce variance and having plans during the game to exploit variance. This can be as simple as including high ARM/BTS and multi-wound models. If you take a bad face to face roll, you can potentially try again. My recent lists have a lot of these sorts of models, which allow me to mitigate the consequences of either bad rolls or my own mistakes.
An example of exploiting variance would be the T2 Cateran. Adam has the same odds of failing ARM against a normal sniper, but the fact that it’s T2 makes it literally twice as bad for the O-Yoroi. I knew the odds weren’t amazing, but I was willing to take the risk because the payoff is so great for me and the investment and potential loss is asymmetrically in my favor, i.e. losing the O-Yoroi hurts way more than losing a Cateran after spending a few orders. I’m also carefully prioritizing targets and trying to shape board state to my advantage. With the O-Yoroi and Daiyokai down, I really don’t have much to fear in terms of long range firepower.
The Ryuken-9 are excellent, but they’re not going to kill the dogs, and it’s too order intensive to ask them to go into the corridors and fight Uxia or something like that. I took a calculated risk in getting them both to reveal, because losing camo state limited their mobility and therefore Adam’s options. I was pretty confident that I could keep the Grey HMG at least dogged, and then I could take on the Daiyokai. I really would have preferred to use the shotgun, but I couldn’t quite set it up.
I’m still trying to form a mental framework for what else I’m doing that’s causing me to be successful. Gotta do some more thinking about it. Love to hear anyone else’s thoughts on it too. Thanks for reading.

Pingback: Is a Quad Dog a Sandwich? – MERC Recon
Pingback: Gwailo Island – MERC Recon