
Dodge This
In case you missed the other Round One game of the recent “PanO only tournament” at Shiv Games:
I played Nomads against George in that game, and for the other Round 1 game I was playing, I played ForCo against John (Sarsippius). John and George kindly conspired to win the lieutenant rolls and take table side so I could stand on the same side of the table while playing both games… otherwise I would’ve gone crazy.
Overview
- Mission: ITS14 Unmasking
- Forces: Foreign Company versus Jurisdictional Command of Corregidor (300)
- Deploy First: Foreign Company
- First Turn: Foreign Company
This was a PanO-only tournament, so naturally, I brought ForCo. This is the same list that I played against Adam in my last game of Critical Mass:
You can read that for more discussion of the list if you’re interested.
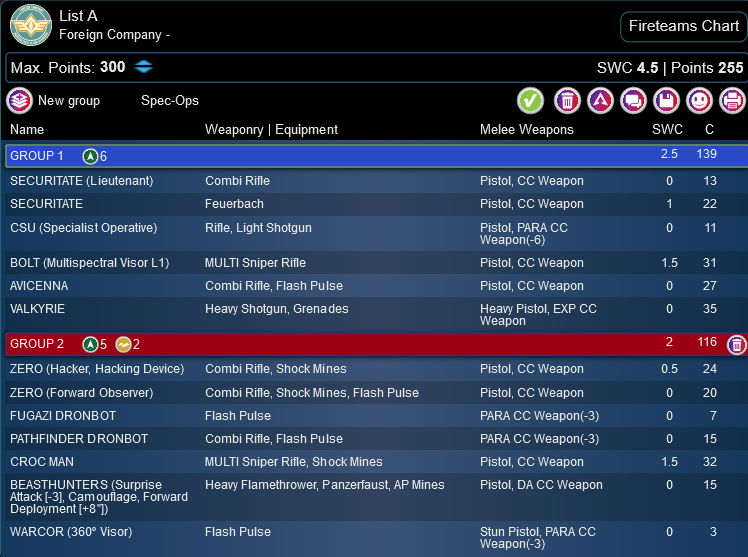
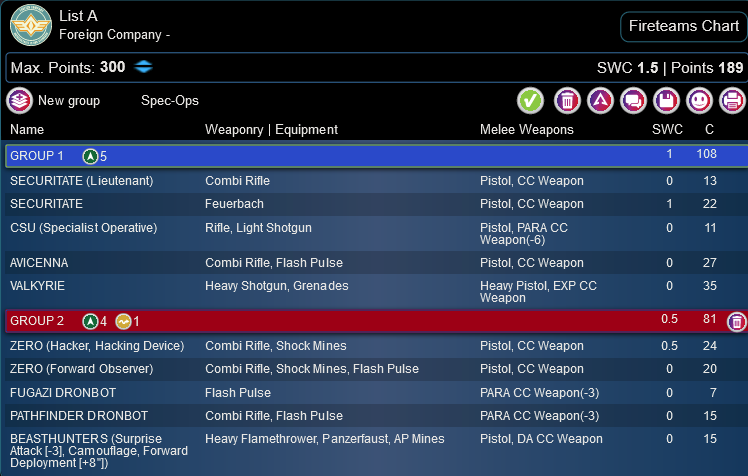
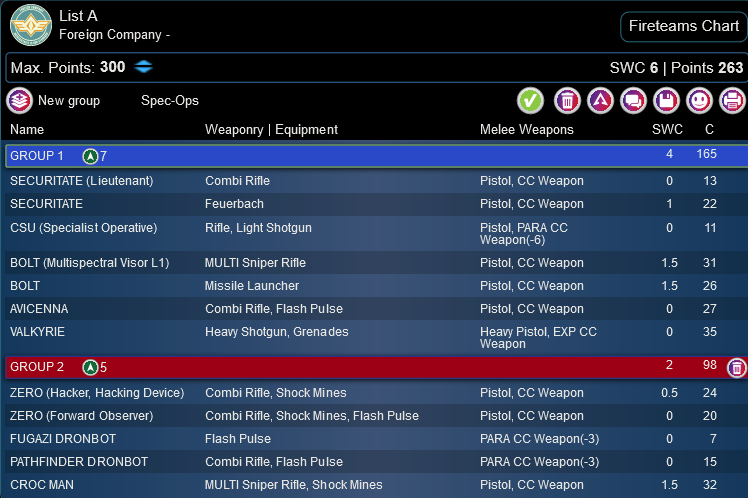
List A
GROUP 1
7
1
1
SECURITATE (Lieutenant) Combi Rifle / Pistol, CC Weapon. (0 | 13)
CSU (Specialist Operative) Rifle, Light Shotgun / Pistol, PARA CC Weapon(-6). (0 | 11)
BOLT (Multispectral Visor L1) MULTI Sniper Rifle ( ) / Pistol, CC Weapon. (1.5 | 31)
AVICENNA Combi Rifle, Flash Pulse / Pistol, CC Weapon. (0 | 27)
VALKYRIE Heavy Shotgun, Grenades / Heavy Pistol, EXP CC Weapon. (0 | 35)
GROUP 2
CHIMERA Combi Rifle, Nanopulser, Eclipse Grenades / Viral CC Weapon, Pistol. (0 | 19)
2X PUPNIK DA CC Weapon. (0 | 2)
ZERO (Hacker, Hacking Device) Combi Rifle, Shock Mines ( ) / Pistol, CC Weapon. (0.5 | 24)
FUGAZI DRONBOT Flash Pulse / PARA CC Weapon(-3). (0 | 7)
PATHFINDER DRONBOT Combi Rifle, Flash Pulse / PARA CC Weapon(-3). (0 | 15)
CROC MAN MULTI Sniper Rifle, Shock Mines / Pistol, CC Weapon. (1.5 | 32)
BEASTHUNTERS (Surprise Attack [-3], Camouflage, Forward Deployment [+8″]) Heavy Flamethrower, Panzerfaust, AP Mines / Pistol, DA CC Weapon. (0 | 15)
WARCOR (360º Visor) Flash Pulse ( ) / Stun Pistol, PARA CC Weapon(-3). (0 | 3)
6 SWC | 300 Points | Open in Army | Copy Code
Like “Jeff” who brought Nomads to the PanO-only tournament (I was playing under Jeff Rossiter’s ITS for the purposes of my game against George and under my own ITS for this game), John brought Nomads as well, specifically Corregidor.
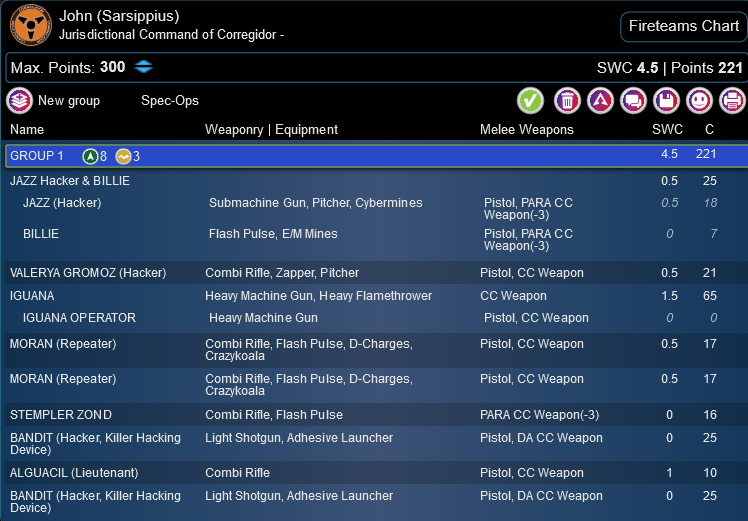
John (Sarsippius)
GROUP 1GROUP 2
JAZZ Hacker & BILLIE undefined / undefined. (0.5 | 25)
BILLIE Flash Pulse, E/M Mines / Pistol, PARA CC Weapon(-3). (0 | 7)
VALERYA GROMOZ (Hacker) Combi Rifle, Zapper, Pitcher / Pistol, CC Weapon. (0.5 | 21)
IGUANA Heavy Machine Gun, Heavy Flamethrower / CC Weapon. (1.5 | 65)
IGUANA OPERATOR Heavy Machine Gun / Pistol, CC Weapon. (0 | 0)
MORAN (Repeater) Combi Rifle, Flash Pulse, D-Charges, Crazykoala ( ) / Pistol, CC Weapon. (0.5 | 17)
STEMPLER ZOND Combi Rifle, Flash Pulse / PARA CC Weapon(-3). (0 | 16)
BANDIT (Hacker, Killer Hacking Device) Light Shotgun, Adhesive Launcher ( ) / Pistol, DA CC Weapon. (0 | 25)
ALGUACIL (Lieutenant) Combi Rifle / Pistol, CC Weapon. (1 | 10)
DAKTARI Combi Rifle ( | MediKit) / Pistol, CC Weapon. (0 | 14)
LOBO (Specialist Operative) Breaker Combi Rifle, Heavy Riotstopper, Flash Pulse(+1B) / Breaker Pistol, PARA CC Weapon(-6). (0 | 25)
RAVENEYE Submachine Gun, E/Marat, Flash Pulse, E/M Mines / Pistol, CC Weapon. (0 | 12)
5.5 SWC | 300 Points | Open in Army | Copy Code
He’s got a pretty solid Corregidor list–double Moran + Jazz, obviously, then added Valerya and an Iguana for added hacking and pew pew. Group two was a mixed Algaucil/Lobo/Daktari link with a Bandit and a Raveneye.
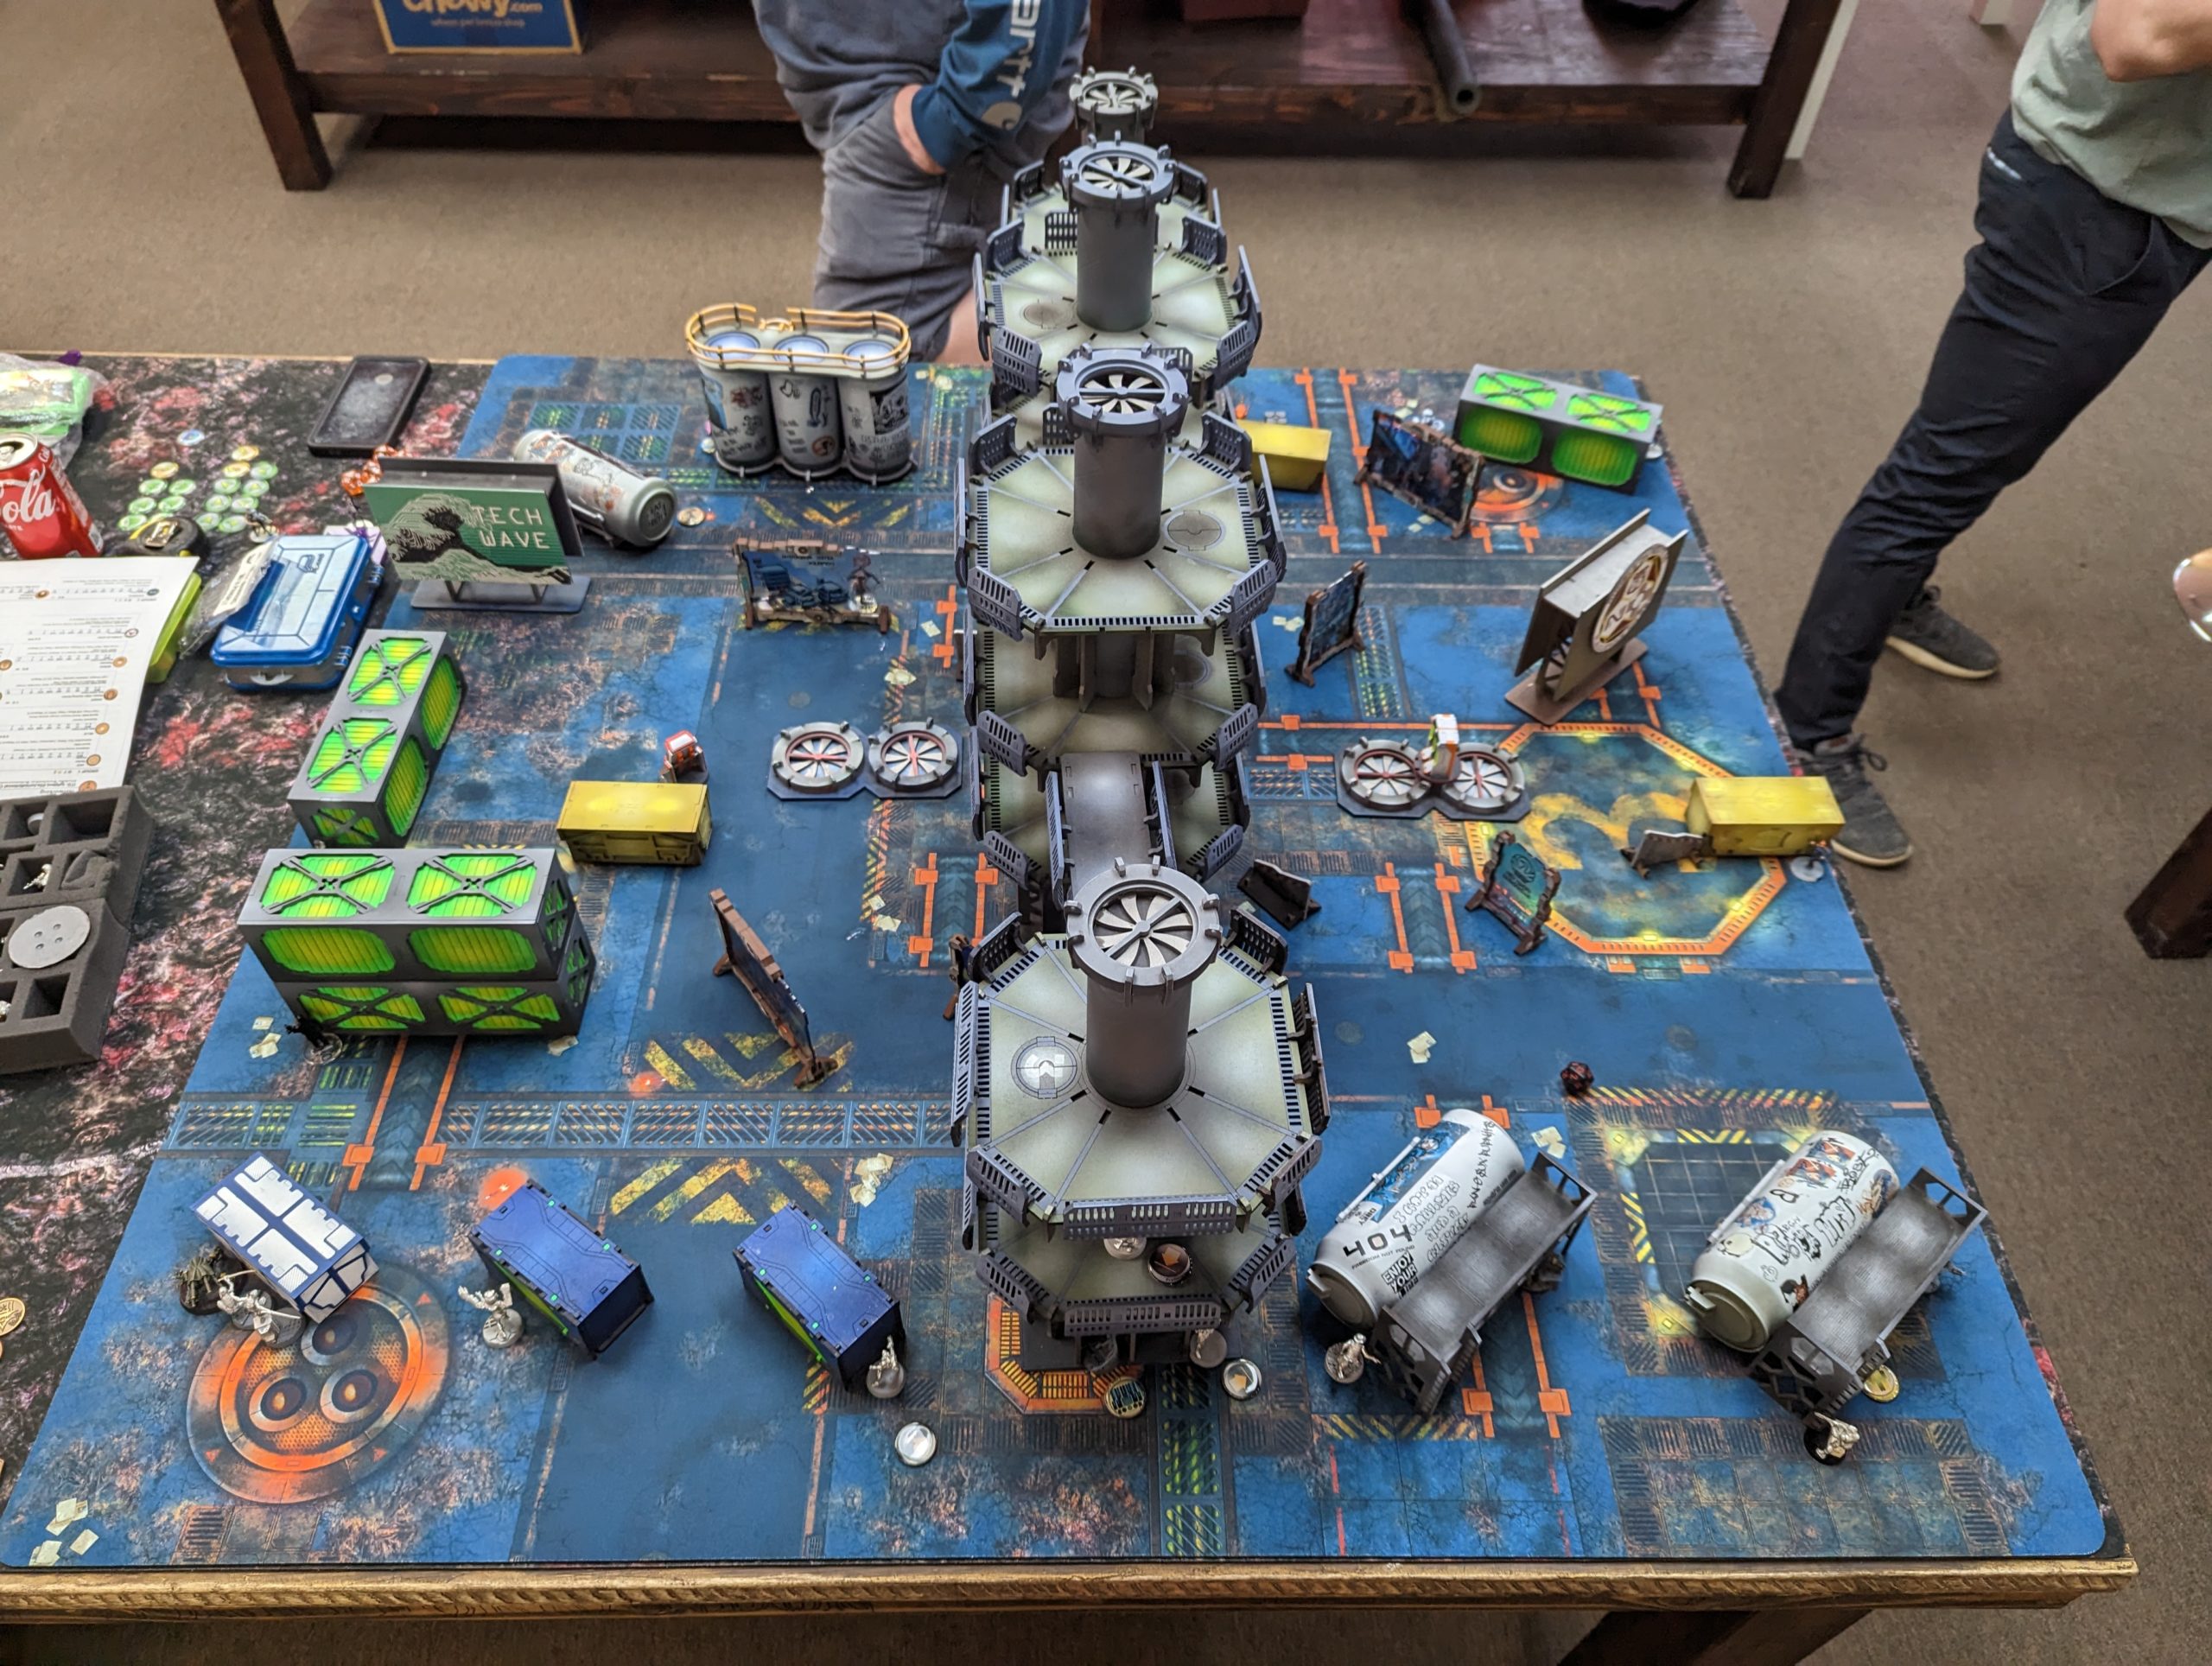
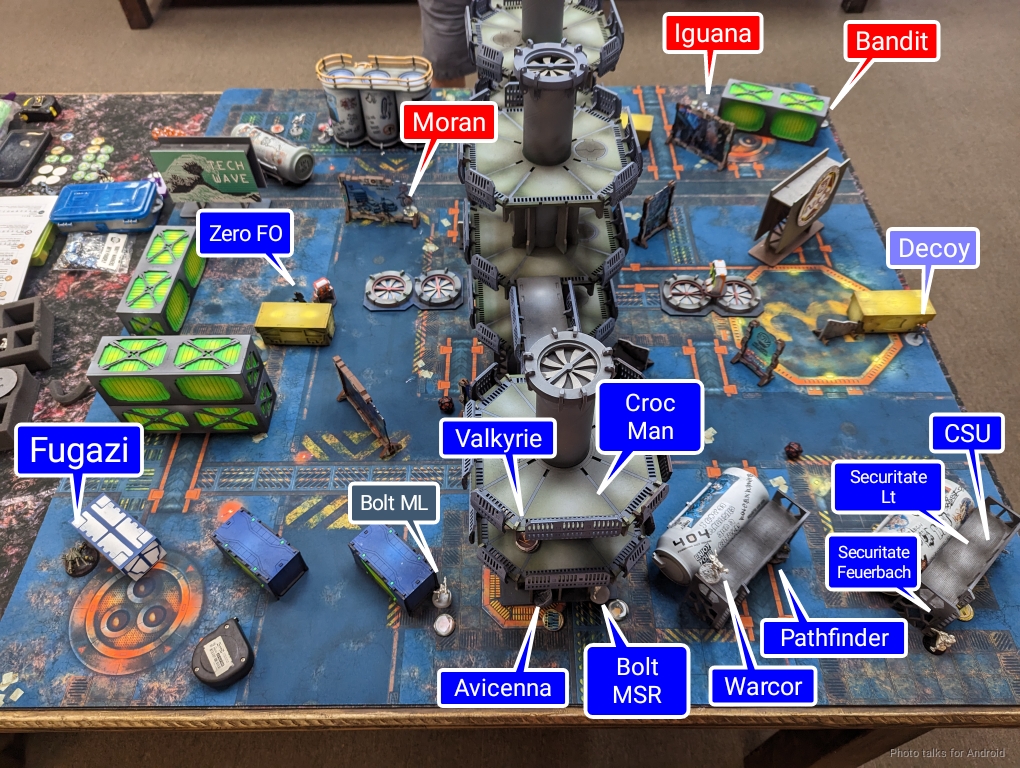
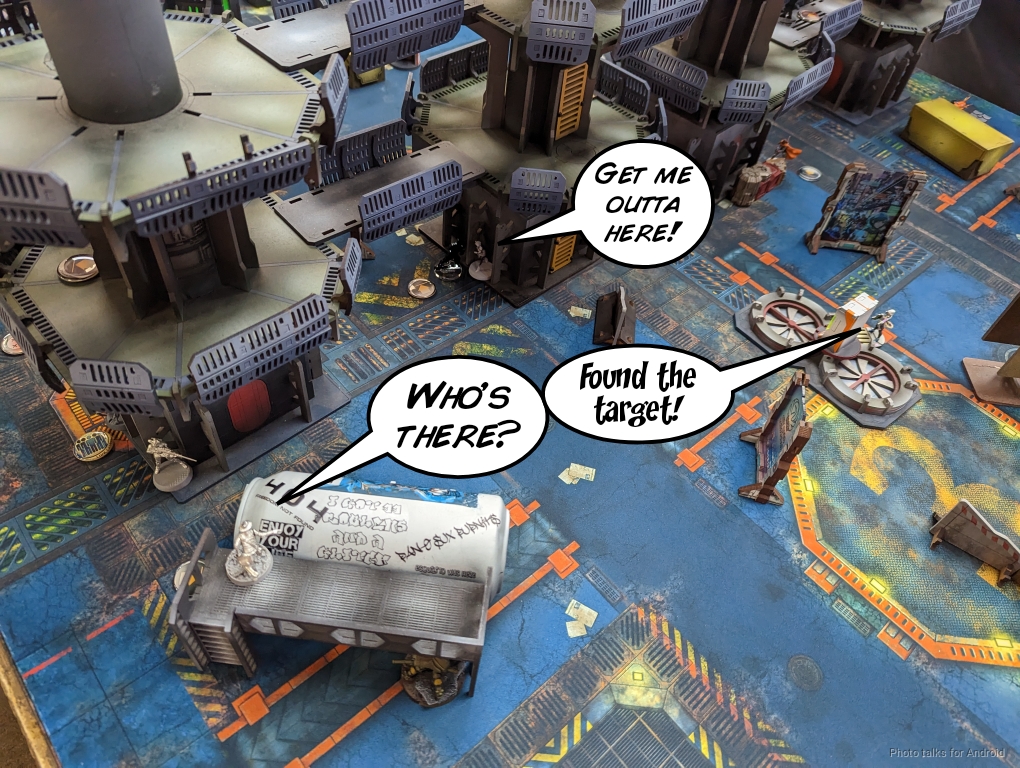
Deployment
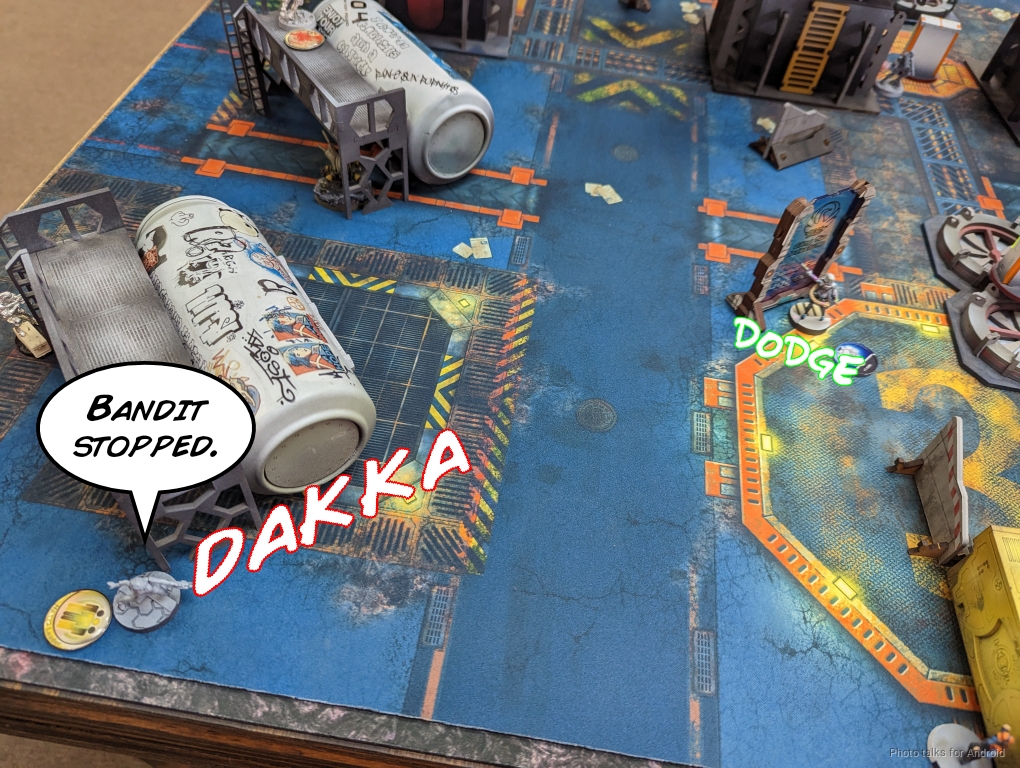
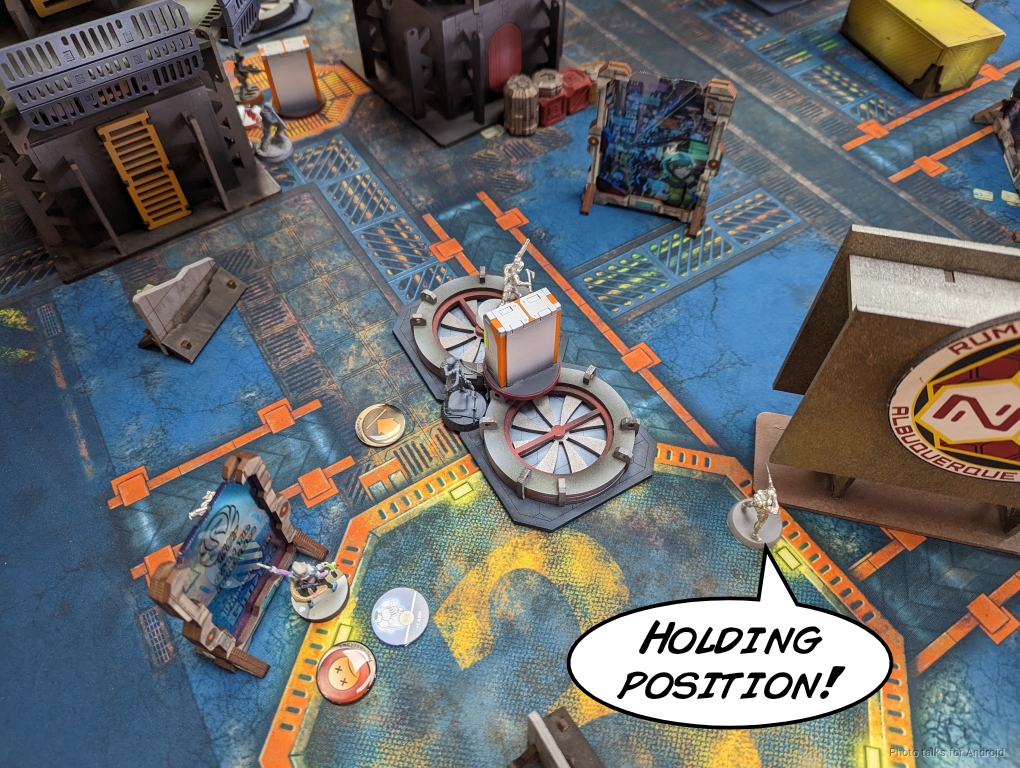
As I mentioned earlier, John generously took deployment so I could play both games on the same side of the table. I stacked my Bolts up in the center of the table, watching the firelanes down the big line of towers from DZ to DZ. The Securitate were all the way on the right, with the Feuerbach covering my Designated Target in the center, which was also guarded by a Beasthunter.
I put the Zero FO on the left and managed to over-infiltrate the Zero Hacker right outside of John’s deployment zone on a catwalk in the towers. I figured this would basically shape his deployment, which was all I really wanted. The two Decoys went at the board edges behind some crates. The Fugazi and Pathfinder just tucked themselves into terrain and I held the Uberfall in reserve.
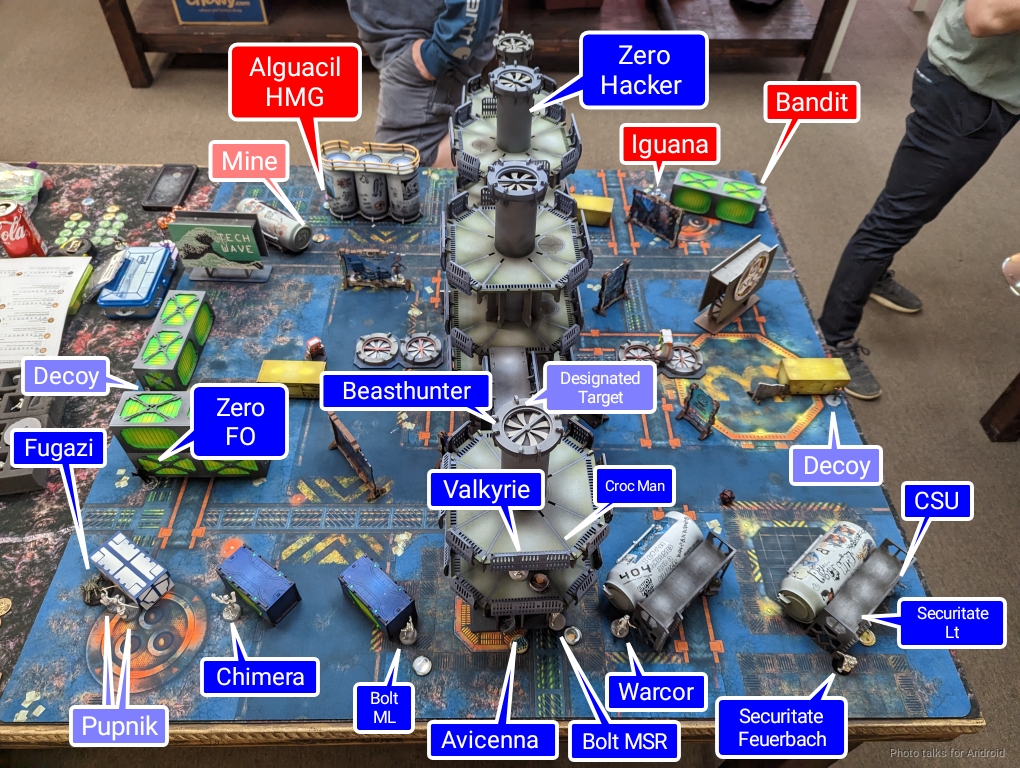
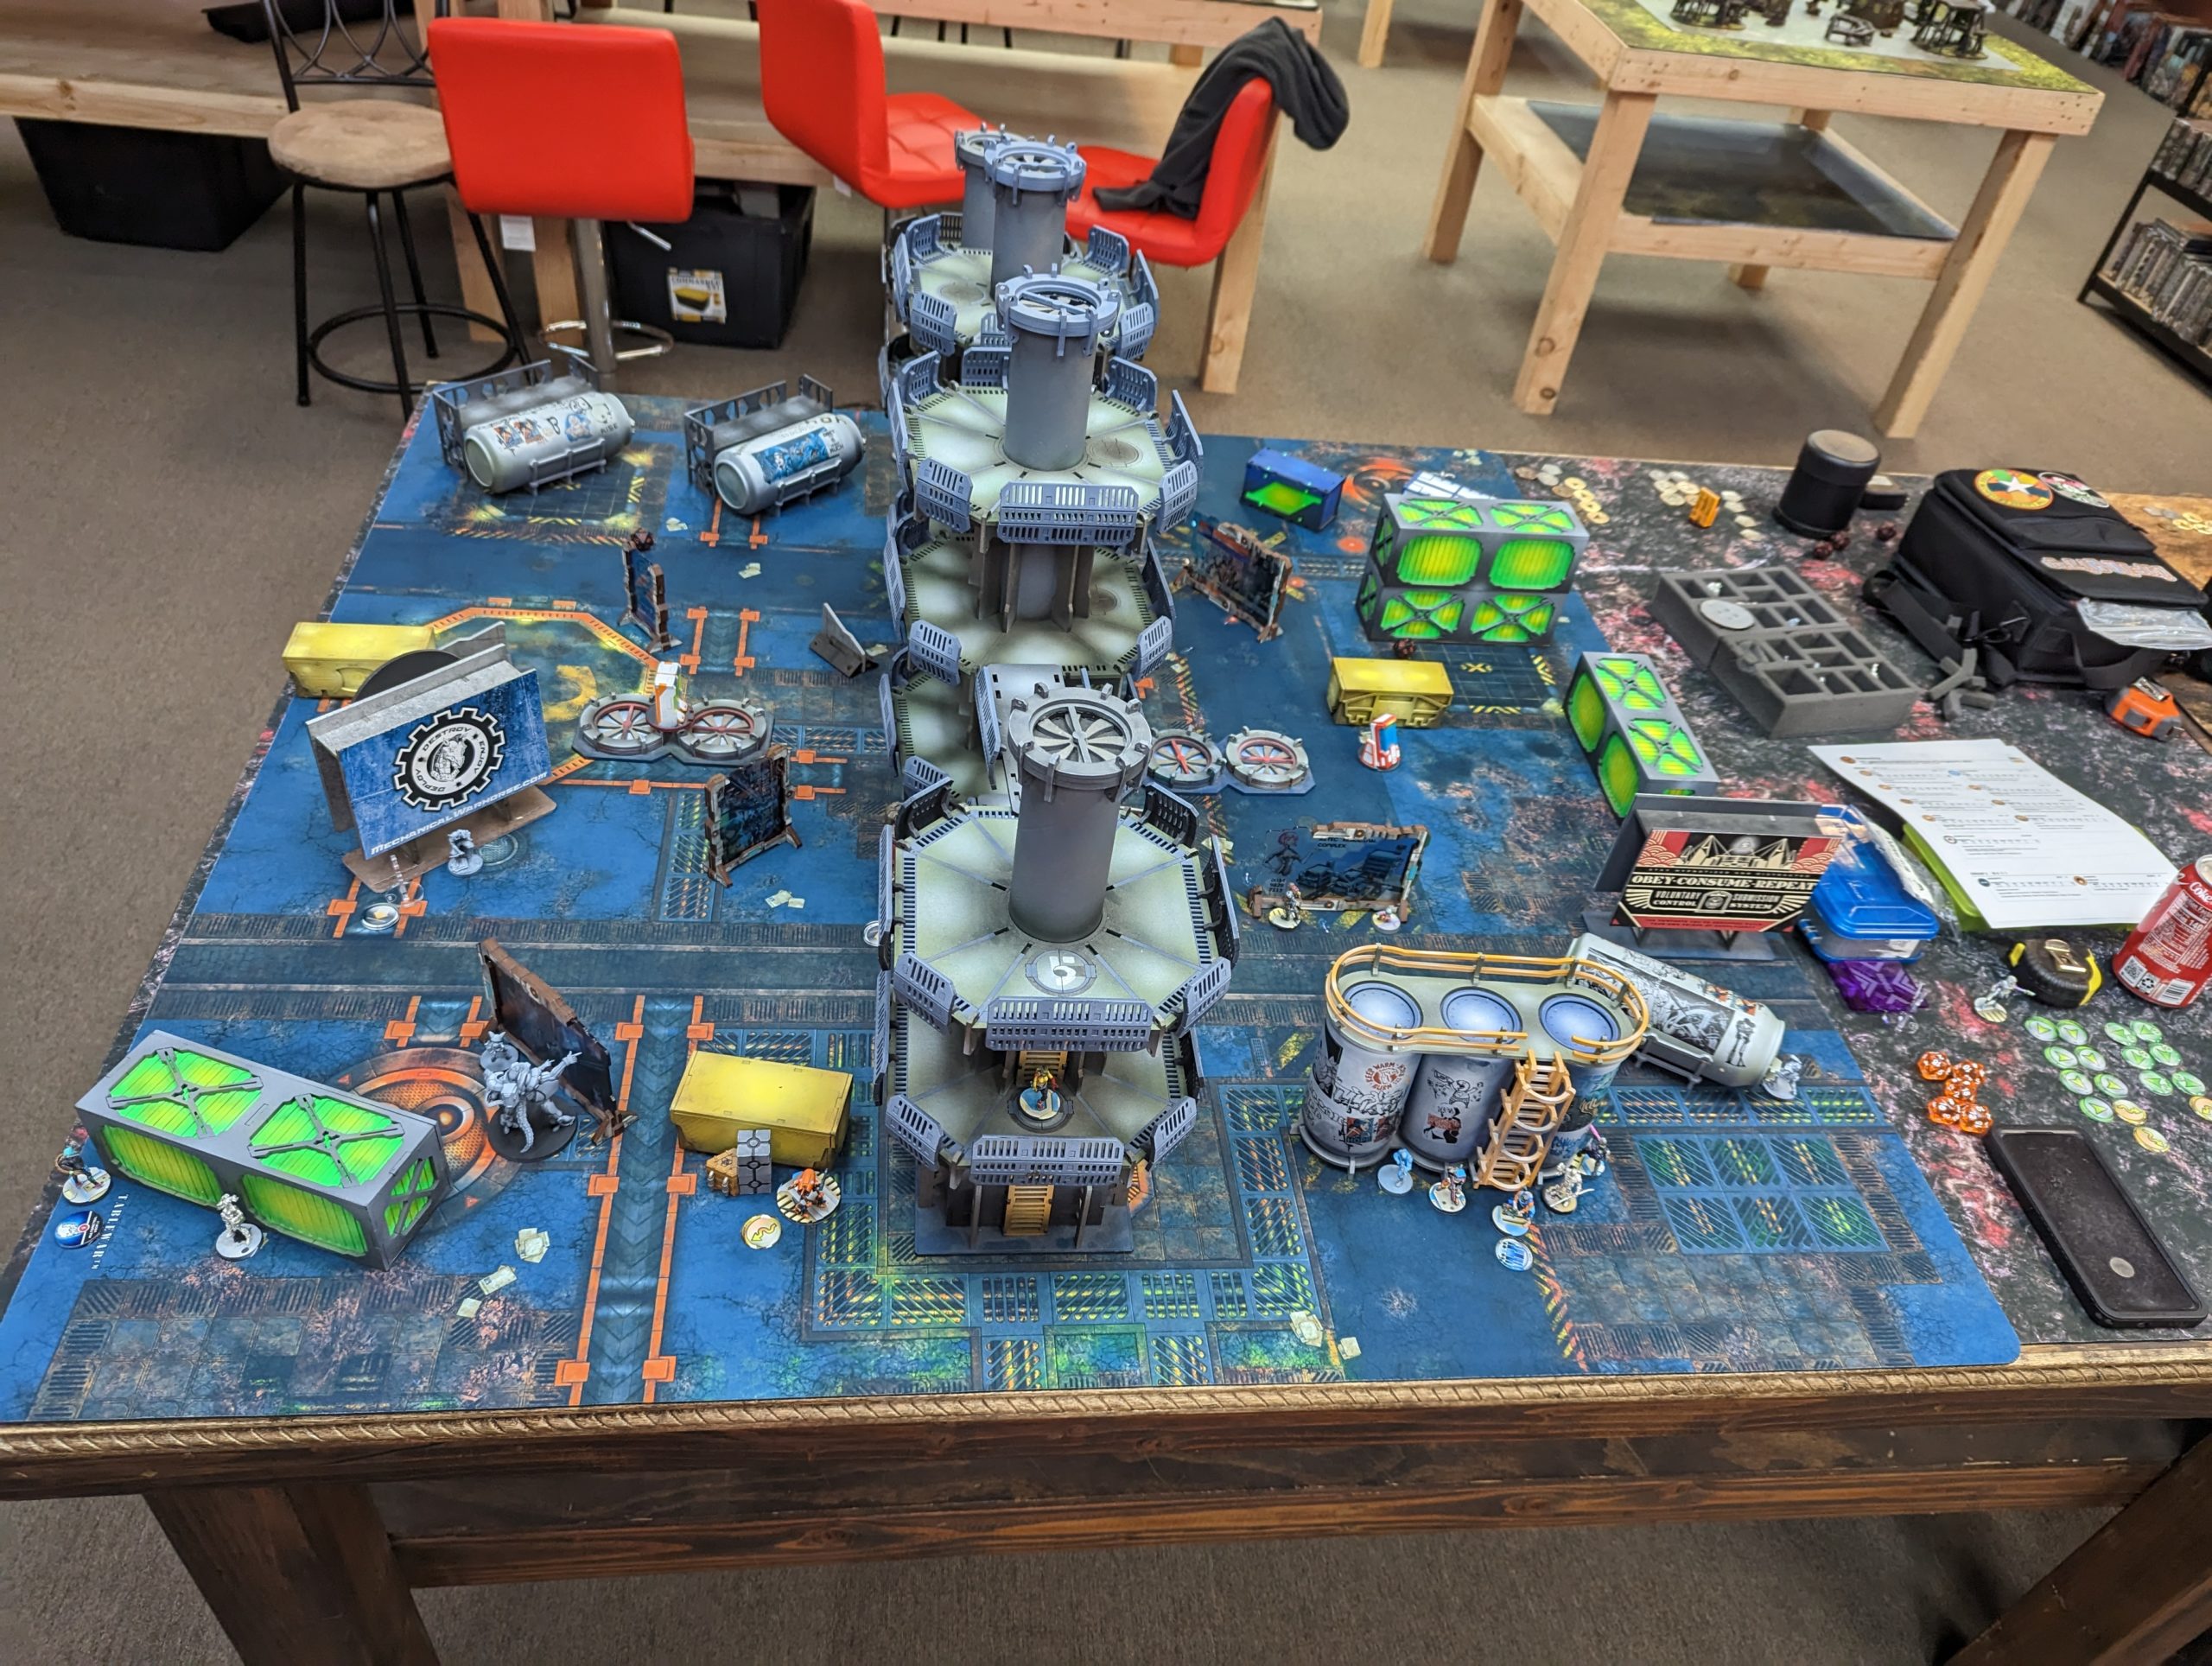
One of the problems with 5-strong links is deploying them. John made do with what he had and stacked the Algaucil link on his right, with the HMG out to ARO and the Raveneye screening things with an E/M mine. Jazz hung out near my Zero Hacker, which was further threatened by a Koala and Moran, with the other Moran on John’s right protecting his Decoy all the way to the right. Unlike me, he chose to have the leftmost HVT be the real one, with the one in the center another Decoy.
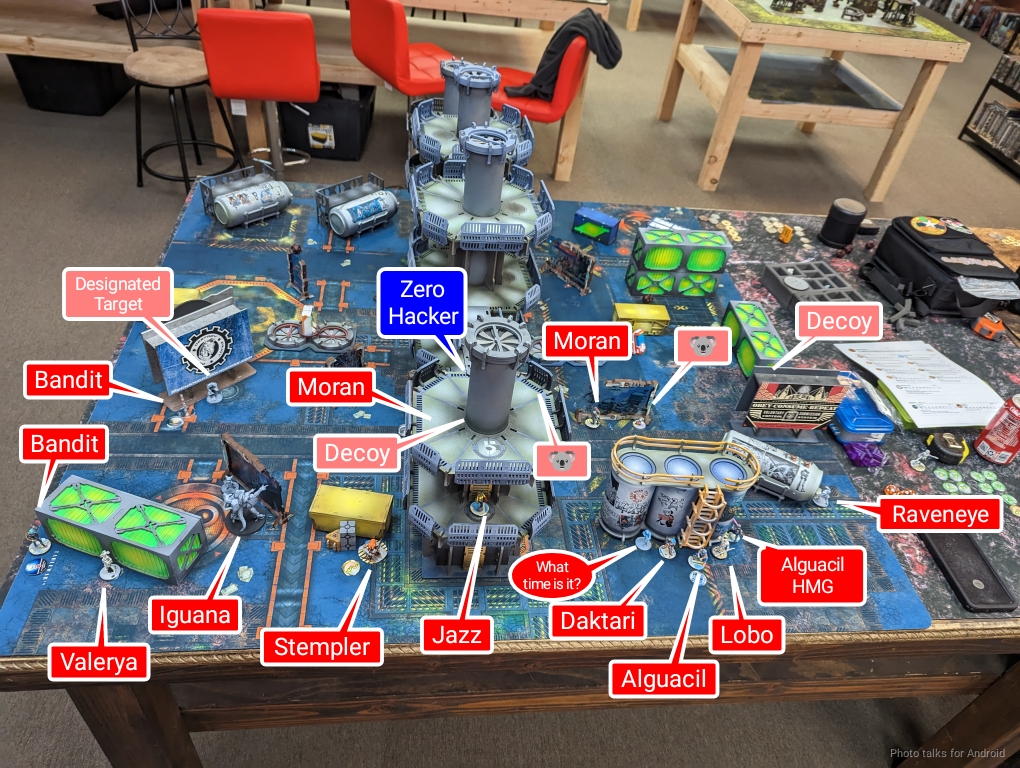
John put a Bandit next to the Designated Target on the left and then attempted to copy my placement of my Zero Hacker with his other Bandit, but failed the roll and stacked up the second Bandit on the left to guard against Akali. I put the Chimera on my left out of reserve, figuring I could eat the link with it, and then John put the Iguana down behind a large billboard on his left.
Turn 1
Top of 1 – ForCo
John takes orders from the Chimera, who just rockets forward powered by the impetuous order. I’d like to clear out the Algaucil HMG, so I use the Bolt ML. I’ve got great odds…
| 77.5 | 11.7 | 10.8 |
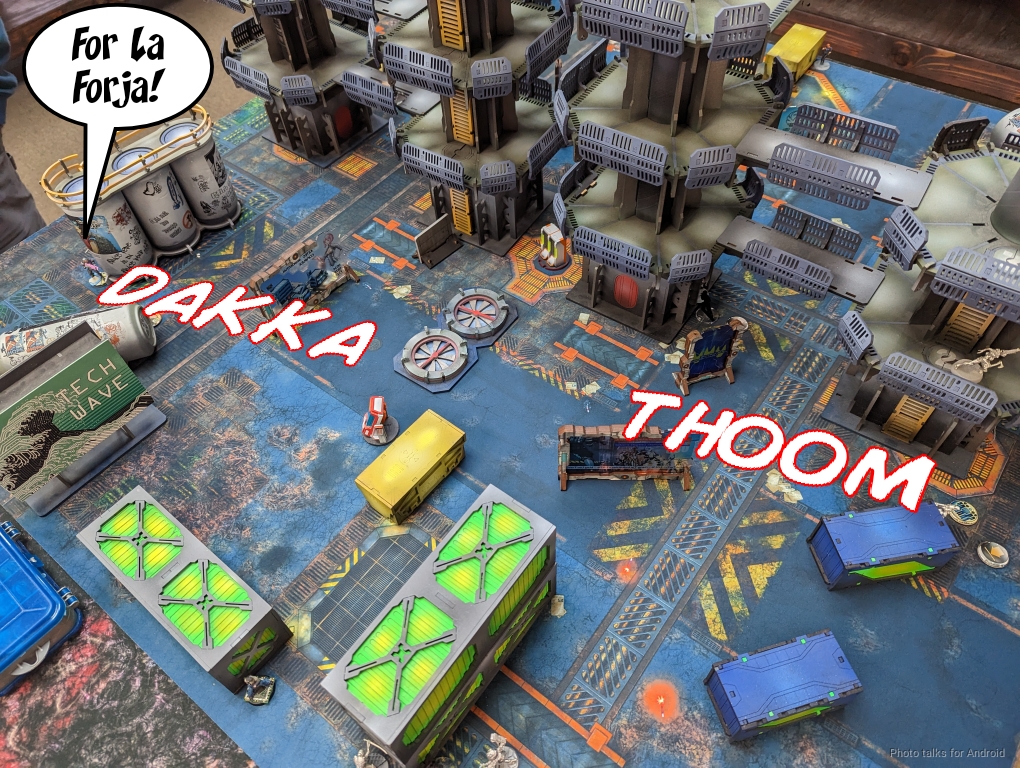
which means of course I take a hit and the Bolt ML goes unconscious. The Chimera make their way forward, clearing a Koala and the RavenEye’s mine. Unfortunately I lose one of the Pupniks to some shots from the RavenEye.
The Chimera easily deletes the RavenEye and then I’ve got one more order in the pool.
I move the Chimera into view of 4/5 members of the link and get the Pupnik into base contact with the Algaucil HMG. John breaks the link and shoots the Chimera with the Algaucil HMG’s pistol and dodges with everyone else. I decide to drop a nanopulsar and hope for the best.
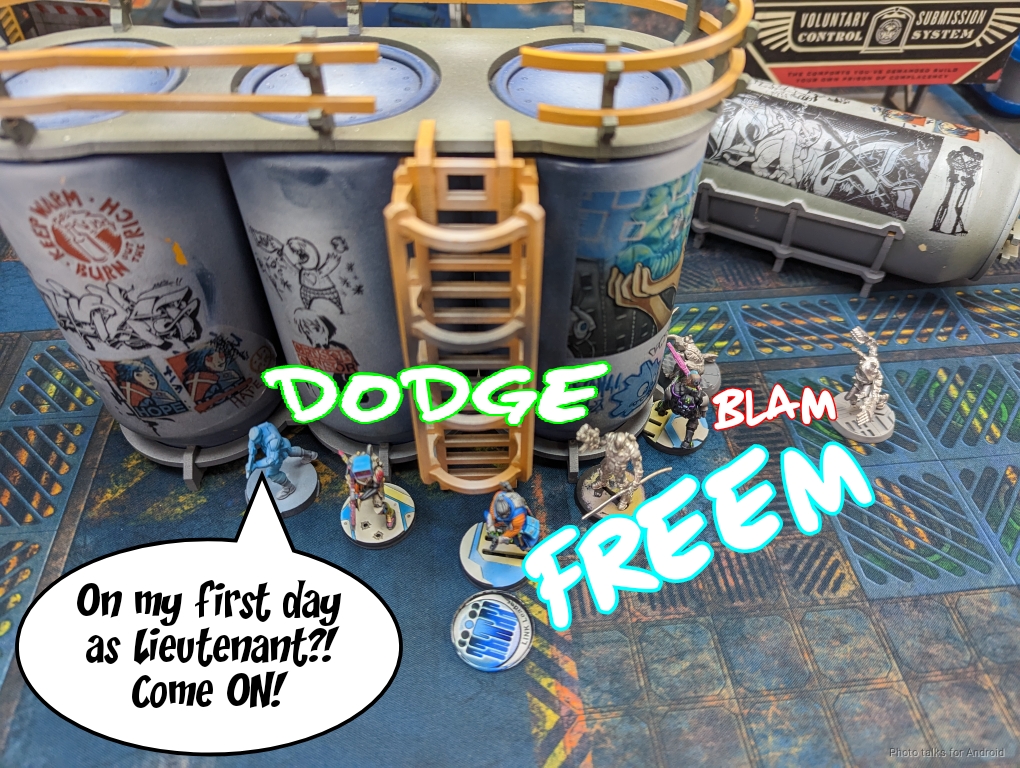
I lose the Chimera, but take out everything in the link except for the Algaucil Lt due to a raft of failed dodges! I’ll take it! I then shuffle my Zero FO around and reveal the central Decoy before recaoming. I reform the Bolt link at 3-strong and pass turn.
Bottom of 1 – Corregidor
John consolidates combat groups and starts his turn.
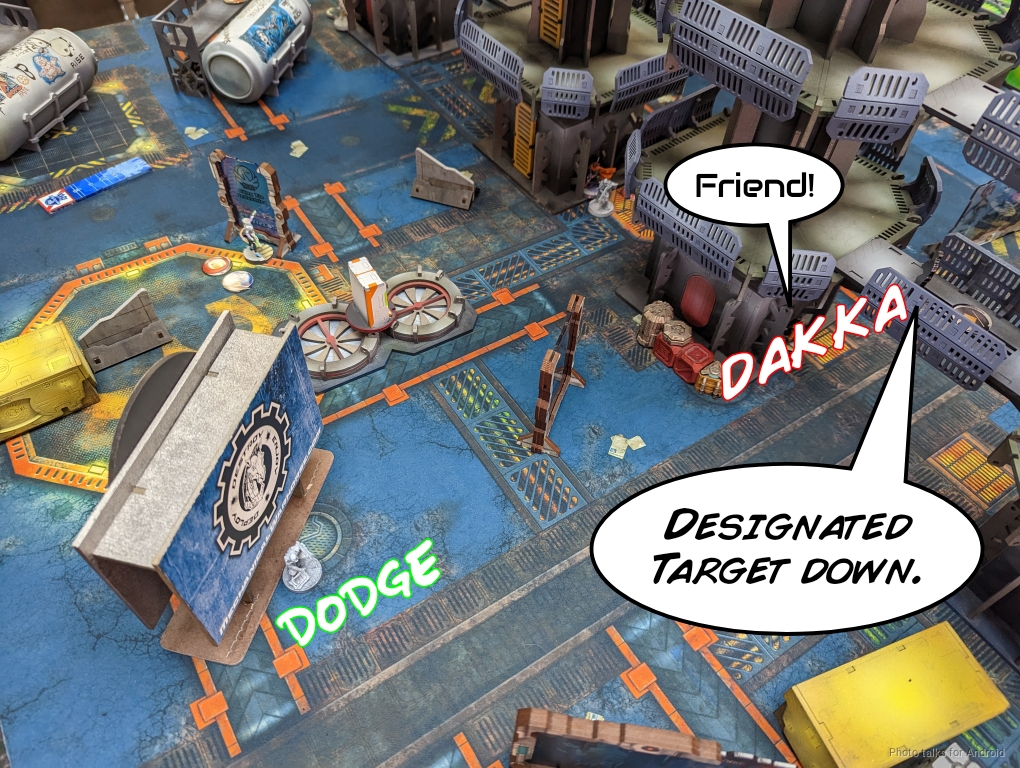
There is an approach vector that one of the bandits can take to access the rightmost console that only sees the Warcor, so John takes it. The Warcor discovers, but the Bandit successfully reveals my Designated Target before going prone and re-camoing! Uh oh.
With the target revealed, John sends in the Iguana, first challenging the Warcor and pasting it…
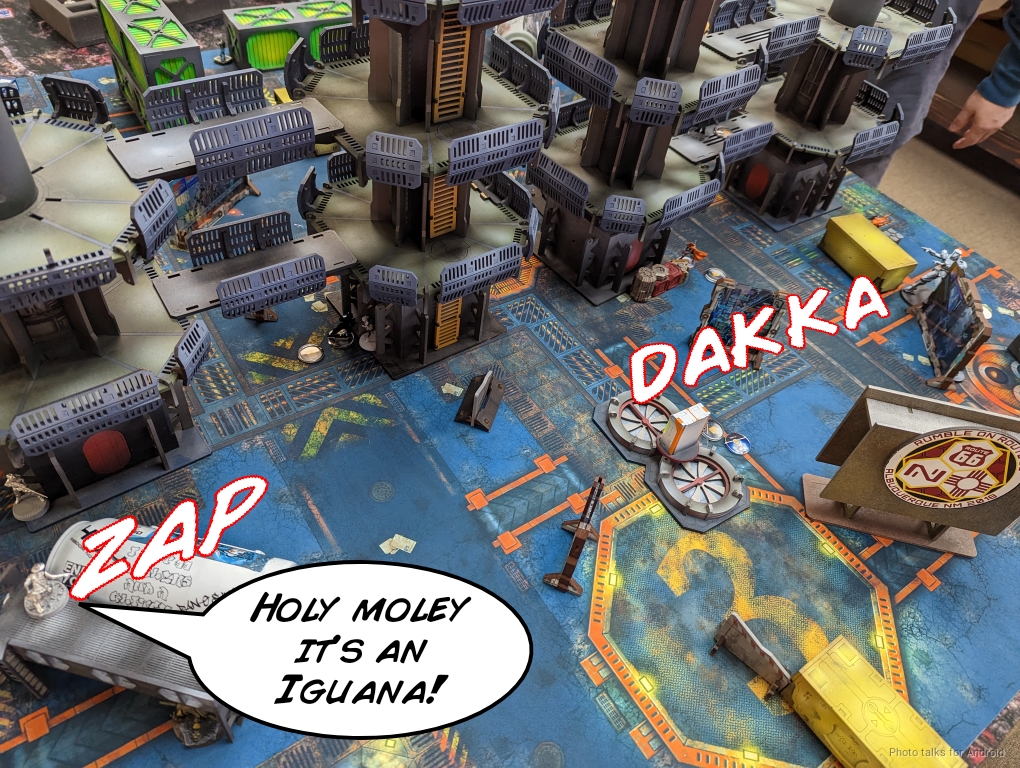
Then as the Iguana moves into the open, I decide to reveal the Croc-Man sniper and take a shot:
| 34.2 | 30.6 | 35.2 |
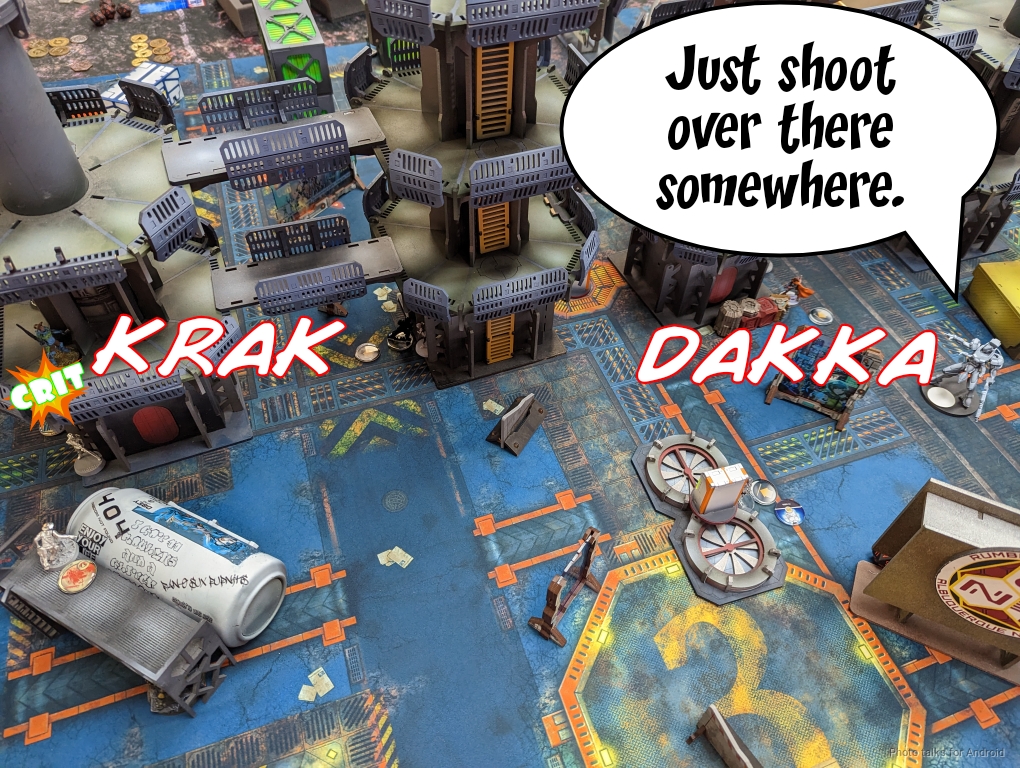
It turns out burst 4 will get you crit from time to time, and the Croc Man is KO’ed. John keeps pushing and fights the Bolt MSR next.
| 24.6 | 36.2 | 39.2 |
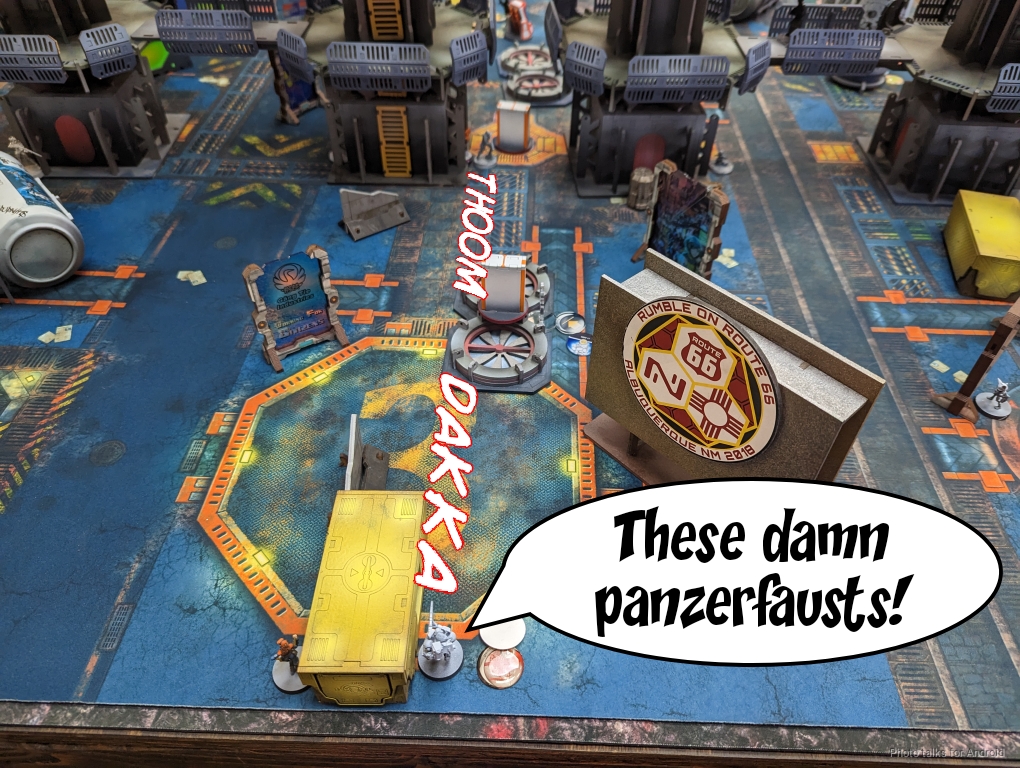
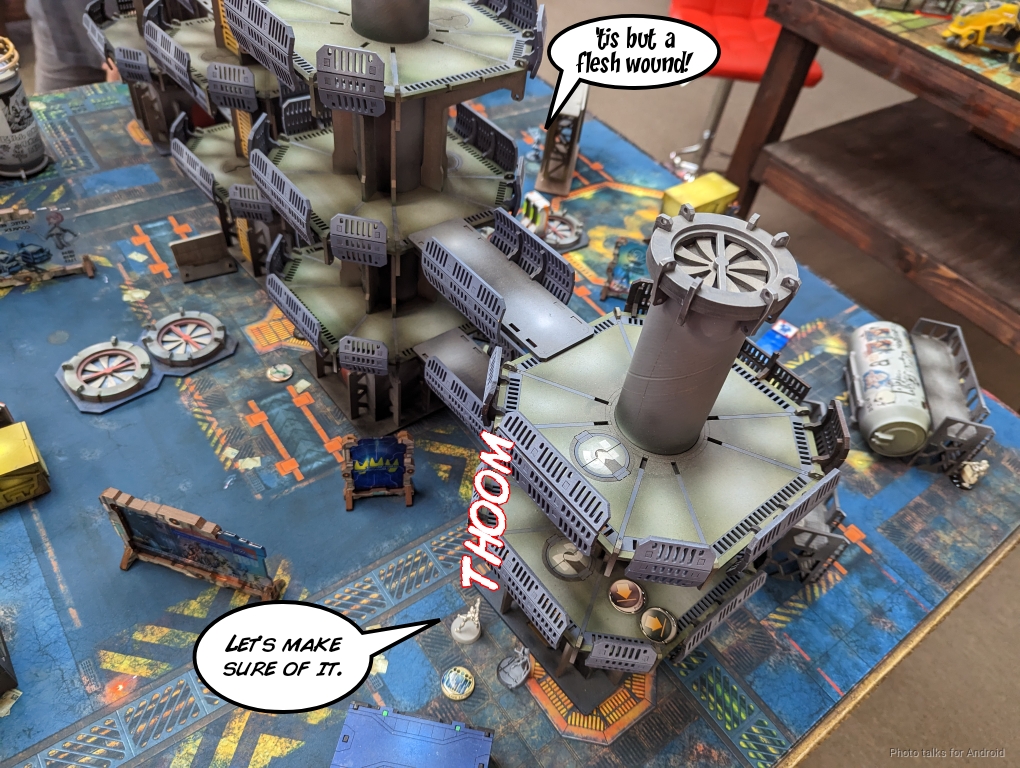
John’s luck holds and the Bolt goes down. Unfortunately, the glue fails on the joint between the Iguana’s feet and the base, so John swaps it out for an Avatar he had in his bag. The Iguana pushes forward and challenges the Beasthunter, so I panzerfaust:
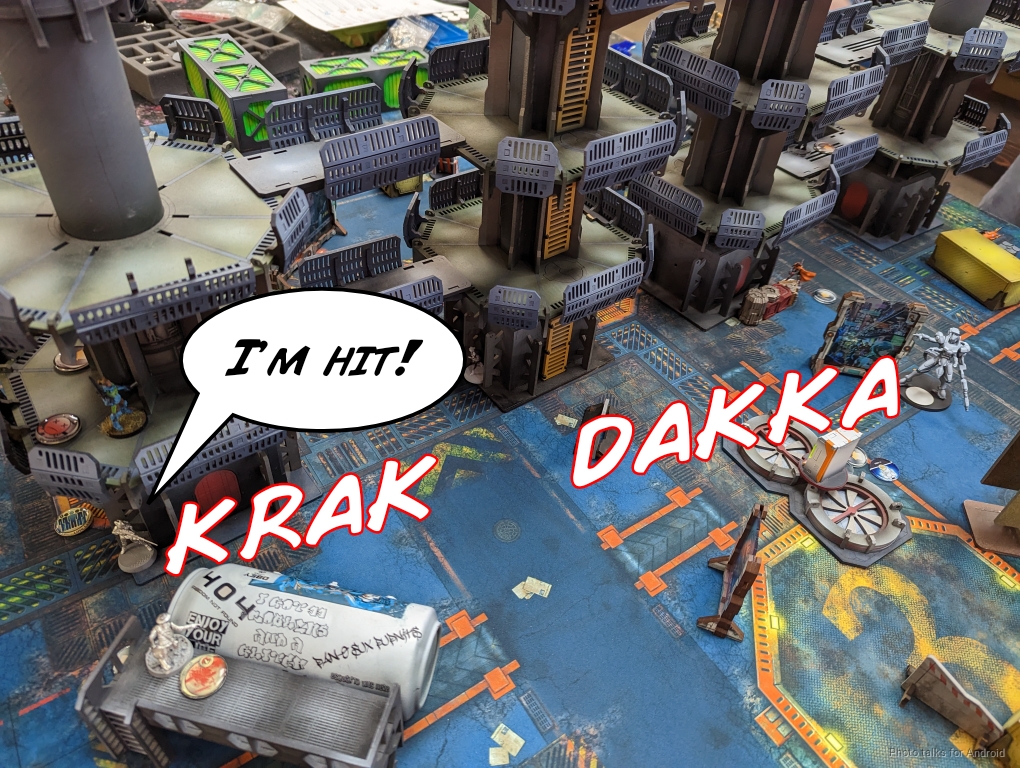
| 27.0 | 18.5 | 54.5 |
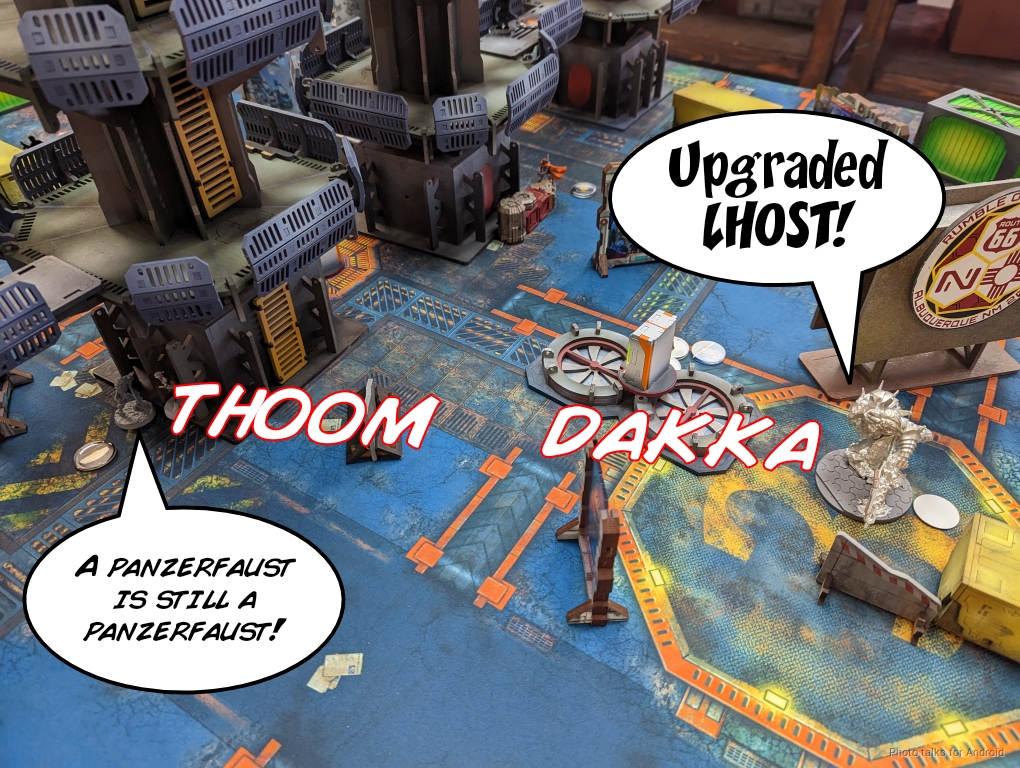
This time, John’s luck does not hold, and I do three wounds, kicking a wounded operator out of the TAG in a cloud of smoke. John retreats the Operator into cover and then pushes the Moran under my Zero hacker onto the opposite side of the tower of my Beasthunter and Designated Target.
He stacks up a Stempler watching the Bolt MSR’s firelane, and passes turn.
Turn 2
Top of 2 – ForCo
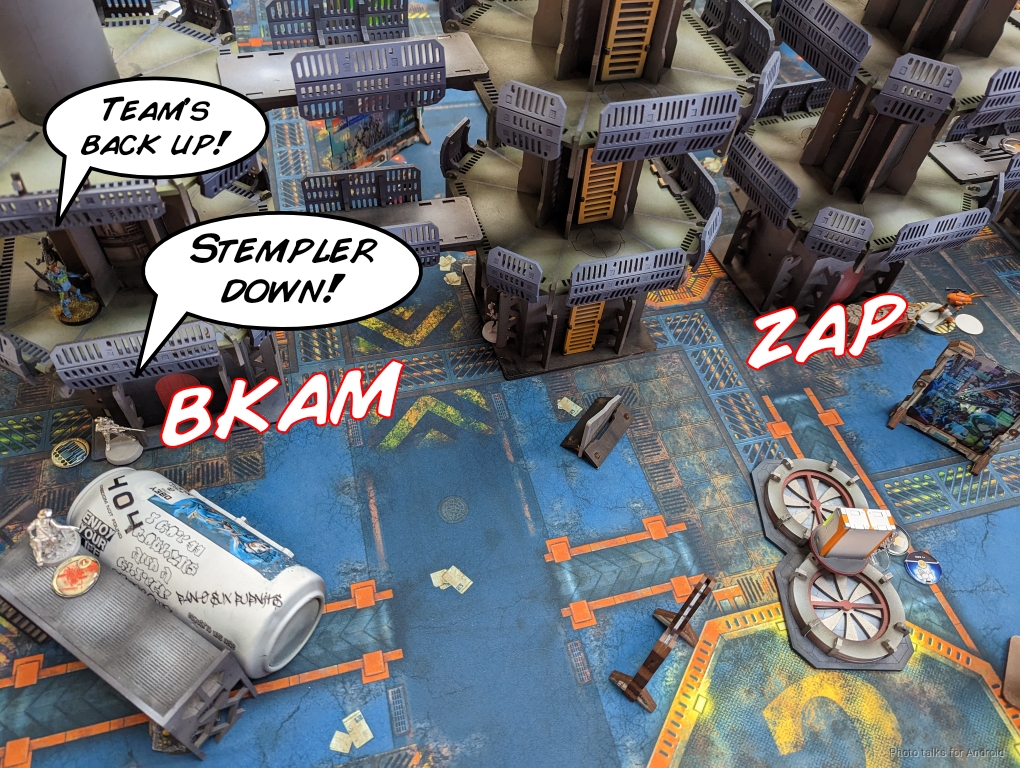
My objectives for this turn are to recover and then see about figuring out which HVT is John’s designated target. Well, I brought Avicenna for a reason, so she spends four orders picking the two Bolts and the Croc Man back up. I then reform the link at full strength and take out the Stempler with the Bolt MSR.
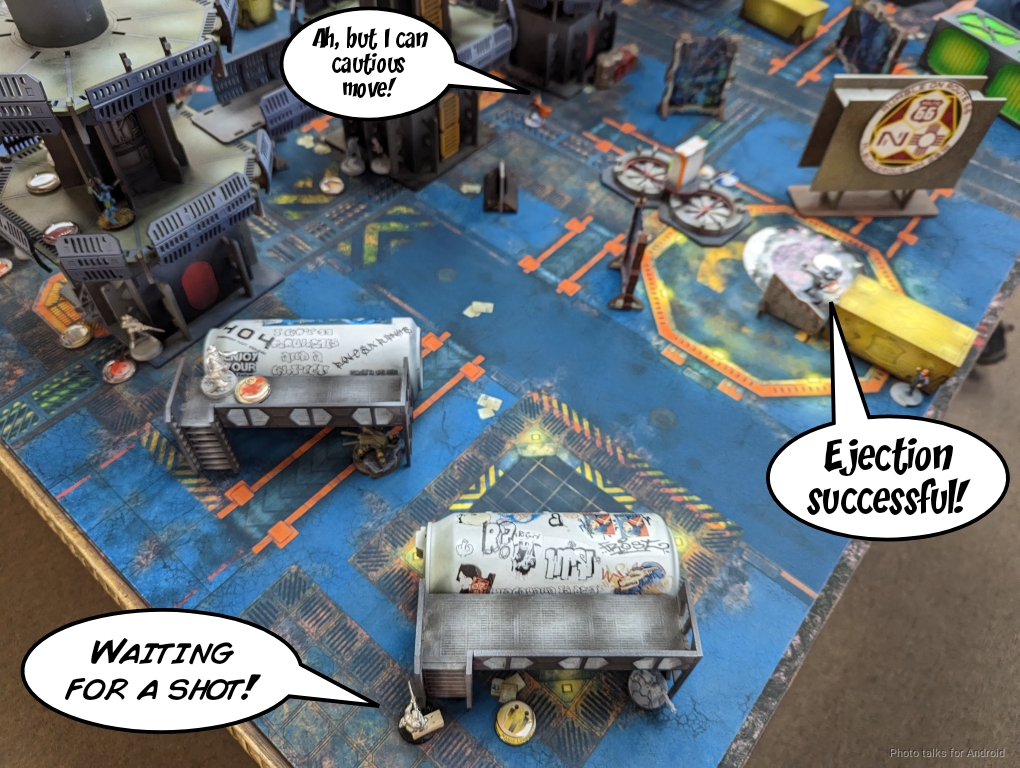
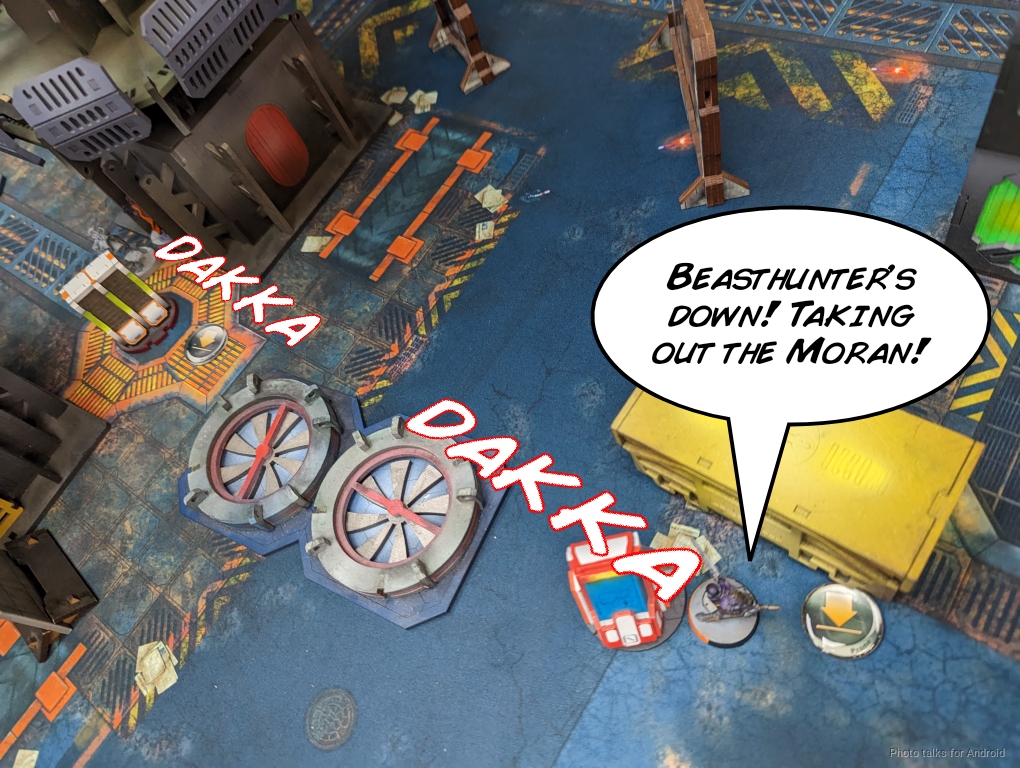
That’s literally all I’ve got in the first pool, so I start working on the the midfield with the Beasthunter. I get into base to base with the Moran after dodge-clearing its Koala and ask for AROs. John thinks for awhile and talks it through, and I get a little confused. It sounded like he’s dodging with the Moran and shooting with the Iguana Operator, but he’s shooting with both. I thought the Moran dodged to avoid a flamethrower hit, but I was mistaken. I declare panzerfaust against the Operator, and take it off the table, but the Moran was actually shooting.
We had already rolled the panzerfaust interaction, so I just let it go and the Moran takes out the Beasthunter. My Zero FO avenges the Beasthunter though, so at least that worked out.
We then realize that John missed an ARO with the other Moran as I declare re-camo with the Zero, so we just assume I did that first and I take out that Moran too.
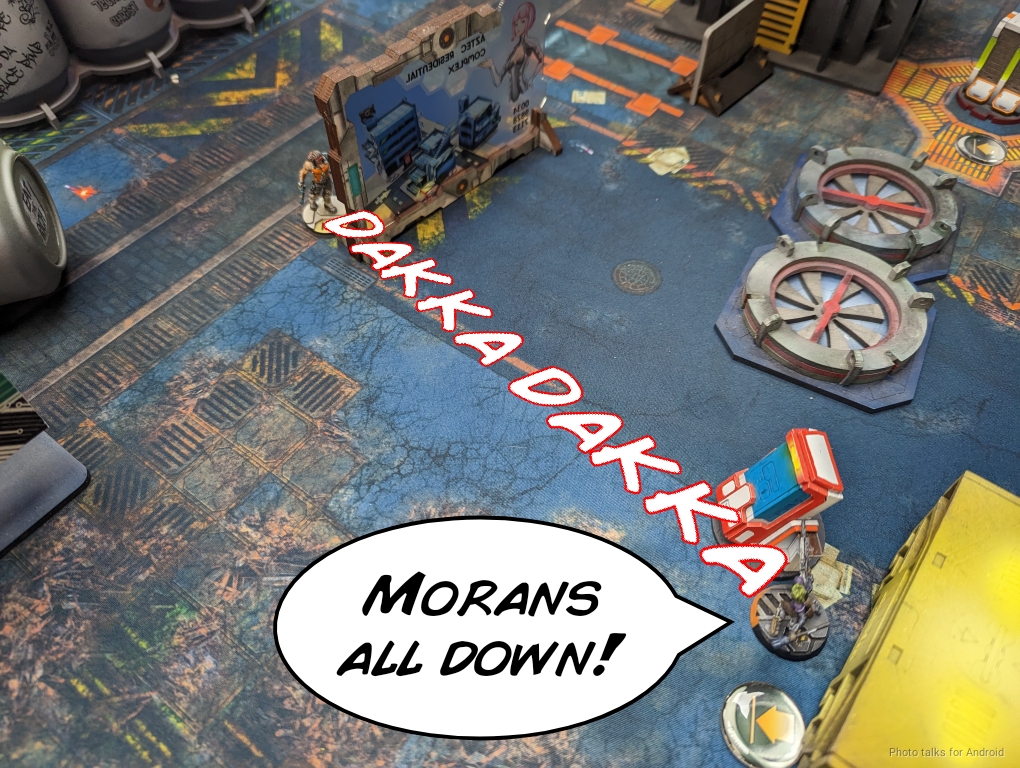
A bit sloppy, but I got the job done. I don’t think this sloppiness of play was because I was playing two games at once–this would have happened in any normal game with missed AROs and missed communication. No big deal.
Bottom of 2 – Corregidor
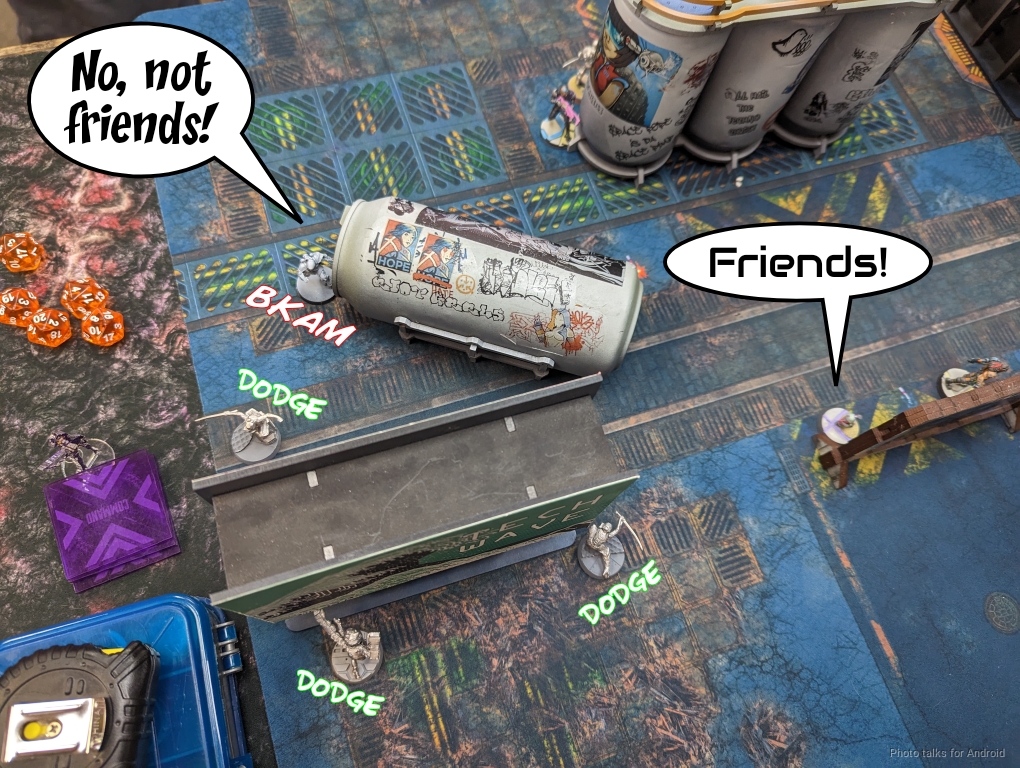
John needs to get my Designated Target, and he’s got his Bandit in position to do so, so he starts taking shots with the Bandit’s shotgun at range.

It doesn’t work, and I keep dodging away while my snipers wait impatiently for a shot.
I end up dodging into LoF of a spot the Alguacil Lt can out and back to, so John makes the attempt. I dodge again.
Jazz, however, does make it happen, sacrificing herself to the Bolt ML’s shot to finally SMG down the Designated Target.
Turn 3
Top of 3 – ForCo
Jazz is down, so John only has Billie.
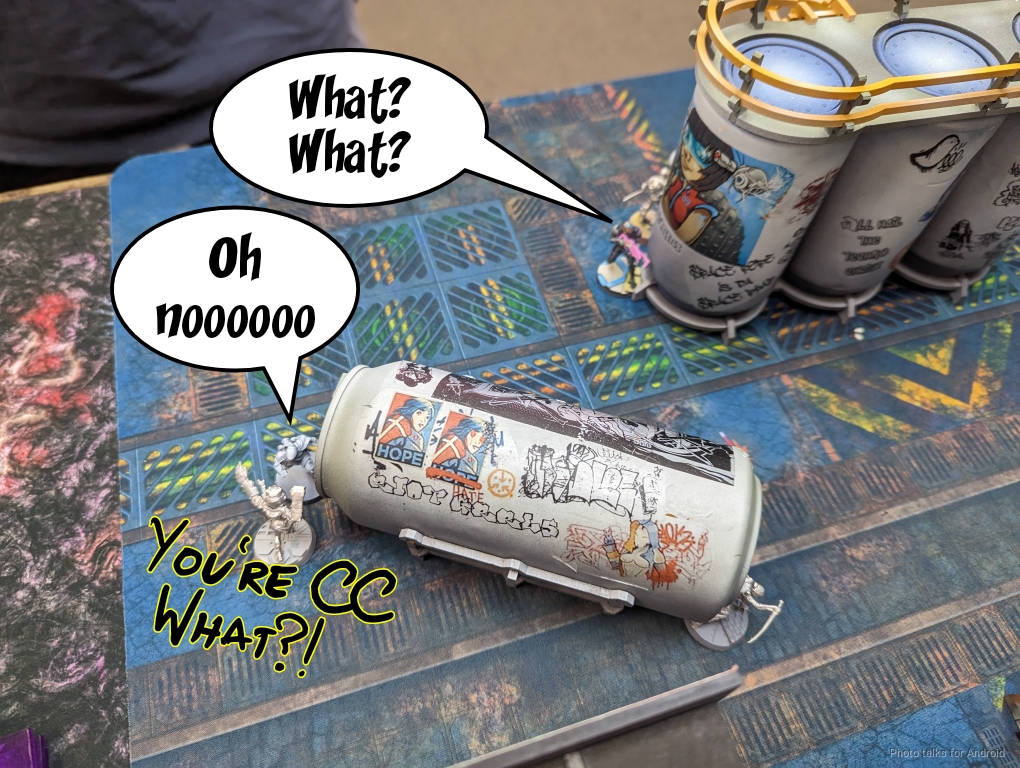
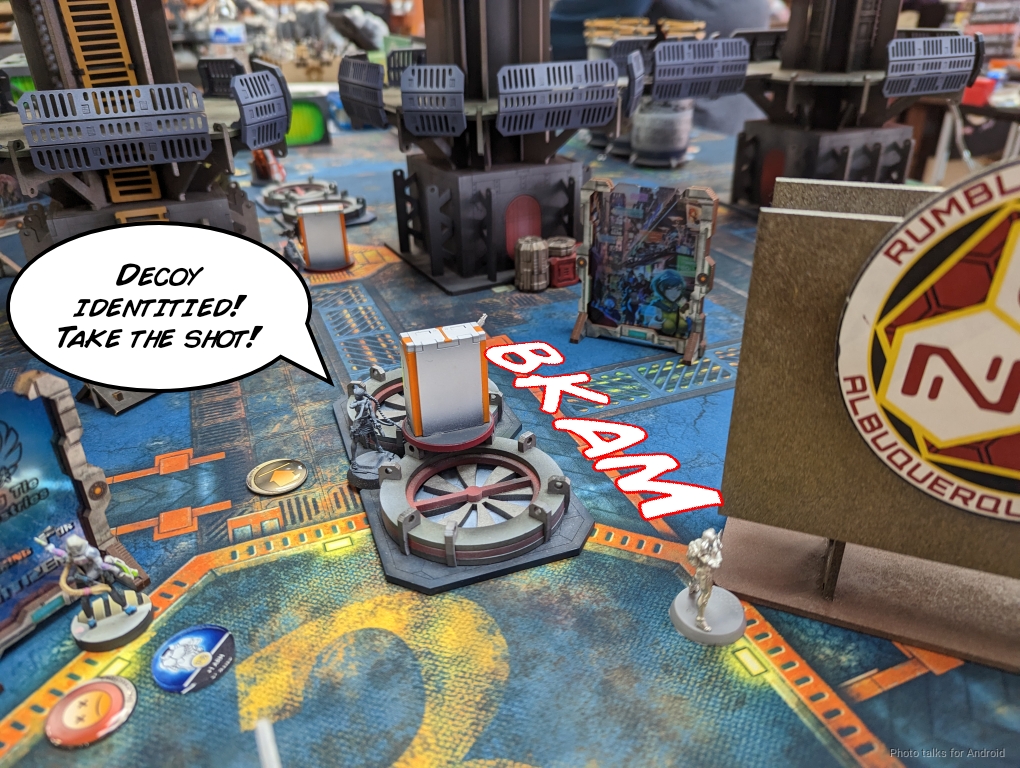
I really need to get John’s Designated Target, so I move the Zero FO into a console, dropping a mine on the way because I’m that awkward 6-7″ away. Thankfully I do reveal the correct HVT!

I clear one of the Bandits with the CSU…
and then throw the Zero hacker under the bus and try to take out the Designated Target. I lose the Zero to a Koala and I think I have it… but then John passes all the ARM saves.
The Bolt ML makes it happen though, and I just start moving the link into the midfield.
Avicenna flips the last console and I take a cross-map shot with the Bolt MSR to drop a decoy.
Everyone stacks up to cover the last console and defend the Decoys, and that’s it for me.
John’s in retreat, so we call it here. I’ve got more consoles, a decoy and the target, and John just has the target, making it a
7-3, 263-36 Foreign Company Victory!
Post Game Analysis
Well! I got incredibly lucky with that Nanopulsar on the Chimera. This game almost got away from me with the Designated Target in the middle. I should have put it on my left, so it can just dodge around the side of the box and deny a huge amount of surface area. Putting the Designated Target in the middle made my attack surface waaaay too big–as we saw when I dodged away from the Bandit to only die to Jazz, of all things.
Avicenna really brought me back into the game after losing basically all my SWC. Honestly this was an incredibly fragile game. I had a pretty poor deployment on the Designated Target, and all my successes were risky plays. A last order nanopulsar from the Chimera, panzerfausts from the Beasthunter, and all those dodges on the Designated Target.
Very fragile win here. I suppose it went both ways, I had some excellent AROs on the Iguana and it just powered through and didn’t even make an ARM roll until it got hit by the panzerfaust. On that note, specifically related to that situation, I should have waited for the Iguana to engage the Bolt MSR and forced a split burst on the Croc Man and the Bolt. I got greedy, plain and simple.
I’m a little ambivalent on the Zero Hacker over-infiltrate. I think I could have used it a little more aggressively, maybe even taking out John’s lieutenant on the first turn by climbing all the way up and sacrificing it to Jazz’s Trinity and maybe the Koala if it I was still in ZoC (maybe not, if I climbed all the way up). There just wasn’t a good time to do it. Maybe if I had chosen the left HVT as my Designated Target, that would have incentivized me to leave the Zero FO there… I should also maybe have used the Zero FO to over-infiltrate instead so avoid the hacking vulnerability.
Anyway. A lot of these things are definitely small optimizations with full information, so not really actionable in a future game. I think the big takeaways for me are I took some pretty big risks on Turn 1 and it paid off, but I don’t think it was a consistent play. It could have been a situation where I just lost the Chimera, did no damage, and then both the Alguacil link and the Iguana to contend with. It might have been better to just take out the Raveneye and then maybe the Moran and then back off, force the Alguaciles to dig me out. A little annoying that the Bolt ML didn’t take out the Alguacil, but it happens.
I think John played a very solid game given the damage I did. He correctly prioritized the mission, positioned stuff well, and just took some bad rolls. To my credit, I did keep the pressure up, but I don’t think John made any serious errors that caused the game to slip away from him. Really I just got lucky and was able to leverage that luck into a win. That said, John did deploy the link in a very vulnerable position, so me recognizing the weakness and exploiting it was a good play, just a high-risk, high-reward play. Stacking just enough of those and having a backup plan, like Avicenna, I guess is what tipped me over the edge here.
Thanks to John and George, again, and as always, thanks for reading.
Pingback: Two, Two Tikbalangs – MERC Recon
Pingback: Blind Riot – MERC Recon