
Brutal Skyline
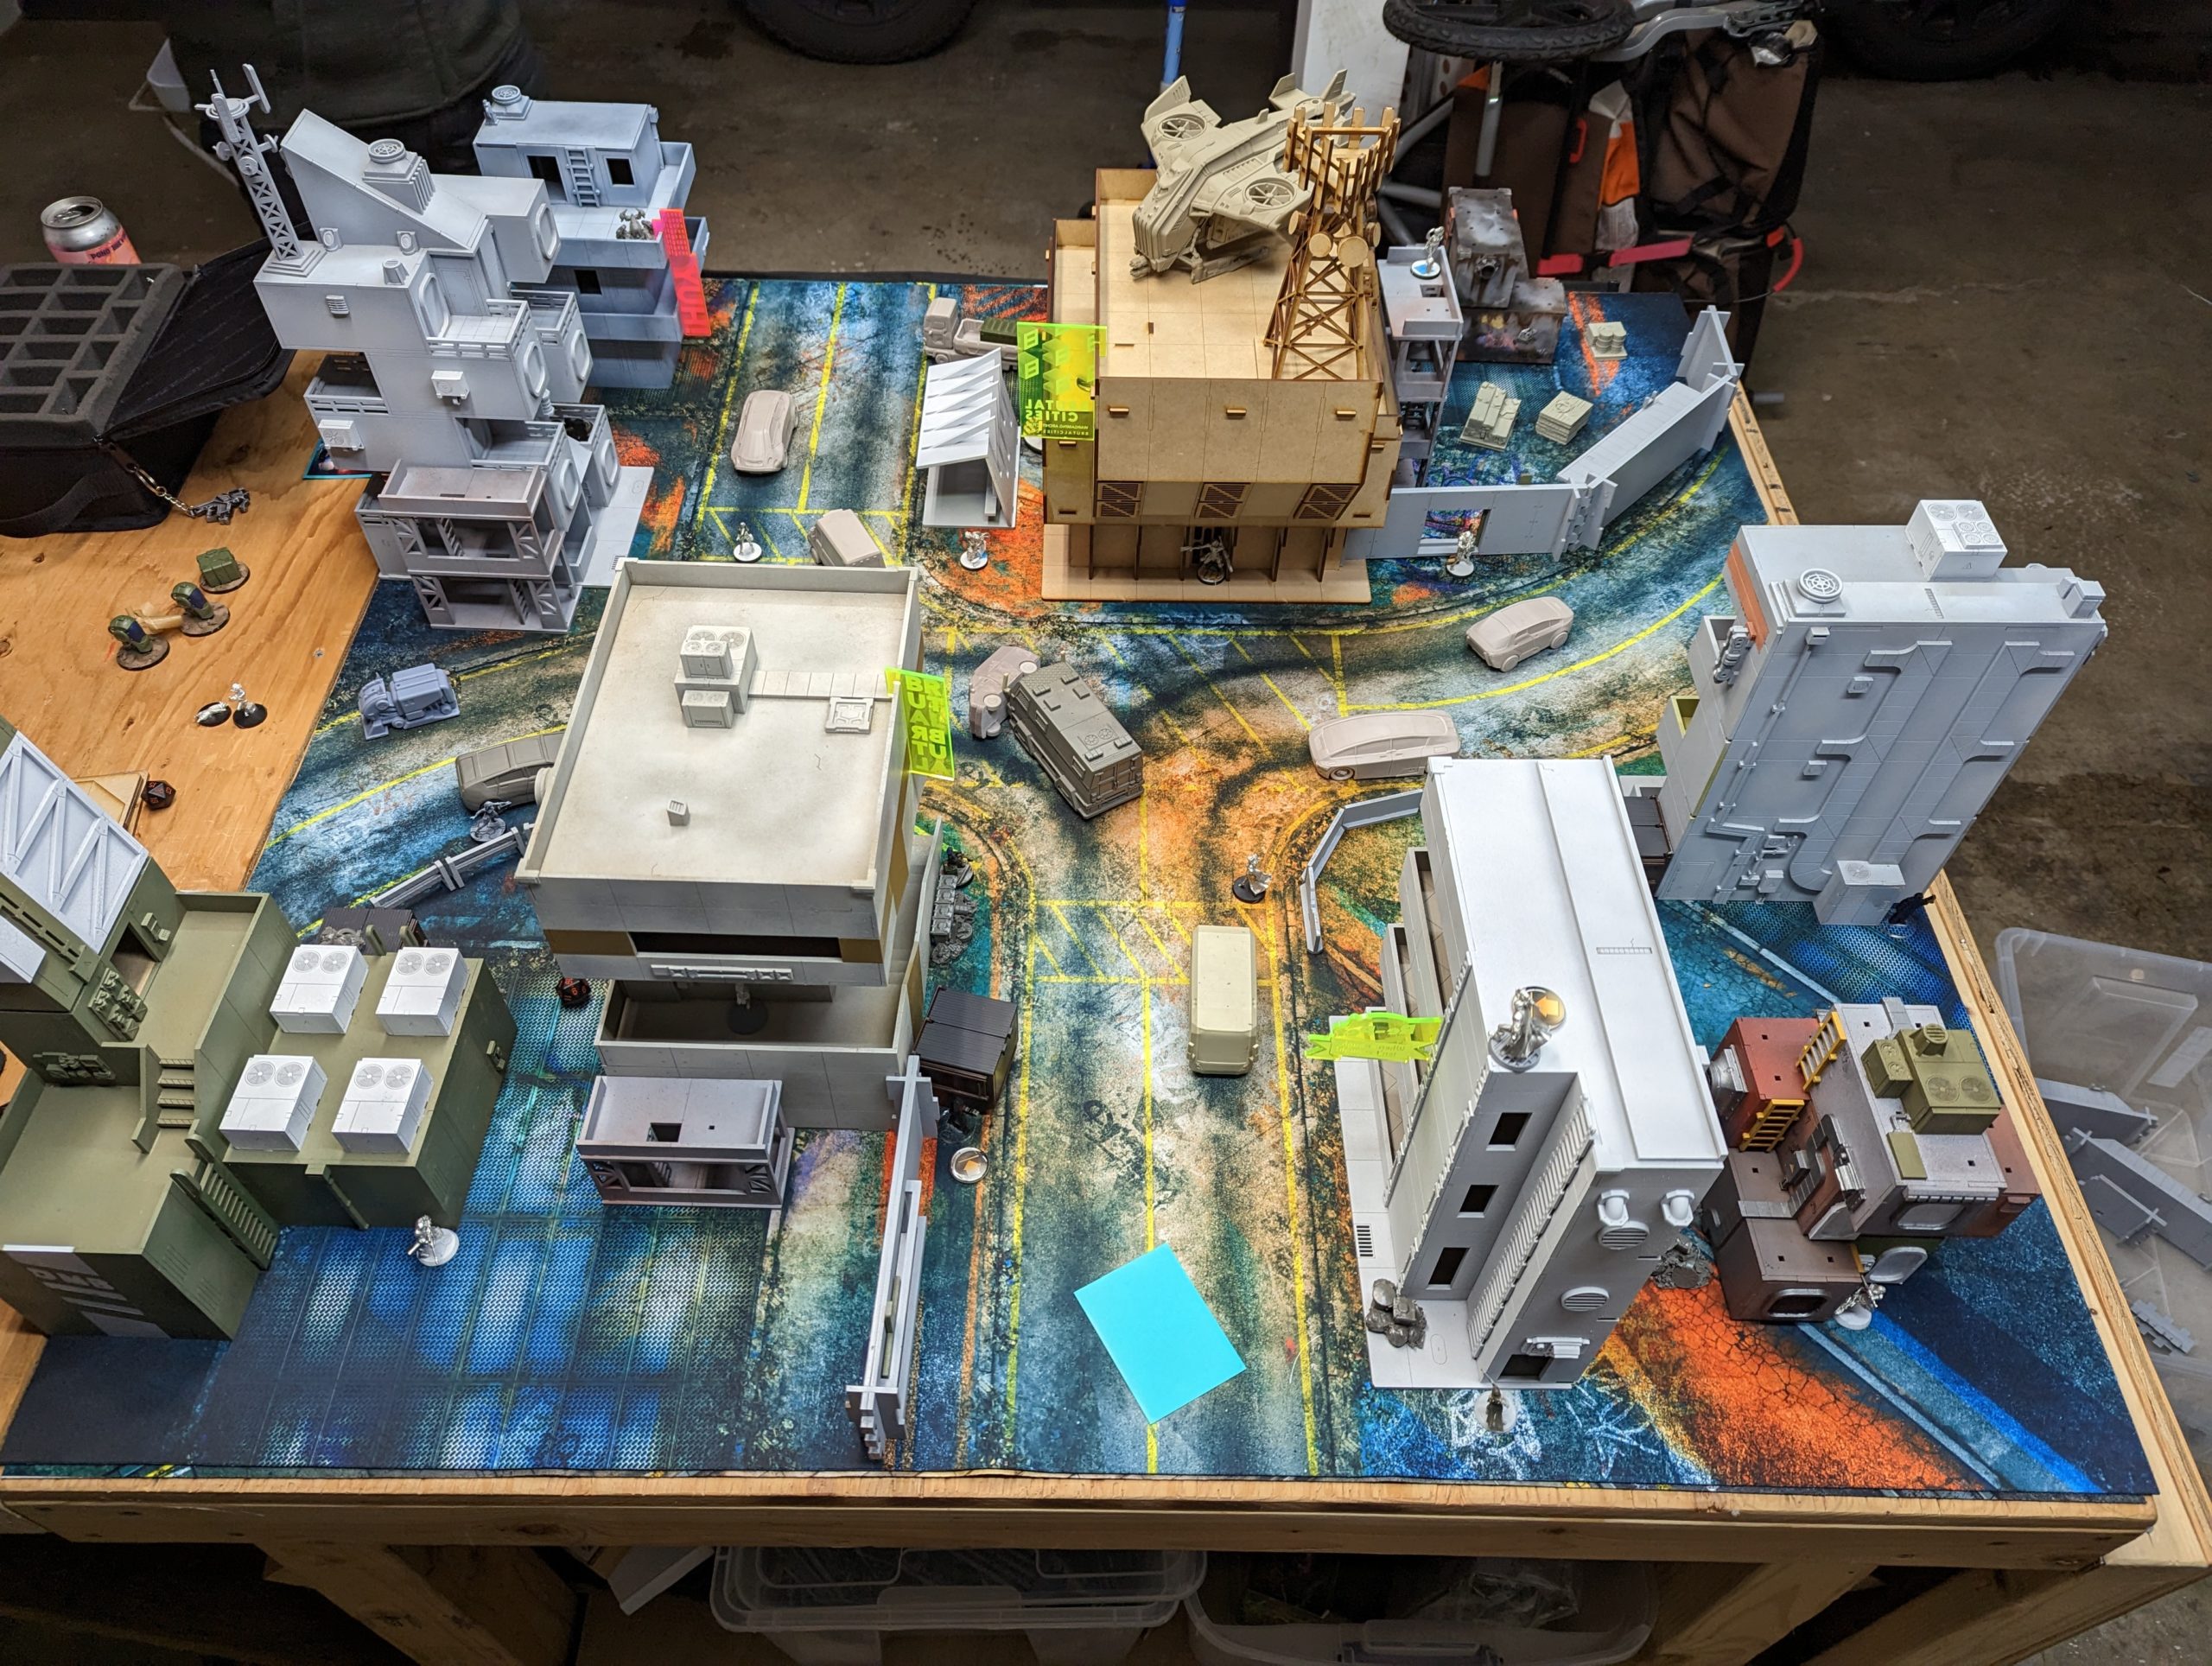
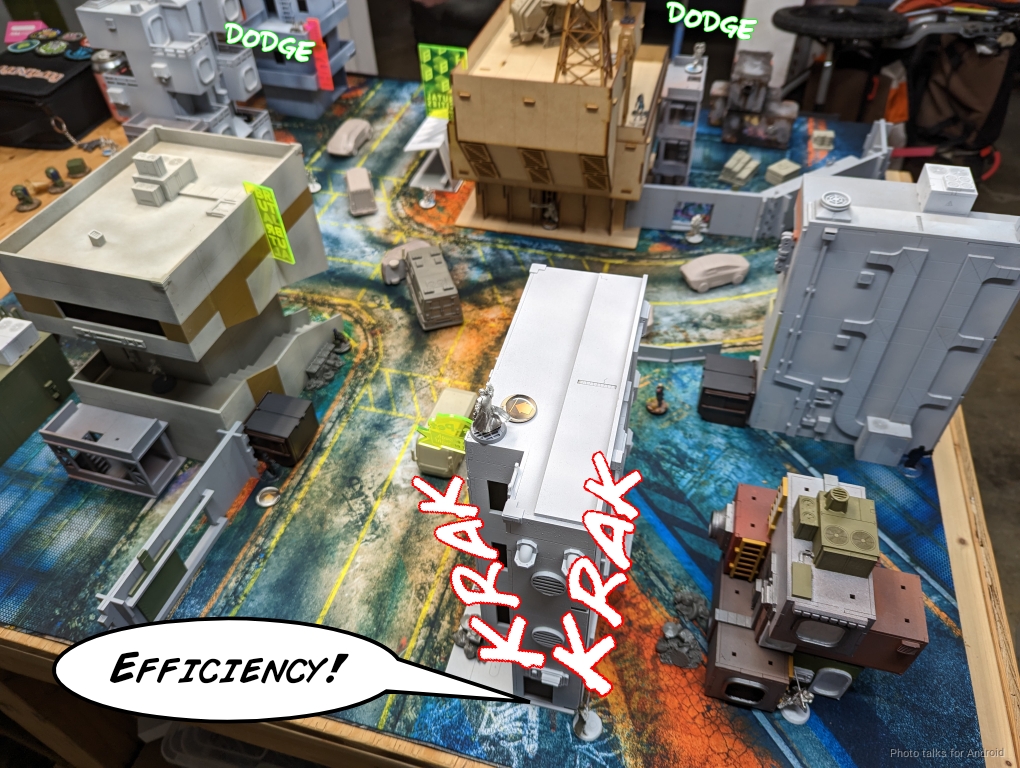
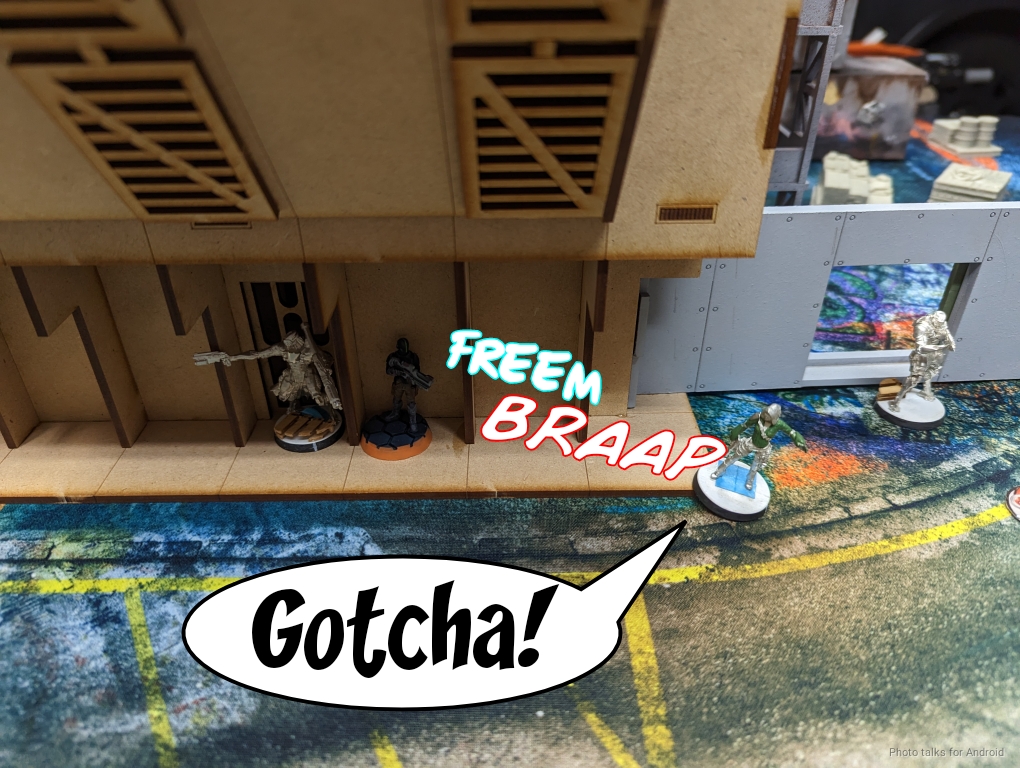
Obi (Nehemiah) was in town, so I made sure to schedule a game with him. I’ve always been a fan of Brutal Cities MDF terrain, but there was always just something off about Adam’s table of it. Today I Learned it was the mat that was the problem. Thanks to Unit9, we have this amazing road map which makes the Brutal Cities terrain really pop.
Overview
- Mission: ITS14 Rescue
- Forces: Jurisdictional Command of Bakunin versus Jurisdictional Command of Tunguska (300)
- Deploy First: Tunguksa
- First Turn: Tunguksa
I’m playing Bakunin as if it were vanilla Nomads. Who needs links? Links are for suckers.
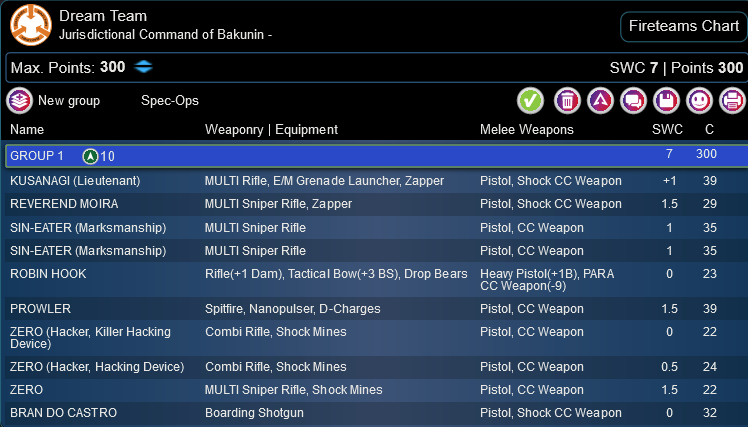
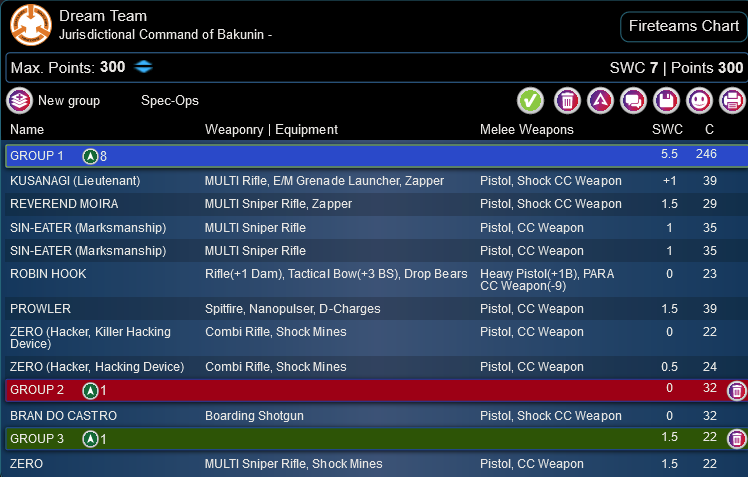
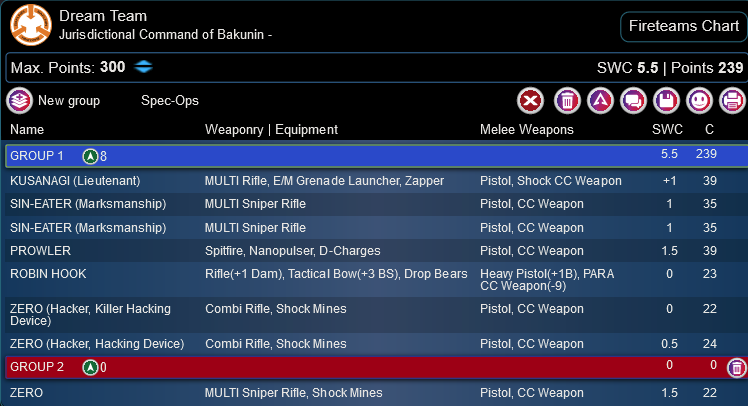
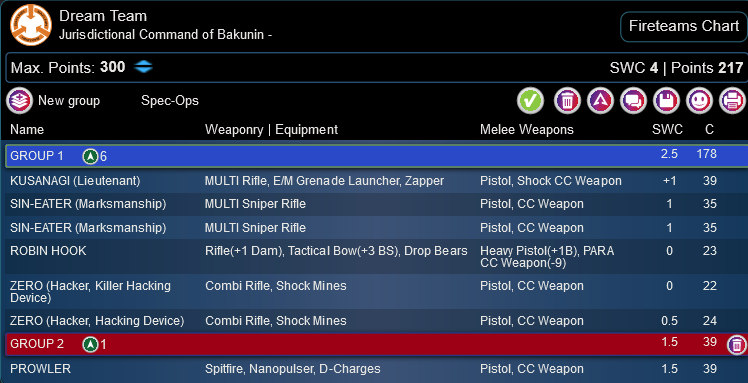
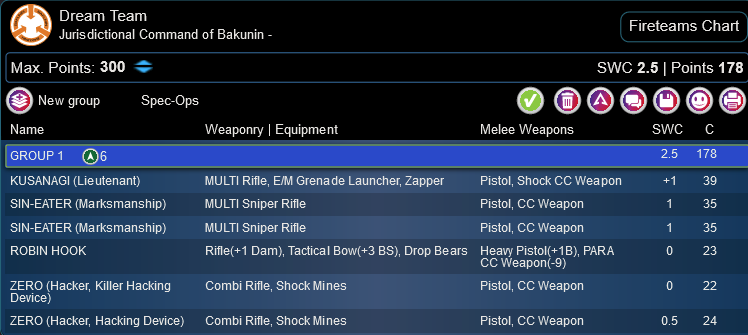
Dream Team
KUSANAGI (Lieutenant) MULTI Rifle, E/M Grenade Launcher, Zapper / Pistol, Shock CC Weapon. (+1 | 39)
REVEREND MOIRA MULTI Sniper Rifle, Zapper / Pistol, Shock CC Weapon. (1.5 | 29)
SIN-EATER (Marksmanship) MULTI Sniper Rifle / Pistol, CC Weapon. (1 | 35)
ROBIN HOOK Rifle(+1 Dam), Tactical Bow(+3 BS), Drop Bears / Heavy Pistol(+1B), PARA CC Weapon(-9). (0 | 23)
PROWLER Spitfire, Nanopulser, D-Charges / Pistol, CC Weapon. (1.5 | 39)
ZERO (Hacker, Killer Hacking Device) Combi Rifle, Shock Mines ( ) / Pistol, CC Weapon. (0 | 22)
BRAN DO CASTRO Boarding Shotgun / Pistol, Shock CC Weapon. (0 | 32)
10 | 7 SWC | 300 Points | Open in Army | Copy Code
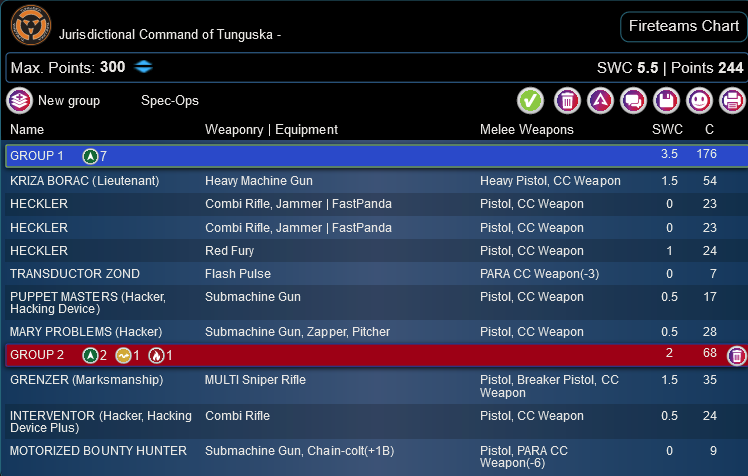
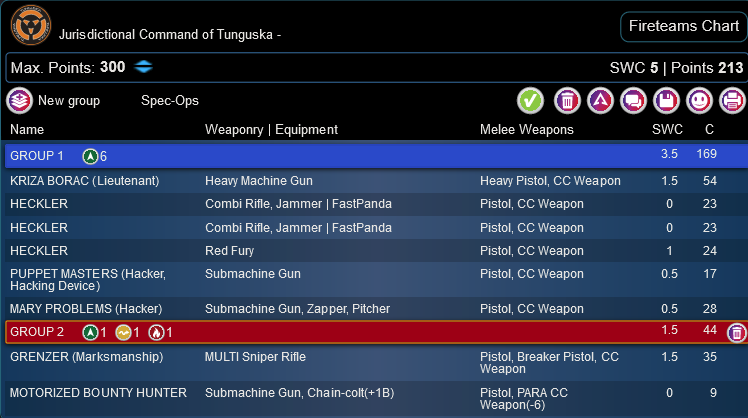
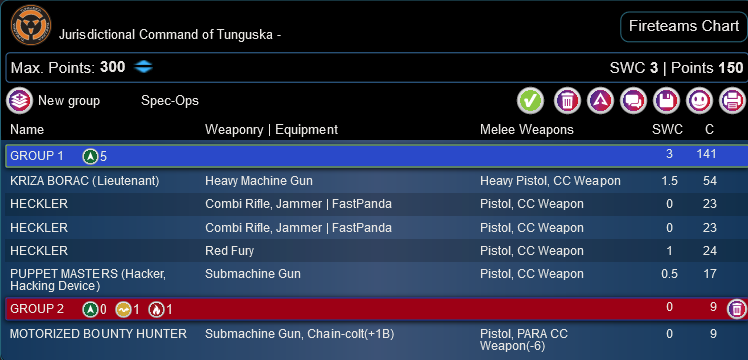
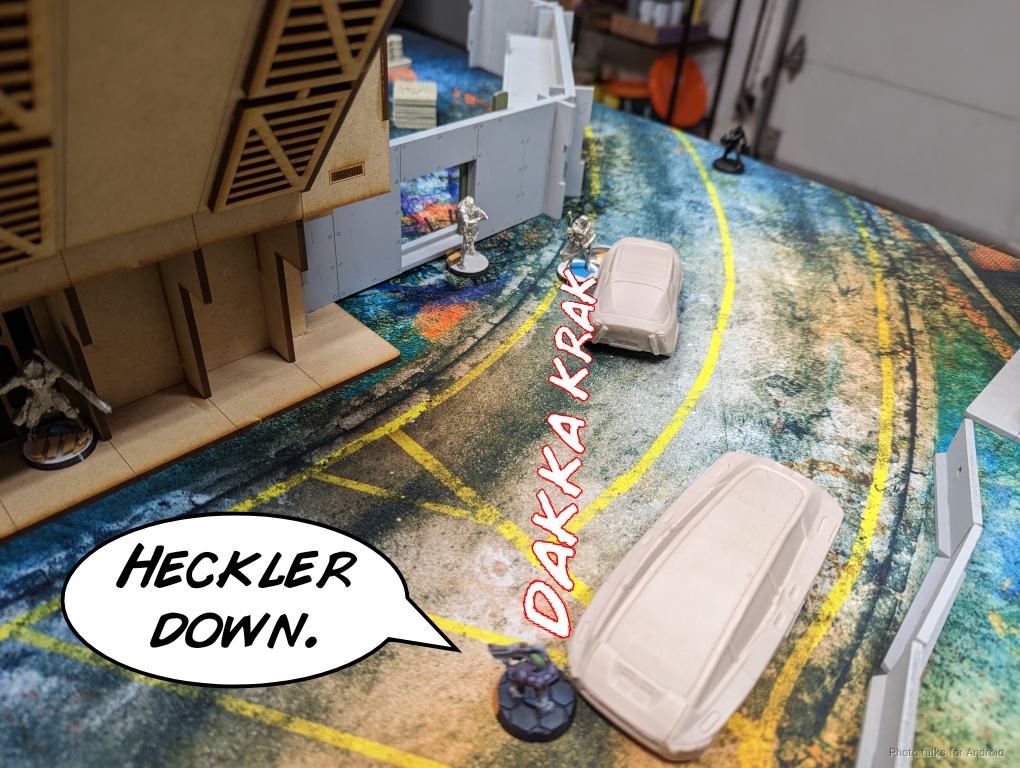
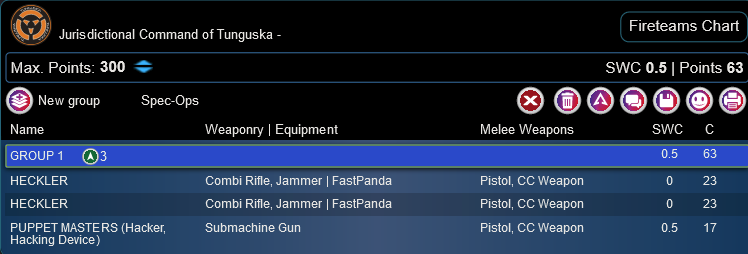
In contrast, Obi has a full 5-strong link of Securitate, Grenzer, and Interventors. He’s practicing for Rescue (I’m not), so his list also includes a pair of Heckler Jammers to make it very difficult for me to grab the HVTs. He’s also got a giant pile of hackers in addition to the Interventors and Securitate, which as we discussed after the game, probably a bit much.
Obi (Nehemiah)
GROUP 1
GROUP 2
KRIZA BORAC (Lieutenant) Heavy Machine Gun / Heavy Pistol, CC Weapon. (1.5 | 54)
HECKLER Combi Rifle, Jammer ( | FastPanda) / Pistol, CC Weapon. (0 | 23)
TRANSDUCTOR ZOND Flash Pulse / PARA CC Weapon(-3). (0 | 7)
PUPPET MASTERS (Hacker, Hacking Device) Submachine Gun ( ) / Pistol, CC Weapon. (0.5 | 17)
MARY PROBLEMS (Hacker) Submachine Gun, Zapper, Pitcher / Pistol, CC Weapon. (0.5 | 28)
1
1
GRENZER (Marksmanship) MULTI Sniper Rifle / Pistol, Breaker Pistol, CC Weapon. (1.5 | 35)
SECURITATE (Paramedic) Combi Rifle ( | MediKit) / Pistol, CC Weapon. (0 | 15)
INTERVENTOR (Hacker, Hacking Device Plus) Combi Rifle ( ) / Pistol, CC Weapon. (0.5 | 24)
MOTORIZED BOUNTY HUNTER Submachine Gun, Chain-colt(+1B) / Pistol, PARA CC Weapon(-6). (0 | 9)
6 SWC | 299 Points | Open in Army | Copy Code
The only real guns he has are the Grenzer, the Kriza, and the Red Fury Heckler (who is such a great late game surprise in a field of obvious Heckler Jammers). Of note is that we’re playing with special rules where Loss of Lieuteant is “off,” due to the rules from the tournament that Obi is practicing for.
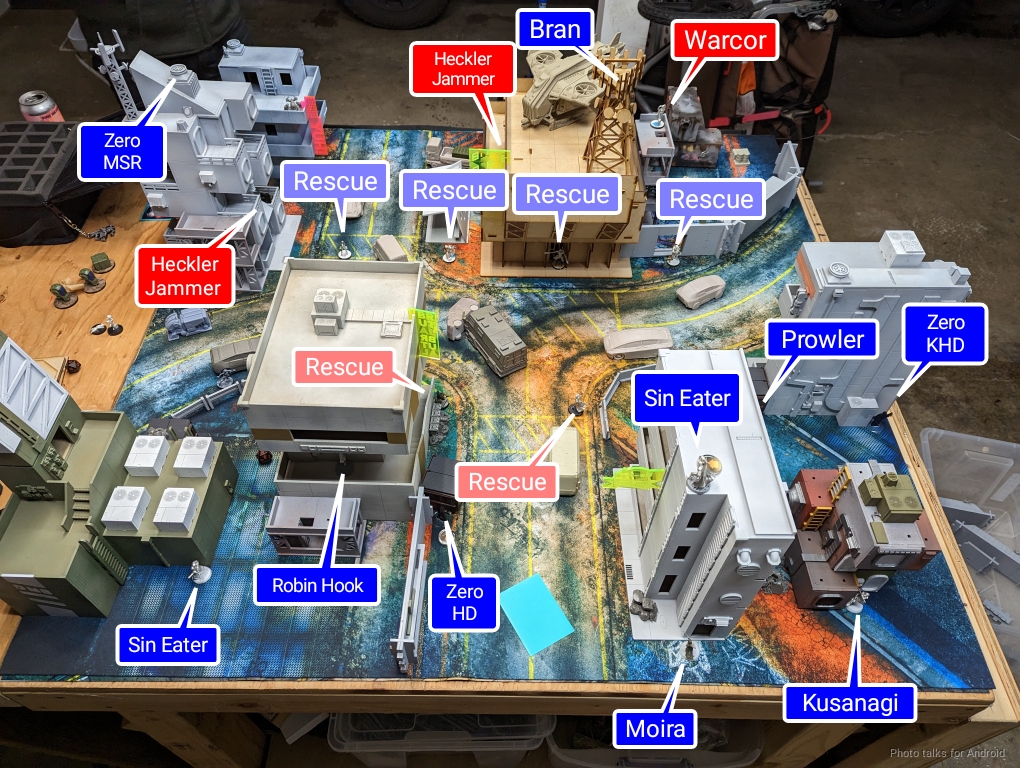
Deployment
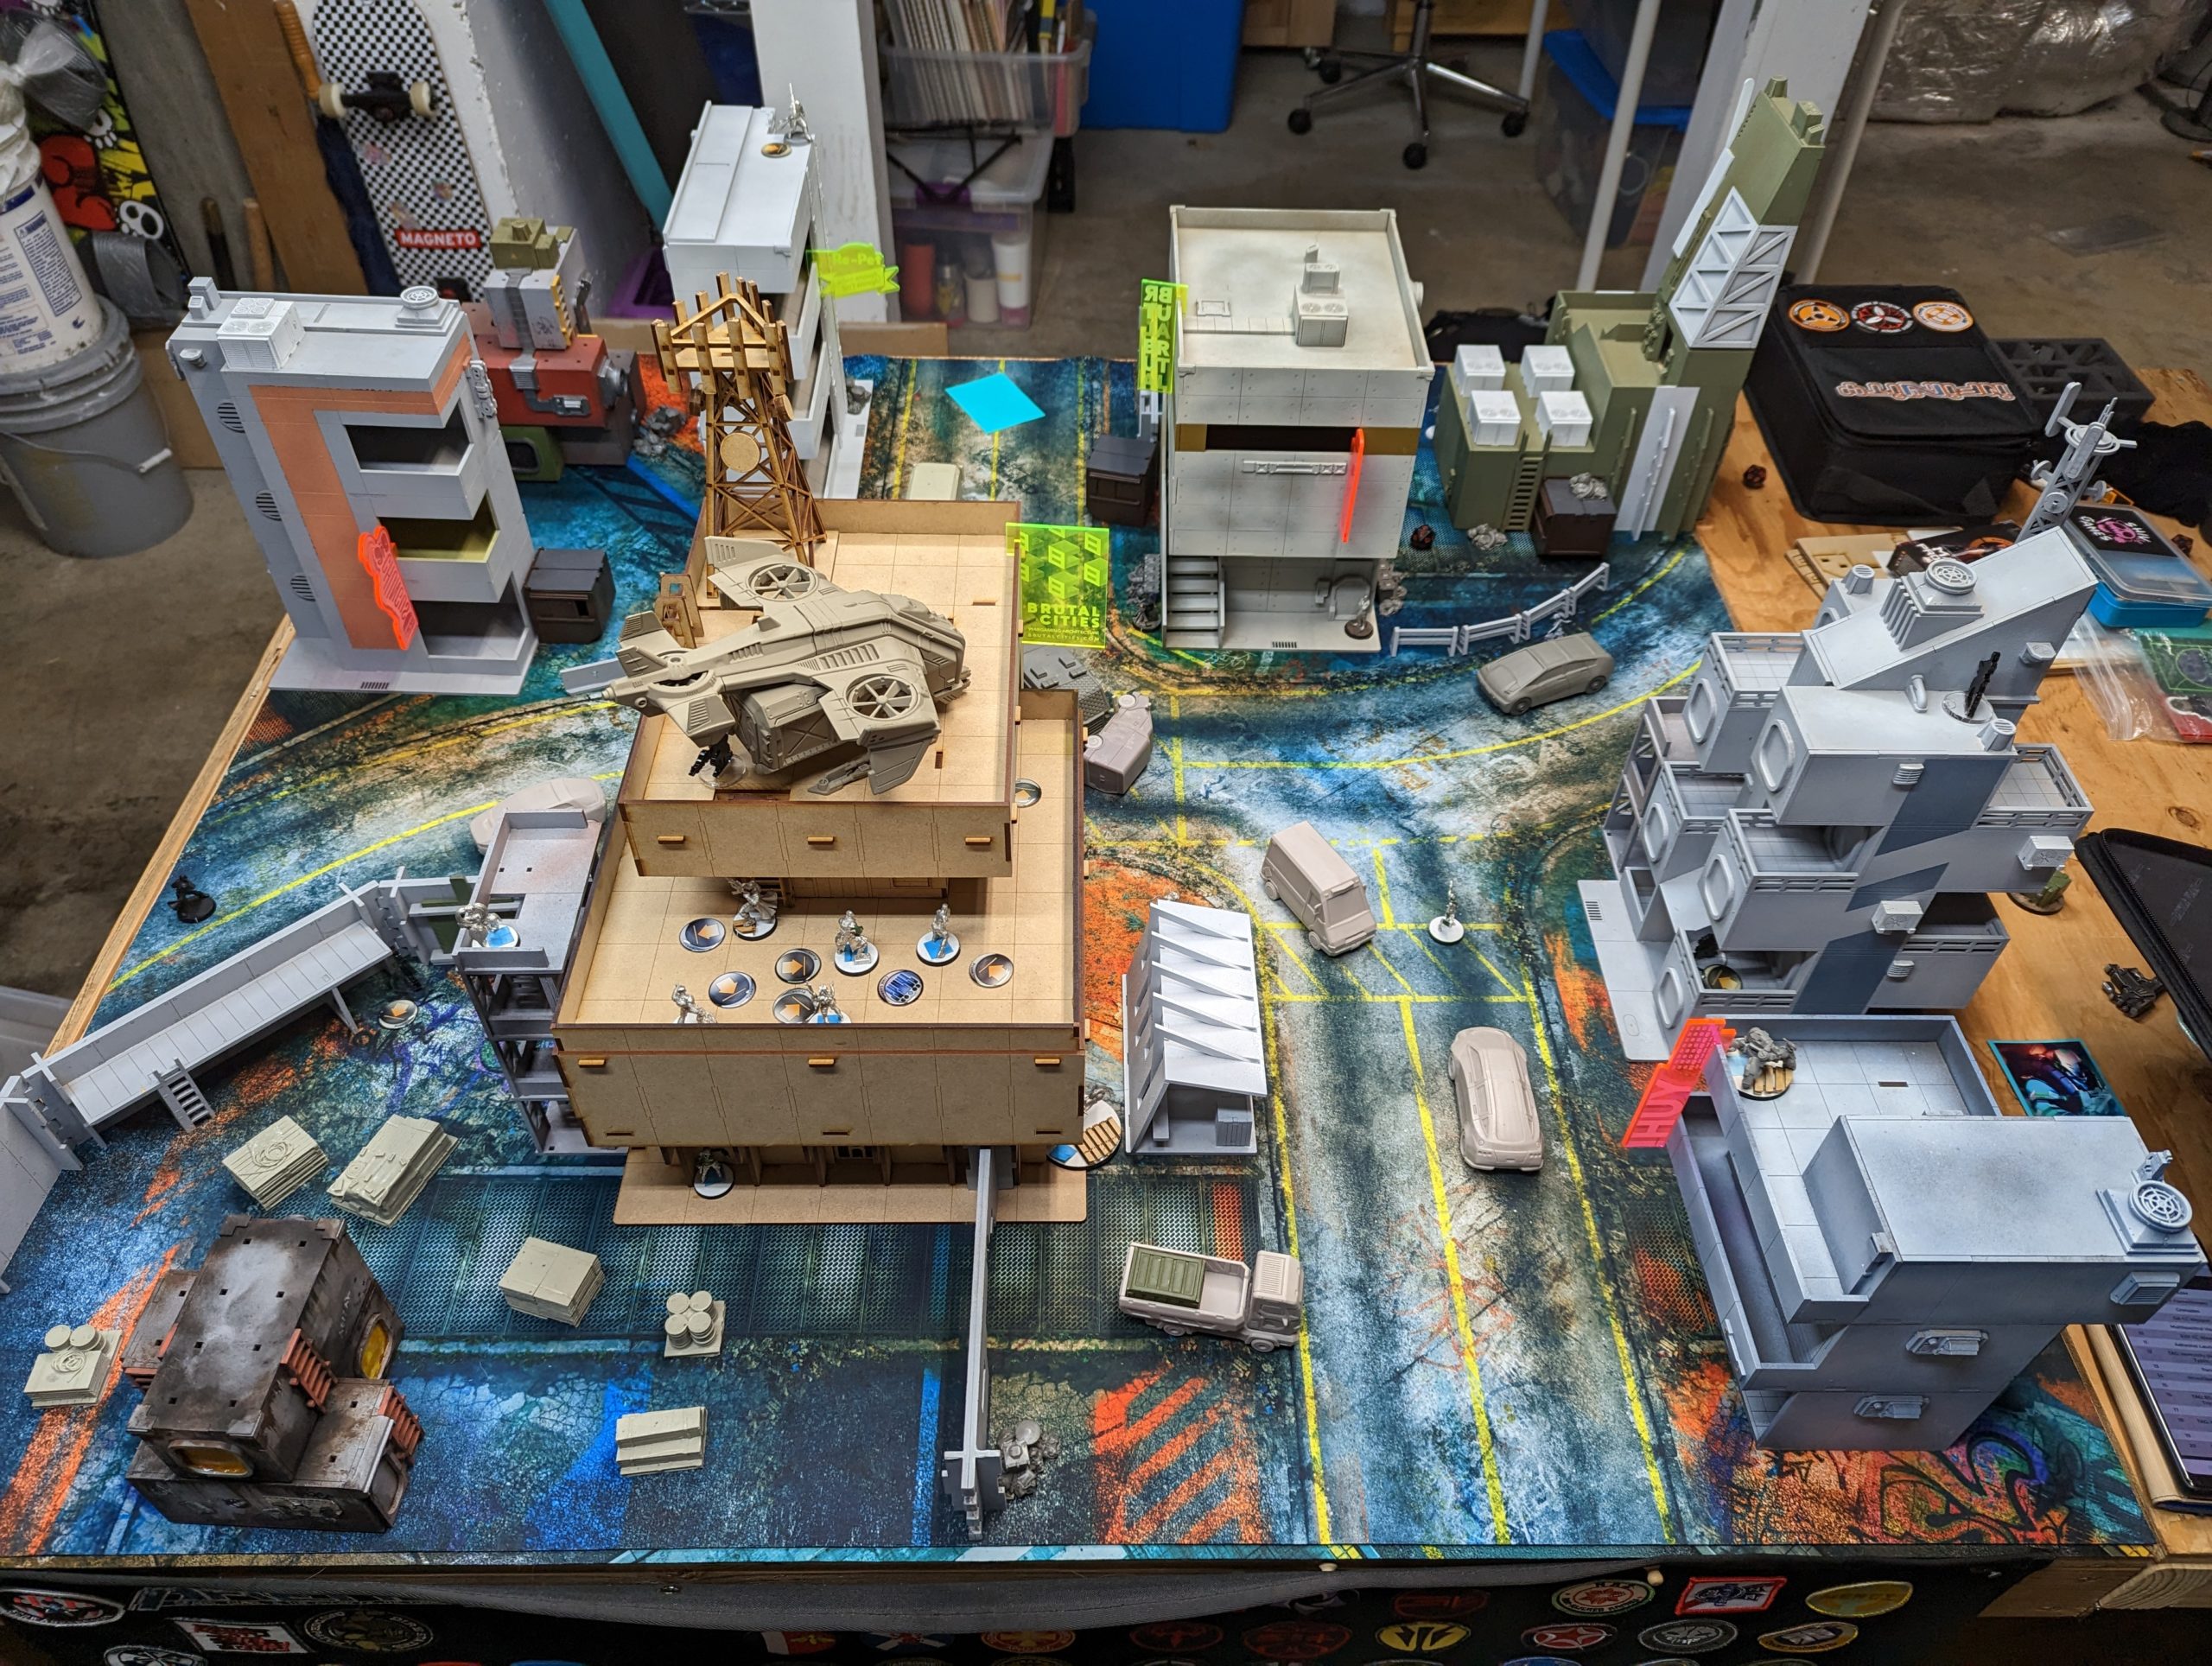
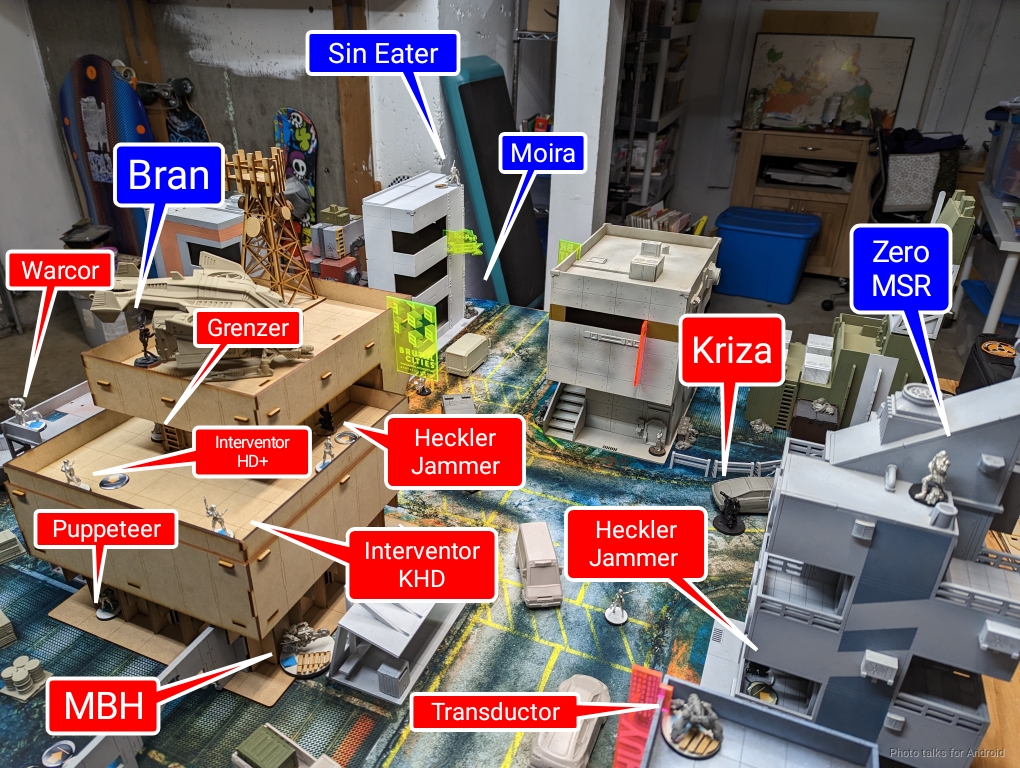
I won the roll off and chose deployment, figuring one side had lots of good spots to put my Sin Eaters. Obi decided to go first. Adam had just assembled the Brutopolis tower, and it has a positively enormous two story roof. The lower part of the roof was still in Obi’s deployment zone, so his entire link went there.
This would keep them safe and give the Grenzer an elevated position to fight from, or so Obi thought.
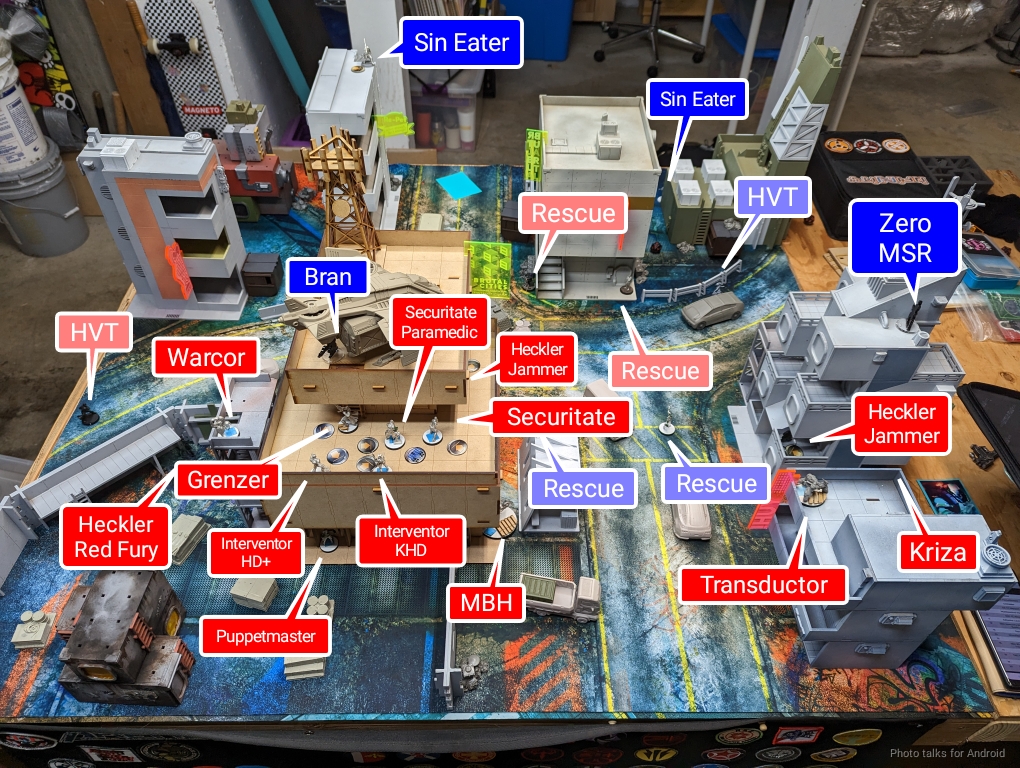
Much of his list has Forward Deployment, so it ended up in the dead zone. Of note are the Hecklers, which are threatening Jammers on anyone trying to abscond with the HVTs.
The rest of Obi’s stuff just hung out, with the Transductor on a roof watching everything and Mary and the Puppeteer adding even more hacking to the Brutopolis tower. Obi’s holdback was the Kriza, and then it was over to me 5o deploy.
I put Kusanagi on the right, as far from the Kriza as I could get. The two hacker Zeroes defended the HVT’s carefully, and I used Robin Hook to extend the Zeroes hacking area to my left.
The table is actually pretty open, and I think my side can take advantage of my Sin Eaters quite well. I really only need to account for the Kriza and the Grenzer, so I set both Sin Eaters up, one on the left and one on the right, to contest the approach of the Kriza and the bounty hunter while denying LoF to the roof that the Grenzer is on.
I then throw caution to the wind and attempt to throw the Zero MSR over the centerline into Obi’s dead zone. This is actually pretty reasonable, because if I fail I can just have a sniper on my back table edge. To Obi’s extreme dismay, I succeed, and place the Zero MSR watching the Grenzer and the rest of the units on the roof.
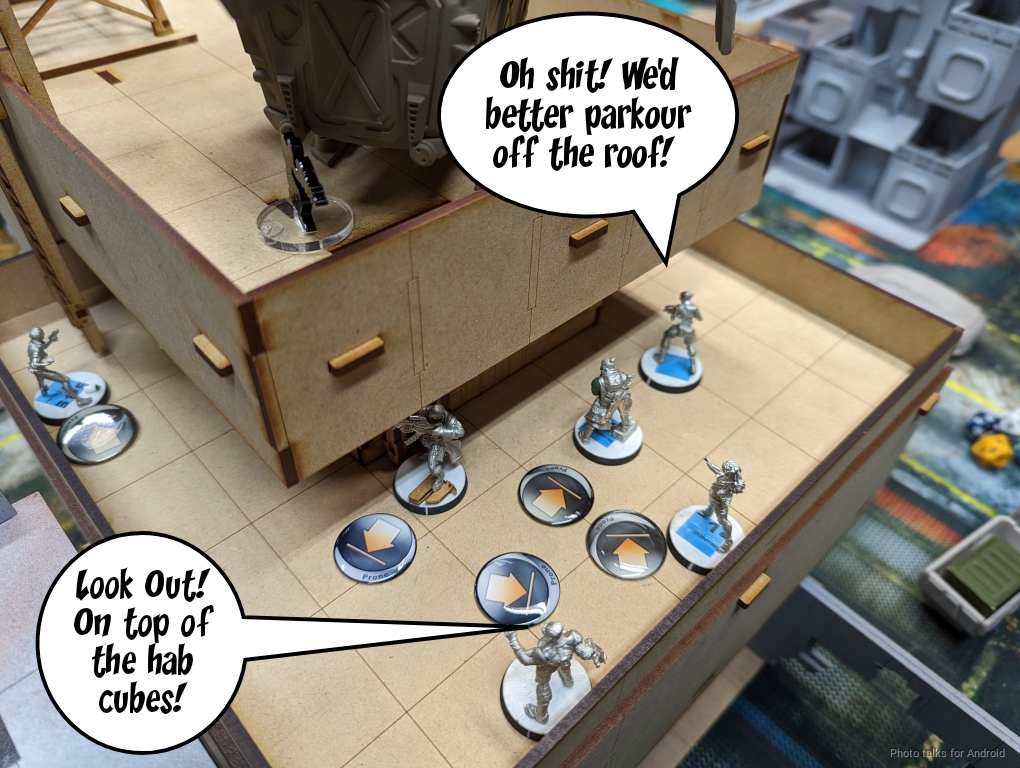
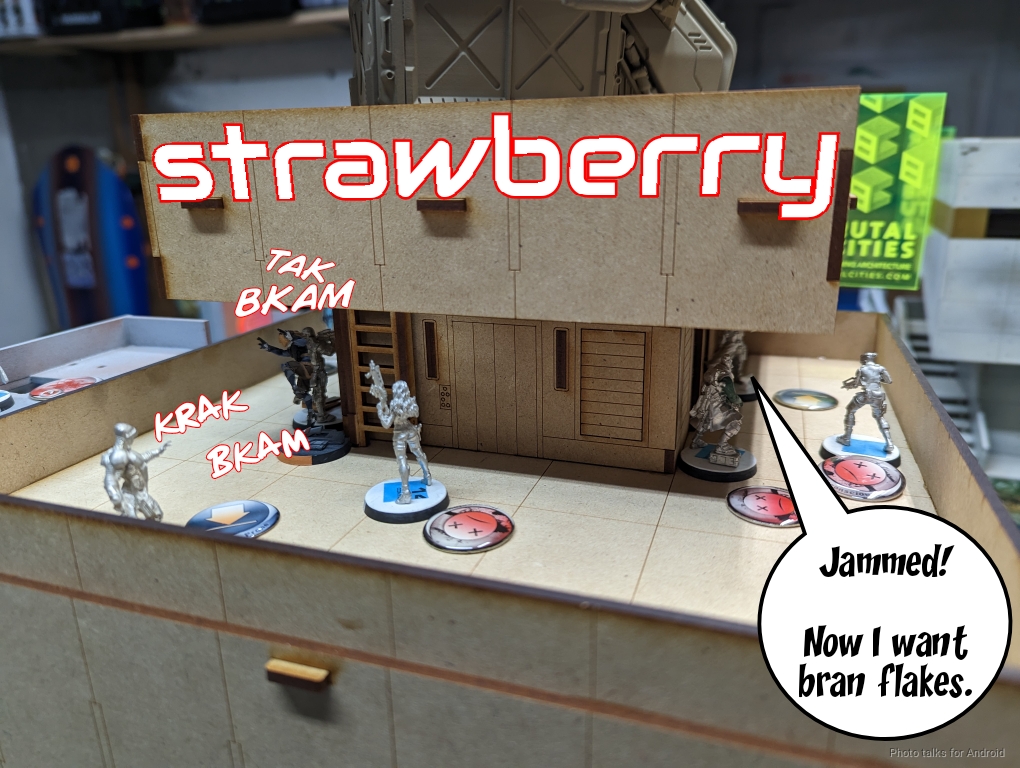
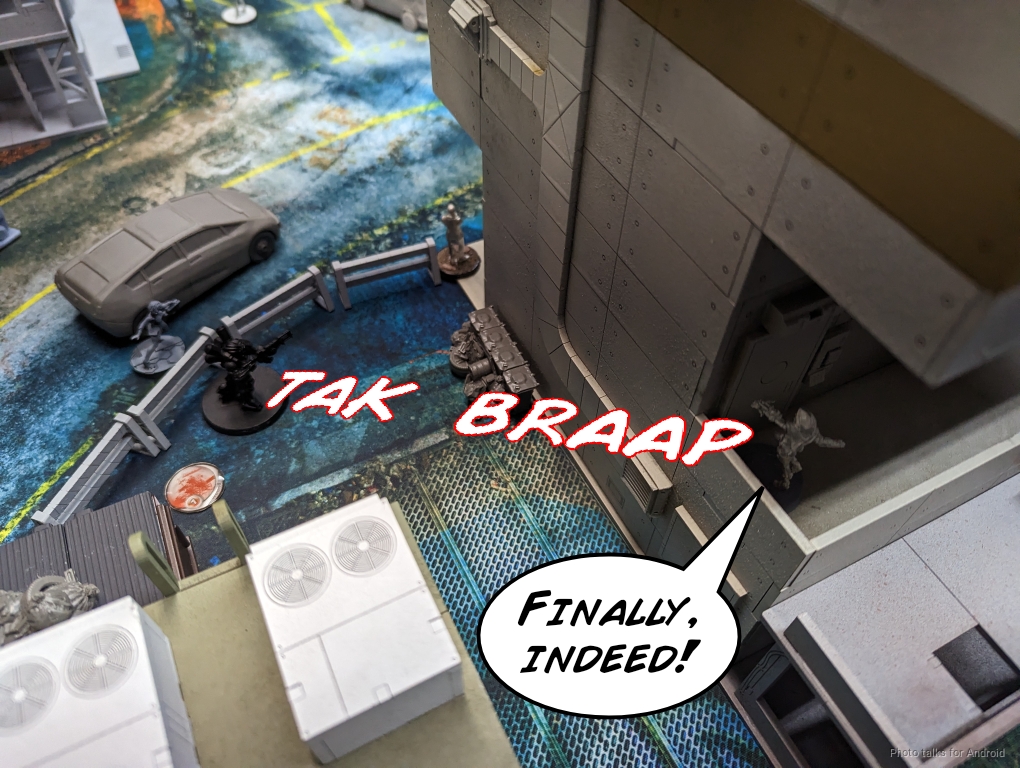
Obi’s holdback is his Kriza, which ends up under the Zero MSR at the base of the building. I then add insult to injury and put Bran on the highest roof, watching Obi’s link through a trap door… just ready to shotgun everything.
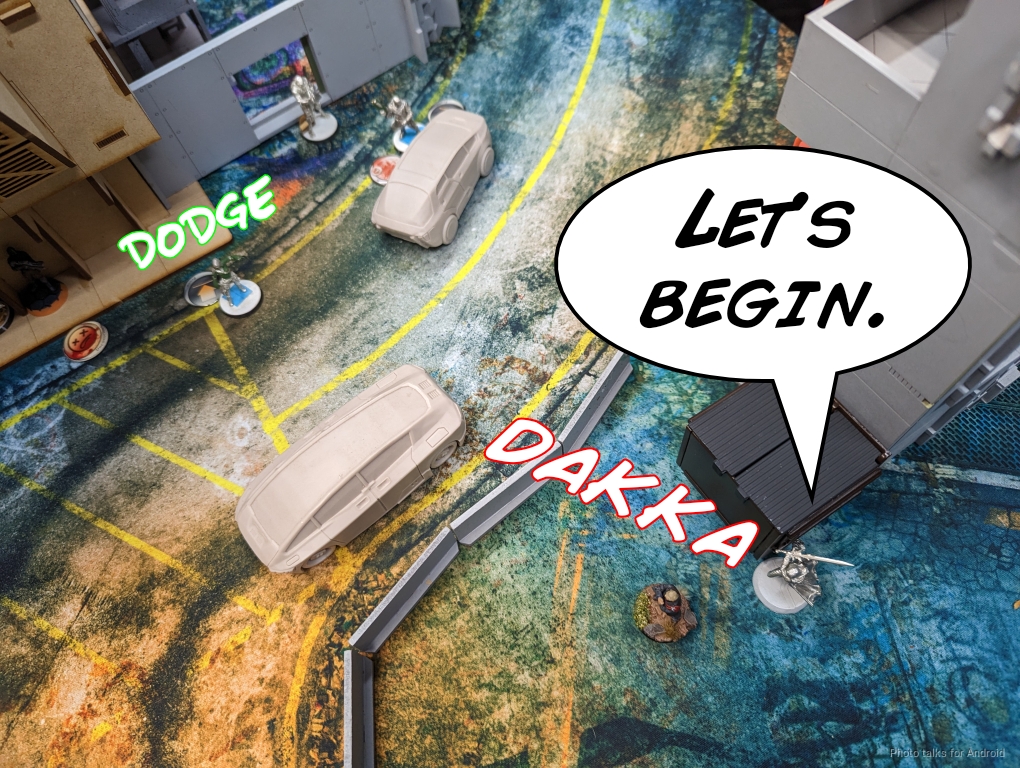
Turn 1
Top of 1 – Tunguksa
At this point, Obi really can’t move the link without granting an ARO to both the Zero and Bran. The Zero can just shoot something in the link and Bran can lay a shotgun template on 2, maybe 3 members of the link, depending on how Obi moves.
I take one order from Obi’s first group to really just make it difficult to extricate the link from danger. If he spends all the orders in group 2 dealing with Bran and the Zero MSR that’s fine with me.
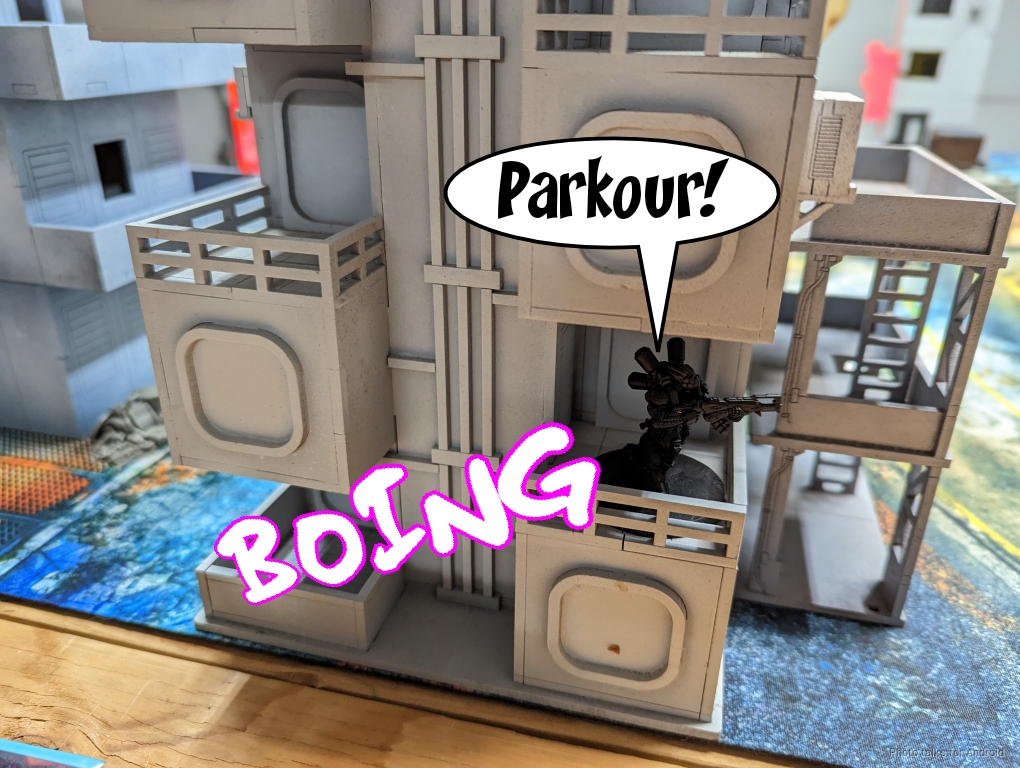
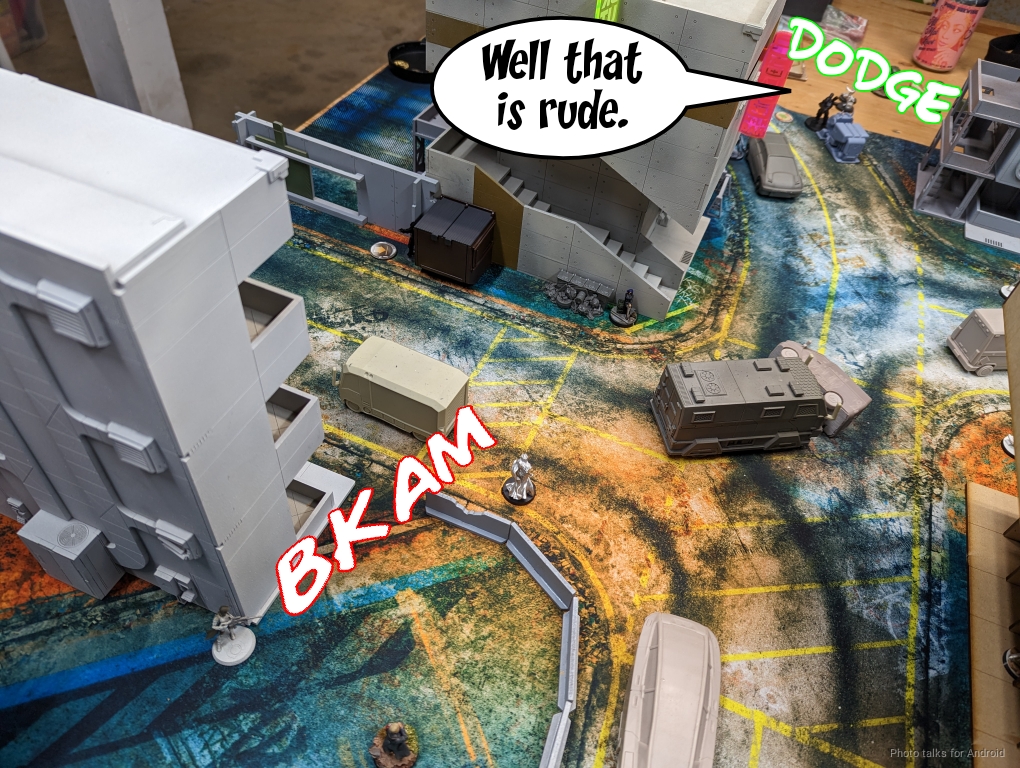
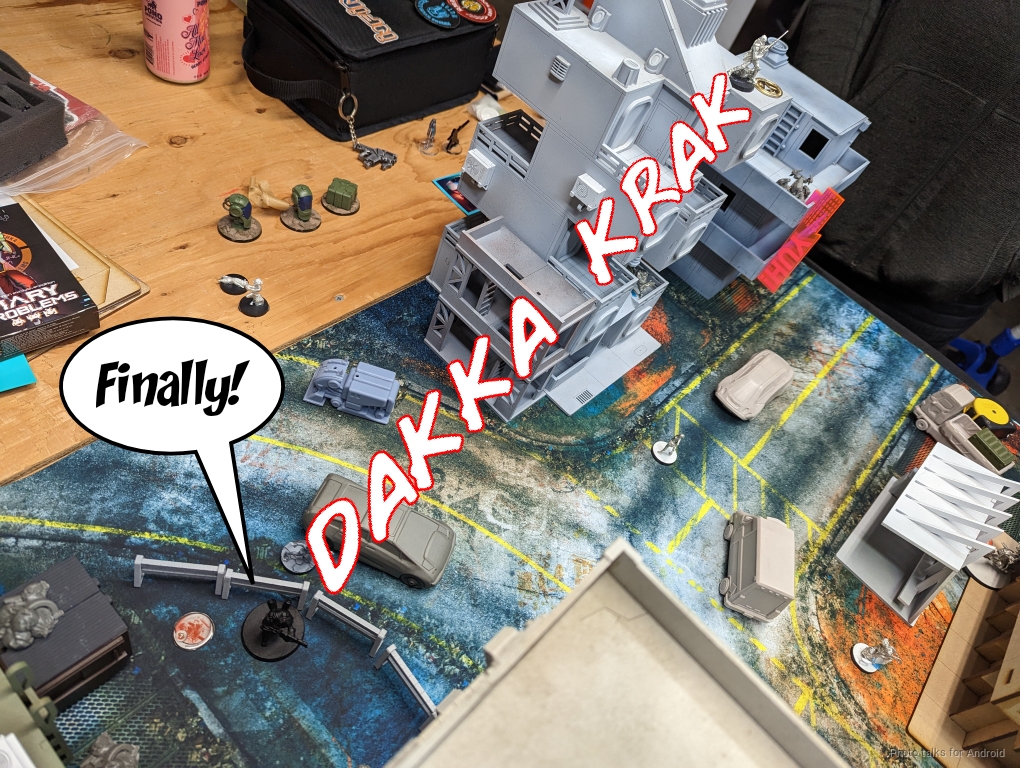
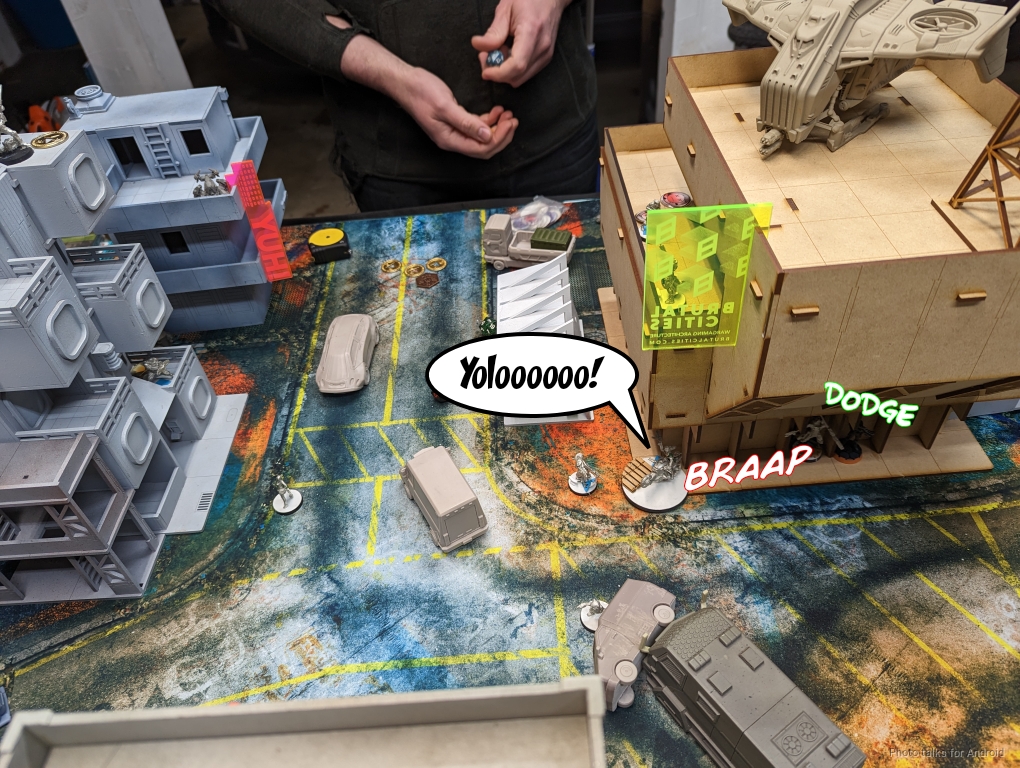
Obi’s plan is to do some damage with the Kriza, but I’ve got a ton of nasty snipers watching the table, so he takes the path less traveled and starts jumping the Kriza around in the Brutal Cities cube apartments to just completely avoid the LoF to the snipers! Genius.
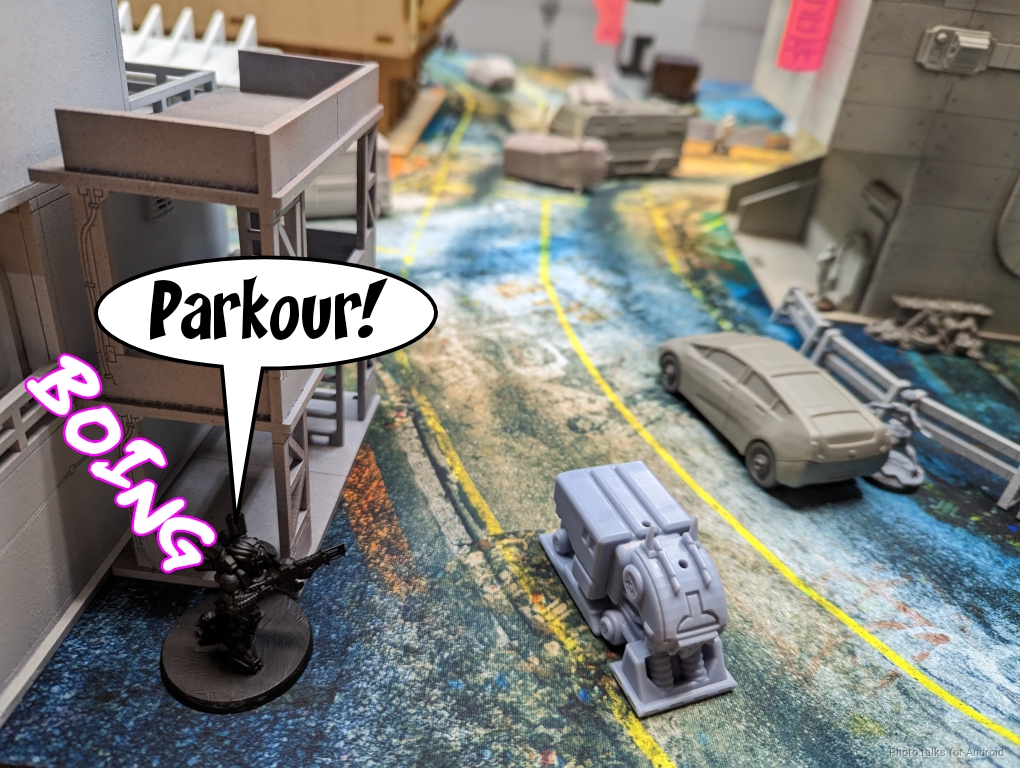
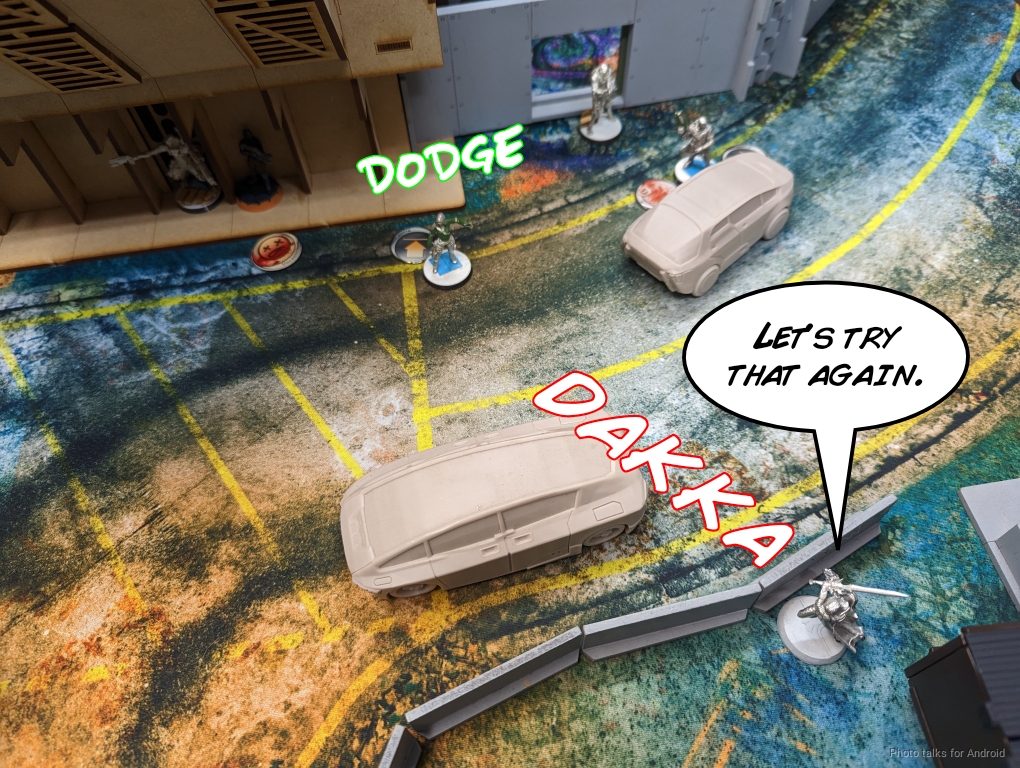
He manages to avoid landing in the Vance Refrigeration fridge box on the other side of the cube apartments, and then challenges one of the Sin Eaters just outside 16″.
| 27.3 | 37.3 | 35.4 |
This ends up working out for me–there’s basically a 64% chance Obi will have to try again. I take a single hit, pass ARM, and fail guts out of line of fire.
Obi now turns his attention to dealing with Bran and the Zero MSR. The Zero can see the entire link out of cover, and Bran can see the two Securitate and the Grenzer.
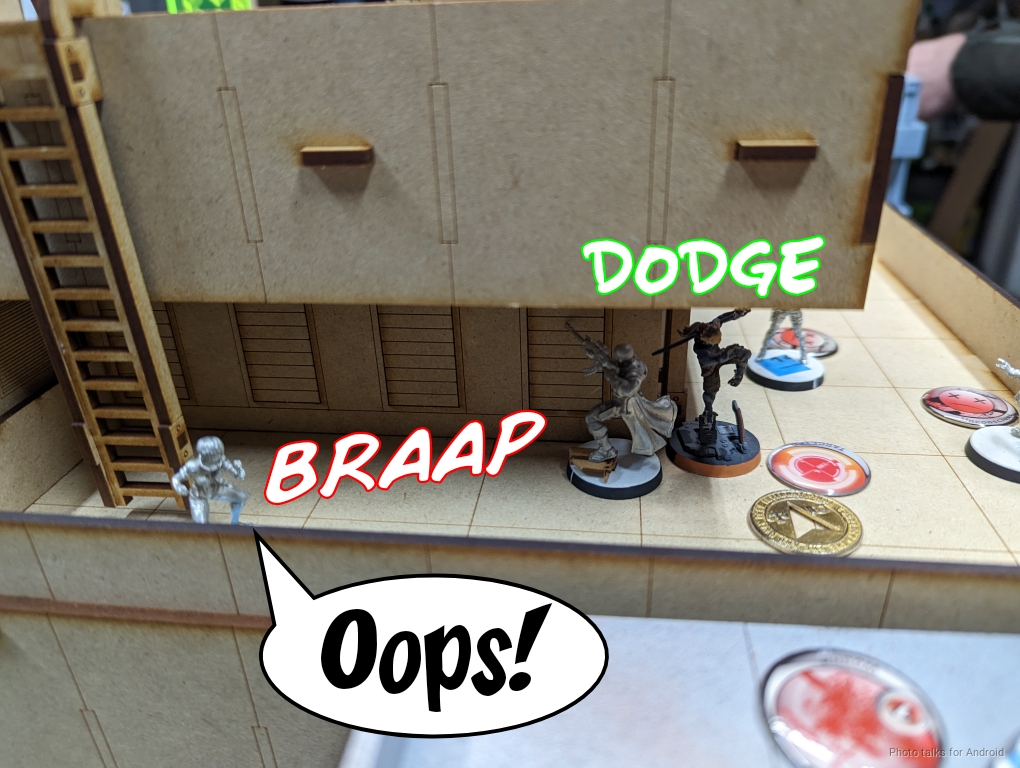
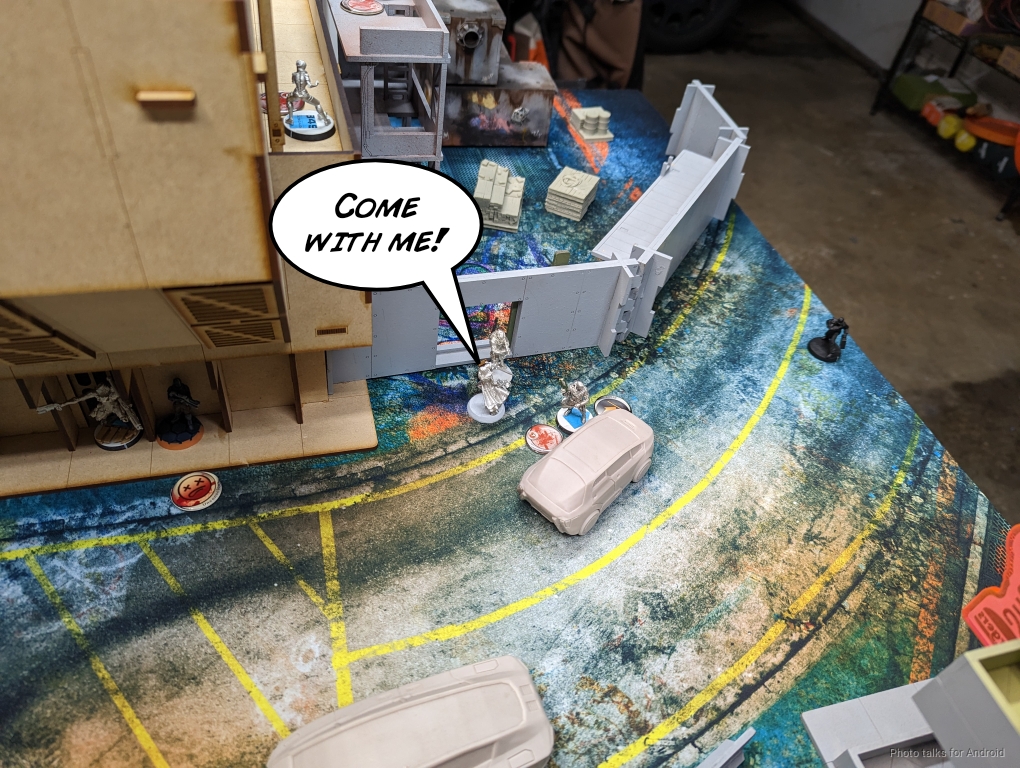
Obi does a crazy thing and puts the Grenzer, the two Securiate, and the Interventor KHD into a coordinated order with one of the Securitate as the spearhead. He then moves everyone out of LoF of Bran, and the Grenzer also makes it out of LoF of the Zero, although the Zero can see everyone else.
He then asks for AROs. I think about this for a bit, and decide that things look pretty okay with me just taking the shot on the Grenzer with the Zero. I’ve got him out of cover, so I’m on 14 versus his 16, both burst 1. The Securitate are going to be out of 16″ so they’re both on -9 and it’s probably pretty safe to ignore their shots on 3s, ditto for the Interventor. The interaction between the Grezner and the Zero is definitely in the Grenzer’s favor, but it’s not unlikely for the Zero to survive:
| 26.6 | 28.2 | 45.2/td> |
Bran templates the two Securitate, and then it’s over to Obi to declare his second short skill. I was convinced he was going to just dodge, but then why would he bother breaking the link and doing a coordinated?
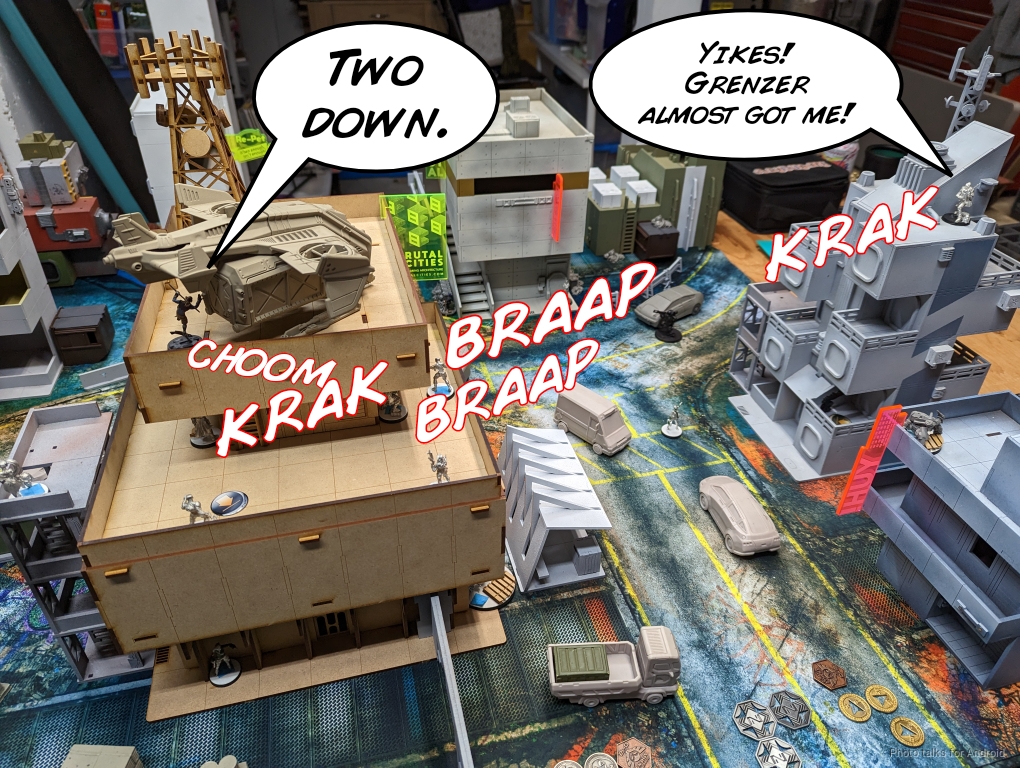
It actually works out quite well for me–Bran KOs both Securitate and while the Zero gets hit in the face with a DA round from the Grenzer, I pass both saves! Obi is of course and justifiably annoyed by this.
I’m still locking down all the approaches to my DZ, although there is a path for the Kriza to grab a HVT and run away. Obi decides to continue trying to extricate his link team. The Interventor HD+ successfully spotlights Bran…
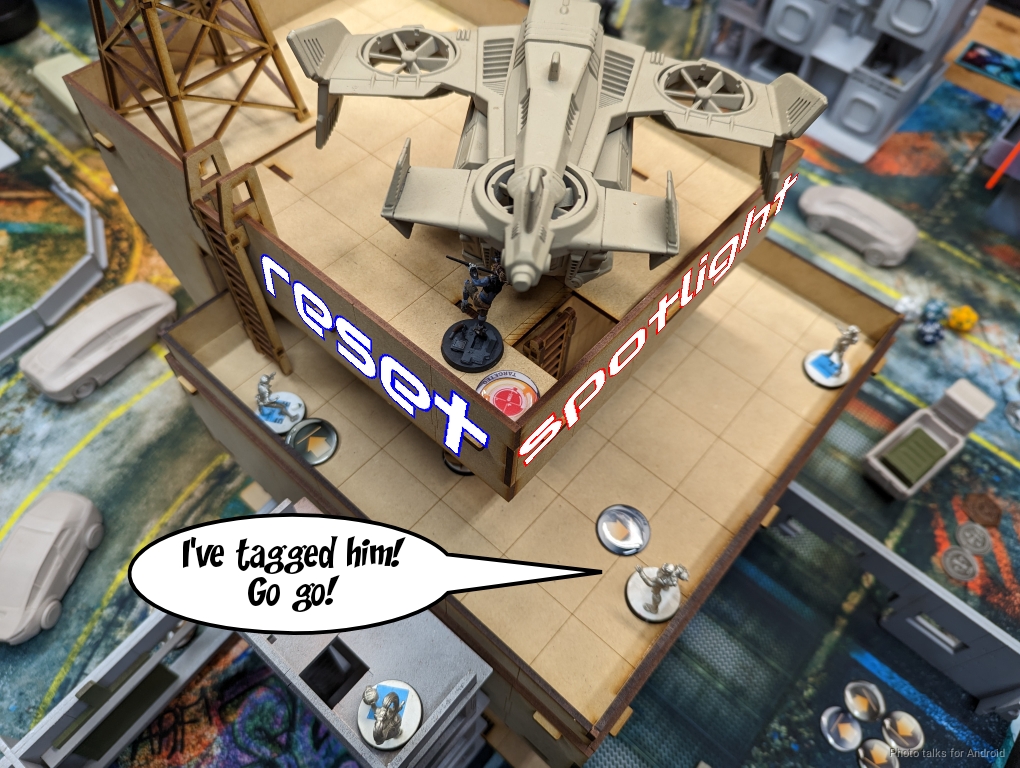
and the Interventor KHD rolls in with a shotgun. I template, figuring I’ll probably at least pass one of the two ARM saves, and Obi obliges me by laying two templates.
My plan comes to fruition and the Interventor goes down and Bran survives with only one wound. The Kriza goes into suppression and Obi passes turn.
Bottom of 1 – Bakunin
I’ve done a pretty amazing amount of damage this turn, just in ARO. The only thing that’s advanced is the Kriza, so if I can just take it out that will really reset Obi’s board state and make it really difficult for him. My tool of choice is going to the Moira MSR, which will definitely force a dodge out of suppression at 24″, and then I can deal with the Kriza with something nearby.
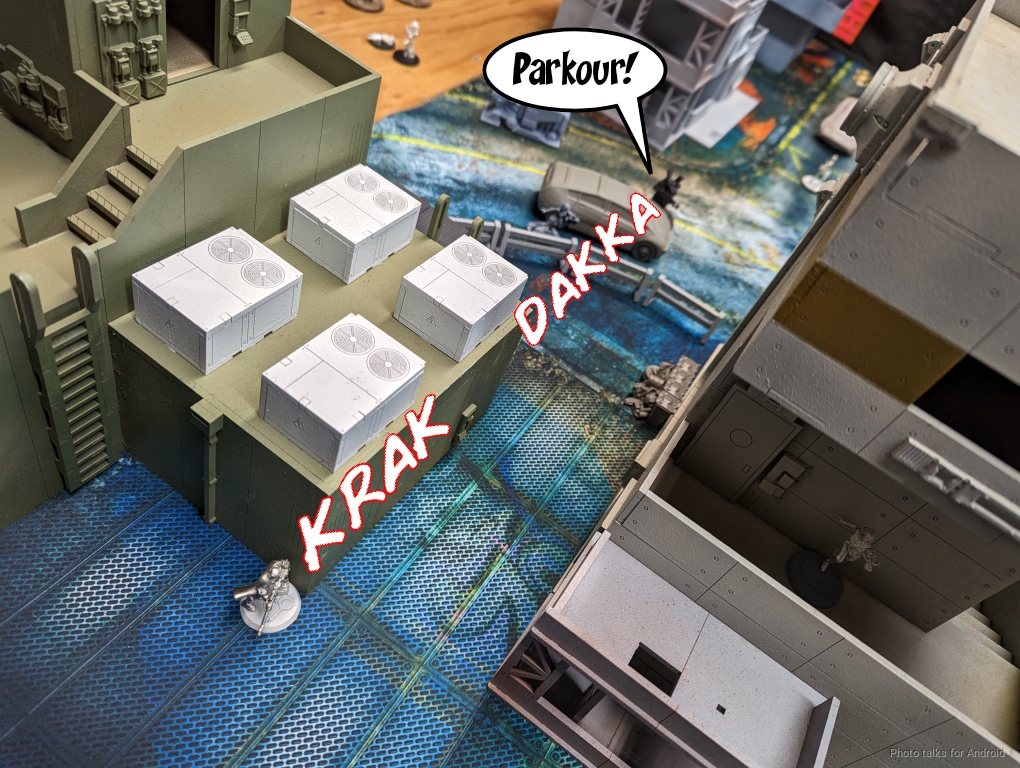
First, I split burst on the Moira against a Transductor and a Warcor, moving 4″ to see both of them in the same order. This would -12 both of them, so they dodge instead, and I take both of them out with the Moira.
Before I get too far, I decide to just put the nail in the coffin for Obi’s link. That Grenzer is basically the only thing that will reliably take out the Sin Eaters and the Moira, so I jump Bran off the roof into base to base with the Grenzer, threatening a CC. The Interventor, recognizing this, blasts Bran with a combi and the Grenzer pistols, so I split burst and take out the Interventor and force a (passed) ARM save on the Grenzer.
Unfortunately, the Heckler Jammer reveals itself and jams Bran successfully. I try to take the Jammer out with the Zero MSR, but it dodges into total cover. This also reveals another Heckler Jammer which successfully jams the Zero.
Ah well. Time to take on the Kriza. I swing around the corner and force the dodge. The Kriza’s ARM is too high though, and it just fails guts into cover behind the car.
This lets me fight the Kriza with Robin Hook. I’m just blasting away with Robin’s rifle, but just cannot do anything about the Kriza’s ARM in cover.
This takes the rest of my order pool. It’s definitely frustrating, but I haven’t really “lost” any material at this point, and I’ve done some more damage to Obi’s link. The Grenzer is in CC with Bran, so at the very least it’s going to take a few orders for it to become usable again, if at all.
Turn 2
Top of 2 – Tunguska
The first turn has been a bit of a wash. I did some damage and have kept Obi boxed into his deployment zone, but I can’t say I’m winning. I don’t have any HVTs yet, and I still have to figure out the Hecklers. Obi at this point I think makes a wrong choice and engages Bran. Bran’s isolated, there’s no reason to fight him as all I’m going to do on my turn is kill the Grenzer, and that was pretty inevitable anyway. Better to spend the orders on other things.
Mary Problems goes in and fires her SMG on shock mode into the combat, figuring that will keep the Grenzer at ARM 3 in case she hits him.
That is exactly what happens, and ARM 3 isn’t enough. The Grenzer dies, and then Mary Problems trades for Bran by SMGing while I template. Absolutely worth it. Obi’s spent something like 3-4 orders on his first turn and 2-3 this turn killing his own link, which just sucks. Obviously it’s good for me but it’s pretty one-sided and unfun.
Obi then surprises me with a Heckler Red Fury, which I was certain was a Jammer.
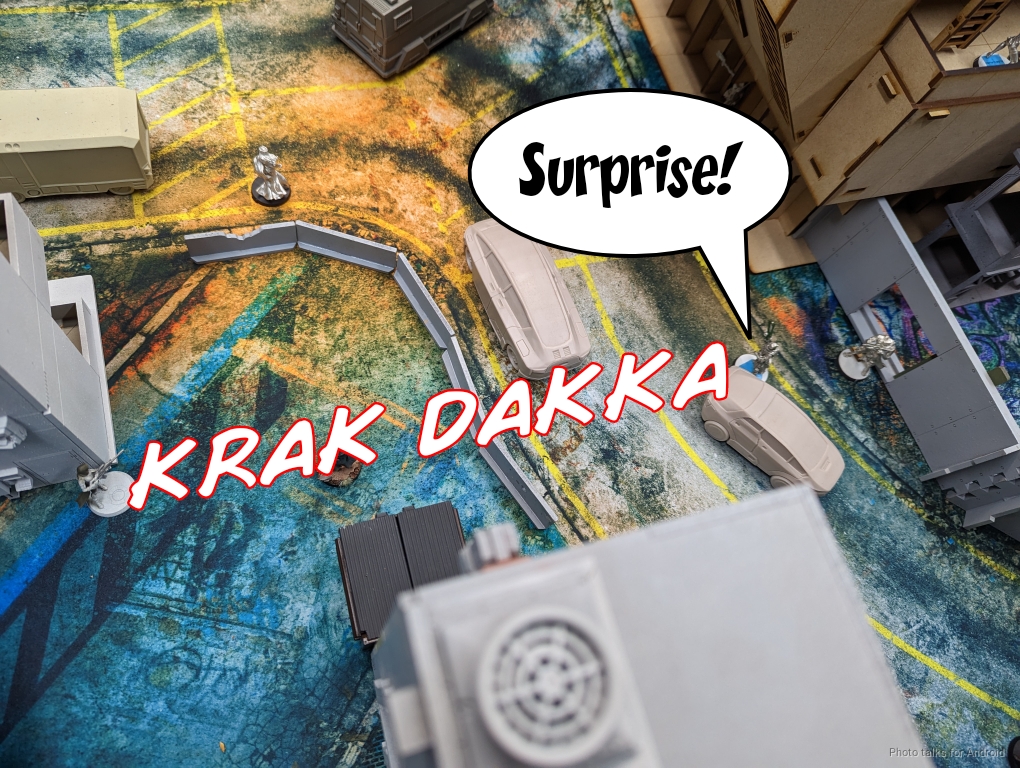
It easily punks the Moira, taking her out. I had hid Robin Hook at the end of my turn, figuring I’d want to have the repeater still, so the Kriza was free to move and fire on the Zero MSR. It hits, and I pass ARM, failing guts into total cover. At this point the Zero has passed 5 ARM saves against DAM 15, which is pretty gross.
The Kriza goes back into suppression and then passes turn.
Bottom of 2 – Bakunin
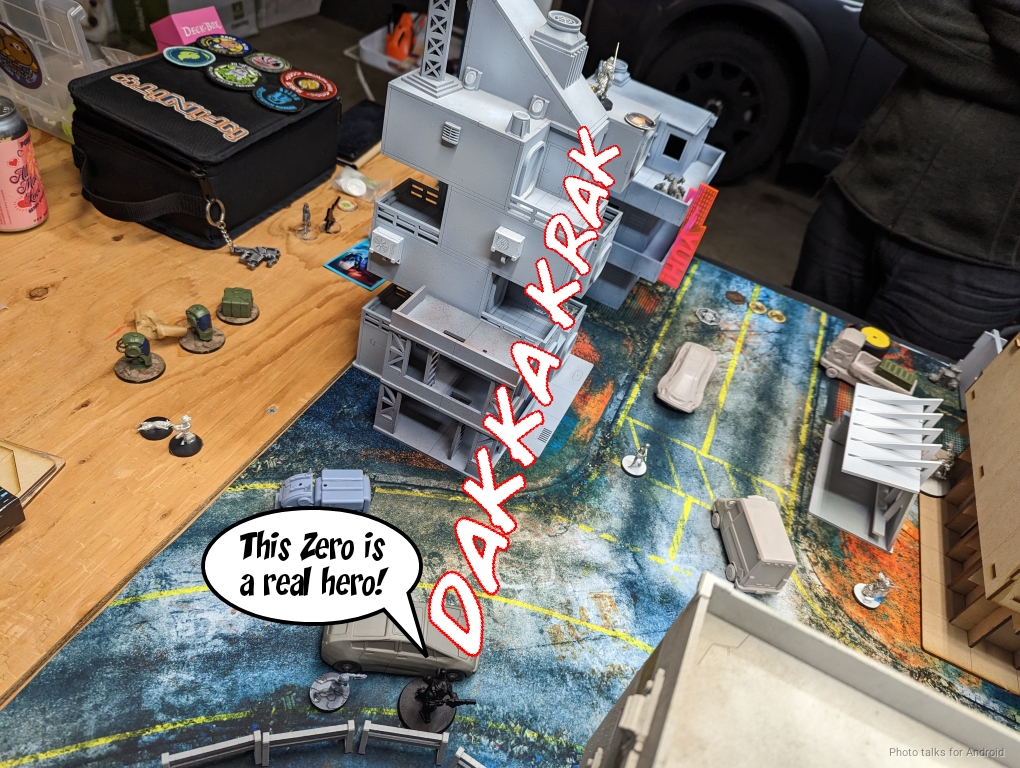
My Moira’s dead, but my Prowler isn’t. I surprise shot the Kriza and force a dodge, doing a wound. It fails guts out of LoF.
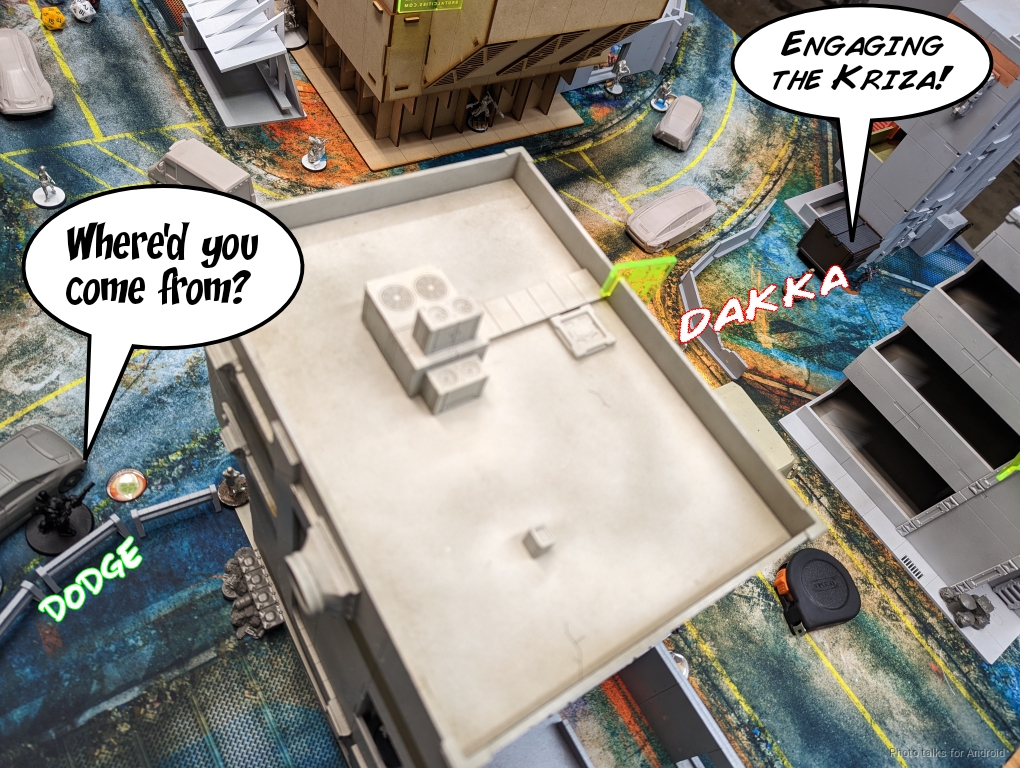
The Zero MSR tries to take it out but dies to the return HMG fire, to which Obi shouts “FINALLY!”
Unfortunately this puts the Kriza right in the danger zone of being near Robin Hood, and the +1 DAM rifle does the rest.
I decide I can make the run now, and the Prowler rolls in to try and grab a HVT, taking out the Heckler Red Fury on the way.
I have one attempt to take the HVT, and I fail WIP and get Jammed by the Heckler on the building. This does deplete it of its Jammers, so at least that’s good.
Turn 3
Top of 3 – Tunguska

We miss the fact that Obi’s in retreat, so he spends his turn trying to kill the Prowler. First to try is the MBH, which fails. Needless to say the Sin Eaters delete the MBH.
The Puppetmaster takes care of business though, and even survives my Nanopulsar in return.
Bottom of 3 – Bakunin
Kusanagi is the tool of choice here. She pushes forward and tries to take out the Puppetmaster… and fails.
another order later and the Puppetmaster is finally down.
I have just enough orders to grab a HVT and escape to my deployment zone.
4-0, 178-46 Jurisdictional Command of Bakunin Victory!
Post Game Analysis
The game boils down to the fact that the table is a fishbowl. Both of us had some pretty oppressive tools to control the fishbowl, but I had more. Furthermore, I had tools to attack into the deployment zone very easily and I got very lucky on the infiltration rolls to get them there. From there it was just a matter of just riding the momentum to the win.
Admittedly the Zero MSR made a pretty high number of ARM saves against DAM 15, but overall that wasn’t necessarily game breaking. The real issue is the Kriza was just unable to get anything done, and Obi’s other order bool was pretty much single handedly killed by Bran mostly in the reactive turn. So much of Obi’s effort was tied up into removing Bran. I think there were a few ways out of the predicament. I think the most efficient way is as follows:
- Don’t form the link, or just break it.
- The Grenzer moves out of LoF of Bran, around the corner. If I reveal either, ignore Bran and put two shots into the Zero on 16s, probably taking it out.
- Climb Mary up and take out Bran from behind–there’s an angle you can find, probably. Alternatively, just cybermask the Interventor KHD and get behind Bran and shotgun him.
If Bran takes out the Grezner there’s a Paramedic there. The Kriza overextension on turn 1 was needlessly risky, especially without grabbing an HVT. I think that was the key mistake Obi made all game. I was going to kill that Kriza if he left it near me, and he did. He could have just grabbed an HVT and absconded on the second turn. He was so focused on attacking Bran and removing the threat that he didn’t get anything done.
Bran is of course a problem, but he’s really not going to be doing anything to win the mission other than attacking Obi’s order pool. This is of course a problem, but my orders are extremely limited. Any orders I spend attacking Obi’s order pool are orders that I’m not spending on rescuing HVTs. I wasn’t able to score any points until the third turn, basically. My first two turns were removing the Kriza and trying to preserve the order pool that I did have. I did make a run with the Prowler, but I didn’t have much margin for failure and was unable to score anything.
That did force the issue on Obi’s third turn though. I think he had an opportunity to rely on his Jammer Hecklers to stop both Bran and the Zero, and they did, actually. So really I just kept him saturated with threats all three turns. This was more of a prioritization puzzle and less of a tactical puzzle. Unfortunately the tactical puzzle was just distracting enough, which won me the game.
In other words, there’s always the moment in the game when you silently panic and say think something like: “I hope my opponent doesn’t do X, because that would really suck for me.” I was terrified that Obi would just run away with the HVT with the Kriza. I couldn’t do much about it in my turn, and it would have been pretty hard to deal with the Kriza once it had retreated back into the protection of the Heckler Jammers.
Still, it must be said that I’m not sure I would have done better at the table if the situation were reversed. I have the advantage here of time and zero stress when writing up this game later. It’s easy to talk about what would have been better without the pressures of a game. The table also really didn’t help, especially when paired with my Sin Eaters. In any case, it was a tough game for Obi and I think the table needs some work to make it less of a fishbowl. Thanks to Obi for sticking with it till the end, and thanks for reading.

Pingback: New Bran Who Dis – MERC Recon
Pingback: Mission 056: Breaking Links – Bromad Academy