

Learning the Lunokhod
I finally assembled a Lunokhod and had the opportunity to get it on the table to see what the fuss about Nomad REMs was all about. I have proxied a pile of blue-tacked-together pieces as a Reakton Zond before, back in the N2 days, but haven’t really gotten back to Nomad REMs till recently.
As a self-improvement exercise, wanted to keep a record of how my first few games with the Lunokhod go as well as any lessons learned. I’m taking a brief break from writing a bunch of fluff due to all the Strikezone Wotan reports, so these reports will be more analytical in flavor. Hope you enjoy.
Game 1 – The Great Enemy
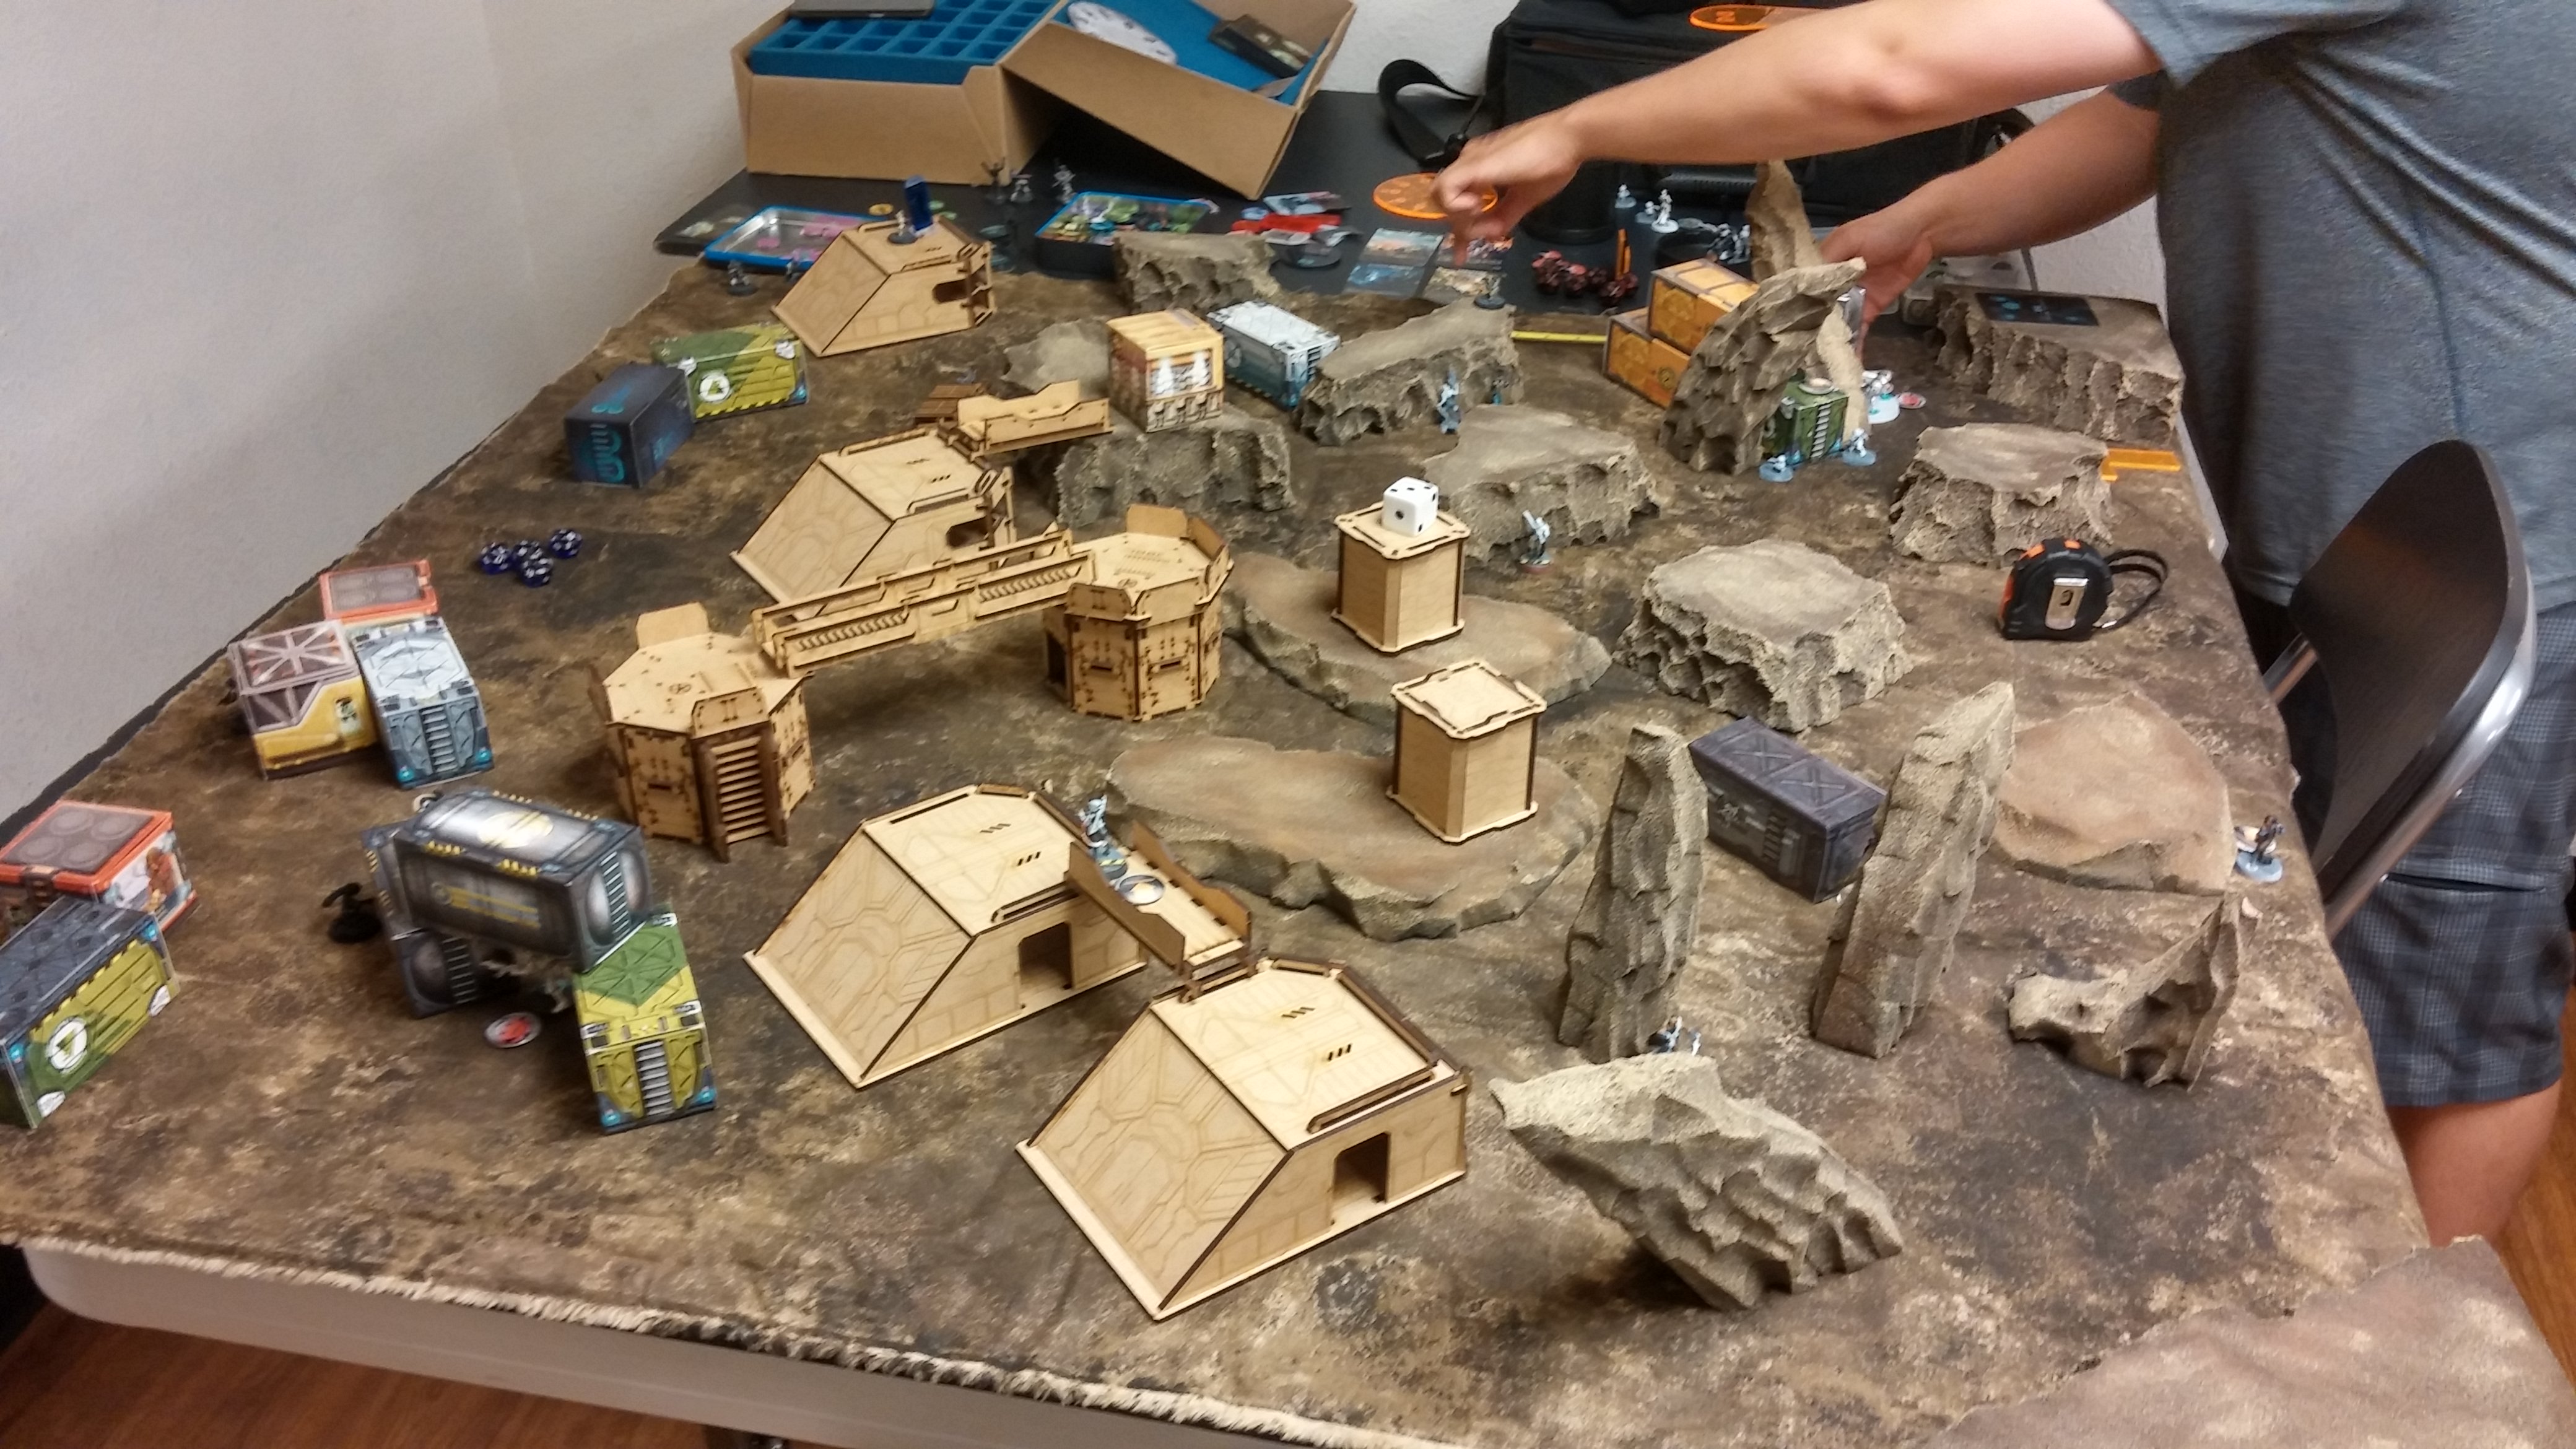
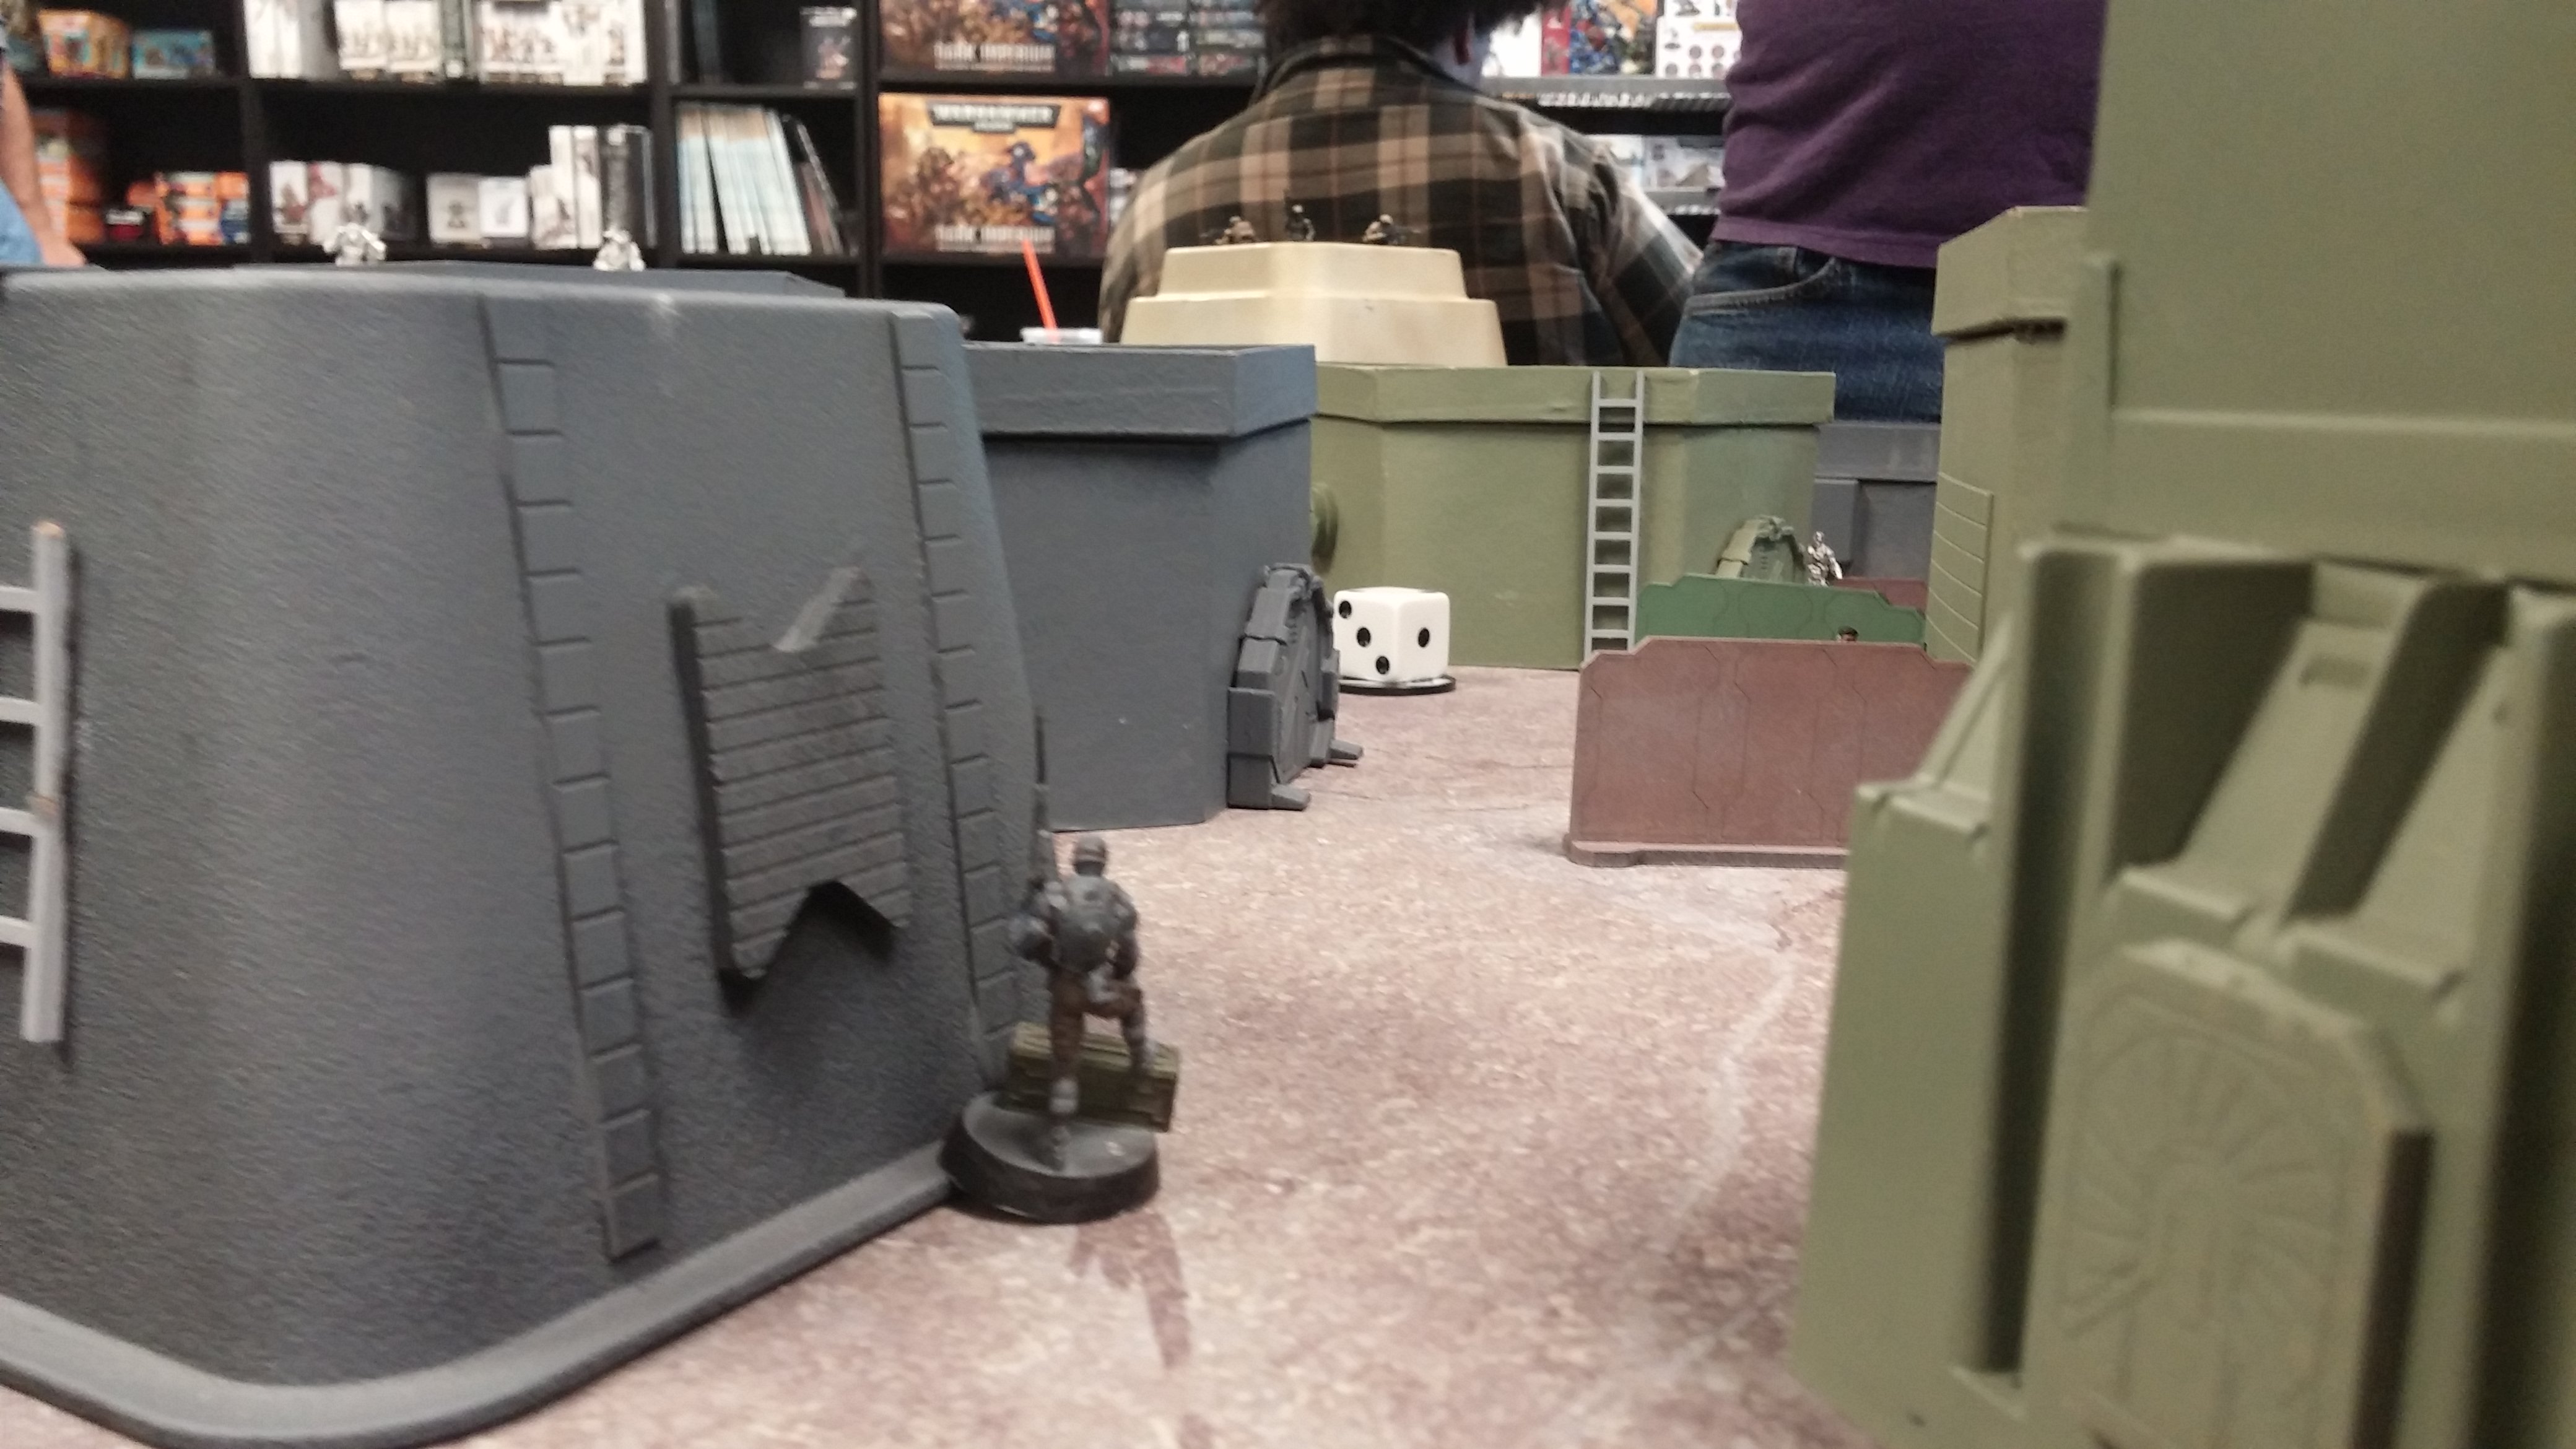
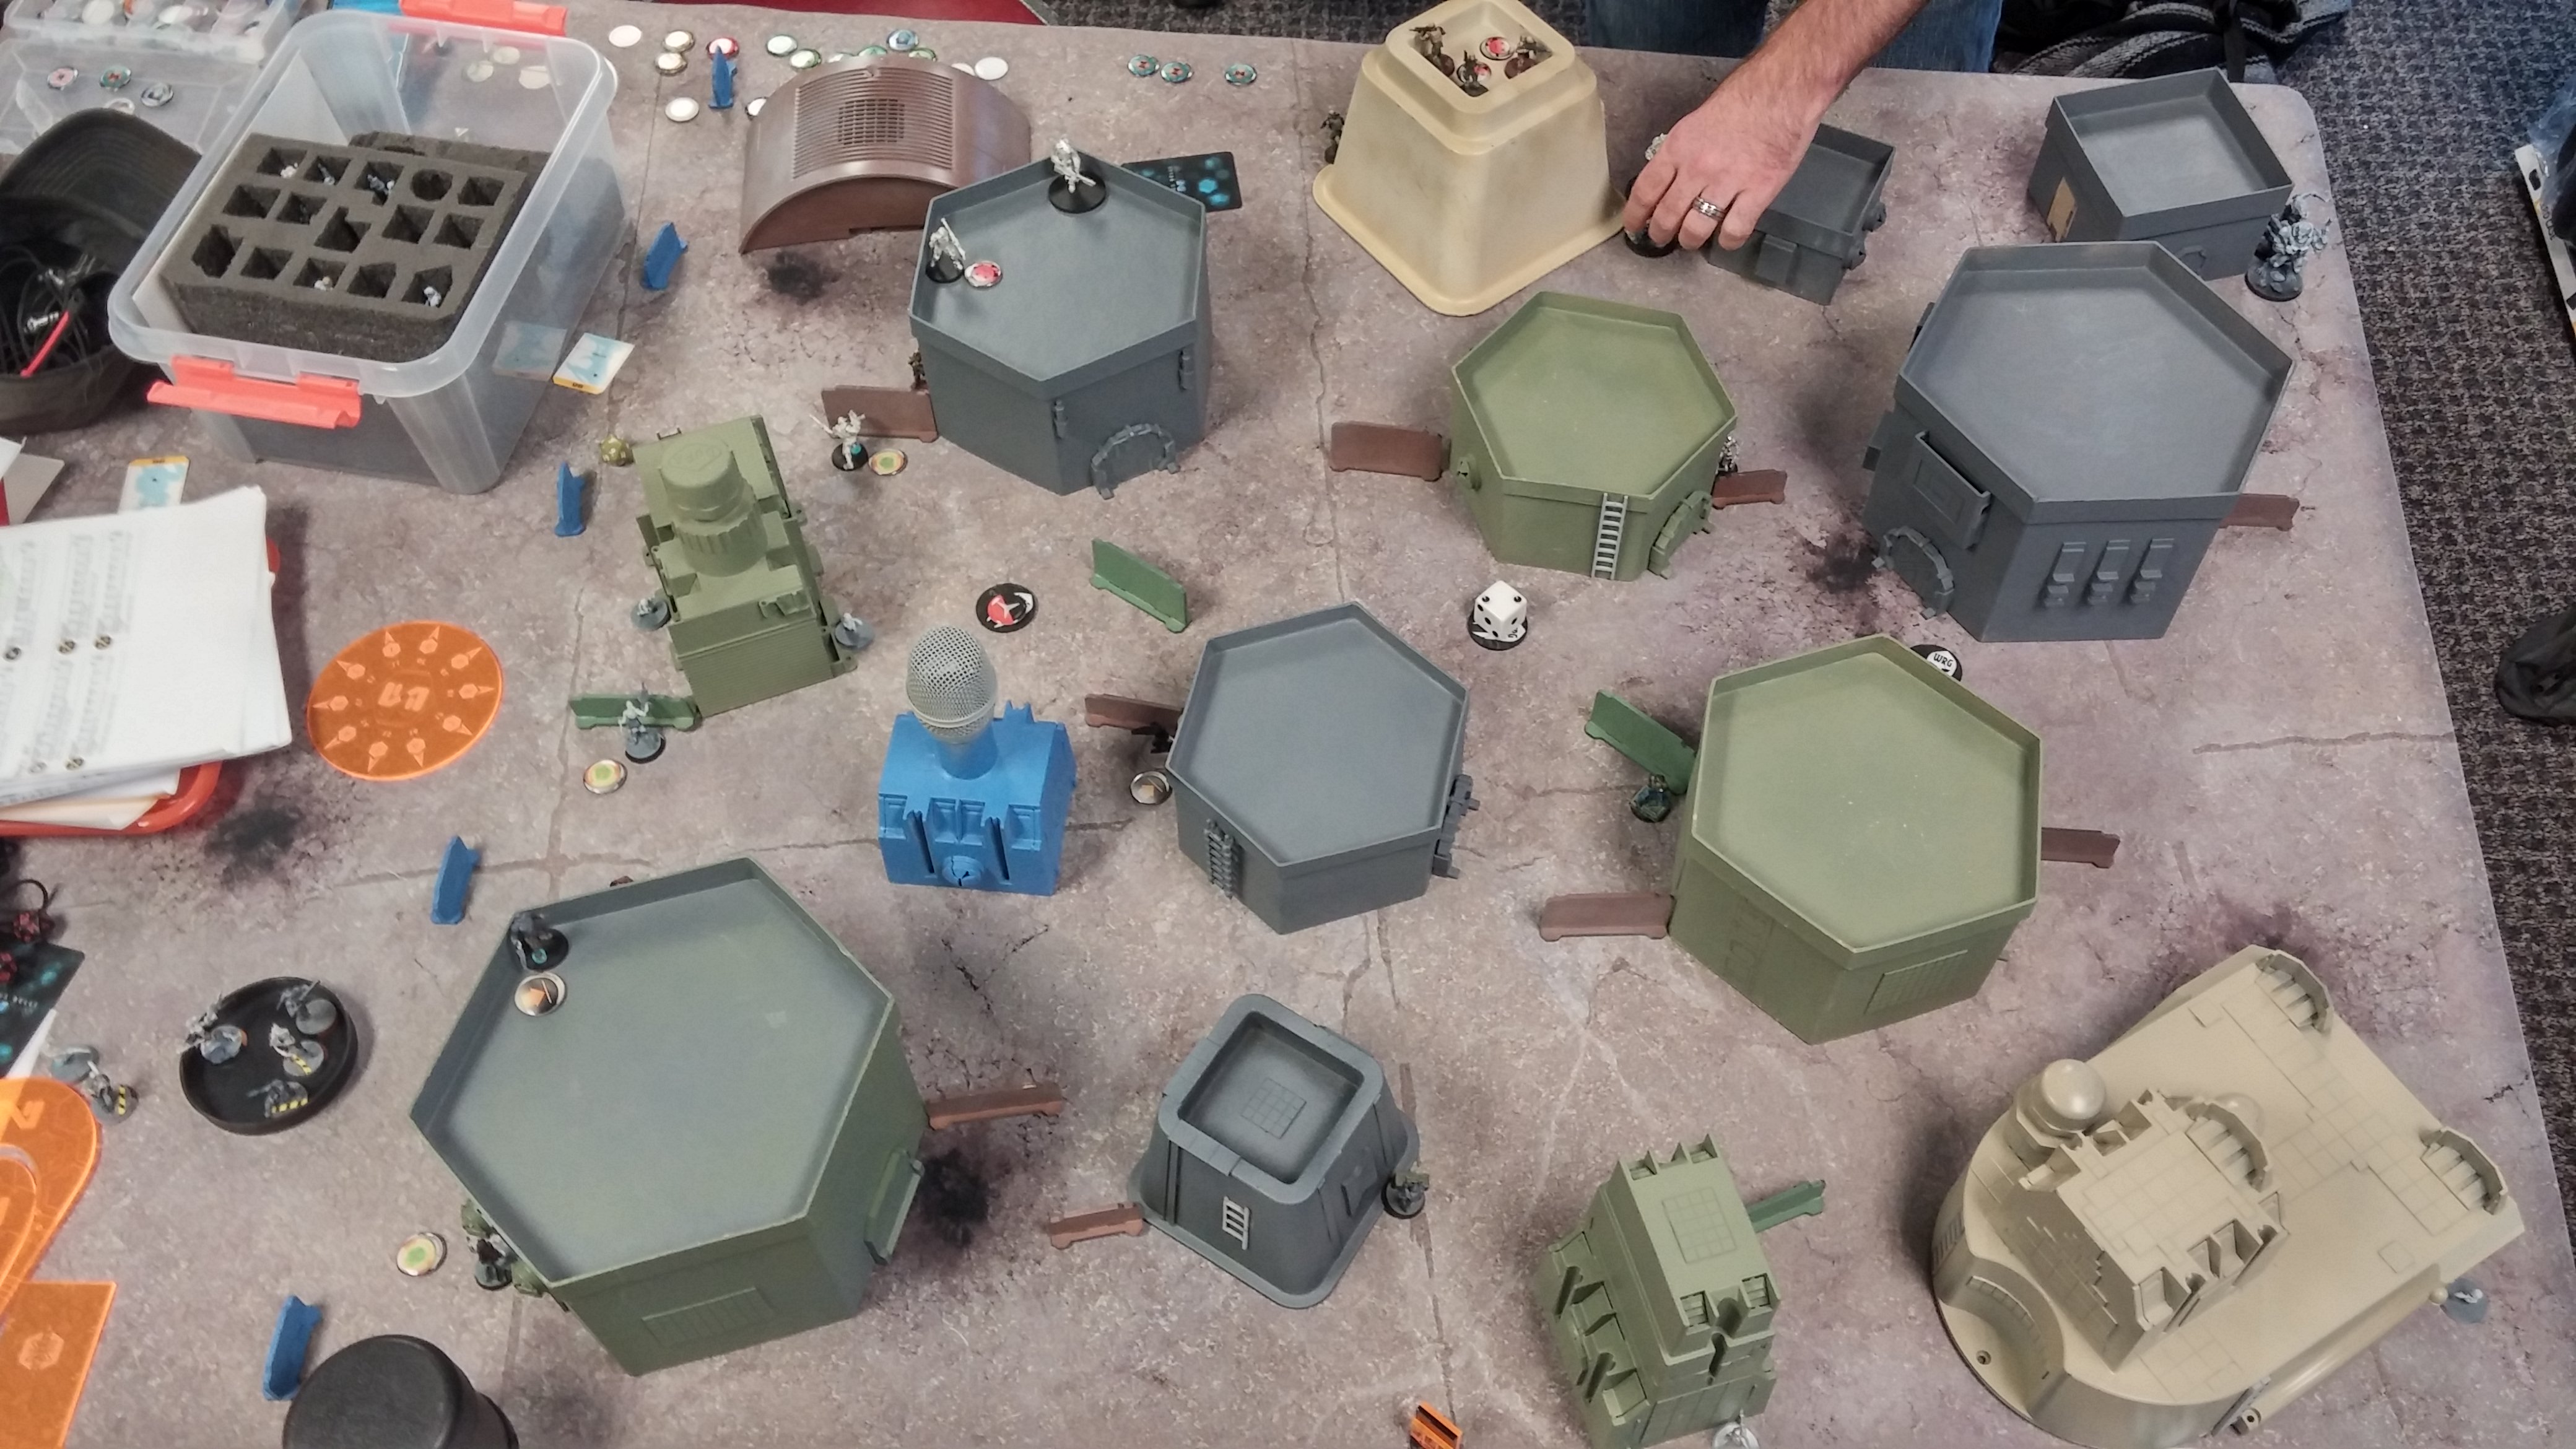
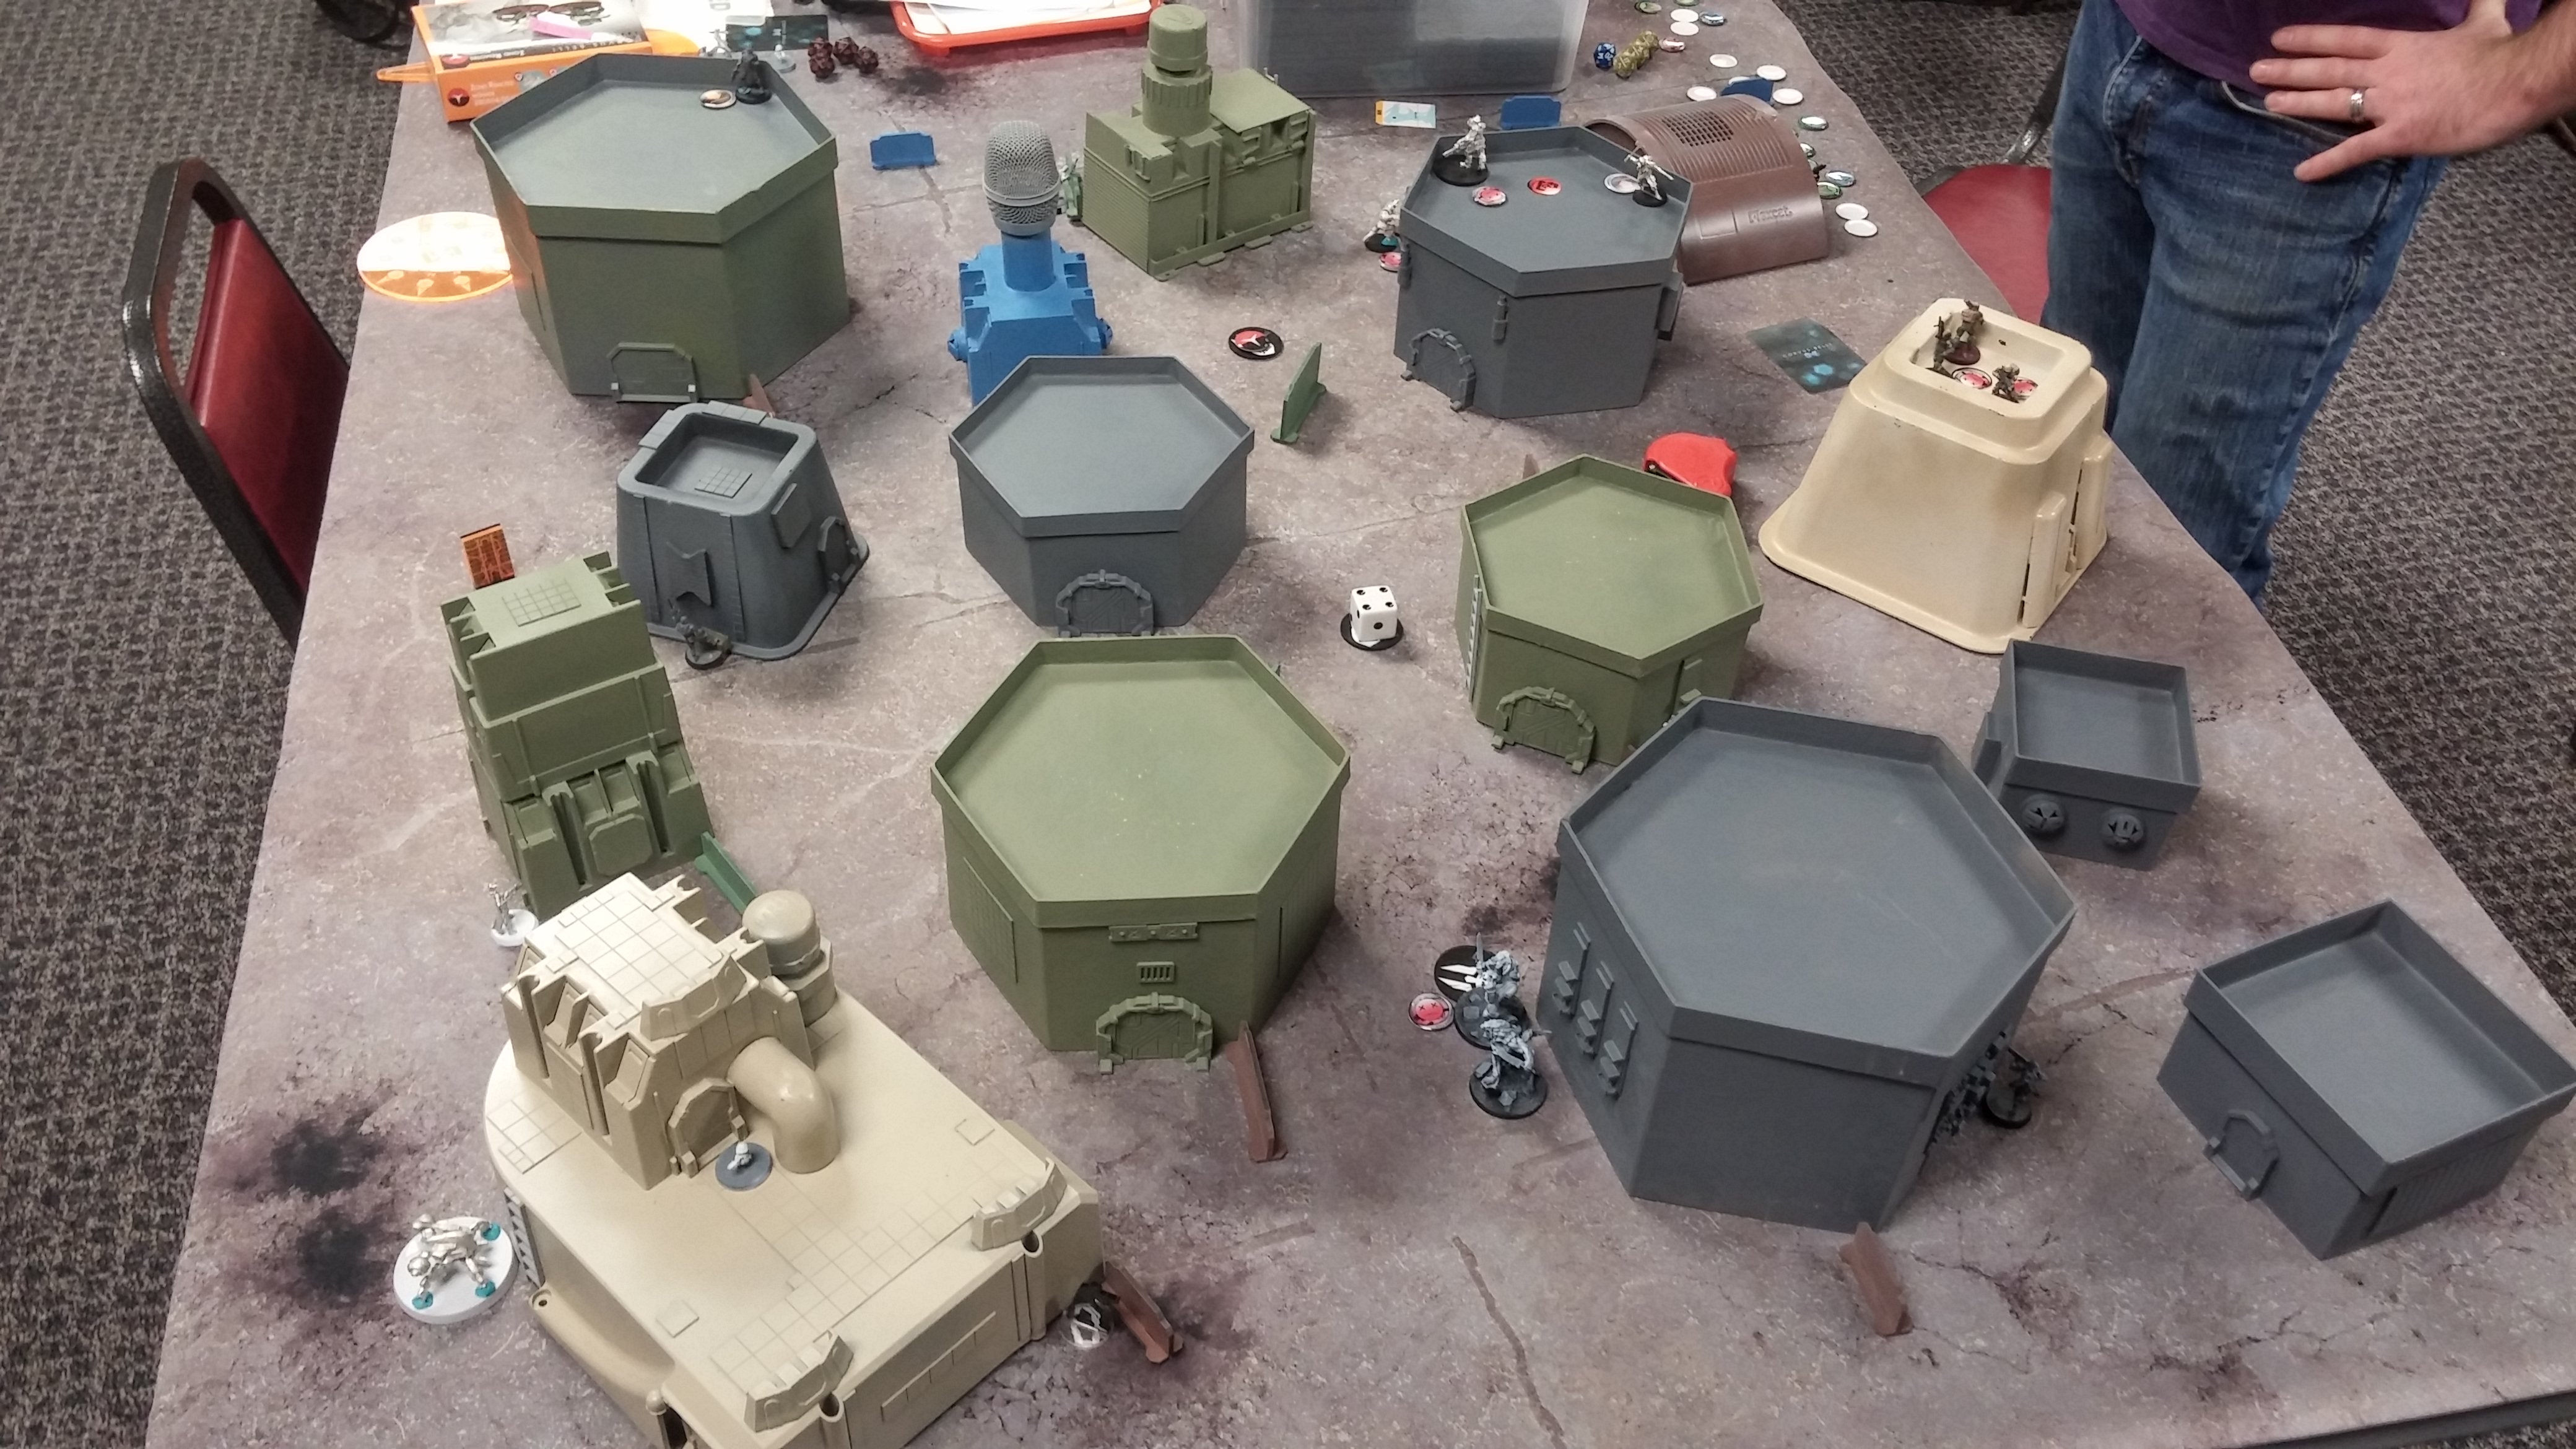
New FLGS, new opponent, got a little distracted and didn’t take many pictures this game. I did manage to get a good shot of the table, which I think was pretty sweet looking. A mix of Warsen.al, Corvus Belli, and personal terrain from one of our locals.
Overview
- Mission: ITS Highly Classified
- Extreme Prejudice
- HVT: Retroengineering
- Sabotage
- Test Run
- Forces: Nomads versus Aleph (300)
- Deploy First: Aleph
- First Turn: Aleph
[img]https://assets.infinitythegame.net/infinityarmy/img/_logosweb/logo_501.png[/img][b] Lunokhod Test[/b]
[b]GROUP 1 |[/b][img]https://assets.infinitythegame.net/infinityarmy/img/_logosweb/orden_regular.png[/img]9 [img]https://assets.infinitythegame.net/infinityarmy/img/_logosweb/orden_irregular.png[/img]1 [img]https://assets.infinitythegame.net/infinityarmy/img/_logosweb/orden_impetuosa.png[/img]1
[img]https://assets.infinitythegame.net/infinityarmy/img/_logosweb/501/logo_16.png[/img] [b]INTERVENTOR Hacker Lieutenant (Hacking Device Plus)[/b] Combi Rifle / Pistol, Knife. (0.5 | [b]25[/b])
[img]https://assets.infinitythegame.net/infinityarmy/img/_logosweb/501/logo_4.png[/img] [b]INTRUDER[/b] Combi Rifle + Light Flamethrower, Grenades / Pistol, CCW. (0 | [b]35[/b])
[img]https://assets.infinitythegame.net/infinityarmy/img/_logosweb/501/logo_33.png[/img] [b]LUNOKHOD[/b] Heavy Shotgun, Heavy Flamethrower, D-Charges, CrazyKoalas (2) / Electric Pulse. (0 | [b]25[/b])
[img]https://assets.infinitythegame.net/infinityarmy/img/_logosweb/501/logo_14.png[/img] [b]DAKTARI[/b] Combi Rifle / Pistol, Knife. (0 | [b]14[/b])
[img]https://assets.infinitythegame.net/infinityarmy/img/_logosweb/501/logo_34.png[/img] [b]ZONDBOT[/b] Electric Pulse. (0 | [b]3[/b])
[img]https://assets.infinitythegame.net/infinityarmy/img/_logosweb/501/logo_10.png[/img] [b]ZERO Hacker (Assault Hacking Device)[/b] Combi Rifle, Antipersonnel Mines / Pistol, Knife. (0.5 | [b]24[/b])
[img]https://assets.infinitythegame.net/infinityarmy/img/_logosweb/501/logo_5.png[/img] [b]REVEREND MOIRA[/b] HMG / Pistol, Shock CCW. (1.5 | [b]34[/b])
[img]https://assets.infinitythegame.net/infinityarmy/img/_logosweb/501/logo_30.png[/img] [b]MORAN[/b] Combi Rifle, CrazyKoalas (2) / Pistol, Knife. (0.5 | [b]21[/b])
[img]https://assets.infinitythegame.net/infinityarmy/img/_logosweb/501/logo_48.png[/img] [b]KRAKOT RENEGADE[/b] Submachine Gun, Chest Mine / Pistol, DA CC Weapon. (0 | [b]15[/b])
[img]https://assets.infinitythegame.net/infinityarmy/img/_logosweb/501/logo_9.png[/img] [b]BANDIT Hacker (Killer Hacking Device)[/b] Light Shotgun, Adhesive Launcher / Pistol, DA CCW. (0 | [b]25[/b])
[img]https://assets.infinitythegame.net/infinityarmy/img/_logosweb/501/logo_24.png[/img] [b]TOMCAT Engineer[/b] Combi Rifle + Light Flamethrower, D-Charges / Pistol, Knife. (0 | [b]22[/b])
[b]GROUP 2 |[/b] [img]https://assets.infinitythegame.net/infinityarmy/img/_logosweb/orden_regular.png[/img]3
[img]https://assets.infinitythegame.net/infinityarmy/img/_logosweb/501/logo_3.png[/img] [b]HELLCAT[/b] HMG, E/Mauler / Pistol, Knife. (1.5 | [b]31[/b])
[img]https://assets.infinitythegame.net/infinityarmy/img/_logosweb/501/logo_13.png[/img] [b]JAGUAR[/b] Adhesive Launcher, Panzerfaust / Pistol, DA CCW. (0.5 | [b]13[/b])
[img]https://assets.infinitythegame.net/infinityarmy/img/_logosweb/501/logo_13.png[/img] [b]JAGUAR[/b] Adhesive Launcher, Panzerfaust / Pistol, DA CCW. (0.5 | [b]13[/b])
[b] 5.5 SWC | 300 Points |[/b] Open in Infinity Army
[img]https://assets.infinitythegame.net/infinityarmy/img/_logosweb/logo_701.png[/img][b] ALEPH[/b]
[b]GROUP 1 |[/b] [img]https://assets.infinitythegame.net/infinityarmy/img/_logosweb/orden_regular.png[/img]10
[img]https://assets.infinitythegame.net/infinityarmy/img/_logosweb/701/logo_46.png[/img] [b]HECTOR Lieutenant[/b] Plasma Rifle, Nanopulser, Stun Grenades + 1 TinBot A / Heavy Pistol, EXP CC Weapon. (0 | [b]71[/b])
[img]https://assets.infinitythegame.net/infinityarmy/img/_logosweb/701/logo_25.png[/img] [b]ATALANTA[/b] MULTI Sniper Rifle + TinBot E (Spotter) / Pistol, Knife. (1.5 | [b]39[/b])
[img]https://assets.infinitythegame.net/infinityarmy/img/_logosweb/701/logo_3.png[/img] [b]DEVA (Multispectral Visor L2)[/b] Spitfire, Nanopulser / Pistol, Knife. (1 | [b]33[/b])
[img]https://assets.infinitythegame.net/infinityarmy/img/_logosweb/701/logo_17.png[/img] [b]PROXY Mk.1 Doctor (MediKit)[/b] Combi Rifle, Nanopulser / Pistol, Knife. (0 | [b]10[/b])
[img]https://assets.infinitythegame.net/infinityarmy/img/_logosweb/701/logo_48.png[/img] [b]PROXY Mk.4[/b] Heavy Rocket Launcher, Submachine Gun, Nanopulser / Pistol, Knife. (2 | [b]20[/b])
[img]https://assets.infinitythegame.net/infinityarmy/img/_logosweb/701/logo_49.png[/img] [b]PROXY Mk.5 (Forward Observer)[/b] 2 Submachine Guns, Nanopulser, E/M Grenades / Pistol, Knife. (0 | [b]10[/b])
[img]https://assets.infinitythegame.net/infinityarmy/img/_logosweb/701/logo_57.png[/img] [b]DANAVAS Hacker (Hacking Device Plus. UPGRADE: Maestro)[/b] Combi Rifle + Pitcher / Breaker Pistol, Knife. (0.5 | [b]25[/b])
[img]https://assets.infinitythegame.net/infinityarmy/img/_logosweb/701/logo_20.png[/img] [b]THORAKITES (Forward Observer, 360º Visor)[/b] Submachine gun, Chain Rifle / Pistol, Knife. (0 | [b]13[/b])
[img]https://assets.infinitythegame.net/infinityarmy/img/_logosweb/701/logo_21.png[/img] [b]MYRMIDON OFFICER (Chain of Command)[/b] Boarding Shotgun, Nanopulser, Eclipse Grenades / Pistol, AP CCW. (1 | [b]35[/b])
[img]https://assets.infinitythegame.net/infinityarmy/img/_logosweb/701/logo_15.png[/img] [b]NETROD[/b] . (0 | [b]4[/b])
[img]https://assets.infinitythegame.net/infinityarmy/img/_logosweb/701/logo_15.png[/img] [b]NETROD[/b] . (0 | [b]4[/b])
[img]https://assets.infinitythegame.net/infinityarmy/img/_logosweb/701/logo_15.png[/img] [b]NETROD[/b] . (0 | [b]4[/b])
[b]GROUP 2 |[/b] [img]https://assets.infinitythegame.net/infinityarmy/img/_logosweb/orden_regular.png[/img]2
[img]https://assets.infinitythegame.net/infinityarmy/img/_logosweb/701/logo_8.png[/img] [b]MYRMIDON[/b] Chain Rifle, Nanopulser, Smoke Grenades / Pistol, AP CCW. (0 | [b]16[/b])
[img]https://assets.infinitythegame.net/infinityarmy/img/_logosweb/701/logo_8.png[/img] [b]MYRMIDON[/b] Chain Rifle, Nanopulser, Smoke Grenades / Pistol, AP CCW. (0 | [b]16[/b])
[b] 6 SWC | 300 Points |[/b] Open in Infinity Army
Deployment
The Proxy Mk.4 covers the board from the top of a shipping container on my left. The Deva Spitfire and two Myrmidons back him up, with Hector and the Mk. 5 hanging out on my right. The rest of his stuff is strung out in his backfield behind some shipping containers.
I castle up Zero Cool the Interventor on a shipping crate on the right side of my deployment zone. Behind him, a Lunokhod. In front of him, a Moran and Acid Burn the Zero AHD. The Moira HMG is on his left. The Jaguars are strung out across the rest of the deployment zone, trying to cover various approaches. Cereal Killer the Bandit KHD hangs out on a bridge near his Proxy Mk.4, with the Krakot also on the left. The Intruder chills on the left covering the center approaches with the Daktari at his back.
Atalanta comes down on too of a building on my right, and I forgot to hold stuff in reserve, so that’s that.
Turn 1
Top of Turn 1 – Aleph
Atalanta snipes my Moira HMG first order. Looking at the table, it looked like the big rocks would’ve given her total cover, but there was one elevated position that I didn’t eyeball during deployment. Sigh. Put a new model down, pick it right back up!
There wasn’t much else that Atalanta could see, so Hector came rolling up the board as part of a few coordinated orders that advance the Deva Spitfire, the Proxy Mk. 5, and a Myrmidon. Hector and the Mk. 5 both successfully dodged the Moran’s Koalas on the way in.
Hector comes into ZoC of Acid Burn (this time with her Zero AHD profile) and I declare Oblivion in ARO, but Hector has Stealth so it’s illegal. I don’t lose my marker state, but now he knows that he can’t advance any further without taking the hacking attack, so he activates the Proxy Mk. 5 alone and SMGs Acid Burn.
I spent a good deal of time deliberating whether or not I should put a mine down in ARO, dodge, or shoot back. I elected to dodge, hoping the dice would go my way and force him to spend another order. They didn’t. The way clear, Hector runs up and starts pew pewing the Lunokhod. He’s out of flamethrower range, so I respond with the shotgun. Hooray! Get to roll dice with a new model!
Fortunately, Hector has to be out of cover to see the Lunokhod, so I’m on flat BS. First order, I get hit a few times and pass all my ARM and BTS rolls. That ARM 3 BTS 6 is pretty handy! Second round of shooting, I put a crit on Hector (take that, ALEPH scum!), but the third order puts two wounds on the Lunokhod. Hector retreats into cover and then the turn passes to me, with the Deva Spitfire and a Myrmidon out of cover, right next to the Krakot.
Bottom of Turn 1 – Nomads
Well, I do what I have to do, and the Krakot manages to catch the Deva Spitfire and the Myrmidon in a chest mine template. The Myrmidon chain rifles the Krakot, and the Deva fails her dodge. I pass my ARM, neither of them do, and I continue walking the Krakot up. The Krakot SMGs a Netrod, and takes the Myrmidon Officer with him as she shotguns him.
I activate Cereal Killer and successfully glue the Proxy Mk. 4! My opponent misses an ARO from Atalanta, who can see the Bandit as she breaks total cover, but at least I glued one of the big ALEPH jerkfaces. Stupid ALEPH!
I turn my attention to Hector now, with most of the threats on my left dealt with. I reveal Zero Cool as my Lt, trying to hack Hector with my Lt order, but Hector is too far from the Moran. I spend way too much time trying to get the Moran in position, even dropping in a Hellcat (which deviated due to losing the FtF against the Danavas) to remove the Proxy Mk. 5. Finally, I get the Moran in place, but Zero Cool flubs both rolls! Not even due to Hector’s TinBot, he just rolled way over his WIP.
This is where I lost the game. I had a Tomcat Engineer waiting in the wings that I could’ve walked in right next to his HVT. It would’ve been in total cover from Atalanta, and behind Hector. I had enough orders to D-Charge the terrain blocking me from Atalanta for Sabotage, and then I could’ve run into the open and banked on making the WIP roll tickling the HVT for HVT: Retroengineering before going down to Atalanta’s ARO. That would put me at 2/4 classifieds, and I had Data Scan as my private classified, meaning I probably would’ve had the game.
The problem was that I wasn’t sure if Hector was within 8″ of where the Tomcat would’ve walked on, and I didn’t want to have to FtF against Hector. Really though, there’s no reason to not do it. I walk in the Tomcat, if he’s in Hector’s ZoC, then I don’t spend any more orders on the Tomcat, so I’m not losing any orders, and now there’s a Tomcat behind Hector.
The other option was to walk the Tomcat in behind my Lunokhod, and then try to fix it. That was another good option, especially since I have Data Scan and that would’ve gotten me Test Run. Probably safer, but I figured I’d try to just remove Hector as a threat entirely instead of banking on snagging objectives early. He didn’t have any engineers, so all he could really hope to do was get Extreme Prejudice and his own classified, whatever that was (turned out to be Data Scan as well), so really I needed to get the Tomcat on the table and pushing buttons.
Turn 2
Top of Turn 2 – Aleph
My window of opportunity had passed. Hector proceeded to murder the Moran, Zero Cool, a Jaguar, and the Hellcat HMG. Atalanta cleans up by sniping Cereal Killer. By the end of the rampage, all I had left was the Intruder, a Jaguar, and the Daktari and her bot. 65 < 75, so I’m in retreat. With his last order, Hector stomps his big ALEPH boot on the Lunokhod, and it’s game.
5-0 ALEPH Victory!
I got stomped pretty hard. I could blame it on the fact that my opponent has a great deal of familiarity with Nomads, and I’m still learning about ALEPH, but that’s not why I lost. I lost because I didn’t bring on the Tomcat and get shit done, plain and simple!
Game 1 Notes
- General Notes:
- Good use of the Krakot. Punched way above his weight. 15 points took out 84. I’ll take it!
- Good use of the Bandit to remove threats, should’ve retreated her as part of the first short movement skill. I need to get better at the “this unit moves forward, pokes out, then hides again,” before asking for AROs.
- Gotta bring in the Tomcat! They’re awesome! Let them be awesome!
- I need to think more careful when figuring out the order of operations for things. I should’ve brought in the Hellcat first, killed the Mk. 5, then moved the Moran up. I had wasted 1-2 orders on moving the Moran up.
- Did I make good use of the Jaguars? Probably not. I let them cover the approaches the non-Hector parts of his army would’ve used, but… why would they advance when Hector exists?
- Reaaally bad placement of the Moira HMG. Need to get down to model level to eye LoF to various places on the table more often.
- Notes on the Lunokhod:
- Uhh… it died turn one to Hector. Not really all that much data.
- I think I need to deploy the Crazy Koalas more aggressively in my deployment zone, but this time it didn’t work out all that well due to terrain.
- I think I need to take the flamethrower version and position it such that I can use the flamethrower in ARO if I’m going second.
Game 2 – USARF Flexes Its Muscles
This game was a rematch from Hellcat Variety Pack. I had one goal in this game, which was to actually use the Lunokhod, especially since it just died to Hector last game.
Overview
- Mission: ITS Show of Force
- Forces: Nomads versus USAriadna Ranger Force (300)
- Deploy First: USARF
- First Turn: Nomads
[img]https://assets.infinitythegame.net/infinityarmy/img/_logosweb/logo_501.png[/img][b] Lunokhod Test 2[/b]
[b]GROUP 1 |[/b][img]https://assets.infinitythegame.net/infinityarmy/img/_logosweb/orden_regular.png[/img]9 [img]https://assets.infinitythegame.net/infinityarmy/img/_logosweb/orden_irregular.png[/img]1 [img]https://assets.infinitythegame.net/infinityarmy/img/_logosweb/orden_impetuosa.png[/img]1
[img]https://assets.infinitythegame.net/infinityarmy/img/_logosweb/501/logo_16.png[/img] [b]INTERVENTOR Hacker Lieutenant (Hacking Device Plus)[/b] Combi Rifle / Pistol, Knife. (0.5 | [b]25[/b])
[img]https://assets.infinitythegame.net/infinityarmy/img/_logosweb/501/logo_4.png[/img] [b]INTRUDER (X-Visor)[/b] MULTI Sniper Rifle / Pistol, CCW. (1.5 | [b]43[/b])
[img]https://assets.infinitythegame.net/infinityarmy/img/_logosweb/501/logo_5.png[/img] [b]REVEREND MOIRA[/b] HMG / Pistol, Shock CCW. (1.5 | [b]34[/b])
[img]https://assets.infinitythegame.net/infinityarmy/img/_logosweb/501/logo_33.png[/img] [b]LUNOKHOD[/b] Heavy Shotgun, Heavy Flamethrower, D-Charges, CrazyKoalas (2) / Electric Pulse. (0 | [b]25[/b])
[img]https://assets.infinitythegame.net/infinityarmy/img/_logosweb/501/logo_14.png[/img] [b]DAKTARI[/b] Combi Rifle / Pistol, Knife. (0 | [b]14[/b])
[img]https://assets.infinitythegame.net/infinityarmy/img/_logosweb/501/logo_34.png[/img] [b]ZONDBOT[/b] Electric Pulse. (0 | [b]3[/b])
[img]https://assets.infinitythegame.net/infinityarmy/img/_logosweb/501/logo_48.png[/img] [b]KRAKOT RENEGADE[/b] Submachine Gun, Chest Mine / Pistol, DA CC Weapon. (0 | [b]15[/b])
[img]https://assets.infinitythegame.net/infinityarmy/img/_logosweb/501/logo_30.png[/img] [b]MORAN[/b] Combi Rifle, CrazyKoalas (2) / Pistol, Knife. (0.5 | [b]21[/b])
[img]https://assets.infinitythegame.net/infinityarmy/img/_logosweb/501/logo_10.png[/img] [b]ZERO Hacker (Assault Hacking Device)[/b] Combi Rifle, Antipersonnel Mines / Pistol, Knife. (0.5 | [b]24[/b])
[img]https://assets.infinitythegame.net/infinityarmy/img/_logosweb/501/logo_9.png[/img] [b]BANDIT Hacker (Killer Hacking Device)[/b] Light Shotgun, Adhesive Launcher / Pistol, DA CCW. (0 | [b]25[/b])
[img]https://assets.infinitythegame.net/infinityarmy/img/_logosweb/501/logo_24.png[/img] [b]TOMCAT Engineer[/b] Combi Rifle + Light Flamethrower, D-Charges / Pistol, Knife. (0 | [b]22[/b])[b]GROUP 2 |[/b][img]https://assets.infinitythegame.net/infinityarmy/img/_logosweb/orden_regular.png[/img]2 [img]https://assets.infinitythegame.net/infinityarmy/img/_logosweb/orden_irregular.png[/img]1 [img]https://assets.infinitythegame.net/infinityarmy/img/_logosweb/orden_impetuosa.png[/img]1
[img]https://assets.infinitythegame.net/infinityarmy/img/_logosweb/501/logo_13.png[/img] [b]JAGUAR[/b] Chain Rifle, Smoke Grenades / Pistol, DA CCW. (0 | [b]10[/b])
[img]https://assets.infinitythegame.net/infinityarmy/img/_logosweb/501/logo_12.png[/img] [b]MORLOCK[/b] Chain Rifle, Smoke Grenades / Assault Pistol, AP CCW. (0 | [b]8[/b])
[img]https://assets.infinitythegame.net/infinityarmy/img/_logosweb/501/logo_3.png[/img] [b]HELLCAT[/b] HMG, E/Mauler / Pistol, Knife. (1.5 | [b]31[/b])
[b] 6 SWC | 300 Points |[/b] Open in Infinity Army
[img]https://assets.infinitythegame.net/infinityarmy/img/_logosweb/logo_304.png[/img][b] USAriadna Ranger Force[/b]
[b]GROUP 1 |[/b][img]https://assets.infinitythegame.net/infinityarmy/img/_logosweb/orden_regular.png[/img]8
[img]https://assets.infinitythegame.net/infinityarmy/img/_logosweb/304/logo_2.png[/img] [b]MINUTEMAN Lieutenant[/b] AP HMG / Pistol, CCW. (1 | [b]34[/b])
[img]https://assets.infinitythegame.net/infinityarmy/img/_logosweb/304/logo_1.png[/img] [b]GRUNT (Forward Observer)[/b] Rifle / Pistol, Knife. (0 | [b]11[/b])
[img]https://assets.infinitythegame.net/infinityarmy/img/_logosweb/304/logo_1.png[/img] [b]GRUNT Paramedic (MediKit)[/b] Rifle / Pistol, Knife. (0 | [b]12[/b])
[img]https://assets.infinitythegame.net/infinityarmy/img/_logosweb/304/logo_1.png[/img] [b]GRUNT (Marksmanship LX)[/b] Sniper Rifle / Pistol, Knife. (0.5 | [b]18[/b])
[img]https://assets.infinitythegame.net/infinityarmy/img/_logosweb/304/logo_1.png[/img] [b]GRUNT (Marksmanship LX)[/b] Sniper Rifle / Pistol, Knife. (0.5 | [b]18[/b])
[img]https://assets.infinitythegame.net/infinityarmy/img/_logosweb/304/logo_1.png[/img] [b]GRUNT (Marksmanship LX)[/b] Sniper Rifle / Pistol, Knife. (0.5 | [b]18[/b])[img]https://assets.infinitythegame.net/infinityarmy/img/_logosweb/304/logo_15.png[/img] [b]BLACKJACK[/b] T2 Sniper, Submachine Gun, Chest Mines / Heavy Pistol, CC Weapon. (1 | [b]36[/b])
[img]https://assets.infinitythegame.net/infinityarmy/img/_logosweb/304/logo_6.png[/img] [b]112[/b] Light Shotgun / Pistol, CCW. (0 | [b]12[/b])
[b]GROUP 2 |[/b][img]https://assets.infinitythegame.net/infinityarmy/img/_logosweb/orden_regular.png[/img]3 [img]https://assets.infinitythegame.net/infinityarmy/img/_logosweb/orden_irregular.png[/img]2 [img]https://assets.infinitythegame.net/infinityarmy/img/_logosweb/orden_impetuosa.png[/img]2
[img]https://assets.infinitythegame.net/infinityarmy/img/_logosweb/304/logo_11.png[/img] [b]MARAUDER (Fireteam: Haris)[/b] Rifle, Heavy Flamethrower / Heavy Pistol, Knife. (1 | [b]22[/b])
[img]https://assets.infinitythegame.net/infinityarmy/img/_logosweb/304/logo_11.png[/img] [b]MARAUDER (Multispectral Visor L1)[/b] Heavy Rocket Launcher / Assault Pistol, Knife. (1.5 | [b]26[/b])
[img]https://assets.infinitythegame.net/infinityarmy/img/_logosweb/304/logo_11.png[/img] [b]MARAUDER[/b] Boarding Shotgun, Antipersonnel Mines / Heavy Pistol, Knife. (0 | [b]22[/b])[img]https://assets.infinitythegame.net/infinityarmy/img/_logosweb/304/logo_12.png[/img] [b]DEVIL DOG[/b] Chain Rifle, Smoke Grenades + 1 K-9 Antipode / AP Heavy Pistol, AP CCW. (0 | [b]30[/b])
[img]https://assets.infinitythegame.net/infinityarmy/img/_logosweb/sep.gif[/img] [img]https://assets.infinitythegame.net/infinityarmy/img/_logosweb/304/logo_12.png[/img] [b]K-9 ANTIPODE[/b] AP CCW. ([b]7[/b])
[img]https://assets.infinitythegame.net/infinityarmy/img/_logosweb/304/logo_12.png[/img] [b]DEVIL DOG[/b] Heavy Shotgun, Smoke Grenades + 1 K-9 Antipode / AP CCW. (0 | [b]39[/b])
[img]https://assets.infinitythegame.net/infinityarmy/img/_logosweb/sep.gif[/img] [img]https://assets.infinitythegame.net/infinityarmy/img/_logosweb/304/logo_12.png[/img] [b]K-9 ANTIPODE[/b] AP CCW. ([b]7[/b])
[b] 6 SWC | 298 Points |[/b] Open in Infinity Army
Deployment
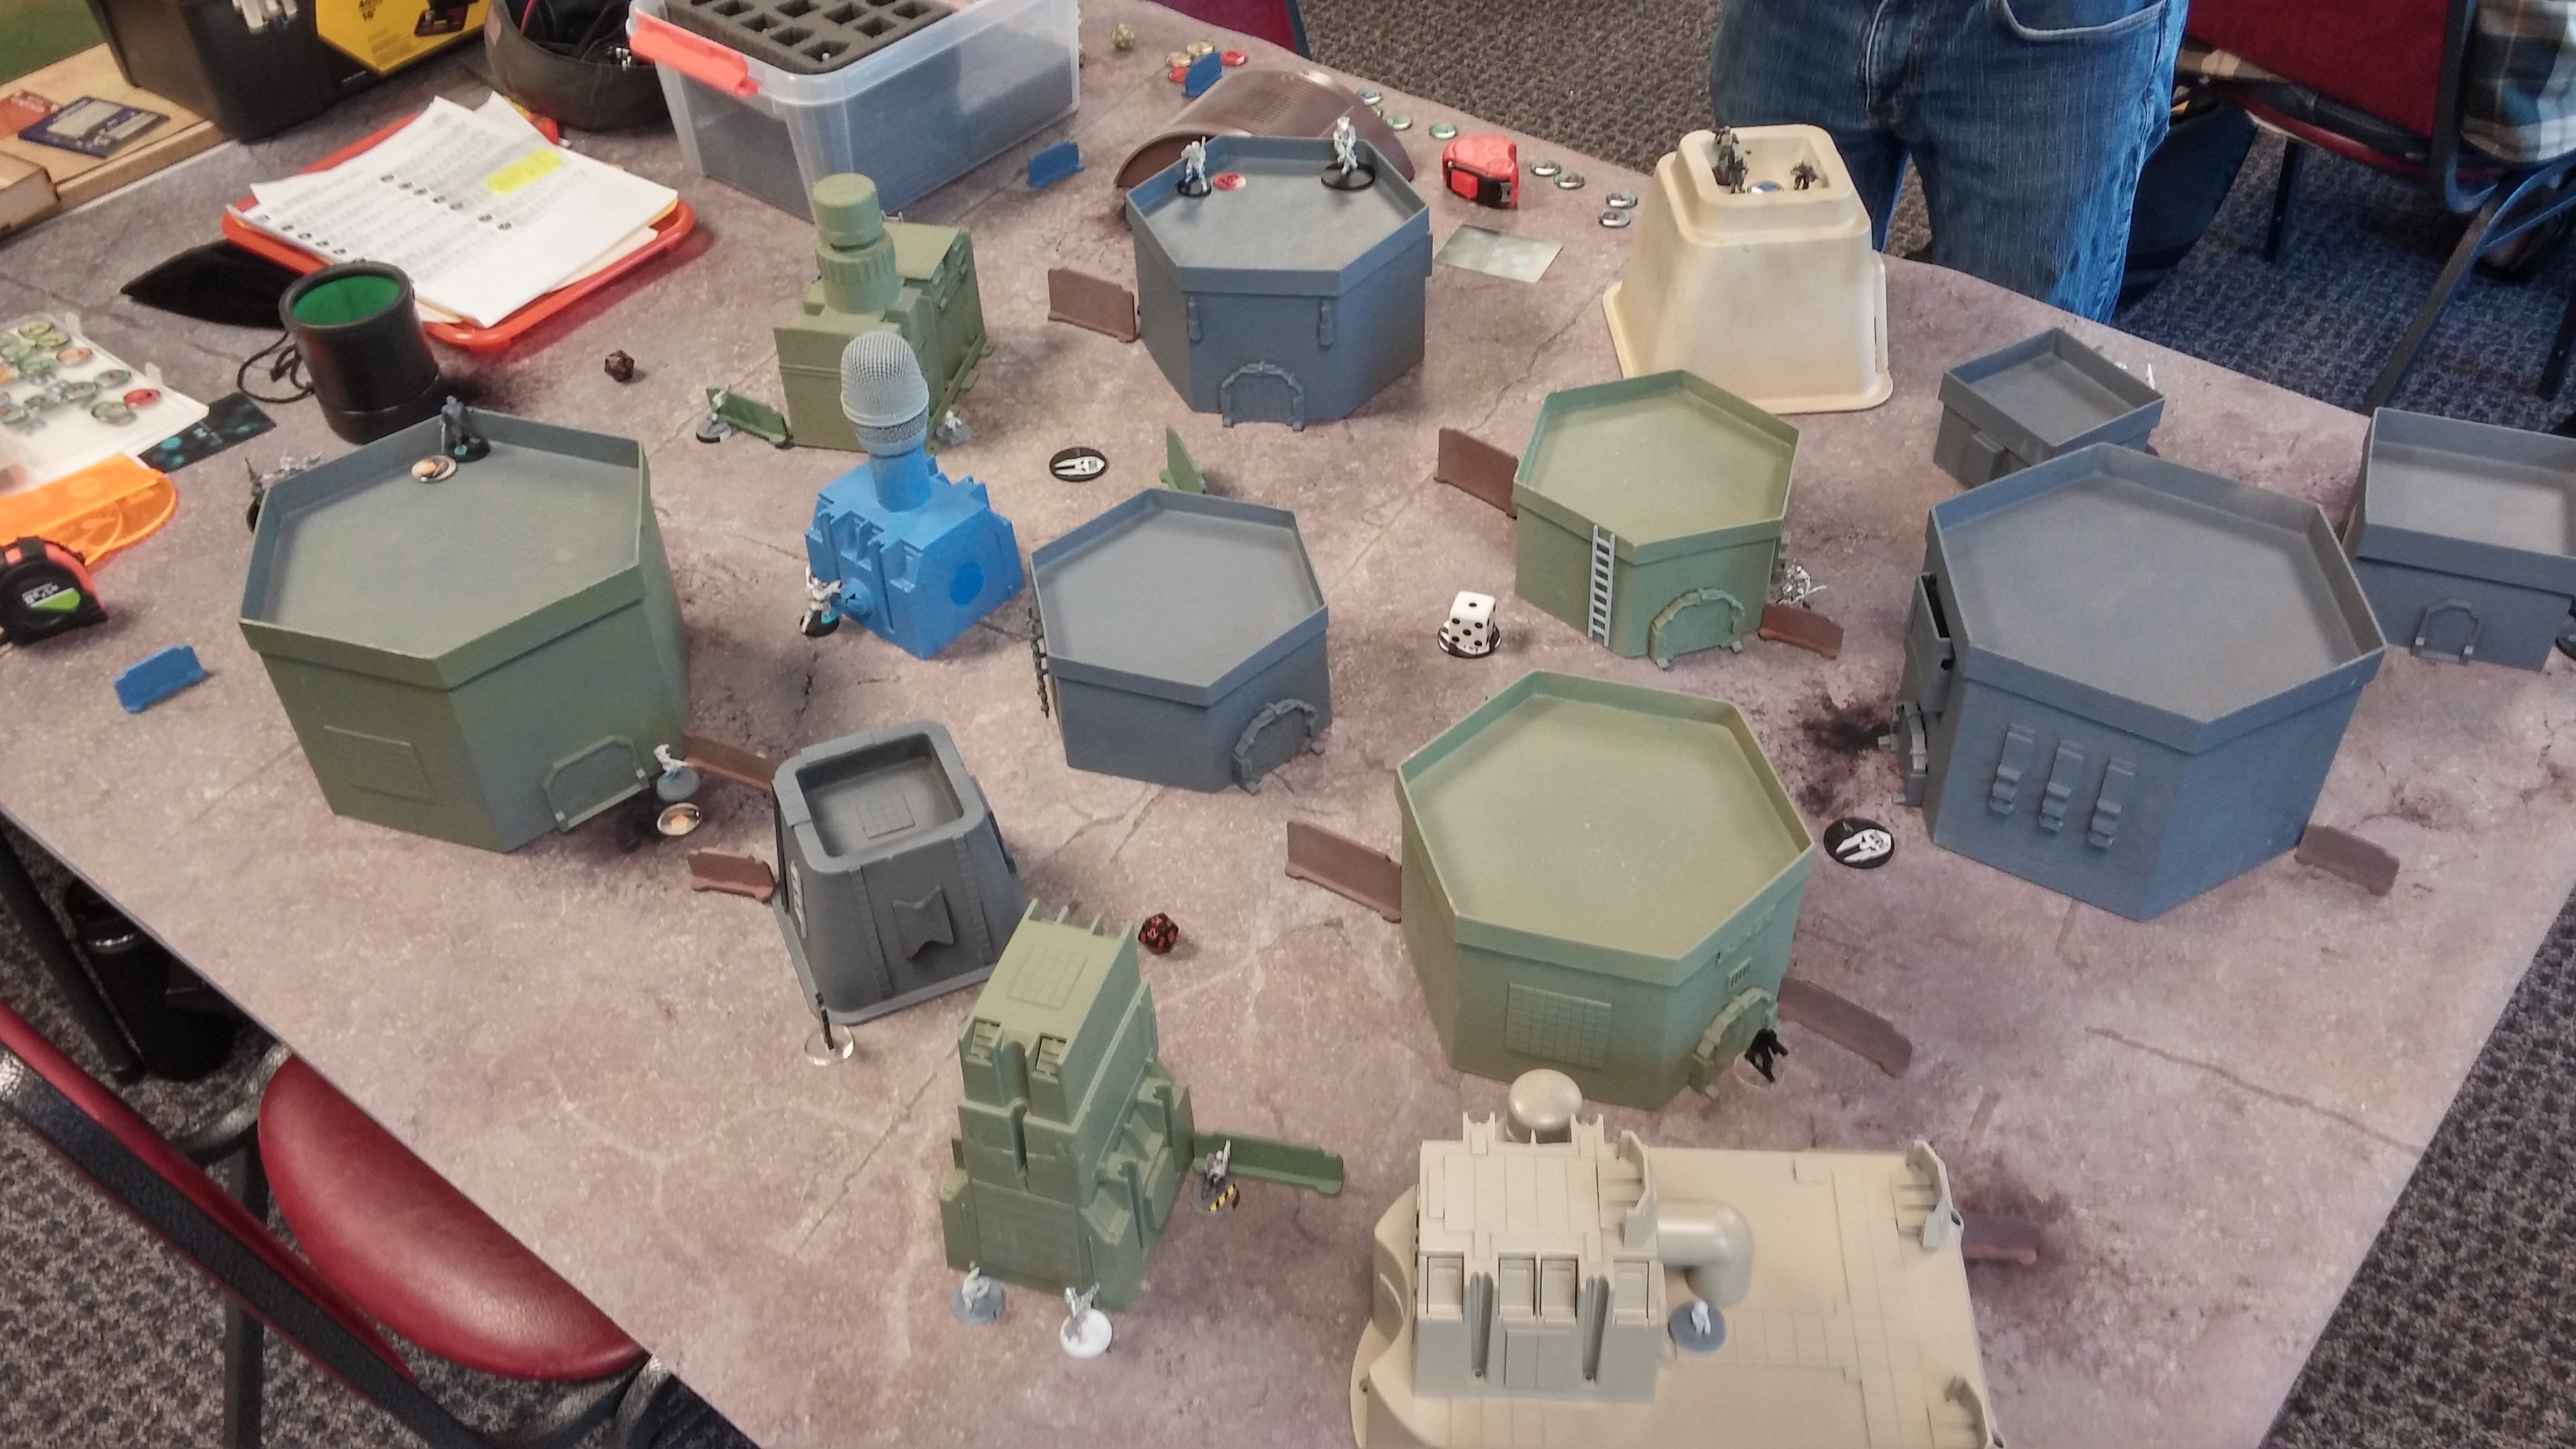
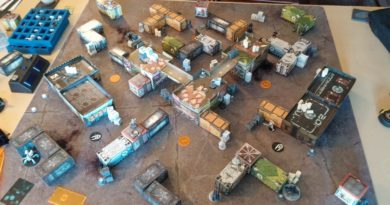
I arrived a little late to the game store, and the kind folks there had already set up a table, which I was told was… kinda… oil-field-like. Sure! Seems reasonable. Could also be a Tesium refinery that the Nomads are trying to take control over. Doesn’t matter.
There was some confusion about who was going first. I thought I was going second, since I chose deployment, but my opponent thought I was going first… anyway. The Marauder Haris comes down my left, HRL up high, shotgun and flamethrower in total cover. A Blackjack T2 sniper hangs out on the roof with the Marauder, with his Minuteman Lt. all the way in the back behind the building. The Grunt link team takes an elevated position in the middle, with three snipers up top and the other grunts on ground level. To round it out, both Devil Dog teams come down on my right.
 I am really concerned about the Devil Dogs and their smoke. To deal with the Devil Dogs, I deploy my Intruder watching a few of their approaches. The Bandit sits directly in their path, ready to glue them to the ground, and Acid Burn the Zero hangs out prone in the middle in case they decide to go that way.
I deploy the Moran on the left to deal with his Marauder Haris, figuring the Devil Dogs will just dodge the Crazy Koalas anyway. The Krakot and Morlock are also on the left, along with Zero Cool (prone on a rooftop). The Lunokhod ends up on the right to back up the Moira HMG with his crazy Koalas. The Daktari’s bot is right there, ready to pick up the Moira if she goes down, with Daktari Inira on the left. The Jaguar covers the approach to the Moira, to further roadblock the damn Devil Dogs.
Turn 1
Top of Turn 1 – Nomads
So, I find out I’m going first, not second. Whoops! Well, I make the best of it. I don’t really want to spend a regular order on the Morlock to cancel her regular order, so I just run her out into the open and chucks a smoke grenade. She eats 7 sniper shots and 2 HRL shots and dies. But hey, I needed 16s! You never know! That would’ve been epic. Next, it’s the Krakot’s turn. I move him up, out dice the Marauder HRL and survive the 6 sniper shots. I manage to open a panoply to get +2 ARM on the way. The Marauder makes his ARM rolls, so I bring out the big guns. The Intruder skirts around a building and drops the Marauder HRL unconscious, then I sacrifice the Jaguar to sniper shots to get some smoke for the Intruder. He comes back around the corner of his building under the cover of smoke, and drops two Grunt snipers, breaking the link.
 I finish out the turn by shifting Cereal Killer the Bandit, the Moria HMG, and the Krakot Renegade into better positions and into suppression fire.
Bottom of Turn 1 – USARF
He advances the Devil Dogs up. One goes down to the Moira HMG’s suppression fire, and the other manages to smoke out the Bandit. He pushes the Blackjack up to SMG the Krakot and succeeds, but takes a wound from one of the Moran’s Crazy Koalas. BATTLE RAVAGED! He spends the rest of his turn trying to doctor some models. The 112 manages to pick up the Marauder, who stands back up, and then passes the turn to me.
Turn 2
Top of Turn 2 – Nomads
I gun down the remaining Devil Dog with the Moria HMG, opening a hole for a Hellcat HMG to walk on the right side of the board.
 The Hellcat drops the Marauder HRL again, and takes out the Blackjack. I run the Bandit up to get into a better position, and then dash the Doctor’s bot across the board to tickle his HVT for my classified.
Bottom of Turn 2 – USARF
He tries to pick up some of his Grunt snipers, but his Grunt paramedic uses his pistol instead of his Medikit and kills the Grunt sniper, taking an HMG round to the face from the Hellcat for his trouble as he gets into position. He tries to pick up the Marauder HRL again with the 112 Doctor, but he fails the WIP roll there too.
Turn 3
Top of Turn 3 – Nomads
I uh, haven’t used the Lunokhod at all yet… So I spend a ton of orders running it across the board into base to base with the center objective. I spent my last two orders setting up some fire covering the central objective, namely the Moran in suppression. I forget to bring the Tomcat on before passing the turn…
Bottom of Turn 3 – USARF
The Minuteman Lieutenant goes on a rampage, killing the Hellcat, Acid Burn, the Moran, and the Lunokhod. I survived the first round of HMG shots with the Lunokhod (hooray ARM 3!) but he passes his ARM roll against the flamethrower hit. I try to out dice him on the second go around and use the shotgun, but roll really low and the Lunokhod finally goes down. Cereal Killer tries to stop the Minuteman with her ADHL as he comes into view on his final dash to touch the central objective, but he guns her down too.
He’s killed a lot of stuff at this point, two points more, in fact, counting the Tomcat. Curses! I’ve opened more panoplies and have my classified, but he’s “killed” two more points worth of stuff and is controlling the center objective.
4-3 USARF Victory!
Fun rematch game against my opponent, who hasn’t been around the LGS for awhile. Was nice to catch up and throw some dice with him.
Game 2 Notes
- General Notes:
- Well. Obviously, don’t forget to bring on the Tomcat. I should’ve tried to bring it on to gank the Minuteman Lieutenant or at least try to speedbump him some more.
- I used up all my command tokens moving things between combat groups, leaving me without enough orders to put more things into suppression fire on the last turn.
- I really needed to put the Intruder and the Moira into positions covering the center objective. That would’ve really saved my bacon. It was only one MOV away.
- Yeah. I could’ve had the Hellcat, the Moira, and the Moran in suppression fire watching the center objective. Acid Burn wasn’t that far from the objective and could’ve easily made a dash much more order efficiently than the Lunokhod. Well, I had a goal to use the Lunokhod, and I’ll keep forcing myself to use it until I figure it out. I think I lost this game by not prioritizing the objective over using the Lunokhod, but that’s arguably the point of this whole exercise.
- Notes on the Lunokhod:
- I felt like the Lunokhod didn’t have much in the way of longer-range stuff. Not that there’s anything wrong with the heavy flamethrower, but the shotgun does feel very short ranged.
- I think I need to use the Lunokhod as a midfield clearing piece. That’s probably the role they’re best suited for.
Game 3 – Linked HMG OP, CB PLZ NERF!

My opponent had just finished a teaching game versus a new player and he had some personal obligations to attend to, so we decided to get in a quicker, 150 point game. Since he was in a rush, I didn’t make an effort to take photos and ended up not taking any.
Overview
- Mission: ITS Capture and Protect
- Forces: Nomads versus Neoterra Capitaline Army (150)
- Deploy First: NCA
- First Turn: NCA
[img]https://assets.infinitythegame.net/infinityarmy/img/_logosweb/logo_501.png[/img][b] Lunokhod Test 3[/b]
[img]https://assets.infinitythegame.net/infinityarmy/img/_logosweb/501/logo_16.png[/img] [b]INTERVENTOR Hacker Lieutenant (Hacking Device Plus)[/b] Combi Rifle / Pistol, Knife. (0.5 | [b]25[/b])
[img]https://assets.infinitythegame.net/infinityarmy/img/_logosweb/501/logo_23.png[/img] [b]MODERATOR[/b] Combi Rifle / Pistol, Electric Pulse. (0 | [b]9[/b])
[img]https://assets.infinitythegame.net/infinityarmy/img/_logosweb/501/logo_23.png[/img] [b]MODERATOR[/b] Combi Rifle / Pistol, Electric Pulse. (0 | [b]9[/b])
[img]https://assets.infinitythegame.net/infinityarmy/img/_logosweb/501/logo_10.png[/img] [b]ZERO (Minelayer)[/b] Combi Rifle, Antipersonnel Mines / Pistol, Knife. (0.5 | [b]19[/b])
[img]https://assets.infinitythegame.net/infinityarmy/img/_logosweb/501/logo_33.png[/img] [b]LUNOKHOD[/b] Heavy Shotgun, Akrylat-Kanone, D-Charges, CrazyKoalas (2) / Electric Pulse. (0 | [b]24[/b])
[img]https://assets.infinitythegame.net/infinityarmy/img/_logosweb/501/logo_24.png[/img] [b]TOMCAT Doctor (MediKit)[/b] Combi Rifle + Light Flamethrower / Pistol, Knife. (0 | [b]22[/b])
[img]https://assets.infinitythegame.net/infinityarmy/img/_logosweb/501/logo_21.png[/img] [b]TRANSDUCTOR ZOND[/b] Flash Pulse, Sniffer / Electric Pulse. (0 | [b]8[/b])
[img]https://assets.infinitythegame.net/infinityarmy/img/_logosweb/501/logo_9.png[/img] [b]BANDIT Hacker (Assault Hacking Device)[/b] Light Shotgun, Adhesive Launcher / Pistol, DA CCW. (0.5 | [b]28[/b])
[img]https://assets.infinitythegame.net/infinityarmy/img/_logosweb/501/logo_12.png[/img] [b]MORLOCK[/b] Chain Rifle, Smoke Grenades / Pistol, E/M CCW. (0 | [b]6[/b])
[img]https://assets.infinitythegame.net/infinityarmy/img/_logosweb/orden_regular.png[/img]7 [img]https://assets.infinitythegame.net/infinityarmy/img/_logosweb/orden_irregular.png[/img]2 [img]https://assets.infinitythegame.net/infinityarmy/img/_logosweb/orden_impetuosa.png[/img]1 [b]| 1.5 SWC | 150 Points |[/b] Open in Infinity Army
[img]https://assets.infinitythegame.net/infinityarmy/img/_logosweb/logo_104.png[/img][b] Neoterran Capitaline Army[/b]
[img]https://assets.infinitythegame.net/infinityarmy/img/_logosweb/104/logo_2.png[/img] [b]FUSILIER Lieutenant[/b] Combi Rifle / Pistol, Knife. (0 | [b]10[/b])
[img]https://assets.infinitythegame.net/infinityarmy/img/_logosweb/104/logo_2.png[/img] [b]FUSILIER[/b] HMG / Pistol, Knife. (1 | [b]18[/b])
[img]https://assets.infinitythegame.net/infinityarmy/img/_logosweb/104/logo_2.png[/img] [b]FUSILIER Paramedic (MediKit)[/b] Combi Rifle / Pistol, Knife. (0 | [b]12[/b])
[img]https://assets.infinitythegame.net/infinityarmy/img/_logosweb/104/logo_2.png[/img] [b]FUSILIER Hacker (Hacking Device)[/b] Combi Rifle / Pistol, Knife. (0.5 | [b]18[/b])
[img]https://assets.infinitythegame.net/infinityarmy/img/_logosweb/104/logo_2.png[/img] [b]FUSILIER[/b] Combi Rifle / Pistol, Knife. (0 | [b]10[/b])[img]https://assets.infinitythegame.net/infinityarmy/img/_logosweb/104/logo_12.png[/img] [b]SIERRA DRONBOT[/b] HMG / Electric Pulse. (1 | [b]25[/b])
[img]https://assets.infinitythegame.net/infinityarmy/img/_logosweb/104/logo_14.png[/img] [b]FUGAZI DRONBOT[/b] Flash Pulse, Sniffer / Electric Pulse. (0 | [b]8[/b])
[img]https://assets.infinitythegame.net/infinityarmy/img/_logosweb/104/logo_24.png[/img] [b]LOCUST[/b] Boarding Shotgun, Grenades, Drop Bears / Pistol, Shock CCW, Knife. (0 | [b]30[/b])
[img]https://assets.infinitythegame.net/infinityarmy/img/_logosweb/104/logo_20.png[/img] [b]MACHINIST[/b] Combi Rifle, D-Charges / Pistol, Knife. (0 | [b]15[/b])
[img]https://assets.infinitythegame.net/infinityarmy/img/_logosweb/104/logo_23.png[/img] [b]WARCOR (Sixth Sense L1)[/b] Flash Pulse / Stun Pistol, Knife. (0 | [b]3[/b])
[img]https://assets.infinitythegame.net/infinityarmy/img/_logosweb/orden_regular.png[/img]9 [img]https://assets.infinitythegame.net/infinityarmy/img/_logosweb/orden_irregular.png[/img]1 [b]| 2.5 SWC | 149 Points |[/b] Open in Infinity Army
Deployment
My opponent puts a Locust on the left console, backed up by a Fugazi, the Machinist, and a Warcor. His link team comes down on my right. His reserve model was a TR HMG bot, which came down on the left.
Here’s where I lose the game. I deploy a little too conservatively in some places and too aggressively elsewhere. I put my Moderators watching my beacon in the center my deployment zone. On my left, Zero Cool the Interventor, the Lunokhod, and Cereal Killer the Bandit AHD. On the right, Acid Burn (Zero Minelayer), backed up by the Transductor Zond and a Morlock. Acid Burn’s mine covers the right console, and Cereal Killer is poised to beep boop the left console.
Turn 1
Top of Turn 1 – NCA
The link team advances without any AROs. I deployed way too conservatively and should’ve had some stuff covering their approach. After they’ve gotten forward a bit, he moves the Fugazi into range of the TR bot and then buffs the TR bot with his Fusilier hacker. The TR bot puts a wound on the Lunokhod, because I think that was the only thing I left out to ARO either flank with its glue cannon. He pushes the link up a little further, tries to take out the Morlock but I manage to get some smoke off, and then he passes the turn after chucking a drop bear to cover Cereal Killer’s approach.
Bottom of Turn 1 – Nomads
The Morlock lands some smoke, dashes through it, and engages the HMG Fusilier in CC. This was a huge mistake on my part. I was so concerned with getting rid of the HMG Fusilier that I just ran the Morlock straight at him, when really I should’ve chain-rifled his link team. I probably could’ve gotten at least 2-3 of them, including the HMG guy, from the elevated position that the HMG Fusilier was at. Furthermore, the Morlock has an E/M CCW, so he can’t kill anything in CC anyway! D’oh! Morlock gets shot off the table after rolling a 3 in CC. I spend the rest of my orders trying to get a shot on the Fusilier HMG with Acid Burn and manage to do so, but she dies the firefight. I can’t really walk Cereal Killer around the corner due to the Drop Bear, so I end up burning her order. If only I had taken the KHD profile! I could’ve spent the order cybermasking. Alas.
Turn 2
Top of Turn 1 – NCA
He proceeds to walk the link team up, pushes the right button, and loses the HMG guy to Acid Burn’s mine. The link team just proceeds to advance up the board and takes out my entire right flank and midfield, leaving me just with Zero Cool and Cereal Killer.
Bottom of Turn 1 – Nomads
I attempt to bring in a Tomcat to push the right button too, but dumb ol’ me didn’t read the scenario! I can’t push an already pushed button. Oh well. I stuck out my hand and conceded the game.
Game 3 Notes
- General Notes:
- Read the scenario, dummy!
- 150 point games are weird after spending a ton of time at 300.
- Linked HMGs are very, very strong in 150 points, especially if one doesn’t have a strong plan to deal with them.
- Should’ve left more things out to ARO.
- Needed to counter the link team harder, probably with the Tomcat in turn 2.
- I don’t like the Bandit AHD profile because it doesn’t have Cybermask. I just used it because I figured I should use some SWC. I’d rather take the FO over the AHD profile, because I really need the Bandit to be able to go anywhere and do anything. Cereal Killer is rapidly becoming a key problem solver for me.
- Not using Morlocks right yet! Too used to being more conservative and surgical with Jaguars. Need to just use them as angry throwaway chain rifles.
- Notes on the Lunokhod
- Need to bring an engineer if I have attack remotes.
- An isolated ARO with the glue cannon is pretty meh.
Overall First Impressions
Well, I can tell you that my opponents really like killing the Lunokhod quickly! I think I’m going to try taking the flamethrower version, and making it really hard to dig out without taking a flamethrower to the face (after having to dig the Koalas out). Three games isn’t enough to really get a feel for the unit, especially with it dying so fast. I do like the ARM and BTS stat line, and right now kinda want to take the glue gun version for some long range firepower (in spite of what I just said about the flamethrower).
I’m going to try to force myself to use it in the midfield more, because I think that’s where it excels. Just a gut feeling. I’m definitely relying heavily on the units that I’m comfortable with, as opposed to trying out the Lunokhod. This exercise kinda backfired in Game 2, but I think I can make better decisions about when and how to use use the Lunokhod in the future.
More data required! I mean games!
Lunokhod is great, highly underrated. I like both the Flamethrower and Adhesive profiles. Fantastic DZ guardian, especially with Enhanced Reaction and Salyut support.
Good report, I love the lunokhod but never get as much mileage out of him as I’d like. Giving it marksmanship with a hacker so that the flamethrower and shotgun have shock is pretty good though.
By the way, e/m CC weapons do physical damage as well as e/m. If someone is hit by one they need an arm save for the normal damage and a bts save at half bts vs the e/m.