
Panic at the Yadu
Well, the next two Late Night Wargame episodes are about ALEPH and Ariadna, so guess what Adam and I are playing! Adam broke out his Novvy Bangkok table and his very alarming objective room for a game of Panic Room.

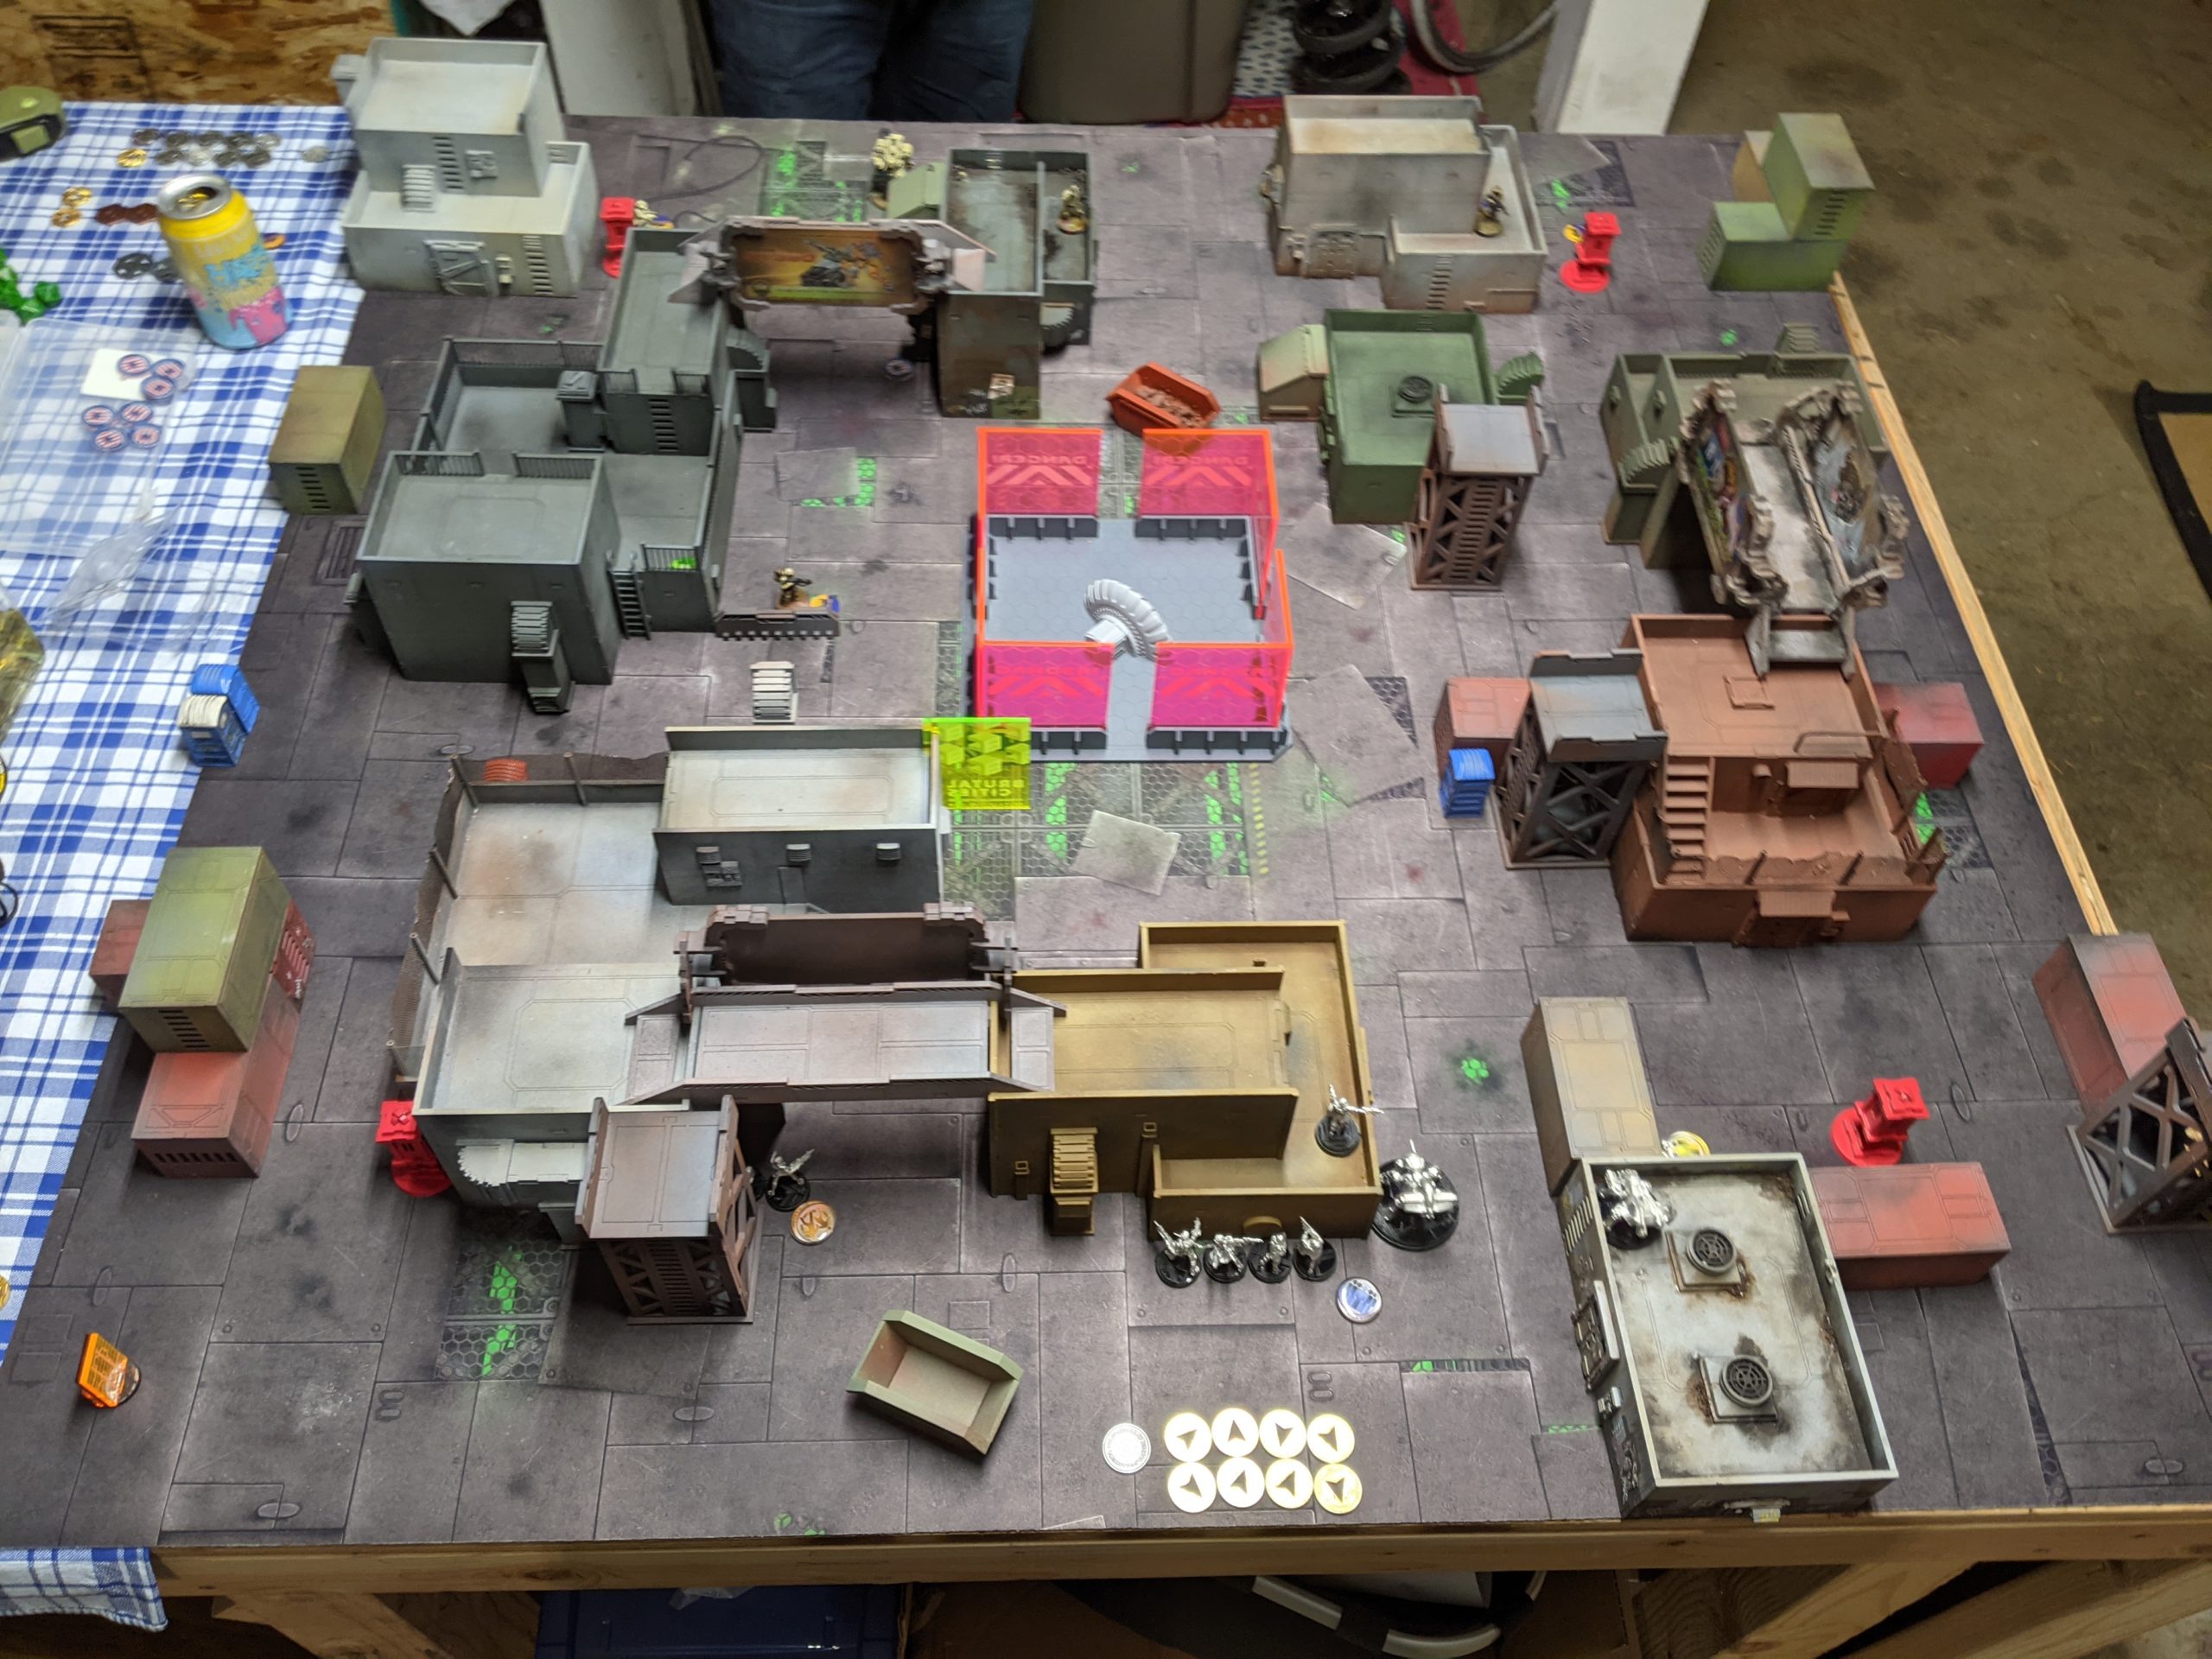
We even put one of those power generator things in the center of the Panic Room to generate an anti-Biotechvore zone, which was pretty fun and thematic.
Overview
- Mission: Panic Room
- Forces: Operations Subsection of the SSS versus USAriadnan Ranger Force
- Deploy First: USARF
- First Turn: OSS
I’ve never really wanted to play Steel Phalanx before, so I only have OSS for ALEPH. I have a few things for vanilla ALEPH, but I wanted to make heavy use of links. I thought about a few different archetypes to play. My first thought was to take a ton of HD+ and KHDs to Cybermask into IMM-2 state. This would let me cancel a lot of the templates that Adam was sure to bring out of USARF, so I was pretty enthused about that. The problem with this plan is that it encourages me to take the Asura, which isn’t bad, but it does limit the links I could build. Then I had an epiphany, which was to use abuse the daylights out of guided missiles. Deva are excellent in this context with their WIP 15 hacking, and of course Yadu aren’t bad either. After a few iterations, I ended up with the following:
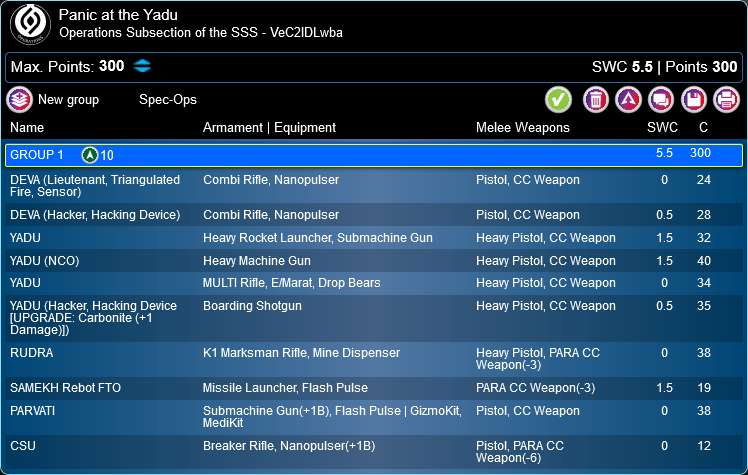
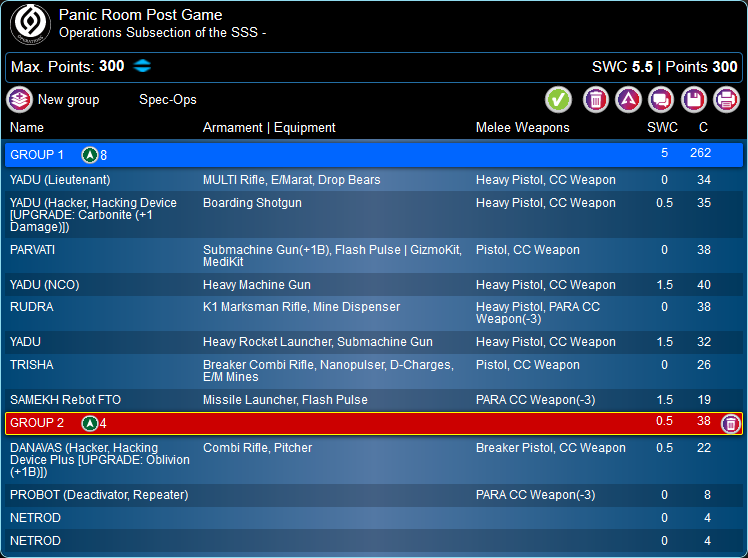
I took a Deva Sensor Lt to reveal any pesky Foxtrots, a Deva Hacker to Spotlight things, all the Yadu heavy weapons, and my favorite profile–the Yadu MULTI Rifle with E/Marat and Drop Bears. The rest of the list is also amazing–Yadu Hacker for redundancy, Rudras for board control, its Repeater, and K1 to shoot the Biotechvore antenna/console things. The list is of course centered around the Samekh, Parvati to keep it running, and a CSU Breaker Rifle to deal with Ariadnans.
All in all the list has EIGHTEEEN wounds for Adam to chew through. The only things that don’t count as Essential Personnel are the Rudras, the Samekh, and the CSU, which is pretty nuts. It’s also pretty points dense, so a single thing in the Panic Room easily stacks up 20-40 points. So even if Adam got a single Foxtrot in there, basically anything I could get in there would out point it.
Adam made a slight mistake in that he missed the “Confused Deployment” rule for Panic Room. This means anything wanting to deploy outside of the DZ has to make a PH -3 roll. He decided that he wanted to risk it with the following list instead of attempting to make another list. Honestly there’s a huge amount of board control in the following list. The only things that don’t start outside the deployment zone are The Unknown Ranger, the Blackjack, Wild Bill, and the Desperado, which is pretty crazy.
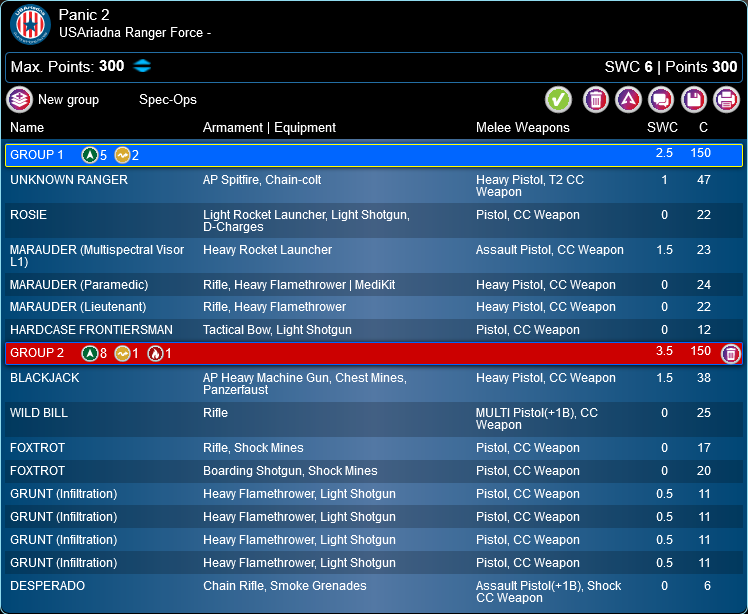
I wasn’t looking forward to trying to chew through that midfield, honestly, so I had my fingers crossed that he would fail a ton of infiltration rolls.
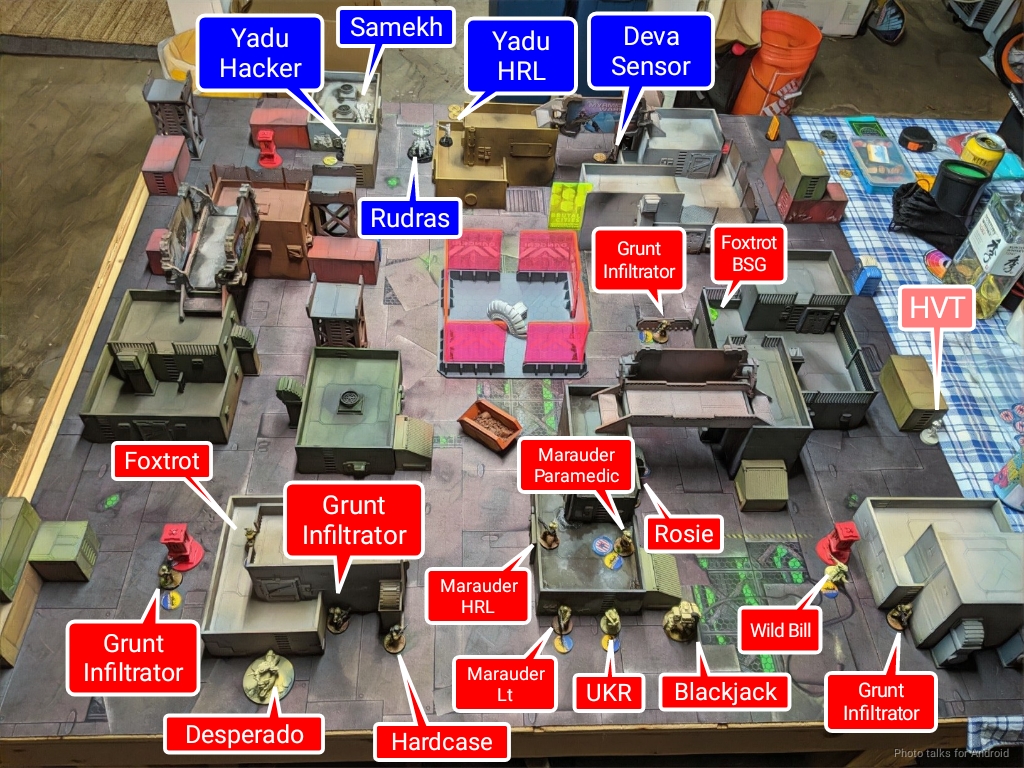
Deployment
I won the roll off and picked the least hospitable deployment zone for Adam–there was very little in the way of cover to advance and not many places to deploy within the 8″ DZ. He chose to go second, even though he was deploying first. I would probably have had to make a similar call if I was in his position.
My crossed fingers worked, and Adam failed all but two of his Confused Deployment rolls. The Marauder link ended up in the center of the his deployment zone with the rest of his stuff hanging out on either side. He left the Marauder HRL and Blackjack out to ARO, with a few smaller things like the Hardcase as I got closer.
I decided that there were a few things that I wanted to do on the first turn:
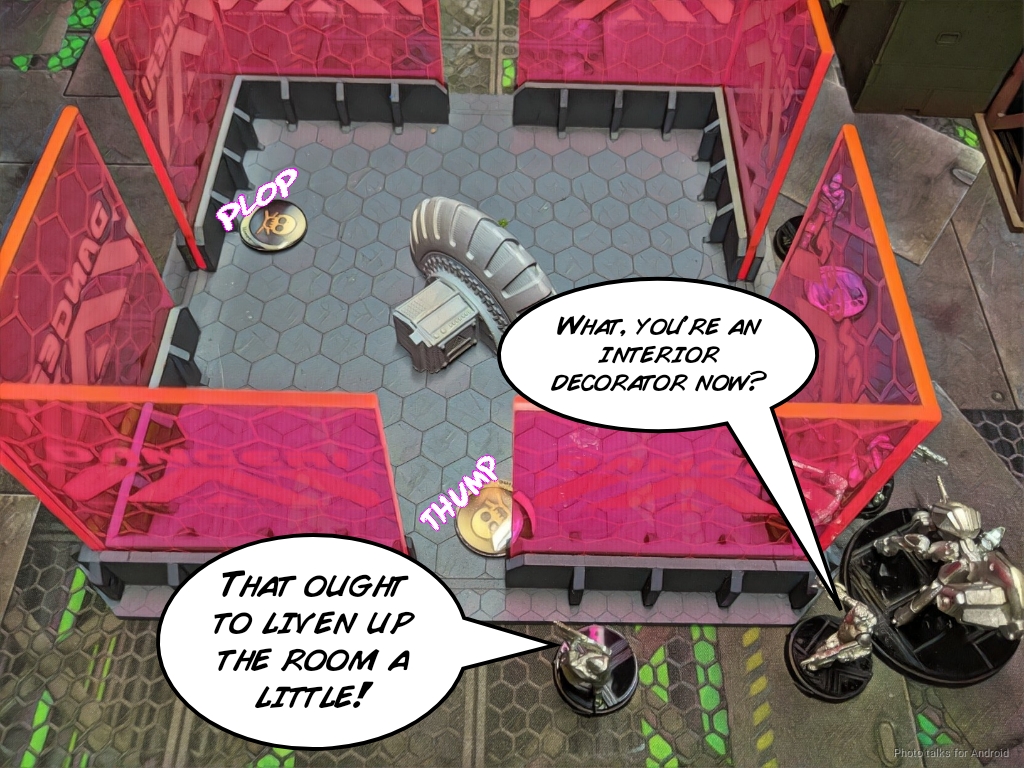
- Get stuff into the Panic Room, doesn’t super matter what.
- Mine up the Panic Room
- Drop a mine covering the UKR and the stuff in a line in Adam’s backfield.
- Sensor the Foxtrot behind the Grunt Infiltrator in the backfield
- Set up for AROs on Adam’s advancing stuff.
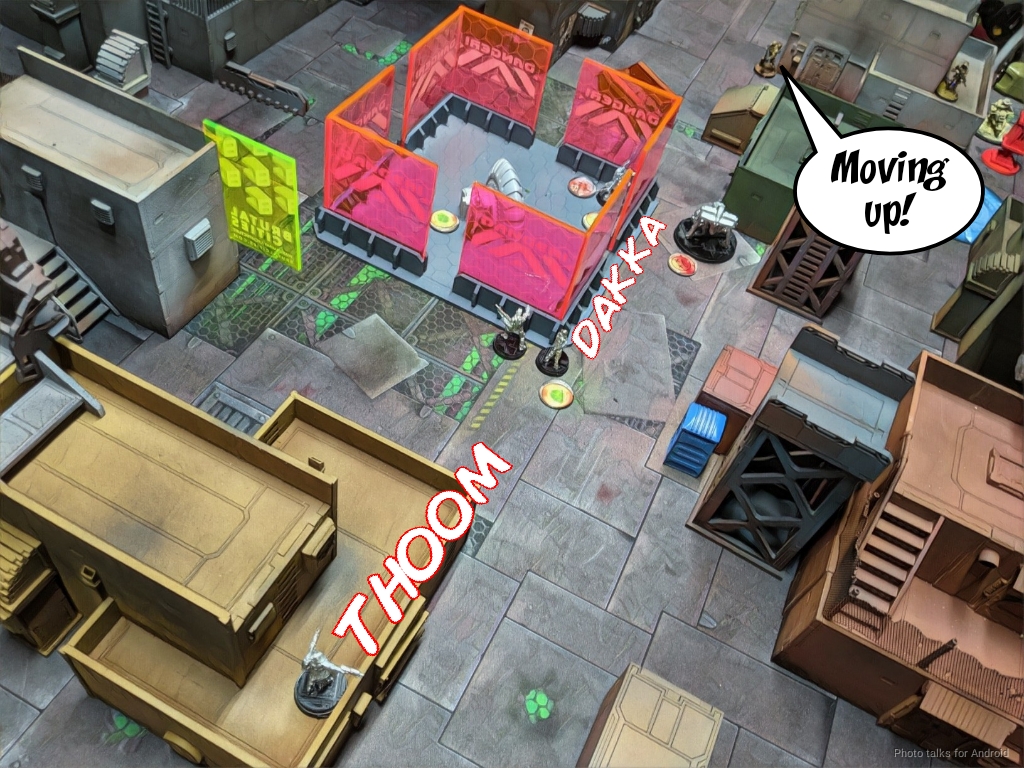
There’s no way I’m getting all of that accomplished on the first turn, but I did want to get the ball rolling. I decided to put the Yadu HRL, Yadu Hacker, and the Samekh into a Haris watching the right side of the board, as that would put the all-important Samekh in a relatively safe spot away from Adam’s heavy hitters. I decided I didn’t want to advance a 5-man link all the way up on the left side fighting Rosie and the Blackjack, so I put everything on the right and ready to advance. The 8″ deployment zone really cramped everything, but I was reasonably happy with things.
The CSU and Deva Sensor went on the left, ready to advance and sensor the Foxtrot. There was also an easy path forward if I needed the CSU’s double nanopulsars in the Panic Room.
Turn 1
Top of 1 – OSS
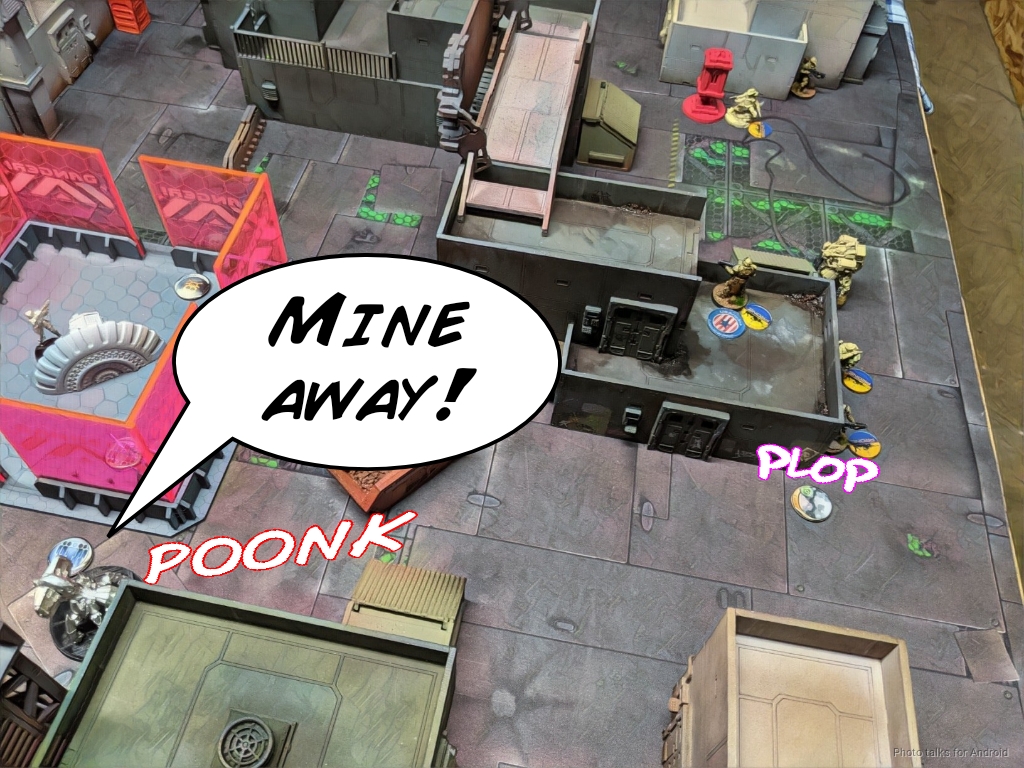
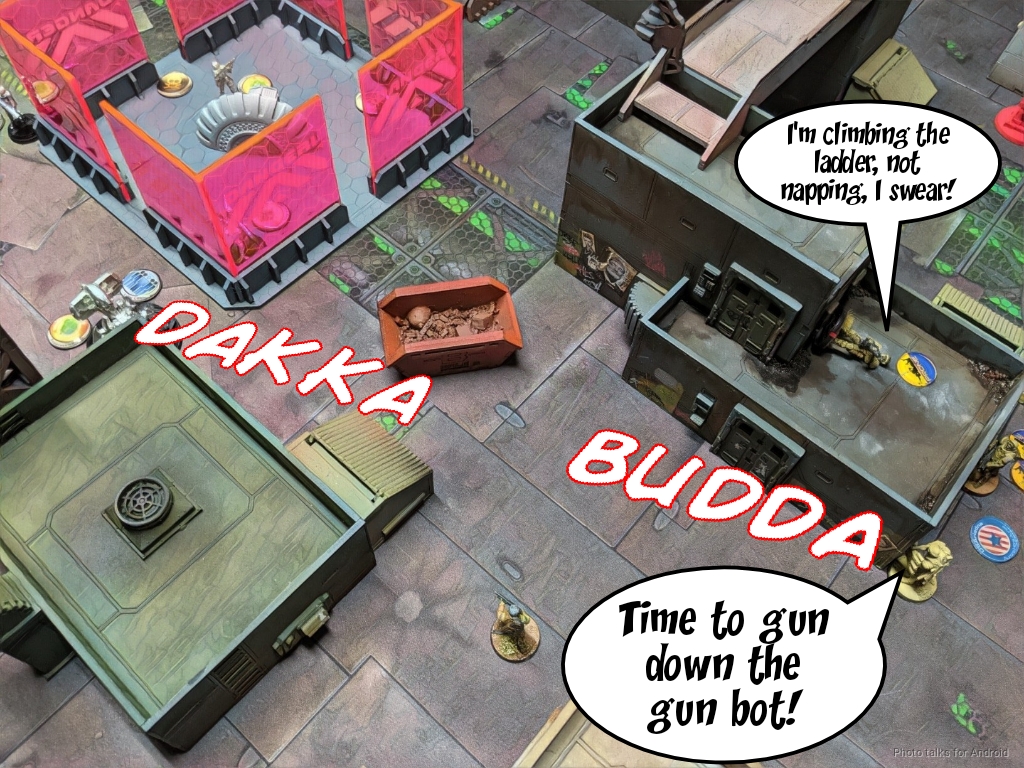
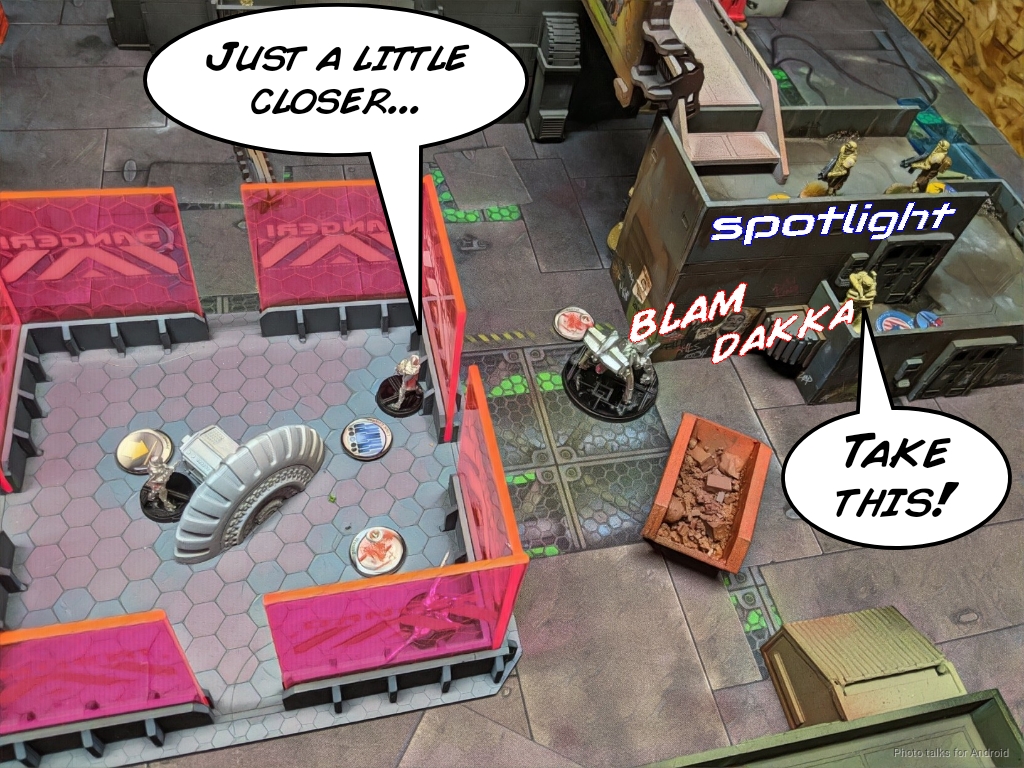
I start things off by advancing a 5-model link of the Rudras, Yadu HMG, Yadu MULTI, Deva Hacker, and Parvati up the board. The Yadu MULTI chucks a pair of Drop bears into the room and then I push the Yadu HMG forward to challenge the Marauder HRL.
We’re within 16″, but we’re both in 5-model links so we’re both at flat BS. I roll two crits and 3 hits, forcing a whopping SEVEN saves.
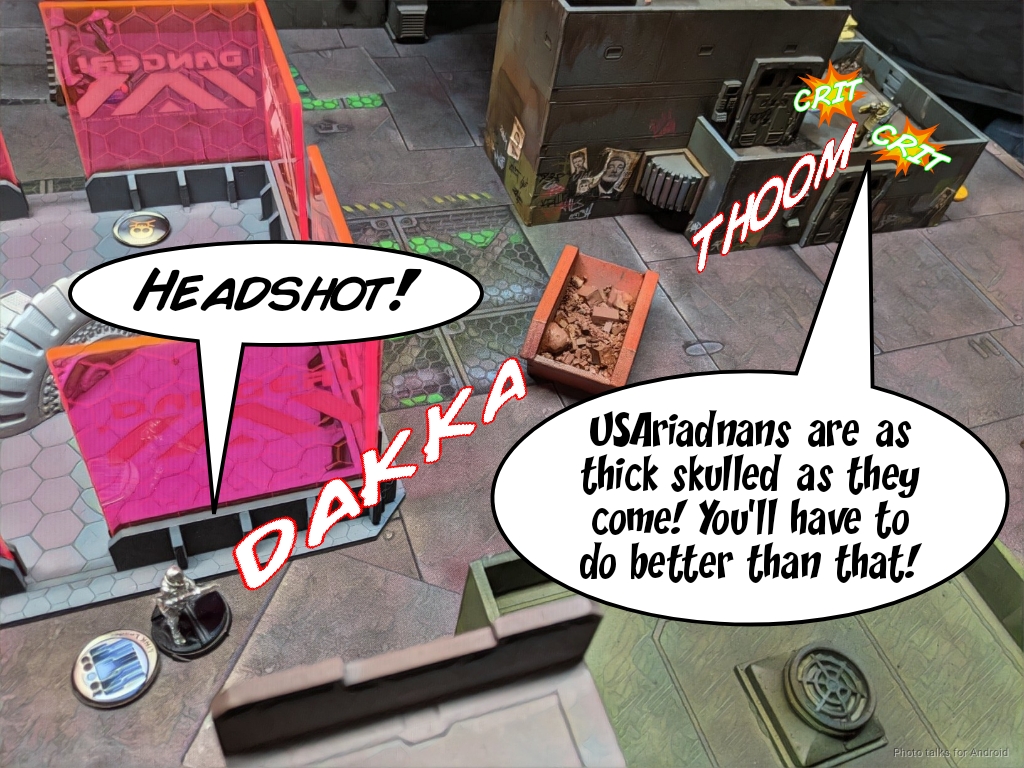
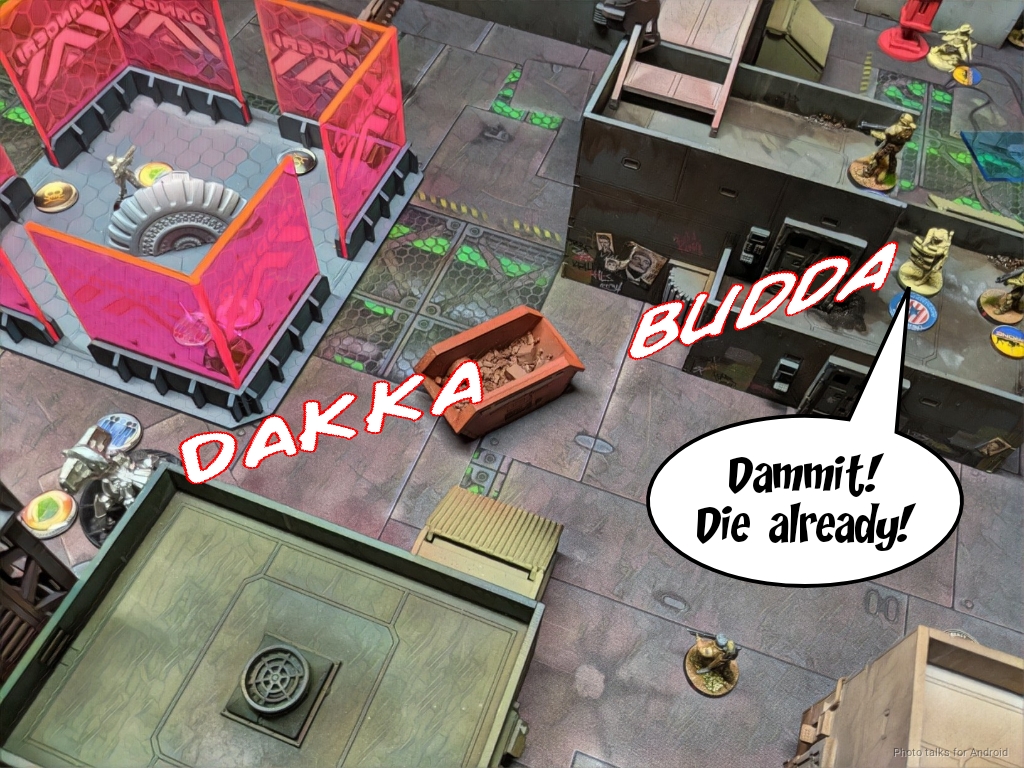
Adam passes ALL OF THEM. He needed to beat 9’s on 7 dice. If I had instead shot him with the K1 Rudras, he would’ve had to beat 10’s, so I don’t think it was a significantly better prospect. I suppose I would’ve been on 15s instead of 13s, but 5 dice on 13s still seems quite good to me.

Aww YISSSS 
OMGWTFBBQ USARF OP!

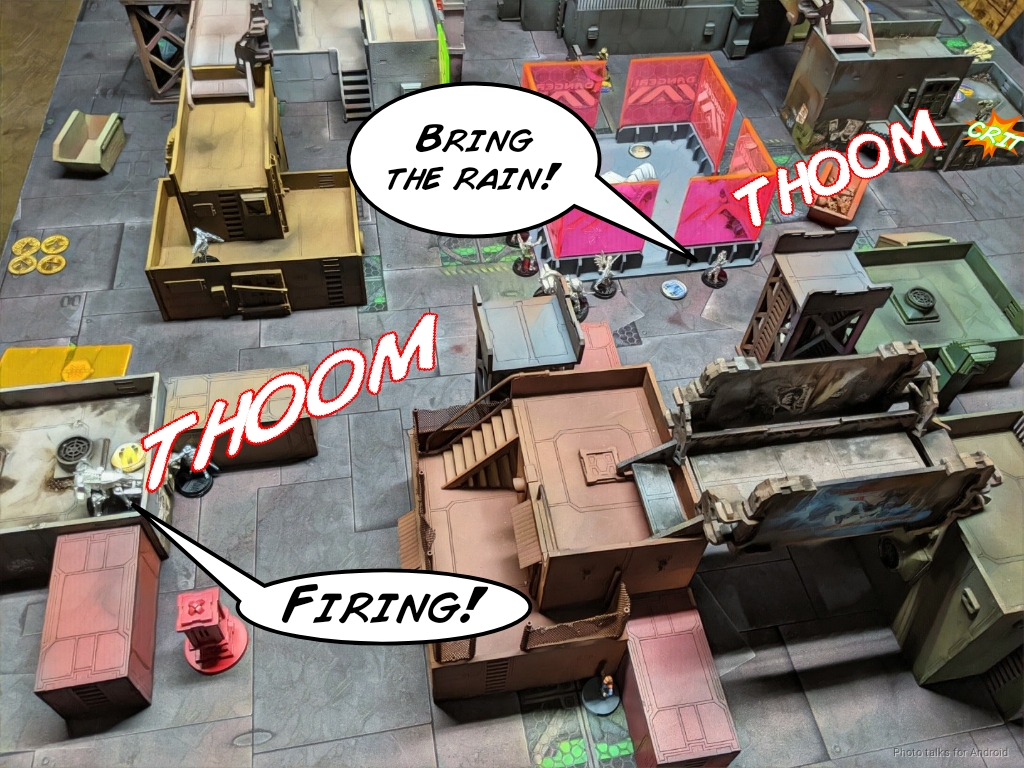
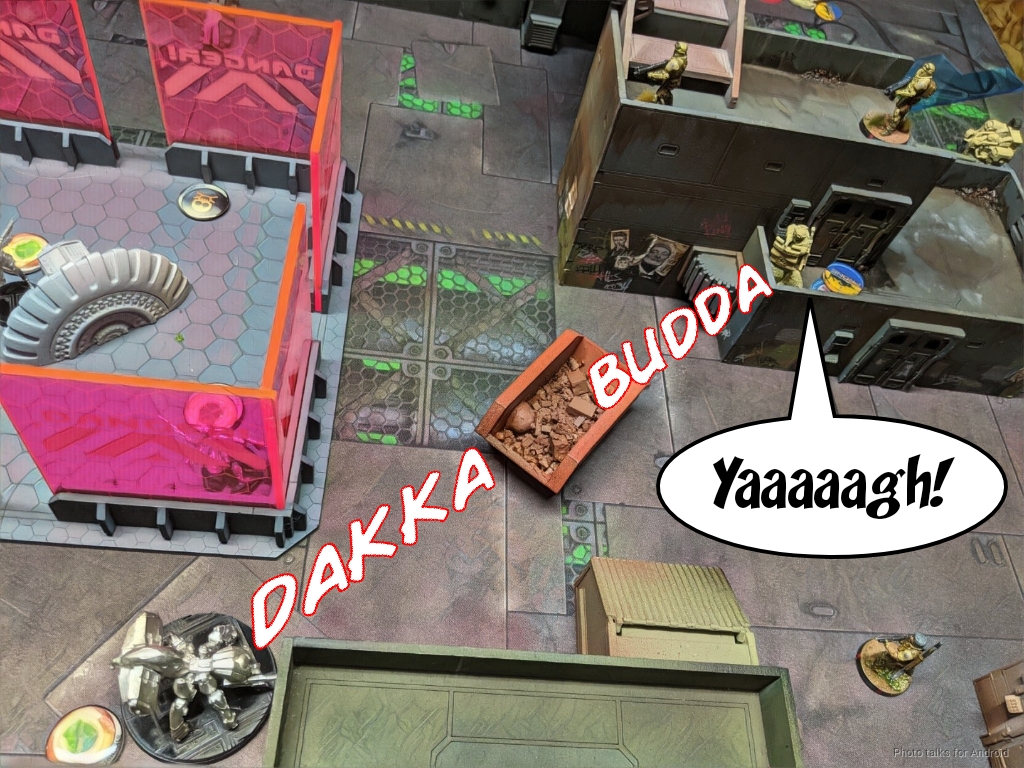
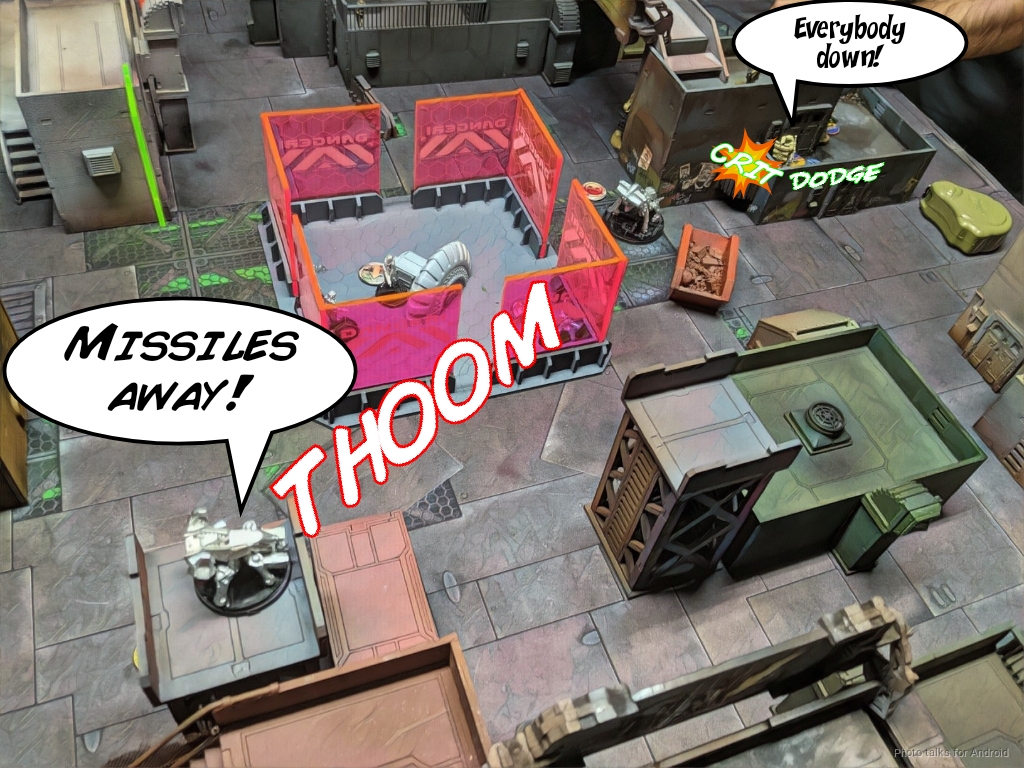
Frustrated, I try again. Adam successfully bounces all my hits, AGAIN. I decide to throw the Samekh at the problem and land a pair of missiles on the Maurader HRL, forcing six saves without cover. While Adam passes FOUR of them, he fails two and the Marauder disappears in a red mist.
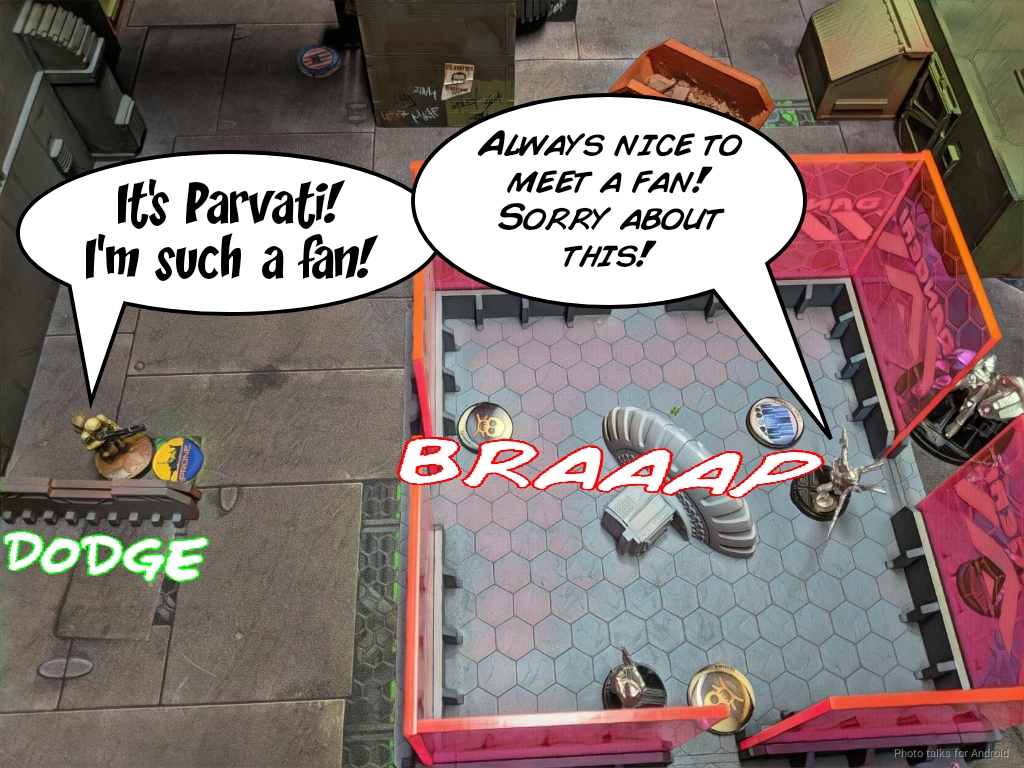
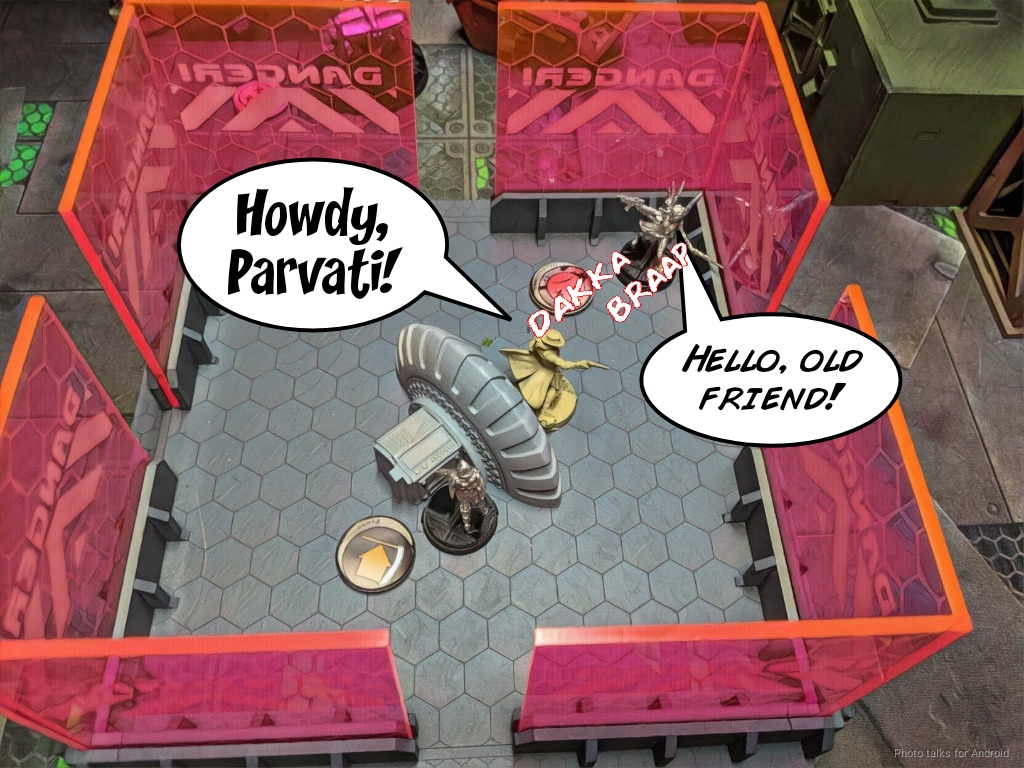
This lets me advance the link further, especially the large base of the Rudras, and I get Parvati into view of the lone Grunt Infiltrator that made his roll, gunning him down with a burst of SMG fire. I like to think that Parvati spends a lot of time signing all her bullets in case she meets a fan and wants to hand out autographs!
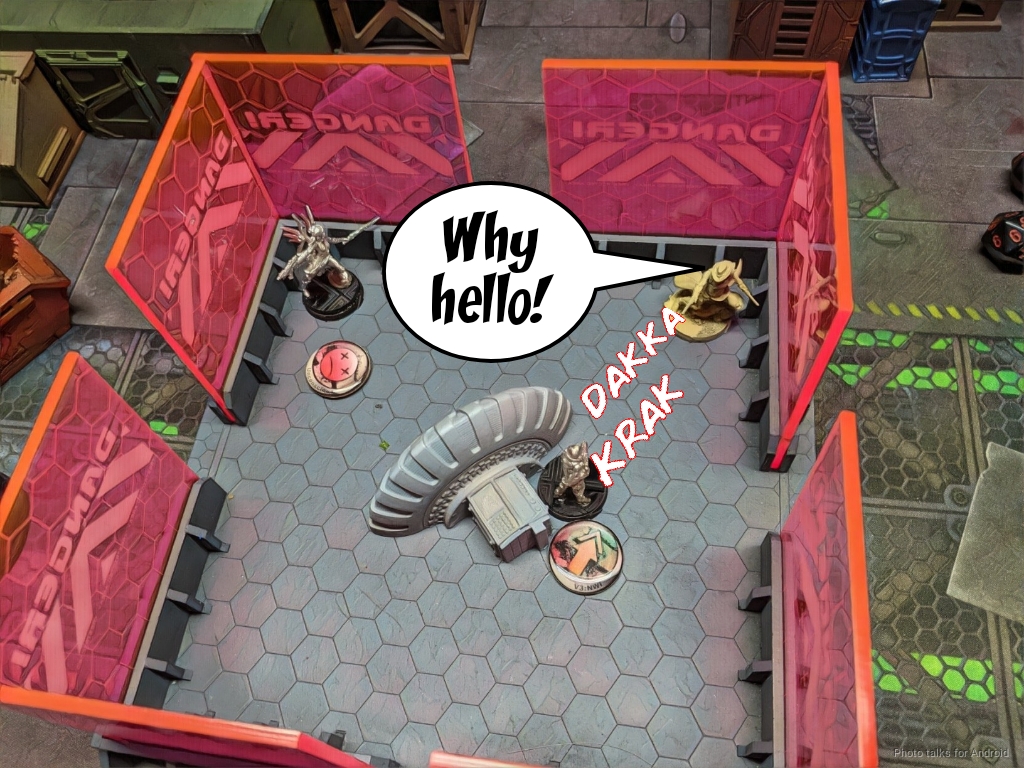
The Rudras fires a few rounds into the slightly exposed Hardcase, who dodges back into cover. I have done nowhere near enough damage to Adam, so I need to buy time. I fire a pair of mines from the Rudras, landing one covering part of his Maruader Haris and the Hardcase and flubbing one covering Rosie on the other side of the building where the Blackjack is.
With the Rudras in a nice spot, backed up by a Yadu HMG and a linked Samekh and Yadu HRL, I decide to go for the suppression play. I throw Parvati, the Yadu MULTI, the Yadu HMG, and the Rudras all into suppression and pass turn.
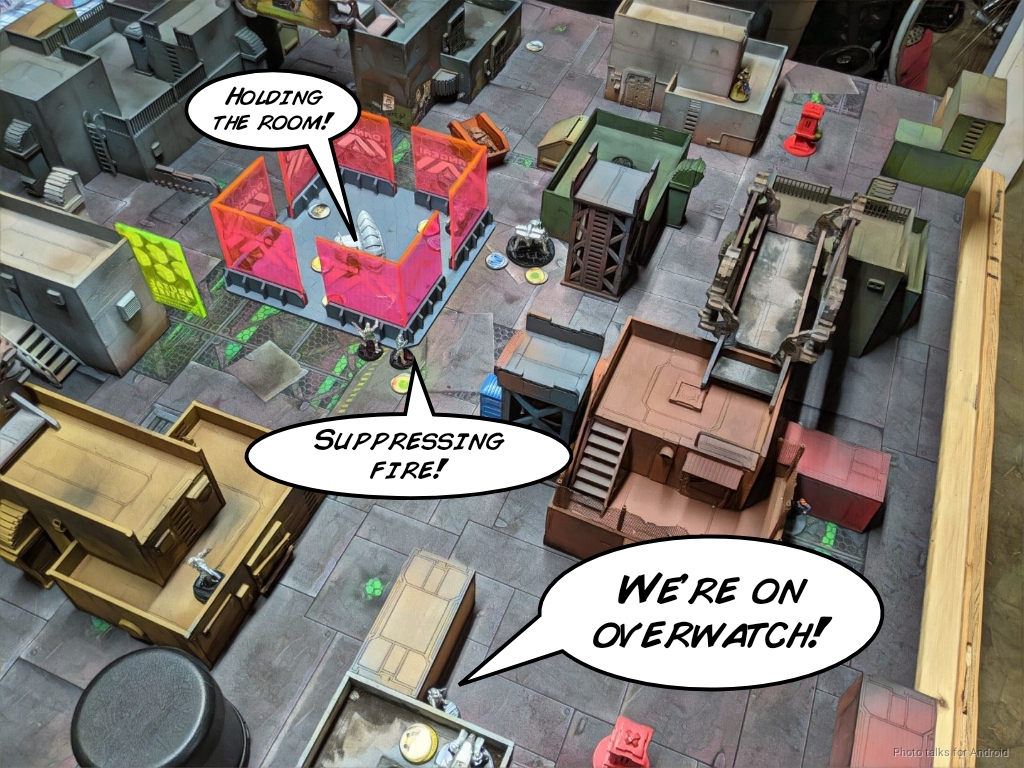
Bottom of 1 – USARF
The HRL is watching the Desperado’s advancement path, so Adam declines to use the impetuous order. Instead, he throws the Hardcase under the bus and successfully dodges HMG suppression, linked HRL, and mine shrapnel. Well then.
The Desperado sets up some smoke for the rest of Adam’s forces while scooting up a bit with its irregular order…
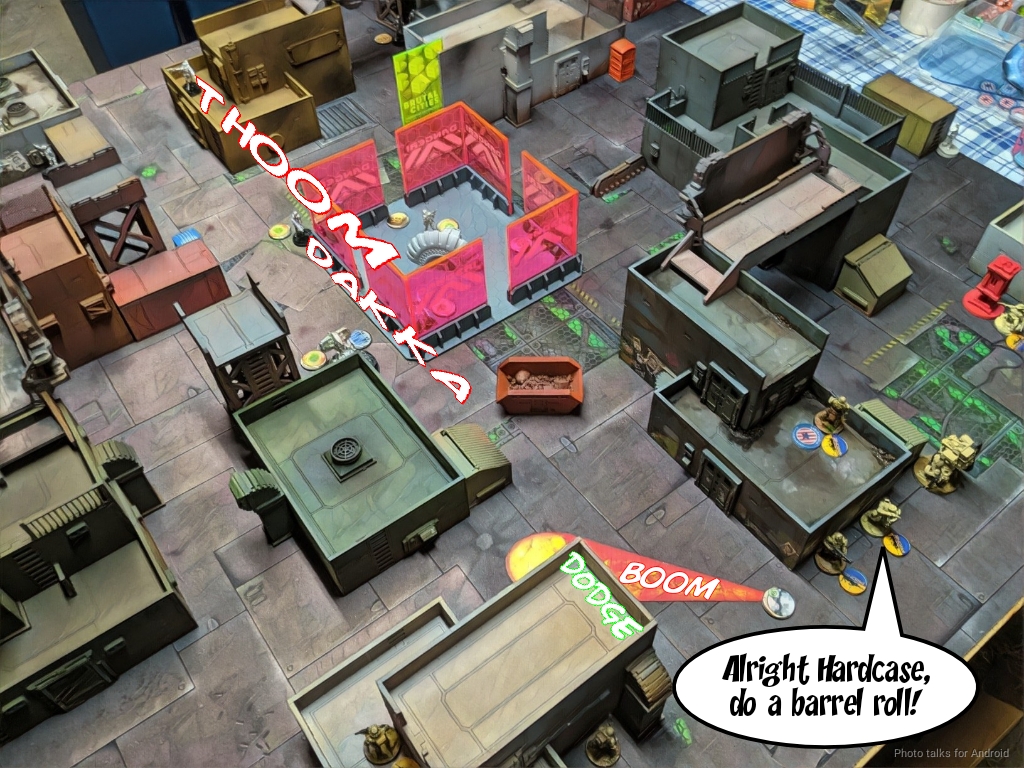
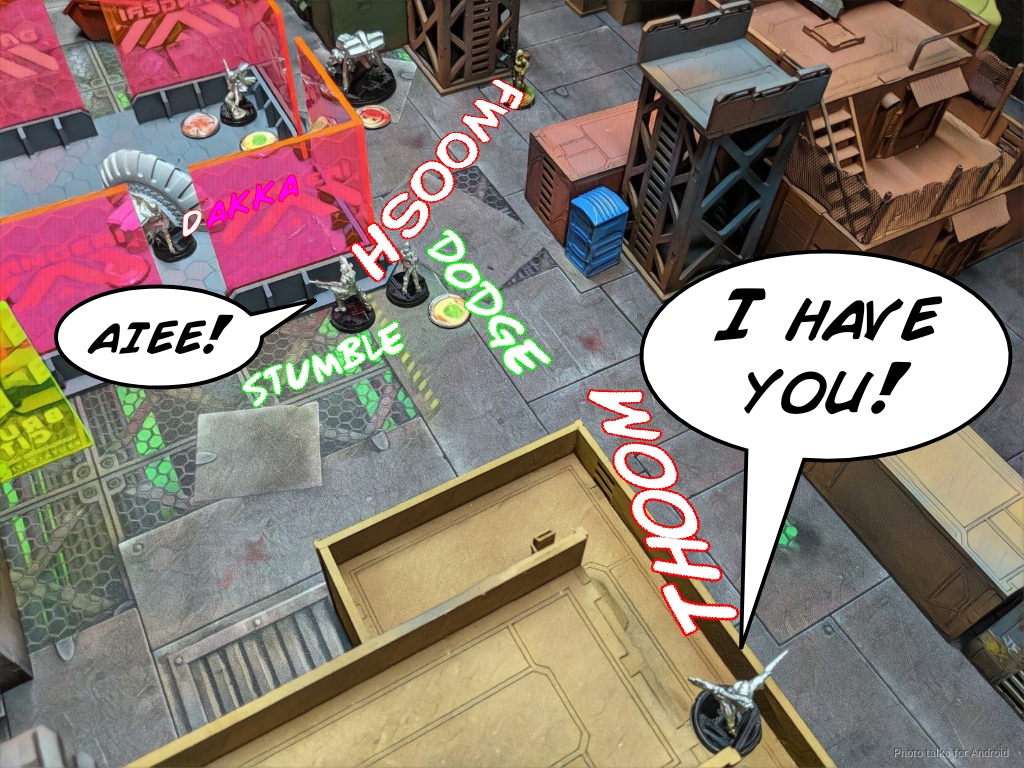
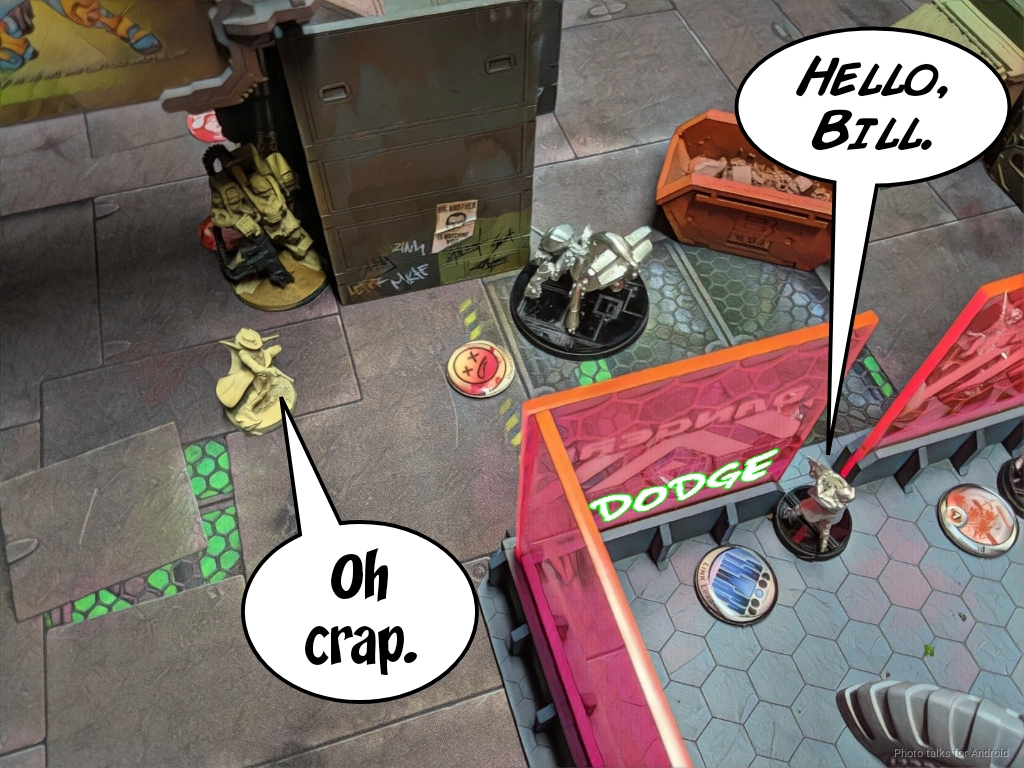
and then Adam attempts to remove the Rudras with the Unknown Ranger. I really don’t want to be shooting on 3s, but I want to keep suppression up. This turns out to be a fantastic idea, as the extra -3 to BS from suppression keeps the Rudras unscathed for the first…
second…
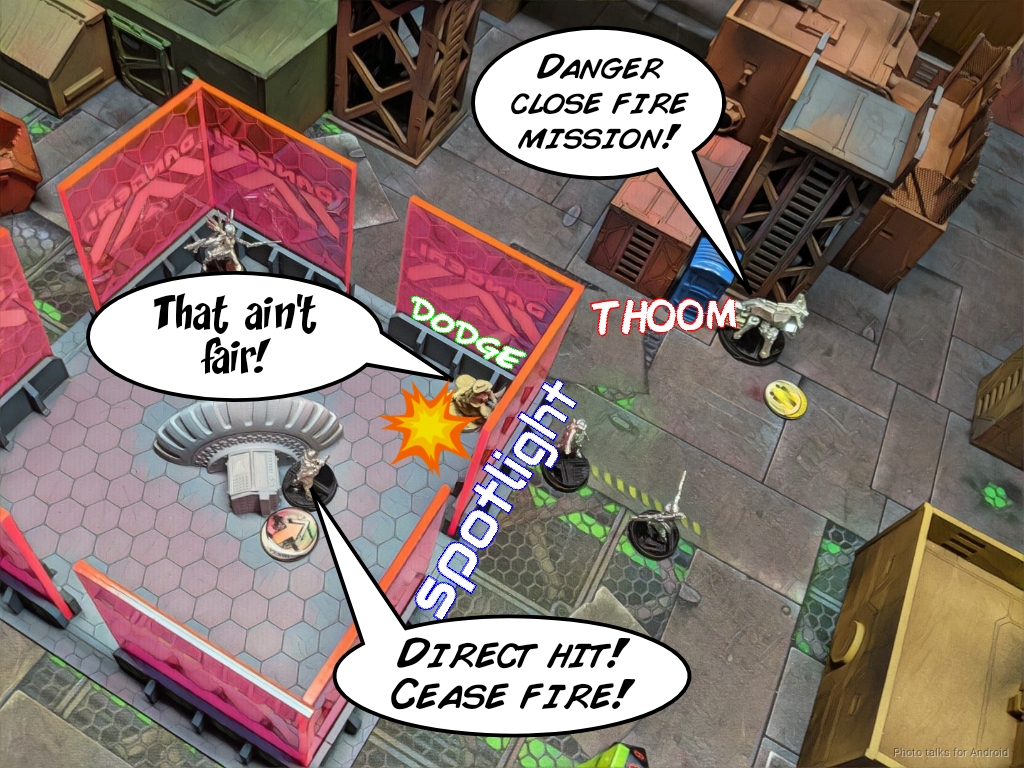
and third and I believe fourth orders spent on blasting away at the Rudras. The picture below is a bit misleading–Adam had gone prone and scooted forward to prevent having to also fight the Yadu in suppression in the room. The final burst of fire from the AP spitfire managed to do two wounds to the Rudras, knocking it out.
With the way now open, Adam dived the lucky Hardcase into the room and dropped a pair of shotgun templates on Parvati. The two mines took it out and I managed to save Parvati from death by passing one ARM save. I Spotlight the Hardcase with the nearby Deva Hacker for my classified to boot.
Adam then spends quite a few coordinated orders pushing his Grunts and other things that failed their infiltration rolls forward. One is exposed to the HRL and HMG and gets blasted to ruin.
The coordinated order does manage to get a Grunt Infiltrator into range to threaten the Yadu HMG and Deva Hacker, who both attempt to dodge the flamethrower template while the Yadu MULTI and HRL blow up the offending Grunt.
Unfortunately for me, the Deva Hacker fails his dodge and dies a firey death. The Yadu HMG dodges easily and lives to fight another day. Adam tries to gun down the Yadu MULTI with the Unknown Ranger but suppression saves me and does a wound to the UKR.
Turn 2
I hold the room with Essential Personnel and have a classified, making it a 3-0 game thus far.
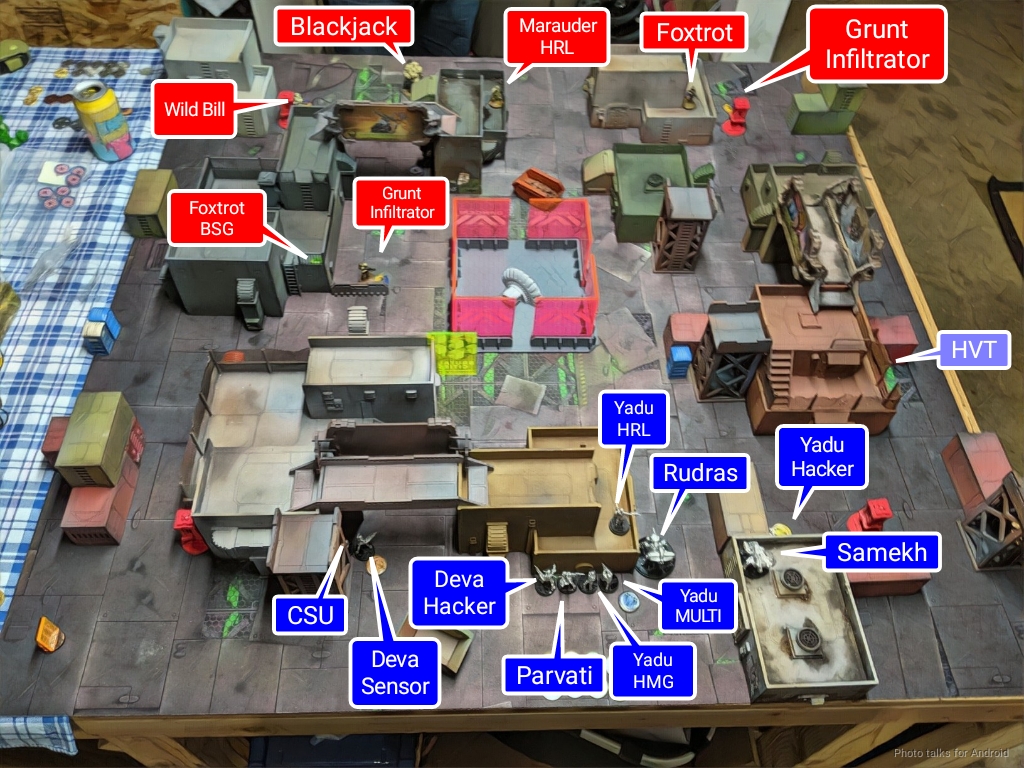
Top of 2 – OSS
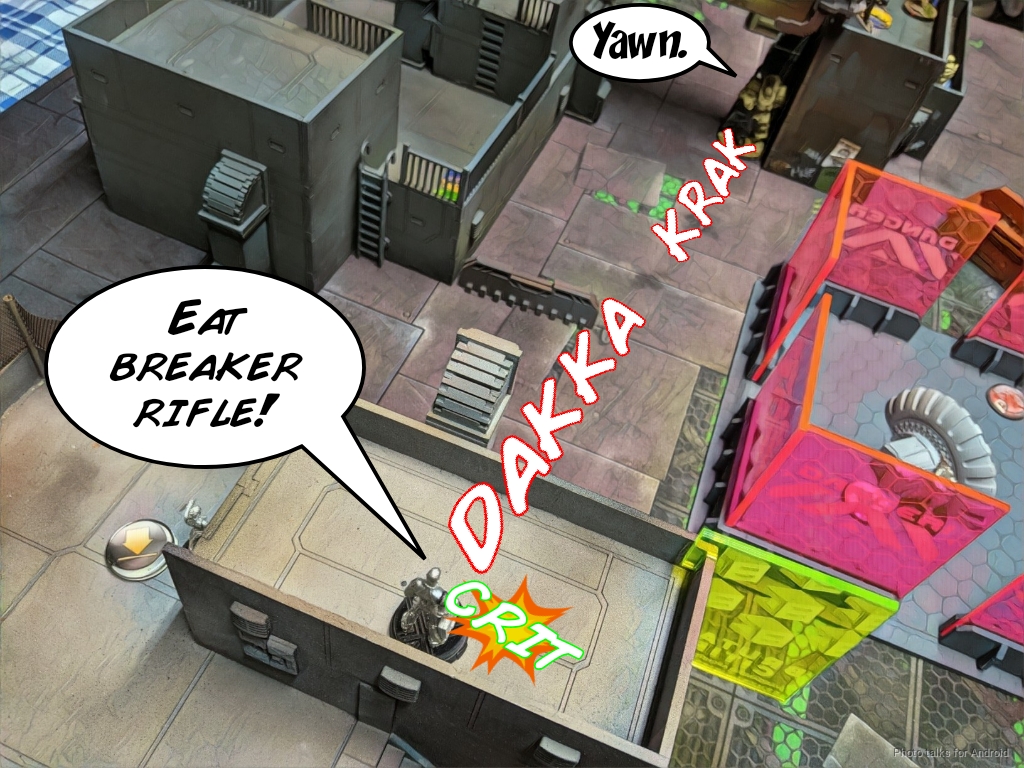
I decide to get cheeky and attempt to use the CSU’s breaker rifle to down the Blackjack as I’ll have cover for being above him in spite of all climbing nonsense. This also lets me advance the Deva Sensor near the Foxtrot and out of the encroaching biotechvore zone. I manage to roll three hits but Adam crits with the Blackjack’s HMG and I lose the CSU.
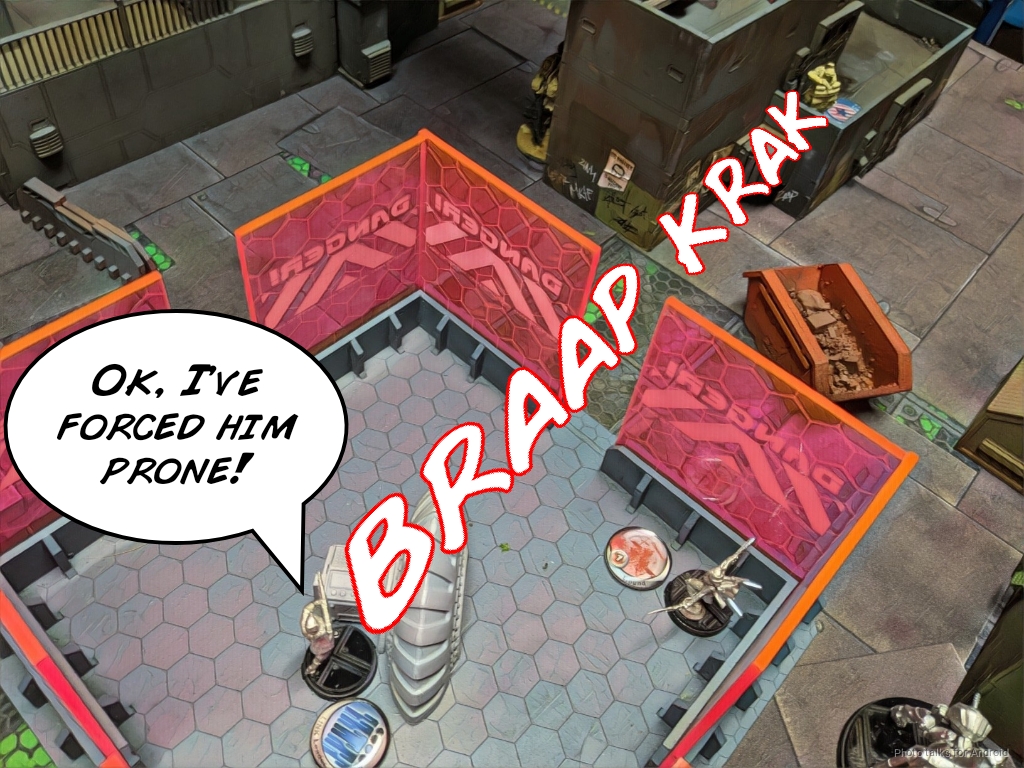
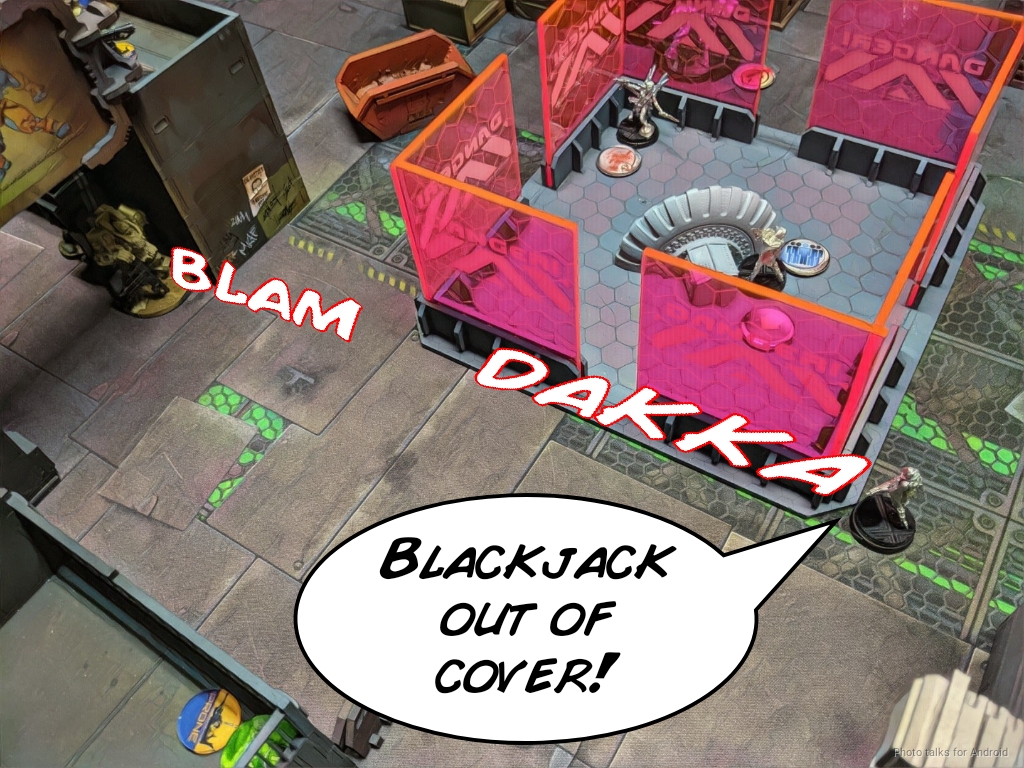
Since the Unknown Ranger is standing, I reform the link around the Yadu MULTI and force the UKR prone with some AP fire from my MULTI rifle.
This also lets me get the movement to get the Yadu HMG into view of the Blackjack. I have to break the link, as the Yadu HMG is too far from Parvati, but burst 4 HMG against a target in the open is enough to drop the Blackjack.
With the Blackjack down, it’s safe to move Parvati into base to base with the Rudras and pick it back up. I reform the link around the Yadu MULTI again and scoot the Rudras into repeater range of the Marauder link and pull everyone else back into the Panic Room.
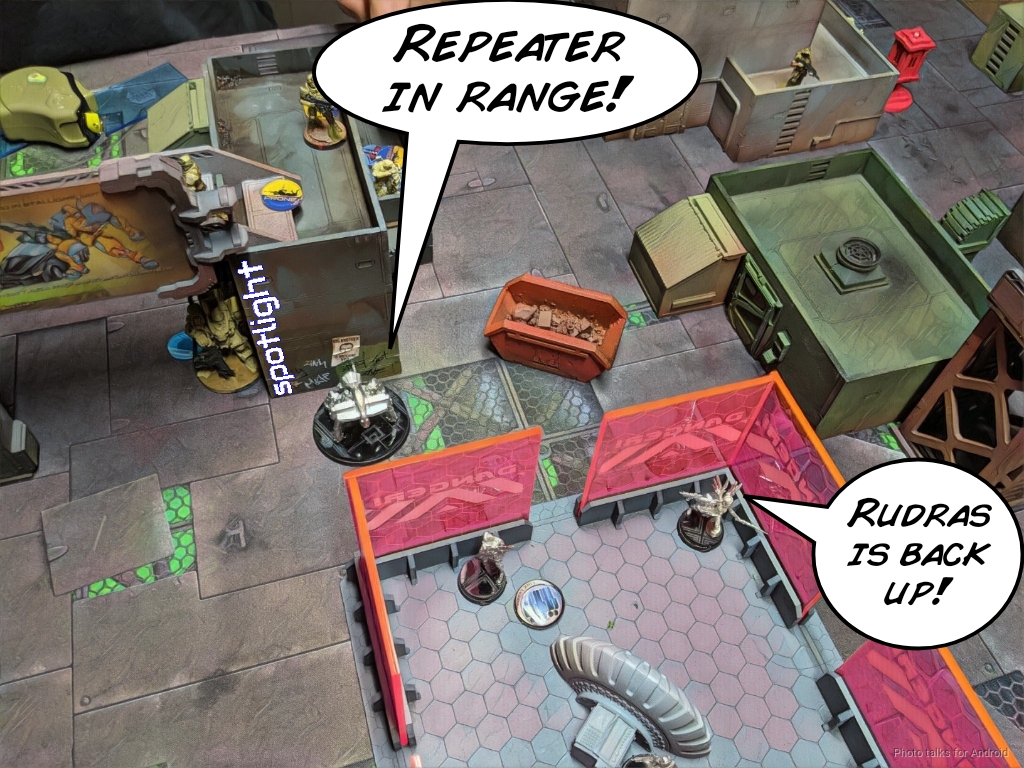
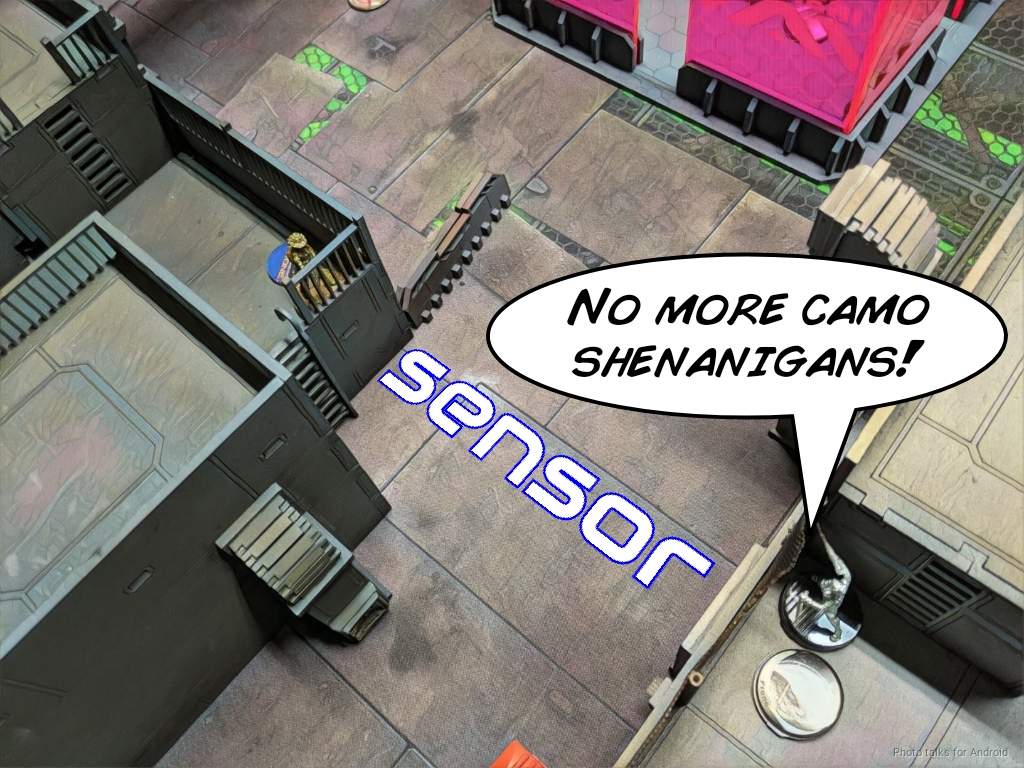
I need to shift the Yadu HRL, Yadu Hacker, and Samekh link around in the backfield to escape the incoming biotechvore zone, so I move them to safety while spotlighting Rosie, who is behind the downed Blackjack. With my last order I move the Deva Sensor into range and Sensor the Foxtrot BSG out of camo. The Yadu HRL is now watching the Foxtrot, so I’m pretty safe from any shenanigans. If Adam wants to crawl away from the Deva to recamo and then try something that’s fine with me.
Bottom of 2 – USARF
Adam decides instead to throw Wild Bill into this circus of a game. The Rudras saves against Wild Bill’s AP rifle and scoots into total cover–from Wild Bill. Adam decides to pick the Blackjack back up with the Marauder Paramedic.
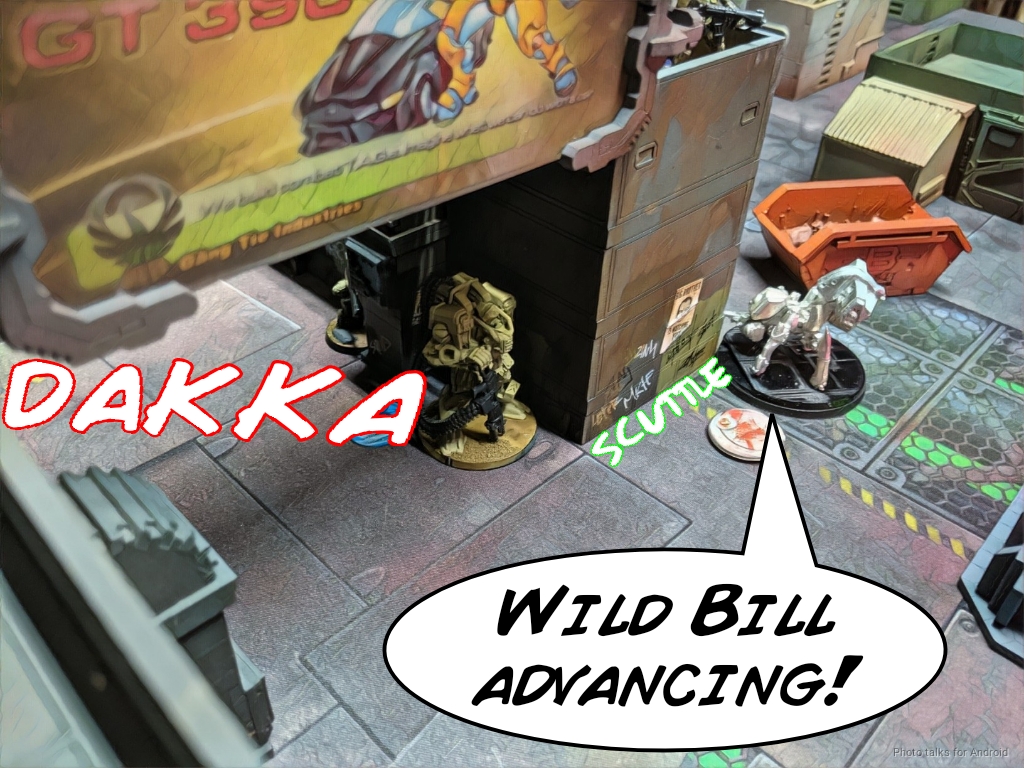
The Unknown Ranger then pops up to take out the Rudras, getting spotlit as he does so. I wanted to dodge the Yadu E/Marat into view, but we were just outside of 8″.
I do manage to do this as Wild Bill scoots closer though, threatening to E/Marat both him and the newly repaired Blackjack.
Adam wisely stops activating Bill and instead tries to take out the Yadu E/Marat with the UKR. I fend off his first attack…
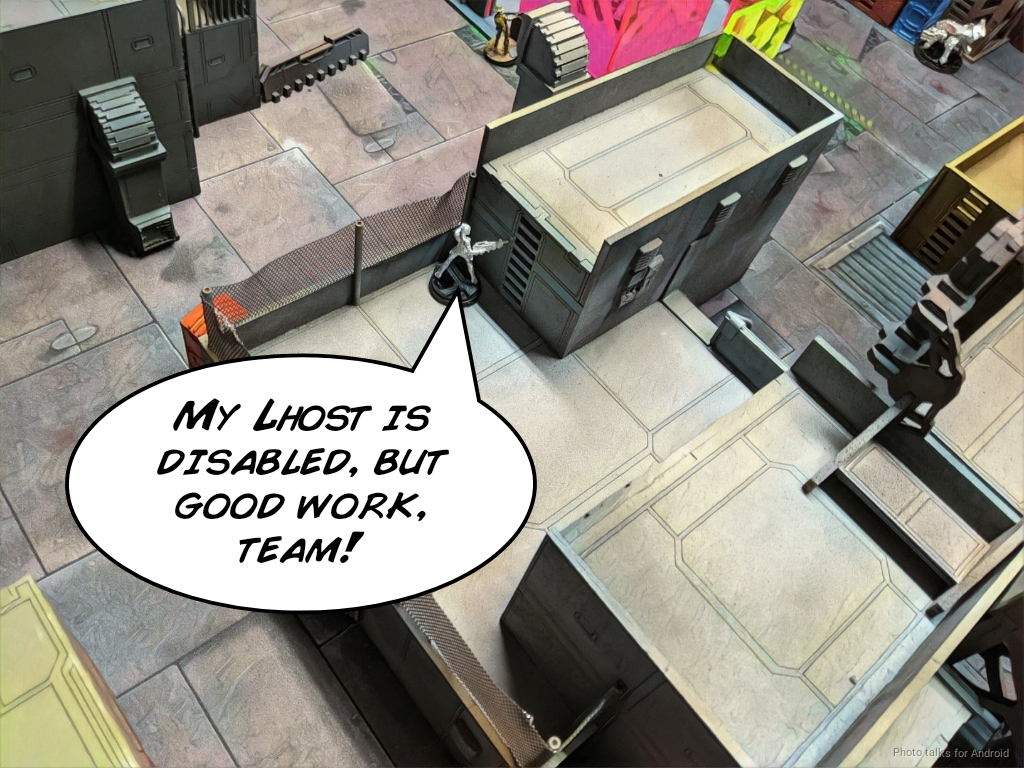
but the second takes the Yadu off the table. I think I should’ve failed guts back to safety after the first attempt. Ah well. Small optimizations.
Wild Bill dives into the room and finally drops Parvati…
but fails to down the Yadu HMG with his last order.
Adam’s last order is an attempt to reset the Marauder link out of Targeted, specifically Rosie and the UKR. Both fail.
Turn 3
I still hold the room with Essential Personnel, but Adam gets an Essential Personnel point, bringing things to a 5-1 lead for me.
Top of 3 – OSS
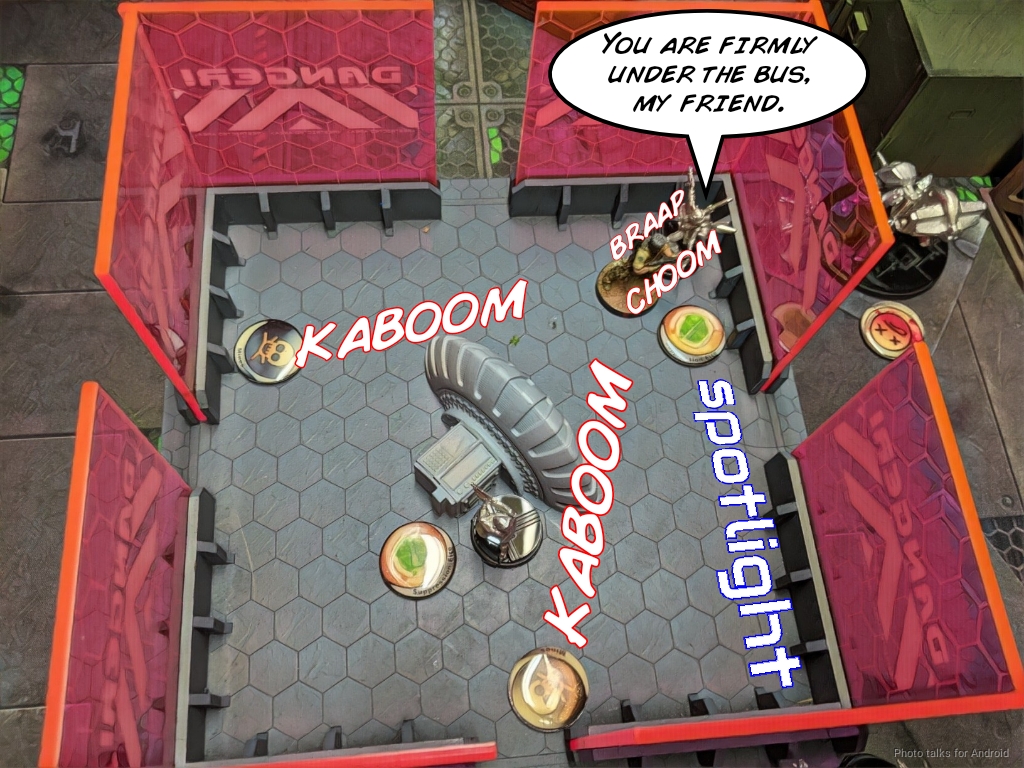
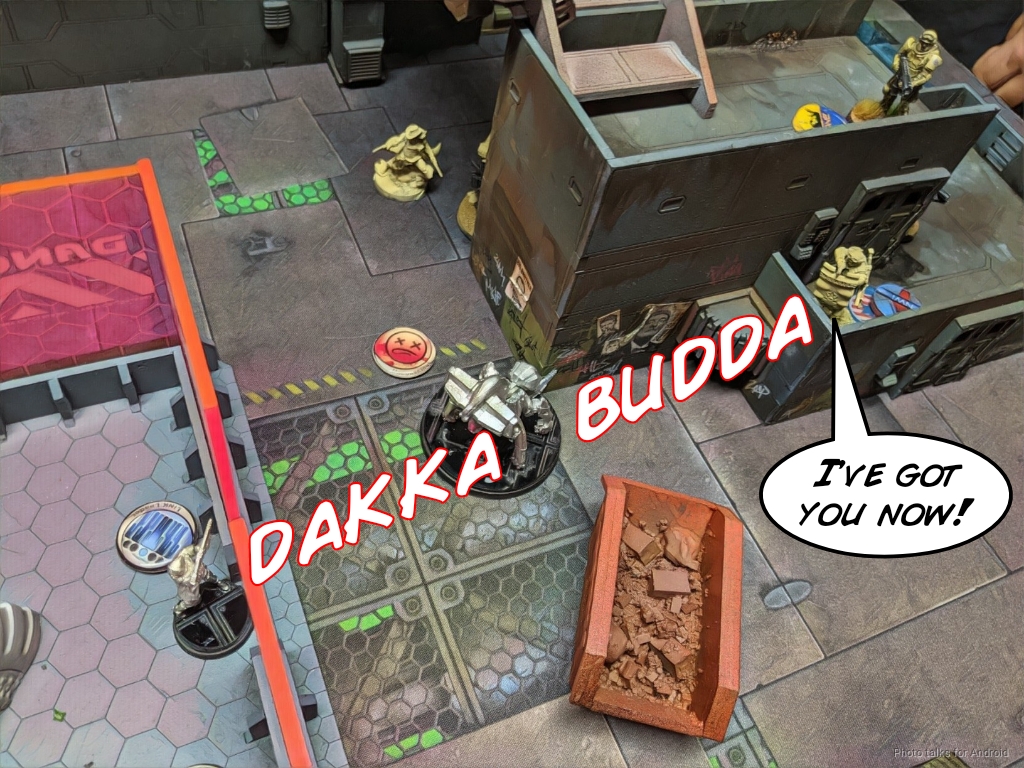
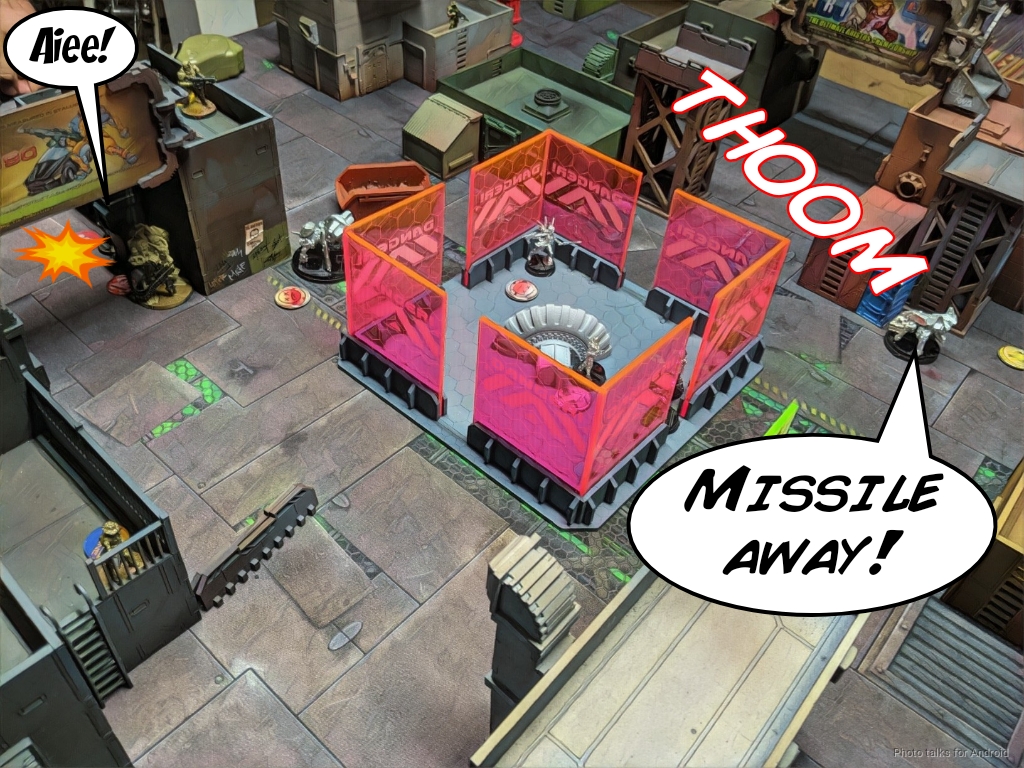
It’s time for the list to do what it was was designed for. The Haris my backfield leaves its overwatch position and the Yadu Hacker spotlights Wild Bill. The steel rain begins. The first casualty to guided missile fire is Wild Bill, cleaning out the room.
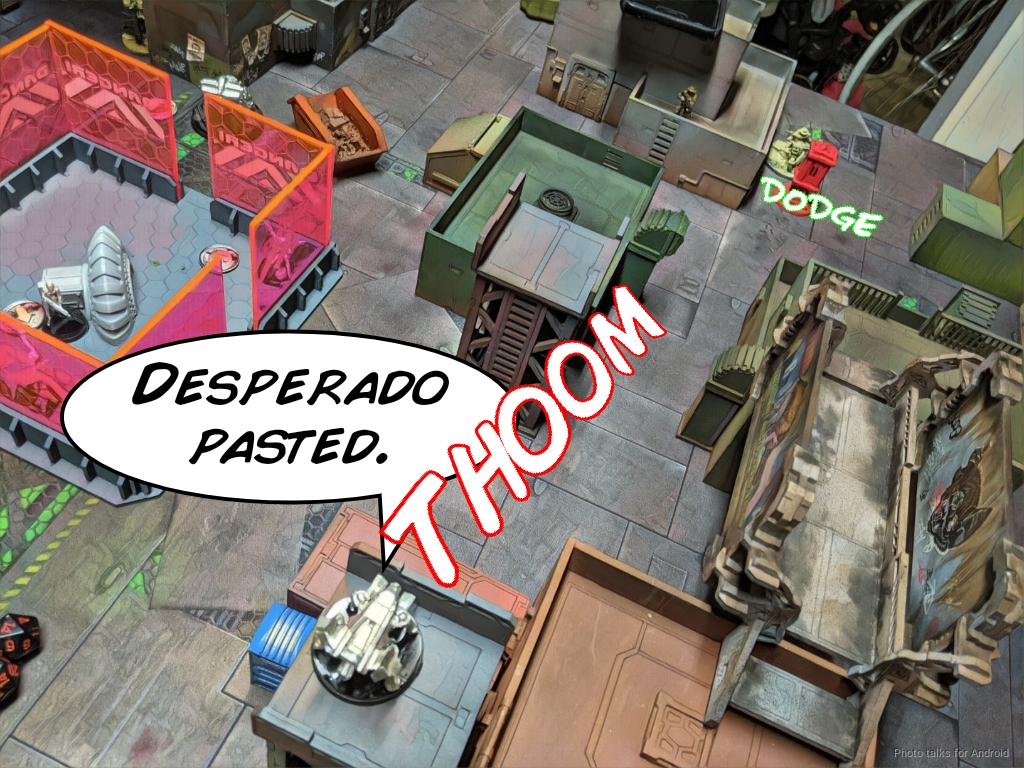
I know what Adam can do with Desperados, so I’m not giving him the option. A quick climb gets my Samekh into view and I vaporize the Desperado with a pair of missiles. Adam cheekily declared dodge to get into base to base with the protective antenna. If having any part of the Desperado in contact with the antenna was the goal, I’d say he succeeded, as there were no stipulations on the size of those parts.
The Samekh starts raining missiles on the link, first asploding the UKR…
and then Rosie.
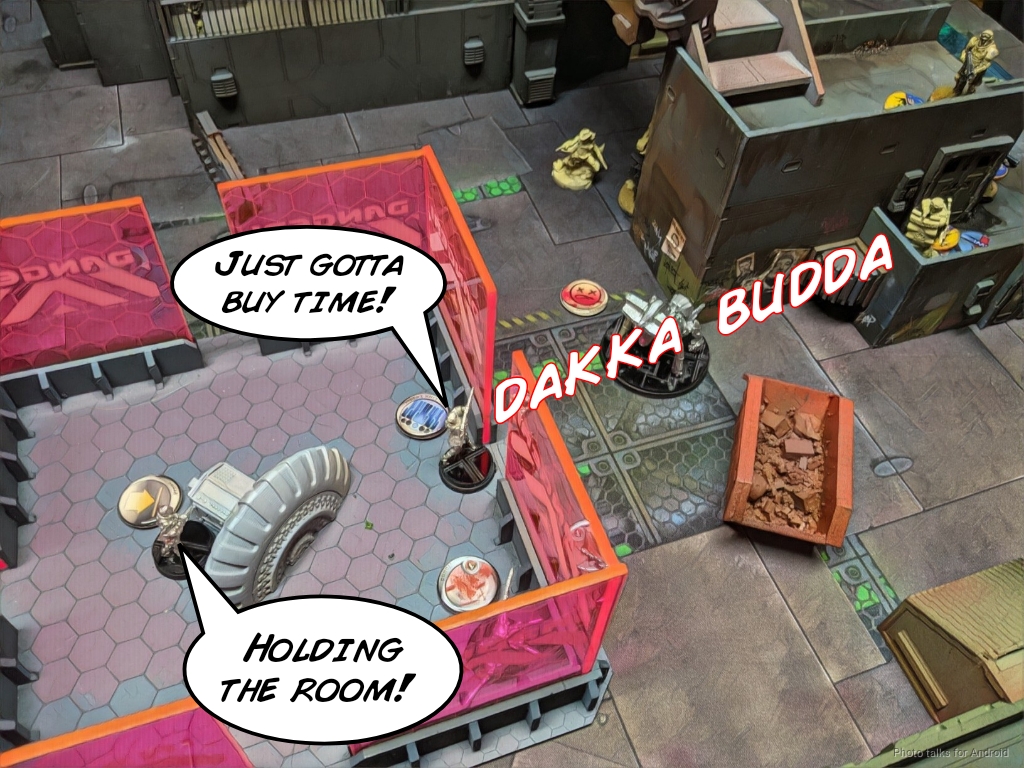
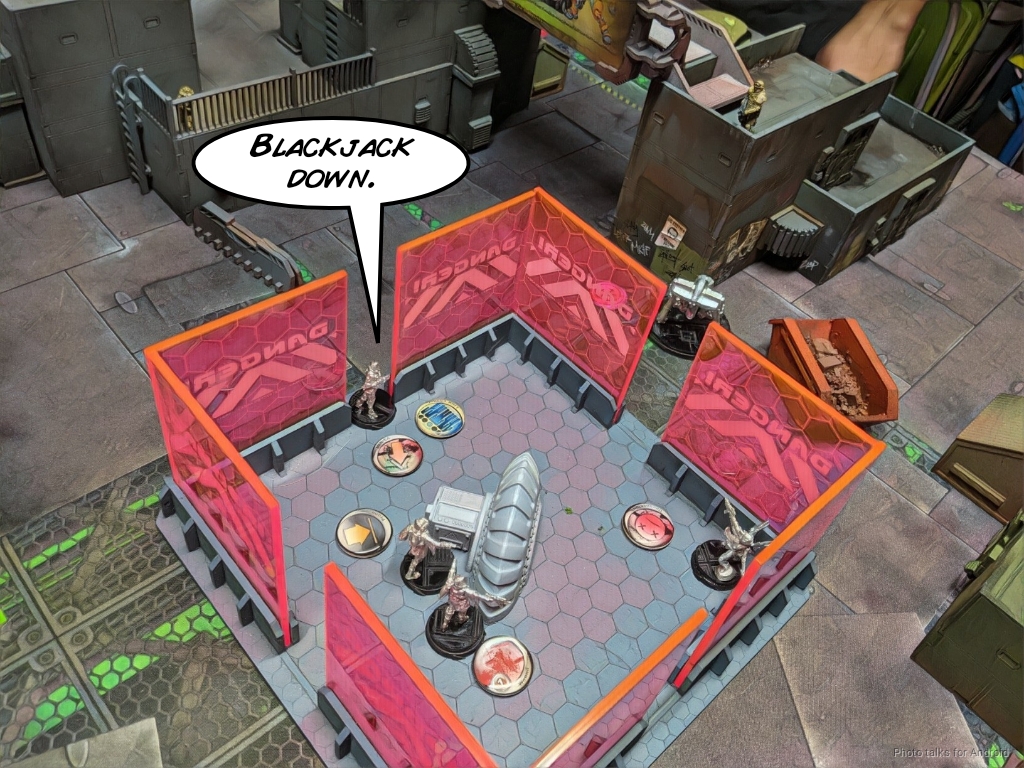
All of this missile fire grants the the movement to get the Yadu Hacker and HRL into the room, although it does break the Samekh out of the Haris. With my last command token, I reform the link around the three remaining Yadu and manage to blast the Blackjack off the table entirely.
Bottom of 3 – USARF
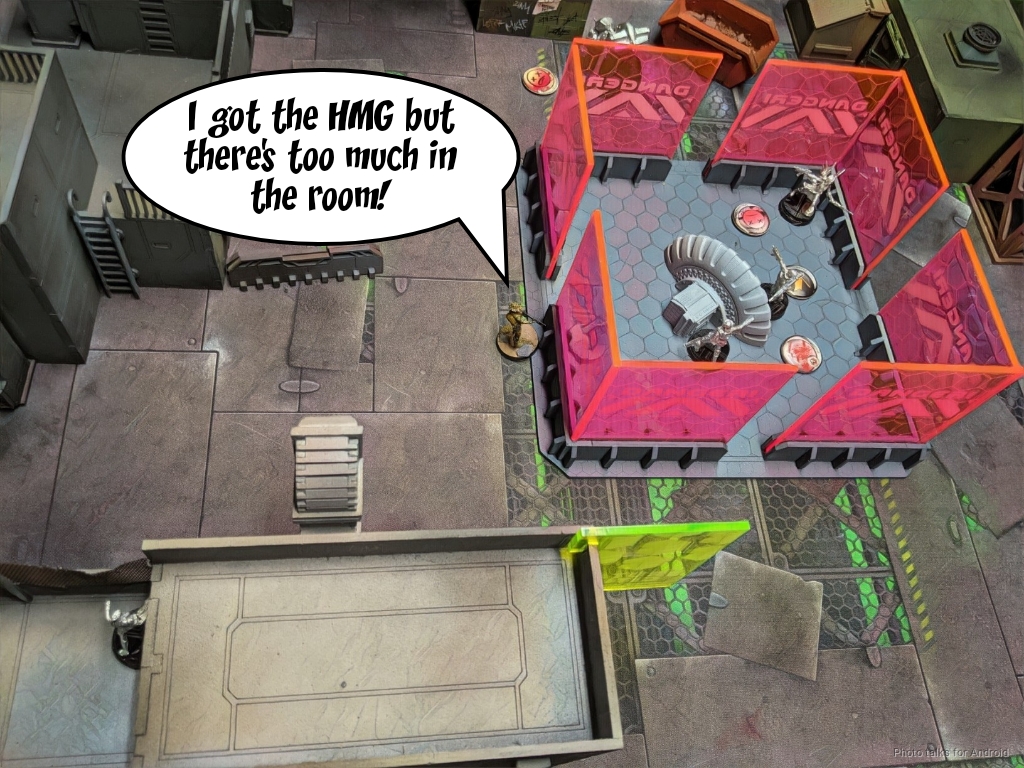
Adam spends some orders trying to take out the Yadu HRL with his Marauder Lt but fails to kill it. His Foxtrot does take out the Yadu HMG but can’t do anything about the remaining Yadu in the room.
Rather than throw the points away, as the Foxtrot isn’t considered Essential Personnel, Adam moves his other Foxtrot in this backfield into base contact with a Biotechvore antenna and relative safety. My poor Deva Lt is just inside the Biotechvore zone and dies horribly.
I’ve dominated the room for 3 turns with Essential Personnel (despite going first, I might add), have my classified, and have more points surviving, making it a
10-1 Operations Subsection of the SSS Victory!
Post Game Analysis
The result of this game should definitely be taken with a grain of salt. Adam’s list was predominantly weighted towards things that had Infiltration or Forward Deployment and failed a bunch of Confused Deployment rolls. Definitely not a great starting position, and Grunts are still 4-2 even in the N4 era. We discussed the game at length afterwards and are pretty convinced that there were no major play mistakes from either of us. There were certainly a lot of small optimizations for both of us, though.
I think going second is generally the right call here. Adam even gave me deployment AND the first turn to have the ability to have the final say. I think my careful use of suppression and targeted, along with dice going my way at key moments, were what kept him from running away with the game.
I was definitely against pushing the UKR and the Marauder link forward and up onto rooftops, as they’re kind of stuck up there. Adam informed me that his plan was (once my AROs were gone) to 6″ climb the UKR off the roof and dodge into the Panic Room, which seems like a pretty decent plan. Still, as I told him, I think the other link members really wanted to be off the roof and throwing themselves into the room. Admittedly, I made it very hard with the Rudras in suppression, but I don’t think it taking 3-4 orders to remove the Rudras is the expected order cost.
I think getting one of the infiltrating grunts into view of the Rudras and just hoping to flamethrower it would’ve been good, or throwing the Hardcase under the bus to remove it might’ve been better. It’s a tall order to crack ARM 4 with a light shotgun, but hey, crazier things have happened. Speaking of ARM, I think if anything, this game has proven the value of ARM in N4. That Marauder surviving that initial HMG burst was pretty brutal for me and stalled my turn for a good 3 orders.
I am, however, very pleased with the list and my piloting of it. It is not easy to pilot, by any means, but I designed it to hold the Panic Room and/or clear the room by Spotlighting and raining missiles. I was very glad to have the redundancy of two hackers, but I think I’ll need to find room for Trisha in a future variation of the list to pick up Parvati or just drop E/M mines. It would be worth thinking about a Danavas as well, for pitchers, when the Rudras inevitably goes down. Perhaps something like this, with a Probot to reload the Danavas’s pitchers or to serve as a repeater of its own:
I initially thought that Netrods would be a liability, but I figure trying to land them at the edge of the Panic Room is probably okay as you can just deploy them touching the antennas if they fail the Confused Deployment roll. Taking a Danavas and two flash pulse bots is also probably fine. I had also thought about taking some Proxies to park on the Antennas at deployment, but I think with most tables there won’t me much in the way of firelanes extending from the Antennas.
Finally, a note on destroying the Antennas. I had plenty of ways of doing that–a K1 Marksman or a Missile will do it just fine. I don’t think it’s really worth it though. Whatever is back there is forced to clump (and will be easy to template later) and is basically irrelevant to the game in the center. Unless there’s a really easy shot on the Antennas I’m of the opinion that it’s not really worth the effort getting into LoF and spending orders of dealing with them. And that’s it! Thanks for reading, and stay safe out there.


Pingback: Intro to Hacking – Infinity the Academy
Pingback: Mission 034: Armored Fury – Bromad Academy
Pingback: Mission 035: Limited Insertion – Bromad Academy
Pingback: Infinity The Academy – Intermedio: Introducción Al Hackeo • WARGARAGE
Pingback: Saddest Susan – MERC Recon
Pingback: Infinity the Academy – Intro to Hacking – Bromad Academy