
Branching Paths
And with that, it was tournament day in Salem, Oregon at Shiv Games. I was paired with Erik (Zelaponeepus) on his table.

I really didn’t have a good feeling going into this tournament. I only had one list that I had any real practice with, and I was still dissatisfied with its composition and my piloting of it in the last few games. Spoiler alert, this tournament was a tough one for me, and I really think it comes down to mindset and its effects on my play. We’ll see that as a through line through the entire tournament, and I think it’s a good theme to structure my discussion of each game.
Overview
- Mission: ITS14 Unmasking
- Forces: Steel Phalanx versus Combined Army (300)
- Deploy First: Steel Phalanx
- First Turn: Steel Phalanx
Round one was Unmasking. I’d practiced this mission with a similar list before, so I wasn’t completely unprepared. I will say that the Thyreos are still sort of in a weird spot for me.
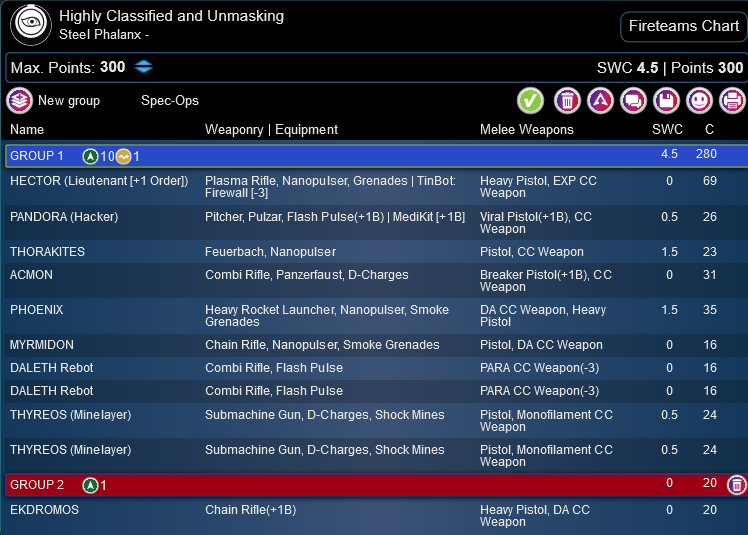
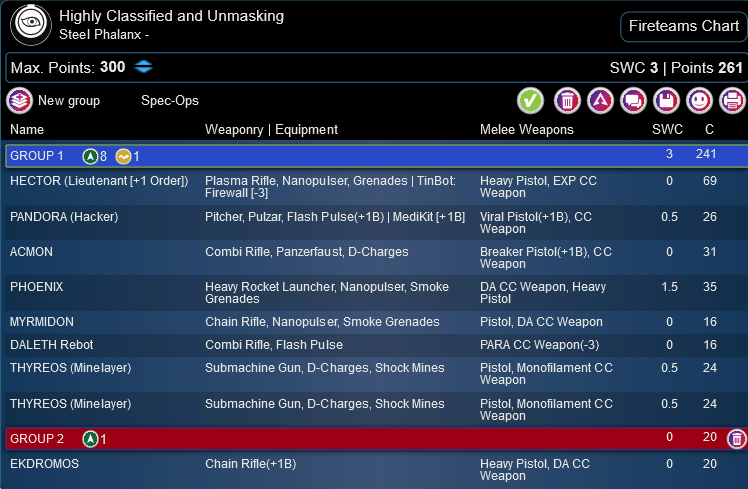
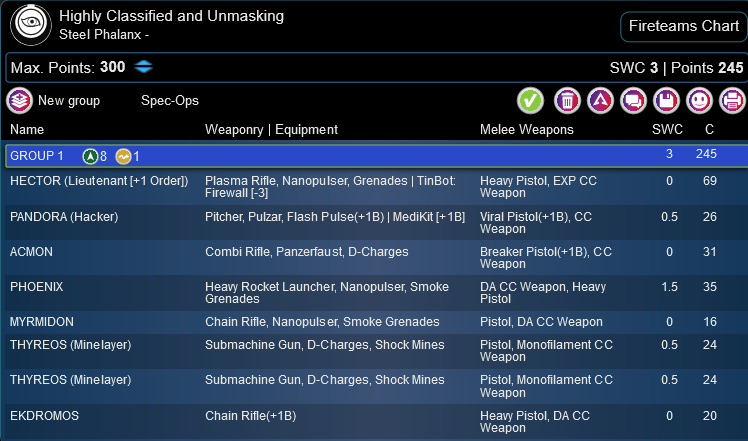
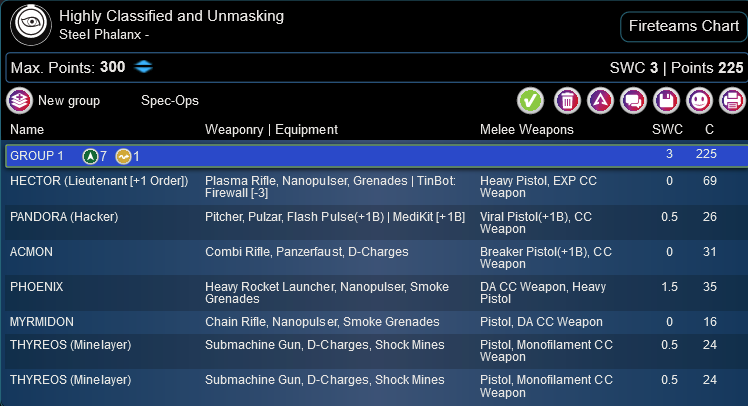
Highly Classified and Unmasking
GROUP 1
10
1
HECTOR (Lieutenant [+1 Order]) Plasma Rifle, Nanopulser, Grenades ( | TinBot: Firewall [-3]) / Heavy Pistol, EXP CC Weapon. (0 | 69)
PANDORA (Hacker) Pitcher, Pulzar, Flash Pulse(+1B) ( | MediKit [+1B]) / Viral Pistol(+1B), CC Weapon. (0.5 | 26)
THORAKITES Feuerbach, Nanopulser / Pistol, CC Weapon. (1.5 | 23)
ACMON Combi Rifle, Panzerfaust, D-Charges / Breaker Pistol(+1B), CC Weapon. (0 | 31)
PHOENIX Heavy Rocket Launcher, Nanopulser, Smoke Grenades / DA CC Weapon, Heavy Pistol. (1.5 | 35)
MYRMIDON Chain Rifle, Nanopulser, Smoke Grenades / Pistol, DA CC Weapon. (0 | 16)
GROUP 2
DALETH Rebot Combi Rifle, Flash Pulse / PARA CC Weapon(-3). (0 | 16)
THYREOS (Minelayer) Submachine Gun, D-Charges, Shock Mines / Pistol, Monofilament CC Weapon. (0.5 | 24)
EKDROMOS Chain Rifle(+1B) / Heavy Pistol, DA CC Weapon. (0 | 20)
4.5 SWC | 300 Points | Open in Army | Copy Code
The Minelayer profile obviously has utility in that it… lays mines. It theoretically can shoot at stuff with its SMG, but it just feels so inefficient and needlessly risky in the sense that you can just straight up lose a 24 point order to a bad face to face. They’re marginally competent in close combat, but seem to have some trouble getting there due to their 2″ dodge coupled with the PH10, which just seems… bad to spend orders on. Really it’s a reactive dodge where it shines, but it’s not high probability and therefore is unreliable.
That’s sort of my problem with them. They have this nice bit of toolkit that works infrequently, so it’s hard to justify it as a strategy or consider it to be part of a coherent gameplan. Nevertheless, they definitely provide a body in the midfield, which up until now was something Steel really just didn’t have much of. I’ll continue to try them in spite of how awkward they’ve been feeling.
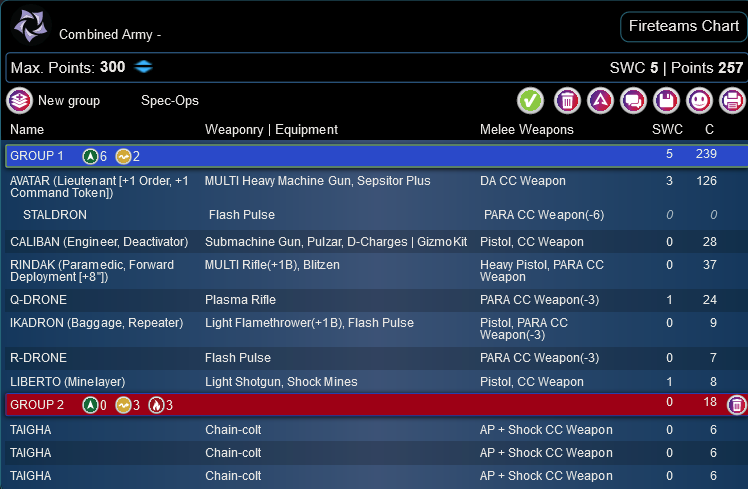
Erik (Zelaponeepus)
GROUP 1GROUP 2
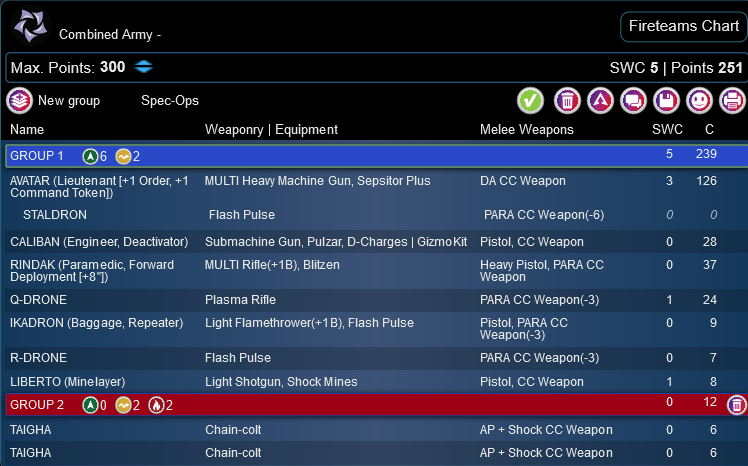
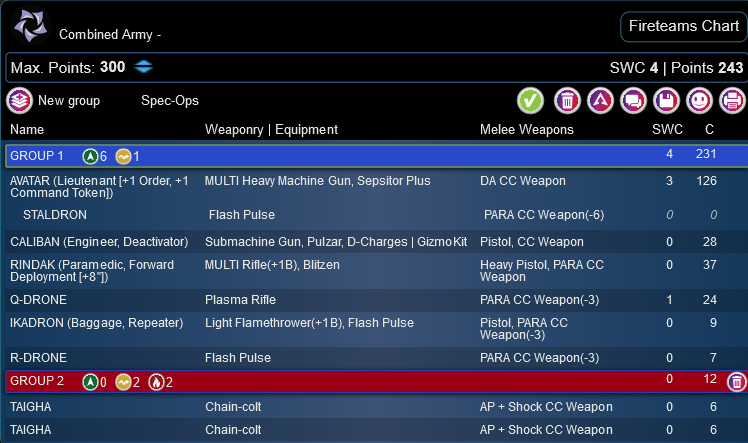
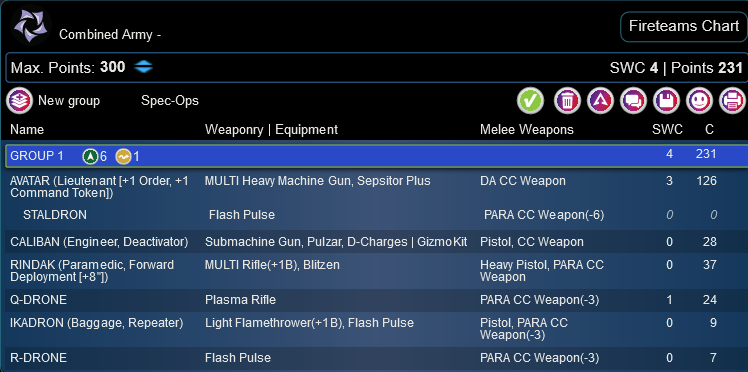
AVATAR (Lieutenant [+1 Order, +1 Command Token]) MULTI Heavy Machine Gun, Sepsitor Plus / DA CC Weapon. (3 | 126)
STALDRON Flash Pulse / PARA CC Weapon(-6). (0 | 0)
CALIBAN (Engineer, Deactivator) Submachine Gun, Pulzar, D-Charges ( | GizmoKit) / Pistol, CC Weapon. (0 | 28)
Bit (Hacker], Killer Hacking Device [UPGRADE: Oblivion]) Submachine Gun, Pitcher ( | Deployable Repeater]) / Pistol, CC Weapon. (0.5 | 21)
RINDAK (Paramedic, Forward Deployment [+8″]) MULTI Rifle(+1B), Blitzen / Heavy Pistol, PARA CC Weapon. (0 | 37)
Q-DRONE Plasma Rifle / PARA CC Weapon(-3). (1 | 24)
IKADRON (Baggage, Repeater) Light Flamethrower(+1B), Flash Pulse / Pistol, PARA CC Weapon(-3). (0 | 9)
R-DRONE Flash Pulse / PARA CC Weapon(-3). (0 | 7)
LIBERTO (Minelayer) Light Shotgun, Shock Mines / Pistol, CC Weapon. (1 | 8)
4
TAIGHA Chain-colt / AP + Shock CC Weapon. (0 | 6)
5.5 SWC | 300 Points | Open in Army | Copy Code
Erik’s playing good stuff Combined. Avatar, Bit & Kiss, Caliban, Q-Drone, Rindak, Libertos, Taigha, orders. Not much else to see here.
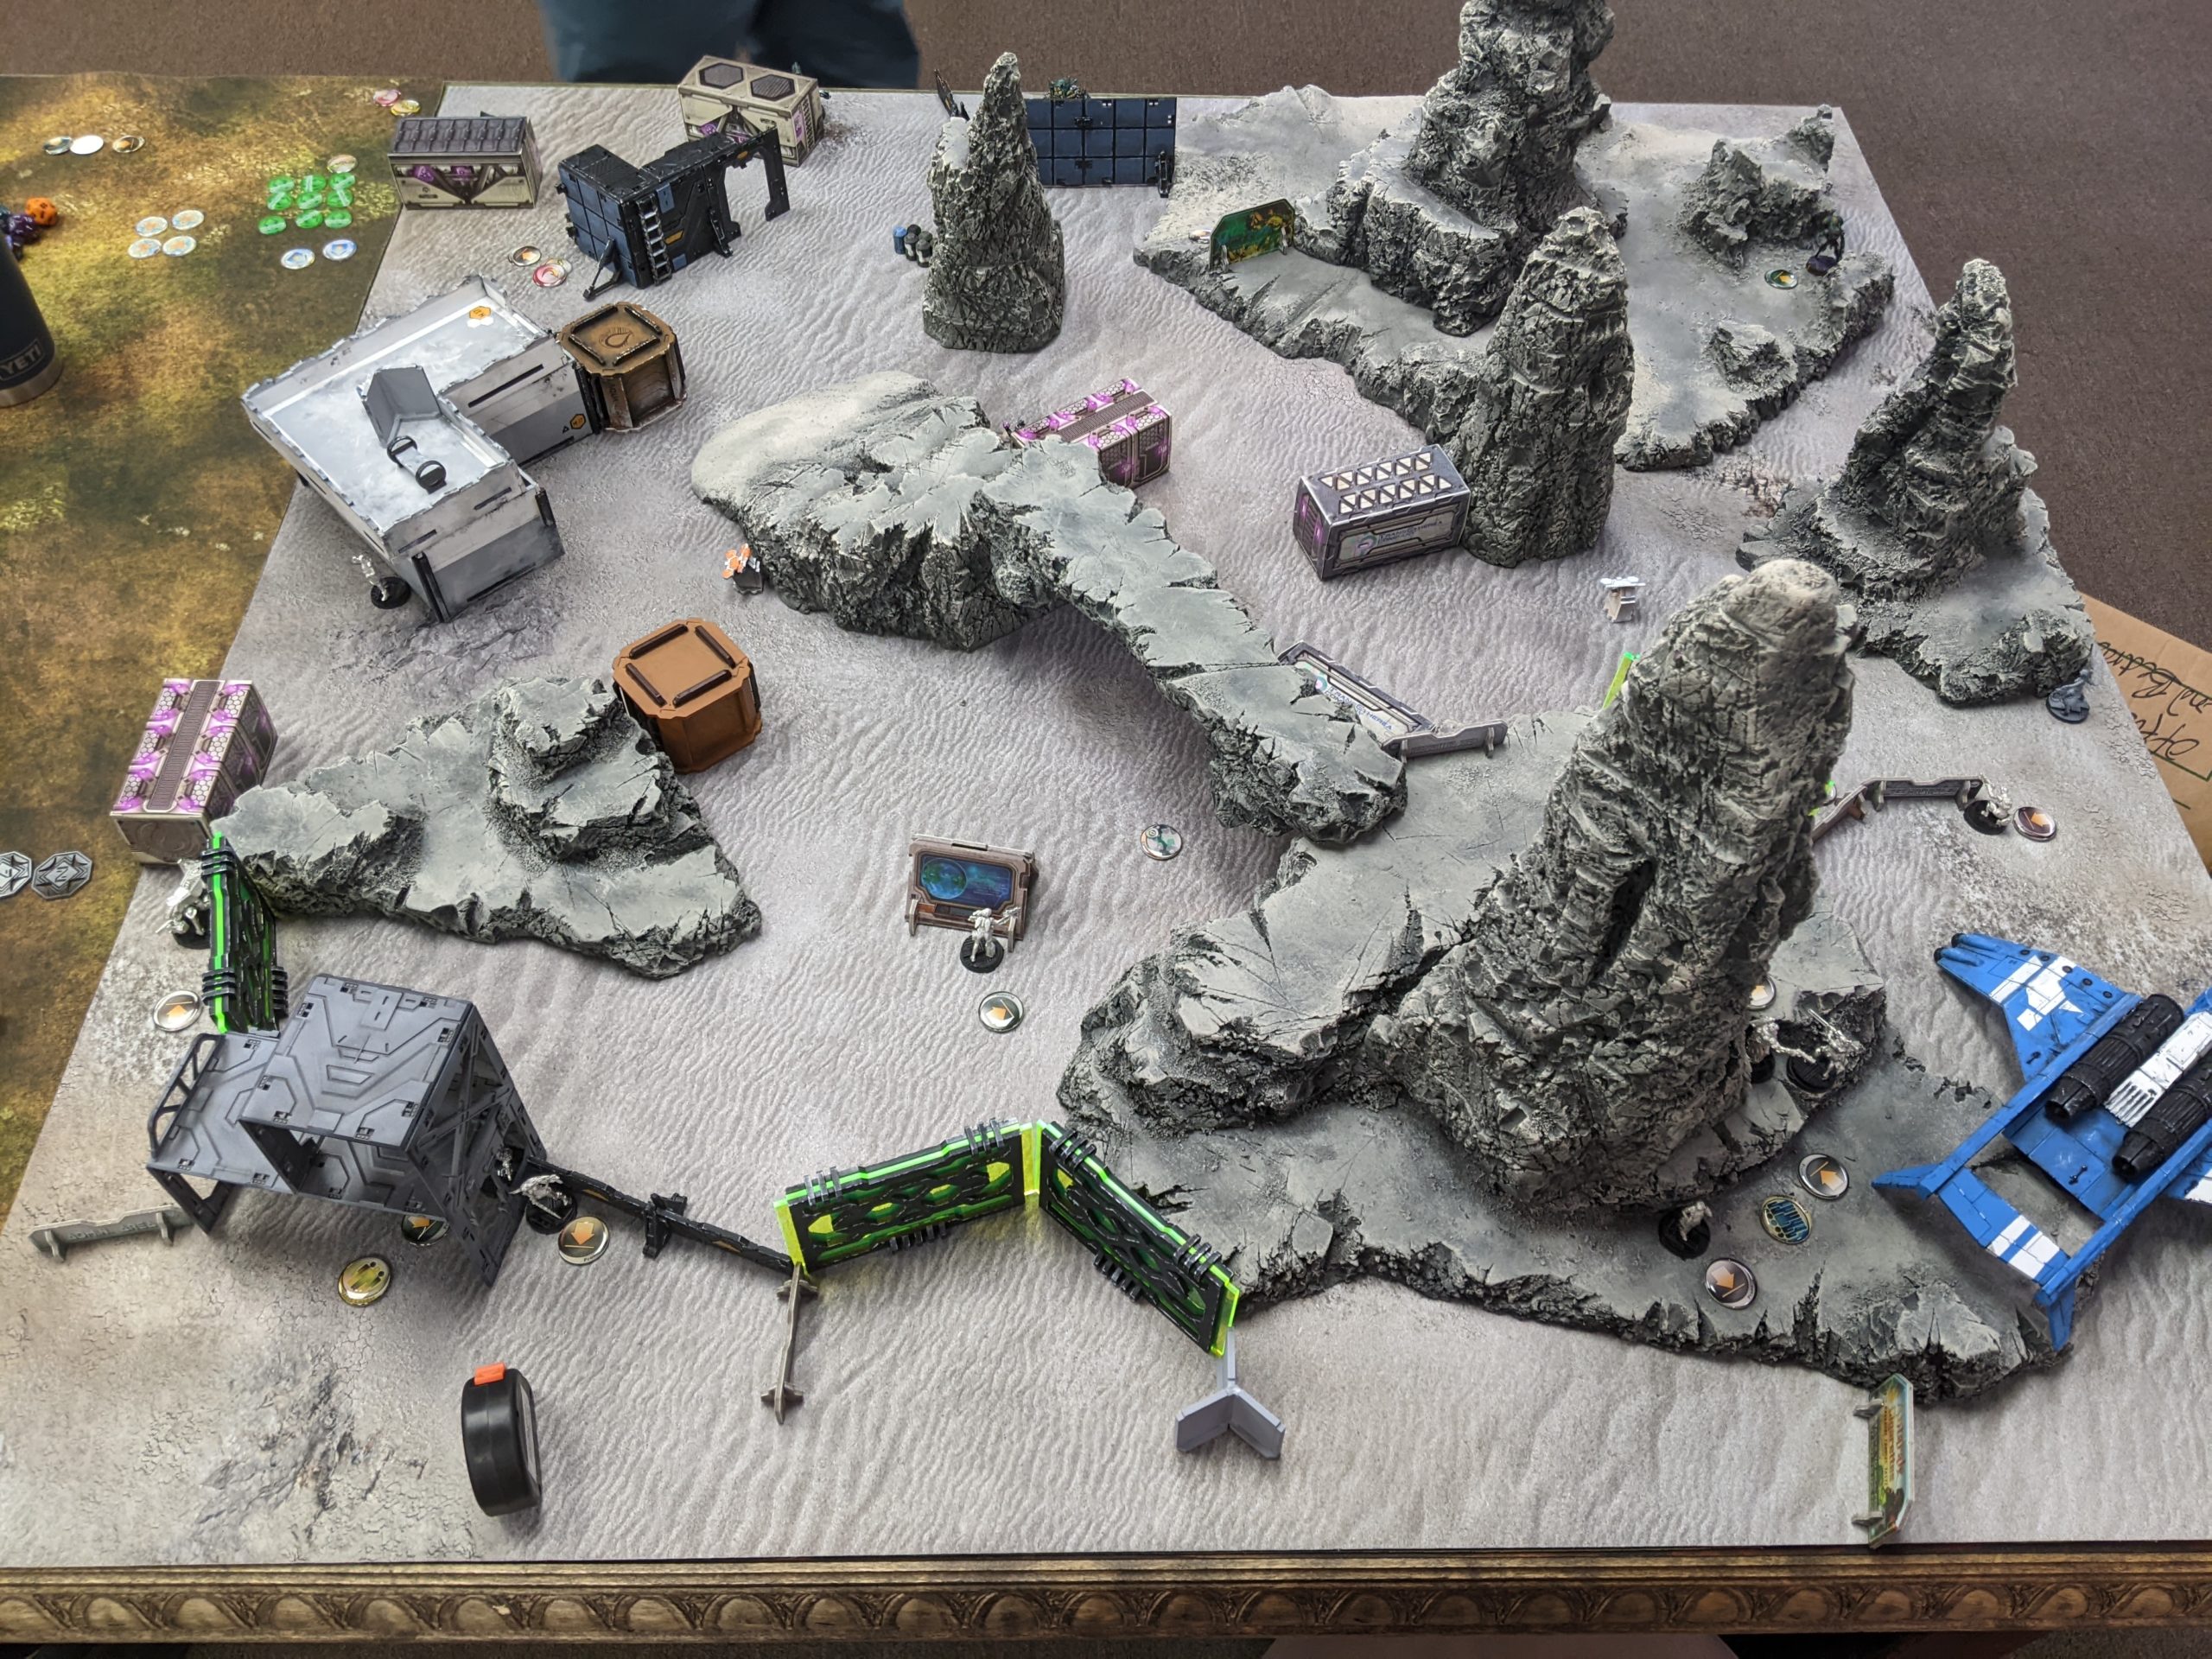
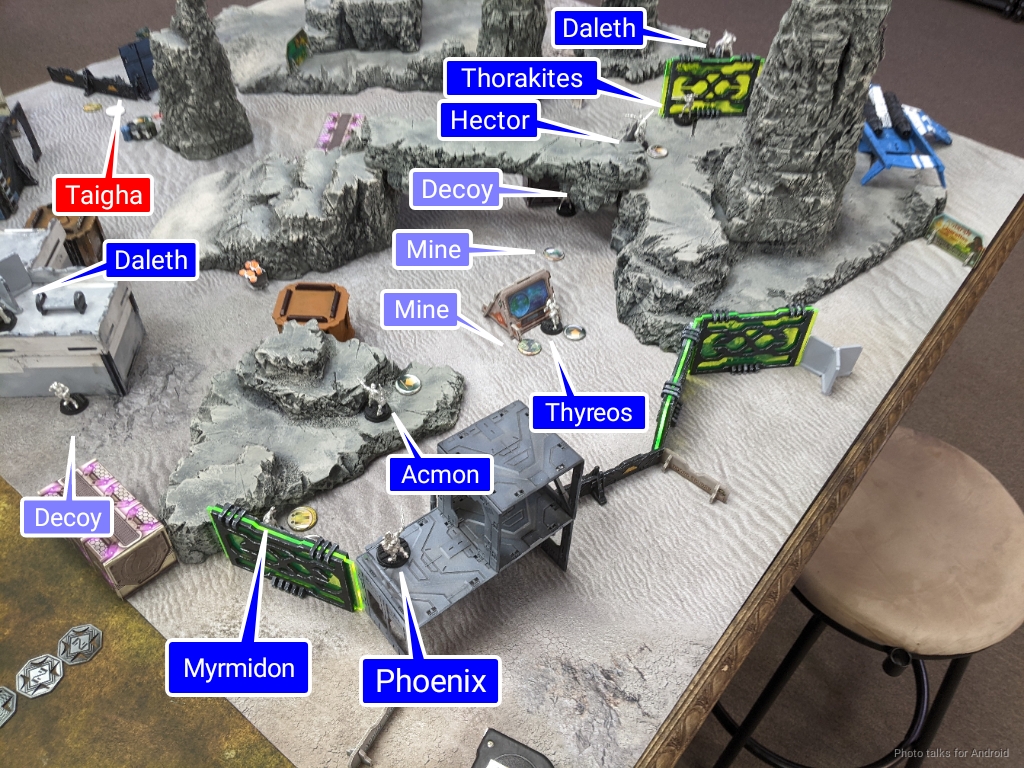
Deployment
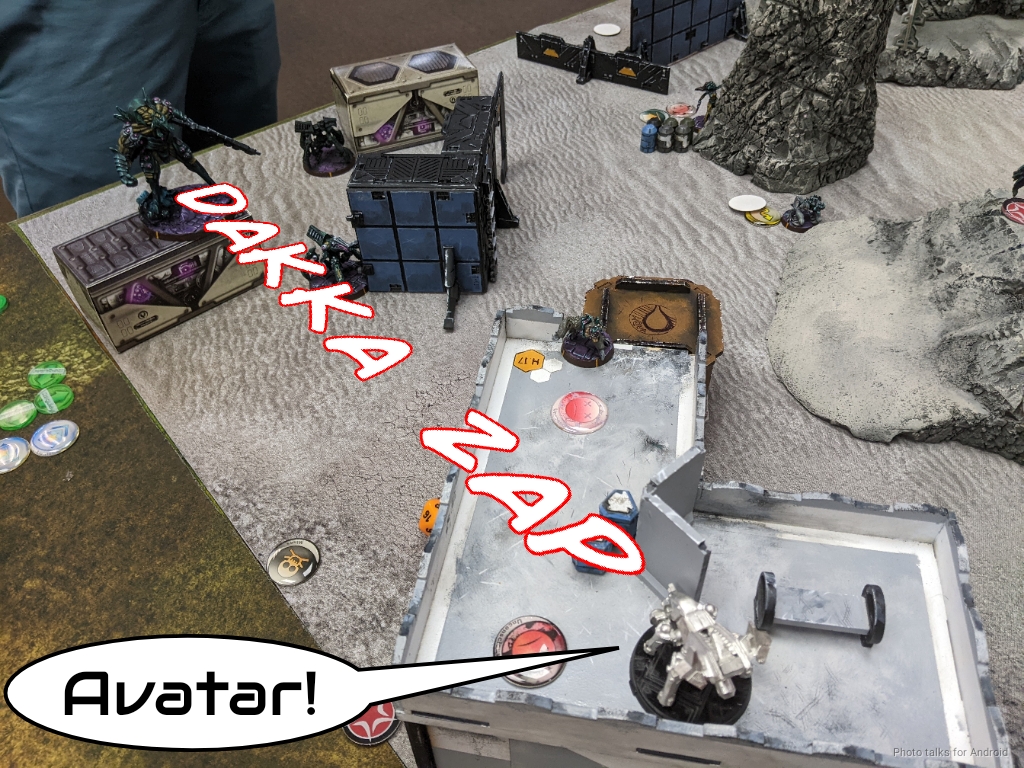
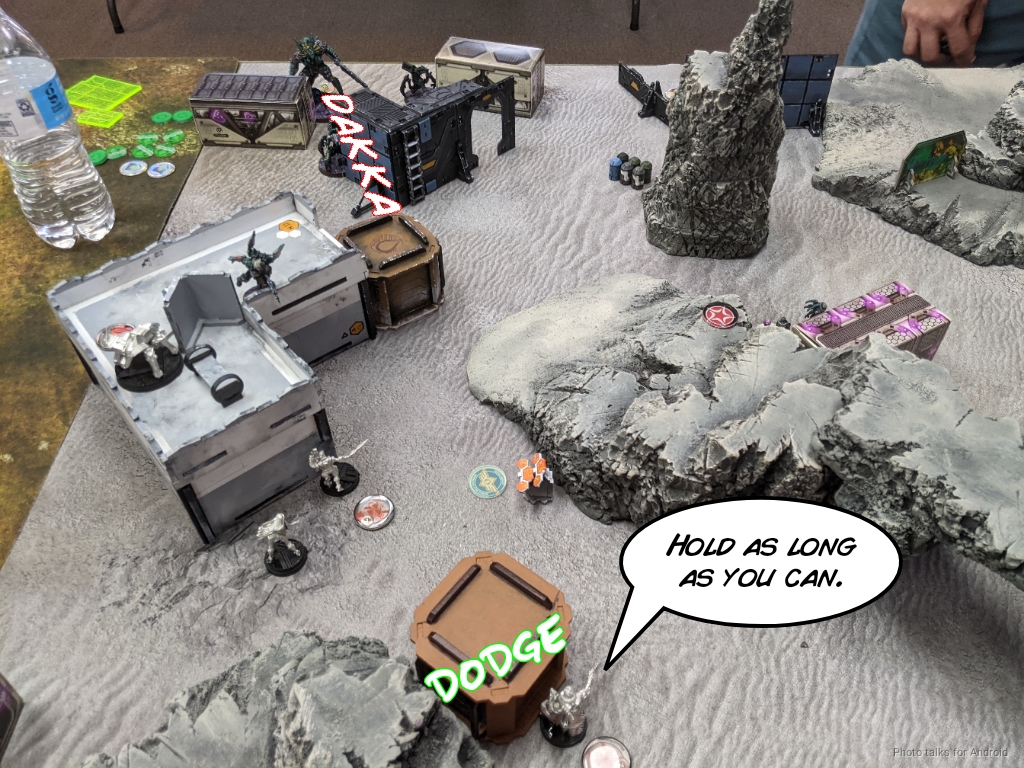
I think I won the rolloff and elected to go first, which is pretty reasonable against the Avatar. This meant I was deploying first. I held Phoenix and the Thorakites in reserve, then thought for awhile about potential Taigha approach paths. The Thyreos went in positions to shield my links as well as to protect the various HVTs. There weren’t really any good spots for my HVT’s, Erik made a good call on choosing table side.
Hector and Pandora hung out on the right in a pretty safe spot, facing the back table edge. I was pretty darn sure there wasn’t going to be a Rasyat or even a Taryot, but hey, I’ve been wrong before and there’s no reason to not be safe. Acmon and the Myrmidon were on the left to balance things out and to give Phoenix a chance to be in a high sniper tower to see things if he wanted, depending on where the Avatar went. I rounded things out with a Daleth on either side to give Pandora some repeater coverage, and then deployment went to Erik.
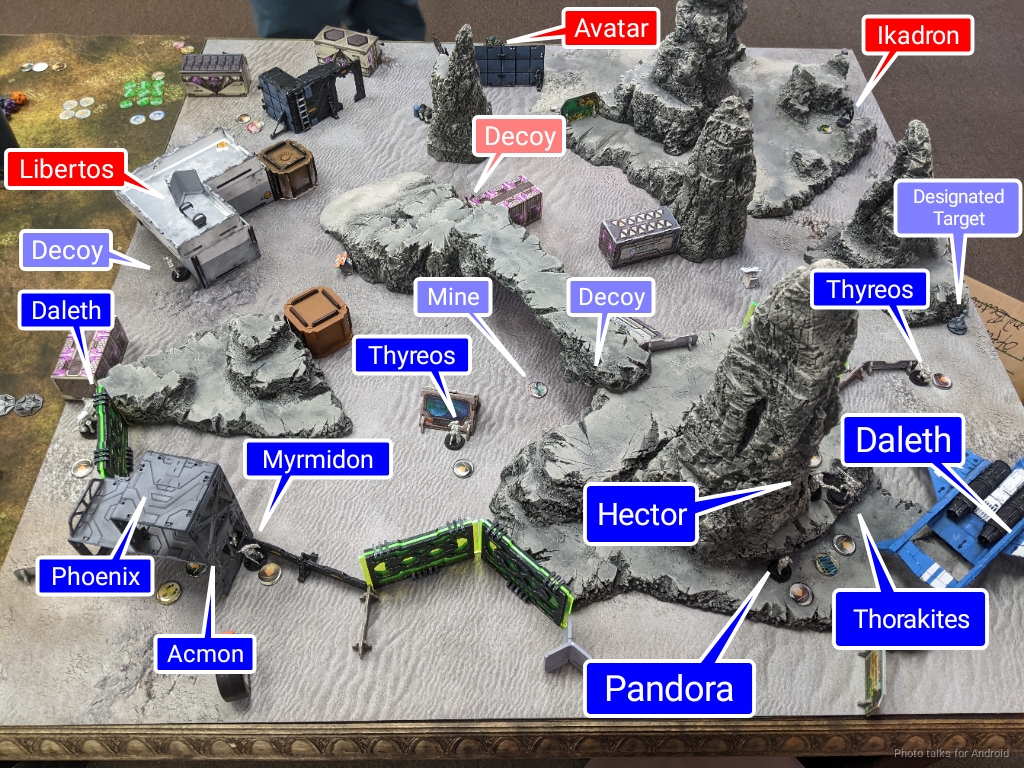
Erik’s deployment is pretty conservative. Taigha cushioning everything, and then the Libertos and Caliban advanced into the midfield to threaten my HVTs.
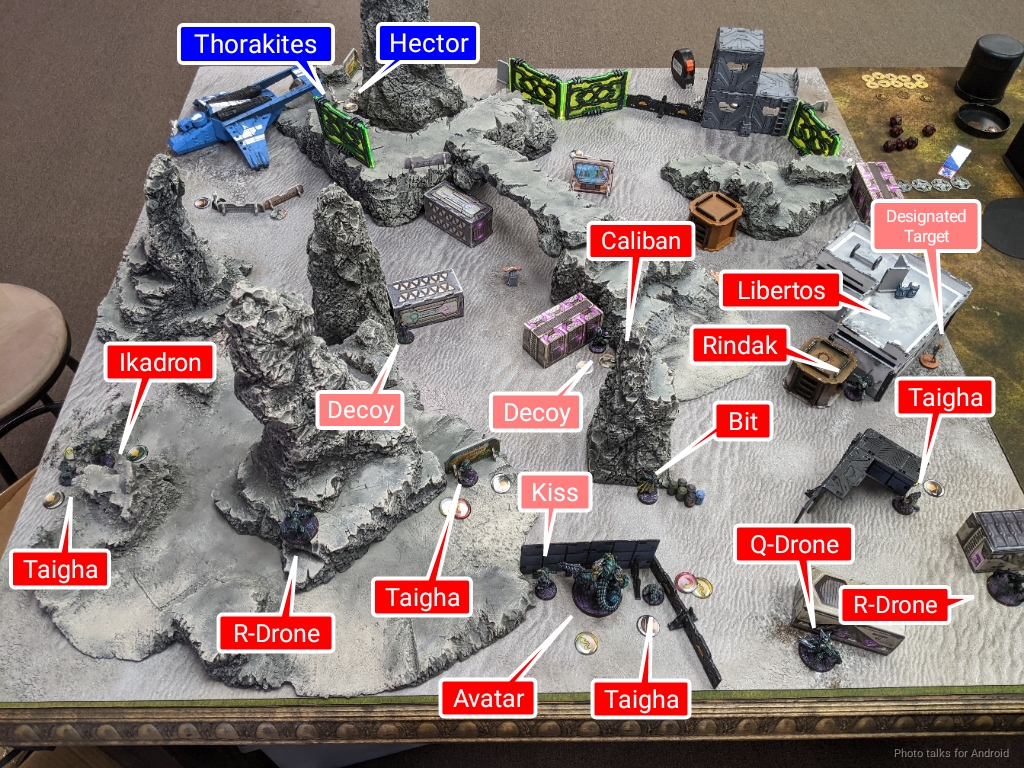
I think Erik actually put the Avatar down and didn’t hold it in reserve, and instead held the Rindak and Q-Drone in reserve. This seems reasonable as there’s really only one good spot for it on the table that’s pretty safe from everything.
I decided to put Phoenix and the Thorakites down in places that they could advance but wouldn’t necessarily be in huge danger if I wasn’t able to move them. Erik then put the Q-Drone down protecting the Avatar and the Rindak further up on the right to go get objectives.
Turn 1
Top of 1 – Steel Phalanx
Erik of course docked me two orders, which I didn’t think too much of, since Hector adds two. One thing I’m noticing is that I’ve been really relying on Hector’s two orders to get me out of trouble, and it’s just not enough to rely on him like that. I think this is related to my observation that many Infinity players, myself included, tend to make better decisions as the game goes on.
This isn’t because people are getting smarter or learning on the fly or something, it’s because there are simply less decisions to make. The optimization space is simply smaller since you have less resources and moves to make, so to speak. Furthermore, your priorities tend to crystallize very quickly because you realize what you can and cannot accomplish and just spend your effort appropriately.
Hector is very powerful because you continue to have two extra orders when you’re in this constrained problem solving environment, which is better than most other lieutenants. What I’ve noticed about my own play when using him is that I tend to have looser plans–more of a sketch than a plan. Turn 1 of this game is a really good example of this. My sketch is to just do some damage on the first turn to deny orders to the Avatar and obtain some board control.
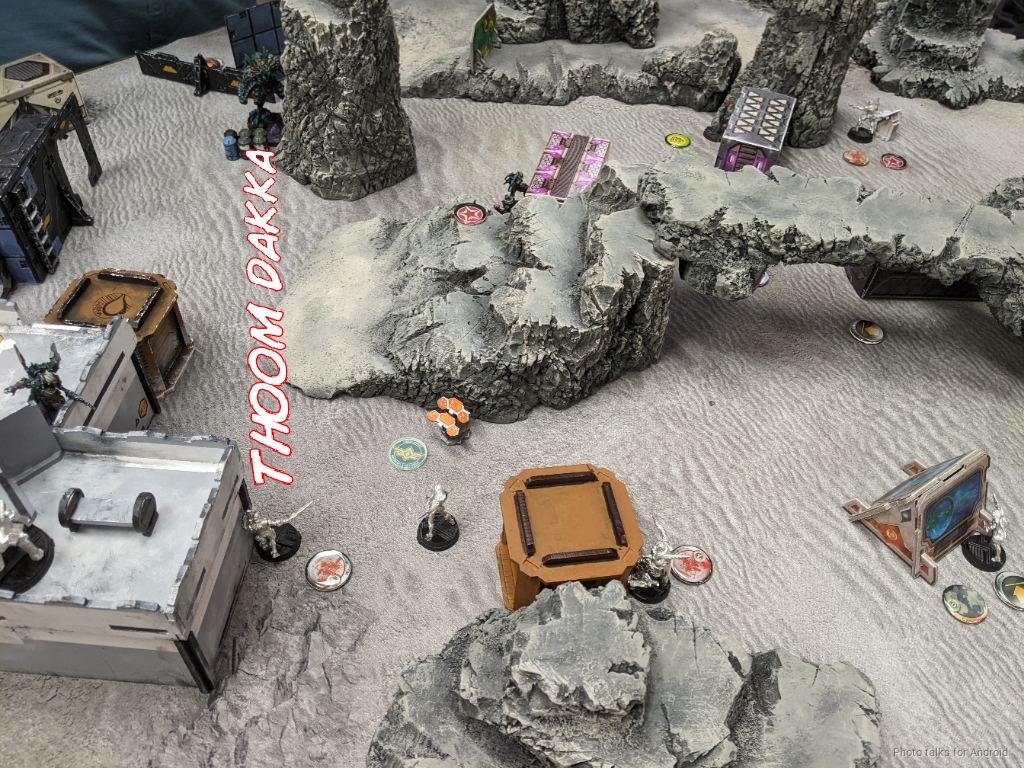
First off, Phoenix has a long shot on an R-Drone against its dodge. This goes well and the R-Drone goes down. I sort of decide to move… forward? with Phoenix’s link, without much of a plan here as I do this.
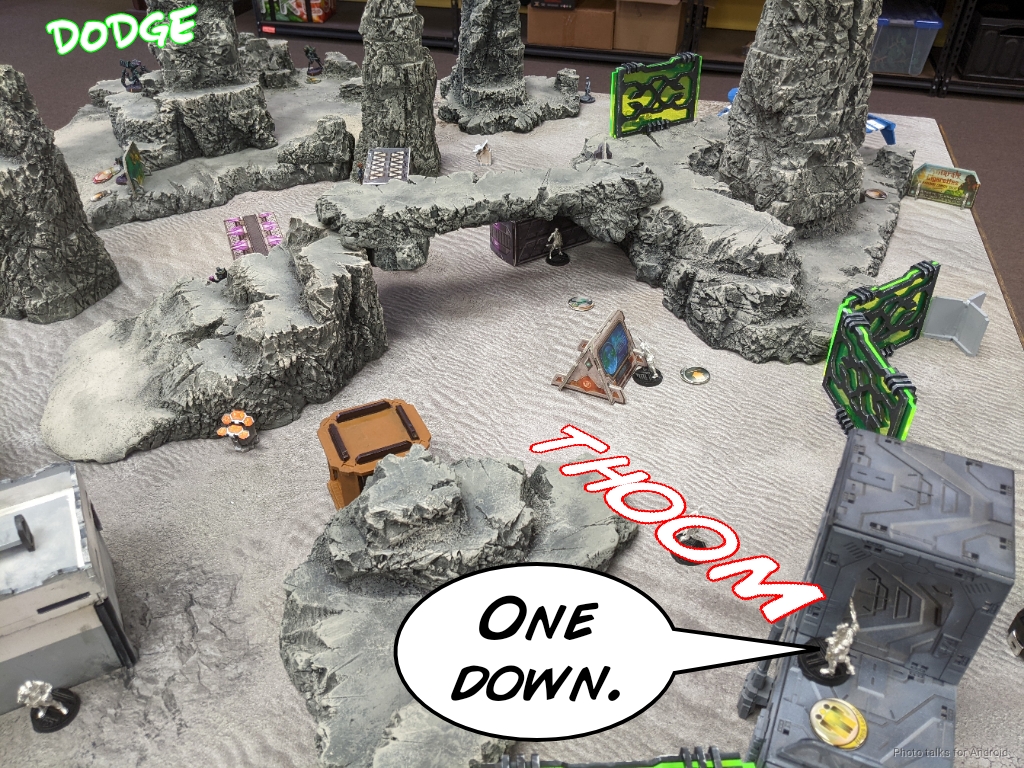
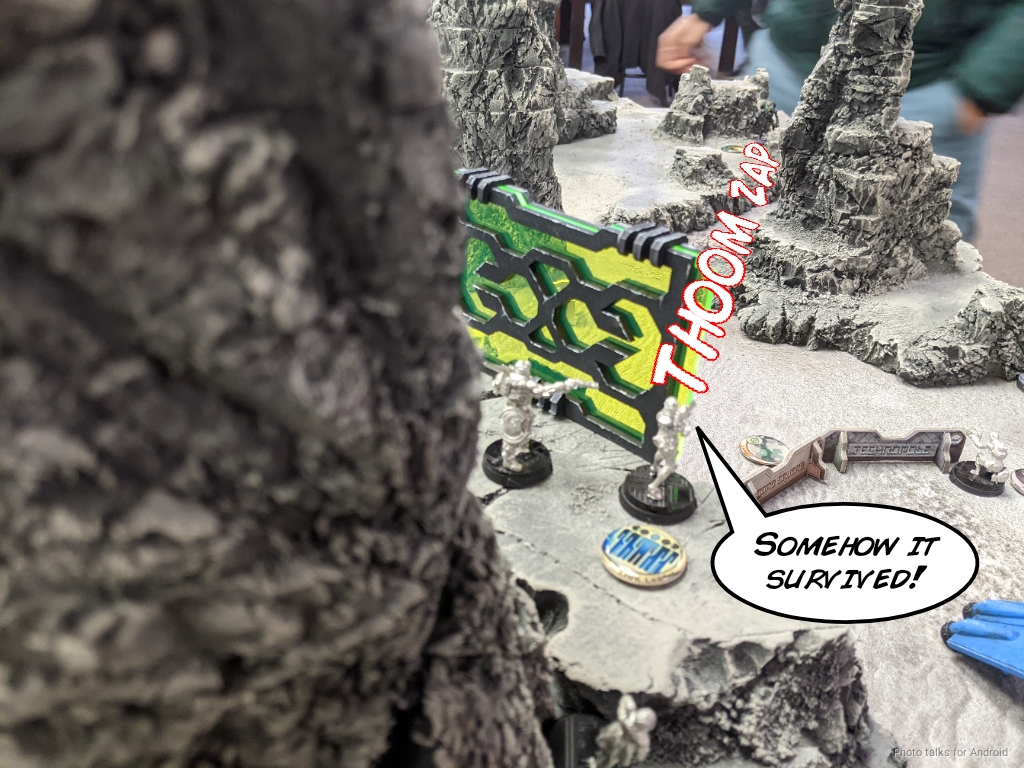
The other link moves forward, with the Thorakites landing a Feuerbach hit but somehow failing to take out an Ikadron.
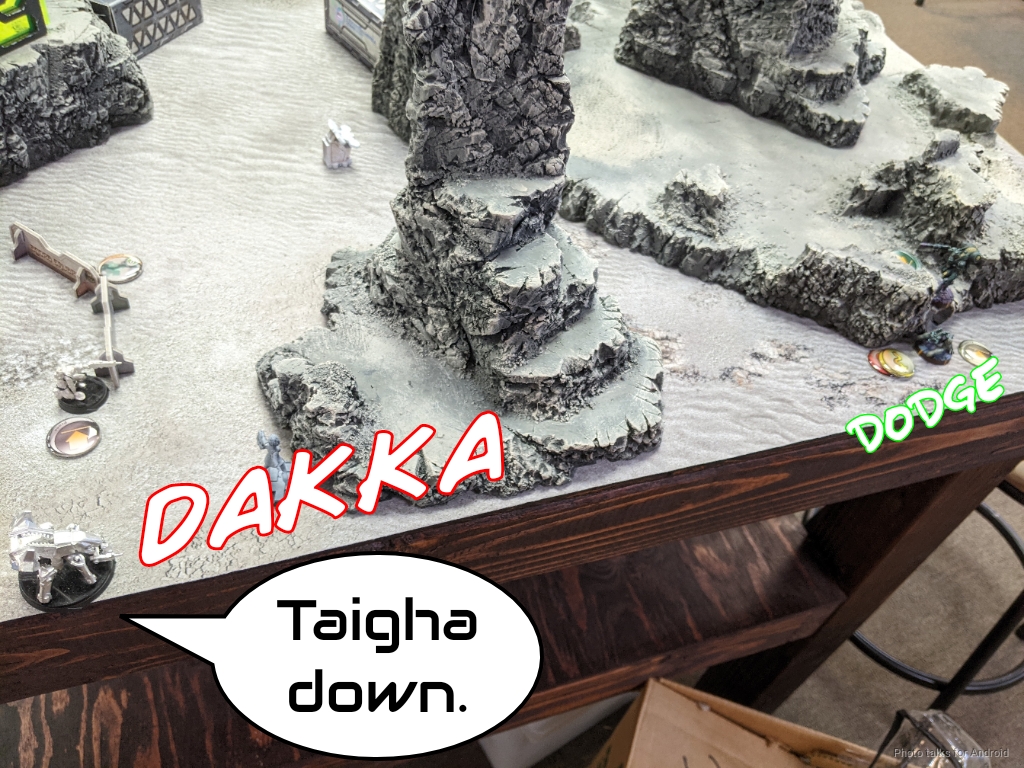
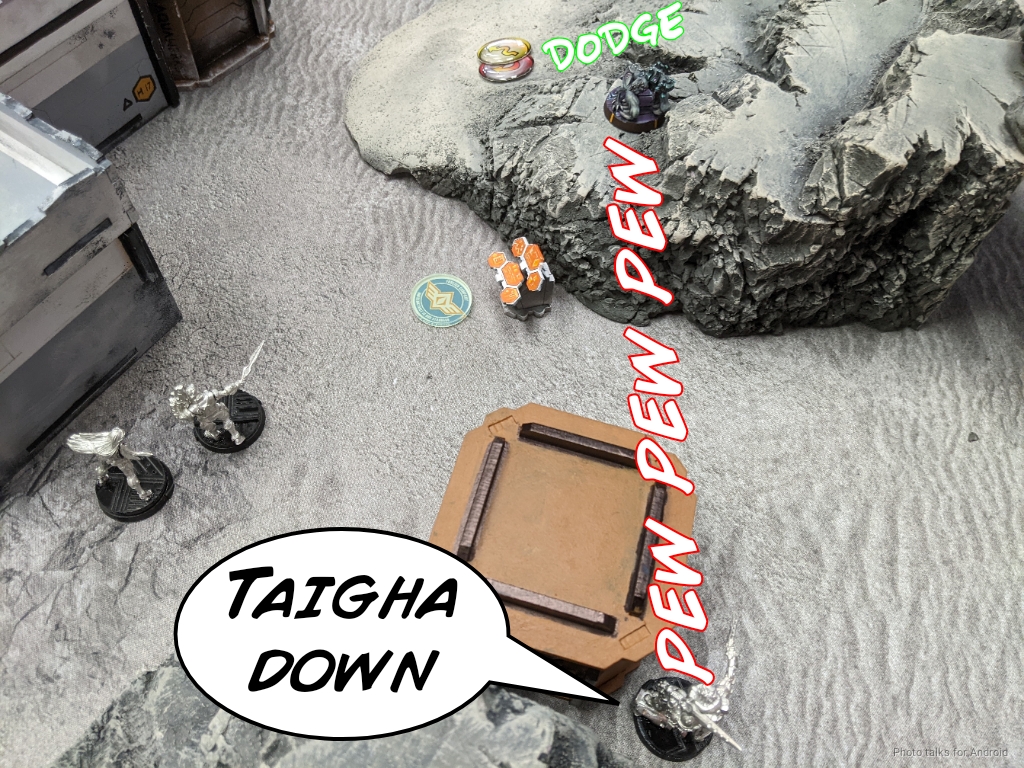
I know I need to think the Taigha herd, so I use a Daleth’s Tac Aware order to take out the rightmost Taigha next to the invincible Ikadron.
The other Daleth has a shot on Bit on its way to put itself as a repeater next to the Rindak, which is I think a pretty good low cost way to deal with the Rindak.
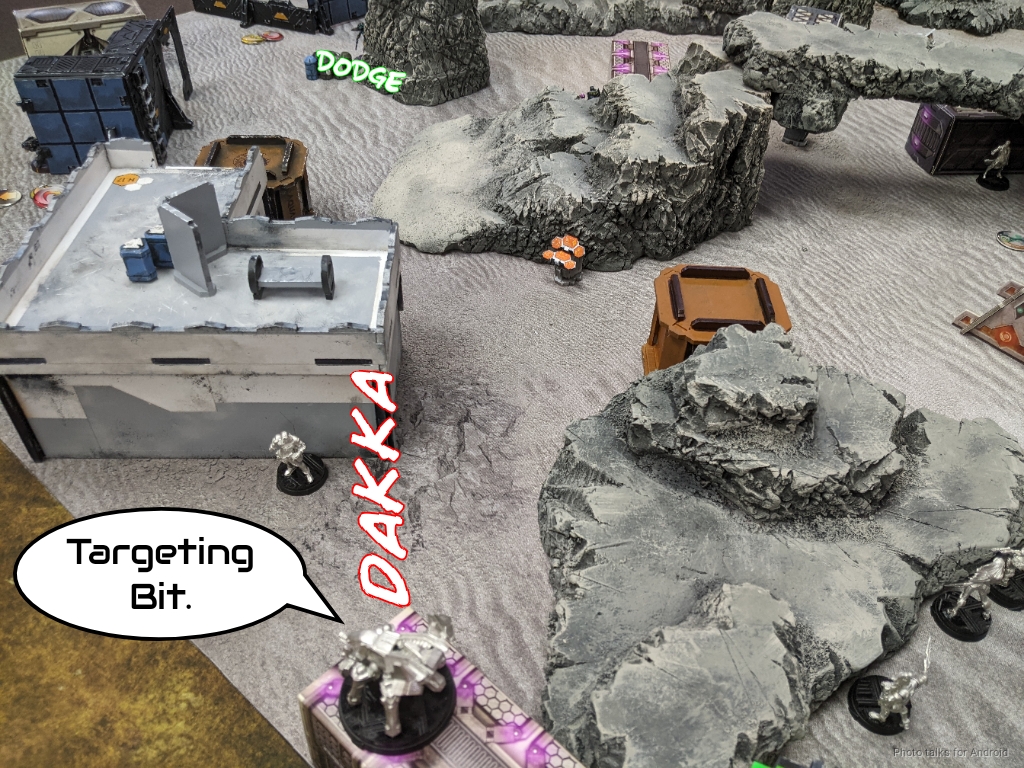
It takes another order but I finally get it done.
I move the Daleth into position above the Rindak on the roof, and then have this weird situation where I have to retreat Phoenix back onto his roof because I don’t have any orders to get Acmon to a console. It’s not great, and I have to use Acmon’s order to do it so it’s just a total mess.
This is what happens when I don’t really have a solid plan of action. I just engaged targets of opportunity and didn’t address the real threats, i.e. the Avatar. I think the other thing that happened was that I assumed I could do too much given Hector’s orders. A better structure for my turn would have been to leave Phoenix where he was to take on the R-Drone, then use Acmon’s order to position better against Taigha.
I had assumed that I was going to use Acmon’s order to flip a console, but really you don’t want to be flipping consoles that early in a game of Unmasking anyway, since it matters who has more at the end. I think I would have been better served pushing harder with Pandora to get a pitcher down near the Avatar and really slow things down. So in short, really the big mistake in this turn was spending additional orders on Phoenix’s link and not just instead developing the board a bit better instead of going backwards with Phoenix.
I thought everyone was mostly safe except for the Thorakitai, but we’ll see!
Bottom of 1 – Combined Army
I at least took out 3 orders, which is basically nothing against an Avatar’s combat group. I at least haven’t taken any damage myself, which is nice… so far.
My plan for the turn is to… survive.
I left the Thorakitai out last turn, mostly because I ran out of orders, but also because I don’t like having orders I guess? My wish is soon fulfilled and the Avatar pastes the Thorakitai.

Erik then discover-shoots one of the Thyreos’s mines with the Avatar, which is certainly a choice. It’s not bad, it’s just not what I would have done. I think it’s actually rather elegant and a safe choice, I just never really think about doing this sort of thing.
The Avatar keeps going and then manages to find an angle on Acmon, who is prone behind some rocks. It’s so hard to account for the height of TAGs on elevated terrain. It really opens up the board. In any case, we’re just outside of 32″, but I don’t know that, so I waste the panzerfausts. I do, however, someone miraculously survive, mostly due to the range penalty.
The Avatar challenges Phoenix next and does a wound, so I fail guts out of LoF. My prone Daleth on the left is really giving Erik’s Rindak fits, so he tries to get a Taigha in place to deal with it, but Phoenix drops it.

The Avatar runs away back to its starting location, killing the Daleth on the right as it does so, and then it’s back to me.
Turn 2
Top of 2- Steel Phalanx
Well, I only lost two orders, so I’m back to the order count I was at the beginning of the game, but with a collapsing right flank.
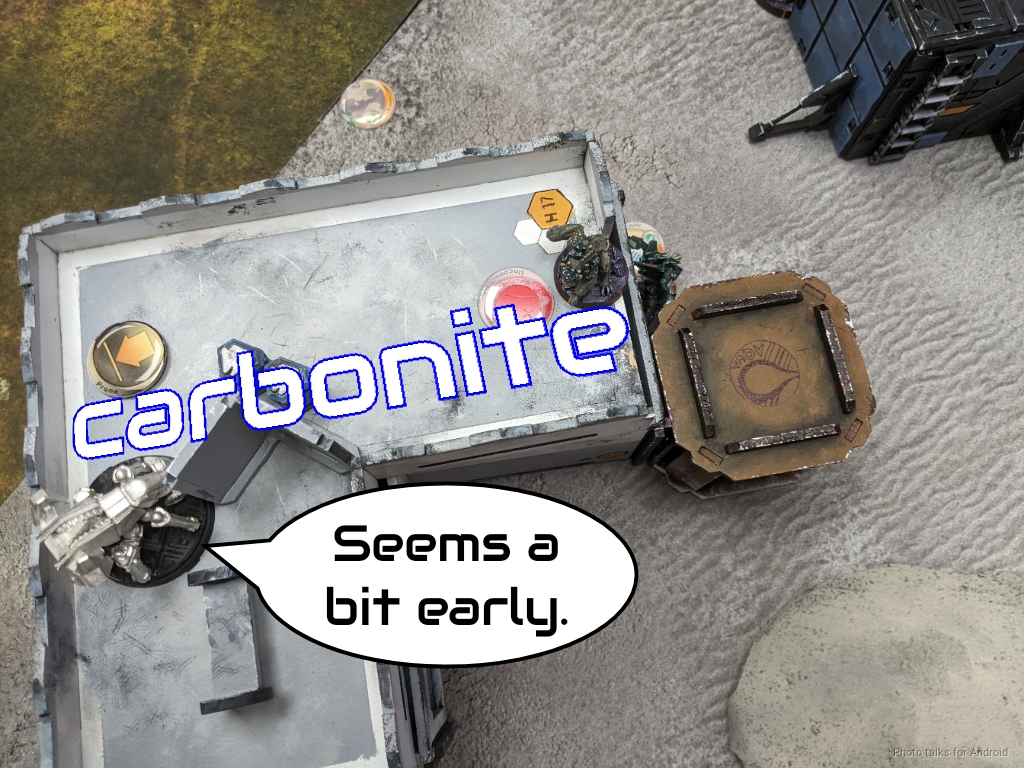
My plan for this turn was to try and get some consoles flipped and take out any HVTs that I could. Maybe doing something about the Avatar would be good too. I started off by breaking one of my own rules, which was I hacked in the active turn to Carbonite the Rindak.
The plan was to get Phoenix’s link up there to deal with it while flipping consoles with Acmon, which went fine till Erik revealed the Libertos and dodged into view of the link. I could have attempted to deal with it locally with the link, but I decided to be super safe. Hector handled it instead, but by activating Hector this allowed the Rindak to reset while Pandora moved around.
I flip the left and central consoles and have Phoenix’s link in a horrible position in the midfield. I reveal both Decoys, neither of which are in a great location for me to access, and I’m forced to correct everyone’s position rather than prosecute the HVTs.
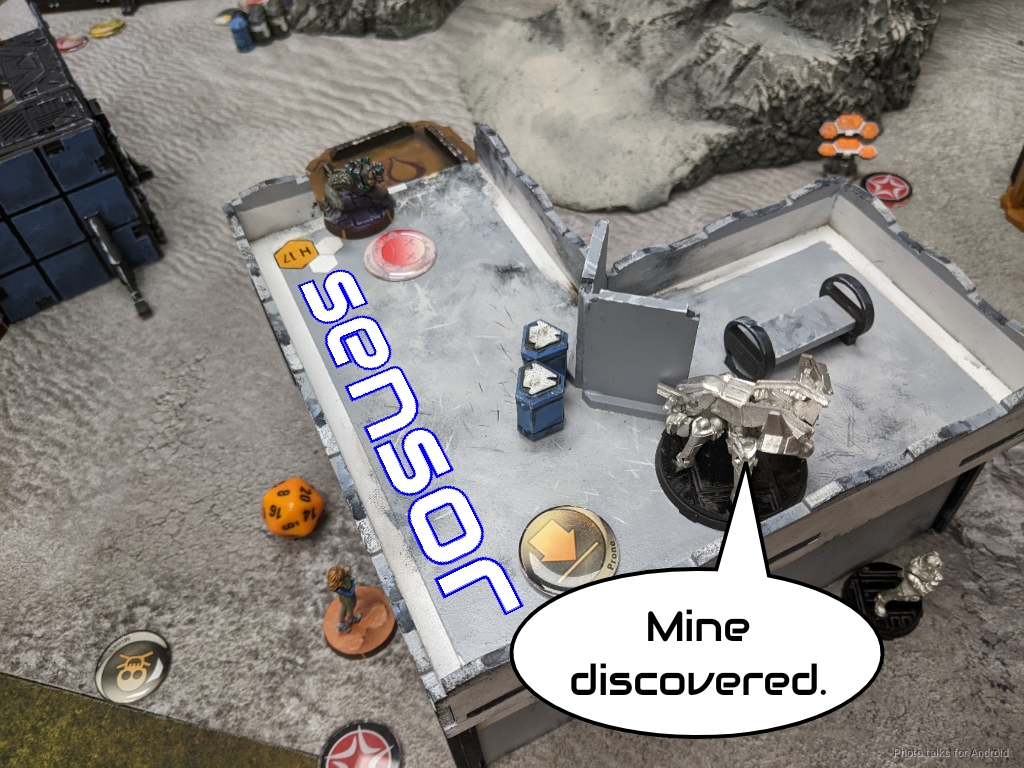
Pandora attempts to land a pitcher near the Avatar and fails both shots over two orders, which is just unfortunate. That would have been really helpful to be able to attempt an isolate on the Avatar. I don’t have much of a follow up here, so I decide to sensor the mine near the unrevealed Designated Target in case I need to shoot it later or something.
Hector is sort of safe. Acmon is hanging out near the last unflipped console, and Phoenix and the Myrmidon are now near Hector and in a link with him and Pandora, trying to protect my HVTs. I pass turn, thoroughly deflated.
Bottom of 2 – Combined Army
There’s no change in terms of material lost here, since I had sort of an ineffective turn. Erik really wants to get his Rindak in the game, so he does something I don’t expect and moves the Avatar into position to engage my prone Daleth on the left. I wish I had thought about this and done something clever like throw the Daleth into suppression. It’s the Avatar, so even though we’re in 16″ it doesn’t take much to take the Daleth out.
The Rindak, now freed, starts getting some work done. Erik starts by trying to pick Bit up, but it fails. Something about human physiology just isn’t compatible with Morat combat stimms, I suppose.
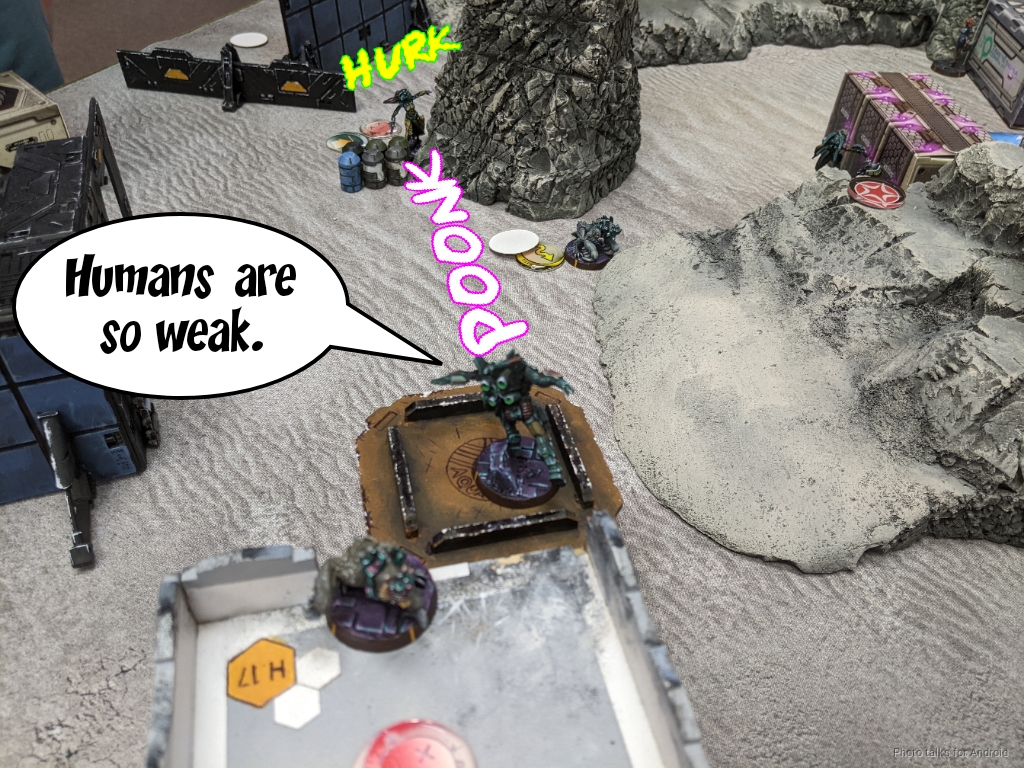
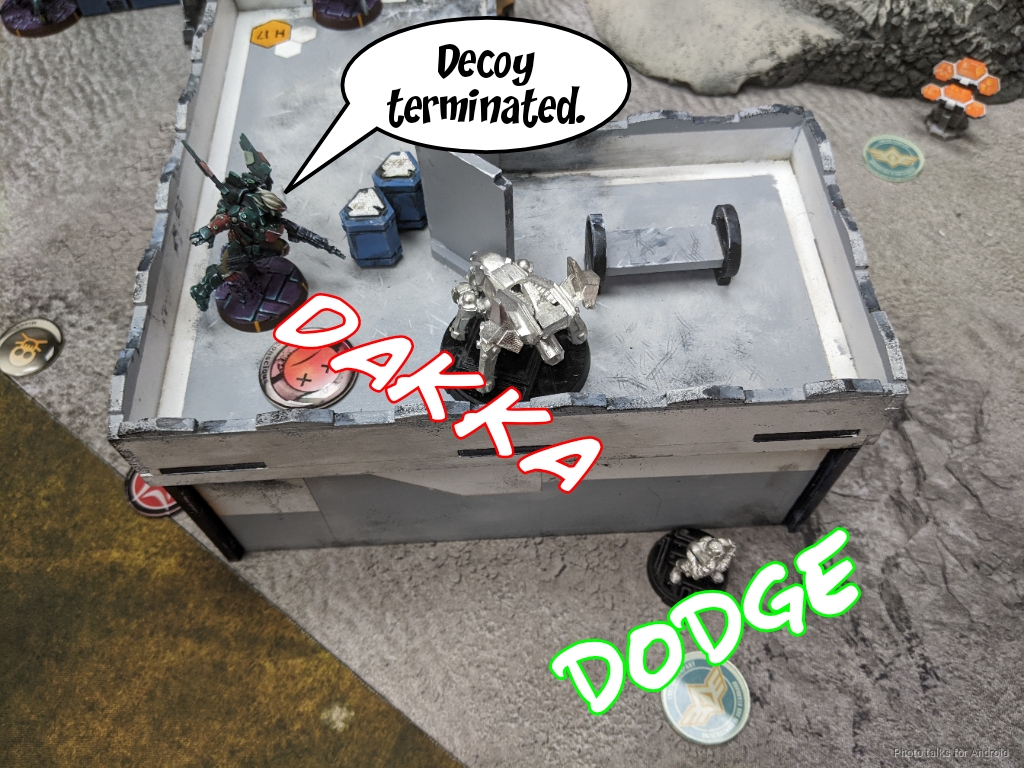
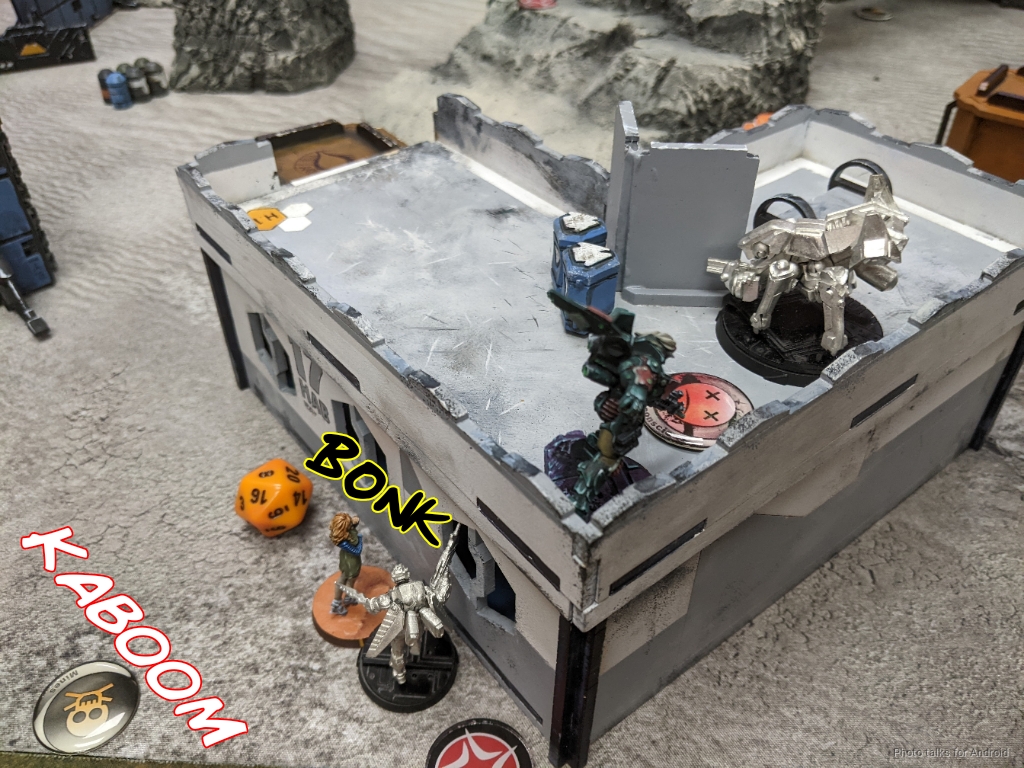
The Rindak easily takes down one of my Decoys by slicing the pie behind a Myrmidon so I can’t smoke if it fails, then goes after the other one.
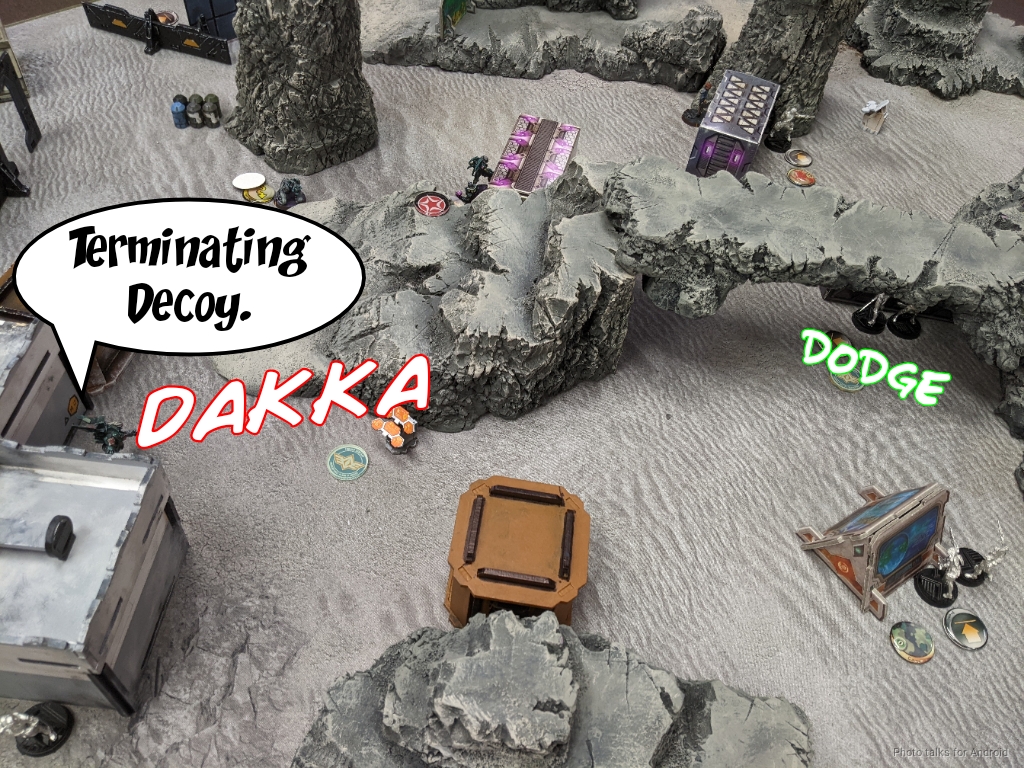
The climbing plus comes in handy here–the Rindak was hanging off the building to get this shot, but to get the camera shot… you get the idea.
In any case, Erik has definitely stabilized.
Turn 3
Top of 3 – Steel Phalanx
Things seem mostly okay at the moment.
Erik’s killed two Decoys to my none, and the antenna count is currently 2 for Erik and and 1 for me. I haven’t taken out the designated target yet, but neither has he. I need to take out the Designated Target to have a hope of winning, flip the antennas to my favor, and hopefully take out a decoy.
Acmon flips the last antenna I need to reveal the Designated Target, which is protected by a mine and the Avatar. After failing to drop the Ekdromoi behind all of Erik’s stuff, including the Avatar, I walk it on near the Designated Target (well near in my deployment zone). I’m convinced I need to get smoke onto it for some reason (spoiler: I don’t) so I single-mindedly focus on that. It takes me a ton of orders to plasma through a pair of Taigha, and then I just straight up fail a coordinated spec-fire smoke from Phoenix and the Myrmidon.
I need to go now, so I roll the Ekdromoi in. It turns out that there was an approach path that didn’t require smoke, so I use that. It’s a suicide run as the mine takes down the Ekdromoi, but I do take out the Designated Target.
There’s not much left for me to do now.
Bottom of 3 – Combined Army
I’ve got more consoles now, and I have the Designated Target points. All I need to do is prevent Erik from killing my own target, which requires flipping an console, so I’ve got to prevent that too.
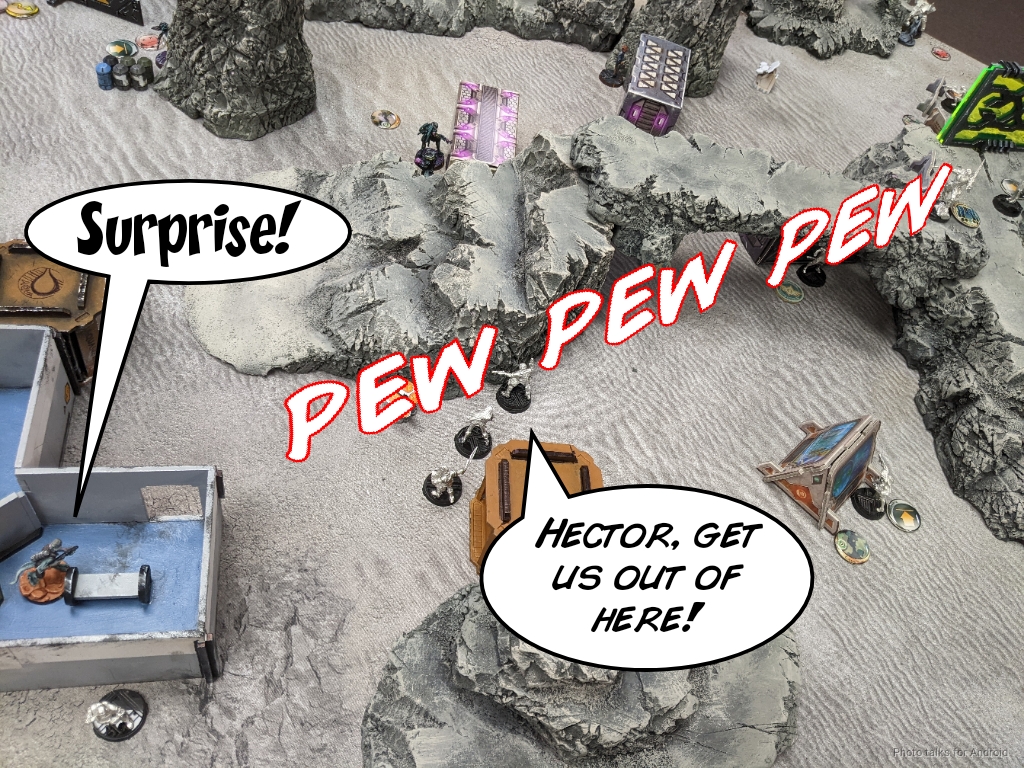
Erik just goes for it with the Avatar, challenging Hector and doing a wound.
The Avatar has a Staldron, so it can do everything and it’s got plenty of orders. The Avatar takes on Phoenix next, and even with the Avatar in the open as it moves forward, Phoenix goes down.
With Hector forced into cover and Phoenix down, the Rindak can flip the last needed antenna. The Avatar keeps pushing and pushing on the Designated Target but Acmon dodges into close combat at the last moment. Hector heroically went down in a blaze of glory to try and slow it down too, and this costs just enough orders! The Avatar will have no problem pasting Acmon, but there’s just not enough orders to get out of close combat and kill the Designated Target.
Still, and unfortunately for me, this means Erik has more consoles and more decoys, which takes us to a
5-5, 121-231 Tie!
Post Game Analysis
Erik was elated at the tie, given our previous games, and it was well deserved. He played carefully, focused on the objectives, and stabilized the game when he needed to. I, on the other hand, squandered a stable position with a horrible late game and handed Erik what I consider the win. So what happened? Let’s pull the game apart and have a look at the big picture.
Turn 1
- Top of 1 – I take out 3 orders, none of which are particularly consequential
- Bottom of 1 – Erik takes out a mine, a Daleth, and the Thorakitai
This is not that great, honestly, for me. Taking out an R-Drone and an Ikadron isn’t really all that good against an Avatar list. I did at least take down a Taigha, which is good. Taking out Bit is great, but really I want to take down the Rindak and Caliban. If I do that I’m in great shape. I’d almost prefer taking out the Rindak and Caliban over Bit here, because Bit is significantly more fragile in the midfield, even if she is a bit of a threat to Hector and Pandora.
I had the tools to deal with both, and I think it would have been much better to be more aggressive against them with fast units like the Daleth, or even the forward-deployed Thyreos. That might actually be a reasonable use case to attack the Rindak with the Thyreos, as the mono gets around the multi-wound and I can always mine plant then SMG if I need to.
So I think I really had a chance here to actively do some damage instead of passively parking a Daleth on top of the Rindak and let Erik do some damage. I’d almost rather spend my entire order pool taking down the Rindak. That isn’t to say the Caliban isn’t a threat, but I have much better tools for dealing with that–there just aren’t any good tools against a Rindak except spending the orders.
In contrast, Erik’s first turn is much better. He took out a big active turn threat in the form of the Thorakitai and really removed specialists from my right flank. Losing the Daleth there was really bad for me, not just because I lost the specialist but because I lost the repeater. Hector and Pandora’s advance into the midfield was really best moving diagonally towards the center of the table on an elevated walkway, so I really didn’t have a way of projecting threat or capability to the far edge of the table.
This was where my Designated Target was, which was a bit of a bluff on my end, which worked out in my favor, but could have just as easily failed horribly. So basically Turn 1 I went in without a solid plan and overconfident in Hector’s ability to get me out of any situation. I could have had a targeted hit list, i.e. the Rindak and the Caliban, and that would have put me in a much better position.
Turn 2
- Top of 2 – I flip 2/3 consoles, attempt to take on the Avatar and Rindak
- Bottom of 2 – Erik flips two consoles and takes out two decoys
This was definitely still a better turn for Erik. I just left the Caliban and the Rindak alone again. Yes, I attempted to Carbonite the Rindak but then let him get a reset off. Failing the pitchers on the Avatar was really rough. Pushing the Daleth on my left would have been pretty reasonable, I probably should have done that. Really I just needed to develop instead of stagnating the link the in the midfield.
Having to push so far forward and then getting mired in place by the Libertos was just too much. I think my priorities were okay here, just the order of operations was bad. I was also really relying on the Daleth to get some button pressing done, there’s just too much pressure on them, and the Thyreos are just not contributing at all, aside from their orders. I think I need to look at a different profile for them and just pay the cost of placing the mine or something.
Anyway, I got too distracted this turn trying to address too many things. I at least got the consoles flipped, but all that does is set Erik up for flipping the consoles back and getting points for that. Unmasking is nicely balanced there, as there are clear advantages for both players, regardless of turn order.
Erik, by contrast, had a focused turn and got the work he needed done. I was just trying to drag links around the table and wasting orders on that.
Turn 3
- Top of 3 – Kill the Designated Target
- Bottom of 3 – Flip another antenna and tie up the game.
I’m in big trouble in Turn 3. I dedicated all my resources to taking out the Designated Target, when I probably could have spent some going after the already revealed Decoys with Acmon. Acmon gets the last console, Ekdromoi gets the Designated Target, then I just spend the rest of my turn moving Acmon around killing Decoys as best I can. I might even be able to take out an order or two, which would of course help. Erik played the last turn well, and that’s why he essentially won.
Summary
So at the beginning I talked about mindset and how it affected this tournament. I was not feeling confident going in and definitely felt like edge was a little dull. I had just had a pretty big rash of games where I wasn’t playing at my best and was feeling pretty rattled. Instead of being open to trying different lines of play, I ended up just focusing on what I felt I could accomplish and didn’t take big risks.
What’s also interesting is that while I was not confident in my play ability this tournament, I was over-confident in Hector’s ability to get me out of trouble. It was like having those two extra orders and suffering from decision fatigue from other events in my life made me just a terrible player this tournament. Infinity at its core is a game about risk and resource management, and if you’re just not playing at your best you can easily squander your resources.
It’s so easy to look at this game several weeks later and see the better lines of play. At the table, under time pressure and not playing at your best it’s very, very hard. There are just so many small mistakes that you can make in this game, from over-investing to making a prioritization mistake. It’s easy to have those snowball into a bad state. Anyway. I played poorly, mental state and mindset aren’t an excuse, and Erik deserved the win! It’s been awhile for him. Congratz to him and I’m looking forward to the rematch.
Pingback: Mission 052: Forward into the New Year – Bromad Academy
Pingback: The Worst Timeline – MERC Recon