
Tanko Tempura
So, I really wanted to play JSA and also test my mission, Blockade Runner,
that I had developed for Operation Hungry Walrus.

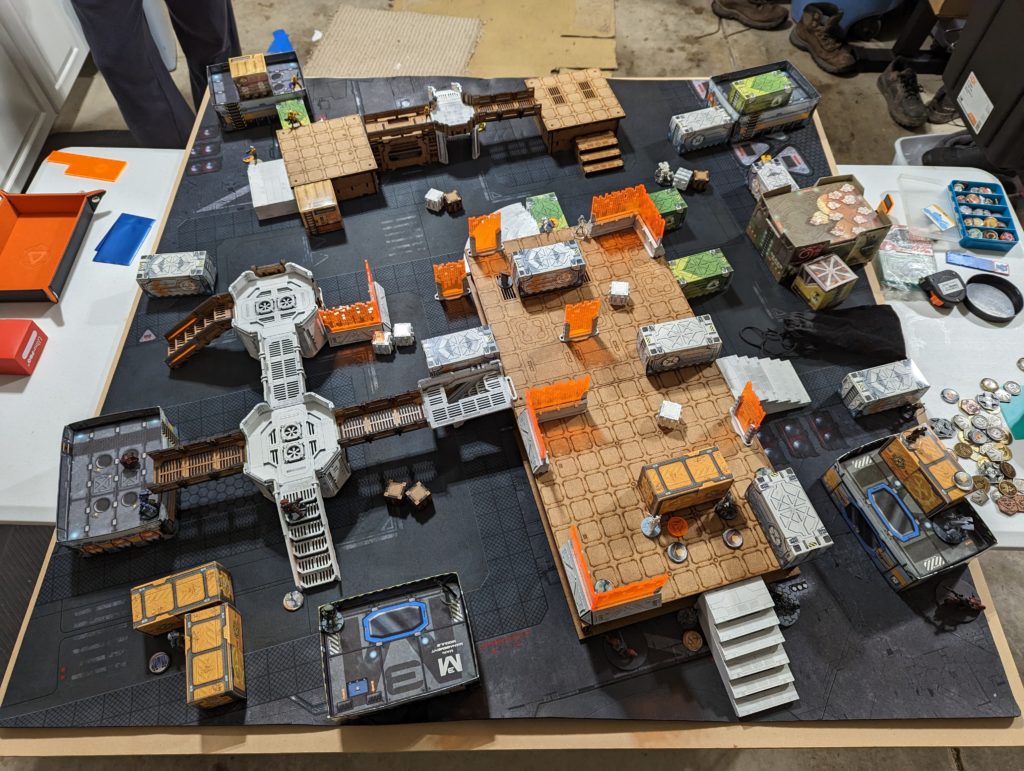
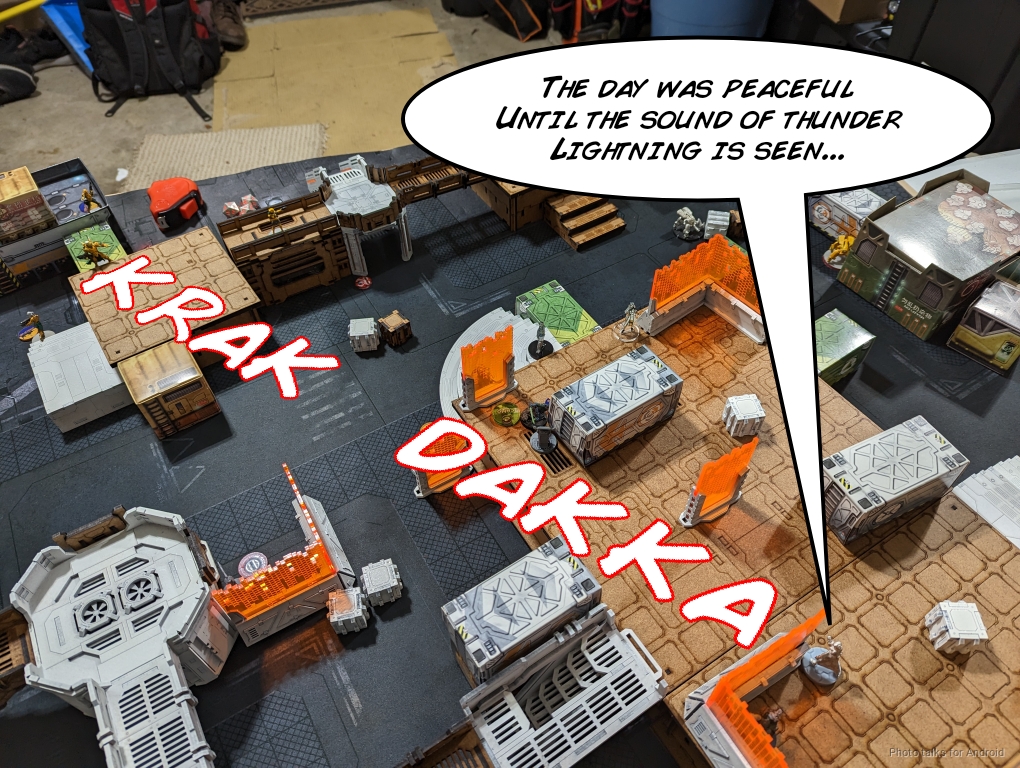
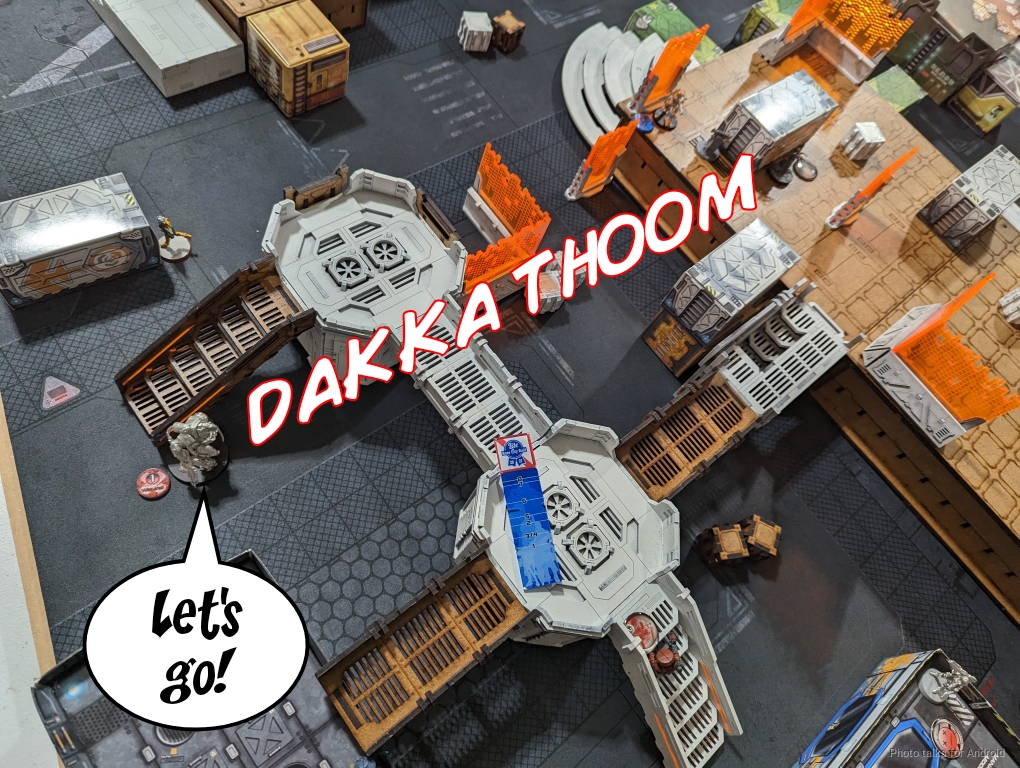
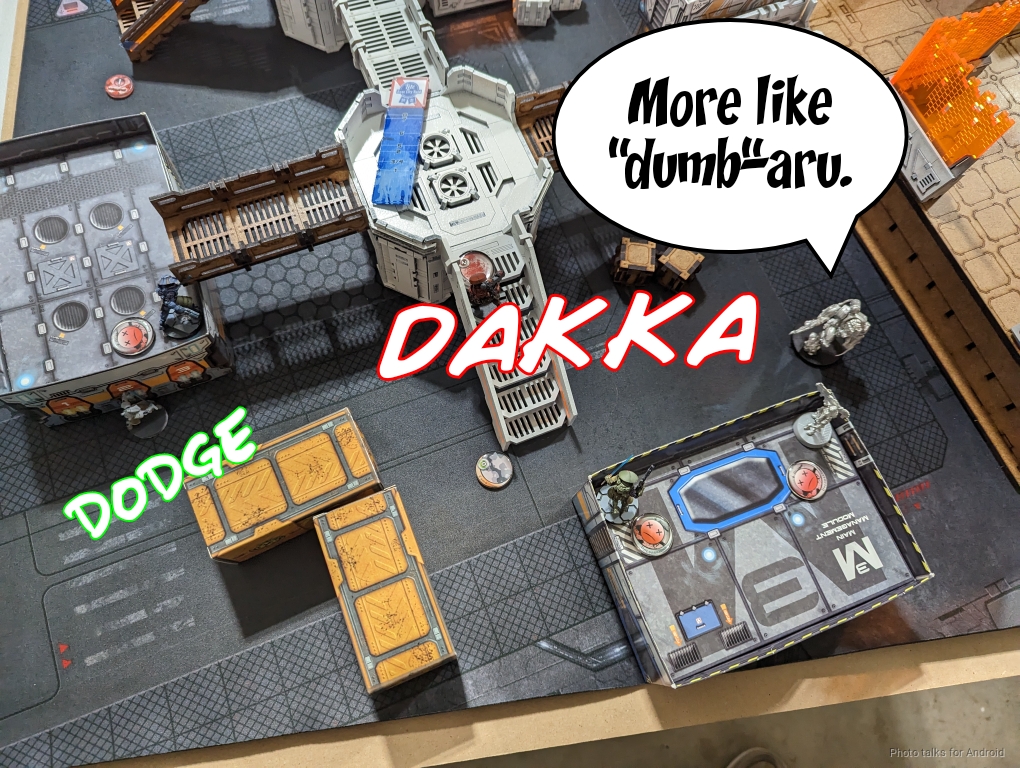
Unfortunately, I had built and packed the list in my bag before James and I agreed to play the mission, but we did get to play on this fun configuration:
Overview
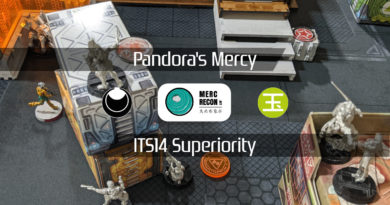
- Mission: Blockade Runner
- Forces: Japanese Secessionist Army versus Yu Jing (300)
- Deploy First: Yu Jing
- First Turn: Yu Jing
So, here’s the quick rundown of what Blockade Runner is all about:
- You’re trying to get your HVT to the enemy deployment zone to “run the blockade.”
- There’s a pair of Mk12 turrets controlled by a Rogue AI which you can possess like TAGs.
- There’s a console in the middle of the table to control at the end of each game turn to “gather data” on the Rogue AI
- 2 Classifieds
So, this list isn’t designed for Blockade Runner. Of note is that it has no hackers to deal with the turrets in Blockade Runner. I either have to smoke them out or just straight up shoot them, which isn’t easy. I’ve got a pretty good ARO game with triple Tanko, and a good candidate to hold the central objective with the Karakuri.
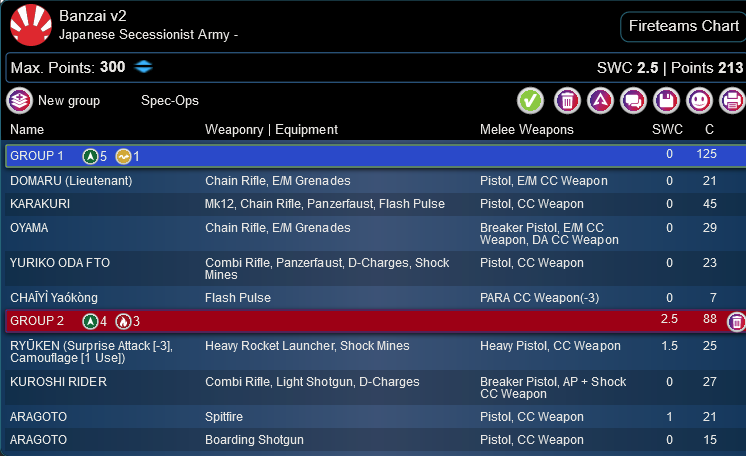
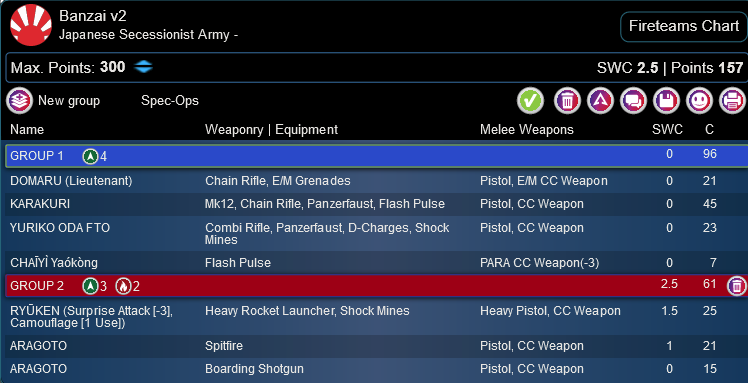
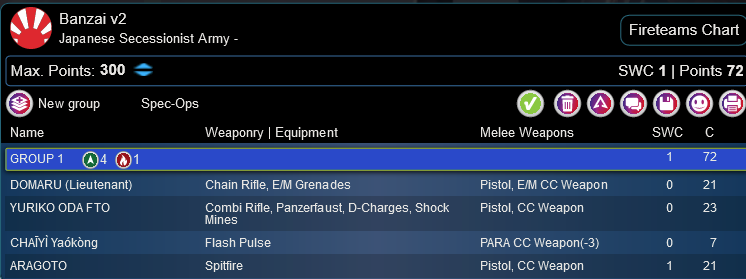
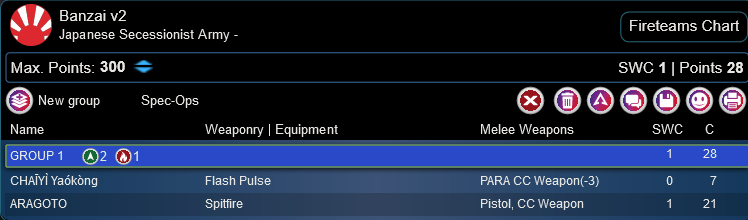
Banzai v2
GROUP 1
8
1
3
DOMARU (Lieutenant) Chain Rifle, E/M Grenades / Pistol, E/M CC Weapon. (0 | 21)
TANKŌ Missile Launcher / Pistol, Monofilament CC Weapon, Shock CC Weapon. (1.5 | 27)
KARAKURI Mk12, Chain Rifle, Panzerfaust, Flash Pulse / Pistol, CC Weapon. (0 | 45)
OYAMA Chain Rifle, E/M Grenades / Breaker Pistol, E/M CC Weapon, DA CC Weapon. (0 | 29)
YURIKO ODA FTO Combi Rifle, Panzerfaust, D-Charges, Shock Mines / Pistol, CC Weapon. (0 | 23)
GROUP 2
CHAĪYÌ Yaókòng Flash Pulse / PARA CC Weapon(-3). (0 | 7)
RYŪKEN (Surprise Attack [-3], Camouflage [1 Use]) Heavy Rocket Launcher, Shock Mines / Heavy Pistol, CC Weapon. (1.5 | 25)
KUROSHI RIDER Combi Rifle, Light Shotgun, D-Charges / Breaker Pistol, AP + Shock CC Weapon. (0 | 27)
ARAGOTO Spitfire / Pistol, CC Weapon. (1 | 21)
5.5 SWC | 300 Points | Open in Army | Copy Code
The Ryuken help with the ARO game, and I’ve got a bike haris if I need it. It’ll be hard to get the HVT across the table unless I make some of the bikes non-impetuous, but that’s certainly possible.
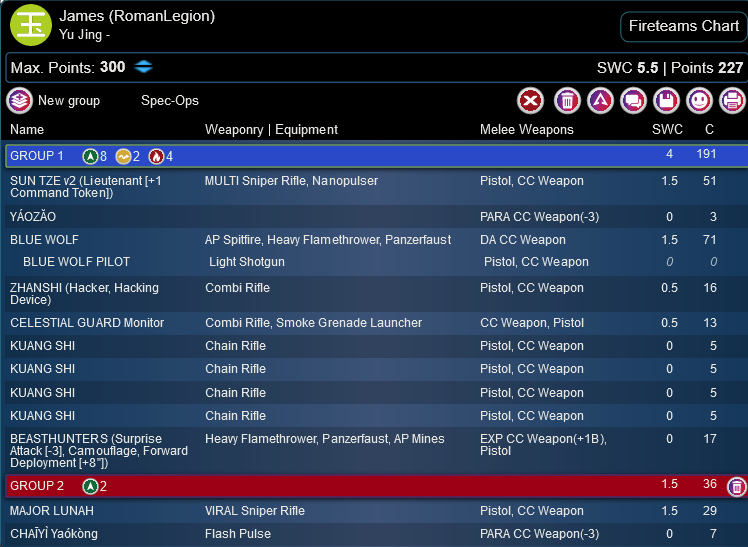
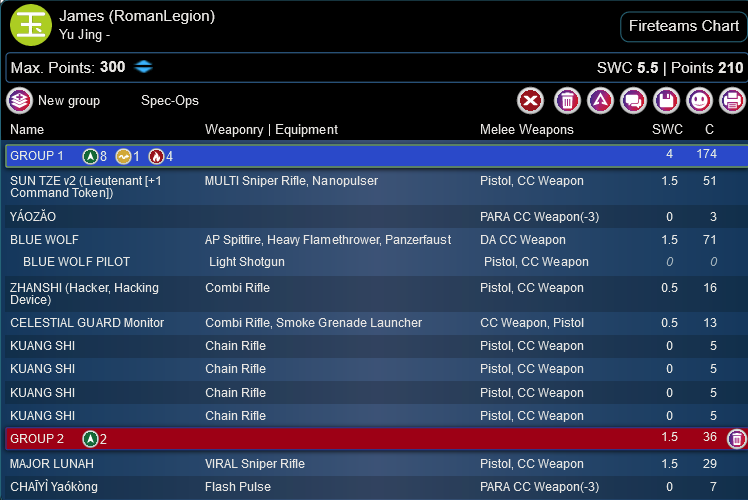
James is running his list from earlier:
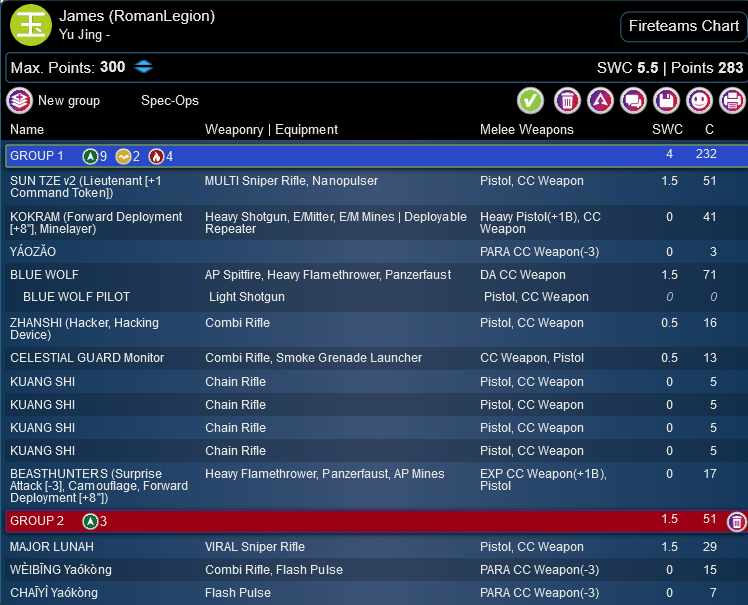
James (RomanLegion)
GROUP 1GROUP 2
SUN TZE v2 (Lieutenant [+1 Command Token]) MULTI Sniper Rifle, Nanopulser / Pistol, CC Weapon. (1.5 | 51)
KOKRAM (Forward Deployment [+8″], Minelayer) Heavy Shotgun, E/Mitter, E/M Mines ( | Deployable Repeater) / Heavy Pistol(+1B), CC Weapon. (0 | 41)
YÁOZĂO PARA CC Weapon(-3). (0 | 3)
BLUE WOLF AP Spitfire, Heavy Flamethrower, Panzerfaust / DA CC Weapon. (1.5 | 71)
BLUE WOLF PILOT Light Shotgun / Pistol, CC Weapon. (0 | 0)
ZHANSHI (Hacker, Hacking Device) Combi Rifle ( ) / Pistol, CC Weapon. (0.5 | 16)
CELESTIAL GUARD Monitor Combi Rifle, Smoke Grenade Launcher / CC Weapon, Pistol. (0.5 | 13)
KUANG SHI Chain Rifle / Pistol, CC Weapon. (0 | 5)
BEASTHUNTERS (Surprise Attack [-3], Camouflage, Forward Deployment [+8″]) Heavy Flamethrower, Panzerfaust, AP Mines / EXP CC Weapon(+1B), Pistol. (0 | 17)
MAJOR LUNAH VIRAL Sniper Rifle / Pistol, CC Weapon. (1.5 | 29)
WÈIBĪNG Yaókòng Combi Rifle, Flash Pulse / PARA CC Weapon(-3). (0 | 15)
5.5 SWC | 298 Points | Open in Army | Copy Code
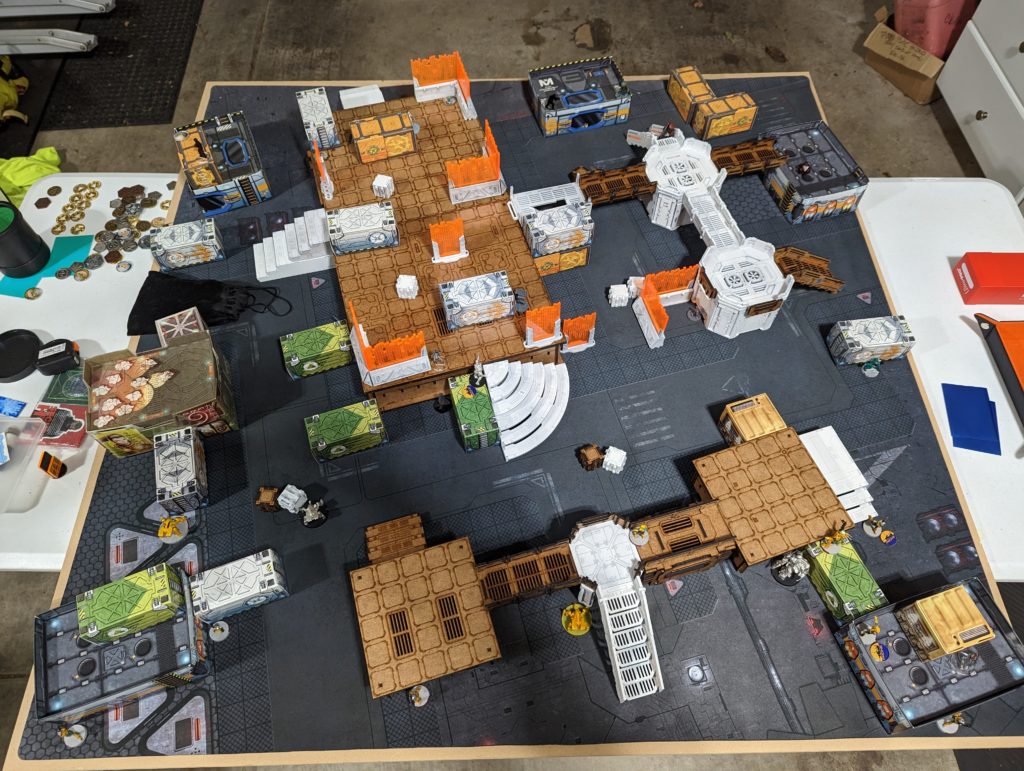
Deployment
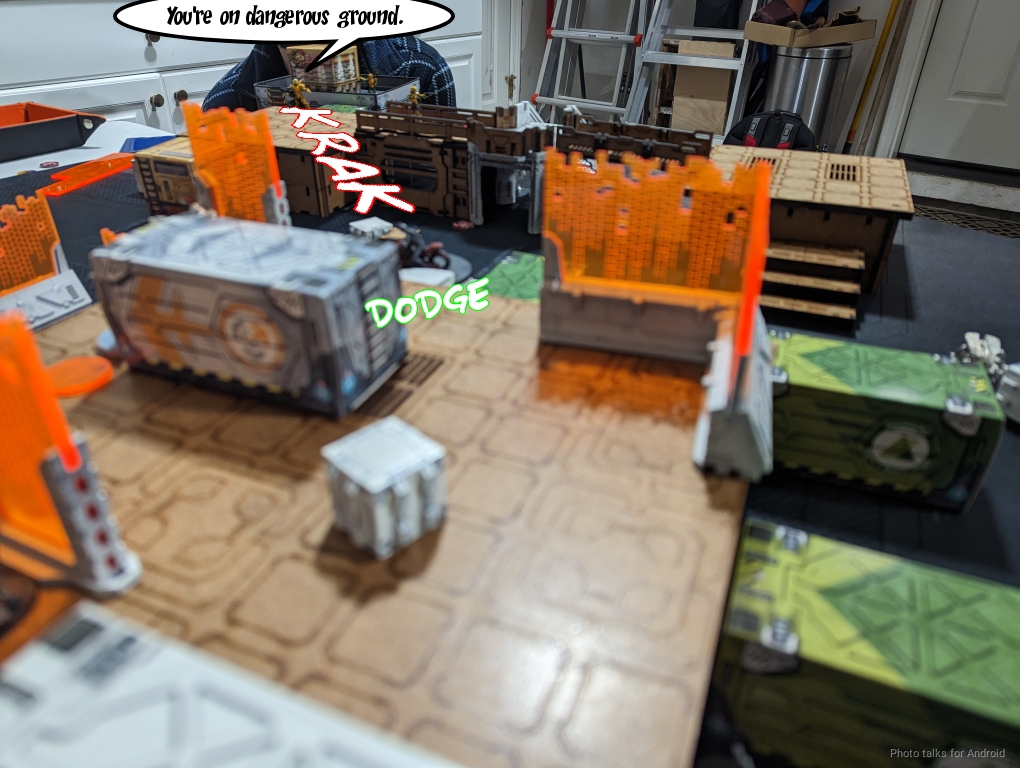
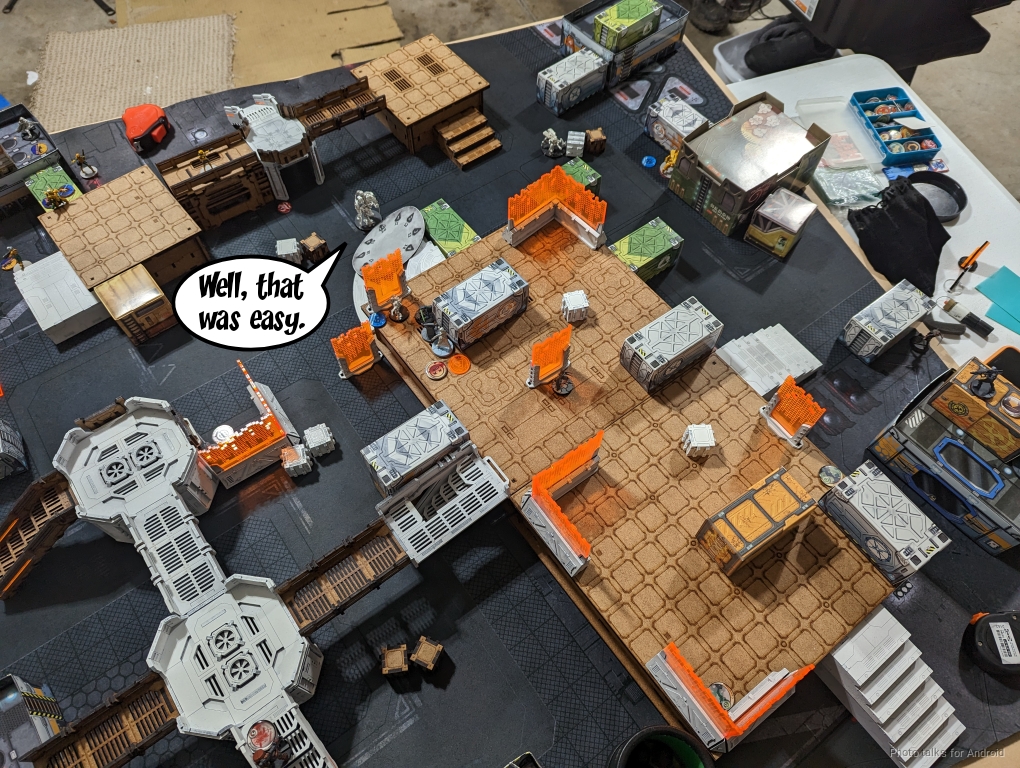
James won the rolloff and elected to go first. I made him deploy on what I thought was the weaker side and had more of the table exposed to one of the turrets. I also had a direct, elevated access to the central console, which I thought would also be helpful. James deployed Krit and a mine right up near the console to deter my approach. The Beasthunter went right next to Krit to really make things difficult.
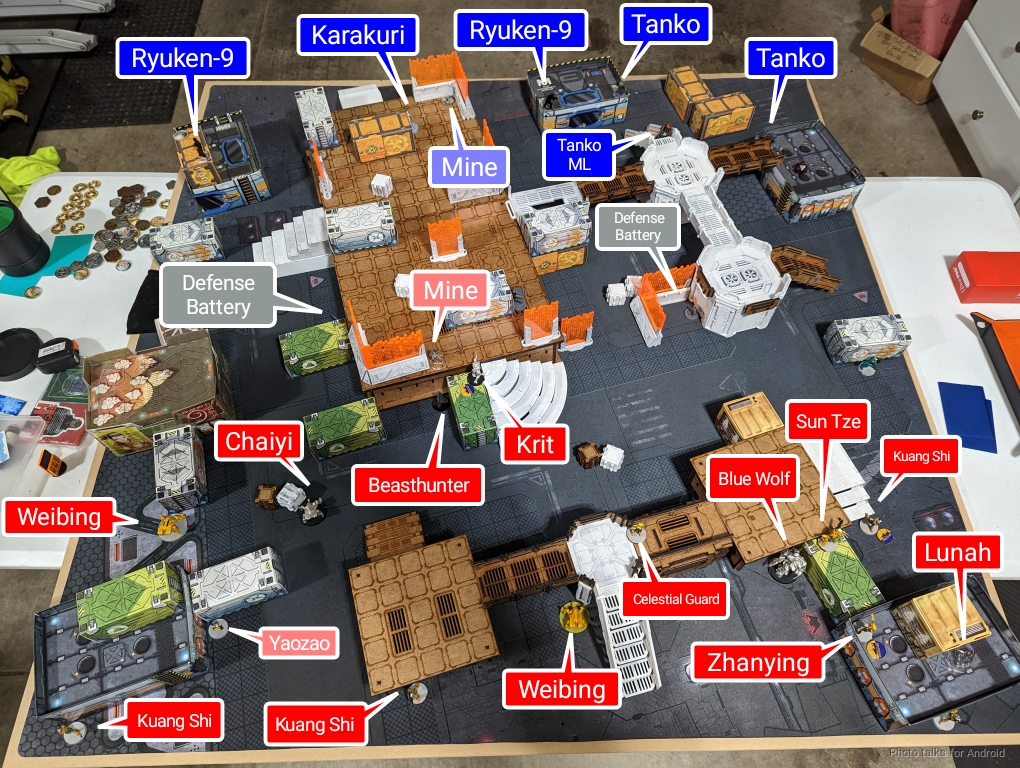
The Kuang Shi just hung out everywhere, and the Weibing and Chaiyi favored the left side, I imagine to try and close a hacking net on the corridor on James’s left. The Zhanying hacker just hung out, prone, and Sun Tze was actually left out standing to bait out AROs.
I covered Sun Tze with two Ryuken and one of the non-missile Tankos, and the Blitzen Tanko covered the table edge. The Domaru just went in a spot that would allow me to form a legal fireteam, and then I left Neko and the Karakuri up on the elevated platform to begin the advance and corner guard. Yuriko’s pretty important, so she hung out on the ground floor to protect her, and screened the approach with a mine against the Beasthunter. The two Ryuken also made things difficult for the Beasthunter with their mines as well.
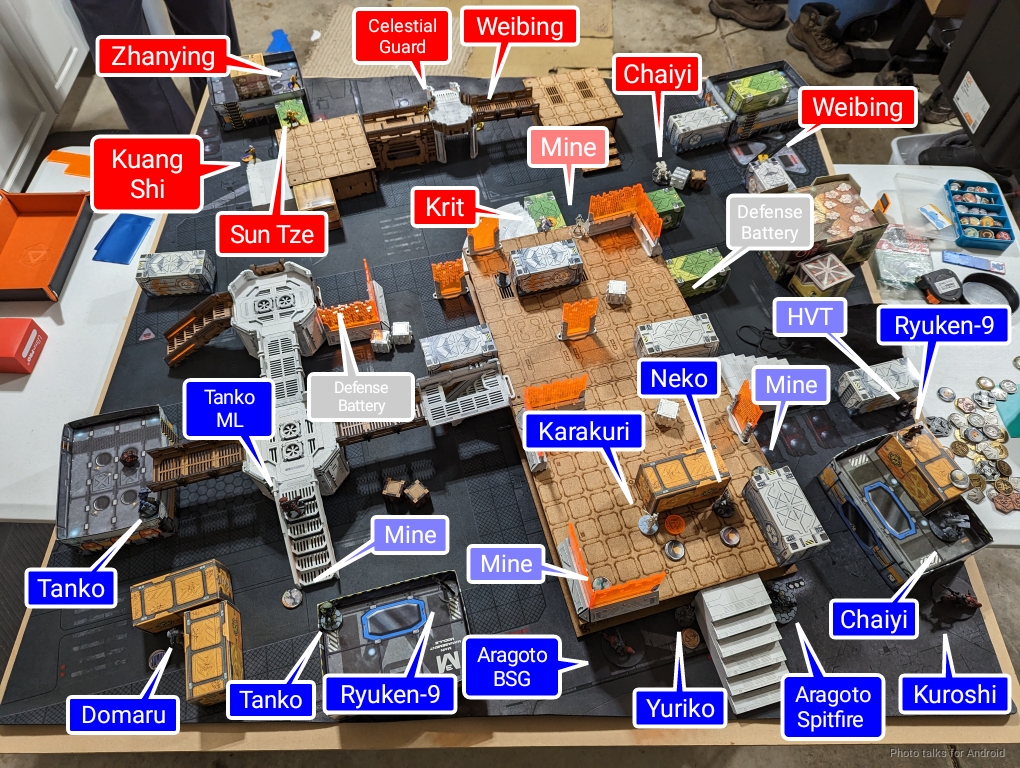
I put the bikes down on the right, ready to advanced up the narrow corridor on my right, then James put down the Blue Wolf and Lunah. I responded by blocking one of the Blue Wolf’s advancement avenues with the Tanko ML, then we were off.
Turn 1
Top of 1 – Yu Jing
Unfortunately, Lunah found a gap where she could challenge the Blitzen Tanko just outside of 32″, turning a win on the face to face for me to a loss and the loss of the Tanko. That +1 DAM Viral Sniper really can ruin your day.
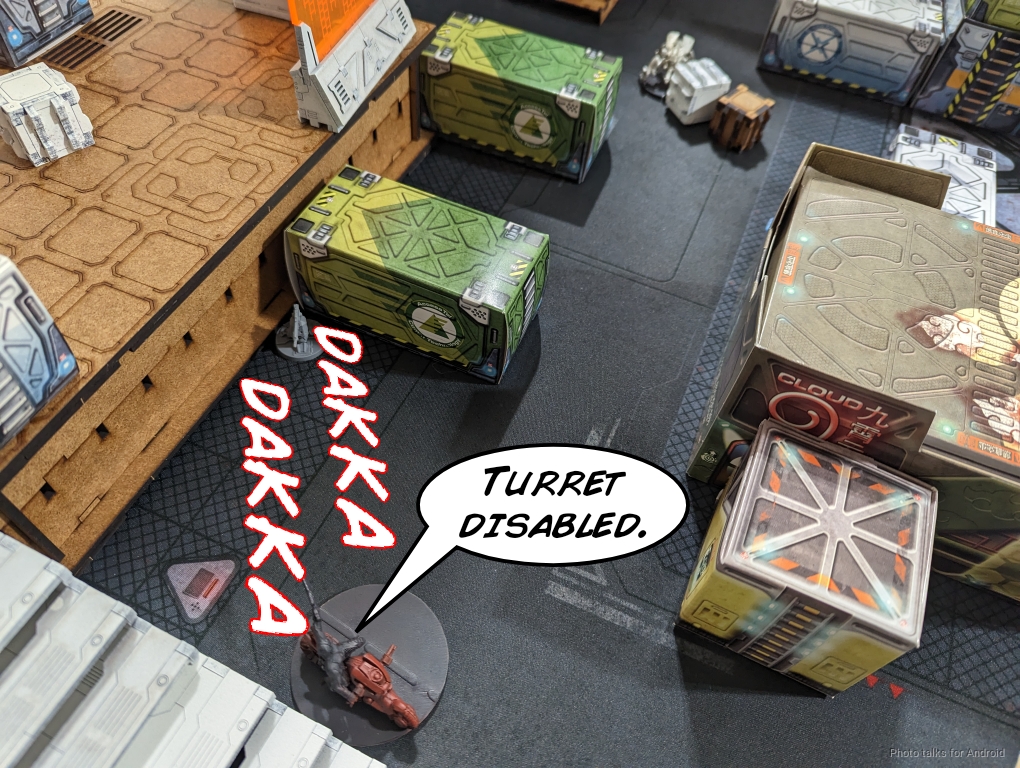
Krit dropped a repeater near the Defense Battery that was pinning most of his right flank in his deployment zone to allow the Zhanying to possess it.
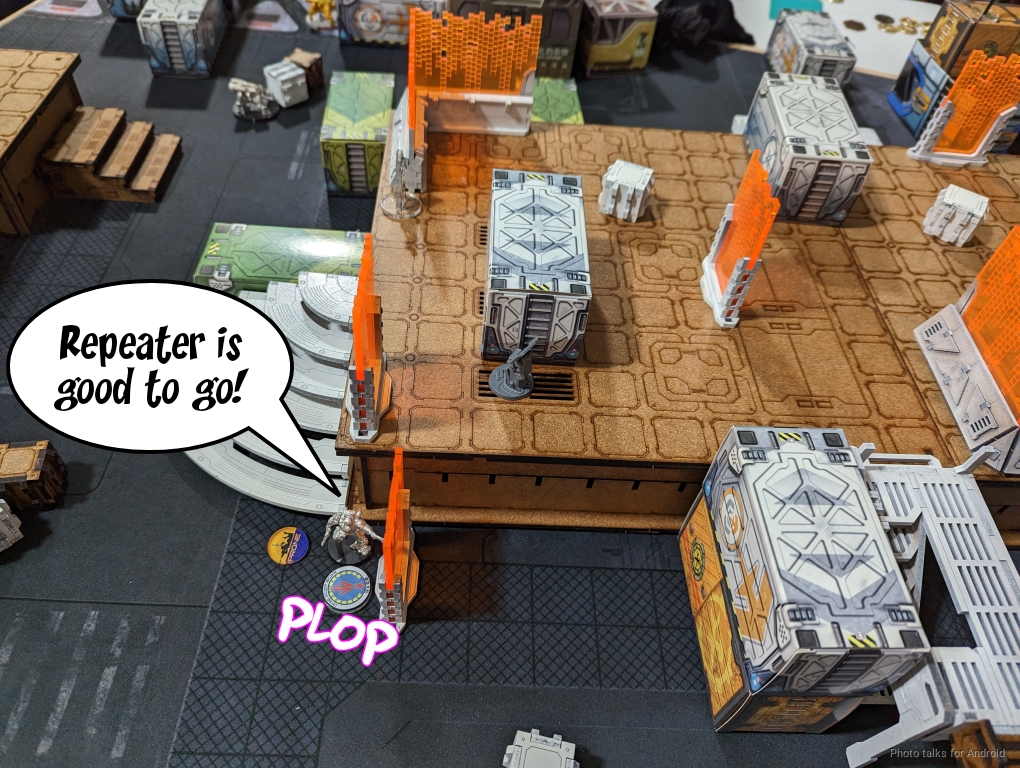
Thankfully it took two orders, but the Zhanying got the job done.
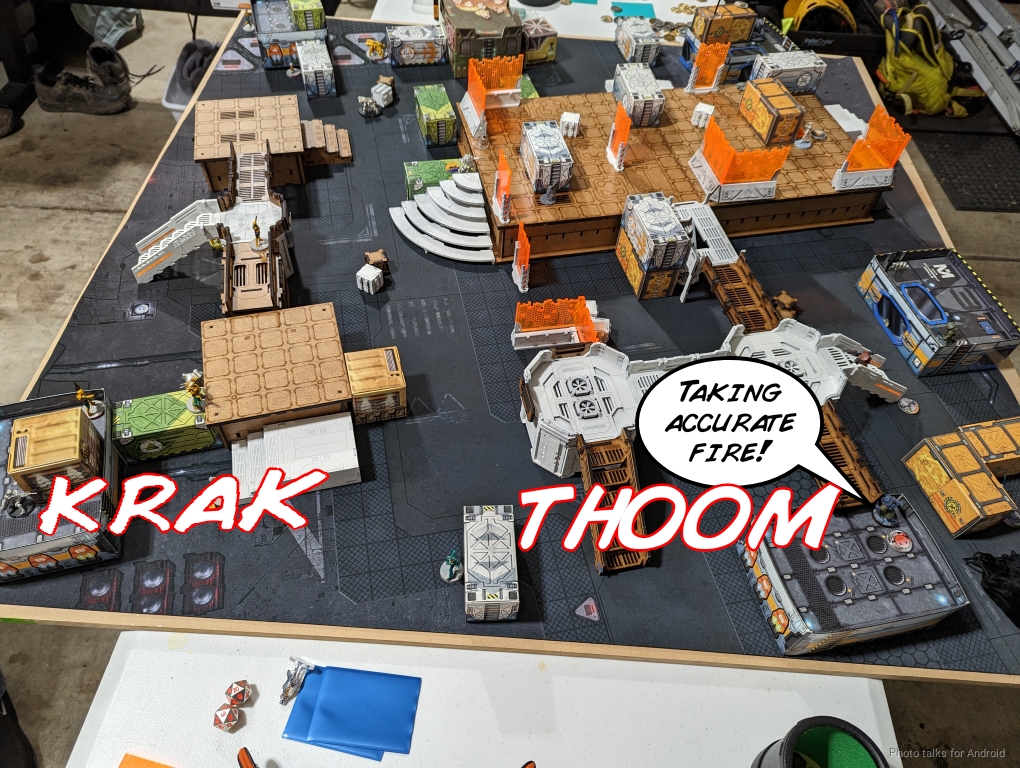
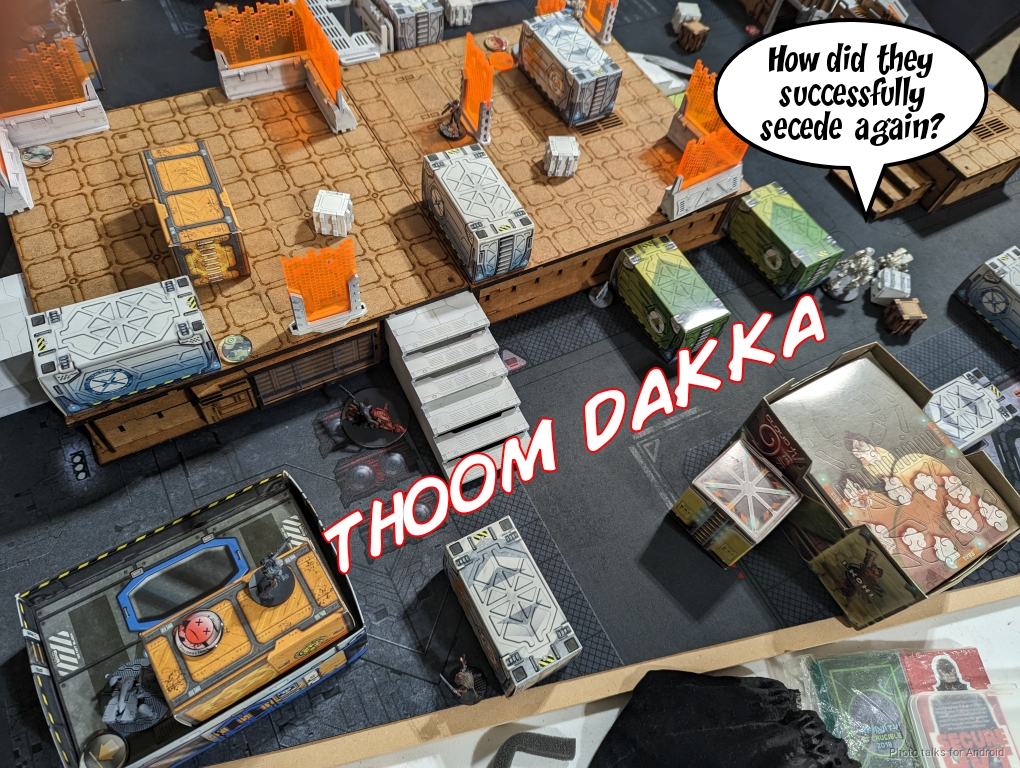
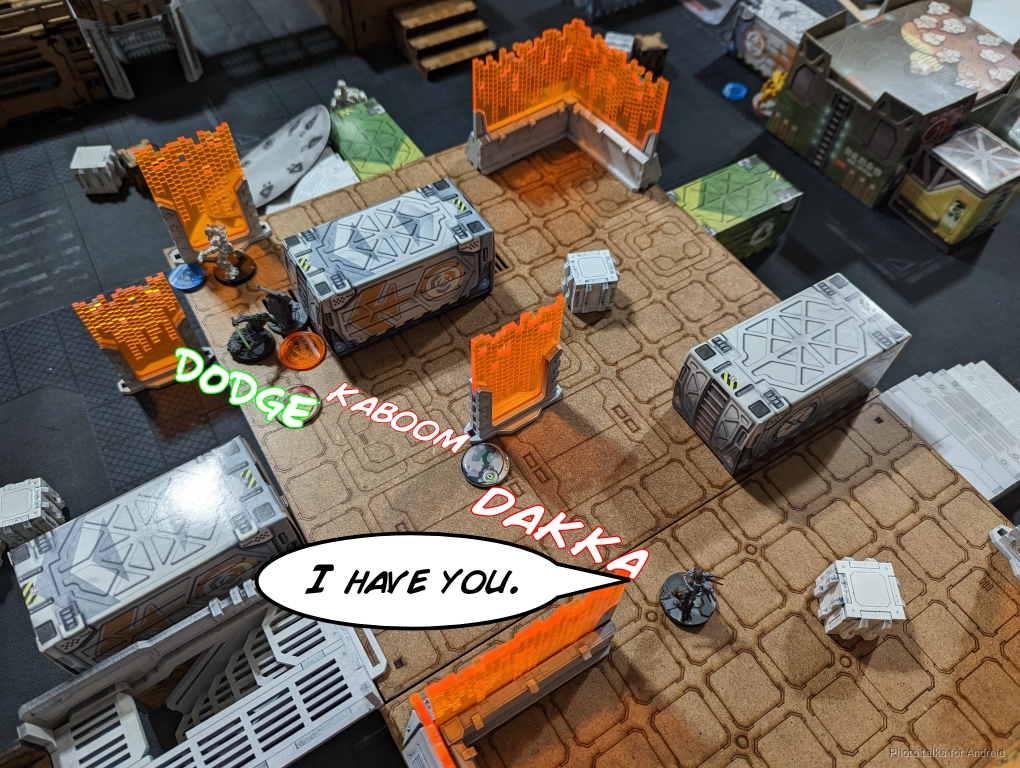
With the turret effectively disabled, the Blue Wolf was free to start moving around the table. It challenged the Flammenspeer Tanko while standing a bit too close to the Weibing. I lost the Tanko to the Panzerfausts from the Blue Wolf, but the Weibing is caught in the template and goes down.
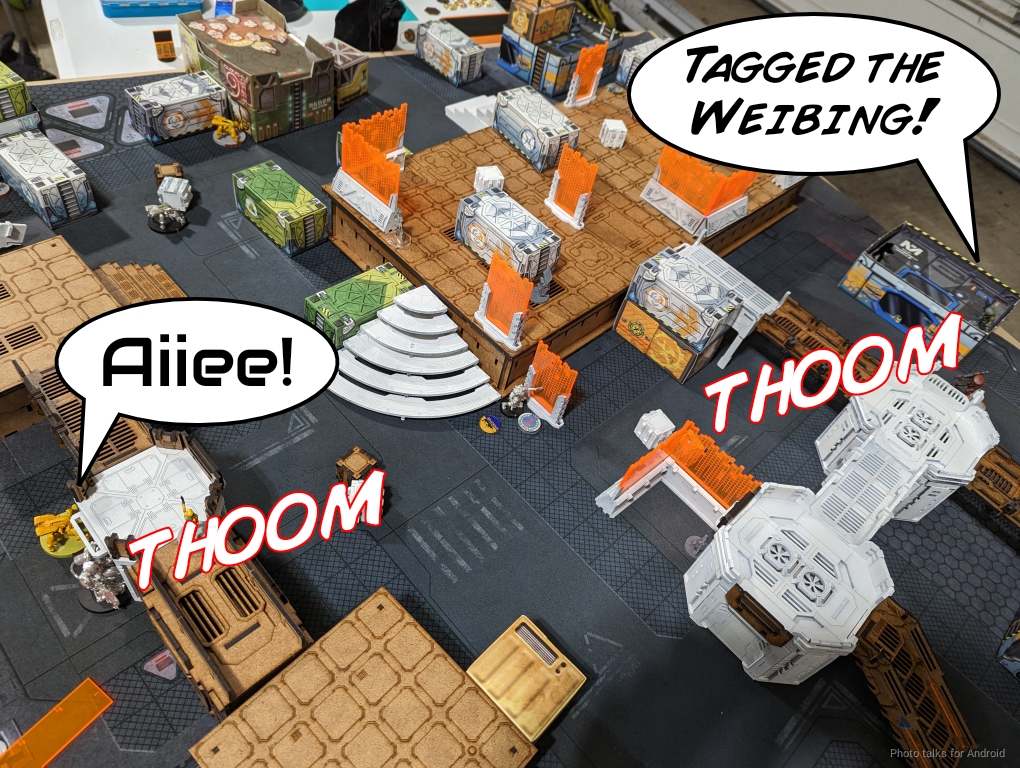
With the Tanko ML down to single burst, the Blue Wolf is ready to challenge it. I take a wound…
then do a wound…
Then finally get dropped. Sun Tze then discover-shoots the Ryuken-9. I decide to take the shot, given MSV1 and Sun Tze’s ridiculous WIP, but Sun Tze takes out the Ryuken-9 HRL, thanks to the range “penalty.” I put penalty in quotes here because of X-Visor, but I don’t have any BS bonuses so I’m on 9’s here to Sun Tze’s 11’s.
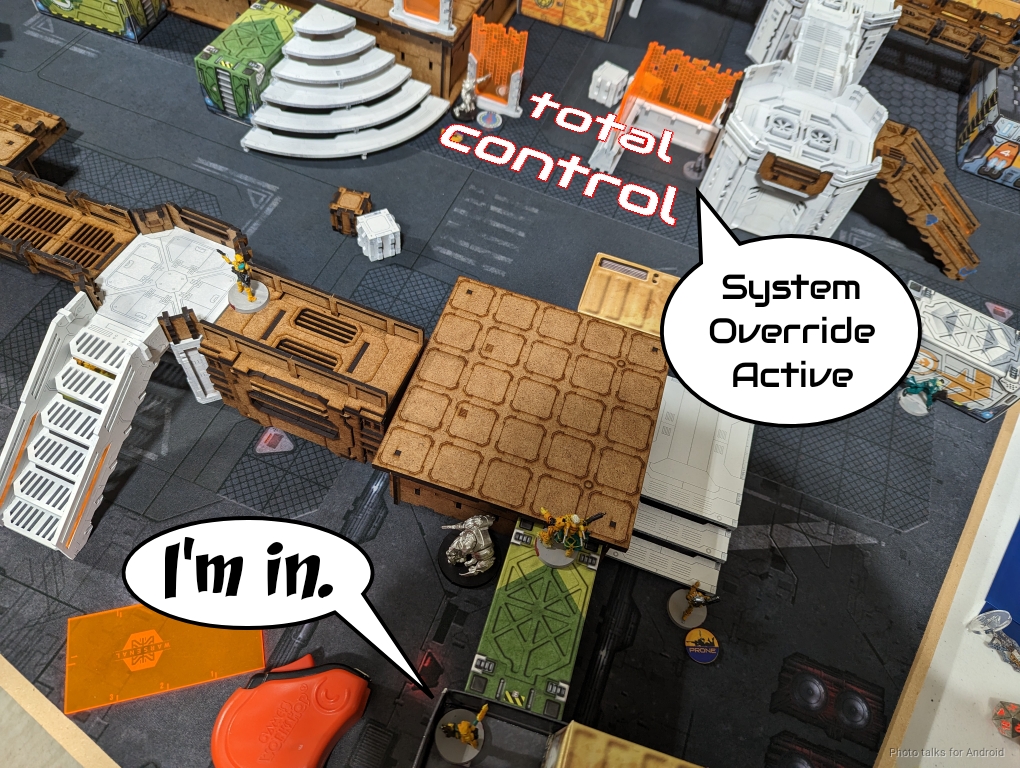
James then moves his remaining Weibing into range of the remaining Defense Battery and the Zhanying possesses it.
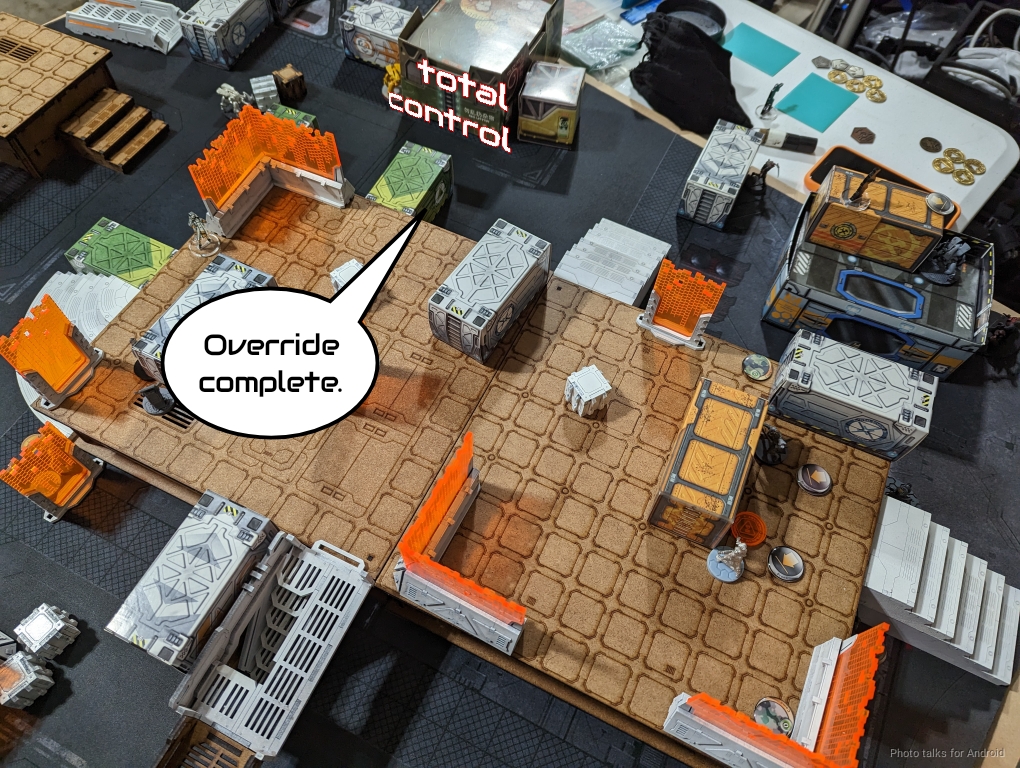
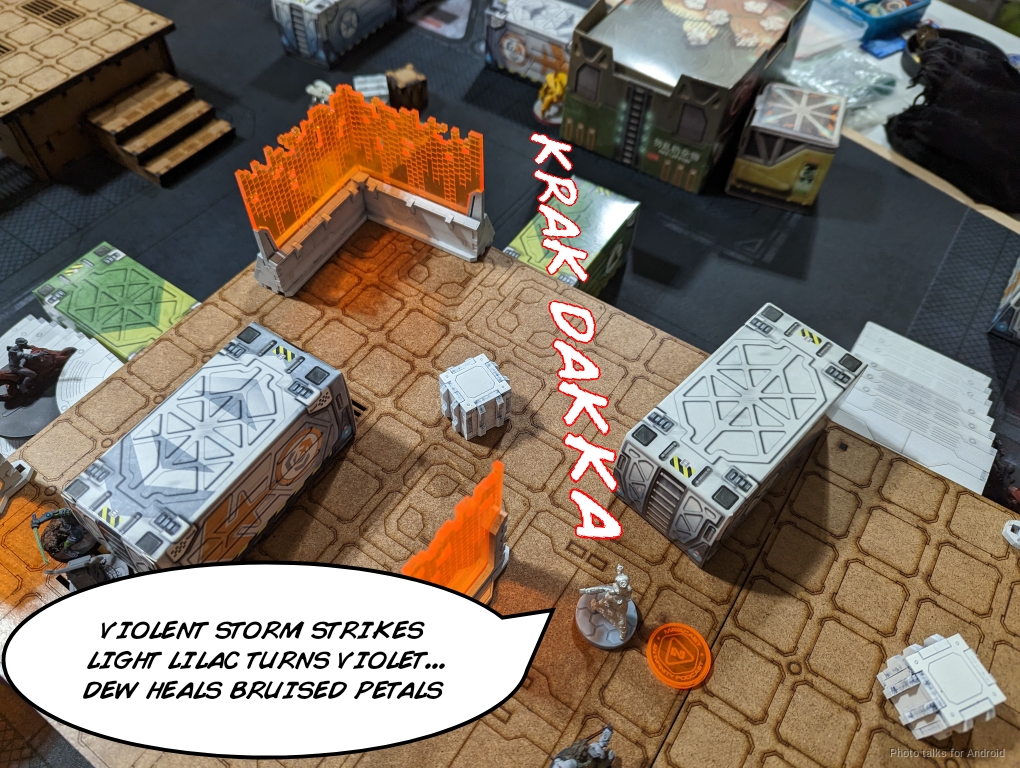
Finally, the Beasthunter hops onto the elevated platform, drops a mine, and denys me the ability to control the central console by basing it.
Krit shifts into cover and that’s James’s turn.
Bottom of 1 – JSA
Holy shit that was an unpleasant turn! James got a lot done with basically no cost to him. Gross.
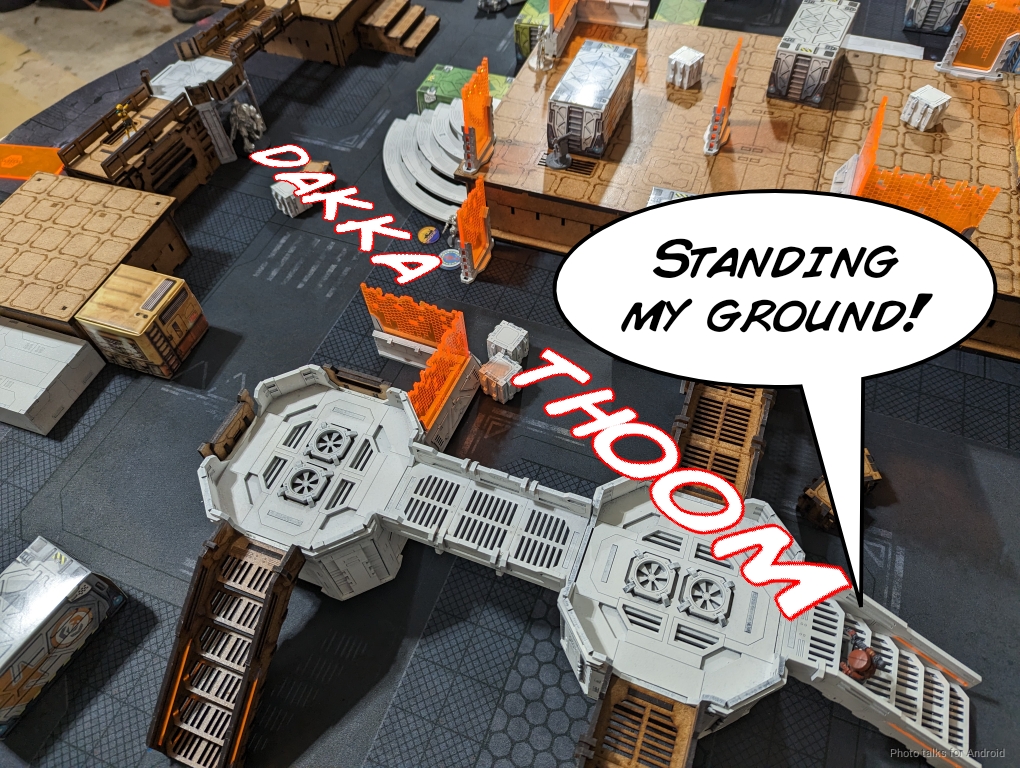
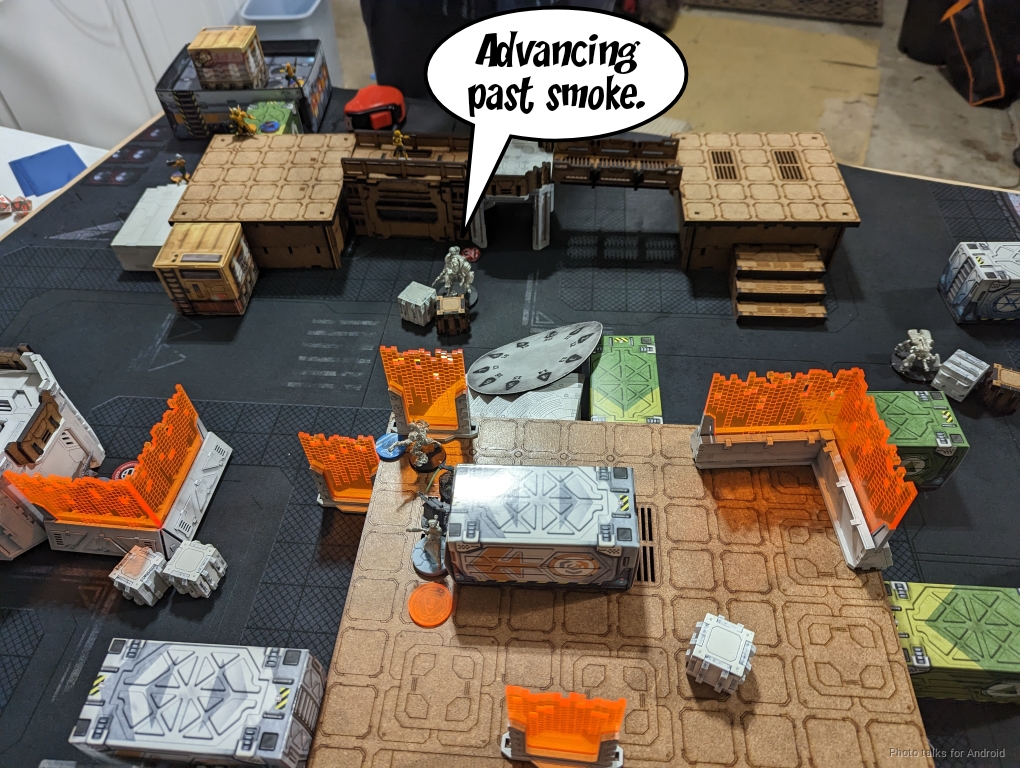
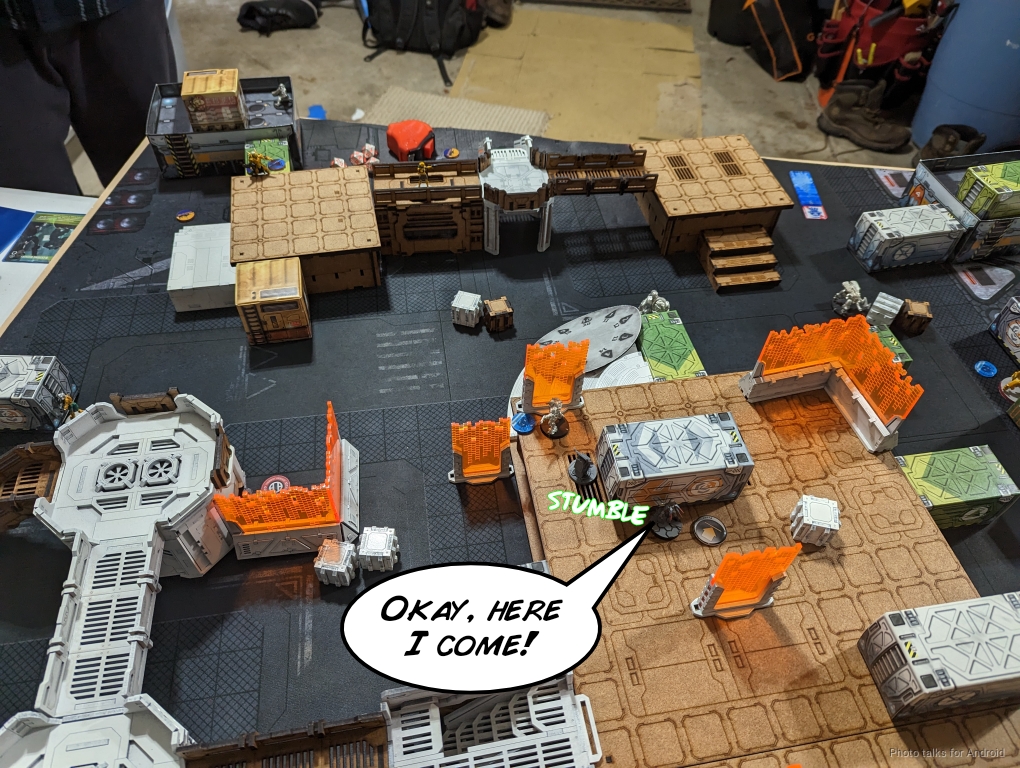
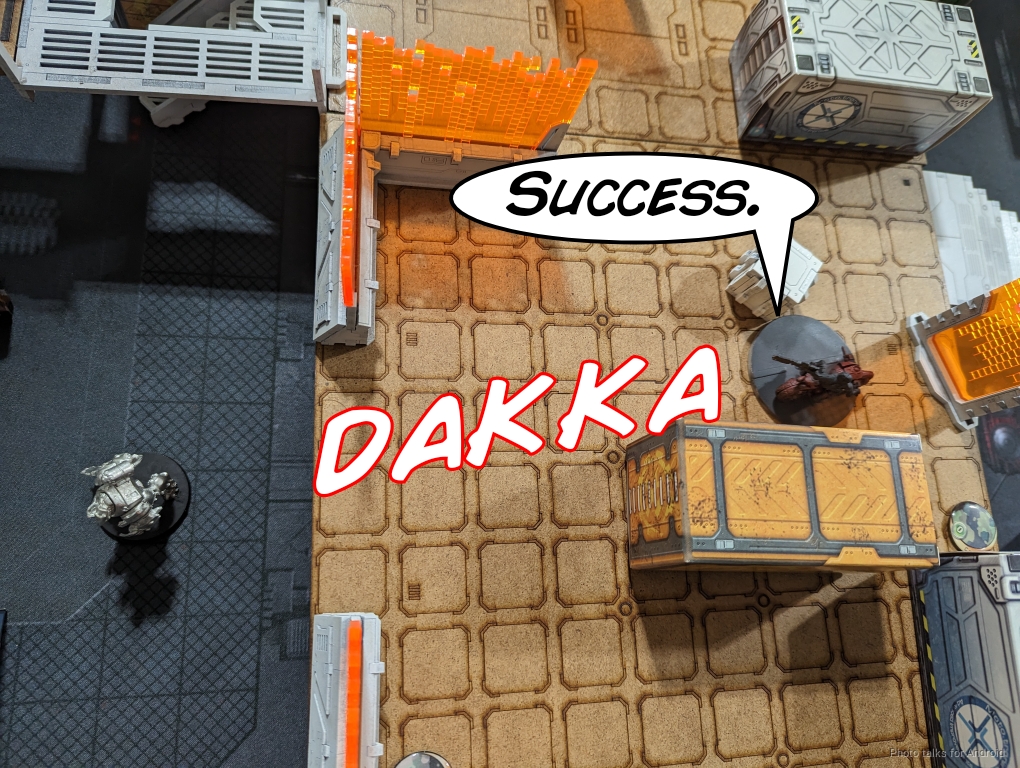
With everything so degraded, I just decided to get into the midfield and control the center console as best I could. To do that, I’d have to clear out a lot of stuff, starting with Sun Tze on overwatch as well as all of the mines and other nonsense sitting on the objective. After taking the impetuous bike moves that I could, I sent in the Karakuri to force Sun Tze prone. I wasn’t able to do any wounds, but at least Sun Tze’s head was down.
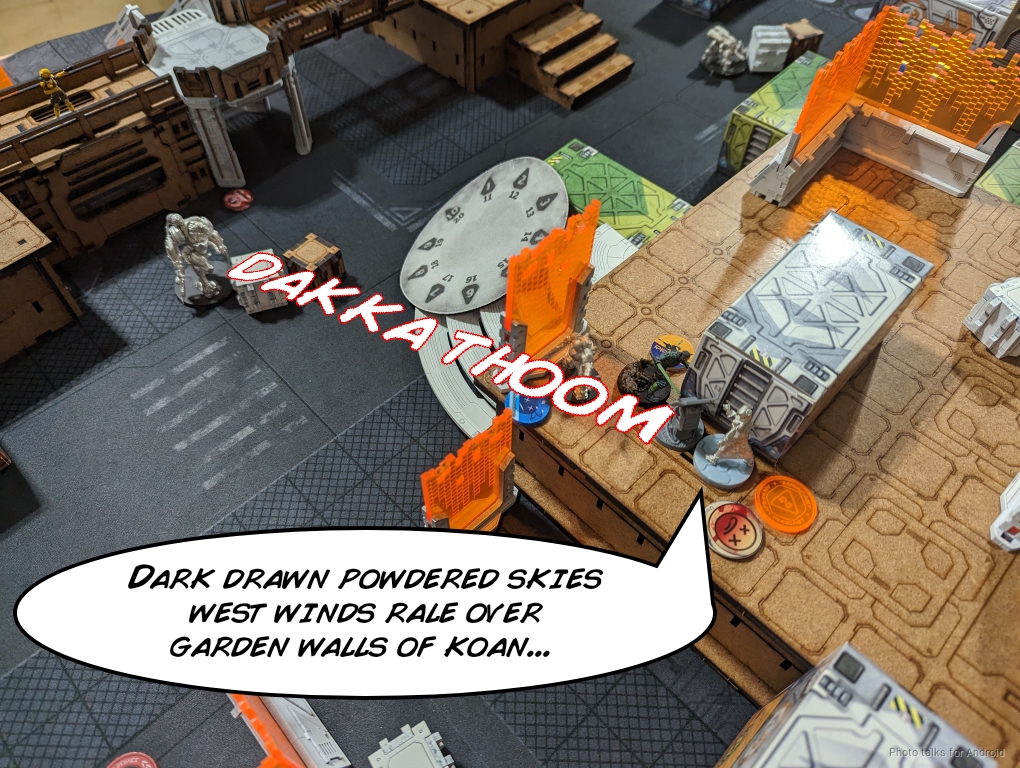
I throw the Aragoto BSG under the bus and template Krit and the Repeater…
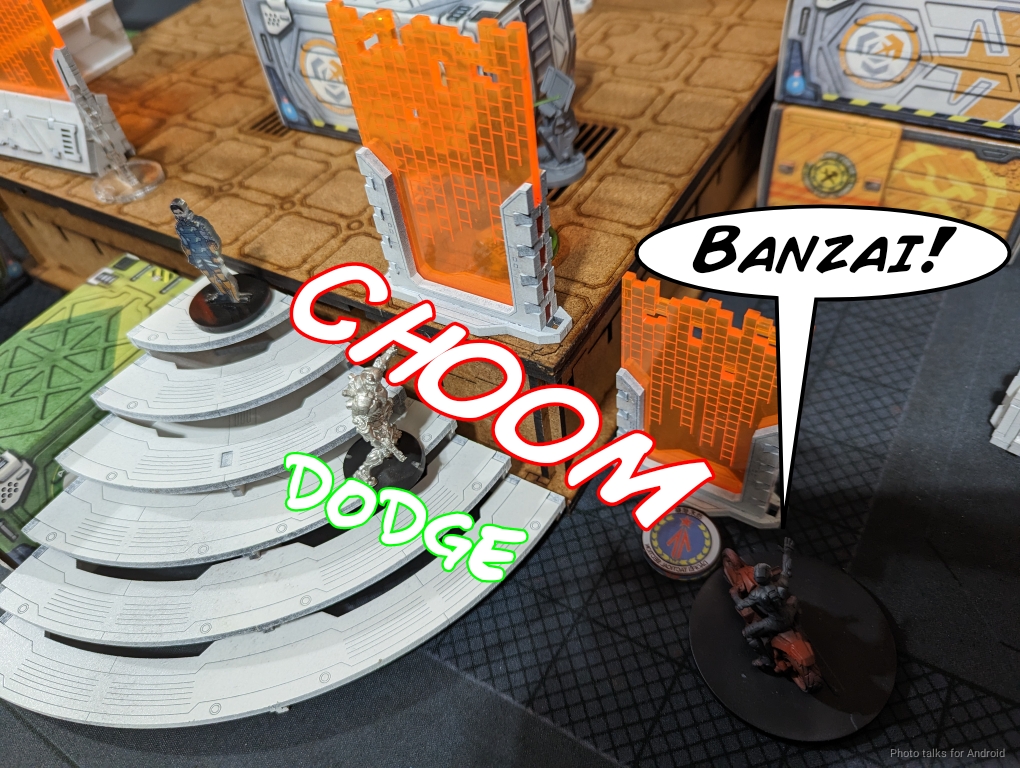
before driving into the midst of all the mines (in the same order) and just eating the templates. I fail the BTS save against the E/M mine but pass the AP save against the Beasthunter’s mine. The Aragoto is isolated, which is annoying because I could’ve killed everything there with it, but now James has to spend orders on it, which is I guess okay.
I take down the remaining Weibing on the way to the console, figuring I might as well.
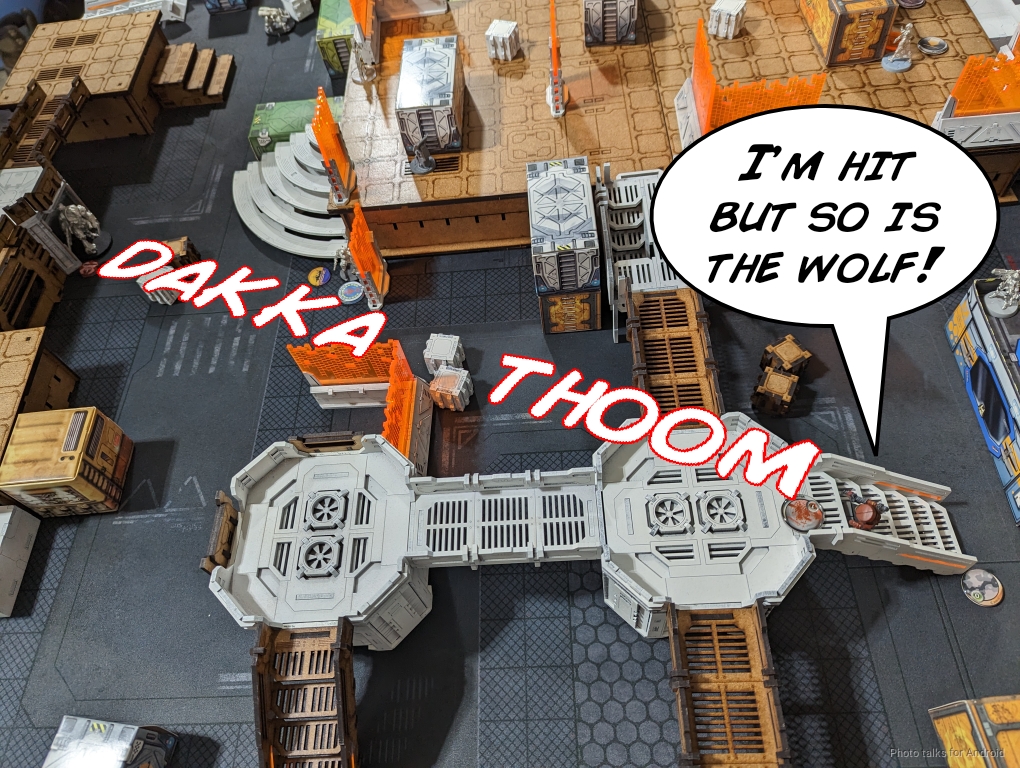
I then throw Neko under the bus to base to base the Beasthunter and Krit. Krit templates and the Beasthunter CC’s. I double chain rifle them both. The Beasthunter passes both saves and Krit takes a single wound, but Neko dies horribly. Thankfully the Karakuri passes its save against Krit’s template as she moves into base to base with the console.
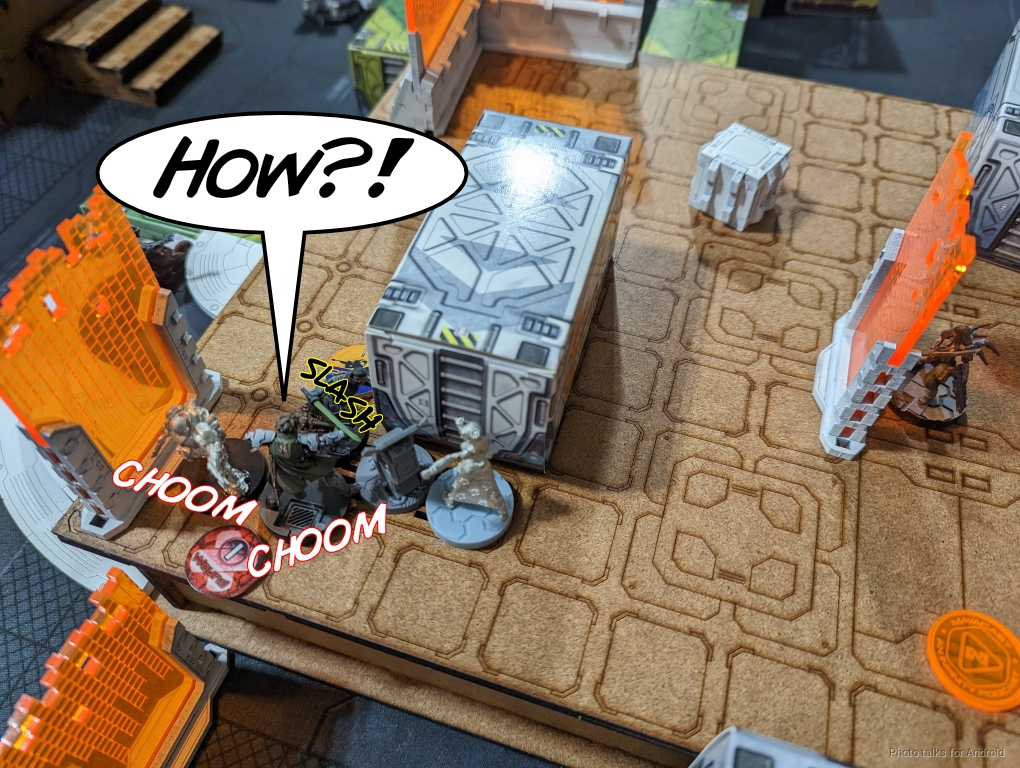
I finish Krit off by sacrificing Kuroshi Rider, and run out of orders to take on the Beasthunter.
With the Beasthunter still alive, I don’t control the console. Womp womp.
Turn 2
Top of 2 – Yu Jing
I’ve definitely lost a lot of capability now, and James’s list is pretty much still intact.
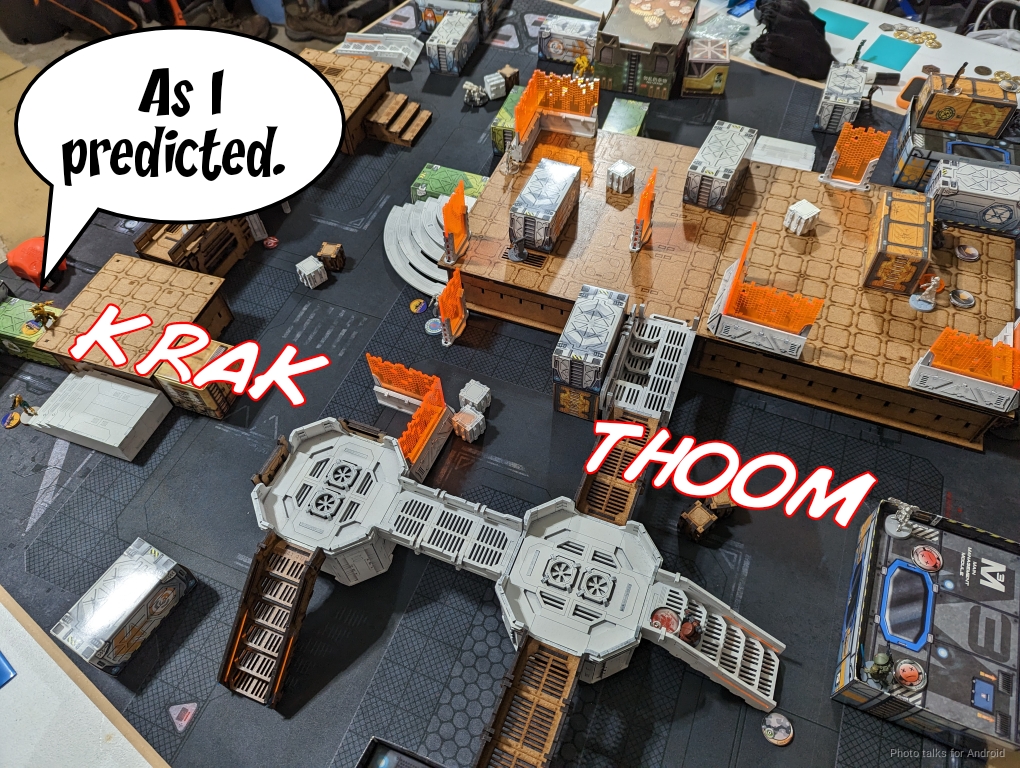
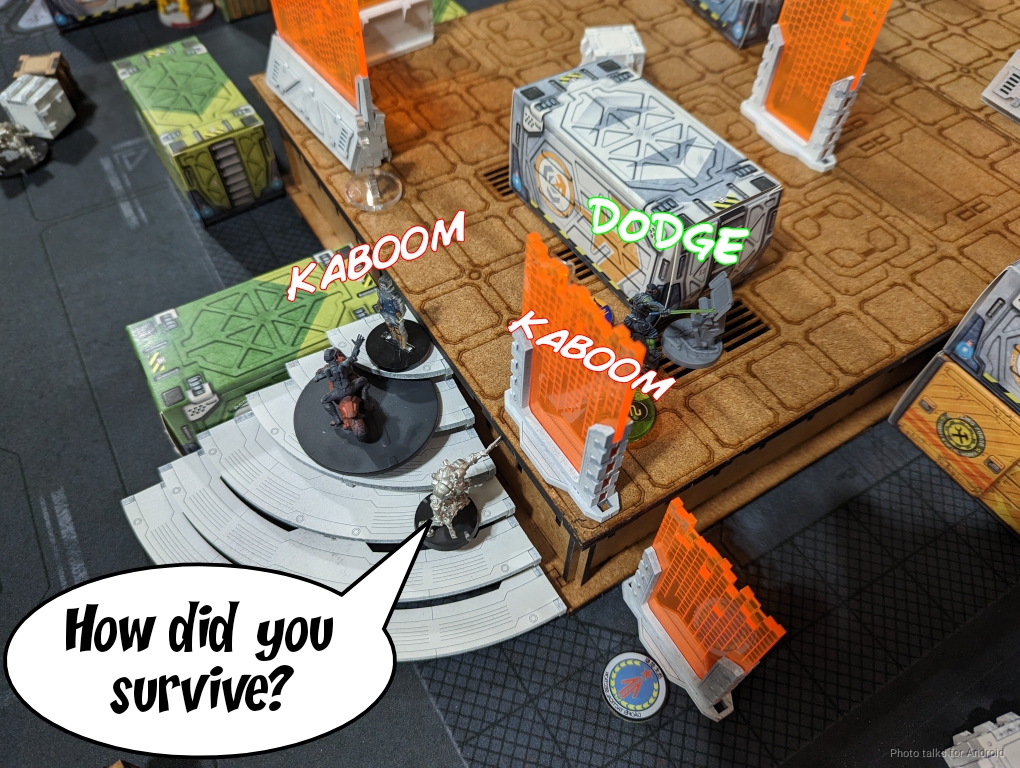
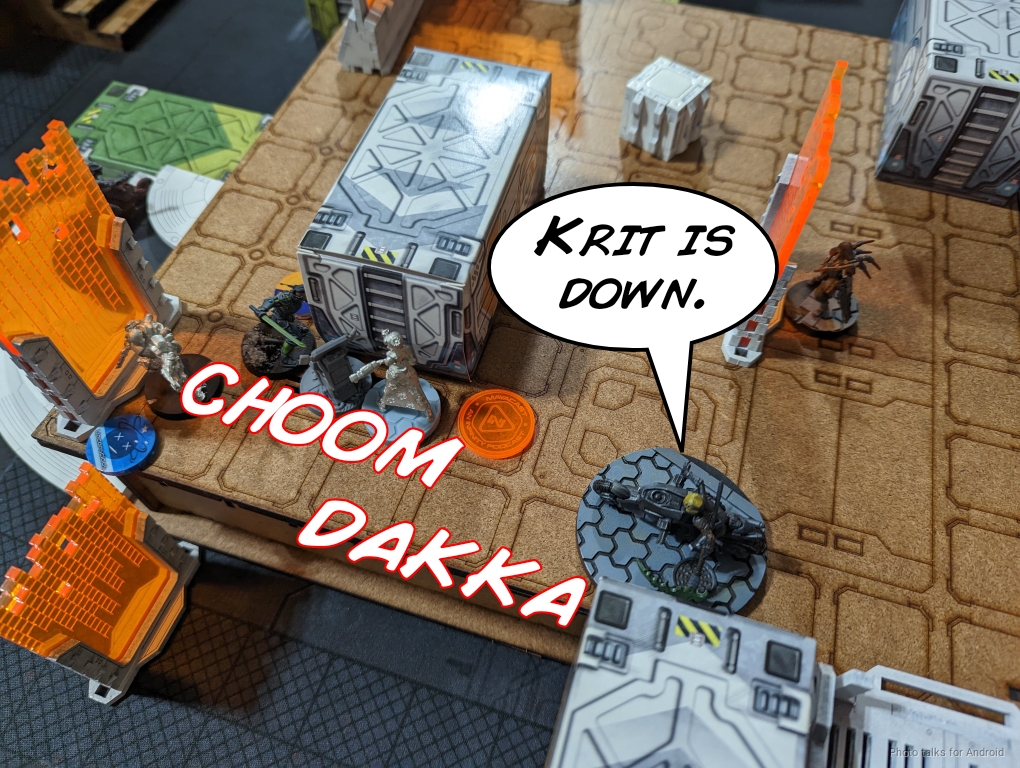
I just need to hold the line and hope for the best. It starts with Sun Tze taking out the Aragoto BSG.
The Celestial Guard sets up smoke to block the Ryuken 9, letting the Blue Wolf move unimpeded.
In one order, the Blue Wolf does three wounds to the Karakuri, and she’s down.
The Blue Wolf shifts back towards James’s left…
and then takes out the Ryuken-9.
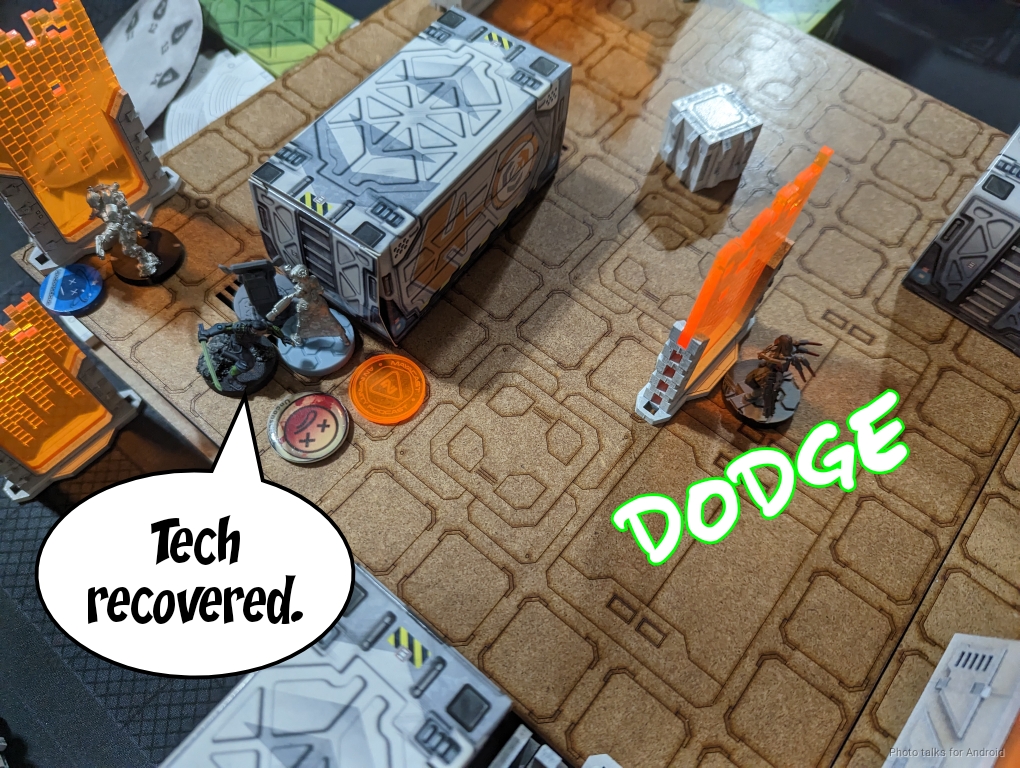
James grabs In Extremis Recovery off of the Karakuri, granting a dodge to Yuriko.
Thankfully, James is out of orders now, and the turn passes back to me.
Bottom of 2 – JSA
Somehow, we miss the fact that I’m in retreat, which is a bit annoying. Neither of us has scored any points yet aside from James’s single classified, though, so the win is still in play… right? I put everyone in the same combat group and see about getting some points on the board.
The Aragoto Spitfire takes out the turret on my right, which is good.
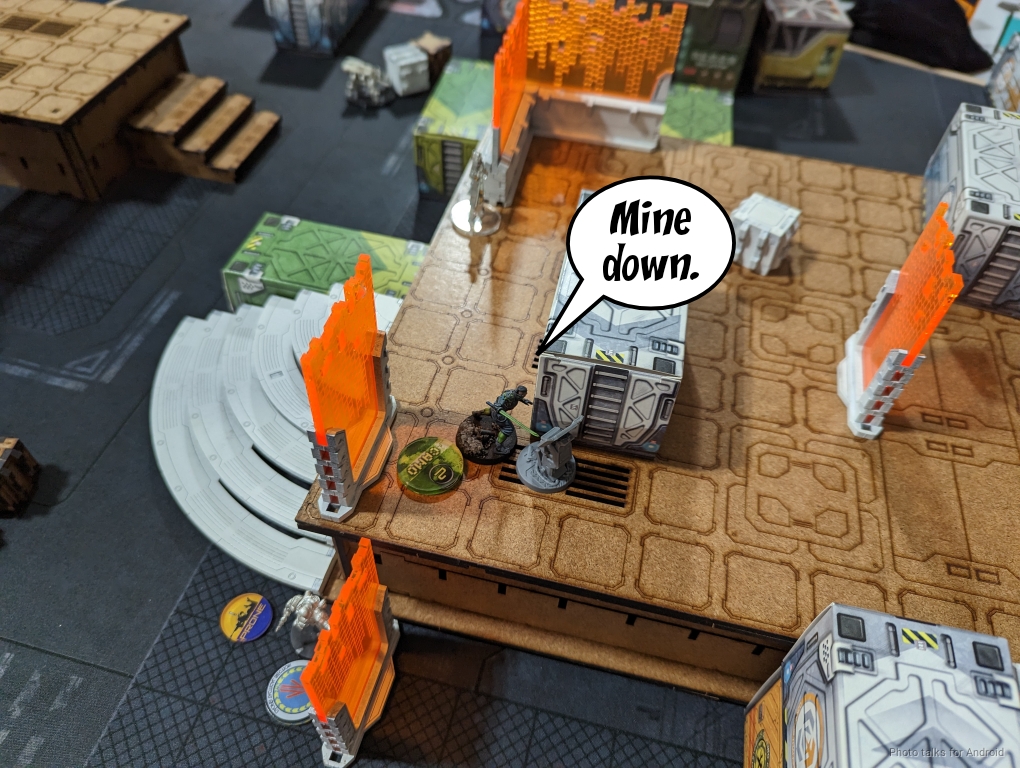
Yuriko lays a mine and takes out the Beasthunter. I had hoped to repair the Karakuri, but that’s not possible. I can’t advance directly onto the central console either, since Lunah is watching.
I attempt to dodge onto it, but fail my dodge roll with my last order.
I foolishly move my Lieutenant out with its order to try and do stuff on the last turn, but all this does is open it to attack.
Turn 3
Top of 3 – Yu Jing

After grabbing James’s HVT, the Blue Wolf easily aces Yuriko, even just walking out of cover.
It then sees my Lieutenant that I left out, and kills it.
It took most of James’s orders to get the Blue Wolf to his HVT and into my deployment zone, so thankfully that’s all that happens.
Bottom of 3 – JSA
Well I’m definitely in retreat now.
Thankfully I’ve got one command token left, and I use it to ignore retreat on the Aragoto Spitfire. I can get into the back arc of the Blue Wolf and I have one chance to do two wounds to an ARM 6 TAG.
I land all four hits, unopposed, and do three wounds, taking out the Blue Wolf and denying the HVT points, making it a
0-1, 28-210 Yu Jing Victory!
Post Game Analysis
Well. It’s a little annoying just how anemic a BS13 ARM3 ARO is these days. Part of it is that the rangebands are just not good–the secondary weapons on the Tankos are 32″, and James has two high quality snipers, and the Tanko ML can be shot within 24″ to deny the +3 as well. Even with sixth sense, the odds on the first Blitzen Tanko against Lunah are atrocious, with a full 36.10% chance to just lose the Blitzen Tanko.
| 11.50 | 23.59 | 64.91 |
Even the Flammenspeer outside of 32″ with both the Blue Wolf and the Tanko on 8’s and 7’s is just miserable. The real problem is that if the Tanko hits, it’s really not going to take the Blue Wolf out. If the Blue Wolf hits though, the Tanko probably asplodes on 27.55% to take two wounds:
| 17.40 | 41.63 | 40.97 |
The Tanko ML outside of 24″ isn’t on good odds, now that it’s on burst 1.
| 26.22 | 29.91 | 43.86 |
Burst two would have been better, unsurprisingly.
| 42.93 | 26.58 | 30.49 |
I guess my takeaway here is that I probably should have just left all the Tanko prone except the ML Tanko and let the Ryuken-9 do the work. That would have given me back at least two orders so I could have properly challenged Krit and the Beasthunter with the Karakuri instead of trying to sacrifice Neko. I definitely could have used a hacker this game to deal with the turrets and maybe even challenged James’s hacker through the repeater.
I am very impressed with the Aragoto’s performance, but not really with my piloting of them. I think I could probably have done a much better job of it, honestly. JSA has all the tools I needed, I just didn’t use the ones I had properly. I am very happy with the basically “free” minefield you get from taking stuff that I want to take like Ryuken and Yuriko. This really helps deal with the Beasthunter that I face every. single. game. Lunah continues to be a problem as well. I basically don’t have a tool other than say the Karakuri to deal with her, so the best I can hope for is to just get something up close or just dice her down with the Karakuri at range.
I was pretty happy with my decisions this game, aside from the clear mistake leaving the non-ML Tanko up at the beginning. I don’t think I made any huge mistakes. I did over-prioritize getting the console in the center controlled when really I could have made one of the Aragoto or Kuroshi non-impetuous and dashed into James’s deployment zone at the end of the game, but it’s a new mission!
As far as the mission goes, I like it. It has two clear things you want to do, and there’s some pressure on the first player to help you blunt an alpha strike thanks to the turrets. It’s a bit too early to have formed a strong opinion on it, but I don’t have any huge problems with the mission thus far. It used to be just Hackers and Engineers allowed to hold the center console, but I think any specialist will do.
I’ll have to try it again soon! Thanks for reading.
Pingback: Tower Defense – MERC Recon