Domaru Cleanup Crew
It feels like it’s been forever since I’ve had a chance to get a game in. I’ve managed to get some painting in though, at least. Finally got to the game store though, just in time to get a practice game of ITS10 Acquisition. My opponent was Isaac, who I haven’t played in awhile either. We got a ton of stuff wrong this game, but it was a good learning exercise and intro to ITS season 10!
Overview
- Mission: Acquisition
- Forces: Japanese Secessionist Army versus PanOceania (300)
- Deploy First: Japanese Secessionist Army
- First Turn: Japanese Secessionist Army
[img]https://assets.infinitythegame.net/infinityarmy/img/_logosweb/logo_903.png[/img][b] List A[/b]
[b]GROUP 1 | [/b][img]https://assets.infinitythegame.net/infinityarmy/img/_logosweb/orden_regular.png[/img]9
[img]https://assets.infinitythegame.net/infinityarmy/img/_logosweb/903/logo_5.png[/img] [b]DOMARU Lieutenant[/b] Chain Rifle, E/M Grenades / Pistol, E/M CCW, Shock CC Weapon. (0 | [b]26[/b])
[img]https://assets.infinitythegame.net/infinityarmy/img/_logosweb/903/logo_17.png[/img] [b]YURIKO ODA[/b] Combi Rifle + E/Mitter, D-Charges, Antipersonnel Mines / Pistol, CCW. (0 | [b]24[/b])
[img]https://assets.infinitythegame.net/infinityarmy/img/_logosweb/903/logo_1.png[/img] [b]KEISOTSU (Forward Observer)[/b] Combi Rifle / Pistol, Knife. (0 | [b]10[/b])
[img]https://assets.infinitythegame.net/infinityarmy/img/_logosweb/903/logo_1.png[/img] [b]KEISOTSU[/b] Missile Launcher / Pistol, Knife. (1.5 | [b]14[/b])
[img]https://assets.infinitythegame.net/infinityarmy/img/_logosweb/903/logo_2.png[/img] [b]KEMPEI (Multispectral Visor L2)[/b] Shock Marksman Rifle / Pistol, CCW, Electric Pulse. (1 | [b]25[/b])[img]https://assets.infinitythegame.net/infinityarmy/img/_logosweb/903/logo_1.png[/img] [b]KEISOTSU[/b] HMG / Pistol, Knife. (1 | [b]17[/b])
[img]https://assets.infinitythegame.net/infinityarmy/img/_logosweb/903/logo_2.png[/img] [b]KEMPEI (Chain of Command)[/b] Boarding Shotgun / Pistol, CCW, Electric Pulse. (0 | [b]21[/b])
[img]https://assets.infinitythegame.net/infinityarmy/img/_logosweb/903/logo_21.png[/img] [b]CHAĪYÌ Yaókòng[/b] Flash Pulse, Sniffer / Electric Pulse. (0 | [b]8[/b])
[img]https://assets.infinitythegame.net/infinityarmy/img/_logosweb/903/logo_12.png[/img] [b]ONIWABAN[/b] Submachine Gun, Nanopulser / Pistol, Monofilament CCW. (0 | [b]37[/b])[b]GROUP 2 | [/b][img]https://assets.infinitythegame.net/infinityarmy/img/_logosweb/orden_regular.png[/img]4 [img]https://assets.infinitythegame.net/infinityarmy/img/_logosweb/orden_irregular.png[/img]2 [img]https://assets.infinitythegame.net/infinityarmy/img/_logosweb/orden_impetuosa.png[/img]1
[img]https://assets.infinitythegame.net/infinityarmy/img/_logosweb/903/logo_3.png[/img] [b]RYŪKEN (Forward Deployment L2, ODD)[/b] Submachine Gun, Antipersonnel Mines, D-Charges / 2 Breaker Pistols, Knife. (0.5 | [b]24[/b])
[img]https://assets.infinitythegame.net/infinityarmy/img/_logosweb/903/logo_3.png[/img] [b]RYŪKEN (Forward Deployment L2, ODD)[/b] Submachine Gun, Antipersonnel Mines, D-Charges / 2 Breaker Pistols, Knife. (0.5 | [b]24[/b])
[img]https://assets.infinitythegame.net/infinityarmy/img/_logosweb/903/logo_13.png[/img] [b]TOKUSETSU EISEI Doctor (MediKit)[/b] Combi Rifle / Pistol, Knife. (0 | [b]14[/b])
[img]https://assets.infinitythegame.net/infinityarmy/img/_logosweb/903/logo_24.png[/img] [b]YÁOZĂO[/b] Electric Pulse. (0 | [b]3[/b])
[img]https://assets.infinitythegame.net/infinityarmy/img/_logosweb/903/logo_11.png[/img] [b]NINJA Hacker (Killer Hacking Device)[/b] Tactical Bow / Pistol, DA CCW, Knife. (0 | [b]29[/b])
[img]https://assets.infinitythegame.net/infinityarmy/img/_logosweb/903/logo_30.png[/img] [b]WARCOR (Aerocam)[/b] Flash Pulse / Stun Pistol, Knife. (0 | [b]3[/b])
[img]https://assets.infinitythegame.net/infinityarmy/img/_logosweb/903/logo_29.png[/img] [b]YOJIMBO[/b] Contender, Nanopulser, Smoke Grenades, CrazyKoalas (2) / Pistol, DA CCW. (0 | [b]21[/b])
[b] 4.5 SWC | 300 Points |[/b] Open in Infinity Army
[img]https://assets.infinitythegame.net/infinityarmy/img/_logosweb/logo_101.png[/img][b] PanOceania[/b]
[img]https://assets.infinitythegame.net/infinityarmy/img/_logosweb/101/logo_20.png[/img] [b]JOAN OF ARC Lieutenant[/b] MULTI Rifle, Nanopulser / Pistol, AP CCW. (+1 | [b]49[/b])
[img]https://assets.infinitythegame.net/infinityarmy/img/_logosweb/101/logo_3.png[/img] [b]NISSE[/b] HMG / Pistol, Knife. (1.5 | [b]34[/b])
[img]https://assets.infinitythegame.net/infinityarmy/img/_logosweb/101/logo_23.png[/img] [b]HEXA[/b] Spitfire / Pistol, Electric Pulse. (1.5 | [b]30[/b])
[img]https://assets.infinitythegame.net/infinityarmy/img/_logosweb/101/logo_48.png[/img] [b]KAMAU[/b] HMG / Pistol, Knife. (1 | [b]28[/b])
[img]https://assets.infinitythegame.net/infinityarmy/img/_logosweb/101/logo_2.png[/img] [b]AKAL COMMANDO[/b] Spitfire / Pistol, E/M CCW. (1.5 | [b]28[/b])
[img]https://assets.infinitythegame.net/infinityarmy/img/_logosweb/101/logo_9.png[/img] [b]SWISS GUARD Hacker (Assault Hacking Device)[/b] MULTI Rifle / Pistol, AP CCW. (0.5 | [b]70[/b])
[img]https://assets.infinitythegame.net/infinityarmy/img/_logosweb/101/logo_35.png[/img] [b]BULLETEER[/b] Spitfire / Electric Pulse. (1 | [b]23[/b])
[img]https://assets.infinitythegame.net/infinityarmy/img/_logosweb/101/logo_61.png[/img] [b]TECH-BEE (Remote Assistant Level 1, Specialist Operative)[/b] Flash Pulse / Pistol, Knife. (0 | [b]5[/b])
[img]https://assets.infinitythegame.net/infinityarmy/img/_logosweb/101/logo_14.png[/img] [b]TRAUMA-DOC[/b] Combi Rifle / Pistol, Knife. (0 | [b]14[/b])
[img]https://assets.infinitythegame.net/infinityarmy/img/_logosweb/101/logo_37.png[/img] [b]PALBOT[/b] Electric Pulse. (0 | [b]3[/b])
[img]https://assets.infinitythegame.net/infinityarmy/img/_logosweb/101/logo_16.png[/img] [b]PATHFINDER DRONBOT[/b] Combi Rifle, Sniffer / Electric Pulse. (0 | [b]16[/b])
[img]https://assets.infinitythegame.net/infinityarmy/img/_logosweb/orden_regular.png[/img]9 [img]https://assets.infinitythegame.net/infinityarmy/img/_logosweb/orden_irregular.png[/img]1 [b]| 7 SWC | 300 Points |[/b] Open in Infinity Army
Deployment
I lost the roll off, and Isaac chose deployment edge, forcing me to go first. Suits me fine, I’m playing JSA! The right of the table had one of Adam’s new water features and was pretty open, so I ended up deploying most of my stuff on the left. I put one Ryuken-9 on either side, as usual. We didn’t know what to do about deploying the XenoTech, so we assumed that they would have the same deployment skills as their controller. As it turns out, that is not the case, and they have to be deployed in your deployment zone. This meant that my Xenotech was far up on the right. The Tokusetsu covered the right side of my deployment zone, but not enough to cover the board edge from AD…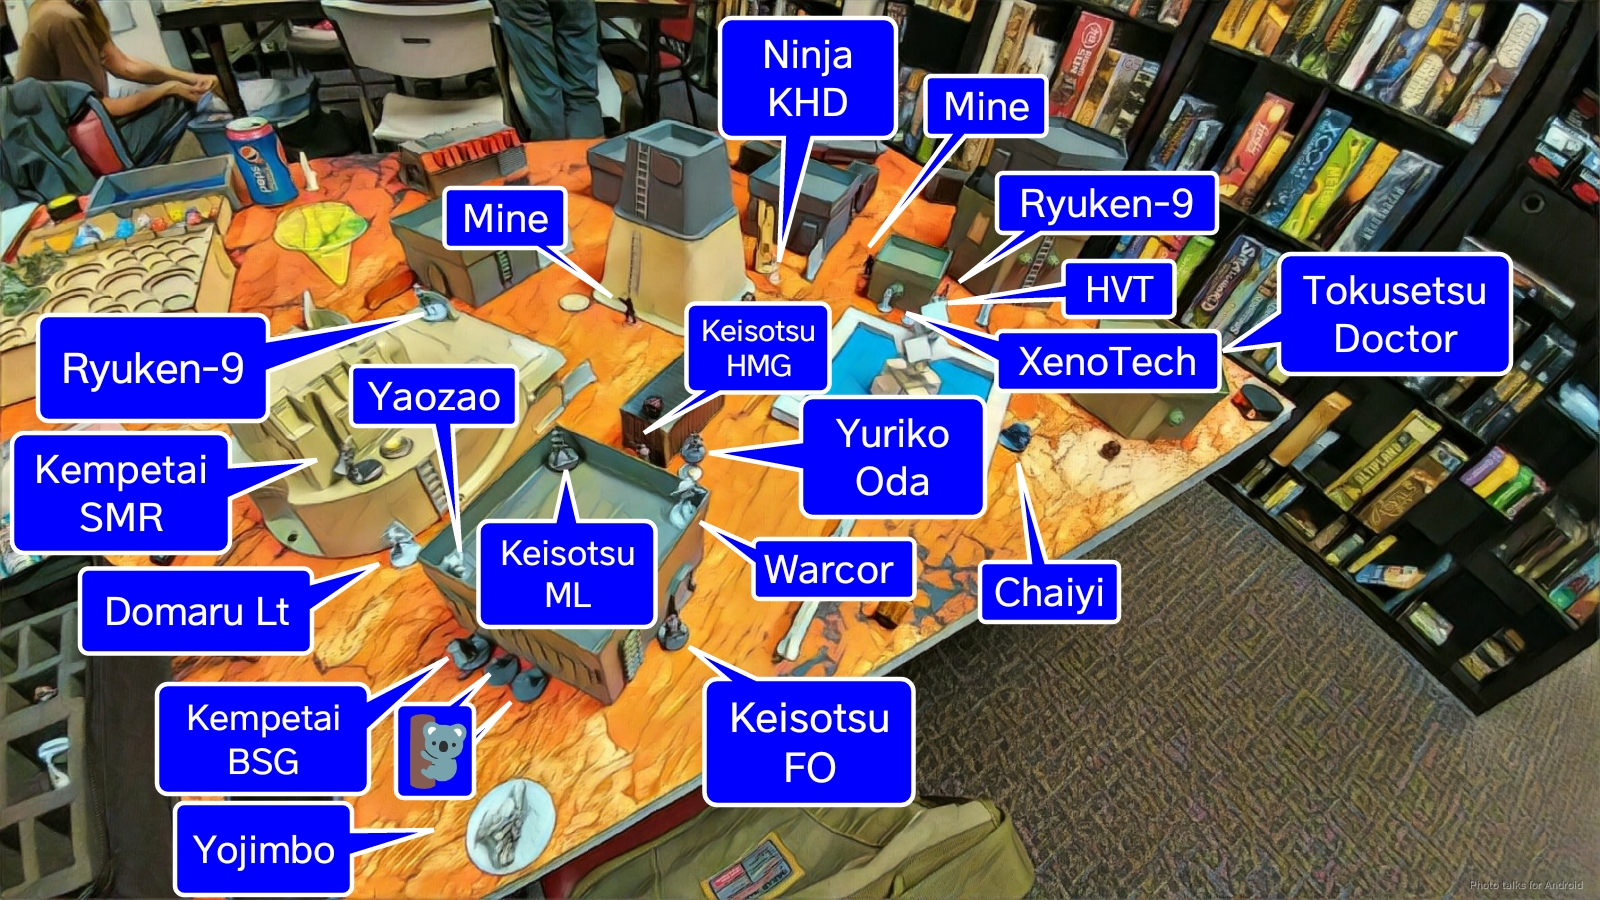 I put the Ninja KHD right near the center objective, planning to leave it there the whole game until I needed it to control the objective at the end of the game. Since my right side was so weak, I put a Chaiyi flash pulse bot as a speedbump over there. My potential Keisotsu link team members were blobbed up on the left, backed up by Yojimbo. The problem was I didn’t really have a good placement on any of them, and didn’t realize I couldn’t form a legal fireteam until the end of deployment. I distinctly remember swapping the Kempetai BSG and Keisotsu FO, which made things illegal too. D’oh!
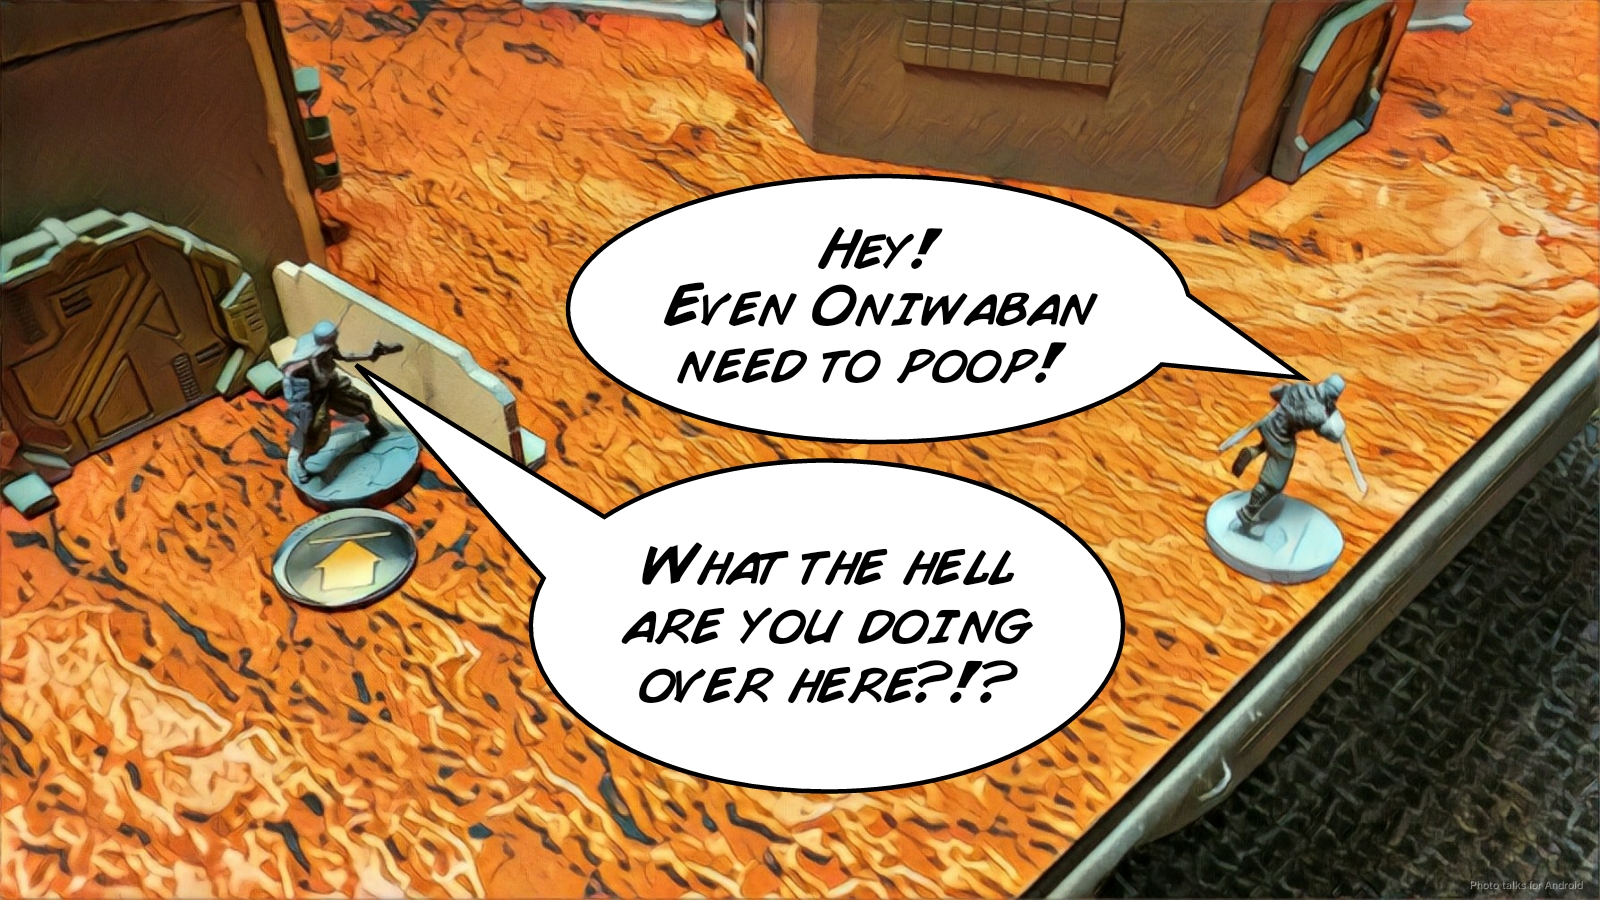
Isaac’s deployment was pretty straightforward, thanks to his two TO models and one AD model in a limited insertion list. The Bulleteer hung out on the right, left out to ARO. He paired his XenoTech with his forward deployed Nisse, using the XenoTech to block the ladder to the Nisse, just in case, then built a row of models: a Kamau HMG, Palbot, and Tech Bee.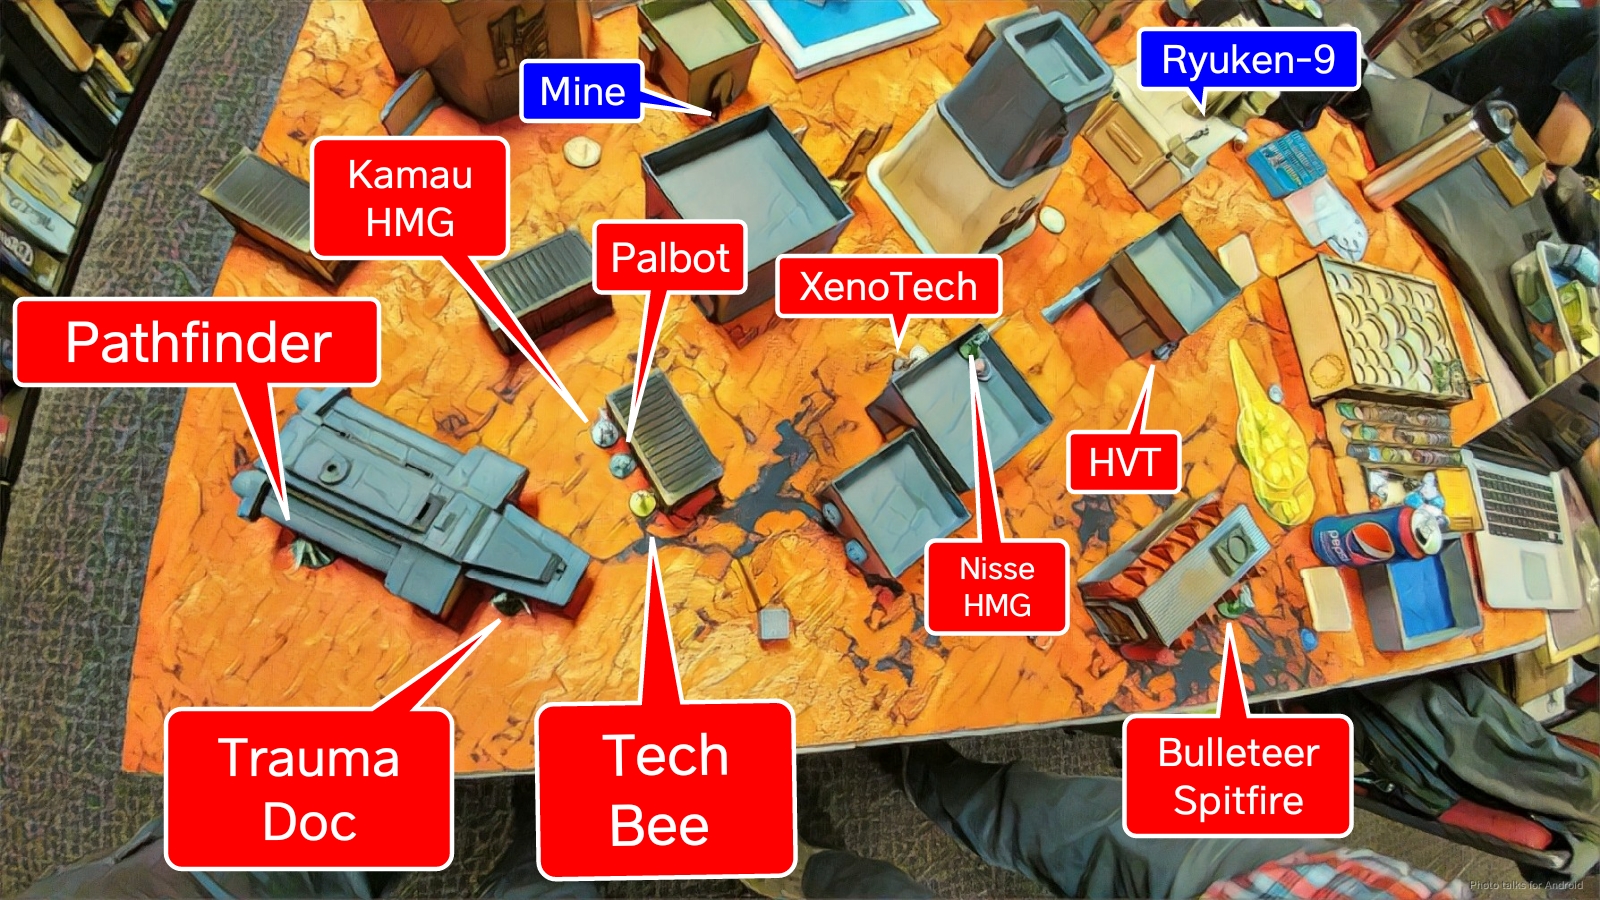 His left flank was a Trauma Doc and a Pathfinder, and then he shooed me away to place his Swiss and Hexa in secret. I attempted to superior infiltrate my Oniwaban right behind the Nisse, but ended up rolling a 20, so he started on the right side of the board instead, near my doctor. I had planned to gank the Nisse, climb the Oniwaban off the roof, and then get the Oniwaban in place to Nanopulsar the Kamau and Tech Bee after recamoing.
 Isaac put Joan down near his Trauma Doc, and we were off. We both missed that the deployment zones were 16″ so that sucked, but ah well.
Turn 1
Top of Turn 1 – JSA
Yojimbo gets some smoke down for my Kempetai MSV2 on his irregular order. After doing a coordinated order to get a legal link configuration in coherency, reforming the link, and knocking out the Bulleteer with the Kempetai through smoke, I sink most of the rest of my order pool into the Oniwaban, rushing up him up the field and picking at Isaac’s order pool. First to go is the Tech Bee, as I shock her off the table in one order.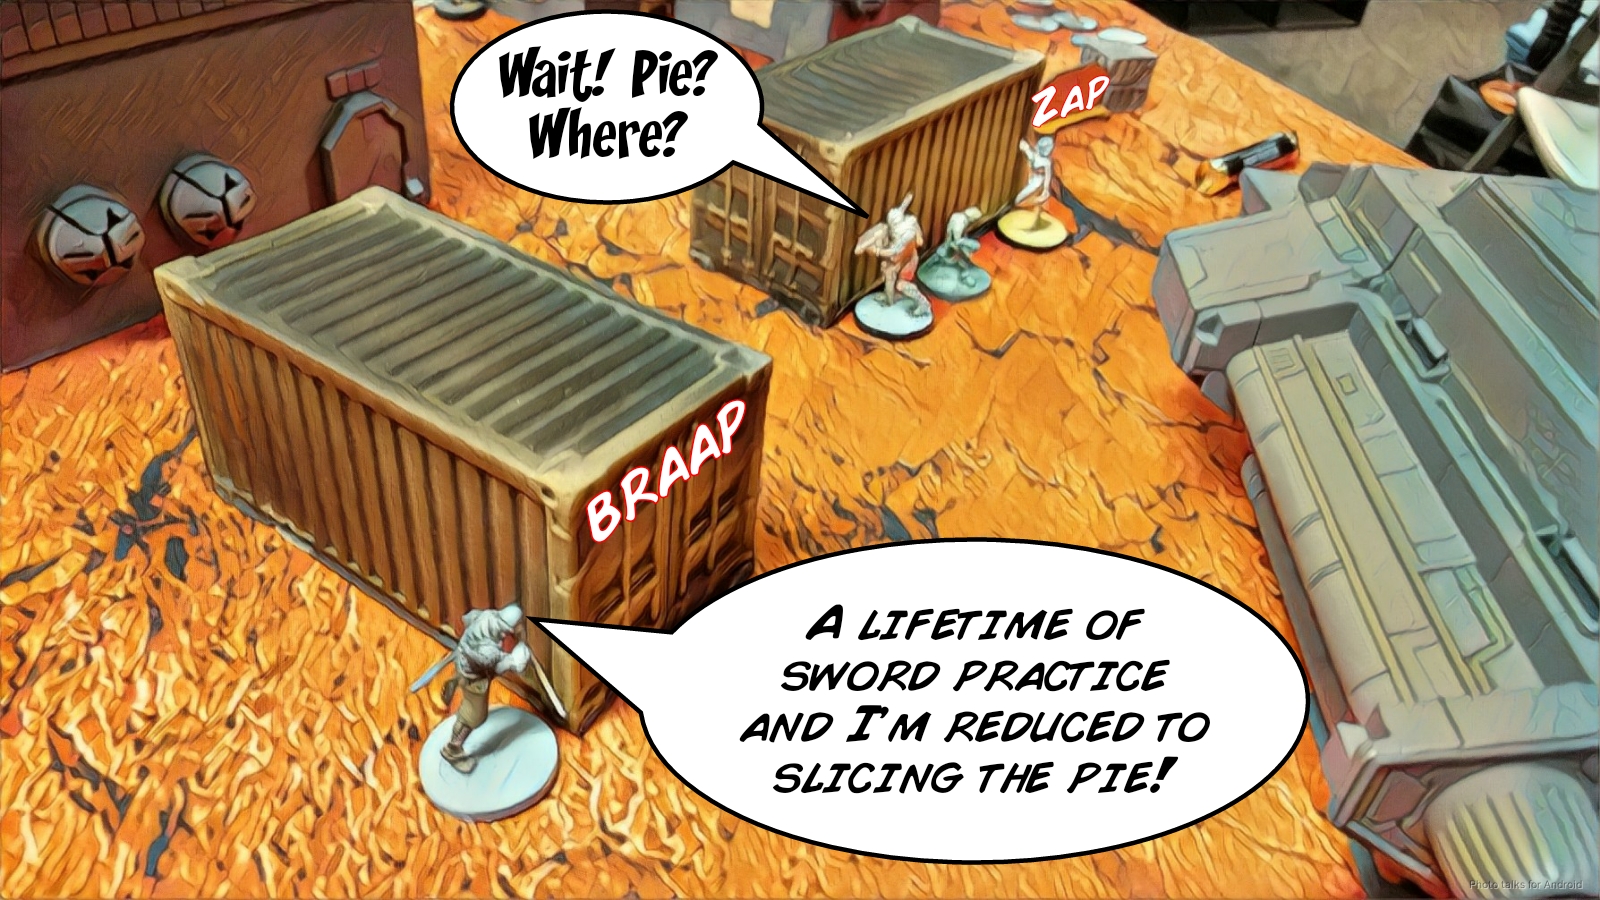 Another order and a little pie slicing later, I crit the Kamau off the table as well. Things are looking good!
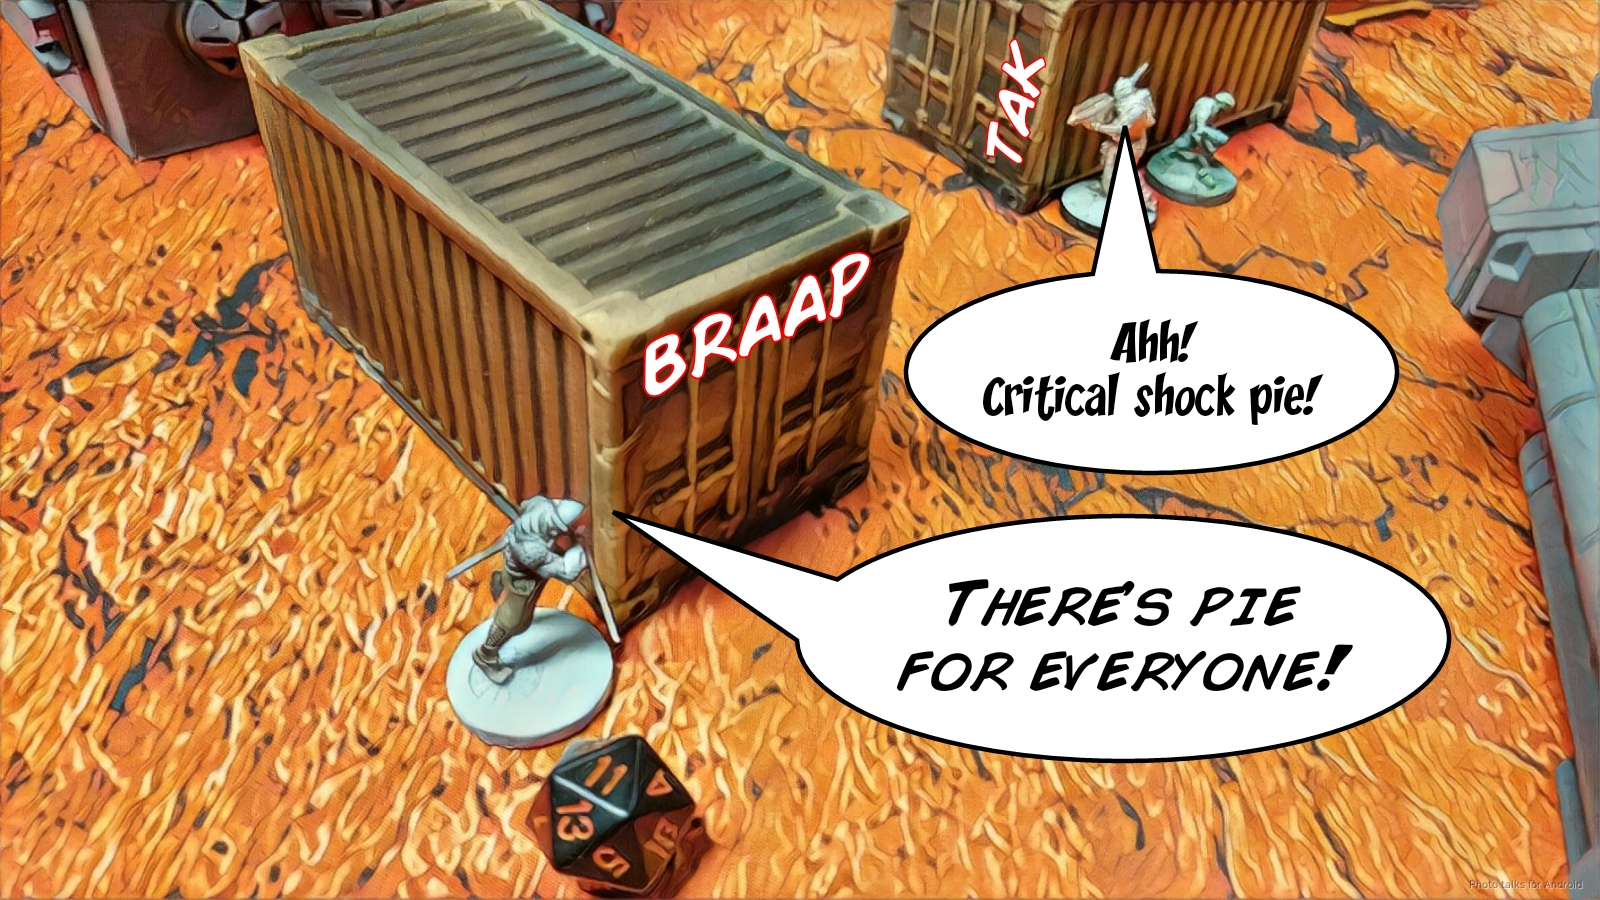 Yojimbo gets into a better position with his irregular order.
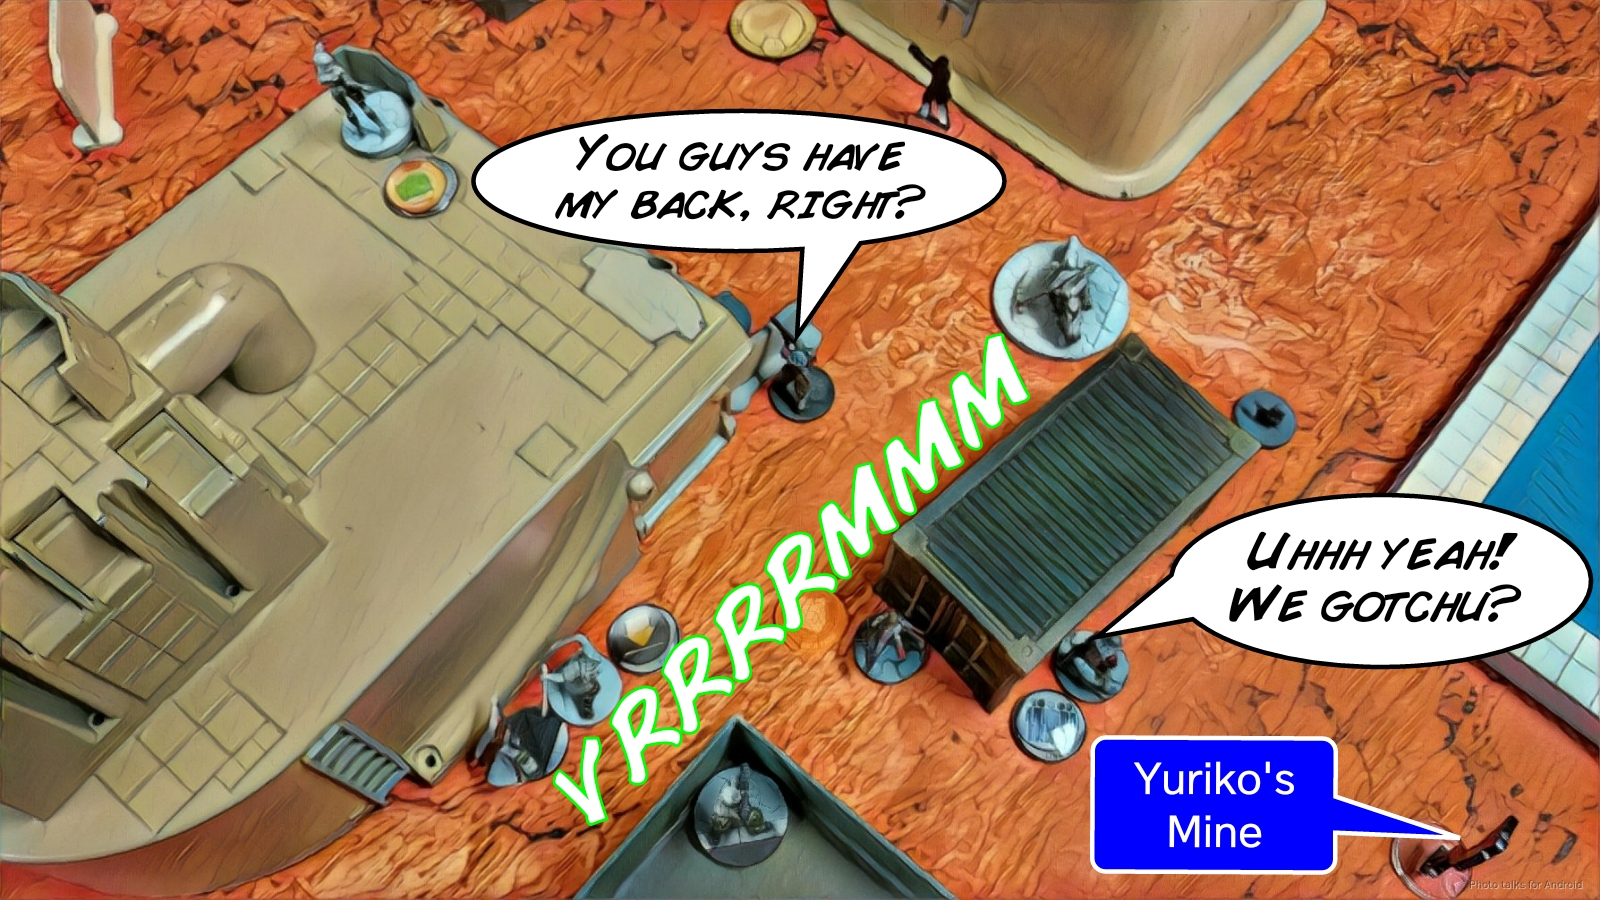 I spend a few orders on the Ryuken-9 doing the new XenoTech thing (it took two orders, which appears to be the minimum), drop a mine, and then blow the rest of my command tokens converting the Warcor’s order into a coordinated order to throw the Ryuken-9 into suppression.
Bottom of Turn 1 – PanO
Isaac walks on a Spitfire Akali and dishonorably guns down my Oniwaban. He doesn’t bother trying to deal with my Ryuken-9 directly yet.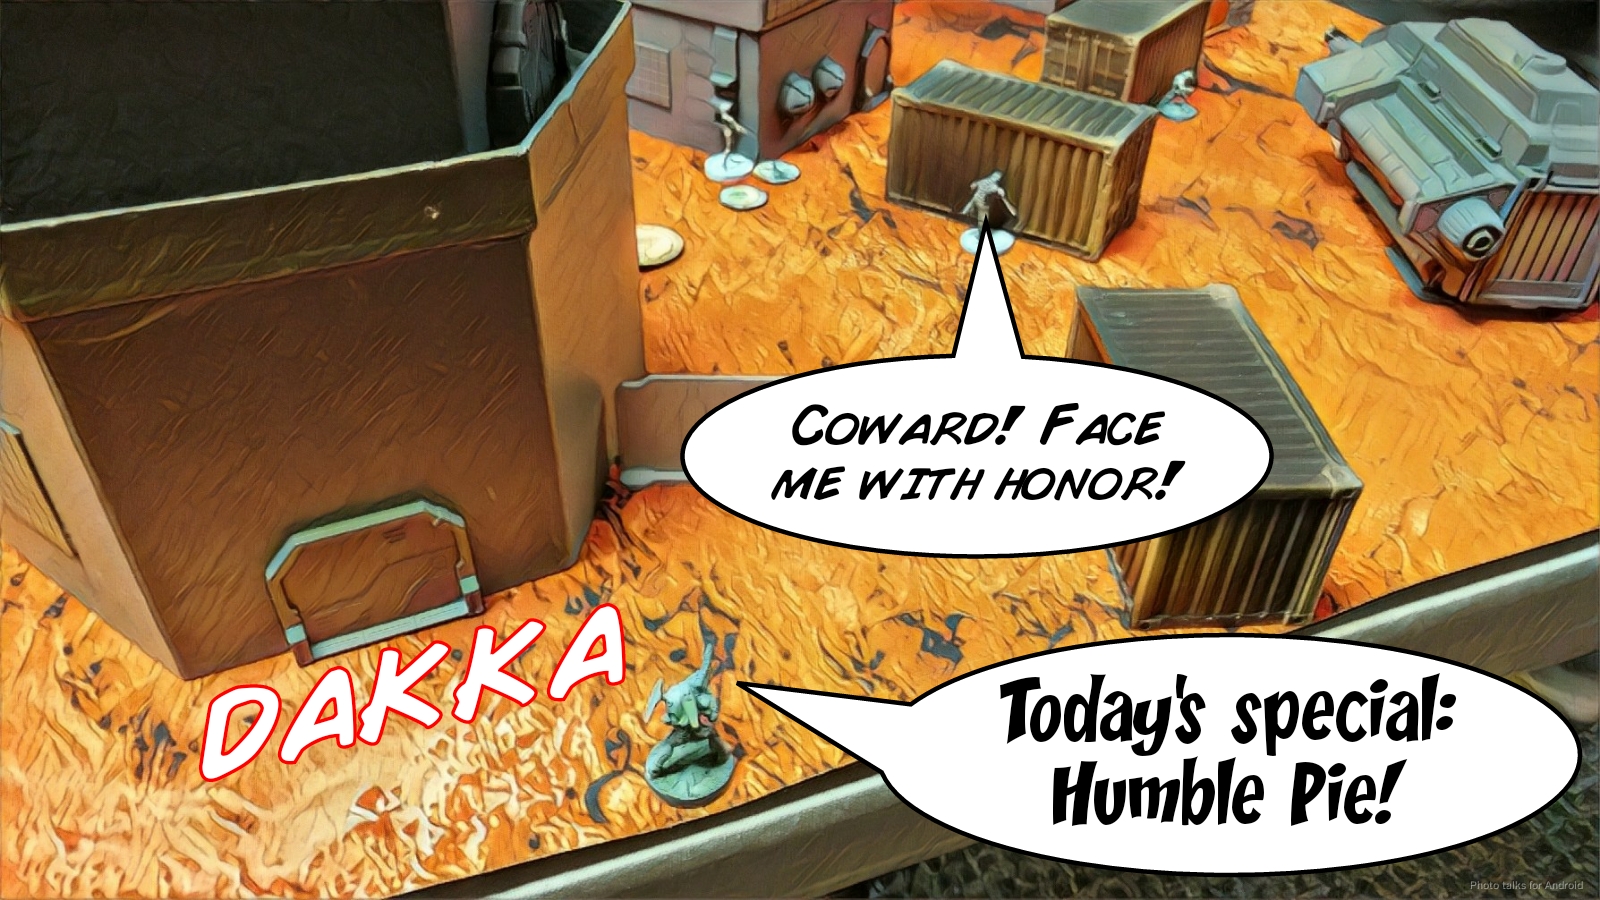 Instead, he clears the mine she dropped with his Palbot. I miss all three suppression shots and the mine’s shrapnel plinks off the Palbots… armor?
 The mine’s gone, at least, so Isaac brings in his Swiss Guard AHD, forcing me to dodge. I fail my dodge but make my armor, and fail guts around the corner.
 Isaac attempts to take out my other Ryuken-9 with his Nisse as part of a coordinated order with Joan, the Pathfinder, and the Swiss Guard, figuring the MSV2 will give him the edge he needs, but I roll a crit and two hits, sending the Nisse off the table in a flurry of AP ammo. Unfortunately for me, I miss that this brings the Swiss into hacking range of my Ninja KHD, but as I write this I’m consoling myself with the fact that I want to keep that hidden till later, just in case.
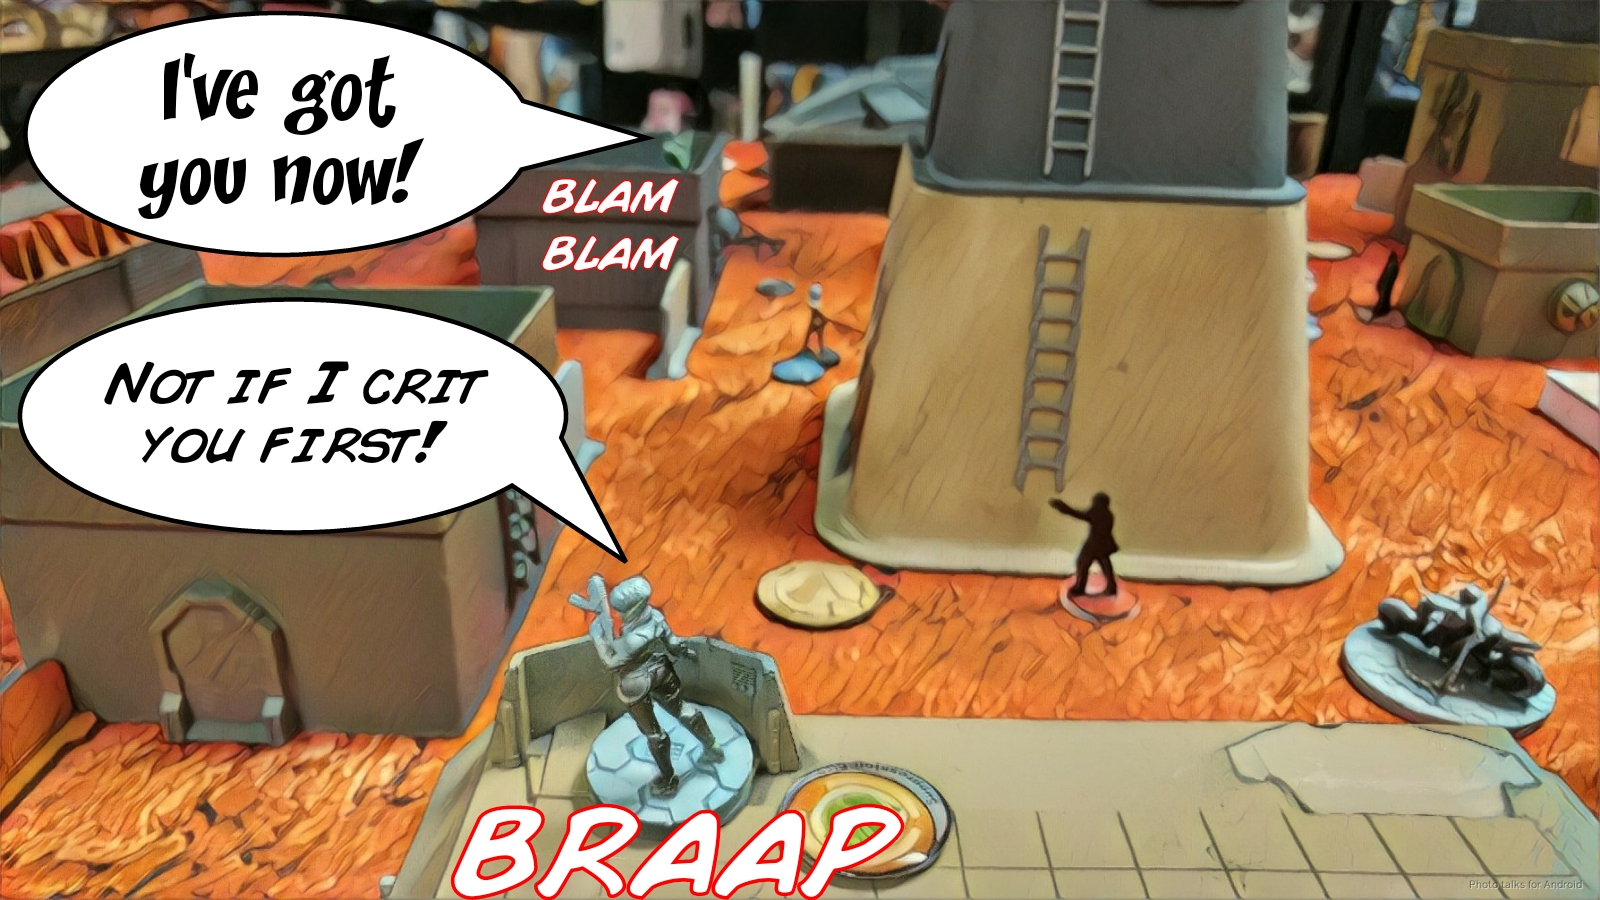 Isaac tries to take out my Keisotsu ML with his Hexa, splitting burst against the unlinked Keisotsu HMG and the ML. The HMG dodges successfully, and in the ML/Hexa fight we both just roll a 1 and misses so nothing happens.
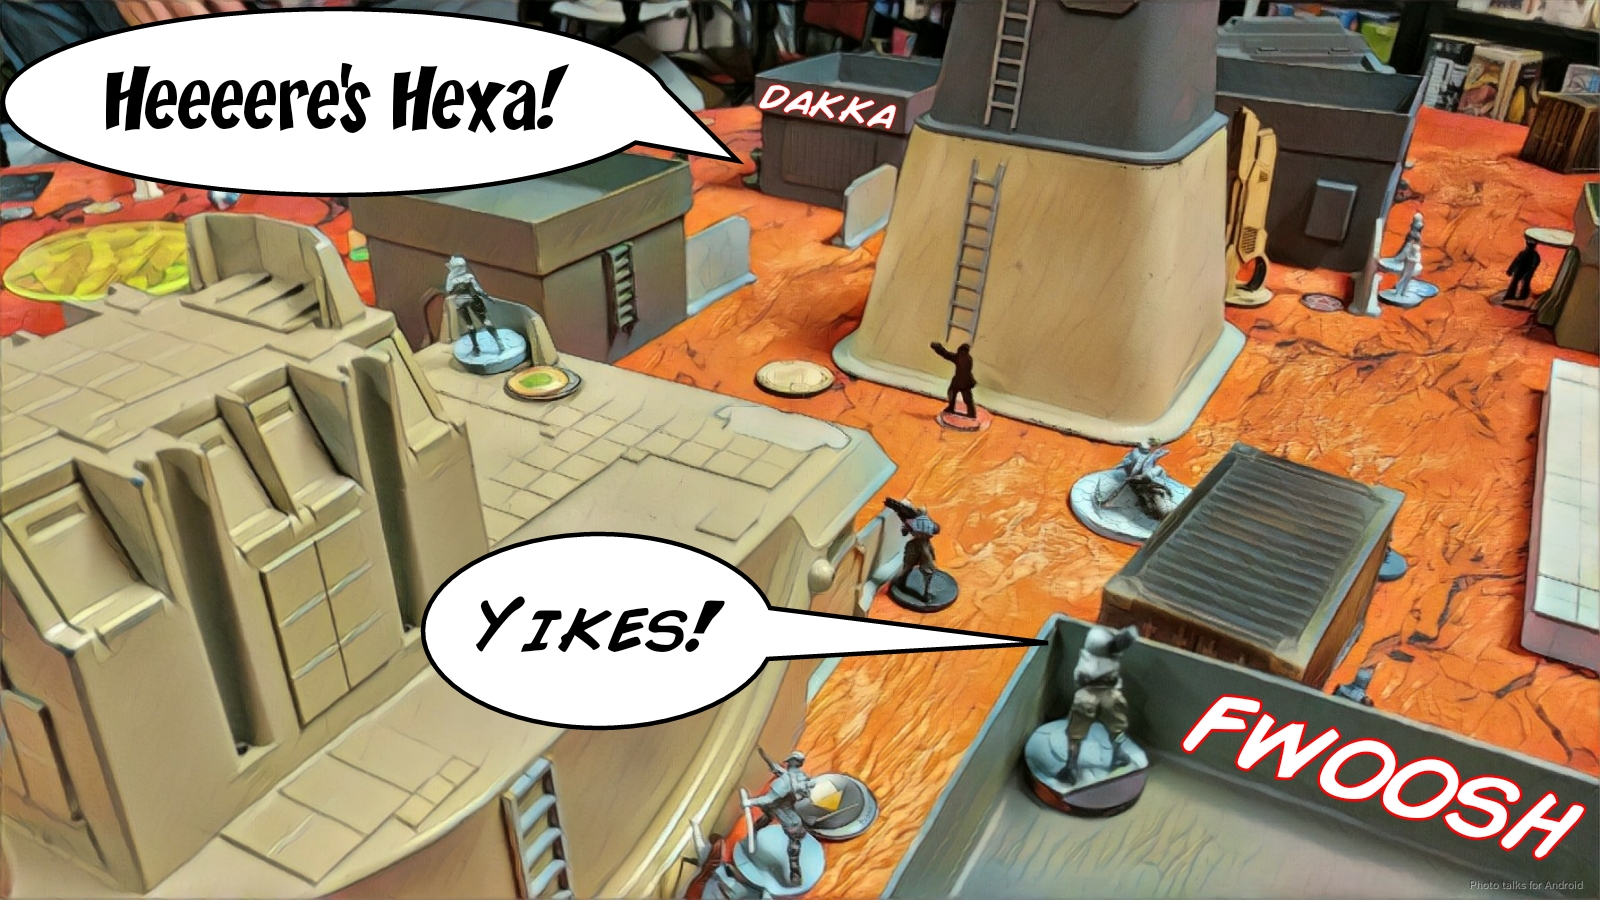 I’ve only lost the Oniwaban so far, so things are looking alright for the JSA.
Turn 2
Top of Turn 2 – JSA
Yojimbo does this thing, shooting smoke against the Swiss Guard near the center, then spending entirely too many orders landing smoke to cover my Kempetai shock marksman rifle. She guns down the Hexa without much difficulty, then I set about pushing buttons. Yuriko nabs the left objective, and I push the link towards the center, breaking the ML out of the link, unfortunately.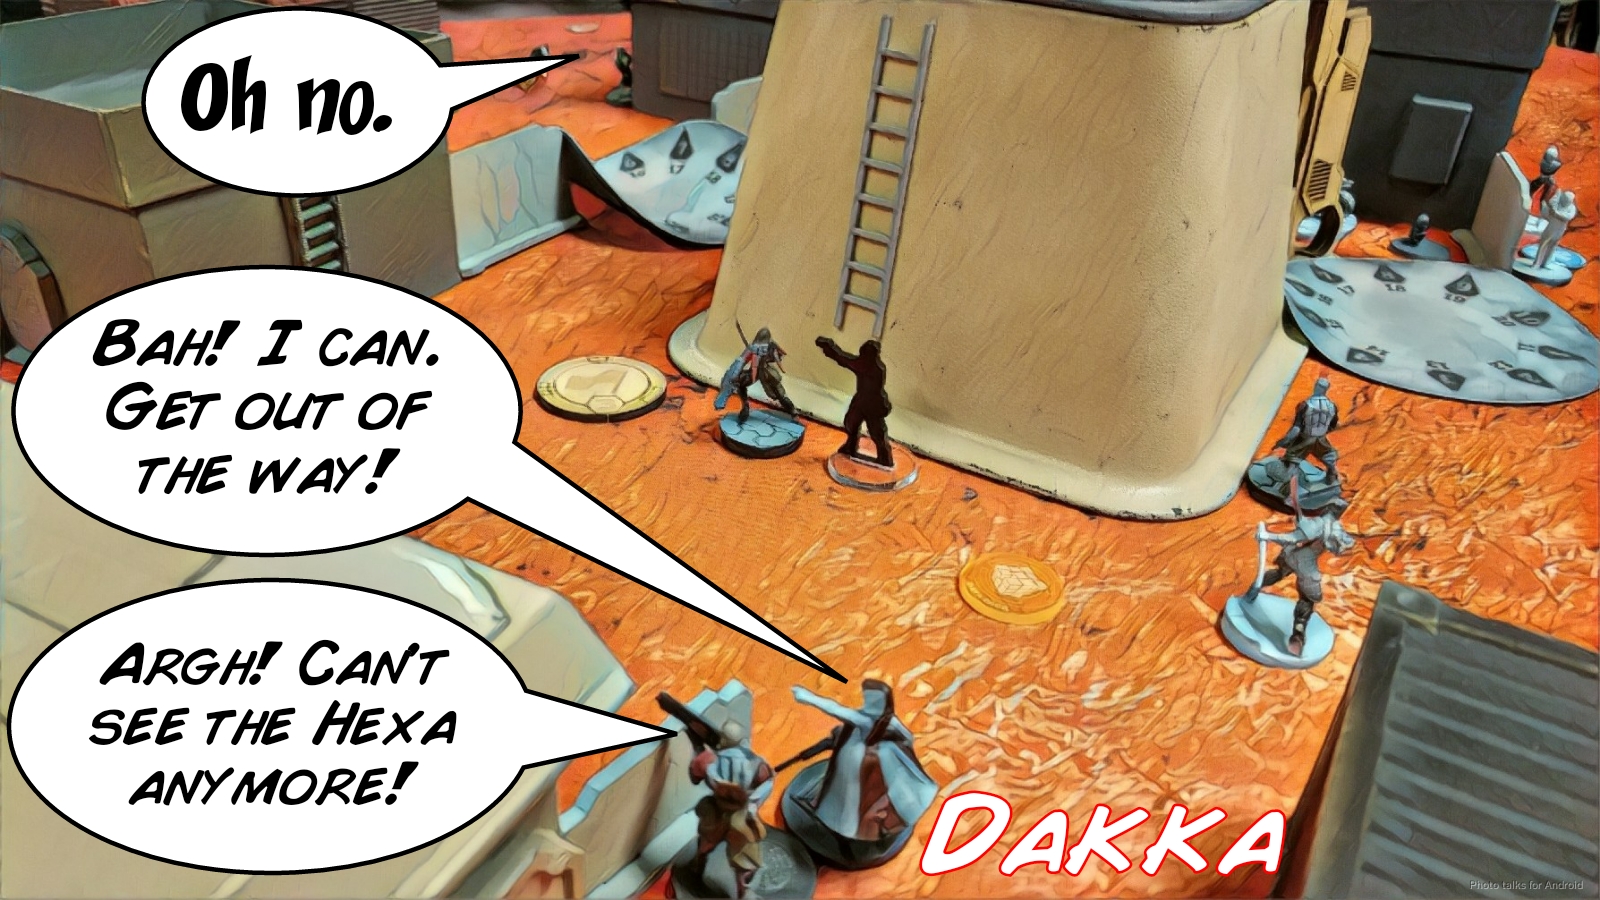 I figure I can just land an E/M grenade on the Swiss Guard, forgetting that it’s an AHD. Who takes that profile, honestly!? (It’s good. Take it.) Isaac beats out my grenade throw with Carbonite, but I pass both BTS saves.
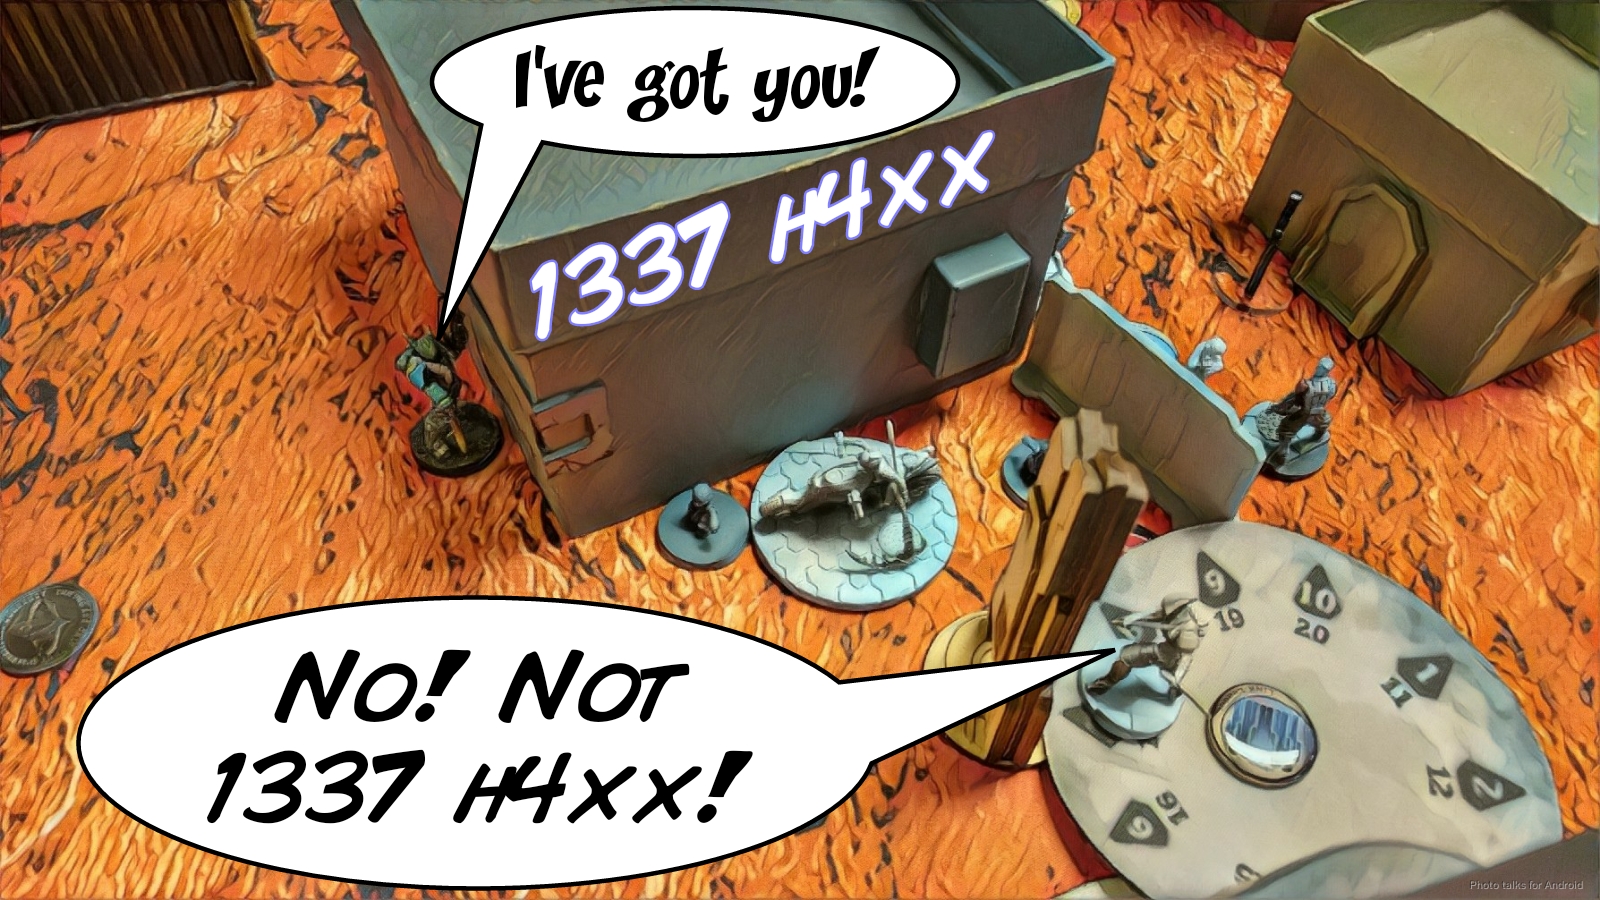 I push Yojimbo around the corner to try and take out the Swiss, but fail to break through his armor. The Domaru comes around the corner, breaking the link due to leaving coherency as the leader to finish him off with a critical hit, with Isaac failing both ARM saves, thanks to two successful rolls from the Yojimbo buddy system.
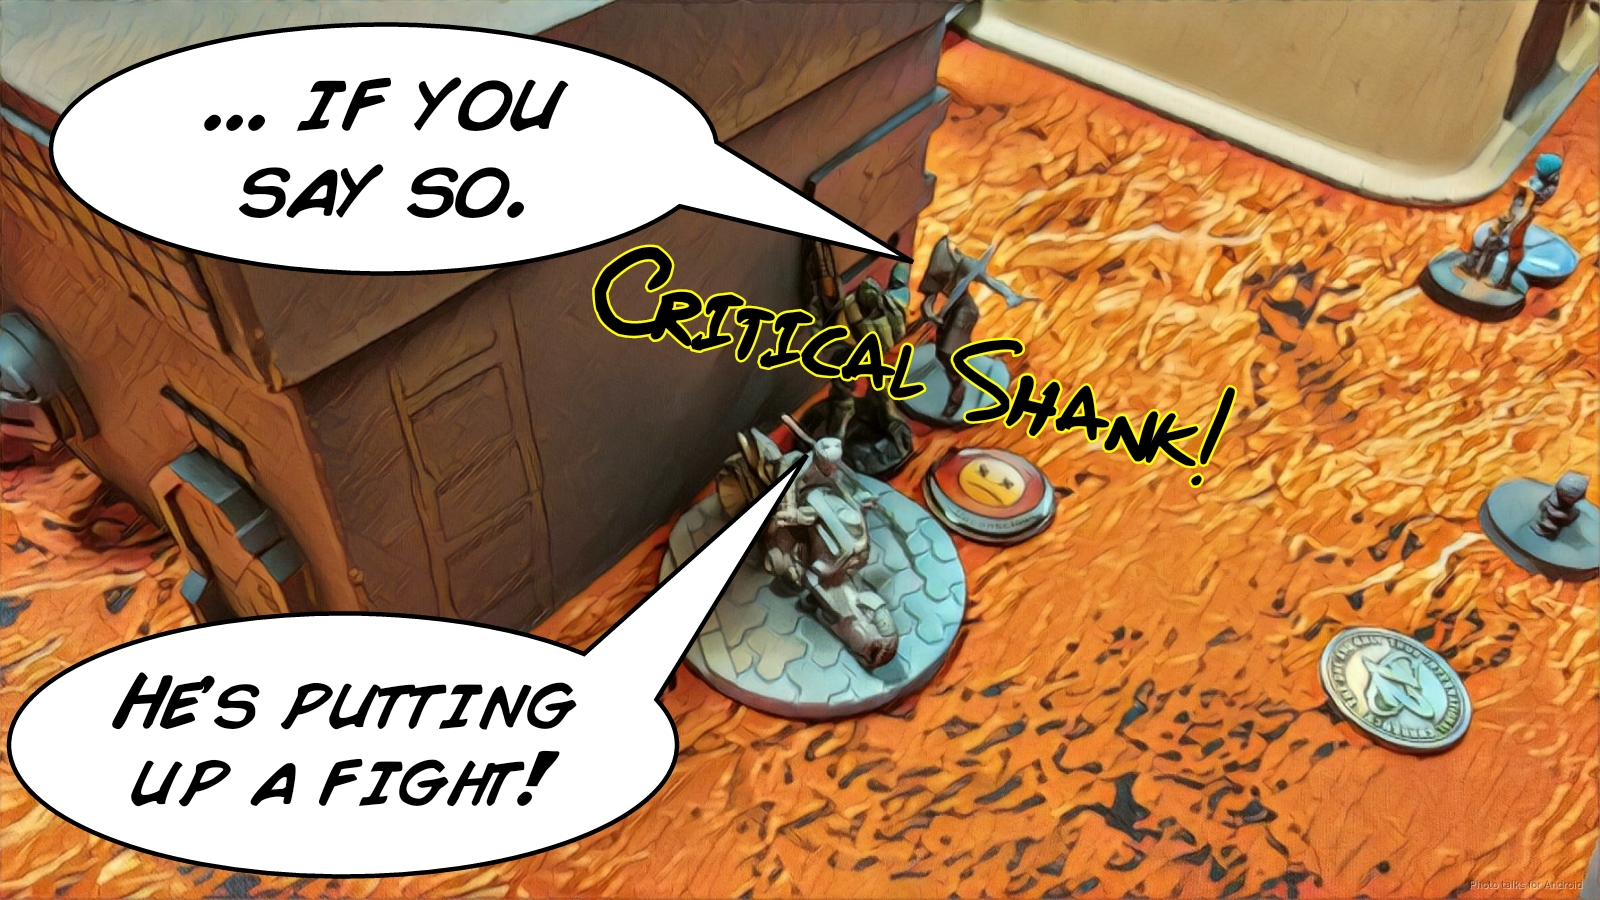 I grab the right objective with the Keisotsu FO, and tuck him into what I think is cover. Yojimbo ate all my orders in the second pool, so after using the Domaru’s lieutenant order to move her up the field towards Joan a bit, I pass the turn.
Bottom of Turn 2 – PanO
Isaac’s Akali finally guns down my Ryuken-9 on the right…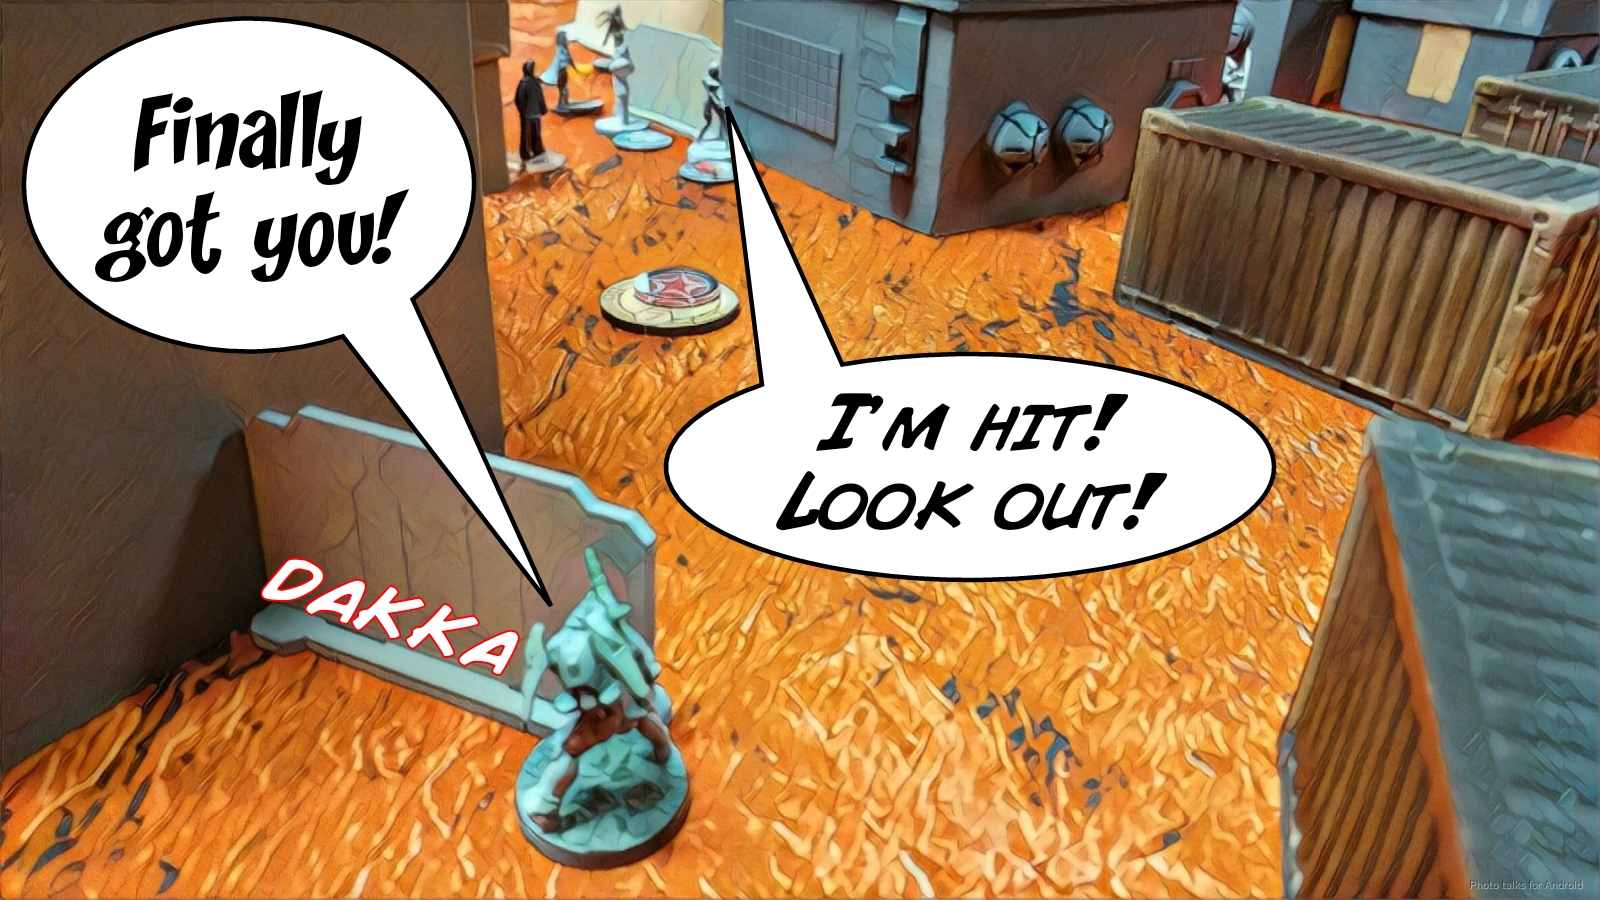 and finishes of my now-unlinked Kempetai shock marksman rifle.
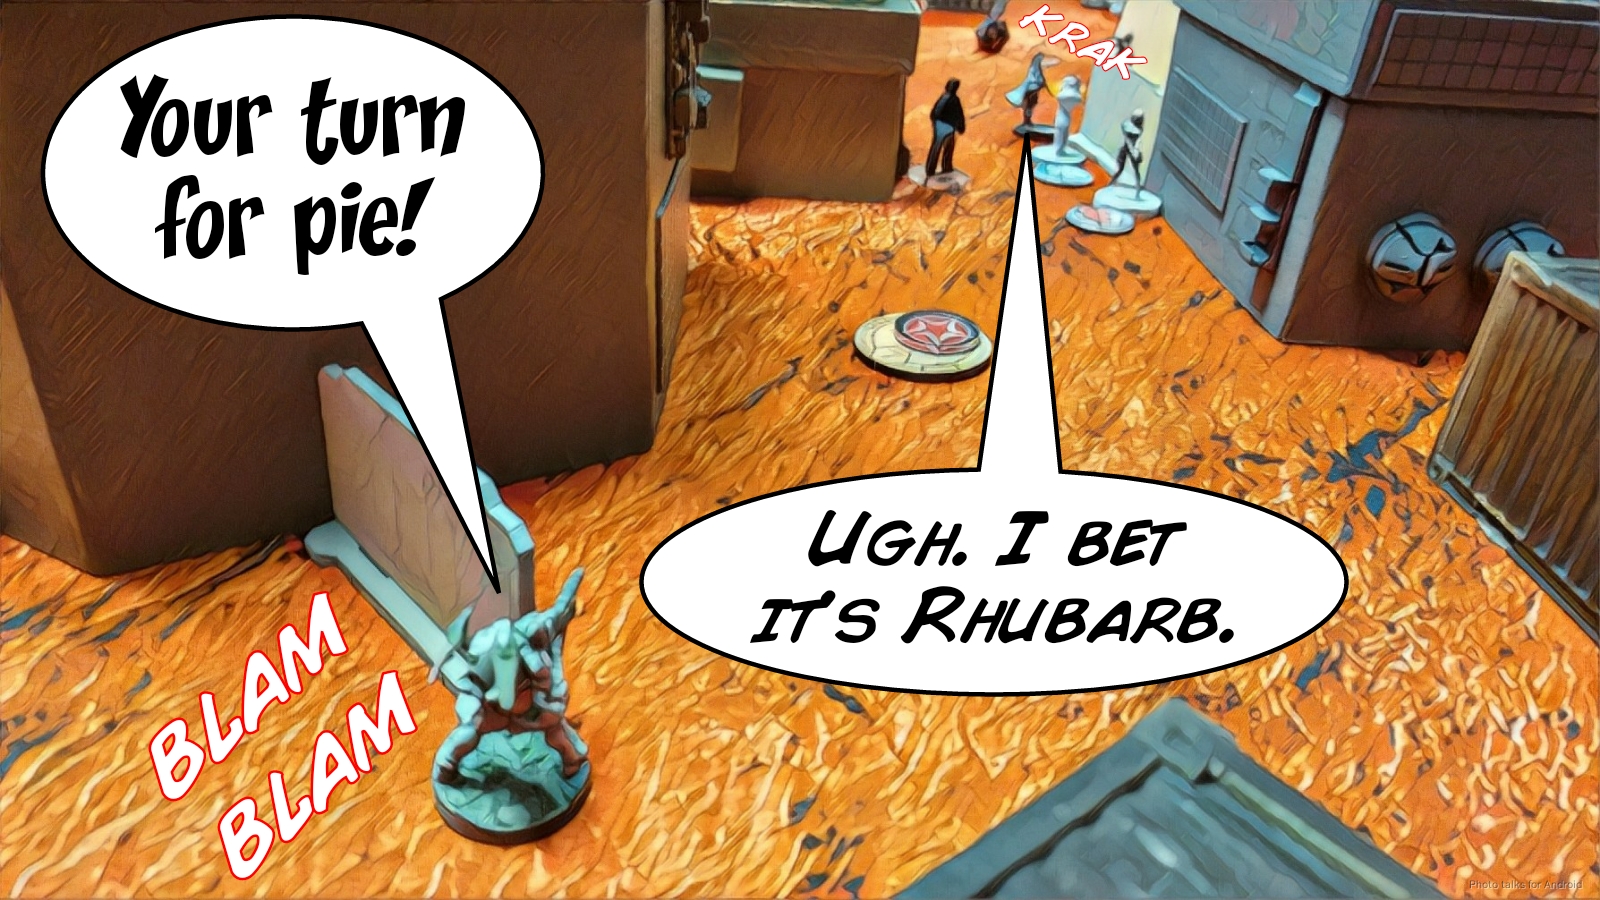 Joan attempts to take out Yojimbo and the Domaru with her MULTI Rifle, but her rounds bounce off my Domaru’s armor and Yojimbo lands smoke easily.
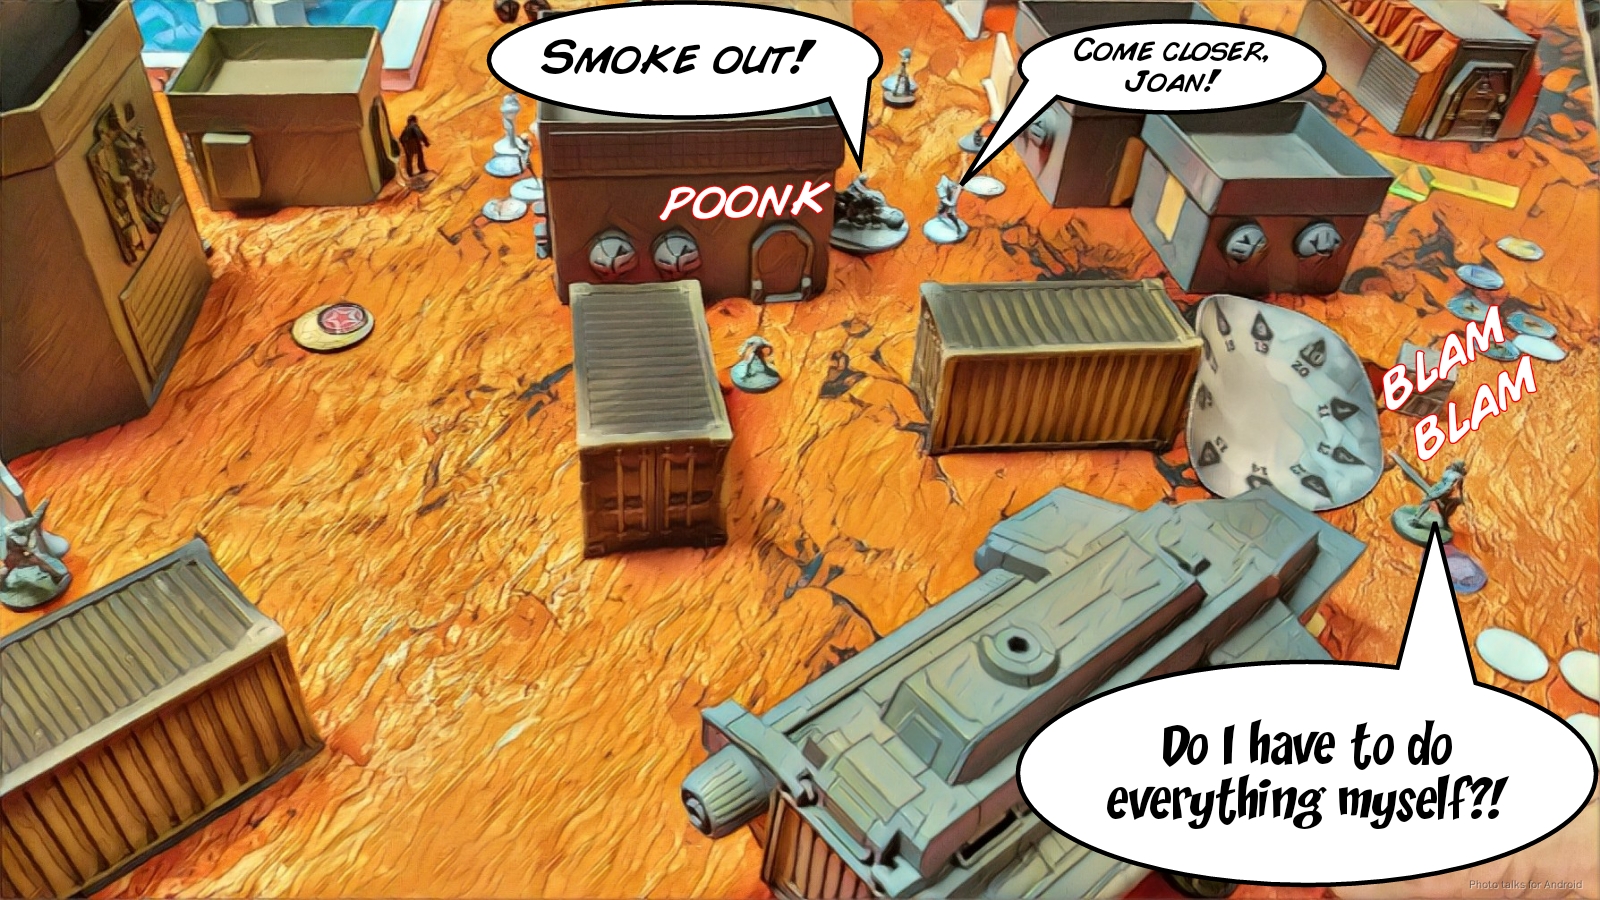 Isaac goes after my Keisotsu FO with the Akali, but I manage to fend it off with some ARM rolls and finally drop it thanks to a long HMG shot from the other side of the table. That’s all of Isaac’s orders, so it’s back to me.
Turn 3
Top of Turn 3 – JSA
Yojimbo goes to work, his MA4 saving him from an embarrassing electric pulse threat from the nearest model–the Palbot.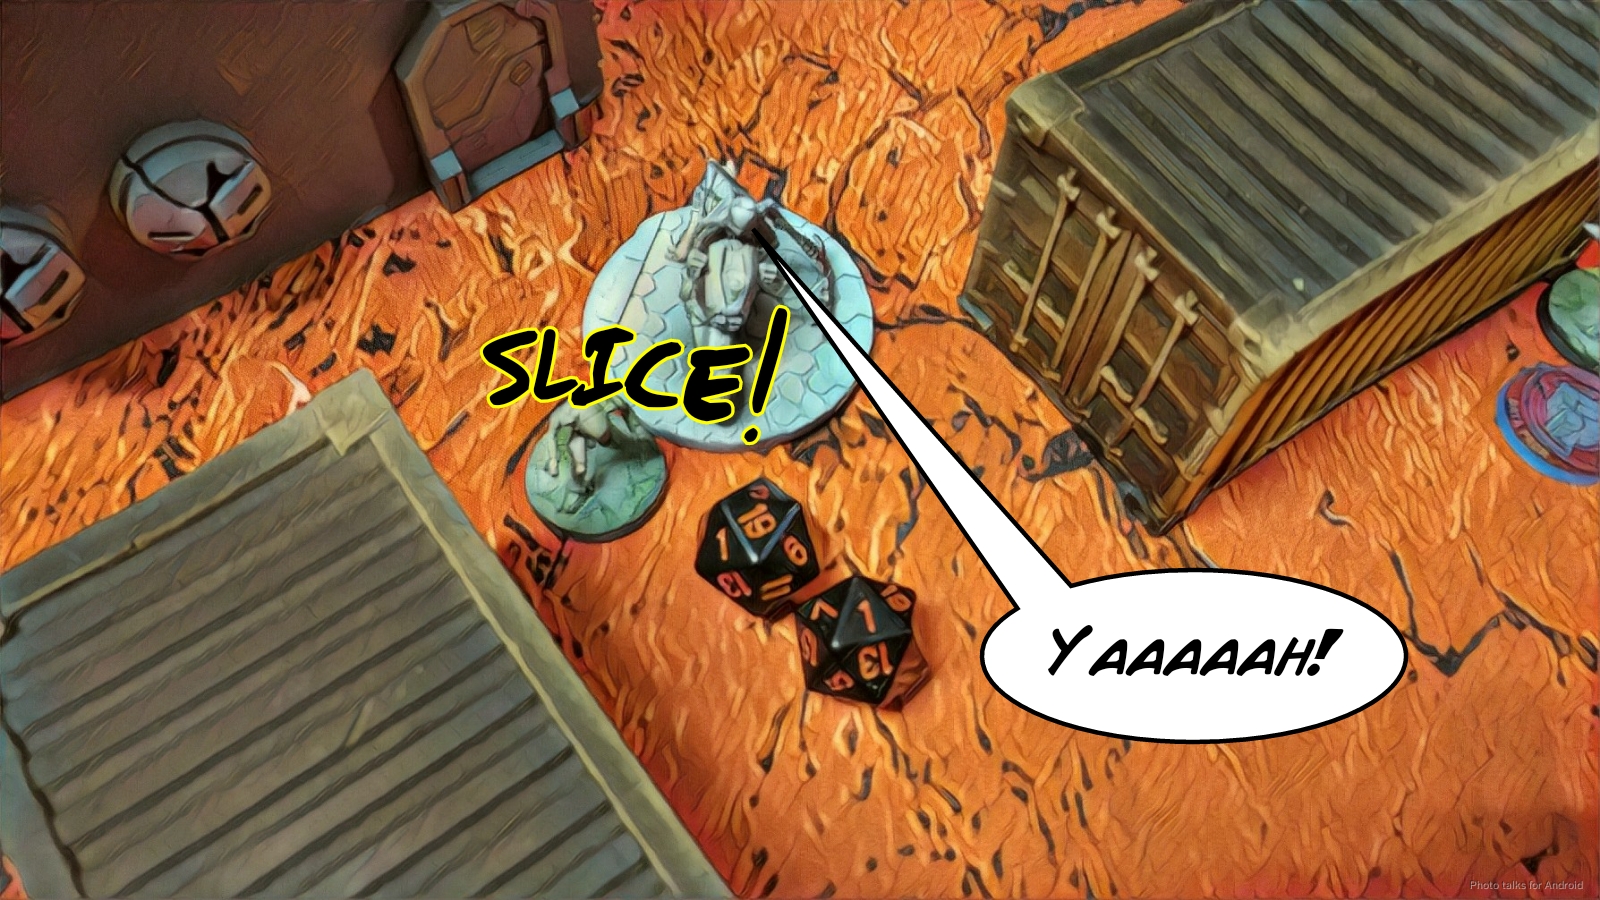 A short move away gets me an angle on Isaac’s advanced Pathfinder, so I drop a nanopulsar on it from behind, knocking it out.
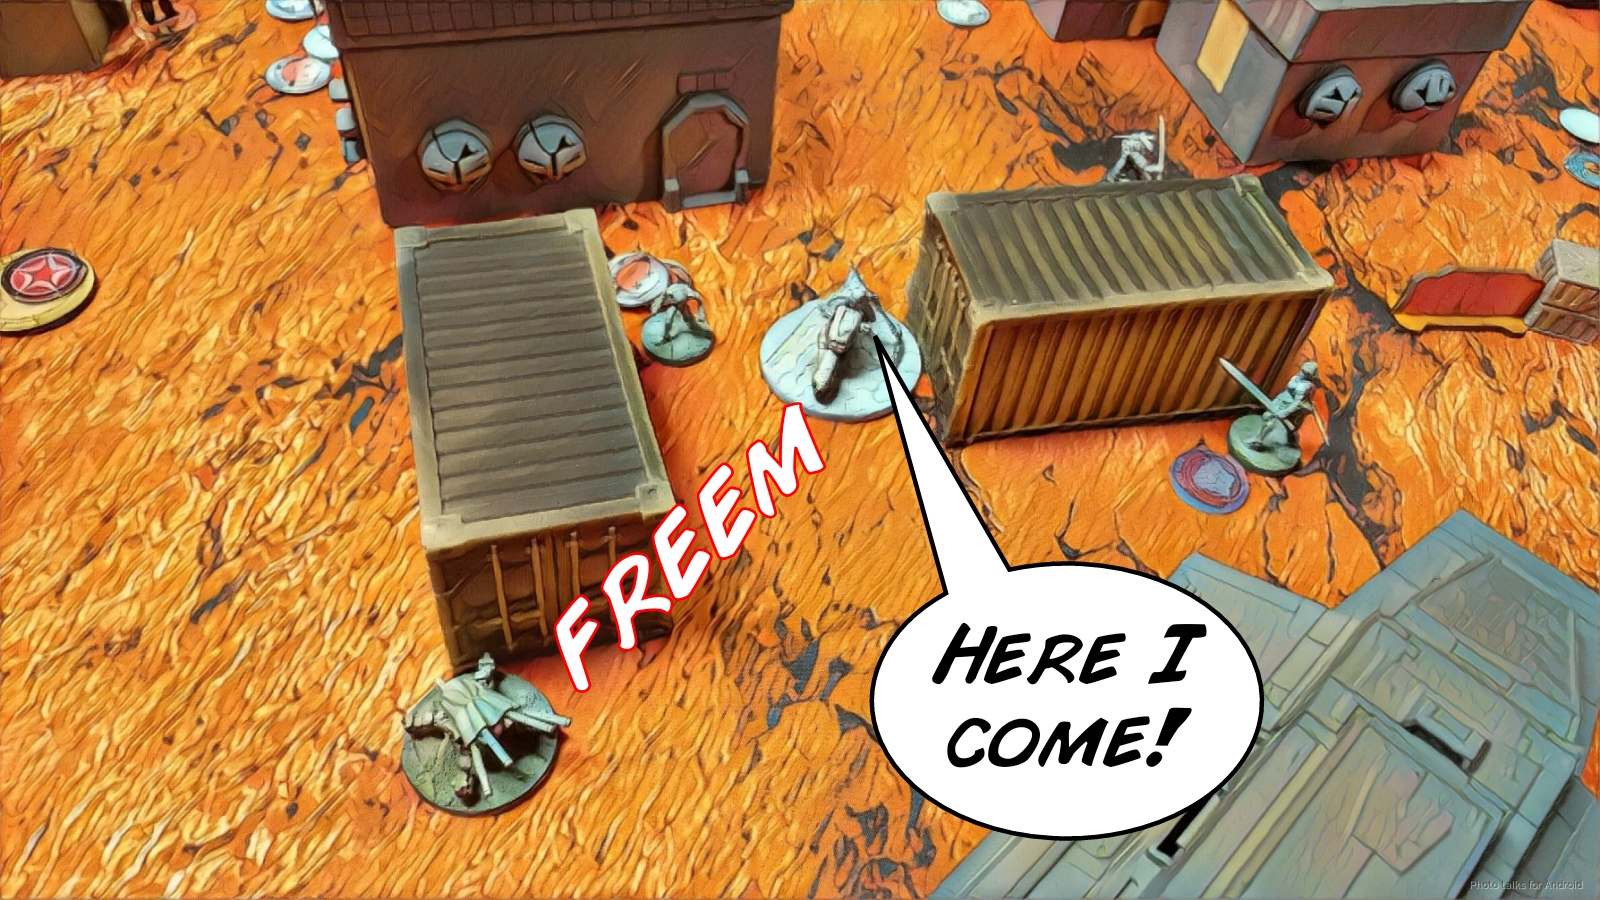 Joan puts up a fight as I move into CC, but Yojimbo manages to put a wound on her.
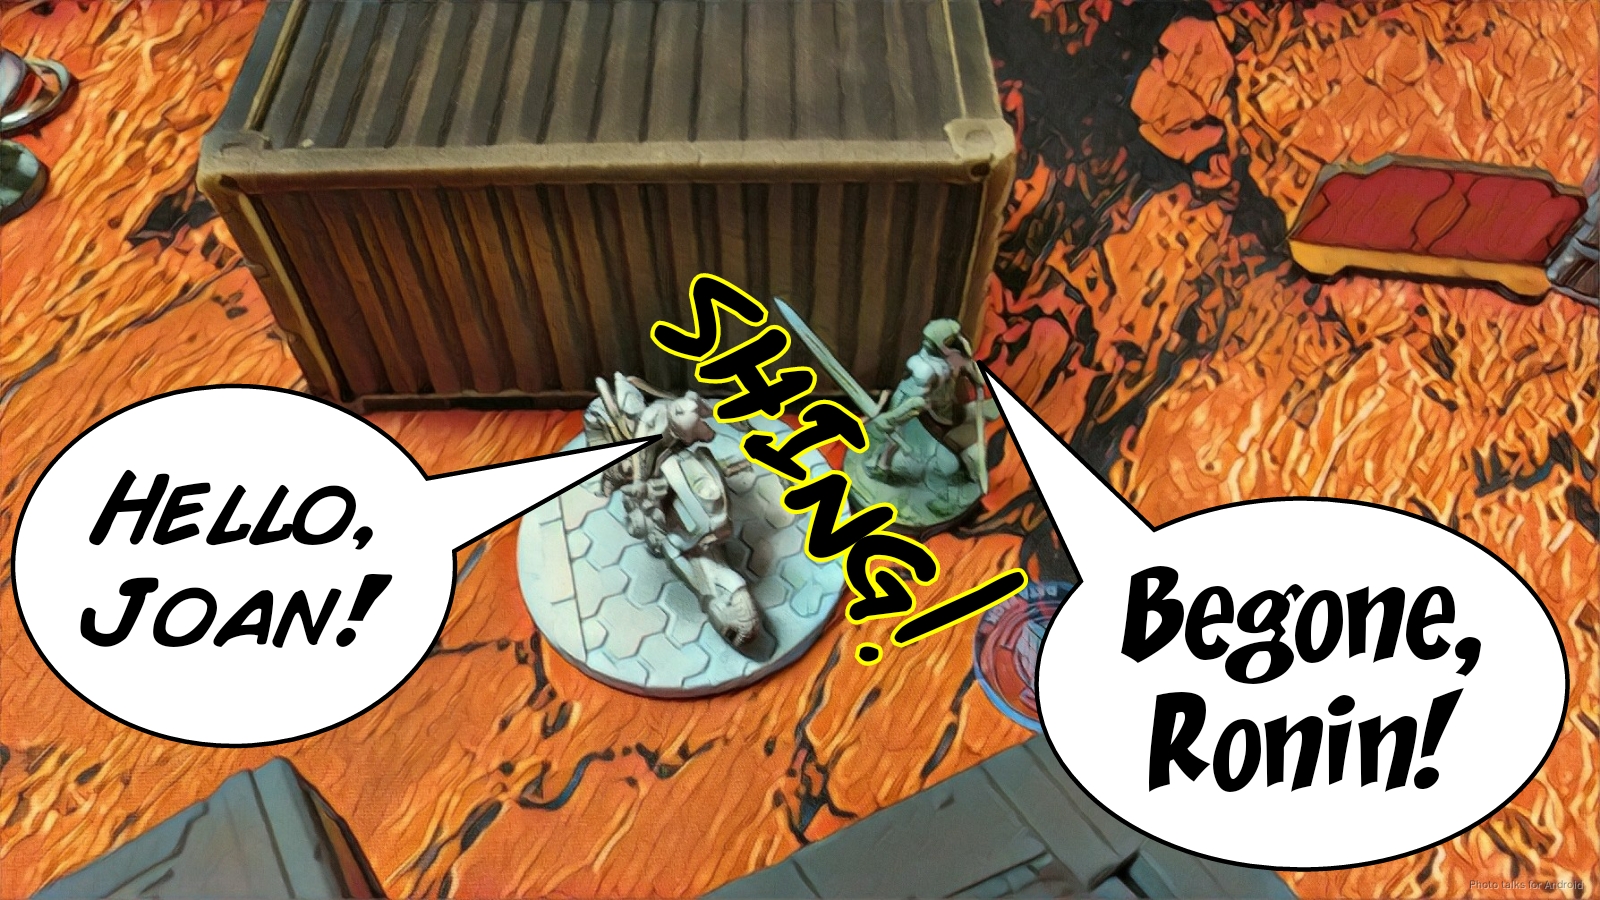 I’m again out of orders for Yojimbo, so my Domaru comes charging in, critting Joan. Isaac passes all the ARM saves, but Joan is now Isolated, Immobilized, and has one wound left.
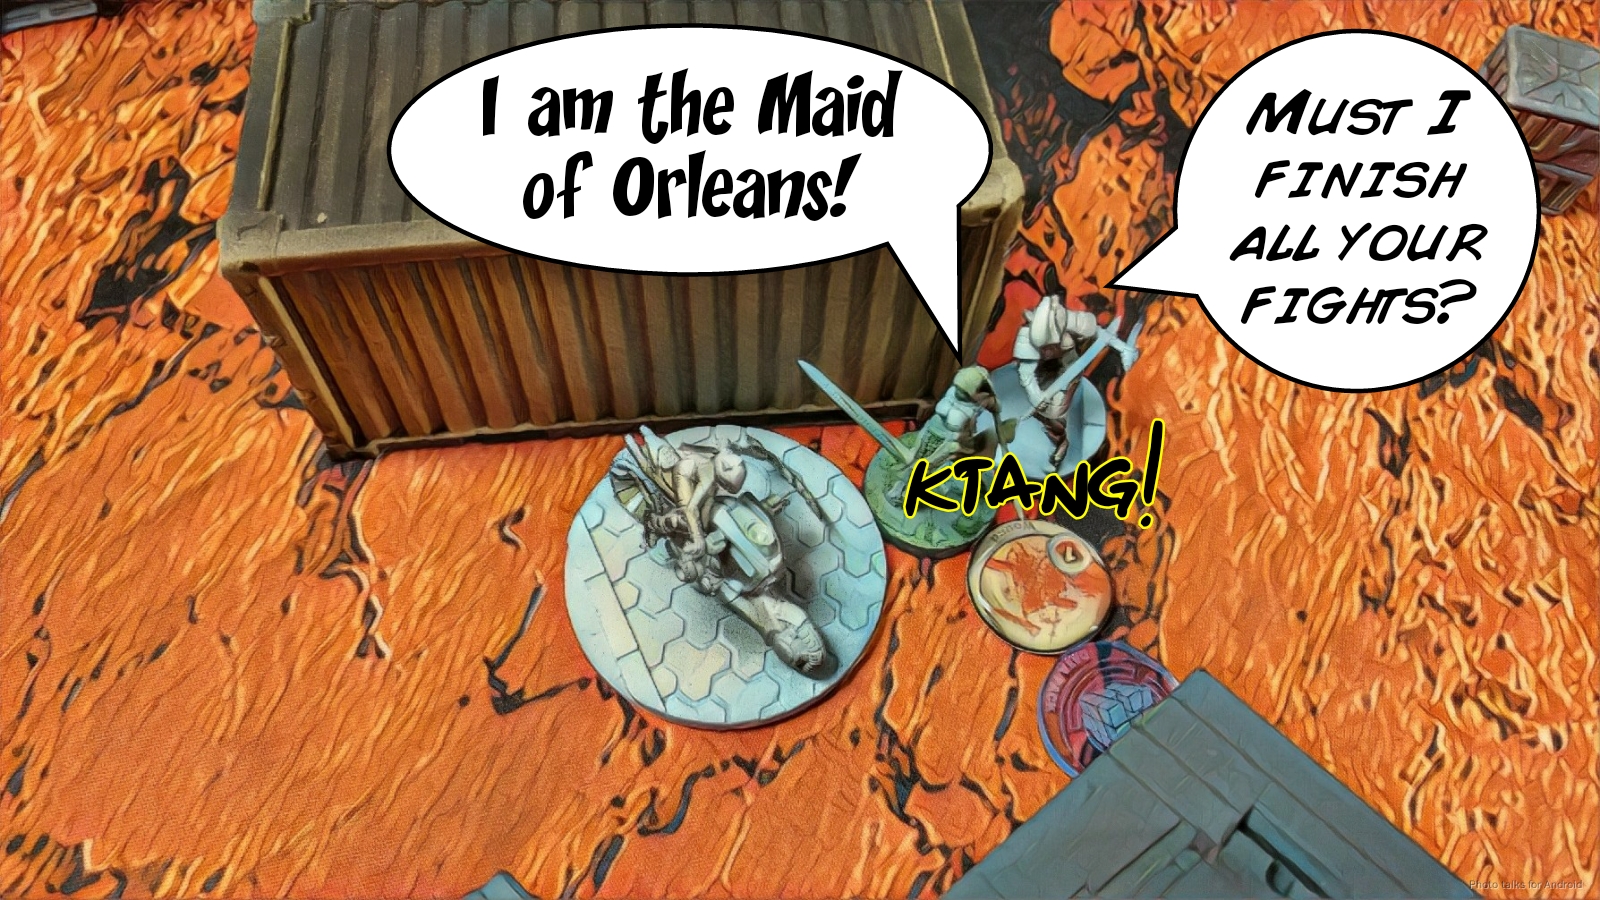 I’ve got a few more orders left, so I go chasing down Isaac’s Trauma Doc.
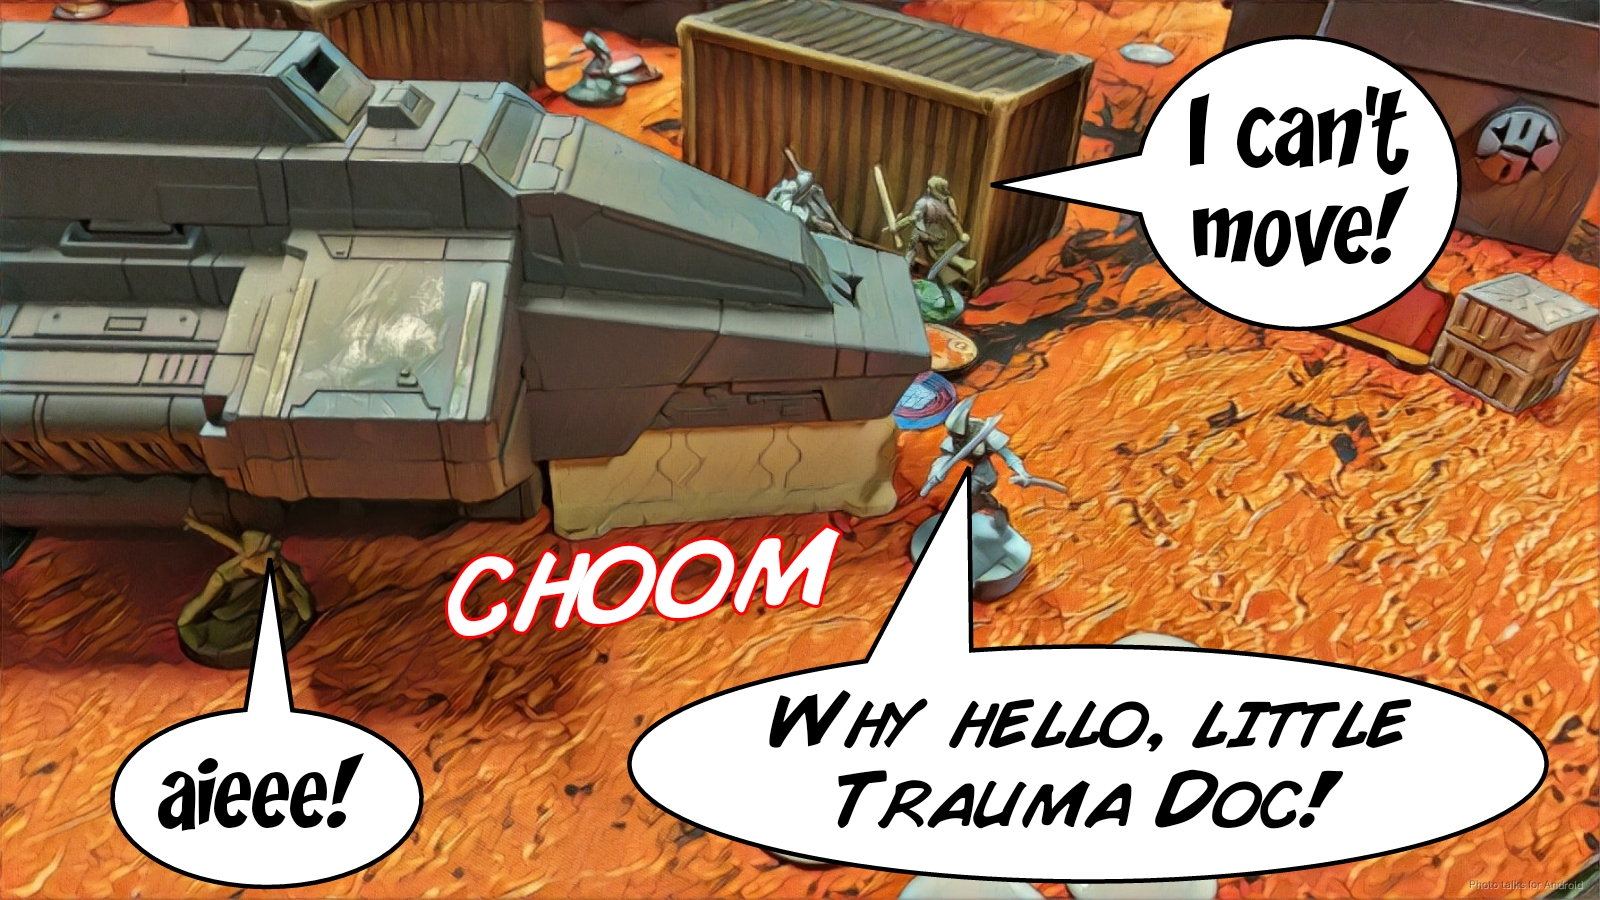 It takes awhile to walk all the way over there, chain rifling all the way.
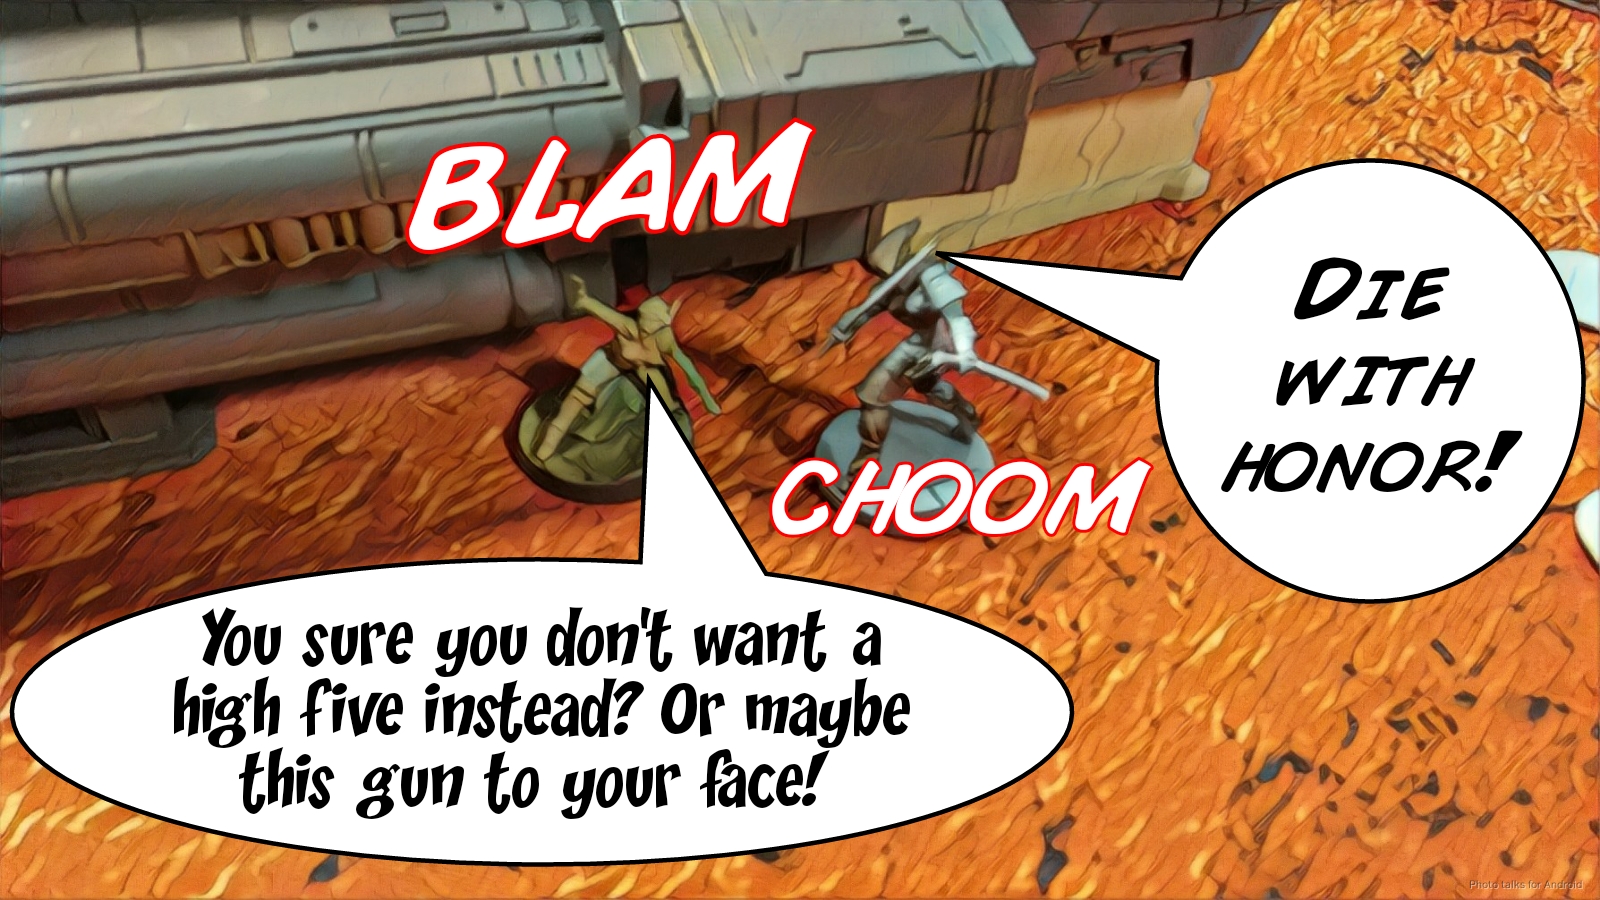 The Trauma Doc manages to put a wound on my Domaru, but I eventually get into close combat and take her out. Yuriko grabs me my Sabotage classified and secures the central objective with my Ninja, who I reveal finally.
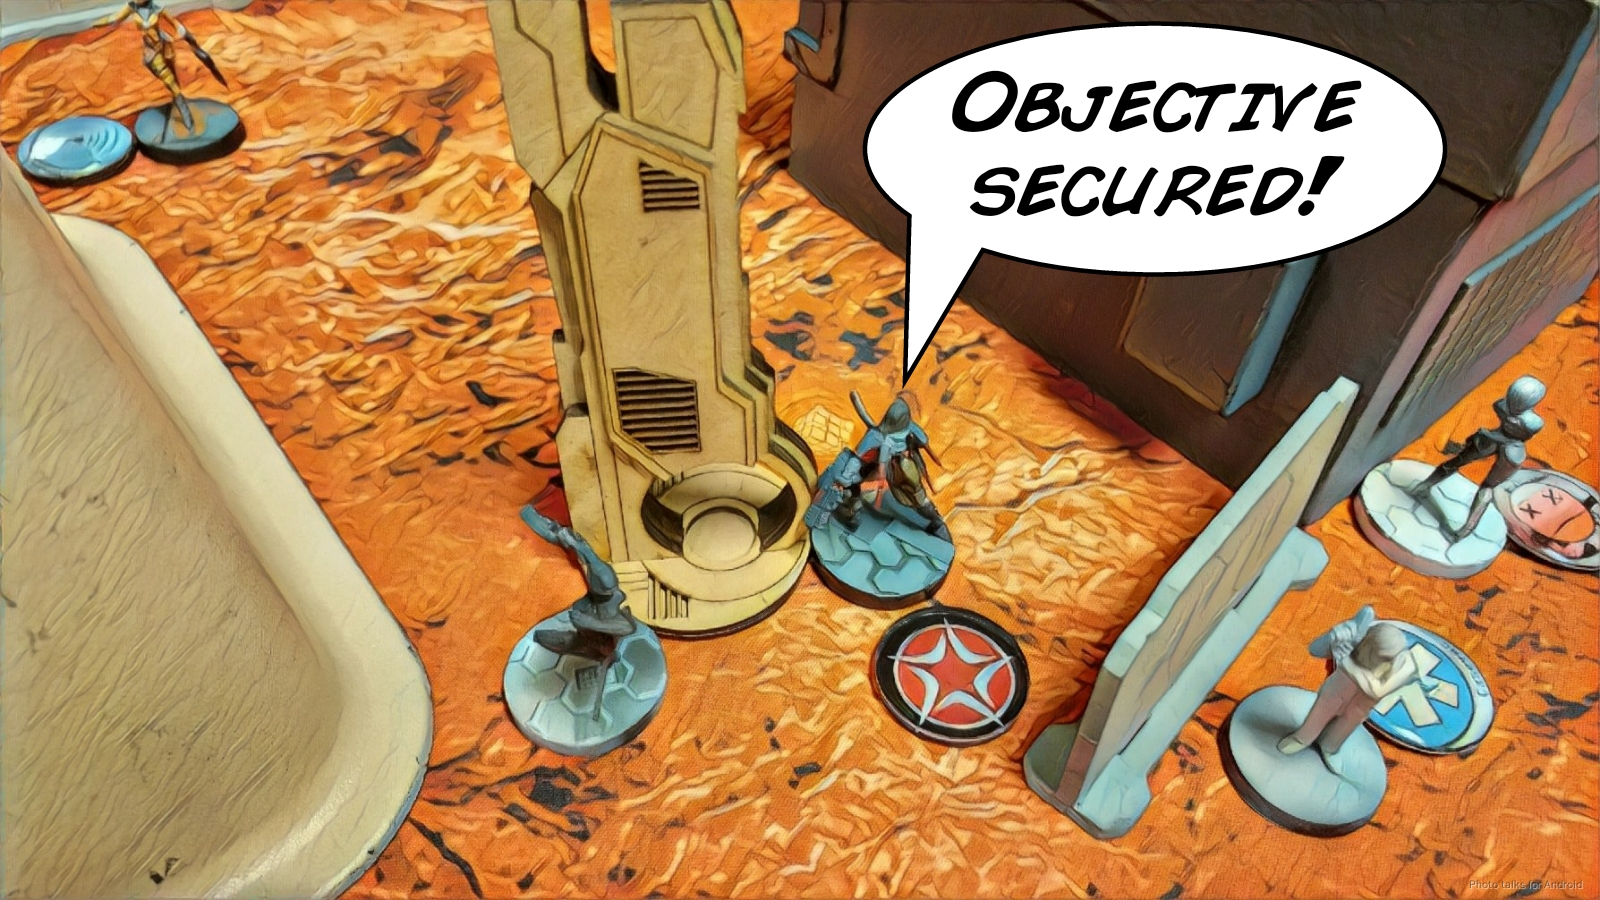 Isaac chortles at this development, reminding me that I had an opportunity to take on his Swiss Guard AHD as it walked by as part of a Coordinated Order. That would’ve been pretty glorious. Alas, I forgot she was there. I think I might’ve moved some guys into contact with the other two objective, but I’m not sure and I don’t have pictures of that, so let’s just say I didn’t? I had a Keisotsu HMG on the left and a Keisotsu FO on the right, so it was definitely possible. In any case, my DataTracker (Yuriko) was controlling the center, so it was at least a
8-0 JSA Victory!
Notes
Notes for Me
- Well, first off, learn JSA link teams better, dummy! I can’t believe I blew an order and two command tokens in the first turn just to form a legal link. UUUUGHHH.
- It’s not so bad when Oniwaban fail their infiltration roll. I definitely was pretty sad about it though. Probably could’ve been worse against a non-LI list where Isaac would’ve had more things that could ARO.
- I still hate links. They’re impossible to move cleanly–at least that’s what it feels like.
- I do, however, like the Keisotsu link team composition. It gives a nice buff to the main killing pieces, the HMG and the Kempetai SMR, and it serves as a specialist and Domaru delivery system. I’ll take it.
- Yojimbo is the bees knees. It’s gonna be hard to not include him in every JSA list. Apparently though, he can’t CC anything to death and requires assistance from a Domaru all the time (sample size 2). Sigh.
- I missed an easy opportunity to create an awful situation for Isaac with my Ninja KHD. That would probably have been an opportunity where it would’ve been “worth it” to pop her out of hidden deployment.
- Ryuken-9 continue to be amazing. Definitely need to think about supporting their flanks more though.
- Definitely still pretty ham-fisted with JSA. Need to play them more.
- Also, we missed the XenoTech deploying in the DZ and the fact that the DZ is 16″ in this scenario. Not a huge difference to the game, but worth noting.
Notes for Isaac
- I’m not sure why you left the Bulleteer out to ARO… especially with Yojimbo and my Kempetai MSV2 on that side.
- As you said, you wanted first turn…
- Putting the Kamau and all that stuff in a line was perhaps a mistake… I ended up taking a few orders to get them, but if it had been a boarding shotgun Oniwaban…
- Great work with the Akali.
- Roll dice better? Your dice were pretty rubbish this game. 🙁 Thanks for the great game though!