
Pathfinder Perfidy
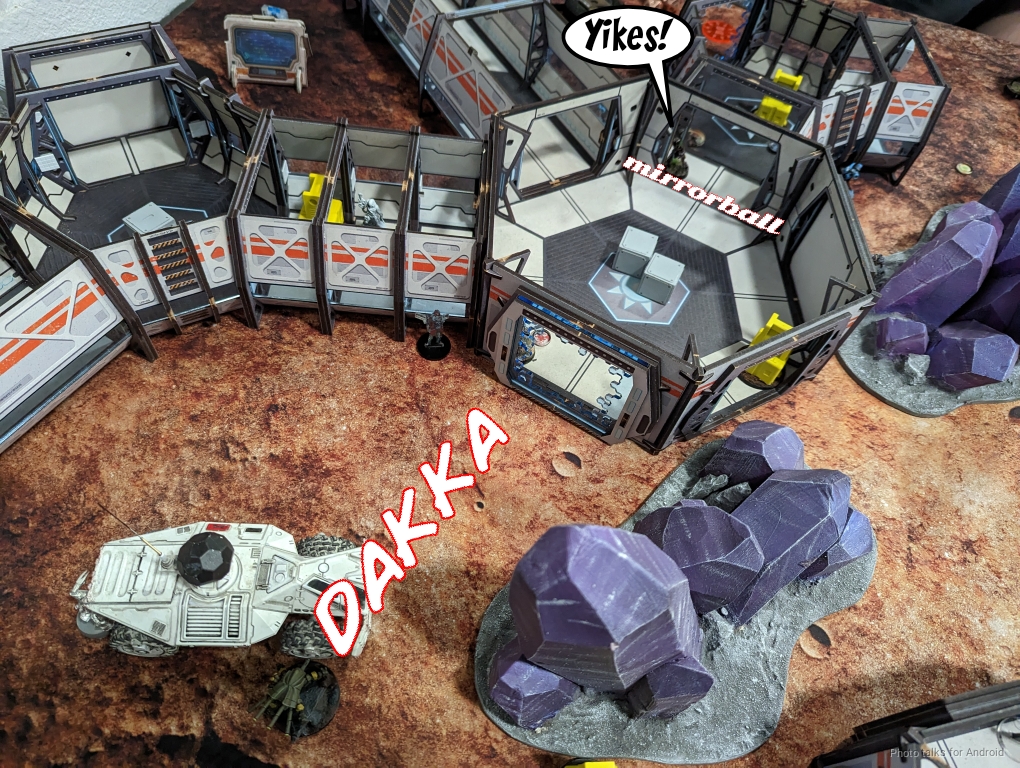
Tony (zhukov2) was most annoyed to see me and my Druze (joking of course).
Overview
- Mission: ITS14 Unmasking
- Forces: Druze Bayram Security versus Spiral Corps (300)
- Deploy First: Spiral Corps
- First Turn: Spiral Corps
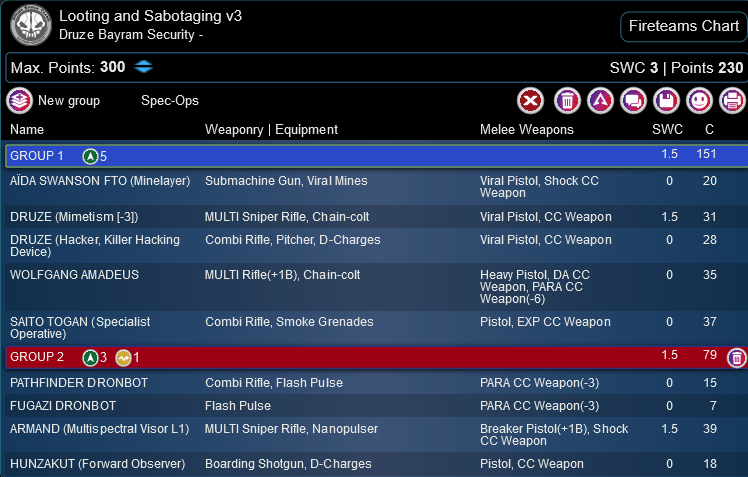
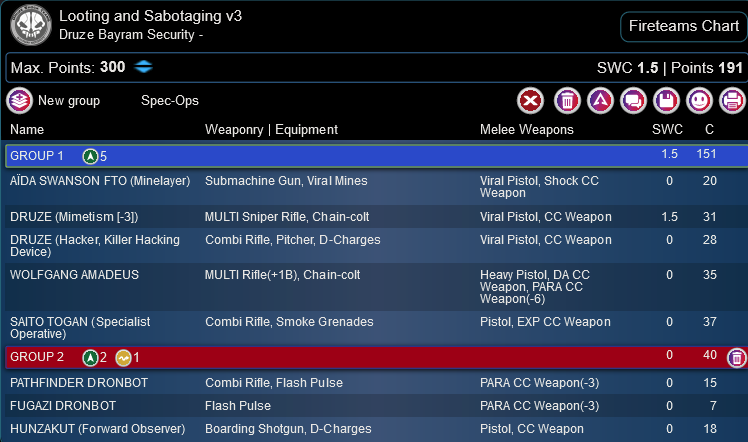
I decided to to take my Looting and Sabotaging list because I felt I would need Saito against Tony. I felt confident in piloting it after my game against Steve, and I know this table very well.
I didn’t know what he was rocking out of Spiral, but i knew he was going to have multiple impersonators so I needed some surprises of my own. I figured I’d use the mines to protect the HVTs and have Saito do some hunting of his own.
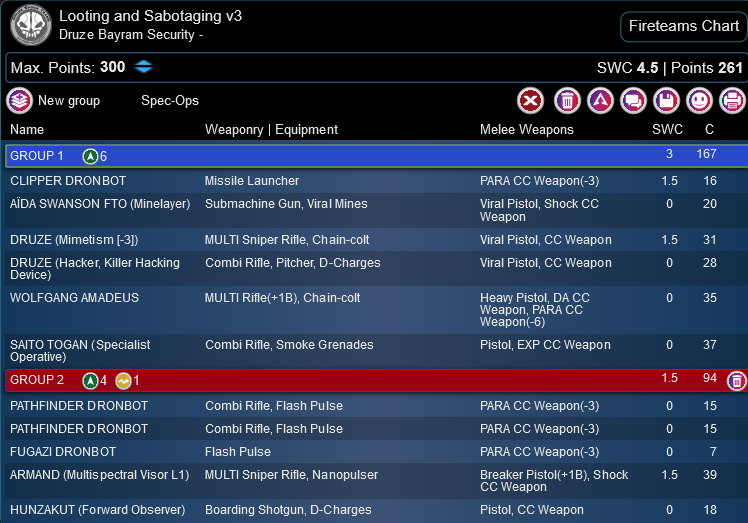
Looting and Sabotaging v3
GROUP 1
8
BRAWLER (Lieutenant) Rifle, Light Shotgun / Pistol, CC Weapon. (0 | 15)
CLIPPER DRONBOT Missile Launcher / PARA CC Weapon(-3). (1.5 | 16)
AÏDA SWANSON FTO (Minelayer) Submachine Gun, Viral Mines / Viral Pistol, Shock CC Weapon. (0 | 20)
DRUZE (Mimetism [-3]) MULTI Sniper Rifle, Chain-colt / Viral Pistol, CC Weapon. (1.5 | 31)
WOLFGANG AMADEUS MULTI Rifle(+1B), Chain-colt / Heavy Pistol, DA CC Weapon, PARA CC Weapon(-6). (0 | 35)
GROUP 2
SAITO TOGAN (Specialist Operative) Combi Rifle, Smoke Grenades / Pistol, EXP CC Weapon. (0 | 37)
1
PATHFINDER DRONBOT Combi Rifle, Flash Pulse / PARA CC Weapon(-3). (0 | 15)
FUGAZI DRONBOT Flash Pulse / PARA CC Weapon(-3). (0 | 7)
ARMAND (Multispectral Visor L1) MULTI Sniper Rifle, Nanopulser ( ) / Breaker Pistol(+1B), Shock CC Weapon. (1.5 | 39)
HUNZAKUT (Forward Observer) Boarding Shotgun, D-Charges / Pistol, CC Weapon. (0 | 18)
5 SWC | 300 Points | Open in Army | Copy Code
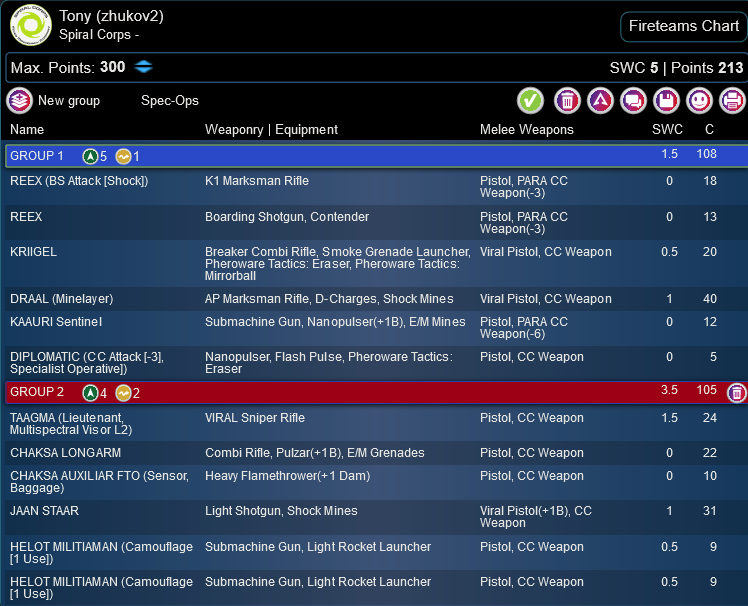
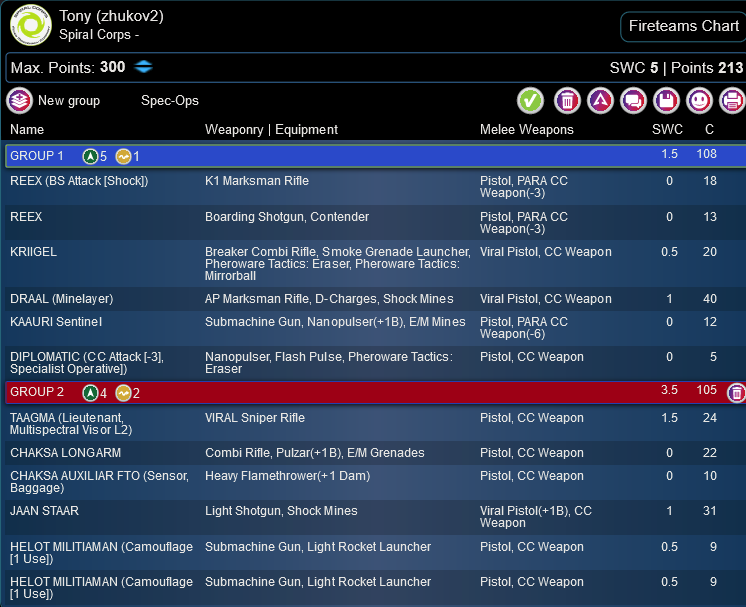
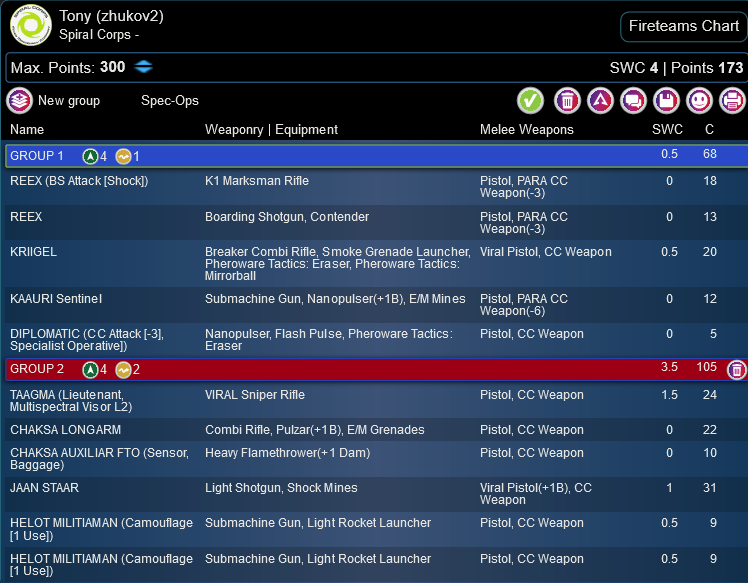
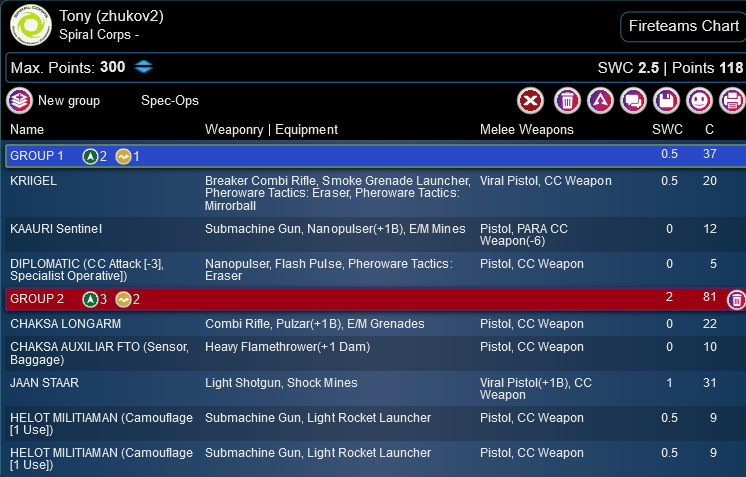
Tony is bringing triple Triad. Reex, triple Draal (what a jerk), and and his Taagma VSR surprise. He’s got a pair of Helots as well, and then the anticipated double impersonator.
Tony (zhukov2)
GROUP 1
REEX (BS Attack [Shock]) K1 Marksman Rifle / Pistol, PARA CC Weapon(-3). (0 | 18)
KRIIGEL Breaker Combi Rifle, Smoke Grenade Launcher, Pheroware Tactics: Eraser, Pheroware Tactics: Mirrorball / Viral Pistol, CC Weapon. (0.5 | 20)
DRAAL (Minelayer) AP Marksman Rifle, D-Charges, Shock Mines / Viral Pistol, CC Weapon. (1 | 40)
KAAURI Sentinel Submachine Gun, Nanopulser(+1B), E/M Mines / Pistol, PARA CC Weapon(-6). (0 | 12)
DIPLOMATIC (CC Attack [-3], Specialist Operative]) Nanopulser, Flash Pulse, Pheroware Tactics: Eraser / Pistol, CC Weapon. (0 | 5)
GROUP 2
TAAGMA (Lieutenant, Multispectral Visor L2) VIRAL Sniper Rifle ( ) / Pistol, CC Weapon. (1.5 | 24)
CHAKSA LONGARM Combi Rifle, Pulzar(+1B), E/M Grenades / Pistol, CC Weapon. (0 | 22)
CHAKSA AUXILIAR FTO (Sensor, Baggage) Heavy Flamethrower(+1 Dam) ( ) / Pistol, CC Weapon. (0 | 10)
GREIF-OP (Surprise Attack [-3], Impersonation [IMP-2]) Combi Rifle, D-Charges / Breaker Pistol(+1B), CC Weapon. (0.5 | 21)
JAAN STAAR Light Shotgun, Shock Mines / Viral Pistol(+1B), CC Weapon. (1 | 31)
HELOT MILITIAMAN (Camouflage [1 Use]) Submachine Gun, Light Rocket Launcher / Pistol, CC Weapon. (0.5 | 9)
5.5 SWC | 300 Points | Open in Army | Copy Code
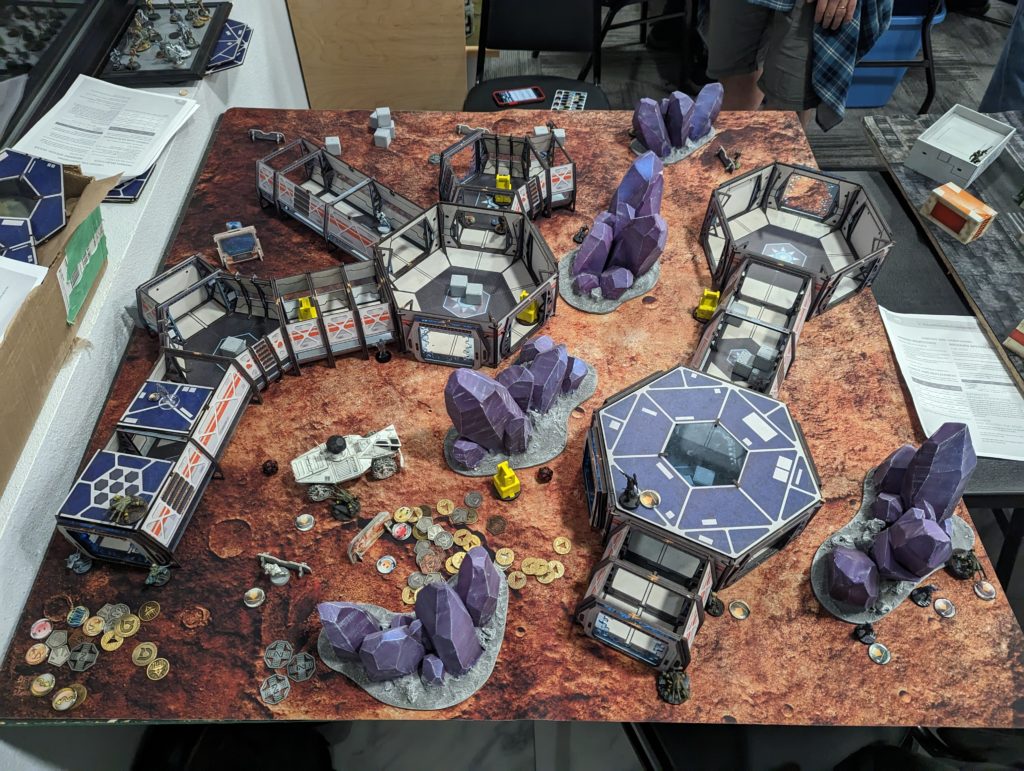
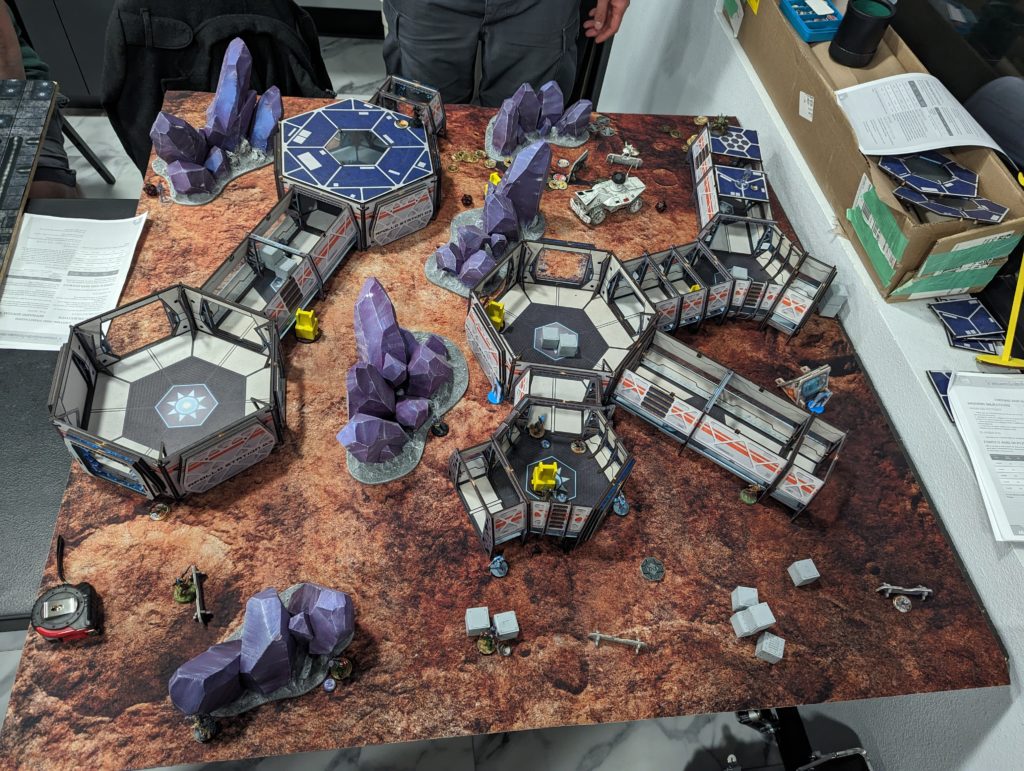
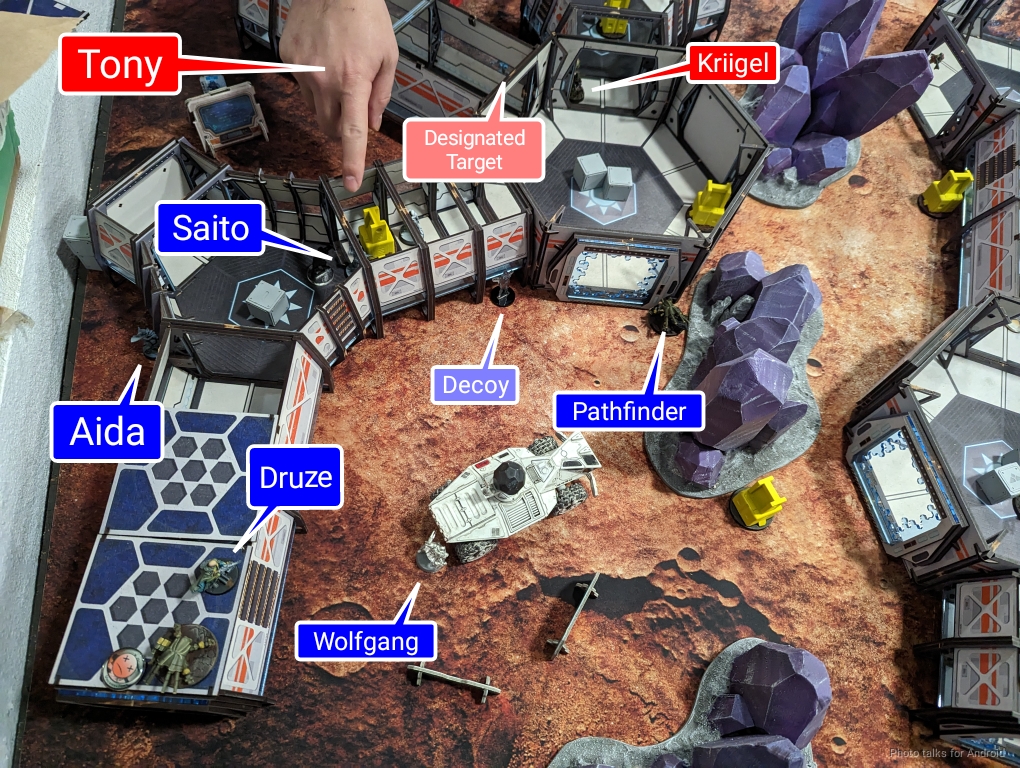
Deployment
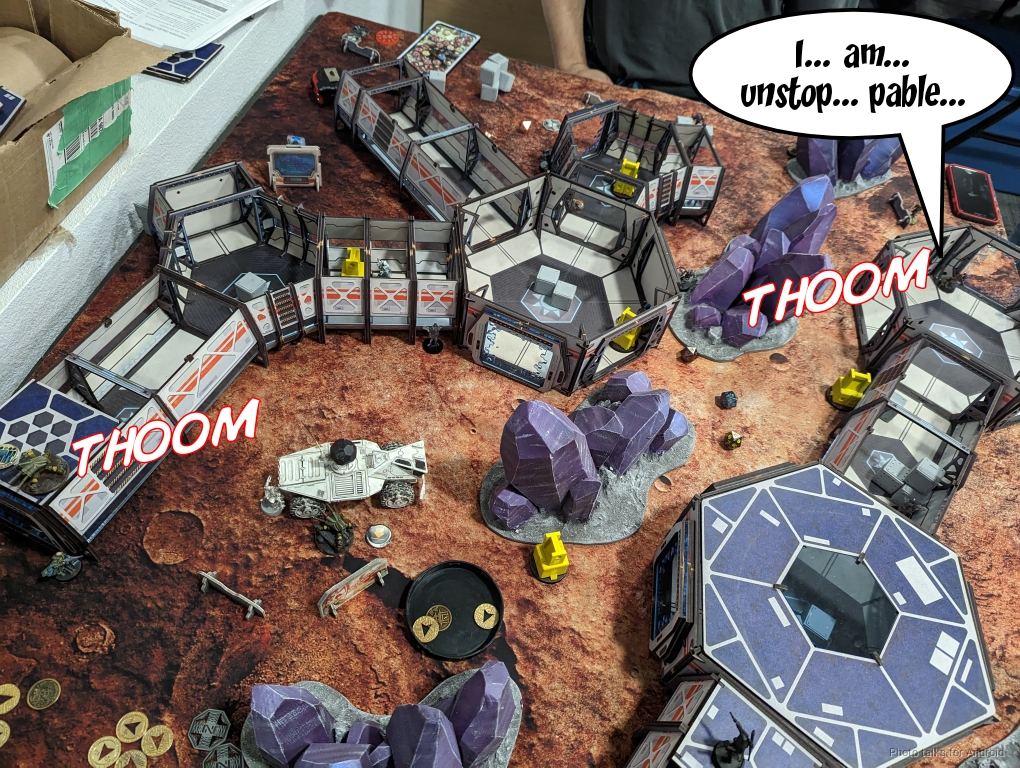
I took deployment so Tony took first turn. He set up a pair of Helots in the back as well as a Kauuri to hold his deployment zone, then stacked the Reex and Draal triads inside the corridor system. All the Pheroware in the corridors would be a huge problem for me trying to get into the corridors to attack the HVTs.
His Taagma and Chaksa ended up in the back behind the purple crystals and some boxes. He held both impersonators in reserve, as you should.
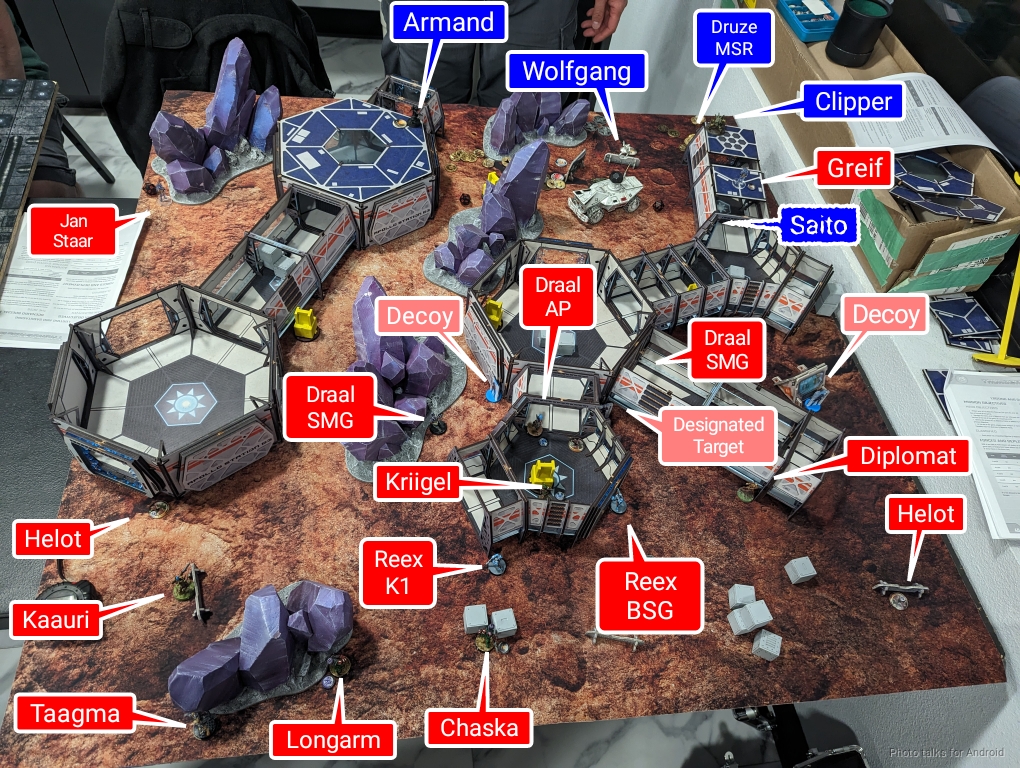
I knew that there was basically no way that I was going to be able to not be in loss of lieutenant on my first turn given 1) the fact that I knew there were two impersonators coming out of reserve and 2) I know how aggressive Tony is as a player. I wasn’t sure where they would all end up. I decided to just castle on the left with the killy link and then put the Brawlers on the right. I swapped the Clipper and the Druze KHD, figuring that the clipper would be a little more useful in a 4-strong link for sixth sense.

The two Pathfinders were centrally located to give me some options. I had some meta knowledge from the tournament gossip that I was going to see a Taagma VSR in Tony’s Chaksa link, so I hid my Druze MSR and Clipper from them pretty well. This sort of pushed them out of the game a bit, but the Druze and the Clipper were both watching the big central room int he middle of the table, and Aida’s mine was guarding the real HVT.
Of course, Tony figured this out real fast and put the Greif up there on the roof and Jan Staar all the way on the right to attack my Brawlers. This was disappointing to me, but I figured at least this way I’d be in loss of lieutenant and not in loss of most of my army–those shotgun templates will really ruin my day if I bunched up, so I spread out some and threw the Brawlers under the bus.
I put Le Muet on the roof, watching the Draal’s approach, as they were the next big threat. With that, it was time to be very sad.
Turn 1
Top of 1 – Spiral
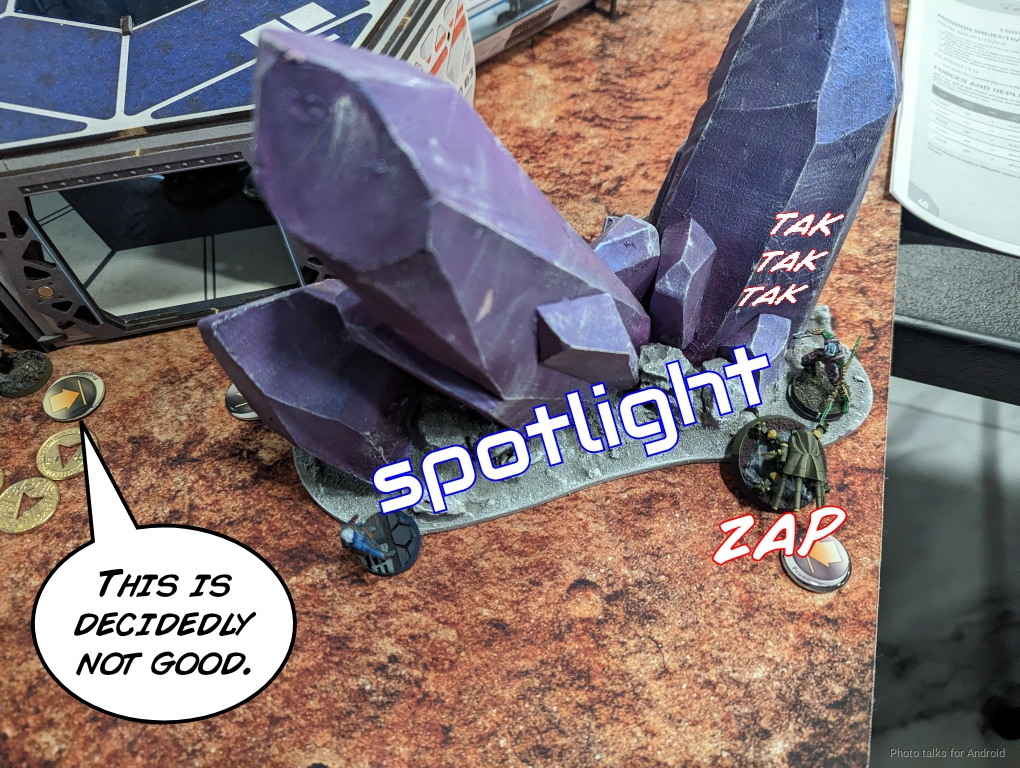
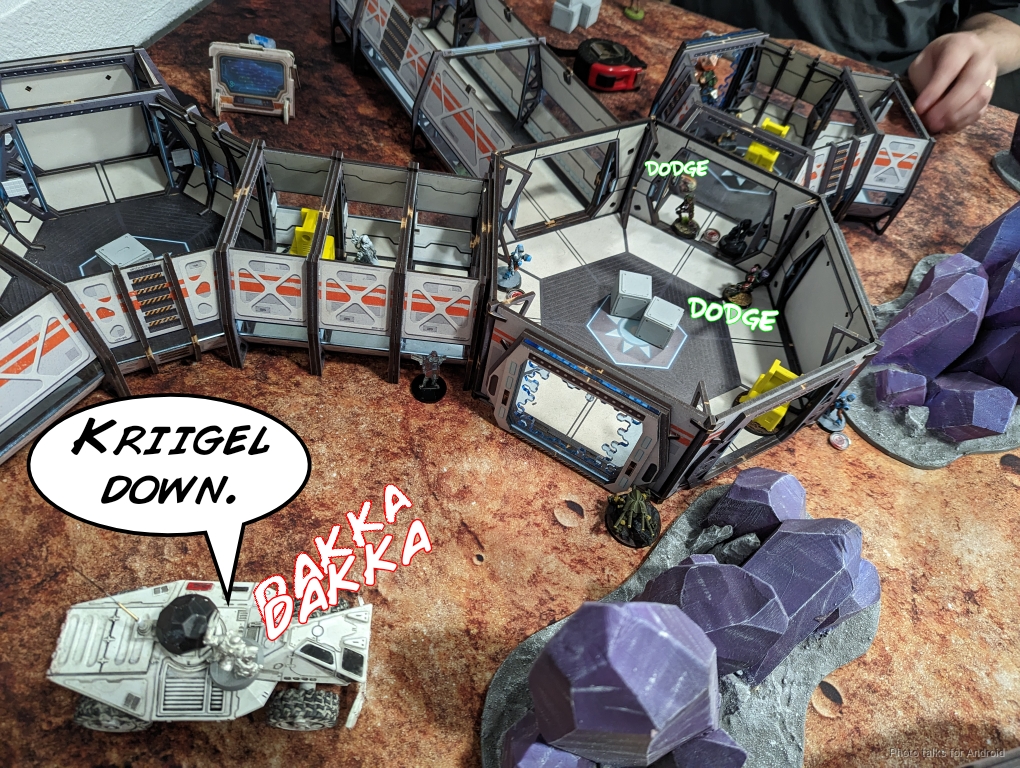
I kept my command tokens because I knew I’d need them when I was in loss of lieutenant and the Taagma would keep the order loss to 1 order anyway. Jan Staar rolls around the corner and splits burst between the Brawler Hacker and my Lieutenant.
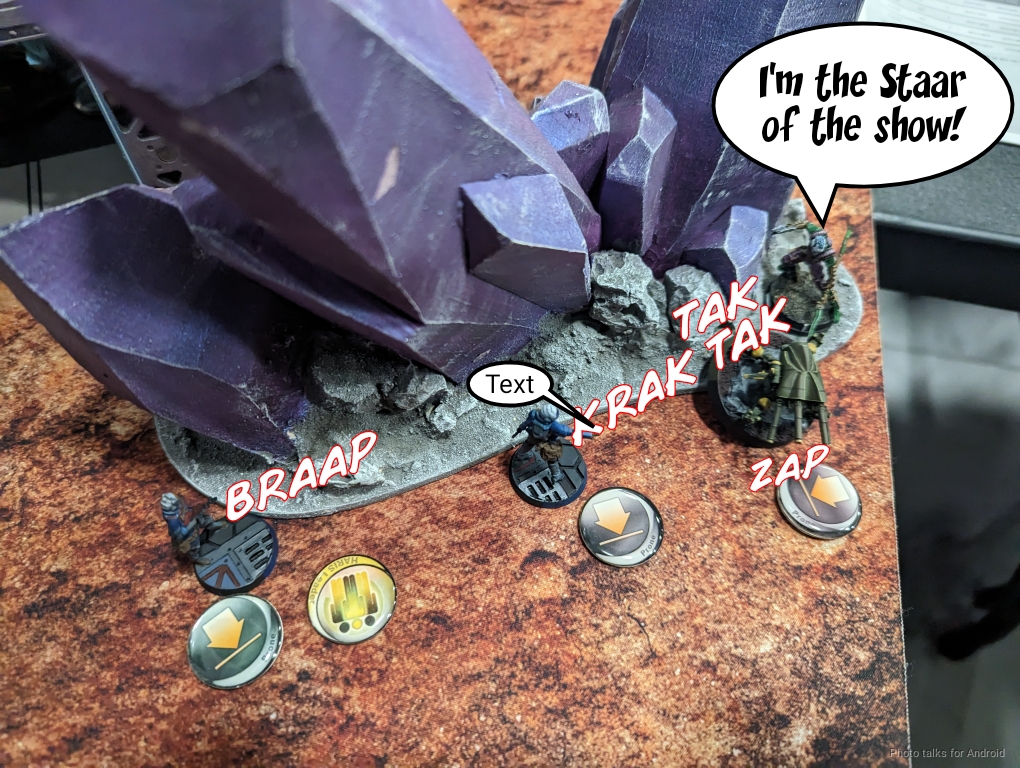
The Fugazi whiffs its flash pulse, which is really annoying. The Brawler Lt crits Jan Staar and the Hacker hits it with a SMG. Jan Staar survives it all, then proceeds to straight up kill the Brawler Lt while beating the Brawler Hacker’s spotlight. The Fugazi whiffs again.
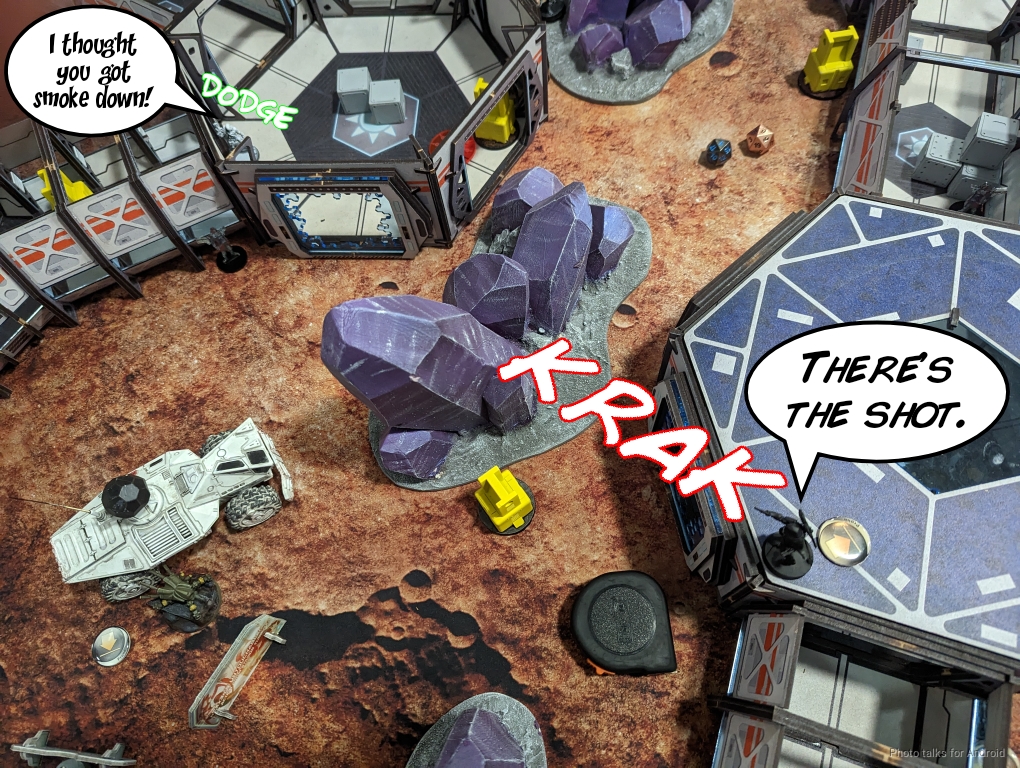
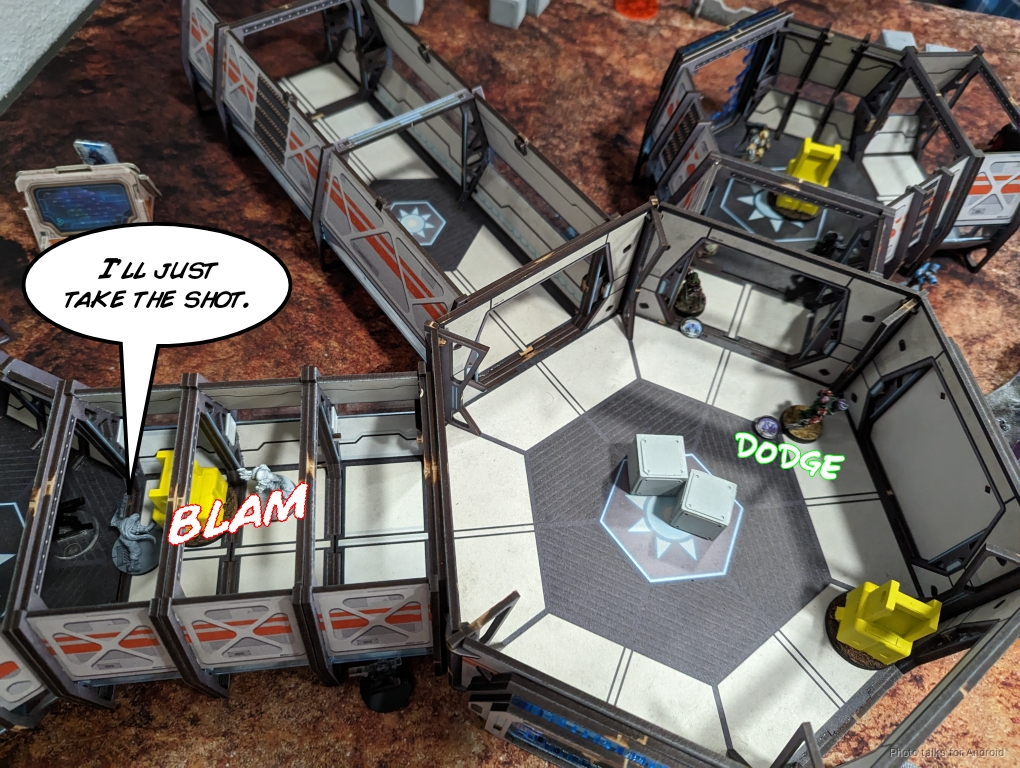
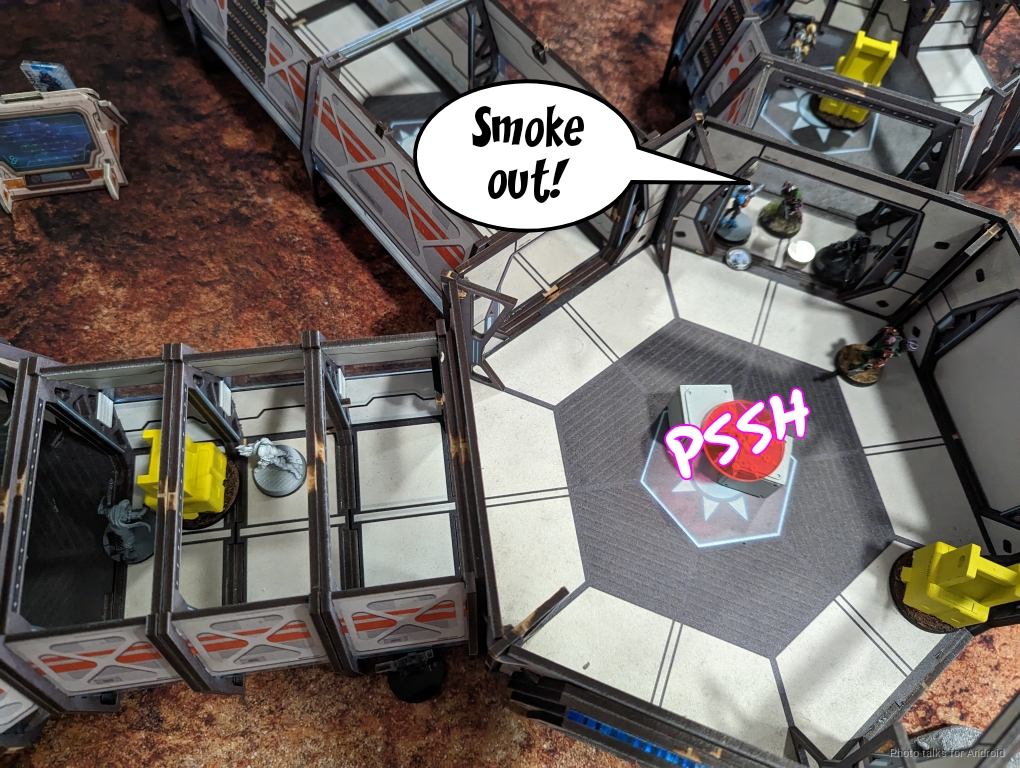
With me now firmly in loss of lieutenant, Tony decides to go ahead and try to get the mission done. He sets up smoke in front of of the door that the Clipper and Druze MSR (and Le Muet) are watching to let the Draal move around.
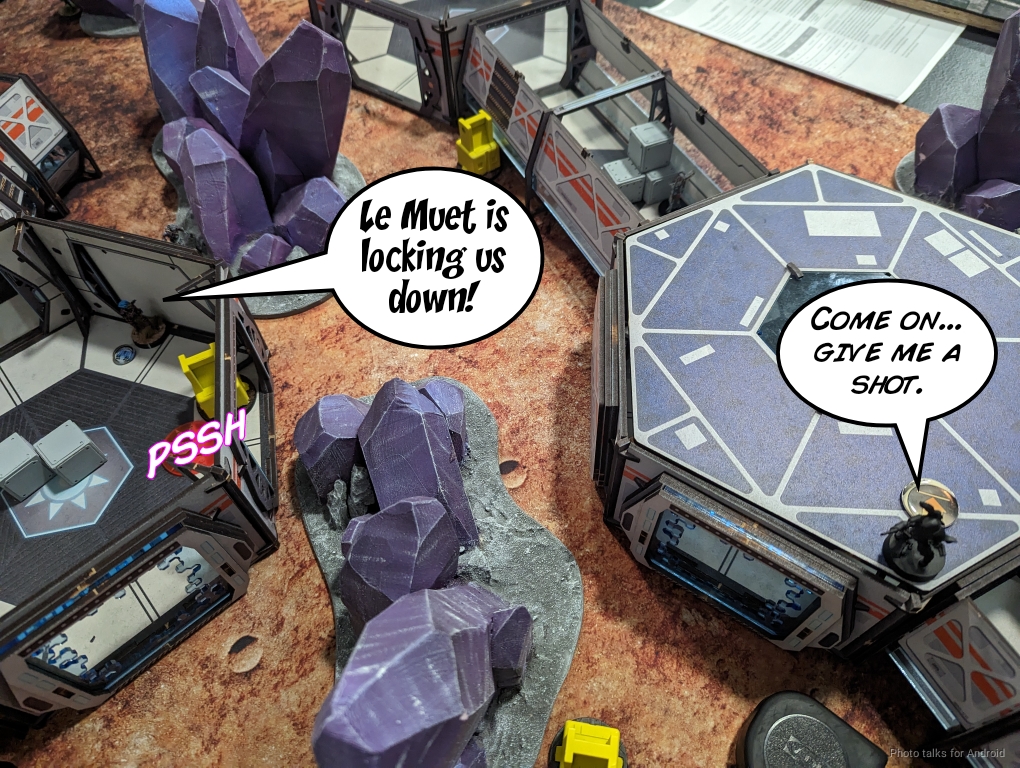
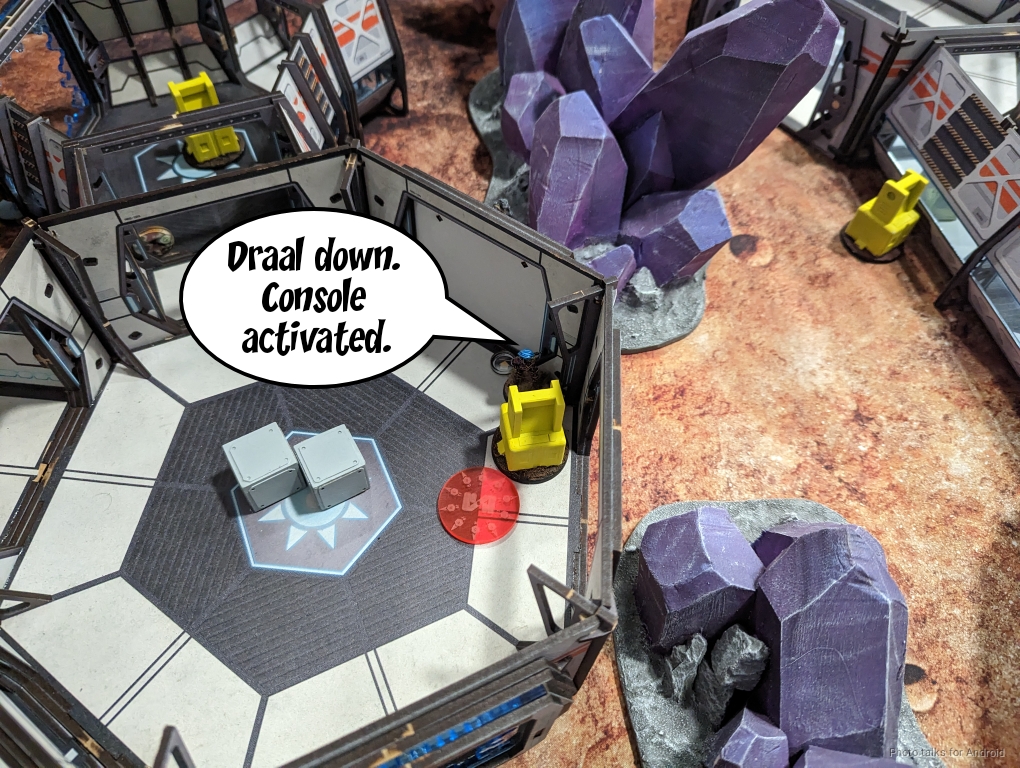
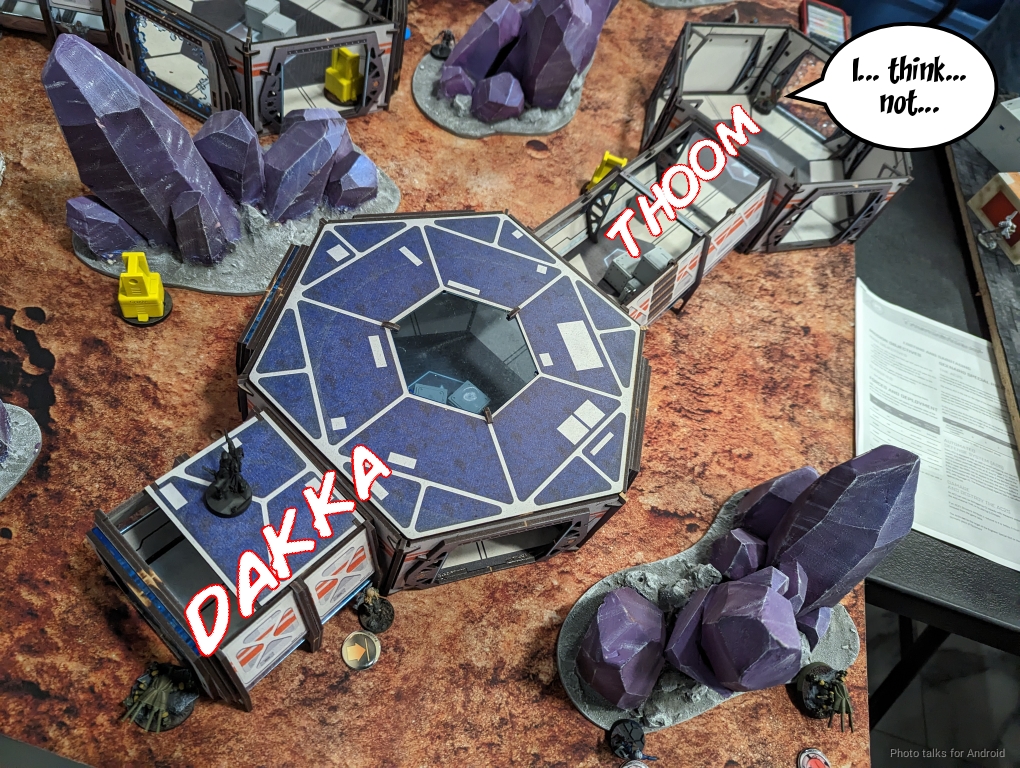
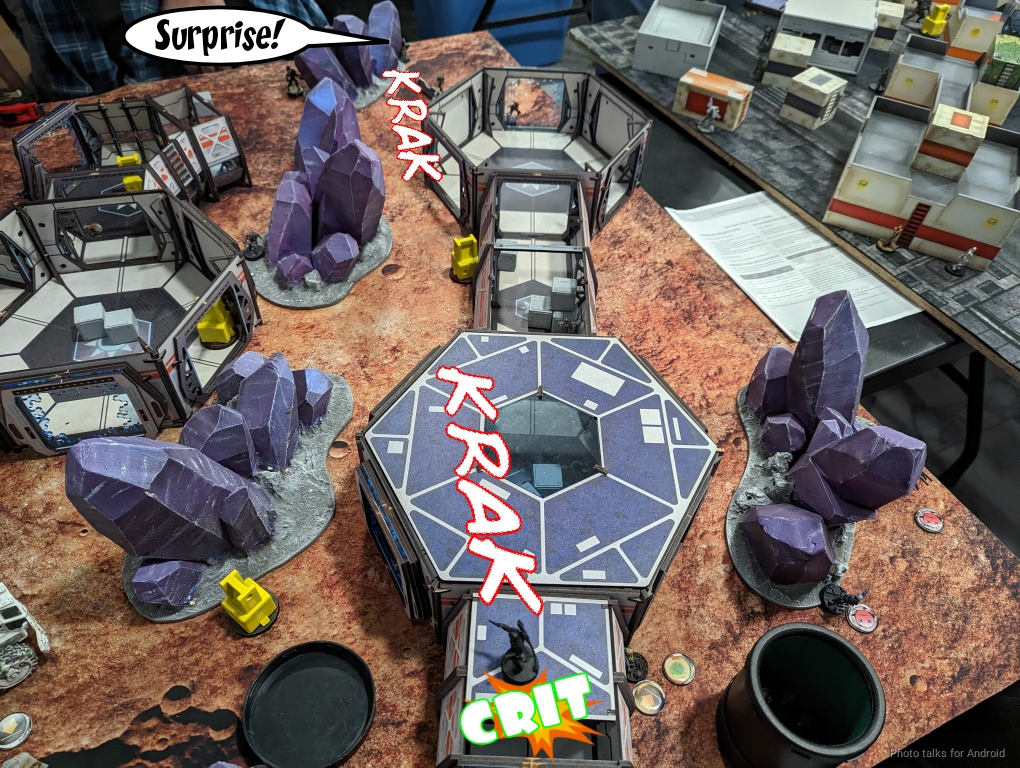
He pushes the Draal forward and one makes its way towards a console but it’s not the link leader. Le Meut can see it through the smoke, so I take the shot and drop it against a forced dodge. I’ll take it!
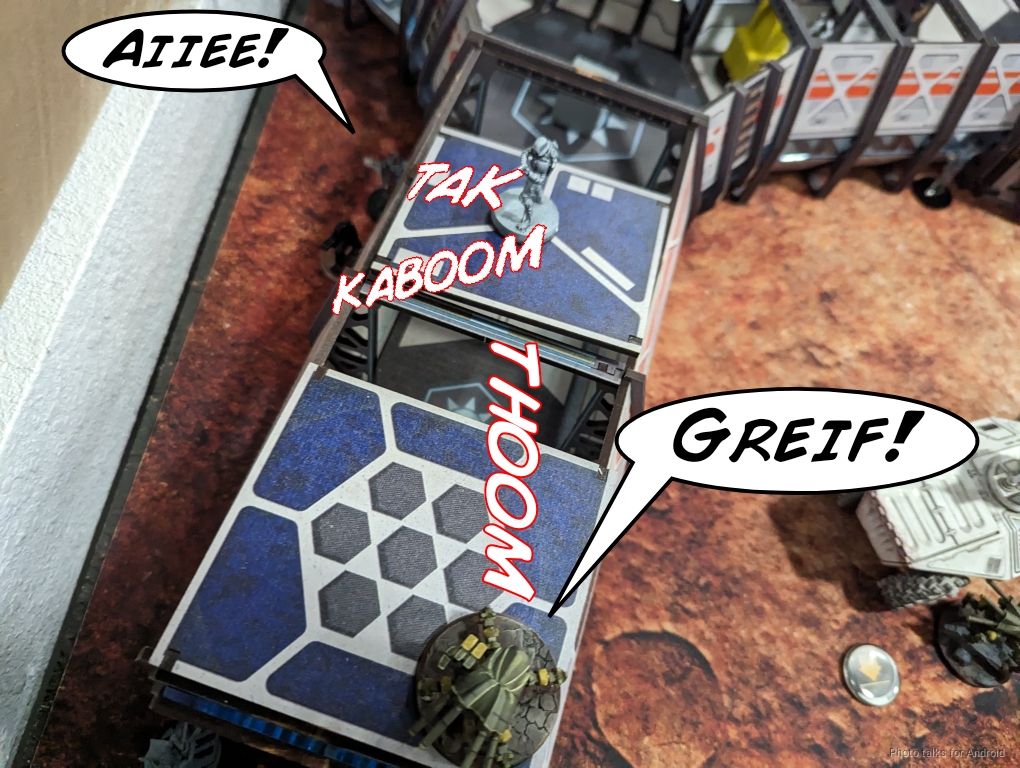
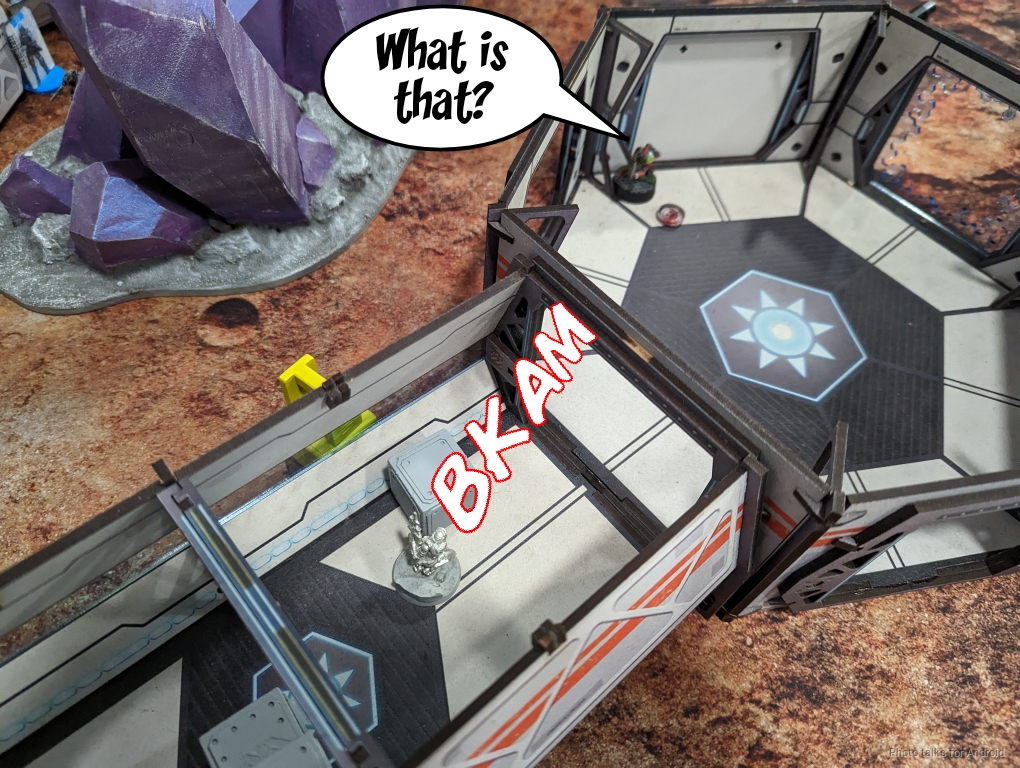
The AP Marksman Draal flips the central console and reveals my very obvious Designated Target…
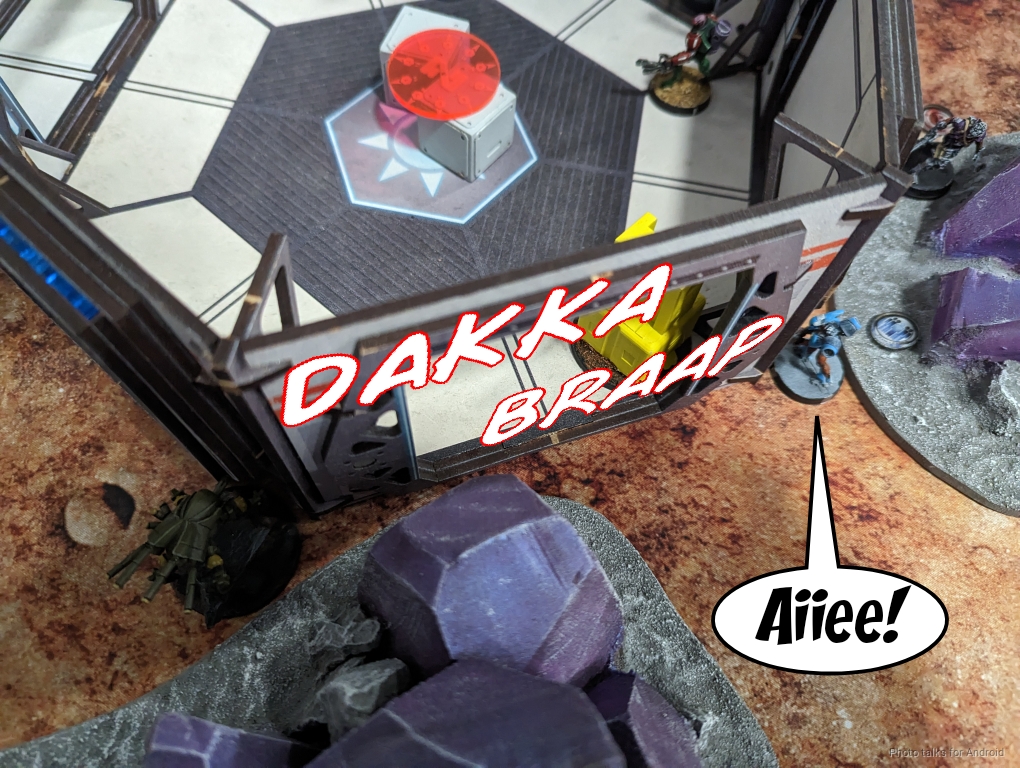
which dies to the Greif pretty much immediately. The Clipper whiffs but Aida’s viral mine handles things for me.
At this point, Tony’s done a ton of things and is getting ready to pass turn. Jan Staar kills the Fugazi that has done nothing (grumble grumble) and then re-impersonates.

Bottom of 1 – Druze
In terms of points lost, I’m actually doing slightly better, but I’m in loss this turn, which will make things quite difficult.

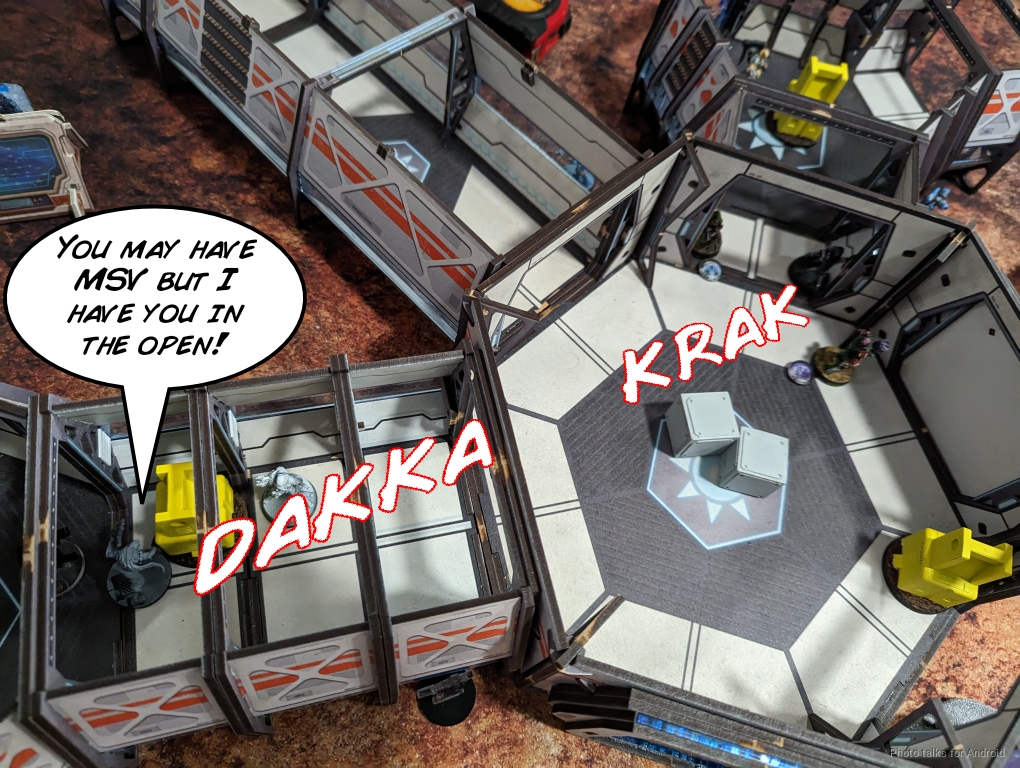
Obviously I can’t do a ton of damage this turn, but plan is to stabilize and take out major threats so I can stay alive to the second turn. If I can just take on Tony’s specialists then I can make it harder for him to accomplish the mission. I start by taking out the Draal in the open. We have a brief discussion about whether or not the Draal is in or out of cover, and it looked to me at the time that it definitively was.
I said so with a very authoritative tone that discouraged disagreement, that Tony, being the kind human he is, let me have it. Looking at the picture I took, it still looks to me that the Draal is out, but in the post game discussion, Tony explained. He said that he was worried that I was really upset because of his excellent first turn. Of course, I was a little frustrated by the turn of events but I certainly wasn’t upset with Tony, and I had to go deep into analysis mode to dig myself out of the problem. When that happens I can generally be a little intense, so that explained but does not justify my tone.
Basically Tony was going to say: “obviously I would have tucked the Draal a little further back and in cover, I just thought I had cover from Le Muet because there’s no way I would have left him out, it’s not like Le Muet is hidden.” Which I would absolutely have let him have if he had said as such, but he was being considerate of the way I was presenting myself as focused, intense, and assertive, and he let it go. I think that’s a pretty laudable thing to do, and I’m a little embarrassed that my tone caused the issue in the first place. In any event, I apologized after the game and all was well. I just wanted to call attention to this because it’s important to a) give all credit to Tony for being a good human, but also b) highlight how important being clear with your communication in this game is. Thanks to Tony for being a gentleman!
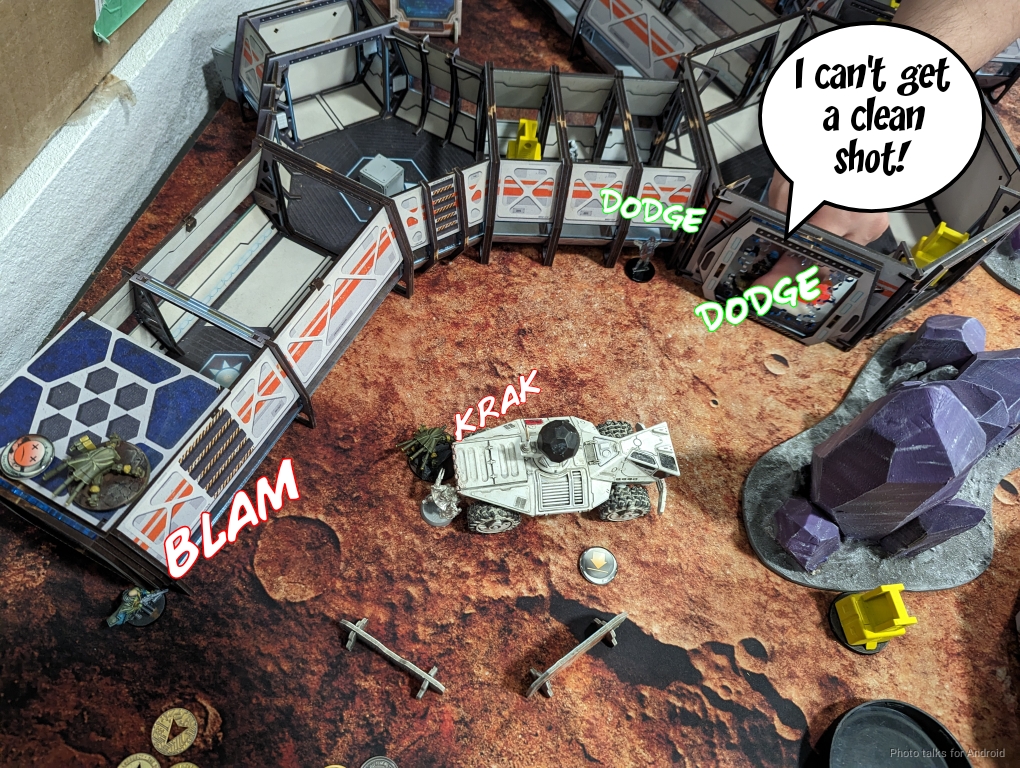
In any case, my good fortune takes a slide–I discover-shoot a Helot with a Pathfinder and lose the Pathfinder. Ugh. Not great.
I try to take the Helot out again with the linked Clipper and fail, not because I miss, but because the Helot passes all three explosive saves from the one missile that makes it through!
I dodge the remaining Pathfinder into view of the remaining Draal and triangulated fire it. It passes ARM several times over the next few orders and then I’m out of orders for the Pathfinder thanks to being out of command tokens.
I try to take on the Helot with the Clipper one last time but the f**king Helot kills the Clipper with me on 15s and it on 5s. What is happening?! I really don’t want to do anything else with my orders so I leave a few on the table. The Druze KHD goes into suppression and then I pass turn, completely out of command tokens. I probably should have Cybermasked, but oh well. Aida’s my new Lieutenant.
Turn 2
Top of 2 – Spiral
I haven’t done nearly enough damage, but I’ve reduced Tony to just the Draal and Diplomat as remaining specialists. I’ve still got plenty of options, and Unmasking favors the player who waits to flip consoles. I just need to be patient and careful, and maintain my cool in the face of really unpleasant dice rolls.
Since I got fixated on that last Draal, I had run out of orders to address Le Meut’s positioning. I immediately lose him to the Taagma, as feared. It’s actually pretty even odds in terms of target number, but 3 to 1 dice is no good. Of course, the one hit that makes it through is a crit, and that’s enough to take out Le Muet.
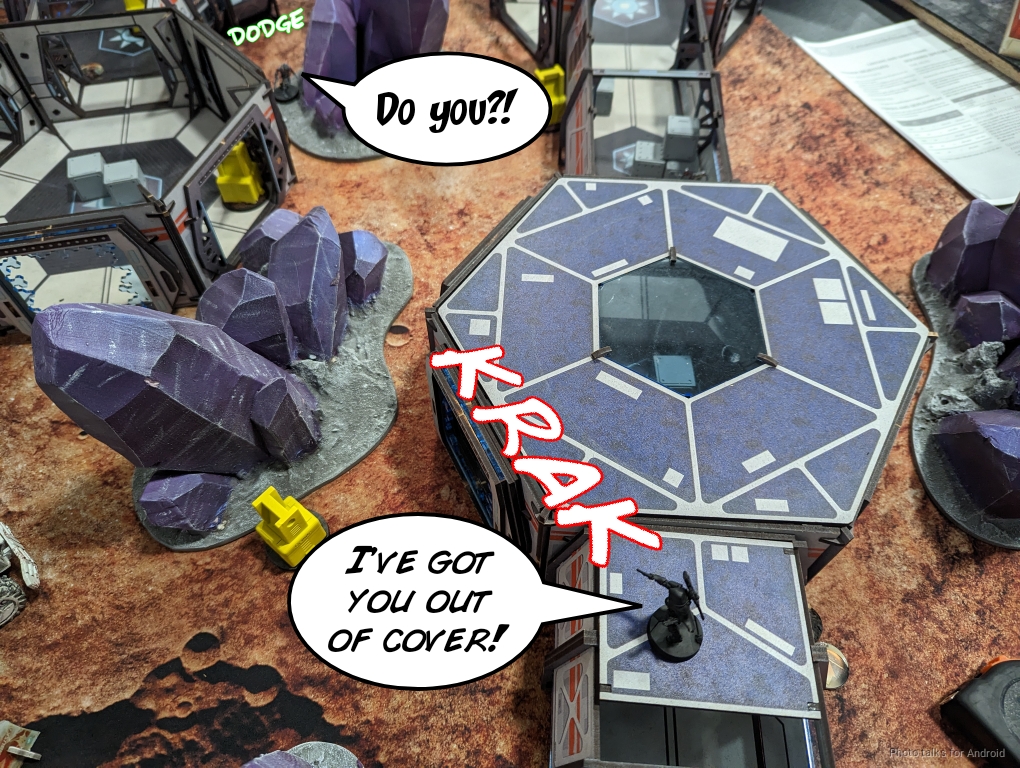
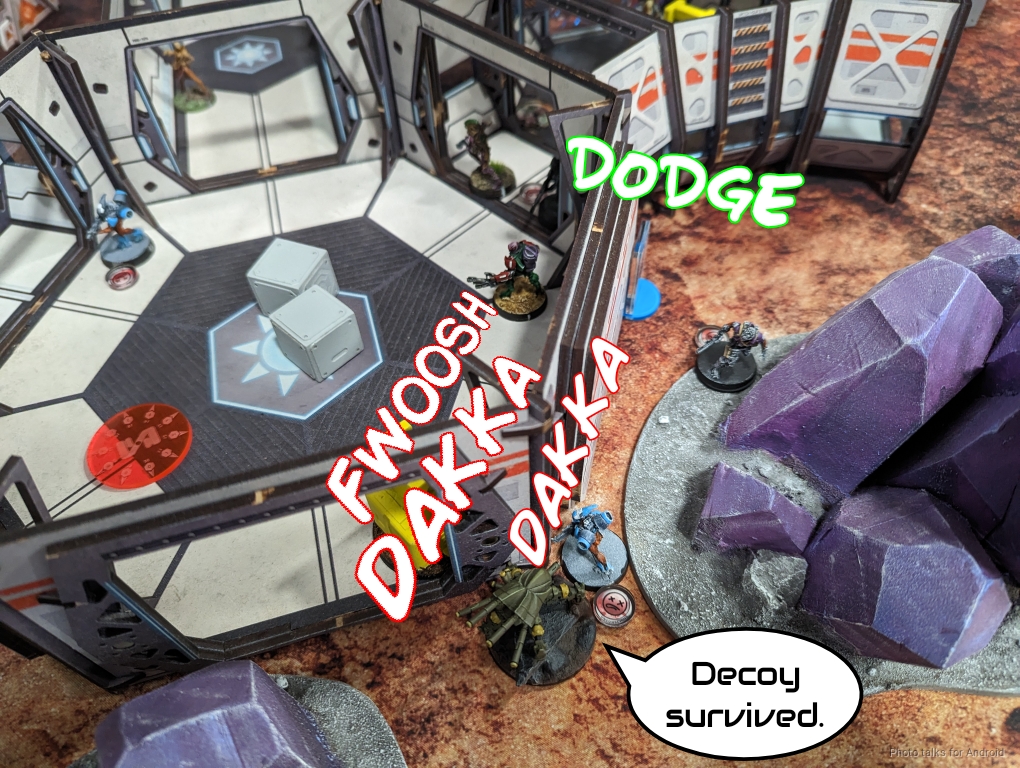
The Draal is still being covered by the Pathfinder and the Druze MSR so Tony sets up smoke with the Kriigel again.

This lets the Draal flip the console on my left, revealing the nearby Decoy. He’s flipped the central and left consoles (from my perspective now). If I can flip two consoles, then I’ll have more consoles flipped, which is points!
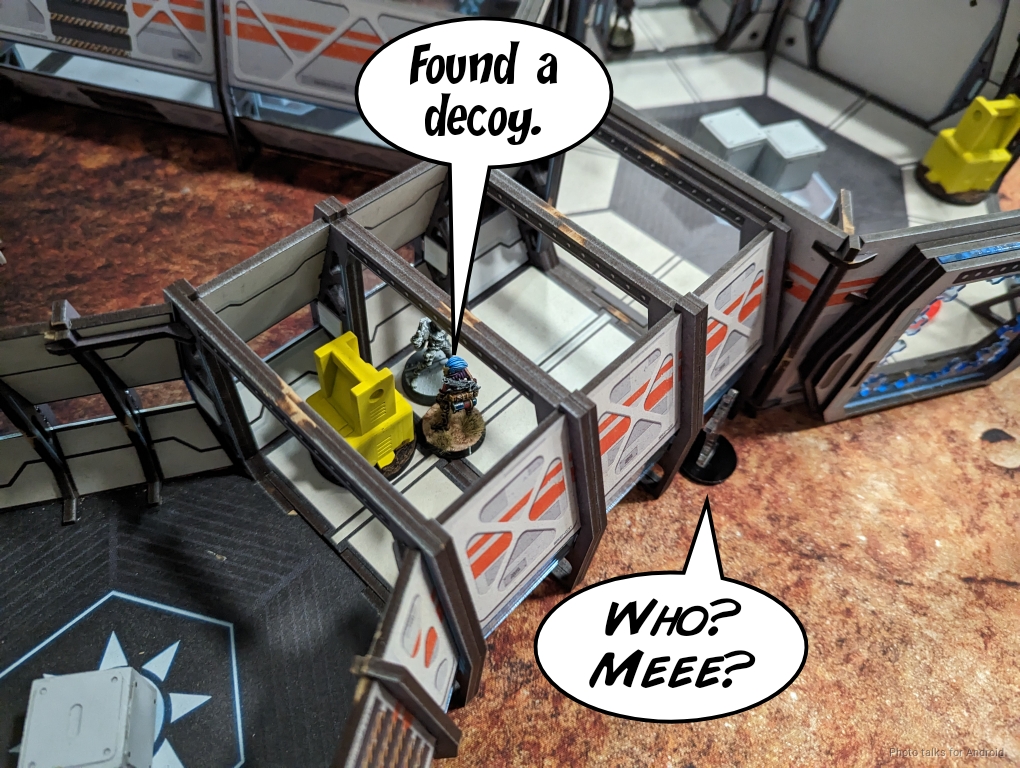
The Draal pushes out the door to see the Decoy then decides it’s too hot and dodges. I manage to do a wound with the Pathfinder. I’ll take it!
Bottom of 2 – Druze

Okay. I need to take out that Draal, but more importantly I need to take out the Kriigel and the Diplomat. If I can do that, then I can move around on the rooftops with impunity. Aida can then just viral pistol the Designated Target and all that. I’m pretty sure I’ve identified the right one, it’s the most defended one, lol. I need to create space, so this turn is about setting up for a turn 3 run.
First things first, the Kriigel needs to go. It successfully Mirrorballs against my Pathfinder’s shot. Come on.
I take on the Draal next and hit it, but it fail guts away… and into view of Saito’s approach.

Saito does ninja things and takes out the Draal.

I push the Pathfinder forward to try and take on the Diplomat, but get flashpulsed. I had hoped to get the central objective, but instead I bail around the corner to the outside of the building.

I could send in Saito to take out the Diplomat. However, I don’t want to over-extend Saito, as I need him to be tucked away and be a threat that Tony will have to spend orders moving towards. That’s what I really need to do, force orders spent on movement. All that needs to happen right now is to protect my order pool. I use Saito to flip the left console, undoing Tony’s work so we’re at least at a die on consoles now, and correctly reveal the Designated Target.
I just need to keep enough of my order pool intact. Saito can die, he just needs to take awhile to die. I move Aida up to the ladder on the edge of a building. I’m afraid this telegraphs too much, but I need this movement or my plan isn’t going to work. My worst fear is Tony will isolate Aida with the Diplomat–that’d be game. I recamo Saito to incentivize Tony to go after him and hope he takes the bait.
Turn 3
Top of 3 – Spiral
Okay. This is it. If I don’t lose too many orders I have a chance. We’ll see how it goes.
Tony is going to use his Chaksa to discover Saito and he’s low on orders as well. He needs to push hard and has to take risks. He gives me the Chaksa on a second short skill discover. I could make him spend the orders here, but I don’t want to deal with a Chaksa on the central objective. I decide to reveal and take the shot, but fail to drop the Chaksa. Uh oh. In retrospect, the Chaksa is going to be on -3 net WIP, so I really shouldn’t have revealed here.
Now the Taagma makes its way in. This is the big one–he’s on 3 dice but just within 16″ and in the open. I somehow make the shot and drop the Taagma too. This is absolutely amazing.
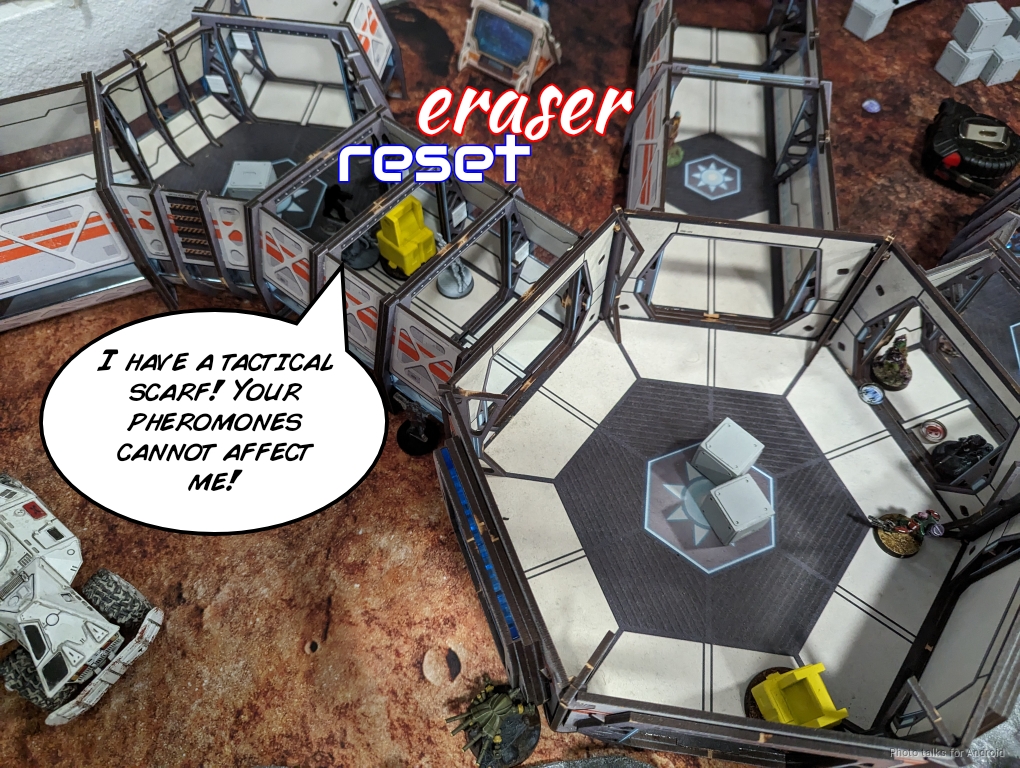
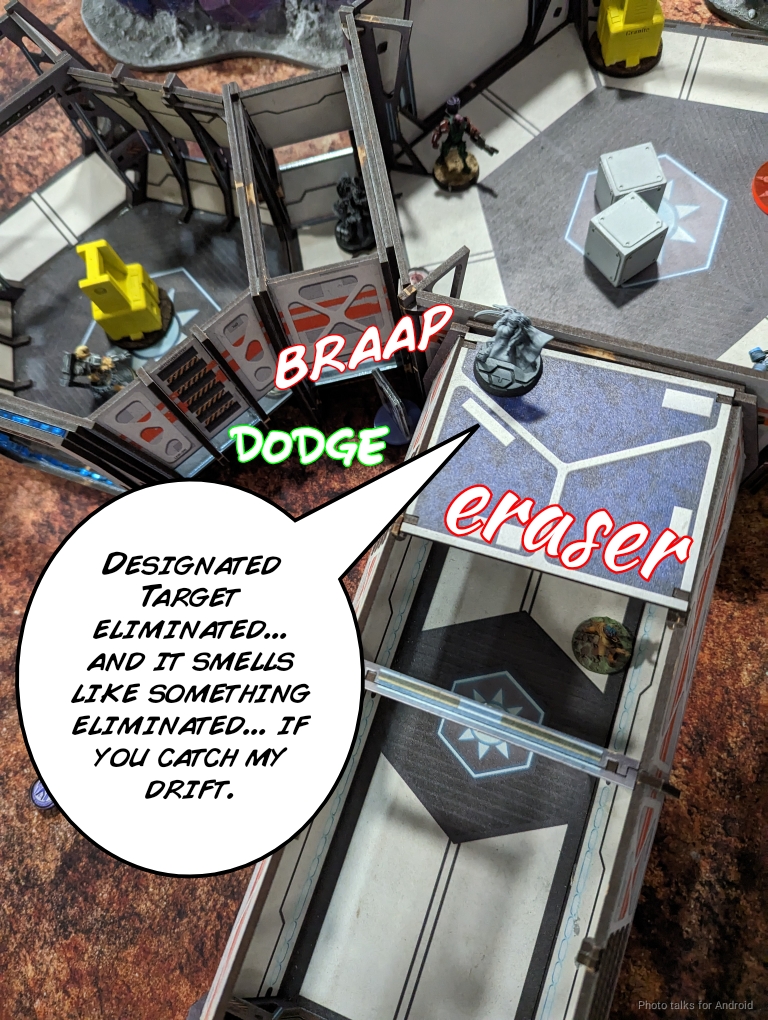
The Diplomat tries to Eraser Saito and fails thanks to his tactical scarf enhanced reset.
The Krigel sets up smoke to allow stuff to move around in front of the Druze sniper and put an end to Saito’s murderous rampage.
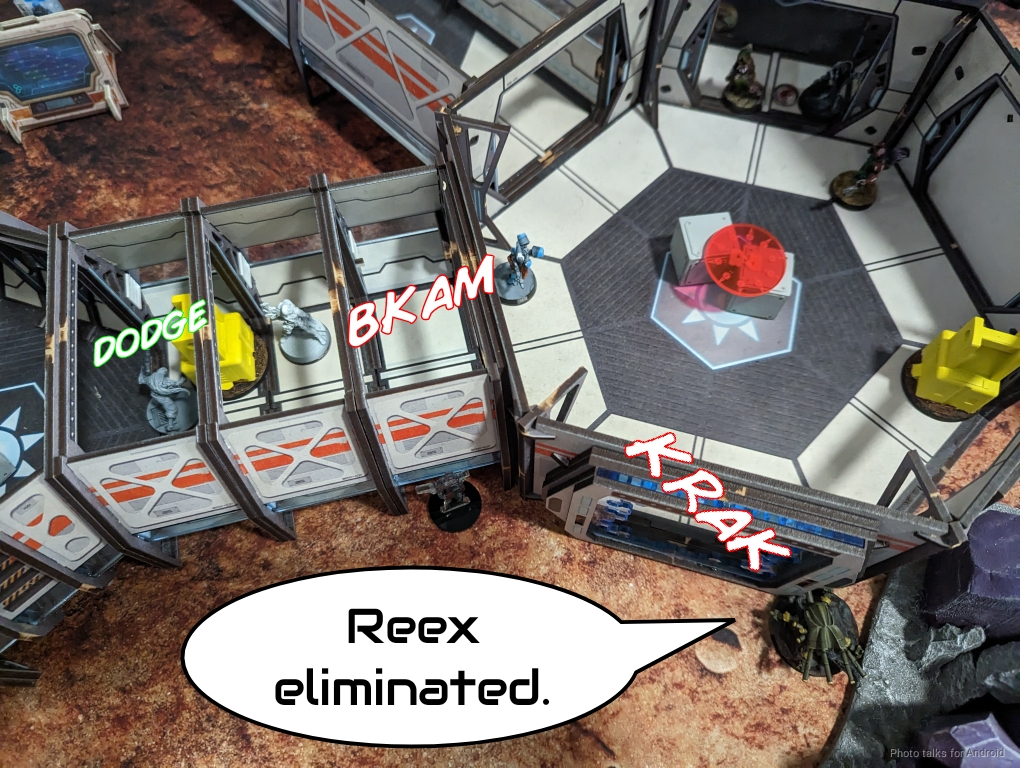
Tony correctly identifies the Pathfinder as part of my plan and uses the cover of smoke to try and take the Pathfinder out with a Reex. The Pathfinder crits instead and drops the Reex.
The other Reex goes after Saito after popping out of the smoke. This one is the boarding shotgun Reex so I have to dodge with Saito, which I do, and the Pathfinder drops this one as well.
In an effort to try and protect himself from Saito, Tony moves his remaining Helot up to cover the corridor, which is huge. Also I suspect there was a little “well I’ve got this irregular order it’d be a shame to waste it” autopilot going on.
Bottom of 3 – Druze
Somehow I’ve lost nothing, which is amazing. The plan this turn is to flip either the central objective and/or the objective on the right with the Hunzakut, who I’ve been moving around with its irregular each turn to get closer when possible.
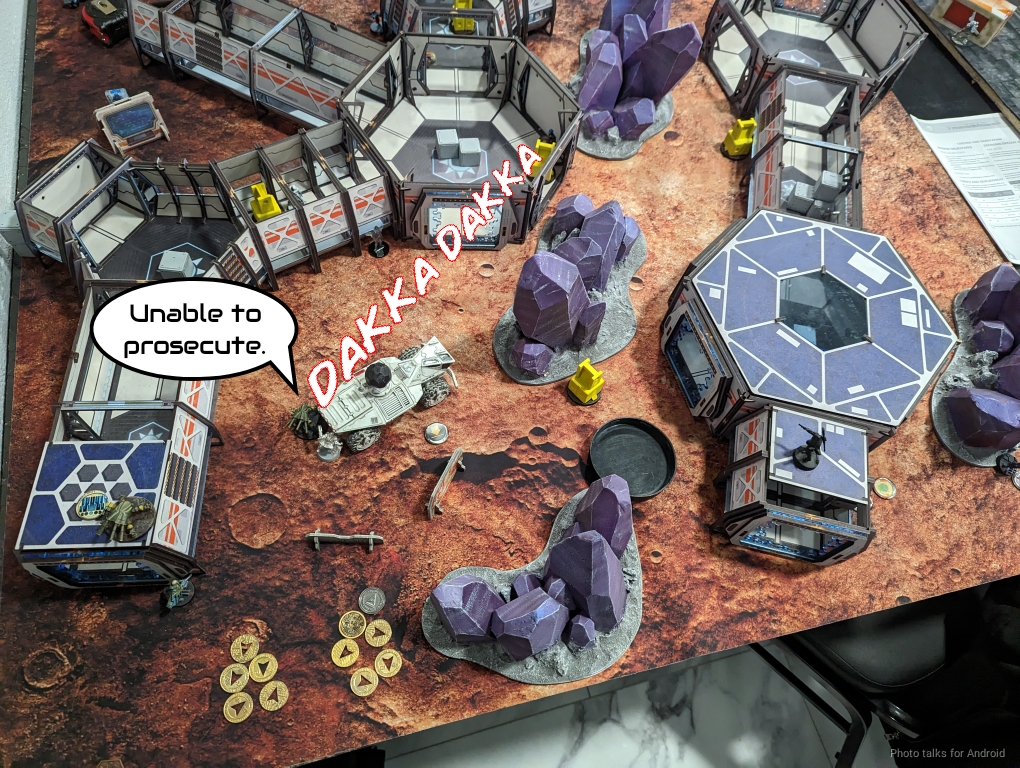
The problem is I need to get rid of the Kriigel and the Diplomat. If I can clear the Chaksa I can grab the central objective with the Pathfinder as well. I hop Wolfgang up onto the lunar rover thing and split burst against the Kriigel and the Chaksa but succeed only in dropping the Kriigel.
I’d use the Pathfinder to go after the central objective, but the idea is to flip the objective then get the nearby Decoy. I can’t do that with the Chaksa up, as I’ll have to grant a flamethrower ARO. I could activate Wolfgang again, but I need all those orders for Aida. I have just enough orders with the Hunzakut. Tony discovers with the Helot on my way, so I decide to risk it outside of 8″ and fire two slugs. I connect and drop the Helot. Phew! That would have been disastrous.
The Hunzakut does her thing and reveals the Decoy near the Pathfinder. I send the Pathfinder in, hit the Decoy, and it passes ARM! NOOOOO!
No matter. Aida just needs to get to the Designated Target and gun it down. I push all the way there with her stealth and manage to drop the Designed Target. The Diplomat Erasers but whiffs, no pun intended.
I’ve got just enough orders to make the attempt on the Decoy, but Aida fails to get it done. Oh well.
With that, I’ve got two consoles to Tony’s one, and we both killed each other’s Designated Targets and that’s it.
5-3, 191-103 Druze Bayram Security Victory!
Post Game Analysis
That was one of the more difficult games I’ve had in awhile to be sure. The dice were pretty unfavorable for most of the game, but they came through on the bare minimum of orders to give me a 2 point lead and the win. A few things that I could have done better–I could have deployed my Brawler Lt a little more safely. I’m still going to lose him, but it might take a few more orders.
What’s interesting is that it’s almost better the way it worked out. By losing the Lieutenant so early and so easily, relatively speaking, that limited the damage. Had Tony had to chew through 3-4 models before getting to the Lieutenant that would have been more damaging overall. I think trying to be efficient with the downed Pathfinder and Clipper was unnecessary. I probably could have just let the turn go and poured more resources into going after the Draal instead of going after the Helot.
There really wasn’t a need to go after the Helot, it’s not like it’s going to win the game or anything. Tony said after the game that he was very impressed with my play with Saito. I surprised myself during the game with my restraint in execution. I think part of it was the relative proximity of the Diplomat and Kriigel–I can’t really push through that very effectively. I suppose those units really further underscore the importance of the Pathfinder remotes–they are immune to Pheroware and can really cover a ton of use cases.
Having to carefully plot two turns ahead and having it pay off was a really rewarding experience. I just wish I had more of a plan for turn 1. It was too undisciplined and reactive. I think I should have prioritized keeping Le Muet safe instead of going after the Draal. I got a little bit of tunnel vision and failed to allocate resources to protect the Draal. I think that’s probably the takeaway here–if you have a general goal of “do damage and recover,” come up with at least one specific resource to preserve, and in this case it should have been Le Muet. That central room would have been significantly more dangerous were he still up and about.
In short, I’m really happy with my second turn, but quite disappointed in my first. I think Tony made one crucial mistake, which was not throwing the Draal under the bus (or a Reex or something) to take out the revealed Decoy. That would have been a tie game. I also think that I made the wrong HVT my Designated Target. Using the one near the Hunzakut was probably better.
I’ll also say that I’m very impressed with the Hunzakut shotgun. I did not expect it to deliver so consistently across all three games. The fact that it’s also a specialist is just awesome. I ended the day with three major victories and a first place finish in a field of 22 players. Thanks to Tony for a great game and to Pete (Exile) for running a great tournament over at Mindtaker Miniatures, and thanks to you for reading!


Hi, i am noobie and i use spiral corps but dont know what is a triad link. Spiral corps can use tri-core link but más have one tri-core unit and the only unit i know that hace that are the taagma units, so i dont know what is that. Could you explain me? Thanks☺️
Triads don’t exist anymore, they used to be a Tohaa-only thing, it’s basically a Haris. I’ve been playing for a long time and I still use the old names. Thanks for stopping by!