Cenobite Crusade
I was pretty happy with my last outing with Bakunin, but I wasn’t sure if it was a fluke:
So I decided to subject James to the same list on this table:
Overview
- Mission: ITS14 Biotechvore
- Forces: Jurisdictional Command of Bakunin versus White Banner (300)
- Bakunin
- Capture
- Follow Up
- Telemetry
- White Banner
- HVT: Kidnapping
- Rescue
- Test Run
- Bakunin
- Deploy First: White Banner
- First Turn: White Banner
Basically the plan here was to stall everything out with the Sin Eaters and then pounce with the rest of the list. I was hoping that Bran and the Zeros would make it out on their own by passing a PH -3 roll (or in Bran’s case a PH +3 roll by staying on my table half). Worth noting that I misread my own list and thought the KHD Zero was a FO the whole game.
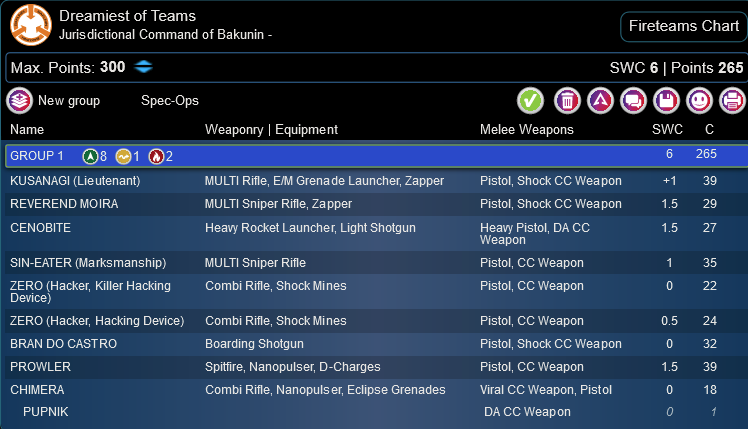
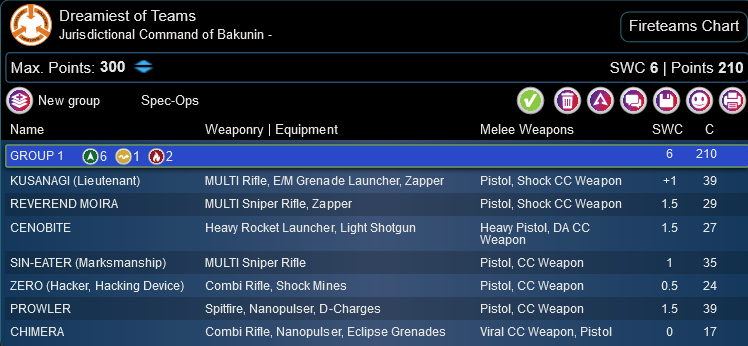
Dreamiest of Teams
KUSANAGI (Lieutenant) MULTI Rifle, E/M Grenade Launcher, Zapper / Pistol, Shock CC Weapon. (+1 | 39)
REVEREND MOIRA MULTI Sniper Rifle, Zapper / Pistol, Shock CC Weapon. (1.5 | 29)
CENOBITE Heavy Rocket Launcher, Light Shotgun / Heavy Pistol, DA CC Weapon. (1.5 | 27)
SIN-EATER (Marksmanship) MULTI Sniper Rifle / Pistol, CC Weapon. (1 | 35)
ZERO (Hacker, Killer Hacking Device) Combi Rifle, Shock Mines ( ) / Pistol, CC Weapon. (0 | 22)
BRAN DO CASTRO Boarding Shotgun / Pistol, Shock CC Weapon. (0 | 32)
PROWLER Spitfire, Nanopulser, D-Charges / Pistol, CC Weapon. (1.5 | 39)
CHIMERA Combi Rifle, Nanopulser, Eclipse Grenades / Viral CC Weapon, Pistol. (0 | 18)

PUPNIK DA CC Weapon. (0 | 1)
9
1
2 | 7 SWC | 300 Points | Open in Army | Copy Code
James is taking his Jing Qo Haris, which I really like. He’s got a mixed bag of heavy infantry and Lei Gong, and his ubiquitous Beasthunter.
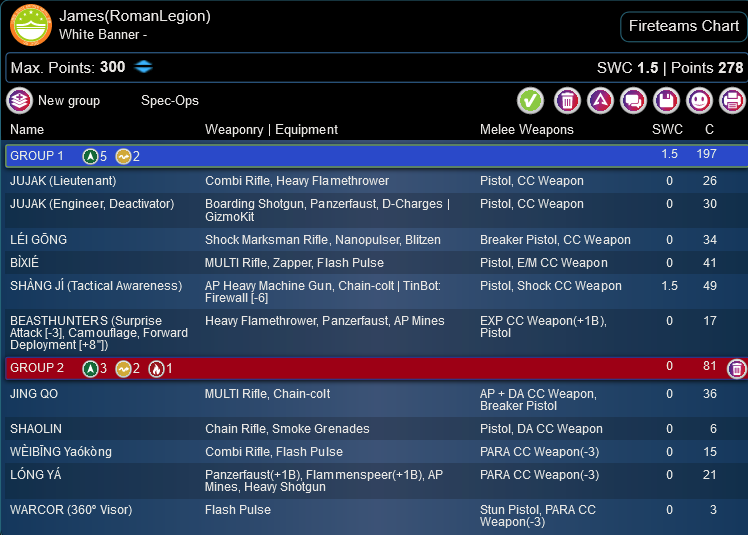
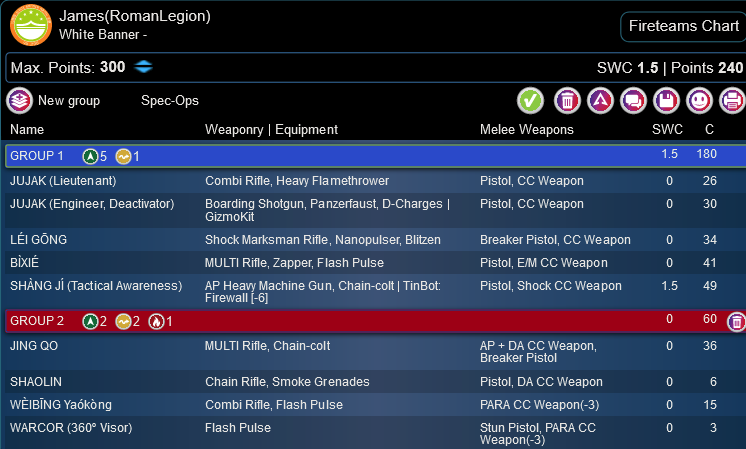
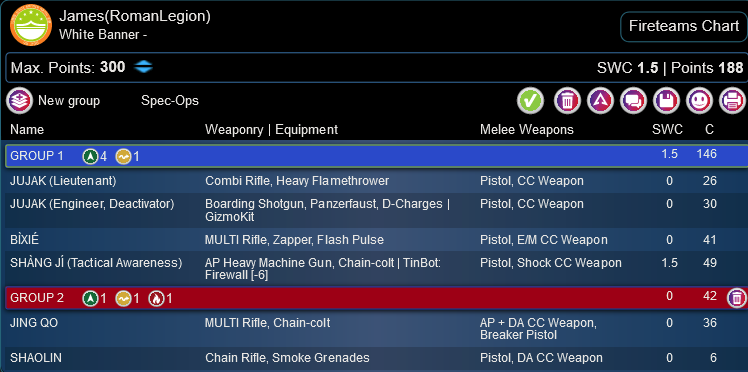
James(RomanLegion)
GROUP 1
JUJAK (Lieutenant) Combi Rifle, Heavy Flamethrower / Pistol, CC Weapon. (0 | 26)
LÉI GŌNG Shock Marksman Rifle, Nanopulser, Blitzen / Breaker Pistol, CC Weapon. (0 | 34)
BÌXIÉ MULTI Rifle, Zapper, Flash Pulse / Pistol, E/M CC Weapon. (0 | 41)
SHÀNG JÍ (Tactical Awareness) AP Heavy Machine Gun, Chain-colt ( | TinBot: Firewall [-6]) / Pistol, Shock CC Weapon. (1.5 | 49)
GROUP 2
BEASTHUNTERS (Surprise Attack [-3], Camouflage, Forward Deployment [+8″]) Heavy Flamethrower, Panzerfaust, AP Mines / EXP CC Weapon(+1B), Pistol. (0 | 17)
JING QO MULTI Rifle, Chain-colt / AP + DA CC Weapon, Breaker Pistol. (0 | 36)
SHAOLIN Chain Rifle, Smoke Grenades / Pistol, DA CC Weapon. (0 | 6)
WÈIBĪNG Yaókòng Combi Rifle, Flash Pulse / PARA CC Weapon(-3). (0 | 15)
LÓNG YÁ Panzerfaust(+1B), Flammenspeer(+1B), AP Mines, Heavy Shotgun / PARA CC Weapon(-3). (0 | 21)
WARCOR (360º Visor) Flash Pulse ( ) / Stun Pistol, PARA CC Weapon(-3). (0 | 3)
1.5 SWC | 299 Points | Open in Army | Copy Code
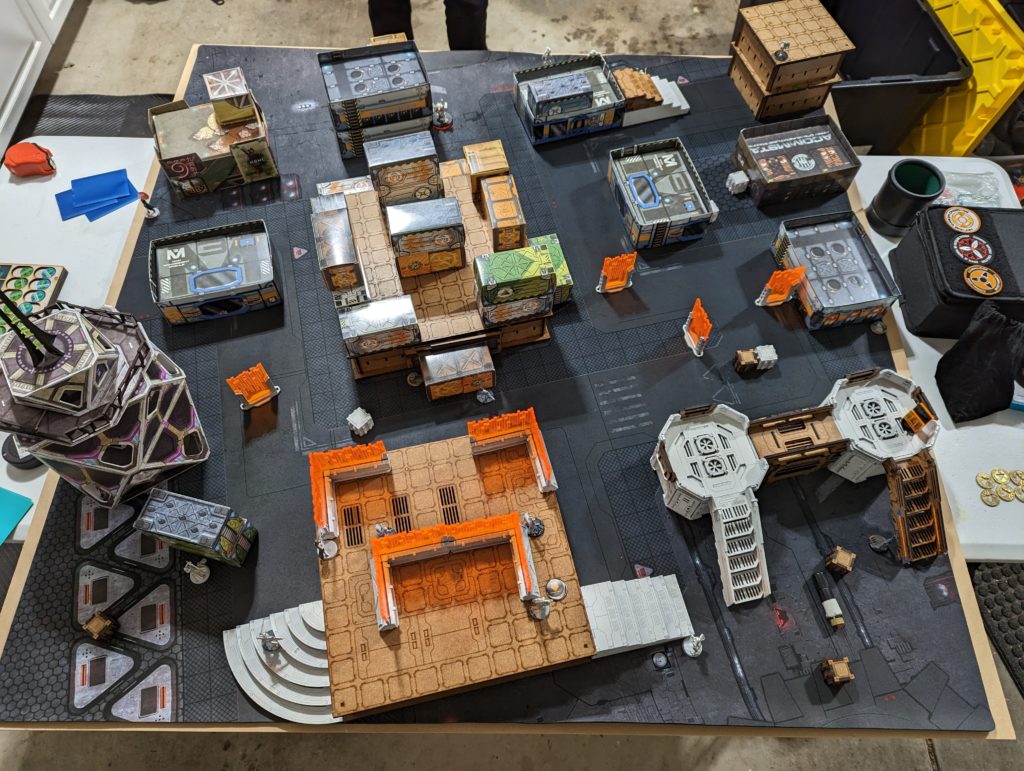
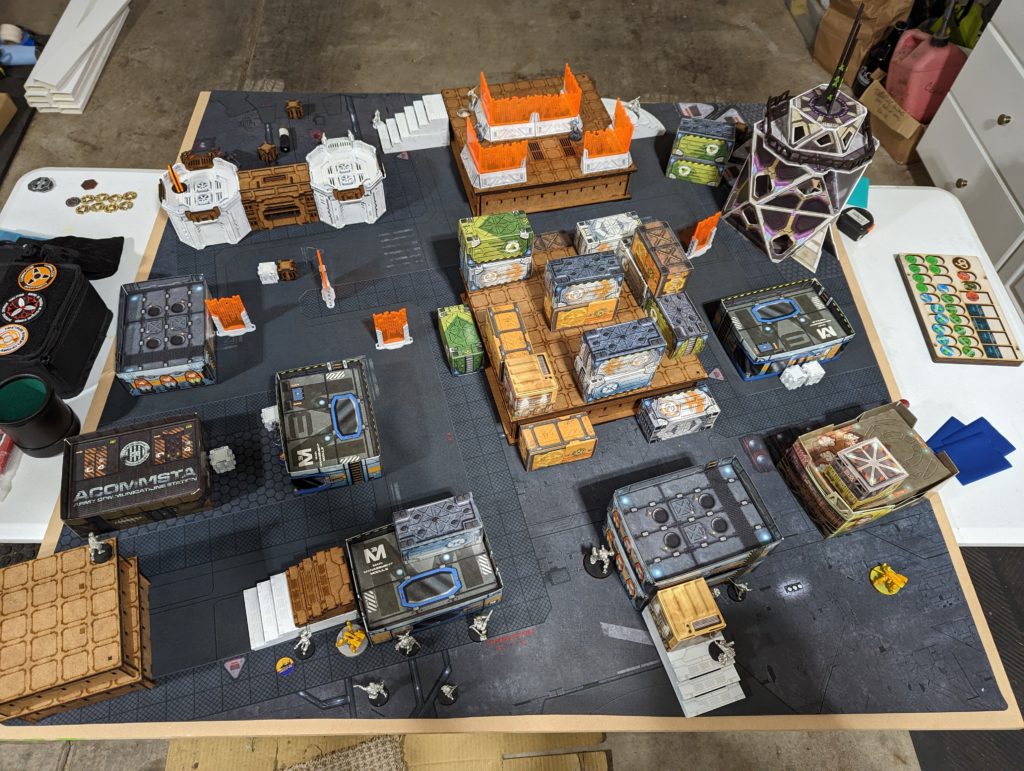
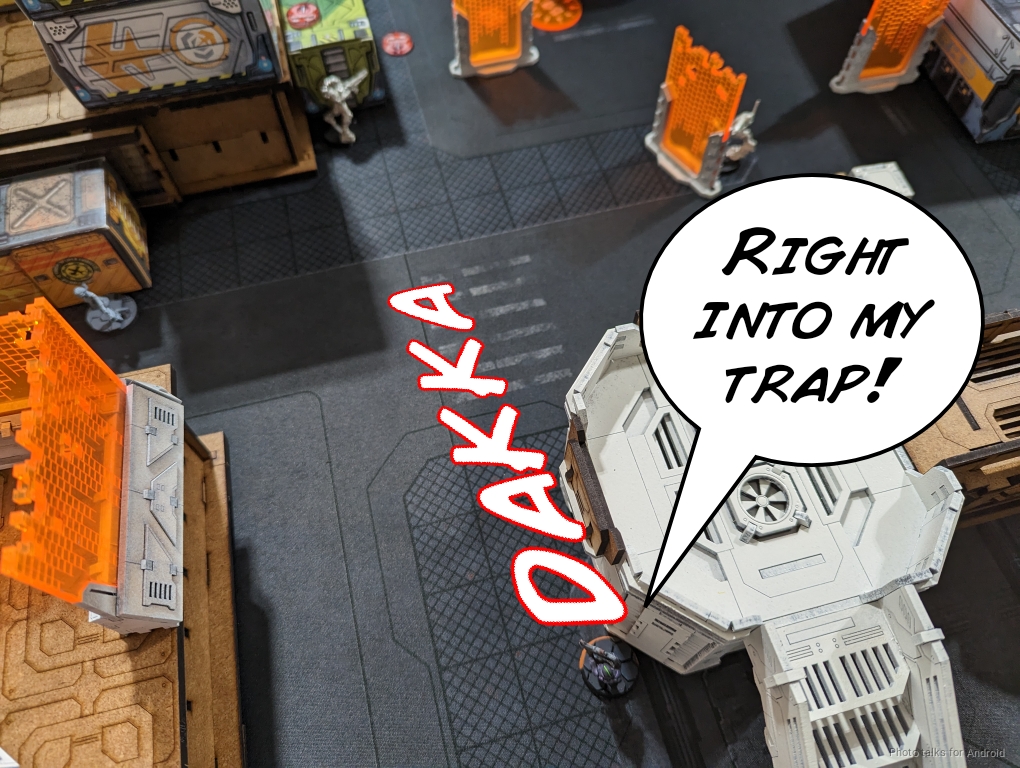
Deployment
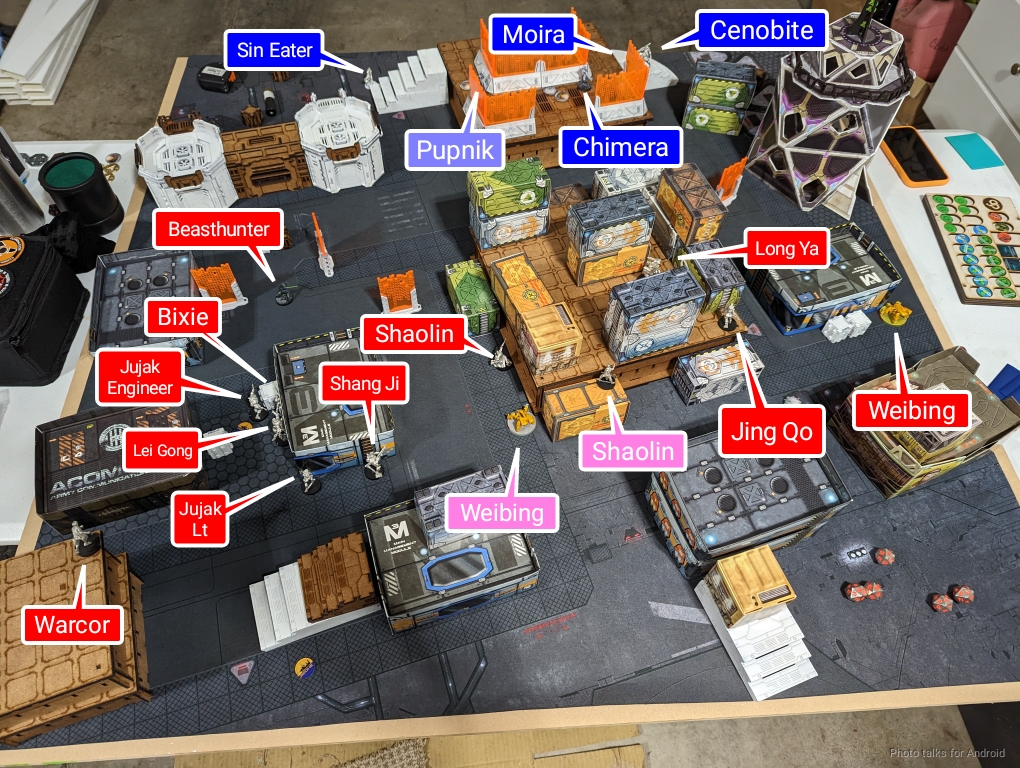
I wanted to go second so I chose deployment, letting James decide if he wanted to go first or second. He obliged me by going first, and set up his two links on either side of the table. The big Shang Ji/Jujak core on the left and the Jing Qo haris on the right. His two Weibing were also split this way with his single Warcor on a roof on the left just at the edge of his deployment zone.
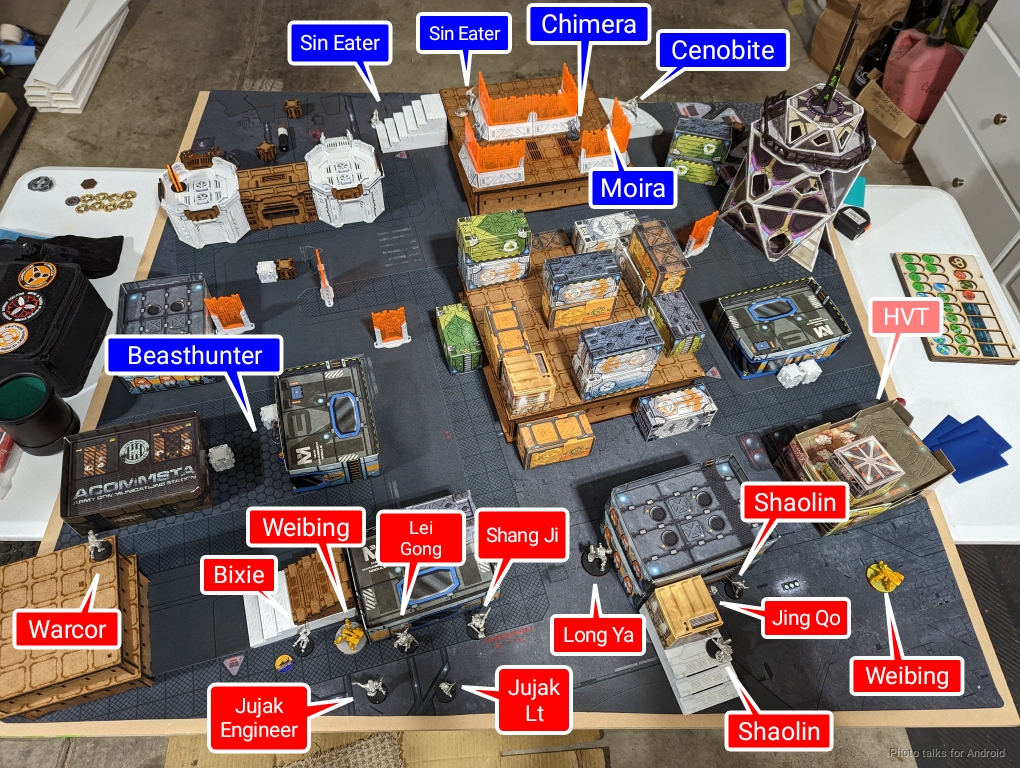
I set up both Sin Eaters to contest the approach of the big Shang Ji/Jujak core, and then put the Moira and Cenobite in a position to contest the Jing Qo haris with Kusanagi protected behind a shipping container. I attempted to land the Zero HD in the way of the big HI core, but I failed so I settled for landing the FO instead. The Chimera parked on a rooftop prone at the 8″ line, and then it was time for reserves.
I think James’s reserve was either the Long Ya or Bixie, and mine was Bran, parked just at the base of the shipping container platform at the middle of the table. My plan was to have him fight Jing Qo once she advanced to that position. I figured the Chimera could eventually fight the HI as they approached, and the Prowler would mop up the pieces.
Turn 1
Top of 1 – White Banner
I of course docked James two orders. I chose the second combat group since I figured the Sin Eaters would do what they needed to do to the first group. My plan was just to try and lock James down and I had all the right tools to do so. James started by taking on a Sin Eater with the AP HMG Shang Ji outside of 32″.
| 49.6 | 31.8 | 18.5 |
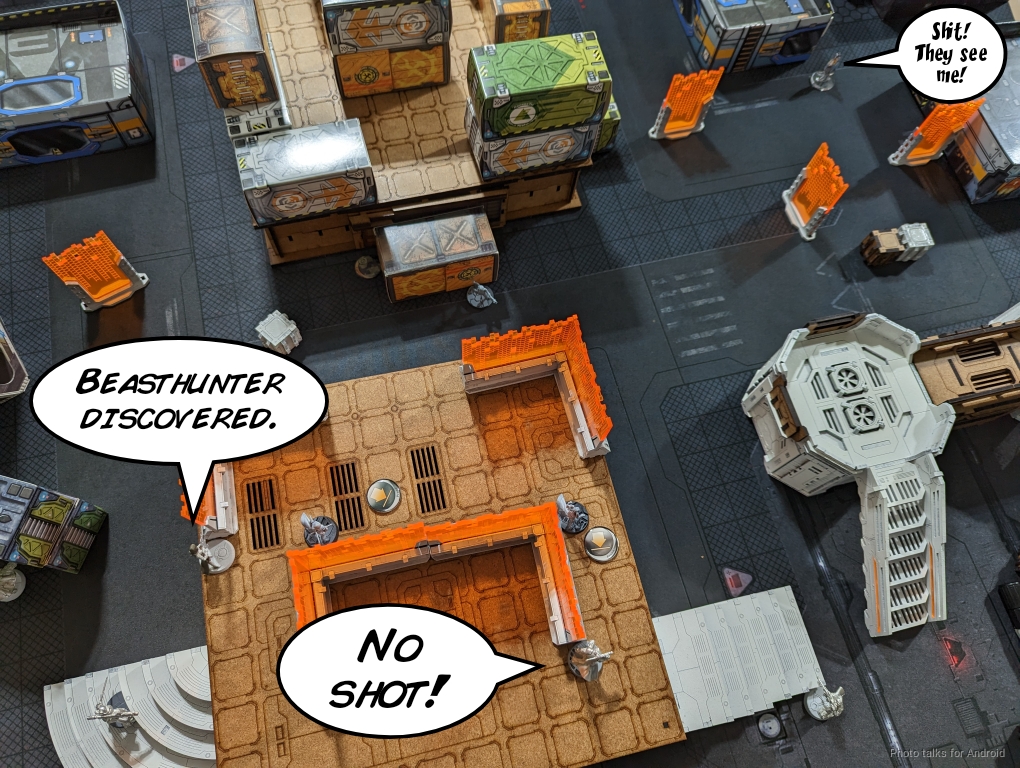
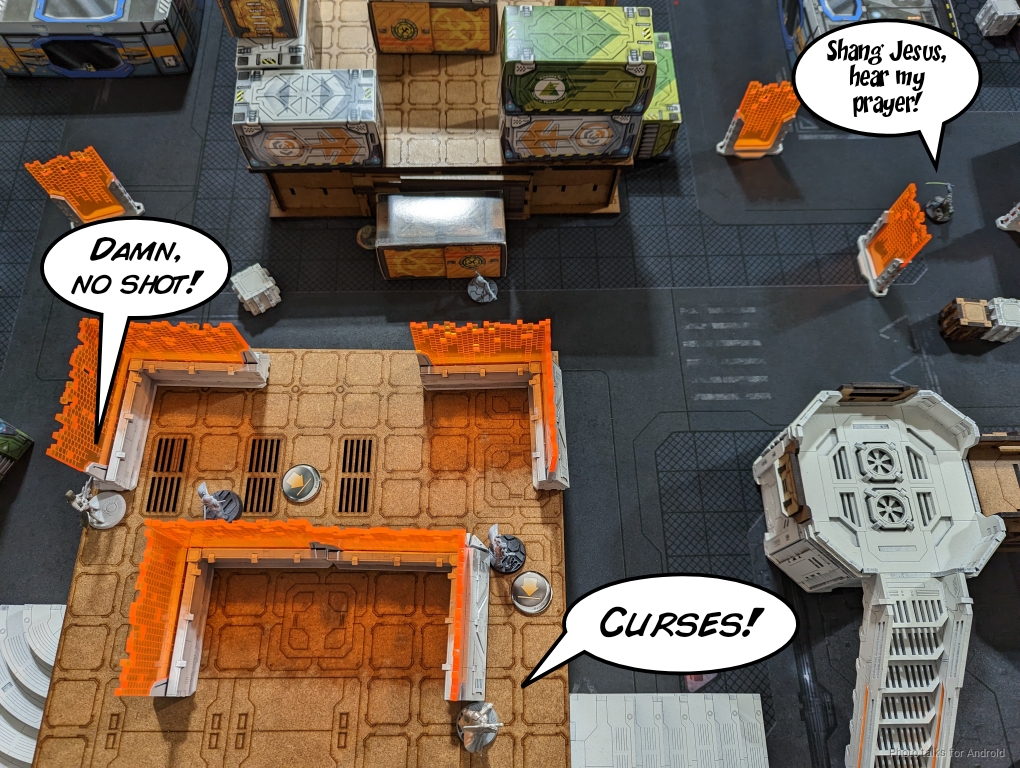
It goes well for me in that I hit, but the Shang Ji passes all its saves. Boo. The Beast Hunter pushes forward, having made its roll, but I can see it with both a Sin Eater and a Moira. I decide to discover with the Moira since I’m in a pure haris, and delay with the Sin Eater. It’s not that likely that the Beasthunter will land a panzerfaust hit on 5s, so James elects to just keep moving.
Somewhat fortunately for James, the Beasthunter is now out of the danger zone and is out of LoF of my AROs even after being discovered by the Moria.
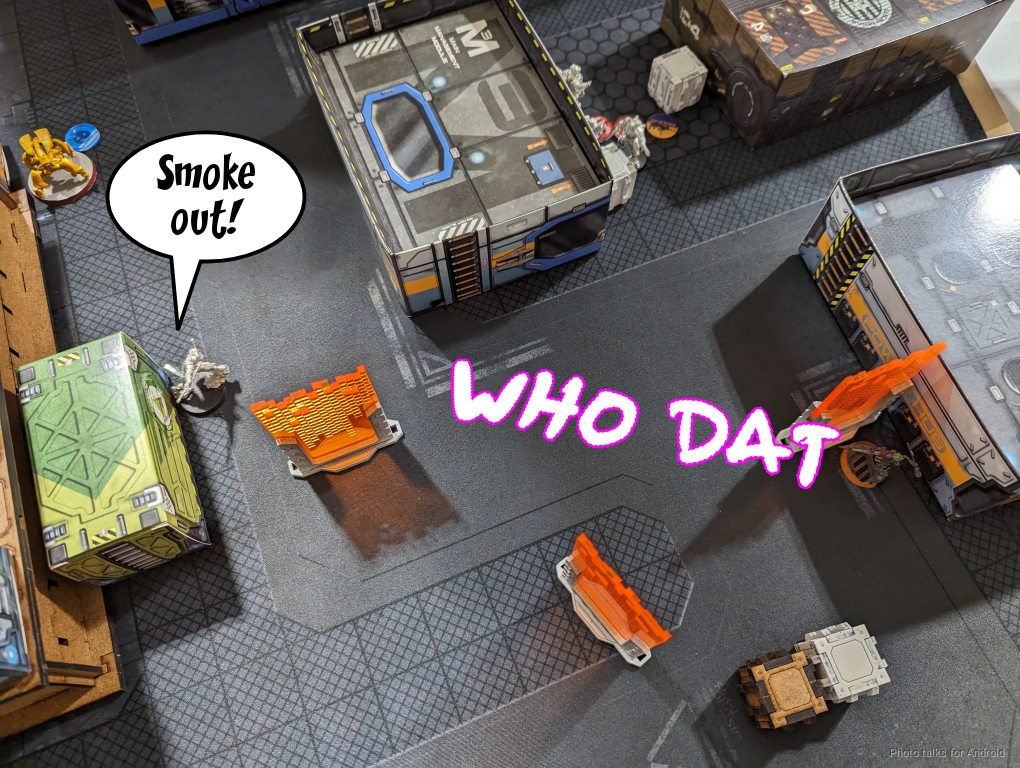
It’s now time for James to extricate his Weibing and Shaolin haris from the biotechvore zone. He sets up smoke with the Shaolin first and then shuffles into a safe spot with the Shaolin and the Weibing.
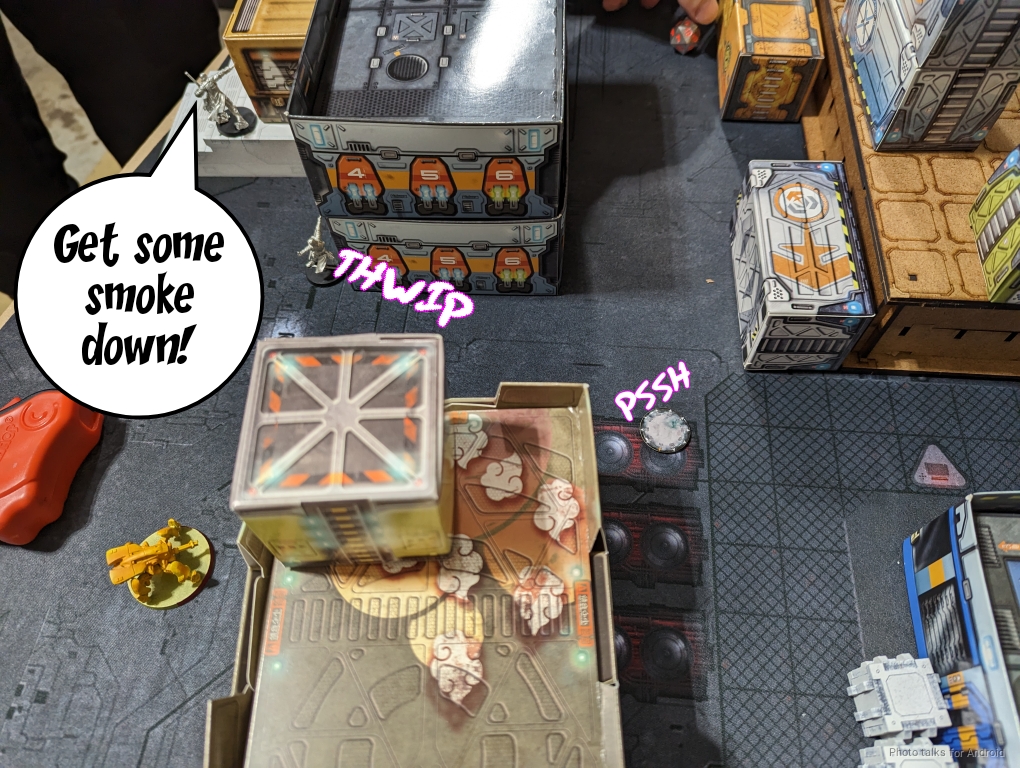
He even has orders to challenge the Chimera with the Long Ya. Thankfully I get eclipse smoke down to save myself.
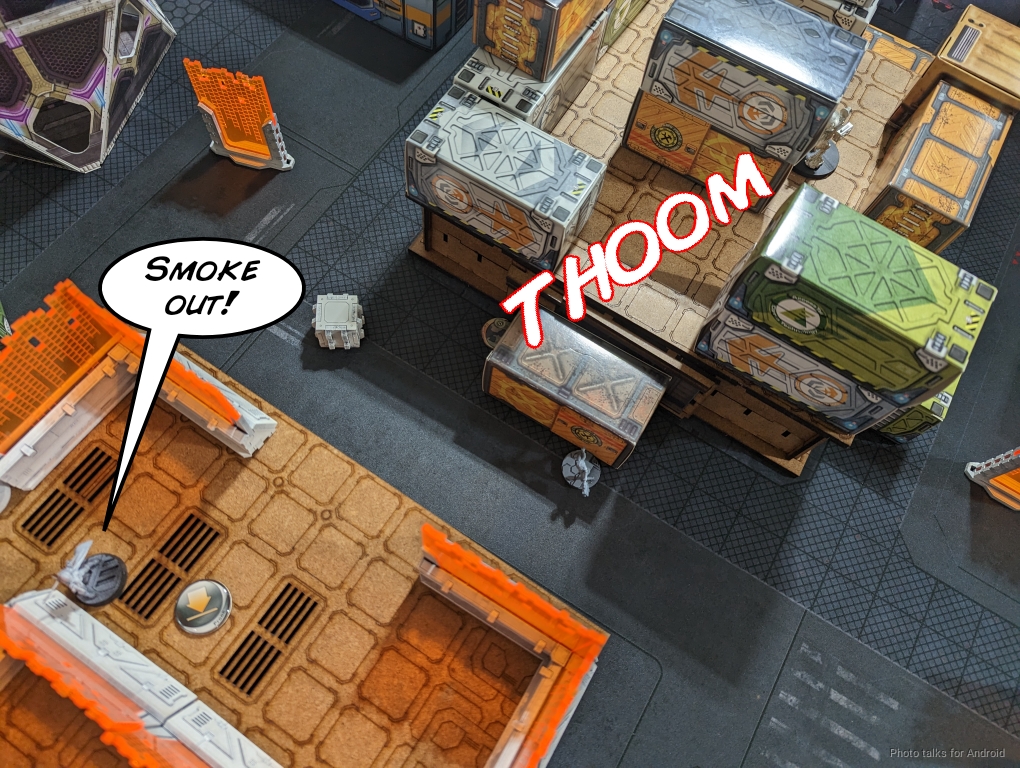
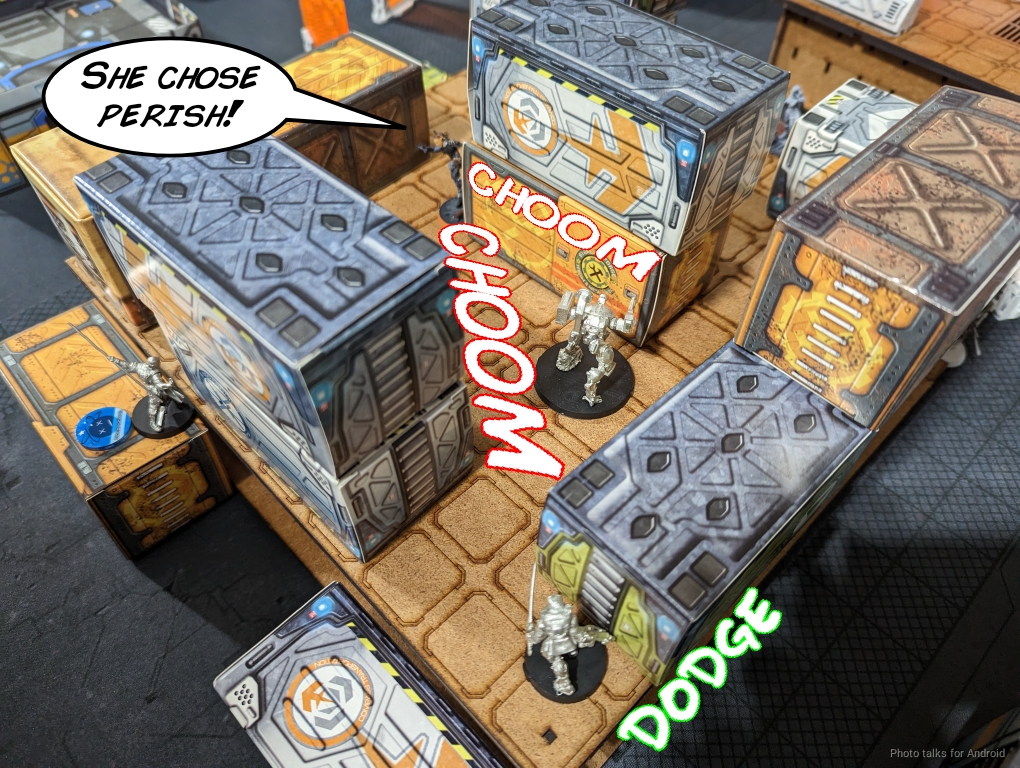
The Shang Ji successfully takes out as-yet-unmolested Sin Eater. It tries one more time to fight the original Sin Eater and fails, but again doesn’t take any wounds. While it seems good for James I think it’s acutally really bad because he’s shifted back and forth to try to get out and then back to try and engage both Sin Eaters. This results in net zero movement, which is basically not something you can afford in Biotechvore.
James is out of orders. He’s successfully extricated part of his Haris and some of the Bots, but most of the Jujak/Shang Ji core take a wound. He also loses the central Weibing and one of the Shaolin to the zone. Shockingly, the Warcor is 100% okay.
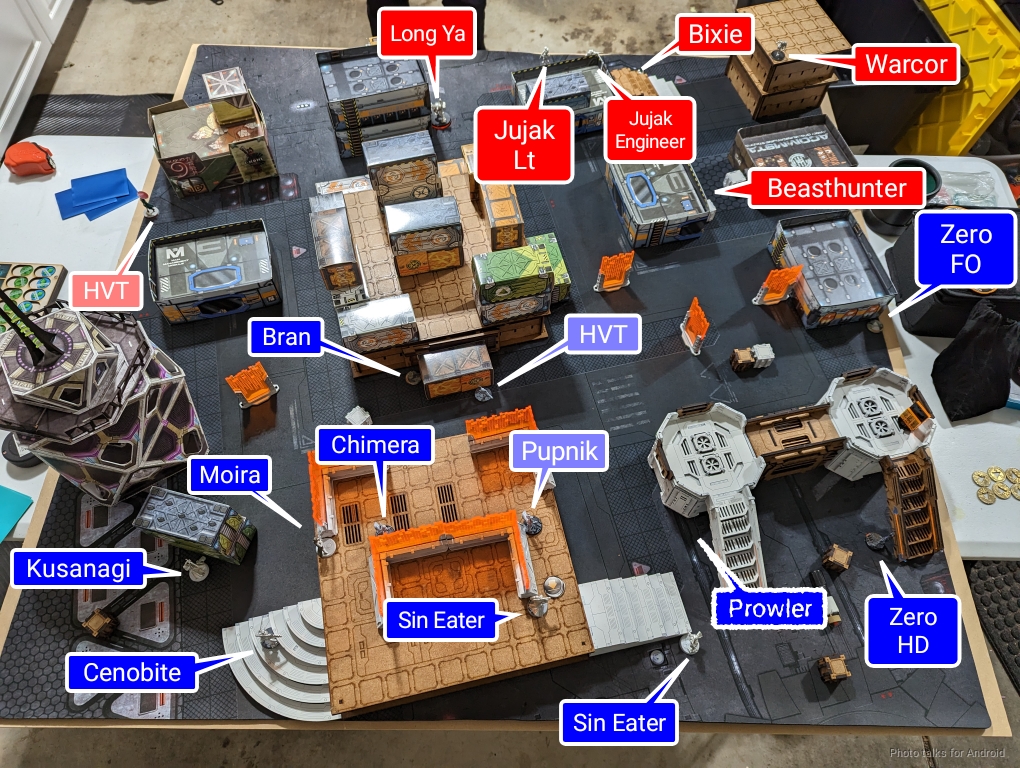
Bottom of 1 – Bakunin
I’ve taken very little damage, and now I need to get out of my deployment zone. Thankfully the Shang Ji link isn’t set up to fight me, so I can move out relatively safely. I start with the Chimera’s impetuous order and try to remove the Beasthunter with her combi rifle. I hit but fail to wound.
The Moira spends her NCO order and can’t finish the job against the Beasthunter’s dodge, which takes him out of LoF again.
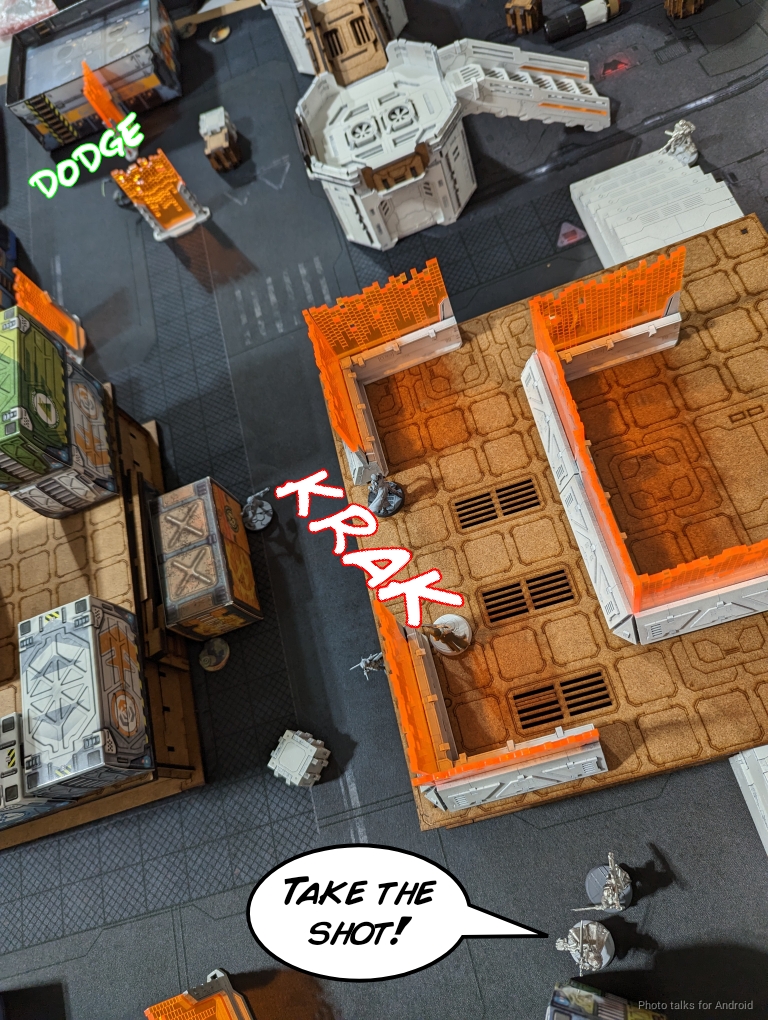
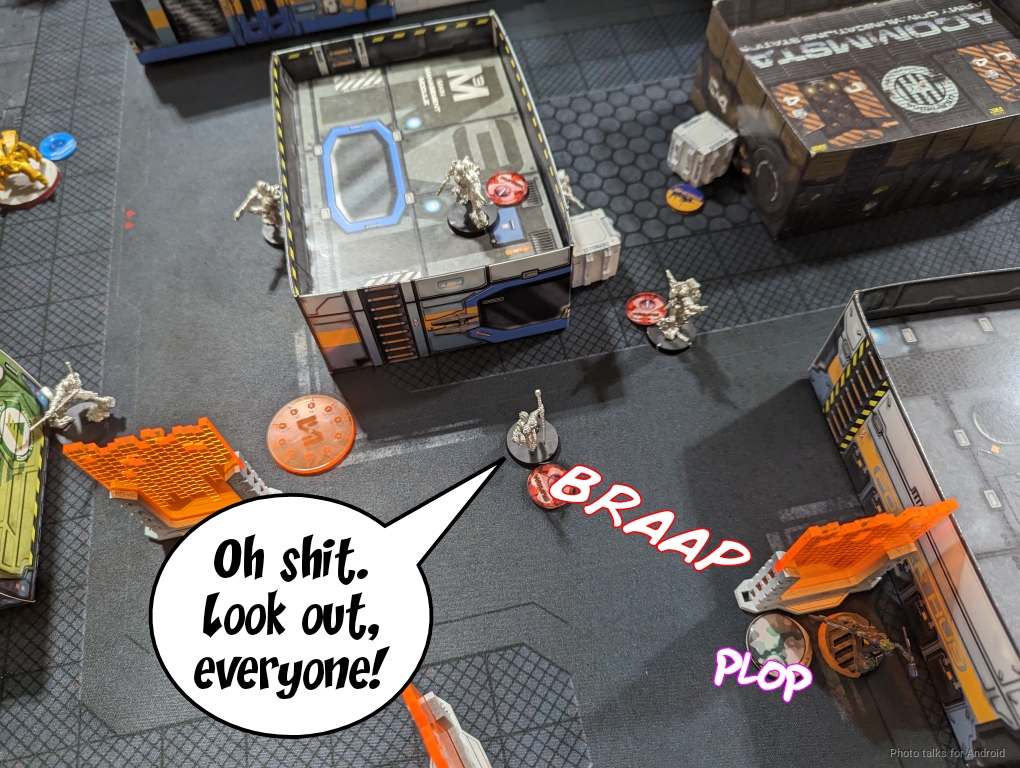
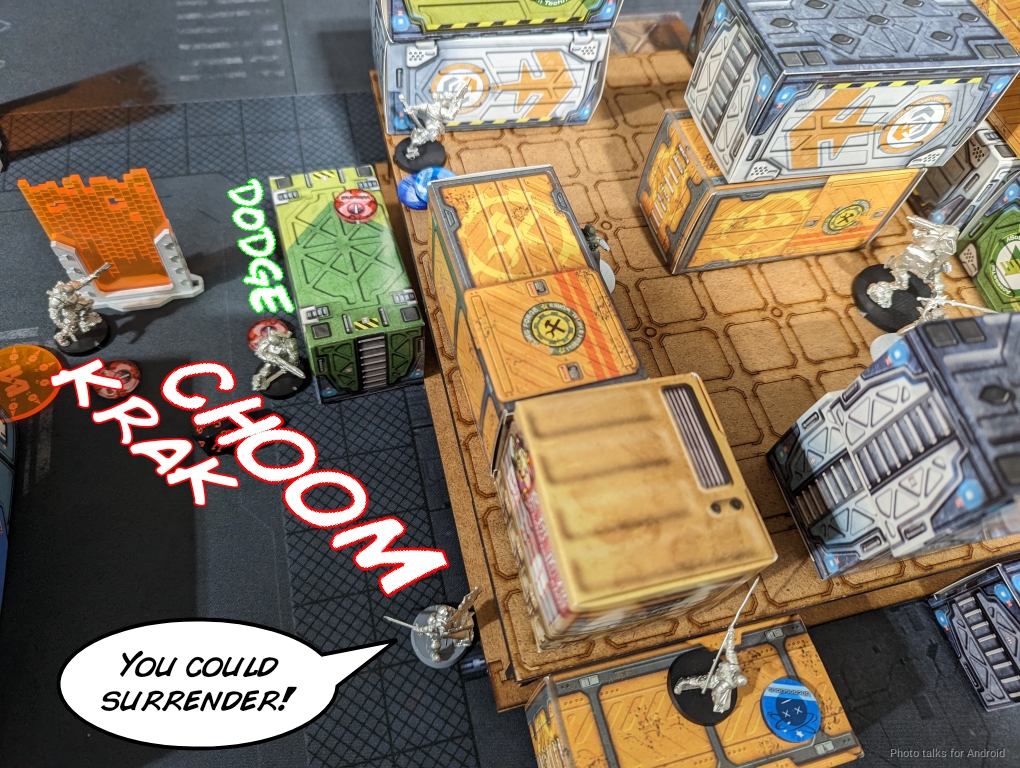
I coordinate a bunch of stuff forward including Bran, the Zeroes, and the remaining Sin Eater. Bran gets discovered by the Warcor, but that’s okay.
Importantly, this lets me get behind the Beasthunter to take a shot with the Zero FO, finally taking him out.
I’ve got a chance to challenge Jing Qo with Kusanagi. Jing Qo isn’t shock immune, so I decide to fire shock. Unfortunately for me, even though I hit twice she has good ARM and passes both saves, failing guts out of LoF.
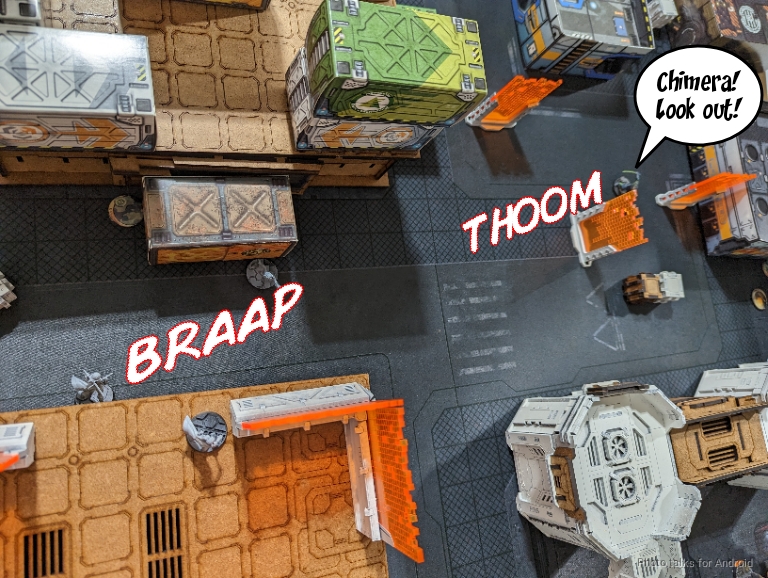
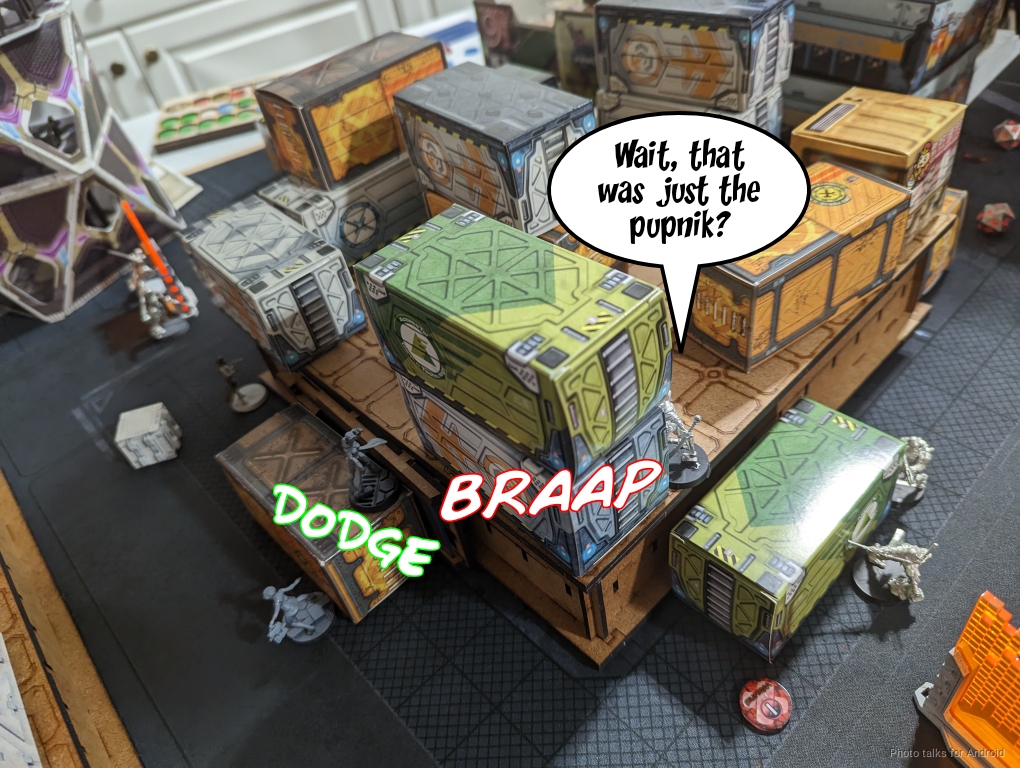
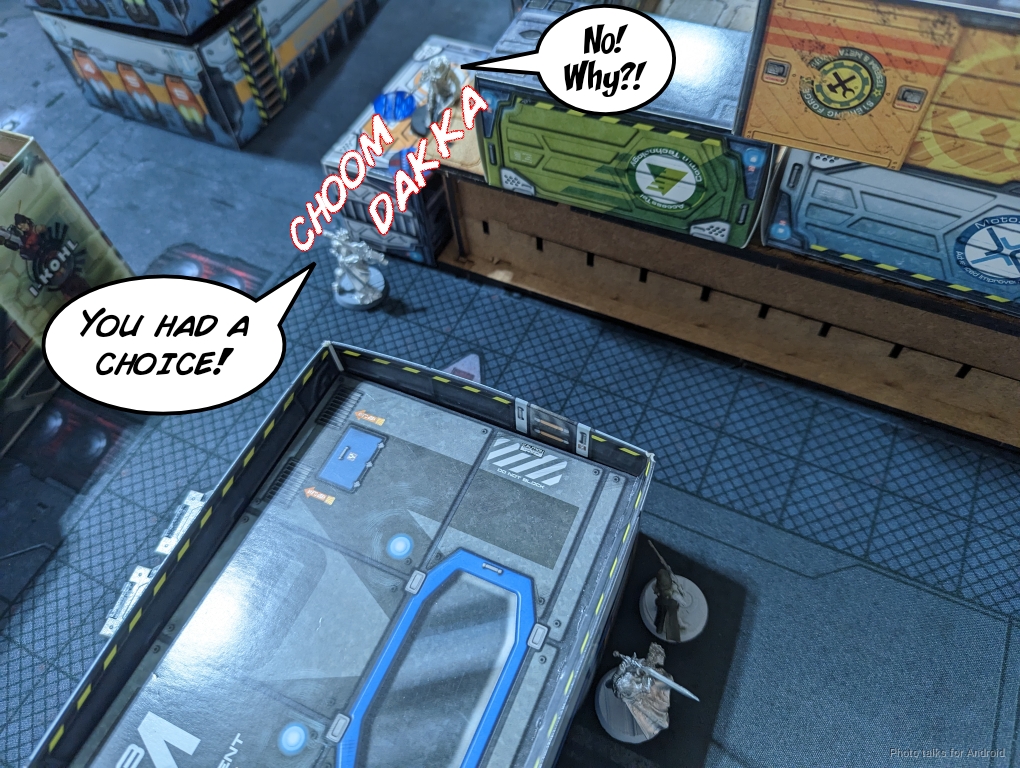
I throw Bran under the bus to template the Long Ya and Jing Qo. The Long Ya templated back and Jing Qo failed her dodge, which meant I did one wound to her and dropped the Long Ya. Bran took a wound from the Long Ya’s shotgun, but I really cannot complain about that result.
All of my stuff made it out of the zone, so I didn’t have to make any rolls.
Turn 2
Top of 2 – White Banner
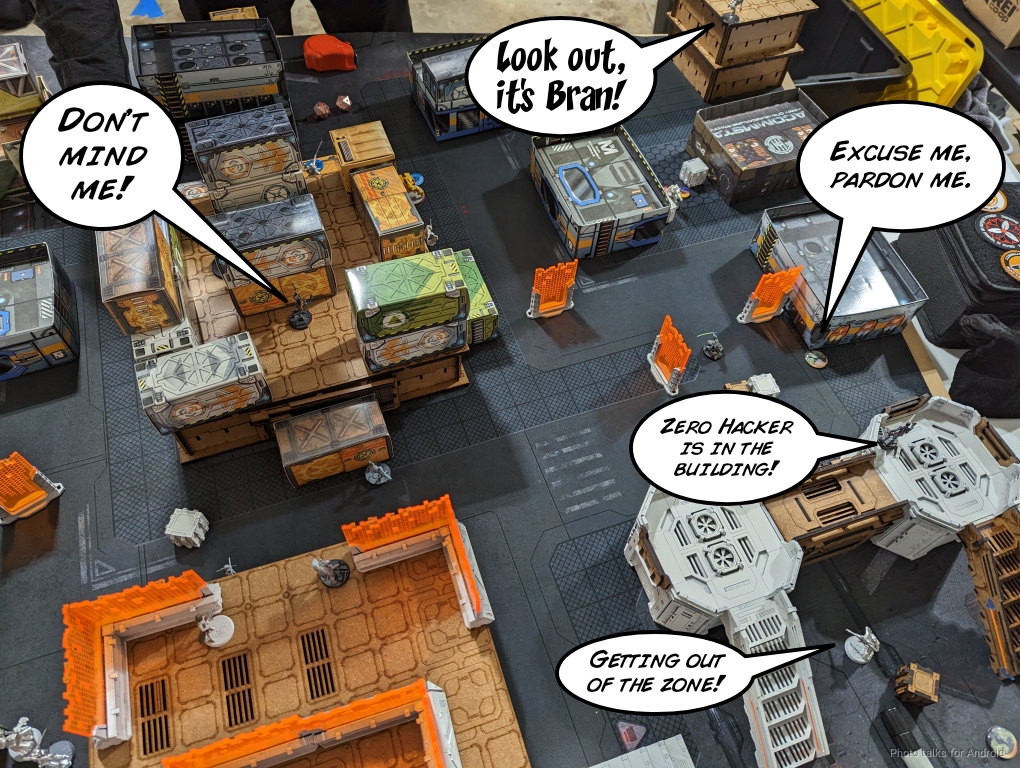
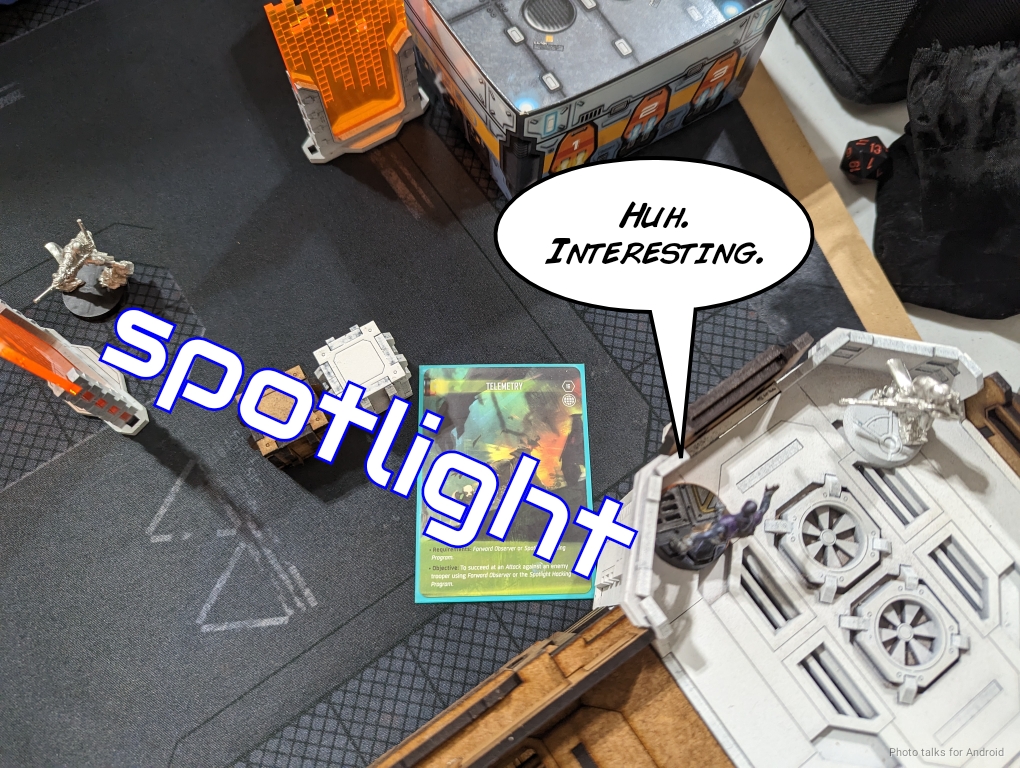
I’ve done a pretty good job applying heavy attrition against James’s list, now it’s just sticking the landing. Keep as much as I can alive, then hit my classifieds and take out as much as I can. James just has to get out of his biotechvore zone this turn or he’s in big trouble. His Shaolin races forward and I try to forward observe it with my Zero for a classified, but it gets smoke down instead.
James then tries to the dodge into triangulated fire trick with the Weibing to fight my Moira MSR. The first part works, but I win the face to face and paste the Weibing.
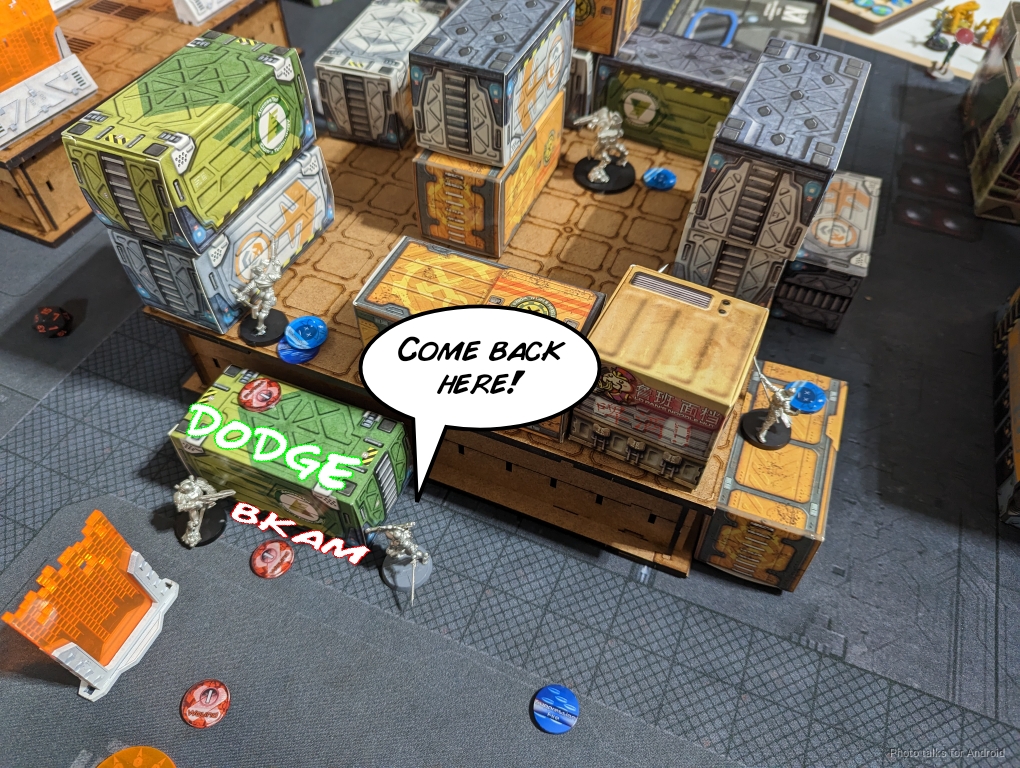
James works on getting his big core out of trouble. In order to get past the Zero, James decides to just remove it with Bixie. I let him, but drop a mine to further complicate things.
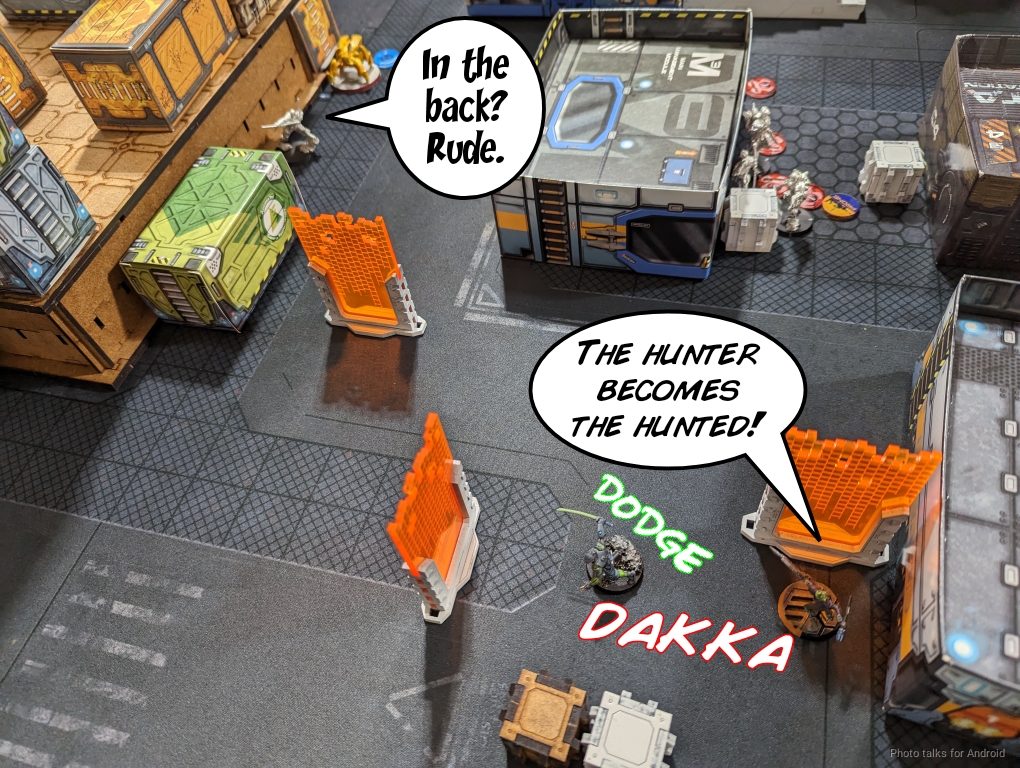
This forces a dodge out of everyone as they roll past the mine. I drop Lei Gong but everyone else either tanks the hit or dodges successfully.
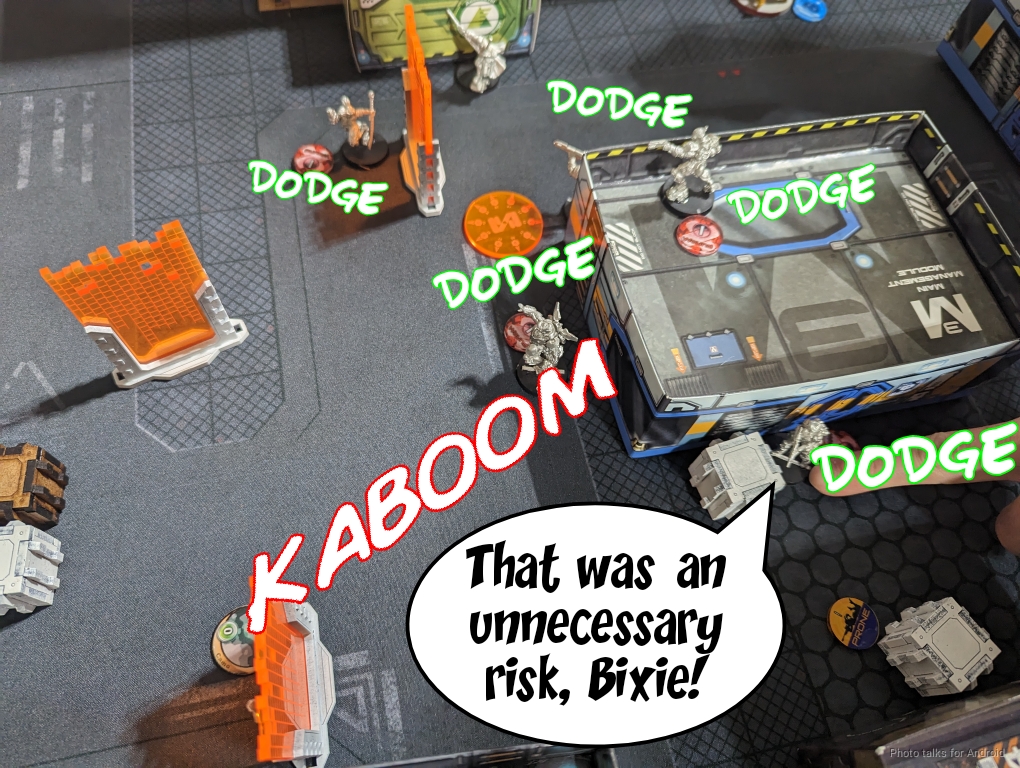
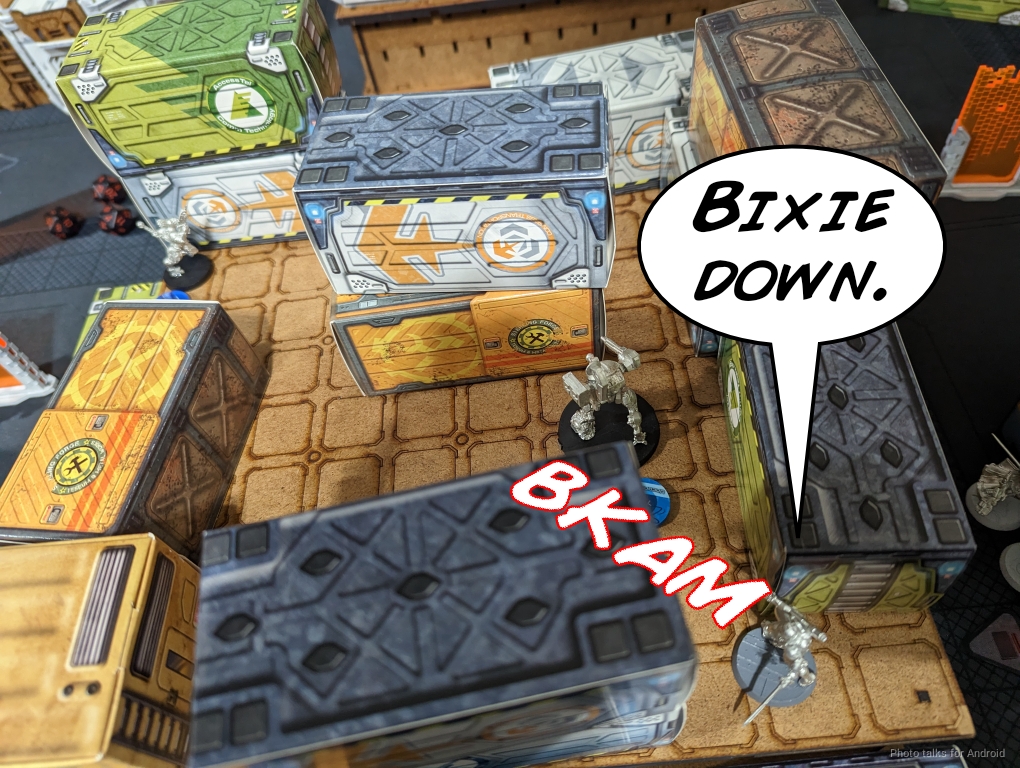
Bixie super-jumps up to shoot Bran in the back. I grant him a dodge with an Alert from the Chimera, but it’s not good enough and I lose Bran.
James’s Jujak engineer tries to fix the nearby Webing that died to the zone on turn 1 and succeeds only in gizmokitting it off the table.
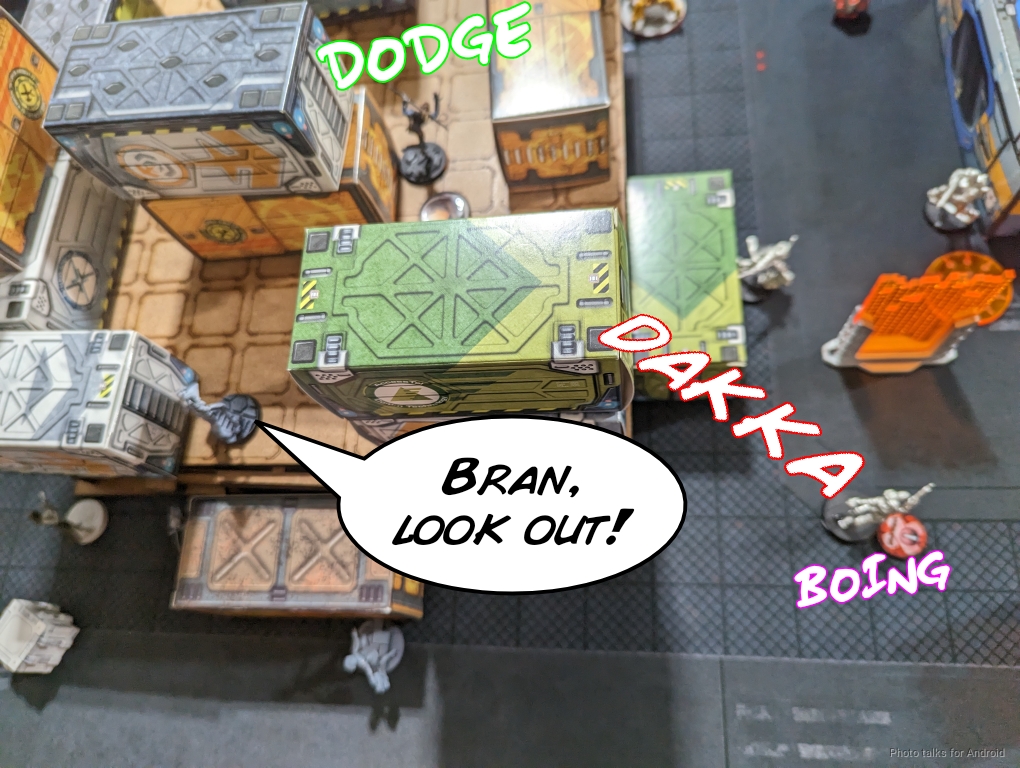
Bixie guns down the pupnik and then settles into to fight the stuff on my table half.
While the Zero didn’t get Telemetry, as James’s Shaolin pushes forward and dodges past something, I do snag it with an ARO from my Zero HD (who is inside the building with the Sin Eater). Bixie and the Sin Eater go into suppression, and that’s turn. At this point the Warcor finally drops.
Bottom of 2 – Bakunin
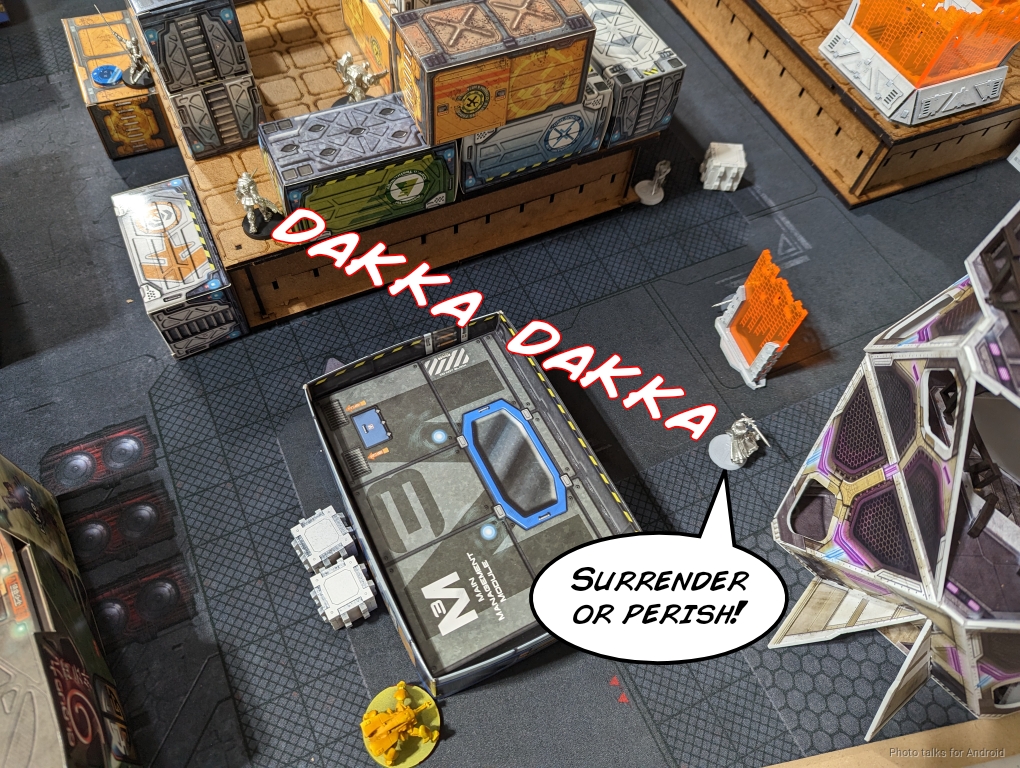
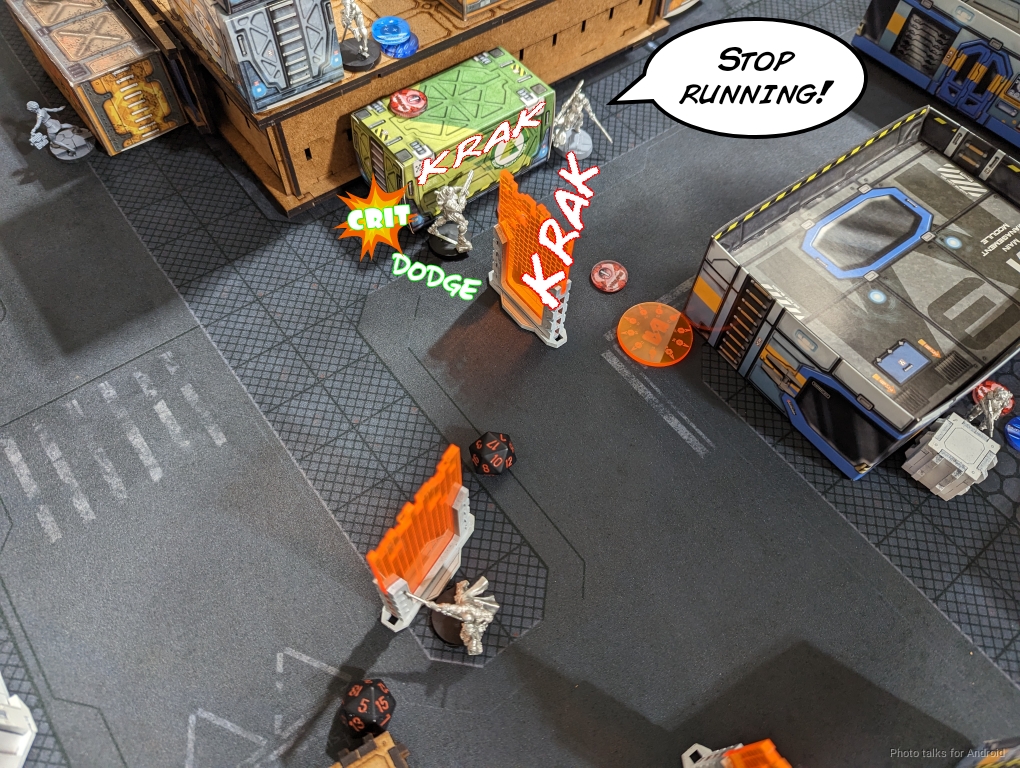
Time to execute on my plan of classifieds and deleting James’s stuff. The Cenobite rolls in to fight Jing Qo with triple templates while the Moira and Kusanagi cower nearby. Mimetism -6 is enough to keep her safe against suppression and Jing Qo is finally down.
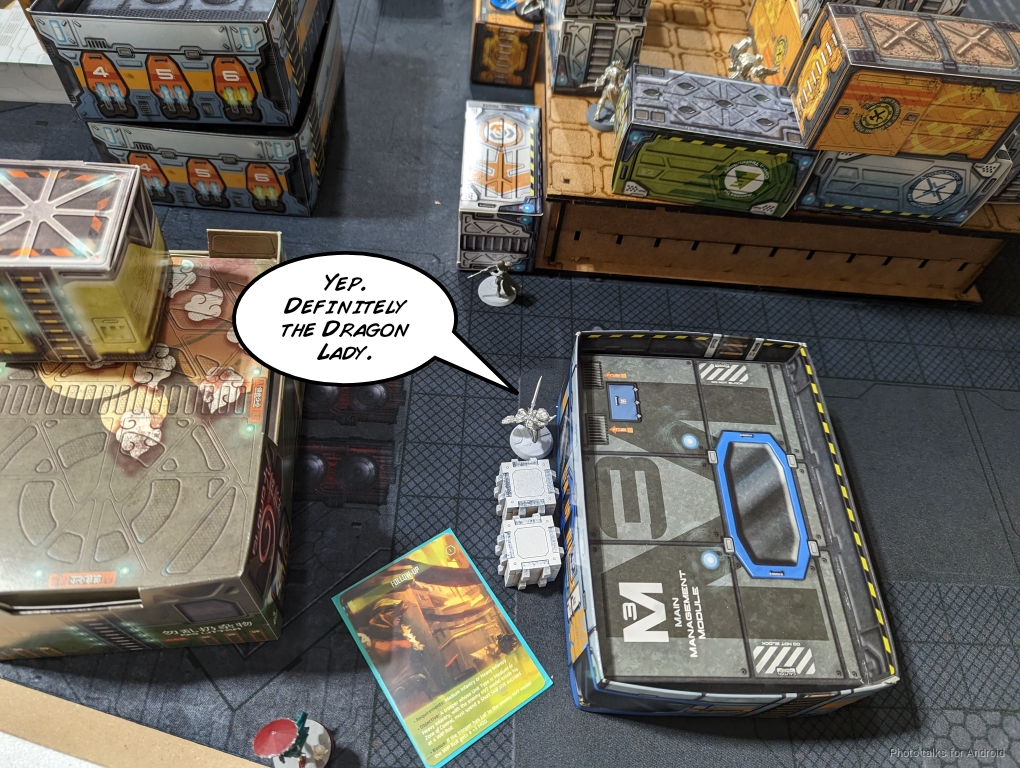
I take Bixie out from behind and outside of 8″ by just landing three light shotgun shells in her back. She was already wounded and can’t use her ludicrious dodge, so that’s that.
Kusanagi snags follow up on James’s HVT while the other team members reposition.
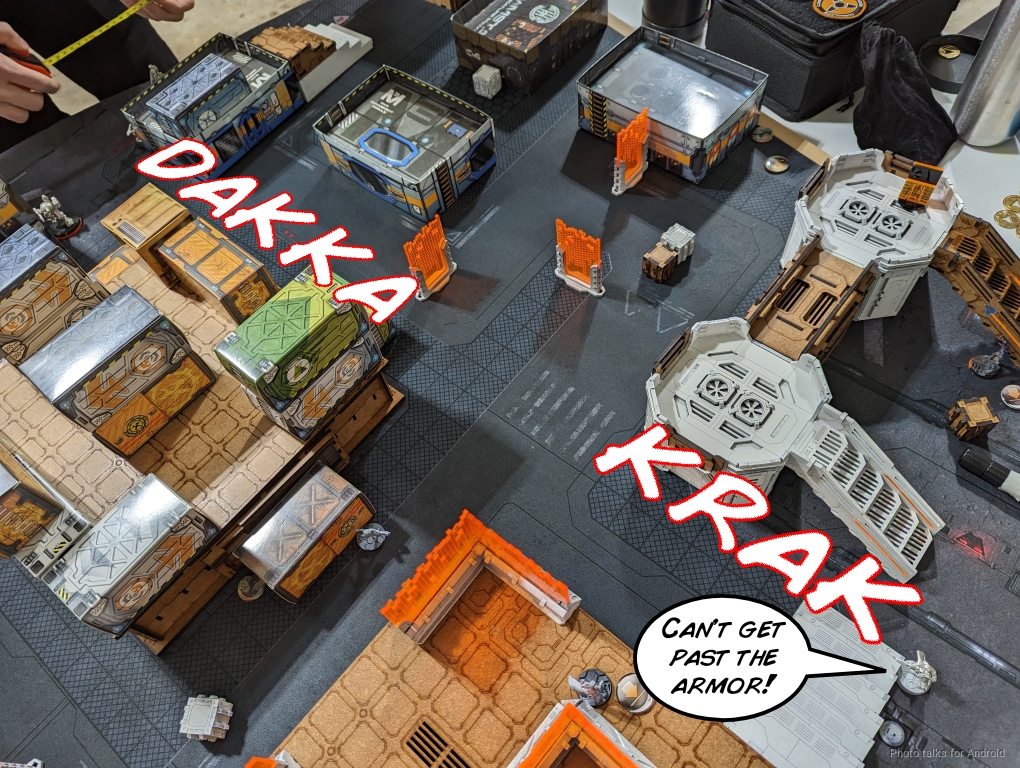
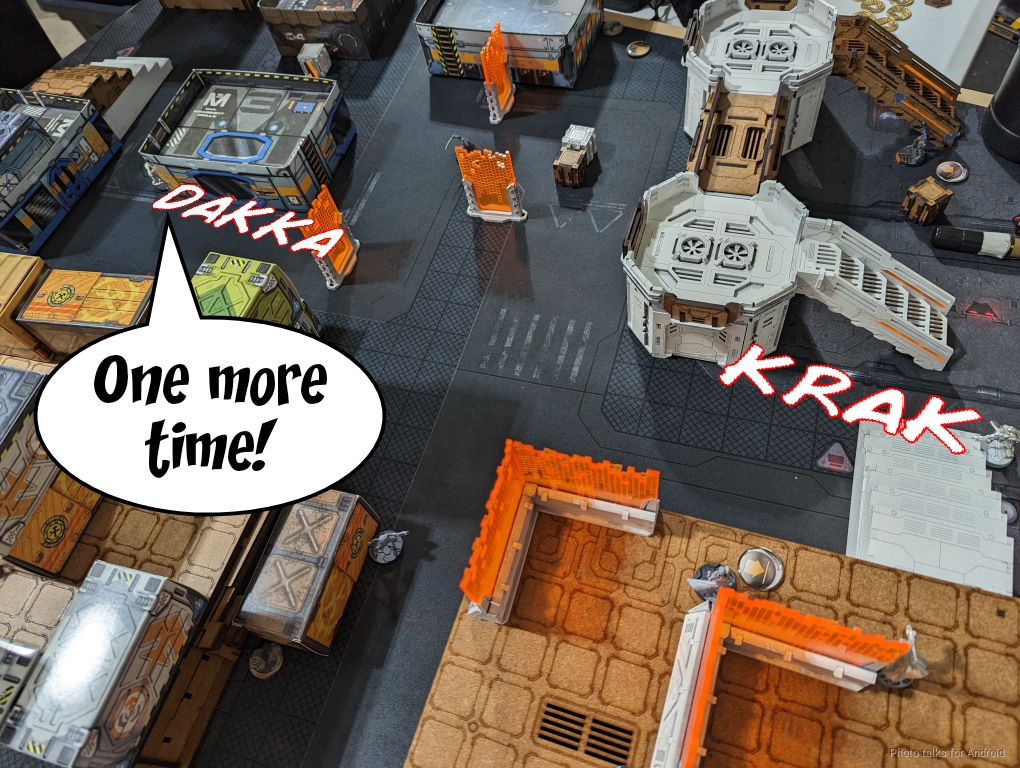
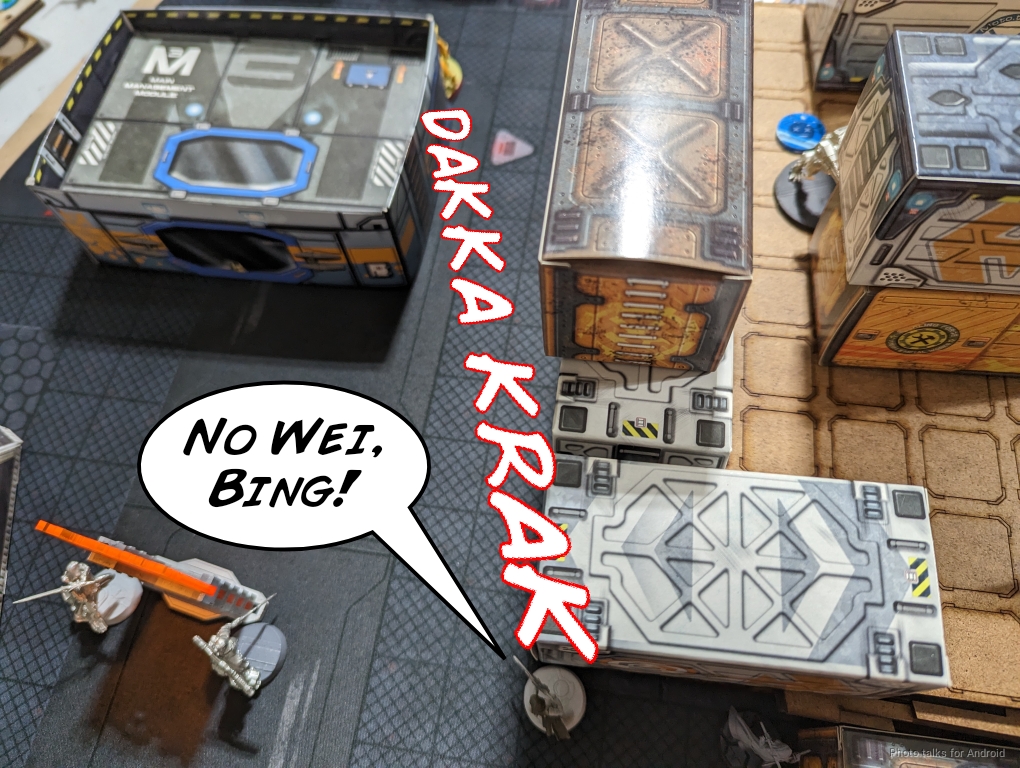
I continue the trend of shooting James’s stuff in the back by sending the Cenobite further in to tag the Shang Ji in the back. I still can’t defeat its armor and James wisely fails guts further away.
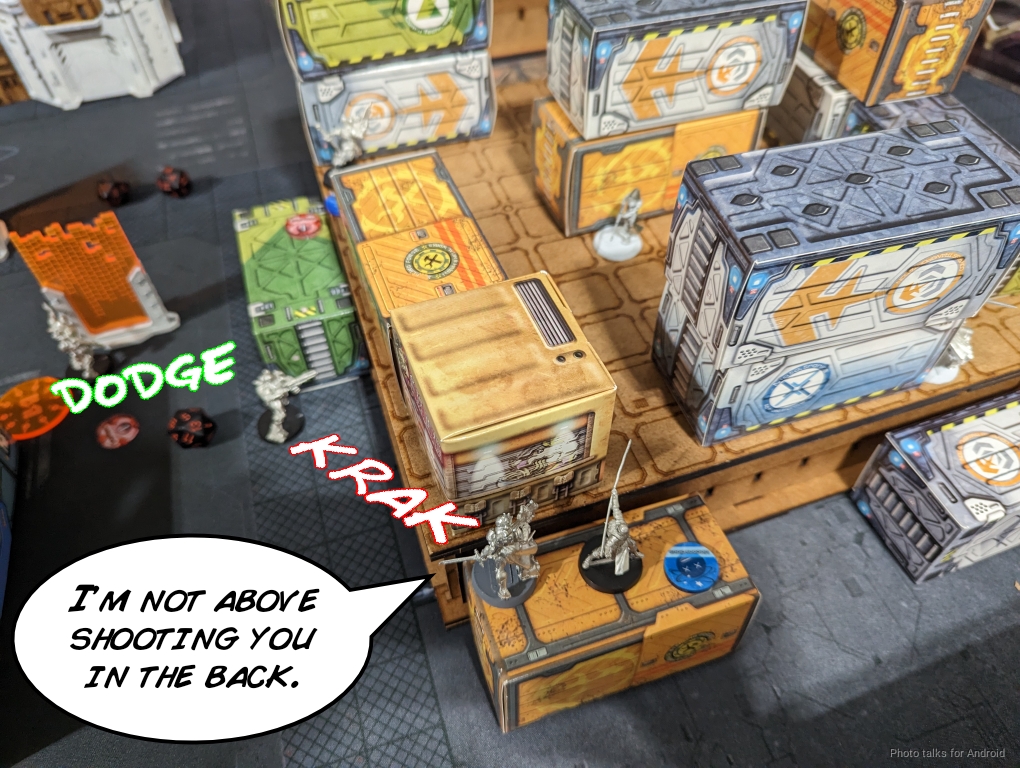
This lets me land a template on both the Shang Ji and the wounded Jujak engineer (proxied by Krit here). Triple templates against a failed dodge finally does a wound to the Shang Ji and drops the Jujak who fails to wound the Cenobite.
I keep trying to take out the Shang Ji but I just can’t get past its armor with a light shotgun.
I finally split burst against it and the Shaolin, finishing off the Shaolin and critting the Shang Ji against its dodge. Somehow it passes both ARM saves, and I’m now out of orders.
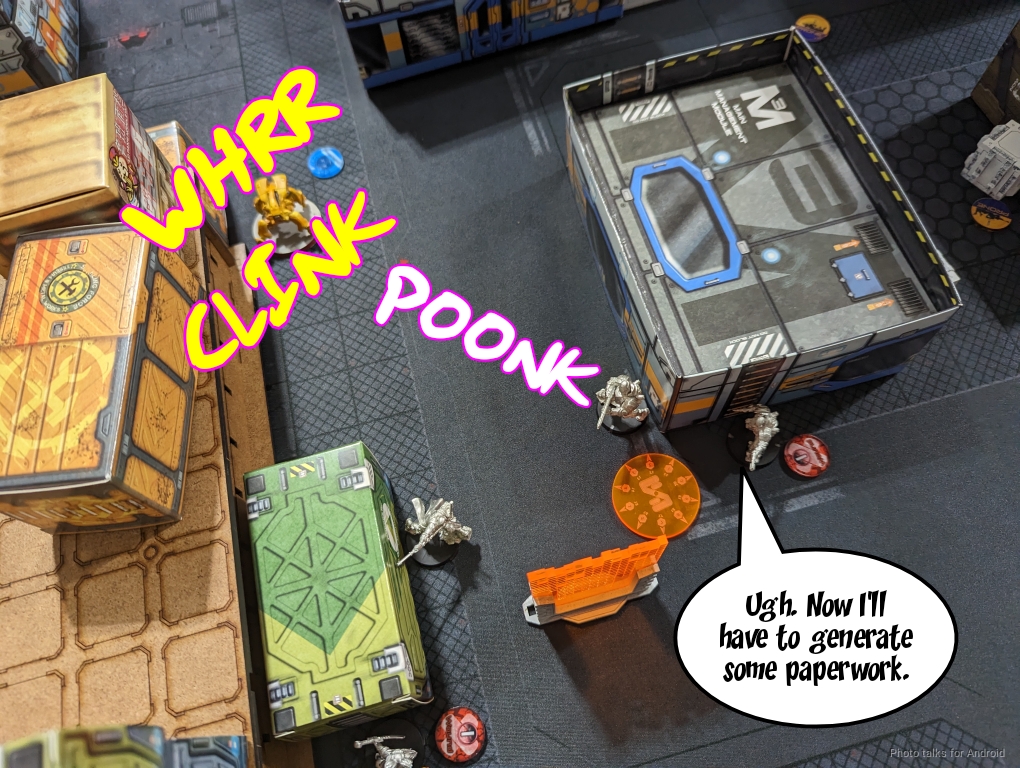
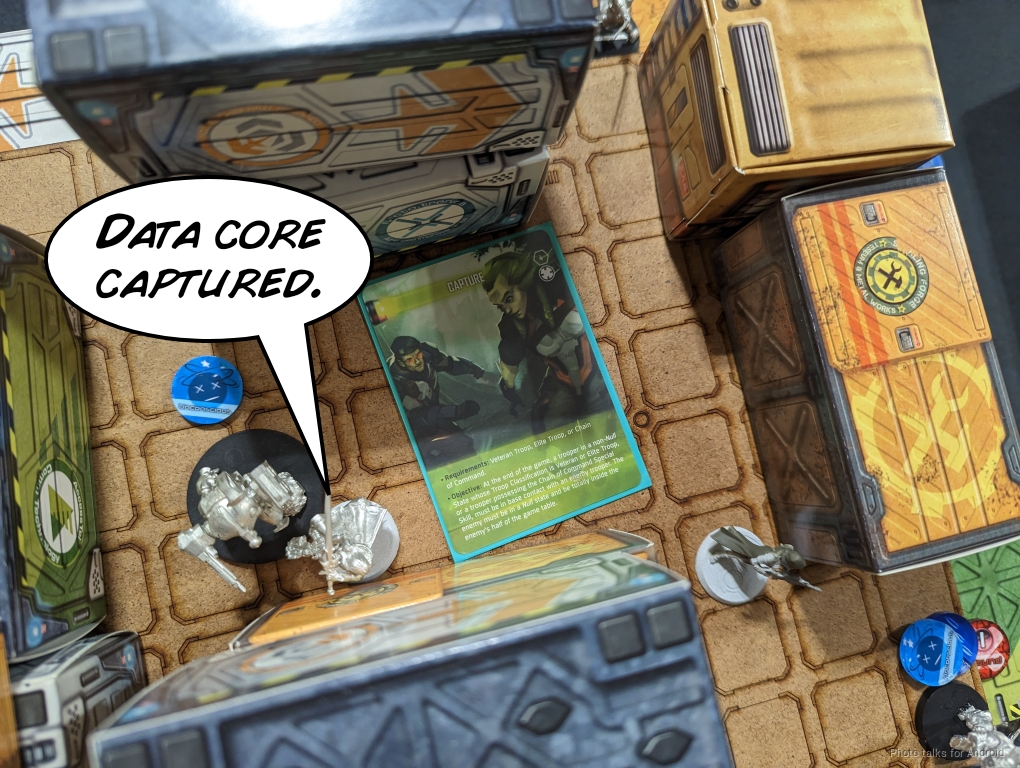
I use these orders to get into base to base with the Long Ya though, giving me Capture.
I’ve only got one order left–the Prowler’s. I empty a full burst into the Shang Ji’s back and still fail to kill it! The Prowler passes BTS against the zone, at least, which means I’ll be able to use it on Turn 3 if I have to.
We decide to call it here though, as James only has his Jujak Lt and the Shang Ji left, both wounded.
9-0, 210-75 Jurisdictional Command of Bakunin Victory!
Post Game Analysis
That was about as good as I could have expected the list to perform in Biotechvore. It did what I designed it to in keeping a link in the biotechvore zone and basically wounding almost all of the members. I had plenty of orders left and the ability to deliver an absolutely brutal strike team to James’s flank. Once that crumbled there was no recovery, regardless of how many ARM saves the Shang Ji passed.
I think this game really came down to James not being as aggressive as he needed to be with the Shang Ji link. Trying to remove Sin Eaters is good, but getting out of the zone is probably better. Might even be worth throwing the Shaolin haris under the bus to set up smoke for the Shang Ji link. It’s incredibly hard to remove and were it not already wounded I would have had some trouble. I had the tools but probably not the orders to do it.
This game also clearly illustrates some of my main criticisms of 5-man links:
- Tool Positioning – James was choosing the AP HMG Shang Ji to challenge my Sin Eaters. I dictated where the engagements had to take place based on where I put my Sin Eaters, so James had to be there if he wanted to fight them. This kept the other 4 members of the link tied to that general area and boxed into the biotechvore zone. It’s worth pointing out I also had a Moira there covering the other side of the building where they were trying to advance, so it’s not quite that simple, but my point remains. Links bring tools, you have to use them to solve problems generally, and that means the other 4 link team members aren’t where they likely want to be.
- Template Vulnerability – When James was challenging my Zero, he likely wasn’t expecting me to drop a mine. But with 3 other members of the link behind Bixie, including his wounded Lieutenant, well, it was unlikely for me to NOT drop a mine. Geometry forces template vulnerability — the smallest template is 8.25″ long and links have to stay within 8″ of the team leader. It won’t always work out for the template wielder, but more often than not you’ll be able to catch someone else under a template, especially with the full 5.
- Excessive and unusable redundancy – While redundancy generally is good, I don’t need 3 extra combi range band things in a blob. I’d much rather have seen two HI links split between the flanks. Really only Bixie and the Shang Ji did anything. It would have been actually fine to just have duo’ed them or something and put the other three on the other side with Jing Qo as a 3-man core, for example. You lose out on the top end, but I think the +3 BS really is just a crutch against bad positioning. I also don’t think Infinity is necessarily much of a “win-more” game.
In general, I think this game worked out the way it did because I had a plan and executed on it: use the Sin Eaters and the Moira/Cenobite to keep James boxed in. That worked. Moreover I had a plan on how to get out of my DZ. I don’t think James did, necessarily, other than “I pray to Shang Jesus for deliverance.” It’s generally a good plan, but not in this case.
Once James was in the midfield, I was able to collect classifieds and take advantage of the increased surface area of his “shape” so to speak to attack. He’s in the middle of the table all spread out, so small movements by me allow me to get to some vulnerable link member, often from behind, as we saw with Bixie and Jing Qo. Anyway. I’m throughly convinced that this list fits my playstyle super well and it’s SUPER FUN to play. I encourage those of you exploring Bakunin to try it out! Thanks to James for helping me test the list more and to you for reading!