Aida Wanna Grow Up
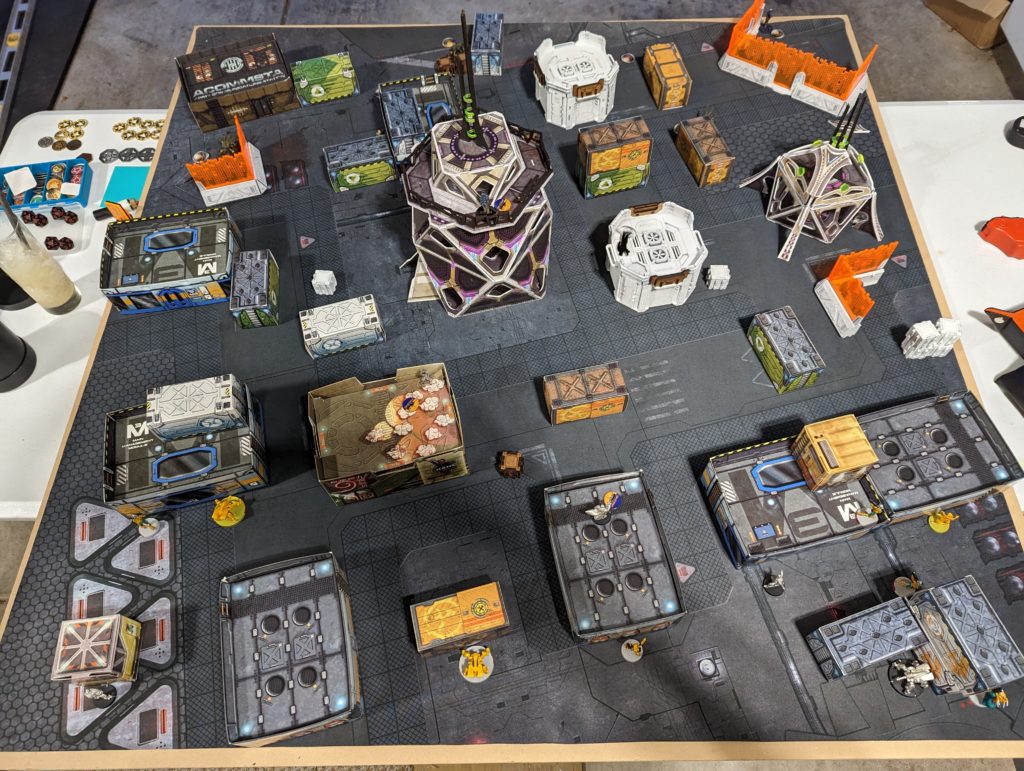
After the last game of Looting and Sabotaging I really needed a better plan for AC2 defense. James also assembled some pre-painted terrain for his table to add some serious verticality!
Overview
- Mission: ITS14 Looting and Sabotaging
- Forces: Druze Beyram Security versus Yu Jing (300)
- Deploy First: Druze
- First Turn: Druze
In comparison to the last list…
I decided to drop the Brawler HRL for a Brawler Hacker, and then Fiddler becomes Aida and a pair of Fugazi to help power the rest of the list.
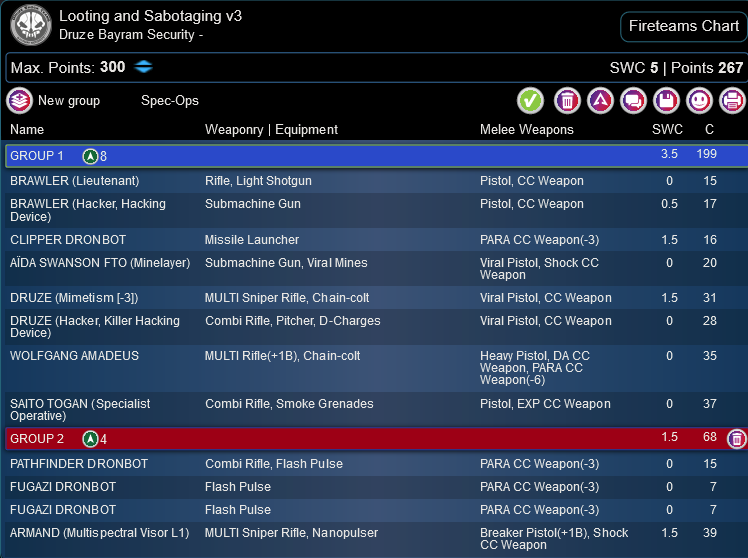
Looting and Sabotaging v3
GROUP 1
8
BRAWLER (Lieutenant) Rifle, Light Shotgun / Pistol, CC Weapon. (0 | 15)
CLIPPER DRONBOT Missile Launcher / PARA CC Weapon(-3). (1.5 | 16)
AÏDA SWANSON FTO (Minelayer) Submachine Gun, Viral Mines / Viral Pistol, Shock CC Weapon. (0 | 20)
DRUZE (Mimetism [-3]) MULTI Sniper Rifle, Chain-colt / Viral Pistol, CC Weapon. (1.5 | 31)
WOLFGANG AMADEUS MULTI Rifle(+1B), Chain-colt / Heavy Pistol, DA CC Weapon, PARA CC Weapon(-6). (0 | 35)
GROUP 2
SAITO TOGAN (Specialist Operative) Combi Rifle, Smoke Grenades / Pistol, EXP CC Weapon. (0 | 37)
1
PATHFINDER DRONBOT Combi Rifle, Flash Pulse / PARA CC Weapon(-3). (0 | 15)
FUGAZI DRONBOT Flash Pulse / PARA CC Weapon(-3). (0 | 7)
ARMAND (Multispectral Visor L1) MULTI Sniper Rifle, Nanopulser ( ) / Breaker Pistol(+1B), Shock CC Weapon. (1.5 | 39)
HUNZAKUT (Forward Observer) Boarding Shotgun, D-Charges / Pistol, CC Weapon. (0 | 18)
5 SWC | 300 Points | Open in Army | Copy Code
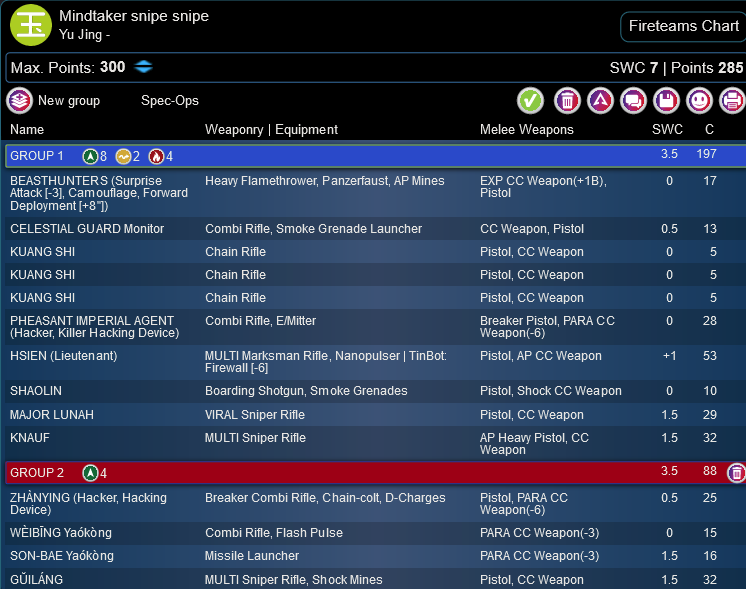
James’s list was different than his last one. He swapped the Sun Tze MSR to a Hsien and swapped the Blue Wolf out for a sniper package. Lots and lots of snipers.
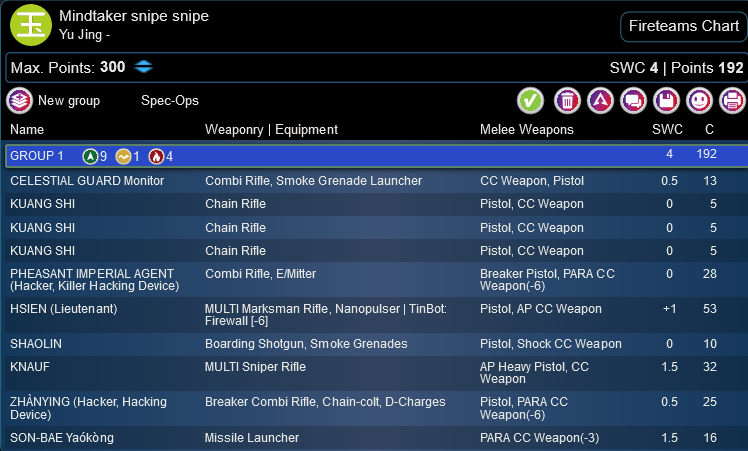
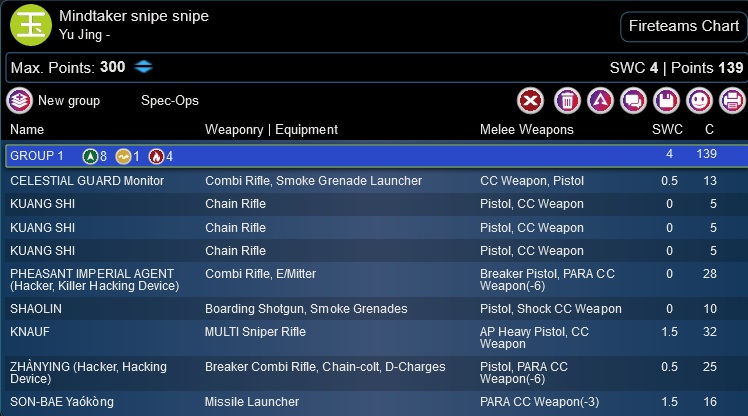
Mindtaker snipe snipe
GROUP 14
GROUP 2
BEASTHUNTERS (Surprise Attack [-3], Camouflage, Forward Deployment [+8″]) Heavy Flamethrower, Panzerfaust, AP Mines / EXP CC Weapon(+1B), Pistol. (0 | 17)
CELESTIAL GUARD Monitor Combi Rifle, Smoke Grenade Launcher / CC Weapon, Pistol. (0.5 | 13)
KUANG SHI Chain Rifle / Pistol, CC Weapon. (0 | 5)
PHEASANT IMPERIAL AGENT (Hacker, Killer Hacking Device) Combi Rifle, E/Mitter ( ) / Breaker Pistol, PARA CC Weapon(-6). (0 | 28)
HSIEN (Lieutenant) MULTI Marksman Rifle, Nanopulser ( | TinBot: Firewall [-6]) / Pistol, AP CC Weapon. (+1 | 53)
SHAOLIN Boarding Shotgun, Smoke Grenades / Pistol, Shock CC Weapon. (0 | 10)
MAJOR LUNAH VIRAL Sniper Rifle / Pistol, CC Weapon. (1.5 | 29)
KNAUF MULTI Sniper Rifle / AP Heavy Pistol, CC Weapon. (1.5 | 32)
ZHÀNYING (Hacker, Hacking Device) Breaker Combi Rifle, Chain-colt, D-Charges ( ) / Pistol, PARA CC Weapon(-6). (0.5 | 25)
WÈIBĪNG Yaókòng Combi Rifle, Flash Pulse / PARA CC Weapon(-3). (0 | 15)
SON-BAE Yaókòng Missile Launcher / PARA CC Weapon(-3). (1.5 | 16)
GŬILÁNG MULTI Sniper Rifle, Shock Mines / Pistol, CC Weapon. (1.5 | 32)
7 SWC | 300 Points | Open in Army | Copy Code
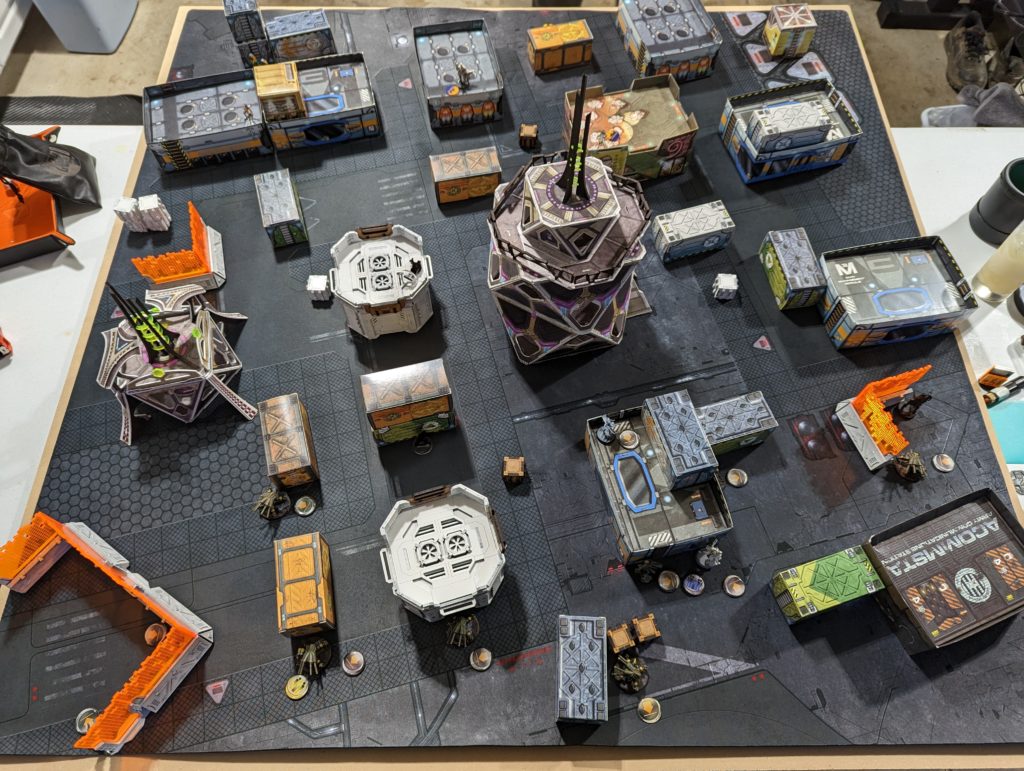
Deployment
I ended up going first so I had to deploy first. Some of the deployment was straightforward, I just tucked Fugazi into various places to protect my order pool and have some AROs to potential AD troops. The Brawler Haris with Clipper went on the left, castled in a partial objective room with only the clipper exposed. The Druze core with Aida and Wolfgang covered the approach to my deployment zone on the left, but not in a way that it would be exposed to likely Lunah spots.
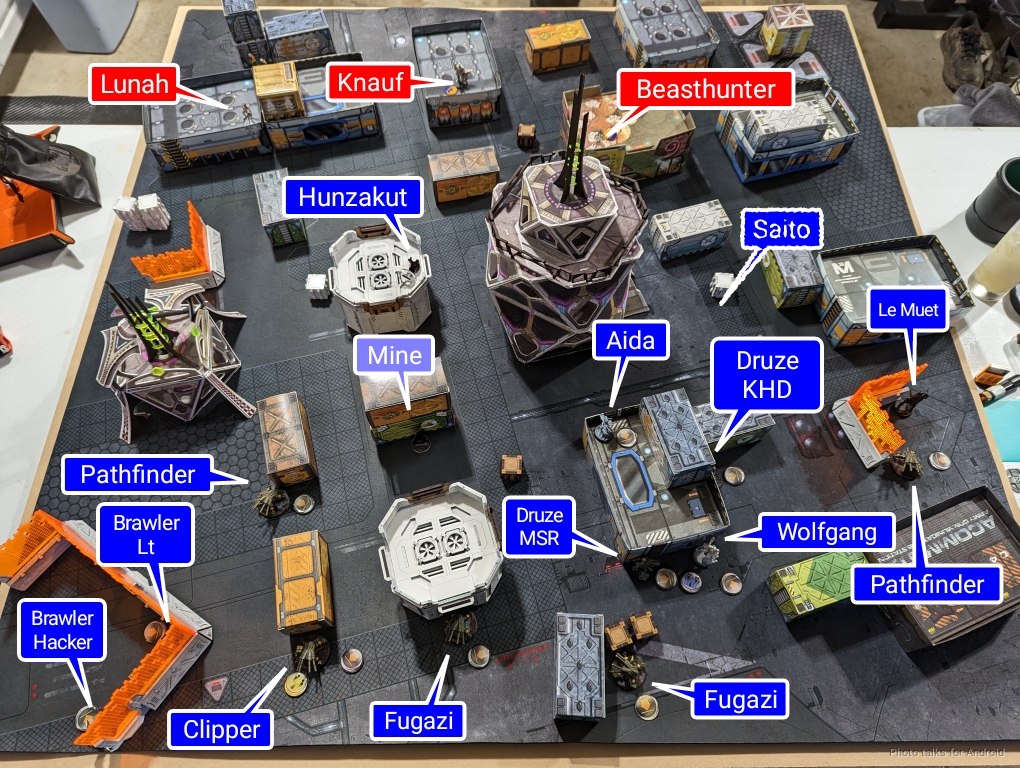
The Pathfinders both took up positions on either side of the table, and Saito ended up near a Panoply on the right. The Hunzakut hid in a building on my left, and I held Le Muet in reserve. James’s Weibing were skewed left to protect the Pheasant KHD. In turn, the KHD protected the Zhanying on the right. James’s Hsien lieutenant went all the way in the back on the right, screened by a Shaolin.
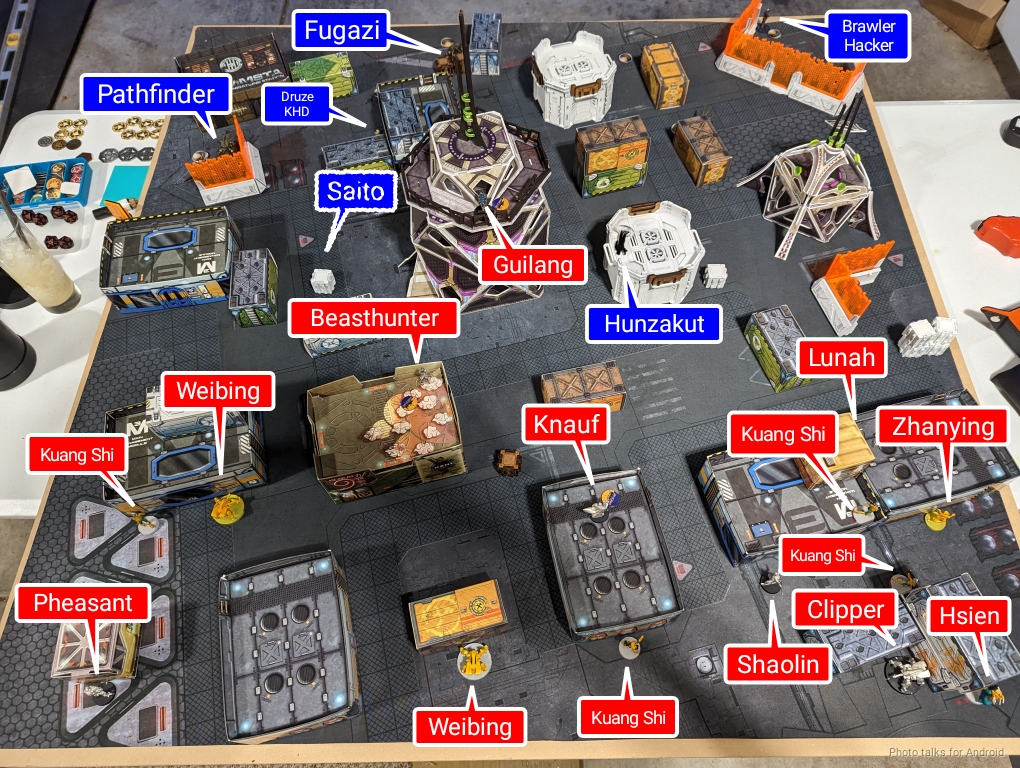
I put Le Muet down watching a horizontal firelane across the approach to my deployment zone, then James put his Beasthunter on a roof just outside his deployment zone.
Turn 1
Top of 1 – Druze
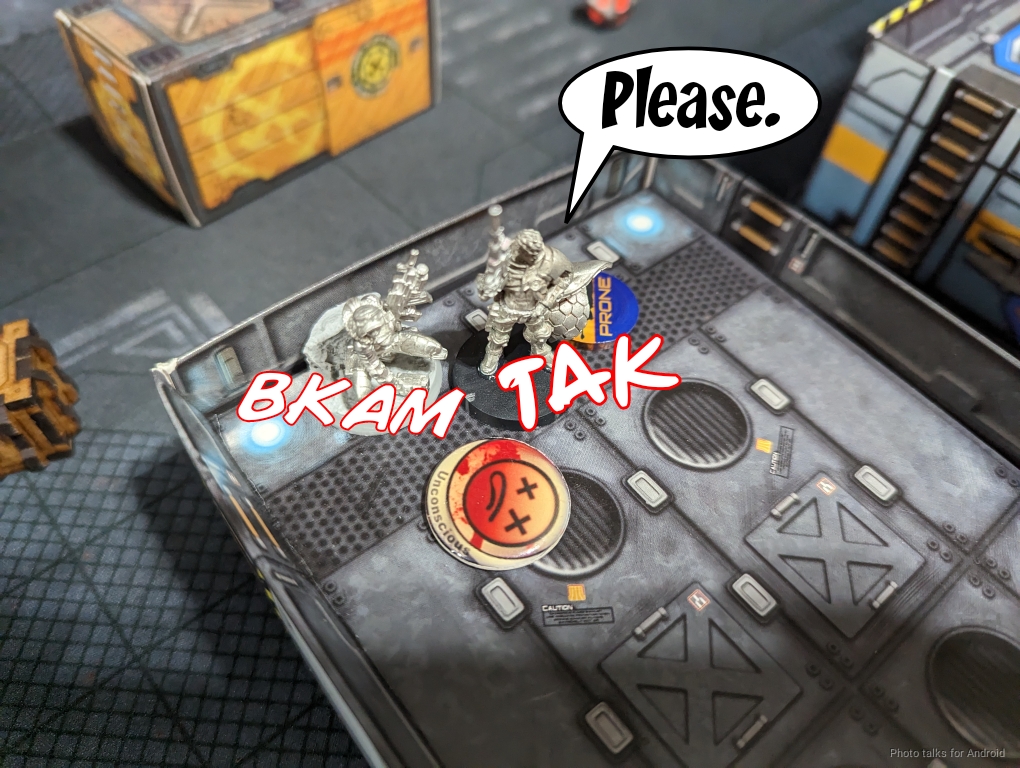
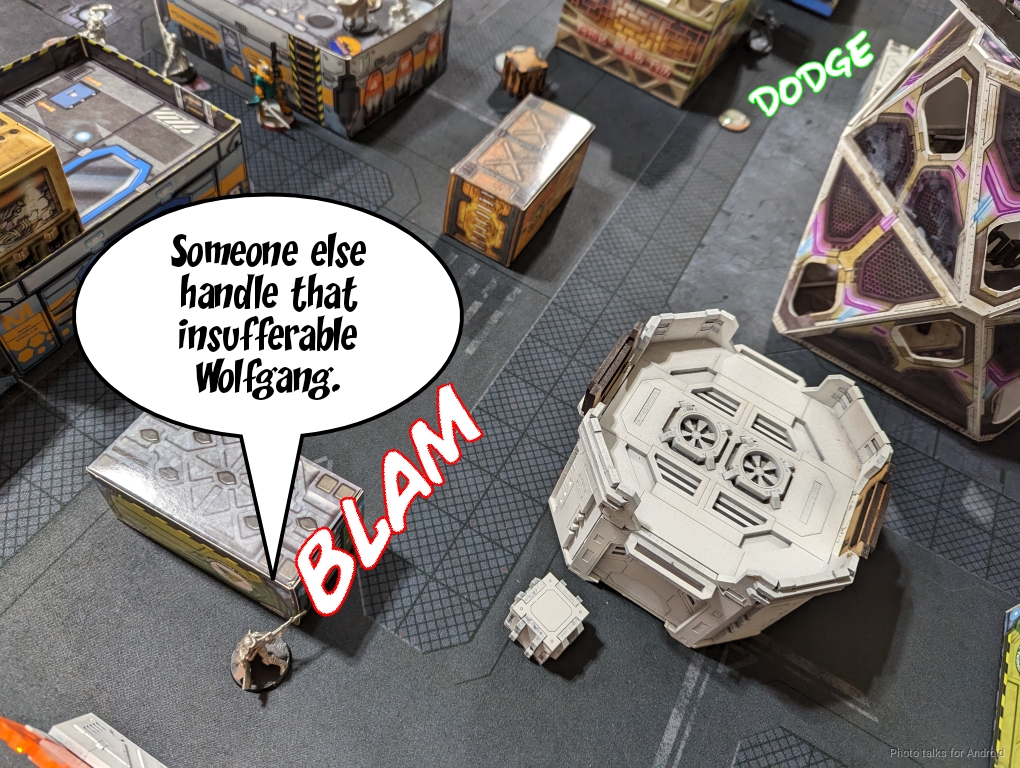
James put a Weibing in suppression watching the AC2 along with Lunah. I didn’t think I had the capability to thread that needle this turn, so I decided to just do some damage and defang James’s list to the best of my ability. I decided to go hunt Knauf down so I sent in the Hunzakut. I probably should have just planted the D-Charge and sacrificed the Hunzakut… but oh well.
In any case, Lunah declined to reveal on the way in, so I decided to just make the push to take out Knauf. My first shots beat his dodge, but he passed ARM. Okay, not great.
I then decided to go after him again by scooting behind him, but this time he beat my roll with a pistol shot, taking out the Hunzakut. Should’ve templated, I was just super greedy.
I then force a reveal from Lunah by declaring discover-shoot with a Pathfinder. It goes poorly and I lose the Pathfinder, but Lunah is revealed at least.
This lets me make an attempt on Lunah with Le Muet. I hit, but she passes ARM and drops prone.
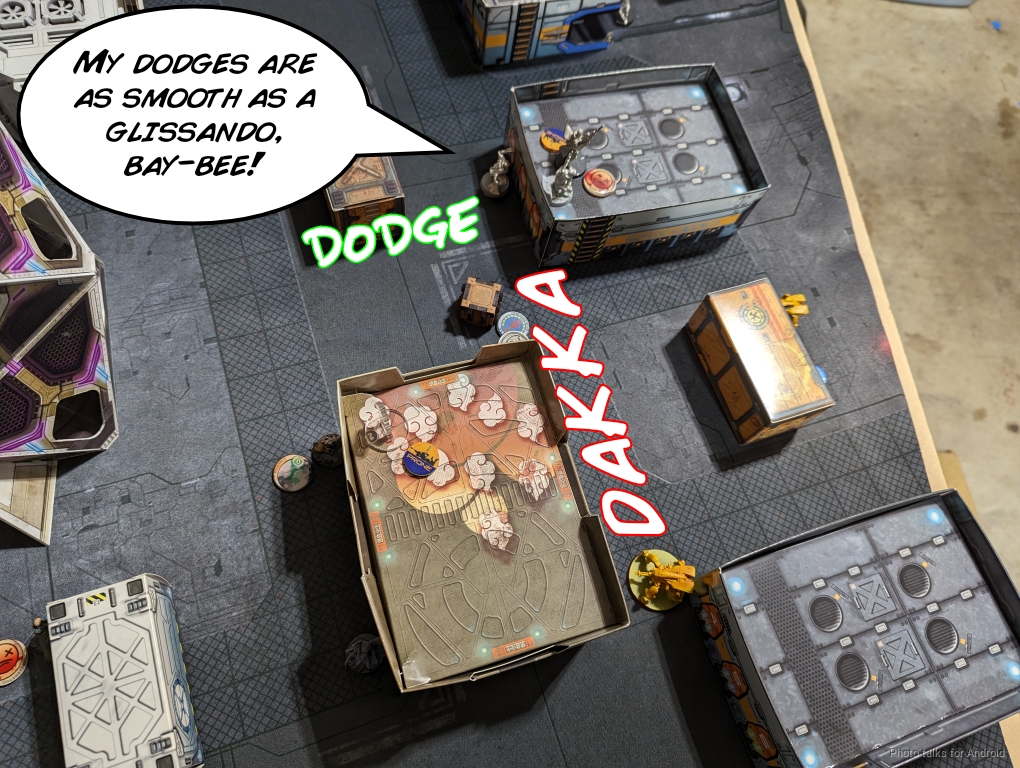
I then make a pretty big mistake and push the whole Druze link forward. Aida rolled an HMG on her Booty rolls, so there was not really a reason that I needed to push everyone up. There is a case for having the link advanced to save orders for an attack on the AC2 on subsequent turns, but I’m also exposing a relatively fragile link in the midfield.
My objective is to get a mine covering the Beasthunter’s approach and do some order pool damage. Only Aida needs to go for that, I don’t need to to bring the whole link with me. I was pretty distracted by the idea of how much efficiency I would get, and was hoping that I would do enough damage to prevent a good counter strike. Of course, hope isn’t how you win this game. Anyway, I start by taking out the Weibing at range with Aida’s HMG, mostly to try it out.
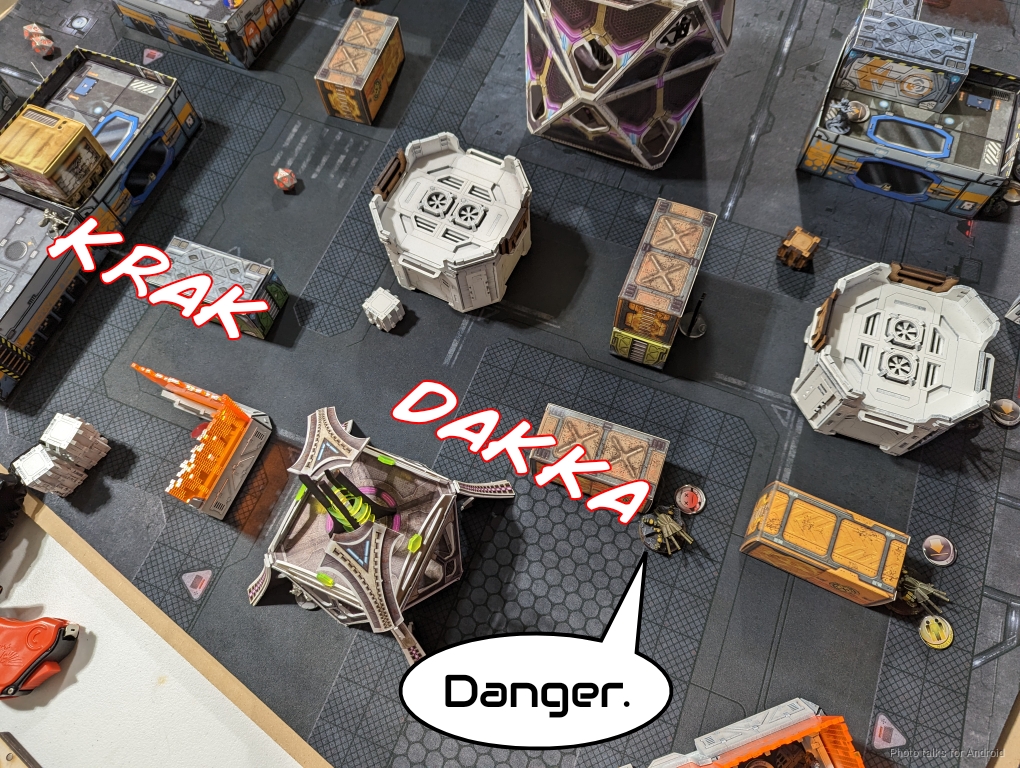
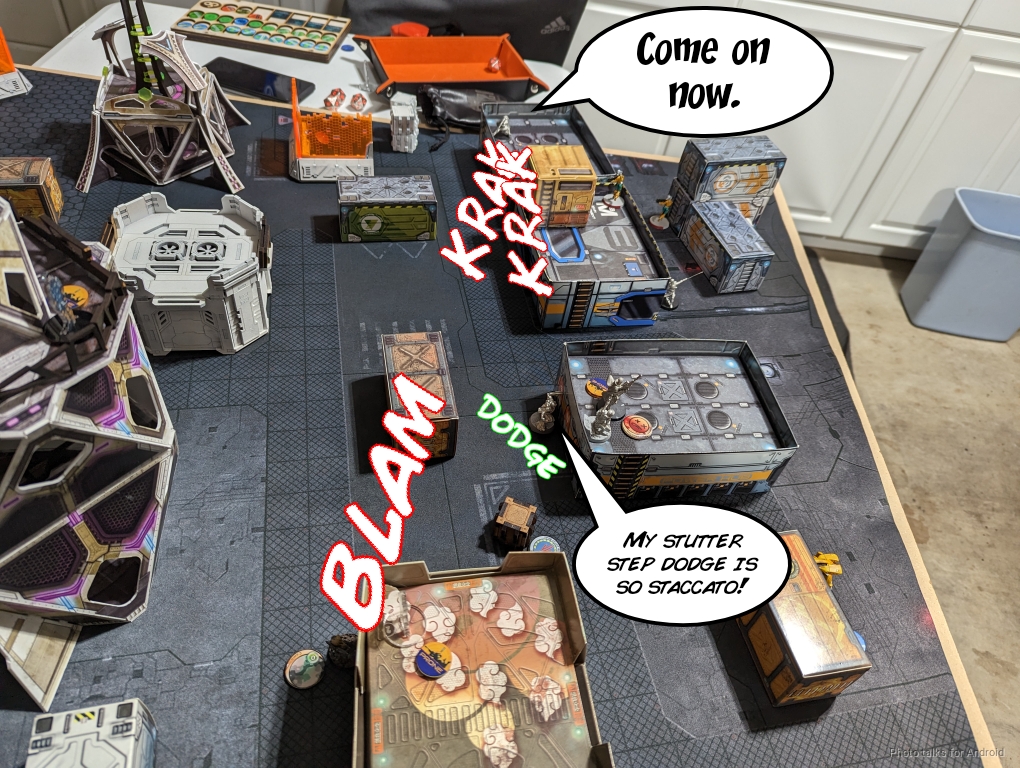
I manage to clear the way sufficiently and get the Druze KHD in a position to hit the AC2 with some D-charges, doing two wounds, which isn’t enough. I have to retreat now, to keep the link intact, and there’s a Guilang on the tower behind all of them, so they’re just asking to get shot in the back.
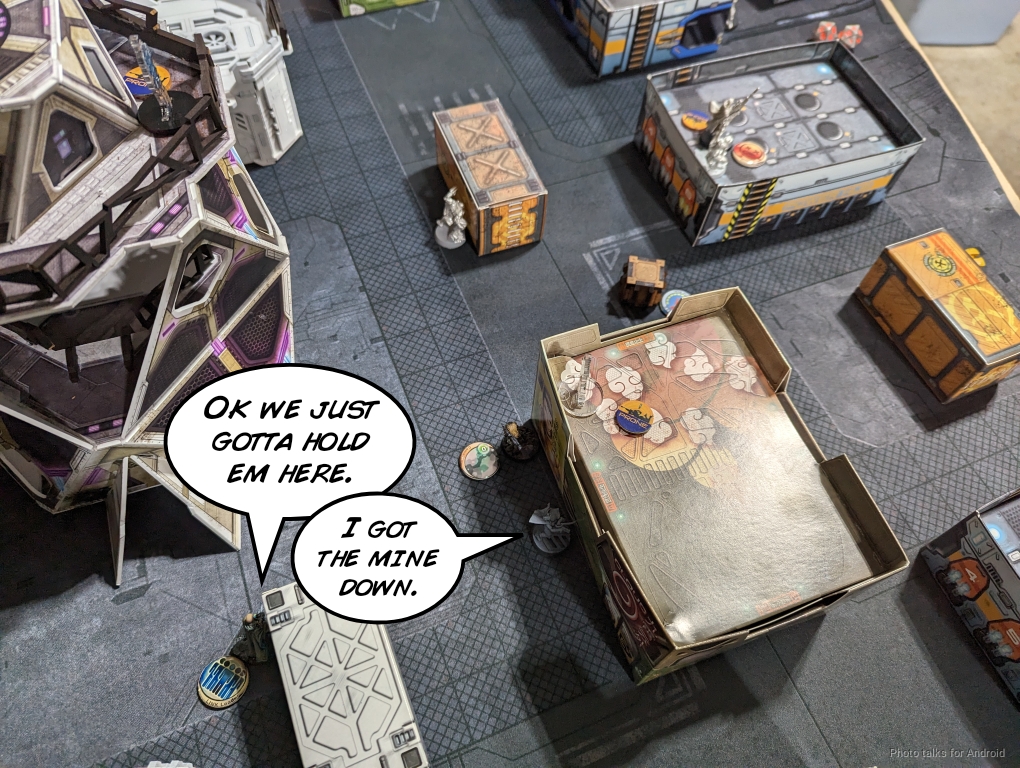
I run out of orders to really set the link up for success, so I end up just stacking them up in horrible positions. I do get a mine down though, which is great. This at least pins the Beasthunter for a bit.
The primary issue here is that I just was too optimistic about my ability to affect sufficient change to the board state, especially after the botched order of operations. I think here’s the correct order of operations:
- Pathfinder reveals Lunah
- Le Muet forces Lunah prone
- Aida advances alone, takes out Weibing in suppression.
- Hunzakut takes advantage of clear path forward and D-charges the AC2, potentially killing it depending on dice.
- Aida drops a mine pinning the beast hunter then goes after the Guilang on the tower
This feels like a much stronger turn. We ruled that the tower had an elevator in it, so it wouldn’t even have been all that order intensive. I think really what this illustrates is that under pressure, you tend to make sub optimal decisions. One of the things that I’ve discovered by writing these reports is that after the game you can usually pick out the “global optimum,” i.e. the best line of play. Obviously one has the benefit of hindsight and complete information by the time you end up writing the battle report, so it’s perhaps unrealistic to expect you to be able to do that during a game.
I think what separates average from great players is the ability to find a local optima–i.e. something it’s good enough and advances the board state in a beneficial way. It might not be the best line of play but it will set you up for a reasonable play position later, assuming maybe some dice go your way. I think this is a good example of that. It’s not the worst that I pushed my link forward. It’s definitely NOT the best line of play as I described, but it does set me up for the next turn and it does mean James is going to have to deal with my link before making a play on my AC2.
So I’m risking a lot of material but I’m also buying some time. The problem that the risk is too high–if the dice really don’t go my way I could find myself in an unrecoverable position. James is also good enough that probably the best I could hope for is a neutral board state–I lose some stuff, I stall him out, and I can figure out a better line of play on the next turn. One other thing is that the available decision space generally decreases as the game progresses due to resource attrition, so a neutral outcome is probably beneficial overall in terms of decision making–if you start a turn in a neutral position, you can accrue a minimal amount of decision fatigue while putting your opponent in a bad position.
Anyway, I should probably get on with the report or I’ll just continue incoherently rambling.
Bottom of 1 – Yu Jing
James’s turn starts with pretty minimal losses on both sides, but I’ve got a positionally advanced link team at risk.
James starts by using his Hsien to take out the Druze MSR. We’re outside 16″, and I’m two on 12’s to James’s 3 on 14’s. You’d think that this would be somewhat even odds, but actually it’s quite bad for me:
| 19.13 | 41.45 | 39.41 |
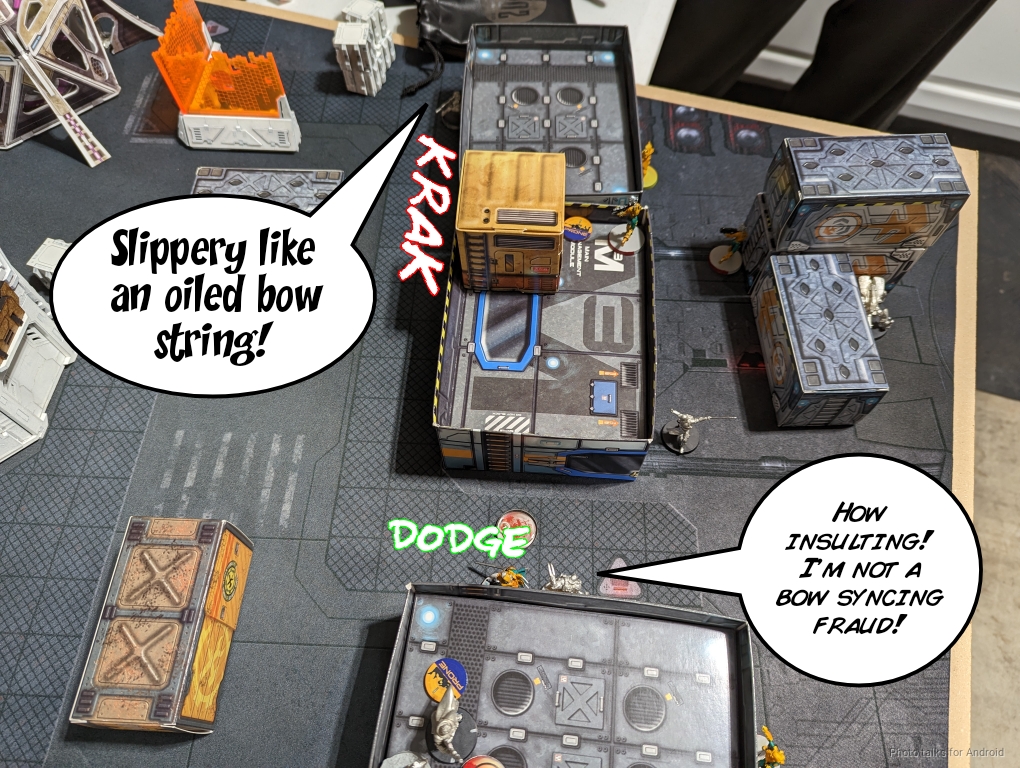
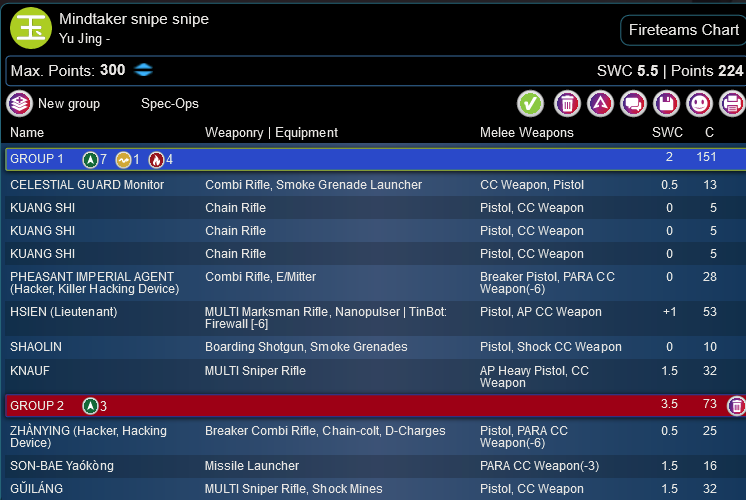
The extra burst, +2 BS, and +2 (effective) ARM is the swing here. I lose the face to face and the Druze goes down. This does let me aggressively dodge Wolfgang forward though, which is pretty nice.
James tries to take him out with a Tac Aware from a Weibing, so I dodge again, getting closer and closer to James’s lieutenant.
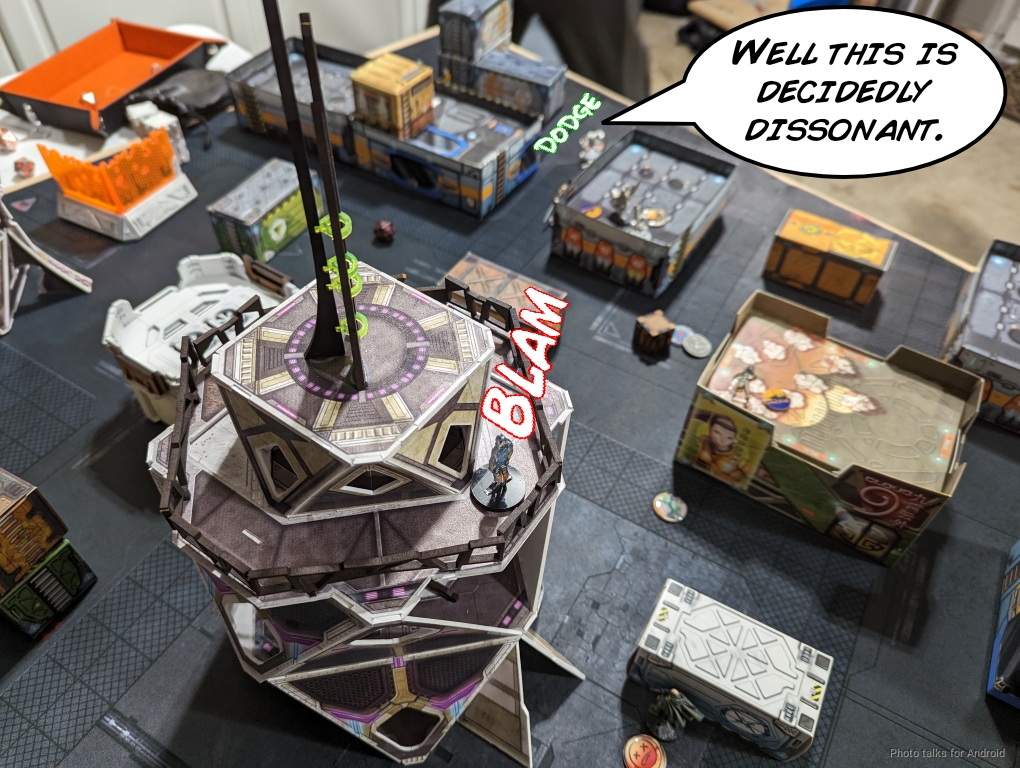
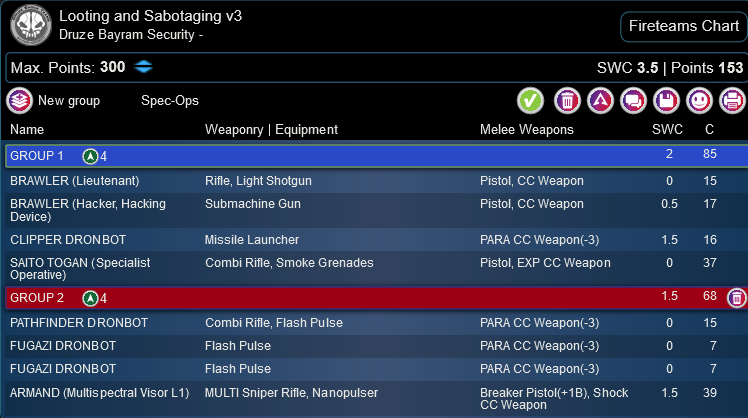
Lunah stands up (I had moved Le Muet out of LoF so I’m no longer covering her) and splits burst between the Druze KHD and Wolfgang. Both get hit, both take a wound. This kills the remaining Druze and does a wound to Wolfgang, who fails guts around the corner away from Lunah’s LoF.
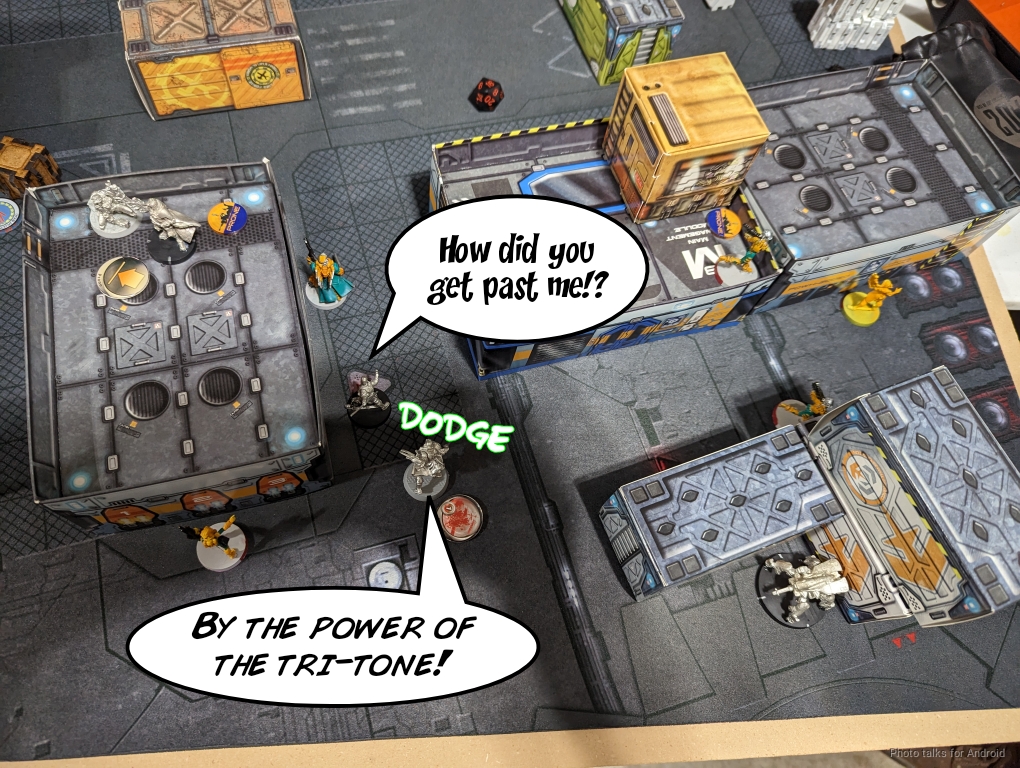
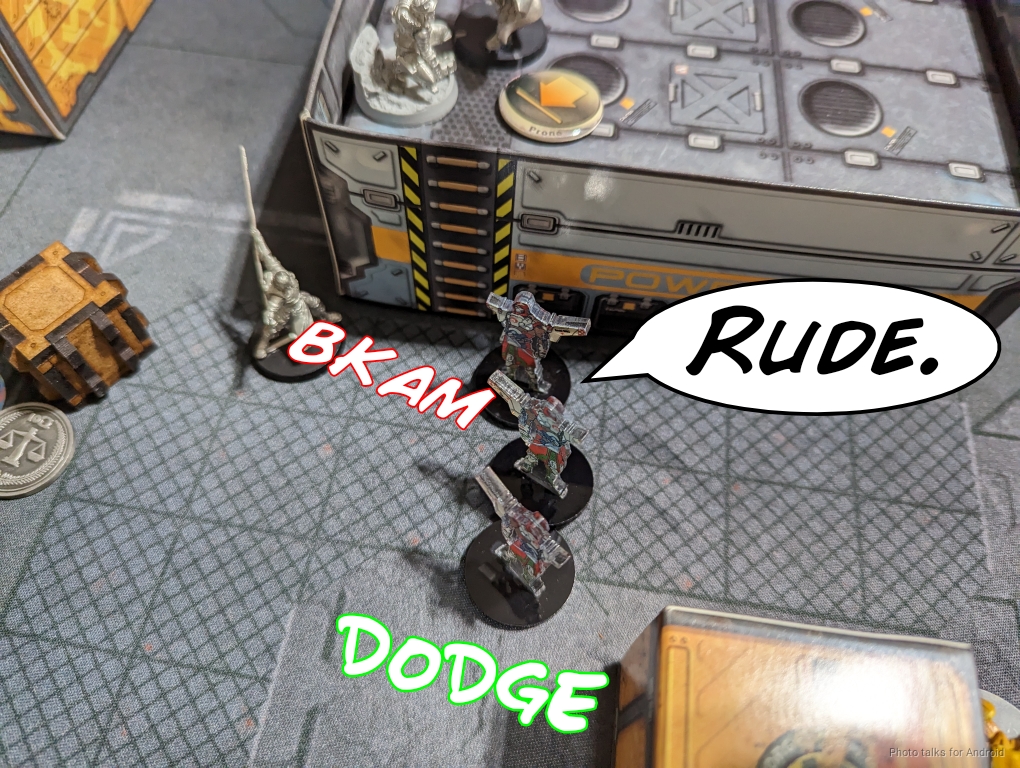
Lunah keeps pushing, climbing off her building to take another shot at Wolfgang who dodges to the other side of the Hsien. I considered dodging into close combat with the Hsien, but there’s a Shaolin right there and I doubt even Wolfgang can handle burst two from a Shaolin.
James tries to move into base to base with the Shaolin, but I’m just out of range so I dodge behind the Shaolin and threaten a chain colt on the Shaolin and the Hsien if either activate.
Lunah takes her anger out on Aida, killing her.
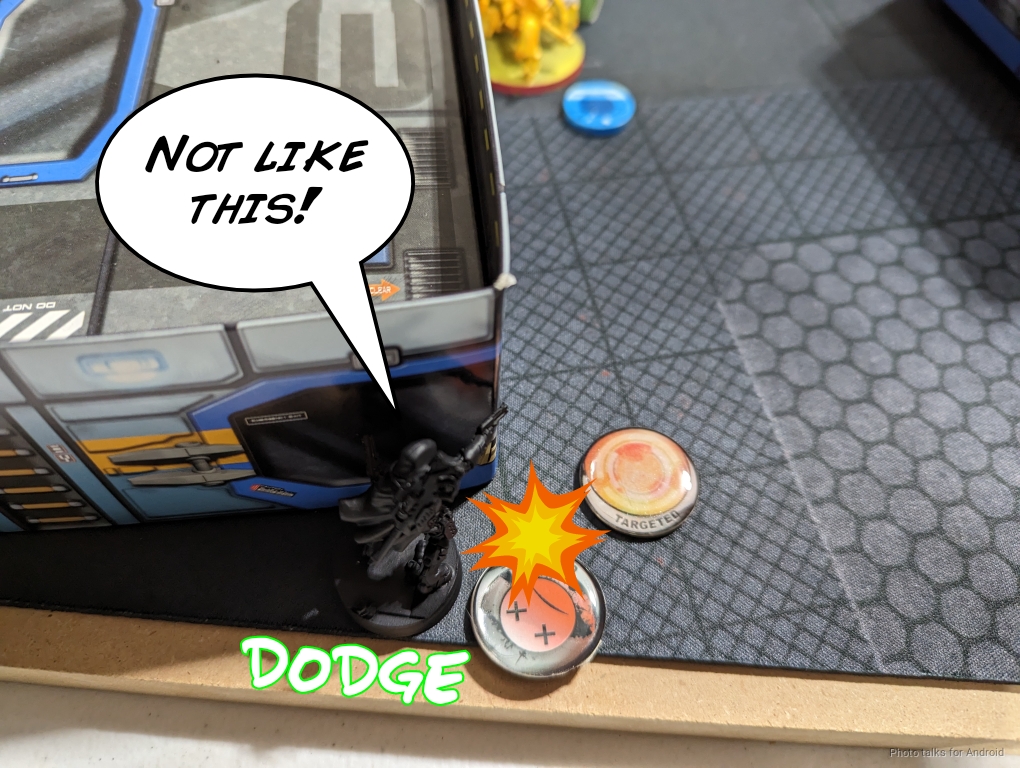
What finally does Wolfgang in is the Guilang MSR revealing itself on the tower and stacking surprise shot to reduce his dodge.
The mine covering the Beasthunter needs to go as well, to unpin it, so James sensors it…
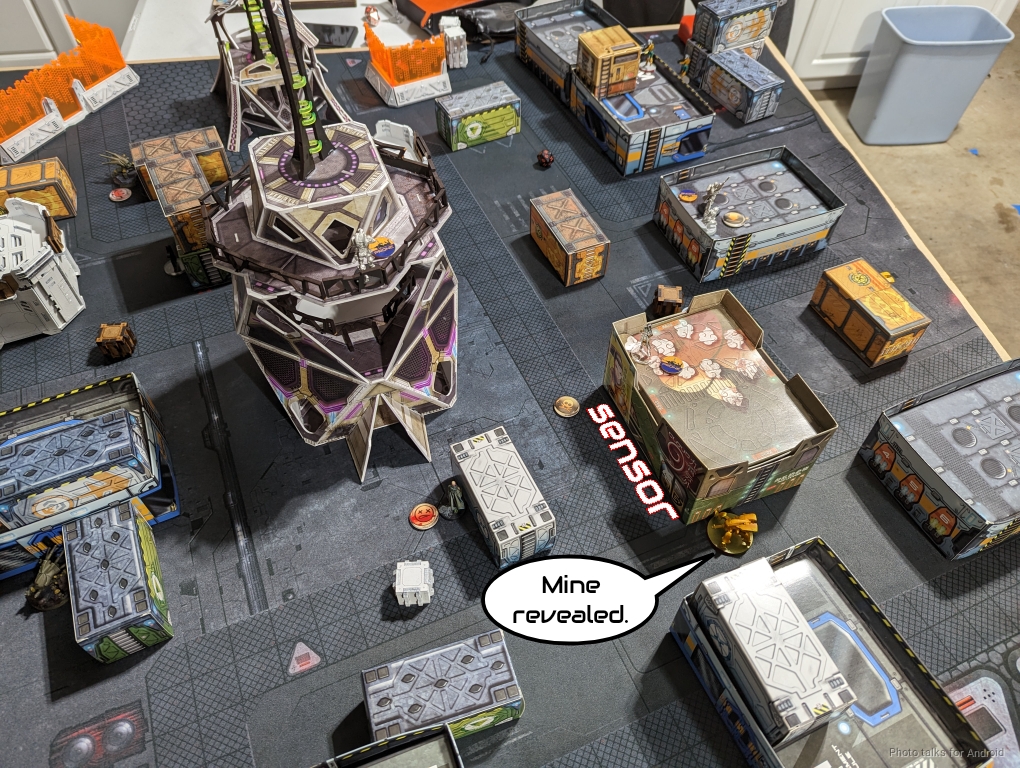
and then shoots it with the Weibing.
That’s the turn!
Turn 2
Top of 2 – Druze
Well, as feared, I lost the entire core link without killing any of James’s stuff. I did, however, drain his entire order pool. Wolfgang dodging on 17s is just bonkers good and let me parkour around. Then the mine had to go which drained the rest of his orders.
I now have a very specific set of things I need to do, which is to kill exactly the right things, specifically the Beasthunter, which will make it quite difficult for James to attack my AC2. The only other options he’s got is to get D-Charges out of the Panoplies or to roll the Zhanying up with its D-Charges. I start by bringing on the free Bashi and taking out Lunah.
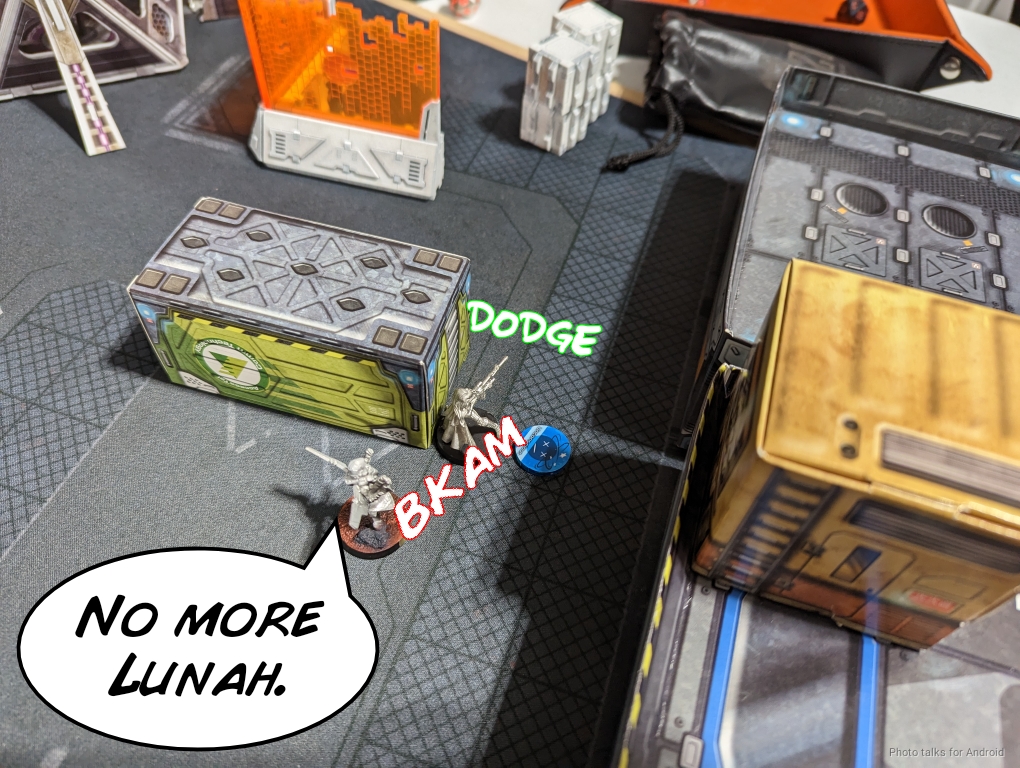
I then get Armand onto a building and find an angle on the Beasthunter and take it out. Thank goodness I passed my Discover roll!
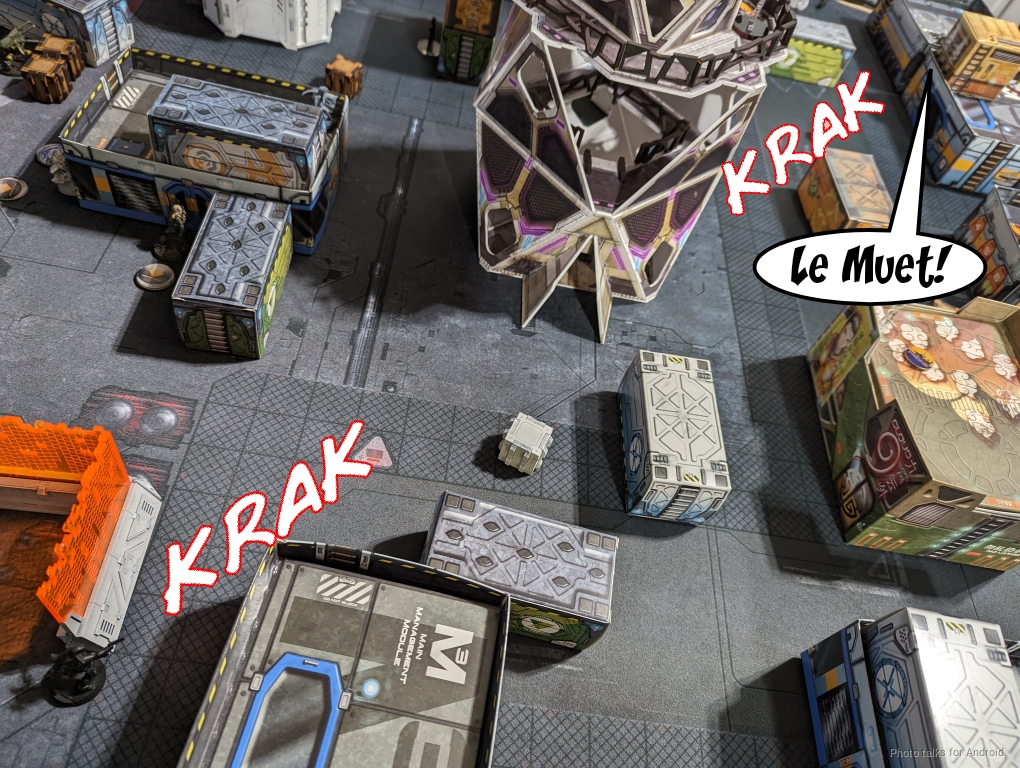
I do get spotlit, which is really bad. That said, if James decides he wants to spend orders on dealing with Le Muet that’s fine. I find an annoying spot for the Bashi and then take away his Weibing before passing turn by blapping it with Le Muet’s breaker pistols.
Bottom of 2 – Yu Jing

Okay, the pressure is off a little with the Beasthunter down, but I still have to worry about the Zhanying, which James moves into the other group along with the Guilang. James also needs to deal with the Bashi, which he easily does with the Shaolin.
James spends his one order on the Son Bae to take out Le Muet… I only needed to make this dodge and… sigh. Oh well.
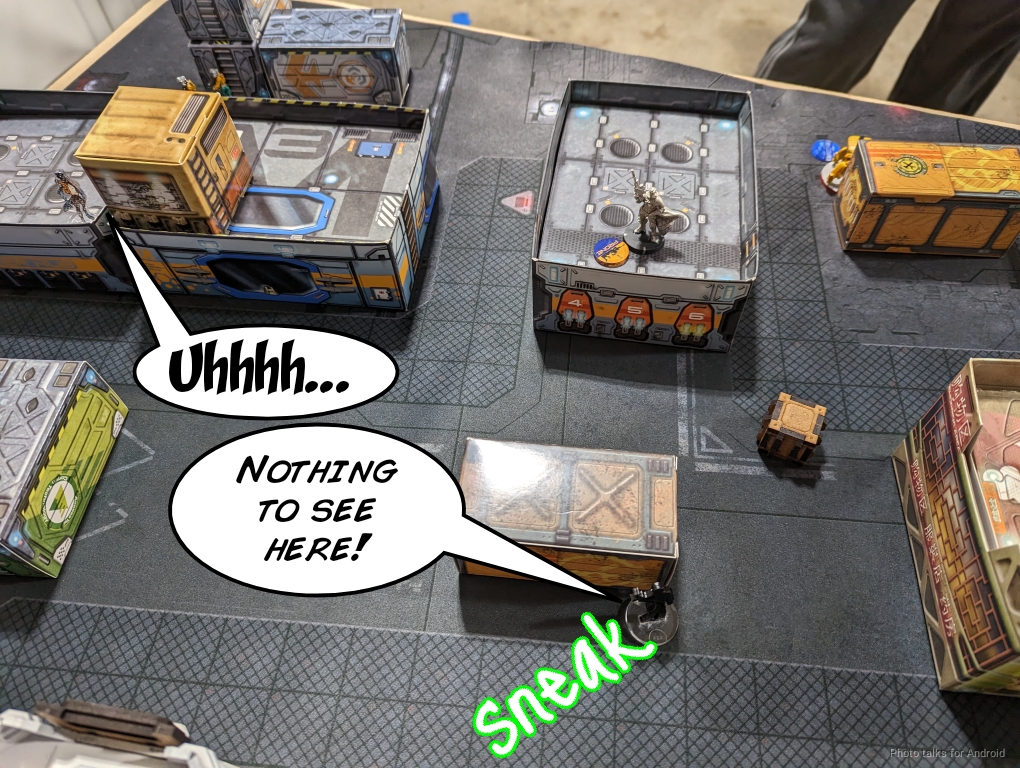
James then starts attacking my order pool. First a Fugazi dies to the Guilang MSR on the tower.

I figure I’m about to lose the Clipper to the Guilang too, but I get super lucky and sneak a missile through, and that’s all I need to stop the bleeding.
James sinks the rest of his orders into advancing the Zhanying hacker and hides her in a building.
He sets up the Hsien in suppression watching the AC2 and passes turn.
Turn 3
Top of 3 – Druze
I’m now scraping the bottom of the barrel here.

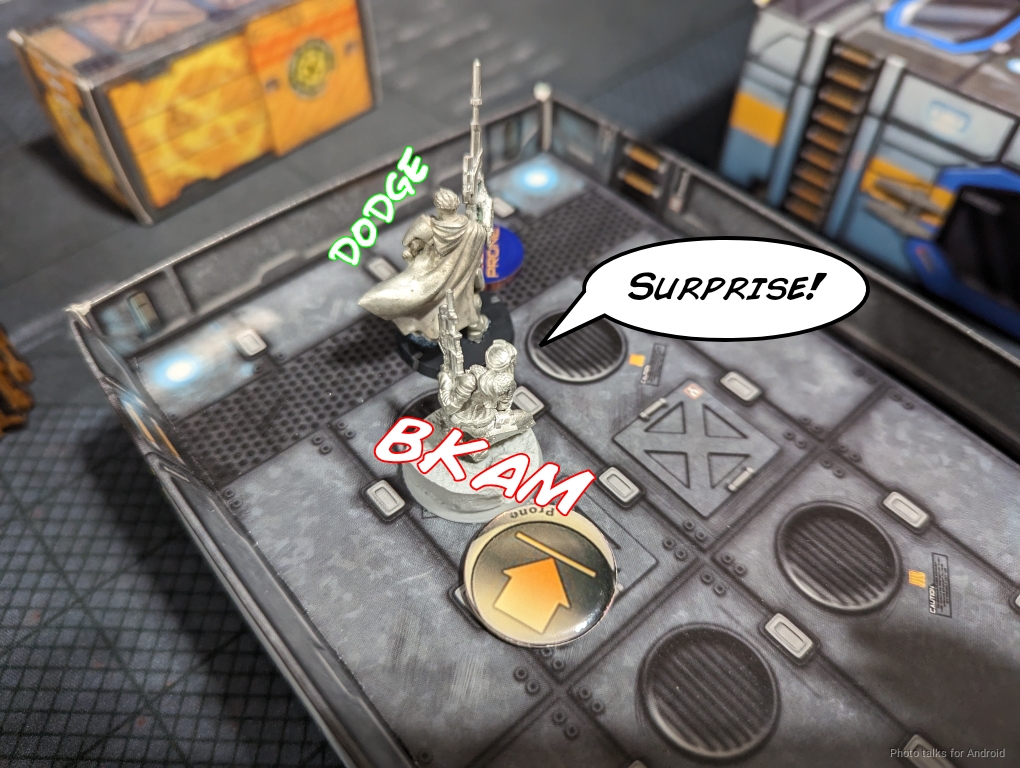
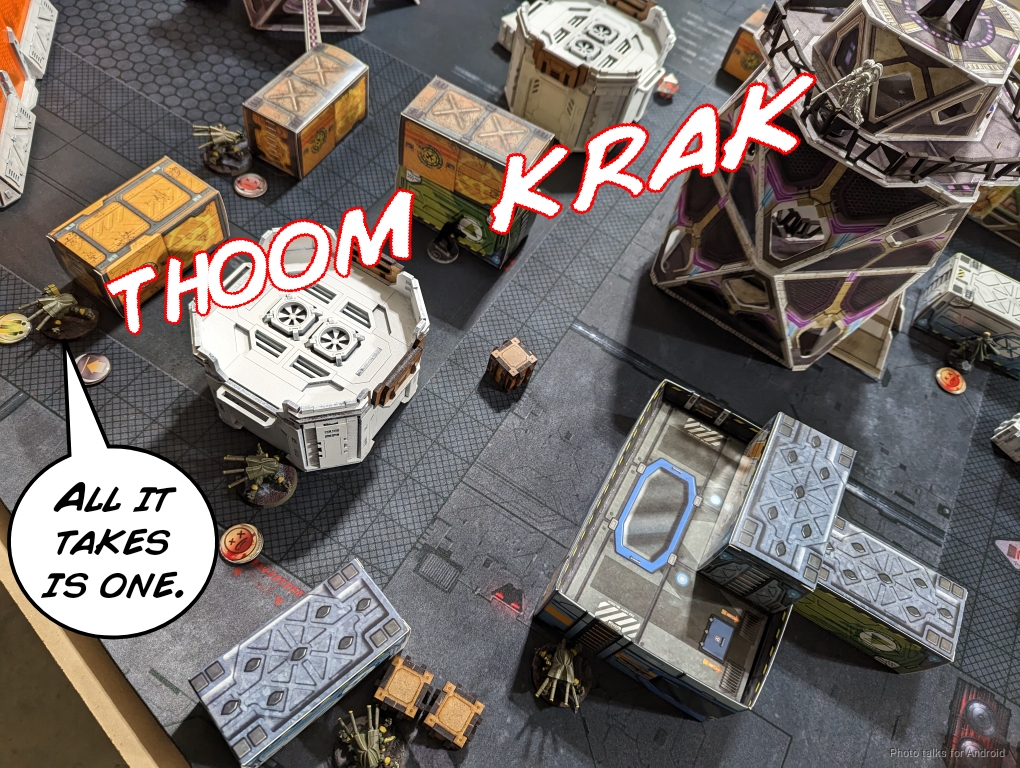
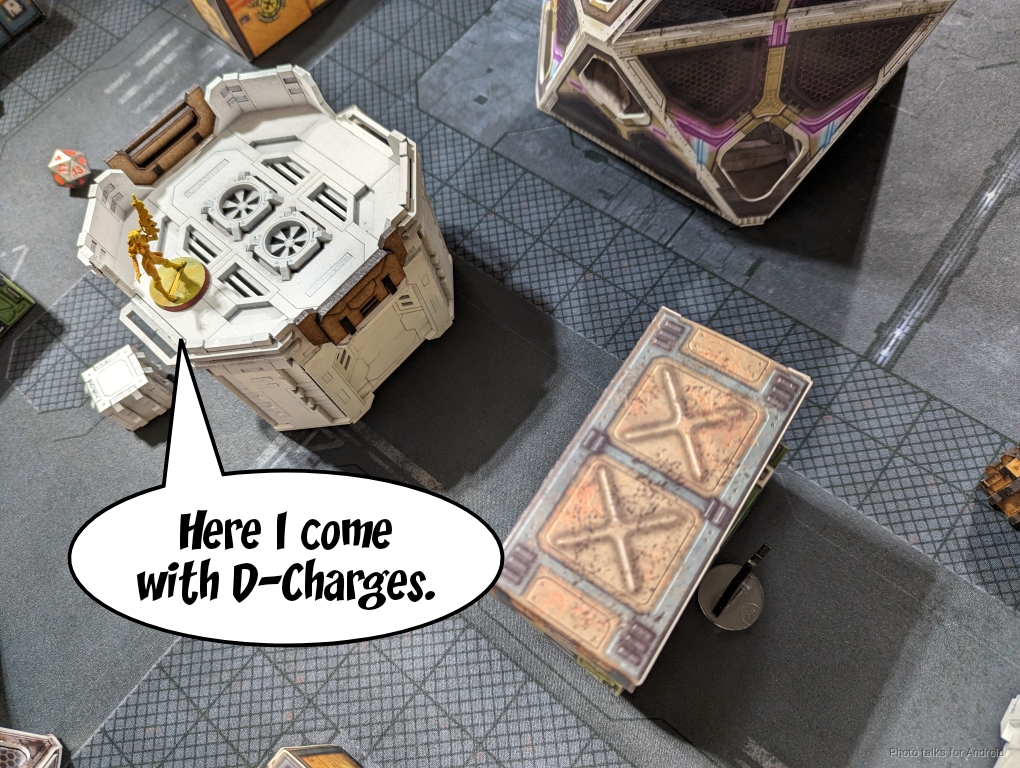
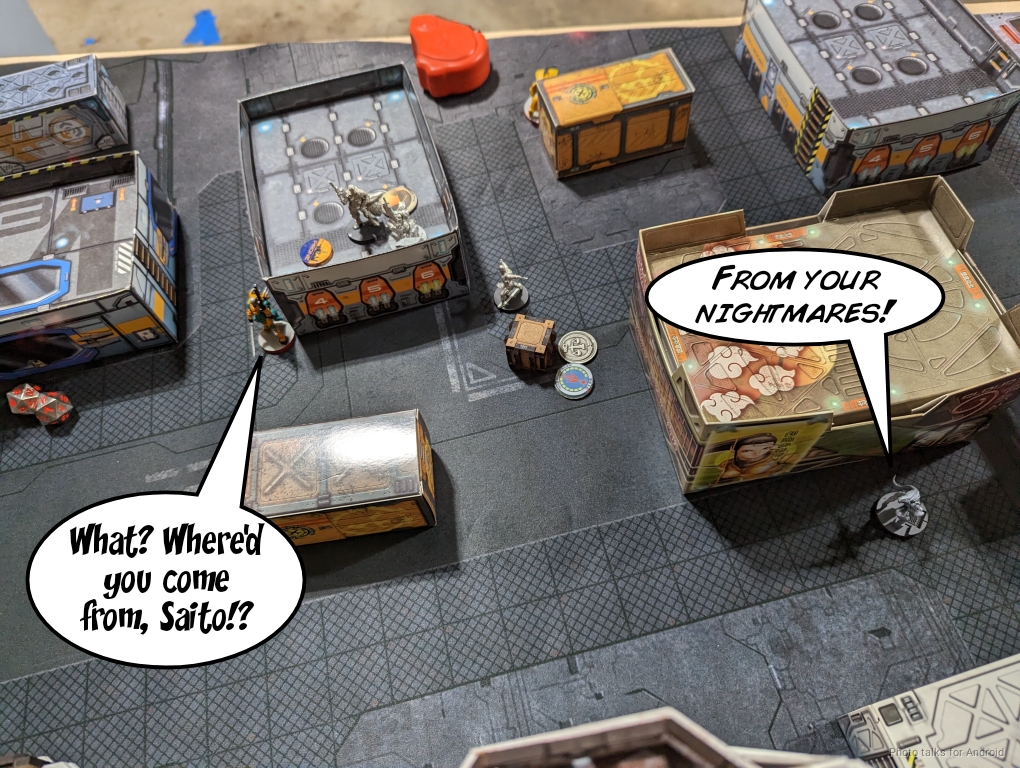
It’s time to reveal my trap card! Saito appears and makes his way towards the AC2. The Hsien breaks suppression to discover, but I end out of LoF.
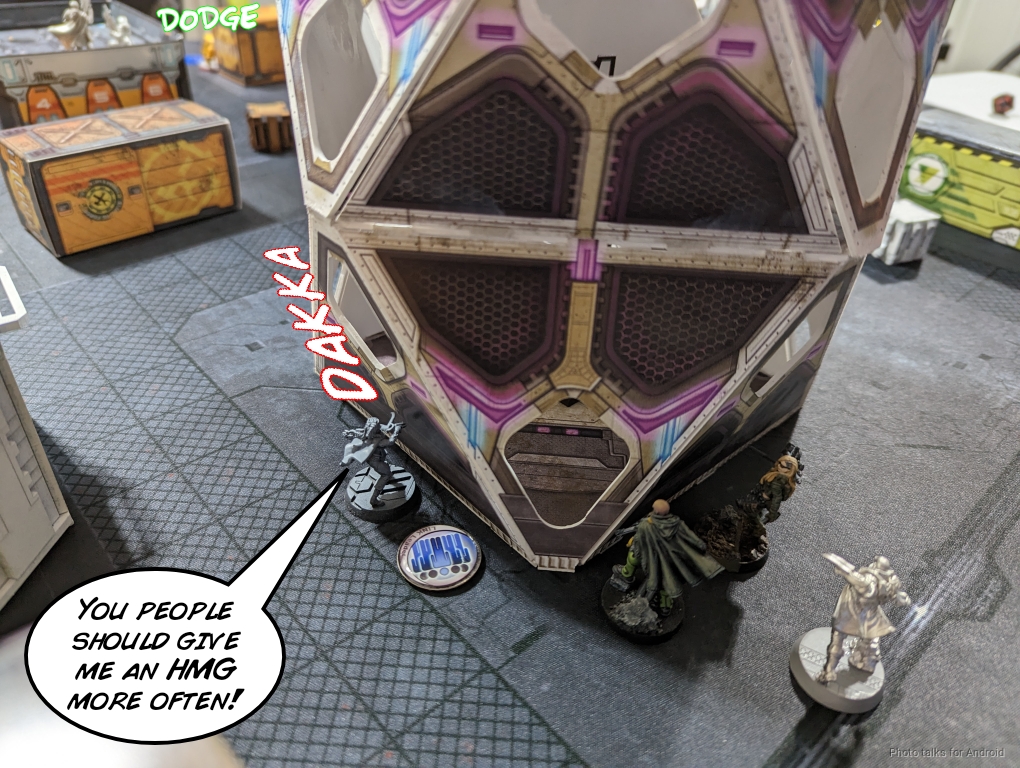
I get some efficiency out of my remaining link and vaporize the Hsien with the Clipper while advancing the Brawlers towards the Zhanying.

Saito rolls in, chucks smoke onto the AC2 and finishes it off. I don’t have enough orders to take on the Zhanying so I just set up a loose defensive net with the Brawlers and hope for the best. After I throw my remaining Pathfinder into suppression I have to pass turn.
Bottom of 3 – Yu Jing
Well, it’s big kid pants time for James.
Saito isn’t really bothering the Zhanying, but James has an opportunity to take him out on principle with the Shaolin, so he tries with the impetuous order. Saito does ninja things and asplodes the monk though.

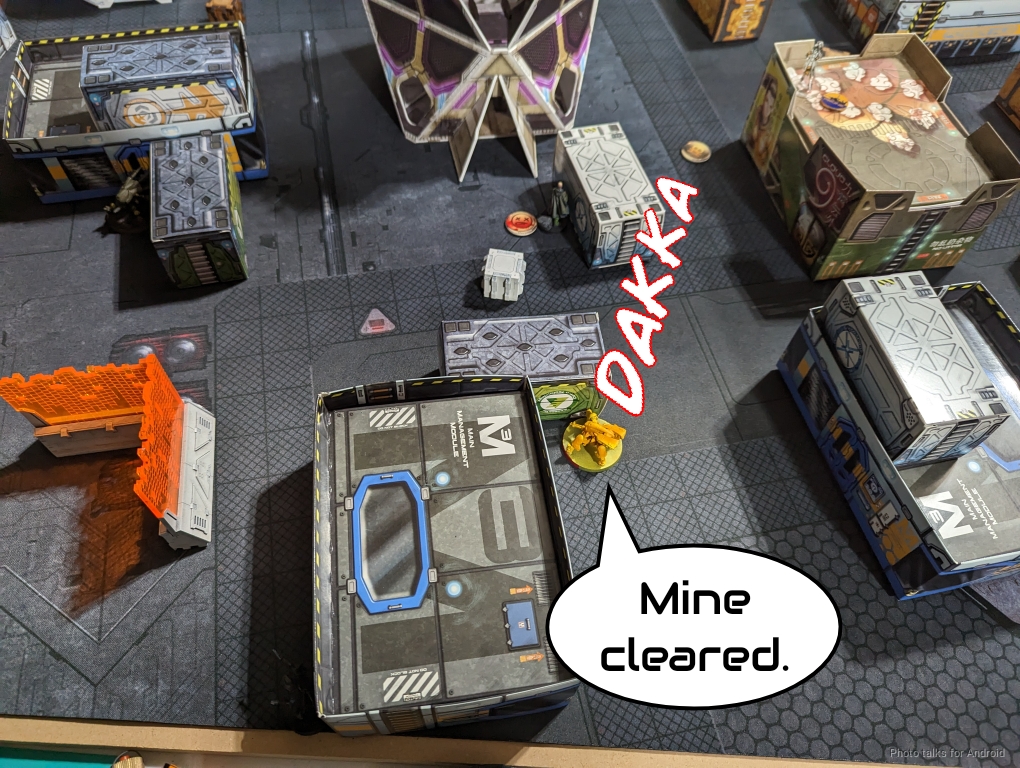
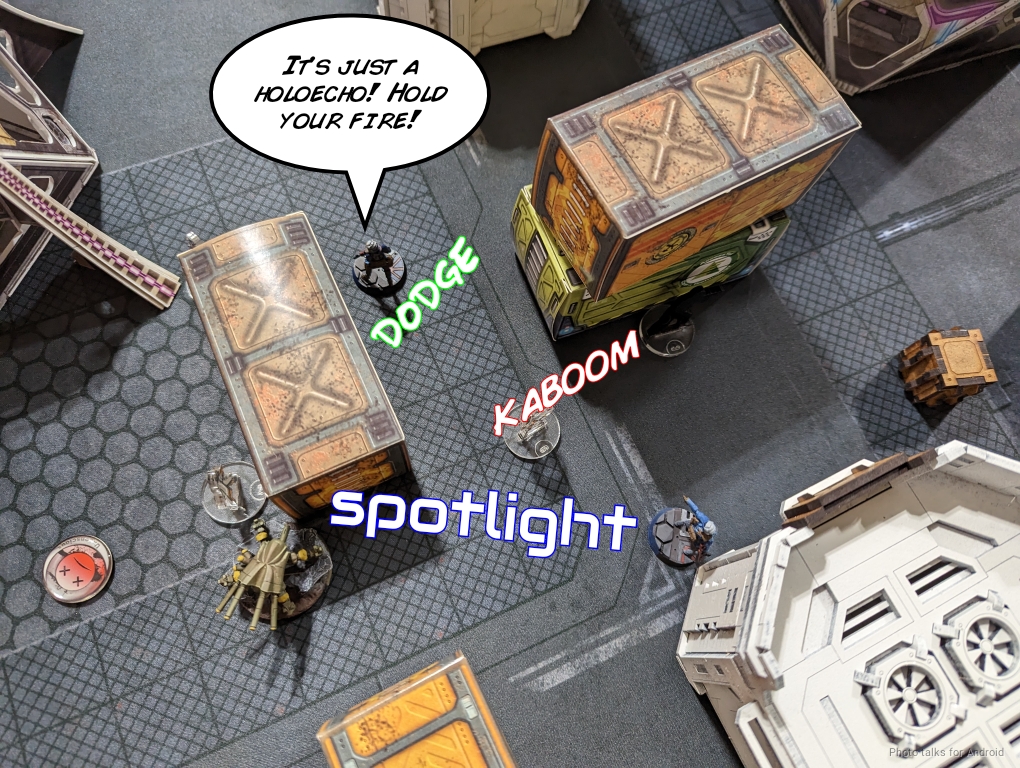
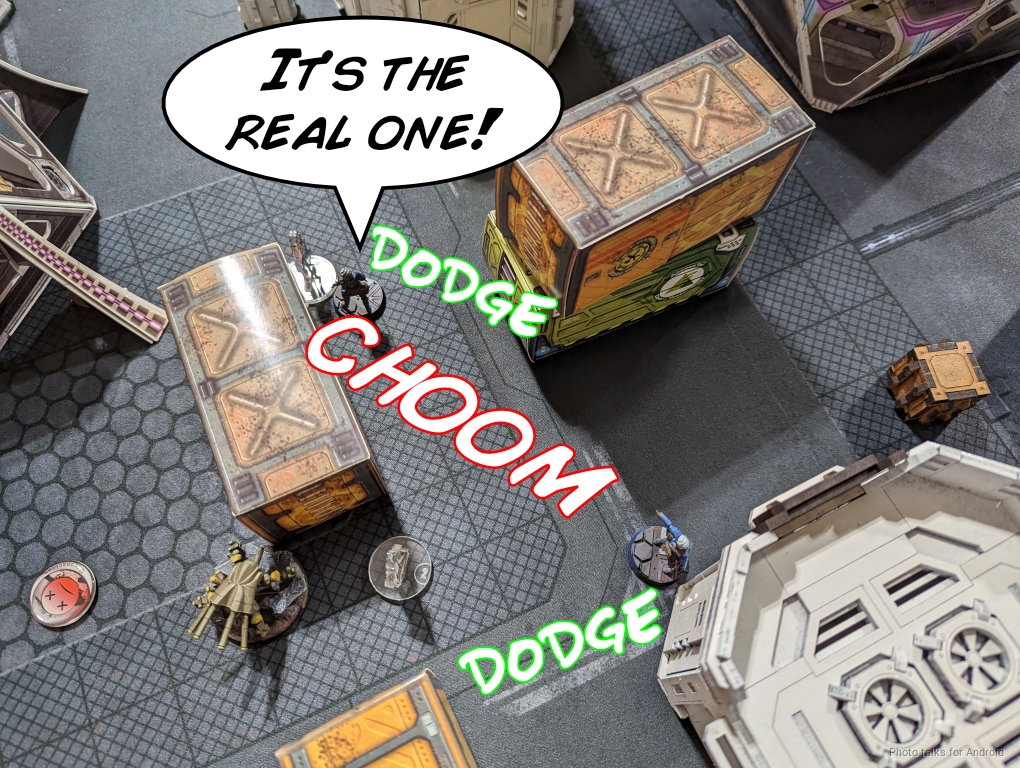
James brings on his own Bashi and clears out my defensive mine from Aida with a Holoecho while I flub a spotlight with the Brawler hacker.
The Bashi comes around the corner and blaps both Brawlers with a shotgun template but doesn’t manage to take either out.
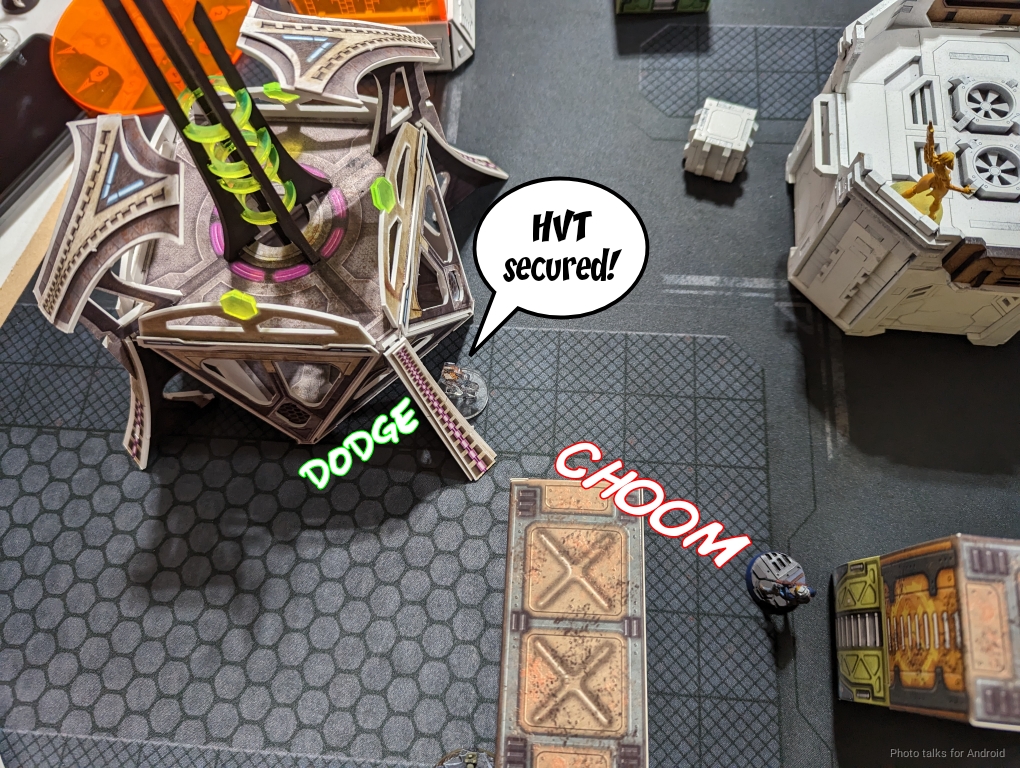
To stack some points James puts the Bashi near my HVT, dodging my Brawler Lt’s shotgun template.
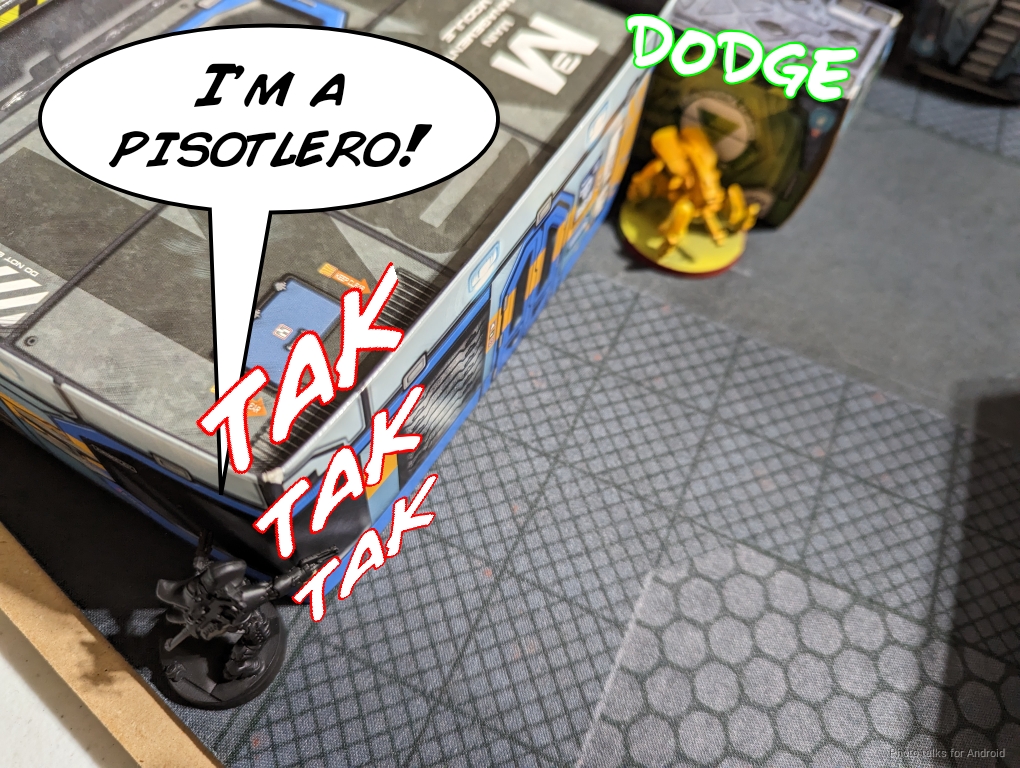
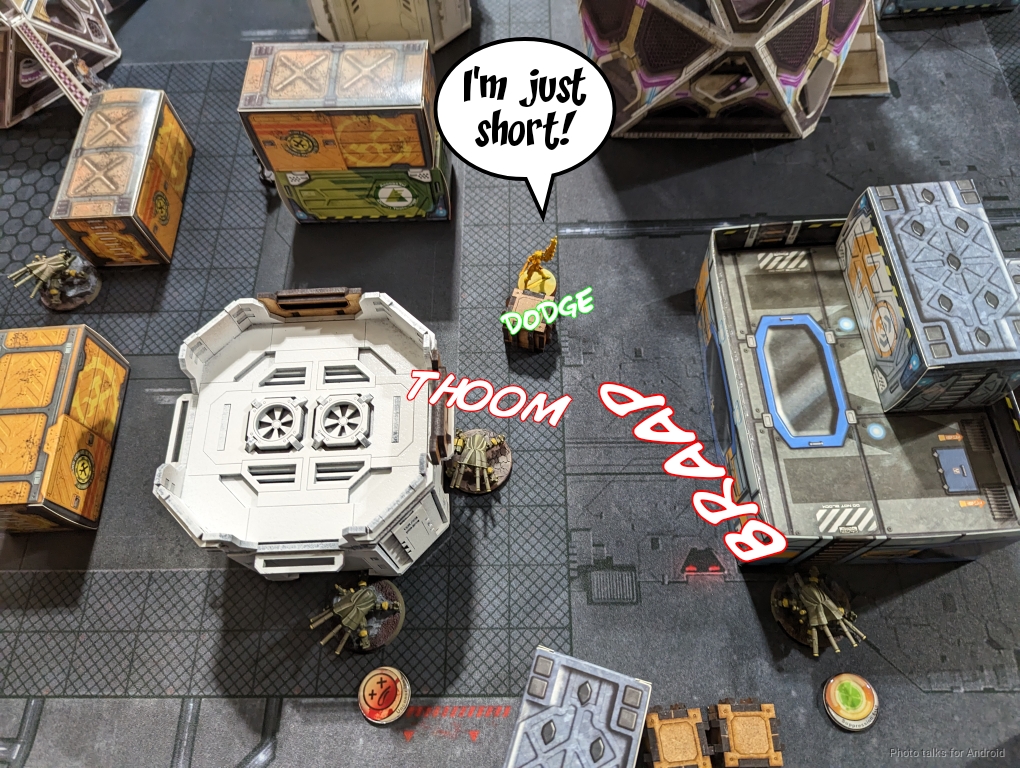
The Zhanying makes her run but is just short and gets chewed to pieces by the Pathfinder in suppression.
8-1, 107-104 Druze Bayram Security Victory!
Post Game Analysis
Well, my gamble paid off. I managed to achieve slightly worse than neutral board state at the top of 2. I was then able to achieve a pretty significant board state improvement by sacrificing Le Muet to take out the Beasthunter. I was never able to attack James’s order pool particularly effectively and was forced to remove tools instead.
I got very lucky with Wolfgang dodging very well throughout the bottom of 1. I think if it hadn’t gone that well for me James could have leveraged the Guilang to do some more damage. I think that’s actually the biggest takeaway from the game for me–I should have just sent Aida up the tower. Having an HMG on the tower and a dead Guilang would have been very dangerous for James. I could even have dragged the link with me and set up a defensive net to further annoy the Beasthunter.
So in short, I think I made a very dangerous play and the dice gave me a window to exploit. I had the presence of mind to take the opportunity, and that was game. I think the other thing that really gave me the game was that I had multiple layers of redundancy in terms of things that could attack the AC2. James had much less, which helped me quite a bit in being able to remove his tools.
Sometimes risks pay off. While I could just chalk this game up to good dice for me followed by a good play, really what I’m getting from this game is how to identify a better play that involves less risk and sets me up for a better position more consistently. Aida’s gotta grow up and climb the tower! Or something. I dunno. Trying to work in the batrep title. How’d I do? Thanks for reading.