
Three Points of Contact
Game two of the Salem Shitshow was against a lovely person named Sam. You can see my horrible loss on round one here:
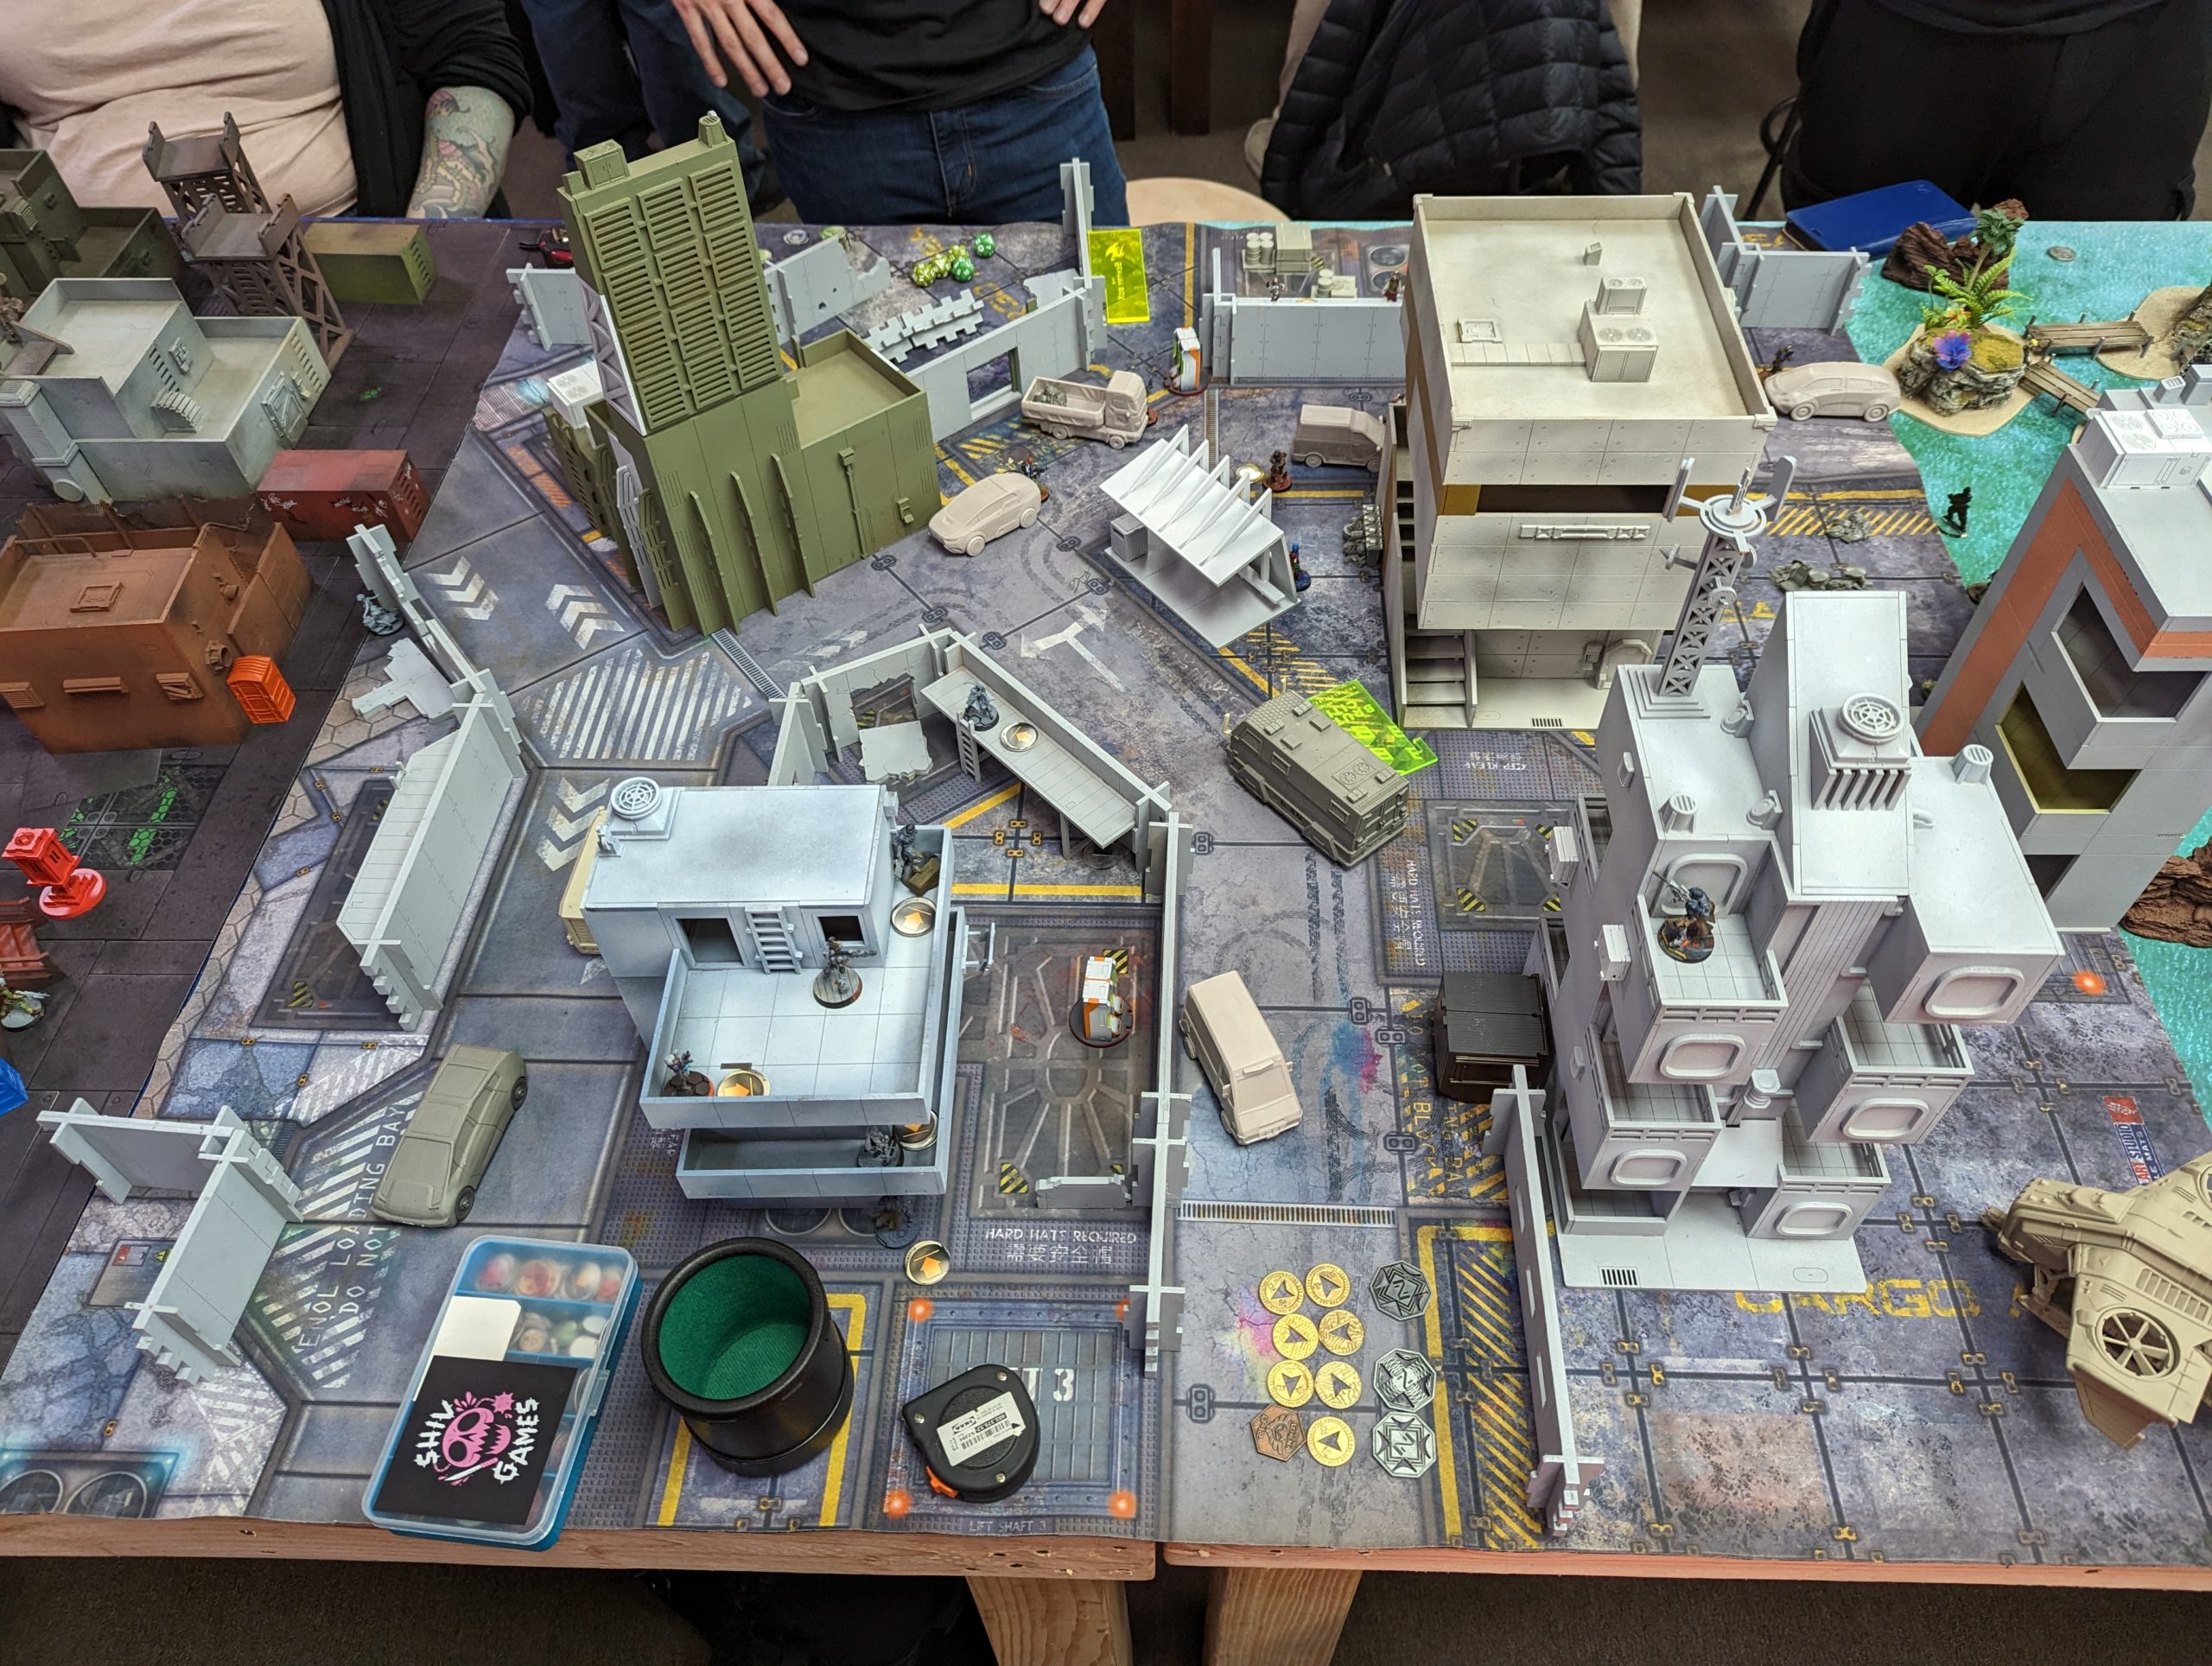
We were playing on Adam (TheDiceAbide)’s Brutal Cities tables, with which I’ve got a bunch of experience. It was also set up to really reward one side with incredible opportunities to get elevation.

Overview
- Mission: ITS14 Decapitation
- Forces: Nomads versus Caledonian Highlander Army (300)
- Deploy First: Caledonian Highlander Army
- First Turn: Caledonian Highlander Army
I’m taking my triple Hellcat list, because I love it and it’s well-suited for Decapitation. Just a reminder that all these lists are random.
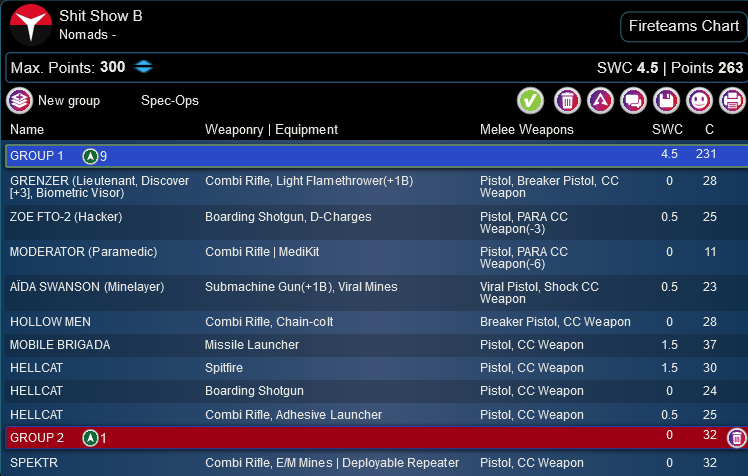
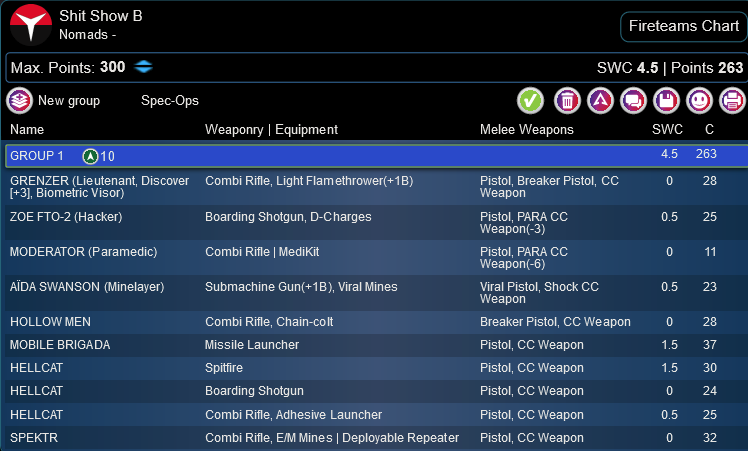
Shit Show B
GROUP 1
10
GROUP 2
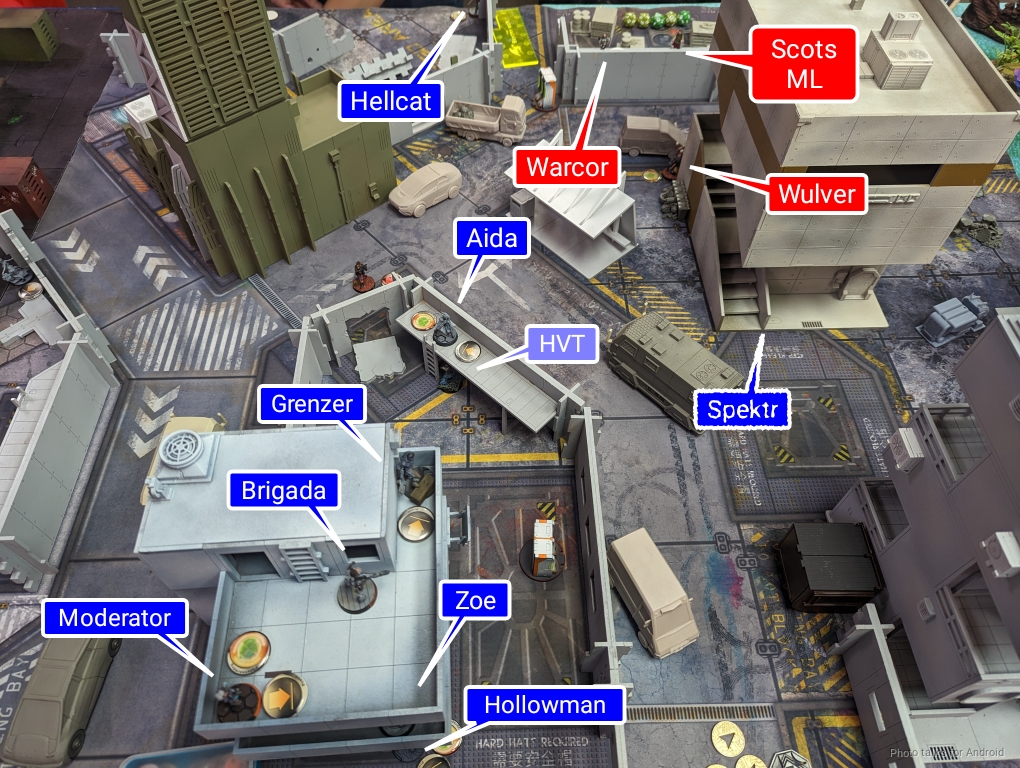
GRENZER (Lieutenant, Discover [+3], Biometric Visor) Combi Rifle, Light Flamethrower(+1B) ( ) / Pistol, Breaker Pistol, CC Weapon. (0 | 28)
ZOE FTO-2 (Hacker) Boarding Shotgun, D-Charges / Pistol, PARA CC Weapon(-3). (0.5 | 25)
MODERATOR (Paramedic) Combi Rifle ( | MediKit) / Pistol, PARA CC Weapon(-6). (0 | 11)
AÏDA SWANSON (Minelayer) Submachine Gun(+1B), Viral Mines / Viral Pistol, Shock CC Weapon. (0.5 | 23)
HOLLOW MEN Combi Rifle, Chain-colt / Breaker Pistol, CC Weapon. (0 | 28)
MOBILE BRIGADA Missile Launcher / Pistol, CC Weapon. (1.5 | 37)
HELLCAT Spitfire / Pistol, CC Weapon. (1.5 | 30)
SPEKTR Combi Rifle, E/M Mines ( | Deployable Repeater) / Pistol, CC Weapon. (0 | 32)
6 SWC | 298 Points | Open in Army | Copy Code
Sam’s list is actually pretty nice for Decapitation as well. A mimetism Lieutenant, a good ARO option, and lots of beefcakes that can really hammer the nail home.
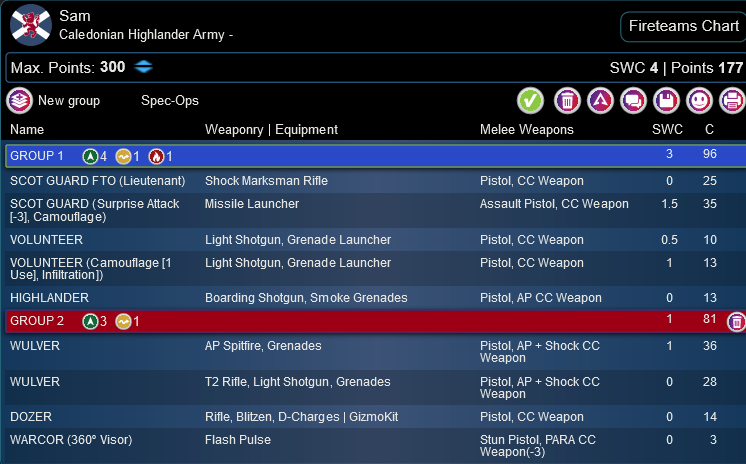
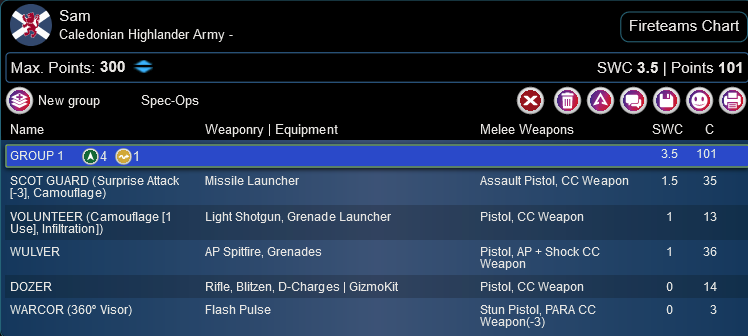
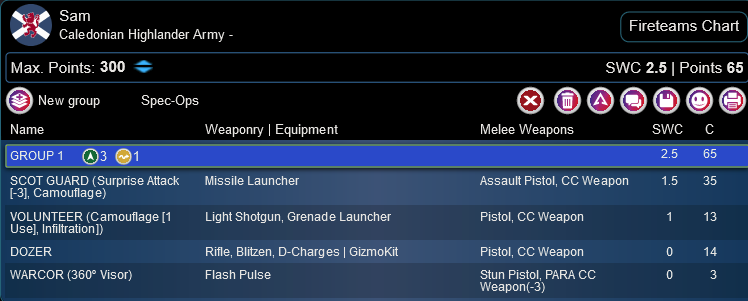
Sam (Sam Roe)
GROUP 11
1
SCOT GUARD FTO (Lieutenant) Shock Marksman Rifle / Pistol, CC Weapon. (0 | 25)
CALEDONIAN MORMAER (NCO, X Visor) T2 Rifle, Chain-colt ( ) / Heavy Pistol, AP CC Weapon. (0 | 36)
HIGHLANDER GREY Heavy Machine Gun, Smoke Grenades / Pistol, AP CC Weapon. (1.5 | 28)
VOLUNTEER Heavy Machine Gun / Pistol, CC Weapon. (0.5 | 19)
GROUP 2
HIGHLANDER Boarding Shotgun, Smoke Grenades / Pistol, AP CC Weapon. (0 | 13)
WULVER AP Spitfire, Grenades / Pistol, AP + Shock CC Weapon. (1 | 36)
DOZER Rifle, Blitzen, D-Charges ( | GizmoKit) / Pistol, CC Weapon. (0 | 14)
WARCOR (360º Visor) Flash Pulse ( ) / Stun Pistol, PARA CC Weapon(-3). (0 | 3)
6 SWC | 296 Points | Open in Army | Copy Code
I do disagree with the combat group breakdown, though–I think that the Wulvers are the stars of the show here. An organization like this I think is stronger:
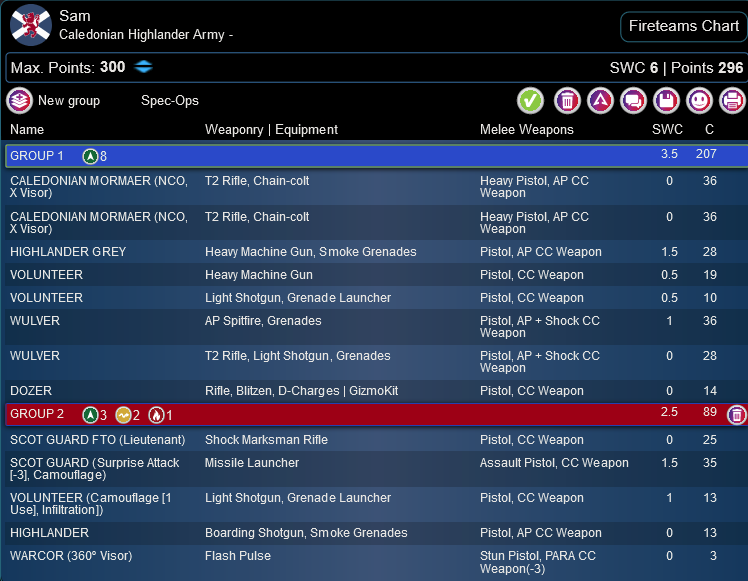
This gives plenty of orders to the Wulvers, and you can missile the Highlander in on Turn 1 followed by the Volunteer on the following turn.
Deployment
In any case, I won the rolloff and immediately selected deployment to give me the best possible chance of my lieutenant surviving. Sam set up the Mormaers on the left in a duo. The Galewegan defended one of his HVTs and the other HVT was defended by the Volunteer GL all the way on the left. Sam’s Warcor and Scots ML were out to ARO on a catwalk, and the Dozer further defended the HVT on the left with a Blitzen.
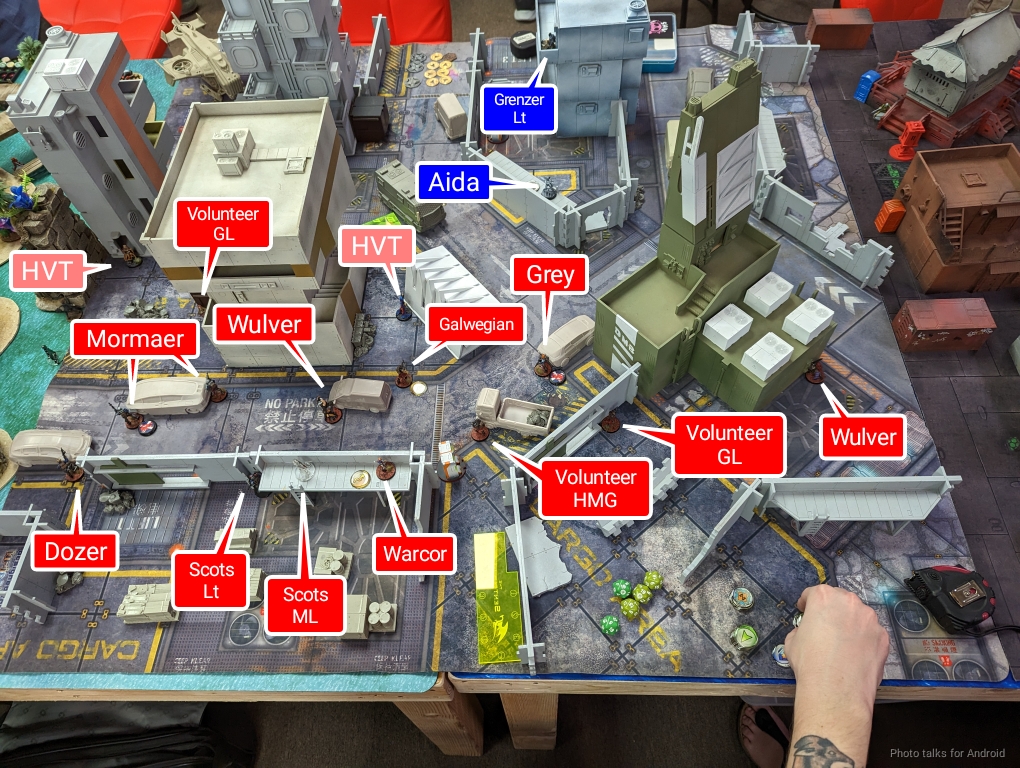
His Lieutenant was tucked up near the other Scot watching the door in the wall, and then the Grey/Volunteer link and the Wulver rifle went on the right. The Wulver AP Spitfire was the reserve.
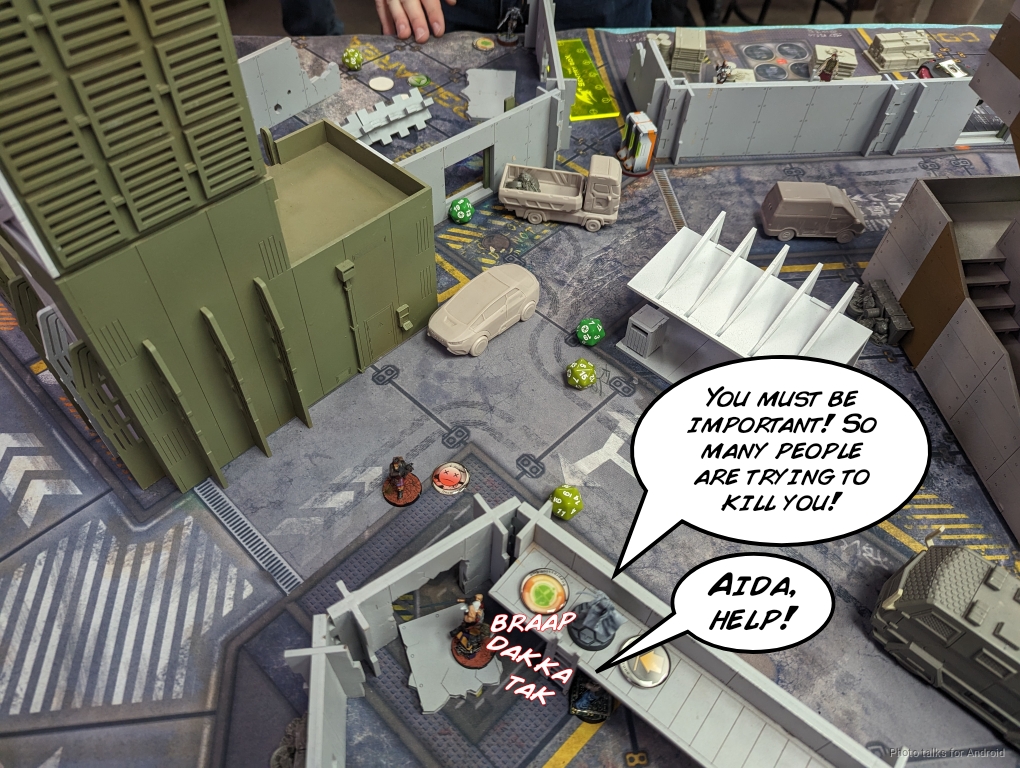
I set up a really beefy cross fire with the Grenzer and Brigada missile, then stacked Zoe, the Hollowman, and the Moderator paramedic on various floors of the building on the left to really make it a nuisance to get up there. I was prepared to lose both HVTs against Sam’s list, but I wanted to at least make it somewhat difficult, so I defended on with Aida, who rolled Mimetism -6. The other HVT was in a spot that you had to get past Aida and the Grenzer (which was my reserve).
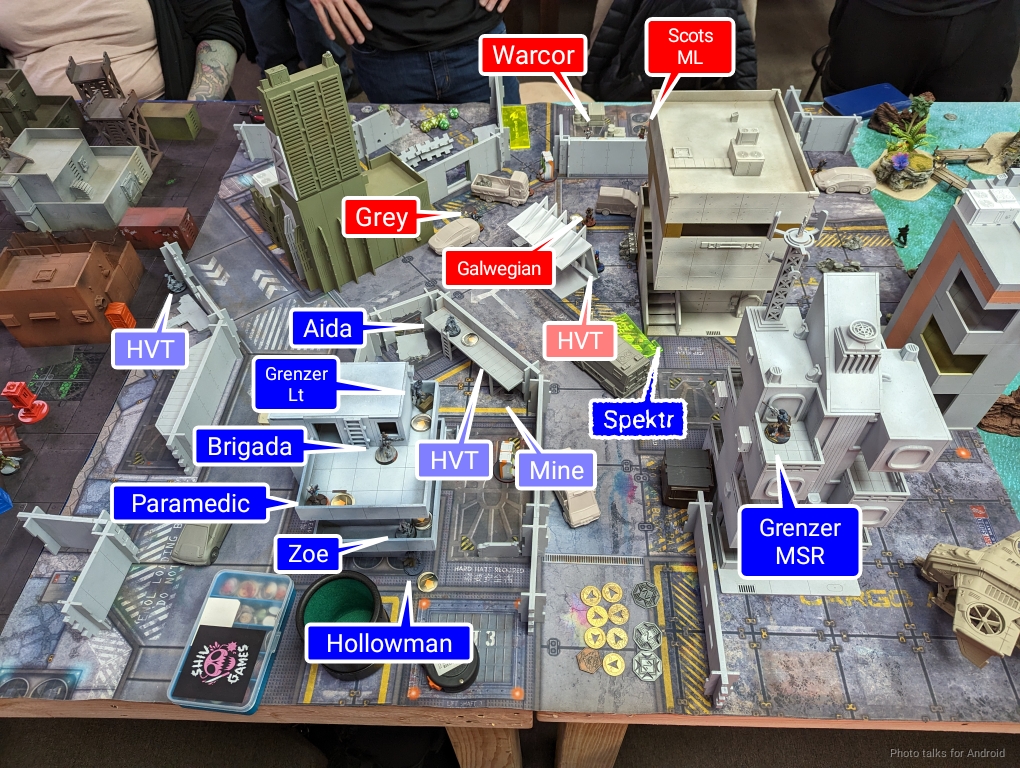
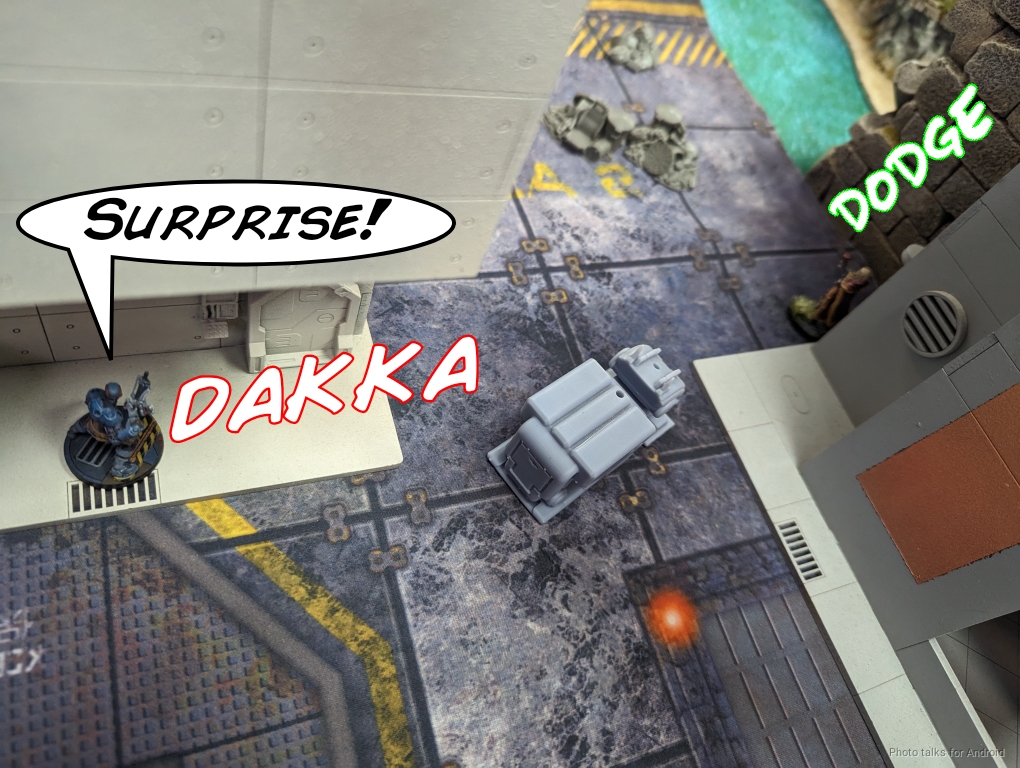
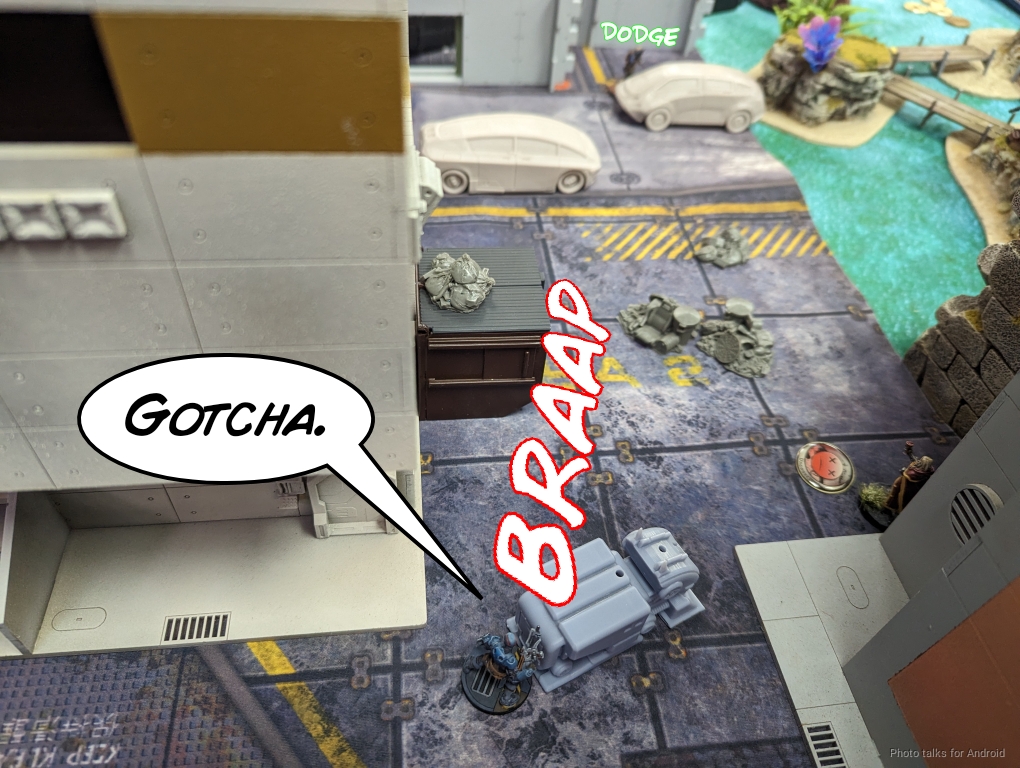
The Wulver AP spitfire, proxied by Cadin, came down in them middle of Sam’s deployment, and I put the Grenzer down to complete the crossfire, as planned.
Turn 1
Top of 1 – CHA
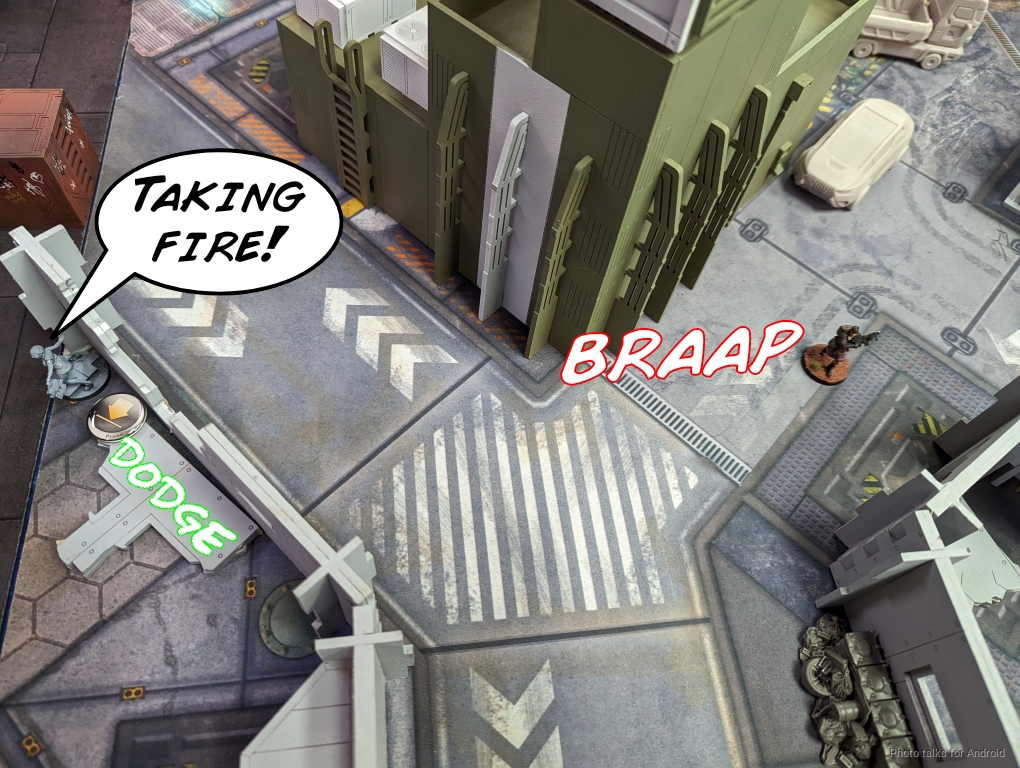
I docked two orders from the Wulvers just to deny Sam the ability to develop them at all, effectively making them a Turn 2 threat only, if that. I felt my Brigada and the Grenzer could sufficiently delay everything else. Sam starts off by attempting a smoke wihth the Galwegian’s impetuous, but fails the roll. This does allow the Galwegian to post up on the HVT though, which is good for Sam.
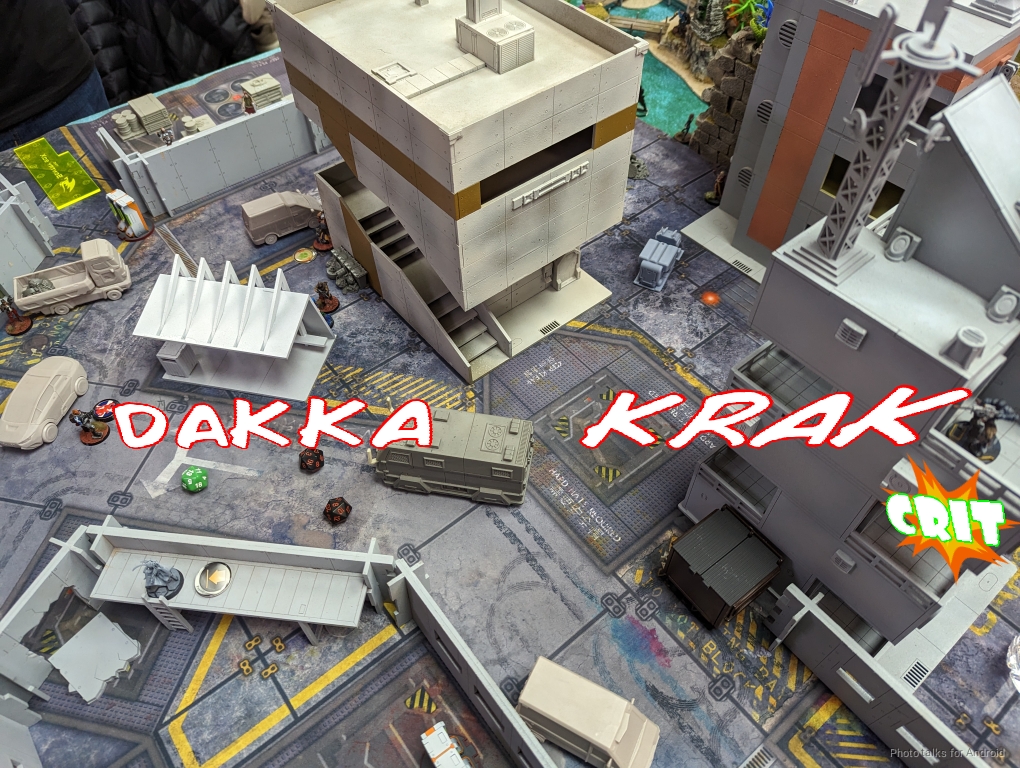
Sam then throws the Highlander Grey HMG under the bus to take out the Grezner–but the Grey rolls a crit, so that’s that!
Sam wisely decides to put some points on the scoreboard and goes after the HVT adjacent to Aida, but an HMG isn’t going to do much against a Mim -6 model in cover within 8″. Sam manages to hover at just outside of 8″, but Mim -6 is still Mim -6, and Aida plants a viral pistol round in the Grey’s gut, dropping him.
The Volunteer HMG tries next, and I actually fire the HVT’s stun pistol at it because the numbers are better. Between Aida’s viral pistol shot and the mine going off, the Volunteer evaporates with my HVT surviving.
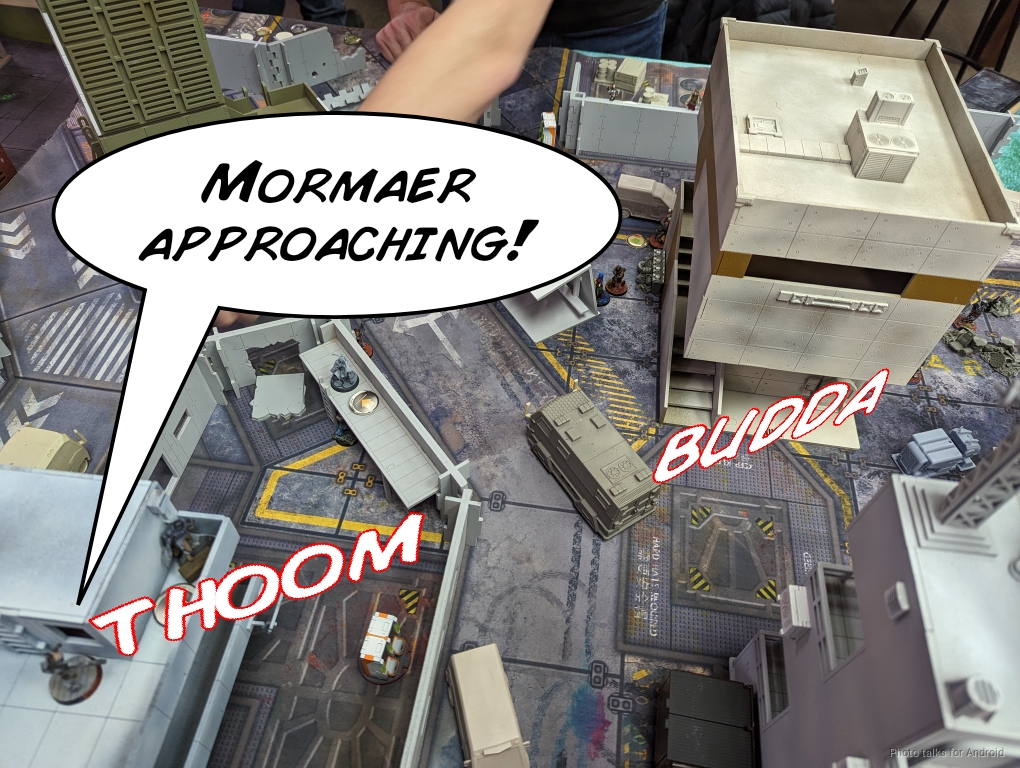
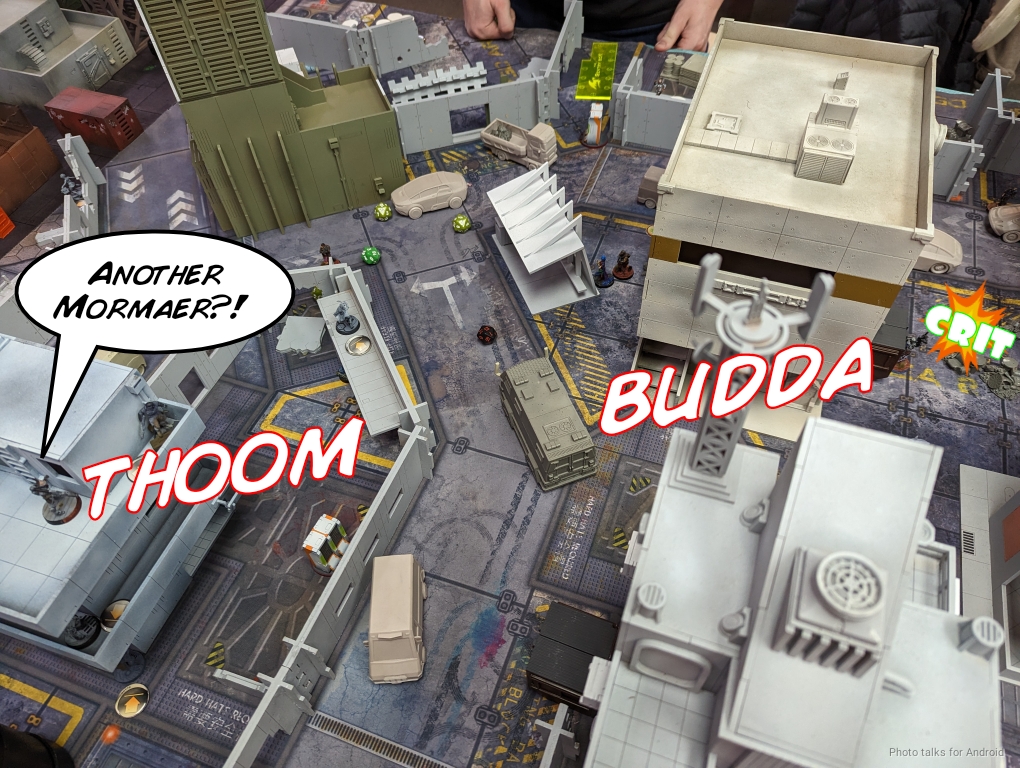
Sam decides he needs to push his way forward and get out of his deployment zone, and choose the Moramers to do it. The first one challenges the Brigada at outside of 24″, and even with X-Visor it’s not enough and the Moramer fails two saves and is off the table.
Sam makes a good decision and focuses on the objectives to let himself mentally recover from the bad dice. I do this as well, and I see it as a sign of a good player. He sends the remaining Grey/Volunteer link member after the HVT on the left by finding the spot that he can see it without getting punked by Aida, but I pass ARM and fail guts prone, denying LoF.
Sam returns to the Brigada problem and sends the remaining Moramer in. This time, I roll a missile crit, and that’s another Mormaer off the table. Brutal.
Remarkably cool and collected under the circumstances, Sam throws the Wulver AP Spitfire in suppression and passes turn.
Bottom of 1 – Nomads
Well. I can’t really argue with that first reactive turn. Now it’s time for the list to do what it’s been “designed” for. I drop the Hellcat Spitfire in and shoot the Scots Lieuteant in the back, achieving my primary objective.
Now it’s just a shooting gallery. FIrst to go is the non-AP Spitfire Wulver.
I can see the non-camo Volunteer GL, the HVT, and the Galwegian, all from behind, so I split burst, putting two into the HVT to be 100% sure.
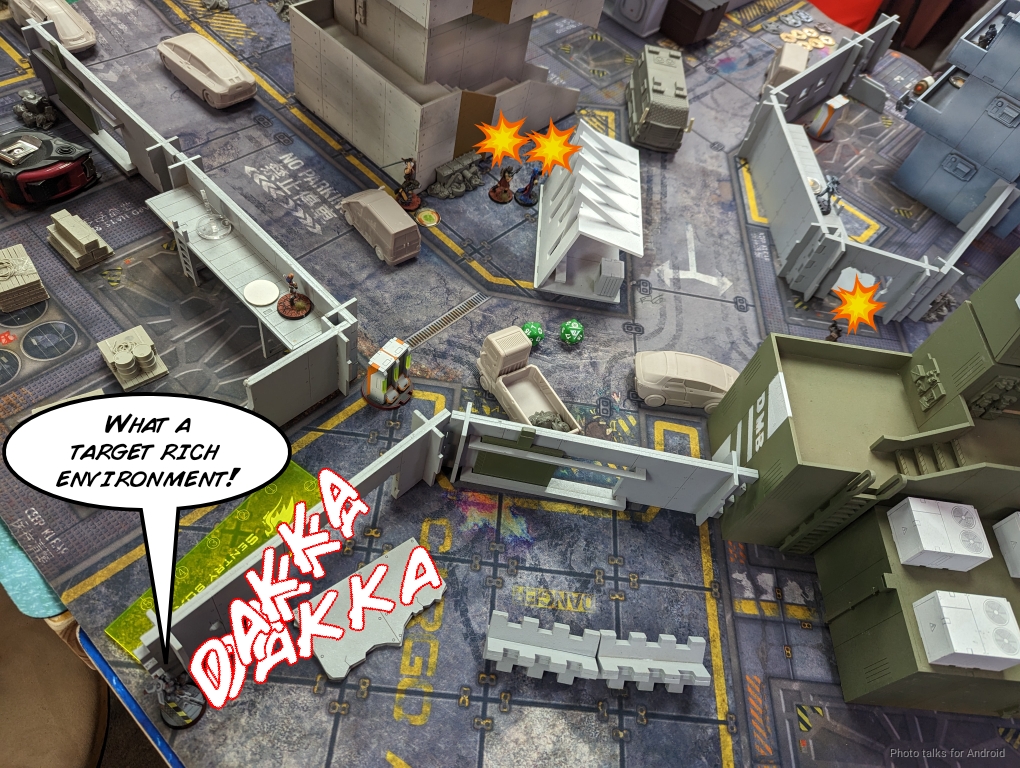
The Galwegian goes dogged, the Volunteer goes unconscious, but the HVT passes both saves. No matter, this lets me put a full burst into the HVT and address the issue.
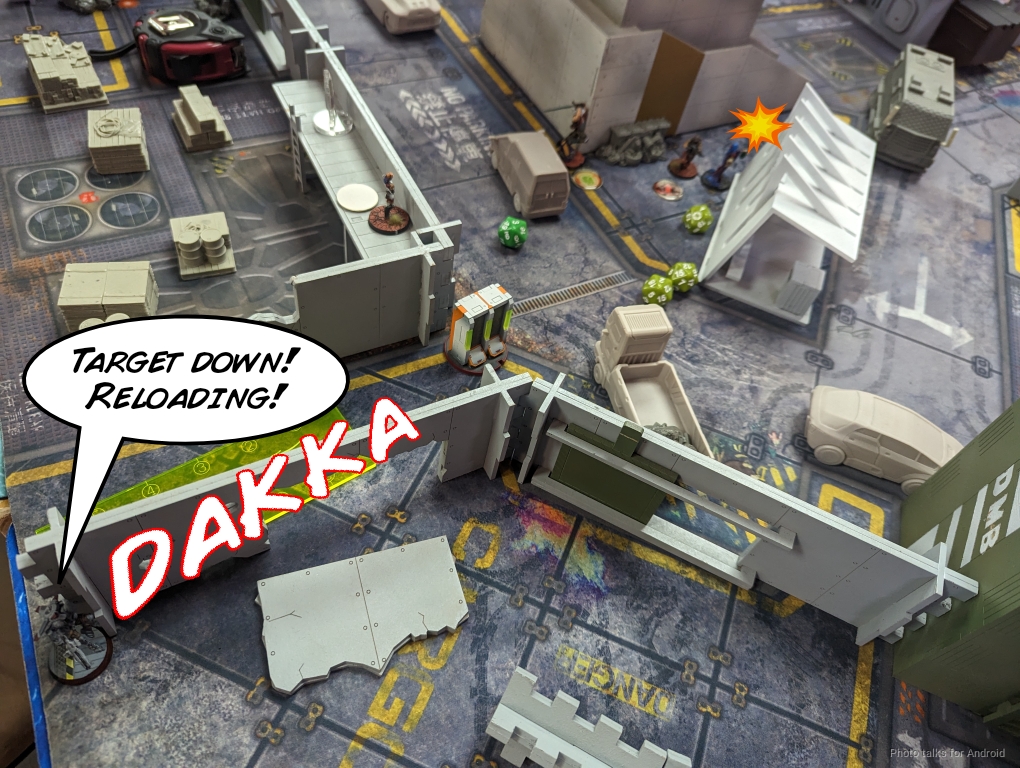
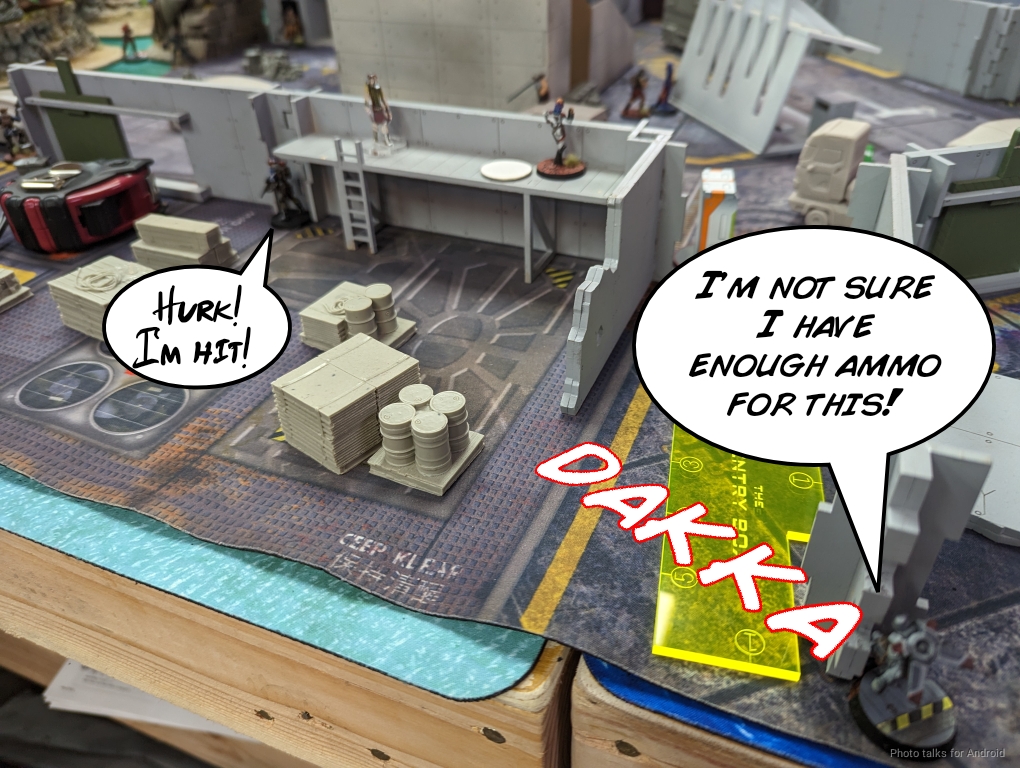
I throw everyone into suppression, including Aida. I’m out of orders, but the Hellcat absolutely did its job. Here you can see the overall picture from my side of the table:
Turn 2
Top of 2 – CHA
Sam’s taken a beating, but he does have a Wulver left.
He assess that he cannot challenge my Lieutenant, so Sam decides to go after the Designated Targets to get some points on the table. He makes the Wulver his Lt for the orders, and just rolls it in to the HVT guarded by Aida.
The HVT survives by stun pistoling the Wulver, and Aida mops him up with a quick burst of suppressive fire.
Bottom of 2 – Nomads
I still have an HVT to get rid of, so I send in the Spektr who clears it easily.
I try to take on the Dozer, but it dodges prone.
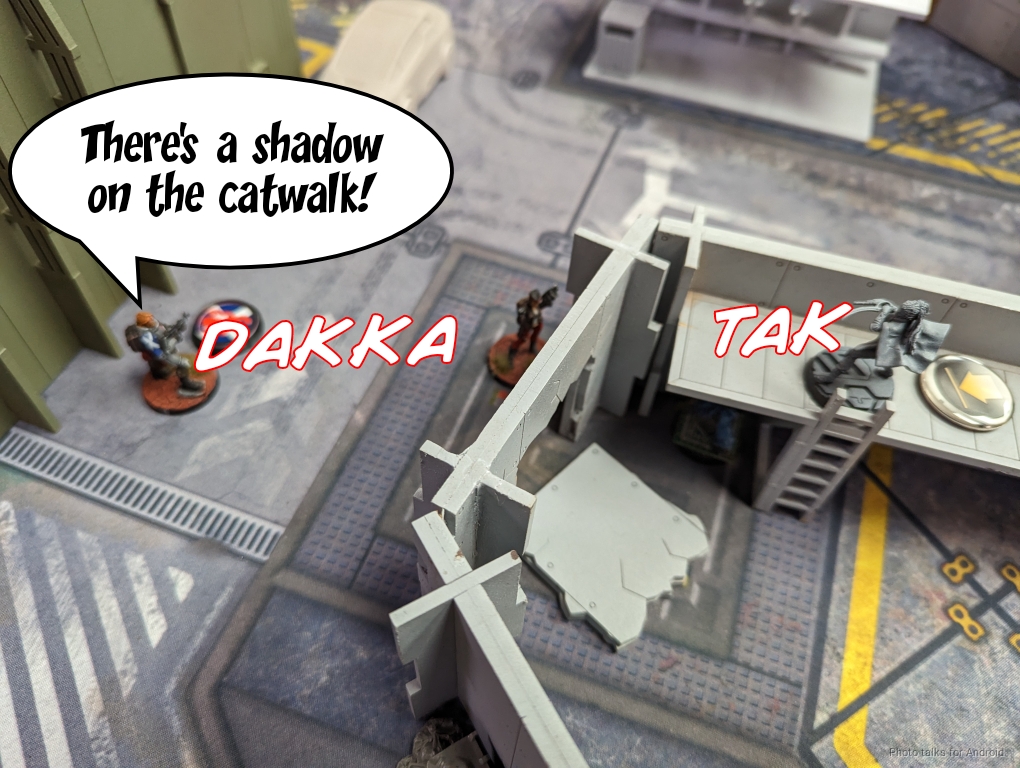
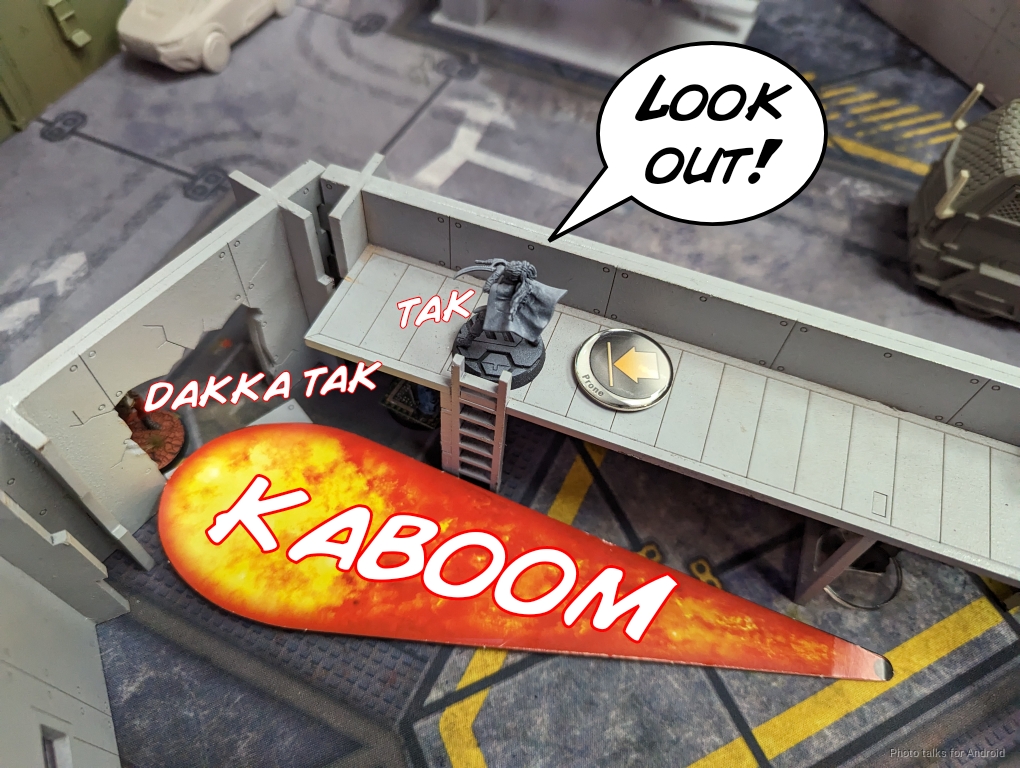
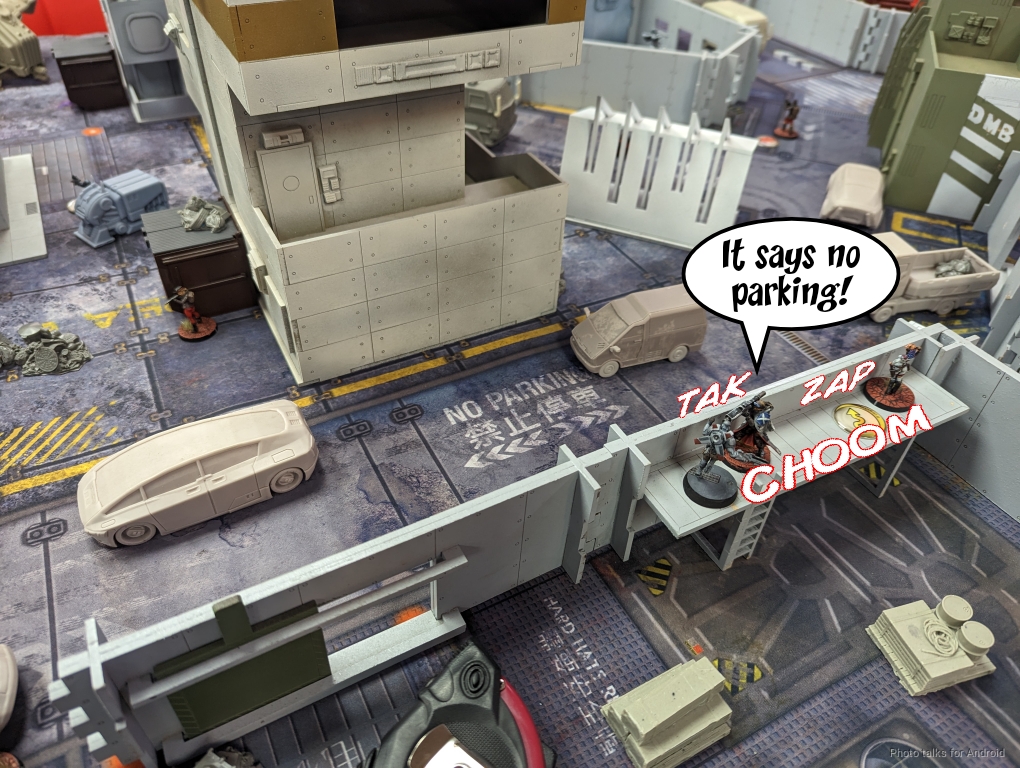
I push on the Dozer with the Spektr, but Sam reveals the Volunteer shotgun and drops a template, which I barely dodge. Learning from my mistake regarding ladders and AD troops, I land the Hellcat BSG near the ladder and climb up, templating both the Scots ML camo token and the Warcor. Both go down, although the Hellcat is flash pulsed.
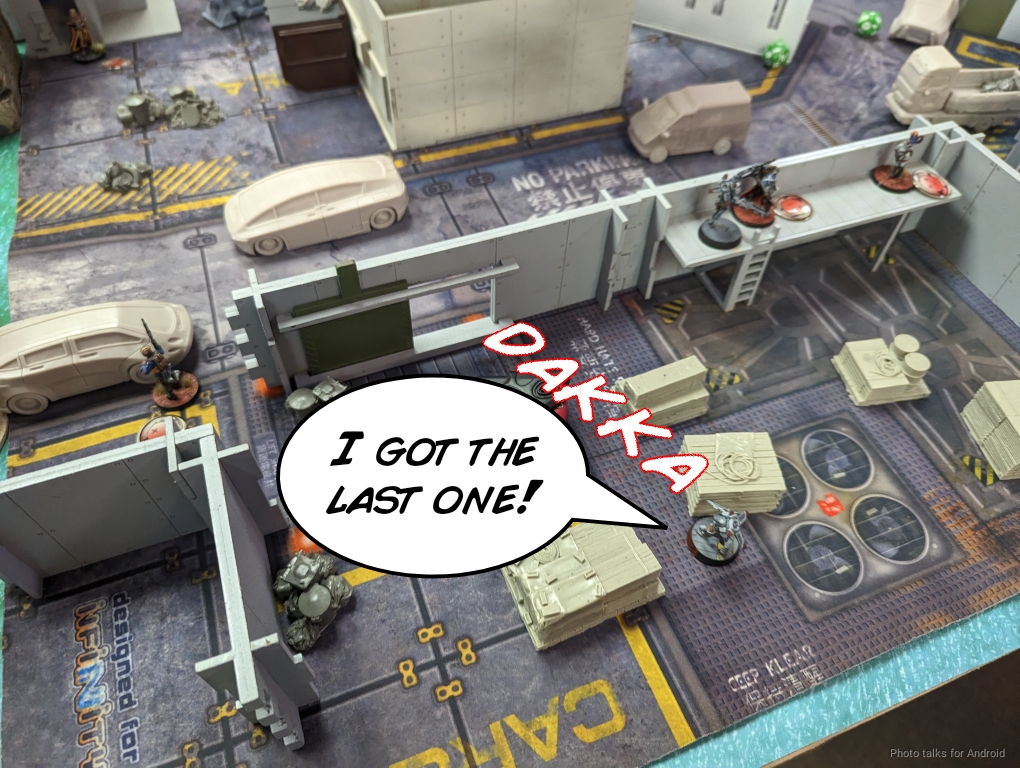
I drop the last Hellcat in, shoot the Dozer in the back, and then polish off the Volunteer.
10-0, 263-0 Nomad Victory!
Post Game Analysis
There was definitely a big vulnerability to Wulvers that I had. I think Sam could have exploited that if his combat groups were different. Here’s the pitch:
- Grey HMG takes out Grenzer.
- Grey HMG smokes out Aida.
- Wulver on my left climbs the tower and CC’s the Grenzer.
That gives me two less orders. I can still do everything I did, more or less, but the points are now more even, and I’m fighting from a disadvantage. If the Wulver somehow survived that run, then I’ve got to deal with it. Not easy. That was probably the biggest improvement.
Also, I think moving the Mormaers up was a mistake. Looking at my deployment, it should have been suspicious and AD troop alarm bells should have been ringing. If anything, I would have moved the Mormaers back to defend his Lieutenant. Hellcat Spitfires are great, but they’re not going to get through two Mormaers.
So yeah, 3 key points:
- Different combat group organization, letting the Wulvers do work (I suspect most people don’t play them, hence them being in group 2)
- Missile a Wulver into my Lt
- Castle to defend the Lt.
That’s a vastly different game, and a much harder tactical knot for me to untie. The HVTs can wait. Also, the table was horrendously asymmetric. I had a significantly better defensive position and able to force the issue with requiring Wulvers, which his list could not do. Thanks for reading, and thanks to Sam for fighting it through to the end with me.

Pingback: Quiddity of Killing – MERC Recon