April Betrayal Tournament Report
We’ve taken to informally calling this tournament “Adam’s Horrible Not Fun Escalation Tournament” because it’s two of the hardest ITS scenarios, sans Biotechvore, and then Comms Center at 400 when your brain is fried from The Grid and Rescue. Seriously though, this was a very fun tournament even though it was a real brain burner, and it was a blast to prepare for it! I played three different factions in preparation for it and eventually settled on StarCo a few days before the tournament. 400 at the end was a bit of a struggle for some of us–a lot of us went to time, but I think everyone had a great time and we got to see Alex Sinkowski and a new face, Gunnar, both of who made the trip up from Eugene to throw down. All in all it was a great day!
Game 1 – Grenades and Horseshoes
 My first opponent was Andrew of SimpleKnight fame, bringing the MAF he’s been lovingly working on for the past few months. He’s got a great Rasyat conversion, of course finished right before Carlos announced the new Rasyat at Adepticon 2018, so thanks for taking one for the team, Andrew! As we all know, it’s always right after someone does a great conversion that CB releases a new minature for that profile, so it was just Andrew’s turn this time. Andrew and I don’t get to play very often, but he’s been showing up to game night and tournaments more often lately, so things are looking up!
Overview
- Mission: The Grid
- Forces: StarCo, Free Company of the Star versus Morat Aggression Force (200)
- Deploy First: StarCo
- First Turn: StarCo
[img]https://assets.infinitythegame.net/infinityarmy/img/_logosweb/logo_905.png[/img][b] The Grid[/b]
[img]https://assets.infinitythegame.net/infinityarmy/img/_logosweb/905/logo_6.png[/img] [b]MOBILE BRIGADA Lieutenant[/b] Boarding Shotgun / Pistol, Knife. (0 | [b]33[/b])
[img]https://assets.infinitythegame.net/infinityarmy/img/_logosweb/905/logo_18.png[/img] [b]EMILY (Chain of Command)[/b] Combi Rifle + Light Grenade Launcher (Normal and E/M), Nanopulser / Assault Pistol, Knife. (0.5 | [b]35[/b])
[img]https://assets.infinitythegame.net/infinityarmy/img/_logosweb/905/logo_1.png[/img] [b]ALGUACIL[/b] Missile Launcher / Pistol, Knife. (1.5 | [b]15[/b])
[img]https://assets.infinitythegame.net/infinityarmy/img/_logosweb/905/logo_1.png[/img] [b]ALGUACIL[/b] Missile Launcher / Pistol, Knife. (1.5 | [b]15[/b])
[img]https://assets.infinitythegame.net/infinityarmy/img/_logosweb/905/logo_1.png[/img] [b]ALGUACIL (Forward Observer, Deployable Repeater)[/b] Combi Rifle / Pistol, Knife. (0 | [b]12[/b])
[img]https://assets.infinitythegame.net/infinityarmy/img/_logosweb/905/logo_1.png[/img] [b]ALGUACIL Paramedic (MediKit)[/b] Combi Rifle / Pistol, Knife. (0 | [b]12[/b])[img]https://assets.infinitythegame.net/infinityarmy/img/_logosweb/905/logo_15.png[/img] [b]SPECTOR (AD: Combat Jump)[/b] Boarding Shotgun, Nanopulser, Drop Bears / Pistol, E/M2 CC Weapon. (0 | [b]33[/b])
[img]https://assets.infinitythegame.net/infinityarmy/img/_logosweb/905/logo_10.png[/img] [b]HAWWA’ (Forward Observer)[/b] Boarding Shotgun, D-Charges / Pistol, Knife. (0 | [b]21[/b])
[img]https://assets.infinitythegame.net/infinityarmy/img/_logosweb/905/logo_12.png[/img] [b]JAGUAR[/b] Adhesive Launcher, Panzerfaust / Pistol, DA CCW. (0.5 | [b]13[/b])
[img]https://assets.infinitythegame.net/infinityarmy/img/_logosweb/905/logo_13.png[/img] [b]IRMANDINHO[/b] Chain Rifle, D-Charges, Smoke Grenades / Pistol, AP CCW. (0 | [b]8[/b])
[img]https://assets.infinitythegame.net/infinityarmy/img/_logosweb/905/logo_26.png[/img] [b]ZONDBOT[/b] Electric Pulse. (0 | [b]3[/b])
[img]https://assets.infinitythegame.net/infinityarmy/img/_logosweb/orden_regular.png[/img]8 [img]https://assets.infinitythegame.net/infinityarmy/img/_logosweb/orden_irregular.png[/img]2 [img]https://assets.infinitythegame.net/infinityarmy/img/_logosweb/orden_impetuosa.png[/img]1 [b]| 4 SWC | 200 Points |[/b] Open in Infinity Army
[img]https://assets.infinitythegame.net/infinityarmy/img/_logosweb/logo_602.png[/img][b] Morat Aggression Force[/b]
[img]https://assets.infinitythegame.net/infinityarmy/img/_logosweb/602/logo_4.png[/img] [b]YAOGAT Lieutenant[/b] Combi Rifle + Panzerfaust / Pistol, CCW. (0 | [b]29[/b])
[img]https://assets.infinitythegame.net/infinityarmy/img/_logosweb/602/logo_1.png[/img] [b]MORAT (Forward Observer)[/b] Combi Rifle / Pistol, Knife. (0 | [b]15[/b])
[img]https://assets.infinitythegame.net/infinityarmy/img/_logosweb/602/logo_1.png[/img] [b]MORAT (Forward Observer)[/b] Combi Rifle / Pistol, Knife. (0 | [b]15[/b])
[img]https://assets.infinitythegame.net/infinityarmy/img/_logosweb/602/logo_1.png[/img] [b]MORAT[/b] Missile Launcher / Pistol, Knife. (1.5 | [b]19[/b])
[img]https://assets.infinitythegame.net/infinityarmy/img/_logosweb/602/logo_1.png[/img] [b]MORAT[/b] Missile Launcher / Pistol, Knife. (1.5 | [b]19[/b])
[img]https://assets.infinitythegame.net/infinityarmy/img/_logosweb/602/logo_1.png[/img] [b]MORAT[/b] Combi Rifle / Pistol, Knife. (0 | [b]14[/b])[img]https://assets.infinitythegame.net/infinityarmy/img/_logosweb/602/logo_10.png[/img] [b]ZERAT Hacker (EI Assault Hacking Device)[/b] Combi Rifle, D-Charges / Pistol, Knife. (0.5 | [b]25[/b])
[img]https://assets.infinitythegame.net/infinityarmy/img/_logosweb/602/logo_10.png[/img] [b]ZERAT (Forward Observer)[/b] Boarding Shotgun, Grenades, Antipersonnel Mines / Pistol, Knife. (0 | [b]22[/b])
[img]https://assets.infinitythegame.net/infinityarmy/img/_logosweb/602/logo_11.png[/img] [b]DĀTURAZI[/b] Chain Rifle, Grenades, Smoke Grenades / Pistol, AP CCW. (0 | [b]14[/b])
[img]https://assets.infinitythegame.net/infinityarmy/img/_logosweb/602/logo_5.png[/img] [b]RASYAT[/b] Boarding Shotgun, D-Charges, Eclipse Grenades / Pistol, DA CCW. (0 | [b]28[/b])
[img]https://assets.infinitythegame.net/infinityarmy/img/_logosweb/orden_regular.png[/img]10 [img]https://assets.infinitythegame.net/infinityarmy/img/_logosweb/orden_impetuosa.png[/img]1 [b]| 3.5 SWC | 200 Points |[/b] Open in Infinity Army
Deployment
I won the rolloff and elected to go first, which meant Andrew made me deploy first. I knew that there would be missile launchers and at least one Rasyat in Andrew’s list, because it’s The Grid, and those are the correct choices for this mission. My HVT came down roughly in the middle. I had no idea where anything would be, most importantly Andrew’s HVT, so I did my best to cover all the options. I put Emily and the Alguaciles (I’d go see that band) on the left, all prone behind cover. My Irmandinho and his helper bot showed up on the right, primarily to help Emily with smoke if she needed it and to cover the middle and right antennas in terms of destroyin them. Speaking of, he rolled EXP CCW on his Booty chart. Well, that is the right thing to roll for this mission! I’ll take it!
My Jaguar watched a long(ish) firelane on the right, which gave him shots on all three antennas on that side. I put my Mobile Brigada BSG LT on the right as well, in cover, watching for particularly diplomatic Morats. I figured if Andrew’s HVT turned on my left, I could use Emily to grenade it. If it was on the right, I could use my Mobile Brigada, and if I had to, I had my Al’Hawwa too. With that, I passed deployment to Andrew.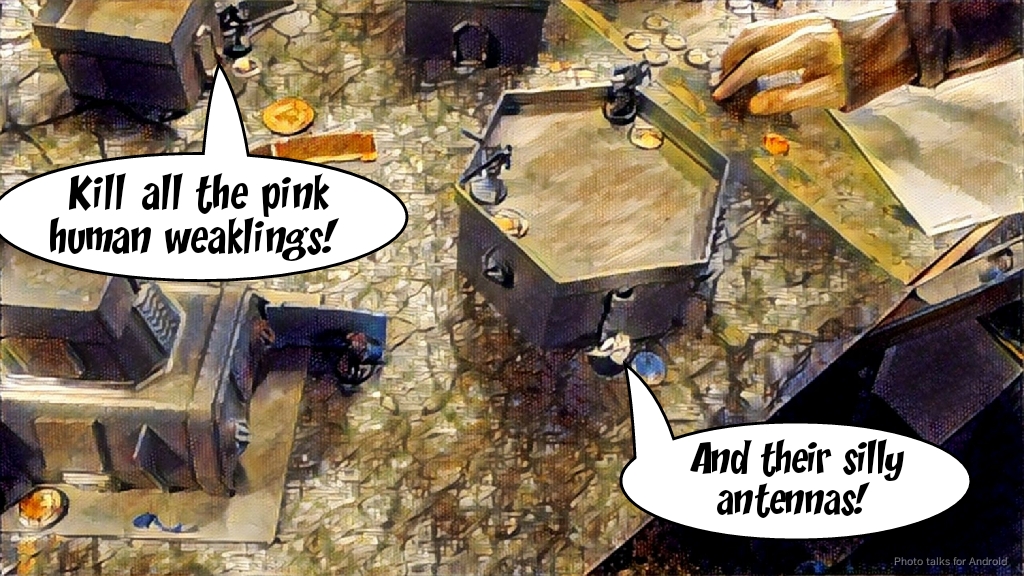 Andrew set up a pair of Vanguard missile launchers on a building on my left, both prone, with the rest of the link behind. One Morat was watching the board edge. His Yaogat watched my Irmandinho’s approach vector as well as the central lane of antennas. The Zerat AHD came down prone on my left, behind a little wall, and the Daturazi hid behind a shipping container in his deployment zone. Andrew’s HVT was all the way on the right board edge, behind a building. Sadly, I can’t make Raoul my DataTracker if he’s off the board, so I put my Al’Hawwa out of camo in the midfield, just a short move away from applying boarding shotgun to HVT face. Andrew put his Zerat FO in the way, figuring that he would at least make us dice off, mimetism BSG versus mimetism BSG. I nominated my Al’Hawwa as my DataTracker and Andrew nominated his Zerat FO.
Turn 1
Top of Turn 1 – StarCo
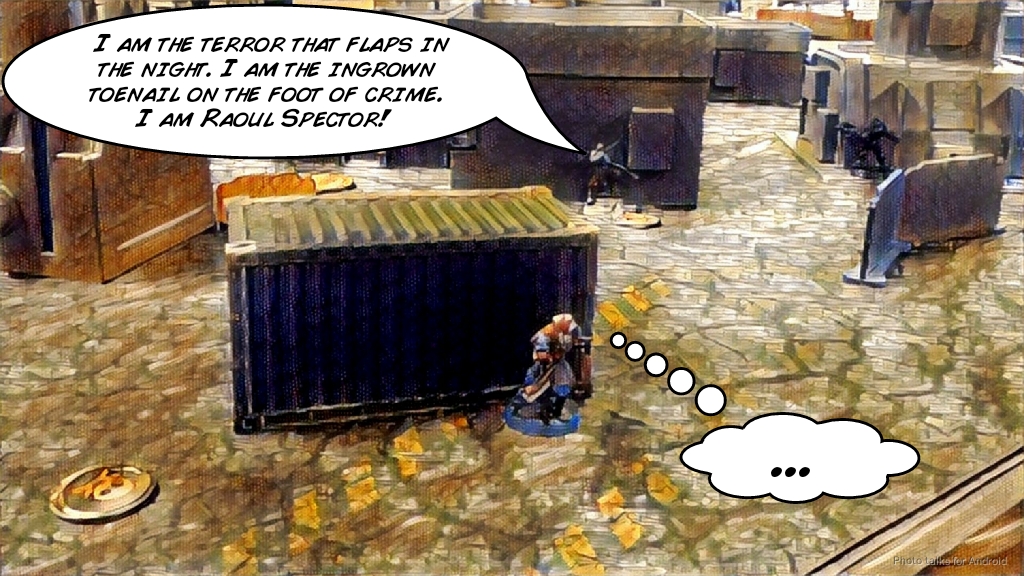
Seemed a shame to roll EXP CCW on the Irmandinho and lose it immediately to the Yaogat, so I canceled my impetuous order and brought on Raoul instead. Raoul walked on outside of LoF of anything but behind the Zerat FO and got to work. He gunned down the Zerat FO, freeing my Al’Hawwa to come around the corner and shotgun the Zerat FO and the HVT down, netting me a ton of points! Raoul was now free to attack the order pool. Before I get started though, I quickly pop Emily out of cover and designate 2/3 of the antennas she can see.
 I ran Raoul back towards the middle of Andrew’s deployment zone, chucking a DropBear to cover the Daturazi on the way. I tried to cover the Yaogat with a DropBear twice but failed twice, so just settled for shotgunning him in the back and calling it a day. I’m basically out of orders at this point so I just tuck Raoul into a reasonably sensible position, after taking a wound from one of the combi-armed Vanguards on the other side of the table due to me missing a fire lane, and await the Daturazi. This does leave the Al’Hawwa a bit exposed, but there’s not much in the way of threat on that side of the table aside from the Daturazi, and I figure I’ve got a Jaguar covering him as well as Raoul in the way. That and I ran out of orders… Let’s pretend I planned it.
Bottom of Turn 1 – MAF
Andrew, smiling, declares that he’s in Loss of Lieutenant and that it 100% doesn’t matter. Oh MAF. The Daturazi manages to dodge his way around the mine and the shotgun fire from Raoul, but not my Al’Hawwa’s flash pulse!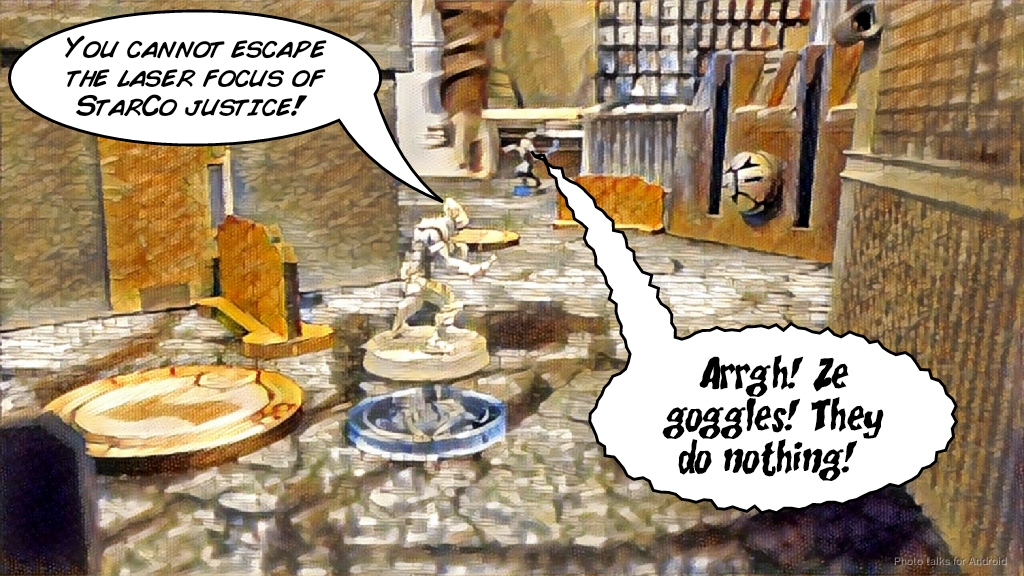 He activates his AHD Zerat and sets about grabbing the two antennas on his right flank by physically walking over and designating them, then planting D-Charges in preparation.
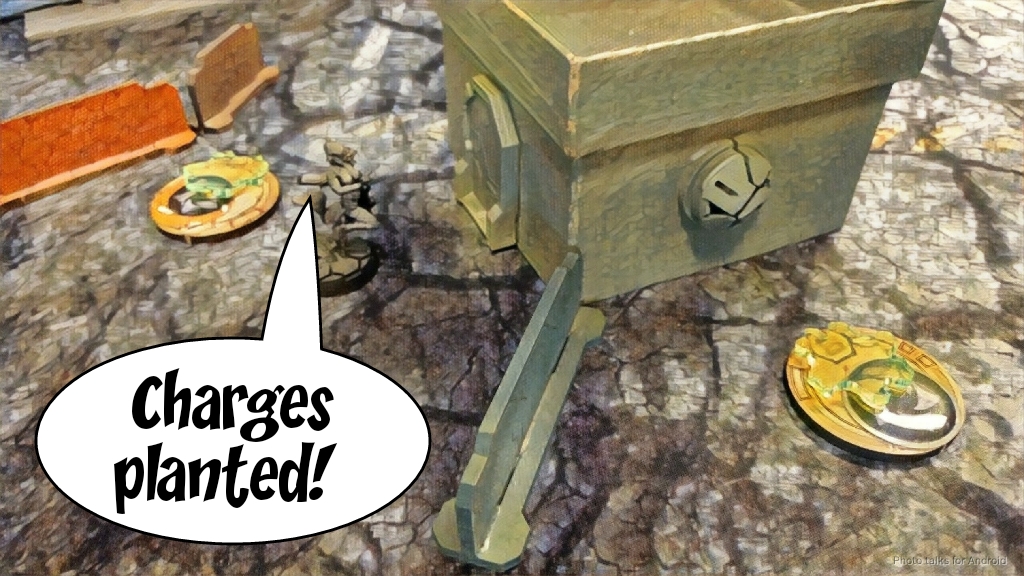 After berating himself for not deploying the FO Vanguard on the roof of the building with the two prone missile launchers (hey, we all make mistakes), Andrew climbs the FO Vanguard up, drops him prone, and stands up a missile launcher Vanguard to cover my link team.
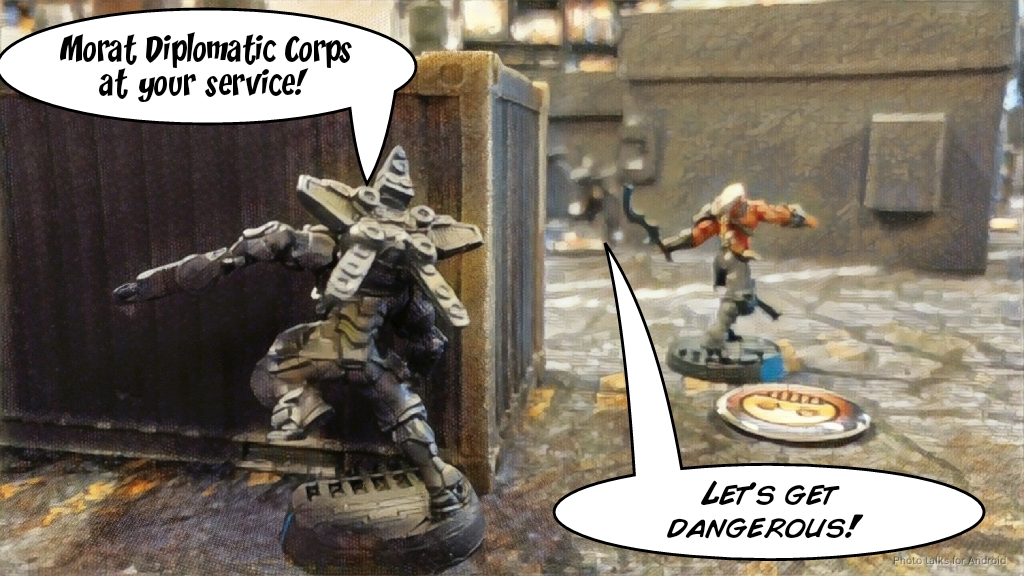 Andrew knows he can’t leave Raoul alive on my turn, so he drops in a Rasyat and finishes Raoul off with a shotgun. With his last order, he throws the Zerat into suppression fire covering my link, who are all prone.
Turn 2
Top of Turn 2 – StarCo
With Raoul dead, I’m not in the best position to deal with Andrew’s Vanguard link, which is quite unfortunate. Fortunately, the Irmandinho is nearby and has smoke. After canceling his order so he doesn’t run out in front of the missile launcher, I drop smoke for Emily and the link and move the Irmandinho towards the near-right antenna, along with his Zondbot. I get him all the way to the antenna and complete a chain of smoke for Emily. I spec-fire a grenade onto the Zerat to try and bait Andrew into breaking suppression but he wisely doesn’t bite and I miss the shot.
Rather than waste more orders on it, I truck Emily and the link through the smoke into a better position, forward observing a few antennas on the way. I do manage to flip an antenna with a D-Charge on it, which is pretty great! Moving them takes forever though, because I have to do a bunch of prone moving to avoid getting shot up as I move. I’d have liked to shoot some missiles at antennas but the smoke and Andrew’s AROs didn’t let me do it properly. I finally settle for putting the two missile launchers watching the roof of the building that Andrew’s link is hanging out on, with Emily and the other two Alguaciles watching some other angles of approach, but out of LoF of the missile launcher. No need to senselessly risk them, especially since Emily is still super relevant at the moment.
I scoot the Al’Hawwa out of line of fire, forward observing an antenna and the Daturazi as I do so, simply to get a face to face roll. Andrew throws smoke so it doesn’t matter. With that, I am out of orders and have to pass the turn.
Bottom of Turn 2 – MAF
The Daturazi makes a beeline for the Al’Hawwa and I waste one of my precious panzerfausts from the Jaguar on it, missing. Nooooooooo what was I thinking?!? Andrew then tries to find a way to unstick his link from the watchful eye of two missile launchers. After puzzling his way through a few options, the ultimate solution is brute force–he splits burst, sending one missile at each of my missile Alguaciles. Sadly, I had to put one of them out of cover to prevent them both from being caught in the blast template, so I lose the out of cover one but manage to blast the Vanguard off the table with the other. Andrew reforms the link and uses the other Vanguard missile launcher to blast my other Alguacil missile off the table.
 Now free to move around, Andrew uses the FO on the roof to designate some antennas, in particular flipping the antenna back so he can D-Charge it. After detonating two of his D-Charges and failing to destroy the antennas–I made some pretty great ARM rolls, Andrew’s got a few orders left to try and blow antennas up with his missile launcher, but sadly whiffs the missile shots, dropping the FO prone as he does so. Thank goodness I got rid of the +3 BS bonus from the link! With that, Andrew passes the turn back to me. I’ve still got to deal with a Vanguard missile launcher and I don’t have any high-burst weapons with range to do it!
Turn 3
Top of Turn 3 – StarCo
I cancel the Irmandinho’s order again, probably unnecessarily, but I don’t want to risk getting grenaded by the Daturazi or shotgunned by the Rasyat. I spend his irregular order and bash the close right antenna into scrap. I really need to get rid of that missile launcher, so I break the remnants of the link and do a coordinated order forward observe on the Vanguard missile, popping Emily, the Al’Hawwa, and my Alguacil FO in and out of cover and moving my Mobile Brigada up. Everyone misses except for the Al’Hawwa, who crits! Success! I use the FO bonus to spec fire a grenade on top of the FO and ML Vanguards, critting on the ML and killing the FO. Emily has all the tools, holy moley! That LGL on a BS13 base is amazing. While it’s not Margot’s BS14, it’s close, and she’s linkable with X-Visor. Better than the Druze LGL!
My Jaguar lands a Panzerfaust on the middle right antenna, but Andrew makes all three ARM rolls. Darn. The Al’Hawwa manages to crit-punch the antenna with a D-Charge, but it isn’t enough to finish it off. I eat a shot from the Rasyat in doing so, but make the ARM roll and go prone. I’ve got one order left, so I try to take out the Rasyat with the Al’Hawwa, figuring I should try to remove one of his options to delete an antenna, but fail. Perhaps I should’ve tried again with D-Charges, I dunno. I use the Brigada’s Lieutenant order to move him into the firelane to watch the Rasyat and eat a pistol crit in the process. Well, that’s why HI are good!
Bottom of Turn 3 – MAF
I just have to keep Andrew from destroying two antennas, and I’m in good shape. He’s got a few that are damaged already, but he needs to actually destroy them. The Daturazi dies to massed shotgun fire from the Al’Hawwa and Brigada, but the Rasyat drops smoke blocking LoF to the far right antenna. Andrew spends the rest of his orders getting his last Vanguard FO into position to observe the far right antenna, and the Rasyat punches it to death with D-Charges. We tally up the final points–tied on destroyed antennas but I’ve got pretty much everything else, making it a
8-2 StarCo, Free Company of the Star, Victory!
Great game against Andrew as always. He might’ve had it if only he wasn’t betrayed by his dice on those missile shots!
Notes
- Emily is ridiculous, as is Raoul. StarCo is really shaping up to be the GI Joe superfriends sectorial. I love it.
- I was really pleased with my use that FO coordinated order, but I was really banking on Emily making it. I relied on her cover and mimetism and was rewarded, but it was still pretty risky! If I had lost her I might’ve had to go after the Vanguard with a Alguacil’s combi rifle and that would’ve been awful.
- I probably should’ve tried punching the antenna again with the Al’Hawwa’s D-Charges… or saved another Panzerfaust round on the Jaguar. Another option would’ve been to plant the D-Charge, hope to survive, not drop prone, and then detonate it in ARO.
- Andrew did a great job locking me down with missiles and suppression–I really didn’t have a way to get out of there other that smoke and crawling.
- I think I countered the tactic pretty well though–I lost my second turn to positioning the link and he lost his second turn to dealing with that instead of making significant progress on the mission objectives, so I think that was worth it.
- I need to work on my Irmandinho positioning, I lost three orders to canceling his stupid impetuous order. I think it was wise to do so, but man was it expensive!
Game 2 – Smash and Grab
 My next opponent was Gunnar, who hails from Eugene, Oregon, and is from Alex Sinkowski’s meta. He claimed to be inexperienced and out of practice, but those were bold faced lies! His rules knowledge, tactics, positioning, and style of play were all on point. His original meta before moving to Eugene was pretty small, so perhaps the only thing he’s missing is exposure to lots of different armies. He is a scary opponent and I can’t wait to play him again!
Overview
- Mission: Rescue
- Forces: StarCo, Free Company of the Star versus Aleph (300)
- Deploy First: Aleph
- First Turn: Aleph
[img]https://assets.infinitythegame.net/infinityarmy/img/_logosweb/logo_905.png[/img][b] Rescue[/b]
[img]https://assets.infinitythegame.net/infinityarmy/img/_logosweb/905/logo_6.png[/img] [b]MOBILE BRIGADA Lieutenant[/b] MULTI Rifle + Light Flamethrower / Pistol, Knife. (0 | [b]39[/b])
[img]https://assets.infinitythegame.net/infinityarmy/img/_logosweb/905/logo_6.png[/img] [b]MOBILE BRIGADA[/b] HMG / Pistol, Knife. (2 | [b]42[/b])
[img]https://assets.infinitythegame.net/infinityarmy/img/_logosweb/905/logo_6.png[/img] [b]MOBILE BRIGADA[/b] Combi Rifle / Pistol, Knife. (0 | [b]34[/b])
[img]https://assets.infinitythegame.net/infinityarmy/img/_logosweb/905/logo_14.png[/img] [b]SEÑOR MASSACRE[/b] Boarding Shotgun, E/M Grenades, Eclipse Grenades / Pistol, AP CCW, E/M CCW. (0 | [b]26[/b])
[img]https://assets.infinitythegame.net/infinityarmy/img/_logosweb/905/logo_29.png[/img] [b]DAKTARI[/b] Combi Rifle / Pistol, Knife. (0 | [b]14[/b])[img]https://assets.infinitythegame.net/infinityarmy/img/_logosweb/905/logo_9.png[/img] [b]BANDIT[/b] Combi Rifle, Antipersonnel Mines / Pistol, DA CCW. (0 | [b]27[/b])
[img]https://assets.infinitythegame.net/infinityarmy/img/_logosweb/905/logo_10.png[/img] [b]HAWWA’ Hacker (Assault Hacking Device)[/b] Boarding Shotgun, D-Charges / Pistol, Knife. (0.5 | [b]26[/b])
[img]https://assets.infinitythegame.net/infinityarmy/img/_logosweb/905/logo_15.png[/img] [b]SPECTOR (AD: Combat Jump)[/b] Boarding Shotgun, Nanopulser, Drop Bears / Pistol, E/M2 CC Weapon. (0 | [b]33[/b])
[img]https://assets.infinitythegame.net/infinityarmy/img/_logosweb/905/logo_23.png[/img] [b]REAKTION ZOND[/b] HMG / Electric Pulse. (1 | [b]26[/b])
[img]https://assets.infinitythegame.net/infinityarmy/img/_logosweb/905/logo_7.png[/img] [b]RIOT GRRL[/b] Missile Launcher / Pistol, Knife. (2 | [b]33[/b])
[img]https://assets.infinitythegame.net/infinityarmy/img/_logosweb/orden_regular.png[/img]8 [img]https://assets.infinitythegame.net/infinityarmy/img/_logosweb/orden_irregular.png[/img]2 [b]| 5.5 SWC | 300 Points |[/b] Open in Infinity Army
[img]https://assets.infinitythegame.net/infinityarmy/img/_logosweb/logo_701.png[/img][b] ALEPH[/b]
[img]https://assets.infinitythegame.net/infinityarmy/img/_logosweb/701/logo_46.png[/img] [b]HECTOR Lieutenant[/b] Plasma Rifle, Nanopulser, Stun Grenades + 1 TinBot A / Heavy Pistol, EXP CC Weapon. (0 | [b]71[/b])
[img]https://assets.infinitythegame.net/infinityarmy/img/_logosweb/701/logo_57.png[/img] [b]DANAVAS Hacker (Hacking Device Plus. UPGRADE: Maestro)[/b] Combi Rifle + Pitcher / Breaker Pistol, Knife. (0.5 | [b]25[/b])
[img]https://assets.infinitythegame.net/infinityarmy/img/_logosweb/701/logo_9.png[/img] [b]SOPHOTECT[/b] Combi Rifle, D-Charges / Pistol, Knife. (0 | [b]31[/b])
[img]https://assets.infinitythegame.net/infinityarmy/img/_logosweb/701/logo_18.png[/img] [b]PROXY Mk.2[/b] MULTI Sniper Rifle, Nanopulser / Pistol, Knife. (1.5 | [b]24[/b])
[img]https://assets.infinitythegame.net/infinityarmy/img/_logosweb/701/logo_49.png[/img] [b]PROXY Mk.5 (Forward Observer)[/b] 2 Submachine Guns, Nanopulser, E/M Grenades / Pistol, Knife. (0 | [b]10[/b])
[img]https://assets.infinitythegame.net/infinityarmy/img/_logosweb/701/logo_21.png[/img] [b]MYRMIDON OFFICER (Chain of Command)[/b] Boarding Shotgun, Nanopulser, Eclipse Grenades / Pistol, AP CCW. (1 | [b]35[/b])
[img]https://assets.infinitythegame.net/infinityarmy/img/_logosweb/701/logo_8.png[/img] [b]MYRMIDON[/b] Chain Rifle, Nanopulser, Smoke Grenades / Pistol, AP CCW. (0 | [b]16[/b])
[img]https://assets.infinitythegame.net/infinityarmy/img/_logosweb/701/logo_7.png[/img] [b]DASYU (Forward Observer)[/b] Combi Rifle, Nanopulser, Antipersonnel Mines / Pistol, Knife. (0 | [b]36[/b])
[img]https://assets.infinitythegame.net/infinityarmy/img/_logosweb/701/logo_11.png[/img] [b]ZAYIN Rebot[/b] HMG / Electric Pulse. (1 | [b]26[/b])
[img]https://assets.infinitythegame.net/infinityarmy/img/_logosweb/701/logo_12.png[/img] [b]SAMEKH Rebot[/b] Smart Missile Launcher / Electric Pulse. (1.5 | [b]18[/b])
[img]https://assets.infinitythegame.net/infinityarmy/img/_logosweb/701/logo_13.png[/img] [b]LAMEDH Rebot[/b] Flash Pulse, Sniffer / Electric Pulse. (0 | [b]8[/b])
[img]https://assets.infinitythegame.net/infinityarmy/img/_logosweb/orden_regular.png[/img]10 [b]| 5.5 SWC | 300 Points |[/b]Open in Infinity Army
Deployment
The game stated with Gunnar throwing a Dasyu over the centerline, unbeknownst to me, of course, aside from the very scary infiltration roll he made. He then set up a TR bot on top of a building, in base to base with a Sophotect, watching the entire left side of the field. The Mk. 5 was behind a building all the way on my right, hanging out with the smart missile bot and the Myrmidon. The Myrmidon officer was on a building on the left, all the way in the backfield, prone on a building. The repeater bot, Hector, and the Danavas hacker hung out in the middle of deployment zone. With that, it was my turn to deploy. I attempted to throw the Al’Hawwa over the centerline on a roof to hack Hector on his way up the board, but failed, so I put the Al’Hawwa behind a building on the right where it would be safe. The Riot Grrl went down on the right, watching the TR bot and the approach the Myrmidon and Proxy Mk5 were likely to take. I was really worried but all this infiltration nonsense so I put the link team prone behind a bunch of cover, but left the MULTI Rifle and HMG up to ARO any scary TO thing that popped out. I threw the TR bot down covering pretty much my entire Dead Zone, figuring that I could at least delay Hector from getting any of my civilians.
 Gunnar looks around the table, makes some notes on his phone and declares that he’s placed his reserve model. I try to infiltrate my Bandit over the centerline onto the roof of the building that the TR bot and Sophotect are on, but fail to make the roll and the Bandit ends up on the left behind a building, just like the Al’Hawwa. Gunnar nominates Hector as his DataTracker and I do the same with Massacre. With that, we’re off!
Turn 1
Top of Turn 1 – Aleph
Gunnar starts by chucking some smoke with the Myrmidon and advancing it up the field a little. After spending an order to move the Sophotect away from the TR bot, Gunnar tries to gun down the Riot Grrl with the TR bot. We trade some ineffectual fire for a bit before he switches tactics. The Dasyu reveals itself and guns down my TR bot from just inside 16″, zeroing me out. Sadly I misjudge the distance and shoot back. My Mobile Brigada MULTI Rifle takes a shot but misses. The Dasyu tries to take out my Brigada but fails to get though the ARM 7. Gunnar brings out the big guns, literally, and blasts the Riot Grrl off the table after taking a single missile wound. After retreating Hector, Gunnar is out of orders and passes the turn, lamenting that he’s left quite a few pieces out of position. Really it’s just the Myrmidon that’s out of place, so it’s not too bad.
Bottom of Turn 1 – StarCo
The turn begins with me gunning the down the Dasyu with my MULTI Rifle brigada and then I drop in Raoul. I manage to catch the Mk. 5 unawares and my boarding shotgun shot covers both it and the Myrmidon, blasting both off the table. Raoul takes out the smart missile bot and then gets in position behind Hector, the mighty!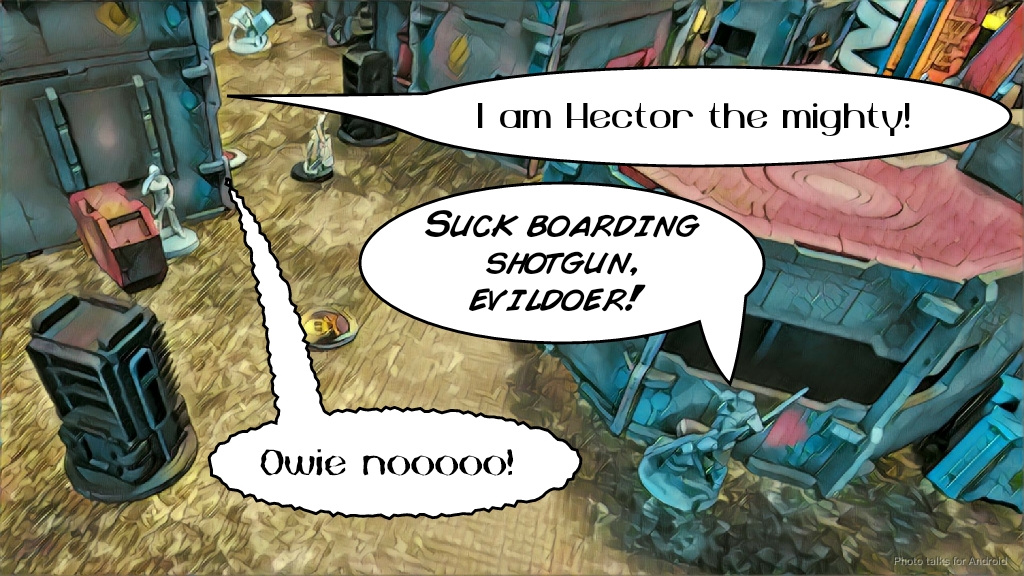 I had chucked a mine, but it was too far away. Nonetheless, two orders later and I’ve dropped the mighty warrior. With my last orders I tuck Raoul into safety and pass the turn.
Turn 2
Top of Turn 2 – Aleph
The Lamedh repeater bot races up the board, its distance and mimetism protecting it from Raoul’s boarding shotgun as travels up the board. The Danavas, over two orders, manages to isolate my Mobile Brigada LT, primarily because he was the link leader and not because Gunnar suspected a Lieutenant profile. With his last few orders, Gunnar climbs the TR bot down to cover Raoul’s escape route.
Bottom of Turn 2 – StarCo
I surprise Gunnar with the news that I’m in loss of lieutenant. Thankfully, I’ve been in loss of lieutenant before and haven’t spent much on command tokens other than denying Gunnar more than 1 token on his first turn. I spend my isolated Brigada’s order to flamethrower the repeater boot, freeing the HMG Brigada to gun down the TR bot. It’s at this point that Gunnar reveals that he’s got a Mk 2 covering the HMG Brigada, but not until after we roll the dice. He’s a gentleman about it and forfeits the ARO, but now I know there’s a Mk 2 there. It changes the character of the game from here onwards, which is unfortunate. I cannot unsee! The combi Brigada stands up to cover the left flank, and I spend a few orders advancing Massacre to the midfield. I recamo the Al’Hawwa and Bandit, just in case. With that, I’m out of orders.
Turn 3
Top of Turn 3 – Aleph
Gunnar is not in retreat but is very low on orders. He stands up the Myrmidon Officer with his Lieutenant order to cover the left flank, and then tries to kill Raoul with the Danavas but we both fail our rolls. He doesn’t have many orders and doesn’t have enough to get to Massacre, and so passes the turn.
Bottom of Turn 3 – StarCo
Massacre grabs a civilian under the cover of smoke and retreats to my deployment zone, again under the cover of smoke to protect him from the Mk 2. I then get greedy and attempt to extract another civilian with Raoul, ignoring the Danavas on the way. The Mk 2 finally reveals itself, but I tank a bunch of ARM rolls before the Mk 2 finally gets Raoul as he grabs the nearest civilian. I’m out of orders and options, but I have a civilian hanging out with my DataTracker in my deployment zone, making it a
5-0 StarCo, Free Company of the Star Victory!
Notes
- It turns out I was in light flamethrower range of the Dasyu the whole time with my Mobile Brigada Lt. I really need to get better at estimating range on templates. And on shooting. I was off by an inch on the 16″ HMG estimation, zeroing out my TR bot instead of dodging.
- Raoul is a monster. Gunnar’s Mk 2 was in LoF of Raoul’s entrance, but he forgot about it until much later in the game. This mistake definitely swung the game in my favor. I look forward to fighting Gunnar again to get a clean rematch!
- The Brigada + Massacre + Daktari link is quite strong. I think taking a hacker or at least a TinBot is worth it in the link. Perhaps the hacker to have a second specialist? I dunno. Need to put in more time with them.
- I was really happy with my TR Zond placement. If a TR Zond dies that means it was in a good spot and in the way!
- I was also really happy with my Riot Grrl placement. She ate a ton of orders on Gunnar’s first turn, which is her entire point.
Game 3 – Freedom and Justice
 Well, I have two major victories on the chalkboard, so that meant I was facing the forces of USAriadna Freedom, commanded by none other than the magnificent Adam of TheDiceAbide fame himself! After informing me that I was about to experience the full weight of freedom in my pants, Adam won the Lieutenant roll and declared he was going first, so as to better liberate me. I told him that StarCo justice would prevail, and after much chuckling we got on with it.
Overview
- Mission: Comms Center
- Forces: StarCo, Free Company of the Star versus USAriadna Ranger Force
- Deploy First: USAriadna Ranger Force
- First Turn: USAriadna Ranger Force
[img]https://assets.infinitythegame.net/infinityarmy/img/_logosweb/logo_905.png[/img][b] Comms Center[/b]
[b]GROUP 1 | [/b][img]https://assets.infinitythegame.net/infinityarmy/img/_logosweb/orden_regular.png[/img]9 [img]https://assets.infinitythegame.net/infinityarmy/img/_logosweb/orden_irregular.png[/img]1
[img]https://assets.infinitythegame.net/infinityarmy/img/_logosweb/905/logo_6.png[/img] [b]MOBILE BRIGADA Lieutenant[/b] MULTI Rifle + Light Flamethrower / Pistol, Knife. (0 | [b]39[/b])
[img]https://assets.infinitythegame.net/infinityarmy/img/_logosweb/905/logo_6.png[/img] [b]MOBILE BRIGADA[/b] HMG / Pistol, Knife. (2 | [b]42[/b])
[img]https://assets.infinitythegame.net/infinityarmy/img/_logosweb/905/logo_6.png[/img] [b]MOBILE BRIGADA[/b] Boarding Shotgun / Pistol, Knife. (0 | [b]33[/b])
[img]https://assets.infinitythegame.net/infinityarmy/img/_logosweb/905/logo_14.png[/img] [b]SEÑOR MASSACRE[/b] Boarding Shotgun, E/M Grenades, Eclipse Grenades / Pistol, AP CCW, E/M CCW. (0 | [b]26[/b])
[img]https://assets.infinitythegame.net/infinityarmy/img/_logosweb/905/logo_29.png[/img] [b]DAKTARI[/b] Combi Rifle / Pistol, Knife. (0 | [b]14[/b])[img]https://assets.infinitythegame.net/infinityarmy/img/_logosweb/905/logo_18.png[/img] [b]EMILY (Chain of Command)[/b] Combi Rifle + Light Grenade Launcher (Normal and E/M), Nanopulser / Assault Pistol, Knife. (0.5 | [b]35[/b])
[img]https://assets.infinitythegame.net/infinityarmy/img/_logosweb/905/logo_17.png[/img] [b]UHAHU Hacker (Hacking Device Plus. UPGRADE: Icebreaker)[/b] Pitcher, D-Charges / Assault Pistol, Knife. (0.5 | [b]25[/b])[img]https://assets.infinitythegame.net/infinityarmy/img/_logosweb/905/logo_15.png[/img] [b]SPECTOR (AD: Combat Jump)[/b] Boarding Shotgun, Nanopulser, Drop Bears / Pistol, E/M2 CC Weapon. (0 | [b]33[/b])
[img]https://assets.infinitythegame.net/infinityarmy/img/_logosweb/905/logo_10.png[/img] [b]HAWWA’ Hacker (Assault Hacking Device)[/b] Boarding Shotgun, D-Charges / Pistol, Knife. (0.5 | [b]26[/b])
[img]https://assets.infinitythegame.net/infinityarmy/img/_logosweb/905/logo_23.png[/img] [b]REAKTION ZOND[/b] HMG / Electric Pulse. (1 | [b]26[/b])[b]GROUP 2 | [/b][img]https://assets.infinitythegame.net/infinityarmy/img/_logosweb/orden_regular.png[/img]3 [img]https://assets.infinitythegame.net/infinityarmy/img/_logosweb/orden_irregular.png[/img]1 [img]https://assets.infinitythegame.net/infinityarmy/img/_logosweb/orden_impetuosa.png[/img]1
[img]https://assets.infinitythegame.net/infinityarmy/img/_logosweb/905/logo_7.png[/img] [b]RIOT GRRL (Fireteam: Haris)[/b] Combi Rifle, Blitzen, Stun Grenades / Pistol, Knife. (0.5 | [b]30[/b])
[img]https://assets.infinitythegame.net/infinityarmy/img/_logosweb/905/logo_16.png[/img] [b]AVICENNA[/b] Combi Rifle, Flash Pulse / Pistol, Knife. (0 | [b]27[/b])
[img]https://assets.infinitythegame.net/infinityarmy/img/_logosweb/905/logo_7.png[/img] [b]RIOT GRRL[/b] Missile Launcher / Pistol, Knife. (2 | [b]33[/b])[img]https://assets.infinitythegame.net/infinityarmy/img/_logosweb/905/logo_13.png[/img] [b]IRMANDINHO[/b] Chain Rifle, D-Charges, Smoke Grenades / Pistol, AP CCW. (0 | [b]8[/b])
[img]https://assets.infinitythegame.net/infinityarmy/img/_logosweb/905/logo_26.png[/img] [b]ZONDBOT[/b] Electric Pulse. (0 | [b]3[/b])
[b] 7 SWC | 400 Points |[/b] Open in Infinity Army
[img]https://assets.infinitythegame.net/infinityarmy/img/_logosweb/logo_304.png[/img][b] USAriadna Ranger Force[/b]
[b]GROUP 1 | [/b][img]https://assets.infinitythegame.net/infinityarmy/img/_logosweb/orden_regular.png[/img]9 [img]https://assets.infinitythegame.net/infinityarmy/img/_logosweb/orden_impetuosa.png[/img]2
[img]https://assets.infinitythegame.net/infinityarmy/img/_logosweb/304/logo_15.png[/img] [b]BLACKJACK[/b] AP HMG, Chest Mines, D.E.P. / Heavy Pistol, CC Weapon. (2 | [b]36[/b])
[img]https://assets.infinitythegame.net/infinityarmy/img/_logosweb/304/logo_5.png[/img] [b]VAN ZANT[/b] AP Rifle / Heavy Pistol, AP CCW. (0 | [b]38[/b])
[img]https://assets.infinitythegame.net/infinityarmy/img/_logosweb/304/logo_7.png[/img] [b]DOZER (Traktor Mul Control Device)[/b] Rifle, D-Charges / Pistol, Knife. (0 | [b]14[/b])
[img]https://assets.infinitythegame.net/infinityarmy/img/_logosweb/304/logo_10.png[/img] [b]MAVERICK[/b] Submachine Gun, Light Rocket Launcher / Pistol, Knife. (0.5 | [b]22[/b])
[img]https://assets.infinitythegame.net/infinityarmy/img/_logosweb/304/logo_10.png[/img] [b]MAVERICK[/b] Submachine Gun, Light Rocket Launcher / Pistol, Knife. (0.5 | [b]22[/b])
[img]https://assets.infinitythegame.net/infinityarmy/img/_logosweb/304/logo_8.png[/img] [b]TRAKTOR MUL[/b] Katyusha MRL / Electric Pulse. (1 | [b]11[/b])
[img]https://assets.infinitythegame.net/infinityarmy/img/_logosweb/304/logo_8.png[/img] [b]TRAKTOR MUL (Minesweeper)[/b] Electric Pulse. (0 | [b]5[/b])
[img]https://assets.infinitythegame.net/infinityarmy/img/_logosweb/304/logo_3.png[/img] [b]FOXTROT (Forward Observer)[/b] Rifle, Antipersonnel Mines / Pistol, Knife. (0 | [b]18[/b])
[img]https://assets.infinitythegame.net/infinityarmy/img/_logosweb/304/logo_3.png[/img] [b]FOXTROT (Forward Observer)[/b] Rifle, Antipersonnel Mines / Pistol, Knife. (0 | [b]18[/b])[b]GROUP 2 | [/b][img]https://assets.infinitythegame.net/infinityarmy/img/_logosweb/orden_regular.png[/img]9
[img]https://assets.infinitythegame.net/infinityarmy/img/_logosweb/304/logo_2.png[/img] [b]MINUTEMAN Lieutenant[/b] Rifle, 2 Light Flamethrowers / Pistol, CCW. (0 | [b]22[/b])
[img]https://assets.infinitythegame.net/infinityarmy/img/_logosweb/304/logo_2.png[/img] [b]MINUTEMAN[/b] AP HMG / Pistol, CCW. (1.5 | [b]34[/b])
[img]https://assets.infinitythegame.net/infinityarmy/img/_logosweb/304/logo_2.png[/img] [b]MINUTEMAN (Forward Observer)[/b] Rifle, 2 Light Flamethrowers / Pistol, CCW. (0 | [b]23[/b])
[img]https://assets.infinitythegame.net/infinityarmy/img/_logosweb/304/logo_2.png[/img] [b]MINUTEMAN[/b] Missile Launcher, Light Flamethrower / Pistol, CCW. (1.5 | [b]29[/b])
[img]https://assets.infinitythegame.net/infinityarmy/img/_logosweb/304/logo_2.png[/img] [b]MINUTEMAN[/b] Boarding Shotgun, Grenades / Pistol, CCW. (0 | [b]24[/b])[img]https://assets.infinitythegame.net/infinityarmy/img/_logosweb/304/logo_15.png[/img] [b]BLACKJACK[/b] T2 Sniper, Submachine Gun, Chest Mines / Heavy Pistol, CC Weapon. (1 | [b]36[/b])
[img]https://assets.infinitythegame.net/infinityarmy/img/_logosweb/304/logo_6.png[/img] [b]112[/b] Light Shotgun / Pistol, CCW. (0 | [b]12[/b])
[img]https://assets.infinitythegame.net/infinityarmy/img/_logosweb/304/logo_3.png[/img] [b]FOXTROT (Forward Observer)[/b] Rifle, Antipersonnel Mines / Pistol, Knife. (0 | [b]18[/b])
[img]https://assets.infinitythegame.net/infinityarmy/img/_logosweb/304/logo_3.png[/img] [b]FOXTROT (Forward Observer)[/b] Rifle, Antipersonnel Mines / Pistol, Knife. (0 | [b]18[/b])
[b] 8 SWC | 400 Points| [/b] Open in Infinity Army
Deployment
Adam’s deployment was quite straightforward. He littered the edge of the exclusion zone with Foxtrots, piled his link team on the right with the missile Ohio exposed, and put a Maverick on both sides. The Dozer and Traktor Muls hung out on the right, and the Blackjacks anchored his left with the AP HMG in the center.
 My deployment was rather difficult. I had a lot of stuff to place and not alot of space to place it! I put my TR bot watching the Minuteman missile, hoping that I could go crit fishing. My Riot Grrl missile launcher also watched the same angle with Avicenna and the Haris Riot Grrl watching her back. I scattered the Brigada link about with Massacre and the HMG exposed. The Irmandinho went on the left with his bot ready to fix the TR bot and Emily and Uhahu wrapped themselves around the building in the back with Emily exposed a bit.
 Adam over-infiltrated a Foxtrot and stuck the landing. I failed to over-infiltrate an Al’Hawwa next, so I just stuck it next to the Foxtrot to be super annoying… I nominate Emily as my DataTracker and Adam gives that role to the Maverick on my right.
 Adam and I shook hands with a firm exchange of “Freedom!” and “Justice!”, then we were off.
Turn 1
Top of Turn 1 – USARF
I’ve set up enough AROs that Adam throws away the Maverick’s impetuous orders and brings on Van Zant. Illegally, I might add, in the exclusion zone! I don’t have a flash pulse on my Al’Hawwa so I’m forced to boarding shotgun him, but I miss. Van Zant guns down the Al’Hawwa over two orders. Van Zant knocks out Emily and the AP HMG Blackjack knocks out the TR Zond. Then, the Foxtrot starts trying to forward observe stuff. He manages to tag the Riot Grrl missile launcher but my Mobile Brigada HMG guns him down. After a few tries at guided fire from the Traktor Mul, Adam finally knocks the Riot Grrl missile launcher down. Van Zant comes around the corner, knocks out Massacre, and finally goes Dogged without any more orders thanks to my Brigada HMG. Sadly, I lose a wound in the process. His alpha strike complete, Adam pushes a button and lays a mine with a Foxtrot and passes the turn.
Bottom of Turn 1 – StarCo
The Irmandinho starts things off by picking up the TR bot. Avicenna picks up Massacre, I reform the link and the Daktari picks up Emily. Adam tells me to stop undoing all of his hard work, but I ignore his pleas! It’s at this point we realize Adam cheated with Van Zant and the exclusion zone, but oh well. I bring in Raoul the non-cheaty way and drop him into Adam’s deployment zone. Sadly, my Raoul luck from the first two games is gone and he deviates in front of a linked missile launcher and disappears. I push the reformed link up, taking out the AP HMG Minuteman on the way with my wounded Brigada HMG.
 Everyone’s a bit out of position, but I try to make the best of it.
Turn 2
Top of Turn 2 – USARF
This time, Adam uses his impetuous orders. I lose the Brigada HMG to the Maverick on the left but I douse it in napalm from my Lieutenant’s LFT and burn it off the table. Sadly, the other Maverick rockets up the board and takes out my designated target, as I don’t have any assets over there to stop it. The AP HMG Blackjack tries to take out my TR Bot again, but this time I win the rolls and blast it off the table. The Minuteman missile launcher also tries his luck but also is blown off the table with a crit and 2 hits. The T2 Blackjack tries to take out my now-broken link team but I fend him off with some smoke from Massacre and manage to land a hit with a Brigada, shaving a wound off the Blackjack. With the line of fire blocked, Adam throws the Blackjack into suppression. He also stops trying to kill stuff and pushes the three buttons on his side and the one on the centerline on my right before passing the turn.
Bottom of Turn 2 – StarCo
I reform the Duo with Emily and Uhahu and try to get some work done. I don’t have the orders to deal with everything and cancel the Irmandinho’s order, so I’m forced to run the Irmandinho into the suppression fire of the Blackjack, losing him. I attempt to stun grenade the Maverick on my right, but fail and just settle for shooting it with my Riot Grrl’s combi rifle while moving Avicenna into position.
 I push Emily and Uhahu up the board, dropping a pitcher near the Blackjack but more importantly near Adam’s designated target. As I move up, I Spotlight the HVT and then use Emily’s LGL to blow it up, securing points for the kill with the DataTracker bonus. I try to E/M LGL the Blackjack but whiff.
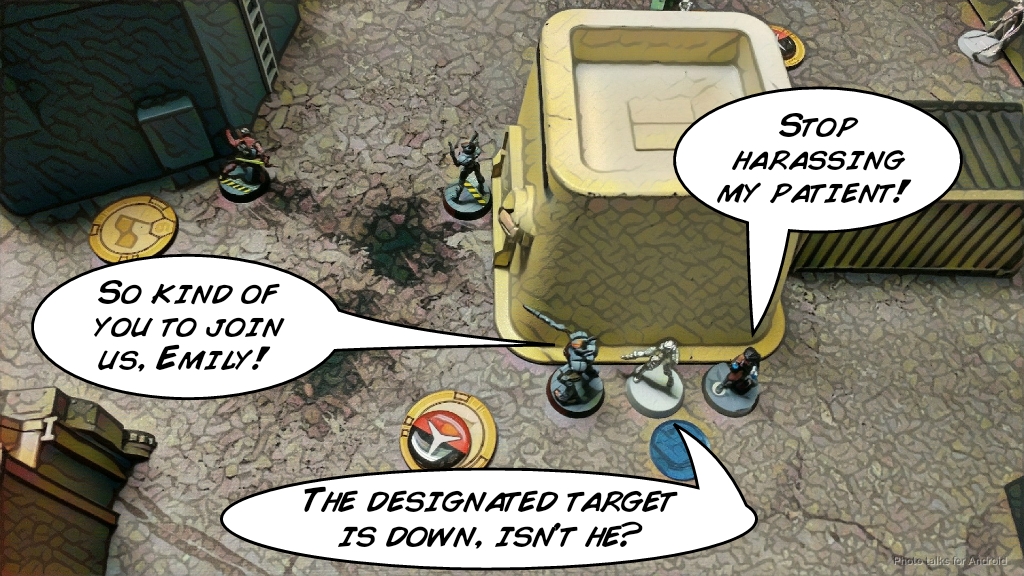 I push a few buttons to make my life easier on the third turn and pass the turn with my guys in shotgun template formation, which makes me really uncomfortable!
Turn 3
Top of Turn 3 – USARF
Adam spends his turn moving his link team up to try and grab the middle left objective. He doesn’t have the movement to make it into base to base with the objective, so instead settles for triple-flamethrowering Massacre and my exposed Brigada. Miraculously, I make a TON of ARM saves and they both only go unconscious. My Brigada Lieutenant takes out the offending Minuteman, thankfully. Adam brings a Foxtrot into the center and nabs the central objective, and pushes the Foxtrot on the right all the way up. That Foxtrot flash pulses my Riot Grrl and nabs that objective, and then Adam’s out of orders and has to pass the turn. Importantly, while my Riot Grrl can’t do anything but dodge, she does get to dodge, so I dodge her closer and closer to the Foxtrot as he pushes the button.
Bottom of Turn 3 – StarCo
Adam has 6 antennas to my 2 right now, so that has to change. I start by running the Riot Grrl into base to base with the Foxtrot on the right, gunning down the Foxtrot in the middle as I do so. The Haris still isn’t broken so this lets me get Avicenna in range of my right near antenna, which I push without difficulty thanks to her stupidly high WIP. Now I need to flip the center antenna to tie up the score on antennas. It takes me four orders to drop the Blackjack, including a successful Gotcha! from Uhahu and much shooting with my Mobile Brigada Lieutenant. Thankfully, this leaves me a single order left to get Uhahu into base to base with the central objective and I make my WIP roll, tying up the count on antennas. I did snag more specialists kills though, by one, so this nets me a
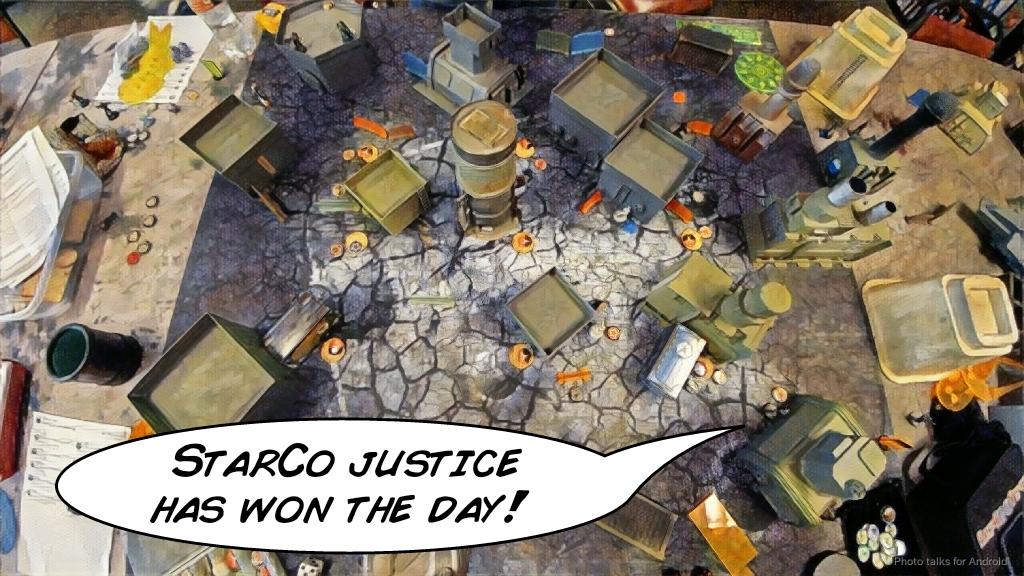
7-5 StarCo, Free Company of the Star Victory!
Adam and I have played each other a ton at this point, so our games go really quick. It only took us 2 hours for a 400 point, hard fought game. The other guys kept rolling dice for quite awhile longer. This gave us the opportunity to hang out and chat, which is always nice. With two majors and a minor, that gave me the tournament win. A big thanks to Adam for organizing and Andrew, Alex, Daniel, Erik, Gunnar, and Than for coming out and playing! It’s always great to see those guys, throw dice with them, and enjoy a nice pub lunch over beer.
Notes
- I initially pooh-poohed the Emily/Uhahu Duo but I am singing a different tune now. Pitchers + LGLs is an amazing combo.
- I probably could’ve Spotlighted the Blackjack then E/M LGL’ed it on my last turn, that would’ve been more order efficient, I imagine, but I figured I might as well spend my Lt order and just gun it down. With it only having one wound left and me with MULTI Rifle I figured it would go okay.
- I deployed okay. Didn’t have everything sorted, but then again I didn’t plan for Van Zant to illegally come into the midfield! Adam! :: shakes fist ::
- The Mavericks with LRLs are pretty great! Too bad USARF has fallen off my “I want that thing!” list.
- I’ve now got 3 games in with the mixed Brigada link and I gotta say I like it but not as much as a link with Emily in it. The real dream link would be Emily + Lupe + 3 Alguaciles. Yes please!
- Avicenna is also amazing, but she eats orders. She wants to be in the primary pool.
- I had horrible luck this tournament with over-infiltrating stuff, but cautious play let me get a good recovery.
- I was a little disappointed in my positioning of my link team. Adam wasn’t able to fully exploit it, but there’s just not enough cover to get them all into good positions while remaining in coherency. I’m tempted to play StarCo with cheaper links and more of a Vanilla-y vibe. We’ll see.
Overall
- I’m now four games of StarCo in, and I love them. They have most if not all of my favorite tools and some seriously awesome characters. The characters really define the sectorial though. If you removed them a lot of the toolboxyness would disappear.
- StarCo links are good enough that I’m willing to take them, and there are enough Duo and Haris options in there to really get some flexibility.
- Did I mention that StarCo is good? It’s good.
- I really think Raoul has solved one of my minor disappointments with Hellcats. There’s always a moment when using a Hellcat where you have to move into position but you don’t have enough movement to move and then shoot something so it takes two orders. Raoul has the same problem, but now you can throw DropBears with the second short skill instead of wasting it! And he has a better statline to boot! What’s not to like?
- I’m going to try to take some weirder things in StarCo soon, like Caterans and CSUs. Time to get good with Caterans…