

October Exploder Tournament Report
Time to redeem myself from the last tournament! I felt like I had a good plan for all the missions, just needed to execute it properly. Easier said than done. We had another good turnout for the tournament this time, with Tohaa, PanO, Combined, Yu Jing, and of course Nomads represented. I would’ve been happy playing anyone there, but I got to play three people that I haven’t played in awhile, so that was a pleasant outcome!
I ended up going first and deploying first all three games. I like the opportunity to alpha strike, but it is hard to do it consistently when they can set up AROs in response to your deployment. I kinda like it more than choosing deployment, but only if I have good warband advancement lanes and or Bran/AD. Need to play some more games where I choose to go first.
Game 1 – Bran Flanks
 I really like Bran flanks, in both varieties, combi and shotgun. I don’t have a great feel for how to abuse super jump yet, but climbing plus I understand. I won the roll off, decided that the table was pretty symmetric (it wasn’t) and chose to go first… Given my toolkit, I figured the way to victory was to play the NCA game: murder all the enemy’s specialists so they can’t accomplish the mission, then push a single button on turn 3 for the win!
Overview
- Mission: Power Pack
- Forces: Nomads versus Neoterra Capitaline Army (300)
- Deploy First: Nomads
- First Turn: Nomads
[img]https://assets.infinitythegame.net/infinityarmy/img/_logosweb/logo_501.png[/img][b] Power Pack [/b]
[b]GROUP 1 | [/b][img]https://assets.infinitythegame.net/infinityarmy/img/_logosweb/orden_regular.png[/img]9 [img]https://assets.infinitythegame.net/infinityarmy/img/_logosweb/orden_irregular.png[/img]1
[img]https://assets.infinitythegame.net/infinityarmy/img/_logosweb/501/logo_16.png[/img] [b]INTERVENTOR Hacker Lieutenant (Hacking Device Plus)[/b] Combi Rifle, 1 FastPanda / Pistol, Knife. (0.5 | [b]27[/b])
[img]https://assets.infinitythegame.net/infinityarmy/img/_logosweb/501/logo_49.png[/img] [b]TASKMASTER[/b] Red Fury, Pulzar, CrazyKoalas + TinBot A (Deflector L1) / Heavy Pistol, DA CCW. (1 | [b]53[/b])
[img]https://assets.infinitythegame.net/infinityarmy/img/_logosweb/501/logo_18.png[/img] [b]REAKTION ZOND[/b] HMG / Electric Pulse. (1 | [b]26[/b])
[img]https://assets.infinitythegame.net/infinityarmy/img/_logosweb/501/logo_9.png[/img] [b]BANDIT Hacker (Killer Hacking Device)[/b] Light Shotgun, Adhesive Launcher / Pistol, DA CCW. (0 | [b]25[/b])
[img]https://assets.infinitythegame.net/infinityarmy/img/_logosweb/501/logo_10.png[/img] [b]ZERO (Forward Observer)[/b] Combi Rifle, Antipersonnel Mines / Pistol, Knife. (0 | [b]19[/b])
[img]https://assets.infinitythegame.net/infinityarmy/img/_logosweb/501/logo_42.png[/img] [b]LUPE BALBOA[/b] Combi Rifle, Nanopulser, Panzerfaust, Smoke Grenades / Pistol, CCW. (0 | [b]23[/b])
[img]https://assets.infinitythegame.net/infinityarmy/img/_logosweb/501/logo_37.png[/img] [b]BRAN DO CASTRO (Specialist Operative)[/b] Combi Rifle + E/Mitter / Pistol, DA CCW. (0 | [b]37[/b])
[img]https://assets.infinitythegame.net/infinityarmy/img/_logosweb/501/logo_30.png[/img] [b]MORAN (Forward Observer)[/b] Combi Rifle, CrazyKoalas (2) / Pistol, Knife. (0.5 | [b]22[/b])
[img]https://assets.infinitythegame.net/infinityarmy/img/_logosweb/501/logo_13.png[/img] [b]JAGUAR[/b] Adhesive Launcher, Panzerfaust / Pistol, DA CCW. (0.5 | [b]13[/b])
[img]https://assets.infinitythegame.net/infinityarmy/img/_logosweb/501/logo_3.png[/img] [b]HELLCAT[/b] Spitfire / Pistol, Knife. (1.5 | [b]28[/b])[b]GROUP 2 | [/b][img]https://assets.infinitythegame.net/infinityarmy/img/_logosweb/orden_regular.png[/img]1 [img]https://assets.infinitythegame.net/infinityarmy/img/_logosweb/orden_irregular.png[/img]2 [img]https://assets.infinitythegame.net/infinityarmy/img/_logosweb/orden_impetuosa.png[/img]3
[img]https://assets.infinitythegame.net/infinityarmy/img/_logosweb/501/logo_48.png[/img] [b]KRAKOT RENEGADE[/b] Submachine Gun, Chest Mine / Pistol, DA CC Weapon. (0 | [b]15[/b])
[img]https://assets.infinitythegame.net/infinityarmy/img/_logosweb/501/logo_12.png[/img] [b]MORLOCK[/b] Chain Rifle, Smoke Grenades / Pistol, E/M CCW. (0 | [b]6[/b])
[img]https://assets.infinitythegame.net/infinityarmy/img/_logosweb/501/logo_12.png[/img] [b]MORLOCK[/b] Chain Rifle, Smoke Grenades / Pistol, E/M CCW. (0 | [b]6[/b])
[b] 5 SWC | 300 Points |[/b] Open in Infinity Army
[img]https://assets.infinitythegame.net/infinityarmy/img/_logosweb/logo_104.png[/img][b] Wrecking Crew[/b]
[b]GROUP 1 | [/b][img]https://assets.infinitythegame.net/infinityarmy/img/_logosweb/orden_regular.png[/img]10
[img]https://assets.infinitythegame.net/infinityarmy/img/_logosweb/104/logo_2.png[/img] [b]FUSILIER[/b] Missile Launcher / Pistol, Knife. (1.5 | [b]15[/b])
[img]https://assets.infinitythegame.net/infinityarmy/img/_logosweb/104/logo_2.png[/img] [b]FUSILIER Hacker (Hacking Device)[/b] Combi Rifle / Pistol, Knife. (0.5 | [b]18[/b])
[img]https://assets.infinitythegame.net/infinityarmy/img/_logosweb/104/logo_2.png[/img] [b]FUSILIER (Forward Observer, Deployable Repeater)[/b] Combi Rifle / Pistol, Knife. (0 | [b]12[/b])
[img]https://assets.infinitythegame.net/infinityarmy/img/_logosweb/104/logo_2.png[/img] [b]FUSILIER Lieutenant[/b] Combi Rifle / Pistol, Knife. (0 | [b]10[/b])
[img]https://assets.infinitythegame.net/infinityarmy/img/_logosweb/104/logo_2.png[/img] [b]FUSILIER[/b] Missile Launcher / Pistol, Knife. (1.5 | [b]15[/b])[img]https://assets.infinitythegame.net/infinityarmy/img/_logosweb/104/logo_24.png[/img] [b]LOCUST Hacker (Assault Hacking Device)[/b] Breaker Combi Rifle, D-Charges / Pistol, Shock CCW, Knife. (0.5 | [b]38[/b])
[img]https://assets.infinitythegame.net/infinityarmy/img/_logosweb/104/logo_24.png[/img] [b]LOCUST[/b] Breaker Combi Rifle, D-Charges / Pistol, Shock CCW, Knife. (0 | [b]32[/b])
[img]https://assets.infinitythegame.net/infinityarmy/img/_logosweb/104/logo_16.png[/img] [b]PEACEMAKER[/b] Heavy Shotgun + AUXBOT_3 / Electric Pulse. (0 | [b]21[/b])
[img]https://assets.infinitythegame.net/infinityarmy/img/_logosweb/sep.gif[/img] [img]https://assets.infinitythegame.net/infinityarmy/img/_logosweb/104/logo_16.png[/img] [b]AUXBOT_3[/b] Heavy Flamethrower / Electric Pulse. (- | [b]4[/b])
[img]https://assets.infinitythegame.net/infinityarmy/img/_logosweb/104/logo_11.png[/img] [b]PATHFINDER DRONBOT[/b] Combi Rifle, Sniffer / Electric Pulse. (0 | [b]16[/b])[b]GROUP 2 | [/b][img]https://assets.infinitythegame.net/infinityarmy/img/_logosweb/orden_regular.png[/img]3
[img]https://assets.infinitythegame.net/infinityarmy/img/_logosweb/104/logo_19.png[/img] [b]TRAUMA-DOC[/b] Combi Rifle / Pistol, Knife. (0 | [b]14[/b])
[img]https://assets.infinitythegame.net/infinityarmy/img/_logosweb/104/logo_17.png[/img] [b]PALBOT[/b] Electric Pulse. (0 | [b]3[/b])
[img]https://assets.infinitythegame.net/infinityarmy/img/_logosweb/104/logo_6.png[/img] [b]SWISS GUARD[/b] Missile Launcher, Light Shotgun / Pistol, AP CCW. (2 | [b]69[/b])
[img]https://assets.infinitythegame.net/infinityarmy/img/_logosweb/104/logo_11.png[/img] [b]PATHFINDER DRONBOT[/b] Combi Rifle, Sniffer / Electric Pulse. (0 | [b]16[/b])
[b] 6 SWC | 300 Points |[/b] Open in Infinity Army
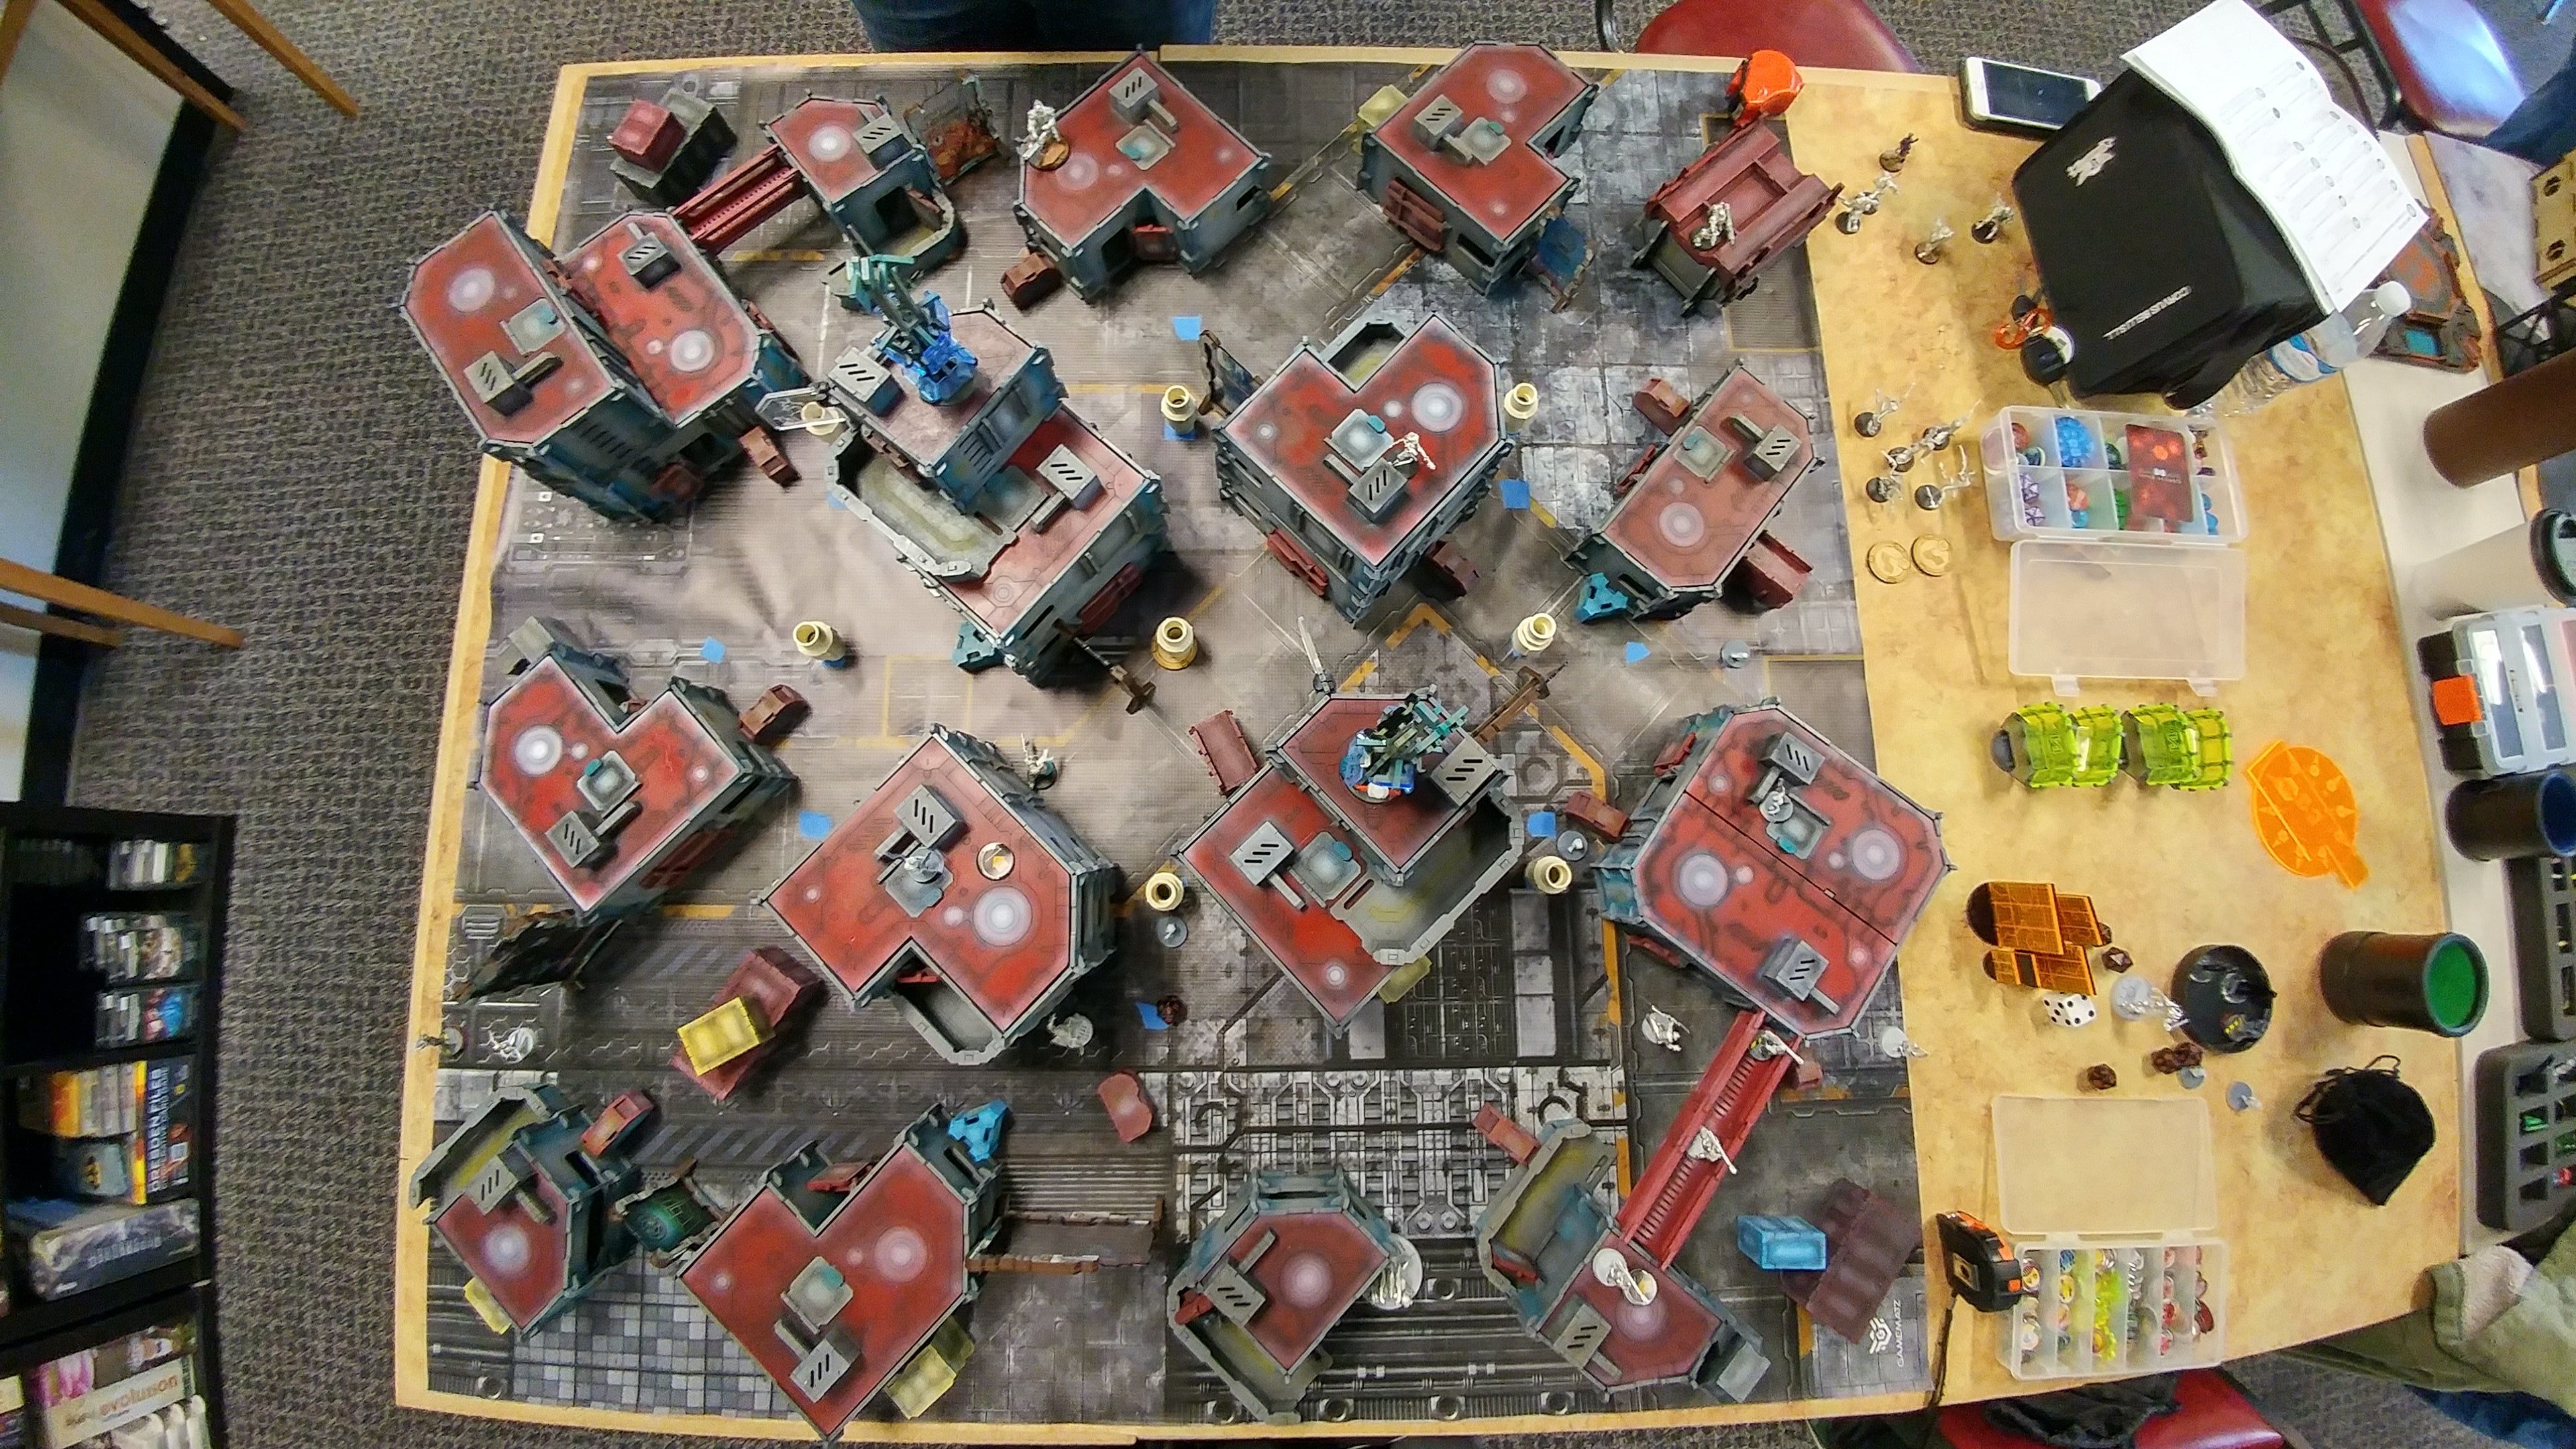
Deployment
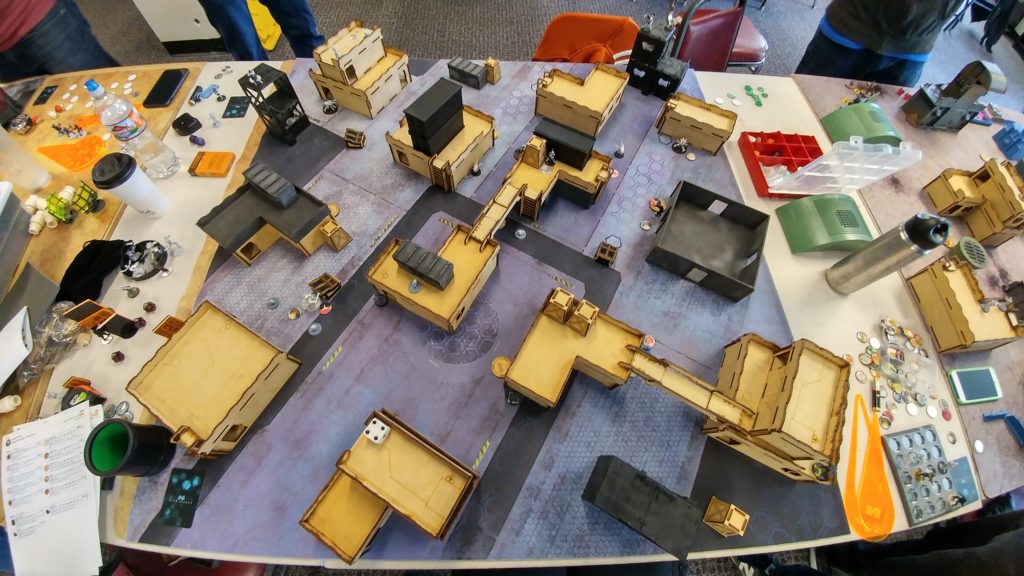
I had to deploy first, which made things a little weird. I expected some missile launchers, a Locust or two, and a Fusilier link. Turns out Erik would give me a lot more to deal with than I anticipated! I put my TR bot and Interventor on the right to support one another, with Lupe poised to make it up the field. My Taskmaster crouched behind the only available cover at the edge of the left deployment zone, with his Koalas behind him, just outside of template range (hopefully). My two Morlocks hung out on either side, tucked behind a building. My Moran and his Koalas secured the center building and the bridge, with my Bandit on the right and my Zero on the left, ready to push some buttons. The Krakot was on the right, crouched behind a box in the big diagonal firelane.
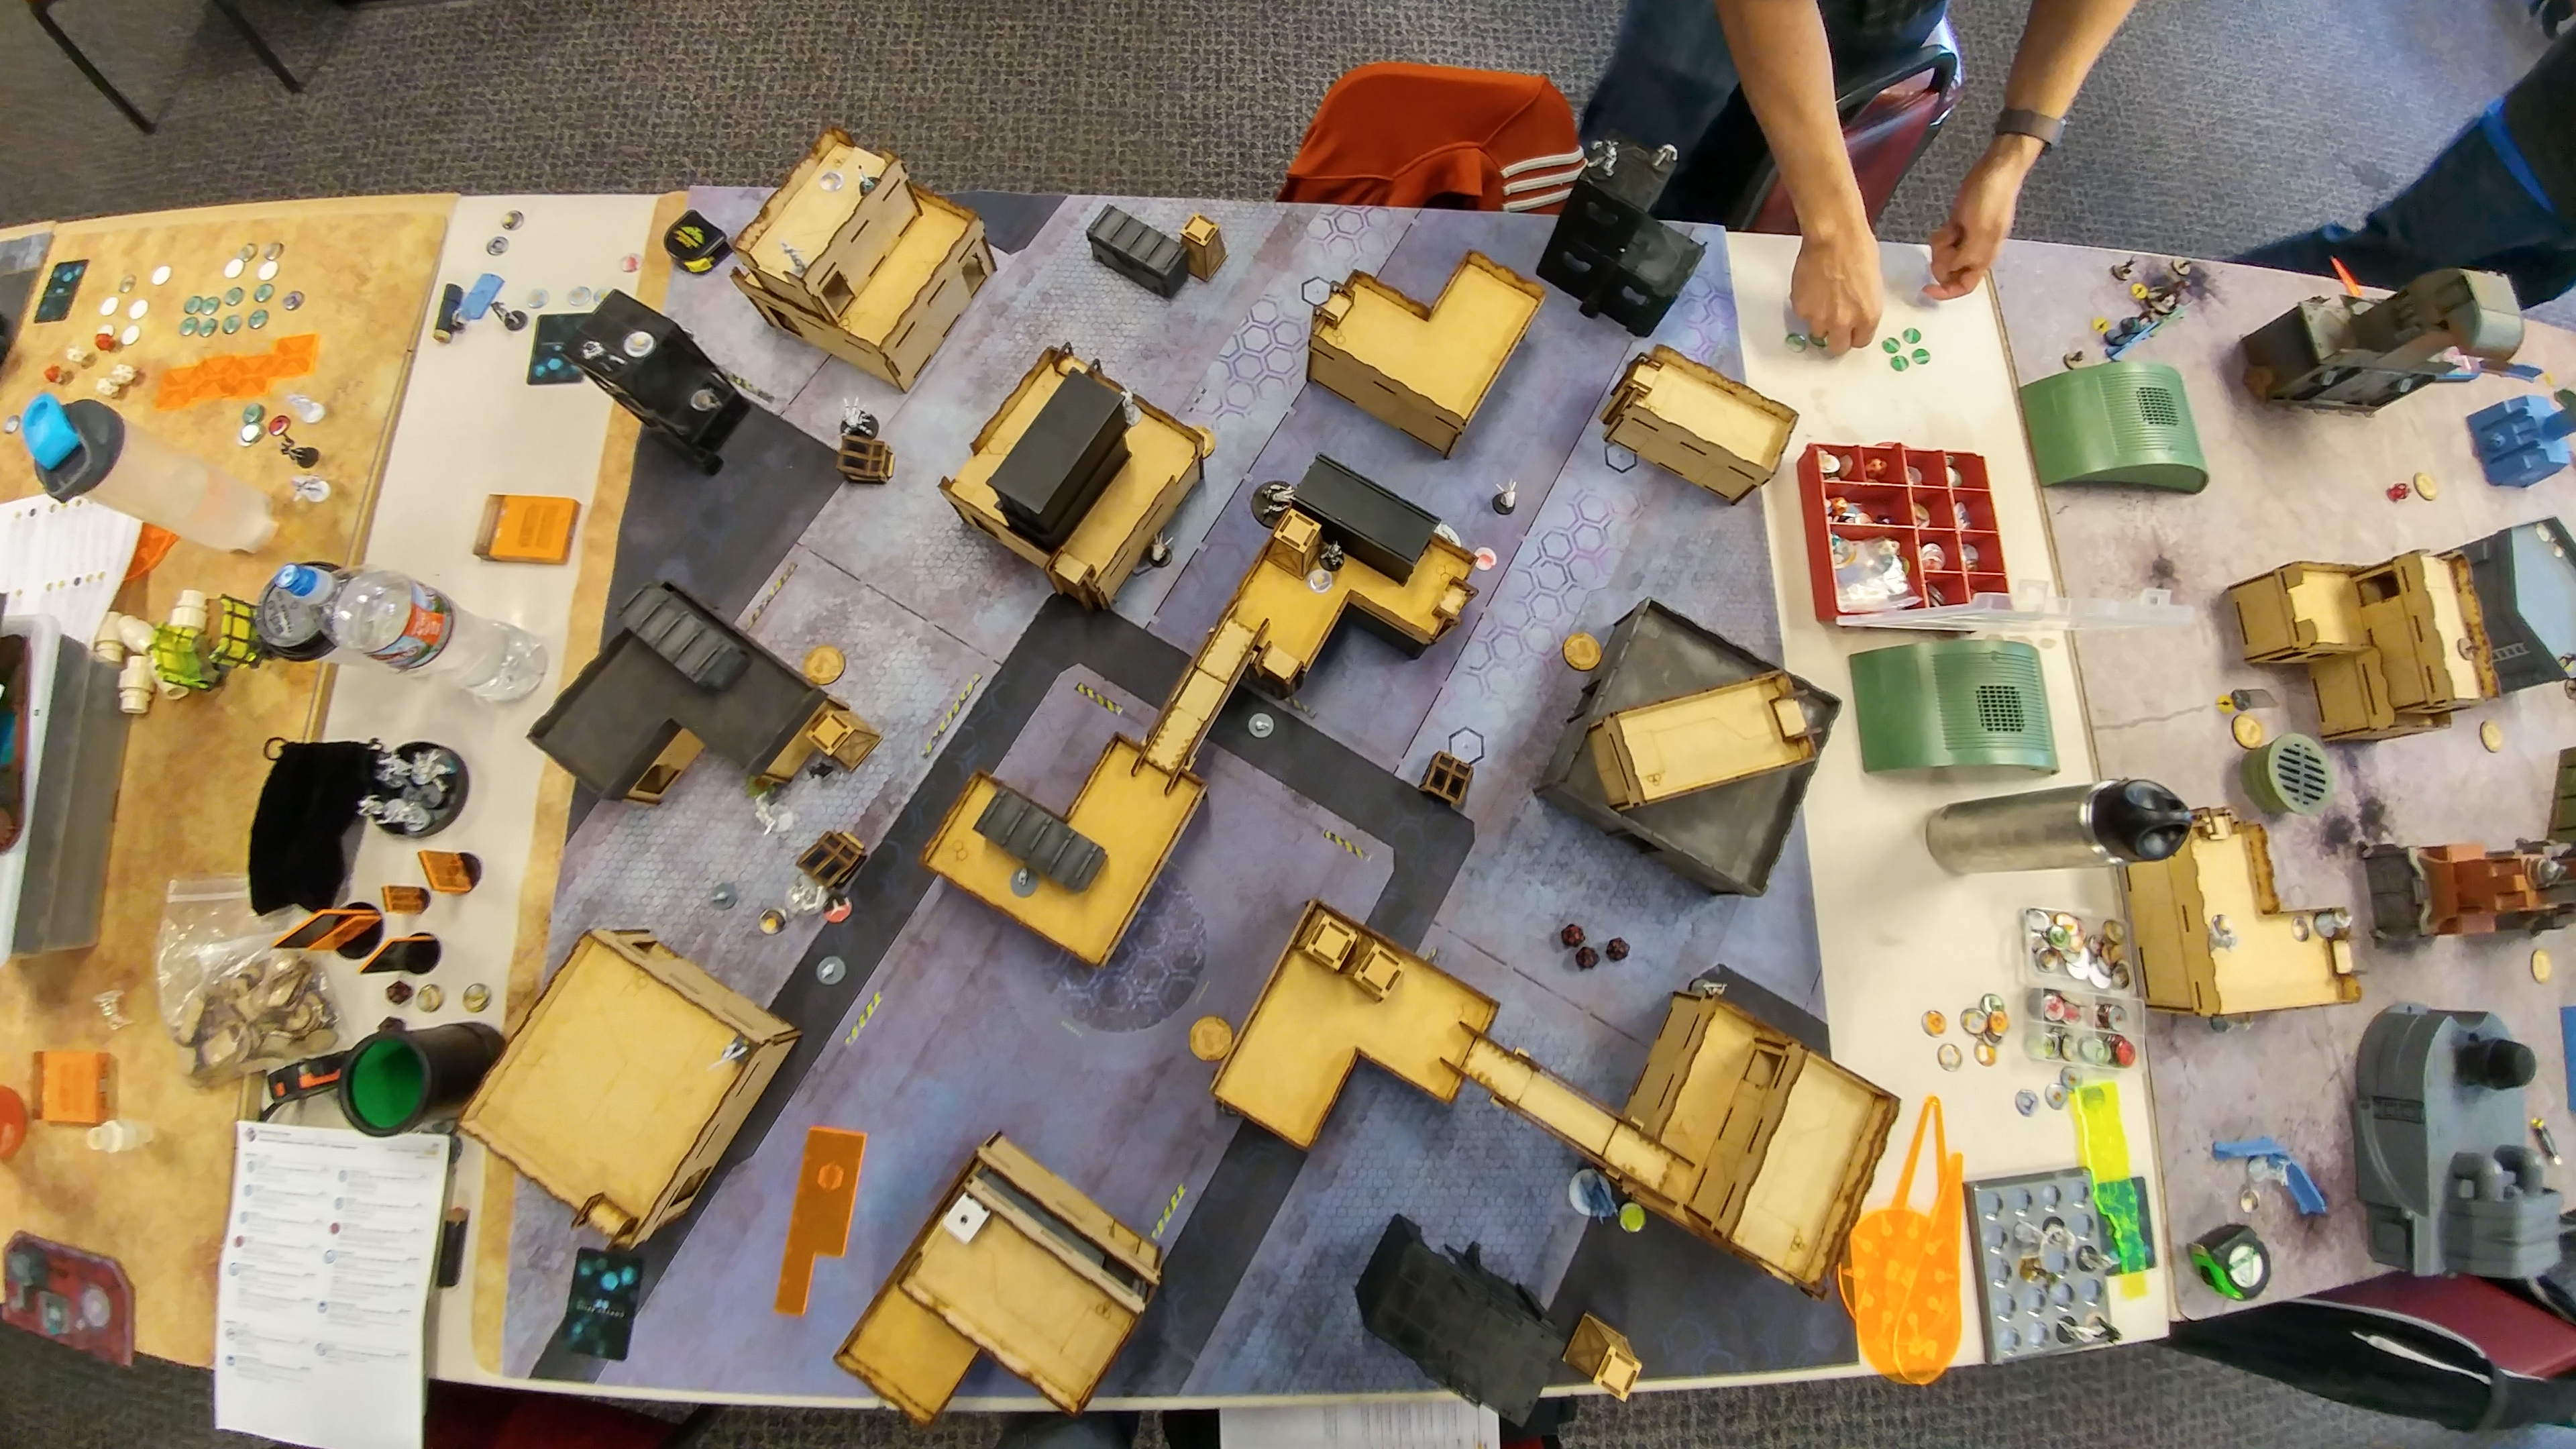
His double ML Fusilier deployed with both MLs watching the massive far left to near right diagonal firelane, backed up by the Trauma Doc (deployed on the roof with one of the ML Fusiliers) and the rest of the link below (hacker as leader, prone behind some short cover). The Trauma Doc’s palbot hung out on top of the sniper tower on the right side (along with the Swiss Guard ML), and the two Pathfinders found some cover with one in each deployment zone. His two Peacemakers contested the central area and the approach to the Swiss Guard on the right. A single Locust deployed on top of the building across the bridge from the building my Moran was hiding in, and then it was time for reserves.
I stick Bran’s infiltration roll with a 4, putting him a mere millimeter outside the enemy deployment zone, right around the corner from the Fusilier link team. Erik deploys a Locust AHD atop a building between his regular Locust and the link team, and then it’s my go. I nominate the Taskmaster as my Datatracker, and Erik nominates the regular Locust as his.
Turn 1
Top of Turn 1 – Nomads
I lose my first Morlock on the right to the Fusilier MLs. The Morlock on the left advances a little, with no AROs, and finishes his order with a second move. I try to kill the Locust datatracker with a super-jumping Krakot, foolishly electing to SMG him instead of attempting a chest mine, but he dodged successfully anyway. The Krakot is fried by a fusillade of fire from the Fusiliers. F. Me. Okay, well, time for a healthy dose of Bran flanks!
I scoot Bran up to the corner of the building that the Fusiliers are hiding behind and dump three shots into what I think is his Fusilier Lieutenant, who manages to survive. I spend another order blasting away, and he chooses this time to reveal the Swiss Guard, so my second skill is running around the corner to break LoF to the Swiss Guard ML. Thankfully, Bran’s camo saves me, and I finally KO the pesky Fusilier Lt. With the +3 bonus gone, I’m able to kill off the Fusilier FO with Bran, and spend another order stepping on the Lt’s throat to finish him off before recamoing Bran. I’m out of orders in that pool, so I just buff the TR bot with my Lieutenant.
I’m in a bit of a pickle now, because I had assumed the Swiss Guard ML was prone, but he was standing and therefore can see my Morlock. I’ve got an irregular order to spend on him, but if I do the Zero in camo nearby is toast. I elect to throw away the order so I at least get a dodge on the Zero in my reactive. Curses! There’s also a chance that the template will cover my Taskmaster… this is bad news bears.
Bottom of Turn 2 – NCA
I was right! I did successfully gank his LT. Hooray! With his irregular order, the Swiss Miss puts a template atop my Morlock. I throw smoke and dodge with the Zero, and my Jaguar whiffs. Thankfully, the Taskmaster is out of template range, JUST BARELY. This is not the first time I’ve gotten someone killed with a Morlock. Ugh. Need to be way more careful. The Morlock and Zero get asploded into a bajillion tiny pieces. Stupid friggin’ Swiss Guard ML! He spends a command token on the Swiss Miss to blow up the Jaguar, and succeeds against my dodge.
The pathfinder near Bran sensors, then rolls around the corner to try and take him out, spending a command token. I dodge on better odds (13 versus shooting on 11) so I elect to dodge closer and do so successfully since he’s on 8’s. He spends another command token to get a regular order for the link team, and the Hacker gives it a go, since I can now see him over the edge of his short cover since Bran dodged closer. Even with the link burst bonus, Bran’s cover and camo give me the edge and I dodge again!
 The peacemaker on the right attempts to contest the right firing lane against my buffed TR bot and does not survive. Erik wants to get some more stuff up the board, so he trots the pathfinder lurking in the back right forward to deter my Bandit from approaching, just out of view of my TR bot. It’s been awhile since Erik has been in loss of lieutenant, so we go over the rules for that, and he announces that his Locust AHD will be his new lieutenant before I can stop him! I offer a takeback, and he accepts, secretly nominating the Trauma Doc (as I find out later) instead. Drat. I was hoping to KHD his LT!
Turn 2
Top of Turn 2 – Nomads
Surely Erik wouldn’t announce that he made his Locust AHD his LT, take the offered takeback, and then not choose something else as his LT, right? But he knows I know that, but I know he knows I know that, and he knows that I know that he knows that I know that…
 I give up on worrying about it, and just get on with things. I need to kill the Locust AHD just in case Erik, inconceivably, stuck with his announced plan, but I don’t want to take a free ARO from the Fusilier hacker if I use my Bandit to do it through the Pathfinder’s repeater. Bran makes short work of the Fusilier hacker, clearing the way for the Bandit’s KHD. I walk her into range, still in the building, and fry the Locust’s brain. I spend another order backing her up, away from the door, so she doesn’t take a shot from the Swiss Guard, and glue down the Pathfinder with the Bandit’s ADHL. I don’t have a ton more orders, so I set about doing the objectives. The Bandit scoots into position, prone, next to the antenna on the right and beep boops the button successfully.
Now that the Fusilier link is broken, I buff the TR bot then rush it out to gun down one of the Fusilier MLs, but end up triggering an ARO from the Swiss Miss! OH NOES! I throw a single shot at the Swiss Guard and two at the Fusilier after accounting for the saturation zone. The Fusilier gets shocked off the roof, but the Swiss Guard sneaks one through and I take a single wound after rolling two 16s. Sigh.
I need to remove the Swiss Guard, but don’t have a good place to drop in a Hellcat to do it, so I settle for taking out the last Fusilier ML. I drop in a Hellcat near my Taskmaster, since the Taskmaster is pinned down by the Swiss Guard, and manage to drop the Fusilier unconscious with my last order. Sadly I don’t have the orders to throw him into suppression and pass the turn.
Bottom of Turn 2 – NCA
Erik decides that my Hellcat needs to go, and picks up his unconscious Fusilier ML with his Trauma Doc. Over the course of the next few orders, we have a 1-vs-1 dice off, Fusilier ML versus my burst one Hellcat Spitfire. I keep beating his BS roll but he keeps passing ARM. I sneak one through once and drop the Fusilier, but the Trauma Doc remembers the difference between a pistol and a MediKit and picks her back up to keep going. Finally, the Hellcat goes down to a missile and it’s my turn again.
Turn 3
Top of Turn 3 – Nomads
With the Hellcat gone and the Swiss Guard still alive, the only thing that’s in position to take out the Swiss Guard is my Bandit (and arguably my Taskmaster, I’m just too chicken to try it). I run the bandit out and attempt a shotgun shot, but I forget that the Swiss Guard has a shotgun and the Bandit takes a nap. I don’t have the orders to get the Taskmaster to the console in Erik’s backfield, especially through the Peacemaker that’s still up and the Swiss Guard, so I settle for gunning down the TraumaDoc with some climbing plus nonsense from Bran.
Bottom of Turn 3 – NCA
As it turns out, that was the right idea, because he had chosen the Trauma Doc as his new Lieutenant. Without any specialists left, Erik settles on accomplishing his classified: Spite, and tries to kill as much of my stuff as he can. He flamethrowers my Moran with the Peacemaker, and then tries to kill Bran with the Fusilier ML’s pistol but I engage successfully and that’s that.
5-1 Nomad Victory!
Notes
- Well, I had to deploy first, so there wasn’t really much I could to counter-deploy the Swiss Guard ML. Even putting Bran over there wouldn’t have helped because I he doesn’t have sensor, and forcing a reveal out of the Swiss Guard by wrecking the Fusilier link team was the next best thing.
- Not having an Intruder is sad, but the saturation zone makes things pretty bad if I try to use the MSR to take out the Swiss Guard. I probably could’ve used the Taskmaster, but the odds are terrible outside of 24″, which was definitely the case for me.
Taskmasters, Bakunin SWAST Team – Red Fury (Saturation Zone)
18.14% — Taskmasters, Bakunin SWAST Team inflicts 1 or more wounds on Swiss Guard (1 W)
01.46% — Taskmasters, Bakunin SWAST Team inflicts 2 or more wounds on Swiss Guard (Unconscious)
00.05% — Taskmasters, Bakunin SWAST Team inflicts 3 or more wounds on Swiss Guard (Dead)
30.53% — Neither player succeeds
51.33% — Swiss Guard inflicts 1 or more wounds on Taskmasters, Bakunin SWAST Team (1 W)
26.99% — Swiss Guard inflicts 2 or more wounds on Taskmasters, Bakunin SWAST Team (Unconscious)
06.01% — Swiss Guard inflicts 3 or more wounds on Taskmasters, Bakunin SWAST Team (Dead)
Swiss Guard – Missile Launcher (Saturation Zone)
- I need to be a lot more careful with my Morlock positioning, relative to other units. This is the second time I’ve gotten someone killed due to triggering a ML ARO.
- 3 MLs is very strong when deploying second. I had Lupe basically out in the open, so she got stuck there most of the game. I could’ve probably dodged her when he activated the link team… in fact, I think I’d have a panzerfaust attack on the fusilier ML when the hacker did something! AGH! Missed a golden opportunity for an ARO!
- Saturation zones a really mess with things. MSV becomes a lot more important for dealing with TO/ODD models, when usually you can rely on weight of dice. Dropping a single die, while it seems unimportant, can be pretty painful.
- Bran really did a great job this game. I’m not sure if I like the Combi or BSG version better, but I think in general I like the BSG better for the better efficiency in killing. Perhaps my tune will change if I start making regular use of the E/Mitter.
- I have yet to try and gank someone with Bran in CC, perhaps I will make that a goal in the future.
- You know, against PanO, hunting obvious Fusilier Lts is pretty good. I should try to do that more often with AD and Bran.
- I don’t know what the best tool for dealing with the Swiss Guard would be in my list. Maybe a coordinated order with Lupe and the Jaguar would’ve worked, in the first turn after he’s revealed? I don’t think it’s great odds, and the fusilier link team was still mostly intact, probably best to do what I did.
- I felt pretty stupid for re-camoing Bran where the pathfinder could’ve just moved into ZoC and then sensored, but it did burn an order in a LoL situation so that probably wasn’t actually a bad thing.
- Dodging repeatedly with Bran in cover is pretty great too. I think this defintely changes if Bran has a BSG, because then I’m likely shooting on 14s instead of dodging on 13s, and I might catch more stuff in the blast.
- Remember to ask what weapons guys have! I totally forgot the Swiss Miss has a shotgun!
- Bandit did her job excellently this game. Took out two models, including a possible lieutenant, and pushed the winning button for me.
- Buffing the TR bot with the Lt order at the end of your turn also helps a lot, especially against shotgun-toting Peacemakers outside of 16″.
- I think I needed to deploy a little smarter with Lupe and the Taskmaster, not just thinking about where I want them but how Erik could’ve covered their approaches with MLs and the like.
- I actually chose to go first, giving him deployment. Since I wasn’t worried about having good sniper nests, I didn’t really look for them on his side… I think going first was a good idea though, esp with Bran, so I’m not terribly upset by this.
Game 2 – Obsession with Possession
 This was a rough game. Alex brought Vanilla Yu Jing and the pain! As always, a great opponent!
Overview
- Mission: Acquisition
- Forces: Nomads versus Yu Jing (300)
- Deploy First: Nomads
- First Turn: Nomads
[img]https://assets.infinitythegame.net/infinityarmy/img/_logosweb/logo_501.png[/img][b] The Grid and Acquisition[/b]
[b]GROUP 1 | [/b][img]https://assets.infinitythegame.net/infinityarmy/img/_logosweb/orden_regular.png[/img]7 [img]https://assets.infinitythegame.net/infinityarmy/img/_logosweb/orden_irregular.png[/img]2 [img]https://assets.infinitythegame.net/infinityarmy/img/_logosweb/orden_impetuosa.png[/img]1
[img]https://assets.infinitythegame.net/infinityarmy/img/_logosweb/501/logo_16.png[/img] [b]INTERVENTOR Hacker Lieutenant (Hacking Device Plus)[/b] Combi Rifle, 1 FastPanda / Pistol, Knife. (0.5 | [b]27[/b])
[img]https://assets.infinitythegame.net/infinityarmy/img/_logosweb/501/logo_49.png[/img] [b]TASKMASTER[/b] Red Fury, Pulzar, CrazyKoalas + TinBot A (Deflector L1) / Heavy Pistol, DA CCW. (1 | [b]53[/b])
[img]https://assets.infinitythegame.net/infinityarmy/img/_logosweb/501/logo_30.png[/img] [b]MORAN (Forward Observer)[/b] Combi Rifle, CrazyKoalas (2) / Pistol, Knife. (0.5 | [b]22[/b])
[img]https://assets.infinitythegame.net/infinityarmy/img/_logosweb/501/logo_30.png[/img] [b]MORAN (Forward Observer)[/b] Combi Rifle, CrazyKoalas (2) / Pistol, Knife. (0.5 | [b]22[/b])
[img]https://assets.infinitythegame.net/infinityarmy/img/_logosweb/501/logo_9.png[/img] [b]BANDIT (Forward Observer)[/b] Light Shotgun, Adhesive Launcher / Pistol, DA CCW. (0 | [b]23[/b])
[img]https://assets.infinitythegame.net/infinityarmy/img/_logosweb/501/logo_9.png[/img] [b]BANDIT Hacker (Killer Hacking Device)[/b] Light Shotgun, Adhesive Launcher / Pistol, DA CCW. (0 | [b]25[/b])
[img]https://assets.infinitythegame.net/infinityarmy/img/_logosweb/501/logo_32.png[/img] [b]TSYKLON[/b] Feuerbach, Pitcher / Electric Pulse. (1 | [b]34[/b])
[img]https://assets.infinitythegame.net/infinityarmy/img/_logosweb/501/logo_48.png[/img] [b]KRAKOT RENEGADE[/b] Submachine Gun, Chest Mine / Pistol, DA CC Weapon. (0 | [b]15[/b])
[img]https://assets.infinitythegame.net/infinityarmy/img/_logosweb/501/logo_24.png[/img] [b]TOMCAT Engineer[/b] Combi Rifle + Light Flamethrower, D-Charges / Pistol, Knife. (0 | [b]22[/b])[b]GROUP 2 | [/b][img]https://assets.infinitythegame.net/infinityarmy/img/_logosweb/orden_regular.png[/img]3 [img]https://assets.infinitythegame.net/infinityarmy/img/_logosweb/orden_irregular.png[/img]3 [img]https://assets.infinitythegame.net/infinityarmy/img/_logosweb/orden_impetuosa.png[/img]3
[img]https://assets.infinitythegame.net/infinityarmy/img/_logosweb/501/logo_13.png[/img] [b]JAGUAR[/b] Adhesive Launcher, Panzerfaust / Pistol, DA CCW. (0.5 | [b]13[/b])
[img]https://assets.infinitythegame.net/infinityarmy/img/_logosweb/501/logo_13.png[/img] [b]JAGUAR[/b] Adhesive Launcher, Panzerfaust / Pistol, DA CCW. (0.5 | [b]13[/b])
[img]https://assets.infinitythegame.net/infinityarmy/img/_logosweb/501/logo_13.png[/img] [b]JAGUAR[/b] Adhesive Launcher, Panzerfaust / Pistol, DA CCW. (0.5 | [b]13[/b])
[img]https://assets.infinitythegame.net/infinityarmy/img/_logosweb/501/logo_12.png[/img] [b]MORLOCK[/b] Chain Rifle, Smoke Grenades / Pistol, DA CCW. (0 | [b]6[/b])
[img]https://assets.infinitythegame.net/infinityarmy/img/_logosweb/501/logo_12.png[/img] [b]MORLOCK[/b] Chain Rifle, Smoke Grenades / Pistol, DA CCW. (0 | [b]6[/b])
[img]https://assets.infinitythegame.net/infinityarmy/img/_logosweb/501/logo_12.png[/img] [b]MORLOCK[/b] Chain Rifle, Smoke Grenades / Pistol, DA CCW. (0 | [b]6[/b])
[b] 5 SWC | 300 Points |[/b] Open in Infinity Army
[img]https://assets.infinitythegame.net/infinityarmy/img/_logosweb/logo_201.png[/img][b] Yu Jing[/b]
[img]https://assets.infinitythegame.net/infinityarmy/img/_logosweb/201/logo_10.png[/img] [b]GŪIJIĂ Lieutenant[/b] MULTI HMG, Heavy Flamethrower / AP CCW. (3 | [b]88[/b])
[img]https://assets.infinitythegame.net/infinityarmy/img/_logosweb/sep.gif[/img] [img]https://assets.infinitythegame.net/infinityarmy/img/_logosweb/201/logo_10.png[/img] [b]GŪIJIĂ PILOT[/b] Light Flamethrower / Pistol, Knife. ([b][/b])
[img]https://assets.infinitythegame.net/infinityarmy/img/_logosweb/201/logo_10.png[/img] [b]GŪIJIĂ[/b] MULTI HMG, Heavy Flamethrower / AP CCW. (2 | [b]88[/b])
[img]https://assets.infinitythegame.net/infinityarmy/img/_logosweb/sep.gif[/img] [img]https://assets.infinitythegame.net/infinityarmy/img/_logosweb/201/logo_10.png[/img] [b]GŪIJIĂ PILOT[/b] Light Flamethrower / Pistol, Knife. ([b][/b])
[img]https://assets.infinitythegame.net/infinityarmy/img/_logosweb/201/logo_11.png[/img] [b]GŬILÁNG Hacker (Assault Hacking Device)[/b] Combi Rifle, Antipersonnel Mines / Pistol, Knife. (0.5 | [b]31[/b])
[img]https://assets.infinitythegame.net/infinityarmy/img/_logosweb/201/logo_12.png[/img] [b]NINJA Hacker (Killer Hacking Device)[/b] Tactical Bow / Pistol, DA CCW, Knife. (0 | [b]29[/b])
[img]https://assets.infinitythegame.net/infinityarmy/img/_logosweb/201/logo_15.png[/img] [b]MECH-ENGINEER[/b] Combi Rifle, D-Charges / Pistol, Knife. (0 | [b]15[/b])
[img]https://assets.infinitythegame.net/infinityarmy/img/_logosweb/201/logo_38.png[/img] [b]YÁOZĂO[/b] Electric Pulse. (0 | [b]3[/b])
[img]https://assets.infinitythegame.net/infinityarmy/img/_logosweb/201/logo_38.png[/img] [b]YÁOZĂO[/b] Electric Pulse. (0 | [b]3[/b])
[img]https://assets.infinitythegame.net/infinityarmy/img/_logosweb/201/logo_51.png[/img] [b]KRAKOT RENEGADE[/b] 2 Chain Rifles, Grenades / Pistol, DA CC Weapon. (0 | [b]14[/b])[img]https://assets.infinitythegame.net/infinityarmy/img/_logosweb/201/logo_22.png[/img] [b]CELESTIAL GUARD (Kuang Shi Control Device)[/b] Combi Rifle + Light Smoke Grenade Launcher / Pistol, Knife. (0.5 | [b]13[/b])
[img]https://assets.infinitythegame.net/infinityarmy/img/_logosweb/201/logo_23.png[/img] [b]KUANG SHI[/b] Chain Rifle / Pistol, Knife. (0 | [b]5[/b])
[img]https://assets.infinitythegame.net/infinityarmy/img/_logosweb/201/logo_23.png[/img] [b]KUANG SHI[/b] Chain Rifle / Pistol, Knife. (0 | [b]5[/b])
[img]https://assets.infinitythegame.net/infinityarmy/img/_logosweb/201/logo_23.png[/img] [b]KUANG SHI[/b] Chain Rifle / Pistol, Knife. (0 | [b]5[/b])
[img]https://assets.infinitythegame.net/infinityarmy/img/_logosweb/orden_regular.png[/img]10 [img]https://assets.infinitythegame.net/infinityarmy/img/_logosweb/orden_impetuosa.png[/img]4 [b]| 6 SWC | 299 Points |[/b] Open in Infinity Army
Deployment
Deployment was pretty straightforward. Morans on both flanks to contest the flank objectives, Morlocks spread across the backfield, two Jaguars on the left, one on the right, and the Interventor near the Tskylon Feuerbach on the right. I attempted to throw one Bandit over the centerline, but she failed her roll and hung out on my right table edge. The other Bandit went in the central room with the Tech Coffin, along with my Krakot. Alex’s deployment was one Guijia, a pile of Kuang Shi and their CG controller, his own Krakot, and an Engineer.
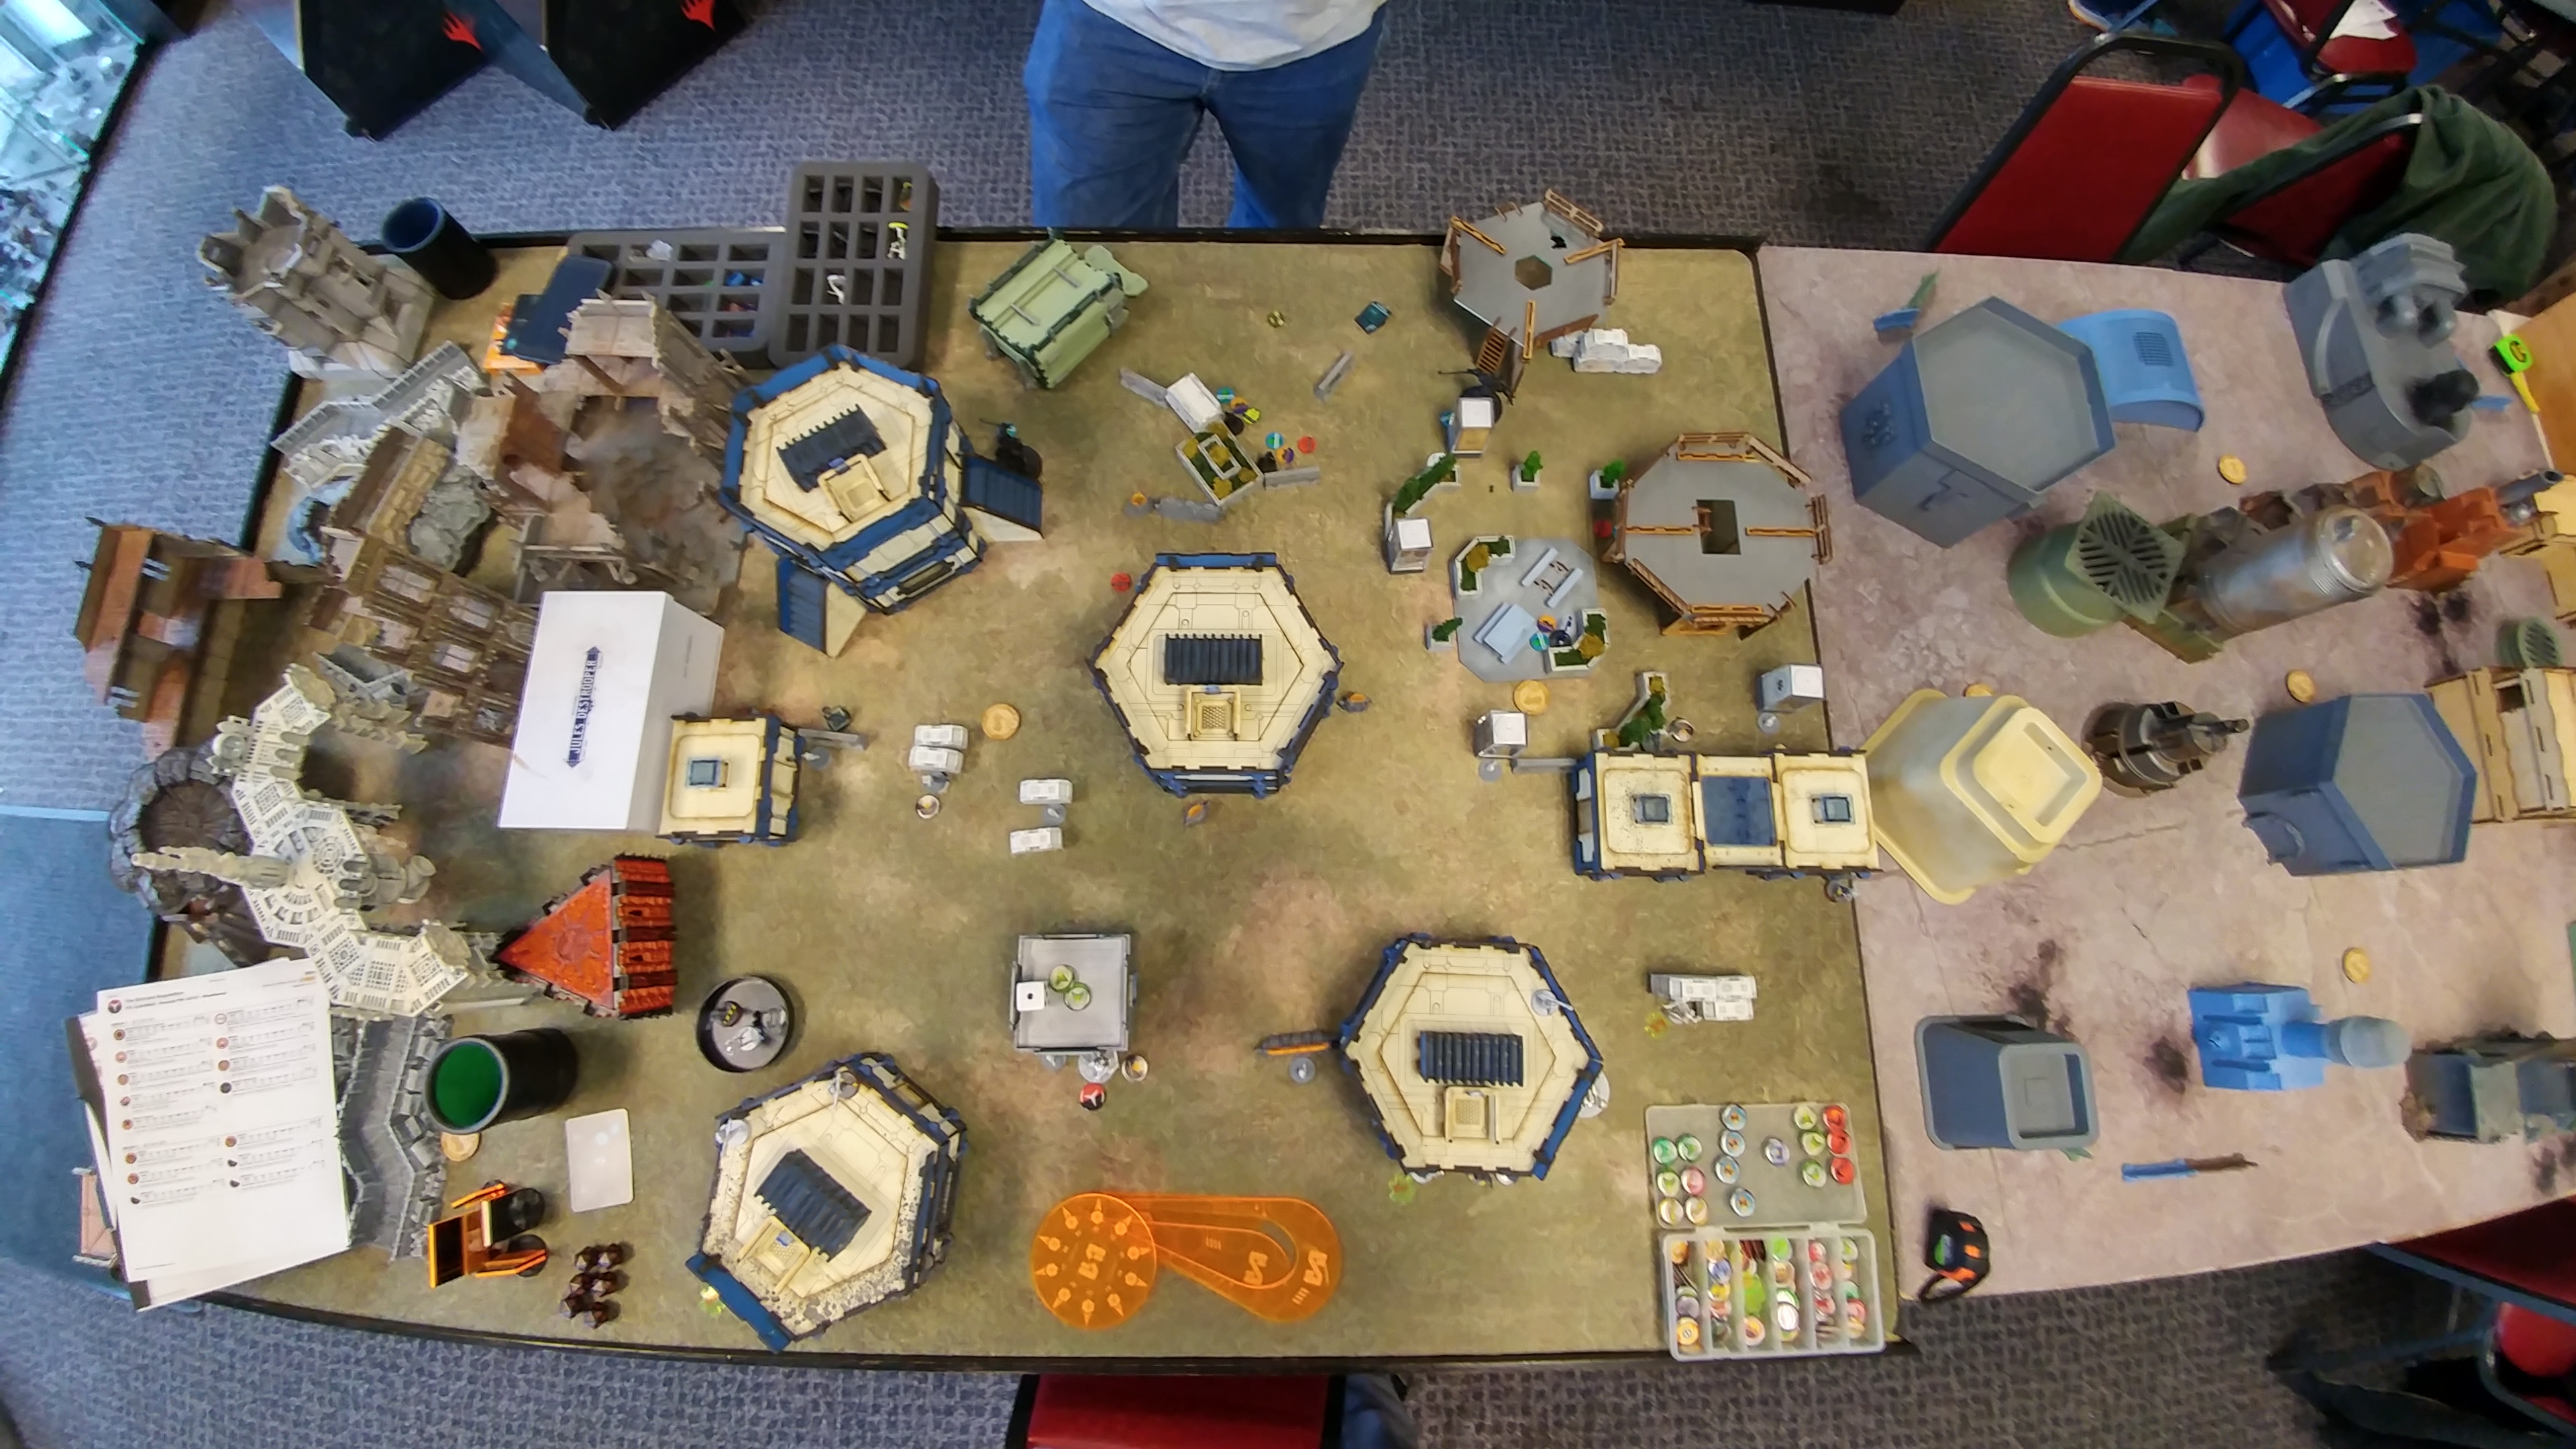
I put my Taskmaster down out of reserve, and Alex put down a second Guijia. Well crap. I don’t have an AHD this game and no big guns aside from the Panzerfausts and the Feuerbach, none of which are high-burst. Not good. I nominate the Taskmaster as my DataTracker, and he nominates his Celestial Guard.
Turn 1
Top of Turn 1 – Nomads
My Krakot tries to deal with his Krakot, and gets himself and my Bandit killed by a grenade, with his Krakot passing his ARM against my chest mine. Not an auspicious start. It goes downhill from here, with all my Morlocks getting shot down by EXP rounds from the Guijias. I attempt to coordinate an order on the Jaguars to take out one of the Guijias, but they fail to scratch the paint. I try again with the Feuerbach, but it gets KOed. I basically broke my army against the wall that was his Guijia. Ah well. I bring the Tomcat on to pick the Feuerbach up, buff the Feuerbach, and scurry the Tomcat away into cover.
Bottom of Turn 1 – Yu Jing
The Kuang Shi advance, with one of them dodging the Crazy Koalas on the left, then taking out the Moran that’s there. The Krakot, at the very least, gets glued, and is now just a grumpy monkey order battery for the rest of the game. The TAGs shock all my Jaguars off the table and drop the Feuerbach Tsyklon again, with my Interventor failing all of his possession rolls against the Guijia on the right. The Celestial Guard sneaks into the central room and gingerly picks her way through shredded Bandit and Krakot as she gets closer to the Tech Coffin.
Turn 2
Top of Turn 2 – Nomads
I don’t really have any options that don’t end with me getting shot by a TAG’s EXP round or heavy flamethowered, so I blow all my orders trying to possess the Guijia, in full knowledge that Alex is sitting on one more command token. Sadly, I fail all my rolls, with him passing BTS against the one roll I do make. Fiddlesticks and teacups.
Bottom of Turn 3 – Yu Jing
A few orders and lots of HMG fire later, all my stuff is dead, and I stick out my hand. Well played, Alex! He even manages to accomplish a few objectives with his sneaky Ninja and Guilang.
9-0 Yu Jing Victory!
Notes
- Uhh… don’t get tabled?
- Bring an AHD?
- Maybe try to recamo with the Bandit and then ADHL the TAG on the right… without getting flamethrowered and killing the Moran that’s there as well?
- D-Charge the Guijia with the Tomcat engineer? I’m sure that’s a great idea!
- Honestly I think I deployed pretty aggressively and didn’t have a great plan to deal with the TAGs. The Kuang Shi did a great job of guarding the table edges against my Tomcat as well as from my approaching Morlocks. I didn’t take E/M Morlocks this time either, because this was my list for the Grid and I wanted DA CCWs to smash antennas.
- Deploying blind against his list on such an open table was really, really tough.
- I don’t want to say that this game was unwinnable, but I do think that a slew of sub-par decisions by me, inadequate deployment, and bad dice crippled me first turn and then Alex had little trouble just mopping me up.
- My plan for this mission was just get the Taskmaster into B2B with the Tech Coffin, but I didn’t have a gameplan beyond that. I think my Power Pack list would’ve fared better against the double Guijia, I had more capabilities to strip their order pool in that list.
Game 3 – Krakot on the Roof
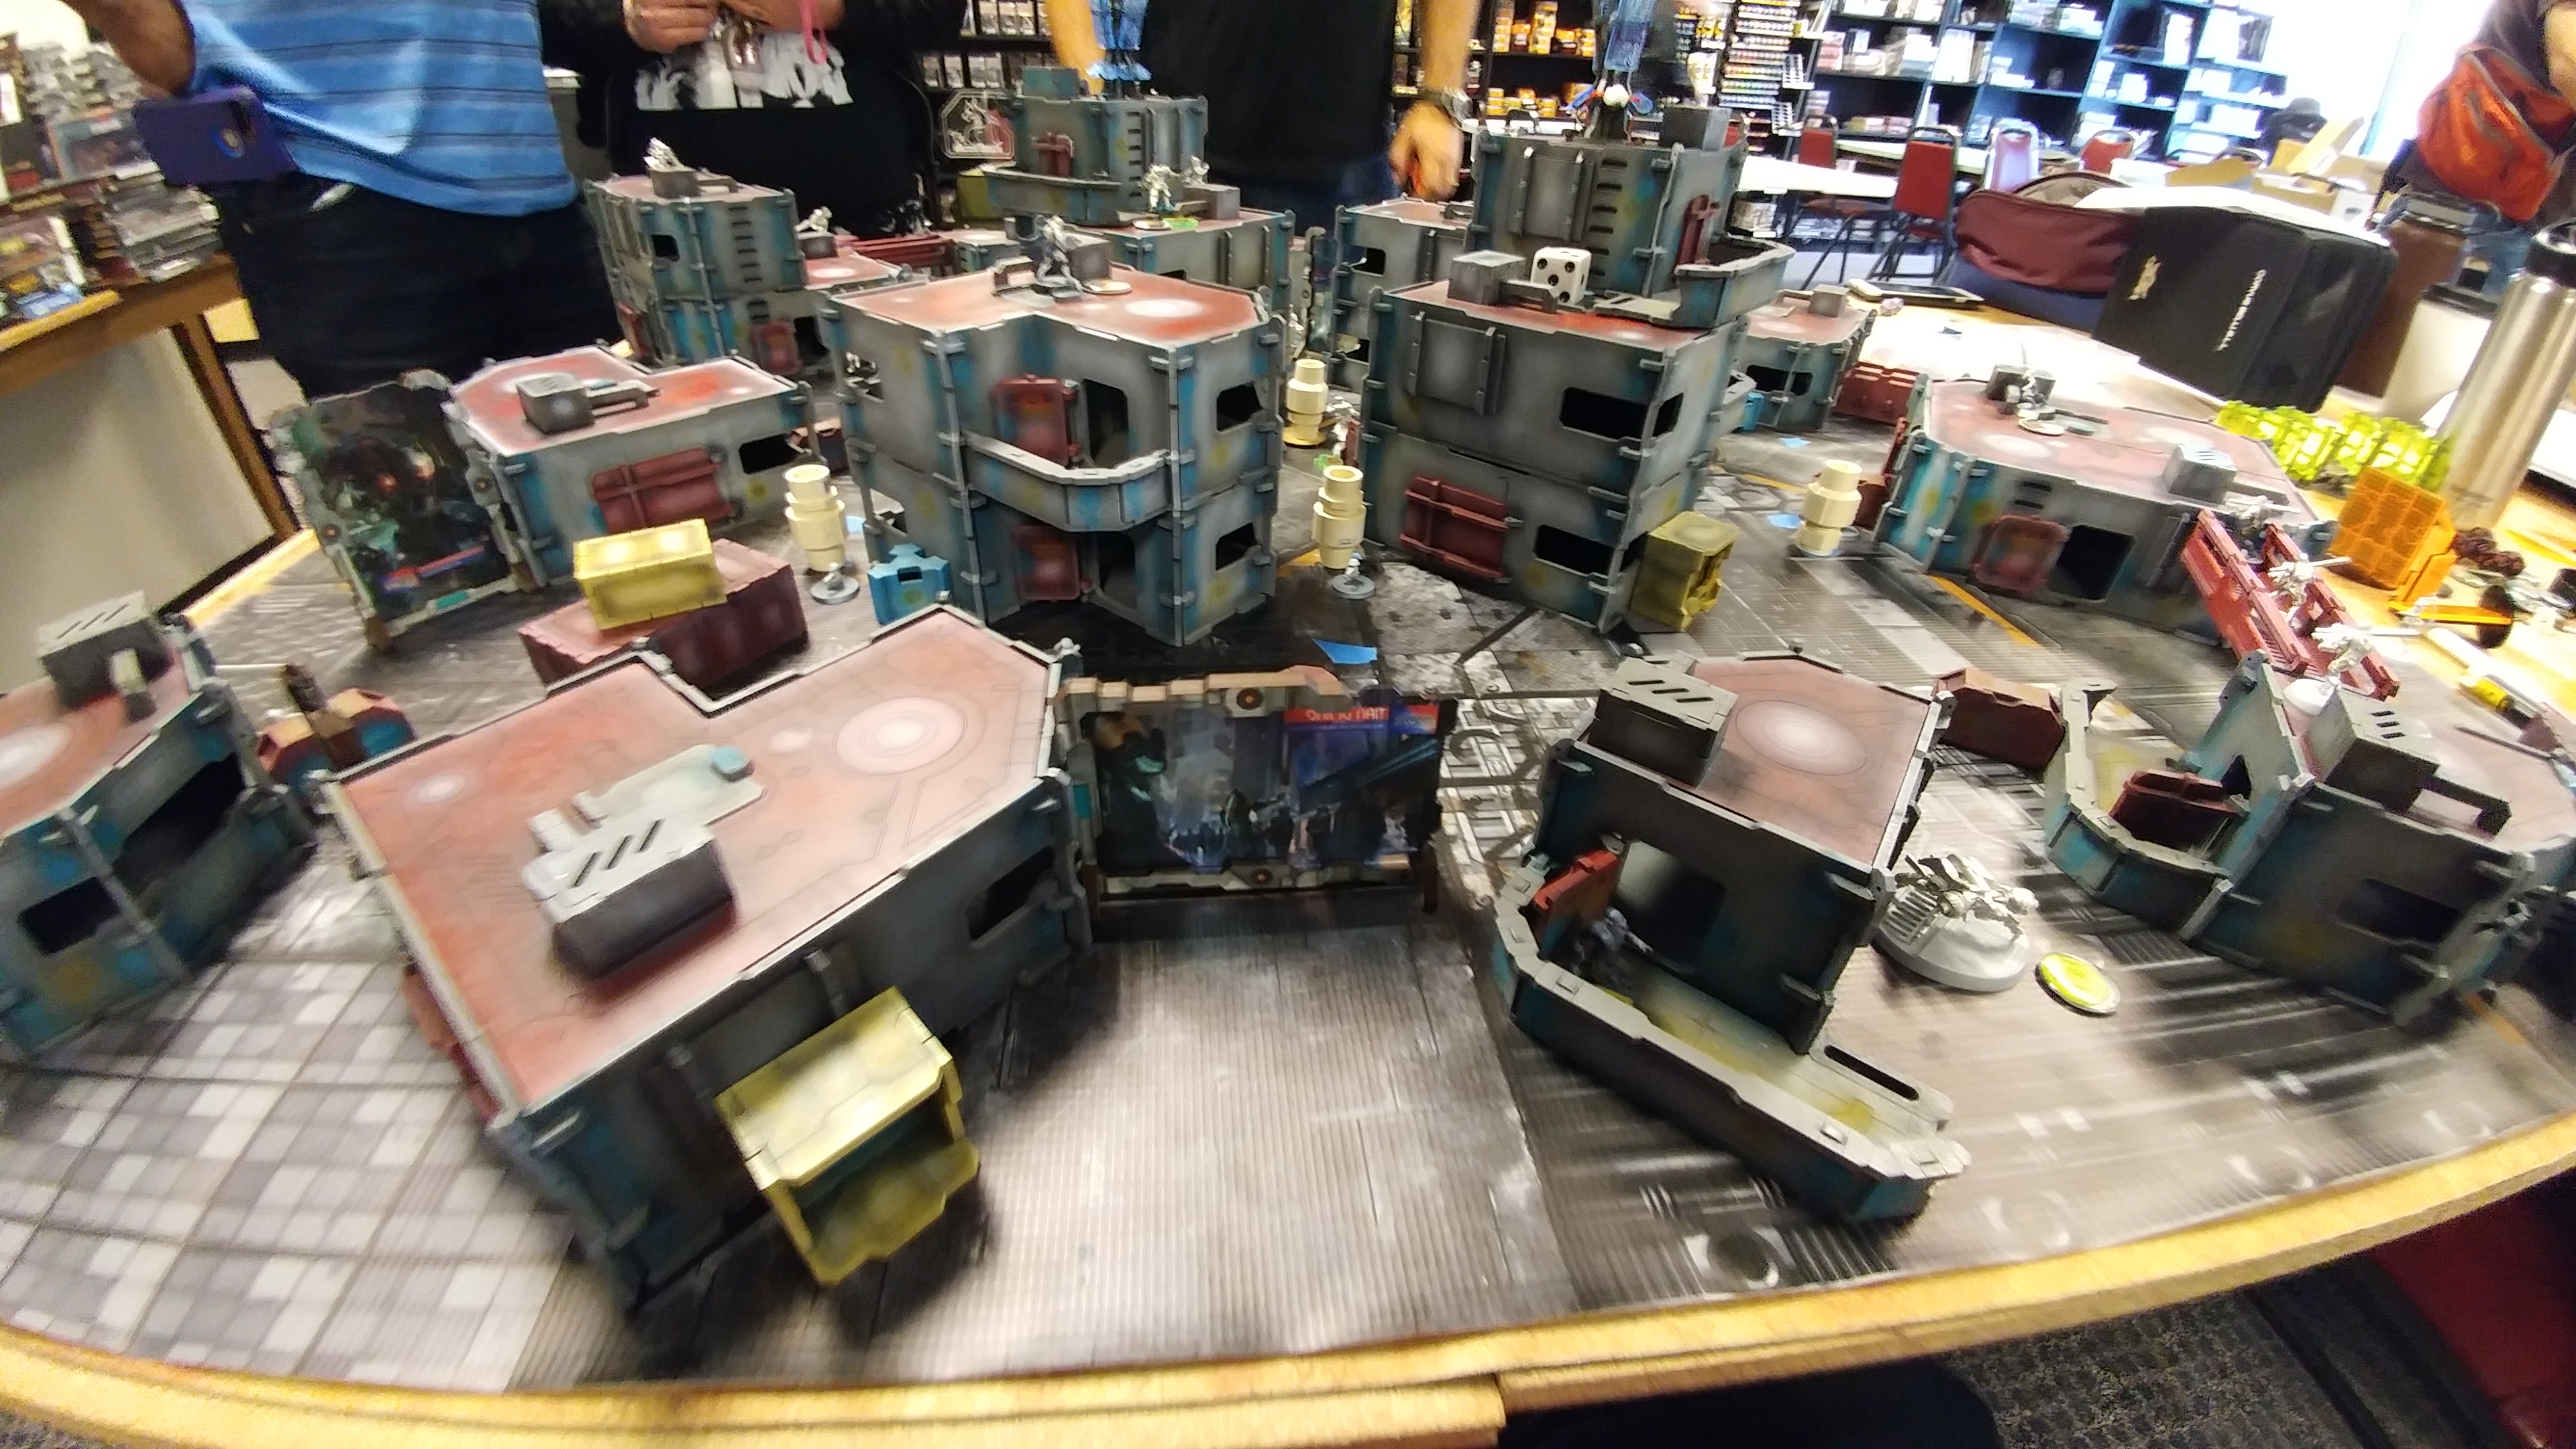
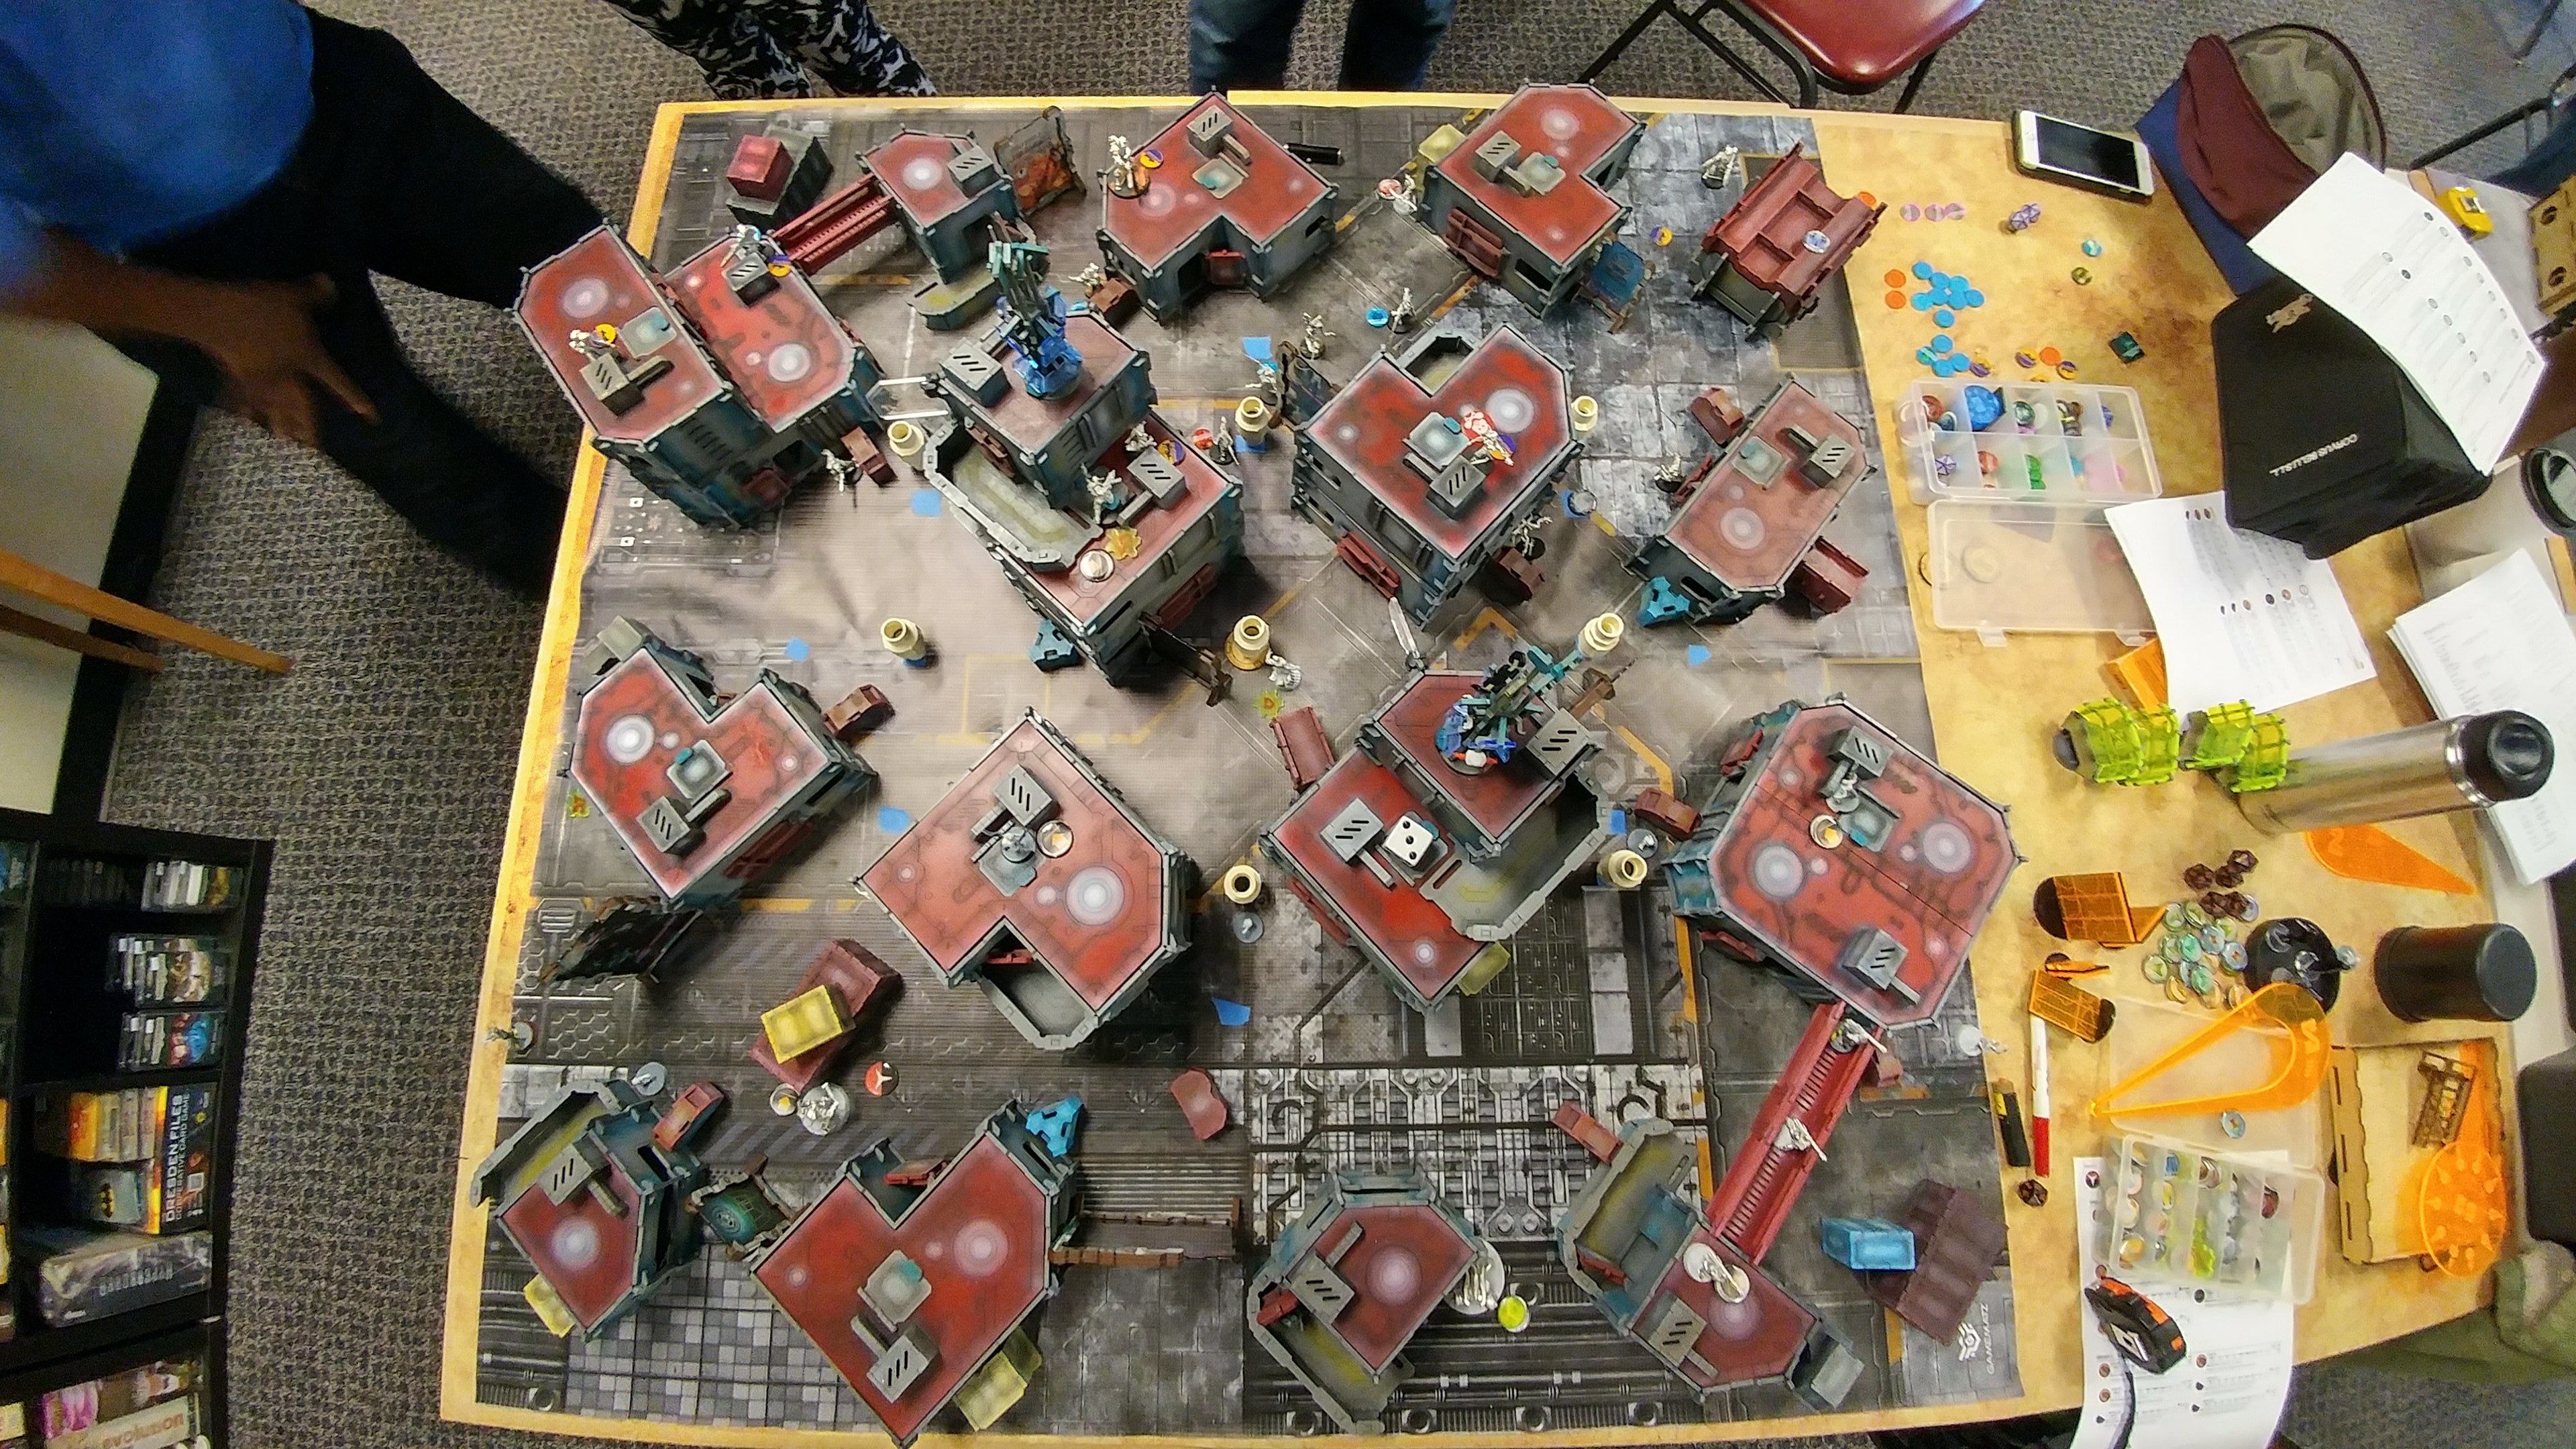
 Adam is a very challenging opponent, and we had a really amazing table painted up by Andrew, one of our Combined Army players (who incidentally took the tournament! Congratz, Andrew!). In contrast to the last game, this table was very dense and warband friendly, something that I would take full advantage of…
Overview
- Mission: The Grid
- Forces: Nomads versus Morat Aggression Force
- Deploy First: Nomads
- First Turn: Nomads
[img]https://assets.infinitythegame.net/infinityarmy/img/_logosweb/logo_501.png[/img][b] The Grid and Acquisition[/b]
[b]GROUP 1 | [/b][img]https://assets.infinitythegame.net/infinityarmy/img/_logosweb/orden_regular.png[/img]7 [img]https://assets.infinitythegame.net/infinityarmy/img/_logosweb/orden_irregular.png[/img]2 [img]https://assets.infinitythegame.net/infinityarmy/img/_logosweb/orden_impetuosa.png[/img]1
[img]https://assets.infinitythegame.net/infinityarmy/img/_logosweb/501/logo_16.png[/img] [b]INTERVENTOR Hacker Lieutenant (Hacking Device Plus)[/b] Combi Rifle, 1 FastPanda / Pistol, Knife. (0.5 | [b]27[/b])
[img]https://assets.infinitythegame.net/infinityarmy/img/_logosweb/501/logo_49.png[/img] [b]TASKMASTER[/b] Red Fury, Pulzar, CrazyKoalas + TinBot A (Deflector L1) / Heavy Pistol, DA CCW. (1 | [b]53[/b])
[img]https://assets.infinitythegame.net/infinityarmy/img/_logosweb/501/logo_30.png[/img] [b]MORAN (Forward Observer)[/b] Combi Rifle, CrazyKoalas (2) / Pistol, Knife. (0.5 | [b]22[/b])
[img]https://assets.infinitythegame.net/infinityarmy/img/_logosweb/501/logo_30.png[/img] [b]MORAN (Forward Observer)[/b] Combi Rifle, CrazyKoalas (2) / Pistol, Knife. (0.5 | [b]22[/b])
[img]https://assets.infinitythegame.net/infinityarmy/img/_logosweb/501/logo_9.png[/img] [b]BANDIT (Forward Observer)[/b] Light Shotgun, Adhesive Launcher / Pistol, DA CCW. (0 | [b]23[/b])
[img]https://assets.infinitythegame.net/infinityarmy/img/_logosweb/501/logo_9.png[/img] [b]BANDIT Hacker (Killer Hacking Device)[/b] Light Shotgun, Adhesive Launcher / Pistol, DA CCW. (0 | [b]25[/b])
[img]https://assets.infinitythegame.net/infinityarmy/img/_logosweb/501/logo_32.png[/img] [b]TSYKLON[/b] Feuerbach, Pitcher / Electric Pulse. (1 | [b]34[/b])
[img]https://assets.infinitythegame.net/infinityarmy/img/_logosweb/501/logo_48.png[/img] [b]KRAKOT RENEGADE[/b] Submachine Gun, Chest Mine / Pistol, DA CC Weapon. (0 | [b]15[/b])
[img]https://assets.infinitythegame.net/infinityarmy/img/_logosweb/501/logo_24.png[/img] [b]TOMCAT Engineer[/b] Combi Rifle + Light Flamethrower, D-Charges / Pistol, Knife. (0 | [b]22[/b])[b]GROUP 2 | [/b][img]https://assets.infinitythegame.net/infinityarmy/img/_logosweb/orden_regular.png[/img]3 [img]https://assets.infinitythegame.net/infinityarmy/img/_logosweb/orden_irregular.png[/img]3 [img]https://assets.infinitythegame.net/infinityarmy/img/_logosweb/orden_impetuosa.png[/img]3
[img]https://assets.infinitythegame.net/infinityarmy/img/_logosweb/501/logo_13.png[/img] [b]JAGUAR[/b] Adhesive Launcher, Panzerfaust / Pistol, DA CCW. (0.5 | [b]13[/b])
[img]https://assets.infinitythegame.net/infinityarmy/img/_logosweb/501/logo_13.png[/img] [b]JAGUAR[/b] Adhesive Launcher, Panzerfaust / Pistol, DA CCW. (0.5 | [b]13[/b])
[img]https://assets.infinitythegame.net/infinityarmy/img/_logosweb/501/logo_13.png[/img] [b]JAGUAR[/b] Adhesive Launcher, Panzerfaust / Pistol, DA CCW. (0.5 | [b]13[/b])
[img]https://assets.infinitythegame.net/infinityarmy/img/_logosweb/501/logo_12.png[/img] [b]MORLOCK[/b] Chain Rifle, Smoke Grenades / Pistol, DA CCW. (0 | [b]6[/b])
[img]https://assets.infinitythegame.net/infinityarmy/img/_logosweb/501/logo_12.png[/img] [b]MORLOCK[/b] Chain Rifle, Smoke Grenades / Pistol, DA CCW. (0 | [b]6[/b])
[img]https://assets.infinitythegame.net/infinityarmy/img/_logosweb/501/logo_12.png[/img] [b]MORLOCK[/b] Chain Rifle, Smoke Grenades / Pistol, DA CCW. (0 | [b]6[/b])
[b] 5 SWC | 300 Points |[/b] Open in Infinity Army
[img]https://assets.infinitythegame.net/infinityarmy/img/_logosweb/logo_602.png[/img][b] Morat Aggression Force[/b]
[b]GROUP 1 | [/b][img]https://assets.infinitythegame.net/infinityarmy/img/_logosweb/orden_regular.png[/img]7 [img]https://assets.infinitythegame.net/infinityarmy/img/_logosweb/orden_irregular.png[/img]3 [img]https://assets.infinitythegame.net/infinityarmy/img/_logosweb/orden_impetuosa.png[/img]5
[img]https://assets.infinitythegame.net/infinityarmy/img/_logosweb/602/logo_8.png[/img] [b]SOGARAT Lieutenant[/b] Feuerbach / Assault Pistol, AP CCW. (1.5 | [b]57[/b])
[img]https://assets.infinitythegame.net/infinityarmy/img/_logosweb/602/logo_12.png[/img] [b]OZNAT[/b] Vulkan Shotgun, Smoke Grenades / Pistol, DA CCW. (0 | [b]20[/b])
[img]https://assets.infinitythegame.net/infinityarmy/img/_logosweb/602/logo_12.png[/img] [b]OZNAT[/b] Vulkan Shotgun, Smoke Grenades / Pistol, DA CCW. (0 | [b]20[/b])
[img]https://assets.infinitythegame.net/infinityarmy/img/_logosweb/602/logo_14.png[/img] [b]PRETA[/b] Chain Rifle / AP CCW. (0 | [b]7[/b])
[img]https://assets.infinitythegame.net/infinityarmy/img/_logosweb/602/logo_14.png[/img] [b]PRETA[/b] Chain Rifle / AP CCW. (0 | [b]7[/b])
[img]https://assets.infinitythegame.net/infinityarmy/img/_logosweb/602/logo_14.png[/img] [b]PRETA[/b] Chain Rifle / AP CCW. (0 | [b]7[/b])[img]https://assets.infinitythegame.net/infinityarmy/img/_logosweb/602/logo_10.png[/img] [b]ZERAT (Forward Observer)[/b] Boarding Shotgun, Grenades, Antipersonnel Mines / Pistol, Knife. (0 | [b]22[/b])
[img]https://assets.infinitythegame.net/infinityarmy/img/_logosweb/602/logo_10.png[/img] [b]ZERAT (Forward Observer)[/b] Boarding Shotgun, Grenades, Antipersonnel Mines / Pistol, Knife. (0 | [b]22[/b])
[img]https://assets.infinitythegame.net/infinityarmy/img/_logosweb/602/logo_10.png[/img] [b]ZERAT (Forward Observer)[/b] Boarding Shotgun, Grenades, Antipersonnel Mines / Pistol, Knife. (0 | [b]22[/b])
[img]https://assets.infinitythegame.net/infinityarmy/img/_logosweb/602/logo_4.png[/img] [b]YAOGAT[/b] Spitfire / Pistol, CCW. (1.5 | [b]32[/b])[b]GROUP 2 | [/b][img]https://assets.infinitythegame.net/infinityarmy/img/_logosweb/orden_regular.png[/img]4 [img]https://assets.infinitythegame.net/infinityarmy/img/_logosweb/orden_impetuosa.png[/img]2
[img]https://assets.infinitythegame.net/infinityarmy/img/_logosweb/602/logo_25.png[/img] [b]KRAKOT RENEGADE[/b] 2 Chain Rifles, Grenades / Pistol, DA CC Weapon. (0 | [b]14[/b])
[img]https://assets.infinitythegame.net/infinityarmy/img/_logosweb/602/logo_25.png[/img] [b]KRAKOT RENEGADE[/b] 2 Chain Rifles, Grenades / Pistol, DA CC Weapon. (0 | [b]14[/b])
[img]https://assets.infinitythegame.net/infinityarmy/img/_logosweb/602/logo_2.png[/img] [b]KURGAT (Support Group)[/b] Autocannon, D-Charges, Antipersonnel Mines / Pistol, Knife. (1 | [b]28[/b])
[img]https://assets.infinitythegame.net/infinityarmy/img/_logosweb/602/logo_3.png[/img] [b]RODOK[/b] Missile Launcher, Light Shotgun / Pistol, Knife. (1.5 | [b]28[/b])
[b] 5.5 SWC | 300 Points |[/b] Open in Infinity Army
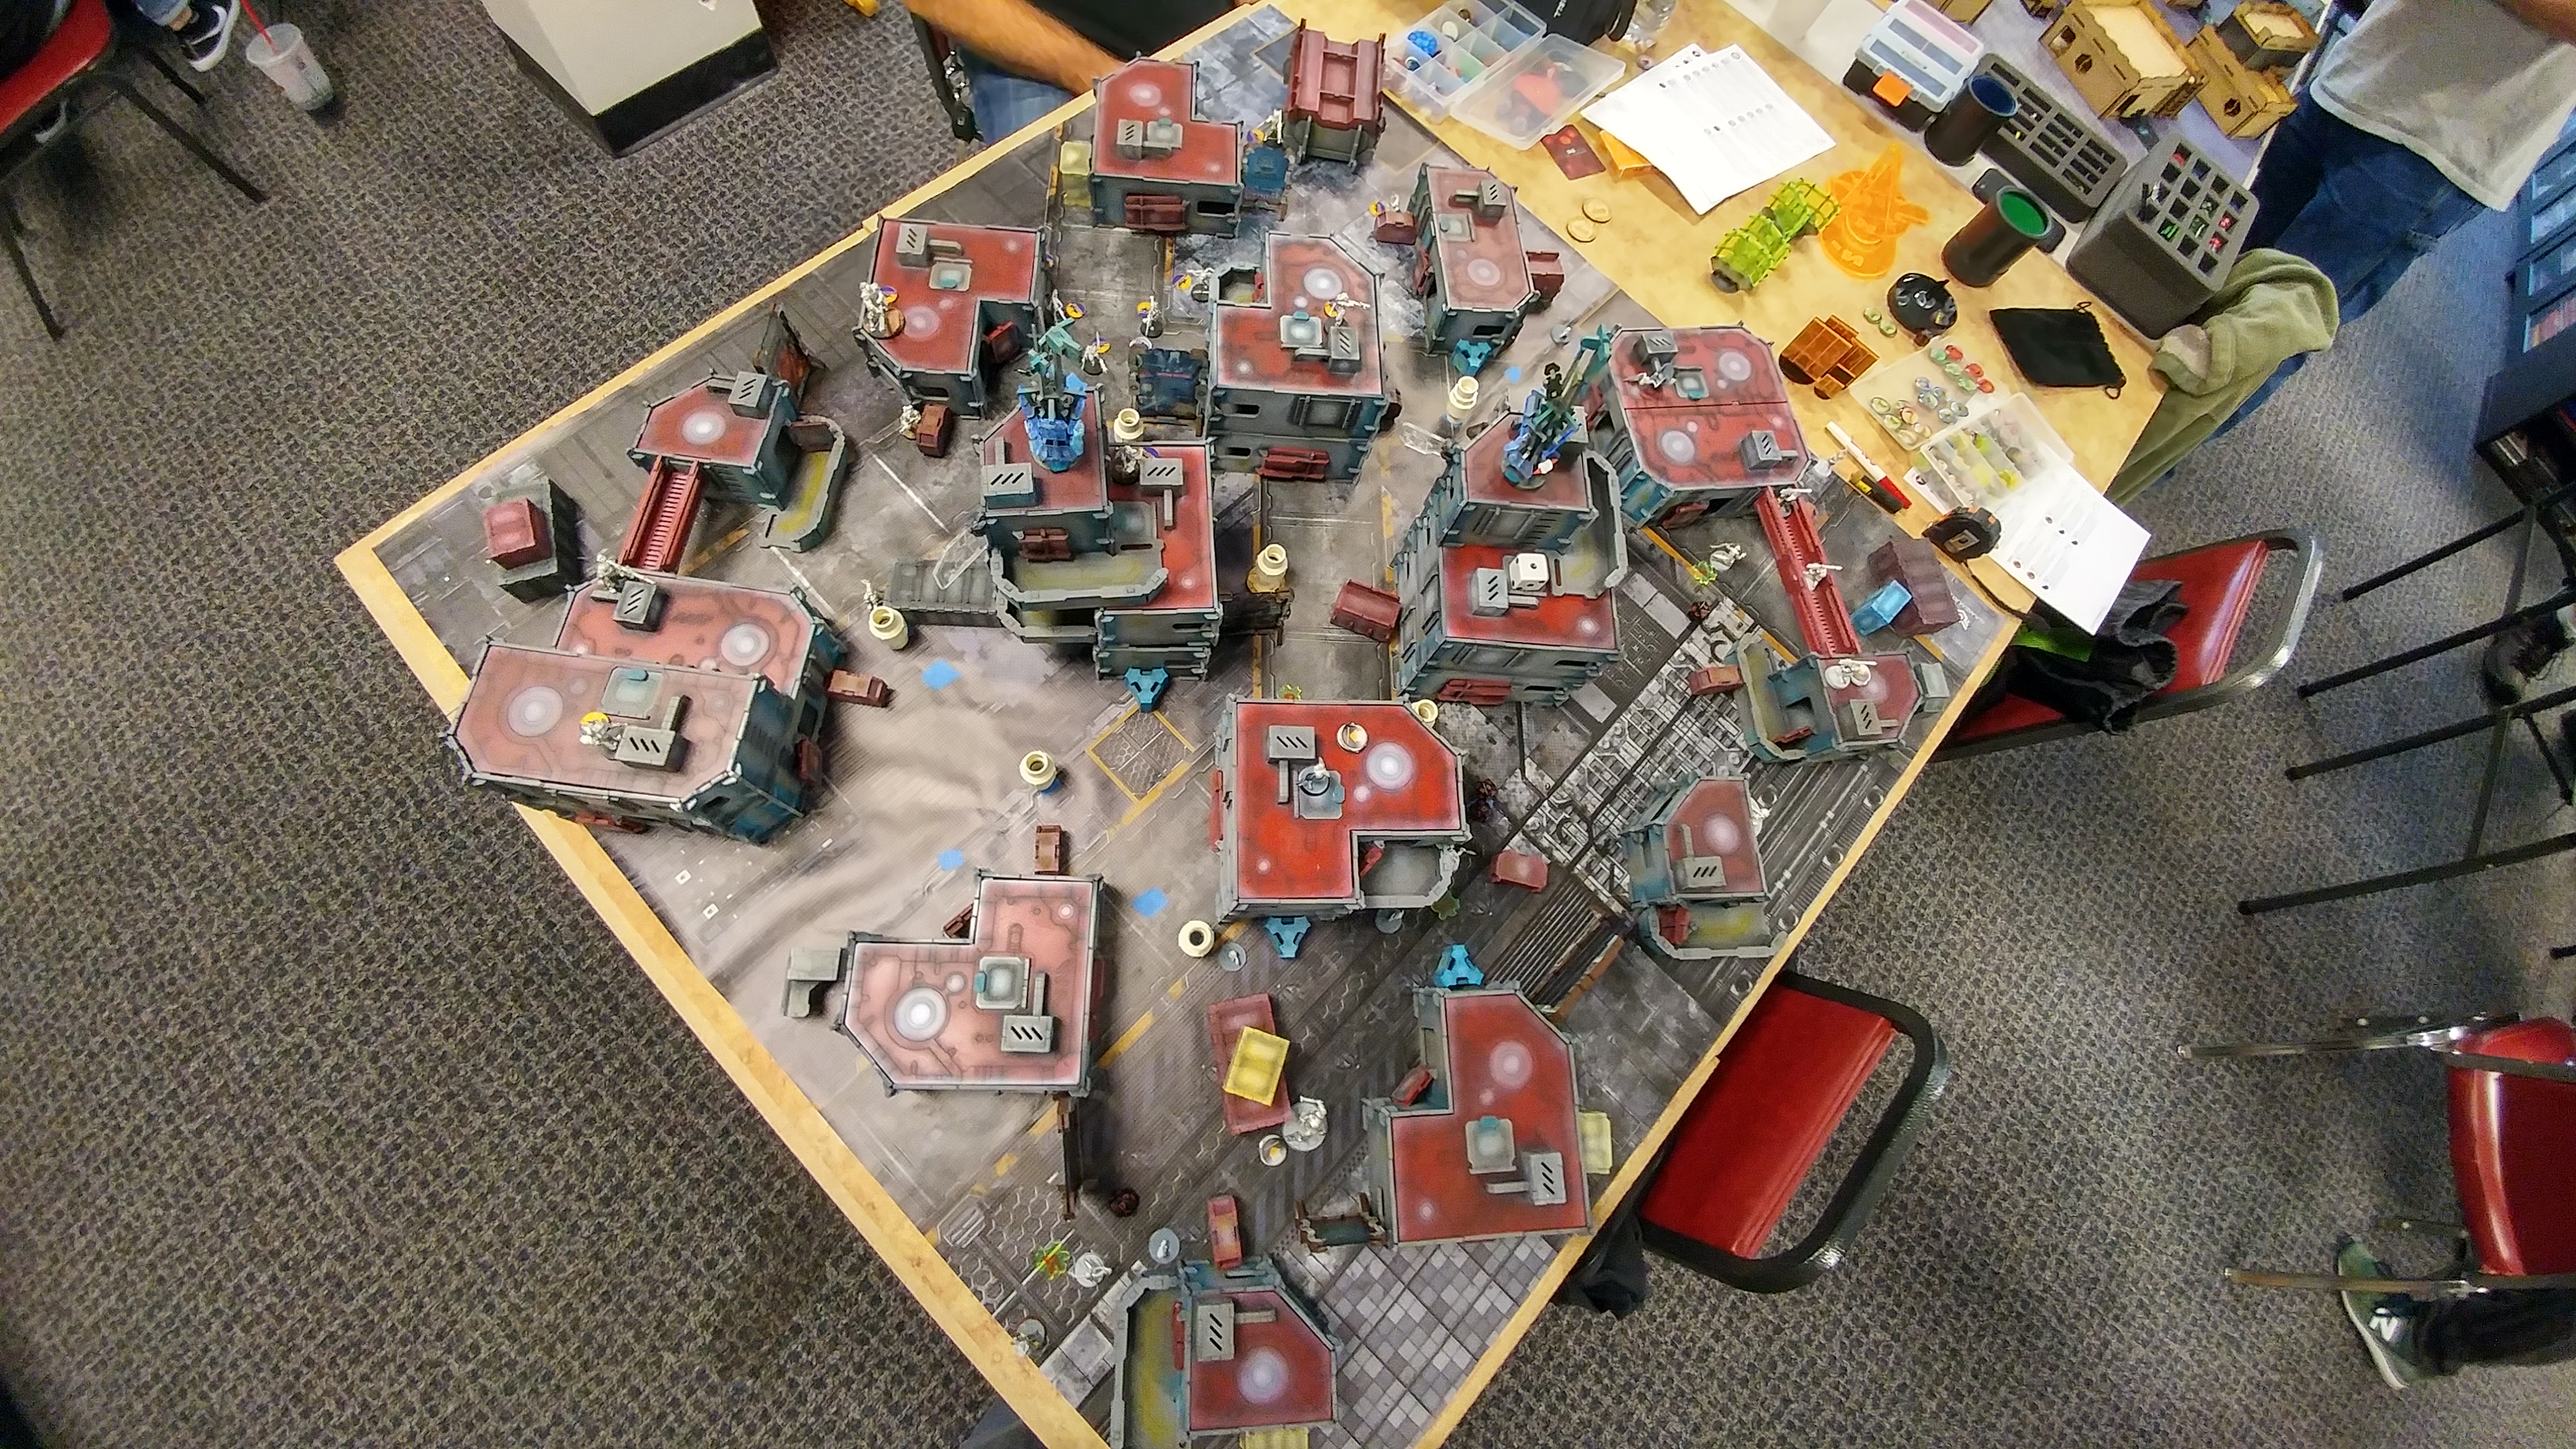
Deployment
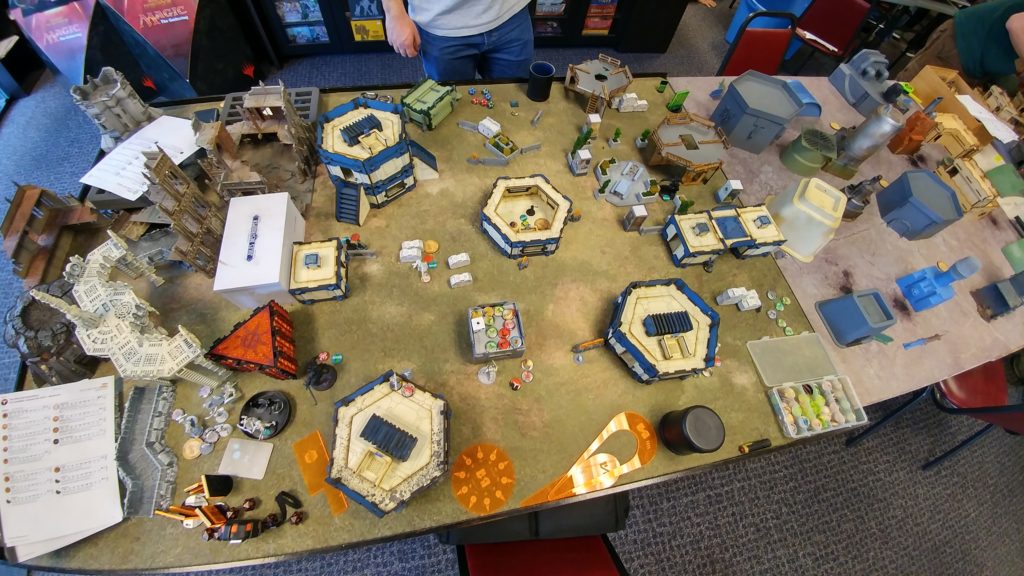
There’s a little bridge on the right side of my deployment zone that just wants to have 3 Jaguar Panzerfausts on it, so that’s exactly what happens. I put a Moran prone on buildings on either side of my deployment zone, and then spread my Morlocks out, an order away from the front lines. The one on the right rolls 8-4 MOV, my favorite roll, with the one on the left rolling super jump.
My Interventor hides all the way at the back, hoping that there isn’t a Rasyat trying to set up a diplomatic meeting waiting in the wings. To discourage this, I plop the Tsyklon nearby and hope for the best. I attempt to throw both Bandits over the centerline, but this doesn’t work out and they end up on the flanks, one on each side. I put my Krakot in the center, and he rolls super jump. With such a tall board, this is sure to come in handy!
 It’s Adam’s turn to deploy. The Kurgat Autocannon shows up on the left staring at the big open clearing in the middle-left. He’s got an Oznat and Preta wrecking crew in the middle, backed up by a Sogorat Feuerbach and a Yaogat Spitfire. His Krakots are on the flanks, ready to chain rifle my guys or smash some antennas. A string of Zerat FOs are lying on the rooftops, prone, ready to start pew pewing antennas and throwing grenades. I drop my Taskmaster down on the left, hiding behind a crate, and he puts down his Rodok Missile Launcher on my right, behind a building ready to super jump and take some potshots at stuff. My Taskmaster is my DataTracker, and Adam cheekily nominates the Zerat closest to my HVT his DataTracker. With a string of three across the centerline, all with grenades, it’s really easy to get the HVT with some spec-fired grenades for a quick 4 points.
Turn 1
Top of Turn 1 – Nomads
The Krakot is staring down the barrel of the Kurgat’s autocannon so he throws away his impetuous order, but the Morlocks advance safely, the 8-4 MOV one rocketing up the board on the right under cover of smoke. She skids around the corner, chain-rifling the Oznat/Preta link, catching a Preta flat-footed and sending it dogged as they all try to dodge. She tanks the return fire from the hostile Krakot on that side and finds a different angle on the link, catching most of them with her chain rifle. Most of them dodge again, but the important bit is that she drops the link leader, breaking the link! Anticipating this, Adam had already broken the dogged Preta out of the link to catch my Morlock with a chain rifle, and this time I fail ARM and down she goes. Totally worthwhile trade though. I activate the center Morlock and manage to catch a Preta out of position with another chain rifle, and send it dogged as well.
I bring in my Tomcat behind the Kurgat and attempt to flamethrower on the way to cover, but the Morat dodges successfully. My Tomcat, undeterred by this, guns down the Yaogat Spitfire and then climbs up the building to point-blank shoot the Kurgat again, this time beating out his dodge but getting pasted by the Sogorat’s Feuerbach. Two heavy weapons down, I’ll take it. This unpins my Krakot, so I super jump him up to the building where the middle Zerat is and attempt to chest mine her, but she dodges. I try again, but she dodges again! Curses! With that, I’m out of orders, so I buff the Tsyklon with Enhanced Reaction and pass the turn.
Bottom of Turn 1 – MAF
Adam doesn’t want to get his Krakot on the left chain rifled by my Morlock there, so he cancels its impetuous order. The Krakot on the right advances, managing to dodge and PH save his way past my Jaguar firing line. The remaining Preta does the exact same, rushing my Morlock in the center, catching a bunch of ADHL shots but passing PH!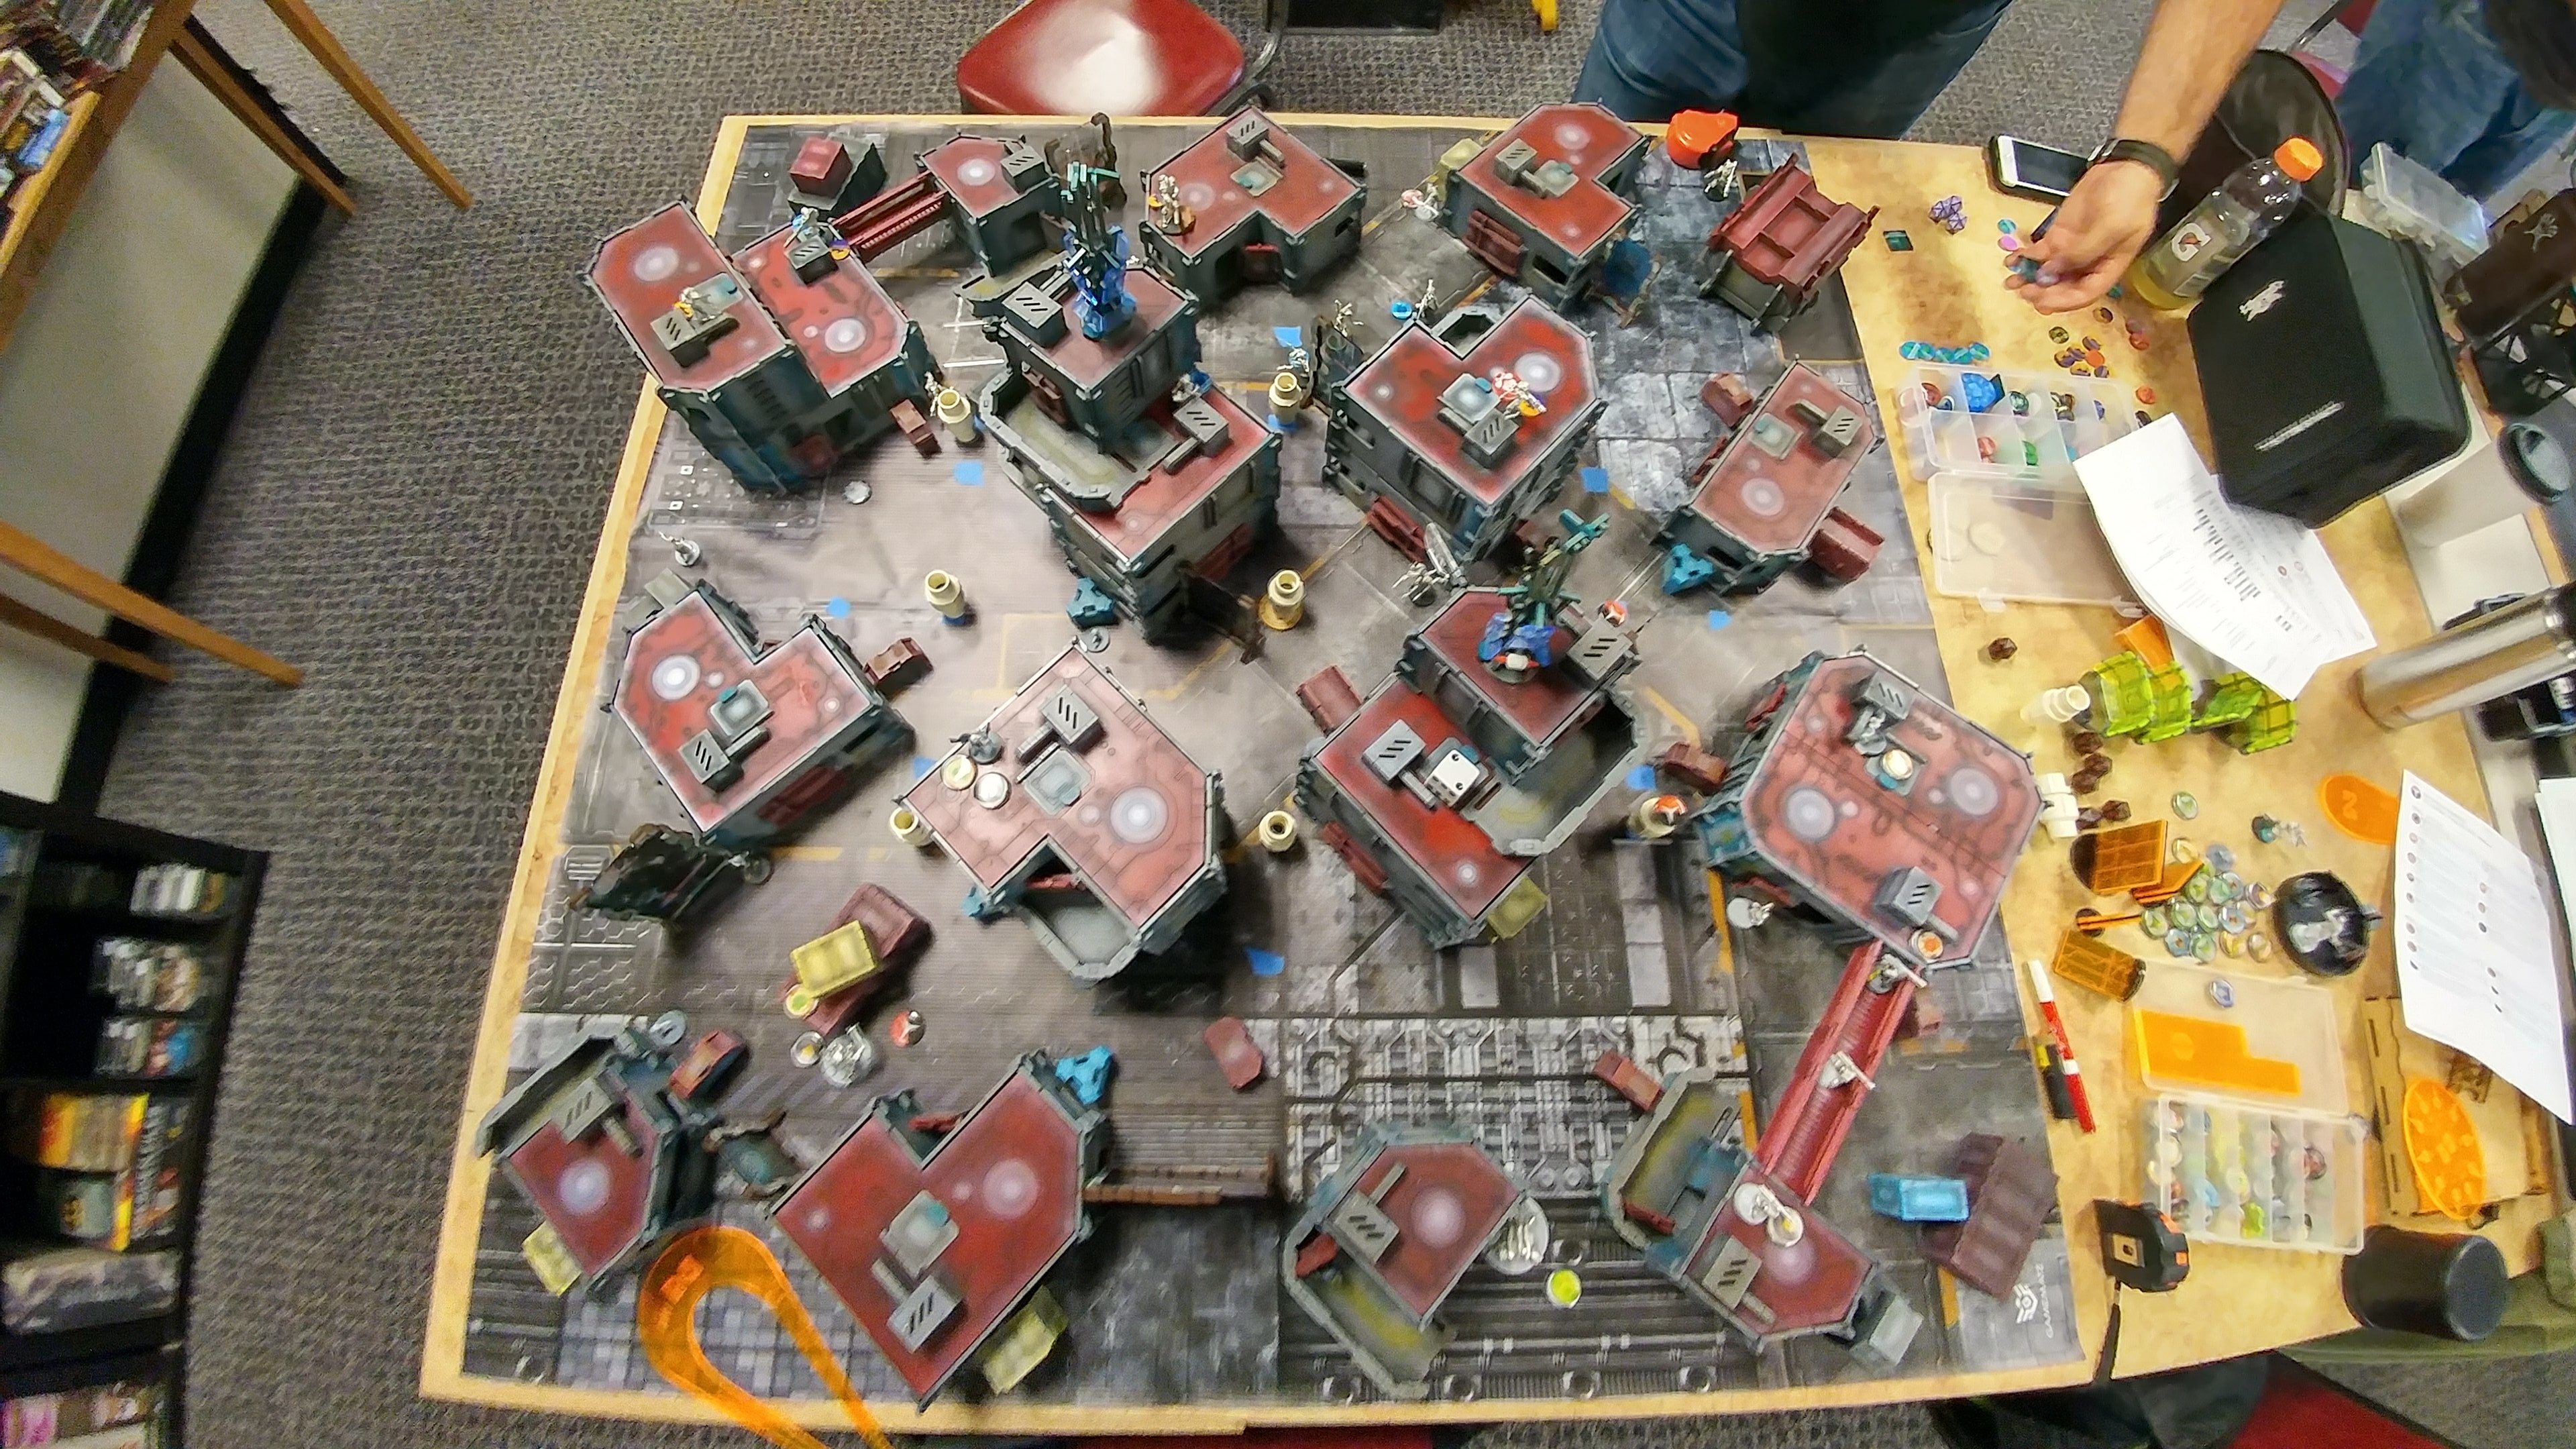 The impetuous phase over, Adam sets about accomplishing some objectives. He rains grenades down on my HVT with his Zerat DataTracker, finally killing my guy after I pass a dodge and an ARM save. With his last order, he tries to shape my movement by putting the Krakot the closest to my Morlock and attempting a chain rifle. I dodge successfully.
Turn 2
Top of Turn 2 – Nomads
The Morlock on the left super jumps up to get an angle on the leftmost Zerat, who successfully dodges my chain rifle. What seems like Adam’s entire remaining force just blows my poor Morlock out of the sky. My Krakot, who is quite close to the Zerat in the middle, bum-rushes her, trying to get past her shotgun before she can pull the trigger. I elect to not use Bezerk and my Krakot beats her roll, gutting her like the Renegade he is! The Morlock in the middle shifts as if to get a Chain Rifle shot lined up on the Preta and Adam’s hostile Krakot, and he dodges, trying to drain orders out of me. I split burst with the Morlock’s pistol and beat out both of his dodge rolls, but he passes ARM against the measly 11 DAM pistol shots.
Now that I’m done with the impetuous orders, I get right down to business. The Moran on the right pops up and forward observes the three right antennas over two orders. I try to snag the left three with the left Morlock, but discover that Adam has a bunch of pistol shots from his two Krakots. I split combi-bursts against his Krakots and the Preta, and fail to wound them, but at least my Moran’s not dead. I manage to scoot him so he only can see the left Krakot, and settle him in to ARO next turn.
I need to do something about Adam’s Zerats, so he can’t FO any antennas. I figure I should use the Krakot, jumping him over to the building on the right to take out Adam’s DataTracker Zerat, but my odds aren’t good and I’m out of chest mines. I waffle a bit, and Adam, being a good warcor, senses this and starts singing the A-Team theme.
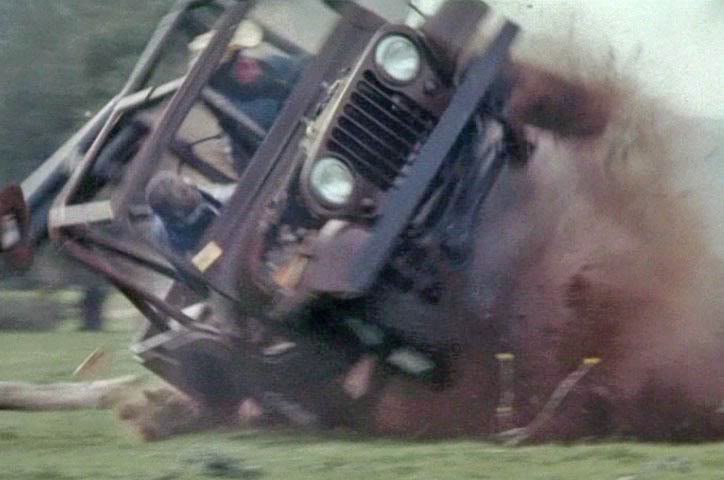
Okay! I’m on board. It’s jeep-flippin’ time! I join in on the singing and leap my Krakot over to the other building, blasting away with his SMG. Between “Bah-dah-bum-dahs,” Adam declares shotgun from the Zerat in response and shoots with his Feuerbach and Rodok ML as well. Adam shouts “PULL!” and only the Krakot’s boots land on the roof, with one tipping over comically as the camera pans in. Well, it was worth a shot!
I get back to playing the objectives and use the Jaguars and their Panzerfausts to blow up 2 out of the 3 antennas I’ve designated on the right (the farther ones, in case Adam trys something sneaky!). I advance my two Bandits so they might be useful this fight, and then throw the Morans into suppression, with the Krakot on the left whiffing his free pistol shot again my Moran.
Bottom of Turn 2 – MAF
The Krakot on the left forfeits his order again, and the Preta clears a Crazy Koala for the one on the right, which trades with my Morlock in the middle. The Oznat drops some smoke for the Zerat on the left, and that Zerat manages to FO the far left antenna (the closest one to it). Apparently I had done more damage to his order pool than I had thought!
Turn 3
Top of Turn 3 – Nomads
My Jaguars are frenzied, because apparently destruction of property gets them going, so they rush up the bridge and between the two frenzied ones manage to glue the Zerat on the roof there. My Bandit finishes off the third antenna with a little help from the Jaguar that’s there, and I spend the rest of my orders running my Taskmaster all the way up the field to gun down the enemy HVT, losing my Crazy Koalas to the Krakot on the left’s grenade as I gun him down. As my Taskmaster guns down the HVT, taking a wound in the process, the Oznat engages! I want the Taskmaster as a beefy roadblock next turn, so with my last order I declare CC, killing the Oznat. Adam recognizes my ploy and his Lieutenant fires his Feuerbach into the fray, making the roll and killing my Taskmaster.
Bottom of Turn 3 – MAF
Adam attempts to Feuerbach the Moran on the left after repositioning and lands a crit! My Jaguars throw some ADHL rounds at the big Morat but he just ignores them. I pick up my dice and the Moran also crits! Adam curses profusely and tries to FO two more antennas with his Zerat, but I drop her with a combi-round from the Moran.
 What a game. With that, it’s over.
10-4 Nomad Victory!
Notes
- I should’ve probably FOed another antenna or two with the Moran on the right, but that would’ve meant sacrificing an order somewhere. Maybe the CC order on the Taskmaster, but I think having him as a roadblock was right. I probably should’ve used the Bandit’s order instead, since the Bandit on the left was an FO.
- I made great use of the Morlocks and the dense terrain!
- Stupid high PH Morats dodging all my stuffs! Grumble grumble.
- Adam was very dismayed to find out that Tomcats had Climbing+. Clearly I need to abuse this more. A lot more.
- My Feuerbach didn’t do much of anything this game. I don’t think I needed it on the right, especially with three Jaguars over there. It would’ve been much better on the left, contesting the left firelanes. My fear of Rasyat diplomacy was what kept it on the right to protect my Lt.
- I didn’t have a great answer to his Sogorat, but I did a reasonable job of playing around it all game. That EXP round did a lot of work though.
- Three Panzerfaust Jags in the same place is amazing. It does make for a tough deployment puzzle, especially to avoid getting templated, but boy is it good at denying an area.
- Morans continue to be awesome.
- Bandits this game… not so useful. Were I to play The Grid again, I might take a single Bandit and a Lunokhod or something. Not having a regular order in an order-intensive mission like The Grid is pretty punishing. I don’t want to lose out on Bandit awesomeness, but maybe one is enough.

Jon, I still feel really bad about that game. Luck was definitely not on your side. I am always happy to see you across the table and you were gracious this time by giving me a solid win ?
Don’t feel bad! You had me dead to rights and the dice went your way! No mercy!