CAPTCHA and Regret
Well, we’re nearing the end of Kurage Crisis, and we Nomads have been trying to put some points on the ALEPH Aplekton site. I reached out to Than, one of our local CA players to have a go of it, but he had some real life commitments come up. Our backup Haqq player also didn’t make it to game night, which meant it was time for some Nomad on Nomad sparring action against Nate!
For those of you who aren’t familiar with Nate, Nate is a bit of a local legend. We lovingly refer to him as our “Infinity Playing Robot” because he rarely makes mistakes, keeps his decision making process ice cold and razor sharp, and generally just consistently plays a tight if not perfect game. Most of Adam’s and my wins against him come down to bad dice, which he is all too quick to illustrate with the handy dandy Infinity Dice Calculator. He always circles back after the game to pick up on potential areas for improvement and then immediately applies any learnings to his next game. It’s a bit like playing the Borg. Outside of Infinity, he is anything but a robot–gregarious, generous, and a real gentleman, but across the game table he is an unstoppable, inscrutable opponent.
This was my first time facing his Tunguska. With Kurage and life happening, we also haven’t played much in recent memory either, so I relished the opportunity to play against a superior opponent to test my mettle! Also, it was another opportunity for Nate to take the CAPTCHA test!
Overview
- Mission: Capture and Protect
- Forces: Nomads versus Tunguska Jurisdictional Command (300)
- Deploy First: Nomads
- First Turn: Nomads
[img]https://assets.infinitythegame.net/infinityarmy/img/_logosweb/logo_501.png[/img][b] Power Pack[/b]
[b]GROUP 1 | [/b][img]https://assets.infinitythegame.net/infinityarmy/img/_logosweb/orden_regular.png[/img]8 [img]https://assets.infinitythegame.net/infinityarmy/img/_logosweb/orden_irregular.png[/img]2 [img]https://assets.infinitythegame.net/infinityarmy/img/_logosweb/orden_impetuosa.png[/img]2
[img]https://assets.infinitythegame.net/infinityarmy/img/_logosweb/501/logo_16.png[/img] [b]INTERVENTOR Hacker Lieutenant (Hacking Device Plus)[/b] Combi Rifle / Pistol, Knife. (0.5 | [b]25[/b])
[img]https://assets.infinitythegame.net/infinityarmy/img/_logosweb/501/logo_10.png[/img] [b]ZERO (Forward Observer)[/b] Combi Rifle, Antipersonnel Mines / Pistol, Knife. (0 | [b]19[/b])
[img]https://assets.infinitythegame.net/infinityarmy/img/_logosweb/501/logo_9.png[/img] [b]BANDIT Hacker (Killer Hacking Device)[/b] Light Shotgun, Adhesive Launcher / Pistol, DA CCW. (0 | [b]25[/b])[img]https://assets.infinitythegame.net/infinityarmy/img/_logosweb/501/logo_62.png[/img] [b]MARY PROBLEMS Hacker (Forward Deployment L1)[/b] Submachine Gun + Zapper, Pitcher / Pistol, Knife. (0.5 | [b]30[/b])
[img]https://assets.infinitythegame.net/infinityarmy/img/_logosweb/501/logo_14.png[/img] [b]DAKTARI[/b] Combi Rifle / Pistol, Knife. (0 | [b]14[/b])
[img]https://assets.infinitythegame.net/infinityarmy/img/_logosweb/501/logo_34.png[/img] [b]ZONDBOT[/b] Electric Pulse. (0 | [b]3[/b])
[img]https://assets.infinitythegame.net/infinityarmy/img/_logosweb/501/logo_61.png[/img] [b]PUPPET MASTERS (Minelayer)[/b] Submachine Gun, Antipersonnel Mines / PistolKnife. (0.5 | [b]14[/b])
[img]https://assets.infinitythegame.net/infinityarmy/img/_logosweb/501/logo_56.png[/img] [b]KRIZA BORAC[/b] HMG / Heavy Pistol, CC Weapon. (2 | [b]54[/b])
[img]https://assets.infinitythegame.net/infinityarmy/img/_logosweb/501/logo_59.png[/img] [b]HOLLOW MEN[/b] Missile Launcher, Chain-colt / Breaker Pistol, Knife. (2 | [b]35[/b])
[img]https://assets.infinitythegame.net/infinityarmy/img/_logosweb/501/logo_48.png[/img] [b]KRAKOT RENEGADE[/b] 2 Chain Rifles, Grenades / Pistol, DA CC Weapon. (0 | [b]14[/b])
[img]https://assets.infinitythegame.net/infinityarmy/img/_logosweb/501/logo_31.png[/img] [b]BAKUNIN ÜBERFALLKOMMANDO[/b] . (0 | [b]23[/b])
[img]https://assets.infinitythegame.net/infinityarmy/img/_logosweb/sep.gif[/img] [img]https://assets.infinitythegame.net/infinityarmy/img/_logosweb/501/logo_31.png[/img] [b]CHIMERA[/b] Combi Rifle, Nanopulser, Eclipse Grenades / Viral CCW. (0 | [b]20[/b])
[img]https://assets.infinitythegame.net/infinityarmy/img/_logosweb/sep.gif[/img] [img]https://assets.infinitythegame.net/infinityarmy/img/_logosweb/501/logo_31_2.png[/img] [b]x3 PUPNIK[/b] DA CCW. (0 | [b]3[/b])[b]GROUP 2 | [/b][img]https://assets.infinitythegame.net/infinityarmy/img/_logosweb/orden_regular.png[/img]1 [img]https://assets.infinitythegame.net/infinityarmy/img/_logosweb/orden_irregular.png[/img]3 [img]https://assets.infinitythegame.net/infinityarmy/img/_logosweb/orden_impetuosa.png[/img]3
[img]https://assets.infinitythegame.net/infinityarmy/img/_logosweb/501/logo_12.png[/img] [b]MORLOCK[/b] Chain Rifle, Smoke Grenades / Pistol, E/M CCW. (0 | [b]6[/b])
[img]https://assets.infinitythegame.net/infinityarmy/img/_logosweb/501/logo_12.png[/img] [b]MORLOCK[/b] Chain Rifle, Smoke Grenades / Pistol, E/M CCW. (0 | [b]6[/b])
[img]https://assets.infinitythegame.net/infinityarmy/img/_logosweb/501/logo_12.png[/img] [b]MORLOCK[/b] Chain Rifle, Smoke Grenades / Pistol, E/M CCW. (0 | [b]6[/b])
[img]https://assets.infinitythegame.net/infinityarmy/img/_logosweb/501/logo_24.png[/img] [b]TOMCAT Engineer[/b] Combi Rifle + Light Flamethrower, D-Charges + 1 Zondcat / Pistol, Knife. (0 | [b]26[/b])
[img]https://assets.infinitythegame.net/infinityarmy/img/_logosweb/sep.gif[/img] [img]https://assets.infinitythegame.net/infinityarmy/img/_logosweb/501/logo_24.png[/img] [b]ZONDCAT[/b] Electric Pulse. ([b]4[/b])
[b] 5.5 SWC | 300 Points |[/b] Open in Infinity Army
[img]https://assets.infinitythegame.net/infinityarmy/img/_logosweb/logo_504.png[/img][b] Jurisdictional Command of Tunguska[/b]
[b]GROUP 1 | [/b][img]https://assets.infinitythegame.net/infinityarmy/img/_logosweb/orden_regular.png[/img]10
[img]https://assets.infinitythegame.net/infinityarmy/img/_logosweb/504/logo_13.png[/img] [b]PERSEUS FTO (Fireteam: Haris)[/b] Breaker Combi Rifle, Nanopulser, Smoke Grenades / 2 Pistols, DA CC Weapon. (0 | [b]33[/b])
[img]https://assets.infinitythegame.net/infinityarmy/img/_logosweb/504/logo_1.png[/img] [b]SECURITATE[/b] HMG / Pistol, Knife. (1 | [b]21[/b])
[img]https://assets.infinitythegame.net/infinityarmy/img/_logosweb/504/logo_1.png[/img] [b]SECURITATE Paramedic (MediKit)[/b] Combi Rifle / Pistol, Knife. (0 | [b]15[/b])
[img]https://assets.infinitythegame.net/infinityarmy/img/_logosweb/504/logo_1.png[/img] [b]SECURITATE (Repeater)[/b] Boarding Shotgun / Pistol, Knife. (0 | [b]15[/b])
[img]https://assets.infinitythegame.net/infinityarmy/img/_logosweb/504/logo_1.png[/img] [b]SECURITATE (Repeater)[/b] Boarding Shotgun / Pistol, Knife. (0 | [b]15[/b])[img]https://assets.infinitythegame.net/infinityarmy/img/_logosweb/504/logo_11.png[/img] [b]MARY PROBLEMS Hacker (Forward Deployment L1)[/b] Submachine Gun + Zapper, Pitcher / Pistol, Knife. (0.5 | [b]30[/b])
[img]https://assets.infinitythegame.net/infinityarmy/img/_logosweb/504/logo_5.png[/img] [b]KRIZA BORAC[/b] HMG / Heavy Pistol, CC Weapon. (2 | [b]54[/b])
[img]https://assets.infinitythegame.net/infinityarmy/img/_logosweb/504/logo_17.png[/img] [b]LUNOKHOD[/b] Heavy Shotgun, Heavy Flamethrower, D-Charges, CrazyKoalas (2) / Electric Pulse. (0 | [b]25[/b])
[img]https://assets.infinitythegame.net/infinityarmy/img/_logosweb/504/logo_4.png[/img] [b]HOLLOW MEN[/b] Spitfire, Chain-colt / Breaker Pistol, Knife. (2 | [b]36[/b])
[img]https://assets.infinitythegame.net/infinityarmy/img/_logosweb/504/logo_22.png[/img] [b]TRANSDUCTOR ZOND[/b] Flash Pulse, Sniffer / Electric Pulse. (0 | [b]8[/b])[b]GROUP 2 | [/b][img]https://assets.infinitythegame.net/infinityarmy/img/_logosweb/orden_regular.png[/img]2
[img]https://assets.infinitythegame.net/infinityarmy/img/_logosweb/504/logo_9.png[/img] [b]INTERVENTOR Hacker Lieutenant (Hacking Device Plus)[/b] Combi Rifle / Pistol, Knife. (0.5 | [b]25[/b])
[img]https://assets.infinitythegame.net/infinityarmy/img/_logosweb/504/logo_7.png[/img] [b]HECKLER[/b] Combi Rifle, Jammer, 1 FastPanda / Pistol, Knife. (0 | [b]23[/b])
[b] 6 SWC | 300 Points |[/b] Open in Infinity Army
Deployment
We agreed beforehand that the little forest feature would be a saturation and low-visibility zone. Knowing Nate, I was going to see a Perseus + Securitate link, a Kriza, an Interventor, and some other stuff. I hadn’t really thought too much about this mission so I just brought my Power Pack list. Nate, of course, had thought about it a lot. I stuck my Hollow Man ML, proxied by a Mobile Brigada ML, on a roof on the right, figuring it would be easy to get him off and onto the ground, thanks to his Super Jump. I put my Puppeteer in the center, with his mine directly behind my objective. I figured it would cost Nate at least an order. Mary Problems went on the other side of the objective, ready to advance up the center of the board and get a pitcher onto either flank depending on Nate’s deployment.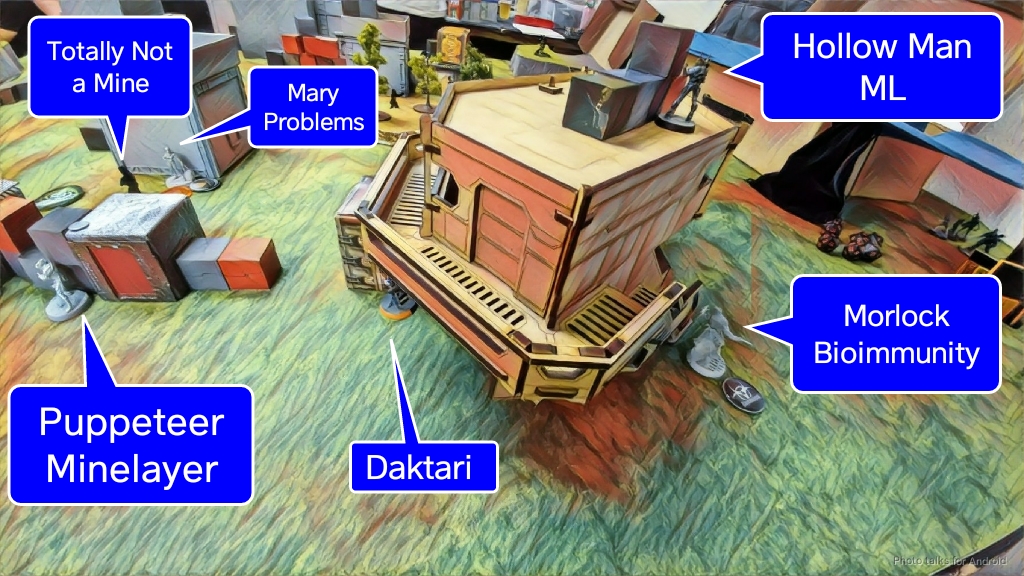 There wasn’t much space for her elsewhere, so my Daktari huddled up behind some terrain on the right. As is usual for me these days in Vanilla, I strung three Morlocks across the backfield. Zero Cool, my Interventor, stuck himself into a nook near the left of my deployment zone, with Acid Burn, my Zero FO, basically dead ahead of him in the midfield.
 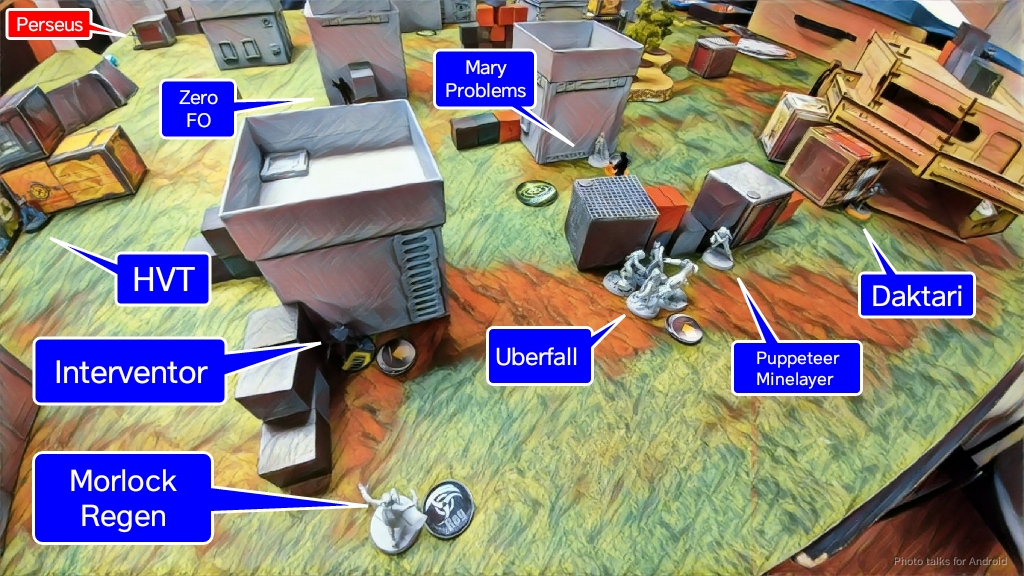 My HVT was in a relatively reasonable position on the left, “protected” by the Krakot. My Bandit went all the way on the right, basically in the open. I figured I’d get her into a better position when it mattered. The Uberfall were right in the center of my deployment zone. I had anticipated throwing smoke for them with my Regen Morlock to cover their advance.
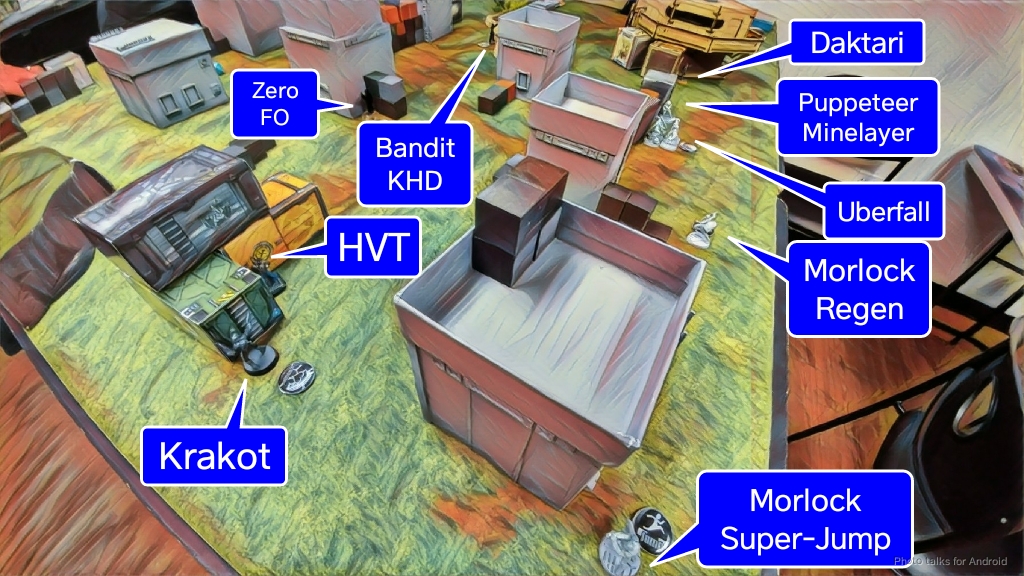 With all my stuff save the Kriza deployed, it was Nate’s turn. His Securitate link formed his right flank, screened by Mary Problems.
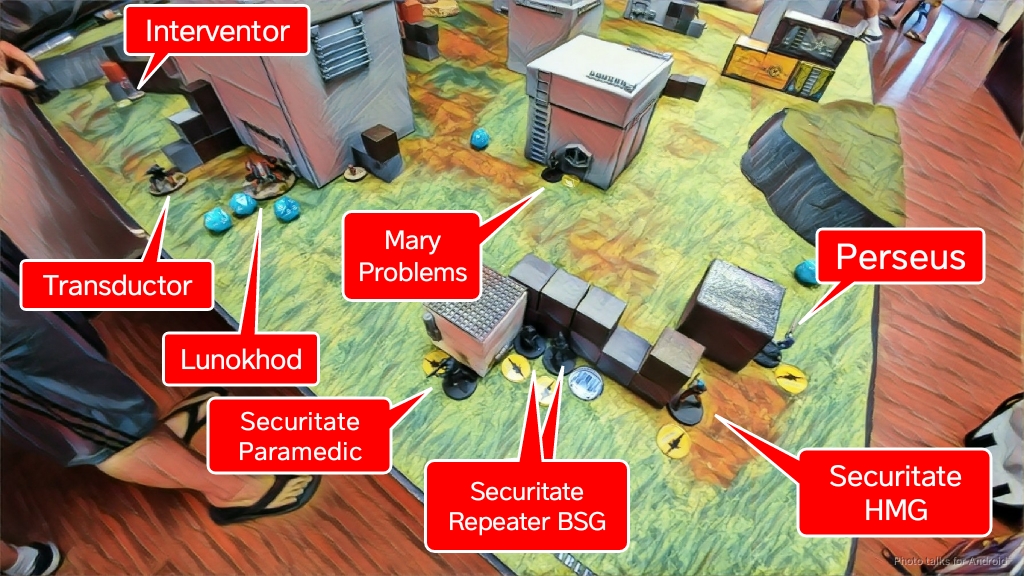 He built himself a truly awful nest of AROs in near his objective, covering it with a Heckler Jammer and a Lunokhod’s repeater and Koalas. Since it was such a good protective bubble, this made it a natural spot to hide his Hollow Man Spitfire as well. Nate knows I’m fond of Hellcats, so he protected his DZ with the Lunokhod’s flamethrower and shotgun on the right and the Transductor’s flash pulse on the left. His Interventor tucked herself into a nook, just as mine did.
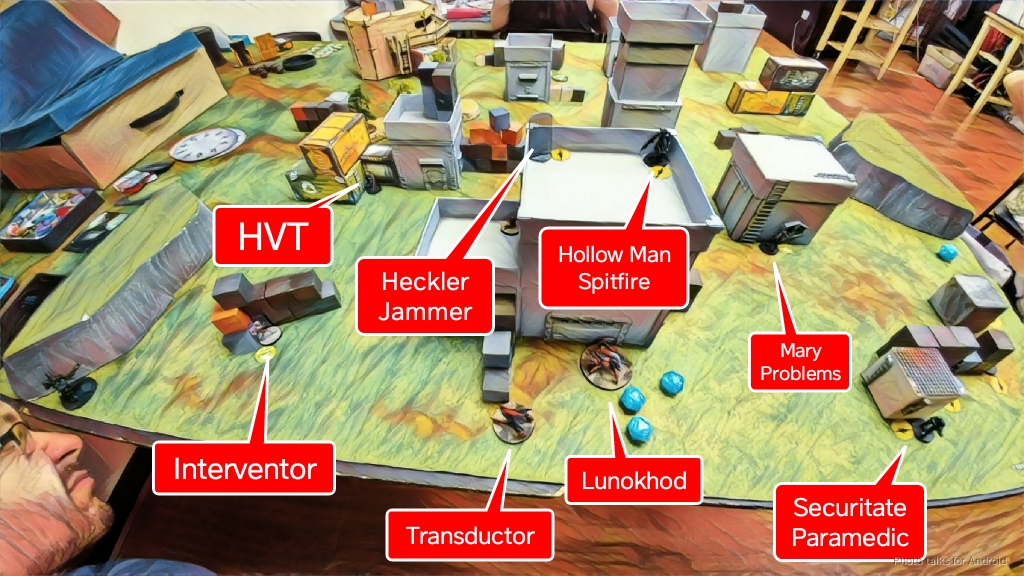 With that, it was time to deploy my Kriza. I dropped him on my left, near the Daktari’s bot. I figured I could use him to attack Perseus, who Nate had left out to ARO if necessary. Of course, linked ODD with NWI would be a nightmare to dislodge, so I was pretty unhappy with this plan. Nate’s real threats were on my left, so I foolishly? met strength with strength.
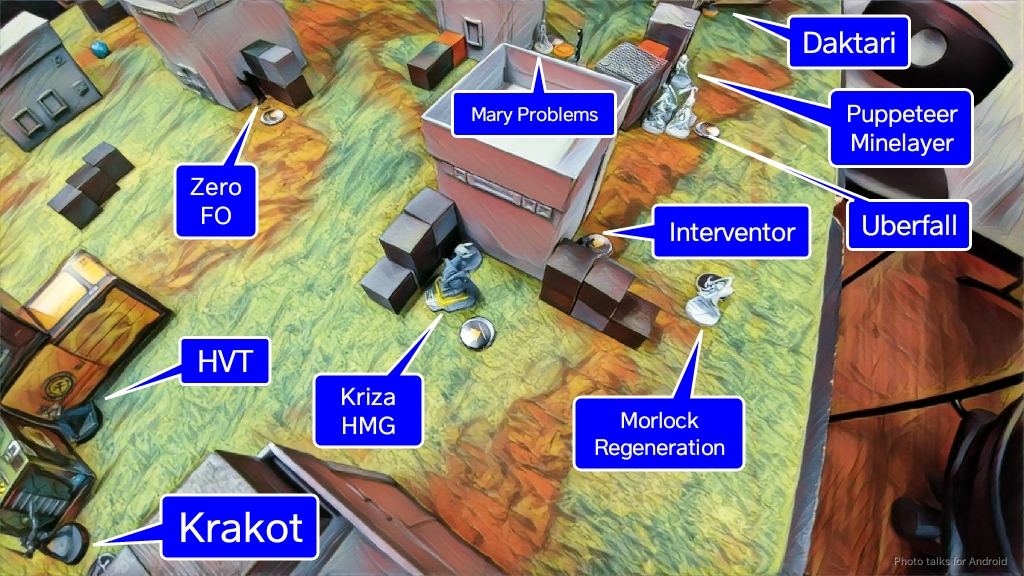 Nate wisely? did the opposite, putting his Kriza on my right (his left) to take advantage of my weaker deployment there. The Hollow Man certainly wasn’t going to hold up in ARO against the Kriza. Not by a long shot.
 I declared Mary to be my DataTracker and Nate chose his Kriza, mentioning that he thought the Kriza was a more survivable profile. Probably right. With that settled, we were off to the Nomad war games!
Turn 1
Top of Turn 1 – Nomads
I sadly whiffed the all-important smoke on my Regen Morlock to cover my Uberfall. At least my other Morlocks were able to advance without incident, along with the Krakot. I waffled a bit on whether or not to chance the face to face roll against Perseus with the Uberfall, eventually deciding that it probably would be fine given that I had a Tomcat engineer waiting in the wings should I need one to pick the Chimera back up. Of course, I lose the face to face and the Chimera takes a dirt nap. Sigh. Not an auspicious start to the game. Nate tried to cheer me up with an observation that our games usually go one of two ways–my dice are on fire or they’re just total duds. Pretty clear which way this game was shaping up! I put those defeatist thoughts away and got back to the game.
After throwing some smoke to provide future concealment for the Hollow Man, I jumped him off the roof, taking a shot at the Securitate HMG that was visible from my aerial vantage point. Sadly, I was out of range and shooting through the saturation and low-vis zone, so I whiffed horribly. Nate didn’t, plinking a wound off my Hollow Man.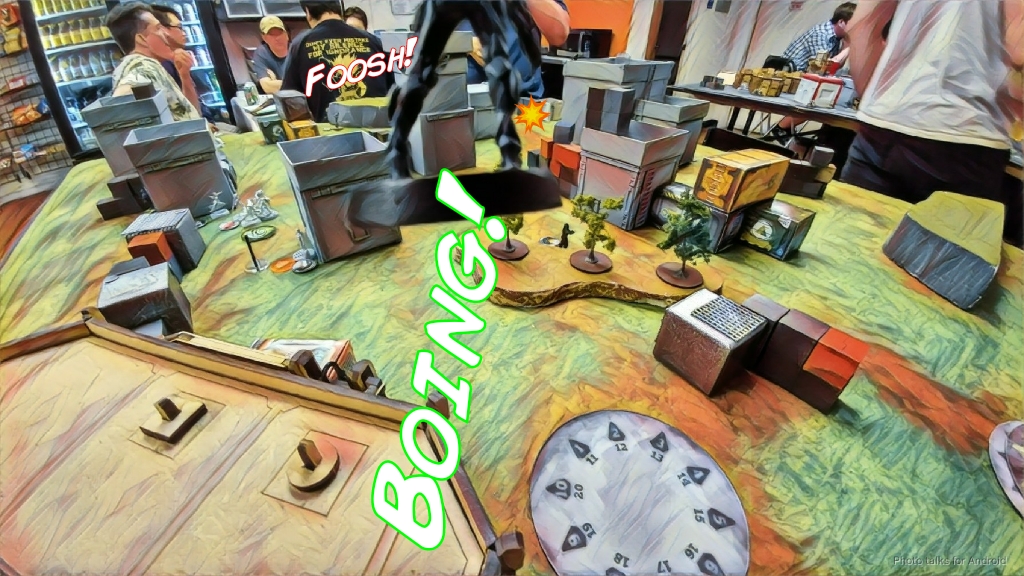 I tried to deal with the problem a different way by getting some smoke down for my Krakot on the left with my leftmost Morlock. Threading the needle was a difficult proposition, but I managed to get the Krakot close enough to drop a pair of chain rifles on Perseus. I ate a pair of breaker rounds in return, going down to them, and Perseus shrugged off both chain rifle hits. Drat!
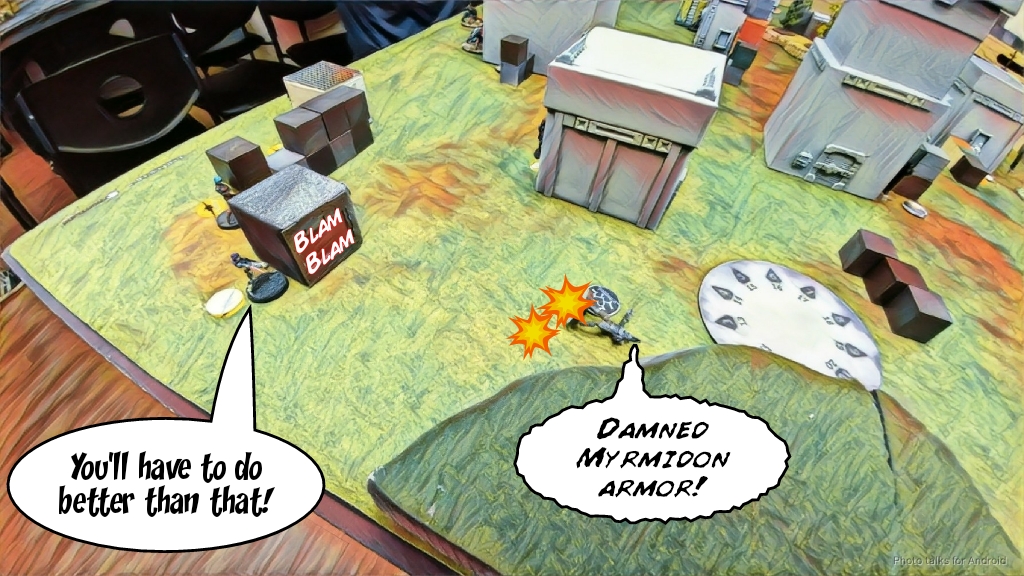 During all of this, however, we noticed that Nate had missed an ARO with his Interventor, across the table… which meant there was a window that my Kriza could see his Interventor… An order or two got me into position and another order put Nate in loss of lieutenant the next turn, assuming his Kriza wasn’t his lieutenant (an entirely real possibility and one that I’ve seen him implement before).
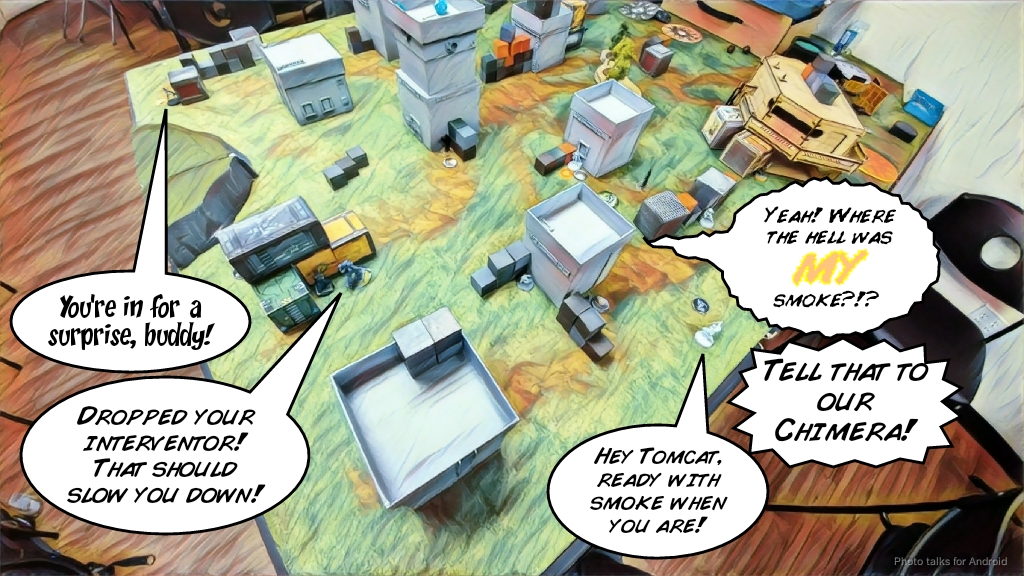 I repositioned my troops, hiding the Kriza and pushing my Regeneration Morlock back towards my board edge to reset her impetuous movement to cover my Uberfall with smoke for the next turn. I had a few more orders left, which I used getting the Hollow Man just to the edge of 40″, which let me drop Nate’s Securitate HMG with a missile crit.
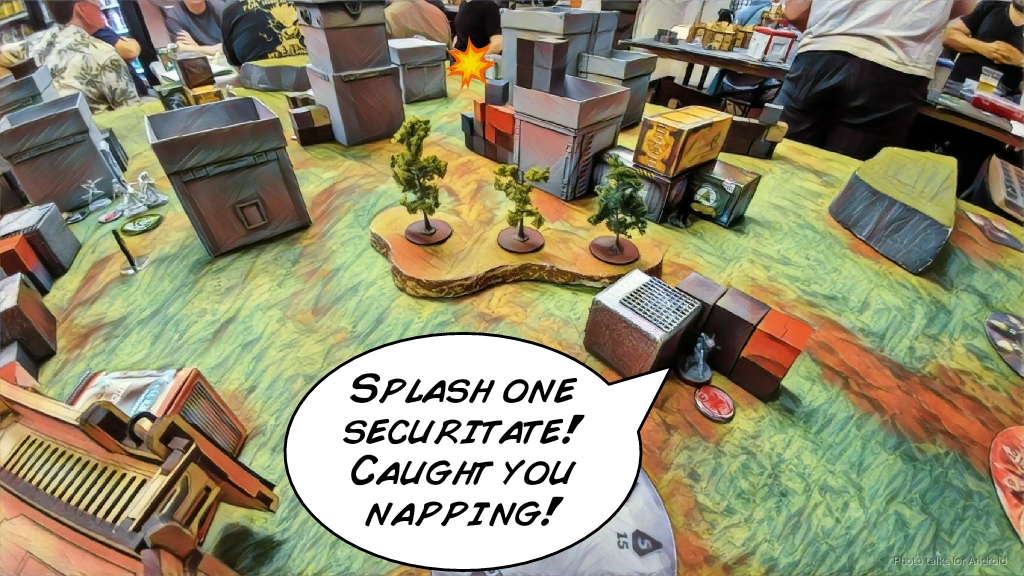 I fail to Cybermask with Zero Cool’s Lieutenant order and am forced to turn things over to Nate. Some would call that a good turn, but I know better. Against Nate of Borg, that would not be good enough! As I see it, here’s how it should’ve gone down:
- Cancel the Uberfall’s order.
- Hollow Man ML kills Securitate HMG.
- Kriza kills Perseus.
- Position troops for turn 2.
2 and 3 are the difficult propositions. Let’s look at the odds! Nate does this all the time, so it’s probably a good thing. To kill the HMG after manuevering to get within 40″ and leveraging the saturation and low-vis zone:
Hollow Men, Tactical Assault Team – Missile Launcher
37.05% Hollow Men, Tactical Assault Team inflicts 1 or more wounds on Securitate (Unconscious)
28.41% Hollow Men, Tactical Assault Team inflicts 2 or more wounds on Securitate (Dead)
43.35% Neither player succeeds
19.60% Securitate inflicts 1 or more wounds on Hollow Men, Tactical Assault Team (1 STR)
Securitate – HMG
So not great odds. Probably take 2-3 orders to do this. This is probably the best possible use of the ML in the active turn, especially given that I can’t be in cover while I’m doing this due to my deployment and the distance to the saturation zone. However, once that all important +3 from the 5-man link is gone, things are looking much better for my Kriza.
Kriza Boracs, Special Crisis Unit – HMG
57.50% Kriza Boracs, Special Crisis Unit inflicts 1 or more wounds on Perseus, Rogue Myrmidon (0 W)
21.13% Kriza Boracs, Special Crisis Unit inflicts 2 or more wounds on Perseus, Rogue Myrmidon (Dead)
33.26% Neither player succeeds
09.24% Perseus, Rogue Myrmidon inflicts 1 or more wounds on Kriza Boracs, Special Crisis Unit (1 W)
00.33% Perseus, Rogue Myrmidon inflicts 2 or more wounds on Kriza Boracs, Special Crisis Unit (Unconscious)
Perseus, Rogue Myrmidon – Breaker Combi Rifle
In fact, just brute-forcing Perseus down on the few orders of the game with the Kriza looks to be a viable option:
Kriza Boracs, Special Crisis Unit – HMG
48.68% Kriza Boracs, Special Crisis Unit inflicts 1 or more wounds on Perseus, Rogue Myrmidon (0 W)
15.97% Kriza Boracs, Special Crisis Unit inflicts 2 or more wounds on Perseus, Rogue Myrmidon (Dead)
37.76% Neither player succeeds
13.56% Perseus, Rogue Myrmidon inflicts 1 or more wounds on Kriza Boracs, Special Crisis Unit (1 W)
00.77% Perseus, Rogue Myrmidon inflicts 2 or more wounds on Kriza Boracs, Special Crisis Unit (Unconscious)
Perseus, Rogue Myrmidon – Breaker Combi Rifle
Why all this post-turn discussion, you ask? Well, I had some time to think about it at the time, courtesy of Erik literally butting into our game and preventing Nate from getting around to the side of the table to start moving his Securitate link up the board.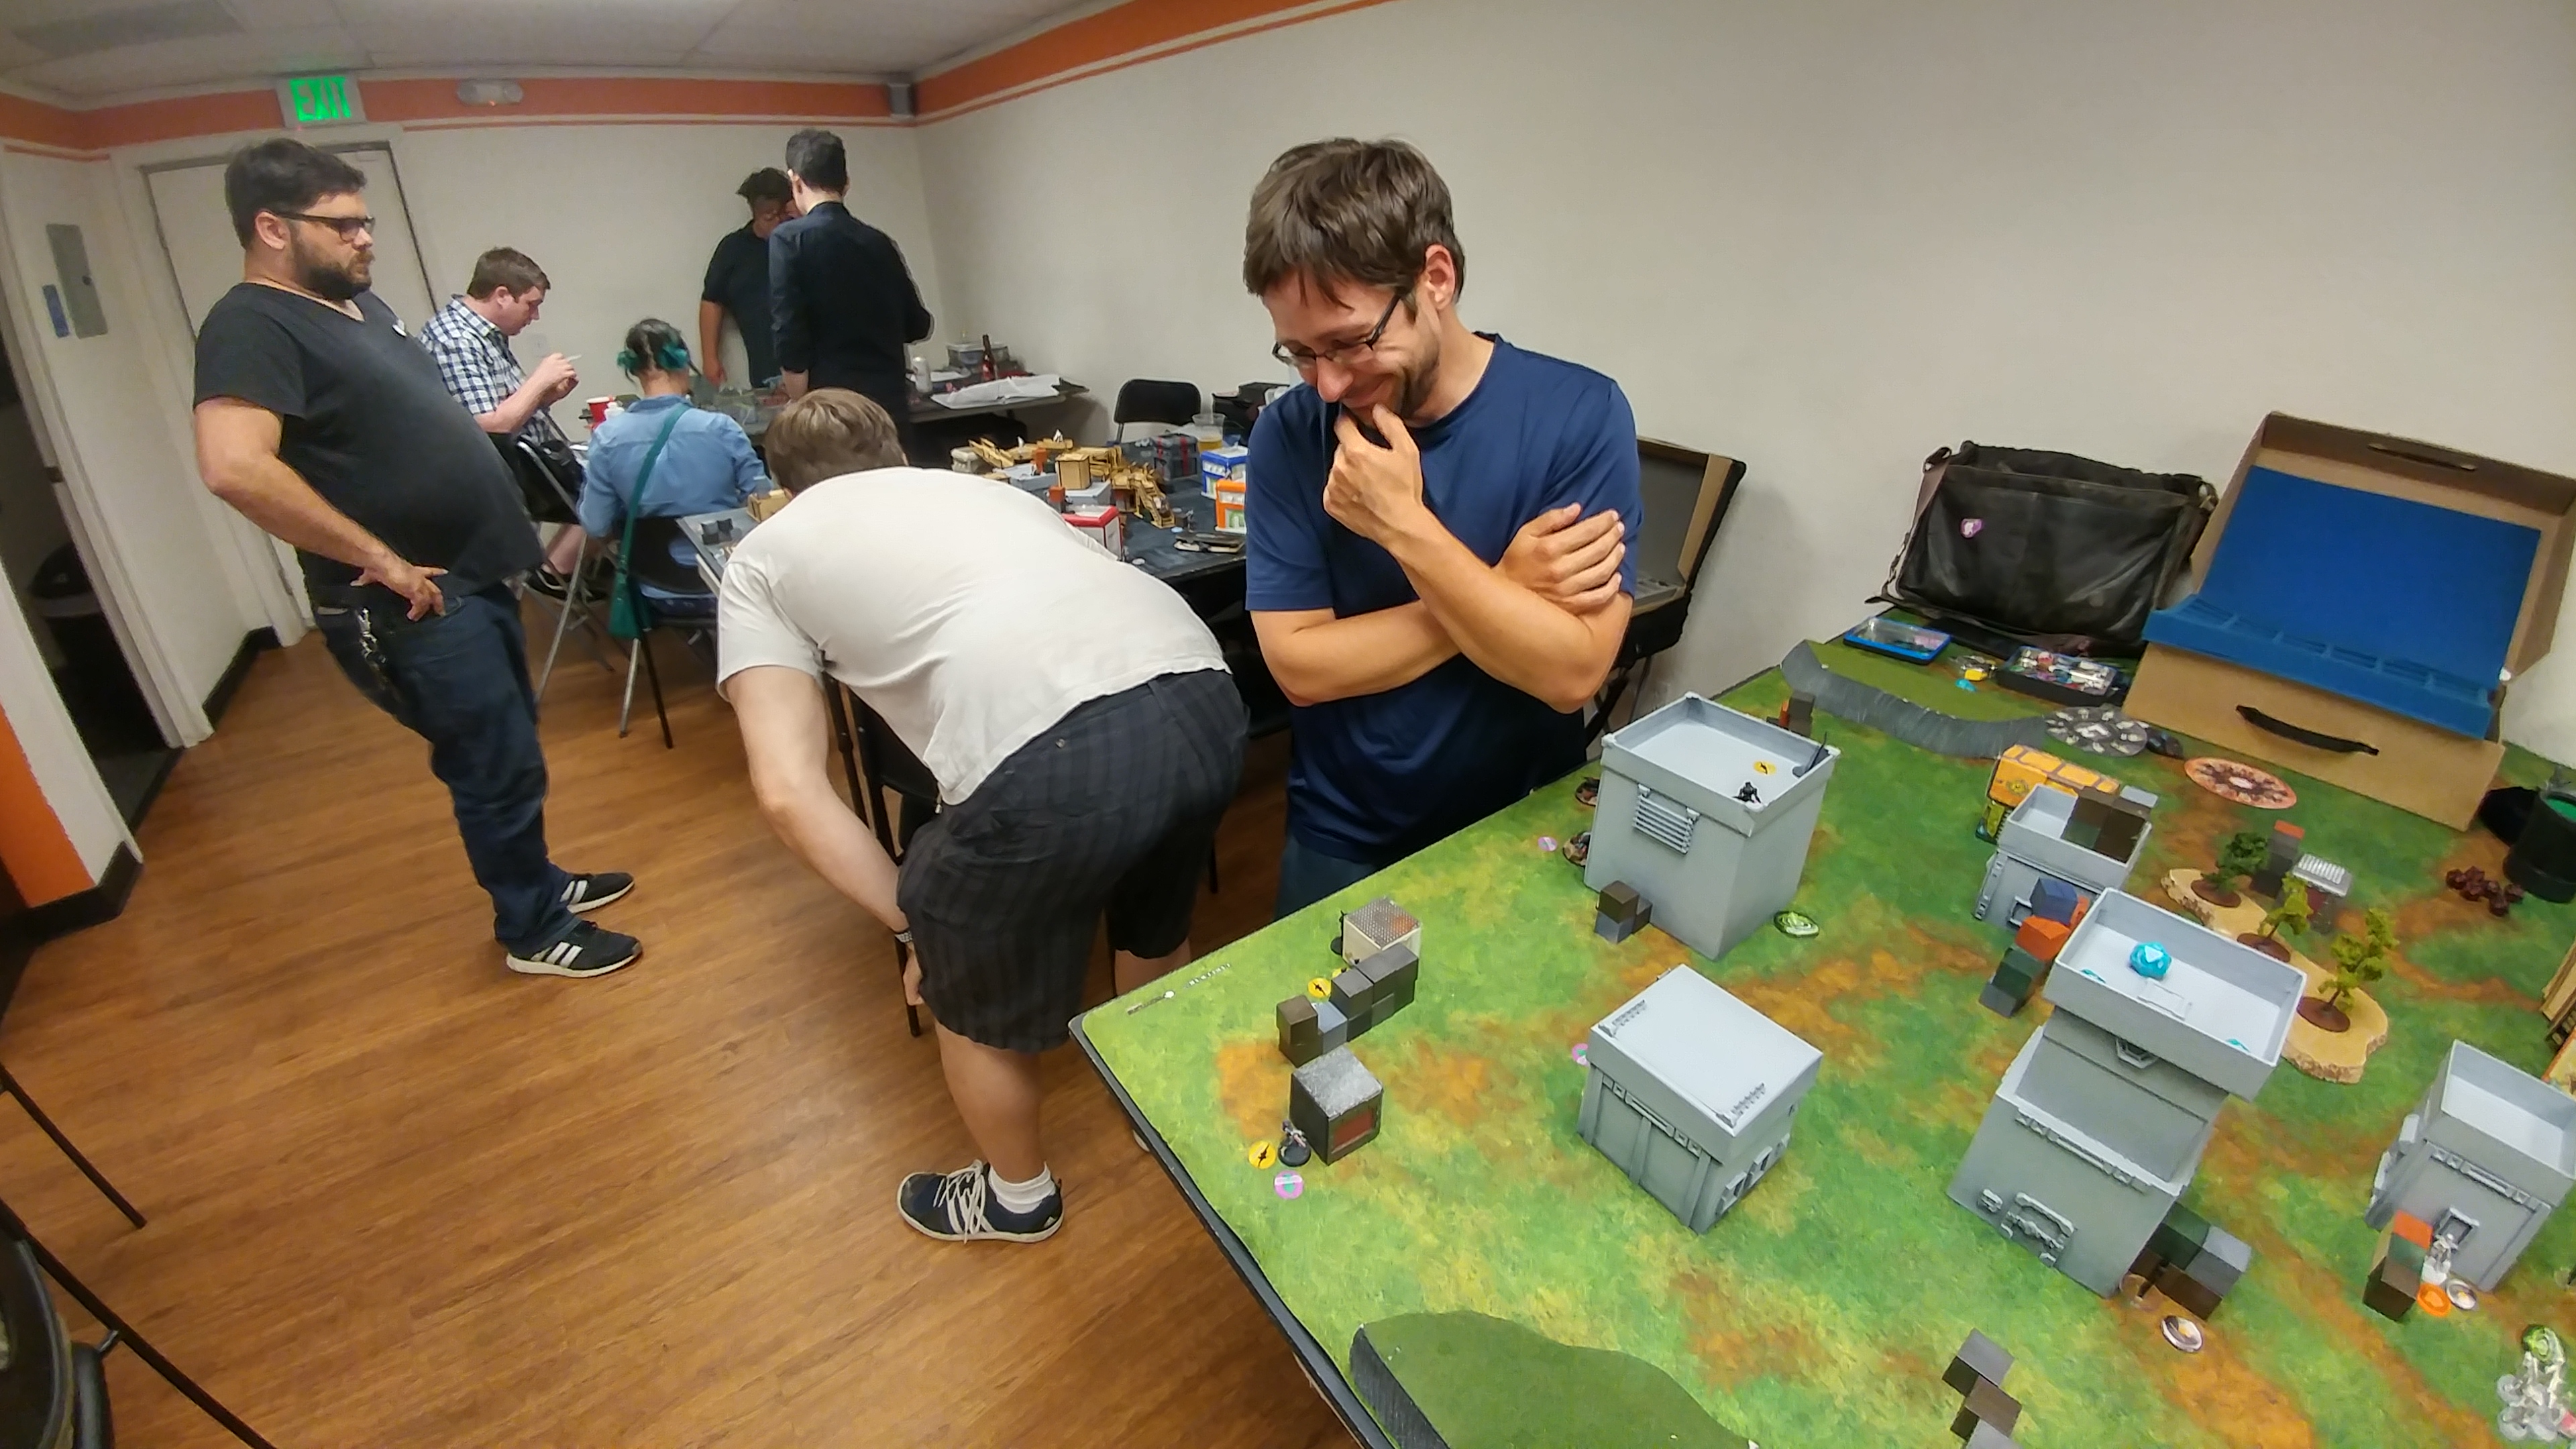 Anyway. What I’ve learned from this exercise is “When in doubt, just freaking shoot it with the Kriza.”
Bottom of Turn 1 – Tunguska
With Erik’s butt out of the way, Nate is free to start pushing his link up the table. After gunning down my Morlock, he keeps pushing the Perseus forward, keeping the rest of the link at a respectful distance while they talk shit about the rogue Myrmidon. It’s at this point that I ask Nate how many orders and command tokens he has left, to which he responds that he’s got a few regular orders left thanks to the Securitate’s Veteran L1. Grumbling, I drop a mine with my Zero FO, figuring I can at least get rid of the Myrmidon that way.
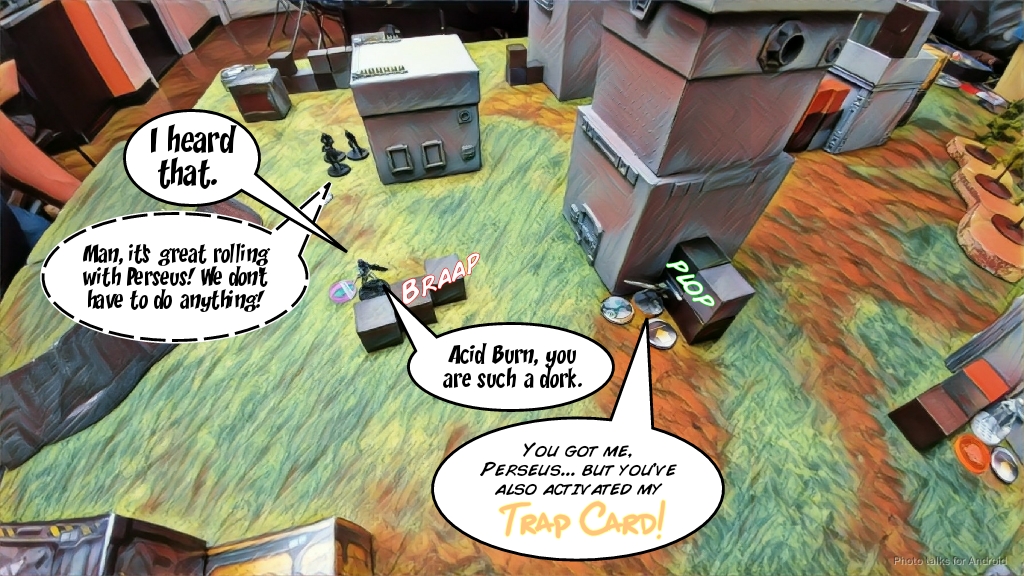 Of course, poor Acid Burn takes a full burst of breaker combi to the face and drops. Unfortunately, in my eagerness, I placed the mine a little too far forward and Nate is able to just catch the edge of its activation range with one of the Lunokhod’s Koalas. The Koala even manages to tank the mine blast!
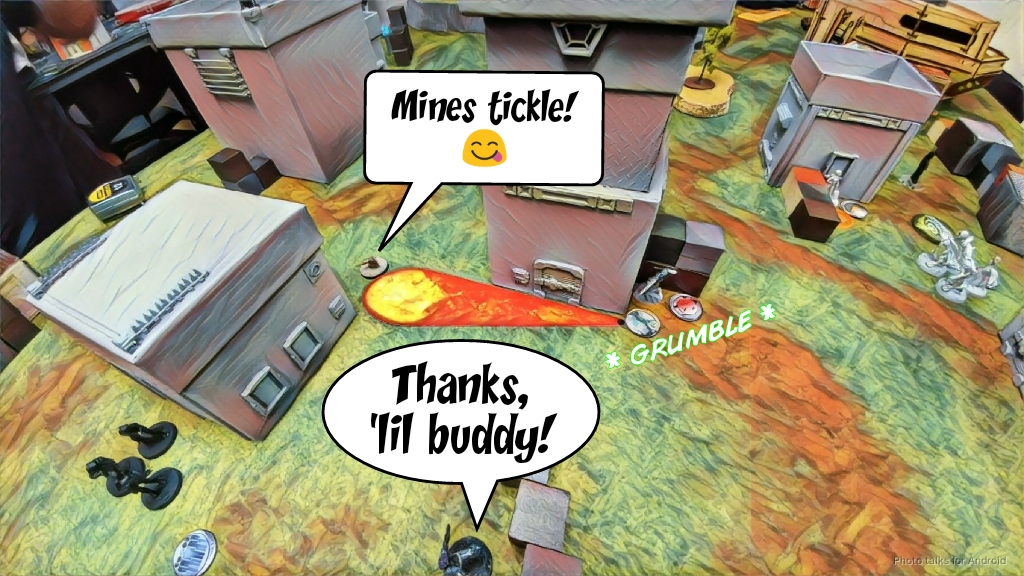 This frees Perseus up to drop my Mary into unconsciousness and then run into base to base with my Kriza and shank him a few times, doing a wound in spite of a frenzy of heavy pistol fire from my beleagured heavy infantry. Nate’s out of orders at this point and low on command tokens at this point, so with his last order he pops his Mary Problems out to stick a repeater near my Kriza, just in case, before passing the turn.
Turn 2
Top of Turn 2 – Nomads
My Morlock in the middle finally covers the Uberfall with smoke, which is something they find less than impressive. I spend some orders jumping the Hollow Man around, blasting one of the Securitate repeaters off the table, but am too scared of the Jammer to try to get further into Nate’s side of the table to get an angle on the other two. I reposition the Bandit again, basically wasting movement, but I need to get her closer to the objective for a possible Hail Mary on Turn 3. Speaking of Mary, I pick her back up with my Daktari, after throwing some more smoke to protect the both of them.
I am disatrously low on orders now, and I don’t have the command tokens to swap order groups to get my Tomcat onto the table and pick up the Uberfall. I forget that I have a Zondcat, but it doesn’t matter. One order to come onto the table, then flipping a Morlock’s irregular to regular with my last command token won’t get me into base to base with the Chimera, even with the additional movement afforded by a Zondcat, so I settle for roasting some Securitate instead, only managing to kill the Securitate Paramedic.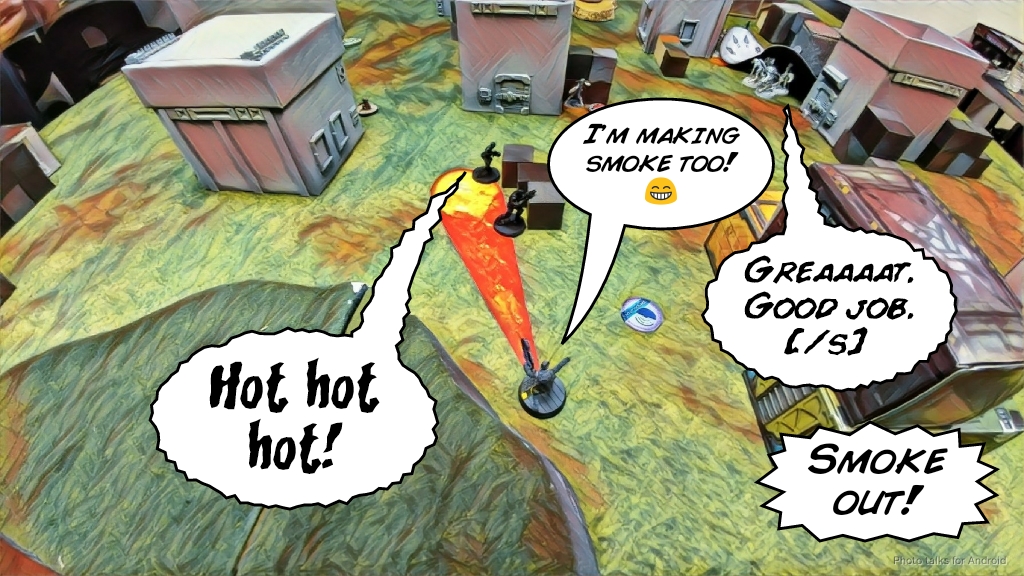 I am then forced to pass the turn after successfully Cybermasking Zero Cool with his lieutenant order.
Bottom of Turn 2 – Tunguska
Nate goes to work with his own Hollow Man, first blasting my Hollow Man off the table. This does let me dodge my Tomcat out of LoF of the Hollow Man Spitfire, which is at least something. Nate has no shortage of attack pieces though. After finishing off my Kriza with Perseus, he pushes his Kriza into view of my Bandit. I correctly judge the distance to be inside 16″ and figure this is the best time to try for a lucky ADHL, but I whiff and the Kriza mows her down.
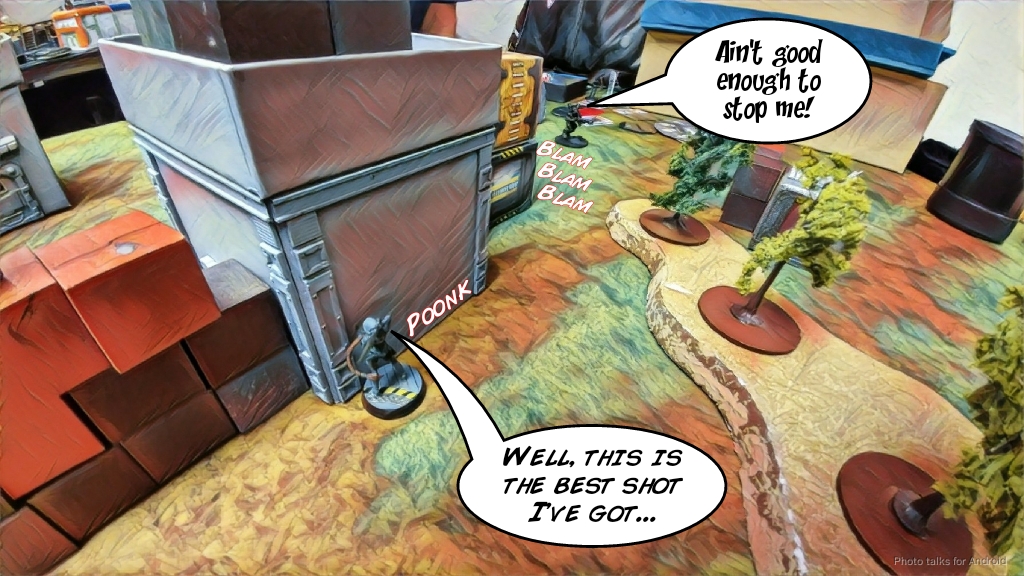 I lose the Tomcat to some long range shooting…
 and the Morlock on the right too.
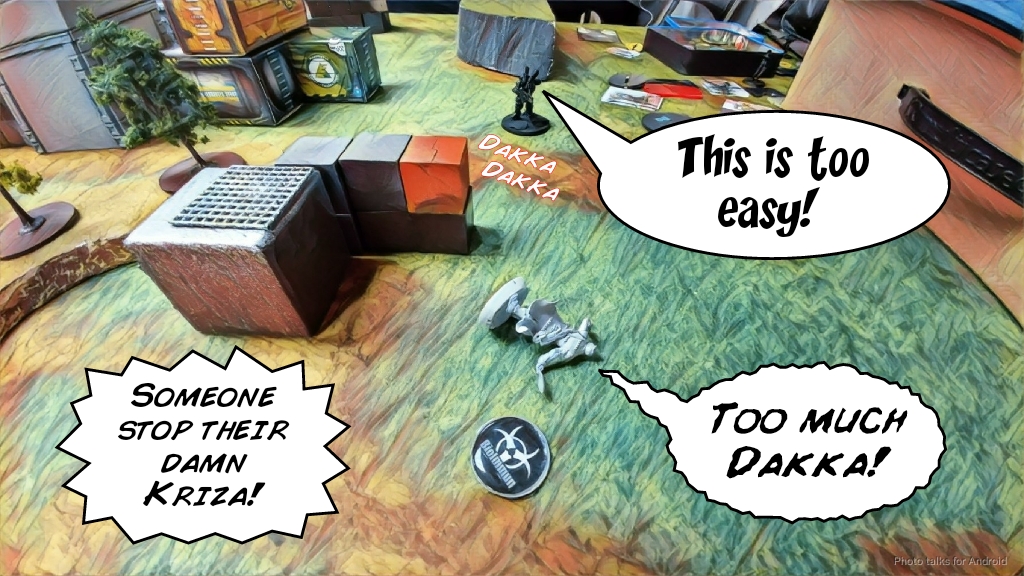 Finally, the Hollow Man jumps off his roof and starts pushing up. A great turn for Nate. He’s developed his left flank, recovered from my piddly amount of damage to his order pool, and still has an active Hollow Man in the midfield watching my deployment zone, not to mention Perseus and the Kriza. Nate also did his thing where he counts points and keeps you just outside of retreat, he certainly would have had no trouble taking out Mary and my Daktari this turn–I think this has a lot to do with his robotic reputation!
Turn 3
Top of Turn 3 – Nomads
Well, I’ve got a Morlock and four orders left. The Morlock immediately dies to Perseus and the Hollow Man. It’s time for Zero Cool to, well, be cool! Using my Lieutenant order and three more, I surprise shot Nate’s remaining Securitate, and manage to actually deal a wound to Perseus before going down to a Hollow Man shot as my last round of firing is blocked by a smoke grenade at Perseus’s feet.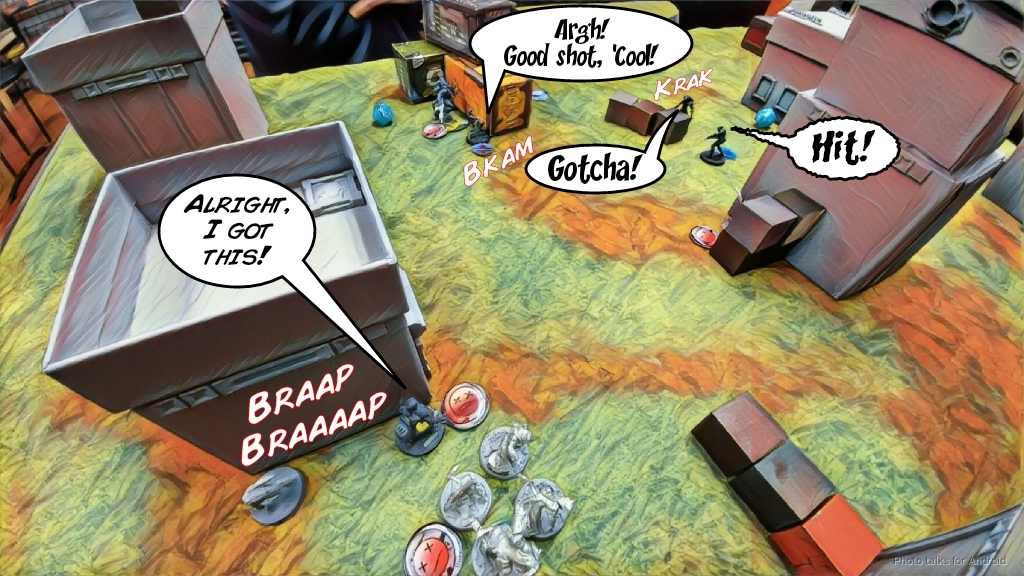 I take advantage of this to throw Mary into suppression and pass the turn.
Bottom of Turn 3 – Tunguska
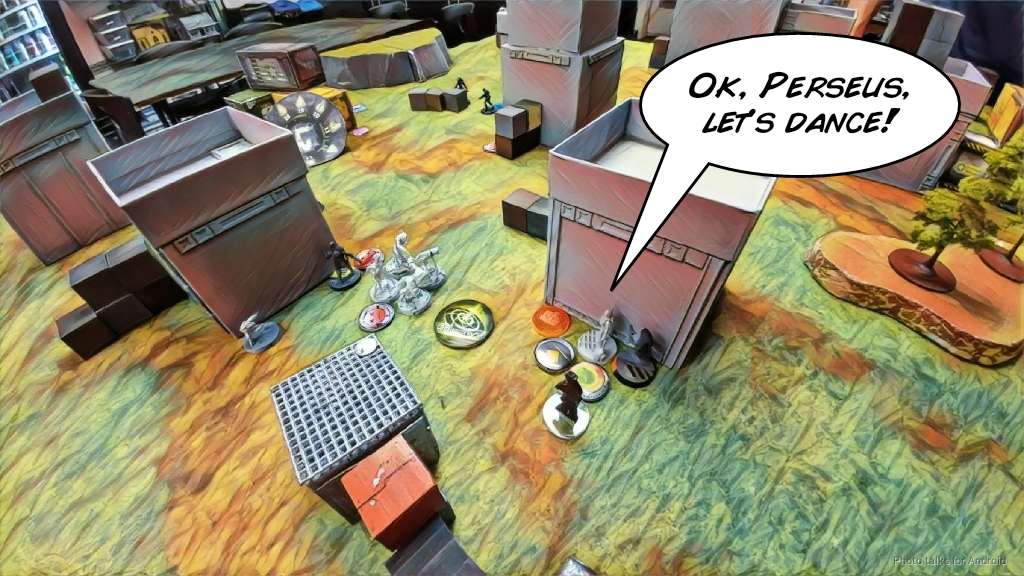
Nate starts the turn by systematically advancing his Kriza. Shockingly enough, my humble Daktari manages to do a wound before going unconscious. This lets Mary spin in place with Warning!, which is super relevant.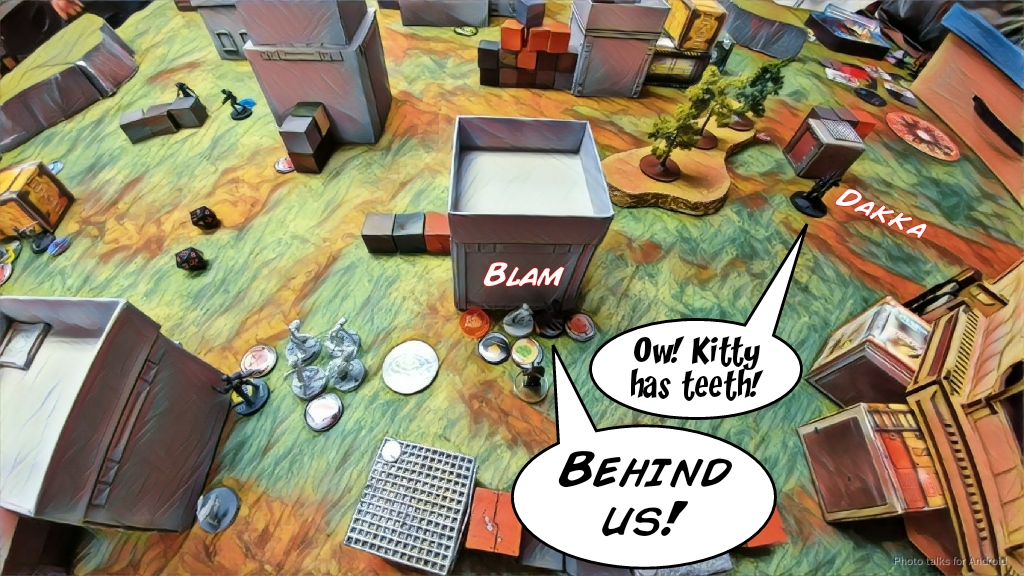 Mary holds off the Kriza with some fancy shooting as he rounds the corner. That -12 in suppression thanks to ODD is no joke!
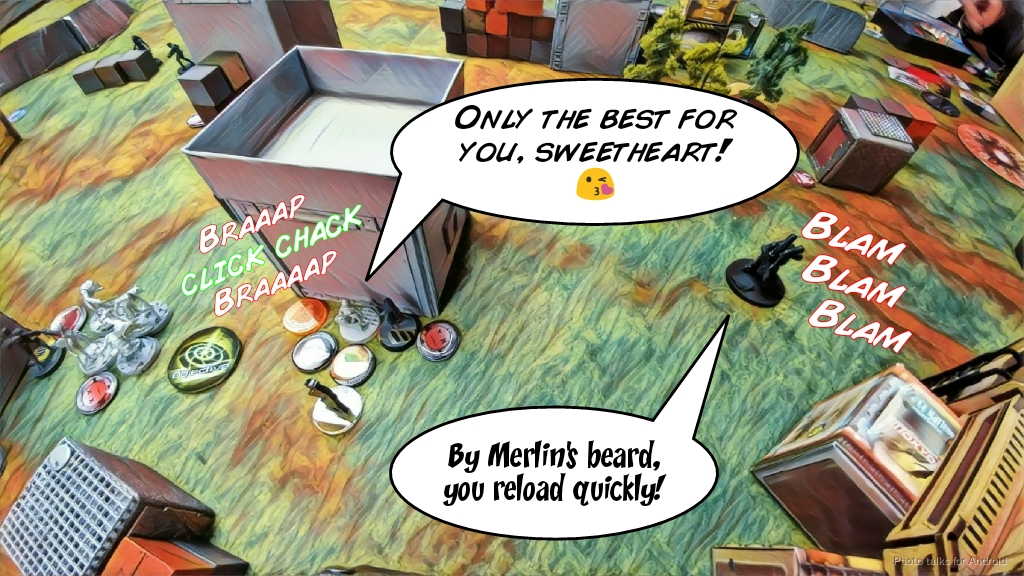 Nate pushes the Kriza all the way around the corner to negate my cover and get into heavy pistol range, but Mary and the mine manage to stop the Kriza in its tracks.
 Perseus gives it a go, but Mary is on fire and plants a SMG AP round right in his face, since shock is no longer necessary, thanks to Zero Cool’s earlier wound.
 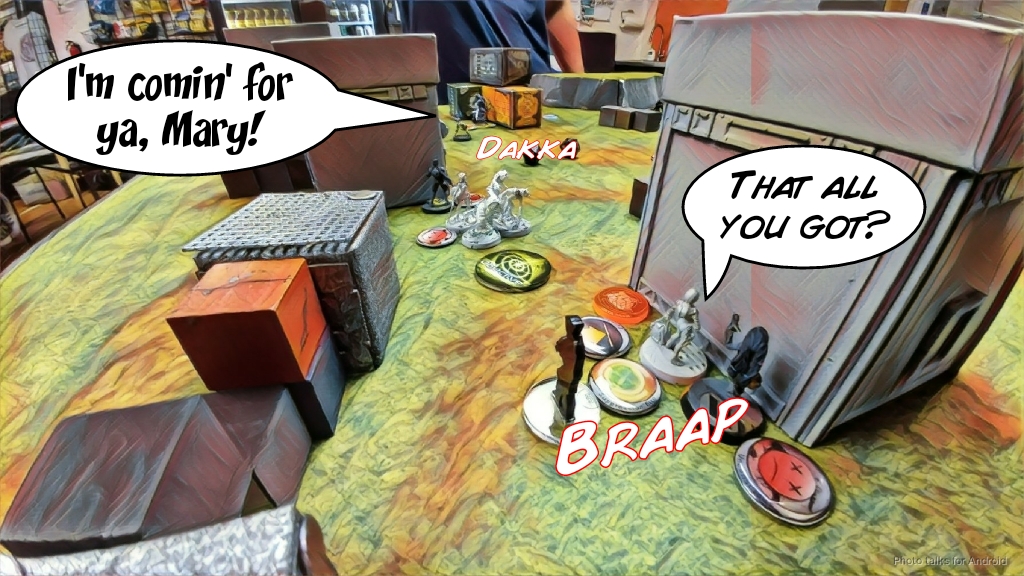 Nate doesn’t have much in the way of orders, so he makes a end run for my objective with his Hollow Man. Fortunately for me, the video game that the brain in the jar is playing seems to have a bit of lag and the Hollow Man doesn’t have enough movement!
 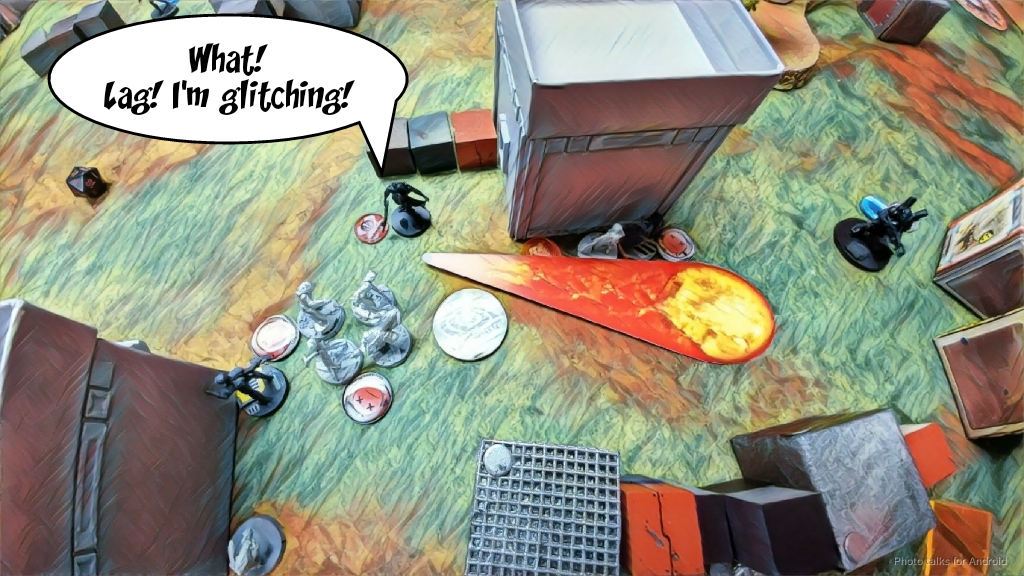 Nate settles for wiping me off the board save for a lone Puppeteer instead, chain colting both Mary and the unconscious Daktari. Once the smoke clears, it’s a
3-3 Nomad versus Jurisdictional Command of Tunguska Tie!
Of course, Nate won this game, basically. I had 14 points left on the table, and Nate had 122, almost 10x my points. As Nate later remarked, regretfully, he could’ve done nothing and won, since Perseus was dominating my HVT. I guess that very flesh and blood human mistake means Nate passed the CAPTCHA test!
 Thanks to Nate for always being a great opponent. I always come away from our games a better player. And thanks to Erik for the suggestion of “Capture and Regret” as a battle report title.
Notes
Notes for Me
- Well, definitely should’ve tried to kill Perseus with the Kriza first off.
- Hollow Man ML is very fussy to use but I think it’s still got some potential. What’s interesting is that I’m often taking it because I want to fill out SWC and not because I want a ML, although in a saturation zone situation it’s quite good still.
- Nate’s protection of his objective was pretty terrifying.
- I think that I psyched myself out of a lot of good decisions this game: Kriza versus Perseus, Hollow Man getting into the zone to grab the objective, etc.
- I’m not sure that a lone Puppeteer is worth it, just for the Counter-Intelligence. It’s good but it’s not game shattering, and I could’ve used something like a Jaguar Panzerfaust instead to slow Nate down some. Perhaps taking a single Puppet would be useful, particularly the AP Marksman?
- I think the Krakot makes for an excellent package retrieval specialist in this mission and matchup, because they’re immune to Jammers! I wish I had been able to keep him alive. Had I enacted my plan of taking out Perseus and damaging Nate’s link better, that might’ve been possible. The Krakot should’ve been deployed in the center of the table as well.
- I’m not sure I need the Uberfall here. I’m just taking them for fun, and could definitely have used a second Tomcat instead.
- Speaking of which, having the Tomcat in the second group presents quite a list issue. I think this would be stronger if I could fit a Taskmaster in group one for the Free Agent skill. I’ll have to rethink this some.
- Out played for sure, this game. Mary did a great job, but that was my dice, not my positioning or use of her.
Notes for Nate
- As always, a strong game!
- As you yourself mentioned, you could’ve just sat there on Turn 3 and won the game 4-3.
- You also noted that a better plan for dealing with Mary would’ve been getting your own Mary to fire off a pitcher and then us having a lighting fight, your two dice against my one. At the very least, that breaks my suppression, making the Kriza’s job easier. Or just sacrificing the Hollow Man to chain colt Mary would’ve been quite effective. As you put it: “I wasn’t thinking laterally enough this game.” In contrast, I don’t think I was being direct enough!
- I’m always impressed by your ability to just push your Kriza up and rely on Full Auto to carry the day when you’re out of cover. It definitely requires a bit of finesse to know when/where to use it, but you definitely get a bunch of order efficiency out of it.
- I’ll get you next time!! Looking forward to our next match!
Updates
After publishing the report, Nate mentioned that were I to have gone after Perseus with the Kriza, he would’ve just thrown smoke and provided the requisite screen shot of the dice calculator. The odds on this for Nate are quite good (surprising no one):
Kriza Boracs, Special Crisis Unit – HMG
31.51% Kriza Boracs, Special Crisis Unit inflicts 1 or more wounds on Perseus, Rogue Myrmidon (0 W)
07.22% Kriza Boracs, Special Crisis Unit inflicts 2 or more wounds on Perseus, Rogue Myrmidon (Dead)
13.57% Neither player succeeds
54.92% Perseus, Rogue Myrmidon blocks Kriza Boracs, Special Crisis Unit with Smoke
18.07% Perseus, Rogue Myrmidon blocks Kriza Boracs, Special Crisis Unit with Smoke
Perseus, Rogue Myrmidon – Smoke Grenades
Had Nate done this, I would’ve been able to run either the Krakot or the (presumably alive) Uberfall up. I probably would’ve blocked the Lunokhod with smoke from either a Morlock or the Uberfall, then gone after Nate’s link. Lots of options here. Nevertheless, all this underscores is that just shooting the crap out of Perseus with the Kriza is a good idea.