Return of Caledonia, the Archnemesis
A little history: I started playing Infinity a bit before the drop of N3, and my primary opponent, the legendary PJ Holmes, played exclusively Caledonia. Back in my early n00b days, when camo surprise shot was so strong, Uxia and the SAS CRAP would regularly table me in the first turn. I almost quit playing the game due to my spectacularly awful win record against this one CHA player and his $*&@ing Volunteer HMG link (it’s worth pointing out we remain the best of friends and he would table me with the most gentle of face punchings). Then I discovered Zeros and the joys of vanilla Nomads coming from Jaguar- and Bandit-less Corregidor (those were dark times), and that rekindled my love for Infinity.
Fast forward almost a decade to the present. Jordan is one of our local USARF players, and he’s recently moved into Caledonia. It’s been awhile since I’ve been able to play him, and it’s been years since I’ve seen Caledonia on the table… My old nemesis is back! Even though they’re piloted by a different person, my irrational fear of/hatred for CHA burns no less bright in my Nomad heart! Jordan and I agreed to play on Aplekton for Kurage Crisis, which meant Supplies at 7 SWC and +1 MOV for Multi-terrain, Mountain Terrain, and Climbing+ units. Sadly, I made a list mistake and couldn’t in good conscience report this game for Kurage. Operation Killer Bees will have to wait a little longer for me. Even without the #IPlayFair movement, I don’t feel comfortable logging the points in the campaign with an illegal list.
Overview
- Mission: Supplies (Aplekton Version, +1 SWC)
- Forces: Nomads versus Caledonian Highlander Army (300)
- Deploy First: Nomads
- First Turn: Nomads
[img]https://assets.infinitythegame.net/infinityarmy/img/_logosweb/logo_501.png[/img][b] Supplies[/b]
[b]GROUP 1 | [/b][img]https://assets.infinitythegame.net/infinityarmy/img/_logosweb/orden_regular.png[/img]8 [img]https://assets.infinitythegame.net/infinityarmy/img/_logosweb/orden_irregular.png[/img]2
[img]https://assets.infinitythegame.net/infinityarmy/img/_logosweb/501/logo_16.png[/img] [b]INTERVENTOR Hacker Lieutenant (Hacking Device Plus)[/b] Combi Rifle / Pistol, Knife. (0.5 | [b]25[/b])
[img]https://assets.infinitythegame.net/infinityarmy/img/_logosweb/501/logo_10.png[/img] [b]ZERO (Minelayer)[/b] Combi Rifle, Antipersonnel Mines / Pistol, Knife. (0.5 | [b]19[/b])
[img]https://assets.infinitythegame.net/infinityarmy/img/_logosweb/501/logo_10.png[/img] [b]ZERO (Minelayer)[/b] Combi Rifle, Antipersonnel Mines / Pistol, Knife. (0.5 | [b]19[/b])
[img]https://assets.infinitythegame.net/infinityarmy/img/_logosweb/501/logo_30.png[/img] [b]MORAN (Forward Observer)[/b] Combi Rifle, CrazyKoalas (2) / Pistol, Knife. (0.5 | [b]22[/b])
[img]https://assets.infinitythegame.net/infinityarmy/img/_logosweb/501/logo_30.png[/img] [b]MORAN (Forward Observer)[/b] Combi Rifle, CrazyKoalas (2) / Pistol, Knife. (0.5 | [b]22[/b])
[img]https://assets.infinitythegame.net/infinityarmy/img/_logosweb/501/logo_9.png[/img] [b]BANDIT Hacker (Killer Hacking Device)[/b] Light Shotgun, Adhesive Launcher / Pistol, DA CCW. (0 | [b]25[/b])
[img]https://assets.infinitythegame.net/infinityarmy/img/_logosweb/501/logo_9.png[/img] [b]BANDIT Hacker (Killer Hacking Device)[/b] Light Shotgun, Adhesive Launcher / Pistol, DA CCW. (0 | [b]25[/b])
[img]https://assets.infinitythegame.net/infinityarmy/img/_logosweb/501/logo_56.png[/img] [b]KRIZA BORAC[/b] HMG / Heavy Pistol, CC Weapon. (2 | [b]54[/b])
[img]https://assets.infinitythegame.net/infinityarmy/img/_logosweb/501/logo_5.png[/img] [b]REVEREND MOIRA[/b] MULTI Sniper Rifle / Pistol, Shock CCW. (1.5 | [b]34[/b])
[img]https://assets.infinitythegame.net/infinityarmy/img/_logosweb/501/logo_3.png[/img] [b]HELLCAT[/b] Boarding Shotgun / Pistol, Knife. (0 | [b]21[/b])
[img]https://assets.infinitythegame.net/infinityarmy/img/_logosweb/501/logo_3.png[/img] [b]HELLCAT[/b] Spitfire / Pistol, Knife. (1.5 | [b]28[/b])[b]GROUP 2 | [/b][img]https://assets.infinitythegame.net/infinityarmy/img/_logosweb/orden_regular.png[/img]2 [img]https://assets.infinitythegame.net/infinityarmy/img/_logosweb/orden_irregular.png[/img]3 [img]https://assets.infinitythegame.net/infinityarmy/img/_logosweb/orden_impetuosa.png[/img]3
[img]https://assets.infinitythegame.net/infinityarmy/img/_logosweb/501/logo_12.png[/img] [b]MORLOCK[/b] Chain Rifle, Smoke Grenades / Pistol, E/M CCW. (0 | [b]6[/b])
[img]https://assets.infinitythegame.net/infinityarmy/img/_logosweb/501/logo_12.png[/img] [b]MORLOCK[/b] Chain Rifle, Smoke Grenades / Pistol, E/M CCW. (0 | [b]6[/b])
[img]https://assets.infinitythegame.net/infinityarmy/img/_logosweb/501/logo_12.png[/img] [b]MORLOCK[/b] Chain Rifle, Smoke Grenades / Pistol, E/M CCW. (0 | [b]6[/b])
[img]https://assets.infinitythegame.net/infinityarmy/img/_logosweb/501/logo_21.png[/img] [b]TRANSDUCTOR ZOND[/b] Flash Pulse, Sniffer / Electric Pulse. (0 | [b]8[/b])
[img]https://assets.infinitythegame.net/infinityarmy/img/_logosweb/501/logo_21.png[/img] [b]TRANSDUCTOR ZOND[/b] Flash Pulse, Sniffer / Electric Pulse. (0 | [b]8[/b])
[b] 7.5 SWC | 307 Points |[/b] Open in Infinity Army
Well, I’ve been list making a bunch with Hellcat Spitfires, so I grabbed the wrong mini out of my bag. The Hellcat, when it landed, was carrying a Spitfire and not a BSG. Sadly, this game it was relevant to have a Spitfire (or at least a combi). The Bandit KHDs in this matchup weren’t relevant at all, and could’ve been FOs just to be specialists, but even with that savings and the +1 SWC granted by the Aplekton special rules I’d still be 0.5 SWC and 3 points over. Sorry, Jordan! I’m the worst!
[img]https://assets.infinitythegame.net/infinityarmy/img/_logosweb/logo_302.png[/img][b] Caledonian Highlander Army[/b]
[b]GROUP 1 |[/b] [img]https://assets.infinitythegame.net/infinityarmy/img/_logosweb/orden_regular.png[/img]10
[img]https://assets.infinitythegame.net/infinityarmy/img/_logosweb/302/logo_4.png[/img] [b]HIGHLANDER GREY[/b] AP HMG, Smoke Grenades / Pistol, CCW. (1.5 | [b]34[/b])
[img]https://assets.infinitythegame.net/infinityarmy/img/_logosweb/302/logo_1.png[/img] [b]VOLUNTEER[/b] HMG / Pistol, Knife. (0.5 | [b]19[/b])
[img]https://assets.infinitythegame.net/infinityarmy/img/_logosweb/302/logo_1.png[/img] [b]VOLUNTEER Paramedic (Medikit)[/b] Rifle / Pistol, Knife. (0 | [b]10[/b])
[img]https://assets.infinitythegame.net/infinityarmy/img/_logosweb/302/logo_1.png[/img] [b]VOLUNTEER[/b] Light Shotgun, Light Grenade Launcher / Pistol, Knife. (0.5 | [b]10[/b])
[img]https://assets.infinitythegame.net/infinityarmy/img/_logosweb/302/logo_1.png[/img] [b]VOLUNTEER[/b] Chain Rifle, Light Shotgun / Pistol, Knife. (0 | [b]6[/b])[img]https://assets.infinitythegame.net/infinityarmy/img/_logosweb/302/logo_13.png[/img] [b]UXÍA McNEILL (Covert Action) (CH: Limited Camouflage, Superior Infiltration, Specialist Operative)[/b] Boarding Shotgun, D-Charges, Smoke Grenades / 2 Assault Pistols, AP CCW, Knife. (0 | [b]27[/b])
[img]https://assets.infinitythegame.net/infinityarmy/img/_logosweb/302/logo_6.png[/img] [b]S.A.S. (Forward Observer)[/b] Rifle / Pistol, AP CCW, Knife. (0 | [b]24[/b])
[img]https://assets.infinitythegame.net/infinityarmy/img/_logosweb/302/logo_6.png[/img] [b]S.A.S. (Forward Observer)[/b] Rifle / Pistol, AP CCW, Knife. (0 | [b]24[/b])
[img]https://assets.infinitythegame.net/infinityarmy/img/_logosweb/302/logo_3.png[/img] [b]SCOT (1st Battalion) (Fireteam: Duo)[/b] Molotok / Pistol, Knife. (1.5 | [b]26[/b])
[img]https://assets.infinitythegame.net/infinityarmy/img/_logosweb/302/logo_3.png[/img] [b]SCOT (1st Battalion) (Fireteam: Duo, Forward Observer)[/b] 2 Submachine guns, D.E.P., D-Charges / Pistol, Knife. (0 | [b]19[/b])[b]GROUP 2 | [/b][img]https://assets.infinitythegame.net/infinityarmy/img/_logosweb/orden_regular.png[/img]5 [img]https://assets.infinitythegame.net/infinityarmy/img/_logosweb/orden_irregular.png[/img]2 [img]https://assets.infinitythegame.net/infinityarmy/img/_logosweb/orden_impetuosa.png[/img]1
[img]https://assets.infinitythegame.net/infinityarmy/img/_logosweb/302/logo_1.png[/img] [b]VOLUNTEER Lieutenant[/b] Rifle / Pistol, Knife. (0 | [b]8[/b])
[img]https://assets.infinitythegame.net/infinityarmy/img/_logosweb/302/logo_1.png[/img] [b]VOLUNTEER[/b] HMG / Pistol, Knife. (0.5 | [b]19[/b])
[img]https://assets.infinitythegame.net/infinityarmy/img/_logosweb/302/logo_1.png[/img] [b]VOLUNTEER[/b] Chain Rifle, Light Shotgun / Pistol, Knife. (0 | [b]6[/b])
[img]https://assets.infinitythegame.net/infinityarmy/img/_logosweb/302/logo_1.png[/img] [b]VOLUNTEER[/b] Chain Rifle, Light Shotgun / Pistol, Knife. (0 | [b]6[/b])
[img]https://assets.infinitythegame.net/infinityarmy/img/_logosweb/302/logo_1.png[/img] [b]VOLUNTEER[/b] Chain Rifle, Light Shotgun / Pistol, Knife. (0 | [b]6[/b])[img]https://assets.infinitythegame.net/infinityarmy/img/_logosweb/302/logo_2.png[/img] [b]CATERAN[/b] T2 Sniper Rifle / Pistol, AP CCW. (1 | [b]24[/b])
[img]https://assets.infinitythegame.net/infinityarmy/img/_logosweb/302/logo_15.png[/img] [b]McMURROUGH[/b] 2 Chain Rifles, Grenades, Smoke Grenades / Templar CCW (AP + DA). (0 | [b]31[/b])
[b] 5.5 SWC | 299 Points[/b] Open in Infinity Army
Deployment
Well, this is Supplies, and Supplies is about locking down the midfield, whether or not you go first. I immediately set about doing that. I covered all major approaches with mines and Crazy Koalas, and then prepped for smoke on all three objectives with three Morlocks. Thankfully, I ended up rolling NWI and Regen on my Morlocks, which really gave me the peace of mind that I would get smoke down. I put my Bandits right next to the central and right Tech Coffins, ready to make a speedy getaway. I didn’t have the specialist coverage to get a camo token next to all three Tech Coffins, so I settled for keeping one of the Morans near the one on the left.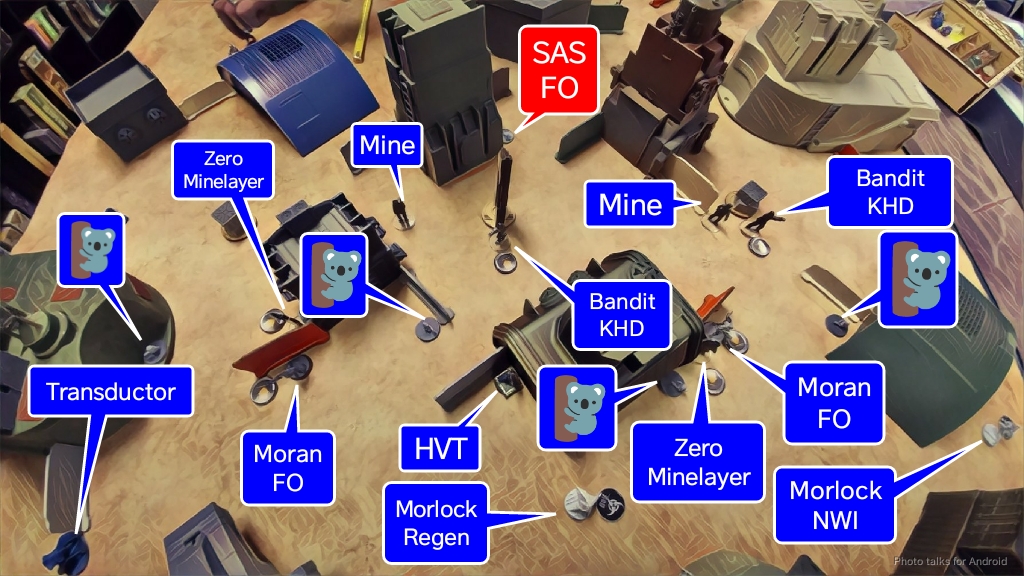 I backed up my Zeros, Morans, and Bandits with flash pulse bots watching the major approaches to the objectives and my backfield, then tucked my Interventor on the left ready to make a run for an objective if it became really necessary. Looking at Jordan’s deployment, it looked like I would need to have more hitting power on the right, so I stuck my Kriza over there to punch a hole to get a specialist through, or to start hunting his objective carrier if everything went truly pear shaped on my first turn.
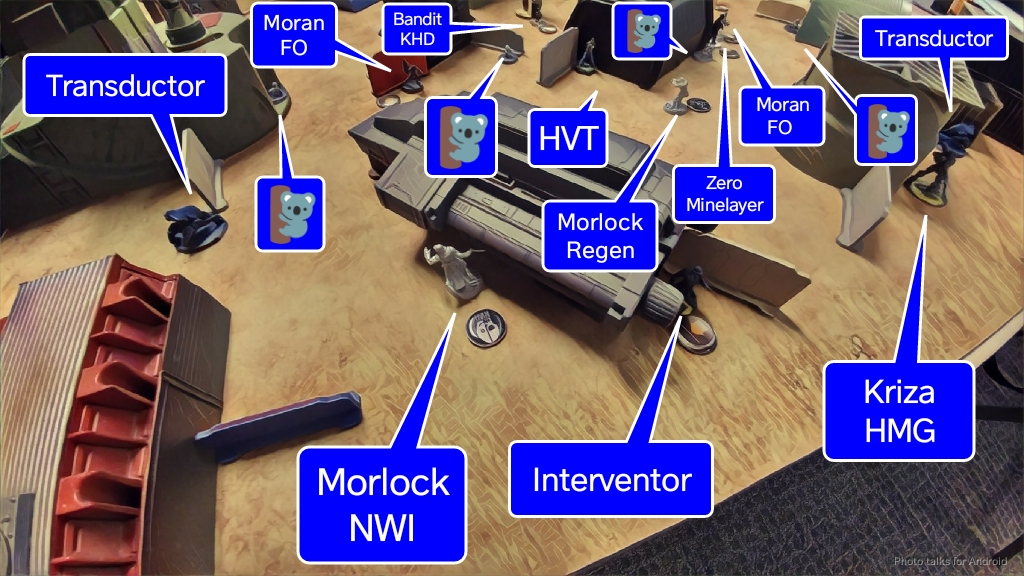 Here’s a better shot of the right side of my deployment zone. I figured the Kriza could loop either towards the central fire lane or to the right one, and punch a hole for me in either one. This would let me cover of Jordan’s roofs in his deployment zone where he was likely to place annoying ARO pieces. The Kriza is also right next to my Transductor in case I see anything with MSV–I’m used to his USARF, where he usually brings Marauders.
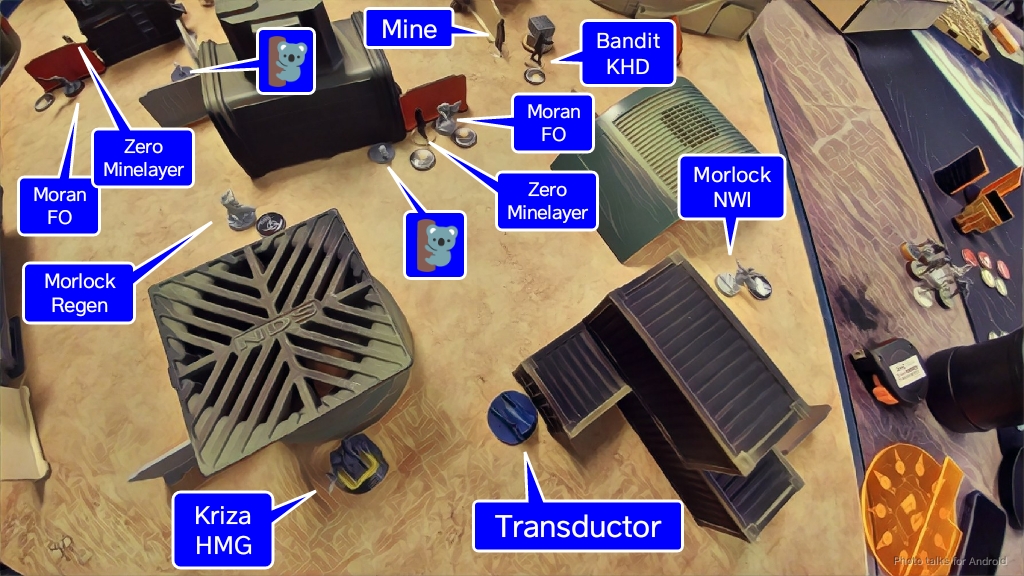 With the central field locked down and most of my forces on the table, it was Jordan’s turn to deploy. He puts Uxia on his far right, ready to punish any deployment holes I left on my left flank and make a hole for his Scots duo on his right. Due to the insane price of the Volunteer HMG, he and I have been bouncing back and forth a two-core list with plenty of linked HMG power. The primary link is the primary pool, and it has the obligatory Grey AP HMG, backed up by a Volunteer HMG and a bunch of other toys. That link went in the center, fanned out to cover a few objectives with the two HMGs. The second link, which had his lieutenant in it, castled up on his left, protected by the small building. McMurder went prone on the roof in case I had any AD troops or other assassins waiting in the wings, and Jordan counter-deployed all my stuff with his SAS FOs. If I missed an objective, he was primed to take it on his turn!
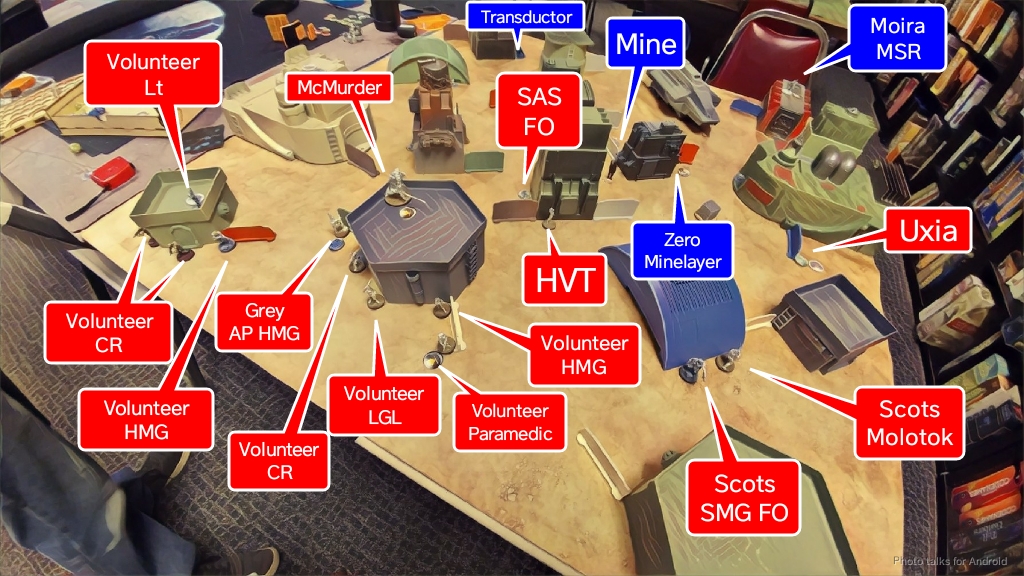 He also blanketed the left side of his deployment zone with chain rifles, making it basically impossible for me to safely land anywhere–the right was covered by a Scots SMG and the other Volunteers.
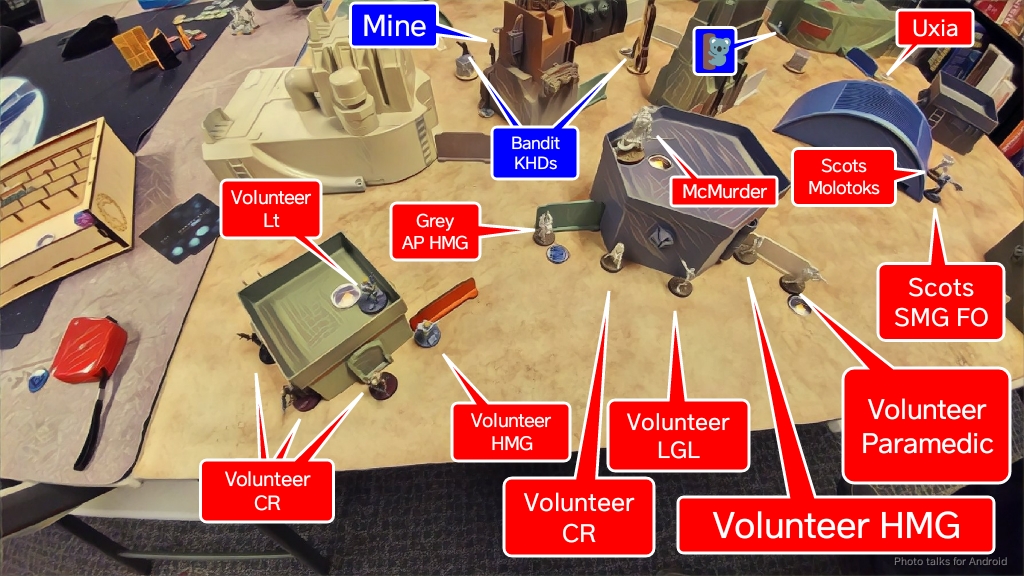 Jordan has definitely been on the receiving end of my Hellcat drops before, so he was very careful in his deployment. With him leaving so much out to ARO, I stuck my Moira MSR down covering a bunch of different targets. I certainly didn’t plan on using her to take anything out on the first turn, as even her ODD wouldn’t protect her from multiple AROs. I suppose Morlock smoke would have been helpful to cut off some LoF if I really needed to remove something, but the Kriza is a more reliable tool for that and I really need to be grabbing boxes on my first turn, not killing stuff. My list is geared to stall my opponent out in the middle as they try to get to my specialists who have retreated well into my backfield.
 Jordan responds by placing down his own scary sniper person. The Cateran comes down on McMurrough’s building to lock down all the firelanes, and that T2 will negate my Morlock’s awesome MetaChemisty rolls. Grump grump grump. I’ll have to deal with that somehow if I can’t get all the smoke I need off.
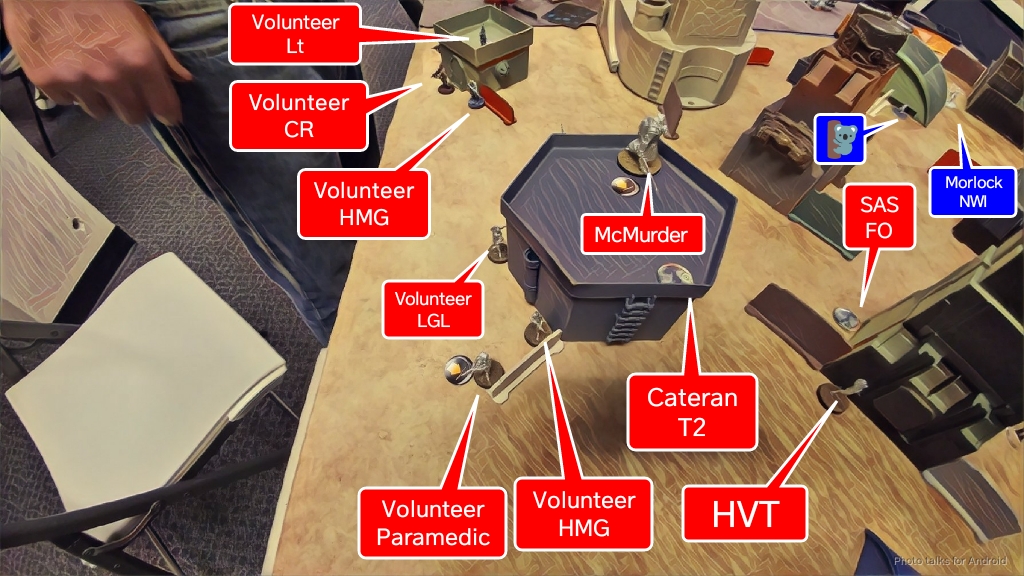 No datatrackers this time, so after Jordan nominates his link team leader, we’re off!
Turn 1
Top of Turn 1 – Nomads
My first turn was really boring tactically, but very fiddly movement-wise. As a result of all the thinking and eyeballing I didn’t really take any pictures till the end of the turn. Basically all three of my Morlocks did their jobs, getting into the right position to throw smoke without granting an ARO. All three objectives got covered by smoke on the first try, and then it was s simple matter of snagging the boxes with my Bandits and coordinating a few orders between them to get them all the way back to my deployment zone. That extra MOV from High Sierra thanks to the scenario really helped with this. 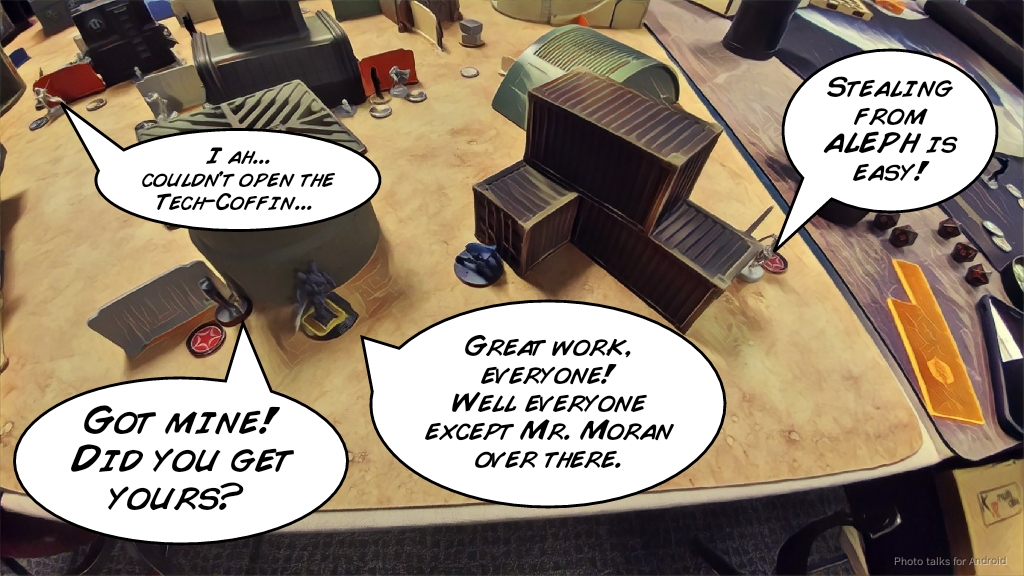 After the two Bandits were safe, with Jordan docking me two orders I didn’t have a ton of orders left. I figured I might as well go for a clean sweep and attempted to grab the left objective with my Moran. Sadly, he failed his first WIP roll and failed his second try as well, meaning that I didn’t have enough movement to get him back into cover, so he just sorta… hung out. At the very least I got his Koalas pushed up into better places.
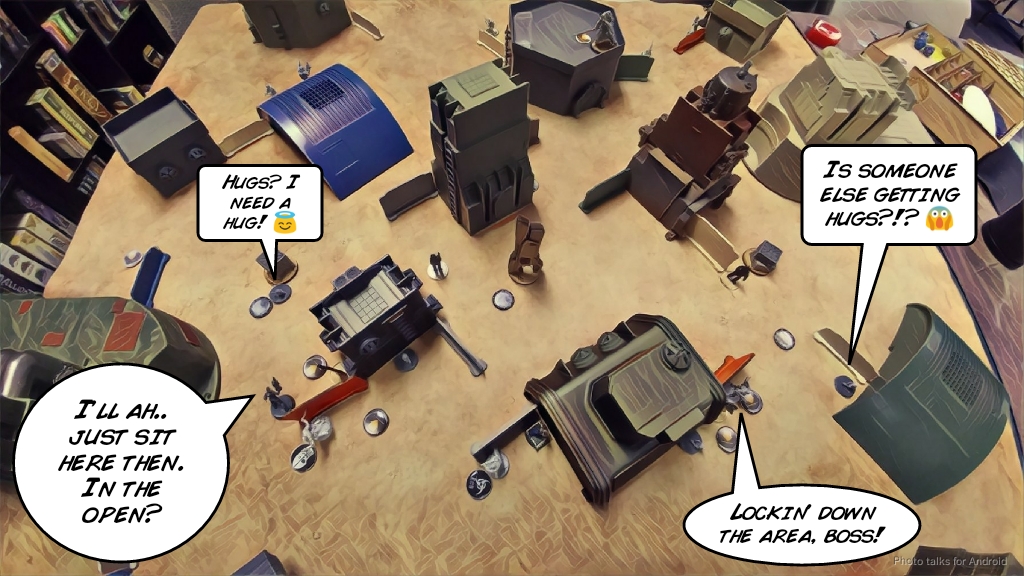
Bottom of Turn 1 – CHA
McMurrough jumps off his building and attempts to throw smoke. He takes some stun rounds from the Moira and a bunch of flash pulses, but we all flub or cancel each other rolls and he’s left awkwardly standing there. Jordan doesn’t want to risk getting McMurrough stunned, so it’s time for the Cateran to take out my Moira MSR. Jordan reveals the Cateran, dumping all shots into the Moira, figuring he can just tank the combi fire and flash pulses coming back from my Moran and my two flash pulse bots that can see. I actually choose to forward observe with the Moran, which as it turns out is not an ARO skill–which is sad because this would’ve gotten me my classified. Regardless, it doesn’t matter because the snipers both roll a 5 and cancel each others’ shots. One of my flash pulse bots comes through for me and blinds the Cateran though, so at least that threat is over. McMurrough attempts to smoke out the one flash pulse bot that can see, which will also let Jordan get the SAS that’s right there into the fight safely (were it not for the mine nearby, but Jordan doesn’t know that). I crit, thankfully, stopping two of Jordan’s scary attack pieces in their tracks. Phew! I’ve still got a linked Grey AP HMG breathing down my neck, but I have enough in the midfield to slow them down that I can relax a little.
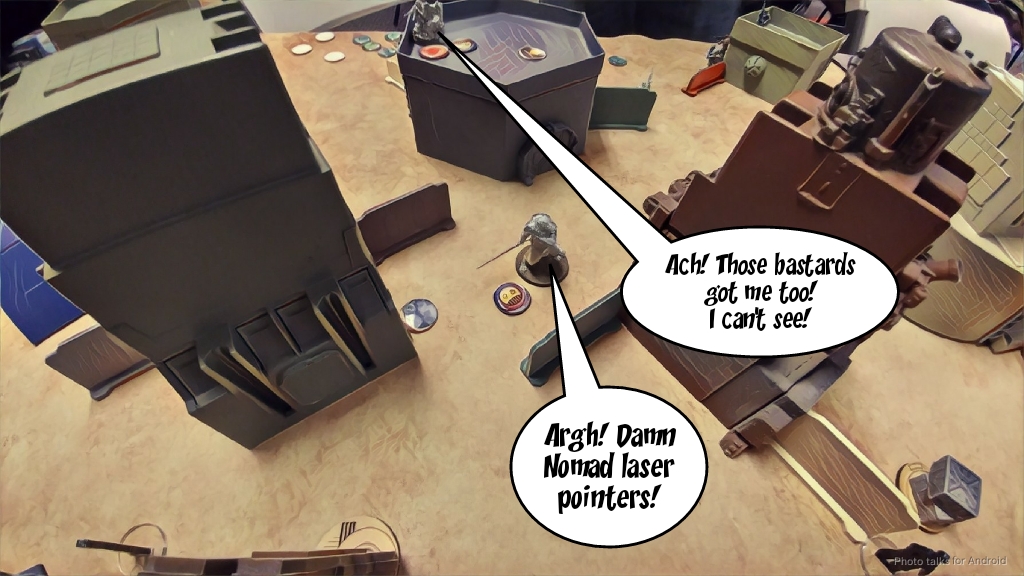 Speaking of the Grey, Jordan wants to set up his primary link for action on the second turn. Due to the relative position of his link, he’s forced to use a centrally positioned link member as the leader to ensure everyone starts in coherency–one of my personal pet peeves about links! Leave too much out to ARO or spread them out to avoid getting templated and you often get stuck in a weird situation. In any case, this lets me get a shot against the Volunteer HMG as they move into a better position with my Moira MSR. I’m too used to playing Jordan’s USARF and was dreading having to punch through ARM6 even with DA, so I was pleasantly surprised when my Moira blows the damn Volunteer off the table! HAH! Take that, PJ! I killed that stupid Volunteer HMG! I’m not even playing you but I just want you to know that somewhere, somehow, a Volunteer HMG is DEAD! RAARRGH! Damned profile was the bane of my existence back in N2 along with Uxia.
  Jordan has grown a lot as a player in the past year. He used to focus a lot on killing stuff, but this time he stuck to the plan and played to the objective. The only “easy” one to get is the one on my left that my Moran couldn’t get, so Jordan activates the Scots and tries to Molotok my Moran off the table. I am insanely lucky and dodge everything except for one hit (thanks, Mimetism!) and fail guts to hide near the Morlock that’s there, watching the rear for Van Zant, who’s not even in the damn faction I’m playing against! Old habits die hard.
 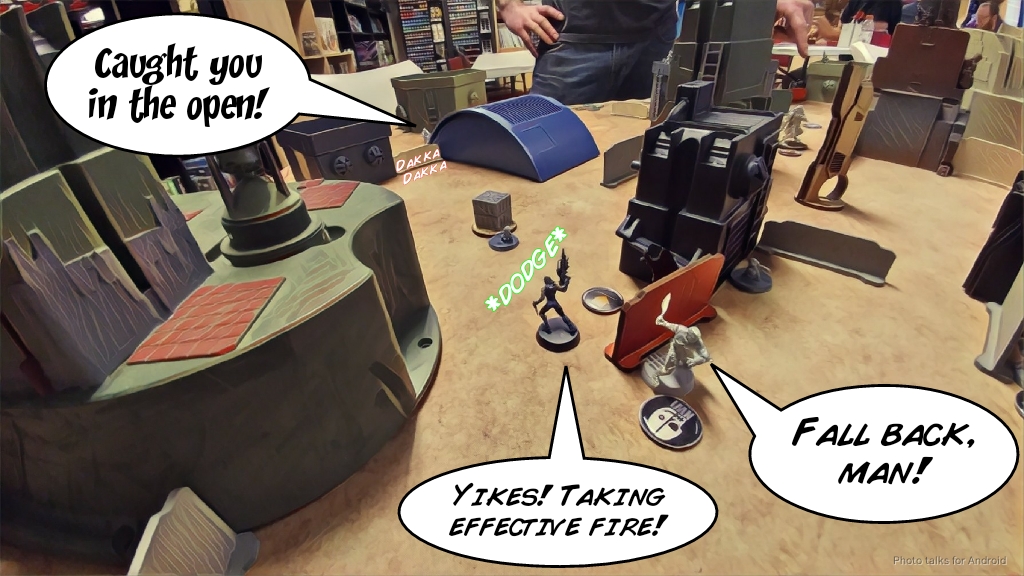 This does mean that the Scots can gun down my poor, defenseless Koala, who is just telling the world how much it loves hugs through song. Why is everyone so damn rude to these poor robots? They have rights too! I guess they’re not very good about personal boundaries and want to hug everything, but they’re harmless, right?
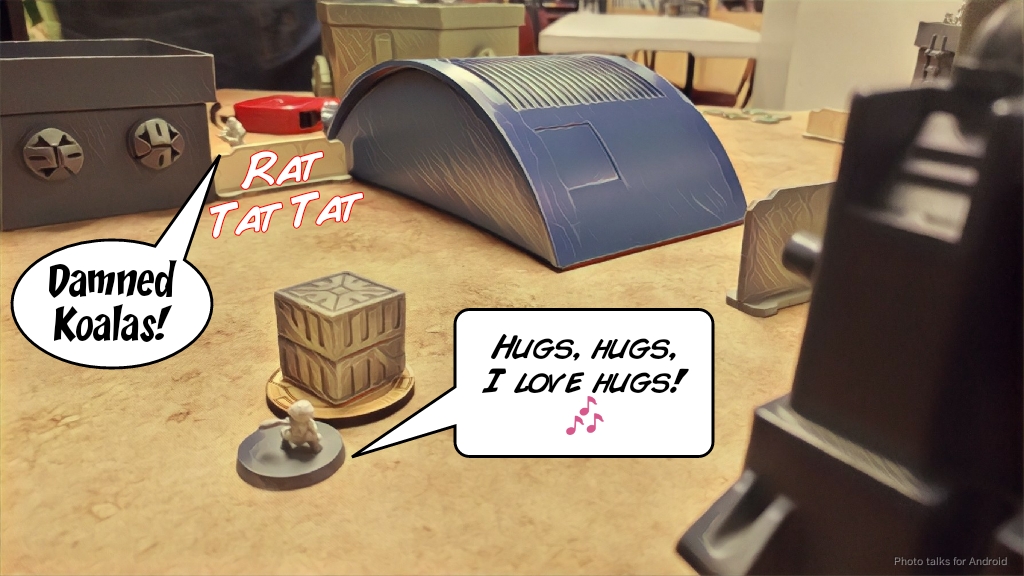 My Moira is still up, and Jordan would like her off the table to relieve some pressure on his Scots and his Volunteer links, so he sends in Uxia. Uxia climbs up the green building on my left flank and makes her way towards my Moira. Fortunately for me, one of my eagle-eyed Morlocks discovers her as she reaches the top of the ladder.
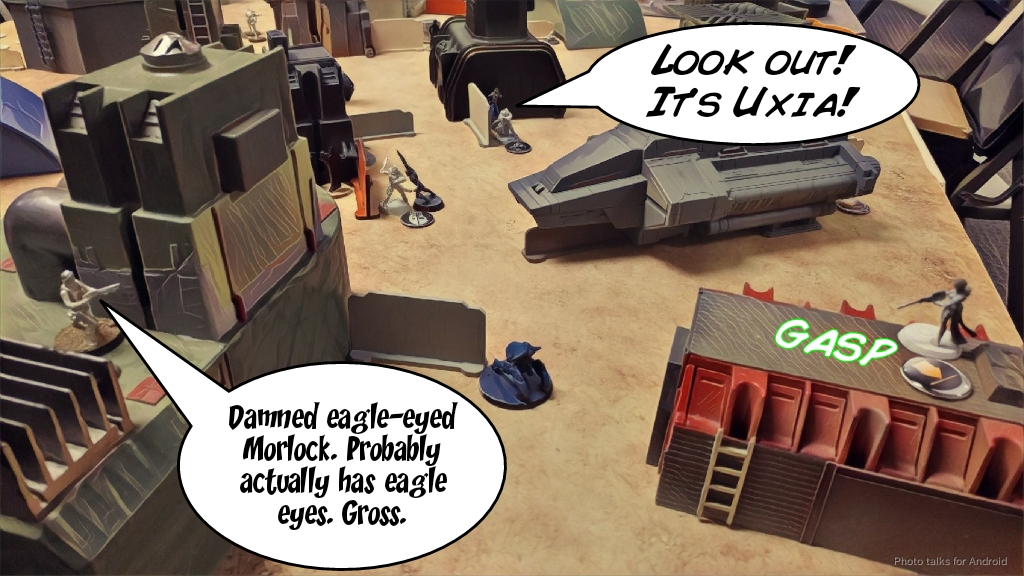 Uxia’s dual assault pistols are enough to punch through the ODD of my Moira and I lose my sniper top cover and now have a very dangerous threat on my left flank. Not good!
 Uxia deletes my flash pulse bot on the left too, depriving me of an order and making things easier for McMurrough on Jordan’s next turn.
 With that, Jordan settles the Grey link into position under the cover of smoke and preps for Turn 2 by running the Volunteer HMG from the second group over to join the link on his next turn.
Turn 2
Top of Turn 2 – Nomads
I lose the left Morlock to the Cateran as he makes his way towards Uxia. I attempted to cover the gap with smoke from my middle Morlock first, but sadly I whiffed the roll there. It did, however, grant McMurrough an ARO, which he uses to throw smoke to cover himself from this angle. I’m enjoying the three-Morlock second group, the middle one can usually get the other two on the flanks out of trouble with smoke by spending their impetuous order first. It doesn’t work when you roll a 20, though!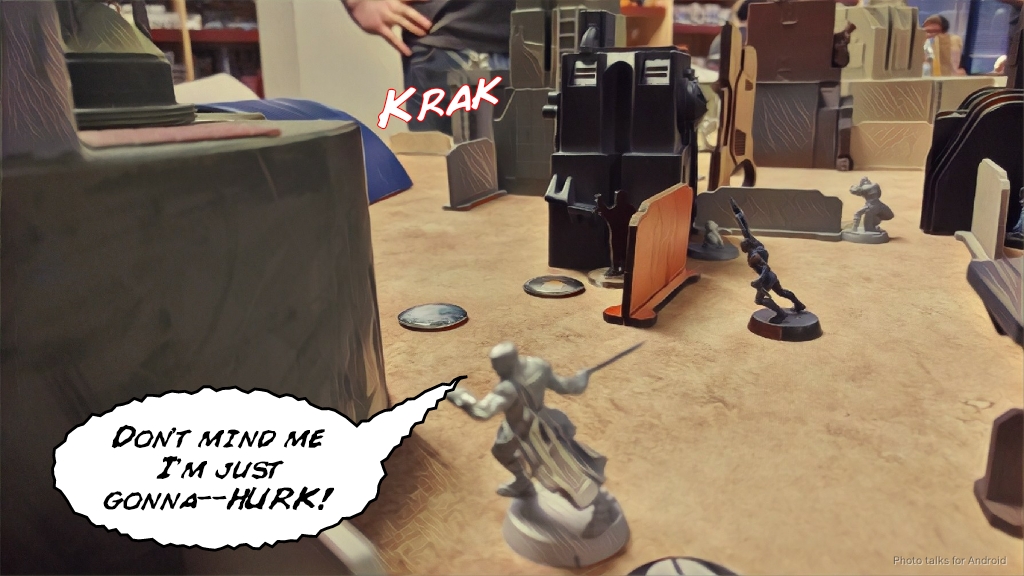 McMurrough is a big enough threat to warrant trotting the Kriza out, so I do that and drop him to unconscious with one order. McMurrough’s earlier smoke did me the favor of blocking the Cateran’s line of fire to my Kriza, but not the line of fire between McMurrough and the Kriza. I’m a little concerned that I’m going to be crutching on the Kriza too much as a player, but it’s just too good of a brute force beatstick to give up in Vanilla. I can’t finish off McMurrough with the Kriza though, since he’s down prone behind cover, bleeding out.
 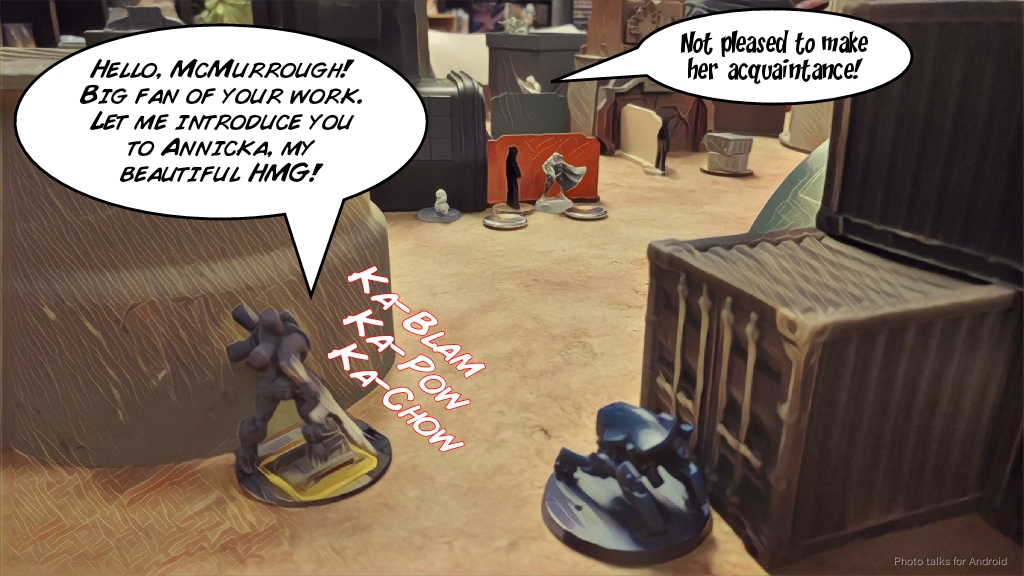 Fortunately, I say to myself, I’ve got a Hellcat Spitfire circling in a dropship! Sadly, this is a pretty big mistake, as my list actually had a boarding shotgun Hellcat in it. As I mentioned earlier, no amount of list massaging will get me a legal Spitfire and let me keep all the other capabilities of the list that I used. I could’ve massaged the list to get a combi rifle Hellcat by downgrading one of the Bandits to an FO. This would have had absolutely no impact on the game as there’s nothing hackable on Jordan’s side of the table and I didn’t do anything but grab the box and run with the Bandits anyway, but the extra burst and the rangebands of the Spitfire were relevant to our decision making. As it turns out, the dice rolls would’ve worked for a combi as well, but that’s really just me rationalizing a pretty stupid mistake on my part. Sorry again, Jordan!
 In any case, my Hellcat drops in and takes out both Scots over a few orders–this is within good rangebands for the combi as well, and the extra burst and damage of the Spitfire turned out to not really be relevant given our dice rolls. This was actually true for shooting the Cateran in the back as well too. I missed all but one shot, and rolled a 2 on my one success with Jordan failing ARM on a 9. This is just me trying to assuage my guilt at making a dumb mistake!
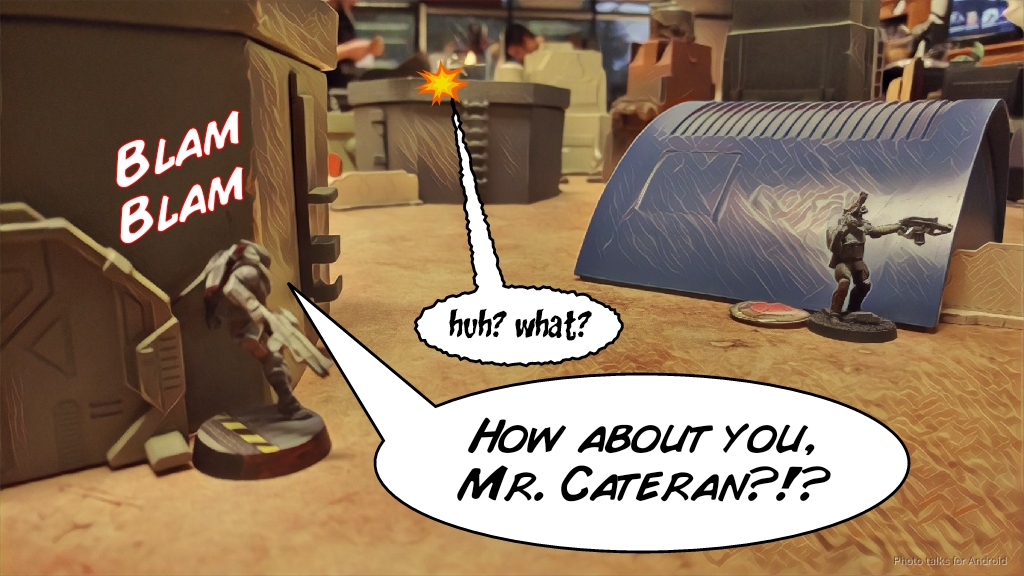 I spend some command tokens to flip the Bandits’ orders to let me take McMurrough off the table, and then all I’ve got left is a Morlock’s irregular order.
 This turns out to be pretty relevant, as I again leverage McMurrough’s smoke to get my central Morlock into a position covering Jordan’s Volunteers with a chain rifle template once the smoke clears.
Bottom of Turn 2 – CHA
This is the predicament I’ve put Jordan in at the start of his turn. It’s a bit of a long chain rifle shot, but I can probably get two of the link if he activates them. Jordan flips the Volunteer HMG from the second group over to the first group so he can form a full 5-man link with two HMGs again, spends a command token to reform the link, and then sets about dealing with my Morlock.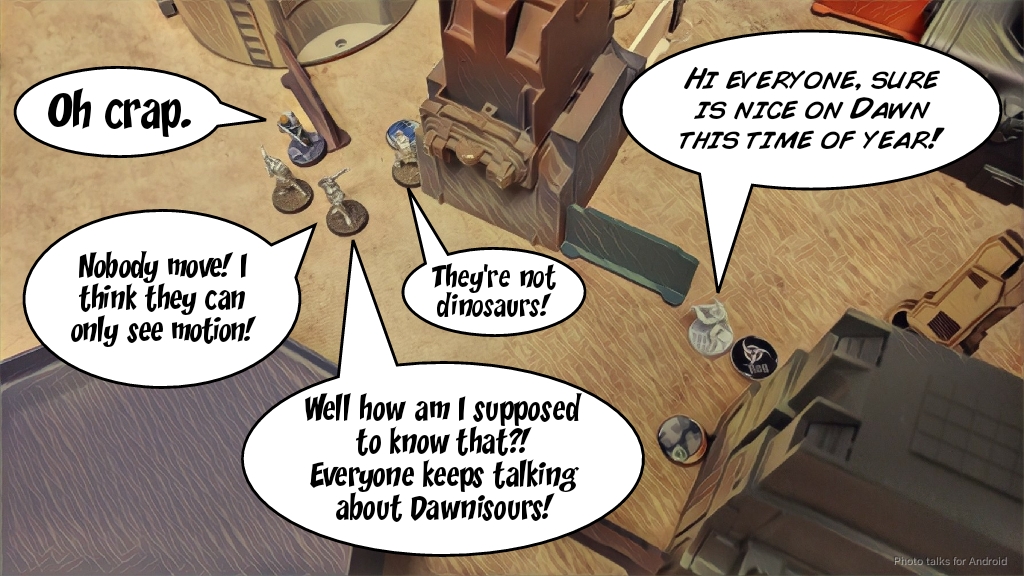 He tries to surprise attack my Morlock with his SAS, but this triggers my nearby mine. I beat out his dodge roll with the Morlock’s CC anyways, so the poor SAS trooper is very very dead.
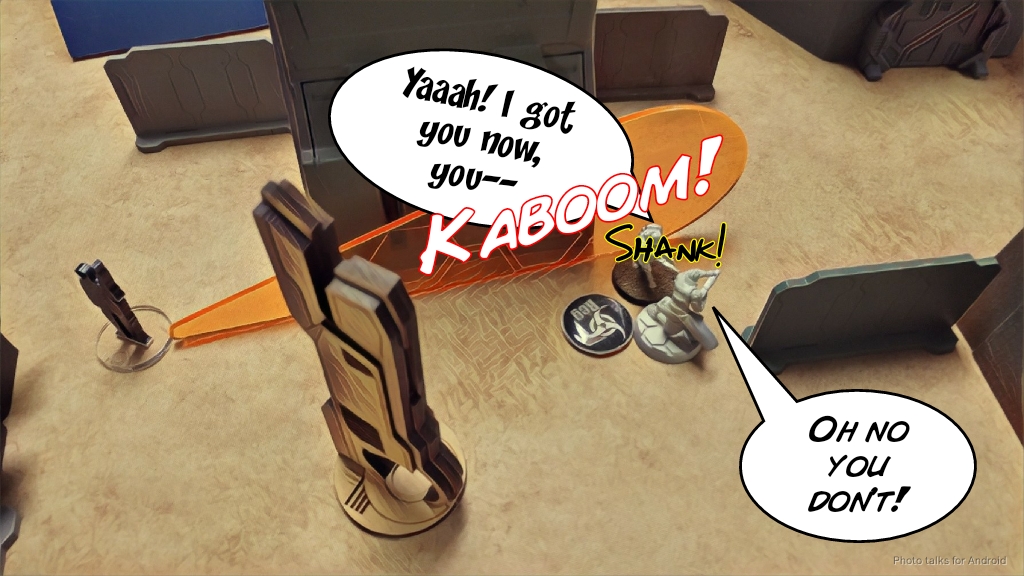 Jordan sends in the other SAS, using the camo state to prevent me from just chain rifling everything with this troublesome Morlock, but my Hellcat makes a long range discover, popping the commando out of marker state.
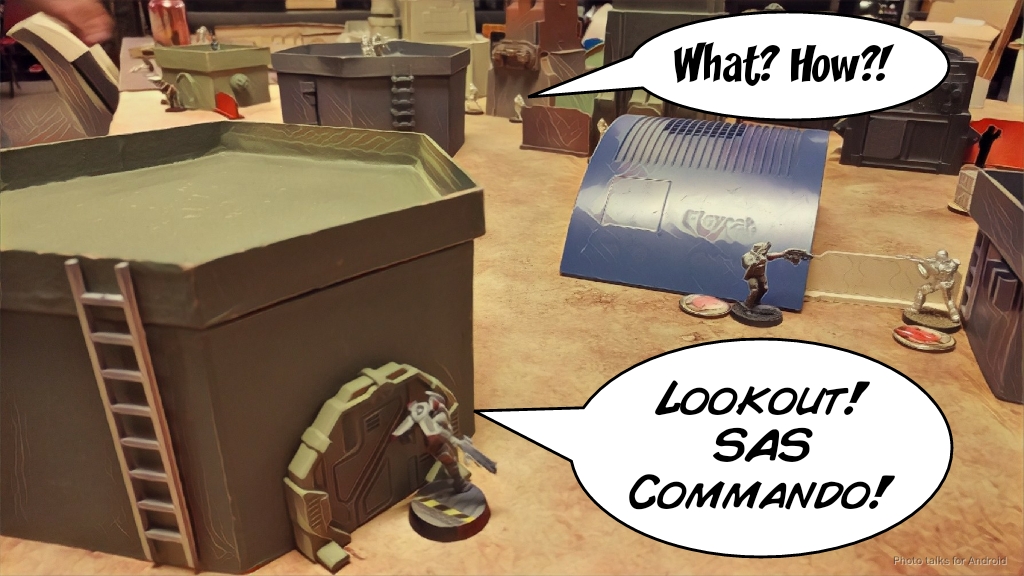 Exasperated and running low on options, Jordan breaks the link and just throws smoke with the Grey, covering his Volunteers from my Morlock’s chain rifle.
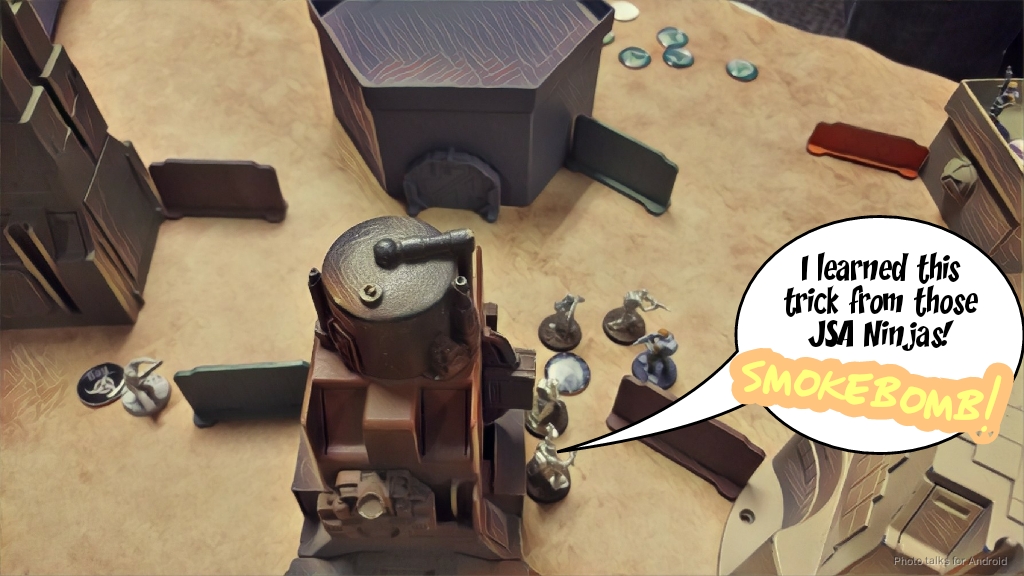 I’ve left my Kriza out, so Jordan pushes his Grey around the corner, being careful to not get all of his troopers nuked by the mine there and tries to drop my Kriza.
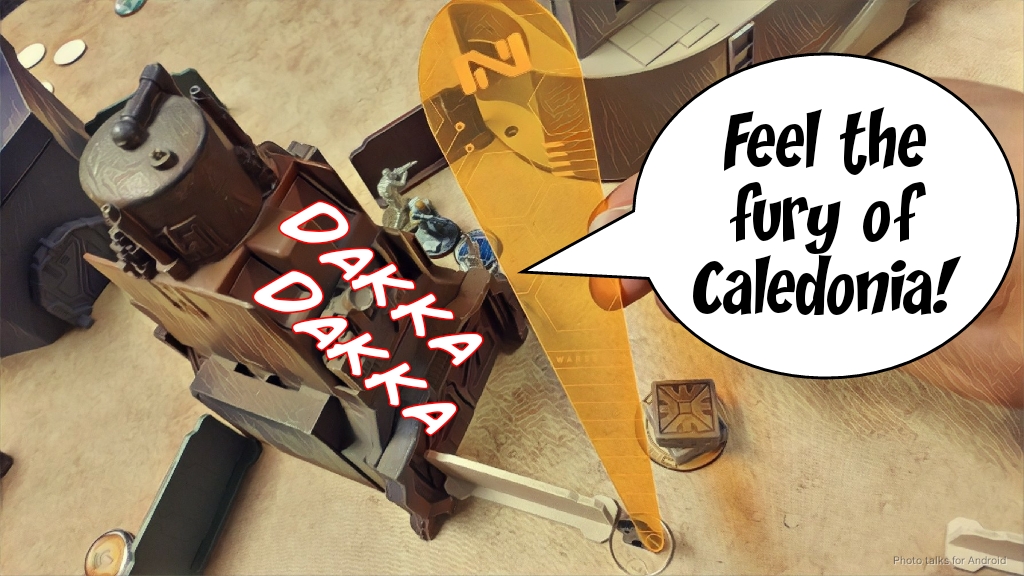 The fury of Caledonia is real, and Jordan lands a crit and a hit on my Kriza. I pass ARM and retreat into cover, but my Transductor zaps the offending Ariadnan in the face, blinding him. The Grey’s heavy Tesium plating lets him shrug off the mine hit, so with the 5-man link still up and running, Jordan activates his backup Volunteer HMG.
 This is his last order, and he uses it to extract vengeance on my poor Transductor Zond, sending it unconscious with a hail of HMG fire.
Turn 3
Top of Turn 3 – Nomads
Okay. My turn! It takes two orders to kill the SAS FO that my Morlock is engaged with, and my other Morlock just dances around behind a building, unwilling to pop out in front of a full 5-man fireteam. Speaking of, the Volunteer HMG is out of cover, so it’s time for some Kriza pie-slicing! The first order blows another Volunteer HMG off the table, breaking the link. After some brief internal celebration, I turn my attention to the now-unlinked Grey AP HMG and blast that off the table as well.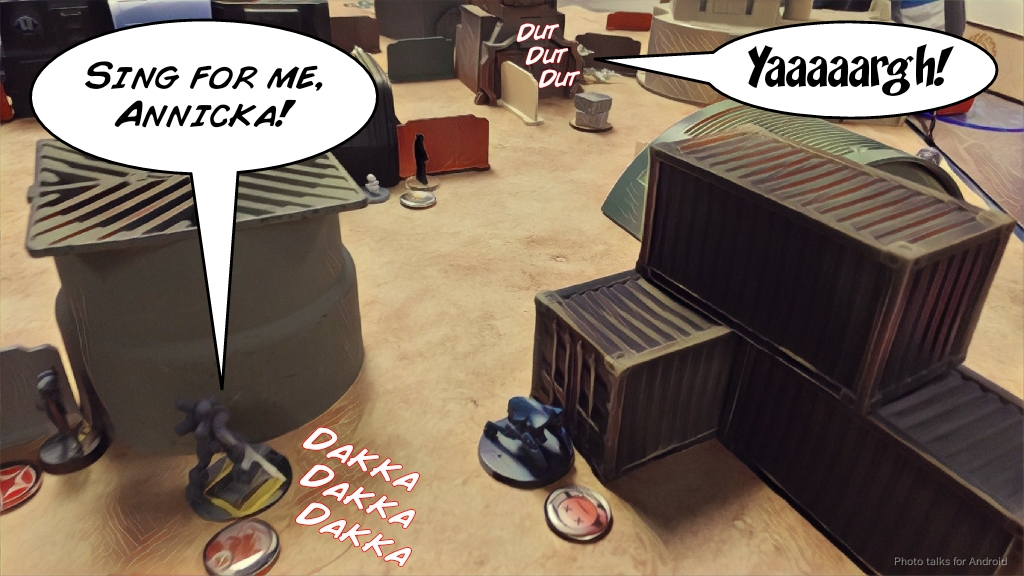 I’m out of command tokens and Uxia is still very much alive on my left flank. Unwilling to risk anything, I use the Bandits’ irregular orders to hide them a little better deep in the right size of my DZ and then try to box Uxia in. I’m confident that the rest of my forces on the right can handle whatever’s left of Jordan’s link on that side, or at least delay them before they can get to my Bandits.
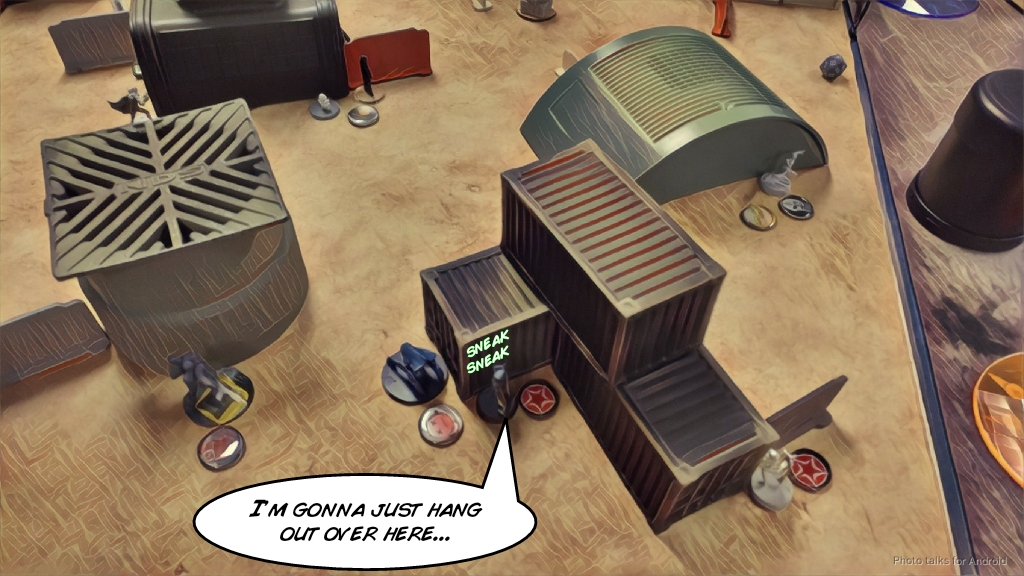 I move my Moran into position, drop two mines with a Zero, and then throw the Moran into suppression.
 I try to position everything so that Uxia will have to deal with a Koala and two mines over the course of three orders, to really drain Jordan’s order pool. Forever unsatisfied with my defensive lines, I pass the turn after throwing Zero Cool the Interventor into suppression with his Lt order.
Bottom of Turn 3 – CHA
Jordan goes for broke and just trusts Uxia to come through for him.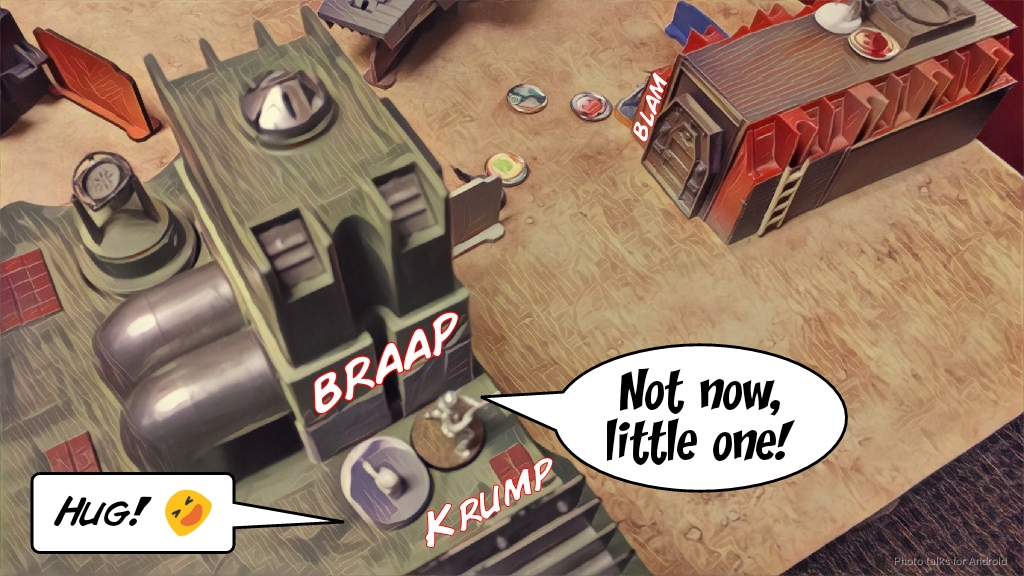 After tanking a Koala to the face and taking out my Zero, it’s time to take on my Moran in suppression. We both crit on the first exchange, draining yet another order.
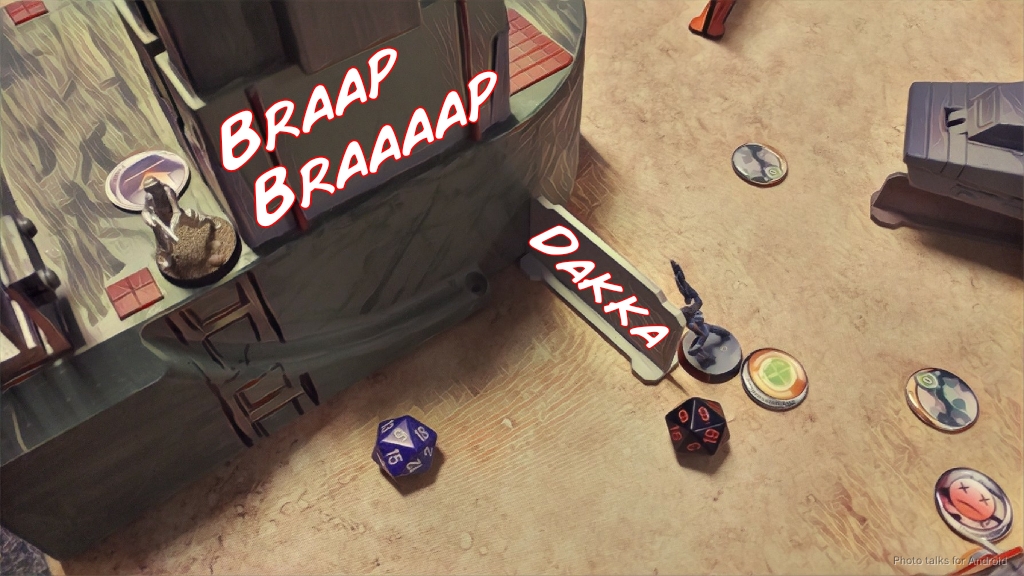 The next order sees Jordan get another crit though, so my Moran’s down for the count.
 Jordan’s basically out of stuff to do, so he settles for dropping a grenade on my Morlock with his Volunteer LGL and sticks it perfectly.
 Now that I’ve had a chance to look everything up post game, it turns out that I can’t FO something in ARO, so I have no classifieds (my second was Extreme Prejudice). Had I not accidentally cheated by bringing a Hellcat Spitfire instead of the boarding shotgun, or even a Hellcat combi, it would have been a
7-0 Nomad Victory!
but as it stands it wasn’t a legal win. Ah well. I really need to be more careful and double-check my lists when I pull stuff out of my bag. This is what happens when you build 2 similar lists right before leaving work for the game store. Thanks for a great game, Jordan, and thanks for being such a good sport after the game when we found out I had cheated!
Notes
Notes for Me
- Check your damn list, ya big idiot!!
- Well, the original list with the Hellcat BSG would’ve been a fine list for Supplies. Really the game was about getting the boxes done on the first turn and then making Jordan’s turns all about slogging through the middle. The list did that just fine, Hellcat mistake or not.
- I’ve settled on the following as a legal Aplekton list. The Moira MSR -> TR Zond is a pretty big change, but it does give me an additional attack piece and gives my Interventor more to do.
[img]https://assets.infinitythegame.net/infinityarmy/img/_logosweb/logo_501.png[/img][b] Supplies Aplekton[/b]
[b]GROUP 1 | [/b][img]https://assets.infinitythegame.net/infinityarmy/img/_logosweb/orden_regular.png[/img]8 [img]https://assets.infinitythegame.net/infinityarmy/img/_logosweb/orden_irregular.png[/img]2
[img]https://assets.infinitythegame.net/infinityarmy/img/_logosweb/501/logo_16.png[/img] [b]INTERVENTOR Hacker Lieutenant (Hacking Device Plus)[/b] Combi Rifle / Pistol, Knife. (0.5 | [b]25[/b])
[img]https://assets.infinitythegame.net/infinityarmy/img/_logosweb/501/logo_30.png[/img] [b]MORAN (Forward Observer)[/b] Combi Rifle, CrazyKoalas (2) / Pistol, Knife. (0.5 | [b]22[/b])
[img]https://assets.infinitythegame.net/infinityarmy/img/_logosweb/501/logo_30.png[/img] [b]MORAN (Forward Observer)[/b] Combi Rifle, CrazyKoalas (2) / Pistol, Knife. (0.5 | [b]22[/b])
[img]https://assets.infinitythegame.net/infinityarmy/img/_logosweb/501/logo_10.png[/img] [b]ZERO (Minelayer)[/b] Combi Rifle, Antipersonnel Mines / Pistol, Knife. (0.5 | [b]19[/b])
[img]https://assets.infinitythegame.net/infinityarmy/img/_logosweb/501/logo_10.png[/img] [b]ZERO (Minelayer)[/b] Combi Rifle, Antipersonnel Mines / Pistol, Knife. (0.5 | [b]19[/b])
[img]https://assets.infinitythegame.net/infinityarmy/img/_logosweb/501/logo_9.png[/img] [b]BANDIT Hacker (Killer Hacking Device)[/b] Light Shotgun, Adhesive Launcher / Pistol, DA CCW. (0 | [b]25[/b])
[img]https://assets.infinitythegame.net/infinityarmy/img/_logosweb/501/logo_9.png[/img] [b]BANDIT (Forward Observer)[/b] Light Shotgun, Adhesive Launcher / Pistol, DA CCW. (0 | [b]23[/b])
[img]https://assets.infinitythegame.net/infinityarmy/img/_logosweb/501/logo_56.png[/img] [b]KRIZA BORAC[/b] HMG / Heavy Pistol, CC Weapon. (2 | [b]54[/b])
[img]https://assets.infinitythegame.net/infinityarmy/img/_logosweb/501/logo_18.png[/img] [b]REAKTION ZOND[/b] HMG / Electric Pulse. (1 | [b]26[/b])
[img]https://assets.infinitythegame.net/infinityarmy/img/_logosweb/501/logo_3.png[/img] [b]HELLCAT[/b] Spitfire / Pistol, Knife. (1.5 | [b]28[/b])[b]GROUP 2 | [/b][img]https://assets.infinitythegame.net/infinityarmy/img/_logosweb/orden_regular.png[/img]2 [img]https://assets.infinitythegame.net/infinityarmy/img/_logosweb/orden_irregular.png[/img]4 [img]https://assets.infinitythegame.net/infinityarmy/img/_logosweb/orden_impetuosa.png[/img]3
[img]https://assets.infinitythegame.net/infinityarmy/img/_logosweb/501/logo_12.png[/img] [b]MORLOCK[/b] Chain Rifle, Smoke Grenades / Pistol, E/M CCW. (0 | [b]6[/b])
[img]https://assets.infinitythegame.net/infinityarmy/img/_logosweb/501/logo_12.png[/img] [b]MORLOCK[/b] Chain Rifle, Smoke Grenades / Pistol, E/M CCW. (0 | [b]6[/b])
[img]https://assets.infinitythegame.net/infinityarmy/img/_logosweb/501/logo_12.png[/img] [b]MORLOCK[/b] Chain Rifle, Smoke Grenades / Pistol, E/M CCW. (0 | [b]6[/b])
[img]https://assets.infinitythegame.net/infinityarmy/img/_logosweb/501/logo_45.png[/img] [b]WARCOR (Aerocam)[/b] Flash Pulse / Stun Pistol, Knife. (0 | [b]3[/b])
[img]https://assets.infinitythegame.net/infinityarmy/img/_logosweb/501/logo_21.png[/img] [b]TRANSDUCTOR ZOND[/b] Flash Pulse, Sniffer / Electric Pulse. (0 | [b]8[/b])
[img]https://assets.infinitythegame.net/infinityarmy/img/_logosweb/501/logo_21.png[/img] [b]TRANSDUCTOR ZOND[/b] Flash Pulse, Sniffer / Electric Pulse. (0 | [b]8[/b])
[b] 7 SWC | 300 Points |[/b] Open in Infinity Army
- I’m a little unhappy with the Bandits being the objective carriers. The Zeros have to be minelayers in this list, and the Morans are a little order intensive to use as box carriers and can generate all kinds of AROs from template weapons in a very saturated midfield by activating with their Koalas. In an ideal world, I’d like to start the Morans right next to the Tech Coffins, grab the objectives, put the Koalas in standby, and then book it out of there. I guess that’s really only losing me a second short skill move in terms of order efficiency, but I am really concerned about generating a ML or HRL ARO and losing a mine, or worse, a Zero from activating a Koala. Could potentially be solved with really careful deployment, but the center of the board is super full and this is very table-dependent.
- I don’t really need to do a lot with my command tokens, and Bandits are probably worse to dig out than Morans with their shotguns, higher PH, and better CC, but not having two orders on turn 3 is pretty annoying. I suppose I would be speaking differently if I had been playing someone with HI and needing the repeaters in the midfield. Really I think it just comes down to opponent, turn order, and table to make the decision. You just gotta make the call at the table.
- It would be pretty great to be able to work in a Jammer Heckler into this list, but it’s probably not all that useful on Turn 1 as it’s probably gonna be out of range. Also that would mean dropping a specialist, probably.
- I was really happy with the performance of the Hellcat. I think a combi one would’ve done the trick, if a bit less reliably. The AD:5 over the AD:2 of a Tomcat I think is really important, especially if you went second and now need to go hunt something down in their backfield.
- I’m not sure how this list holds up to heavy armor. Lots of repeater coverage, but that’s asking a lot from Zero Cool the Interventor.
Notes for Jordan
- Definitely be careful where you place smoke in reactive. It’s very much a double edged sword. I could’ve pie sliced McMurrough off the table still with my Kriza, but that Morlock getting into the right place to threaten your link cost you your whole second turn, basically.
- All the Koalas and mines gave you a bunch of trouble, but what I think what really did it was you tried to do too much in your first turn.
- I think you could’ve left your link alone on Turn 1, killed the Moira with Uxia, and then used your Scots to grab the objective in relative safety. You spent a few orders shuffling the link around and that actually cost you a Volunteer HMG for no reason.
- With the Moira down, the worst that was going to happen was a flash pulse. You can then use the Cateran to deny me a specialist on the left, killing the Moran and taking his Koalas offline, and then that makes your Scots even safer.
- Then, on Turn 2 with McMurrough back up and running, you can punch a hole with him by sacrificing him to clear my mines and Koalas, then run your link into my backfield to go Bandit hunting.
- I’m not sure what the right call was for that SAS that ate the mine. CC gives you a reasonable chance at killing my Morlock–16 versus 13 is reasonable in a burst 1 dice off. On the other hand, dodging and then just sitting there is also good. If it takes me a bit to kill the SAS, like the other one did on my turn, then that’s still a win. Tough call.
- Find better opponents that don’t play illegal lists! 0.5 SWC and 3 points over is not much, but it still sucks. Sorry man, and thanks for the great game!