
Failure of Command
Well, after a pretty decent game of Engineering Deck with my Ikari, I was ready to give The Armory a go. James has been itching to try out Invincible Army since it dropped and has been hounding everyone in our meta for a game. It’s the holiday season, so we’ve all had to rain check games with him for awhile, but we finally made it happen on a regularly scheduled game night. I’m going to use this game as a vehicle for discussing cognitive load, mental state, and planning, as I went in pretty tired and unfocused, or perhaps focused on the wrong things. Hopefully the exercise will prove useful to others.
Overview
- Mission: The Armory
- Forces: Ikari Company versus Invincible Army (300)
- Deploy First: Ikari
- First Turn: Ikari
[img]https://assets.infinitythegame.net/infinityarmy/img/_logosweb/logo_904.png[/img][b] List A[/b]
[b]GROUP 1 | [/b][img]https://assets.infinitythegame.net/infinityarmy/img/logos/orden_regular.png[/img]7 [img]https://assets.infinitythegame.net/infinityarmy/img/logos/orden_irregular.png[/img]2 [img]https://assets.infinitythegame.net/infinityarmy/img/logos/orden_impetuosa.png[/img]2
[img]https://assets.infinitythegame.net/infinityarmy/img/_logosweb/904/logo_2.png[/img] [b]BRAWLER Lieutenant[/b] Rifle + Light Shotgun / Pistol, Knife. (0 | [b]16[/b])
[img]https://assets.infinitythegame.net/infinityarmy/img/_logosweb/904/logo_1.png[/img] [b]KEISOTSU[/b] HMG / Pistol, Knife. (1 | [b]17[/b])
[img]https://assets.infinitythegame.net/infinityarmy/img/_logosweb/904/logo_1.png[/img] [b]KEISOTSU Paramedic (MediKit)[/b] Combi Rifle / Pistol, Knife. (0 | [b]11[/b])
[img]https://assets.infinitythegame.net/infinityarmy/img/_logosweb/904/logo_1.png[/img] [b]KEISOTSU (Forward Observer)[/b] Combi Rifle / Pistol, Knife. (0 | [b]10[/b])
[img]https://assets.infinitythegame.net/infinityarmy/img/_logosweb/904/logo_7.png[/img] [b]TANKŌ[/b] Missile Launcher / Pistol, Monofilament CC Weapon, Shock CC Weapon. (1.5 | [b]32[/b])[img]https://assets.infinitythegame.net/infinityarmy/img/_logosweb/904/logo_5.png[/img] [b]KARAKURI[/b] Heavy Shotgun, Chain Rifle, D.E.P. / Pistol, Knife. (0 | [b]35[/b])
[img]https://assets.infinitythegame.net/infinityarmy/img/_logosweb/904/logo_4.png[/img] [b]DRUZE Hacker (Killer Hacking Device)[/b] Combi Rifle + Pitcher, D-Charges / Viral Pistol, Knife. (0 | [b]25[/b])
[img]https://assets.infinitythegame.net/infinityarmy/img/_logosweb/904/logo_3.png[/img] [b]BASHI BAZOUK[/b] Combi Rifle, E/Mauler / Pistol, CC Weapon. (0 | [b]17[/b])
[img]https://assets.infinitythegame.net/infinityarmy/img/_logosweb/904/logo_12.png[/img] [b]YUAN YUAN[/b] Chain Rifle, Smoke Grenades / Pistol, AP CCW. (0 | [b]8[/b])[b]GROUP 2 | [/b][img]https://assets.infinitythegame.net/infinityarmy/img/logos/orden_regular.png[/img]5 [img]https://assets.infinitythegame.net/infinityarmy/img/logos/orden_irregular.png[/img]2
[img]https://assets.infinitythegame.net/infinityarmy/img/_logosweb/904/logo_6.png[/img] [b]WÚ MÍNG[/b] Heavy Rocket Launcher, Light Shotgun / Pistol, Knife. (2 | [b]33[/b])
[img]https://assets.infinitythegame.net/infinityarmy/img/_logosweb/904/logo_6.png[/img] [b]WÚ MÍNG (Fireteam: Haris)[/b] Chain Rifle, Submachine Gun / Pistol, Knife. (0 | [b]25[/b])
[img]https://assets.infinitythegame.net/infinityarmy/img/_logosweb/904/logo_2.png[/img] [b]BRAWLER Engineer[/b] Rifle + Light Shotgun, D-Charges / Pistol, Knife. (0 | [b]20[/b])[img]https://assets.infinitythegame.net/infinityarmy/img/_logosweb/904/logo_26.png[/img] [b]FUGAZI DRONBOT[/b] Flash Pulse, Sniffer / Electric Pulse. (0 | [b]8[/b])
[img]https://assets.infinitythegame.net/infinityarmy/img/_logosweb/904/logo_14.png[/img] [b]TOKUSETSU EISEI Doctor (MediKit)[/b] Combi Rifle / Pistol, Knife. (0 | [b]14[/b])
[img]https://assets.infinitythegame.net/infinityarmy/img/_logosweb/904/logo_30.png[/img] [b]LIBERTO (Minelayer)[/b] Light Shotgun, Chain-colt, Antipersonnel Mines / Pistol, Knife. (1 | [b]10[/b])
[img]https://assets.infinitythegame.net/infinityarmy/img/_logosweb/904/logo_15.png[/img] [b]JÄGER[/b] Submachine Gun + E/Mitter / Pistol, Monofilament CC Weapon. (0.5 | [b]18[/b])
[b] 6 SWC | 299 Points |[/b] Open in Infinity Army
[img]https://assets.infinitythegame.net/infinityarmy/img/_logosweb/logo_204.png[/img][b] Invincible Army[/b]
[img]https://assets.infinitythegame.net/infinityarmy/img/_logosweb/204/logo_2.png[/img] [b]DĀOYĪNG Lieutenant L2 Hacker (Hacking Device)[/b] Boarding Shotgun / Breaker Pistol, Knife. (0.5 | [b]29[/b])
[img]https://assets.infinitythegame.net/infinityarmy/img/_logosweb/204/logo_15.png[/img] [b]TAI SHENG[/b] Breaker Combi Rifle, Chain-colt + 1 TinBot B (Deflector L2) / Heavy Pistol, Knife. (0 | [b]45[/b])
[img]https://assets.infinitythegame.net/infinityarmy/img/_logosweb/204/logo_3.png[/img] [b]HǍIDÀO Hacker (Killer Hacking Device)[/b] Boarding Shotgun / Breaker Pistol, Knife. (0 | [b]26[/b])[img]https://assets.infinitythegame.net/infinityarmy/img/_logosweb/204/logo_5.png[/img] [b]ZÚYǑNG[/b] HMG / 2 Breaker Pistols, Knife. (1.5 | [b]35[/b])
[img]https://assets.infinitythegame.net/infinityarmy/img/_logosweb/204/logo_5.png[/img] [b]ZÚYŎNG (Fireteam: Haris, Tactical Awareness)[/b] Combi Rifle + 1 TinBot B (Deflector L2) / 2 Breaker Pistols, Knife. (0.5 | [b]34[/b])
[img]https://assets.infinitythegame.net/infinityarmy/img/_logosweb/204/logo_5.png[/img] [b]ZÚYǑNG (Forward Observer)[/b] Combi Rifle / 2 Breaker Pistols, Knife. (0 | [b]28[/b])
[img]https://assets.infinitythegame.net/infinityarmy/img/_logosweb/204/logo_5.png[/img] [b]ZÚYǑNG (Forward Observer)[/b] Combi Rifle / 2 Breaker Pistols, Knife. (0 | [b]28[/b])
[img]https://assets.infinitythegame.net/infinityarmy/img/_logosweb/204/logo_20.png[/img] [b]SON-BAE Yaókòng[/b] Missile Launcher / Electric Pulse. (1.5 | [b]17[/b])[img]https://assets.infinitythegame.net/infinityarmy/img/_logosweb/204/logo_9.png[/img] [b]MÓWÁNG (NCO)[/b] Spitfire, Flammenspeer / Heavy Pistol, Knife. (2 | [b]54[/b])
[img]https://assets.infinitythegame.net/infinityarmy/img/_logosweb/204/logo_24.png[/img] [b]WARCOR (Aerocam)[/b] Flash Pulse / Stun Pistol, Knife. (0 | [b]3[/b])
[img]https://assets.infinitythegame.net/infinityarmy/img/logos/orden_regular.png[/img]9 [img]https://assets.infinitythegame.net/infinityarmy/img/logos/orden_irregular.png[/img]1 [b]| 6 SWC | 299 Points |[/b] Open in Infinity Army
Edit: It’s worth noting that even with Wildcard, the Tai Sheng + Haidao combo is NOT a valid Fireteam: Duo. It didn’t affect the game whatsoever, but a good thing to remember. Thanks to Greg Strom for the catch!
Deployment
Okay, so let’s start with my mental state walking in the door of the game store. I was pretty tired and felt a bit rubbish, so I knew I needed to keep a short mental checklist in mind or my game would’ve devolved into a series of reactionary moves. This is a useful cognitive load reduction technique–by limiting focus there’s simply less things to think about, and it also helps you to focus your planning on the important things. Here’s what I had come up with in the car on the drive over:
- Liu Xing – James has been chatting these guys up excitedly in our meta’s group chats, so I knew I’d at least have to deploy accordingly–no more than two models under a template, with the most likely landing zones covered by something that can do multiple wounds, e.g. D.E.P.s, missiles, HRLs, etc.
- Apply E/M – Whether James puts Yu Jing or Invincible Army on the table, there’s going to be some heavy infantry in his list. If it’s vanilla, I expect a Hsien and a Su Jian, if IA, well pretty much everything is going to be HI. I designed my Ikari list to be able to apply E/M to important targets, so I knew I was going to have to think carefully about how to get E/M to the right places.
- Tanko ML Placement – Put this guy in a good spot covering as much of both sides of the armory as possible.
And that was basically it. I figured that all I would need to do late in the game was walk the Karakuri into the armory, along with maybe some mines from the Libertos, and I’d be set, especially if I had gotten the Wu Ming CR in there already. So, right at the start, I wasn’t really setting myself up for success with a clear plan of attack on the armory. Who was I going to use to open the door? Was I going to get the Druze to D-Charge her way in? Tanko ML the door? Push the button with one of my specialists? How was I going to get the Karakuri into the building? I simply focused on the wrong aspects of the game–by not explicitly adding mission objectives to my checklist, I don’t have a clear plan in place to accomplish said objectives. Furthermore, when I reach a decision point in the game, I can’t fall back on my checklist to help me accomplish the mission as there are no mission objectives on the checklist!
This is a good time to talk about mental state–apprehension let my opponent dictate the terms of the engagement. I’ve never faced IA before, as it’s a brand new sectorial, and all of the internet chatter and hivemind discussion I’ve been exposed to has been talking them up, especially the Liu Xing and all the heavy infantry on the table. I responded to this threat with all the tools to counter them, but that’s still reactionary, not anticipatory. I had no active plan to win the game, just a lot of plans to deal with heavy infantry.
In any case, I won the roll off and elected to go first, because I wanted to drop E/Maulers on James’s HI with the Bashi and just wipe out all of my problems in one go. At the very least I figured I could pick off key members of a link with my HMG, HRL, or even ML, and then sort out some sort of cohesive strategy on the table. Not a terribly good plan. I then spent a fair amount of time carefully deploying my stuff to fend off a Liu Xing attack. I put my Brawler Lt and Keisotsu FO on the ground floor, covering my backfield with rifles and flash pulses, then put the Tanko, Paramedic, and HMG atop a platform, all prone in case there were any AROs to worry about. I deployed the HMG, Paramedic, and Tanko very carefully, with a maximum of two under a template at any time. I was hoping to get the Tanko under a Liu Xing’s template so I could dodge engage…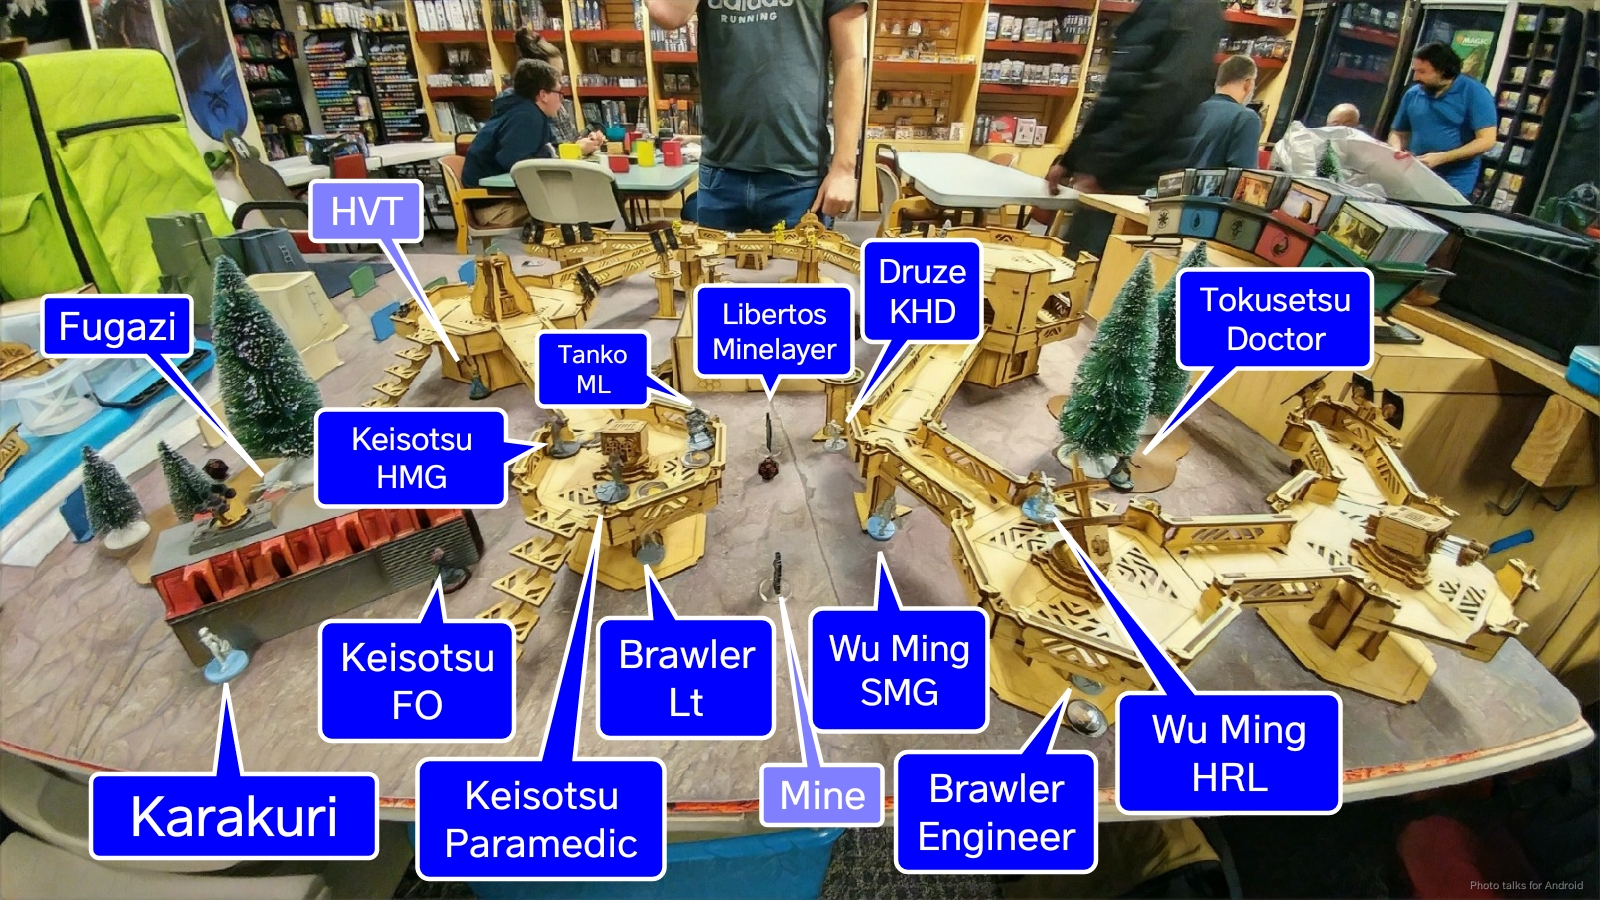 My Karakuri was out of template range from the FO, even if the Liu Xing came in right in the middle of them, and her D.E.P. was watching the roof of the platform to ARO against the Liu Xing as it came in. My Wu Ming SMG protected my Druze KHD’s back, who was deployed at the edge of the exclusion zone, and they both were backed up by the Libertos and his mine, which also covered the area near the Brawler just in case. My Wu Ming HRL went on a different roof, with the Brawler engineer immediately below him. I stuck my Fugazi on the left in a saturation and low-vis zone to really make it a PITA to get rid of it, and then put my Doctor on the right, holding my Bashi in reserve.
James put his Zuyong link in the middle of the table, with an FO, the Haris profile, and the Son-Bae missile bot on top of the catwalk system with another FO and the HMG on the ground floor. His Warcor went on the right to cover that side, and then his obvious Daoying Hacker went on a rooftop on the left. He took an interesting Duo with Tai Sheng’s Tinbot B profile and a Haidao KHD, figuring he’d throw them into the central building and make it a real bitch for me to hack him into submission. Not a bad plan.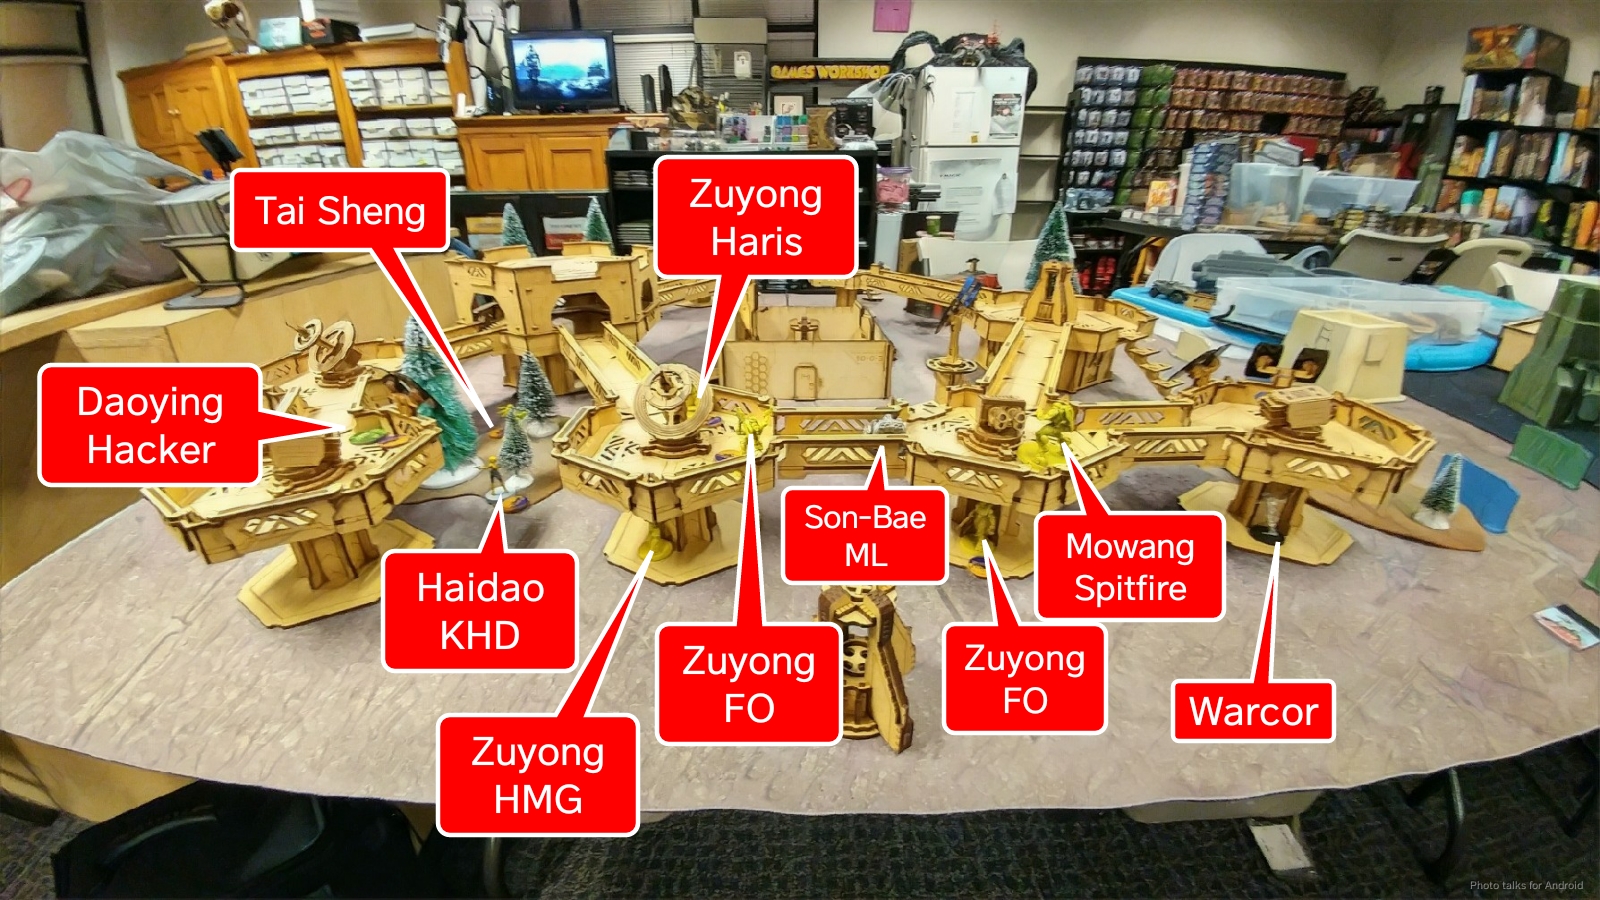 After I shooed him away from the table to choose my Bashi’s entry point (I chose the side near Tai Sheng), James plunked a Mowang spitfire down on the right, near his Son-Bae. So, I had successfully ticked off all the boxes on my mental checklist:
- Liu Xing – I was about as satisfied as I could be with my counter Liu Xing deployment, with a interlocking web of AROs including linked SMGs, missiles, shotguns, chain rifles, and even a D.E.P.
- Apply E/M – I had a plan for my Bashi to get E/M on his Tai Sheng/Haidao duo, and decided to bring in my Cube Jager on the same side when an opportunity presented itself.
- Tanko ML Placement – I put my Tanko ML on a platform that could see both sides of the armory, and put him prone so I could move him into position to cover whatever he needed to.
but… still no plan to get into the objective room!
Turn 1
Top of 1 – Ikari
I looked at the current board state, and then decided I wanted as many orders as possible for my Bashi to do her job. That meant the fastest way of taking out the missile bot (the only real thing that James had left out to ARO) was probably going to be dropping a Yuan Yuan behind it and the Mowang and then chain rifling them both. Bonus points if I could move into base to base with the Mowang and chain rifle them both. If James elected to not CC me and I survived, he’d have a Yuan Yuan stuck to to his Mowang on his active turn, because I certainly wasn’t going sink any precious orders into it on my turn. Sadly, I failed my PH -3 roll and the Yuan Yuan was blasted off the table by the very ‘bot I had hoped to kill. Alas.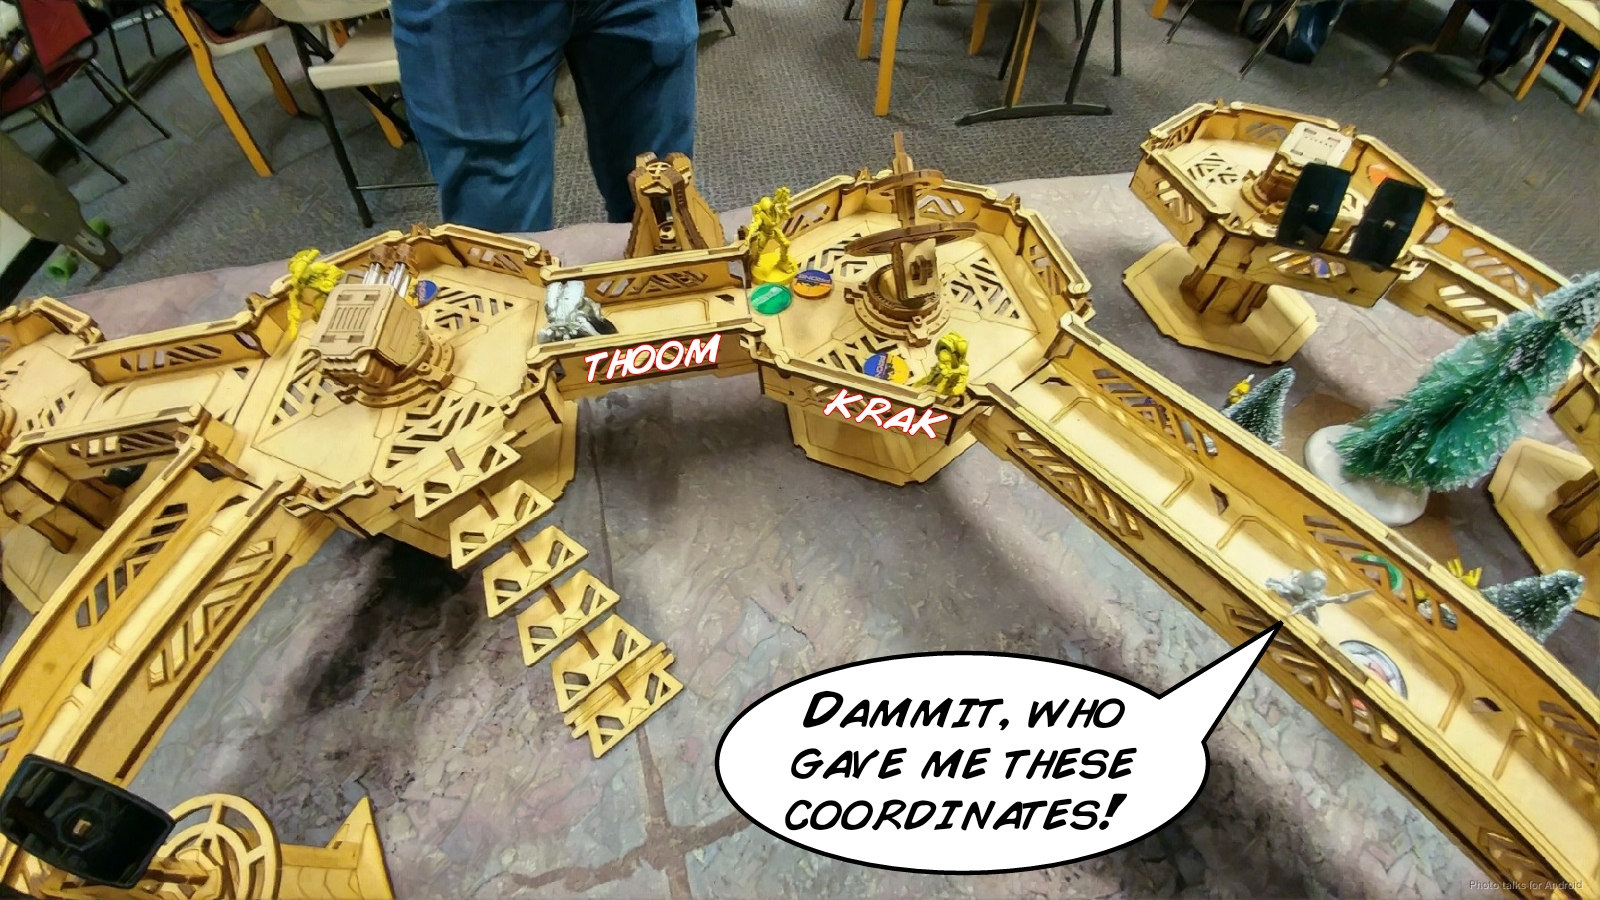 The Keisotsu HMG had actually been a last minute suggestion from one of the Infinity hive minds I regularly commune with, so I decided to try it out as an active turn piece. It did not disappoint, landing a crit and two hits on the troublesome missile bot. This dealt two wounds to the ‘bot, meaning it was still on the table and actually physically blocking the two Zuyong from walking over it to get to the stairs in James’s deployment zone… an added bonus! James had actually left the missile bot in a position to cover my Keisotsu FO, but I figured if he wanted to give me 5 normal dice to paste a Keisotsu FO, I’d let him. It’s worth noting that 5 on 13’s versus 2 on 15’s actually isn’t amazingly reliable, with the Keisotsu at 48.40% odds against the Son-Bae’s 35.57% of doing a wound. Thankfully, things went my way.
 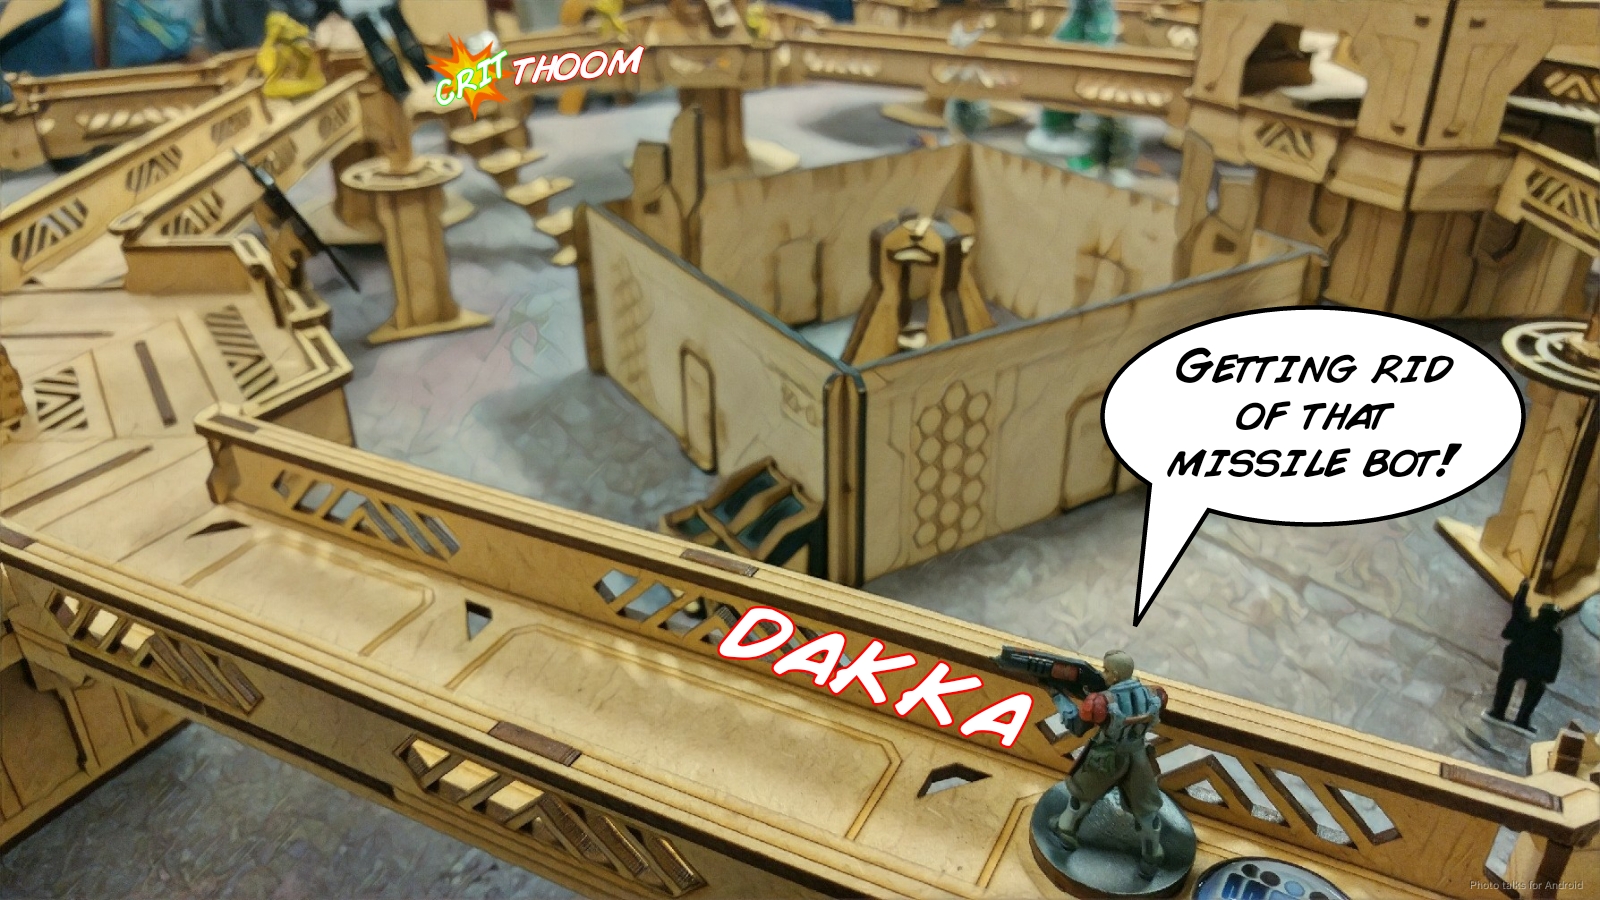 With the missile ‘bot down, I started going after James’s HI. I brought on a Bashi and was forced to sacrifice one of its holoechoes to the Zuyong’s HMG. I dropped an E/Mauler from out of LoF, covering Tai Sheng, and then nestled the Bashi into total cover, which would hopefully force James into dealing with her and wasting a bunch of orders.
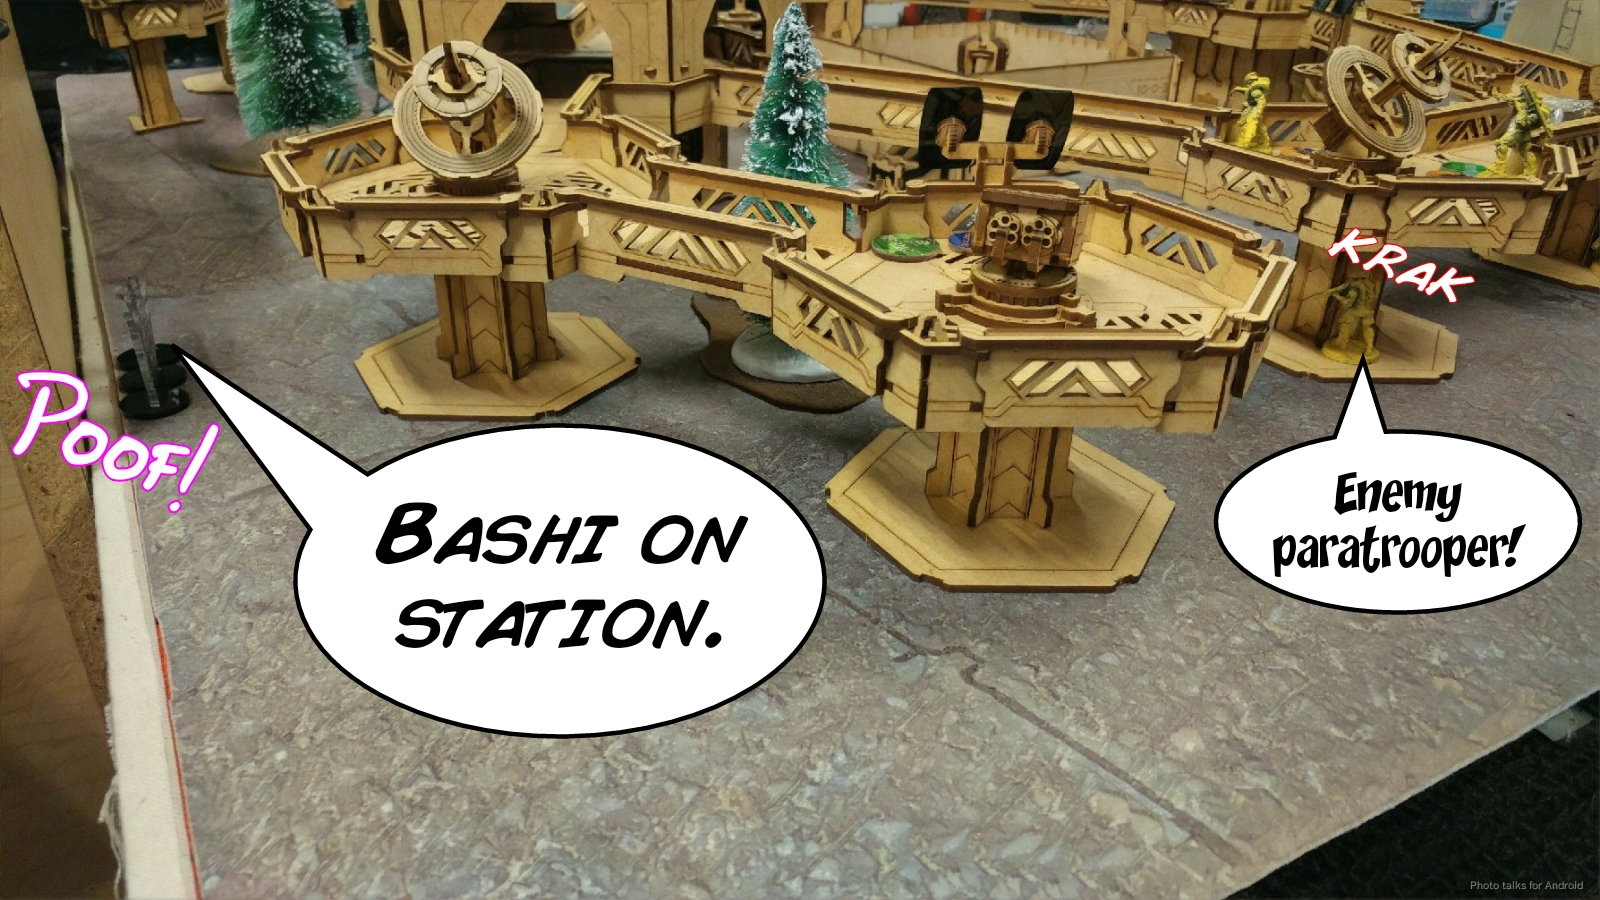 I noticed that there was enough of the Zuyong FO’s base showing on the ground floor, so I spent two orders pasting it with the Keisotsu while shuffling my other link team members into a better position.
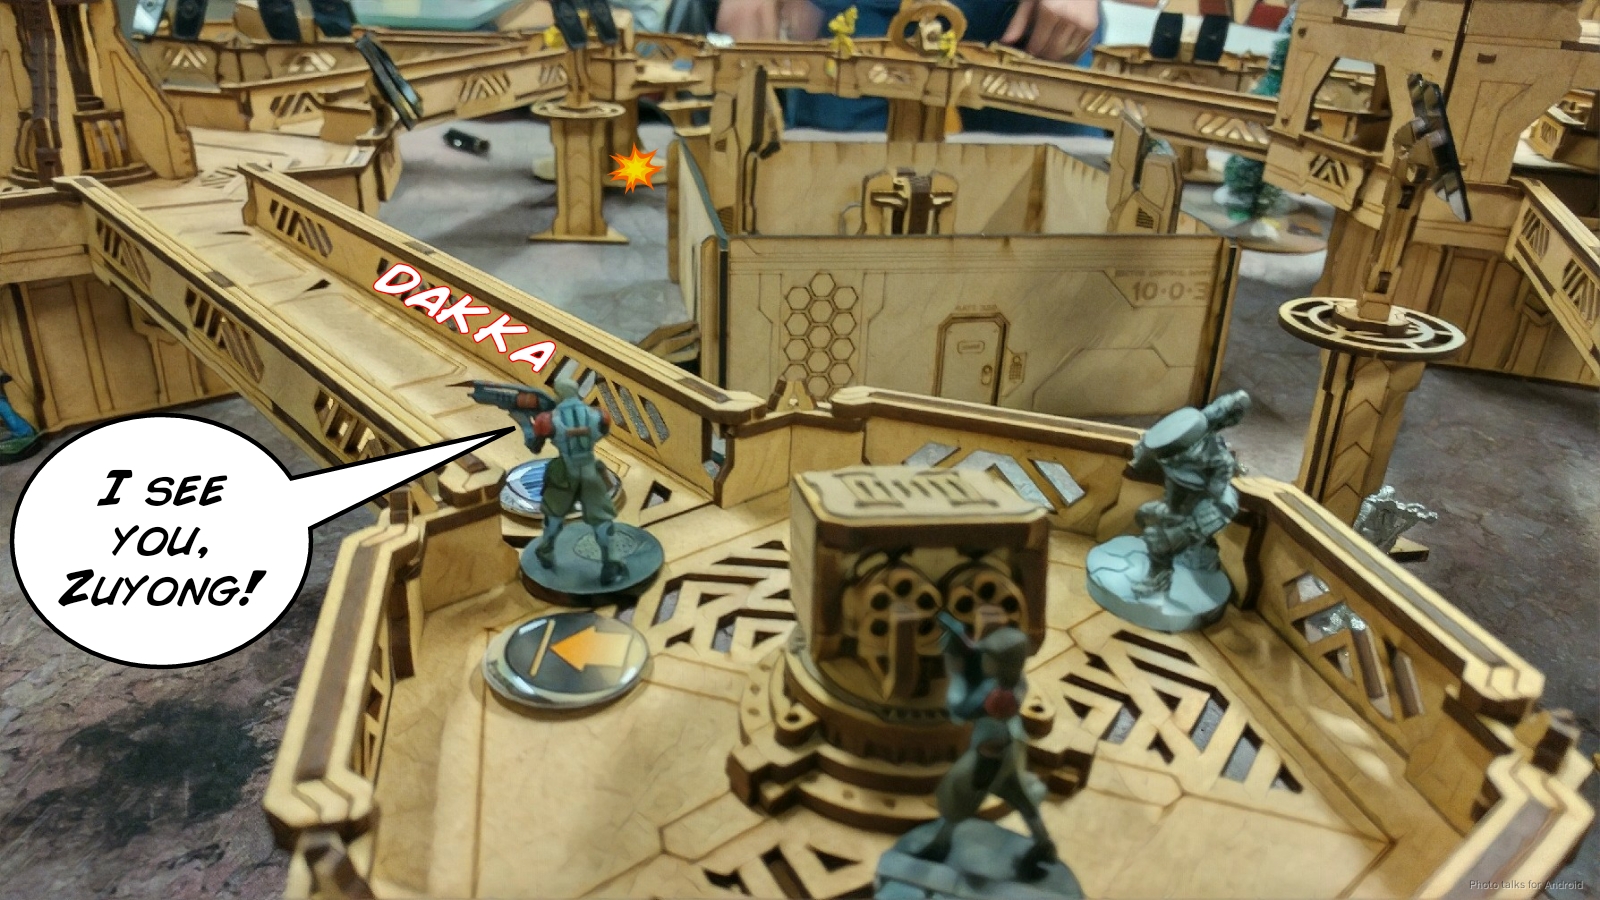 I then wasted the orders in my second pool trying to take out James’s Zuyong HMG with my HRL Wu Ming. Since we had identical rangebands, my additional burst wasn’t really enough to swing things into my favor. The only hit I scored (which he passed ARM on) was when James gave me normal rolls by shooting my Brawler engineer as she ran by towards the armory while my Wu Ming blasted away. Thankfully, the HMG missed my Brawler, and a single movement was enough to get her out of LoF.
| > 32″, Normal | > 32″, F2F | < 32″, F2F | Outcome |
| 51.63% | 36.12% | 42.10% | Wu Ming wounds Zuyong. |
| 33.74% | 23.01% | 28.37% | Wu Ming KOs Zuyong. |
| 21.70% | 14.49% | 18.77% | Wu Ming kills Zuyong. |
| 45.09% | 36.89% | Neither player succeeds. | |
| 18.79% | 21.01% | Zuyong wounds Wu Ming. | |
| 1.36% | 1.96% | Zuyong KOs Wu Ming. |
Interestingly enough, the Wu Ming is roughly 2x more likely to win that exchange in all of the interactions I had, but I ended up whiffing a few times and having to face tank HMG rounds. In any case, because I was faffing about trying to take out the Zuyong, that tied up the Brawler and Engineer inside the zone of control of the Wu Ming HRL for a few orders. That meant that I was a few orders late to getting the doors open with the Engineer when I finally decided to cut my losses, but cutting your losses by definition means you’re losing. I was able to dive the Libertos into the room as the last order in my second pool just to put something in there. Probably not the best plan, but I chickened out at burning two command tokens to do an irregular coordinated order to get everyone in there. This is the perfect example of why it’s so important for your mental checklist to include mission objectives. Getting more models into the central room wasn’t on my checklist, so I dismissed it out of hand. 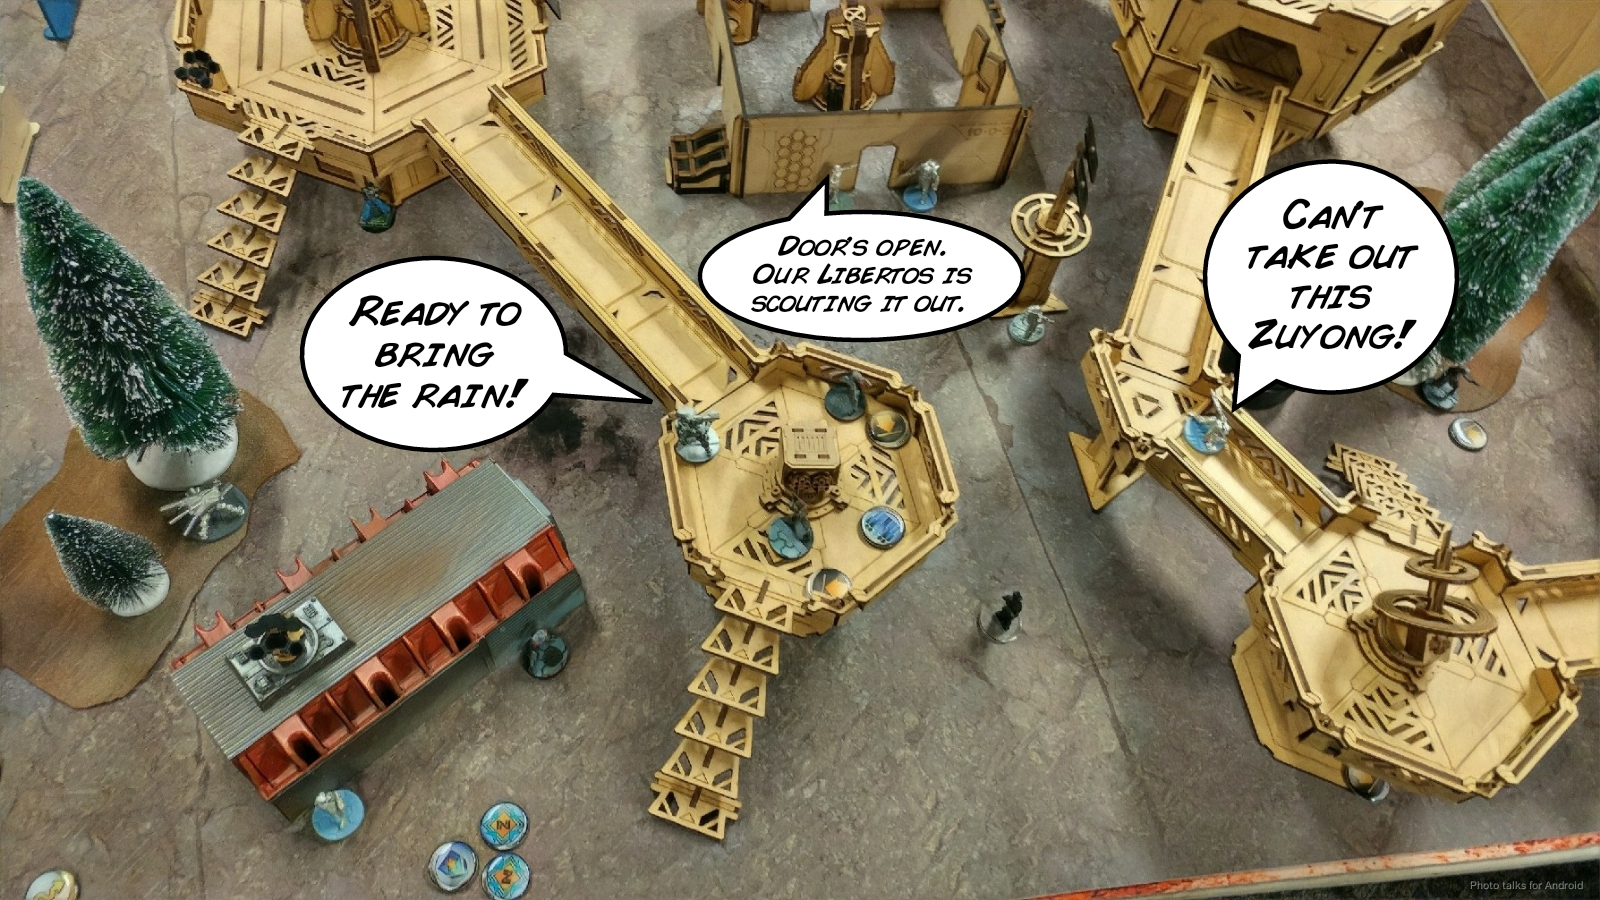 I had one order left in my main pool, so I did the suppressive fire holoecho trick on the Bashi and passed turn.
 Let’s go back to my checklist.
- Liu Xing – I lost sight of this a bit, but if the Liu Xing decides to drop on my Brawler Engineer and Wu Ming Chain Rifle, it’s going to eat a ton of AROs. Ditto with my Druze.
- Apply E/M – I’ve got an E/Mauler in place, but I don’t have one covering the Haidao. Probably should’ve placed one, but it did look a little like it might be out of range. The fact that both Tai Sheng and the Haidao are in a low visibility zone brings their dodge to -6, which is great for me. Should’ve pushed it further, especially since I decided to keep the fully hidden Bashi as the real one in suppression, as I thought James would aggressively try to dig me out and that would drain the most orders.
- Tanko ML Placement – Tanko’s in a good spot, covering the left side of the table against the Mowang and relatively protected from the Zuyong HMG which is the other scary threat.
Circling back to my mental state, I did a good job of reducing my cognitive load by limiting myself to three things in my working memory, but the wrong three things. I focused A LOT on Applying E/M though, and that actually took much of my attention in the first turn. Also, because I was getting such good momentum rolling, taking out two members of the link and getting an E/Mauler in position, I got tunnel vision really badly and went after the Zuyong HMG with the wrong tool.
Bottom of 1 – IA
I forgot to throw the Wu Ming HRL prone as part of my movement, which was just me being stupid and not really related at all to my planning. I was tired, I missed it, and I paid for it. The Zuyong HMG has no problem in deleting the Wu Ming HRL in one order, actually dealing three wounds and taking it off the table.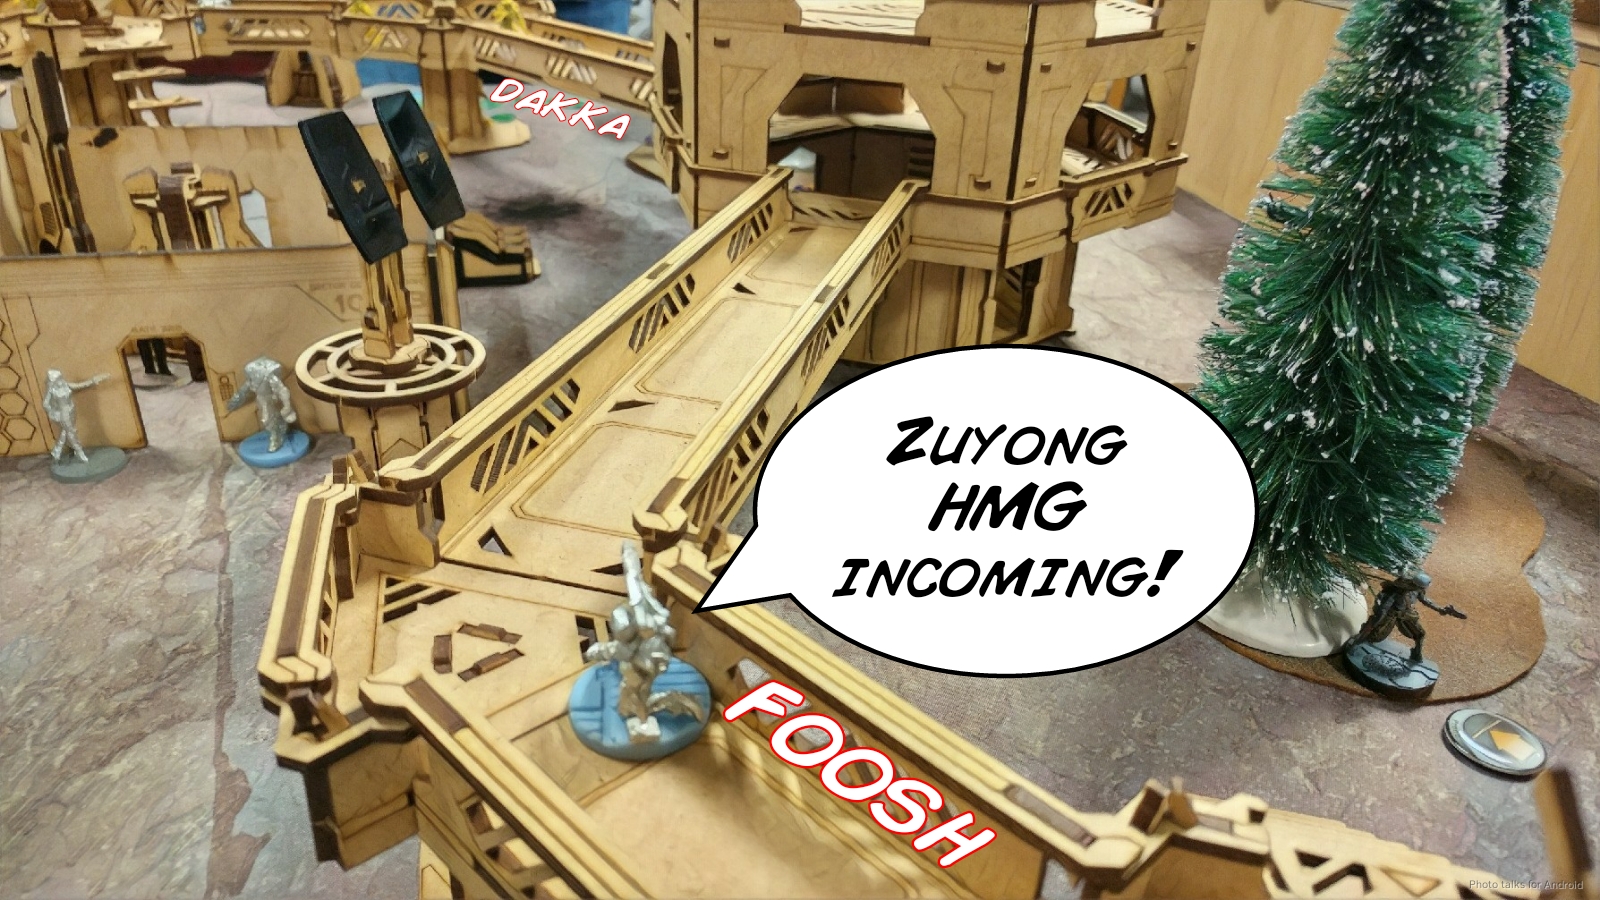 I kicked myself for not being more aggressive with the Bashi by shifting the Holoecho out to cover the Haidao and the Zuyong HMG, which would’ve seen that Holoecho out of cover. I declared no ARO from that Holoecho when the Zuyong took out the HRL, since it was a fake Bashi. I tend to get a little more conservative with my risk taking when I’m tired and out of it to reduce the cognitive load, but I think that may have ended up hurting me in this interaction. Let’s actually run the numbers. If I had done that suppressive fire holoecho trick against the Zuyong, with the Zuyong in LoF of both the Bashi (who is in 16″, probably, and out of cover) and the Wu Ming HRL, I assume that James would probably have done a 3/2 burst split–three against the Bashi, two against the Wu Ming…
| 3 versus Bashi | 2 versus Wu Ming | 5 versus Wu Ming | Outcome |
| 46.65% | 34.73% | 61.89% | Zuyong wounds Ikari. |
| 12.75% | 4.77% | 27.55% | Zuyong 2 wounds Ikari. |
| 7.92% | Zuyong 3 wounds Ikari. | ||
| 33.28% | 46.88% | 28.53% | Neither player succeeds. |
| 21.07% | 18.39% | 9.58% | Ikari wounds Zuyong. |
| 2.47% | 10.11% | 5.27% | Ikari KOs Zuyong. |
| 0.12% | 5.56% | 2.90% | Ikari kills Zuyong. |
Adding the Bashi into the mix essentially doubles the Wu Ming’s chances of winning the face to face and gives me a 1 in 10 chance of taking out the Zuyong outright. What’s interesting here is that I made the decision to keep the suppressing Bashi out of LoF as in isolation–only thinking about having the Bashi out of cover against the Zuyong.
Generally, this is a great tool for reducing cognitive load, because you’re only looking at one interaction instead of a mess of AROs and dice odds, but in this case it came back to bite me. Had I remembered about the HRL being up and been more aggressive with my Bashi using the holoecho suppression trick, I might’ve stopped or at least delayed the Zuyong. Of course, there’s the chance that I just lose both of them in an order, but it’s quite unlikely to lose the Wu Ming entirely in one order if James splits burst–the chance drops from 27.55% to 4.77%. In summary the takeaways are: stacking AROs is in general a great idea, and don’t over-apply cognitive load reducing tricks as you’ll oversimplify the game and end up making bad calls. Everything in moderation.
James then tries to unstick Tai Sheng and the Haidao, making his only serious mistake of the game. He shoots at the Holoecho in “suppression” on Tai Sheng’s side (not the one facing the Zuyong) and just facetanks the E/Mauler. The Holoecho goes “poof” and Tai Sheng is out of the game after failing a BTS save.  James then uses the new Tactical Awareness nonsense to get the Zuyong link up and moving. He advances the HMG towards the armory and moves the two Zuyong on the catwalk system to my right. All of this is blocked by the LoF shadow of the armory, so I don’t get to ARO now that my Wu Ming HRL is gone and the Bashi is stupidly firing her gun into a wall. James eventually moves the HMG out of coherency and spends orders on it directly to take out my Fugazi, who is poking out too far to give me that all important -9 from mimetism, cover, and low-vis. I lose the Fugazi.
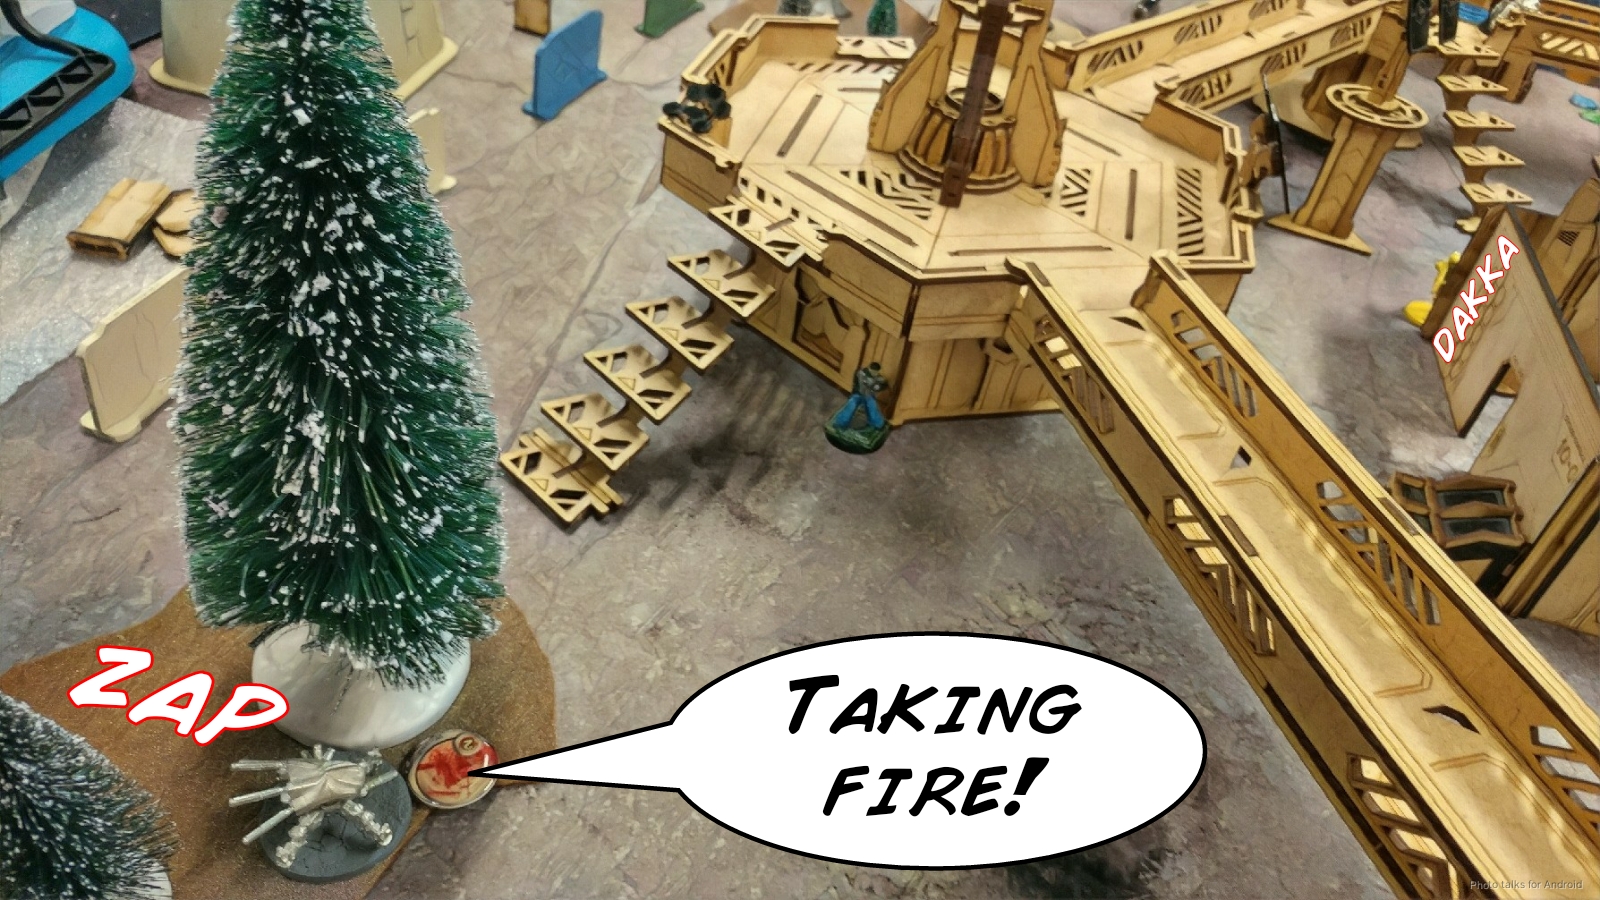 Some more pie-slicing later and the HMG has put a crit on the Tanko before retreating…
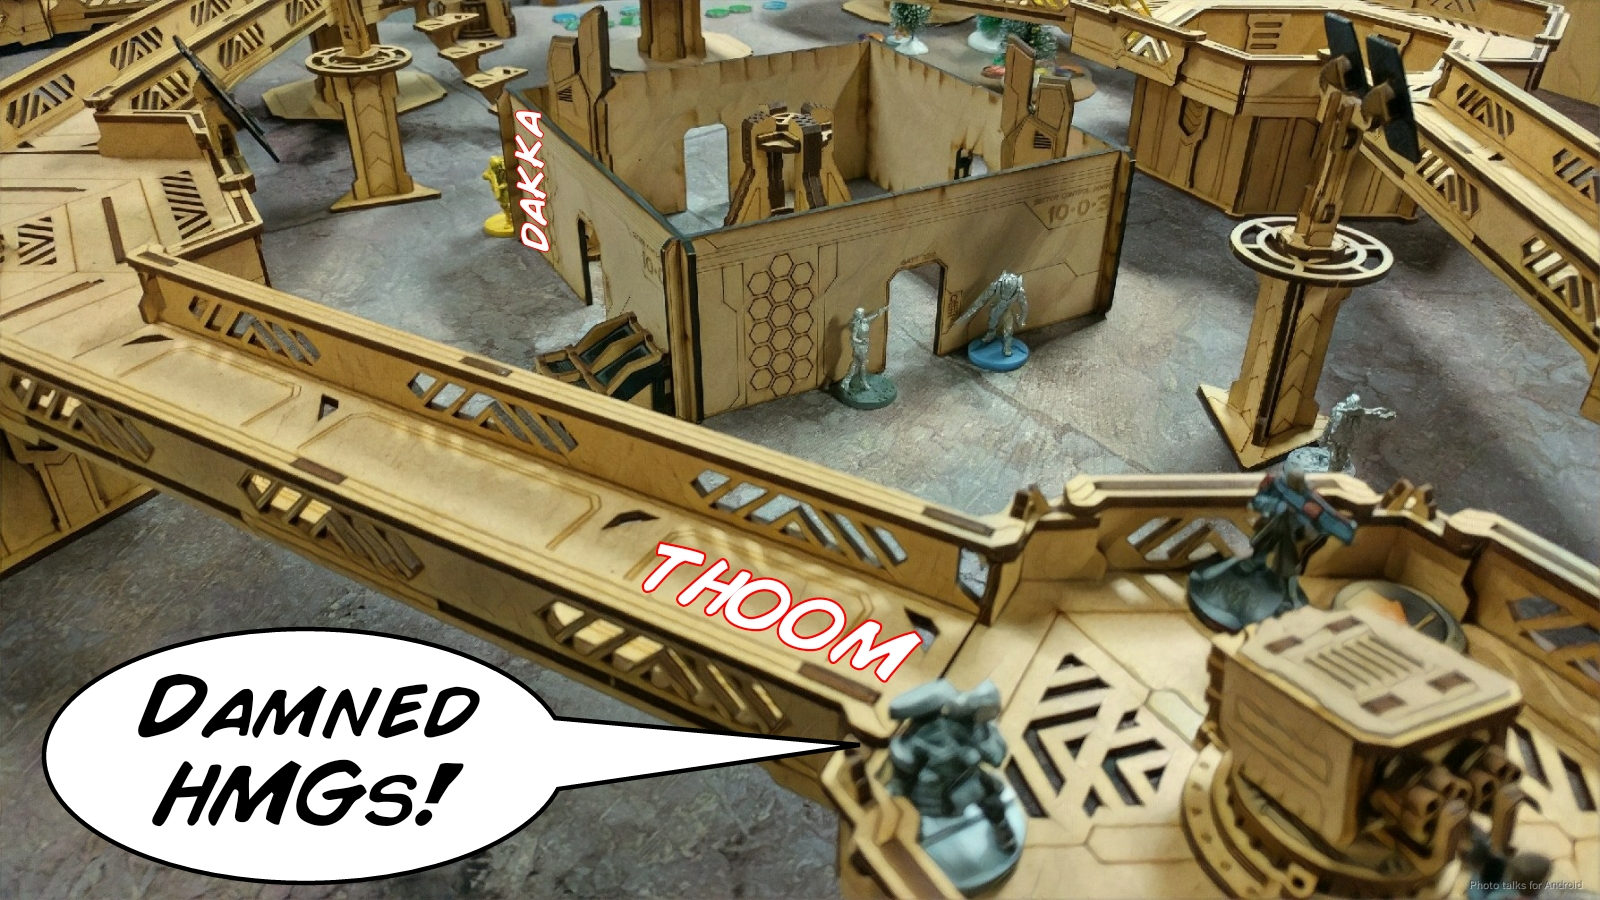 into the armory and…
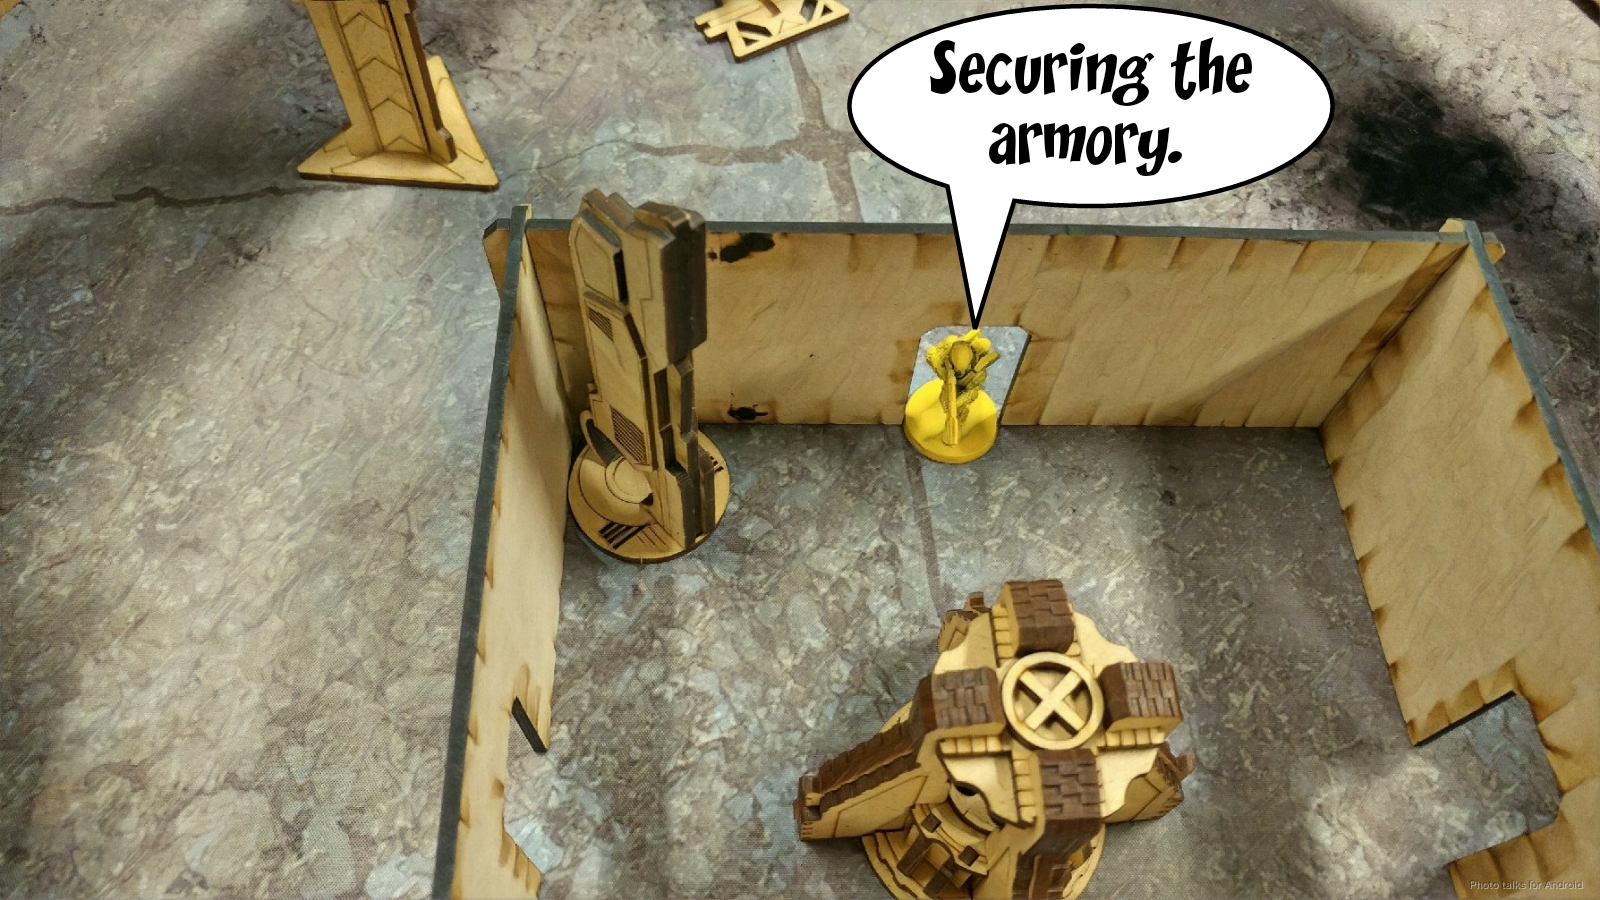 grabs ODD from the panoply. Going prone let him do this without LoF to any of my stuff, and things are now WAY harder.
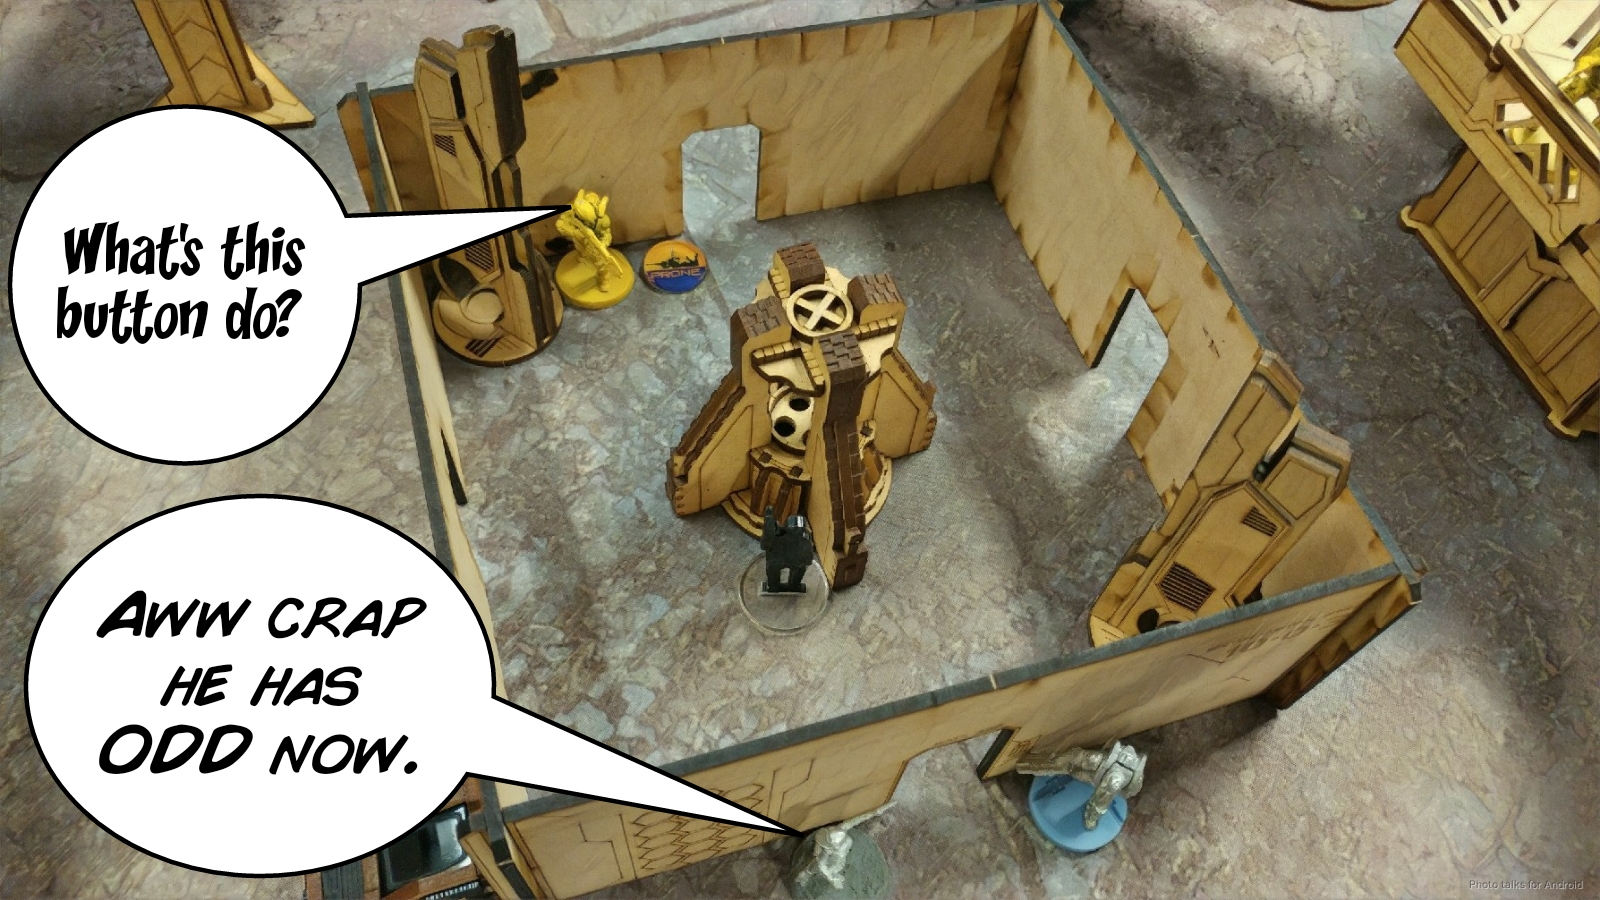 James has two Daoying Lt orders to spend still, so he scoots the Mowang forward, prone, and then stands it up to fight my Tanko. He rolls a smattering of single digit numbers, and I land a pair of 12s, forcing 6 armor saves.
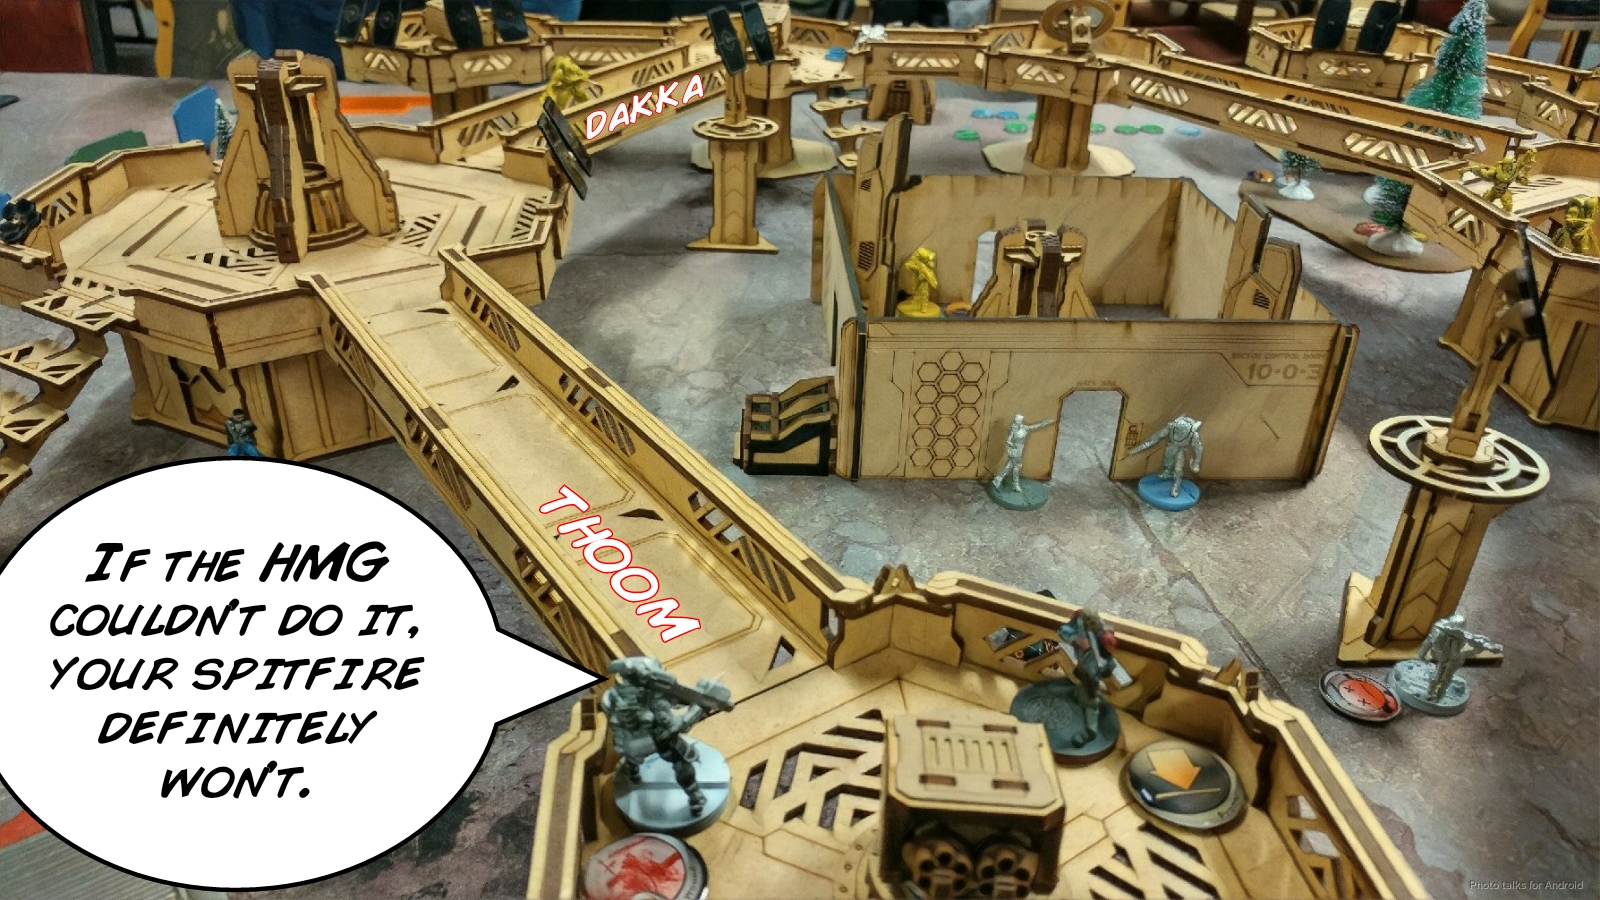 Even with ARM5, 2W, and NWI, the Mowang is removed from the table. Turns out I was pretty lucky here. James had a 43.29% chance to wound and I had a 26.38% chance to wound and only a 6.35% chance to blow through all three of the Mowang’s wounds. James ends the turn by throwing the two Zuyong on the right of the above picture and the Zuyong HMG into suppression. The one proxied by the Wu Ming panzerfaust is standing and the other is prone, both out of LoF of the Tanko and all my other pieces. At some point while he was shuffling the Zuyong on my right around they KO my Druze. Bummer.
Turn 2
Top of 2 – Ikari
I’m feeling pretty good after that extremely favorable exchange between my Tanko and the Mowang. So good that I don’t really stop to take a serious look at the tactical situation and just try to get fancy. What’s extremely important and we both miss is that there is a ladder right behind the Zuyong in suppression on my right, which leads to a door. From the doorway, you can access all of the stuff in my backfield, and you can also see the back of the Zuyong in suppression. In any case, I see two models that I can place under a missile template, so I try to do that. I do some fancy shuffling to try and get outside of 24″ or at least outside of 16″ with the Tanko. For some stupid reason, I decide it’s a good idea to try and throw some Keisotsu into the objective room, so I advance my FO towards the door while shuffling my HMG forward to try and get an angle on the Wu Ming in suppression. Of course, my Tanko eats a crit from the Zuyong.
I fall back on my checklist again, and I tell myself I need to get my Tanko back into action, killing him with a MediKit.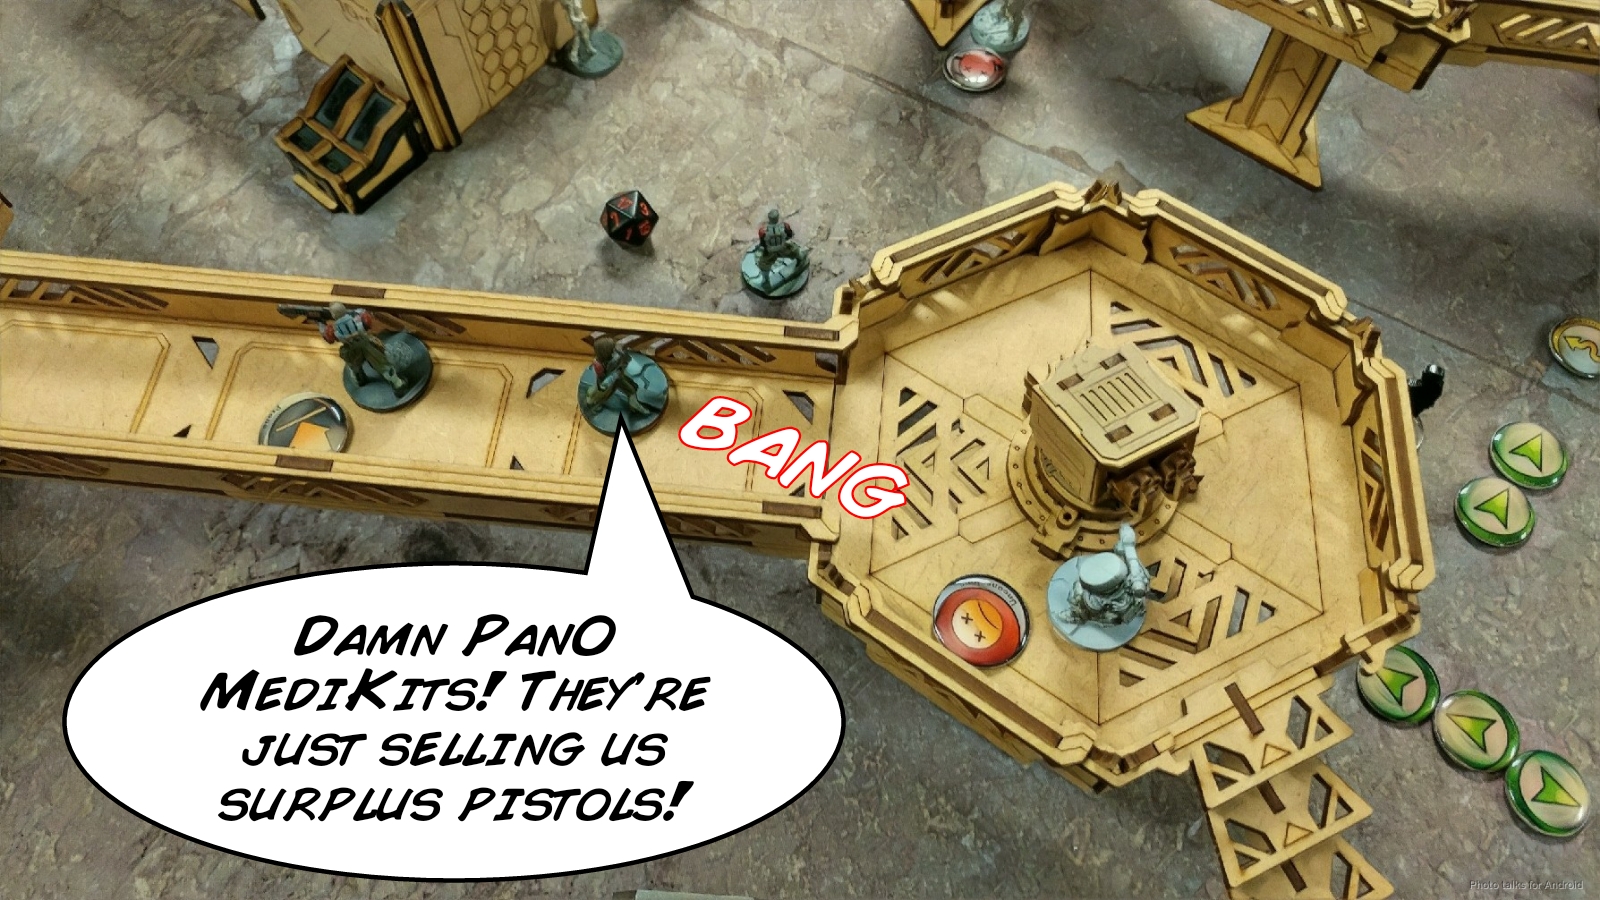 I then repeat the mistake by moving my Doctor out of the forest to try and get the Druze back up, also killing him with a MediKit. I’m not sure what my plan was here, I’m going to chalk this up to tunnel vision and wanting to have a successful MediKit attempt.
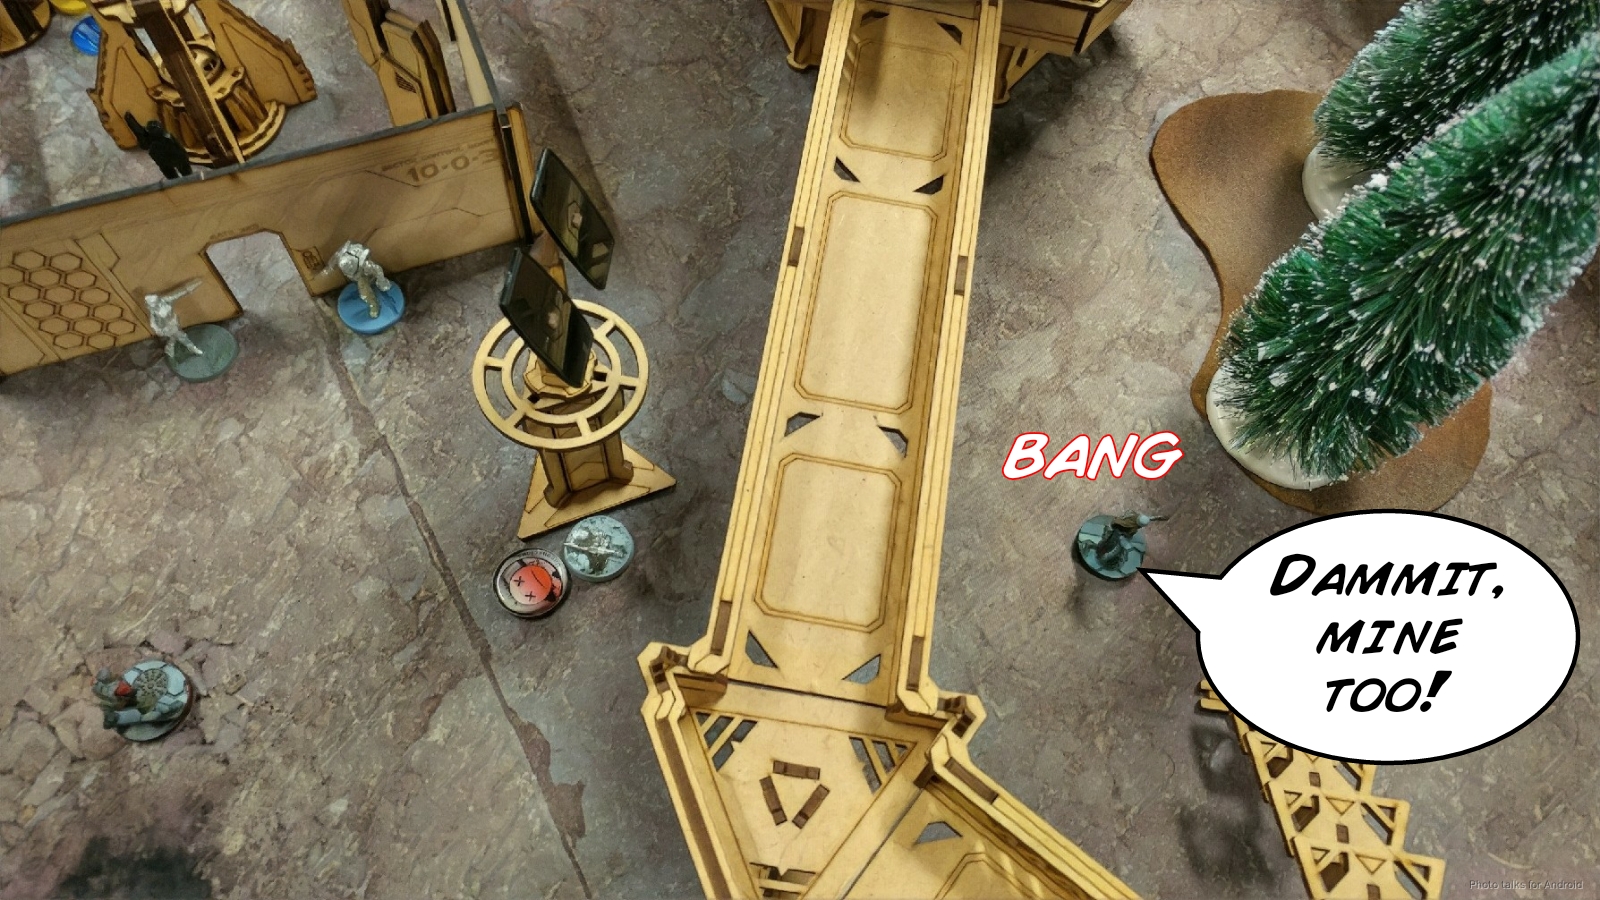 At this point in the game, I realize way too late that I’ve got to do too much. I have to
- Get more stuff into the central objective room
- Deal with the Zuyong HMG in suppression
- Deal with the Zuyong that are going to advance into my backfield along the catwalk (at least this is what I think, since we’ve both forgotten about the door and ladder behind them)
- Get my doctor back into cover
- Repair the awful situation with my Keisotsu FO who is dancing around in the middle of no man’s land.
- Get my Cube Jager into a position to do something useful.
Unfortunately, with the Fugazi and the Wu Ming HRL down, I’m running a bit short on orders in my second pool, and my first pool is dangerously low after attempting the Tanko ML shot and failing to pick him up. None of the things I need to do are on my checklist, so I don’t have a good mental tool for setting priorities on any of them, so I do the worst possible thing and try to accomplish them all. I run the Libertos past the Zuyong HMG in suppression and drop a mine behind him. Then I run the Wu Ming chain rifle into the room to chain rifle the Zuyong. The mine goes off, I thankfully pass my ARM saves against the suppression shots, and the two templates manage to get a wound off the Zuyong and drop him out of suppression with a failed guts roll.
I’m now out of orders in my second pool, so I can’t get the doctor to safety, my Brawler is out of position, and my Libertos is just sort of hanging out outside the building. What I should’ve done was spent my remaining command token (having used some irregular orders as regular already) to move the Brawler and Wu Ming CR in to put more shots onto the Zuyong and also fixed my doctor’s positioning. Instead, I spent the command token on reforming my Keisotsu link, which let me get the Keisotsu HMG into position to see the Zuyong inside the building and drop five dice on him, out of cover. This actually is pretty reasonable odds for me, 46.40% versus 21.82%, but a one in 5 chance is still pretty high and my link is broken. At the very least this did allow me to get my Keisotsu forward observer closer to the building, also out of cover.
I’ve got an order left for my Bashi, which I spend attempting to take out the Haidao, actually managing to do a wound in spite of the saturation and low vis zone. With that, I’m out of orders and have basically not improved my situation at all. All I’ve done is swapped a Wu Ming CR for a Libertos in the central building.
Bottom of 2 – IA
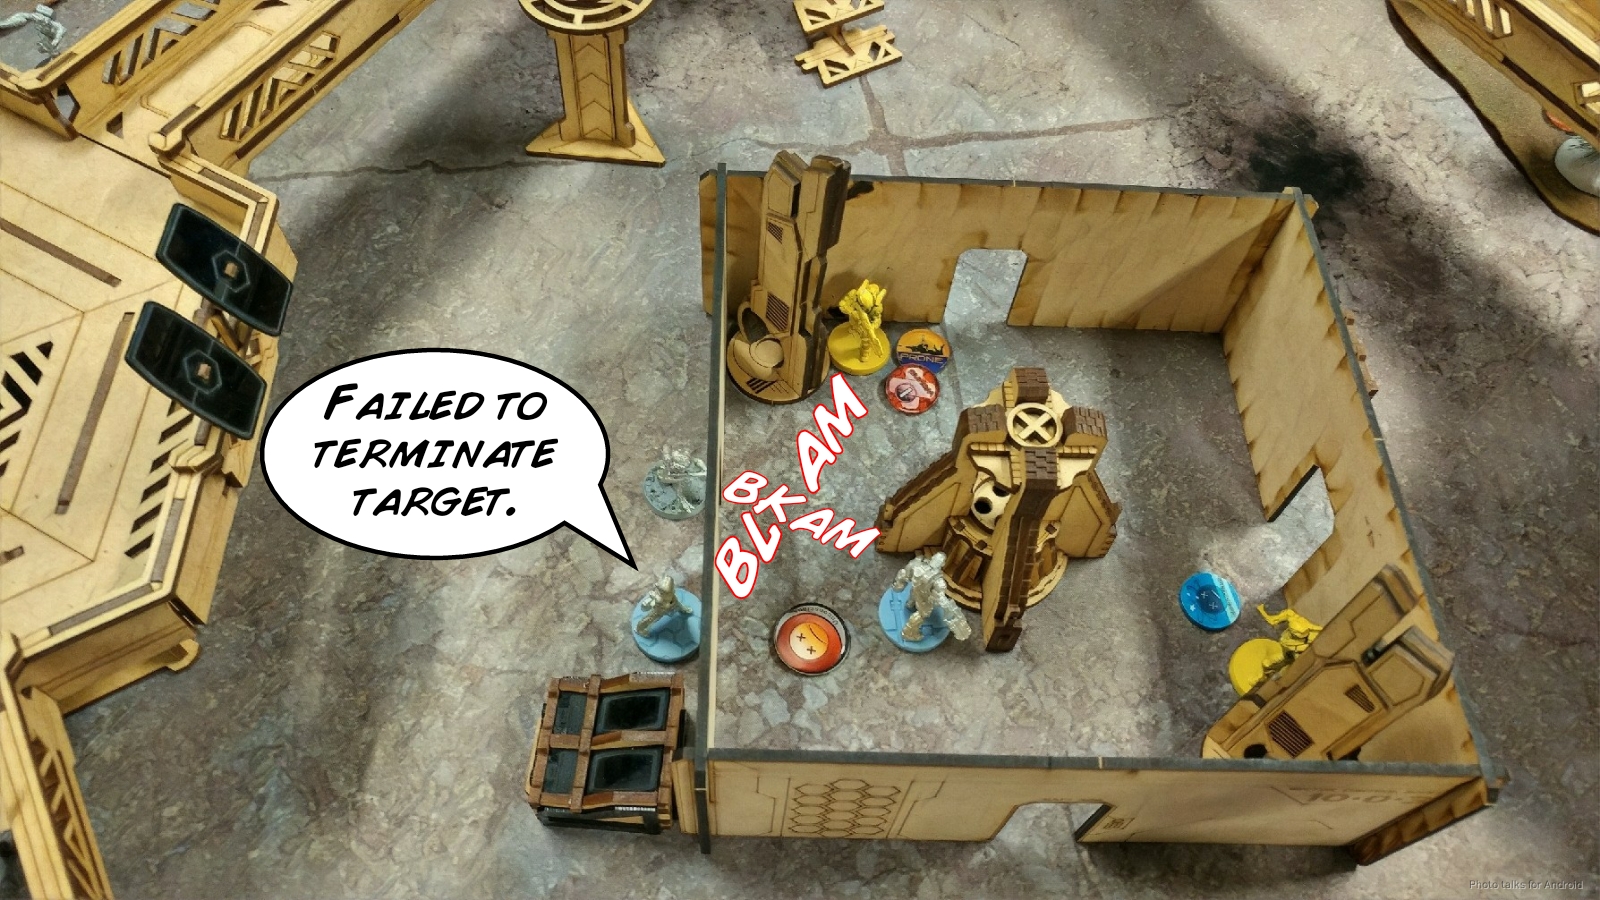
It’s at this point that we discover the ladder and the door. This is most irritating, because that would’ve been a perfect place for my Cube Jager to get a free, uncontested E/Mitter shot on on the Zuyong in suppression, which would’ve let me avoid all the stupid mistakes with my Tanko early on. I could’ve also just dropped a missile template on the resulting Zuyong statue, and potentially taken both Zuyong out. Drat. Anyway, with the door now in play, my backfield crumbles. The Zuyong climbs down, wipes out my Doctor,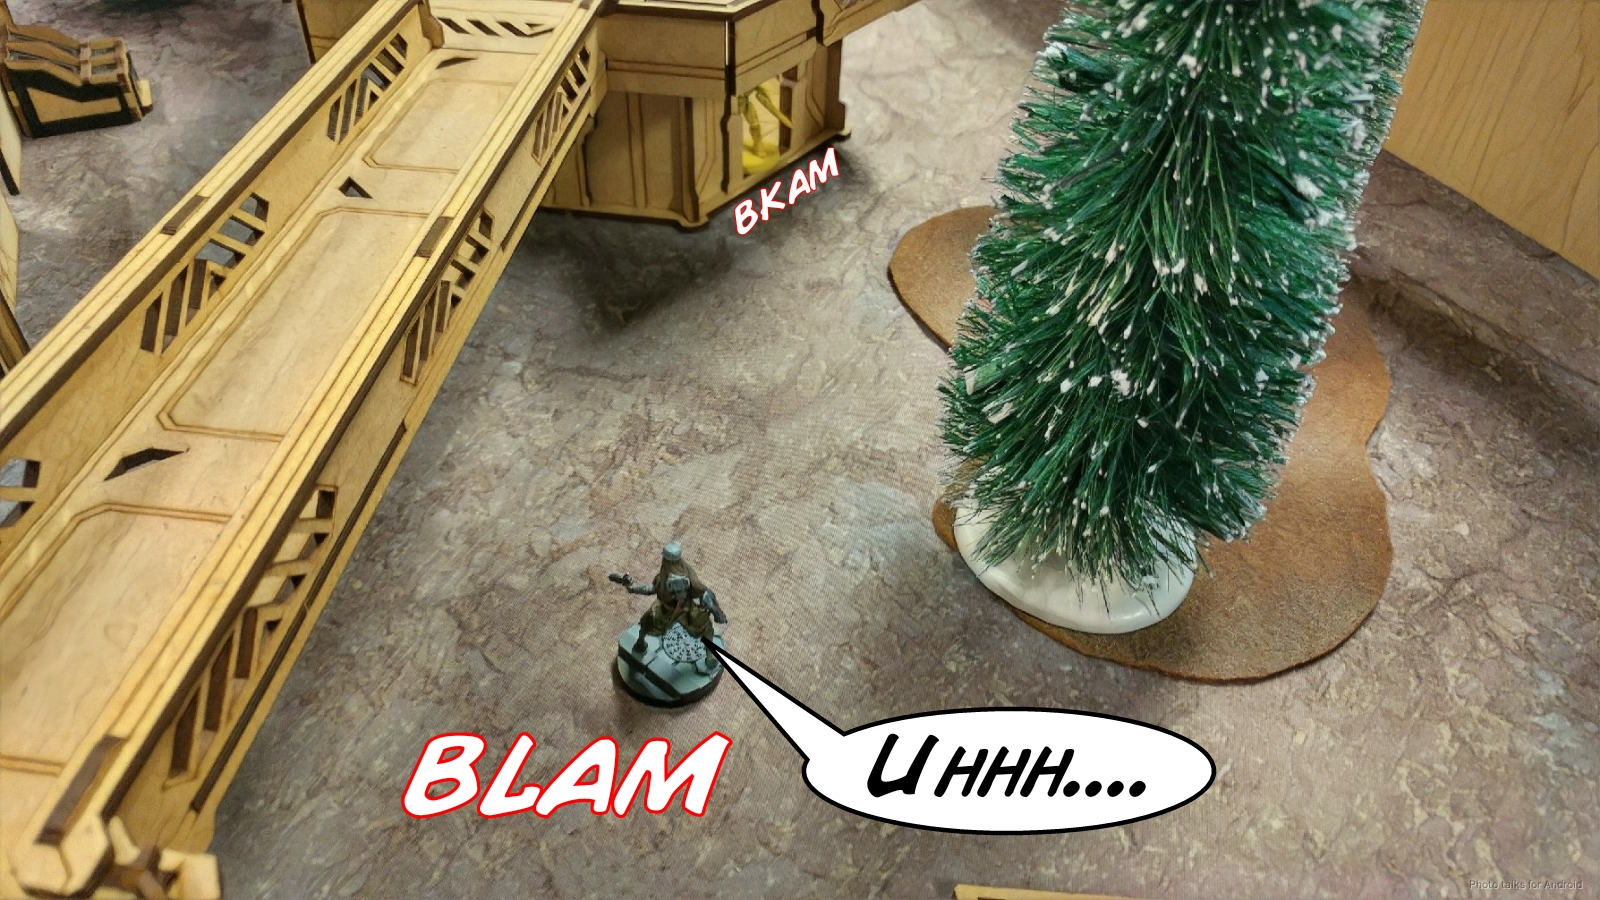 my Brawler…
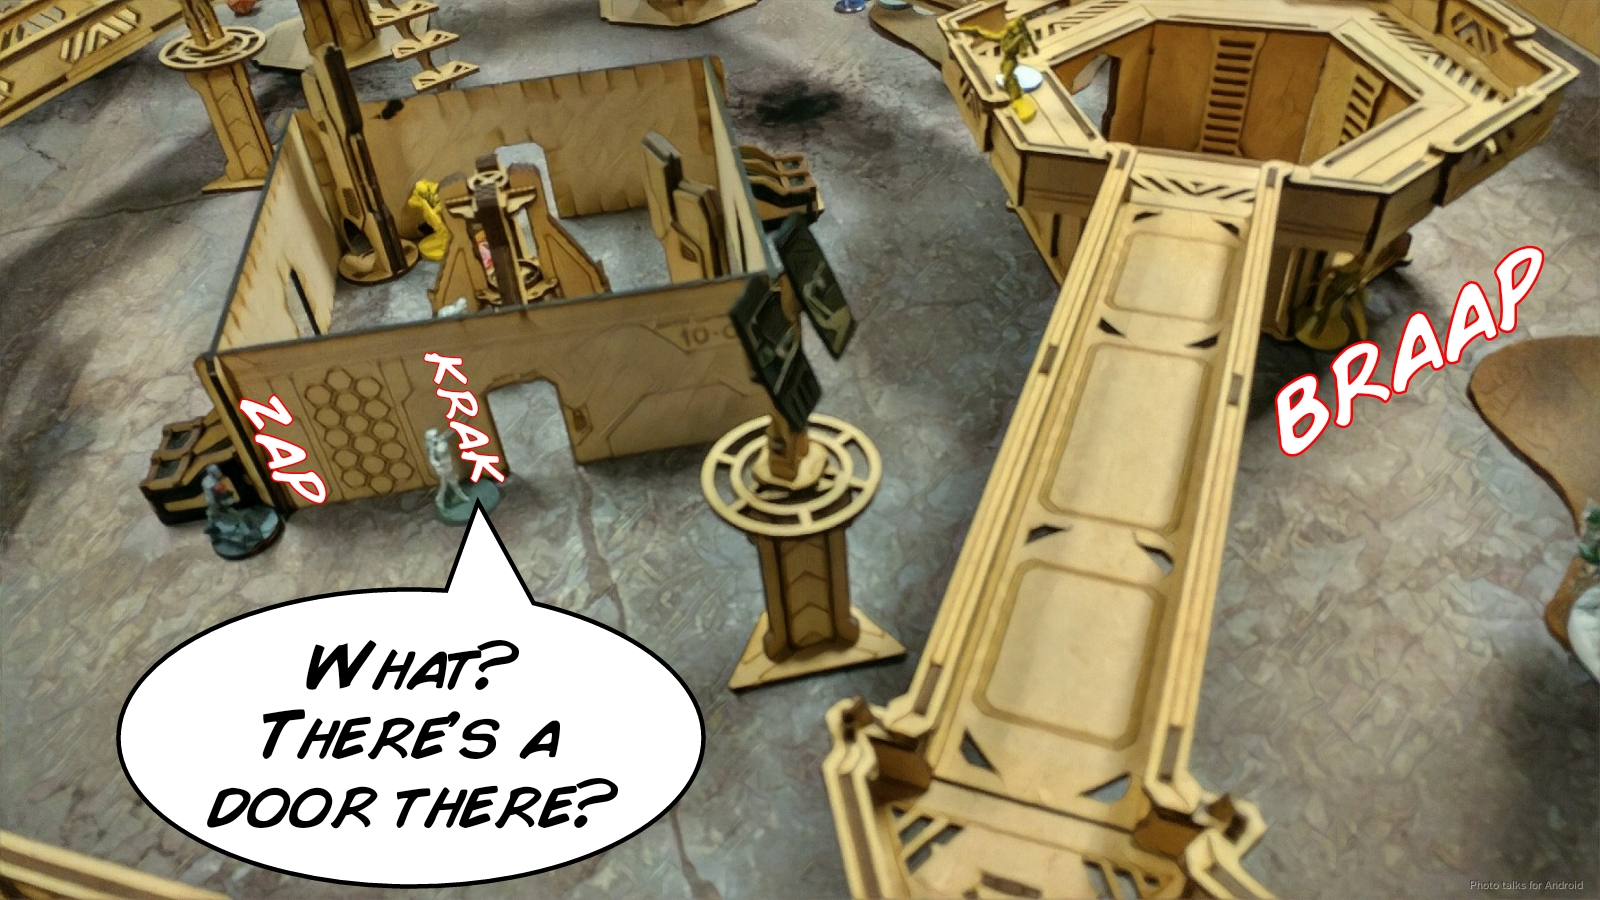 my Keisotsu FO, and the Wu Ming inside the room.
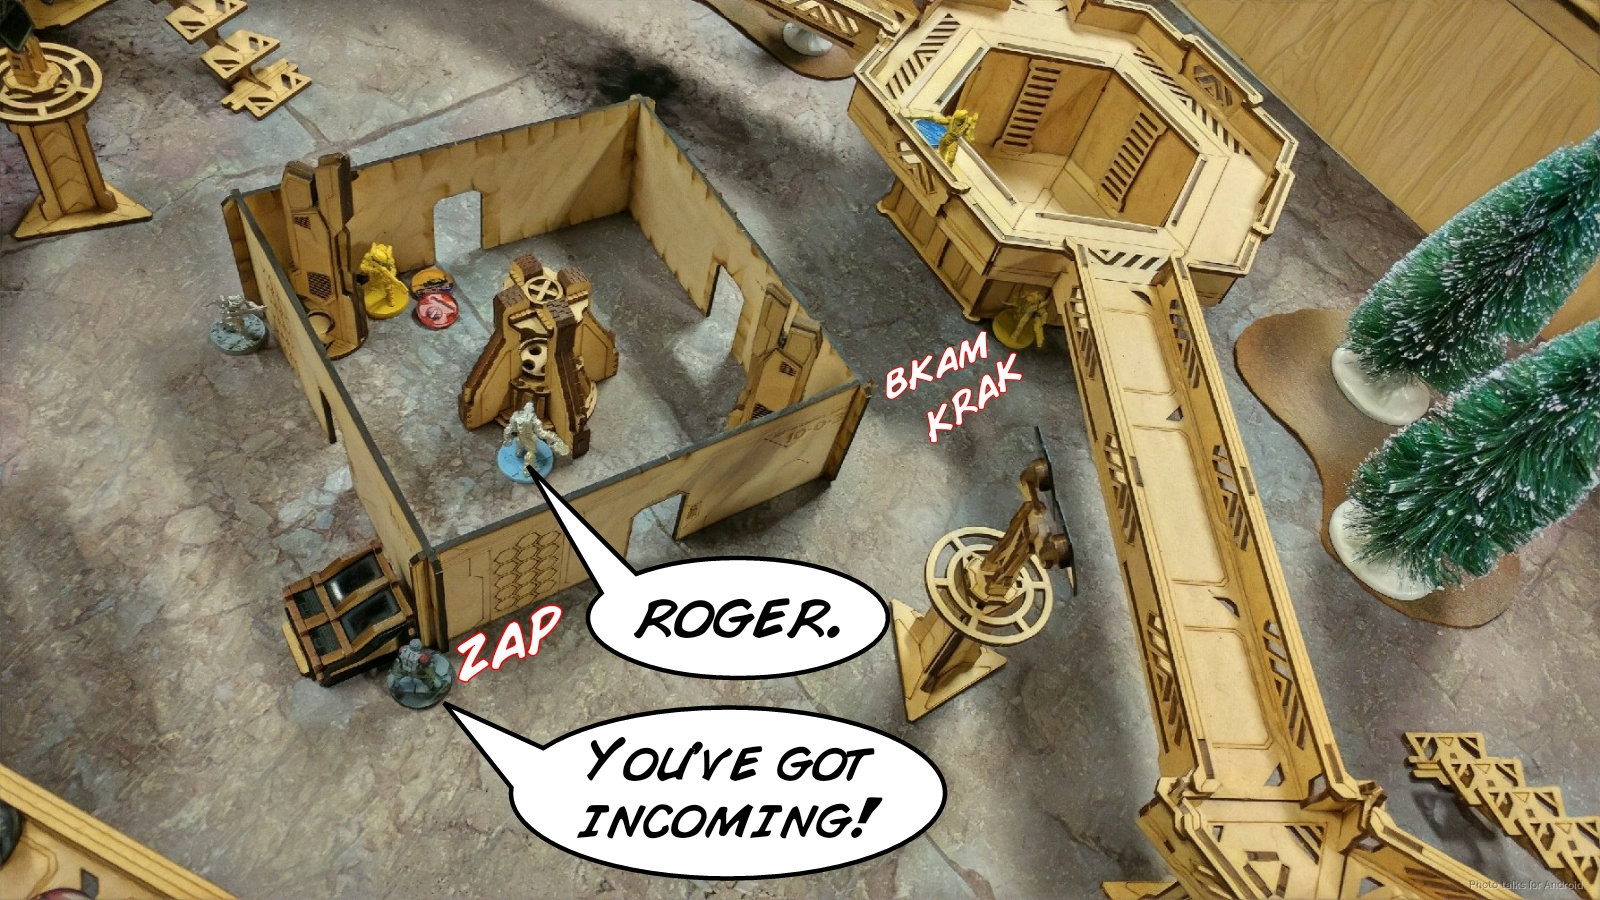 I do have a free uncontested shot on the Zuyong with my Karakuri’s D.E.P. though, and I land it. James passes 2/3 saves though, and the Zuyong continues on. I had honestly forgotten about the Karakuri entirely.
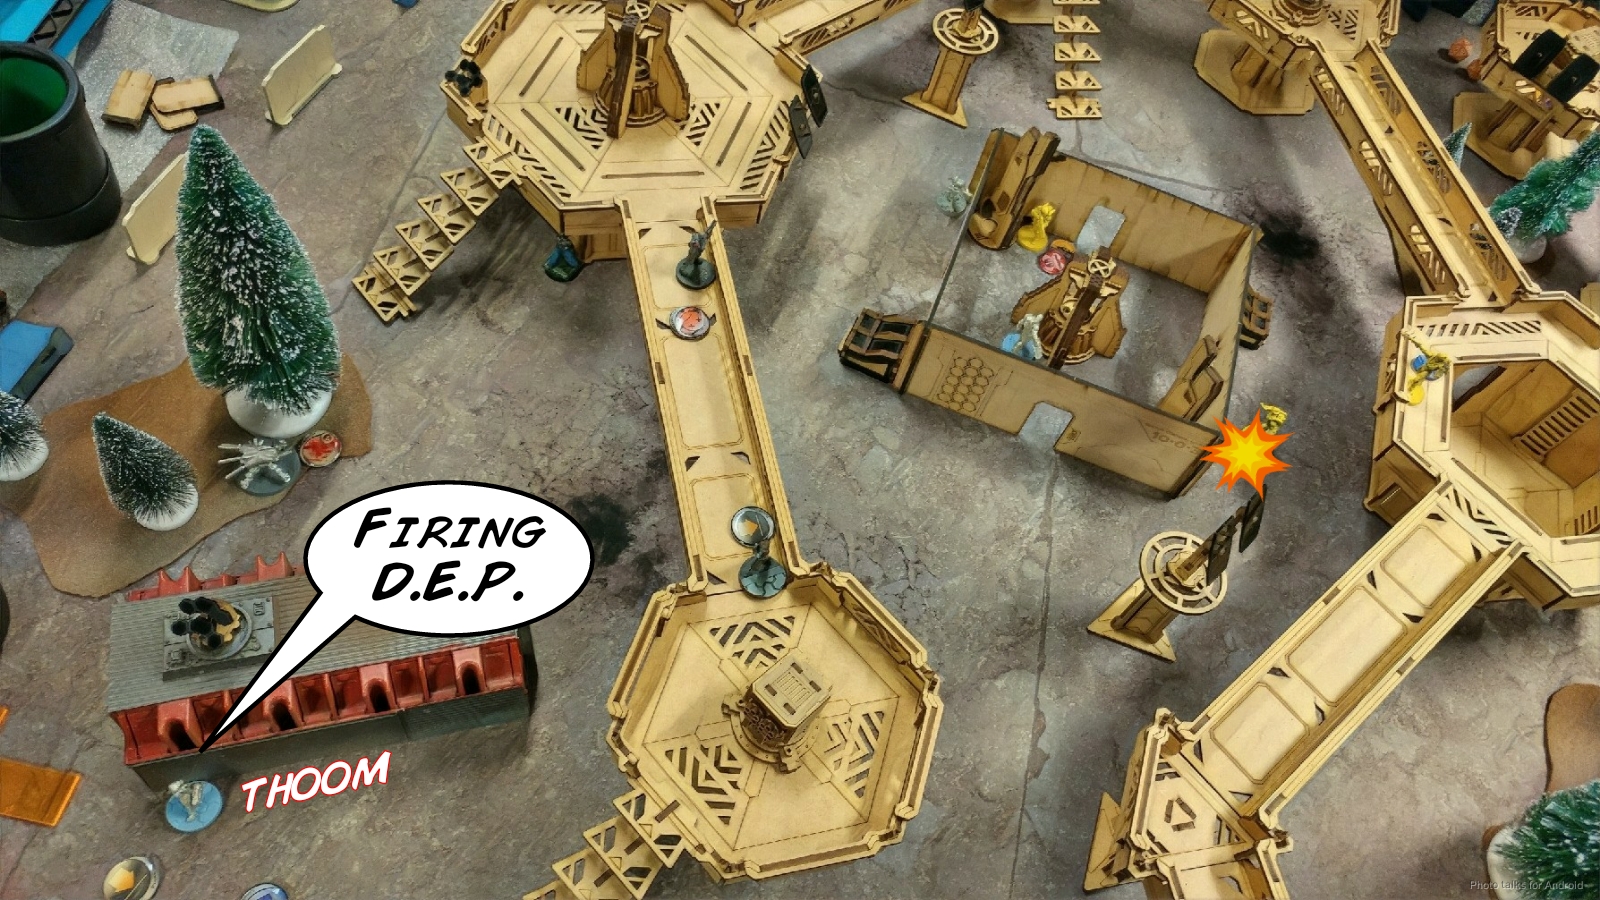 James finishes the turn by getting the Zuyong combi rifle into the room.
Turn 3
Top of 3 – Ikari
I have basically no orders left. My libertos takes out the Zuyong combi with a pair of LSG shots, and then I’ve got one chance to take out the Zuyong HMG with ODD using my Karakuri. Perhaps I should’ve used the chain rifle, but I opted for the heavy shotgun instead. The odds are actually better for the chain rifle in this case:
| Heavy Shotgun | Chain Rifle | Outcome |
| 47.58% | 50.00% | Karakuri KOs Zuyong. |
| 10.67% | Karakuri kills Zuyong. | |
| 40.34% | Neither player succeeds. | |
| 12.08% | 23.00% | Zuyong wounds Karakuri. |
 At this point we call it. There was some possibility of James getting his Warcor to dominate my HVT, but with a Karakuri right there it wasn’t necessarily a guarantee. It doesn’t matter as it’s a
9-0 Invincible Army Victory!
Bit of a rambling battle report this time, but hopefully all the discussion is useful. I don’t want to detract from James’s game at all. Aside from his E/Mauler mistake, he played a smart, careful game and definitely deserves the win–I just think I should’ve made it harder for him, at least.
Notes
Notes for Me
- Check ingress and egress points for buildings! It’s a relatively new table to the store, so we’re all still learning it. It’s donated by the illustrious Alex Sinkowski and assembled by our very own Isaac. Thanks guys!
- Definitely need to make sure that I can simplify the mission down to 1-2 points for my mental checklist. With the damage I had done in the first half of the game and the positioning of the stuff James had left, had I just ignored the Zuyong HMG with my HRL Wu Ming and gotten the rest of the Haris into the bulding, things would’ve shaped up very differently, I think.
- On that note, I’m enjoying my list but I think I need to stop using the Wu Ming as an attack piece. If I force myself to use them in the armory by removing the HMG and HRL as options I think I’ll set myself up better for success in the future. This also will let me take the Combi, E/Mitter, Mines profile, which has my favorite things!
- The Karakuri is good, but it’s not really synergistic with the rest of my list. Everything in here wants all the orders so having to juggle the orders to somehow get the Karakuri in there as well maybe not working for me. I think it’s a great choice for the mission but its not gelling with the way I want to build my lists at the moment. I think I need to either find a different list composition or really commit to putting the Karakuri in there.
- Definitely got in my own way this game.
- One YY may not be enough to be reliable as a spot removal piece.
Notes for James
- There are lots of good ways of dealing with E/Maulers. Face tanking with an important HI piece is not one of them.
- IA is interesting. It’s quite resilient to an alpha strike, because of all the Tactical Awareness and NCO available.
- It doesn’t come up often, but S3 blocks S2 from walking through, so if your own bot doesn’t get shot off the table it can totally block a catwalk.
- Good job getting into the armory and staying alive.


Love the batreps! Quick question if you don’t mind: why can a S2 not vault an S3? The S2 is taller right?
http://infinitythewiki.com/en/General_Movement_Rules
Your S value must be >= their S value. S3 > S2, therefore you cannot walk over them. Bots don’t go prone when they get KOed, therefore, they retain their S3. If it had been the Mowang in the way that for some reason didn’t activate NWI and went unconscious, it would go prone, i.e. to S0, and therefore a Zuyong can hop over the KO’ed Mowang.
Awesome. Really appreciate the explanation thanks!
Maybe don’t get something, but against the Zuyong isn’t the boarding shotgun better? On the chart at least, looks that way, and using the dice calculator suggests the boarding shotgun would do better too.
Wouldn’t the Boarding Shotgun be better with the Karakuri against the Zuyong?
Are you accounting for ODD?