Bak-unin the Saddle
It’s been quite awhile since I’ve played a game, much less played a game with my Nomads. I wanted to try Bakunin, just to get more experience with the faction, and I wanted to try out the Lizard to see what all the Heavy Grenade Launcher fuss is about.
I had just returned from a pretty exhausting road trip over the long weekend, so Erik generously agreed to make the trek across town to play at my home instead of meeting up at the game store (which would’ve added another hour in the car in an already car-filled day for me). Thanks Erik!
Overview
- Mission: Unmasking
- Forces: Jurisdictional Command of Bakunin versus Hassassin Bahram (300)
- Deploy First: Hassassin Bahram
- First Turn: Hassassin Bahram
Unmasking
GROUP 1 |10
MODERATOR Lieutenant Combi Rifle / Pistol, Electric Pulse. (0 | 9)
GROUP 2 |
LIZARD MULTI HMG, Heavy Grenade Launcher / . (2.5 | 87)

REAKTION ZOND HMG / Electric Pulse. (1 | 26)
ZOE & PI-WELL . (0 | 47)
PI-WELL Combi Rifle / Electric Pulse. (0 | 19)
ZONDBOT Electric Pulse. (0 | 3)
AVICENNA Combi Rifle, Flash Pulse / Pistol, Knife. (0 | 27)
3
3
SIN-EATER Spitfire / Pistol, CCW. (1.5 | 31)
MORLOCK Chain Rifle, Smoke Grenades / Pistol, E/M CCW. (0 | 6)
6 SWC | 299 Points | Open in Infinity Army
This list started as a Bakunin list, then turned into a vanilla Nomads list. I decided to force myself to play Bakunin. I wanted a decent number of orders, which meant Moderators… which meant I was going to be blobbing up a bunch of Moderators in a link. UGH. #RAGEQUIT.
This list is meant for a tournament including Highly Classified, Unmasking, and Frostbyte. I figured I’d tailor lists for Unmasking and Frostbyte, and then choose between them for Highly Classified based on what classifieds we draw.
Since this list also has to pretend to be good at Highly Classified, Zoe and Pi Well make an appearance. 2/3 of the scenarios have an exclusion zone, making Zeros less cool (but not bad). I was hoping to just plop down a bunch of Zero Minelayers, but it’s hard to fit that in with a TAG, so I threw in a Sin Eater and a TR Bot for fun and board presence instead.
I’d definitely prefer to have a Sin Eater HMG over the Spitfire–I’m not going to use FD1 against Mutts, but the Lizard ate all my points and SWC. Since I don’t have Zeros who start next to buttons, I need some speedy specialists. I’ve already mentioned Pi Well, and I want a doctor for Highly Classified, so we get Avicenna in the mix too.
I need a backup gun, and the Moderator Spitfire is cheap, so that happened. Threw in an LGL too because cheap. Why not, right? Fill out the rest with bodies and Zondbots, and call it good. Morlock E/M CCW because that’s the correct Morlock…
Hassassin Bahram
GROUP 1 |
MUYIB Lieutenant Rifle + Light Grenade Launcher (Normal and Smoke Ammo.) / Pistol, Knife. (1.5 | 23)
LEILA SHARIF Hacker (Killer Hacking Device) Shock Marksman Rifle, D-Charges / Breaker Pistol, Knife. (0 | 20)
GROUP 2 |
NAJJARUN Engineer Rifle + Light Shotgun, D-Charges / Pistol, Knife. (0 | 17)
RAFIQ REMOTE FTO (Fireteam: Duo) Red Fury, Sniffer / Electric Pulse. (0.5 | 22)
FARZAN (Chain of Command) Boarding Shotgun / Pistol, Knife. (0 | 26)
GOVAD HMG / Breaker Pistol, Knife. (1.5 | 29)
MUTTAWI’AH Chain Rifle, E/Marat, Jammer, Smoke Grenades / Pistol, Knife. (0 | 5)
ÁYYĀR (Surprise Shot L2) Shock Marksman Rifle / 2 Viral Pistols, CCW, Knife. (0 | 39)
DAYLAMI (CH: Limited Camouflage, Inferior Infiltration) Light Shotgun, Panzerfaust / Pistol, Knife. (0.5 | 8)
6 SWC | 299 Points | Open in Infinity Army
Erik brought a different HB list than I’ve been playing against. It doesn’t have the Muyib HRL in it, which means I win, right? By default?
It’s got a ton of board control though. Three Daylami and four Mutts is a pain to deal with, and he’s got a lot of other fun toys in there as well. I personally prefer the Rifle, E/Mitter, DEP Ayyar, but I’m nuts for E/M weapons. Quite an annoying list to deal with. I decided to try and play it safe. Aside from the one Mutt in group 1, I wasn’t really worried about an all in Mutt attack on Turn 1.
Deployment
Erik wins the rolloff and decides to go first. There’s definitely a better side on this setup of the plane crash table, so I take it and make him deploy on the sad side. It’s worth noting for those of you that haven’t seen the plane crash table that anything that’s on an MDF base (most of the table) counts as difficult terrain and as a low-visibility/saturation zone.
He deployed his entire link team behind the plane’s wing, tucked in by the engines and screened by a Mutt. He hid his engineer on the left with a Rafiq in front, and then liberally sprinkled Mutts all over his deployment zone. The Farzan hung out behind a smaller piece of plane fuselage, and his three HVTs were strung out across the midfield.
Annoyingly, Erik managed to land a pair of Daylami, with a third flubbing his roll. The ones that passed ended up on both sides of the table, just outside of my deployment zone. The one on Erik’s right was in a plane fuselage out of LoF of my entire deployment zone, and the other was in full view of the right side of my deployment zone, prone.
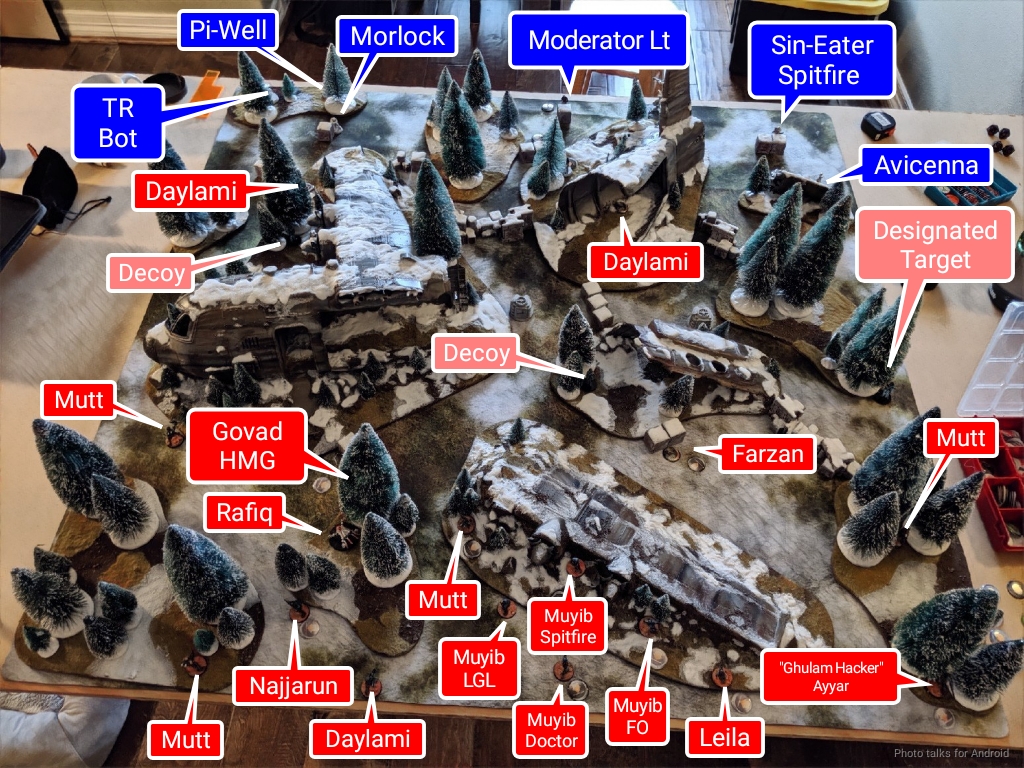
The three consoles were much easier to access for me, including one that was on my side of the table, on the other side of the largest piece of plane fuselage. Erik stuck one of his Decoys on my side of the table, probably in an attempt to get me to waste time killing it. The other two were in more defensible areas, but not significantly more so. Erik stuck an Ayyar masquerading as a Ghulam Hacker all the way in the back right of his deployment zone, then passed deployment to me.
I hate deploying link teams, so I struggled with that for awhile. I gave up and let the Sin-Eater and TR bot shape my deployment. Since the Sin-Eater only has a Spitfire, I set him up to cover the middle and left objectives, with the right one and my designated target protected by the TR bot. Then it became an exercise in cramming models into weird spots that I thought might be safe.
I set up a pair of Morlocks on the left to protect where I was going to put my TAG–it was really the only place that would fully block LoF to the Lizard. This also meant a Zondbot was there, just in case. Avicenna went on the left too, to make a run for the left console. On the right went Pi Well and another Zondbot for Zoe, since the TR Bot and Pi Well were right there.
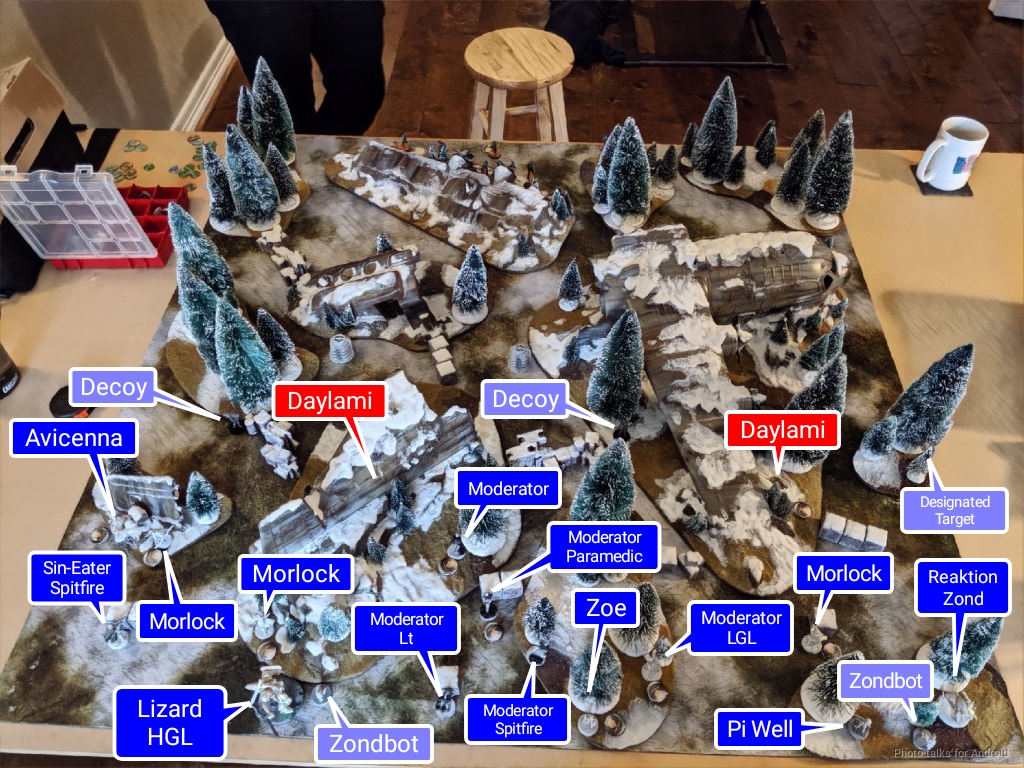
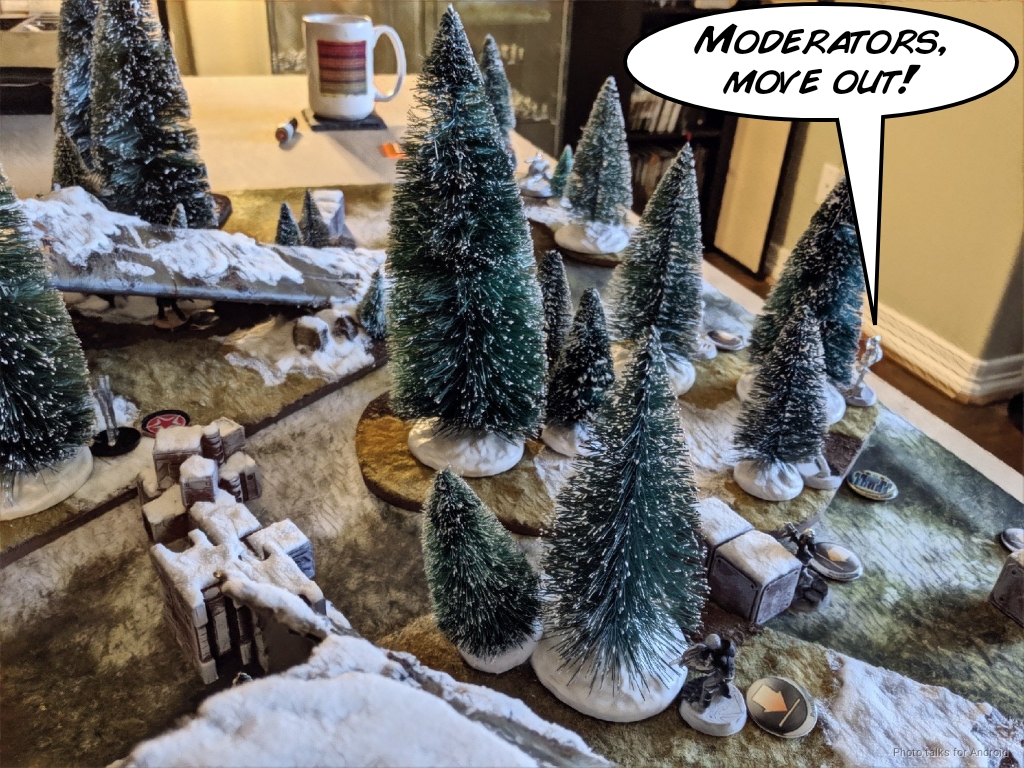
I covered the Daylami on the right with a Morlock, and then hid Zoe behind a tree in the back of my deployment zone. Then it was time to deploy the link. I just sort of blobbed them up in the best available cover in the middle of my deployment zone, with the Lieutenant protected in the back as best I could. There wasn’t really any rhyme or reason to the deployment, I just tried to keep them out of LoF, in cover, and in coherency.
Erik revealed his Govad HMG out of reserve and dropped her prone behind some boxes on my right, then it was time to pull my TAG out of my model case and drop it on the table. Erik was pretty surprised by this, which I was quite amused by.
Turn 1
Top of 1 – Hassassins
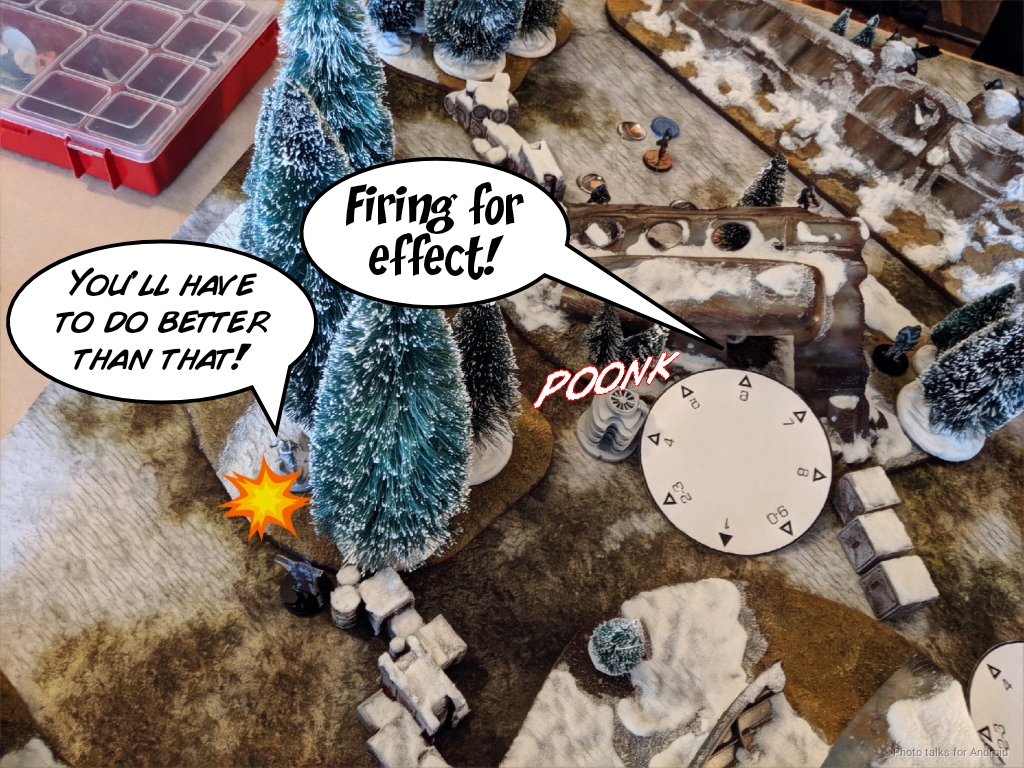
As we got started, I noticed that I did a piss-poor job of deploying my TR bot, and it wasn’t watching down the long table edge. Whoops. Getting sloppy! In any case, all I had watching the advance of the first Mutt was Pi Well, who whiffed his shot against the Mutt’s successful smoke.
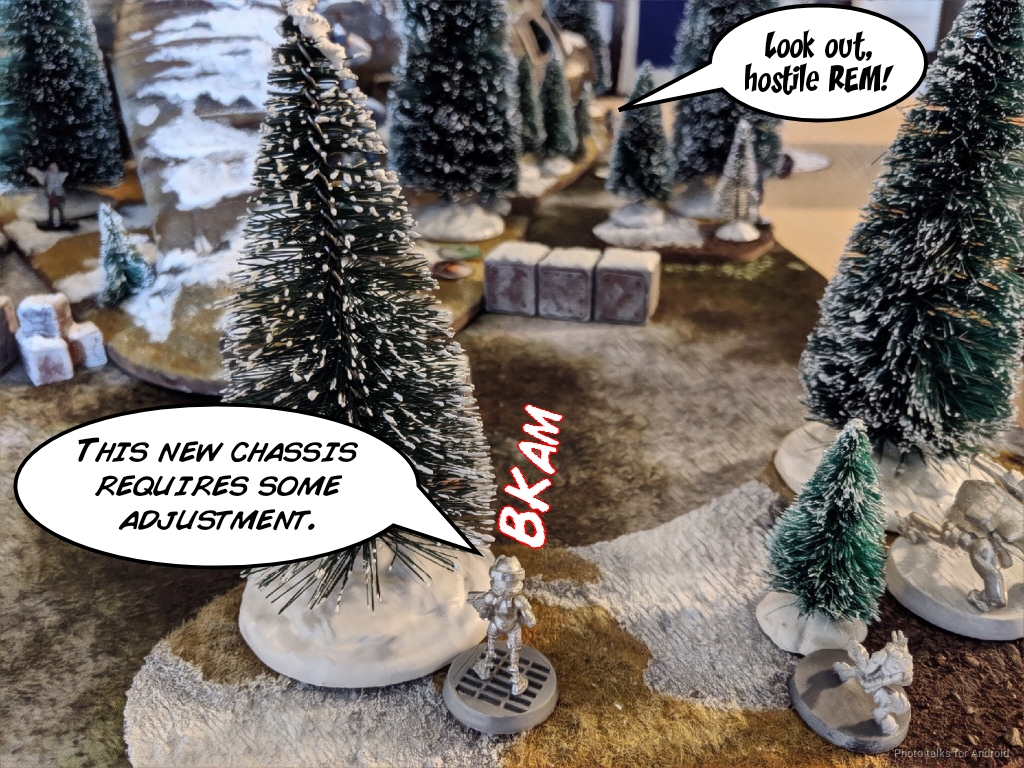
The second Mutt faced the Sin Eater at bad range for me and successfully landed smoke.
The other two Mutts made it safely on their impetuous orders, and then the second Mutt covered the central objective with some smoke.
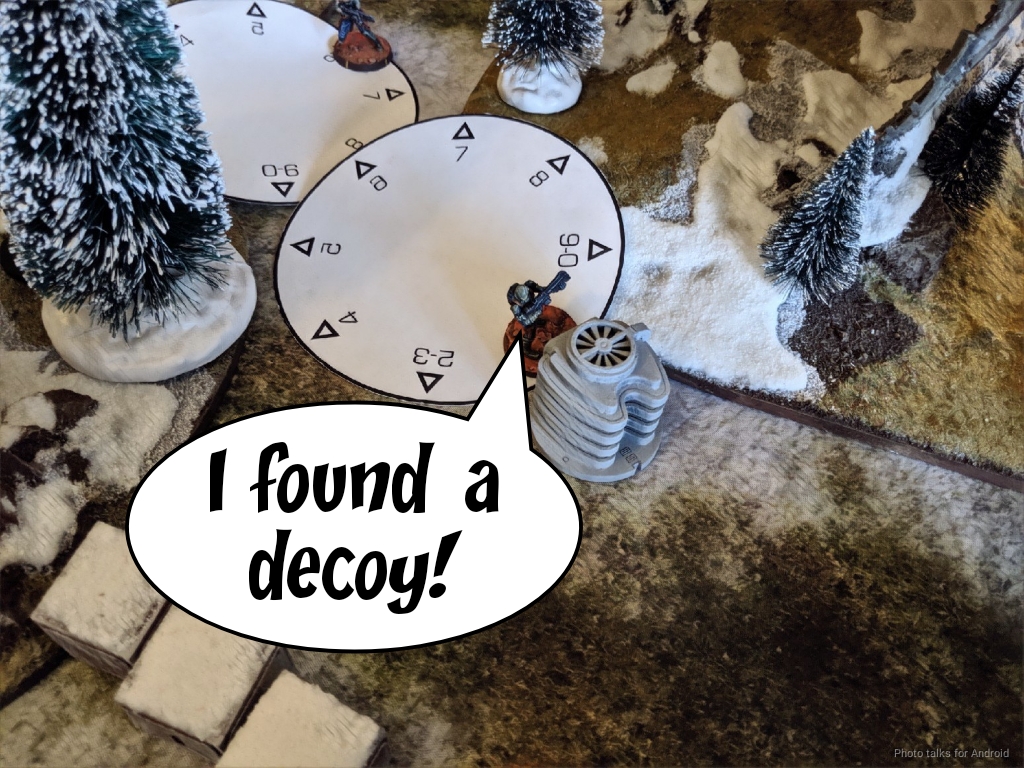
This let the Farzan sneak by against the Sin-Eater failed discover, and then the Farzan beep-booped the button and revealed my Decoy in the center.
Erik retreated the Farzan to safety inside the plane’s main fuselage, and then tried to position one of his remaining Mutts, which died to the Sin Eater.
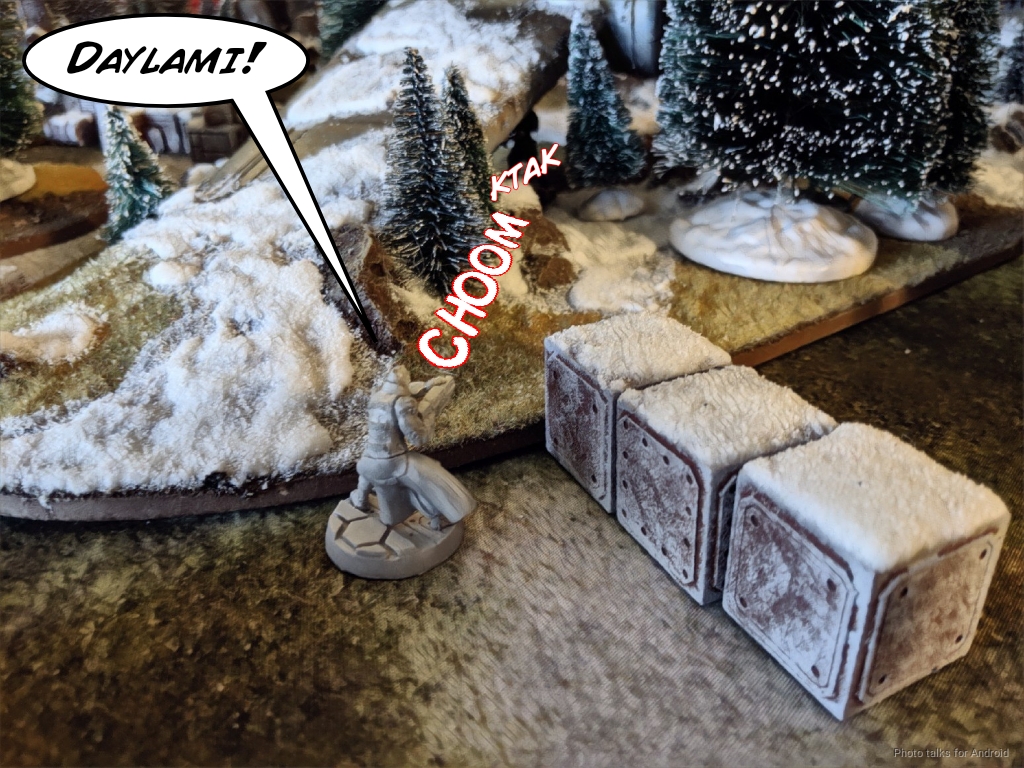
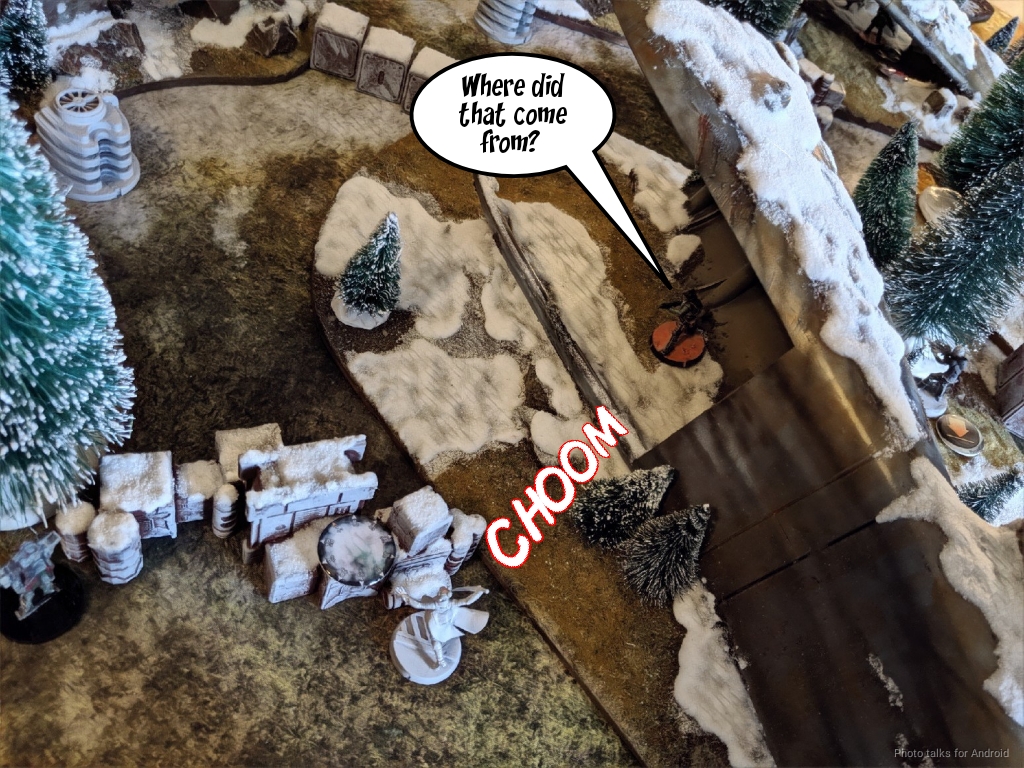
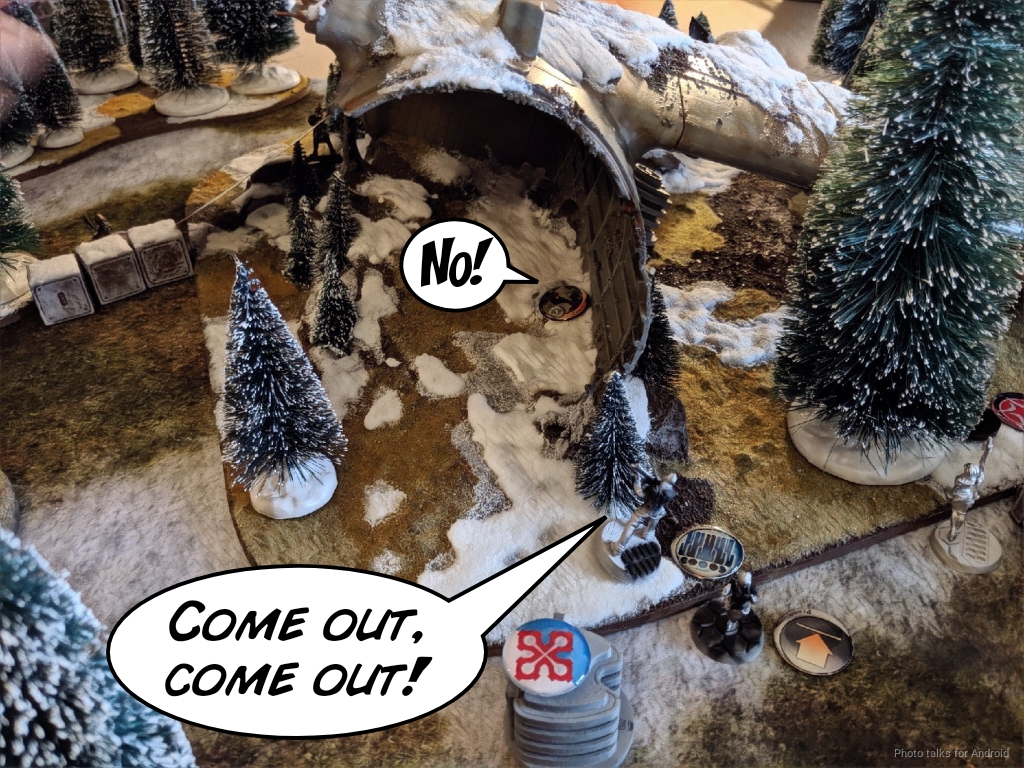
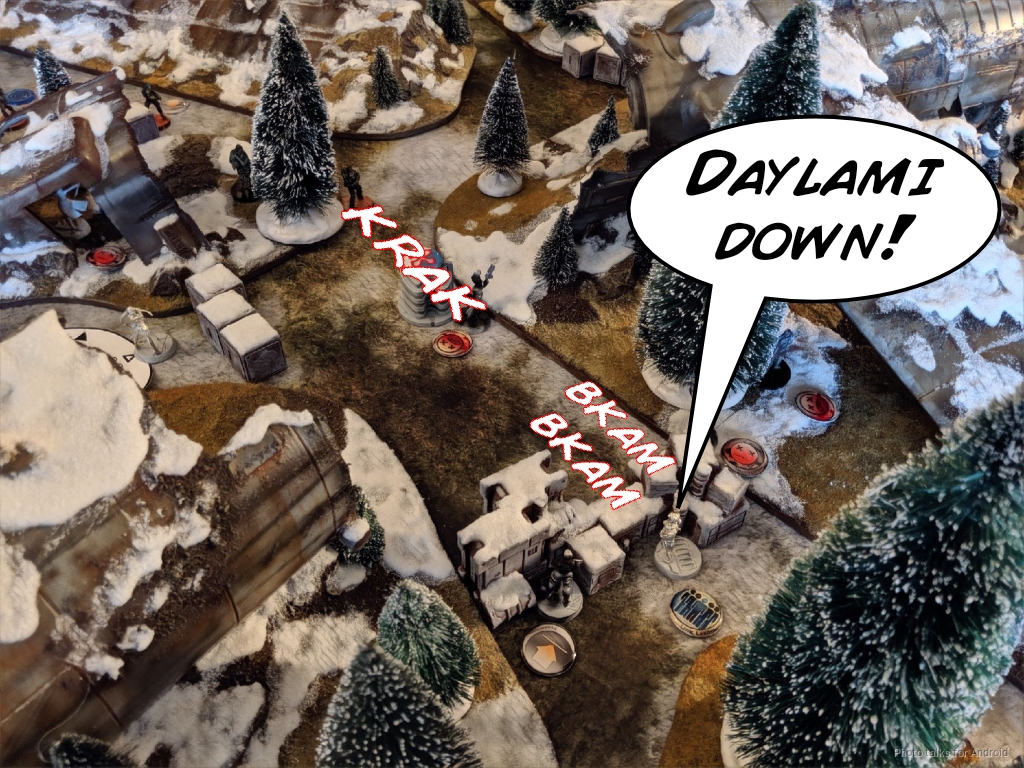
The Daylami on my right, the one prone and in view of my DZ, ran away from all my stuff to hide under the wing of the plane, but Pi Well discovered it easily with Sensor.
After settling all of the rest of his Mutts and Daylami either out to ARO in the case of the Daylami that failed infiltration or hiding in the case of the remaining Mutts, Erik passed the turn after re-camoing the Farzan.
Bottom of 2 – Bakunin
At this point it looked like I was pretty boxed in by a bunch of Mutts and Daylami on my flanks. I decided to spend my first turn clearing out as much of Erik’s board control that I could while establishing some of my own.
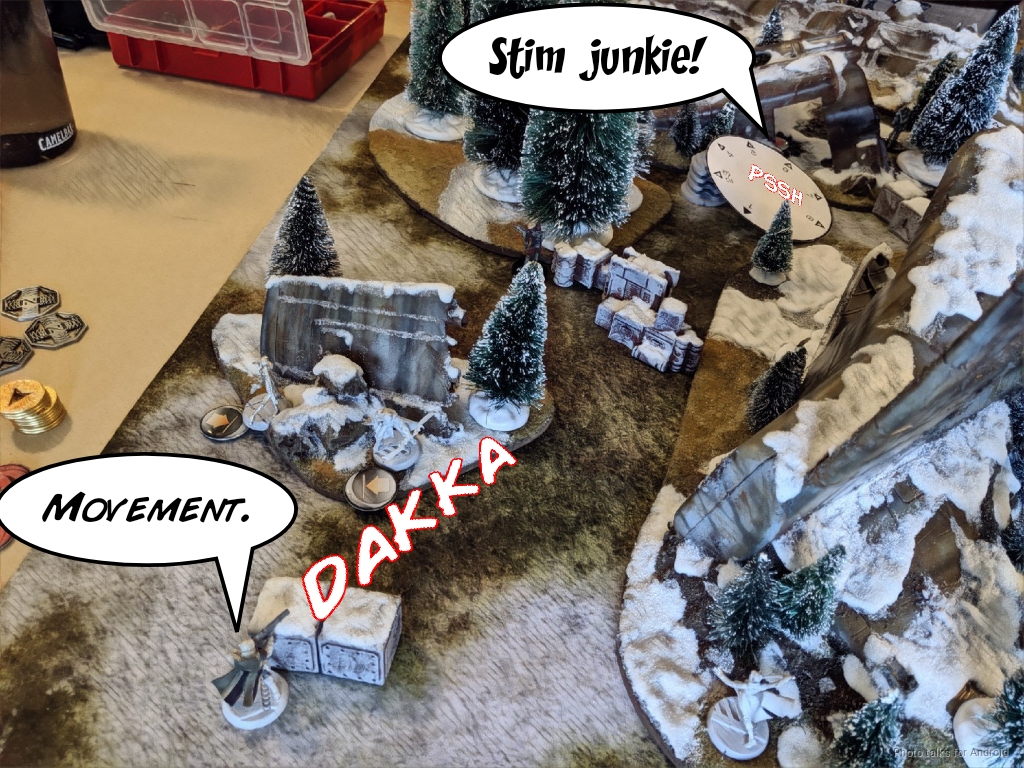
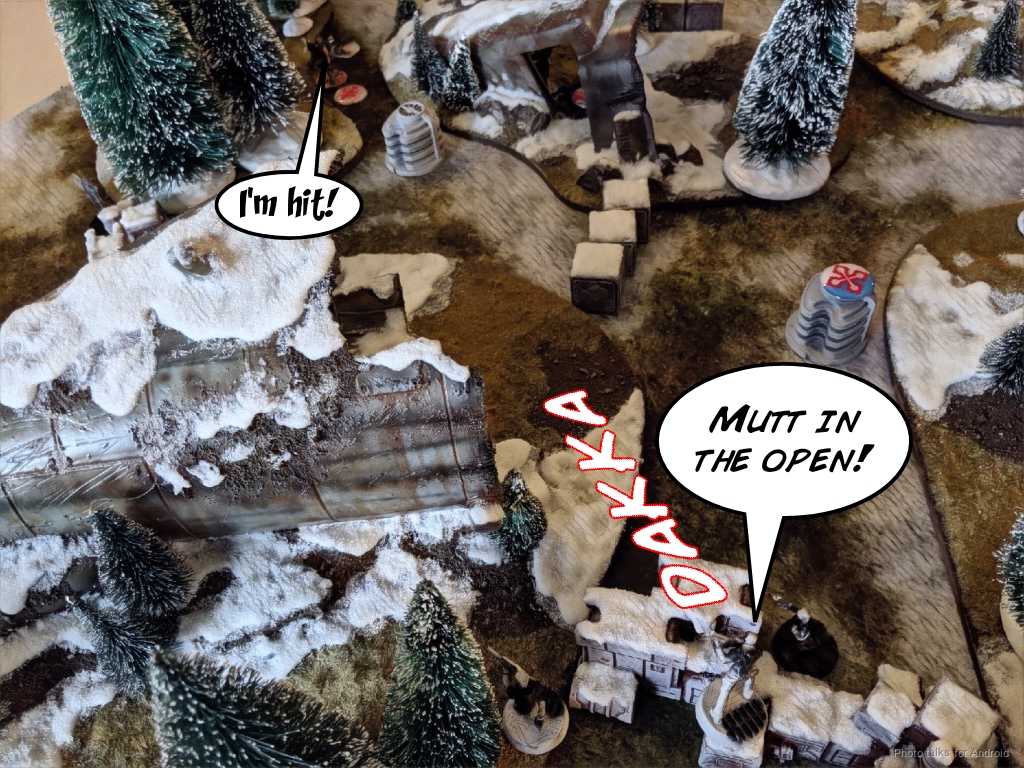
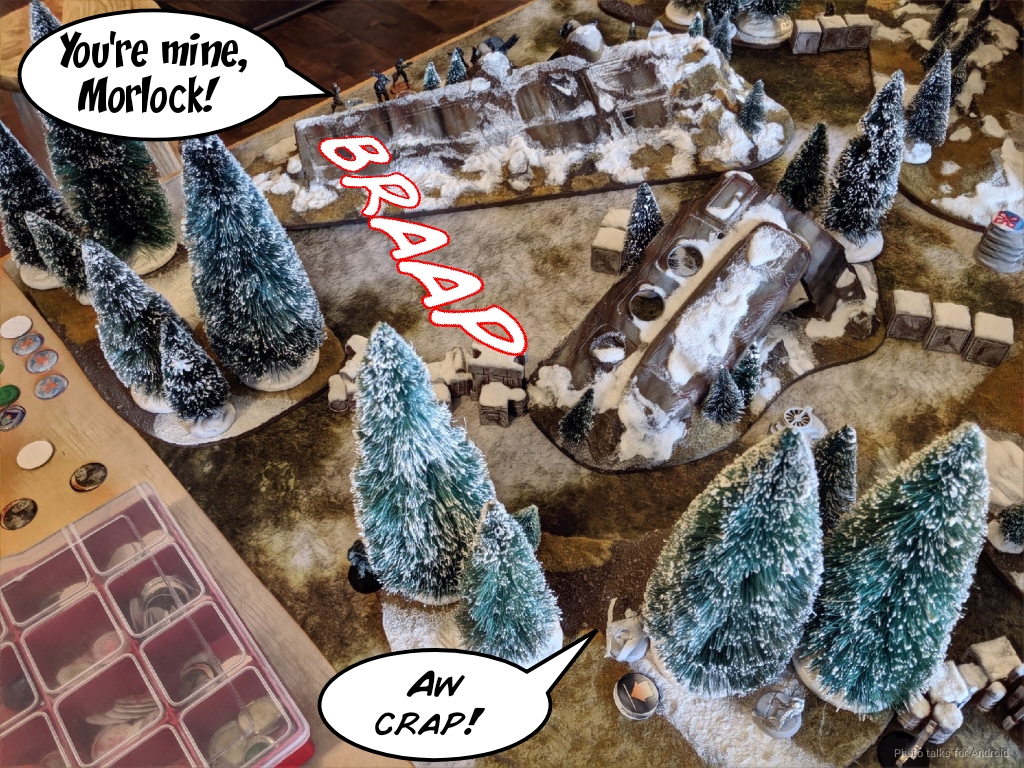
First off was the revealed Daylami on my right. My Morlock sadly had to trade, my chain rifle versus his LSG.
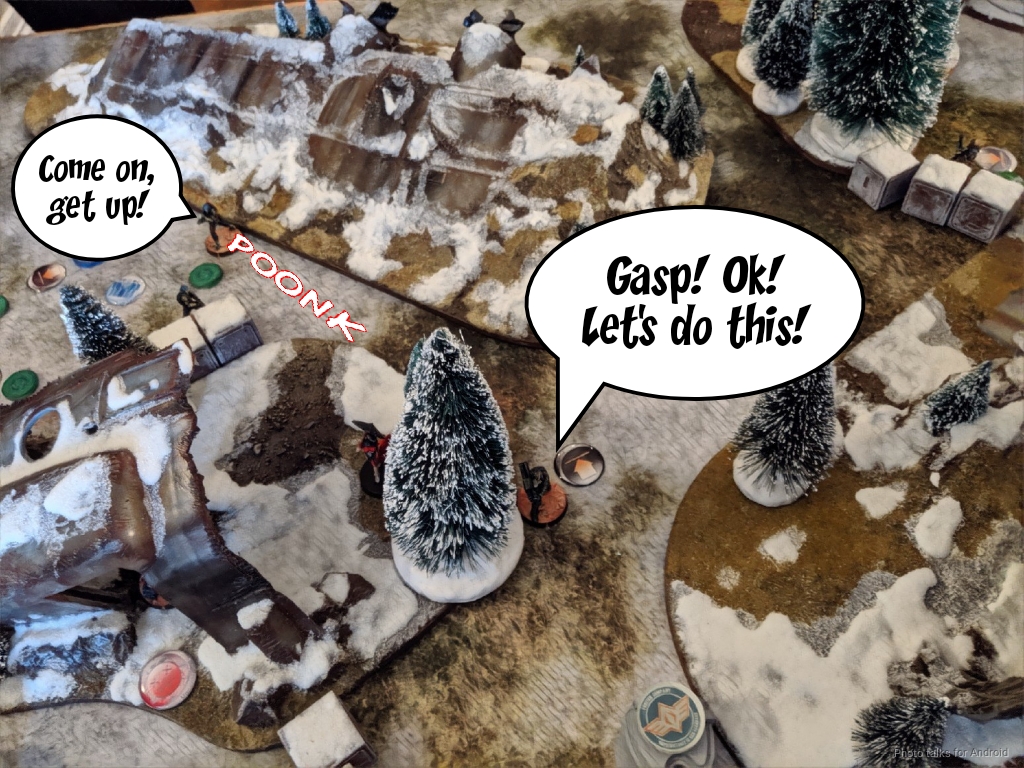
Next up, I dropped smoke to cover the movement of my two Morlocks on the left and then coordinated them using the Sin-Eater’s ordre. This set one up to attack the Mutt pinning Avicenna on my left, and setting the other up for an intuitive attack against the Daylami on my left, still in camo. Sadly, I roll a 15 on my WIP, but at least the Daylami dodged to reveal itself.
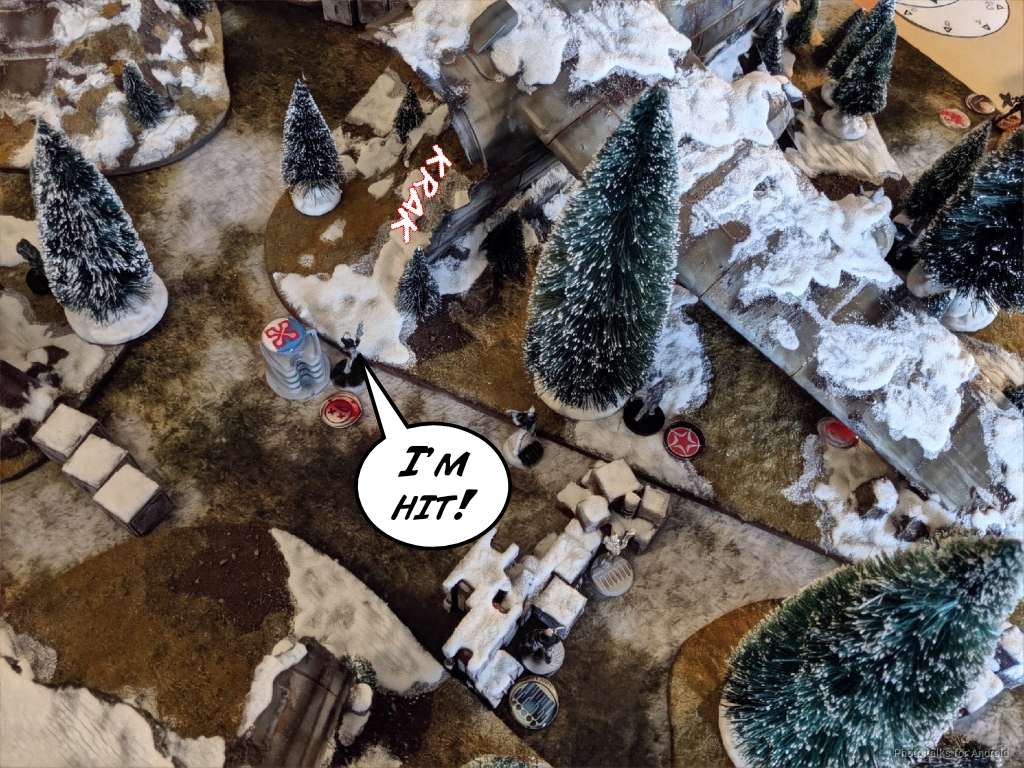
The remaining Morlock that hasn’t spent its irregular orders trades with the Mutt pinning Avicenna. I had hoped Erik would choose to make it unconscious, but he sent it dogged instead. This forced me to spend more orders on killing it outright with the Moderator Spitfire, who drove up the middle, the rest of the safety patrol in tow.
This did let me gun down the revealed Daylami though…
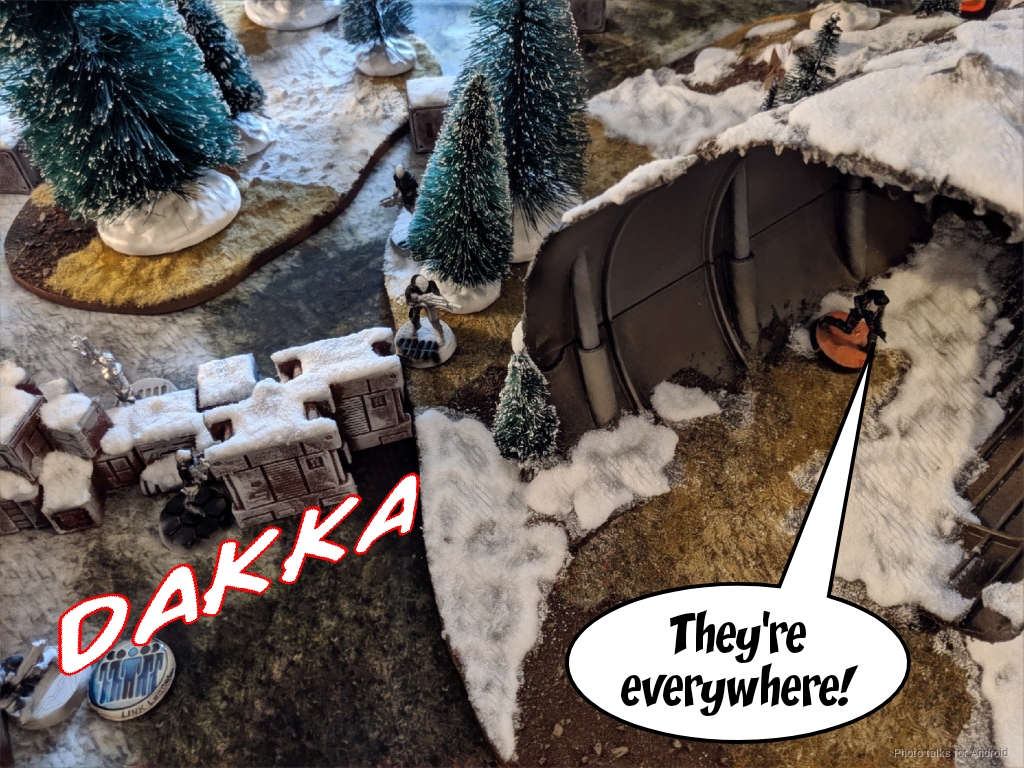
as well as put the Mutt on the far right, near my Designated Target, dogged.
I tried to bait out a reveal from the Farzan on the way, but Erik didn’t bite.
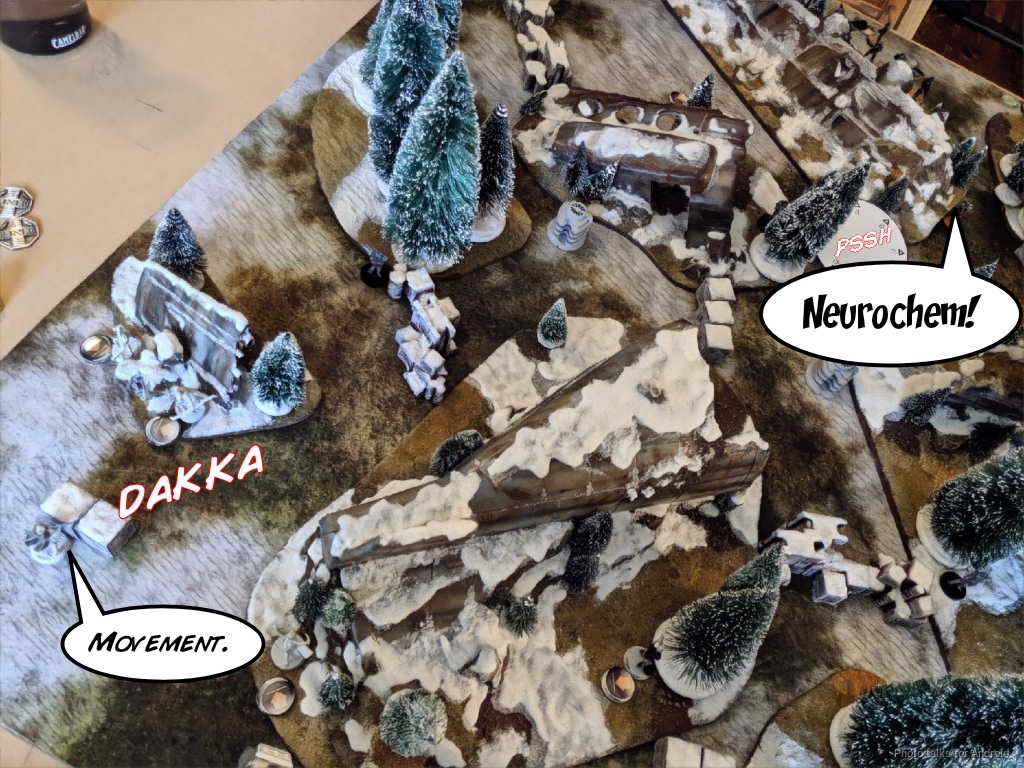
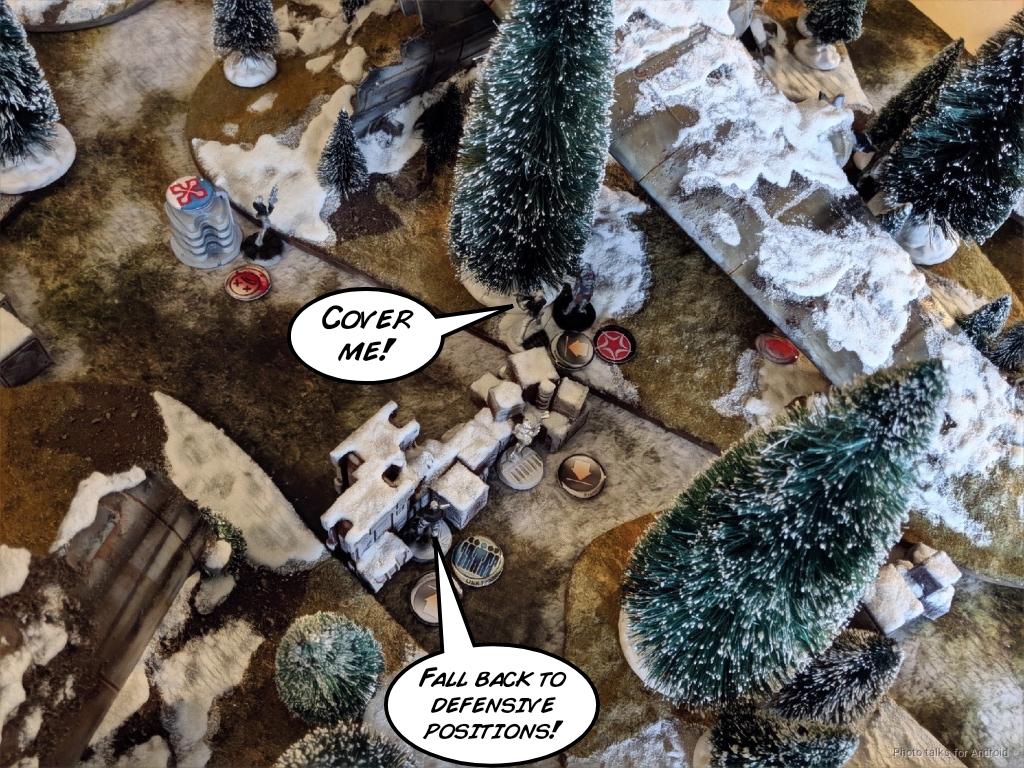
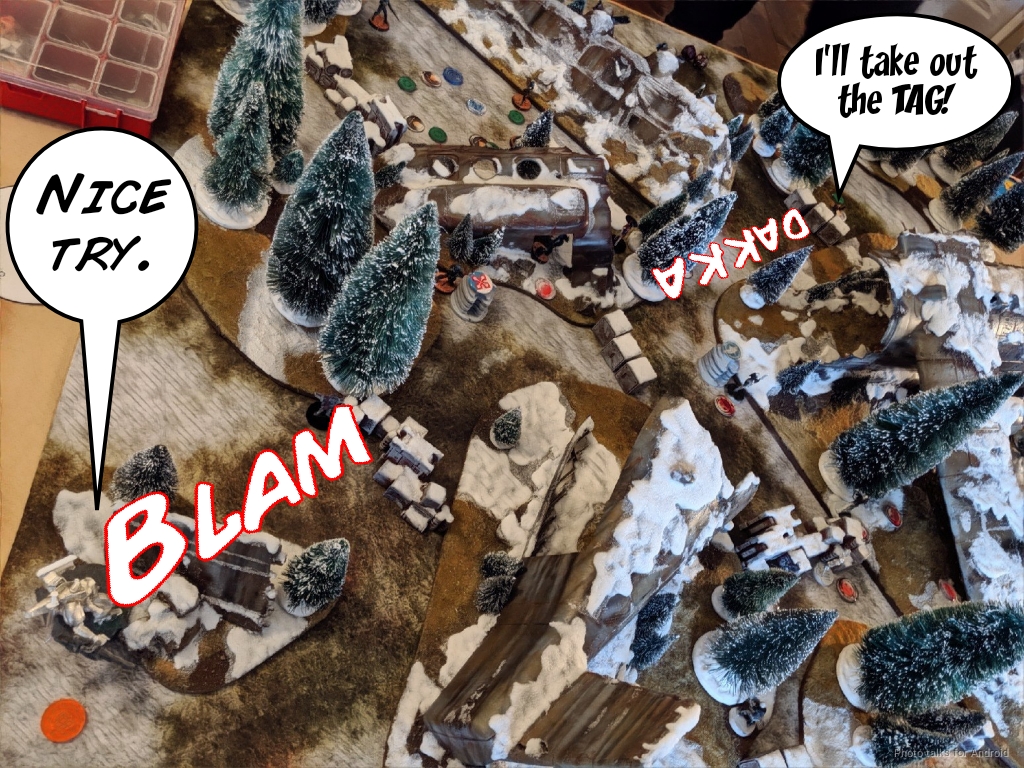
Instead, I threw the Moderator Paramedic under the bus and tried to push the central button. This convinced Erik to shoot her, which he did successfully. Sadly, I flubbed the WIP roll, so I lost a Moderator for nothing other than a revealed Farzan.
I spend another coordinated order trying to spec-fire the Farzan with both my Moderator’s LGL and the Lizard’s HGL before reforming the link, but Erik rolls fantastically and beats out both of my successes. Bah!
I foolishly try to get Avicenna into play, advancing her towards the left button, but then realize I need to fix up my Moderator’s positioning, which I do quickly and haphazardly.
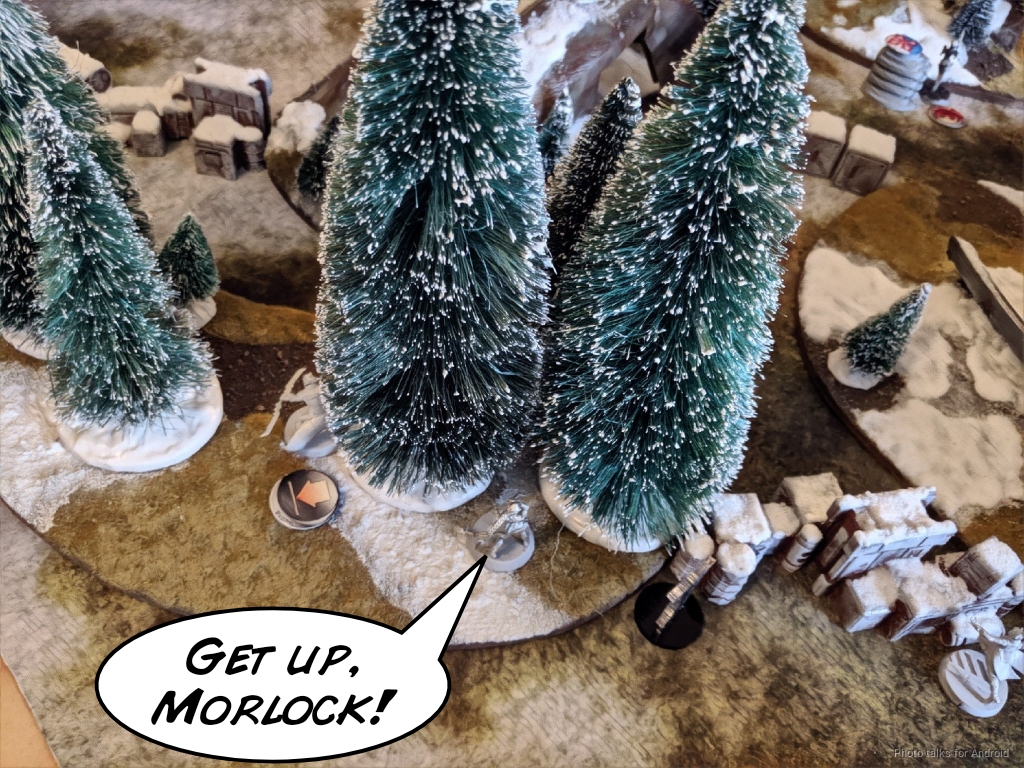
Avicenna is forced to just MediKit the Morlock that went down to the Mutt while trudging through terrain. It takes me two tries but the Morlock survives the cocktail of stims and I pass turn.
Turn 2
Top of 2 – Hassassins
This was kind of a waste, because Erik immediately kills the Morlock with a fully linked Leila.
I get some vindication when the Muyib Doctor attempts to pick up the Mutt downed by the Sin Eater earlier and kills him, but really it’s the order tax that I’m excited about.
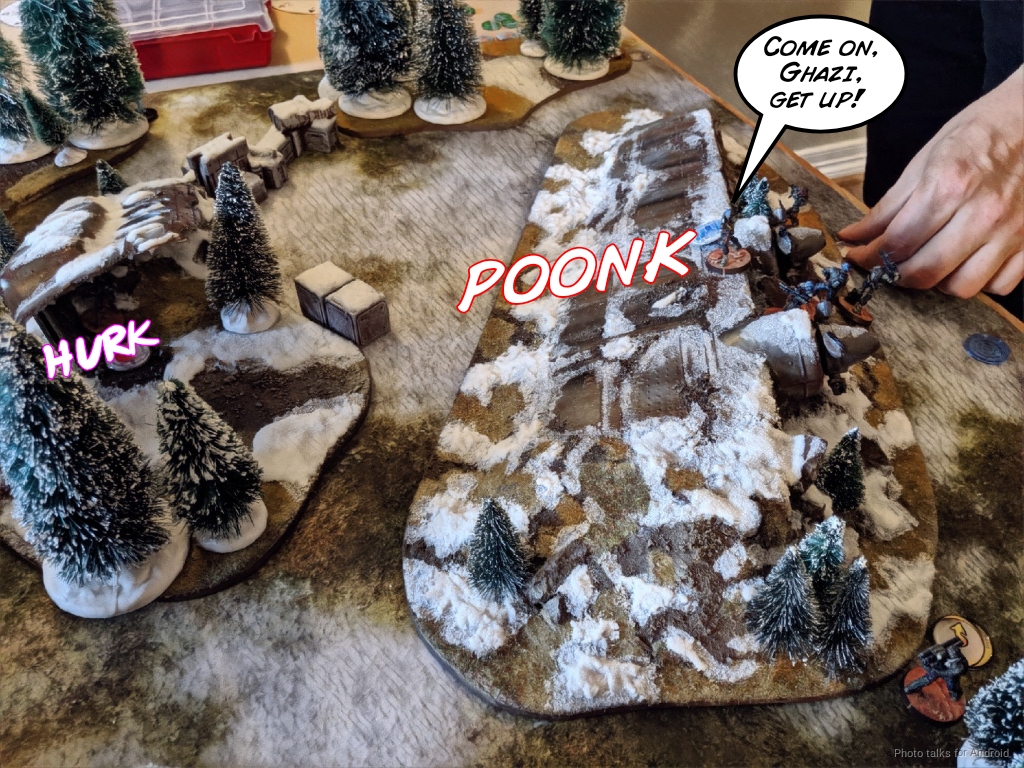
I had to leave my Spitfire Moderator in an awkward spot, but it turns out that this is giving Erik some trouble, as he’s now covering the entire broken wing’s surface. It takes him a few orders of shuffling, but he gets the Muyib Spitfire into view and I lose the fight.
Erik covers the Sin-Eater’s LoF with a smoke grenade from his Muyib Lt while Leila takes a tumble down the slippery surface of the wing, and then Erik is free to move around.
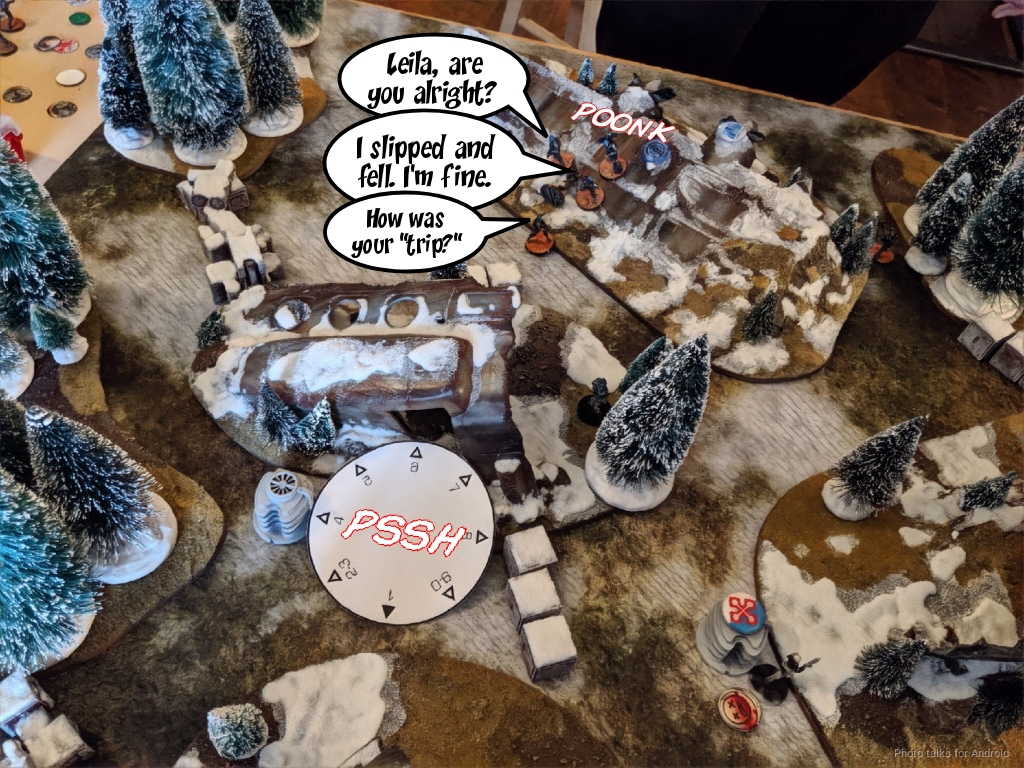
He has some trouble deciding exactly where to go, but settles for spreading out his Muyibs behind the small piece of fuselage in the center of the board. He’s afraid of getting grenades rained on his head.
Since grenades are on his mind, though, he spec-fires two at my Decoy, knocking it out, then one at Avicenna with his Lieutenant order. Thankfully, she passes ARM before he tries again after reforming the link.
He’s out of orders now, so he just passes the turn after shuffling up his remaining Daylami (the one that failed infiltration) again.
Bottom of 2 – Bakunin
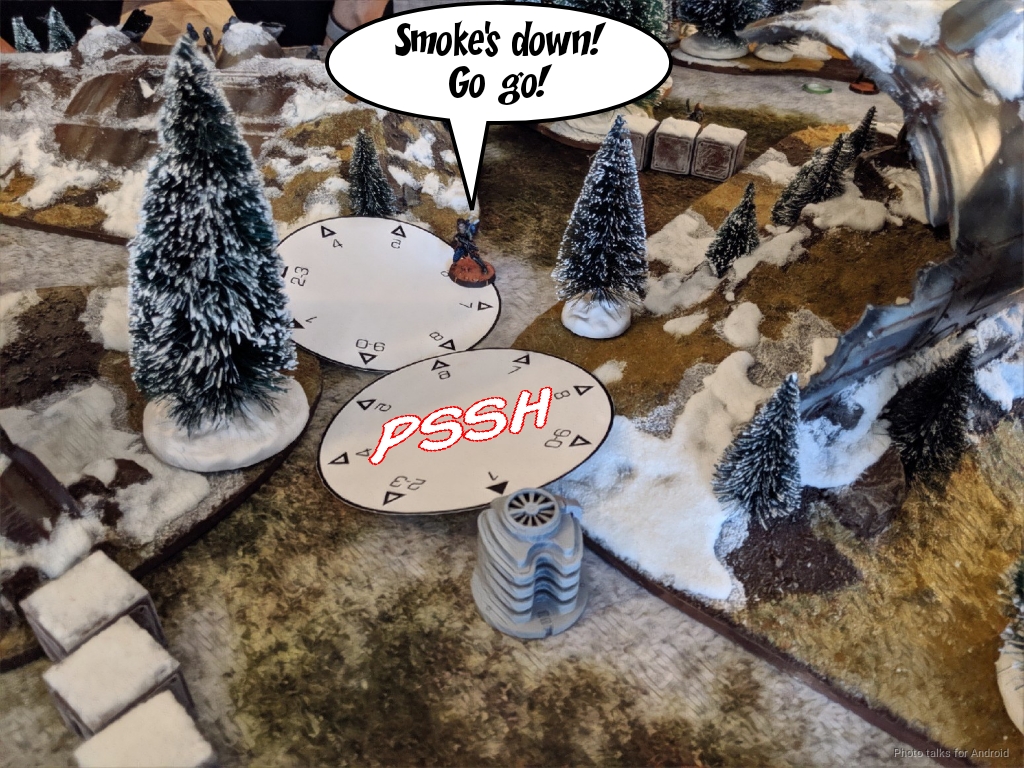
I’ve got a Morlock in range of the Muyibs, so I get smoke down and set up for an attack run with the Sin Eater’s order.
I run into base to base with the Muyib Lt, but it’s kinda hard to get a good chain rifle off–turns out that spreading out against grenades works well against chain rifles too, so I settle for smashing the Muyib Lieutenant’s radio with the Morlock’s E/M CCW (he passed ARM but not BTS) and isolate Erik’s Lieutenant. The Farzan does manage to take out the Morlock though, an impressive shot through a low-vis zone. The other Muyibs missed.
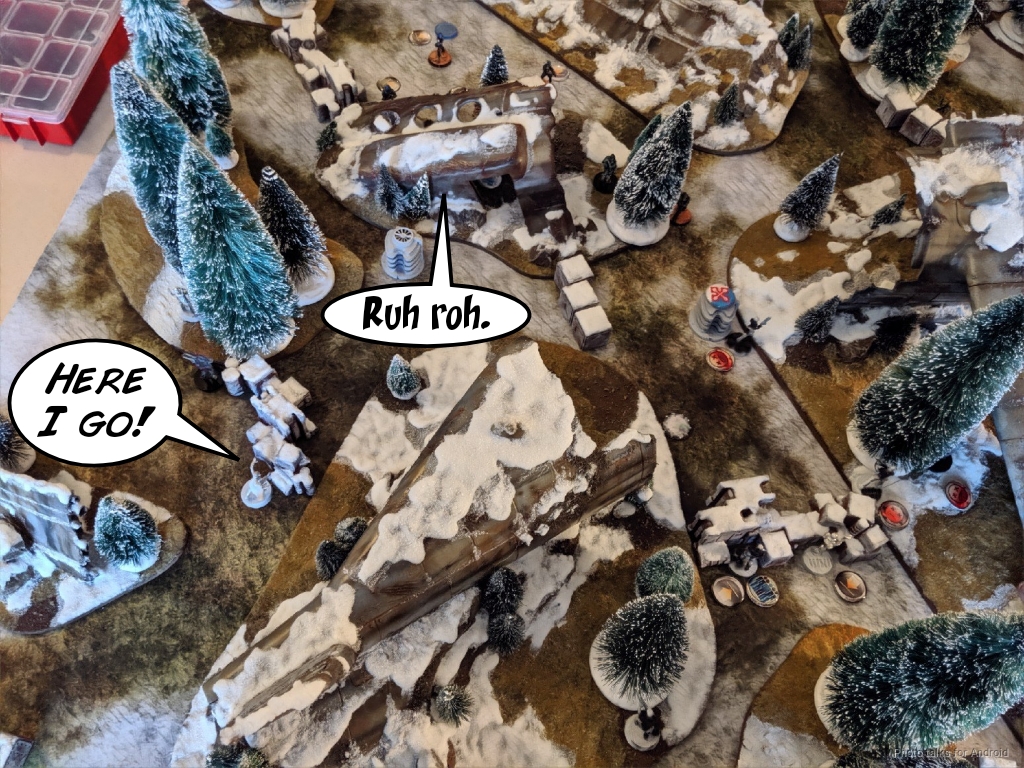
The Farzan has to go now, so I send in my Lizard and shock it off the table.
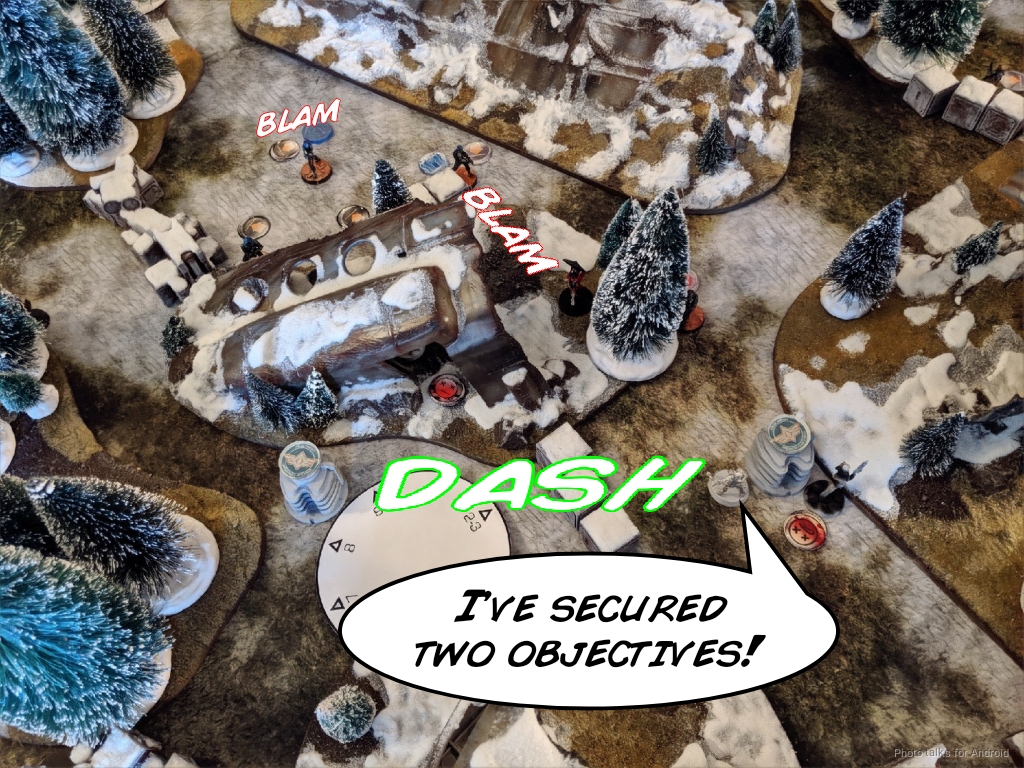
Avicenna pushes the left button, revealing the left HVT to be the real Designated Target. I get the Lizard into place and whiff all three HMG shots while the Designated Target dodges into safety. I’ve got to reset my position before Erik gets another turn.
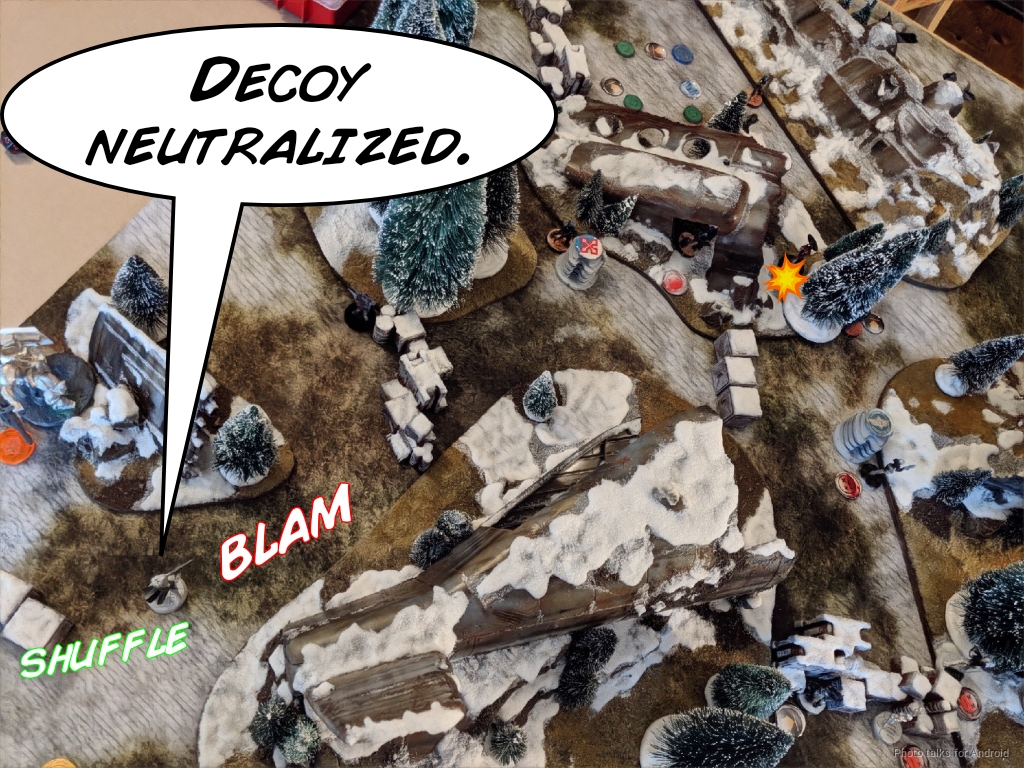
I retreat the TAG, pop up the Moderator LGL to take out Erik’s remaining Daylami, and then sacrifice Avicenna to flip the center console, revealing the Decoy in the center that’s easy pickings for the Lizard later.
Turn 3
Top of 3 – Hassassins
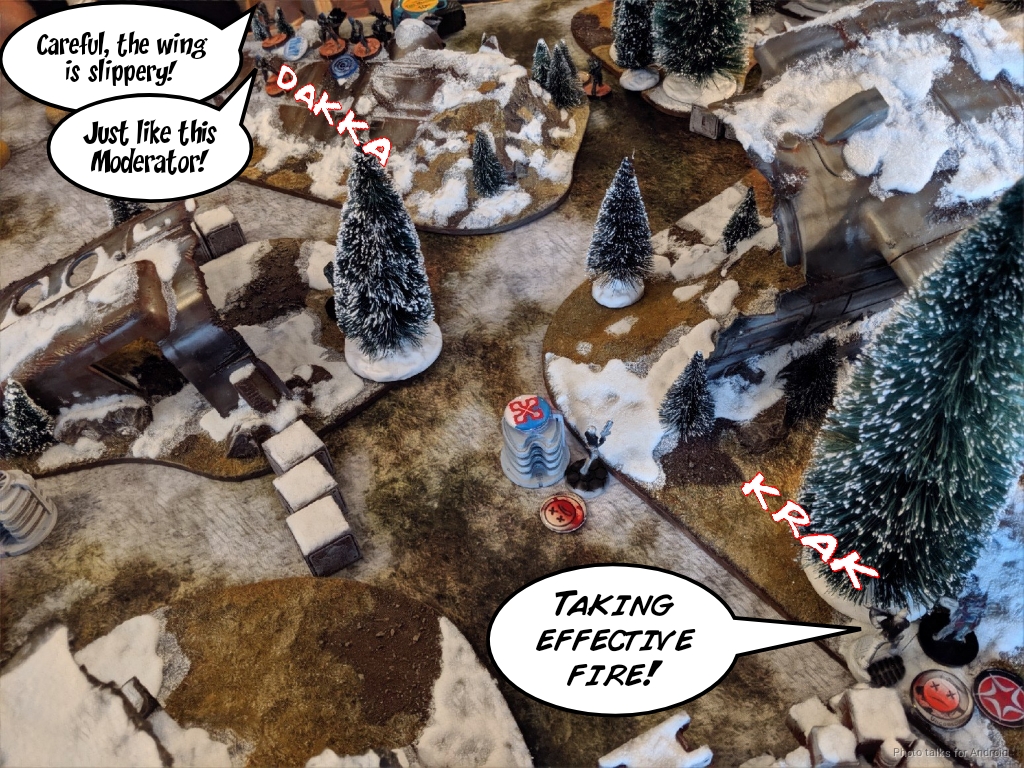
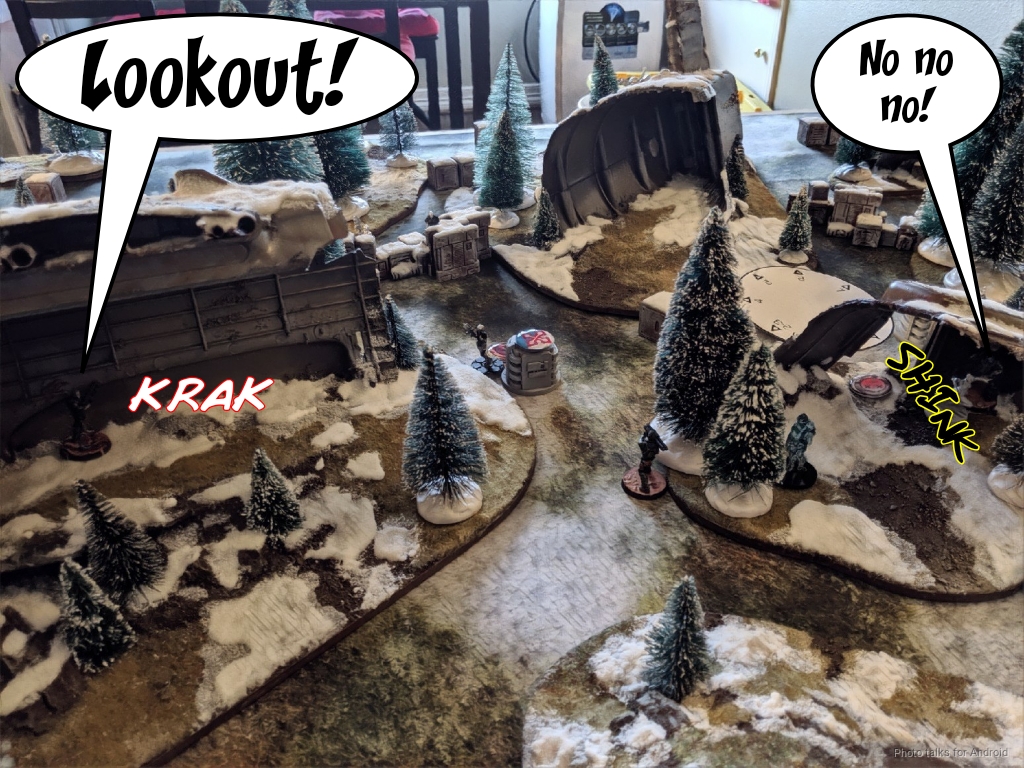
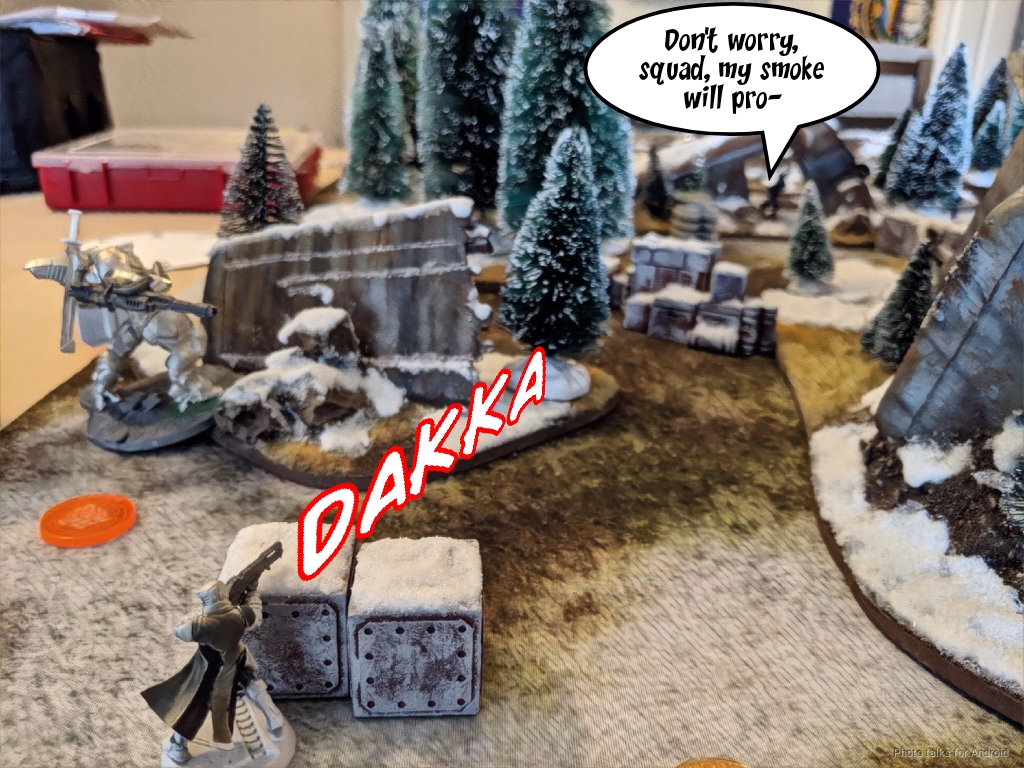
With the Farzan dead, Erik’s in Loss of Lieutenant. He spends his Lieutenant’s irregular order trying to set up smoke for the rest of his Muyibs, but my Sin Eater puts a quick stop to that.
The Spitfire removes the Moderator LGL though, letting the Muyib FO get into position to flip the left console back to Erik.
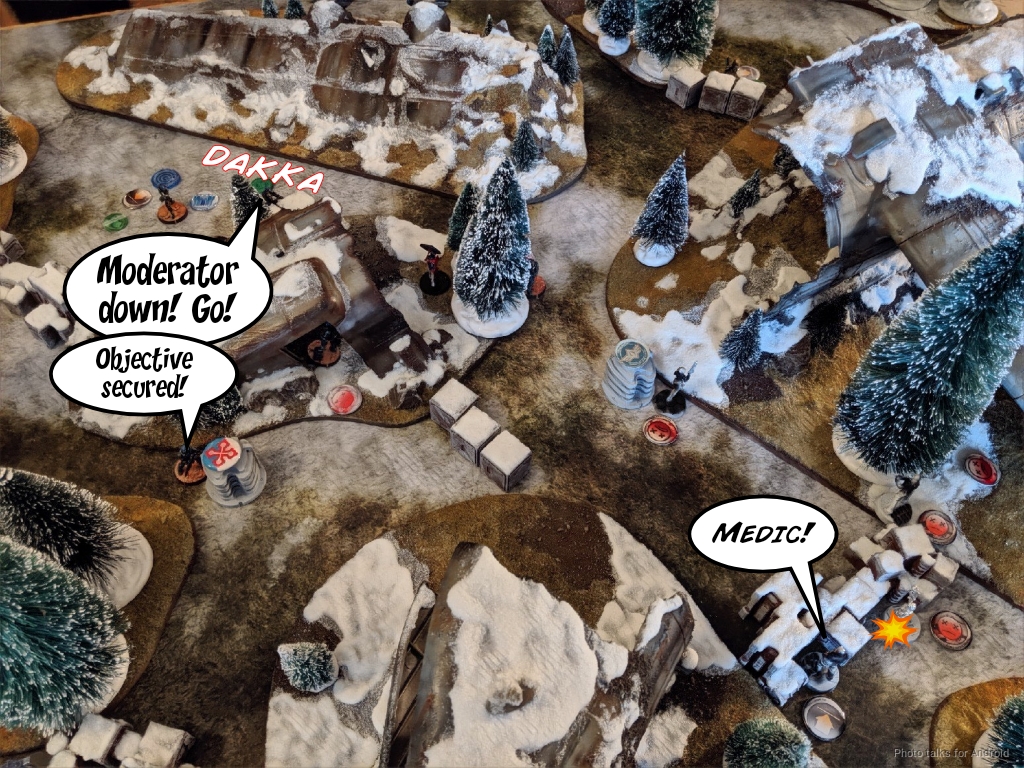
To set up more AROs, Erik picks up the downed Daylami with his Muyib Doctor’s MediKit.
He’s still got to deal with my TAG though, so he throws the Govad under the bus, or should I say the EXP round, which splats her at just under 40″.
Bottom of 3 – Bakunin
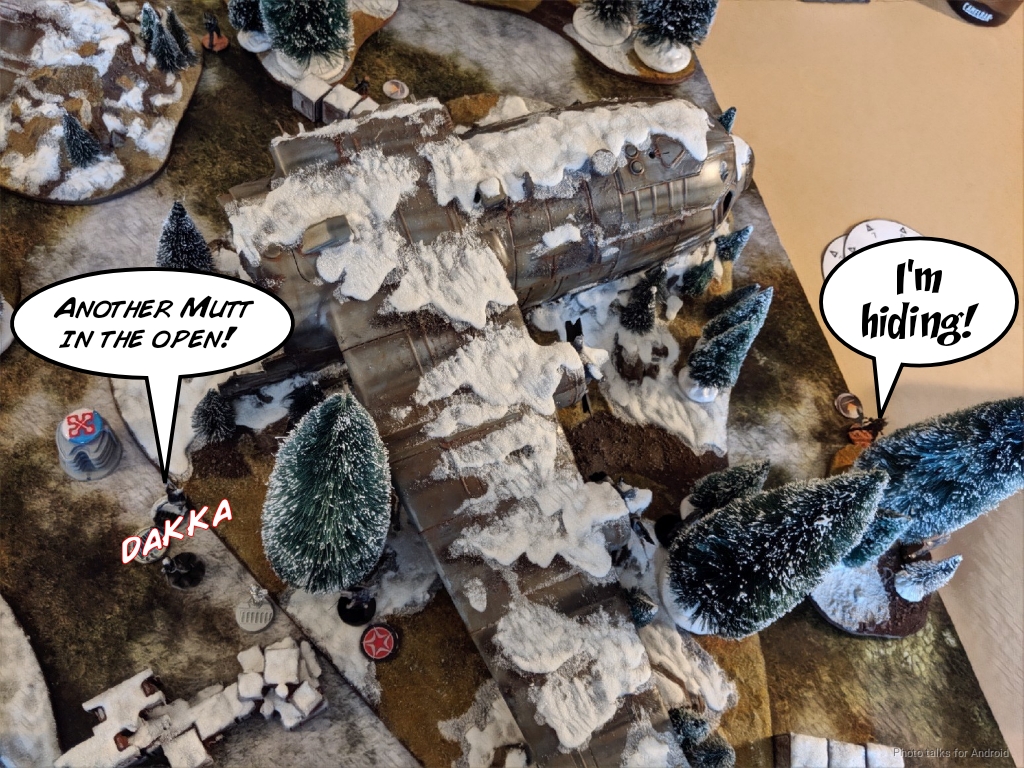
I’ve got just the Sin Eater left in my second pool, and I think I’ve got a shot at 24″ on Erik’s decoy if I run forward. I do just that and lo and behold, I’m at just under 24″! I roll well to boot, and the single Spitfire shot KOs the Decoy.
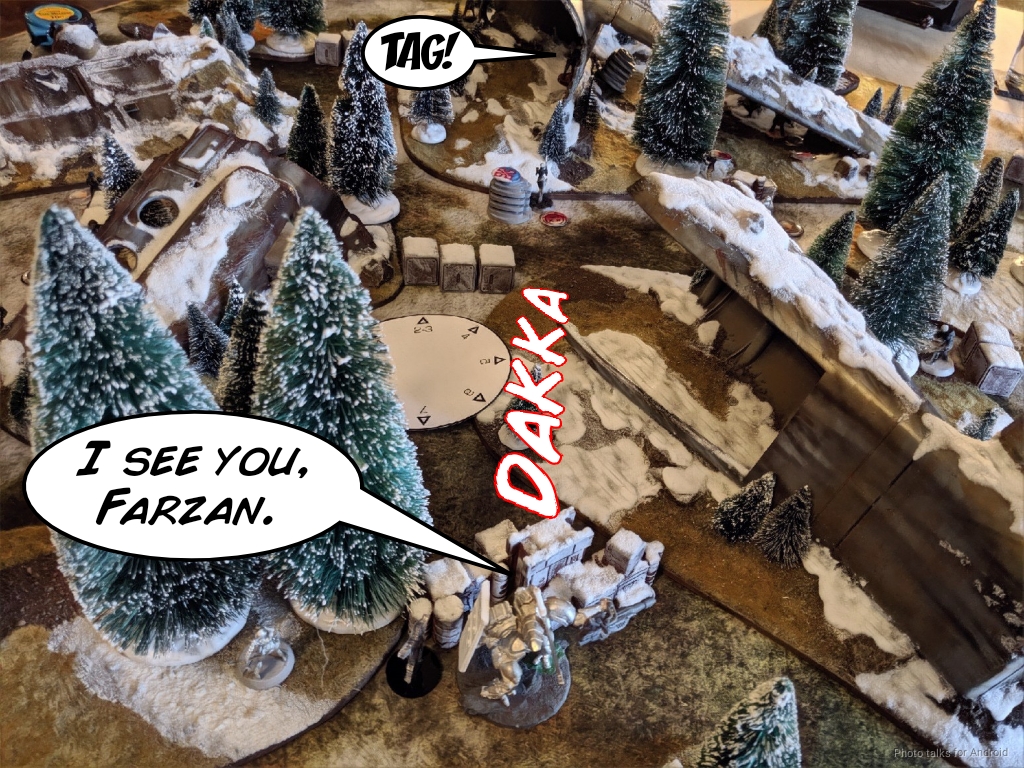
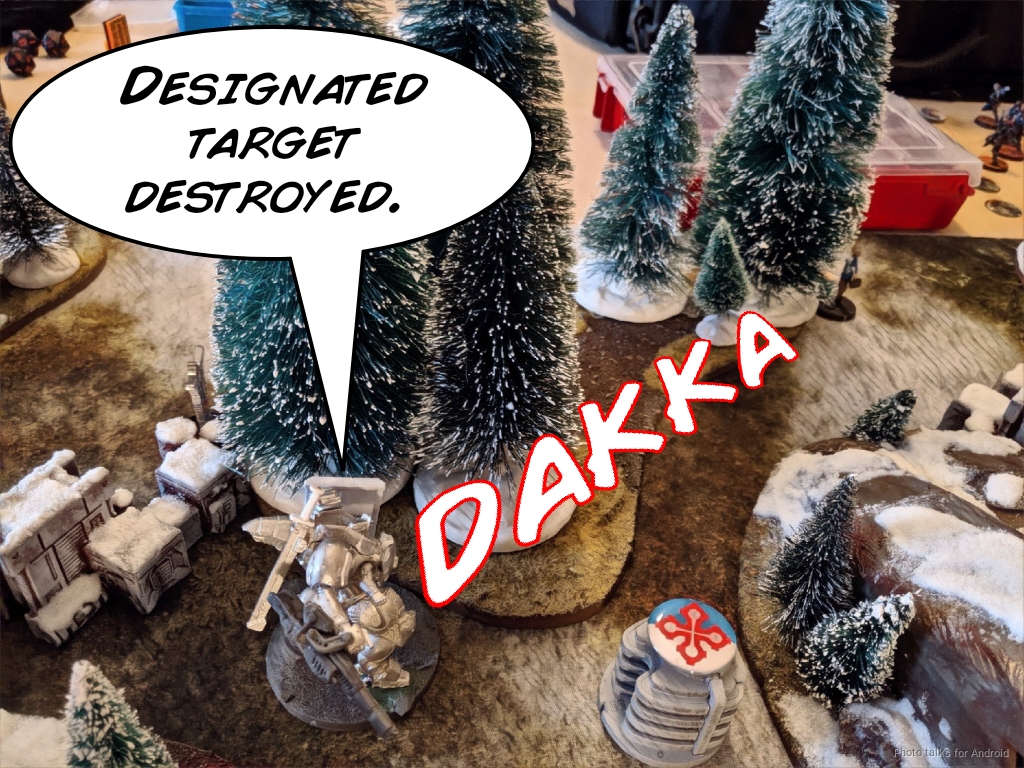
I’ve got to get the Designated Target with my Lizard, who is my DataTracker. Since it was the point of the bringing the Lizard, I spec fired a grenade at the HVT and whiffed.
Rather than rain grenades and be upset about continuing to whiff a bunch of rolls, I decide to be a little aggressive and shove the Lizard forward, trading fire with the Muyib FO. I beat out the DEP but he passes ARM. He beats me with a flash pulse, but I pass BTS. Finally, when I’m in cover and just out of 8″, I shock the Muyib off the table on the third order.
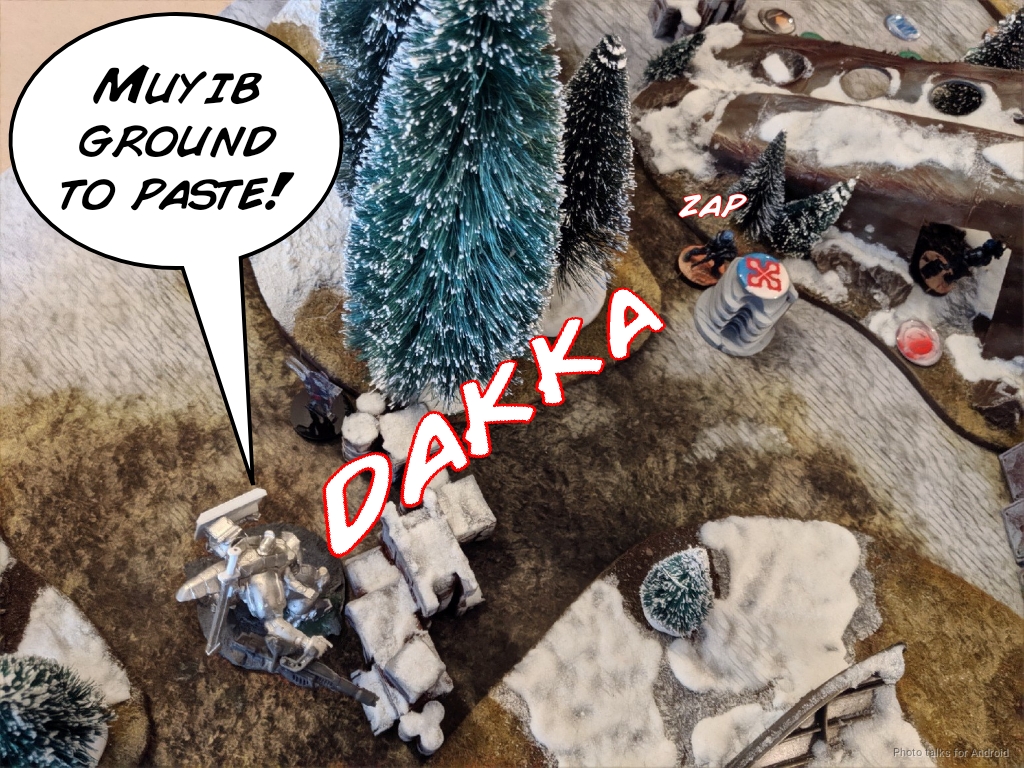
I keep advancing, putting me into view of the Designated Target, and this time I do two shock wounds, securing me those points.
Finally, I leverage the Lizard’s pilot and flip the console back to me…
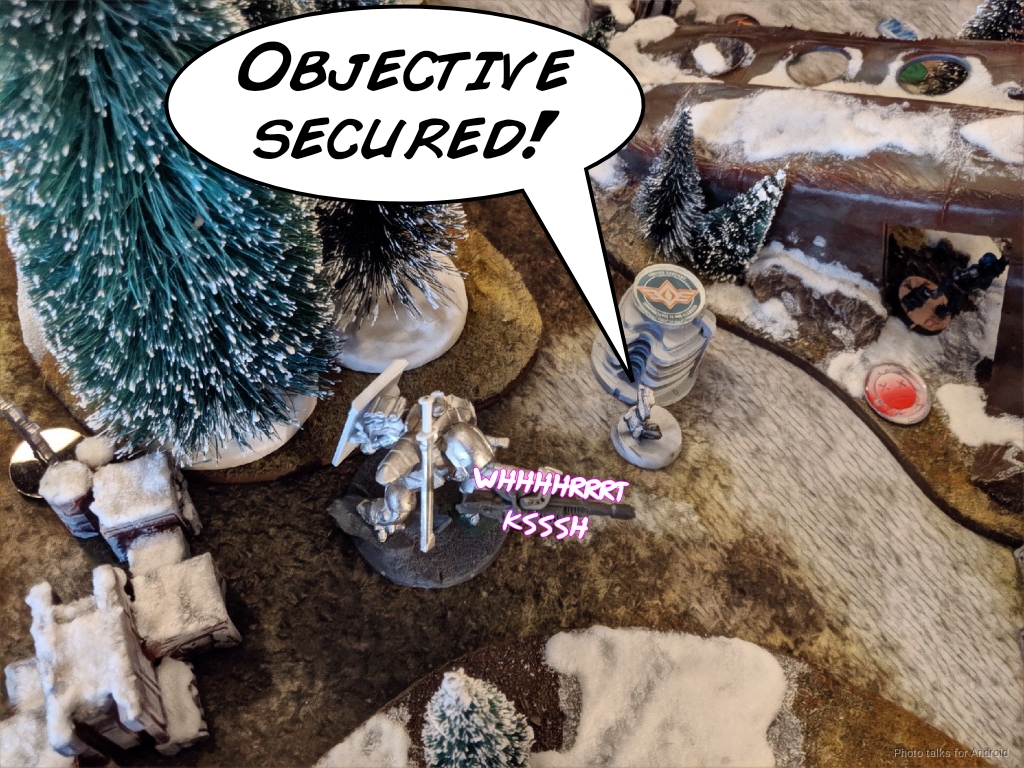
which makes it a
9-1 Bakunin Victory!
Post Game Analysis
Okay, so that was a really fun game. I really like the Lizard. I do wish that it had the HGL and the HFT in one profile, but that would be too awesome. It’s not so much that I actually used the HGL to grenade something successfully, it’s that it was an option and it shaped Erik’s game and applied a lot of positional and order pressure. He had to think about keeping his guys spread out, which is hard on this very challenging table and costs a lot of orders.
So just by having the Lizard it messed with Erik’s play, just like a Fiday does. Against a less experienced player, who forgets about the HGL, then I get some crazy value out of dropping grenades on a link, or worse yet, using Pi Well to forward observe first. Speaking of which, I still love Pi Well, but he didn’t really get to do anything this game. Avicenna and the link did most of the heavy lifting, along with the TAG at the end of the game. No matter. He was there if I needed him.
I do need to think more about how to power the Morlocks. They’re definitely a key part of my play when I have them in Vanilla, and they fill a lot of roles in Bakunin too, perhaps moreso than Vanilla. I felt under-ordered for the Morlocks this game, so I may have to make an effort in list building to get some more orders for them.
I’ve long been annoyed with Sin Eaters and their “overcostedness” versus Reakton Zonds, especially since they really can’t go on the attack. I think that was before I started playing on tables with visual modifiers regularly, where the Mimetism stacks to become really annoying. I don’t think my Sin-Eater actually did anything to Erik, in terms of winning a face to face with something actually shooting lethal stuff at him, but I think it fulfilled a pretty strong deterrent role. He did a lot of smoke throwing to get around it, which is definitely worth it for me. I think the table did a lot of winning the game for me, because it allowed me to make it very difficult for Erik to advance.
I don’t particularly like the Moderator link, but it was… fine. It’s a reasonable thing to take, gives you 5 orders and two useful guns for really cheap. I’d much rather have a single Taskmaster, but that basically costs the same as the entire link and has 4 less orders. It’s much easier to deploy and defend though. A very reasonable and well defined tradeoff. I still don’t particularly love Bakunin, but I’m enjoying the different puzzle they’re presenting.