
Maggie’s Big Butt
Obadiah (Nehemiah) was in town for the long weekend, so in addition to handing off some of the armies I’d sold to folks in the San Francisco/Oakland area, we met up for lunch and a quick game of Infinity. Obi is playing in the 2022 Rose City Raid which is fast approaching, which means I’ll be playing a lot of practice games with folks that are attending. Adam was kind enough to host our game on his Brutal Cities table.
Overview
- Mission: Biotechbore
- Forces: Dahshat Company versus Jurisdictional Command of Tunguksa (300)
- Deploy First: Tunguksa
- First Turn: Tunguska
I threw together a Dahshat list with some silly tricks in it. Really all I wanted out of the list was to put Maggie on the table. To power her, I took some cheap orders in the form of Ghulam link with the NCO profile, and what looked like a Dozer and two Traktor Muls but was actually Sforza and a Lu Duan. I thought that’d be a fun trick to play on someone, not that Obi would really fall for it, but it was just a fun idea I had.
Unfortunately for me we randomly selected Biotechvore for our practice mission, which was something I had neither prepared for or thought about. Fortunately for me, neither had Obi. It’s worth noting that we’re playing with the Rose City Raid rules. This year, that means there’s no Loss of Lieutenant (and also no way to nominate a new one so you can lose your NCO orders unless you have Chain of Command).
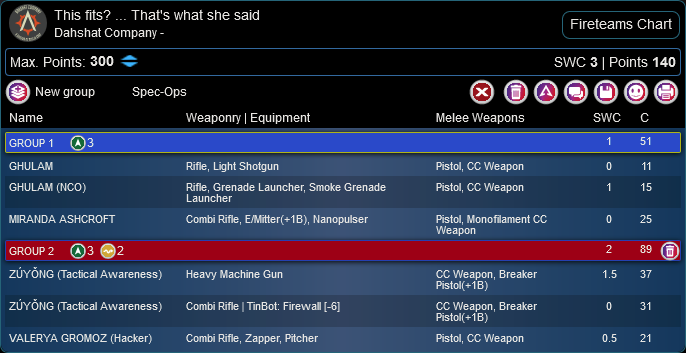
This fits? … That’s what she said
GROUP 1
7
1
GHULAM (Lieutenant) Rifle, Light Shotgun / Pistol, CC Weapon. (0 | 11)
SFORZA FTO Viral Rifle, Adhesive Launcher(+1B), Nanopulser / Heavy Pistol, PARA CC Weapon(-6). (0 | 26)
LÙ DUĀN Mk12, Heavy Flamethrower(+1B) ( | Deployable Repeater) / PARA CC Weapon(-3). (0 | 24)
GROUP 2
MAGHARIBA MULTI Heavy Machine Gun, Heavy Flamethrower(+1B), Mine Dispenser / AP Heavy Pistol, CC Weapon. (1.5 | 85)
MAGHARIBA PILOT (Paramedic) Light Shotgun, D-Charges / Pistol, CC Weapon. (0 | 0)
MIRANDA ASHCROFT Combi Rifle, E/Mitter(+1B), Nanopulser / Pistol, Monofilament CC Weapon. (0 | 25)
ZÚYǑNG (Tactical Awareness) Heavy Machine Gun / CC Weapon, Breaker Pistol(+1B). (1.5 | 37)
VALERYA GROMOZ (Hacker) Combi Rifle, Zapper, Pitcher / Pistol, CC Weapon. (0.5 | 21)
FANOUS REMOTE Flash Pulse / PARA CC Weapon(-3). (0 | 7)
4.5 SWC | 300 Points | Open in Infinity Army
The rest of the list was about having a backup plan in the form of a Zuyong tac aware haris. I sent a copy of this list to Tim (Chainsaw) with the Fugazi in the primary group, and he convinced me to move them into the group with the Zuyong. For any other mission, I think he’s right, but in the Biotechvore case I really wanted the extra orders in Group 1. It’s a pretty straightforward list with some profiles I’ve always liked: Valyeria and Miranda. I’ve been trying to make her work for me since she debuted in N2, but I think it really took the E/Mitter profile and the link changes to make her reach her full potential. There’s been a lot of updates to her through the years, like the change from Irregular to Regular and the various link options, but something about the new changes to links just make her make sense to me.
Obi’s a big fan of Perseus in a 5-model Securitate link. It always gives me fits, and this time he added a Vostok and Raoul for good measure. It’s a pretty solid list and I think Obi’s willingness to run the 5-model core in its own group is pretty powerful.
Jurisdictional Command of Tunguska
GROUP 1
INTERVENTOR (Lieutenant, Hacker, Hacking Device Plus) Combi Rifle ( | FastPanda) / Pistol, CC Weapon. (0.5 | 26)
SALYUT (Hacker, EVO Hacking Device) ( ) / PARA CC Weapon(-3). (0.5 | 15)
GRENZER (Marksmanship) MULTI Sniper Rifle / Pistol, Breaker Pistol, CC Weapon. (1.5 | 35)
VOSTOK (Mimetism [-6]) Mk12(+1 Dam) / PARA CC Weapon(-3). (0 | 44)
GROUP 2
CLOCKMAKER Combi Rifle, D-Charges ( | GizmoKit [+1B]) / Pistol, CC Weapon. (0 | 18)
ZONDBOT PARA CC Weapon(-3). (0 | 3)
SPECTOR (Parachutist, Combat Jump) Boarding Shotgun, Drop Bears / Pistol, E/M CC Weapon, DA CC Weapon. (0 | 33)
WARCOR (360º Visor) Flash Pulse ( ) / Stun Pistol, PARA CC Weapon(-3). (0 | 3)
PERSEUS FTO Breaker Combi Rifle(+1 Dam), Nanopulser, Smoke Grenades / Heavy Pistol(+1B), DA CC Weapon. (0 | 32)
SECURITATE Heavy Machine Gun / Pistol, CC Weapon. (1 | 21)
3.5 SWC | 300 Points | Open in Infinity Army
It’s good to get a sanity check by playing Obi as I re-engage with Infinity. He’s an excellent player in his own right, and his meta is also pretty cutthroat and has been holding enough tournaments recently that they’re all in reasonable practice. If I didn’t fold like a house of cards I’d be pretty happy with the game–and of course getting to hang out with Obi is always a treat.
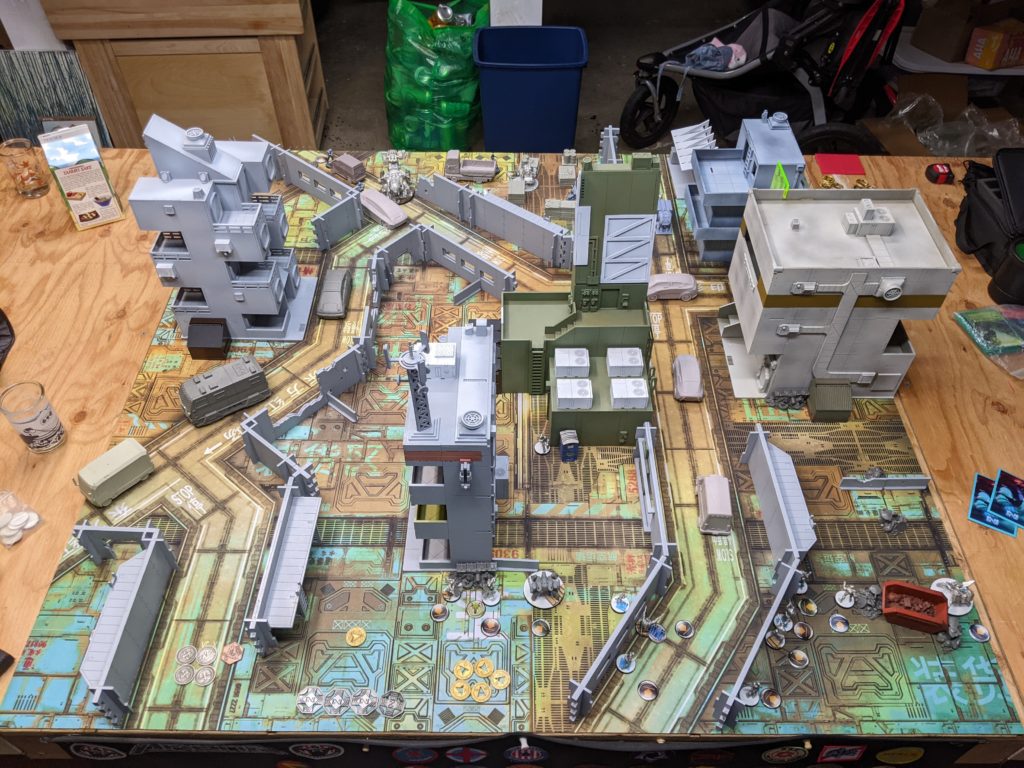
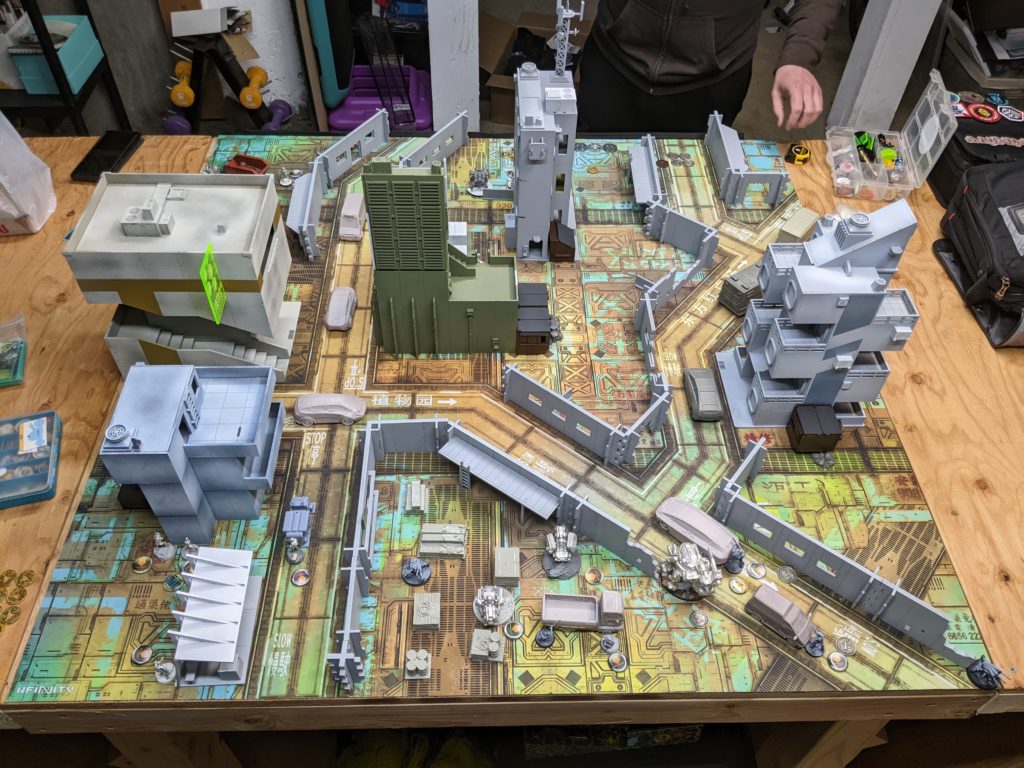
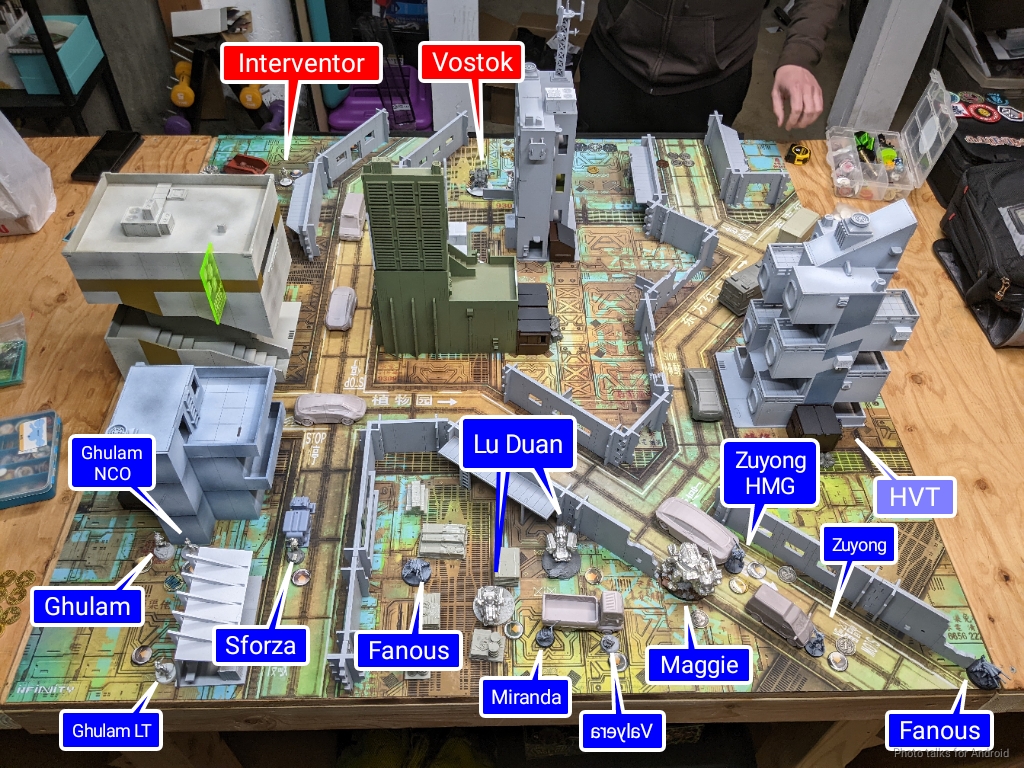
Deployment
Obi decided to deploy first, so I gave him what I thought was the worse side. He basically clustered everything on his right, with the Securitate, Interventor, Clockmaker, and Salyut all over there. The Grenzer Haris was in the middle, and his lonely Warcor was off by herself on the left.
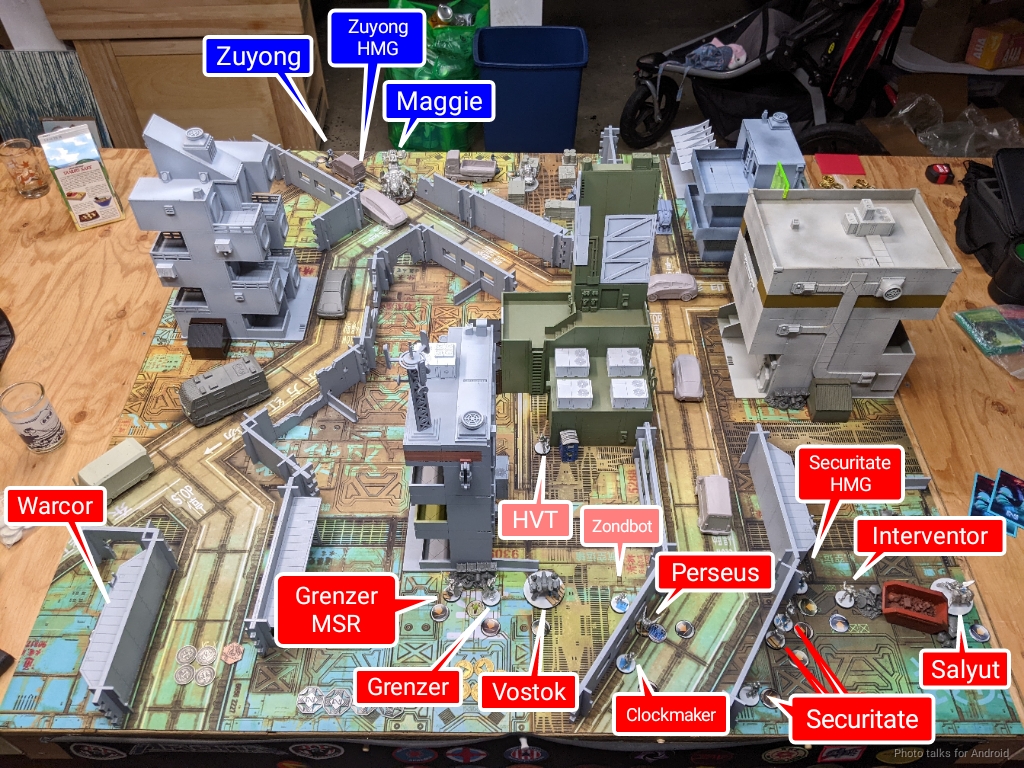
I took the side that I took because I wanted some walls to protect me from the Grenzer sniper–the Vostok hadn’t shown up yet out of reserve. I didn’t want to contest any firelanes, really, because order pools and points are so important for Biotechvore. I contested some diagonal firelanes with the Fanous and basically hid everything else. I thought a little bit about my advancement paths, but really I was just trying to find a reasonable spot for Maggie to live–there weren’t many in either deployment zone, and even though Maggie is ARM 11 in cover, she’s still kill-able.
Spoiler Alert: I lose this game. I could blame the list (it really wasn’t doing me any favors), but really it was my piloting of it.
I think this is a really good example of failure in deployment and a reactive gameplan snowballing really badly. I had more or less complete knowledge of what Obi’s plan was, given his obvious list composition and deploment. He was very strong on my left side with the Securitate core and the Interventor providing white noise in case I had MSV2 to take down Perseus through his smoke. The Grenzers and whatever 3rd member of the team that was going in the middle was just going to punch forward and try to get out of the zone. What I didn’t know at deployment was what his combat groups and therefore order pools looked like, which would determine the degree to which he could attack me.
I’m also horrendously out of practice with Biotechvore. Ever since Panic Room came out, which is just a more fun mission to play, I haven’t really given Biotechvore much thought. I actually think ITS 13 Biotechvore is a reasonably well designed mission, and it presents a challenging problem to solve outside the typical Infinity experience. It also has a nice catchup mechanic or alternate line of play option with the classifieds as well.
That said, I don’t think I’ve ever had a fun game of Biotechvore, at least in comparison to other missions. I’ve won some, I’ve lost some, but one of the players is usually having a bad time, which can cause some salt for the losing party and guilt for the winning party. I think Biotechvore shines the most when used in a Showdown tournament format, because it forces you to really think carefully about list construction and your gameplan. Then it becomes a test of your abilities in risk assessment, resilience to failure, and excellence of execution.
It is an extremely disruptive mission in a 5-mission tournament format. It requires very specific list design and values mobility, midfield survivability, and the overall resilience of a list in ways that are atypical of more standard missions. This is fine in a showdown tournament as you can highly optimize lists and plans, but in a 5-round tournament, it often overconstrains list design for at least one of your two lists.
As an example, the last time I played in a 5-round tournament with Biotechvore, it was at the Humboldt Irregular in 2019 and I consciously made the decision to not design or plan for Biotechvore. I won the other 4 games, but unfortunately for me, my Biotechvore game was against none other than Reuben (Polynikes), who mopped the floor with me. It’s unlikely I would’ve won my Biotechvore game against anyone else, or I would’ve won any other mission against Reuben,
Rose City Raid is intended to be quite difficult, on purpose. We design the mission lineup to create difficult puzzles for list construction as well as execution on game day, so Biotechvore made an appearance this year. In solidarity with our players, I suffered through it too, haha! In any case, brief whining session on Biotechvore over.
I think the biggest problem with my choice of deployment zone was the fact that for everything in them middle, I needed to exit the region either horizontally or diagonally, robbing me of a ton of movement forward–the most precious resource for turn 1 of Biotechvore. One of the key lessons of Biotechvore in planning your first turn meticulously. That involves several things:
- Travel Path – There has to be a sane exit path for the Biotechvore zone that minimizes exposure to enemy units for order efficiency purposes
- Final Position – Wherever I end up has to be reasonably defensible, I can’t just be chilling in the middle of no man’s land. Obviously I should be out of the zone too.
The problem was that I only had a plan for the Zuyong Haris. There wasn’t really a solid plan for the Ghulams other than “go forward,” same as the Lu Duan and the Fanous. My gameplan going into deployment was to null deploy, thereby not slowing Obi down, and then try to survive and “figure it out” on my turn. One simply cannot do that and expect to win against a player of Obi’s caliber (or really anyone). Let’s see how it went.
Turn 1
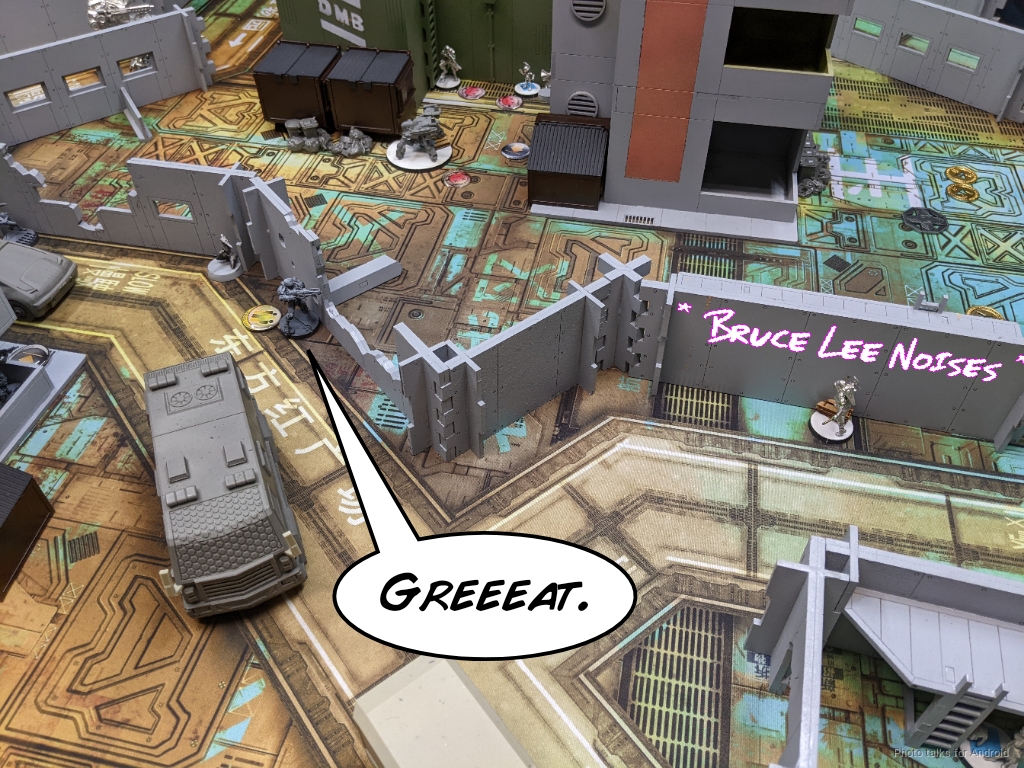
Top of 1 – Tunguska
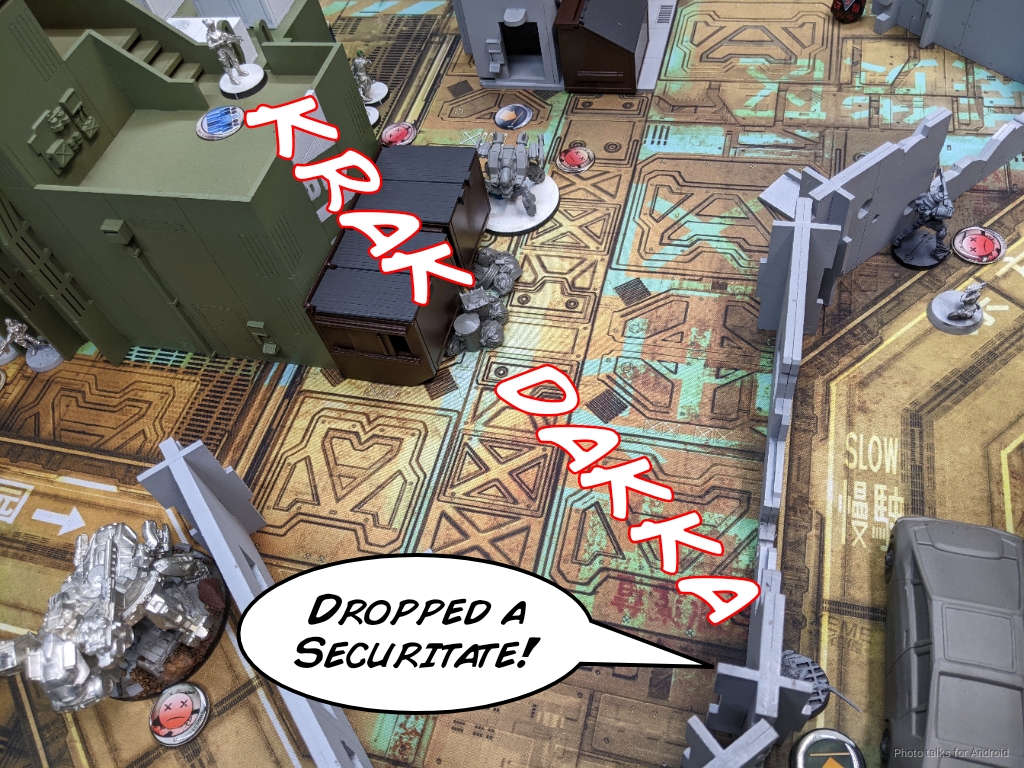
Judging by the hemming and hawing from the other side of the table, Obi didn’t really have a particularly well thought out plan of attack either. He did, however, have a plan to secure the central building with his Securitate team, which was light years ahead of the planning I had. That, coupled with my complete lack of contesting firelanes, resulted in the following at the end of Obi’s first turn.
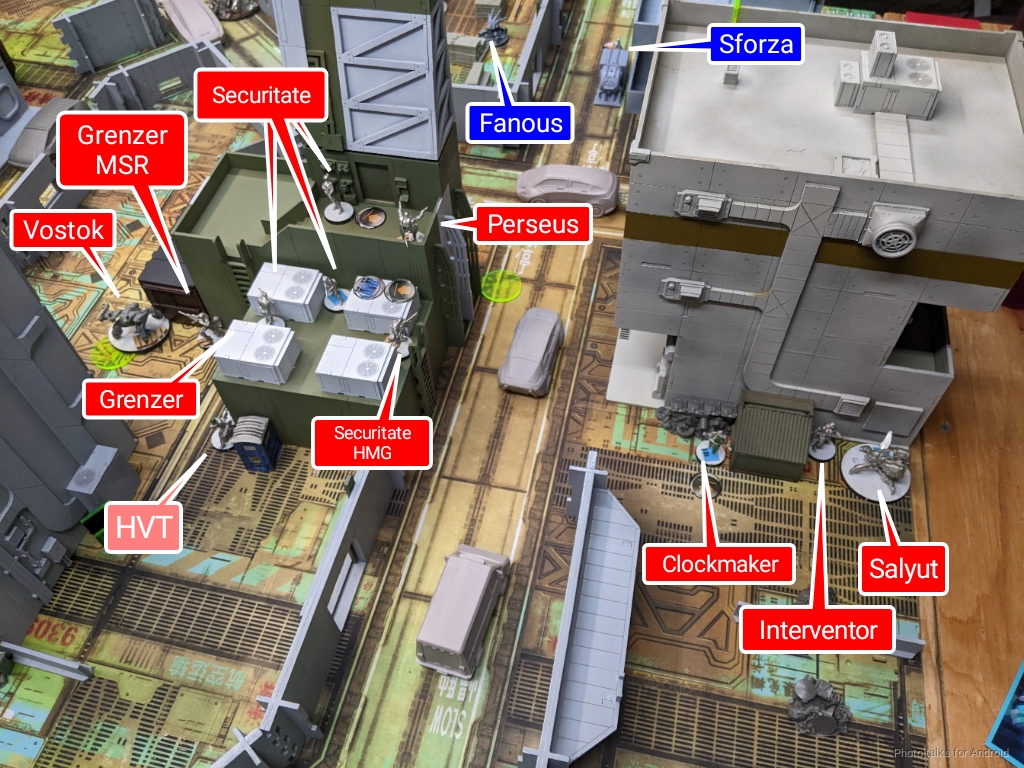
Everything except the Warcor (which made her save) was out of the zone, and Perseus and the Securitate HMG were out to ARO things along with the Vostok. Perseus had put down smoke to allow them to get to the places they needed to go. I had docked orders from the larger primary group, I think that was a mistake and I should have docked orders from the link. Three orders to maneuver a 5-model link to safety really isn’t enough.
Bottom of 1 – Dahshat
Well, now that I saw the state of the board, I could formulate a plan. This statement means that I’ve lost the initiative, or sente for all you Go players, and am just playing reactively now. There are a few structural weaknesses in Obi’s positioning that I can exploit. The Grenzers aren’t exposed at all, but they’re all in a line around the corner so I could conceivably hit them with a template of some sort. The Interventor, Clockmaker, and Salyut also exhibit this structural weakness, but they’re adequately screened by Perseus and the Securitate HMG, so that weakness isn’t as pronounced.
The Securitate team, however, is quite positionally strong. They are elevated and I have to advance far out of position to engage them in favorable range bands, meaning I lose cover to do so. The Vostok, on the other hand, is immediately accessible and gating progress for Maggie and the Zuyong team. So I decide to deprioritize getting the the Fanous, the Ghulam, and the Lu Duan out of the zone until I can deal with the Vostok. Once the Vostok is down, I can get the Ghulams out to preserve my NCO order, and then I’ve got the Zuyong to problem solve anything left.
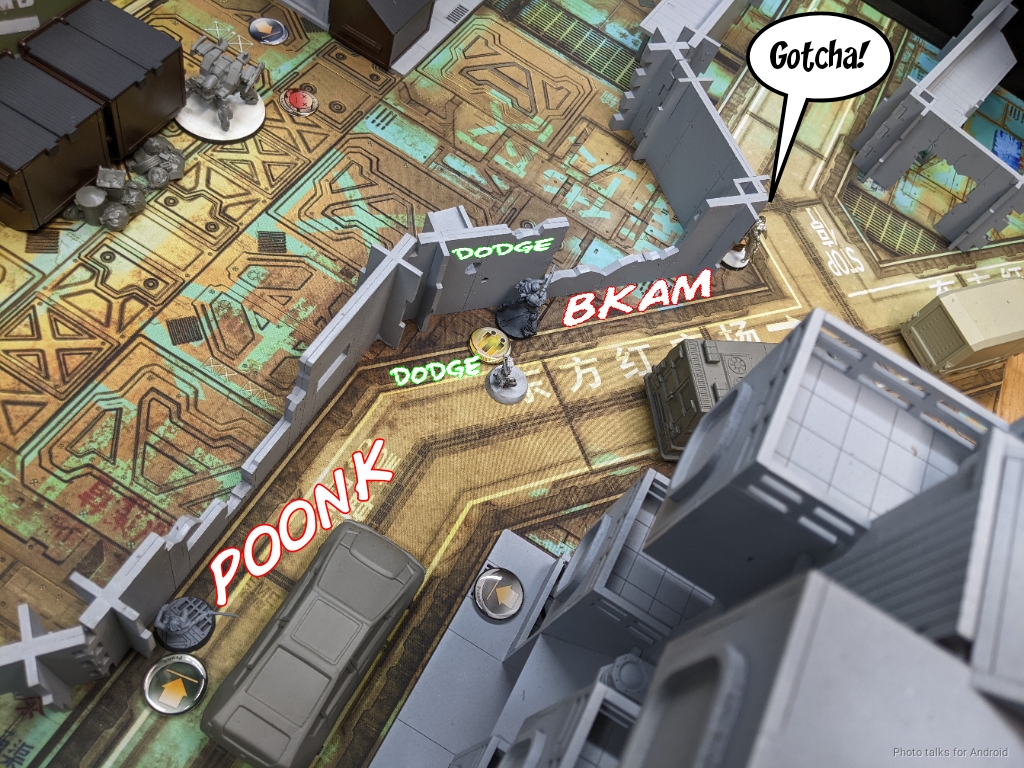
I start things off by challenging the Vostok directly with Maggie’s HMG to get Miranda into position to leverage her E/Mitter. The odds are really not all that stellar:
| 28.48 | 54.73 | 16.79 |
As expected, nothing happens. I do manage to get Maggie and Miranda out of LoF by a hair, which lets me drop a pair of mines covering the Grenzers and the Zondbot. This really exploited the weak structure of the Grenzer’s positioning, which I felt pretty smart about. I’m sure this scenario had gone through Obi’s head but he had decided to risk it, mostly due to lack of orders to do anything else.
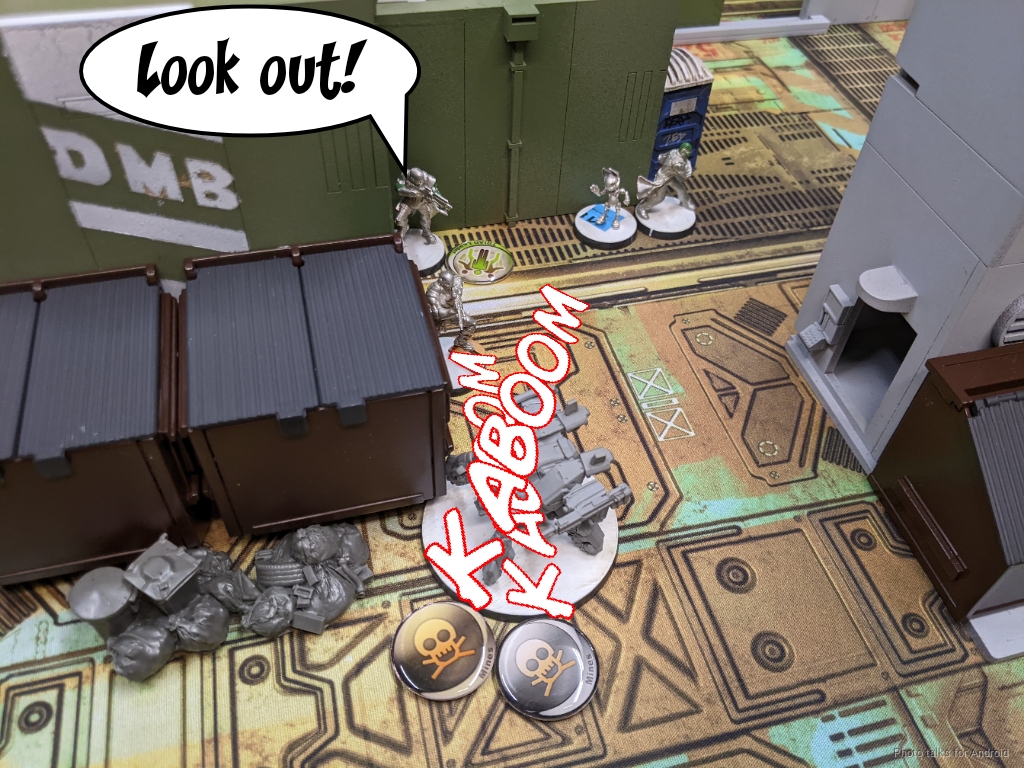
I triggered the dodge using Miranda’s E/Mitter, but was at 17″ so I auto-missed the Vostok. The Vostok and one of the Grenzer both dodged successfully, even on -6 for the Grenzer, and the other Grenzer passed both his ARM saves. The Zondbot was not so lucky and went down. One might be tempted to blame the dice here and say I lost the game because this clever trick didn’t work out. To that I say you cannot rely on the dice to get you the win. You have to know when to prosecute an objective and when to stop. In this case I was running out of orders so I tried something more risky. I pushed Maggie into what I thought was 10.5″ heavy flamethrower range. Obi checked my ZoC to see if he could hack through the Vostok’s repeater–we were out, thankfully, but the measurement suggested that we were easily within 10″, so I asked for AROs. As he should, Obi fired the Vostok’s Mk 12. I templated with the +1 burst flamethrower, and as suspected, we were just within range!
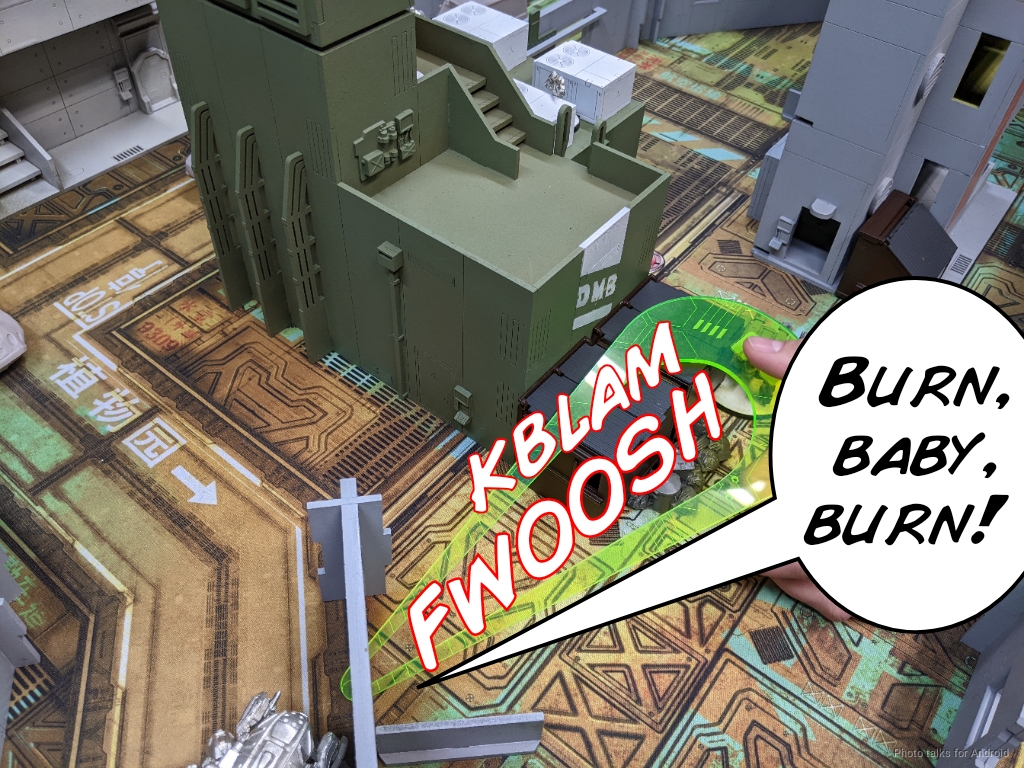
The odds are surprisingly good here. My odds of wounding the Vostok with the burst two flamethrower is shockingly high:
| 84.00 | 16.00 |
In retrospect, this isn’t particularly surprising, as the Vostok is only ARM 3 and I’m stripping cover. I actually have a 64.80% chance of KOing the Vostok and a 33.70% chance of taking it off the table. Wild. Conversely, the Vostok has a much tougher time wounding Maggie on ARM 11, effectively:
| 70.67 | 29.34 |
Reasonable chance of doing one wound, but only a 3% chance of doing two. 0.10% chance doing enough wounds to KO Maggie outright. In any case, the dice are slightly kinder to me here and I KO the Vostok and only take one wound, as expected. It’s now time to get the Ghulams out of trouble, so I use the NCO order to drop smoke for them and then push them forward. I had put the Dozer in the link at the end of deployment in my head, which would’ve clued Obi into the ruse, but I forgot to mention this due to my sleep deprivation as of late. Obi, ever gracious, let it slide. In any case, the 4-modelgroup made their way forward.
I melt the Securitate HMG with some viral rifle fire, but Perseus is made of sterner stuff and successfully throws smoke to block further engagement.
Sadly, all of this meant I had run out of orders to get the Lu Duan to safety, but I made a valiant effort and did a Coordinated Order to get the Lu Duan as far forwards as I could, along with pushing Maggie and Miranda up. I was a little conservative in my advancement of Maggie, as I didn’t want to make it too easy for Perseus to engage her on Obi’s next turn or worse have her be possessed by the Interventor.
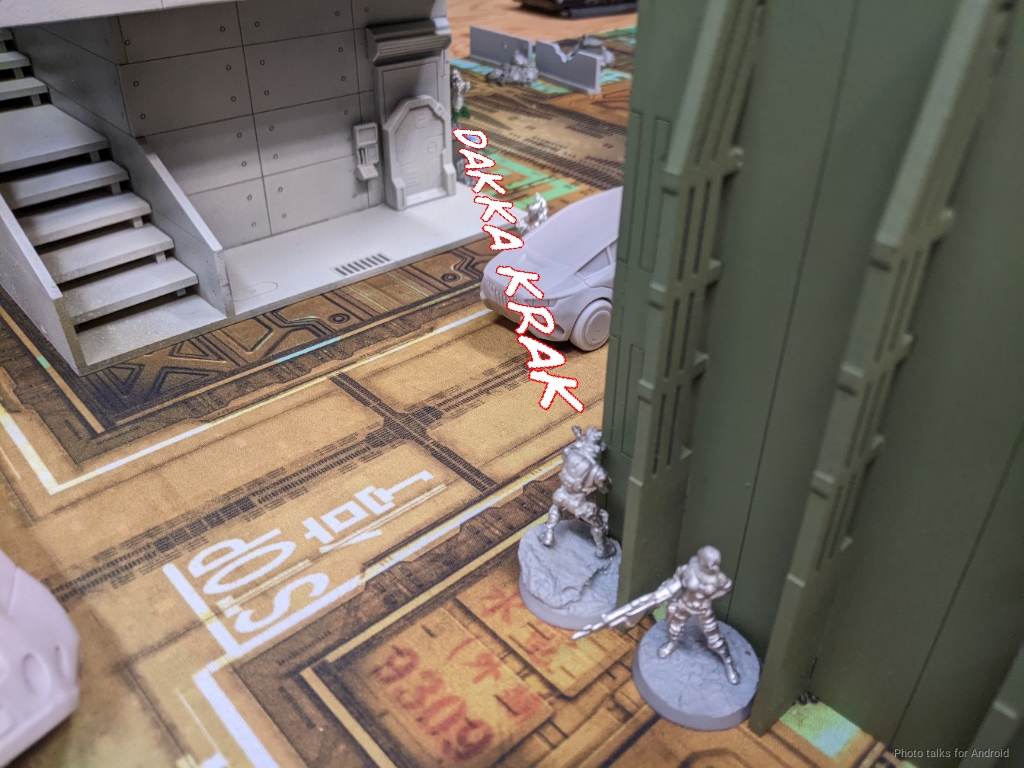
In any case, it was time to advance the Zuyong. I took out a Securitate on the way for free, basically, and then it was time to engage the Grenzers.
Unfortunately, it took the rest of my order pool to drop both Grenzers, which meant the Fanous were making rolls.
To my horror, I had eyeballed 16″ incorrectly (I had put my HVT down as a reference point but didn’t estimate correctly), so I lost Sforza, my Ghulam Lt, both Fanous, the Lu Duan, and Maggie to the biotechvore zone. This was plain and simple just me being tired. It wasn’t a matter of running out of orders or movement–I had both. It was me being too risk adverse to push Maggie half an inch forward to really ensure that she was safe, and that was a combination of me eyeballing things poorly when I was tired, not having a coherent final placement for Maggie at the end of my turn that I was sure was safe, and not playing to the mission, i.e. protecting my forces.
A more dispassionate and well rested me would have realized that even if I was making Maggie more vulnerable in positioning, that still costs Obi resources. At this point, he was really down on resources himself, as I had basically killed half his list on the first turn:

Of course, the damage I had done to myself was about the same:
I was in big trouble now. Obviously the most heinous mistake was not pushing Maggie, Sforza, and the Ghulam forward slightly, out of cover, but I think the real problem was just my lack of situational awareness. I could tell from Obi’s body language that I had really damaged his order pools, but I should’ve stopped to ask how badly–it’s public info, after all. Had I seen the reduced list above, I would’ve been far less risk-adverse. Sure, he can kill Sforza and my Ghulam Lt out of cover, but that means Perseus isn’t killing Maggie, which is great.
Taking the shot from Sforza on Perseus was also a mistake, I could’ve used that order to get the Lu Duan out. Letting the two Fanous die to take out the two Grenzers was I think worth it though. They’re not really contributing anything but orders at this point, and the Lu Duan would have been pretty instrumental in digging out things with its Flamethrower and MSV1.
Turn 2
Top of 2 – Tunguska
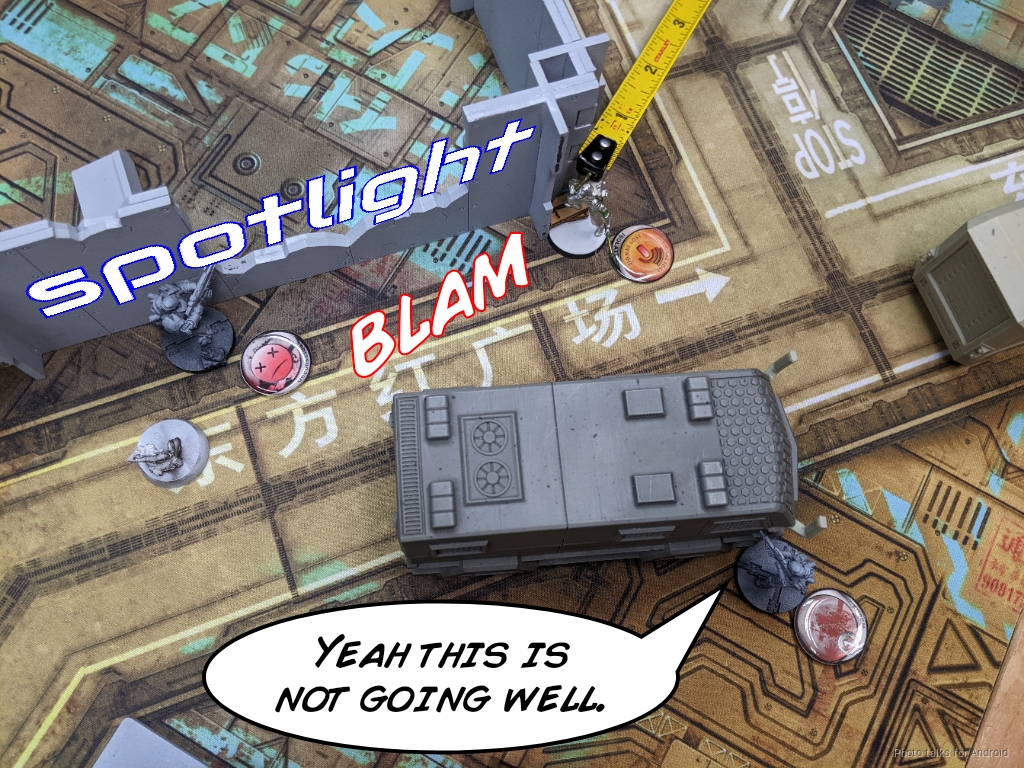
In any case, Obi goes for the Raoul play, even throwing up Controlled Jump on the Salyut with a precious order. He fails the landing, but ends up anywhere in his Deployment Zone thanks to Confused Deployment.
Raoul takes out my Zuyong HMG, but I stop him cold with a lucky E/Mitter shot from Miranda. I think I made a slight positioning error with Valyera, she should’ve been on the other side of the bus from the Zuyong HMG, which would let me have safely Spotlit Raoul from cover, breaking the link. I had a classified to do that, and RCR is red deck so I had to do it twice. In any case, Raoul’s rampage was over.
The Clockmaker takes down my Ghulam and the Interventor manages to get the same classified on the Ghulam.
Obi then tries to pick up one of the Grenzers with his Securitate Paramedic but fails the PH roll and kills it.
Bottom of 2 – Dahshat
Things are totally broken now for me. I have to deal with Raoul, who is infuriatingly hard to kill now that he’s been upgraded to Mimetism -6. I decide the most reasonable thing to do is to attempt to do it with Miranda, and then set up a run on Obi’s HVT to secure it and get Follow Up with my remaining Zuyong. Miranda first has to deal with the Securitate Paramedic, which she does easily. Unfortunately this lets Raoul dodge around.
I keep trying to take him out, but keep failing. I eventually throw the Zuyong at him but fail an ARM save against the boarding shotgun template and whiff all my shots even with Raoul out of cover. Frustrating, but statistically normal:
| 63.81 | 36.19 |
Turn 3
Top of 3 – Tunguska
In any case, Raoul finishes off Valyeria with a template. I do successfully spotlight him though and strip a wound with a lucky combi shot from Miranda.
Obi throws Perseus into suppression and passes turn.
Bottom of 3 – Dahshat
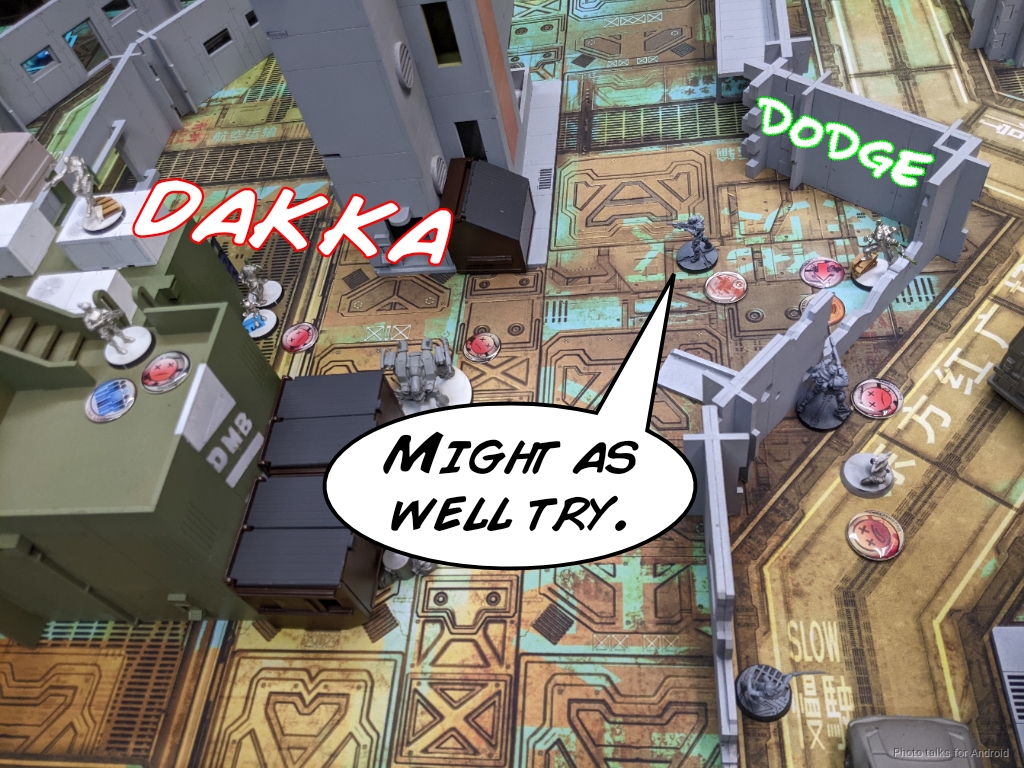
At this point, I have one shot to get any points on the board, which is to run across the table with my Zuyong, get Follow Up, and secure Obi’s HVT. This would put me at 2 classifieds to Obi’s one. I’ve definitely killed at least 75 army points, as has Obi, and neither of us have more than 150 surviving points now thanks to Miranda taking down the Paramedic. If I can do this, that would put me at 5 objective points (1 for each classified, 2 for more classifieds, 1 for killing at least 75), and Obi would be at 4 points (1 for his classified, 2 for killing more, and 1 for killing at least 75).
If I can kill Raoul, I just need to get through one, maybe two rounds of suppression shooting from Perseus and then I’m behind him and can make the WIP roll on the HVT for the win, shockingly. Miranda has a go at taking down Perseus and fails.

I manage to get the Zuyong past Raoul, but I take three hits from Perseus after failing a dodge roll and that’s game.
At the end of it, it’s a
4-2 Jurisdictional Command of Tunguska Victory!
Post Game Analysis
Well I think it’s pretty clear when it all went wrong for me. I’m at the point in my Infinity career that once I’m up against the ropes I generally can come up with a reasonable plan of action and a way to execute on it. I hadn’t mathed out the possibility for the win at the table, but at least I had quickly identified the most likely way for me to get there. In any case, there were just so many ways for me to not be in such a terrible position, and in my mind, my failings in this game were all tied to my lack of planning and foresight.
Even though I had done immense damage to Obi on the first turn, even without a coherent plan, I didn’t do the right amount of damage, i.e. not backing off with Sforza versus Perseus. I also didn’t stop to assess the situation, which would have let me take more risks and thereby kept Maggie alive. Anyway. A rough game for both of us. The deciding factor was Obi had a positional advantage with Perseus and Raoul at the end, thanks to his superior planning, which kept me from the win.
Worth noting that I should’ve tried to just drop a smoke grenade on Perseus and solved the suppression fire problem that way.
I gotta say I love the list. For any other mission than Biotechvore I felt very good about it. I’ll probably tweak it some–the Sforza/Dozer and Lu Duan/Traktor Mul trick isn’t really all that meaningful in Biotechvore, it’s more just for my own amusement. Anyway, thanks for reading!

Amazing battle report as always. Also, as a Tunguska player myself, that’s a very interesting Tunguska list. Lots to learn here!