
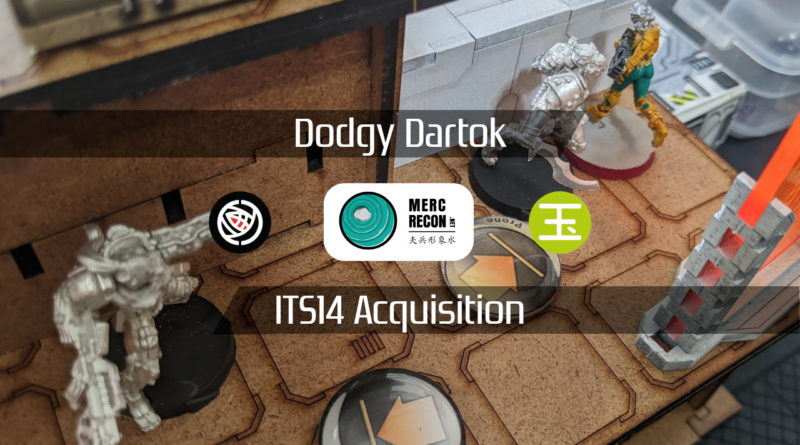
Dodgy Dartok
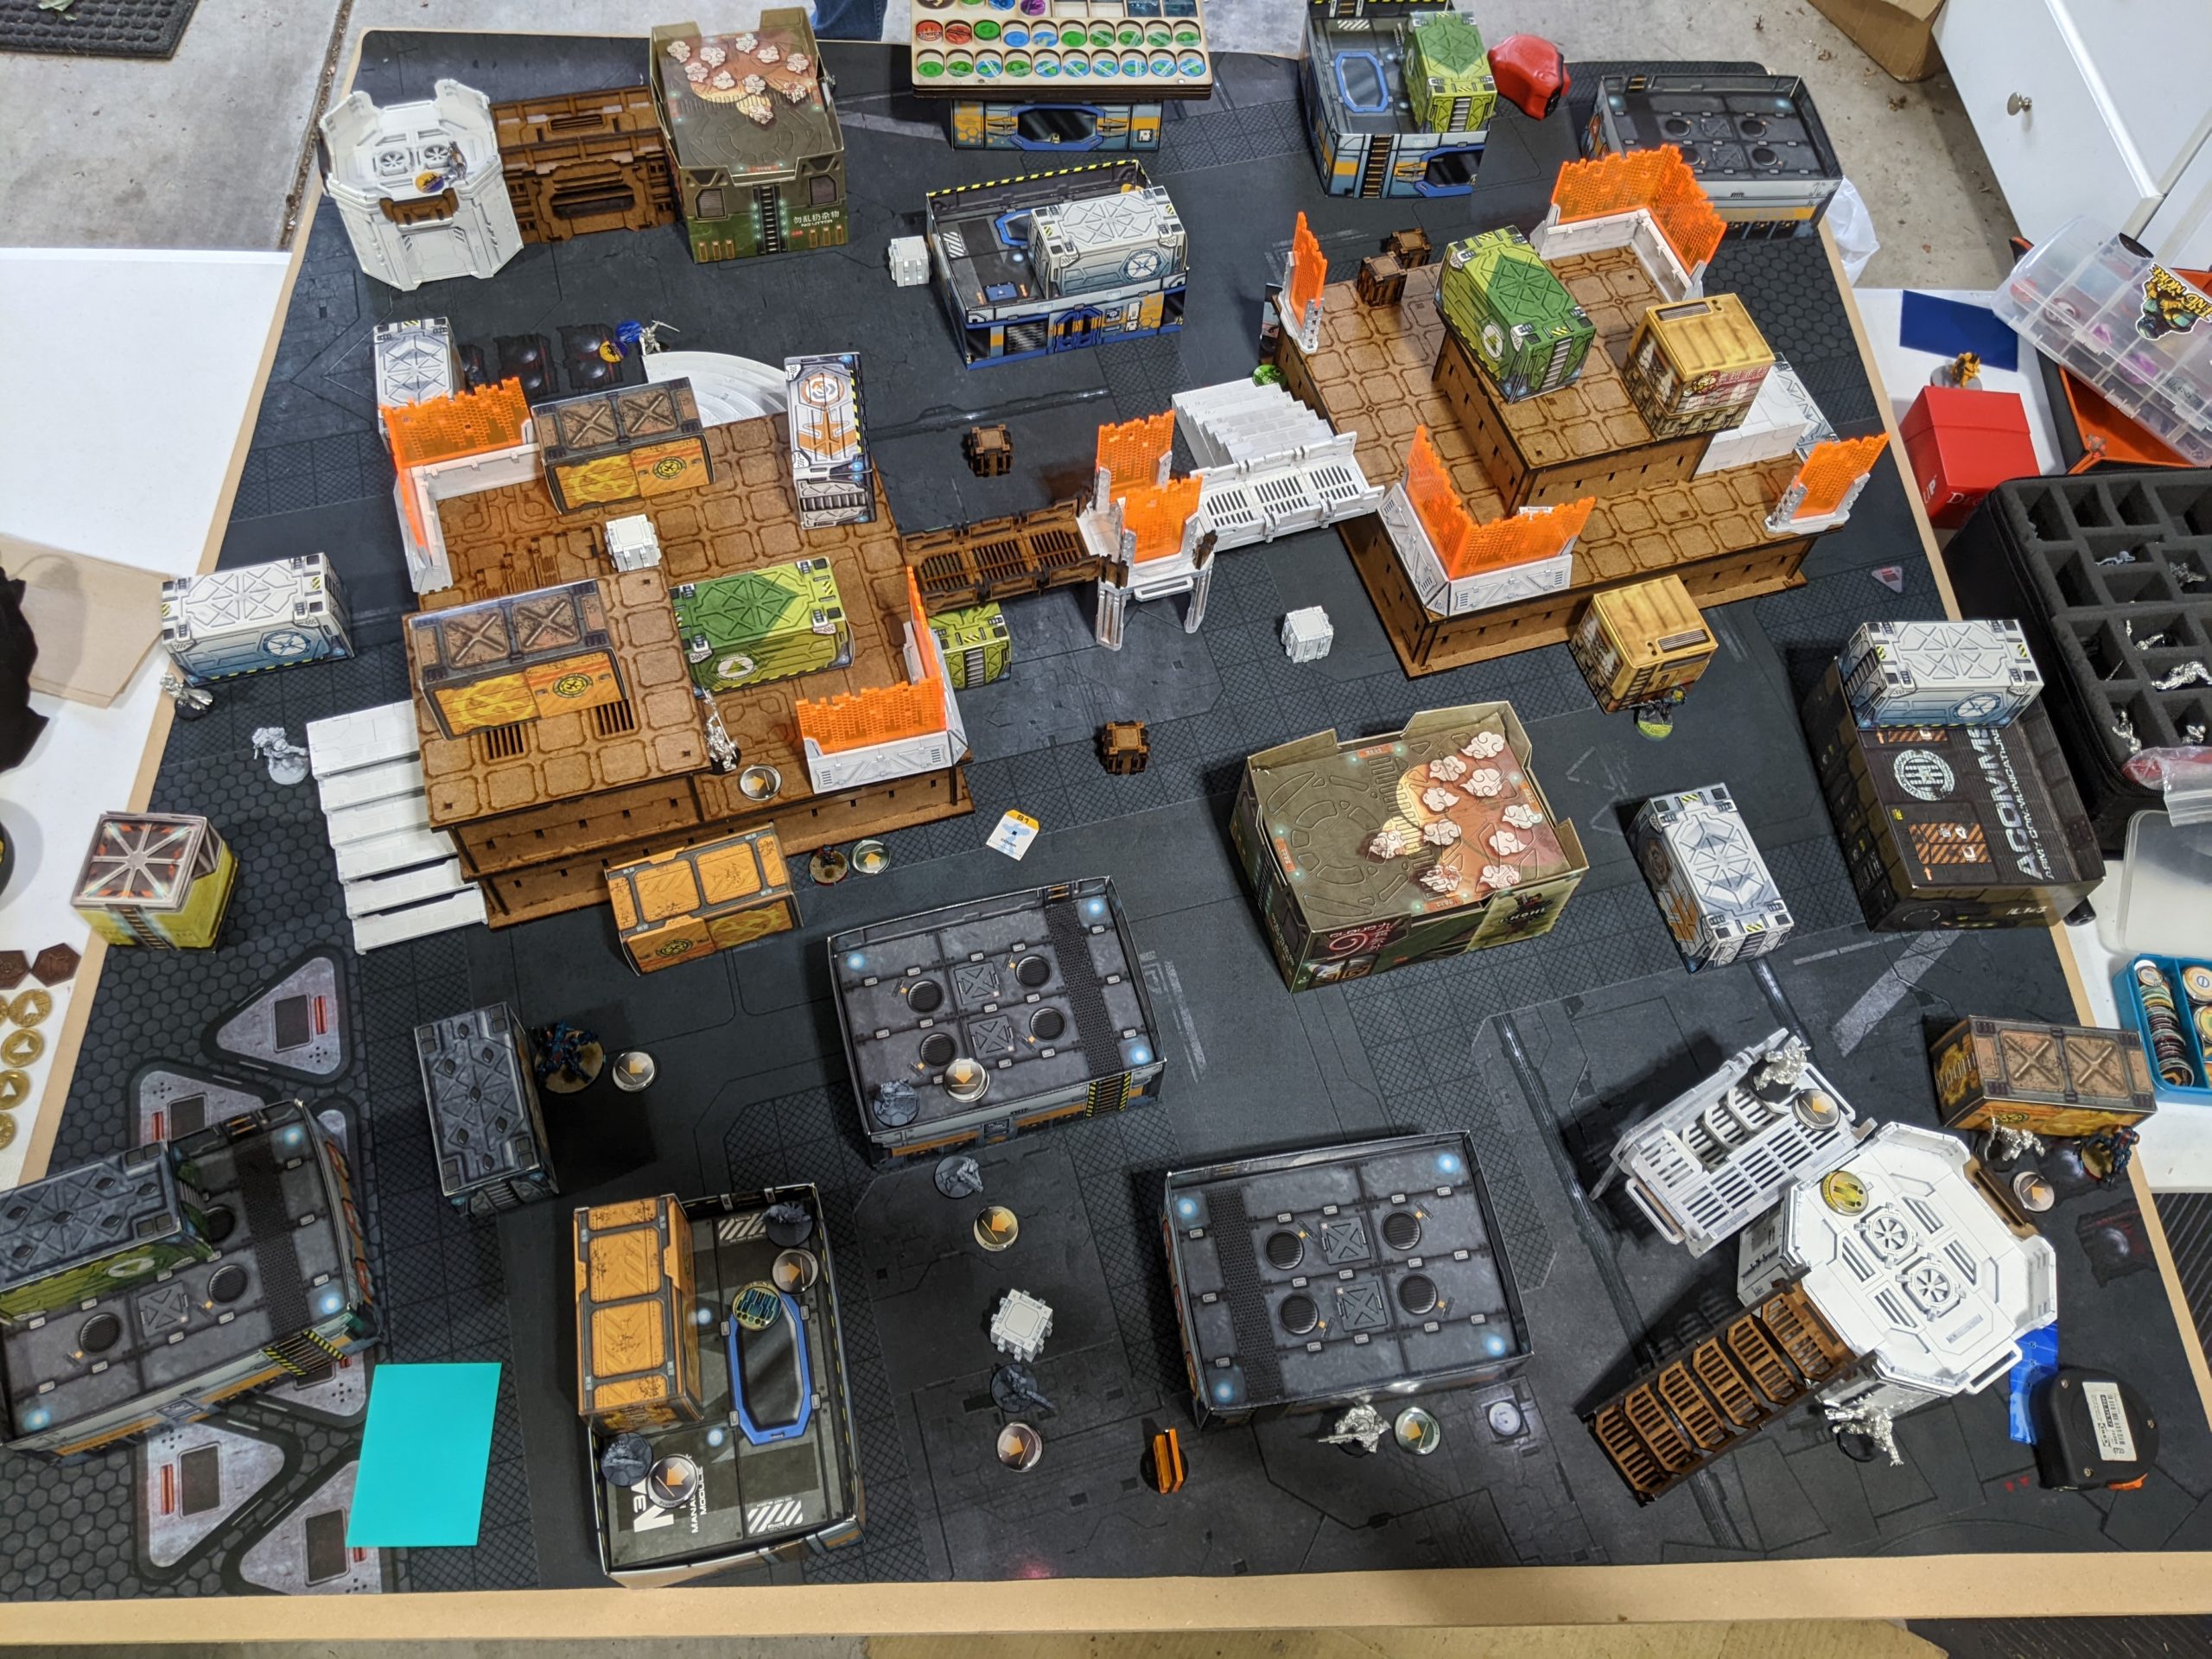
James and I were both planning to attend the first Shiv Games tournament in Salem, Oregon, so we decided to get some practice in. We were pretty ambitious and decided to try and get a game in over our lunch break. We’ve been iterating on James’s table and I’m starting to really like it. Really goes to show you that you can get a lot out of just the old CB paper terrain!

Overview
Acquisition is really not my favorite mission. It’s quite swingy and sort of demands that you just sit there and take it if you go first. A really skewed game depending on turn order, but hey, it’s in the next tournament so we gotta prep for it.
- Mission: ITS14 Acquisition
- Forces: Morat Aggression Force versus Yu Jing (300)
- Deploy First: MAF
- First Turn: MAF
I (foolishly?) decided to buy back into just Morats. I wanted a few things in the new Morat box and I’m using a lot of Morats in my vanilla Combined list ideation, so here we are. I also got to support Jeff at Shiv Games so that is an added bonus. For Acquisition, I wanted an option in case I went first (not by choice) to sit on the central objectives and hopefully not die.
Thankfully, Morats have Rindaks, which are AVA2 and are pretty much designed to take the midfield and bleed orders from your opponent while they try to kill them. If you’ve been following my vanilla CA exploits, you know I’ve been waffling a lot on either the the MULTI Rindak or the BSG Rindak, but now I don’t have to choose and can have both!

After playing Hector a bunch, I’m willing to pay a lot in both opportunity cost and points to get a 2-order Lieutenant with Strategos, which means Kornak was making an appearance, as was the Yaogat MSV2 sniper, because of my experiences with linked Knauf in StarCo.
Anyat is a natural inclusion in a link with the Yaogat, and the Dartok is just a super effective hacker as well.
Acquisition and Supremacy
GROUP 1
8
KORNAK (Lieutenant [+1 Order], Strategos L1) Mk12, Light Flamethrower / Heavy Pistol, DA CC Weapon. (0 | 45)
YAOGAT MULTI Sniper Rifle(+1B) / Heavy Pistol, CC Weapon. (1.5 | 35)
DARTOK (Hacker) Combi Rifle, Pitcher, Cybermines / Heavy Pistol, CC Weapon. (0.5 | 25)
ANYAT K1 Combi Rifle, Chain-colt, Smoke Grenades, E/M Grenades / CC Weapon, Heavy Pistol. (0 | 24)
GROUP 2
RINDAK (Paramedic, Forward Deployment [+8″]) Boarding Shotgun, Blitzen(+1B) / Heavy Pistol, PARA CC Weapon. (0 | 35)
IKADRON (Baggage, Repeater) Light Flamethrower(+1B), Flash Pulse / Pistol, PARA CC Weapon(-3). (0 | 9)
TYROK T2 Rifle, Shock Mines / Heavy Pistol(+1B), Trench-Hammer(+1 Dam). (0 | 25)
SKURGOT DA CC Weapon. (0 | 4)
4
5
Q-DRONE Plasma Rifle / PARA CC Weapon(-3). (1 | 24)
OZNAT FTO Combi Rifle, Smoke Grenade Launcher / Shock CC Weapon, Heavy Pistol. (0 | 16)
GAKI AP CC Weapon. (0 | 4)
3 SWC | 300 Points Open in Infinity Army
Group two is an Oznat and pile of Gaki purely for orders. One of the Rindak is here to do some load balancing, and I added in a Plasma Q-Drone for an additional attack piece. If someone kills the Oznat, there’s enough room to rescue the Rindak and Q-Drone into Group 1 and literally unleash the Gaki to do some damage. Ideally this wouldn’t happen, but at least I have a solid mitigation plan.
The fact that I give up on the ability to have a core here isn’t a big deal to me. 32 points for 5 orders beats even the much lauded Kuang Shi 33 points for 5 orders, although that is significantly more flexible. I’m happy with a Haris and either the Dartok or Kornak as the spare tire.
Of particular note is that once my Yaogat dies, I’m heavily reliant on my Rindaks, Kornak, and the Q-Drone to get work done. I also have very little in the way of hard AROs and need to rely on careful placement of units and using the terrain to my advantage to protect my models.
The Rindaks tend to occupy a large amount of headspace for my opponents, so I’ll usually lose one but at the cost of most of their first turn, if I go second. I included a Tyrok as well to eat some more orders in the midfield, although it’s rather flimsy as a full on speed bump. I think this only works well in a moderately aggressive meta, though. The Q-Drone does give me a little additional insurance once a rambo unit gets to my backline, so I at least have that.
James is playing a variant of Tim’s Yu Jing list that he brought to RCR. It’s got the Krit + Su Jian duo powered by Kuang Shi, the ubiquitous Lunah and Long Ya minelayers, and the Daoying Lieutenant.
Salem OCT2022
GROUP 1GROUP 2
LÓNG YÁ (Minelayer) Panzerfaust(+1B), Flammenspeer(+1B), Submachine Gun, AP Mines / PARA CC Weapon(-3). (0.5 | 17)
AÏDA SWANSON FTO (Minelayer) Submachine Gun, Viral Mines / Viral Pistol, Shock CC Weapon. (0 | 20)
CELESTIAL GUARD Monitor Combi Rifle, Smoke Grenade Launcher / Pistol, CC Weapon. (0.5 | 13)
KUANG SHI Chain Rifle / Pistol, CC Weapon. (0 | 5)
KOKRAM FTO MULTI Rifle(+1 Dam), Chain-colt, D-Charges / Heavy Pistol(+1B), CC Weapon. (0 | 36)
SÙ-JIÀN Spitfire, Light Flamethrower, Panzerfaust / Heavy Pistol, CC Weapon. (1.5 | 54)
LIÚ XĪNG (Specialist Operative) MULTI Rifle, D-Charges / Pistol, Shock CC Weapon. (0 | 35)
MAJOR LUNAH VIRAL Sniper Rifle / Pistol, CC Weapon. (1.5 | 29)
SON-BAE Yaókòng Missile Launcher / PARA CC Weapon(-3). (1.5 | 16)
DĀOYĪNG (Lieutenant [+1 Order]) Boarding Shotgun / Breaker Pistol, CC Weapon. (0 | 22)
BEASTHUNTERS (Surprise Attack [-3], Camouflage, Forward Deployment [+8″]) Heavy Flamethrower, Panzerfaust, AP Mines / EXP CC Weapon(+1B), Pistol. (0 | 17)
PANGGULING (Deactivator, Repeater) ( ) / PARA CC Weapon(-3). (0 | 8)
6 SWC | 299 Points | Open in Infinity Army
James’s “salt to taste” units are the Liu Xing MULTI, Aida, and the Beasthunter. I’m on board, I like the list!
Deployment
I’m pretty sure I lost the rolloff and James took deployment so I went first. My plan was to do some damage with the Rindaks and then sort of adapt to the situation as the game progressed. I was pretty concerned about the Su Jian, but I didn’t know where it would end up. I decided to let the Gakis drive my deployment, since they needed to be out of explosion radius of one another. Since they can’t really defend an area while in the link it was fine to keep them out of LoF of one another. I bought two boxes of Hungries but I am just… avoiding assembling them because I don’t hate myself that much. I’m using my Bostria Kuang Shi Controller and 4 Kuang Shi as proxies for now.
Update: QueensGambit on the forums informs me that Explode doesn’t hurt friendly models in N4 anymore, so I can be a little more sloppy in Gaki deployment in the future.
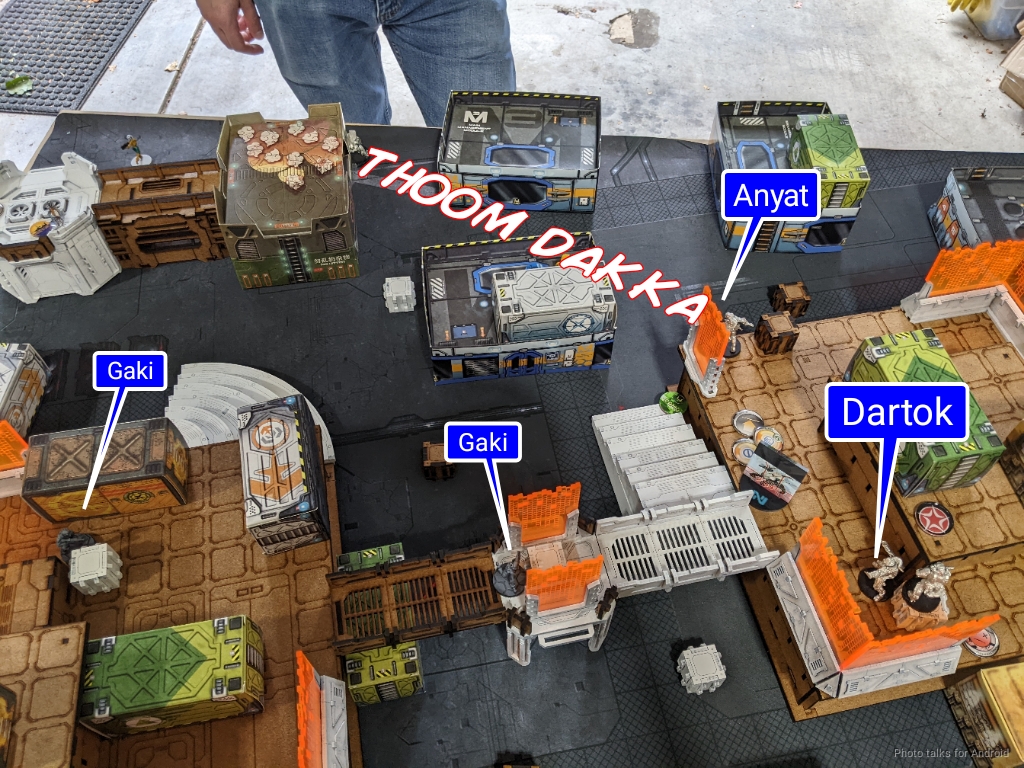
I did want to let them use the Oznat’s smoke launcher if necessary, so I kept her within 8″ of everything. There was only really one reasonable spot in my deployment zone where this was possible, and it was by leveraging a bunch of building roofs on the left of my deployment zone. That handled, I put my Ikadrons on either side of my deployment zone to defend against Liu Xing walking in just out of my DZ. I figured i’d put my Yaogat on the right at the top of some stairs in an elevated firing position, and then put the Dartok, Anyat, and Kornak nearby to form whatever link was necessary.
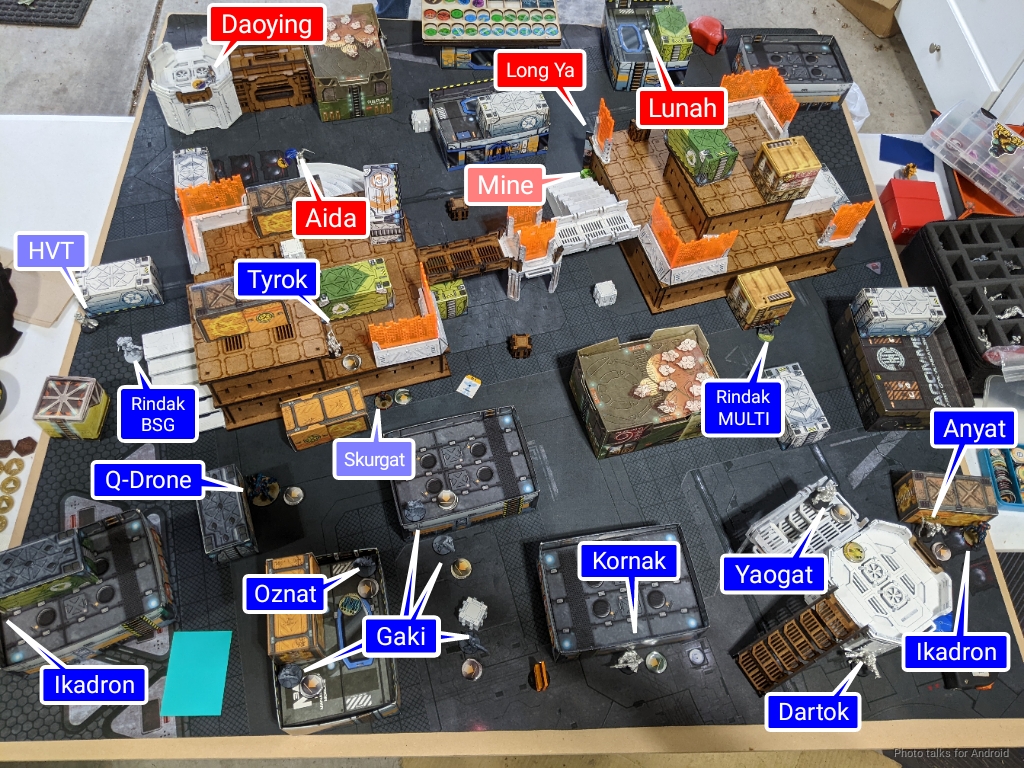
The Tyrok ended up on the left as far up as it could go, really, with its Skurgat below to be able to attack things on the ground. I didn’t really have a great spot for it, but I knew I probably wasn’t going to use it in an alpha strike and wanted to keep it relatively safe for a turn, so that meant putting it in a weird sort of pocket on the left side of the table. The Q-Drone went behind it, and I was intending to move it so I had it relatively exposed. I held both Rindak in reserve.
James sprinkled Kuang Shi around his deployment zone and set up his two Long Ya to defend a choke point in the middle of the table. Krit and the Su Jian hung out on the right behind a big wall of buildings for protection, with the other approach covered by a Son Bae. The Beasthunter hung out on the right and Lunah on the left with a Panguling.
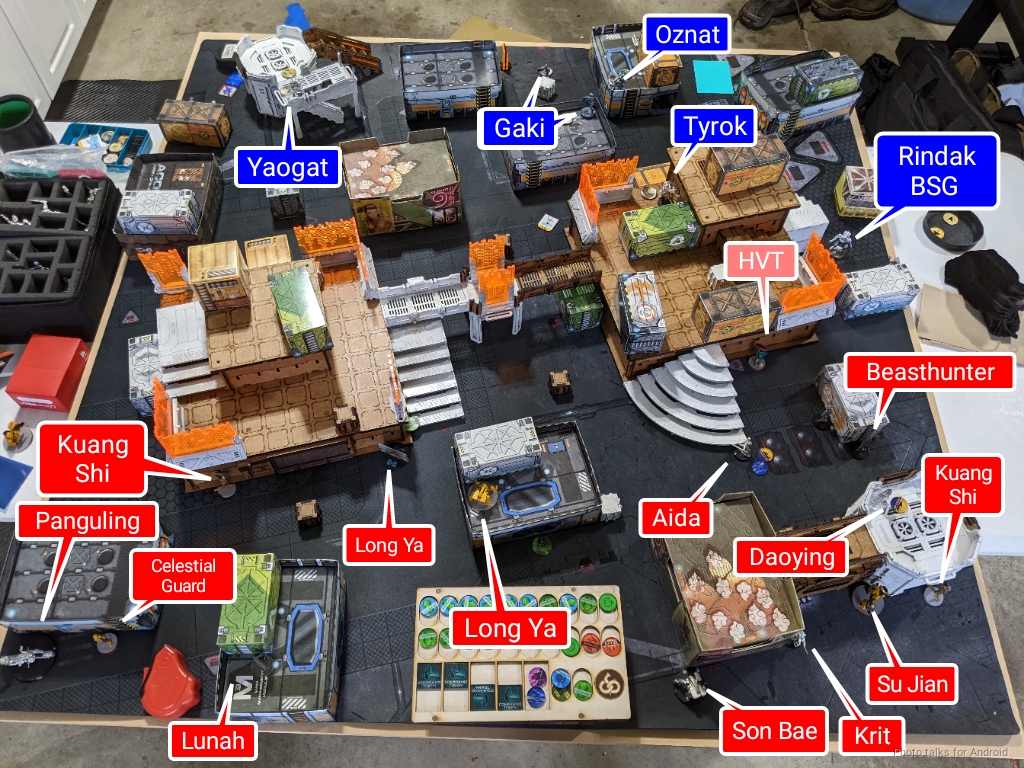
The Daoying hid on the roof on the right, and then it was time for the Rindaks. I figured the boarding shotgun had an opening to push hard on my left, and the MULTI had some targets on the right. James’s reserve was Aida, who he started in suppression to protect against my Rindak BSG.
Turn 1
Top of 1 – MAF
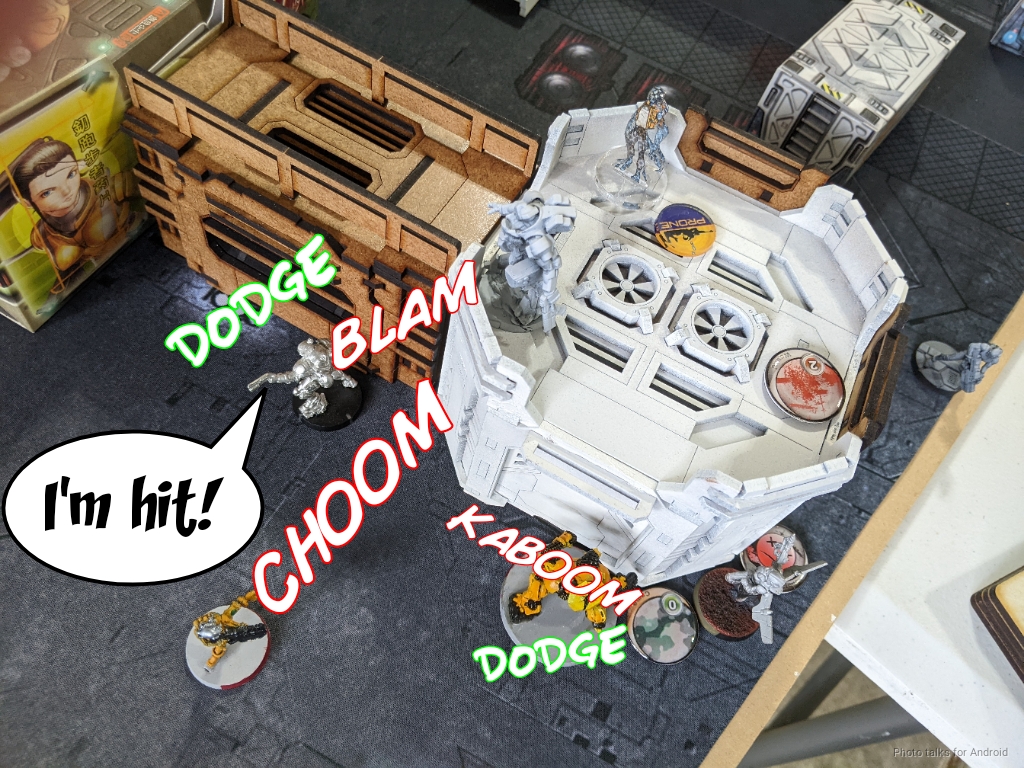
I decide to capitalize on the situation and push with the Rindak BSG, sensoring the Beasthunter.
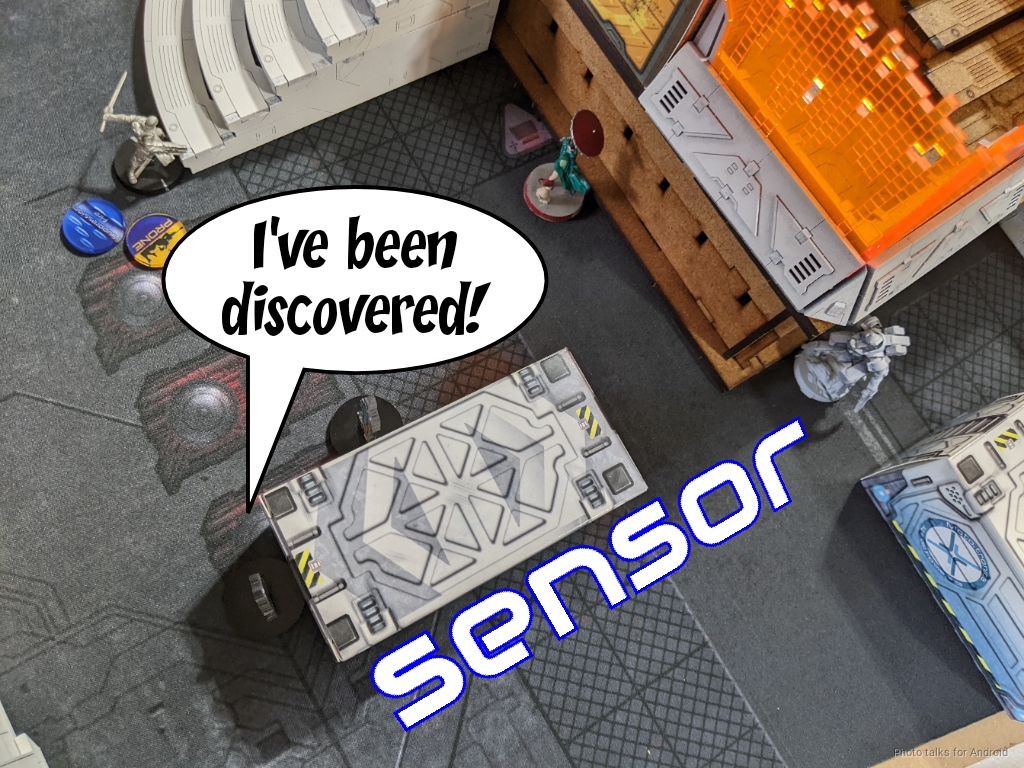
We forget that you can’t cautious move in zone of control, so the Rindak pushes forward to threaten the Beasthunter. I’m planning on just blasting it with a boarding shotgun template that will also catch Aida, but if it dodges I’ll put two slugs into it. James informs me that the Long Ya on the building can see the corner where the Rindak would need to be, so I try to take it out with the other Rindak.
I discover it, but lose the face to face and die to a panzerfaust. The odds are definitely in my favor, but sometimes the dice just say no.
| 51.35 | 37.08 | 11.57 |
With my right midfield basically dead, I decide to just be hyper aggressive with the Yaogat haris. I shove them into the midfield and get an angle on Aida, easily removing her from outside of 24″.
The Beasthunter is next, which rescues the Rindak BSG.
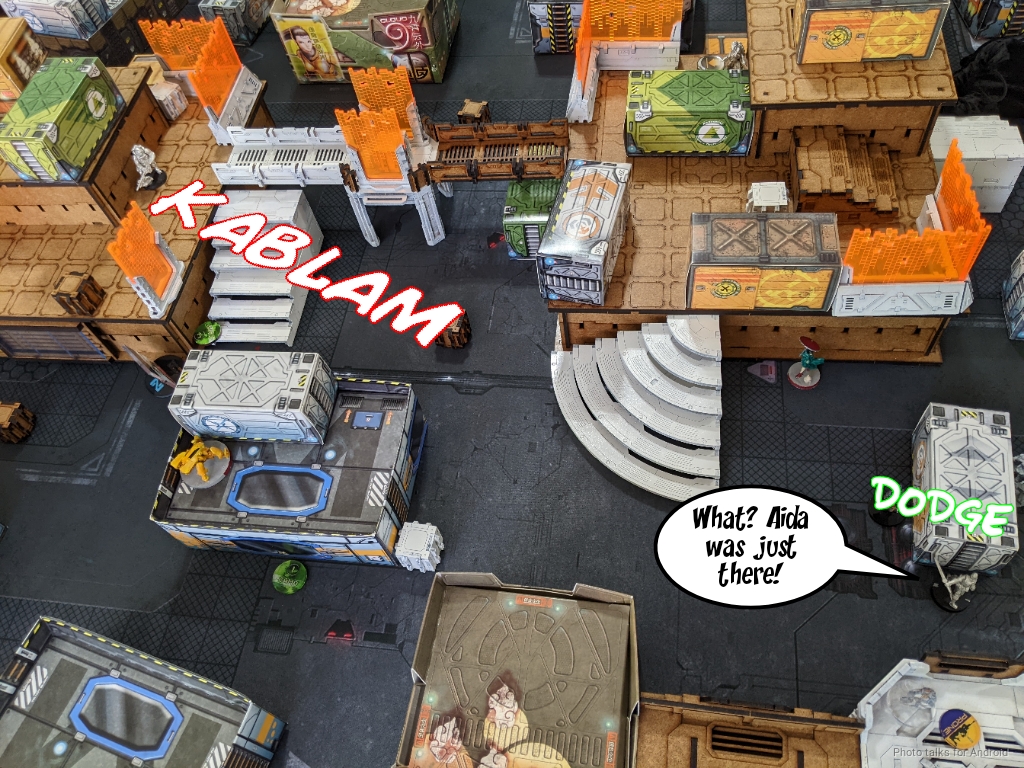
I then go for broke and discover and kill Lunah.
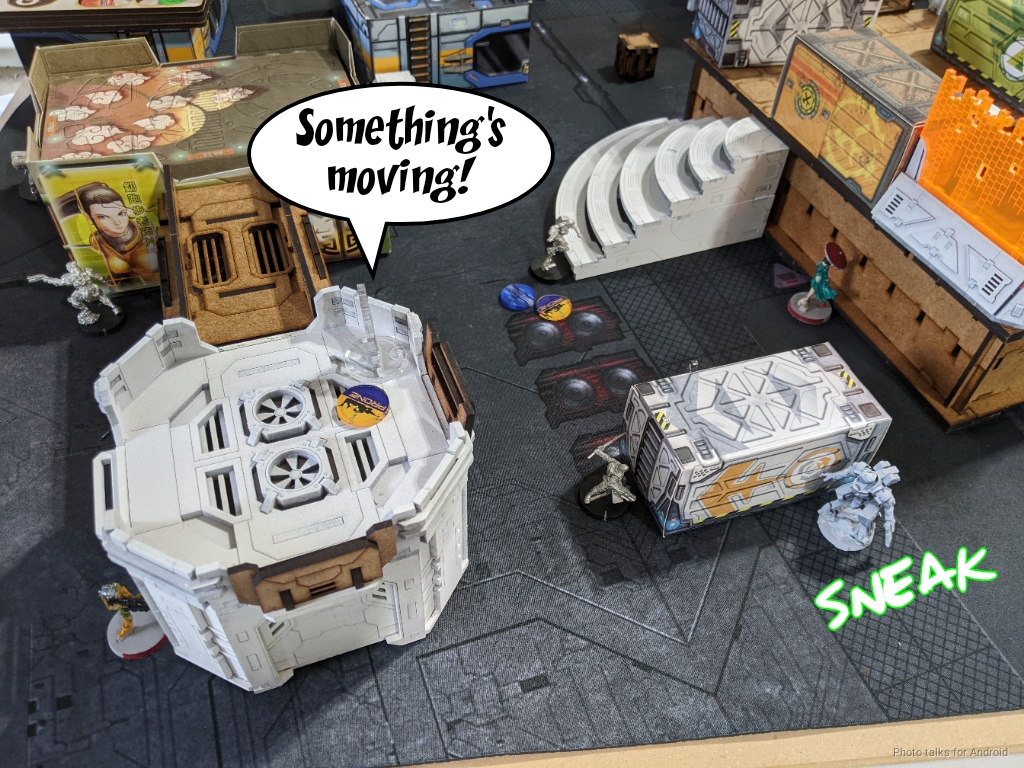
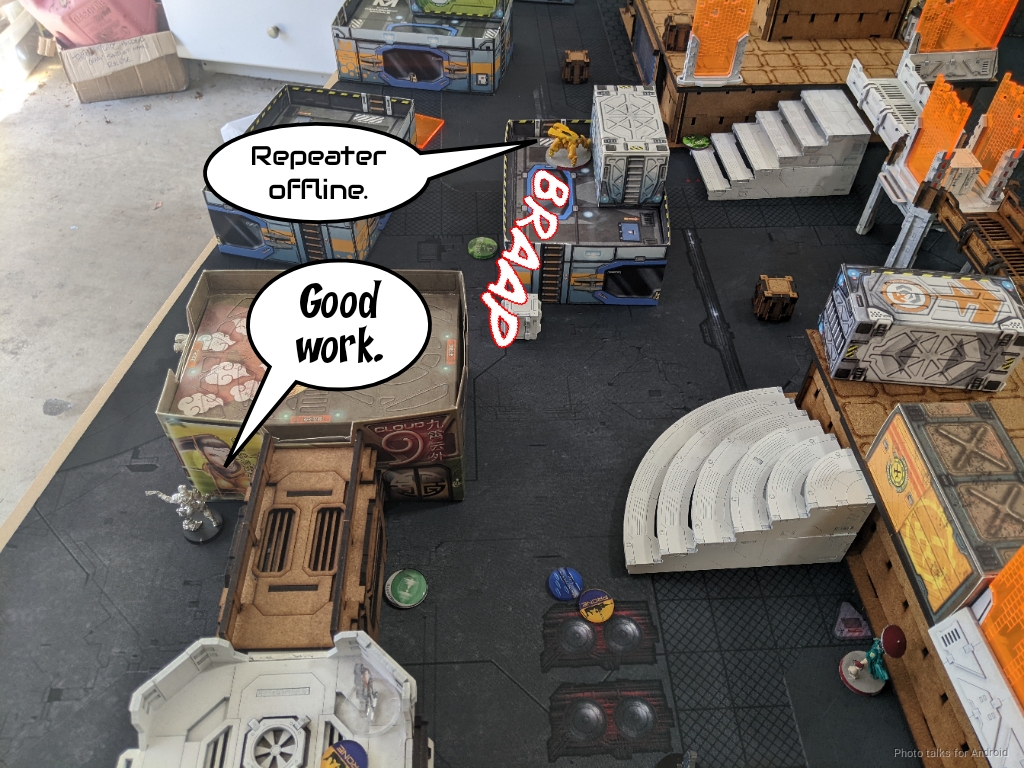
I retreat a little and set up a repeater next to Krit and the Su Jian. I spent a coordinated order to try and hack through the repeater while retreating the Rindak, but this grants an ARO to a Kuang Shi who dodges out of the room he was in, and I also fail my hack. Boo.
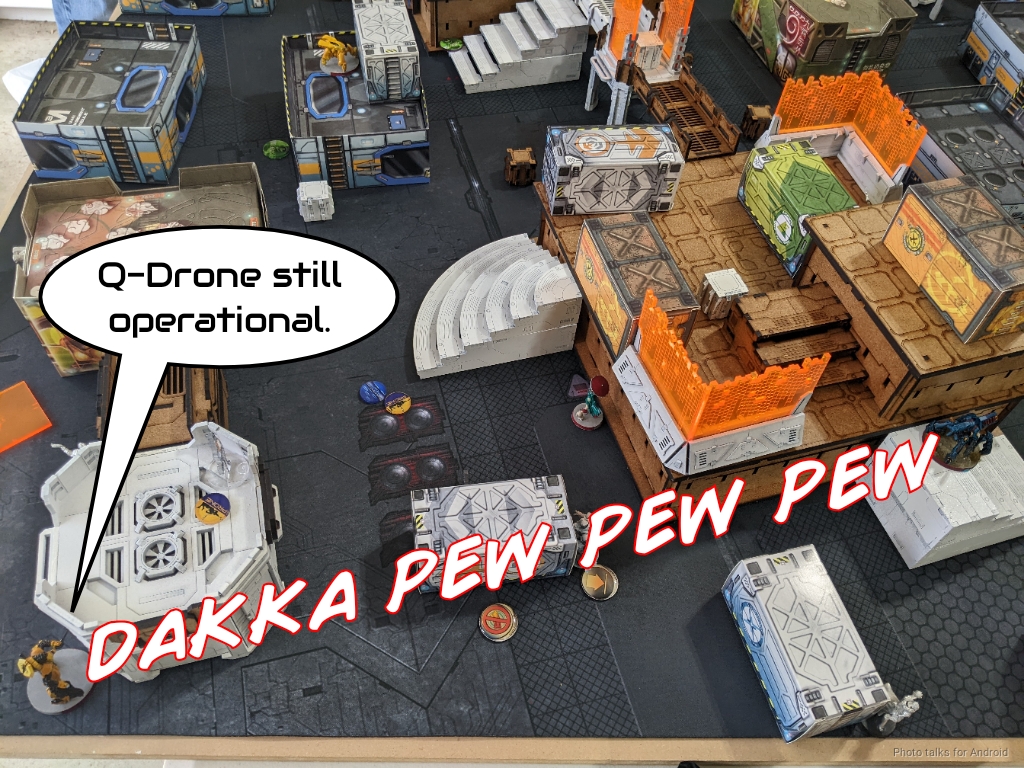
My last order in group to darts the Q-Drone to the top of the stairs to defend the Rindak.
Bottom of 1 – Yu Jing
The Kuang Shi that dodged out of the room tries to pistol down the Rindak, threatening an explode as well, but the Rindak dodges successfully and the Q-Drone melts the Kuang Shi.
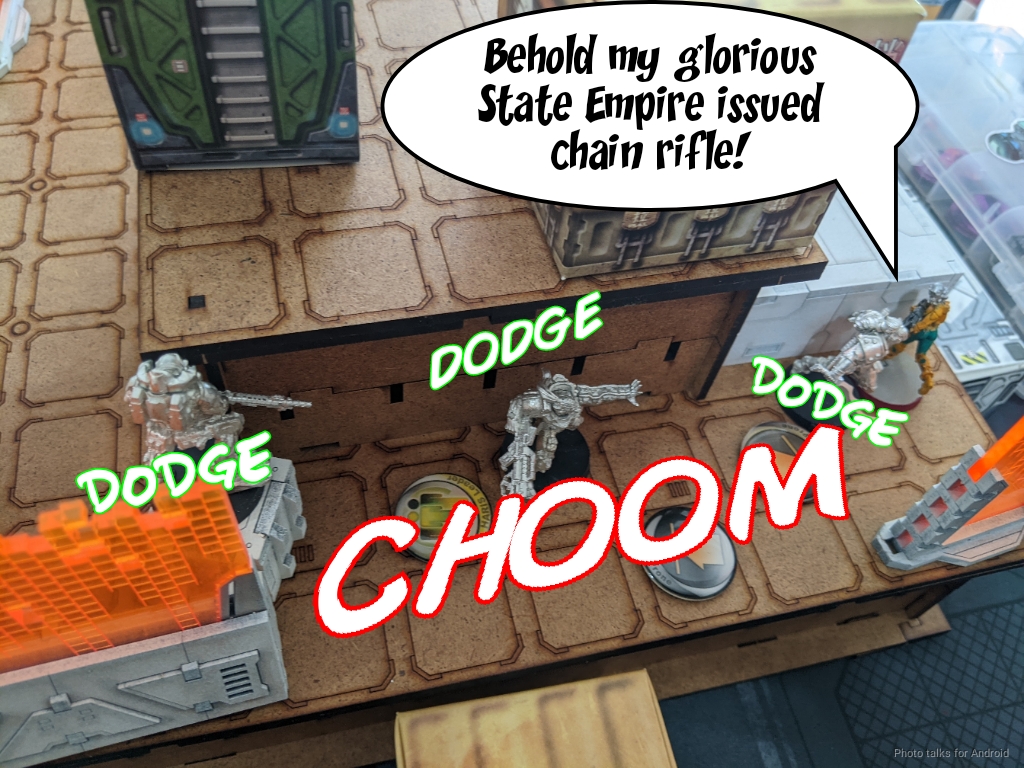
James has a chance to land a chain rifle on my Yaogat, Dartok, and Anyat here, which will dramatically change the game. They’re wildly overextended and I didn’t have the orders to see the Kuang Shi’s approach, so this was basically me risking the dodge. The Kuang Shi templates, and all three dodge successfully! I even dodge Anyat into close combat to prevent any further shenanigans.
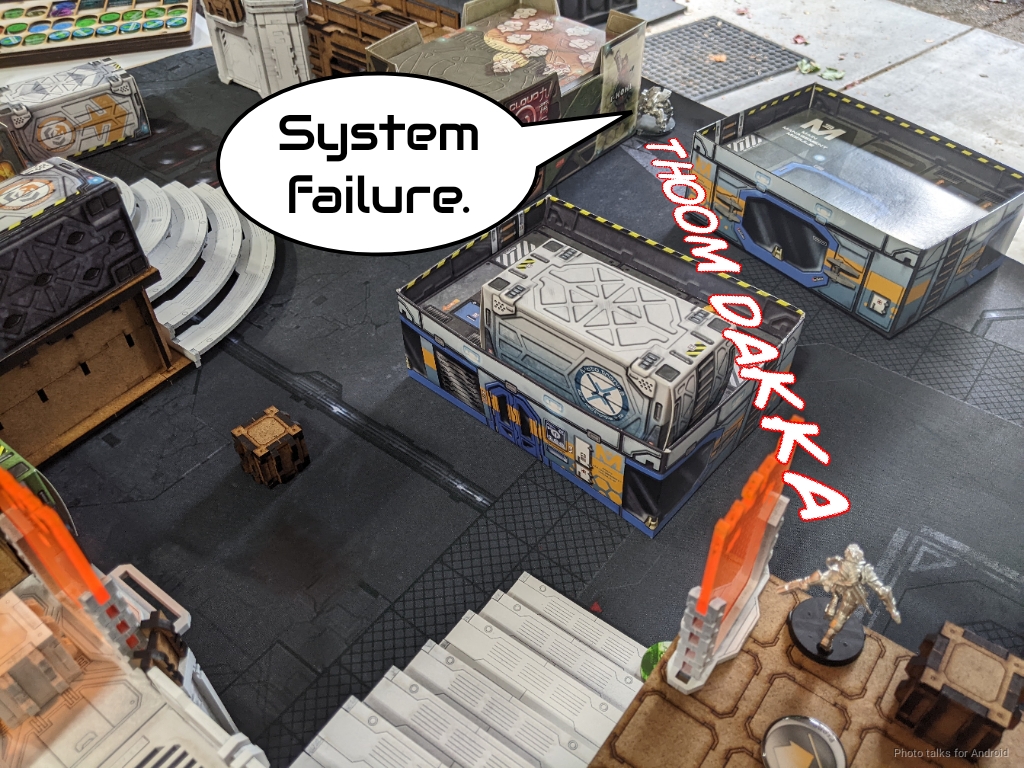
The Long Ya that killed the Rindak shoots the repeater off the table, which frees Krit and the Su Jian up to move around.
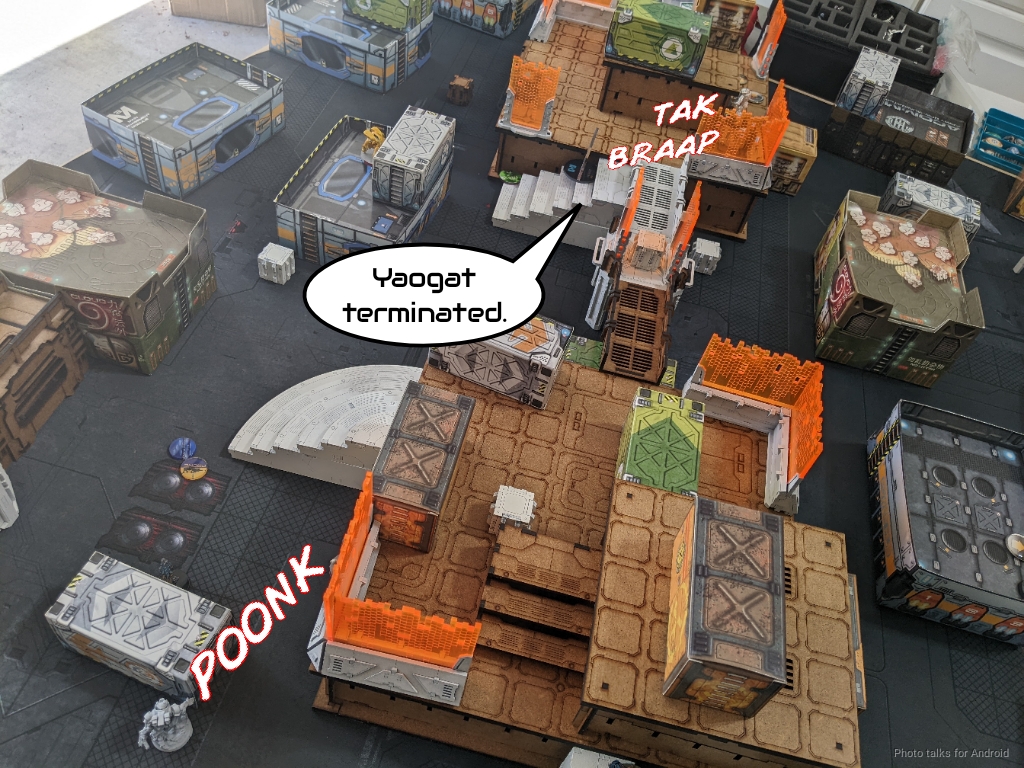
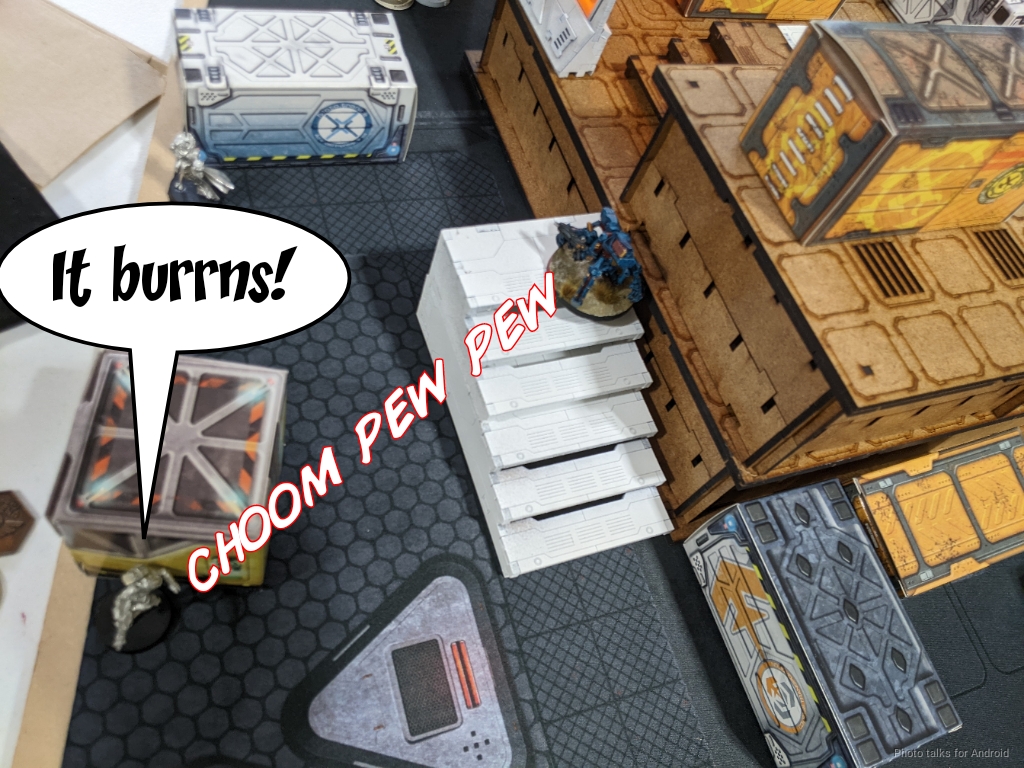
The other Long Ya advances up the stairs to challenge the Yaogat, fighting my Heavy Pistol ARO with an SMG. The Rindak BSG tries to Blitzen but whiffs. I tank the SMG shots and James is forced to try again. This time, the Rindak Blitzens successfully but the Yaogat goes down.
James pushes his luck by trying to take out Anyat in close combat with the Kuang Shi, but I Heavy Pistol it off the table.

The Su Jian takes on the Rindak, forcing me to dodge around the corner.
The Su Jian challenges the Q-Drone, but it’s a bad plan. Even with being outside of 16″ the Mimetism and burst three keeps me from taking more than one hit and I save against the spitfire.
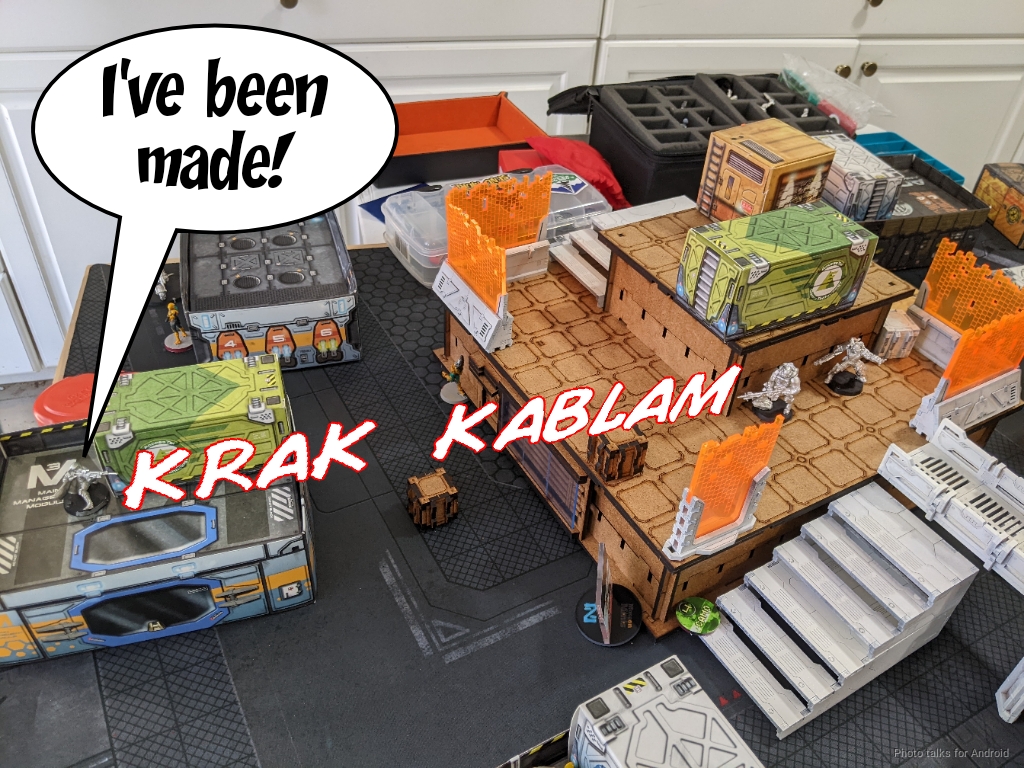
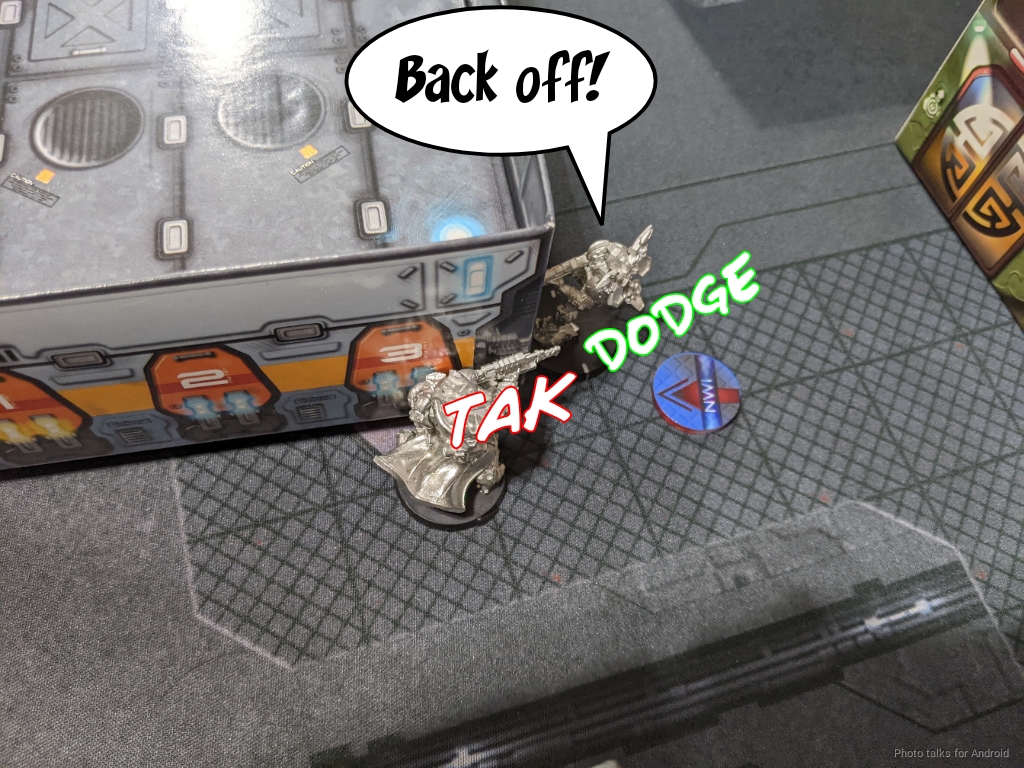
At this point, James decides to drop in his Liu Xing near Kornak to go for a lieutenant snipe. I dodge aggressively towards the Liu Xing, figuring Kornak can probably dodge into close combat and punk the Liu Xing, and manage to dodge to get it out of cover. As it retreats it gets seen by an Ikadron, so it splits burst against them both.

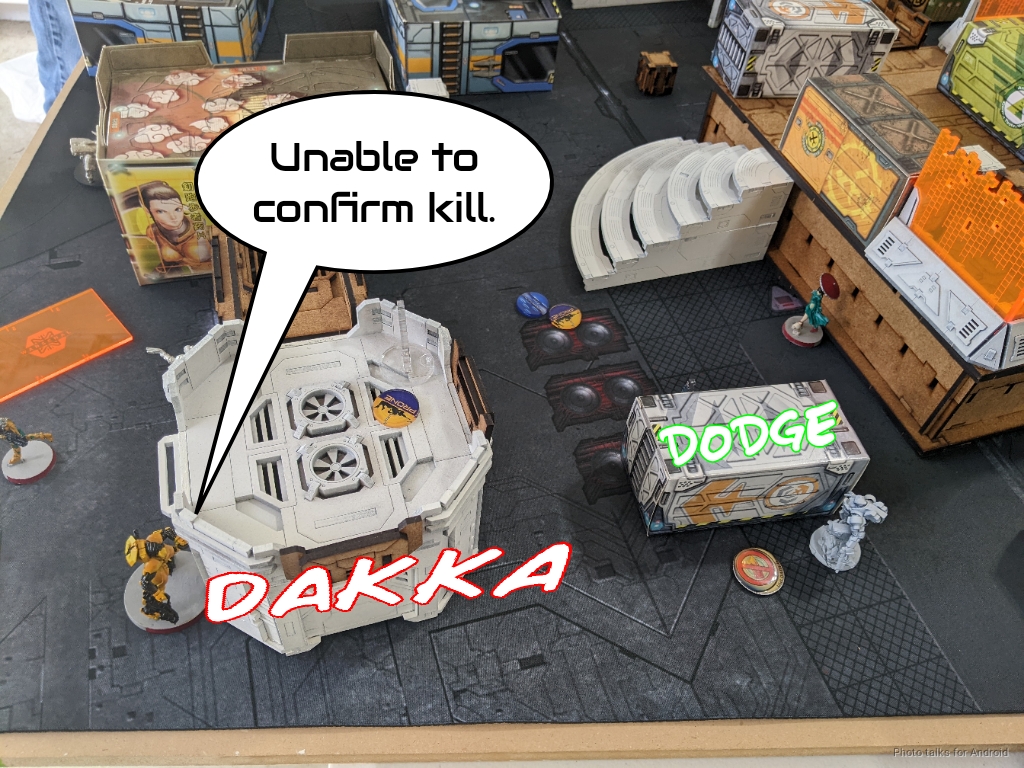
James rolls terribly and I manage to get a Heavy Pistol hit and a flash pulse hit, and James fails all the saves and is sad. He’s keeps pushing though, and brings on a Bashi with shotgun to trade for my Q-Drone. It works, and he passes turn.
Turn 2
Top of 2 – MAF
I need to get rid of the Liu Xing, do some damage, and then see about getting some objectives taken care of. Kornak takes his Frenzy movement but fails to heavy pistol down the Liu Xing.
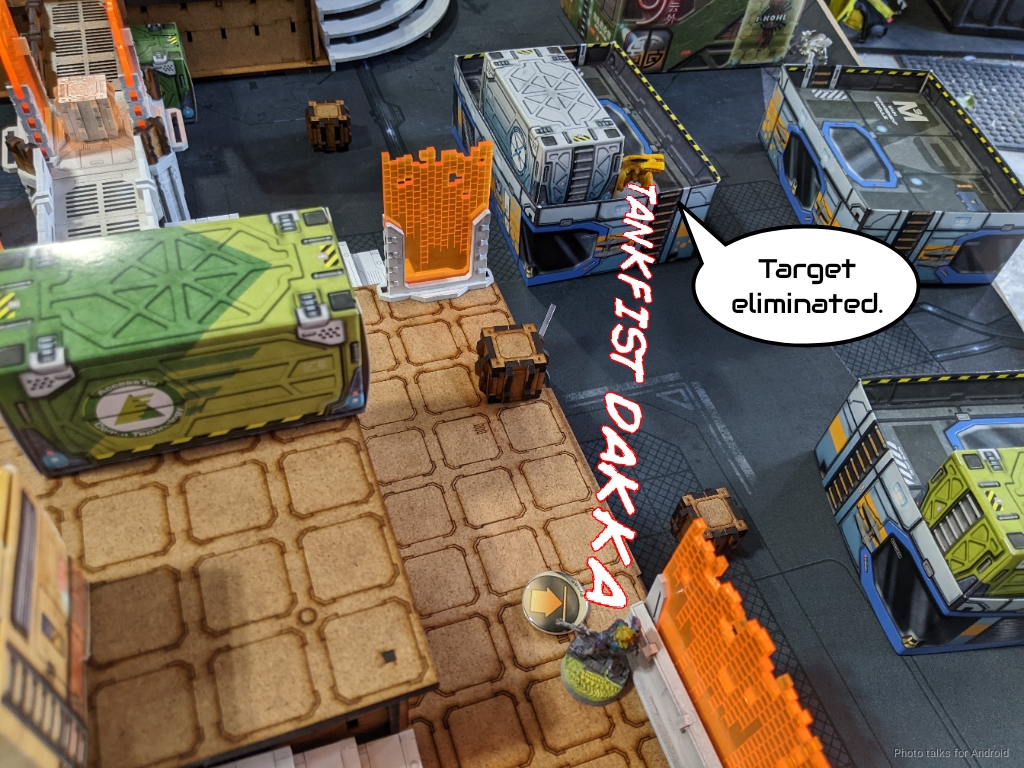
I’m not really worried about losing Kornak, but I really want to use the Tyrok for fun, so I shoot the Liu Xing in the back with the Tyrok’s T2 rifle and remove it.
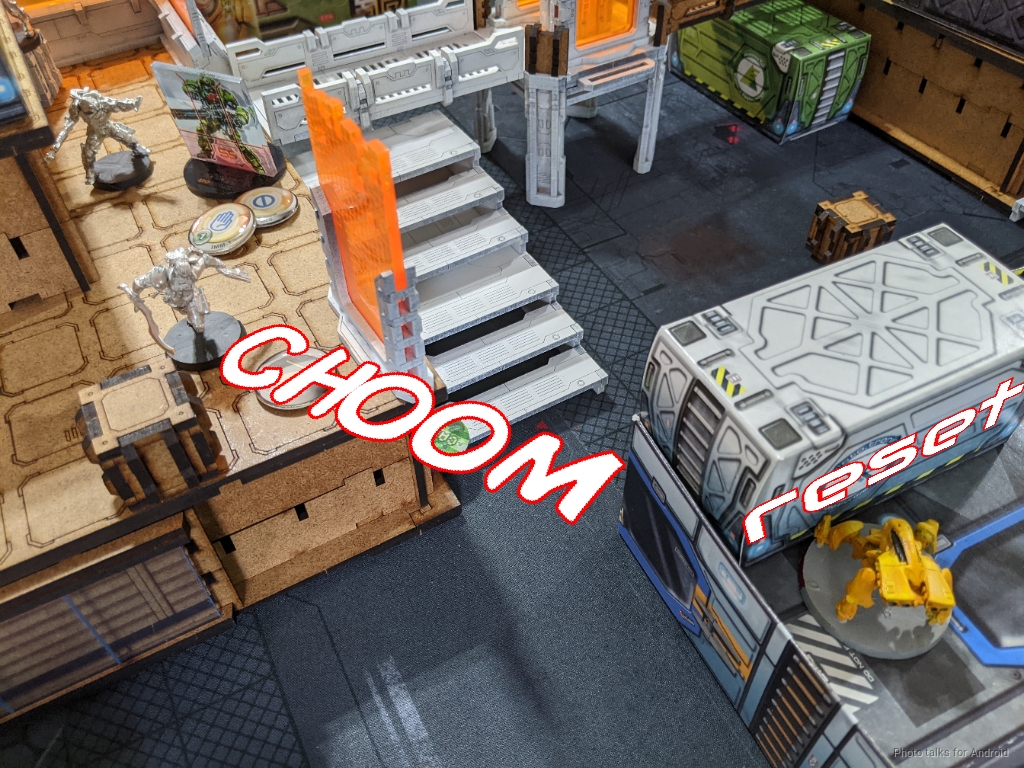
Long Ya are WIP 12, so once they’re Isolated and Immobilized they’re effectively dead, which lets me push the remnants of the Yaogat link forward. I Carbonite the other Long Ya…
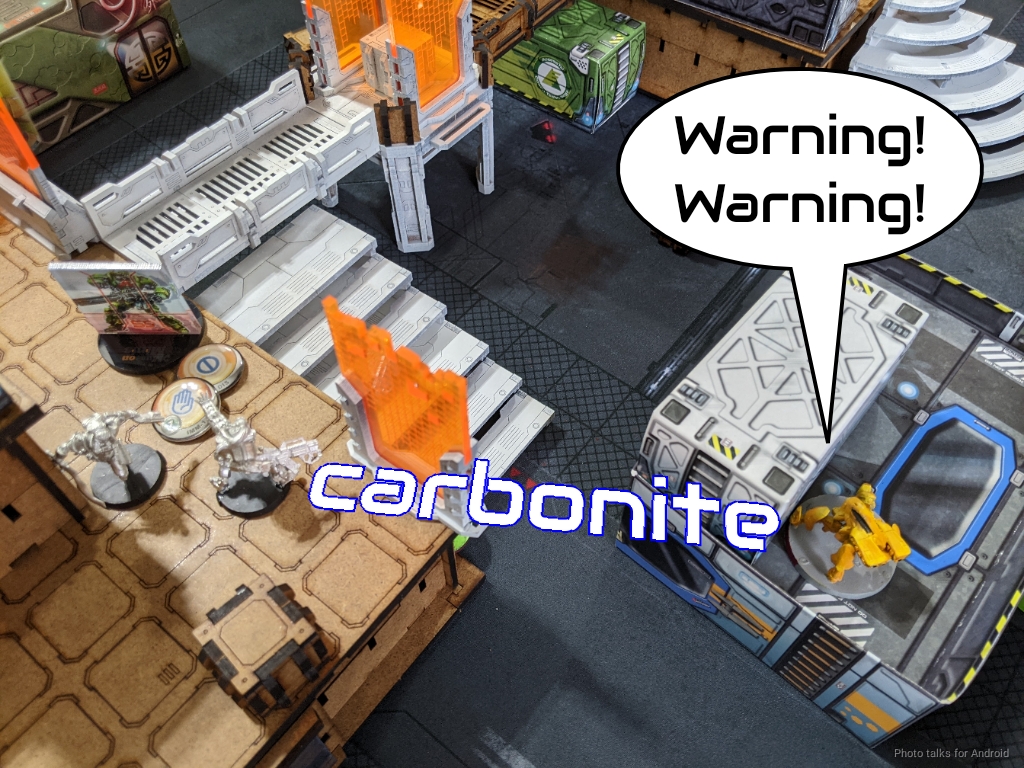
Then chain colt it unconscious with Anyat. I was a little scared of hitting it with the K1 and then having it pass arm due to cover. Checking the math, the K1 has a 55.67% chance and the chain colt has a 60% chance, so my gut was right.
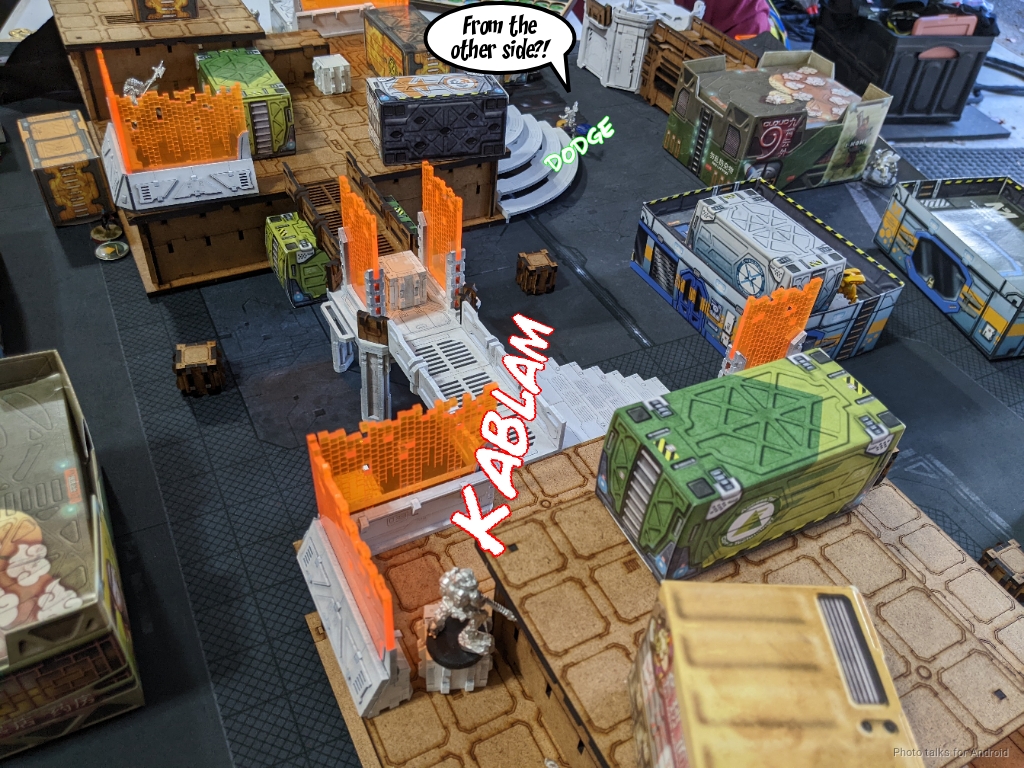
I bring on my own Bashi and try to bait out a reaction from the Su Jian, but James delays.

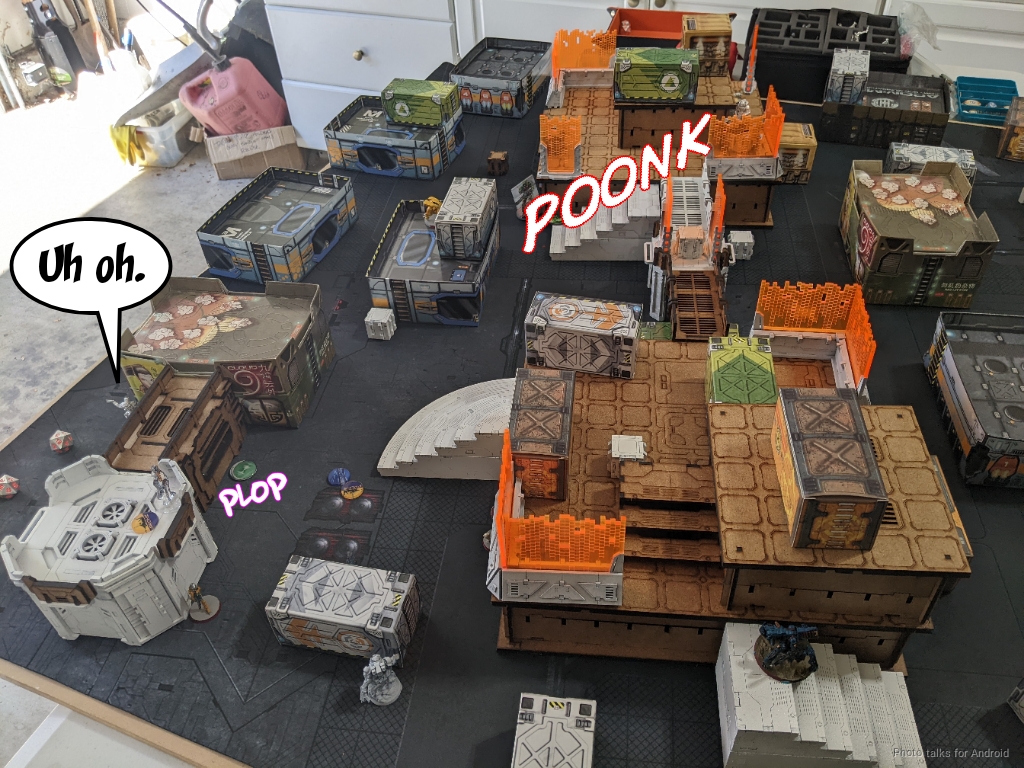
I just drop a mine and die to the flamethrower, which isn’t great but isn’t awful.
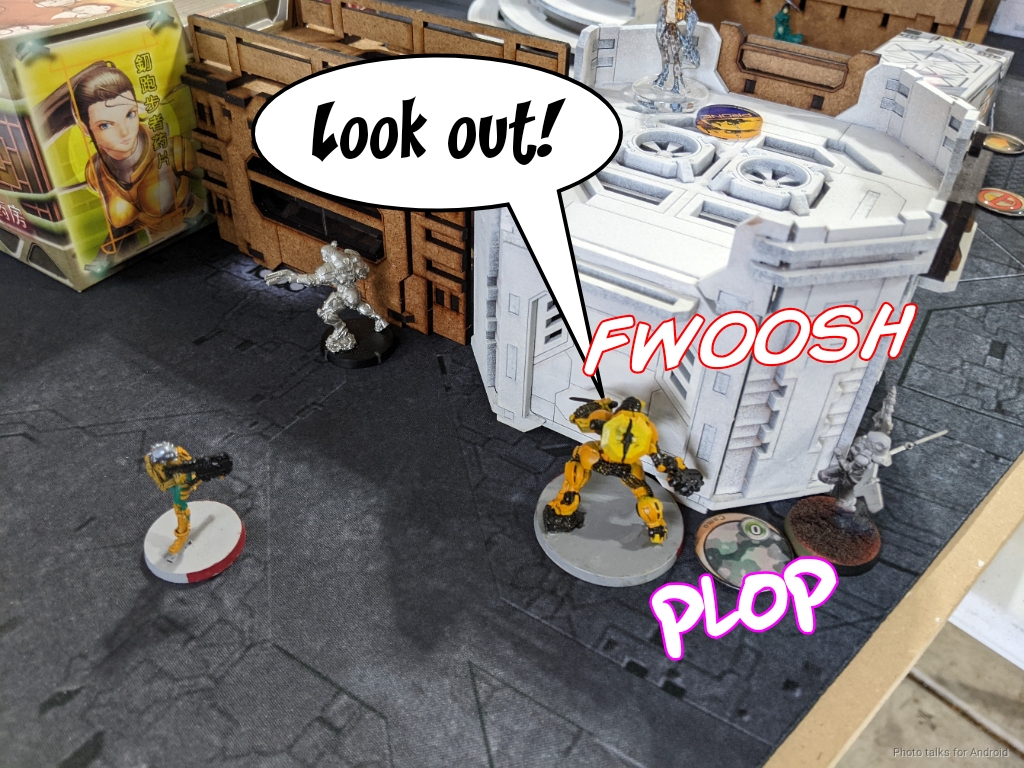
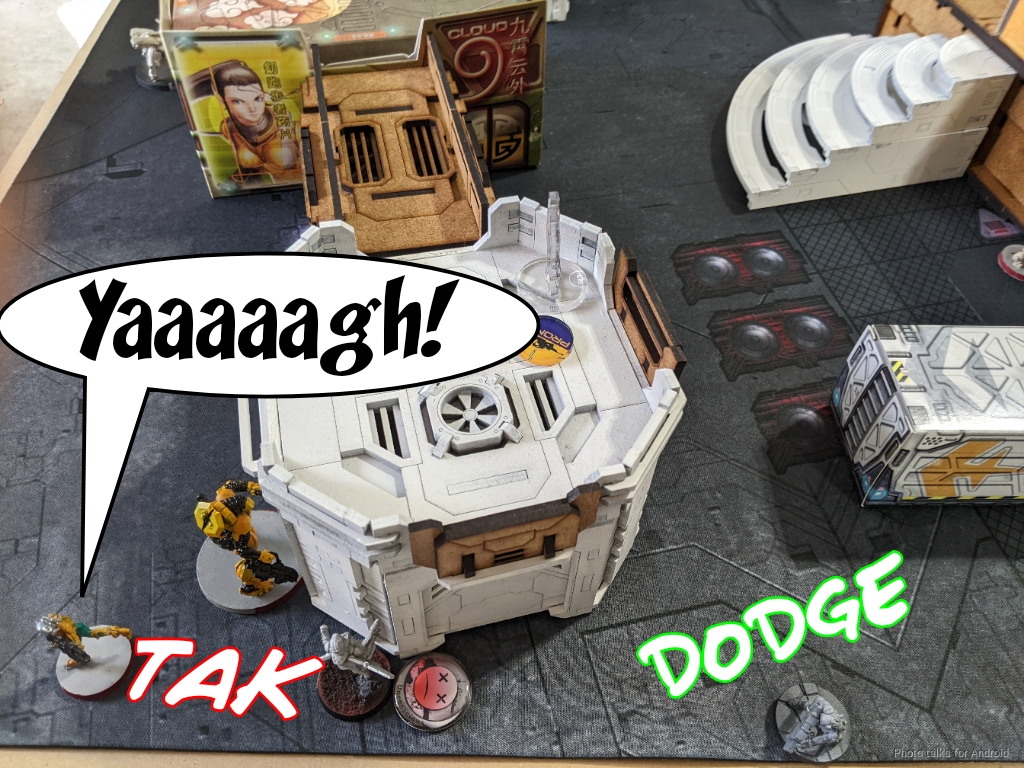
I’m 100% certain of the identity of James’s lieutenant now, so I send the Rindak in. I sensor it out of camo then shotgun it down. James fires slug mode at me to force me to template, and we trade wounds.
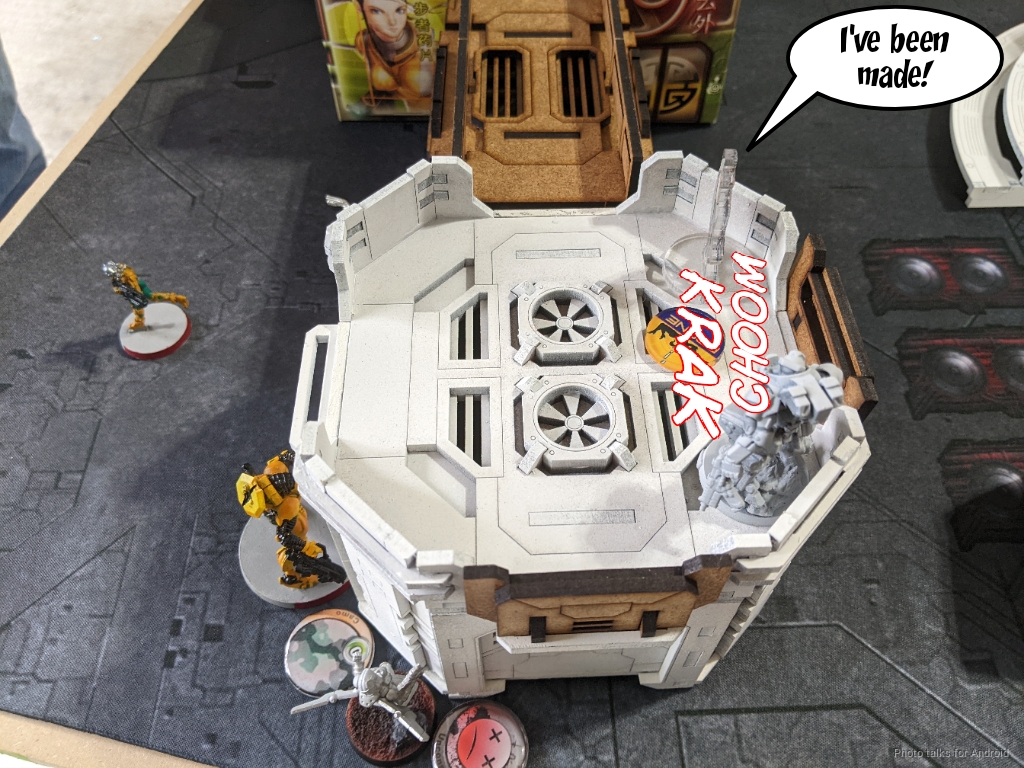
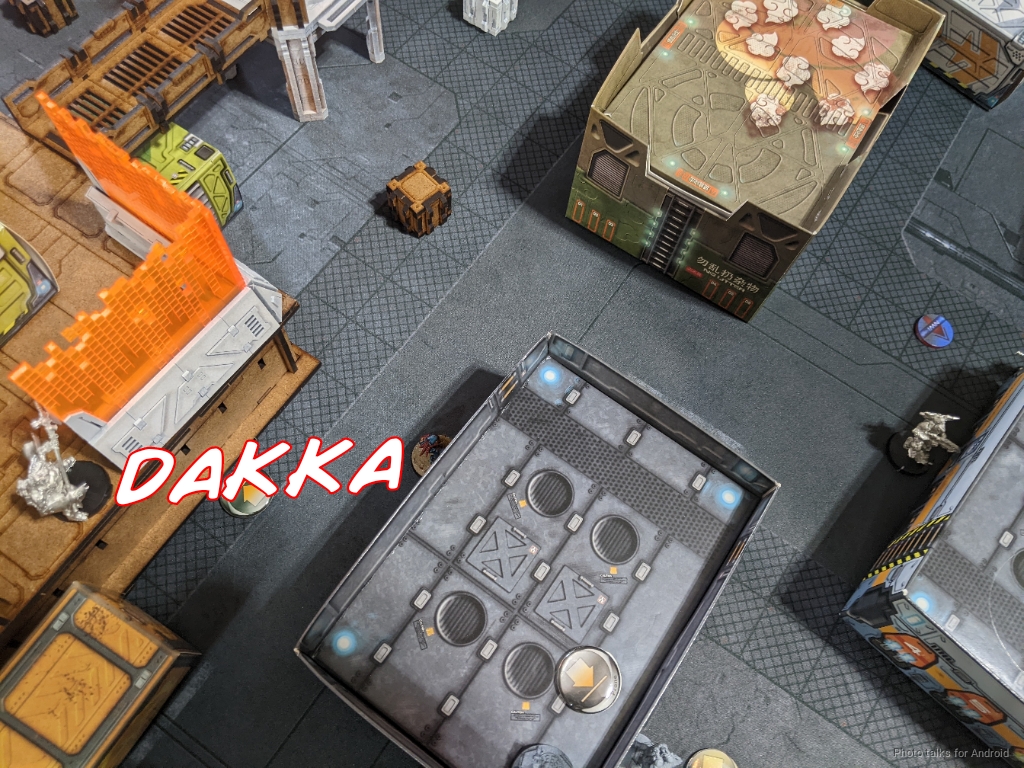
Everyone’s been avoiding dodging to set off the mine so far, but I force the issue by getting the Rindak on top of Krit to shotgun him unconscious. I lose the Rindak to the Kuang Shi’s chain rifle, and the Su Jian dodges the mine. Krit doesn’t, but he’s unconscious already so whatever. With nothing left in my second pool except for the Gaki link, I make use of their RIDICULOUS movement toolkit and get them on the objectives. I dispatch one to screen against the Kuang Shi as well.
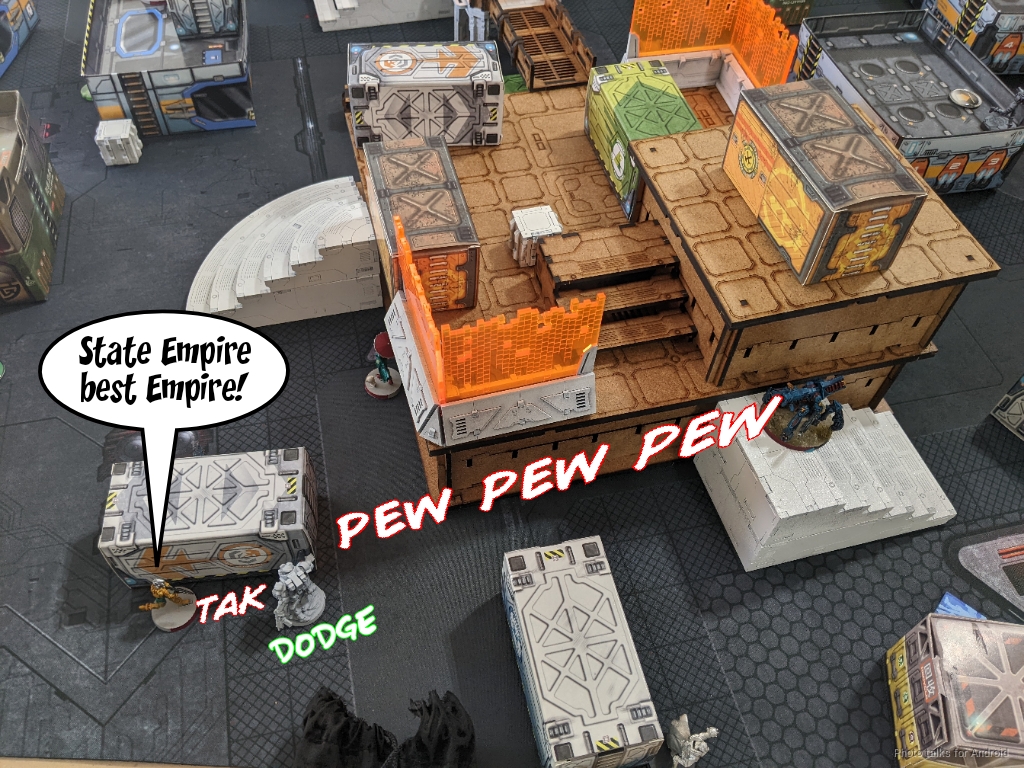
I’ve got two orders left in my primary group, so the Dartok flips and controls the right objective, and Anyat decides to try and take out the Son Bae to let a Gaki make it onto the central objective, but the Son Bae passes ARM. I risk the dodge on the Gaki and that’s it.
Bottom of 2 – Yu Jing
James isn’t in retreat but he is in loss of lieutenant. His Kuang Shi does manage to kill the Gaki though.
He then tries to take on Anyat with the Son Bae, but this time it fails ARM.
With only the Su Jian, Panguling, and Celestial Guard controller left, and our lunch break running long, we call it here. I’ve activated an antenna, am securing James’s HVT, and I control all three objectives, making it a
8-0, 165-75 Morat Aggression Force Victory!
Post Game Analysis
I think I made a few mistakes this game for sure. I’m really not happy with the way I handled the Rindak on my left, I think I was just too aggressive with it on the first turn. I think I need to practice what I preach and play as if I’m going to run out of orders to activate something. A much stronger play would have been to retreat the Rindak to the box on the left, saving a few orders.
Probably the play is as follows:
- Rindak BSG sensors the Beasthunter.
- Yaogat kills Aida
- Yaogat kills Beasthunter
- Yaogat kills Lunah
- Rindak MULTI kills Kuang Shi on right, sensors the Long Ya out of camo
- Dartok splits burst on Carbonite for both Long Ya?
- Rindak MULTI kills both Long Ya?
- Set up for turn 2
That seems far better. I had all the tools I needed, and getting a repeater near Krit and the Su Jian is good, but I can only probably get one of them and Krit can fix stuff pretty easily. The repeater also is too easy to kill with both Kuang Shi there. That might be too many orders, and I think the Son Bae can probably see some of this so it’s not a perfect plan. Turn 2 went fine.
As for James’s first turn, going for the Lieutenant snipe was fine, I think he should’ve committed harder to it and not split burst and just gone for the kill. I think Kornak being good in close combat scared him off. Liu Xing aren’t awful in CC, obviously not as good, but it has a non-zero chance of murdering Kornak. I did a pretty good job of locking down where the Liu Xing could come in, so I did make it hard for him.
The Bashi was great, taking out the Q-Drone. Probably doing that first and then sending the Su Jian more aggressively after the Rindak might have been better. Once you force the Rindak around the corner, the Q-Drone dies to Bashi, then use the orders on Krit to push hard. One minor mistake was not using the Kuang Shi’s impetuous to take out the repeater with its chain rifle, and just letting it die to the Q-Drone.
James’s Long Ya performed very well this game. I think they’re more generally useful (and cheaper) than a full-blown TR HMG bot these days. DAM 15 by itself generally isn’t enough, so having the Panzerfaust is pretty important. TR is obviously good, but the Mimetism helps boost the odds for the Long Ya. Getting mines is of course helpful as well.
James really likes Aida here, but I think it was a mistake putting her in suppression. We both made mistakes there for sure, but I think leaving her out there was rough. She exists to put out mines and then pressure the midfield, asking her to stand up in ARO means she’s dead.
In any case, I don’t think James made many mistakes this game, I just had a strong attack and kept the pressure up, and of course there was the game winning dodges against the Chain Rifle from the Yaogat Haris. Sometimes you just get lucky and then it becomes unrecoverable for your opponent. My plan for sending in the Rindak MULTI to take down the Kuang Shi (the one above) would have helped here. I think trying to take on the Long Ya was unnecessary, and I could’ve spent the effort attacking James’s orders, which is probably better, and also removes the chain rifle as the tool. Thanks for reading!
Pingback: Corsair Kerfuffle – MERC Recon
Pingback: Gutsy Gamma – MERC Recon