Ragnarok 2019 – Day 1
Canadian Adam (avanst), Ryan (halfjackz), and the Vancouver, BC meta put on a great tournament to finish out the 2019 Cascadia Circuit! If you’re looking for Day 2, here it is!
Since there were three Adams at the tournament, I’ll be using their ITS names to differentiate them.
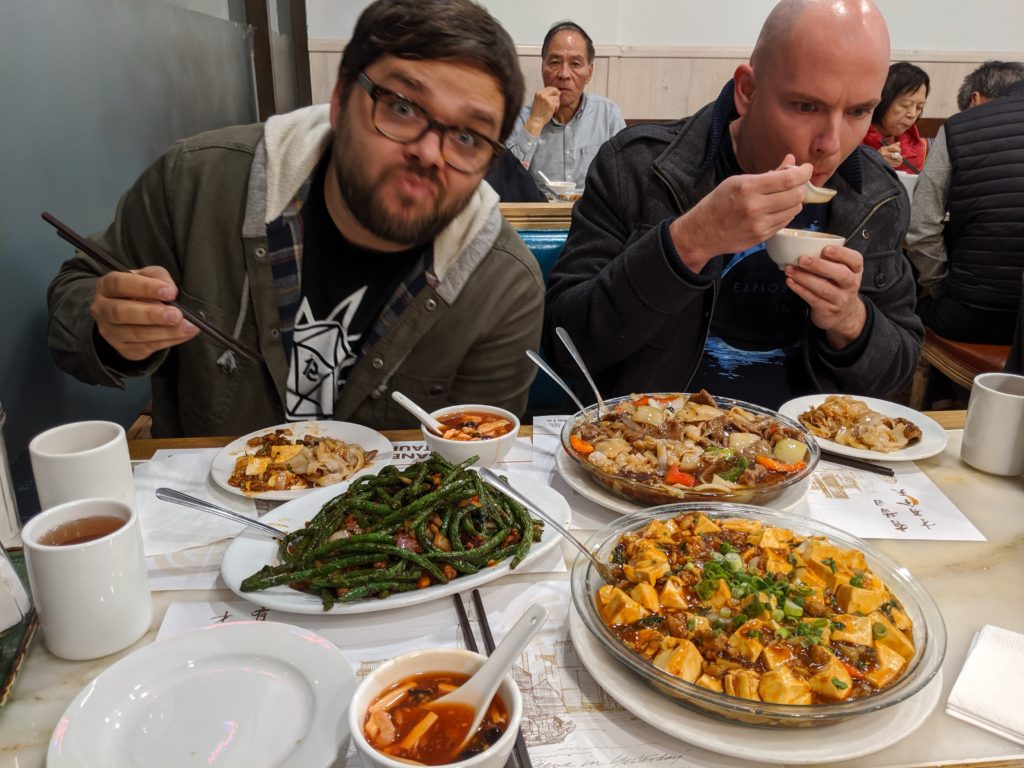
Adam (TheDiceAbide), Obi (nehemiah) and I bundled ourselves into my car after Obi drove all the way up to Portland, Oregon from California. We left on the Friday morning before the tournament and started our sojourn to visit America’s hat. We arrived just in time to beat the dinner rush at a Cantonese joint in Richmond, and gorged ourselves on some string beans, beef chow fun, mapo tofu, and hot and sour soup.
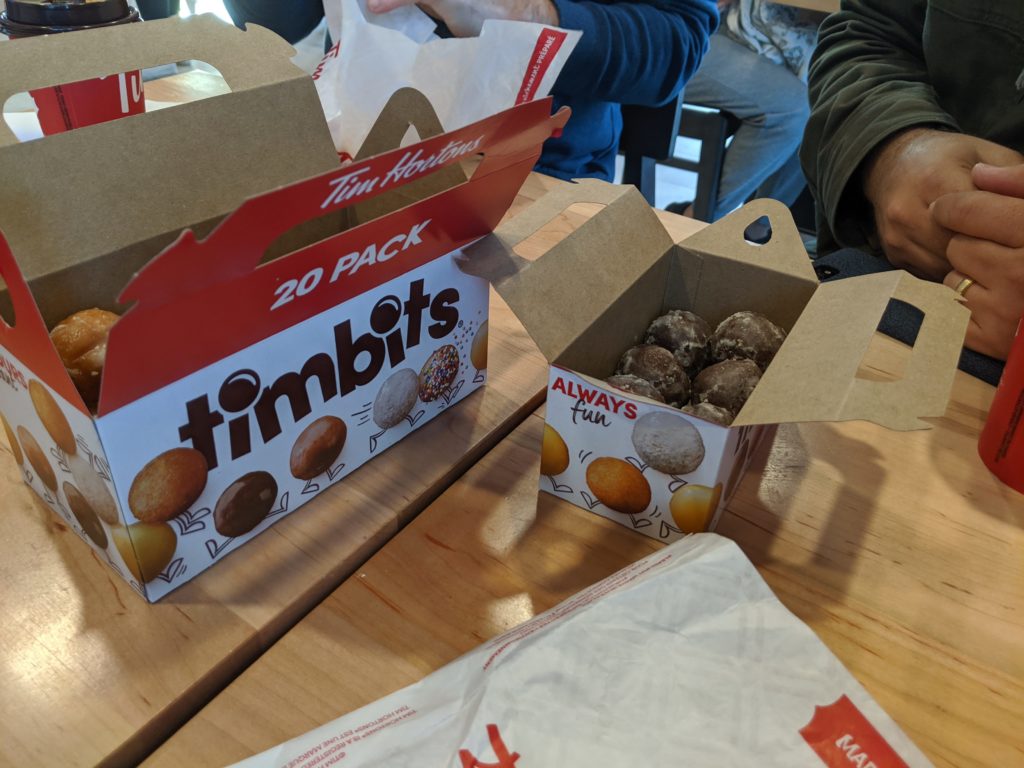
We waddled into our AirBnB, met up with James (RomanLegion) and caught some sleep before hitting up a Tim Horton’s for some Timbits and double doubles in the morning. Adam (avanst) and crew had settled on an art gallery as a tournament venue.
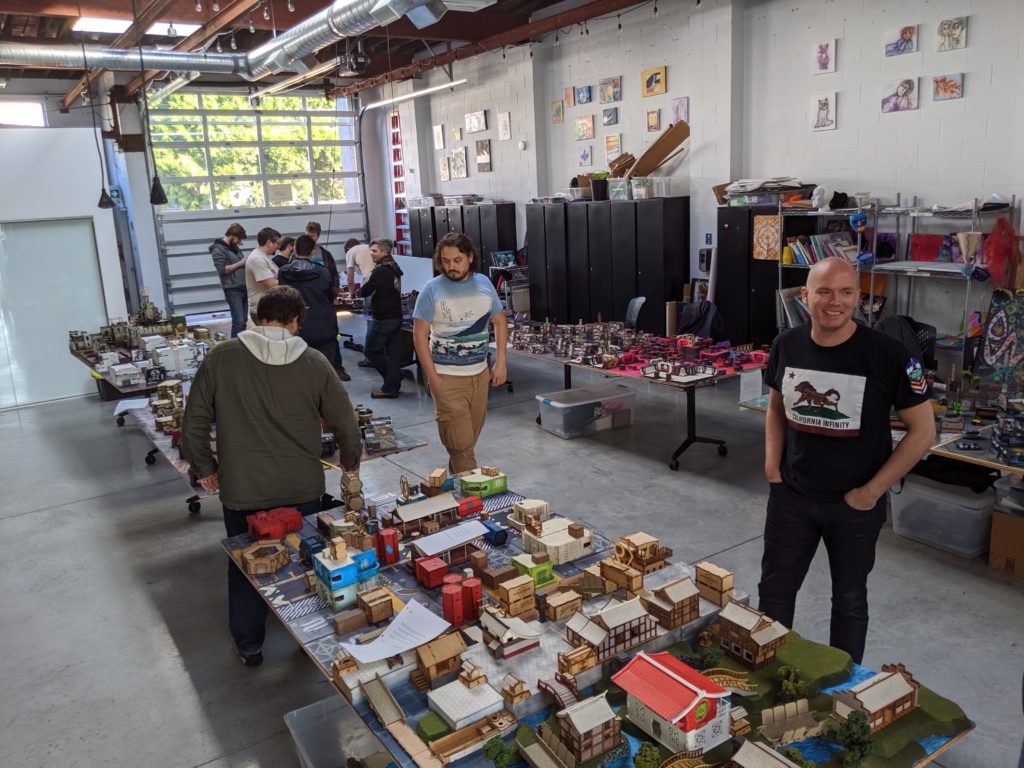
One really interesting choice was that Adam (avanst) designed the tournament experience to be “like a house party but with Infinity.” We had very forgiving game times, looong breaks, and a generous start time. The first day ended up finishing up well after 8PM, but as we all remarked later it was the “chillest tournament” we had ever been to–very low stress and very positive. Adam (avanst) even provided some kegs to keep the salt at a minimum after the crits started flowing!
I had some trouble deciding what to take to the tournament, but decided to finish out the 2019 tournament season by taking my JSA. They’d served me well at the Best of the Pacific Northwest, Adepticon, the Humboldt Irregular, and now I hoped I wouldn’t let them down during the end of days, Ragnarok!
Game 1 – So it Begins

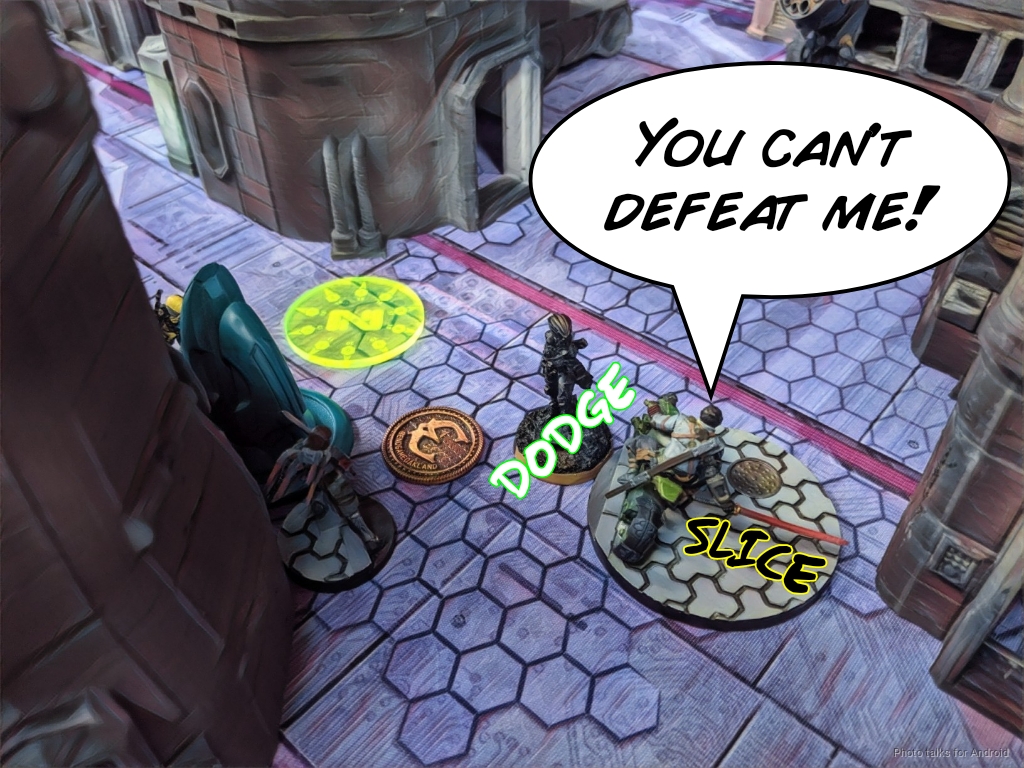
Game one saw me paired up against Obi (nehemiah) for some Power Pack action against his Spiral Corps. He had been struggling with the choice of what army to bring as well and we’d been throwing list ideas back and forth. At the very least he knew my tricks, so I knew this would be an uphill battle!
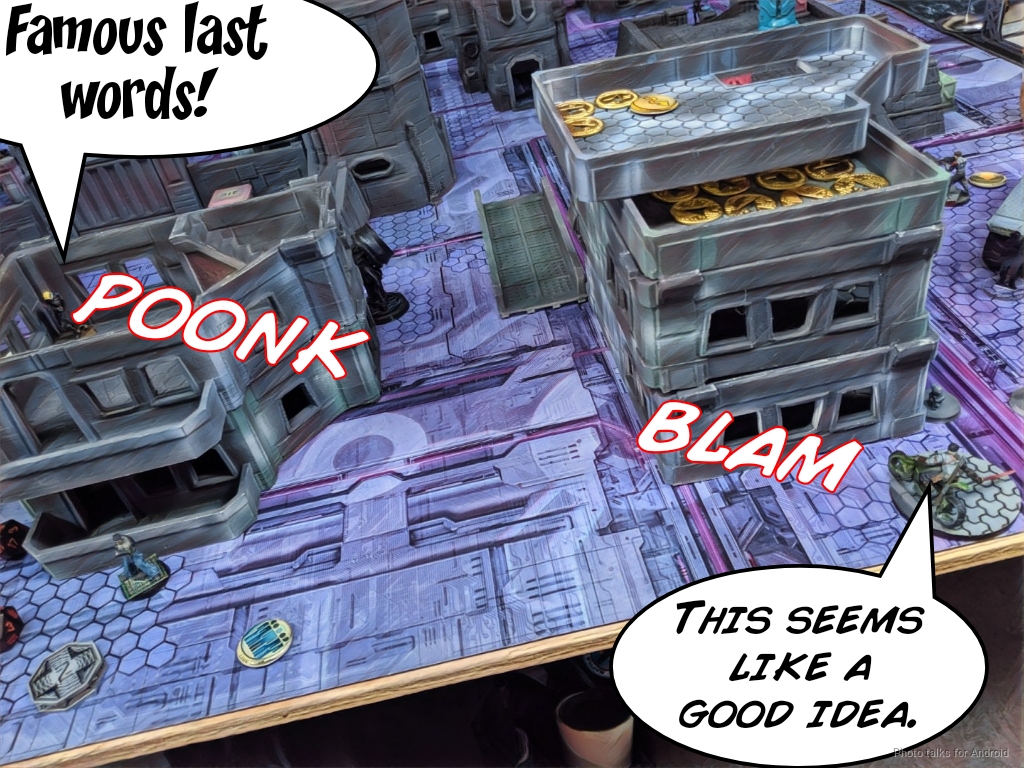
Sadly, I don’t know who is the owner of this table–I think it was one of the Vancouver locals. The layout was probably not the best for Power Pack, but most tables aren’t. What’s worth noting is that there’s a giant door in the wall that blocks half the table on the centerline. I wish I had known that earlier, but that’s why sportnauts talk about “home turf advantage” when they play sportsball or whatever. I did really enjoy the character of the table, it’s got some fun elements and does a good job of breaking up long firelanes while not overly impeding movement.
Overview
- Mission: Power Pack
- Forces: Japanese Secessionist Army versus Spiral Corps (300)
- Deploy First: JSA
- First Turn: JSA
Long Range
GROUP 1 |9
1
1
KUROSHI RIDER Lieutenant Combi Rifle + Light Flamethrower / Breaker Pistol, AP + Shock CCW. (0 | 33)
KEMPEI (Multispectral Visor L2) Shock Marksman Rifle / Pistol, CCW, Electric Pulse. (1 | 25)
YURIKO ODA Combi Rifle + E/Mitter, D-Charges, Antipersonnel Mines / Pistol, CCW. (0 | 23)
KEISOTSU Combi Rifle / Pistol, Knife. (0 | 9)
GROUP 2 |
TOKUSETSU EISEI Doctor (MediKit) Combi Rifle / Pistol, Knife. (0 | 14)
LÙ DUĀN Mk12, Heavy Flamethrower / Electric Pulse. (0 | 21)
YÁOZĂO Electric Pulse. (0 | 3)
WARCOR (360º Visor) Flash Pulse / Stun Pistol, Knife. (0 | 3)
TANKŌ Missile Launcher / Pistol, Monofilament CC Weapon, Shock CC Weapon. (1.5 | 32)
MIYAMOTO MUSHASHI (Regular, Fireteam: Haris) Chain Rifle, Flash Pulse / Pistol, AP CCW, EXP CCW. (0.5 | 28)
YOJIMBO Contender, Nanopulser, Smoke Grenades, CrazyKoalas (2) / Pistol, DA CCW. (0 | 21)
5 SWC | 300 Points | Open in Infinity Army
My JSA lists for tournaments have been divided into “the one with the Tanko ML Haris” and the one without. This one is the one with missiles, and I decided to spice things up a little bit by taking a Lu Duan and disguising it as a Rui Shi during deployment. The rest of the list is pretty standard JSA, although I dropped the Keisotsu HMG to take a hacker to buff the Lu Duan instead. Why a Lu Duan instead of a Rui Shi? Purely to be an Infinity hipster.
Game 1 – nehemiah
GROUP 1 |
KRIIGEL Lieutenant Breaker Combi Rifle + Smoke Light Grenade Launcher / Viral Pistol, Knife. (0.5 | 27)
TAAGMA (Tri-Core) Breaker Combi Rifle, Nanopulser / Pistol, Knife. (1 | 21)
DRAAL (Minelayer) AP Marksman Rifle, D-Charges, Antipersonnel Mines / Viral Pistol, Knife. (1 | 40)
GROUP 2 |
KIIUTAN Submachine Gun + E/Mitter, E/Mauler / Viral Pistol, Knife. (1 | 28)
KAAURI Sentinel Submachine Gun, 2 Nanopulsers, Nullifier / Pistol, Electric Pulse. (0 | 12)
KUMOTAIL Combi Rifle, D-Charges / Pistol, Knife. (0 | 22)
CHAKSA SERVANT Electric Pulse. (0 | 3)
IGAO Boarding Shotgun, Stun Grenades / Pistol, DA CC Weapon. (0 | 25)
CLIPSOS (Forward Observer) Combi Rifle, Antipersonnel Mines / Pistol, Knife. (0 | 25)
KAELTAR (Chain of Command) Light Shotgun, Flash Pulse + 2 SymbioMates / Pistol, Electric Pulse. (0.5 | 21)
CHAKSA AUXILIAR (Baggage, Sensor) Heavy Flamethrower / Pistol, CCW. (0 | 10)
GREIF-OP (Inferior Impersonation) Combi Rifle / 2 Breaker Pistols, Knife. (0.5 | 21)
6 SWC | 300 Points | Open in Infinity Army
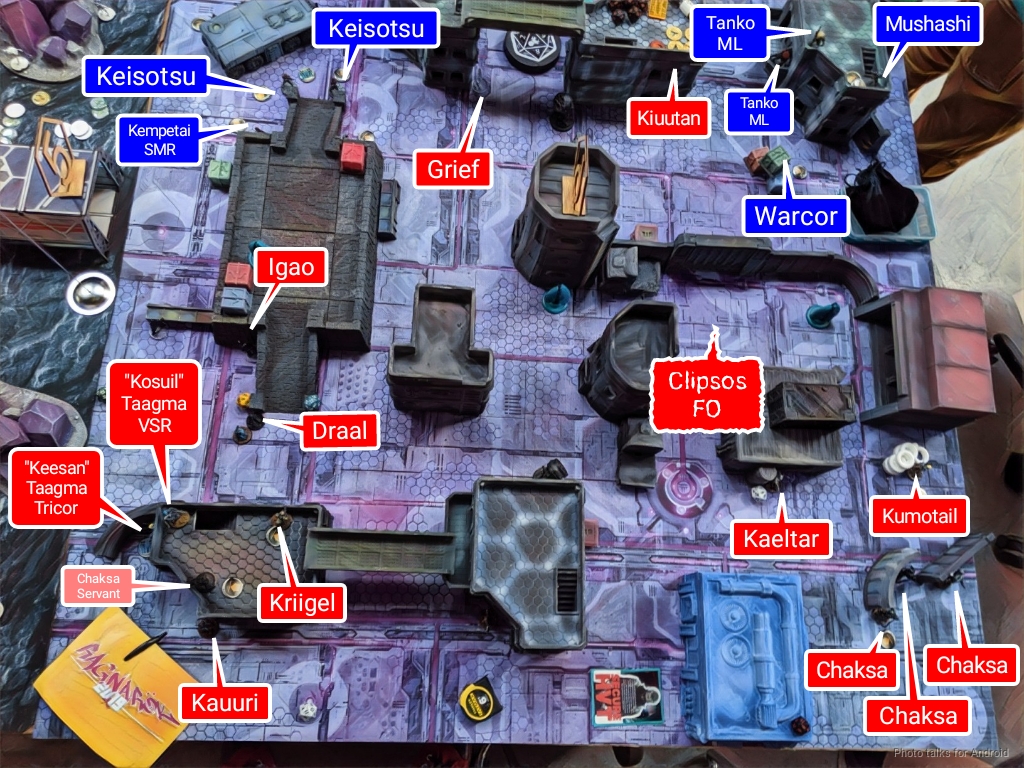
Obi’s list has a pretty brutal Triad in the first order group. That Tri-Cor is no joke. He also had some pretty brutal board control in the form of those impersonators which are really gross in Power Pack–the attack surface of your deployment zone is so big! I really enjoy playing Obi because he has such a different approach to list building. It’s so different that I often don’t “get it.” He’s a savvy and experienced wielder of artichokes, so I’m not disparaging his choices, I’m just saying that they’re pretty alien to me!
Deployment
I lost the roll off and Obi took table side, a great decision especially since we thought the big wall dividing the left side of the table (my perspective) had no door! It was almost enough for me to consider taking my Shikami list when I first saw the table. In any case, with the “lack” of a door, I decided to deploy the Tanko ML Haris on the left, as the “lack” of a door would protect them from an aggressive attack. Since I had to put the link somewhere, I put them on the right which had very little in the way of cover except for an armored personnel carrier. I put Kuroshi on the left to protect her from getting shot, and my “Rui Shi” ended up on the right.
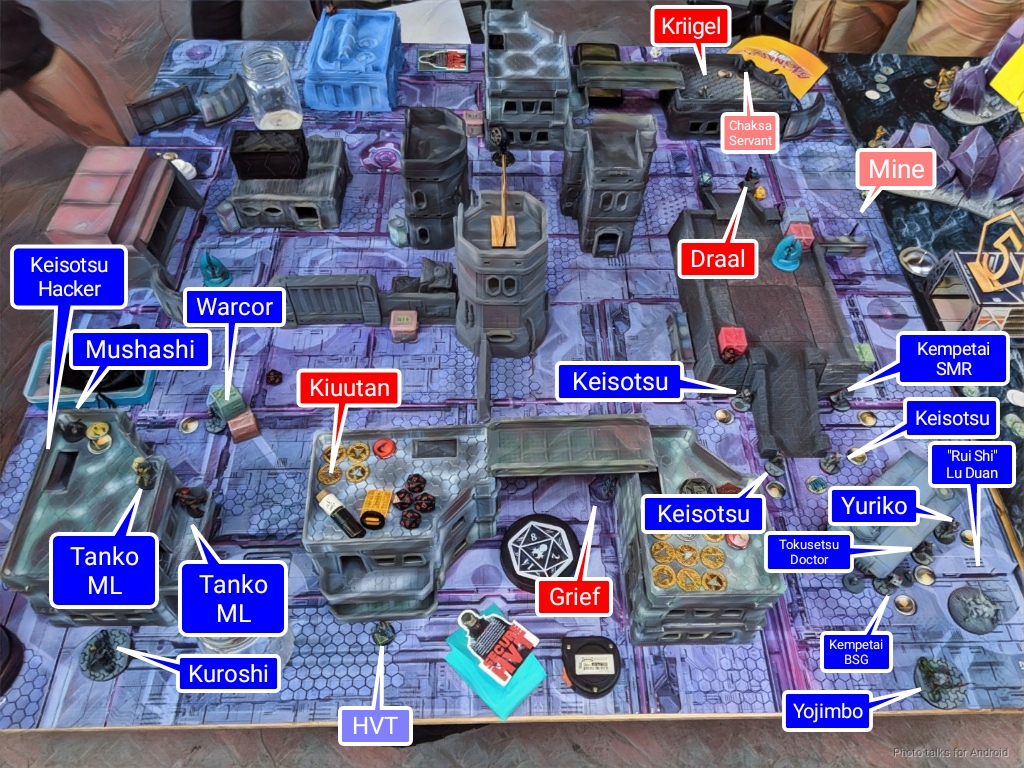
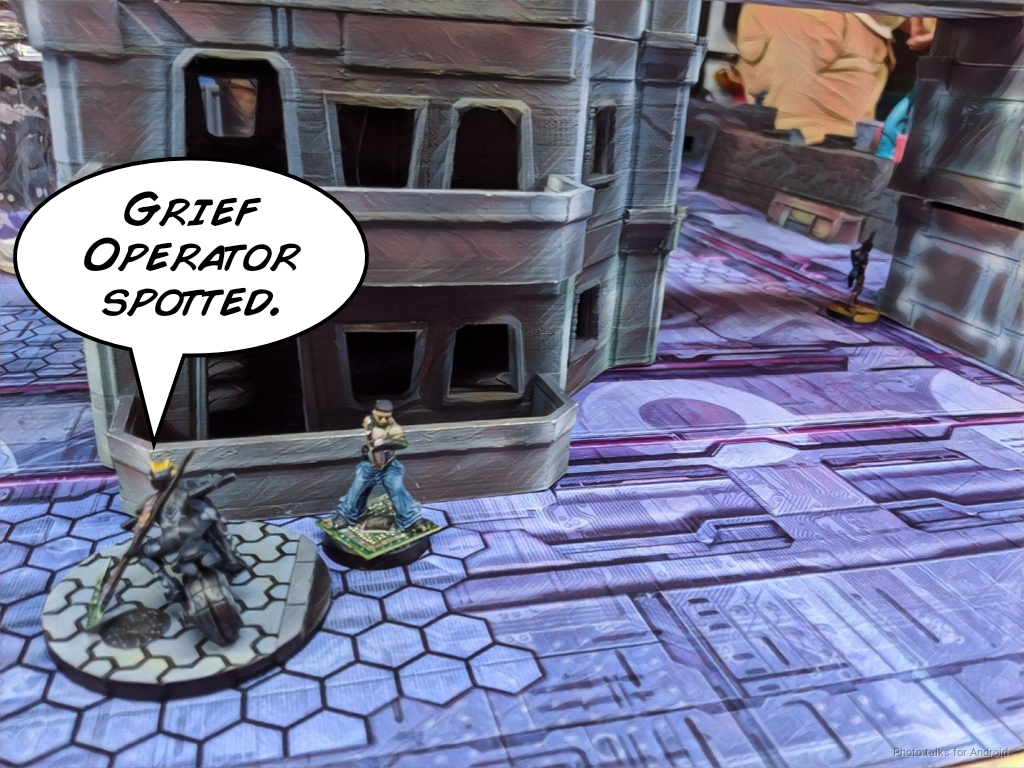
Obi also thought the wall had no door, so deployed heavily on the left. THe right side had two visible specialists and he feinted a Taagma on the right with a trio of Chaksa. Little did I know that he put a Clipsos on the right as well, which would prove my undoing. Obi stuck a Grief operator threatening the right side of my deployment zone, and then it was time for my reserve.
I placed Yojimbo on my right, and then Obi threatened my Tanko with the Kiiutan.
Turn 1
Top of 1 – JSA
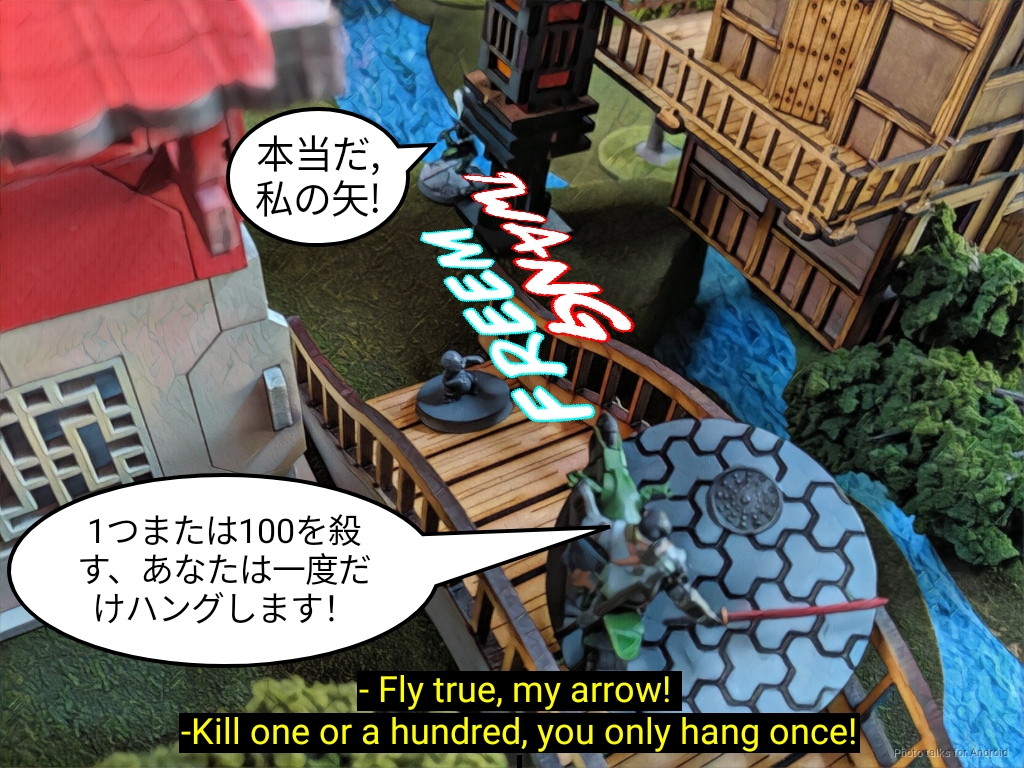
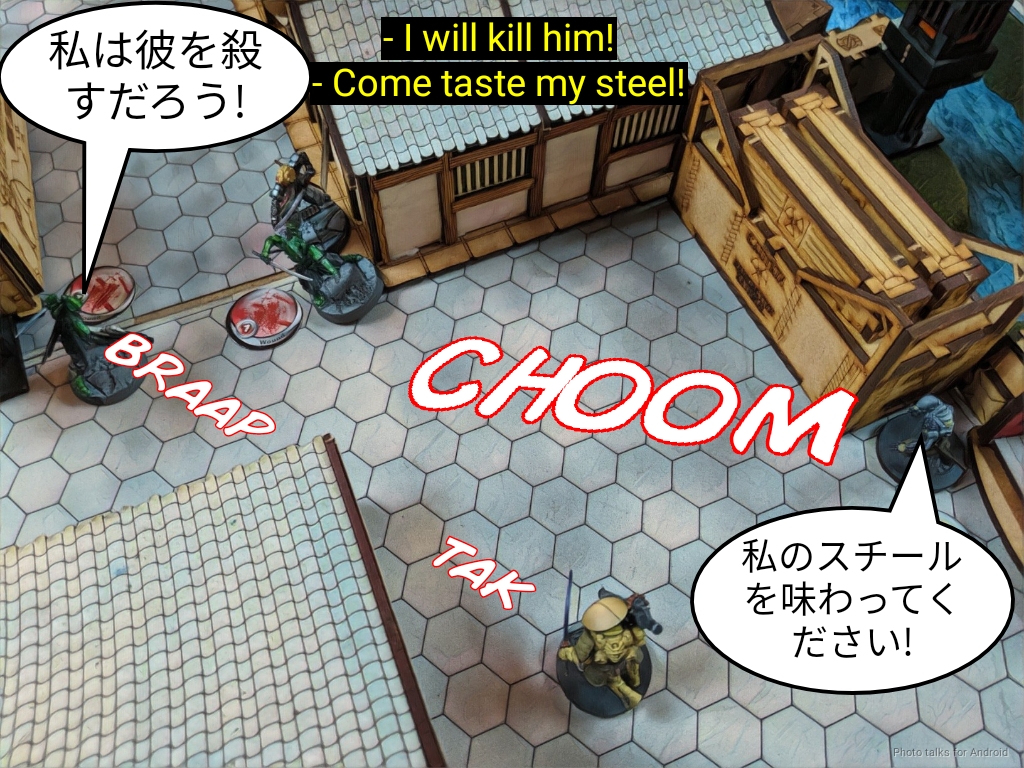
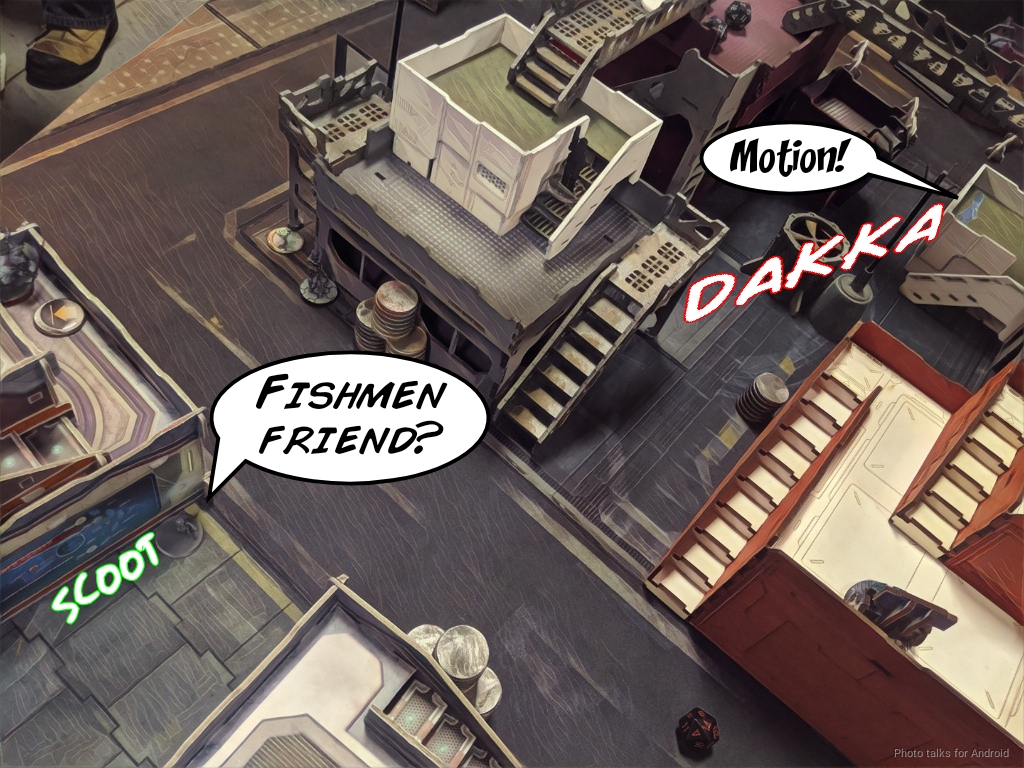
I started things off by canceling Yojimbo’s order, there was no way he could move safely under the watchful eye of the Taagma. Kuroshi had more freedom of movement and made her way towards the right side of the table, bringing her into view of the Grief.
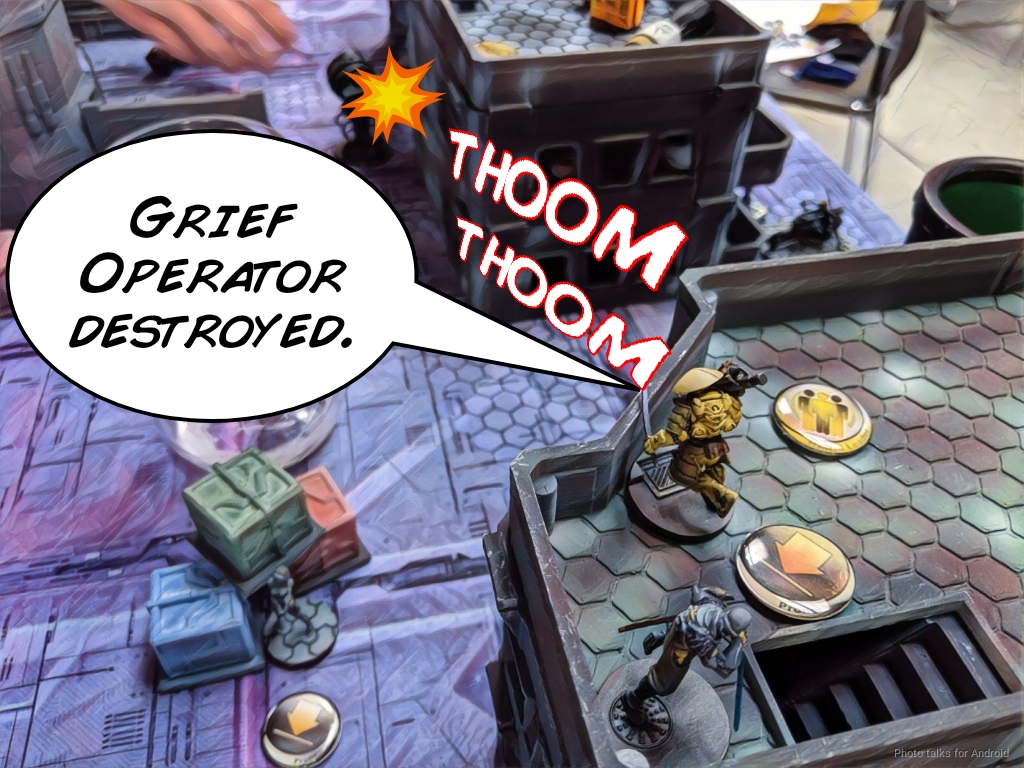
The first game of a tournament is always a bit full of nerves for me, so I made a pretty silly mistake. Instead of discover-shooting, I moved and then discovered. In any case, I succeeded on the discover attempt and then to “recover” the order, I activated the Tankos to shift them away from the Kiiutan as well as drop a pair of missiles onto the Grief from behind, blasting it off the table.
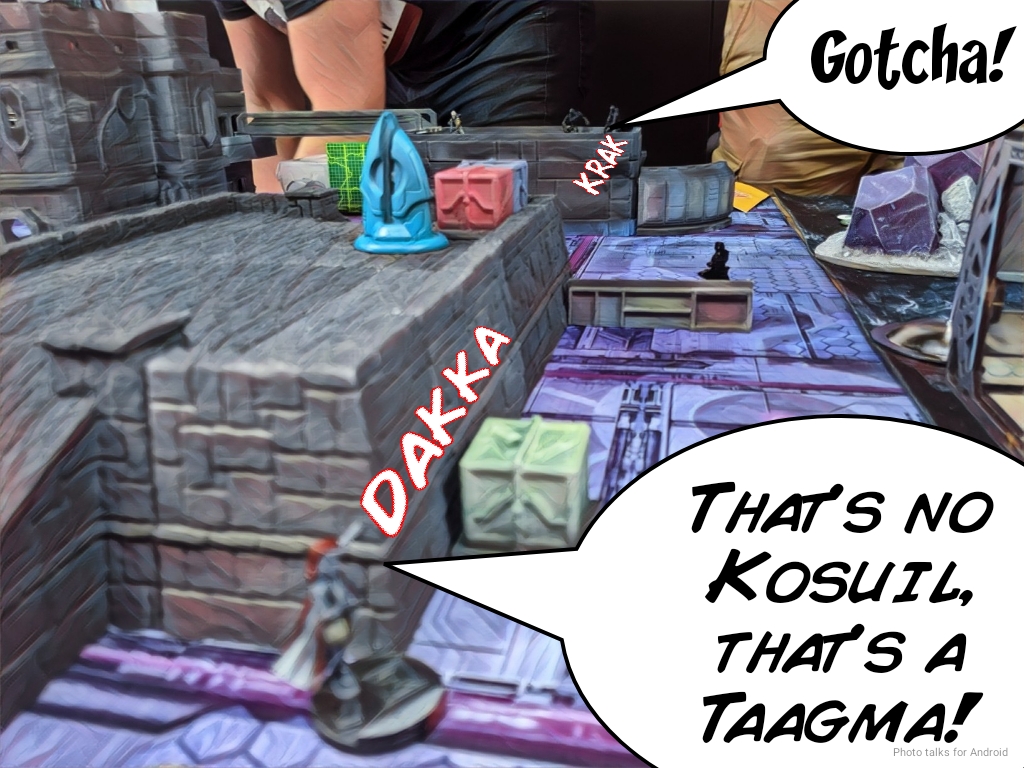
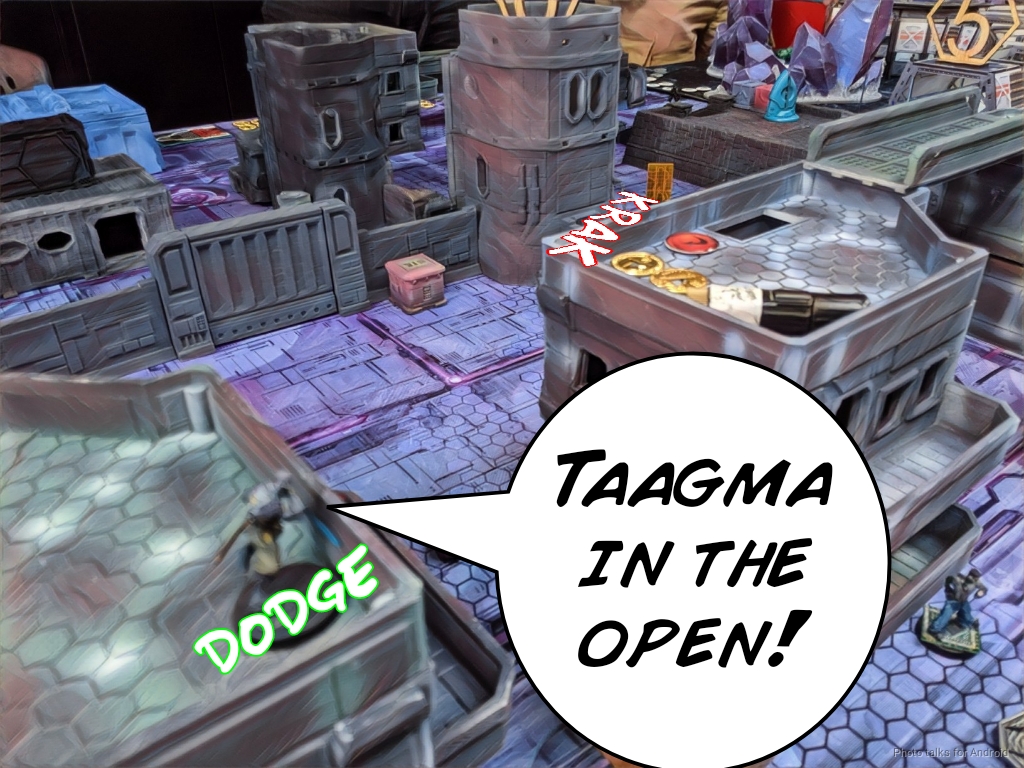
I then decided to throw the Kempetai at the “Kosuil,” which Obi revealed as the Taagma viral sniper with MSV2. Good thing I didn’t spend a ton of orders trying to land smoke for her!
| 70.24 | 17.91 | 11.85 |
Really not the best odds, and I ended up losing the Kempetai immediately. The saturation zone helped quite a lot in this case, without the saturation zone the odds are much worse:
| 46.05 | 27.41 | 26.54 |
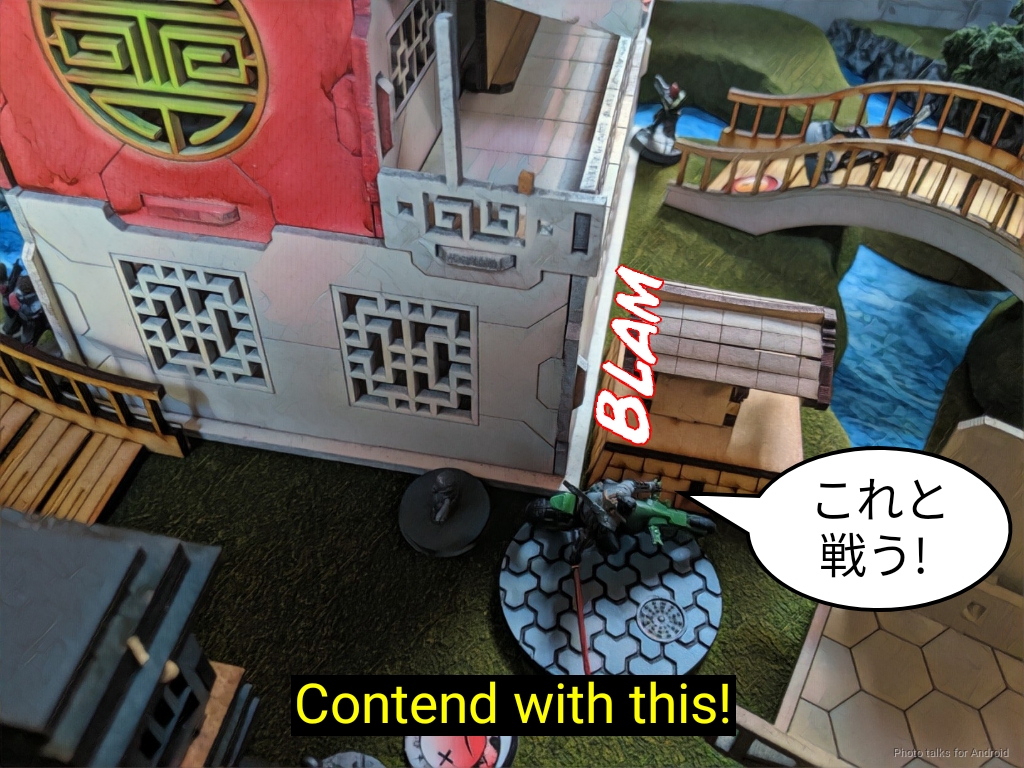
It’s at this point we discovered the door in the wall, so I went for it. Kuroshi Rider made her way through the door, flipped the left antenna, and then set about killing all the visible specialists on that side. First to go was the Kaeltar.
| 50.16 | 33.26 | 16.58 |
Kuroshi Rider’s mimetism helps here, but it took three orders to take out the Kaeltar because of the saturation zone.
I then made the mistake of threatening a light flamethrower on the Chaksa, figuring that the lead one might be a Taagma. The flamethrower would at least cover the Kumotail. The Chaksa ended up being a Chaksa after all, and flamethrowered Kuroshi rider. I threw two dice against the Kumotail’s dodge but we both rolled 2’s and the face to face roll is a tie.
| 50.16 | 23.39 | 26.45 |
I lose Kuroshi Rider to the Chaksa’s flamethrower. I shuffle Mushashi over to cover the Kiiutan with his chain rifle and then I’m forced to pass turn.
Bottom of 1 – Spiral
The Tankos do their job and really limit Obi’s movement. He shuffles the Draal around enough to get it into LoF of the “Rui Shi,” which I reveal as a Lu Duan. I take a hit and fail guts into cover.
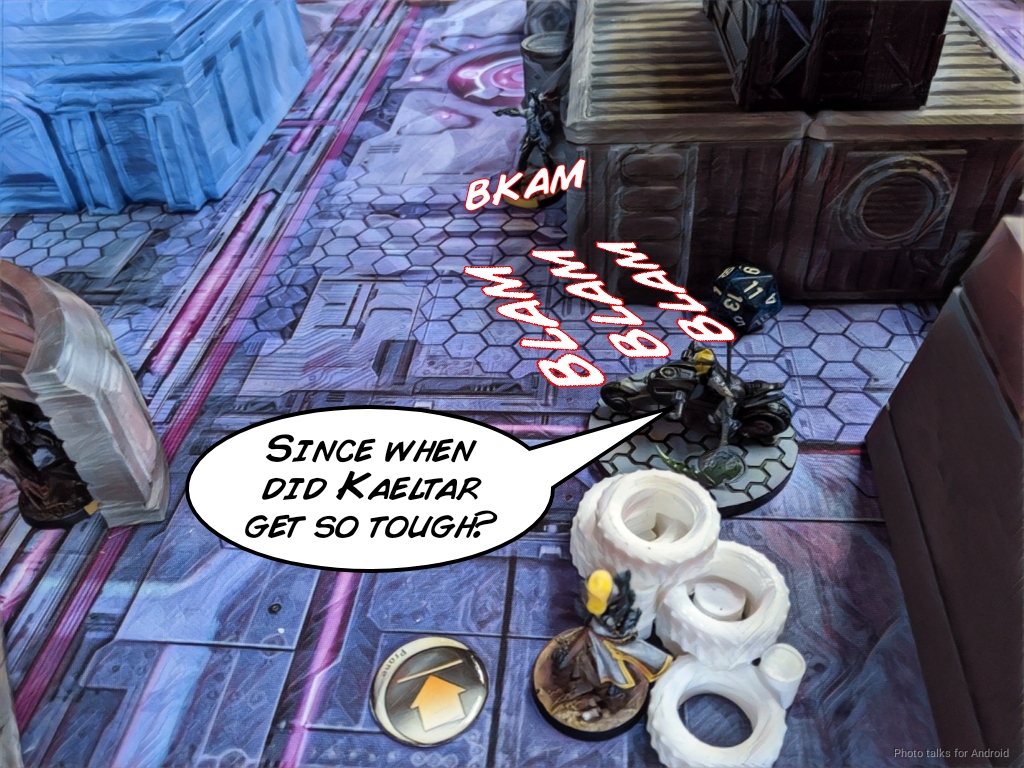
The Taagma jumps off the roof and gets into position to take a shot on Mushashi, taking him out against his dodge.
The Taagma tries to take out the Lu Duan next, but I roll slightly better and the Mk12’s high damage does the rest, dropping the Taagma.
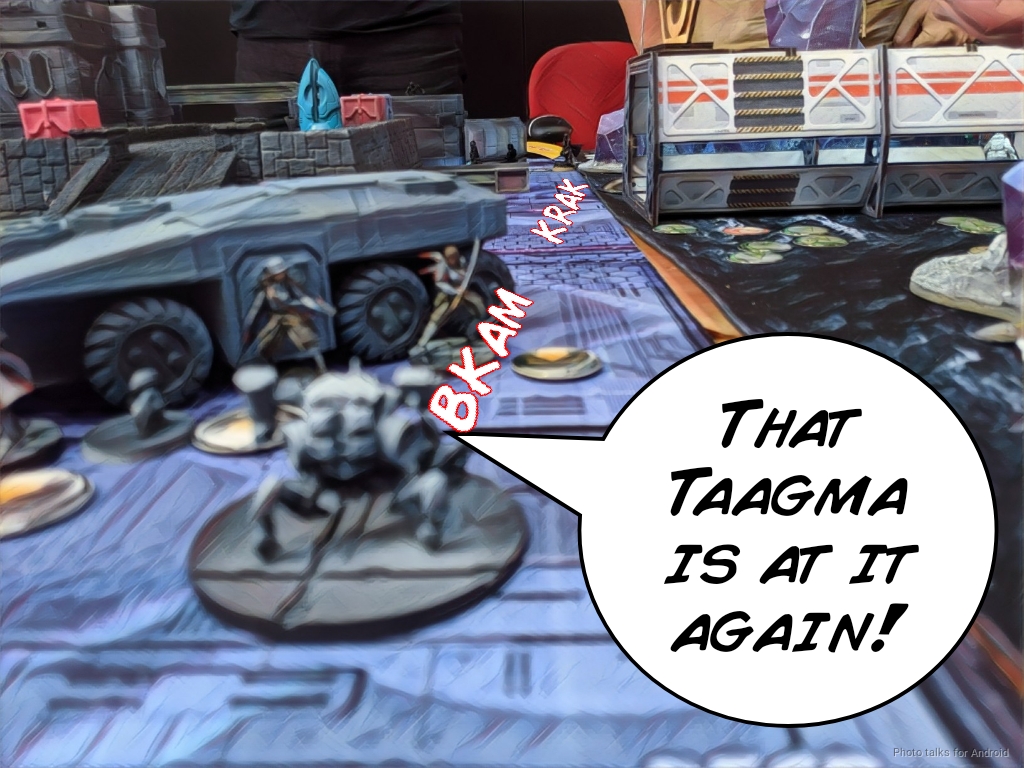
Obi then sends in the Kiiutan, dropping an E/Mauler covering my Tanko and then firing a E/Mitter shot. What a great profile! Thankfully I crit dodge the E/Mitter and pass the BTS save from the E/Mauler, going prone to protect my order pool.

The Kiiutan goes after the second Tanko with his SMG, but I pass ARM and go prone with this Tanko as well.
Obi decides to go after my Warcor next, but whiffs entirely.
Thankfully, the damage was relatively minimal. Both of us have had pretty rubbish first turns, and active turn comes back to me.
Turn 2
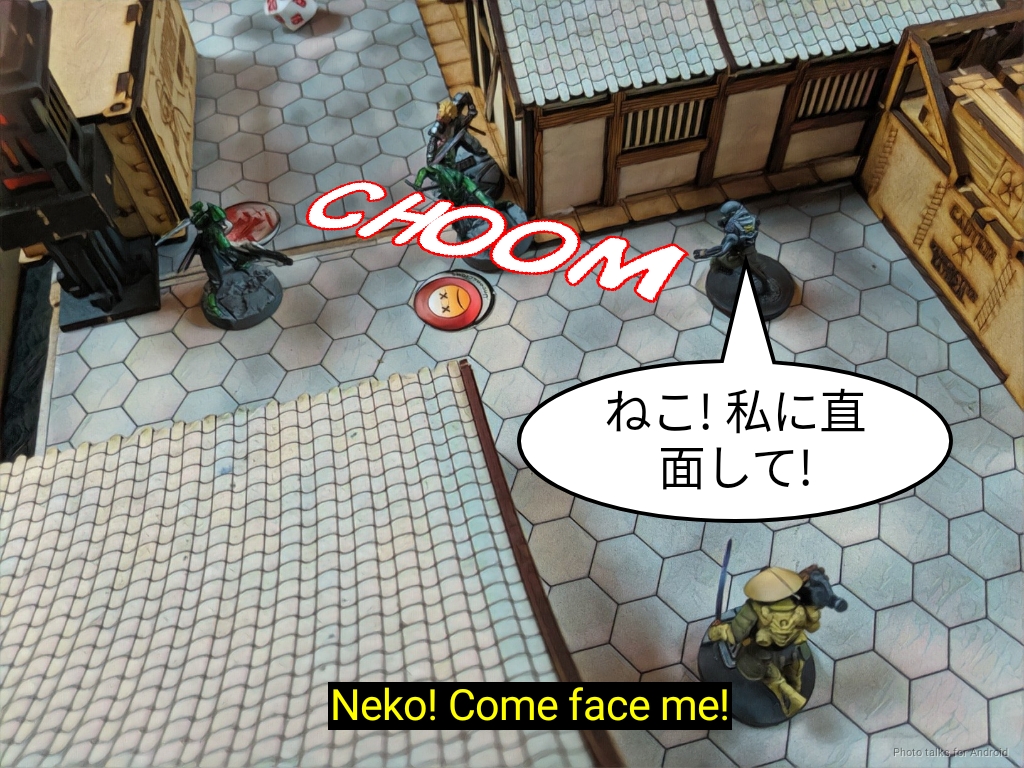
Top of 2 – JSA
I can see the Kiiutan hiding in his corner with Yojimbo, but both of us miss with our E/Mitter and Contender, respectively. Yojimbo’s great movement let me expose myself only for the impetuous order.
I then get it into my head that I need to use the Lu Duan. For… some reason. After buffing it with the Keisotsu hacker, I lose the Lu Duan to return fire from the Draal, twice (I repaired it with Yuriko).
I get Yojimbo into the building with the Kiiutan, but don’t have the orders to close combat it down and instead just block the stairs down to the first floor (the Kiiutan was on the second floor). I stand the Tankos back up and pass turn back to Obi.
Bottom of 2 – Spiral
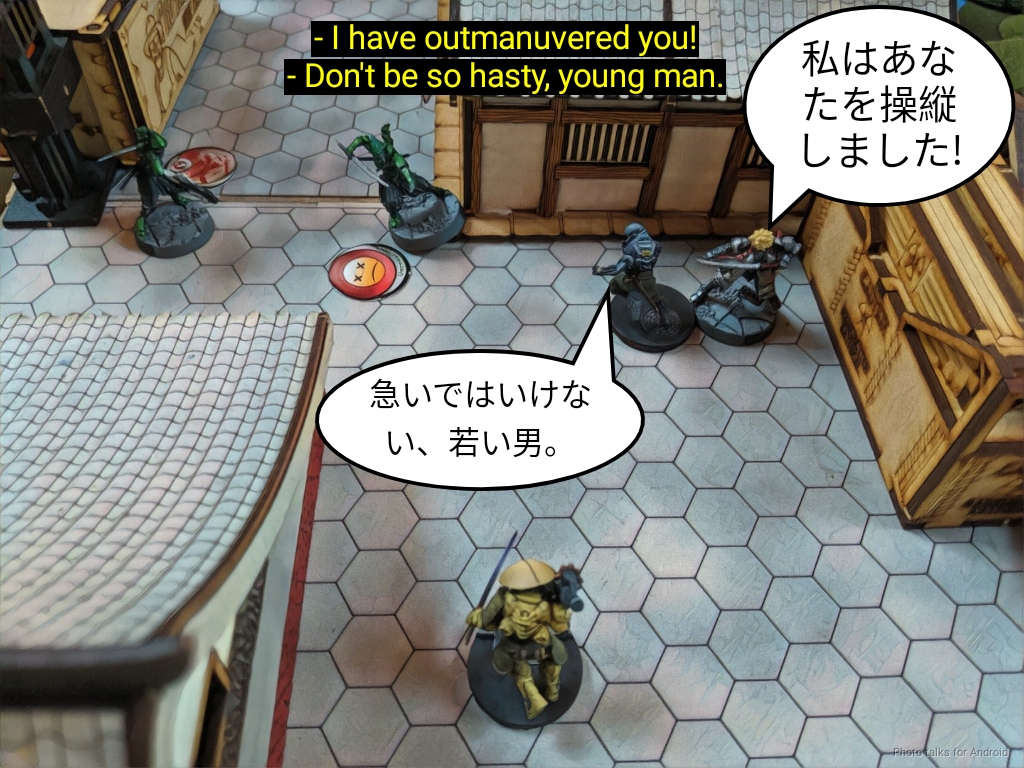
With my link never reformed after losing the Kempetai MSV2, Obi decides to start picking off orders, starting with the outermost Keisotsu. Thankfully I win the face to face and pop the SymbioMate, but no other damage is done. I do lose the Lu Duan to some additional fire from the Kriigel, I think it was.
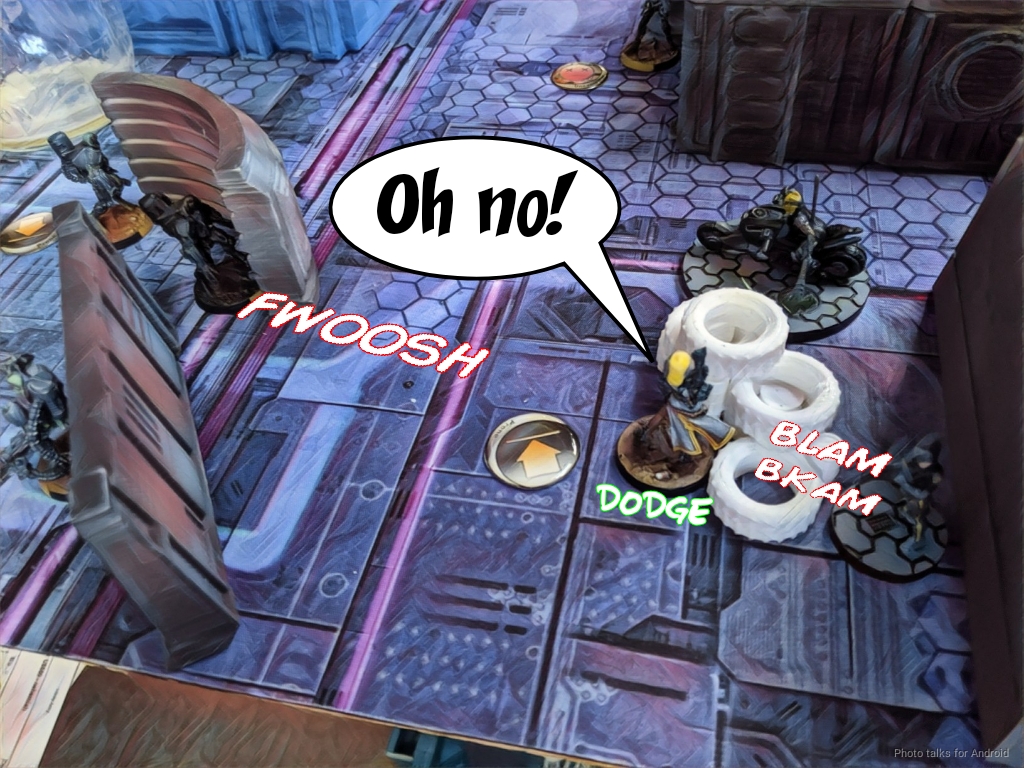
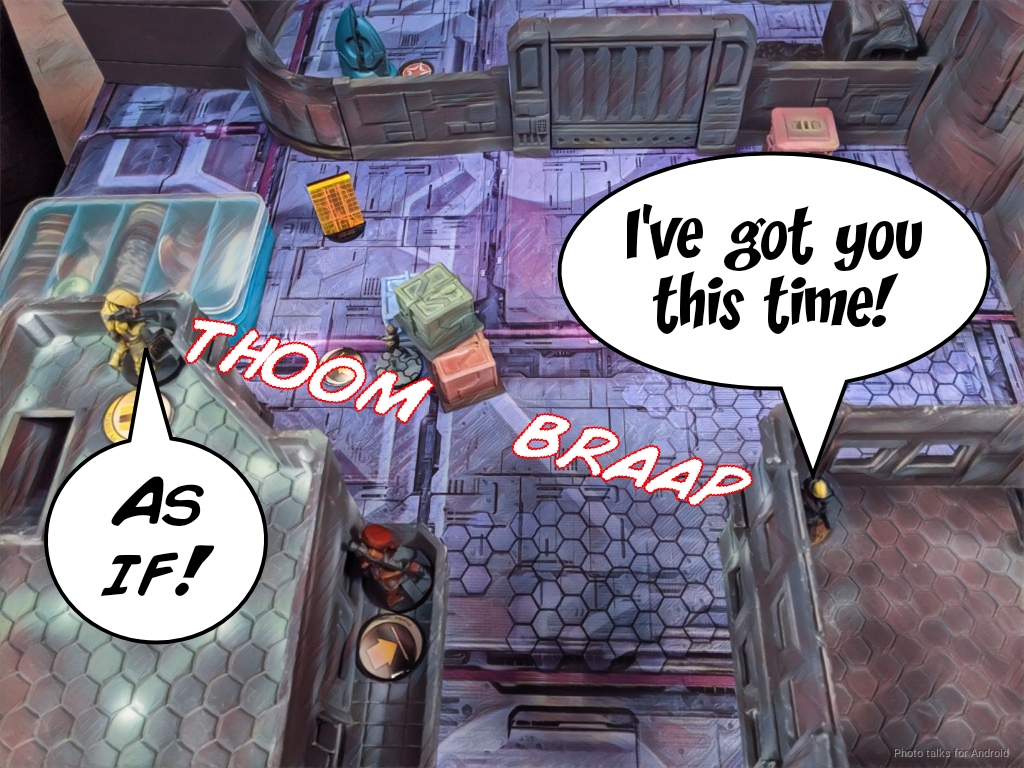
The Kiiutan decides to go after the Tanko again, but first has to dodge away from Yojimbo’s Koalas. He fails the dodge and both ARM saves!
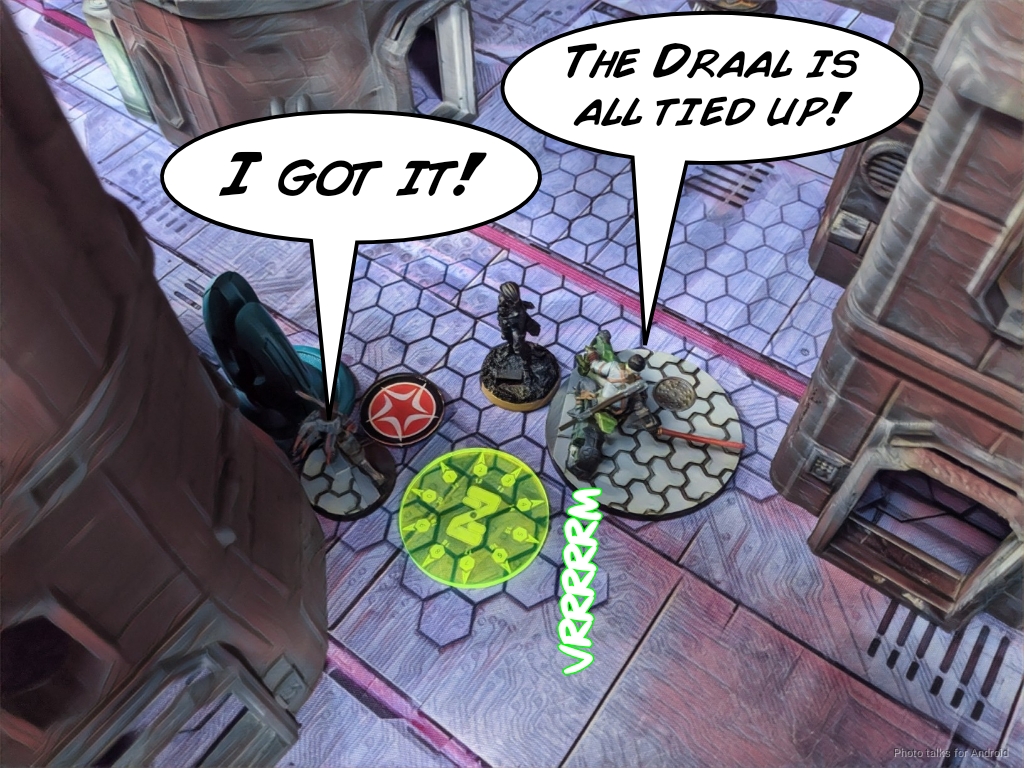
Obi then reveals his Clipsos, flipping the antenna I activated on my left over to him, and then flips the central antenna with the Draal before advancing a camo token that I suspect is an Igao.
Turn 3
Top of 3 – JSA
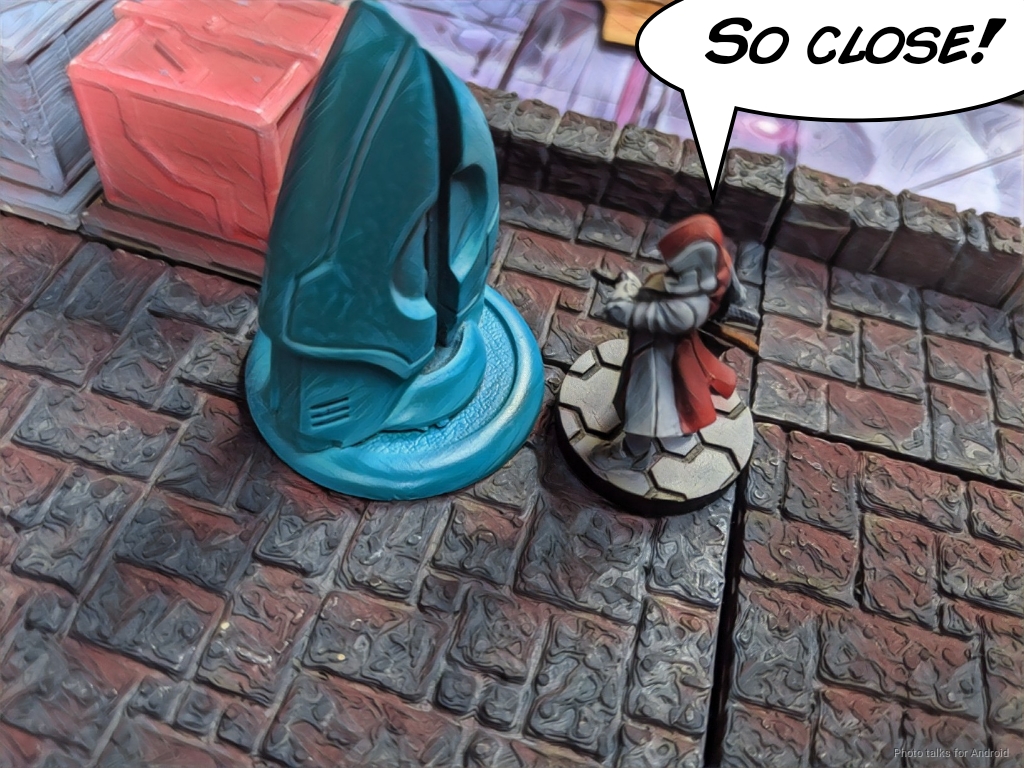
I’m in a bind, but I have to commit! Yuriko takes advantage of some smoke from Yojimbo to flip the central antenna, and then I try to get the Kempetai boarding shotgun to the right antenna. Sadly, I have to fight my way through the Igao and it takes too many orders. I’m literally a millimeter away from the objective on my first short skill of my last order. ARGH!
At this point we’ve both got two antennas, and I need to prevent the Draal from getting the antenna back, so I get Yojimbo into base contact to tie him up in the smoke.
Bottom of 3 – Spiral
Obi just needs to flip one more antenna to win. He takes out my Kempetai with his lieutenant, then sets up smoke for the Clipsos and the Draal.
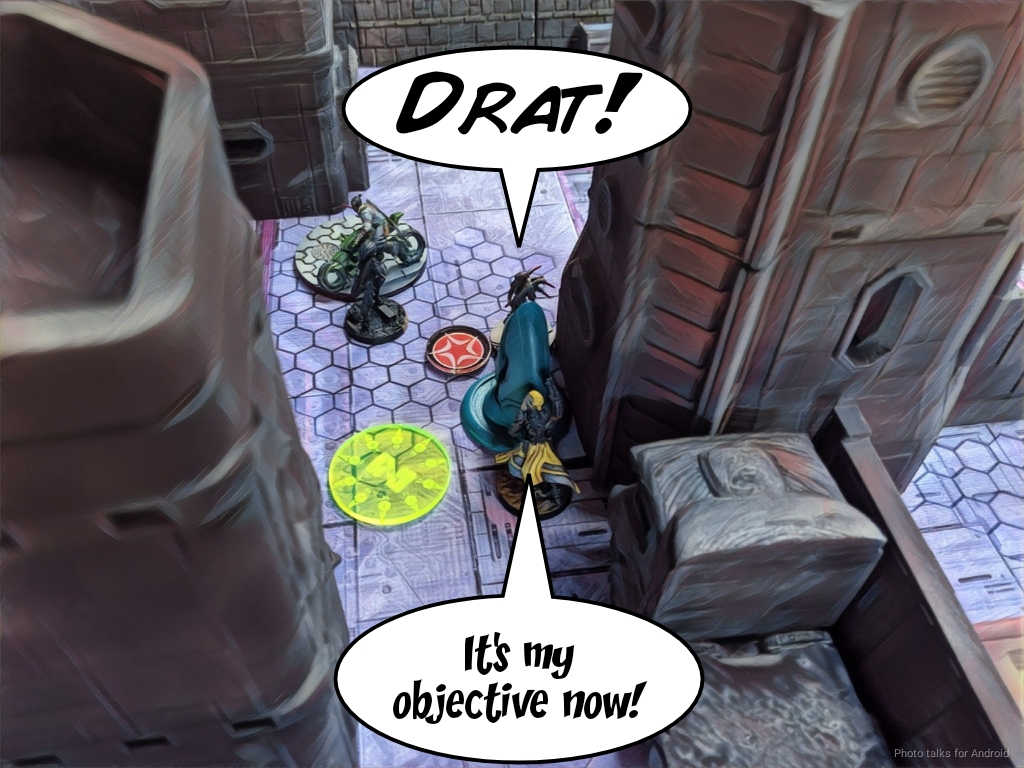
The Clipsos flips the central antenna back from Yuriko, which seals the deal. I should’ve saved an order to drop a mine or something, especially because the Clipsos fails all but the last WIP roll to flip the antenna!
We discuss how to maximize his points for a bit, and we decide the best way is for the Draal to dodge out of close combat and make a run for my console. Of course, Yojimbo doesn’t allow this and we have a dead Draal on our hands.
Obi wanders around trying to pick up some downed troopers to improve his VP for tournament ranking, and then we shake on a
6-2 Spiral Corps Victory!
Post Game Analysis
I got way too distracted by the Grief and the Kiiutan. If I had actually played to the objective from earlier, that would’ve set me up to make things much harder for Obi. With the Taagma MSV2 down, I could’ve had run of the board thanks to Yojimbo’s smoke.
I did need to go after the Draal though, since it was so close to the right objective. Without taking it out I would’ve wasted any orders I spent flipping the right antenna. I think I just made a bunch of small sub-optimal plays that snowballed. Not discover+shooting, spending orders on Yojimbo going after the Kiiutan instead of setting up smoke, not prepping to have the orders to protect the central objective with a mine even though I knew there was a Clipsos… the list goes on.
Obi did a great job exploiting my mistakes and had a great list for the mission. Two impersonators really can threaten a large part of the table and get in someone’s head. Which is exactly what happened. “Killing” the Tankos with E/M would have sucked, but all that would have meant was I’d have to share the orders in the first pool between Yojimbo and whatever else. A rough start to the tournament, but it’s always good to enjoy the company of a good friend!
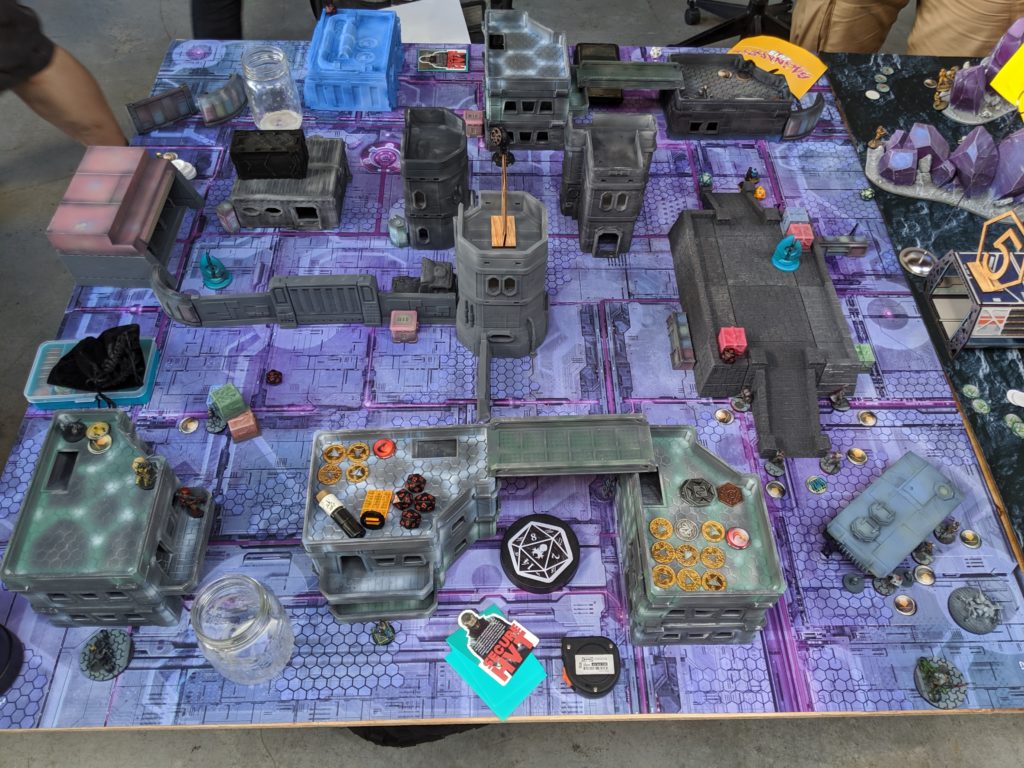
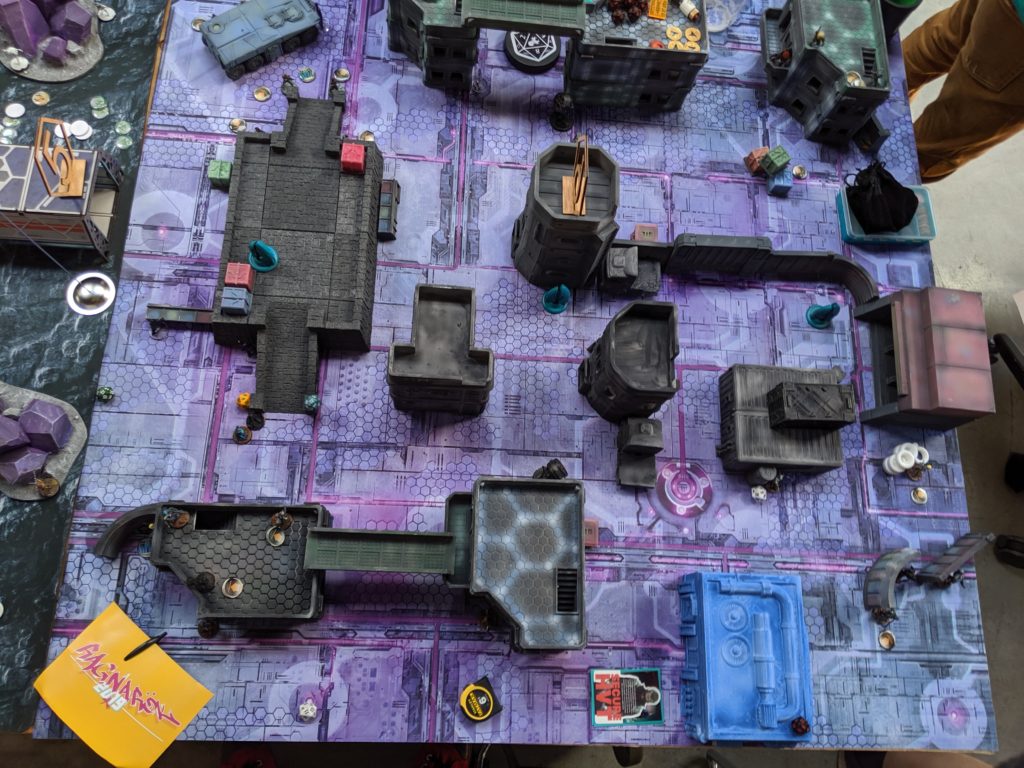
Game 2 – Otaku Overload
Game two I paired off against Daniel (DanielB), a fellow JSA player! I was really excited to play a mirror match on the most… asia-…appropriate table at the venue. Tony (zhukov2) has definitely created a complex table which demands strong game fundamentals, especially in deployment.
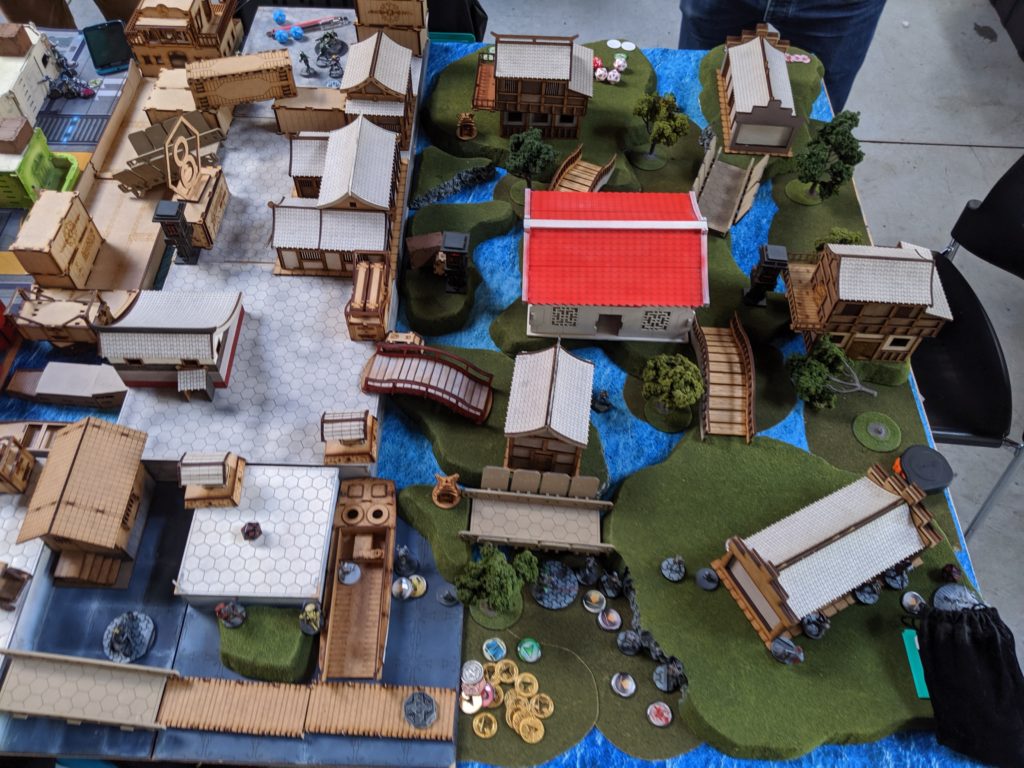
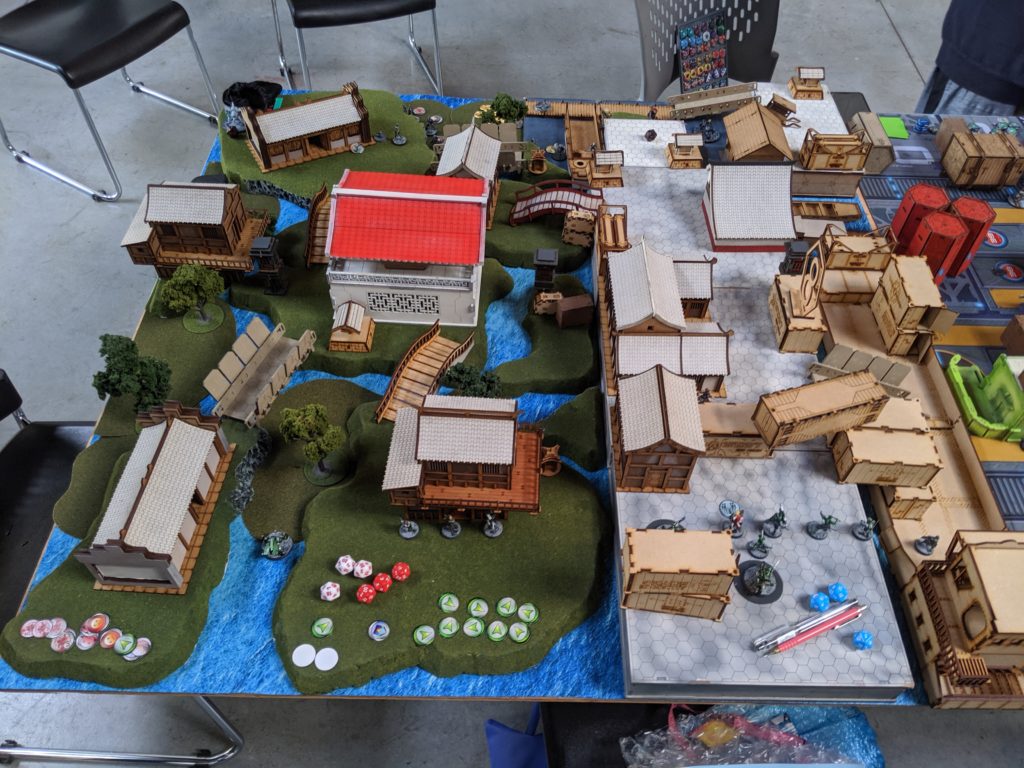
What’s funny is that I wasn’t really paying attention to the fact that I was on the most appropriate table at the venue at the time. It wasn’t until I finished the game that I tuned into the aesthetics of the table, hah!
I was quite pleased to have finished converting/painting my second Tanko ML, because it looked great on the table!
Overview
- Mission: Biotechvore
- Forces: Japanese Secessionist Army versus Japanese Secessionist Army (300)
- Deploy First: JSA (OpFor)
- First Turn: JSA (OpFor)
GROUP 1 |
GROUP 2 |
5 SWC | 300 Points | Open in Infinity Army
My Tanko Haris list was, by default, my Biotechvore list because it has two links. Pretty straightforward there.
GROUP 1 |
OYAMA Lieutenant Chain Rifle, E/M Grenades / Breaker Pistol, AP CCW, EXP CCW. (0 | 28)
DOMARU Spitfire / Pistol, E/M CCW, Shock CC Weapon. (2 | 39)
GROUP 2 |
NINJA Hacker (Killer Hacking Device) Tactical Bow / Pistol, DA CCW, Knife. (0 | 29)
ARAGOTO (Killer Hacking Device) Combi Rifle + Light Shotgun / Pistol, Knife. (0 | 25)
HÙSÒNG Yaókòng HMG / Electric Pulse. (1.5 | 25)
6 SWC | 300 Points | Open in Infinity Army
Daniel’s list is pretty speedy. He designed his second combat group to get out of the deployment zone as efficiently as possible, but wasn’t counting on difficult terrain or me docking orders from the second group. The first group is a Domaru/Tanko pain train, which I was sure would give me fits if it got into the midfield!
Deployment
Thankfully, I won the rolloff and gave Daniel the more difficult table edge to deploy on. I had been looking at the table earlier as table setup was going on and had mentally made a note of where to put my Tanko ML Haris on it should I play Biotechvore on the table. Not that I was expecting to, but more as a mental deployment exercise. I recommend doing this as you walk by tables at a tournament. It will help you focus in the first critical decisions of the game, as you’ve already rehearsed some things.
In any case, Daniel deployed his Keisotsu and Kempetai on his left, behind a convenient building. His TR bot hung out nearby, just barely touching some terrain. There was a keyhole between some shipping containers on the right, wide enough and flat enough for bikes to get through easily, so that’s exactly where the Aragoto went. To protect them, Daniel set up his pain train to advance through the same gap.

I elected to directly counter-deploy the Tanko/Domaru with not one but both Tanko MLs watching the link. I put Kuroshi on that side, hoping that my Tanko would punch hole in Daniel’s lines during my reactive large enough for her to advance through.
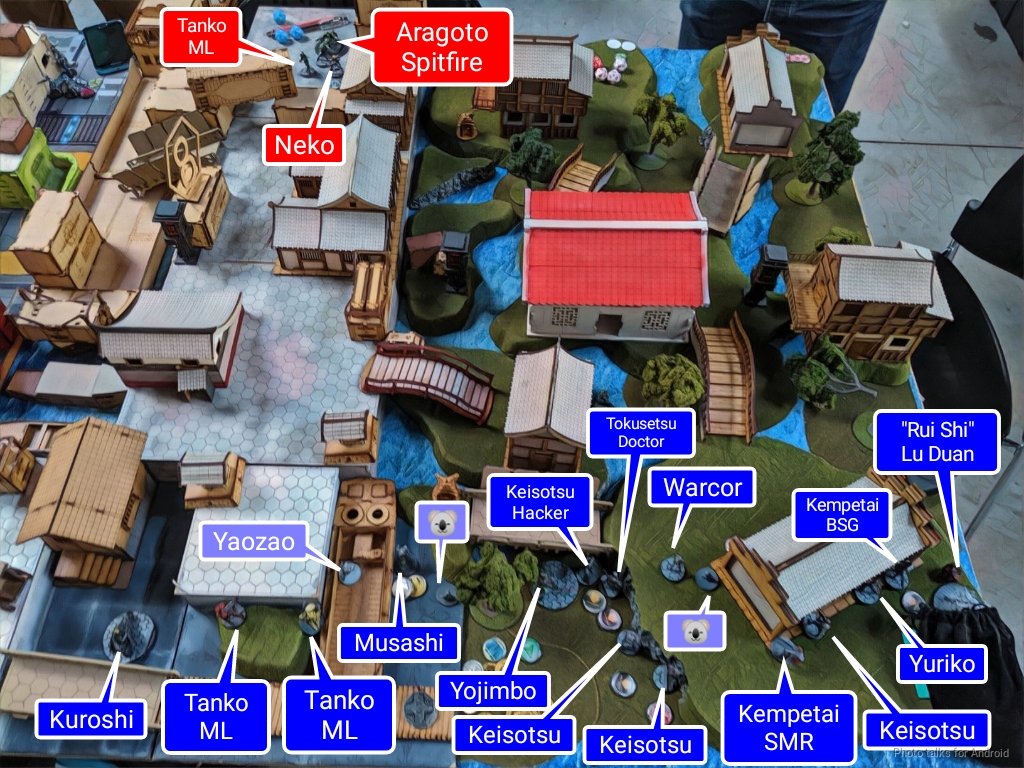
The rest of my stuff went on the right, basically in total cover save for some key pieces left out to ARO the corners of buildings in case a TO camo of some sort showed up. Daniel made that a possibility by asking me to turn around while he hidden deployed something. I stuck my “Rui Shi” down on the table, watching likely Ninja spots to discourage any TO schenaigans on the first turn.
Turn 1
Top of 2 – JSA (OpFor)
I docked Daniel two orders in the second pool, leaving him with only two impetuous and a single regular order to get both Aragoto and the Husong out of the deployment zone. The Aragoto would be forced towards my Tanko, ensuring that I would have the chance to blanket the Domaru link with four missile templates as the impetuous bikes zoomed forward. Daniel canceled the impetuous orders, electing instead to leave the bikes’ fates in the hands of BTS save against Biotechvore. The Husong was left to the same fate, moving only 4-4 in difficult terrain on its single order.
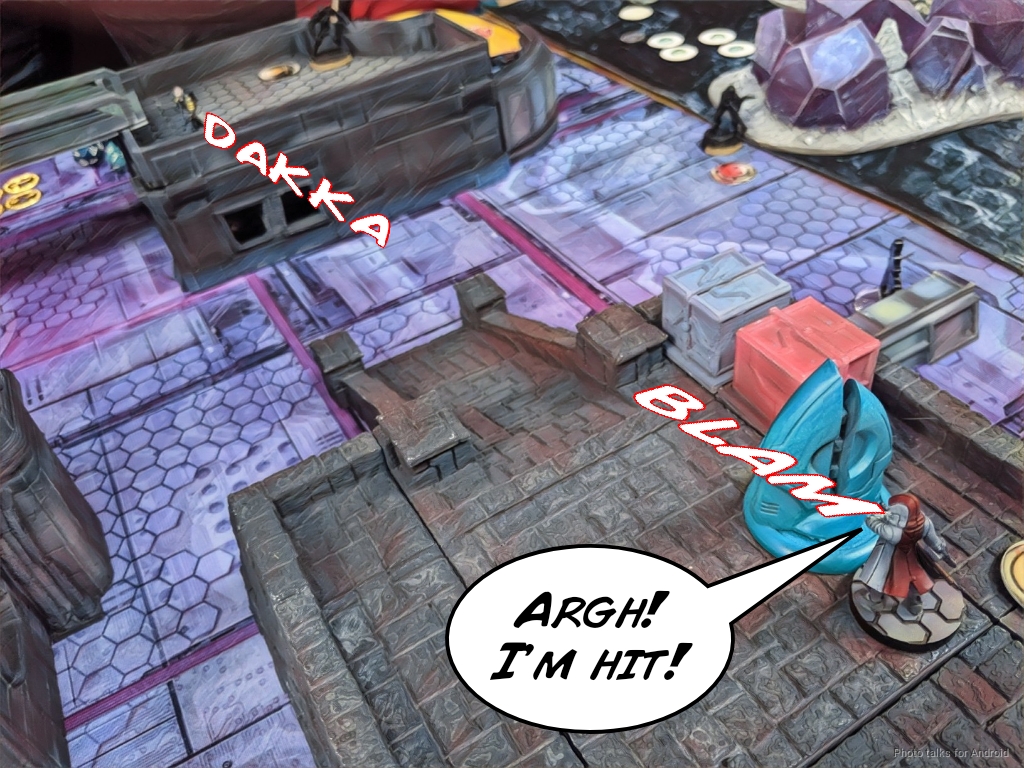
It was then time to advance the Domaru/Tanko link. Daniel decided to face to face my red Tanko with a Flammenspeer. I had carefully deployed everything out of direct template range, but Daniel was not so lucky! I covered the Tanko Flammenspeer, the Tanko ML, and the Domaru Spitfire with all of my missile templates.
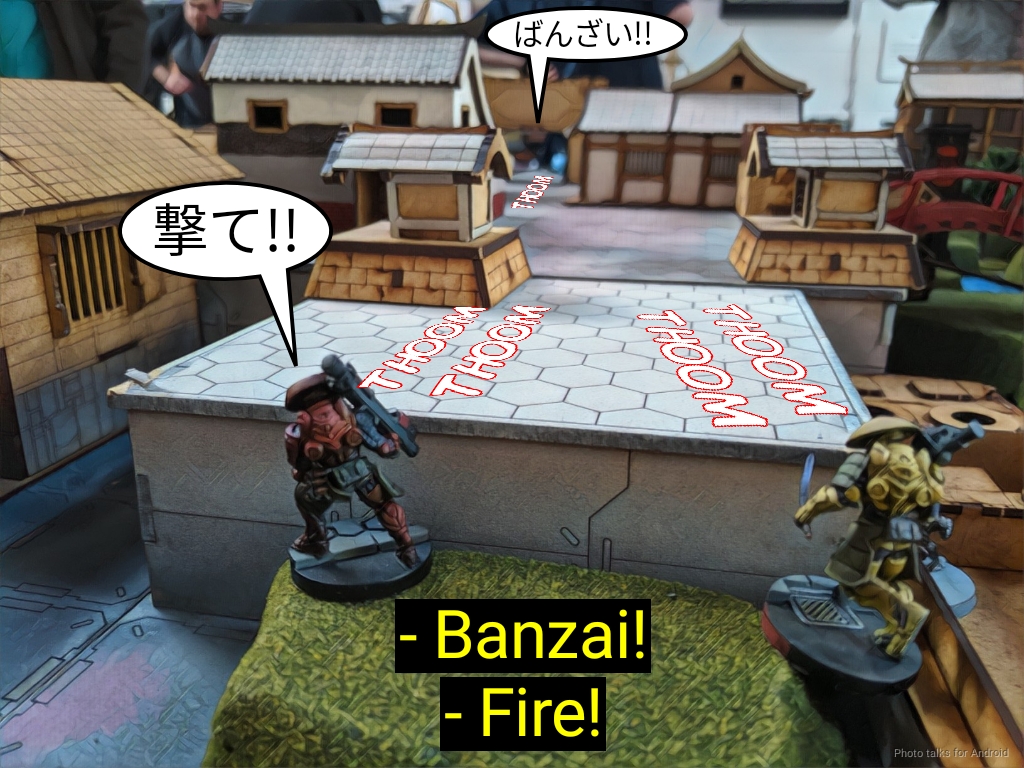
The Flammespeer Tanko managed to burn the red Tanko off the table, but not before it took a wound from the single missile the yellow Tanko was able to sneak through. The Domaru and Daniel’s Tanko ML did not fare so well and were forced to roll 9 ARM saves. Neither survived.
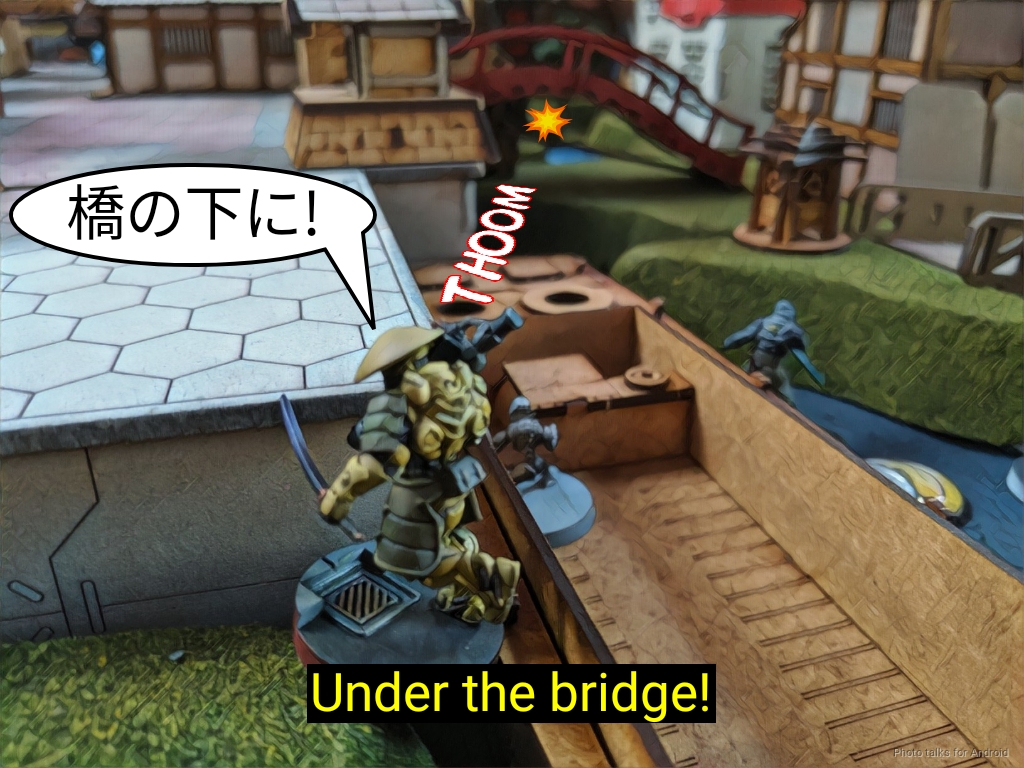
After taking advantage of the long skills Climb and Jump, Daniel was able to safely extricate the remaining members of the link by “hopping over” a box over the course of two orders. After settling them into a nook in the buildings, Daniel turned his attention to the other side of the table.
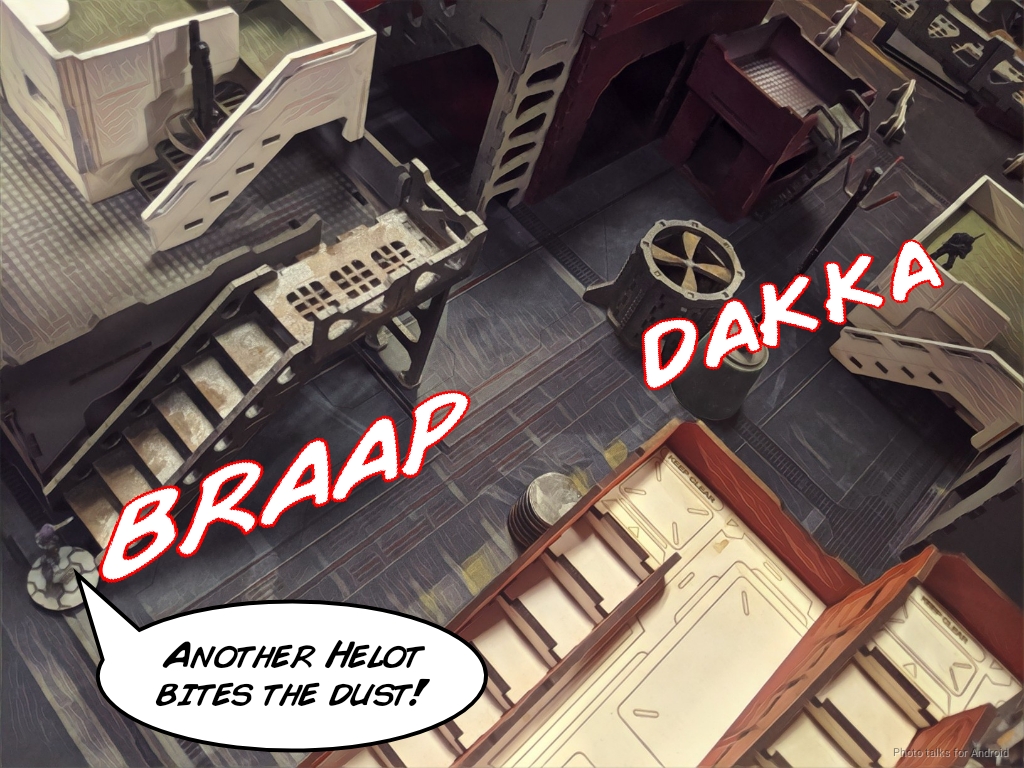
The yellow Tanko also covered a likely approach path of the Keisotsu/Kempetai on that side, and I was rewarded with a single shot on them that took out two of them.
Daniel’s managed to get most of his troops out of the danger zone, but sadly loses the Aragoto, the Husong, and a single Keisotsu to the Biotechvore. The remnants of his Domaru link are safe at least.
Bottom of 1 – JSA
Yojimbo makes it forward without incident, but Kuroshi Rider has to go face to face with a Tanko’s Blitzen or SMG to make it forward. I decide to chance it and drive her forward.
| 30.55 | 22.95 | 46.50 |
I get lucky and do a wound to the Tanko. Yojimbo keeps moving up and gets shot in the face by a sneaky Ninja, who crits with her Tacbow! I pass the second DA save and the Ninja goes down to Yojimbo’s nanopulsar.
After getting my Doctor in range to heal Yojimbo out of NWI for an Experimental Drug classified, and then send Yojimbo in to contender a Keisotsu in the back.
I shuffle as mnay things forward as I can, but I’m running low on orders even with a link and coordinated orders, thanks to my stunt with the Doctor. I’ve got one more order left in the main pool, so after I move the remaining Tanko and Musashi forward, I decide to risk sending Kuroshi Rider in to flamethrower Neko and the unharmed Tanko, but she dies in a hail of gunfire and the enemy heavy infantry’s armor holds against the flamethrower.
By some miracle, the Keisotsu Hacker, the Warcor, and one regular Keisotsu pass their BTS saves. I lose only Yuriko’s mine and the Yaozao, which now lets me do a coodinated order with the Doctor!
Turn 2
Top of 2 – JSA (OpFor)
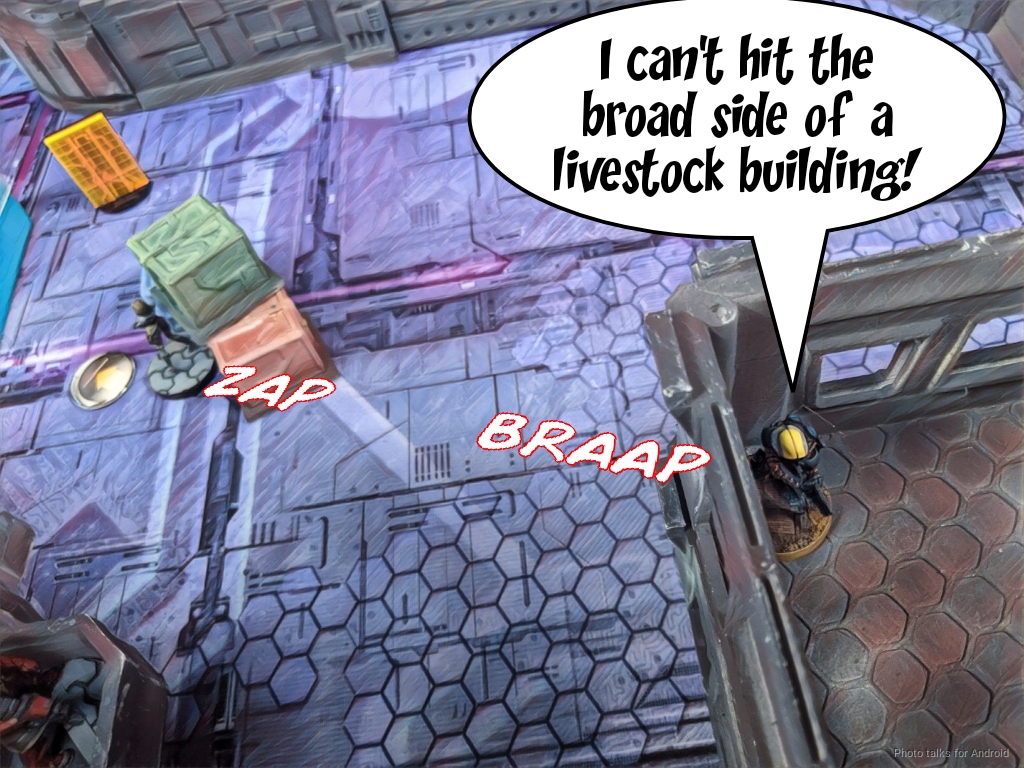
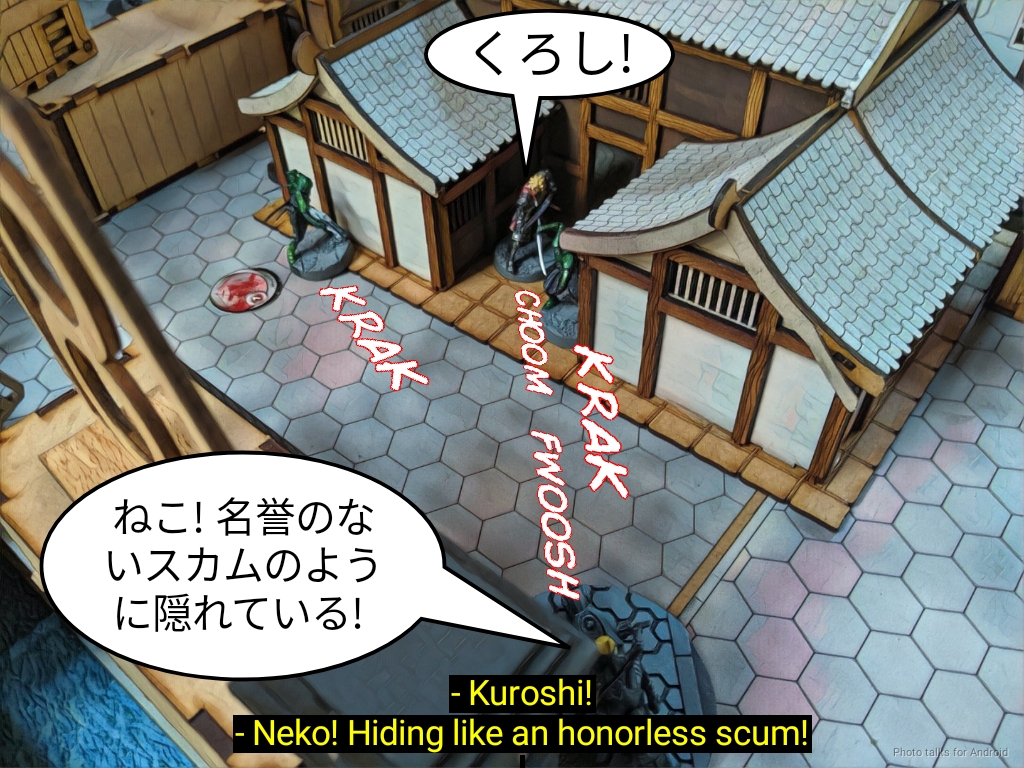
I’ve got my Tanko and Mushashi facing off against Neko and two Tanko, which isn’t great for me. The Tanko’s impetuous orders get them into view of my own Tanko, and I trade SMG, contender, and missile fire with no one failing any ARM saves.
After moving a Tanko to the corner and splitting burst against the remainder of my Haris, Daniel moves the left Tanko forward to take SMG shots at my yellow Tanko, but again we fail to do any damage. Neko slides up behind the Tanko at the corner, hiding behind it to protect himself from AROs.
Daniel spends his last order trying to take out my yellow Tanko, exposing both of his Tanko to Musashi’s chain rifle. The cloud of steel manages to KO the inactive Tanko, the first wound done all turn!
Out of options, he passes turn with everything either out of the danger zone or dead in it.
Bottom of 2 – JSA
Yojimbo is forced to drive backwards into the danger zone to go towards Daniel’s remaining forces, so I just spend his irregular order driving him right back to where he was, to safety. I then break the Musashi haris let me move Musashi forward safely, threatening a chain rifle on Neko and the remaining Tanko who engage and dodge, respectively.
Neko successfully engages Mushashi, so I decide to stop sending orders on Mushashi and make Daniel do that next turn.
Daniel’s remaining Tanko SMG gets knocked out by a double tap from the yellow Tanko’s pistol, and I spend the rest of my orders rescuing the remaining folks in the danger zone and set my Doctor up for a classified run on Turn 3.
Turn 3
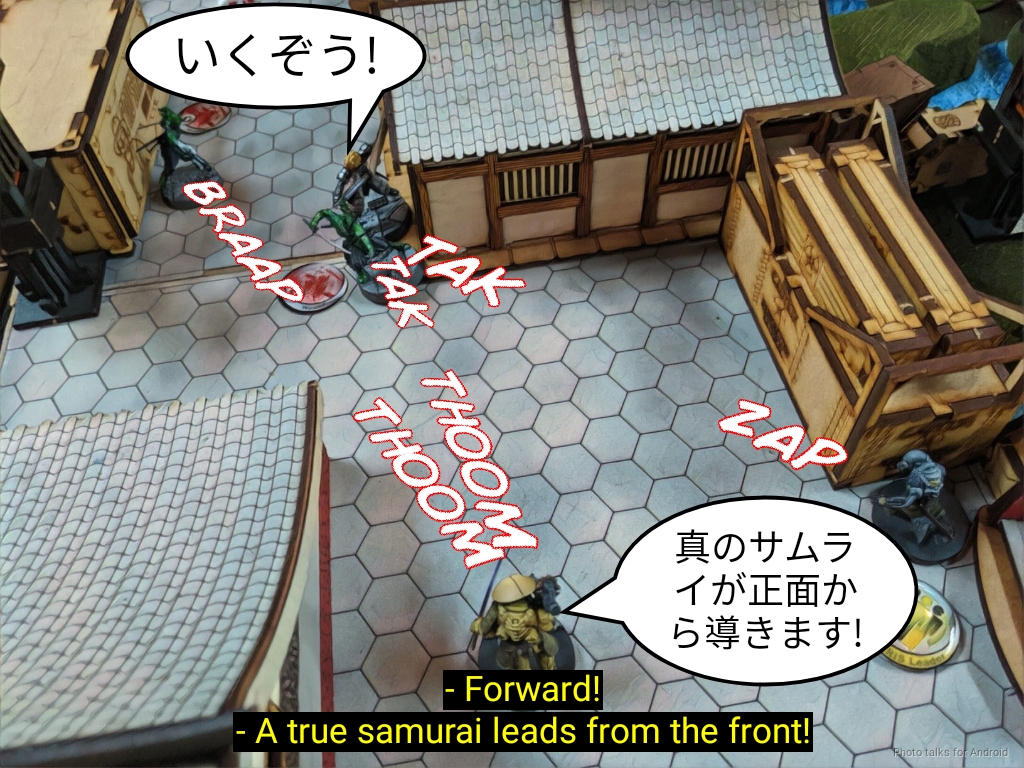
Top of 3 – JSA (OpFor)
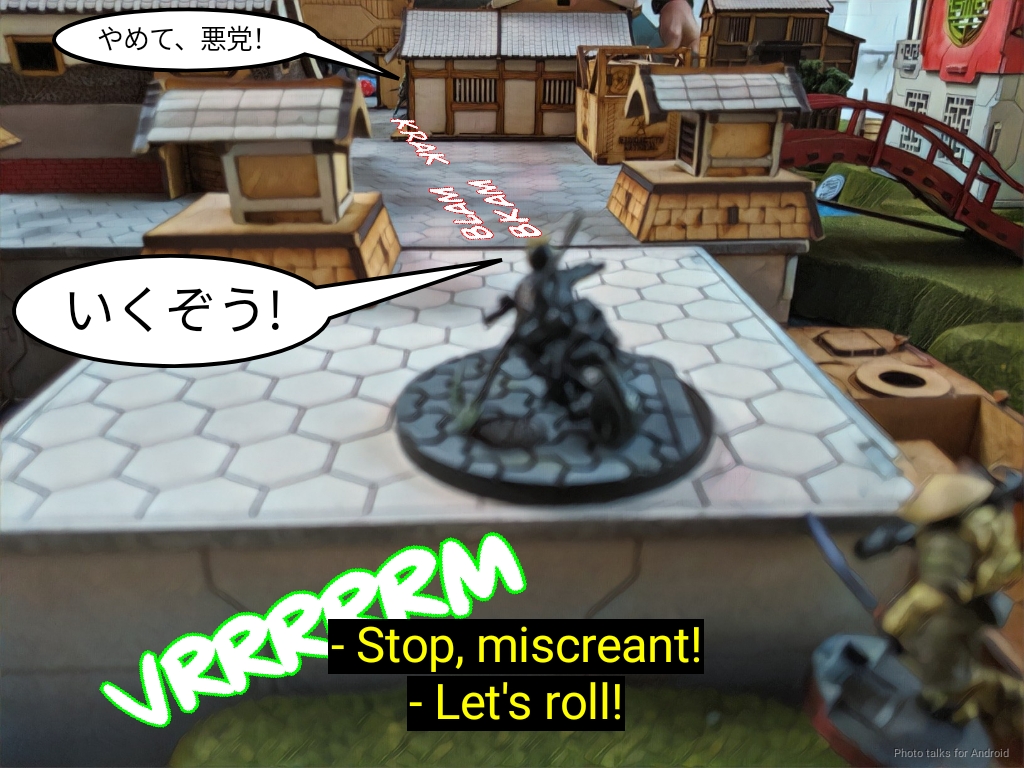
Daniel’s got two orders left, one regular, one lieutenant. In our extreme excitement at this moment straight out of an anime, we forget that Neko has Berserk and elect to just roll MA3 against one another.
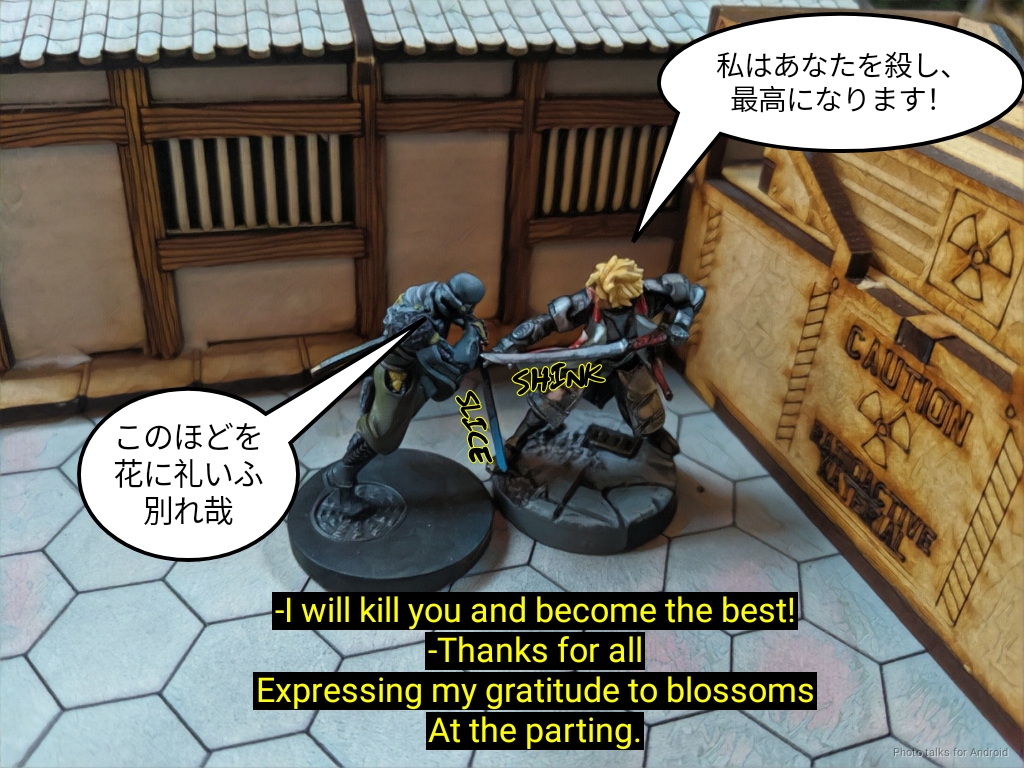
It takes both orders, but Musashi proves himself Neko’s better and leaves Neko’s cooling corpse with a haiku.
Bottom of 3 – JSA
I spend all my orders on getting my remaining classifieds successfully, making it a
9-0 Japanese Secessionist Army Victory!
Post Game Analysis
Daniel and I discussed the game at length afterwards. My opinion was that he should have deployed his Aragoto on the container ship, which would have forced me to either dedicate resources to contesting that firelane or let them advance safely.
Clearly the Domaru/Tanko link deployment needed to be fixed. That’s an easy and impactful improvement. I think the combat groups needed some work as well, or at least to coordinate the bikes and Husong out of the deployment zone on a more forgiving table and ARO situation.
One other minor improvement would have been to have the Keisotsu/Kempetai link formed first, then switch over to the Domaru core. The Keisotsu core is pretty fragile, even linked, so I think it’s better to improve the chances of your more durable link.
I think Daniel was faced with a pretty complex set of deployment considerations and deployed himself in a pretty vulnerable position, a fact which I exploited heavily. Once the “literal” smoke had cleared, his recovery was smooth, careful, and well thought out. Losing most of your models on the first turn is incredibly difficult to recover from, and I think Daniel made some great decisions on turns two and three to set himself up to take a big chunk of my VP (and therefore OP) away.
It wasn’t until after the game that Daniel informed me that this morning he had had his first 300 point game in Round 1! I applaud him for his excellent recovery from such a difficult position, and look forward to a rematch!
Game 3 – Suppressing JSA
Game three was against James (stampysaur), the community organizer from Olympia, Washington. It was a little weird to start a game after 5PM at a tournament. Both of us arrived to the game a little tired, but very relaxed and enjoying ourselves.
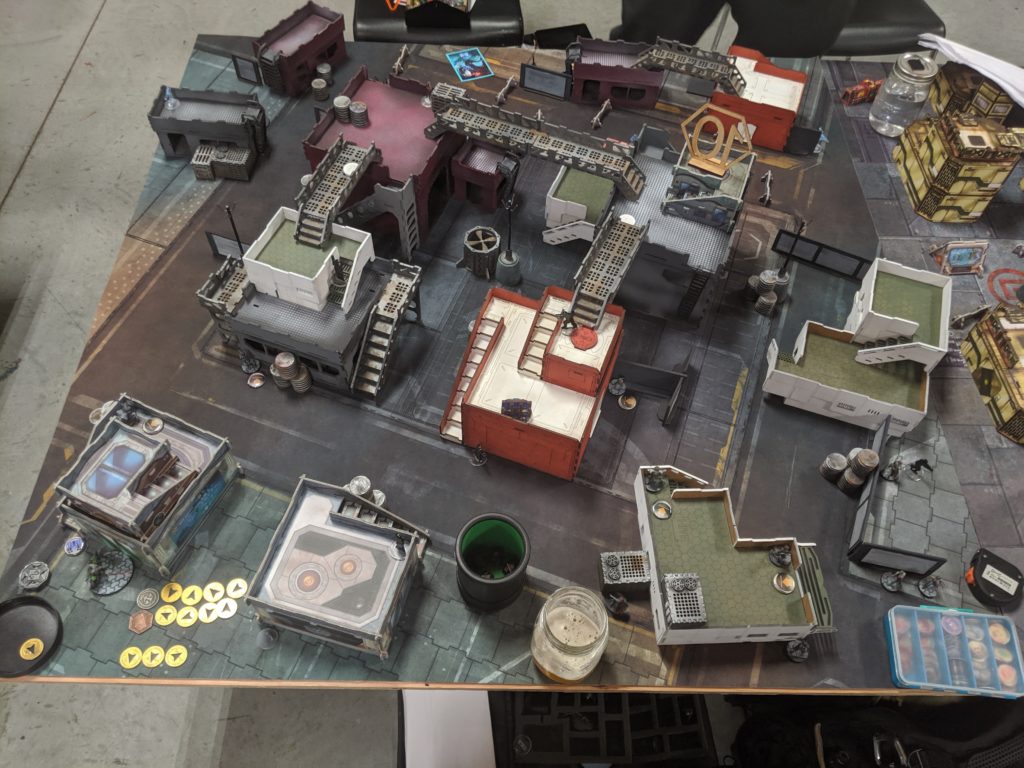

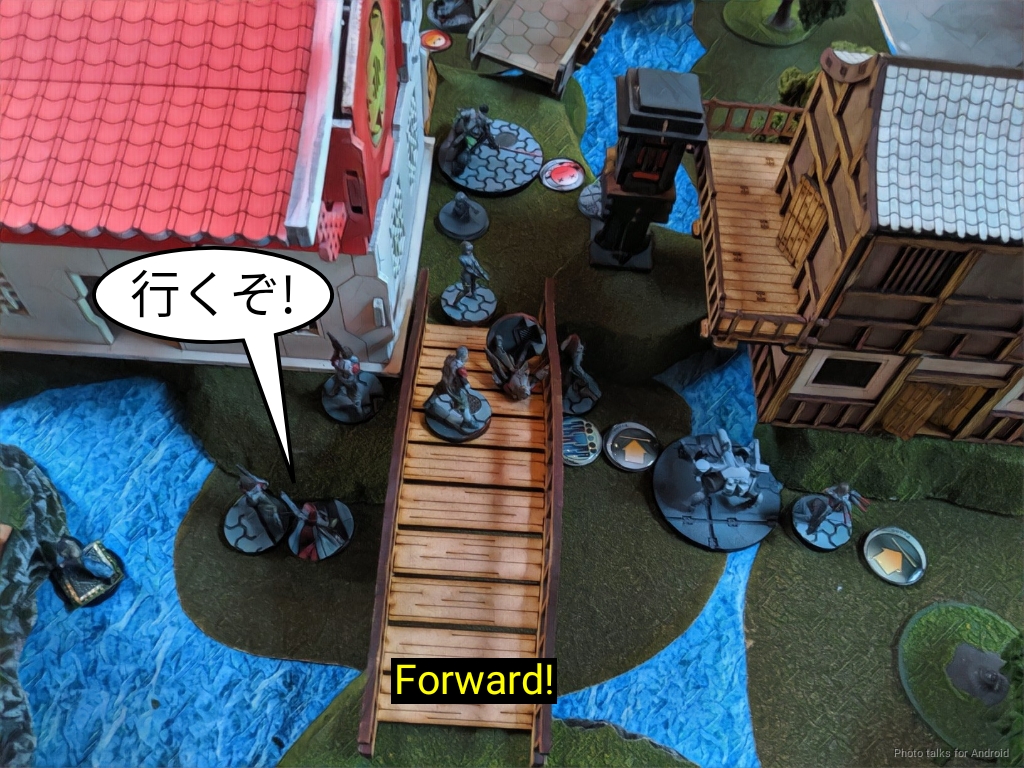
Our table was a mix of different buildings from different brands but with a few unifying splashes of color to make it all work out. A few buildings were that new heavy card stock stuff that we got in Operation Wildfire. It was the first time I’d seen it assembled in person, and I gotta say it’s pretty good quality!
Overview
- Mission: Frontline
- Forces: Japanese Secessionist Army versus Varuna Immediate Reaction Division (300)
- Deploy First: VIRD
- First Turn: VIRD
GROUP 1 |
GROUP 2 |
SHIKAMI Contender, Nimbus Grenades / Assault Pistol, DA CCW, AP CCW, Knife. (0 | 45)
ONIWABAN Submachine Gun, Nanopulser / Pistol, Monofilament CCW. (0 | 37)
RYŪKEN (CH: Limited Camouflage) Heavy Rocket Launcher, Antipersonnel Mines / Heavy Pistol, Knife. (1.5 | 23)
5 SWC | 300 Points | Open in Infinity Army
I was pretty out of it at this point and only barely remembered that I had to take my other list because it actually has an FO in it to be my Liaison officer, so that’s what I did. This is my “other” JSA list archetype, with a bunch of Ryuken-9 to get some work done. I’m trying something new though–I tend to always have my Ryuken-9 SMGs killed very early, so I put them in Group two. If someone leaves a bunch of stuff out for them to kill and I run out of orders for them I can always use the Kempetai MSV2 through smoke. The rest of the list is all about powering the Oniwaban, Ryuken-9 HRL, and Shikami.
Game 3 – stampysaur
GROUP 1 |
FUSILIER Lieutenant Combi Rifle / Pistol, Knife. (0 | 10)
KAMAU (Multispectral Visor L2) MULTI Sniper Rifle / Pistol, Knife. (1.5 | 32)
ORC HMG / Pistol, Knife. (2 | 44)
GROUP 2 |
CROC MAN Hacker (Assault Hacking Device) Combi Rifle, Antipersonnel Mines / Pistol, Knife. (0.5 | 36)
ZULU-COBRA (Sensor) Combi Rifle, Jammer / Assault Pistol, Knife. (0 | 29)
BULLETEER Spitfire / Electric Pulse. (1 | 23)
HELOT MILITIAMAN Shock Marksman Rifle / Pistol, Knife. (0 | 13)
5 SWC | 294 Points | Open in Infinity Army
I’m not sure of the Fusilier’s profiles. James explained it all, but I was pretty tired. The rest of the list is correct though. It’s definitely designed for Frontline with a ton of expensive camo and TO camo troopers, the ubiquitous linked Kamau sniper out of VIRD, three Helots, and a Bulleteer to get some work done. Seems pretty straightforward, no tricks.
Deployment
James lost the rolloff and I made him deploy on what I thought was the more difficult side to control, with a big open band just in front of his deployment zone. He locked down the middle scoring zone with a pair of Croc-Men, strung three Helots out across his deployment zone, and shoved a Fusilier link blob into really the only convenient spot in his deployment zone.
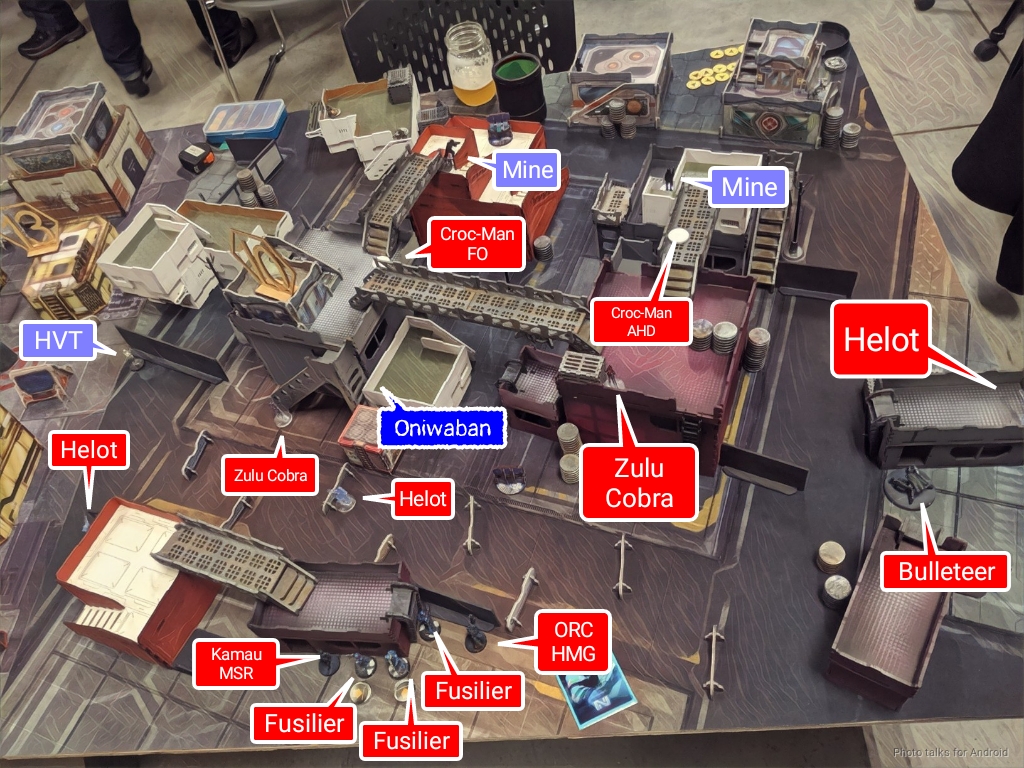
A pair of Zulu Cobra hung out on either side, just out of his deployment zone. He was going first, so I knew I’d have to basically null-deploy against all that PanO firepower. I tucked the Keisotsu fireteam in a spread out blob on the right. The Keisotsu FO was ready to make its way forward into a walled area which would hopefully keep him safe to perform his liaison officer duties at the end of the game. I stuck Yuriko guarding that board edge against any Echo Bravos, and further discouraged AD with her mine.
I knew I’d need to give James something to focus his guns on, so I left the Ryuken-9 HRL’s mine atop a roof, looking like it was out to ARO, with the actual Ryuken-9 on the ground floor. Yojimbo secured the left side of the table with his Koalas, and then I did my best to deny the left board edge as well by covering it with a Ryuken-9’s SMG. The other Ryuken-9 hung out close to the middle of the table.
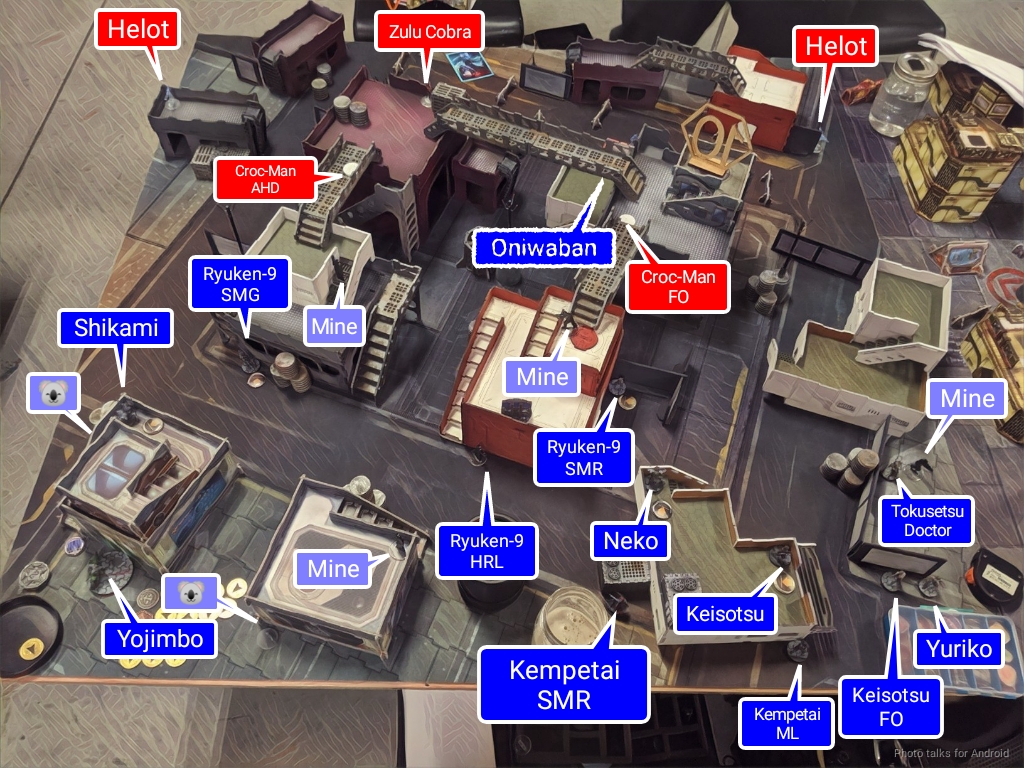
I deployed both Ryuken-9 SMGs’ mines in a way that would prevent the Croc Men from advancing too far. I made sure that they weren’t in a legal trigger zone to make sure that I could deploy them there. I left the Shikami on a convenient roof, and left the Keisotsu ML out to ARO, figuring I might get lucky. Finally, James dropped the Bulleteer on my left flank. I figured I’d be okay with the Koalas there, and my Kempetai MSV2 was already watching that flank. I deployed the Oniwaban just outside James’ deployment zone for points later. We both forgot to do the Intelcom card.
Turn 1
Top of 1 – VIRD
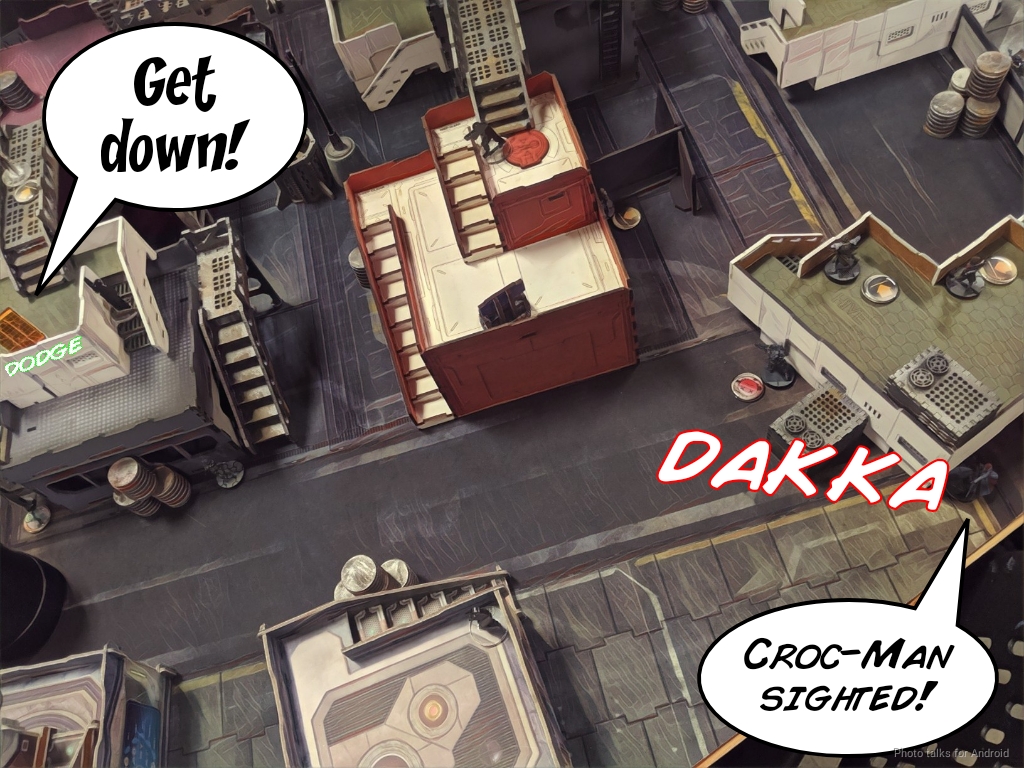
James surprises me by not doing a sensor sweep of the area near his deployment zone. I figured I was taking a big risk by putting the Oniwaban so close and figured either he’d ignore it and stick to his plan (fine for me) or dump a ton of orders into dealing with it (also fine with me). Instead, he did something totally unexpected and climbs a Zulu Cobra onto the roof near the Croc Man on my right and tries to jammer my poor Ryuken-9 SMG in the middle of the table. We both fail our WIP rolls and then James dumps the rest of his orders into the link.
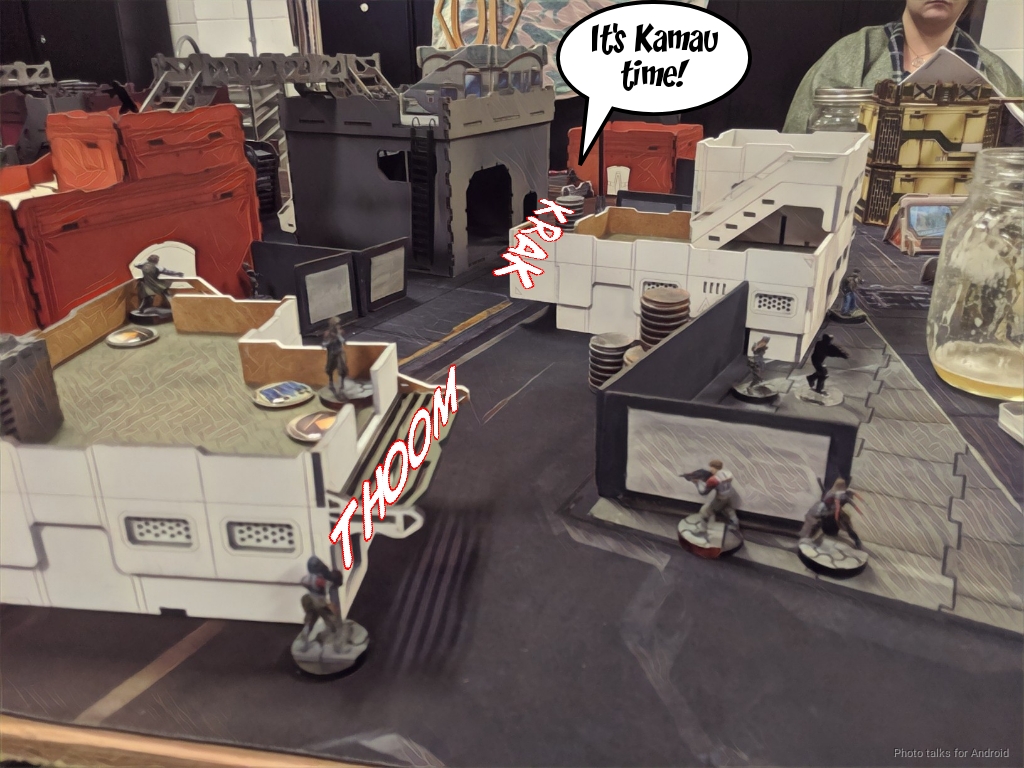
Instead of challenging my mine that I left on the roof, James goes instead for my Keisotsu ML, easily taking it out with the Kamau.
| 75.97 | 9.65 | 14.38 |
He then settles the Kamau and the Fusilier link into that general area, pushing the Kamau further out and dragging the Fusiliers behind him. After adjusting the Helots with their irregular orders, James passes turn.
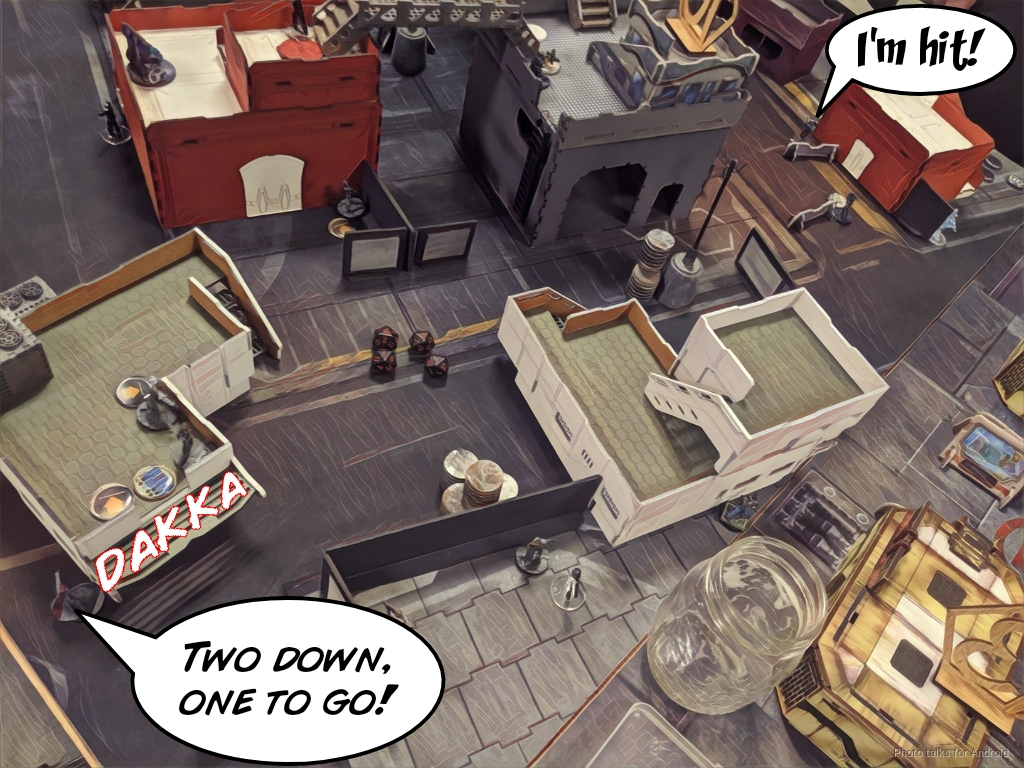
Bottom of 1 – JSA
I have no interest in losing Yojimbo to a shock marksman Helot, so I cancel his order. I then shuffle the Kempetai MSV2 over to the right after re-forming the link back to a 5-man. After sling-shotting the Keisotsu FO forward some as I had planned, the Kempetai starts shooting Fusiliers, carefully staying out of LoF of the slightly advanced Kamau.

A few orders later, and all three Fusiliers are gone, shocked off the table as they try to dodge.
| 57.02 | 22.12 | 20.86 |
I poke the left Ryuken-9 out, the one that’s not covered by a Jammer, and discover the Helot. I move back into cover as we trade shots, and the Ryuken wins.
| 44.18 | 38.55 | 17.26 |
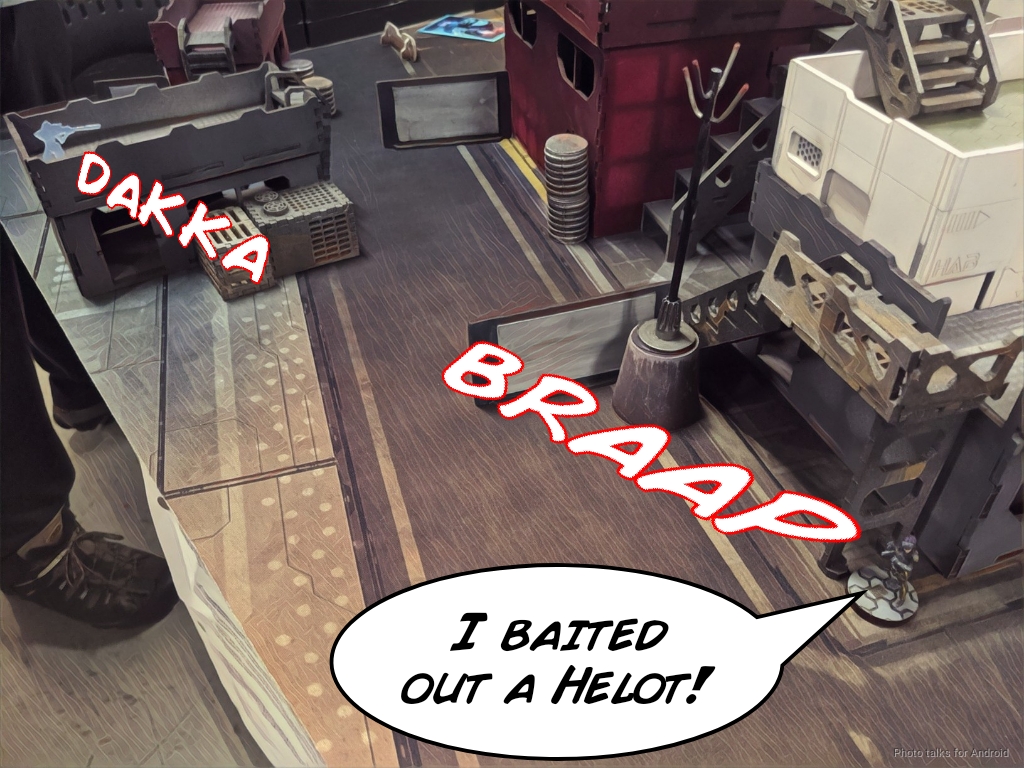
After dropping a mine with the Ryuken, I shuffle Yojimbo’s Koalas around to threaten the Bulleteer some more, which baits out a second Helot. I lose the Koala, but this was totally worth it.
I’ve got a chance to take on the Kamau, now that it’s without a link, using the Ryuken-9 HRL, so I give that a go. Of course, the Kamau is one on 10s versus my two on 9s, which isn’t terribly good for me.
| 38.49 | 42.66 | 18.85 |
I think he rolled a 9 and I didn’t crit, so I lose the Ryuken-9. Drat.
Turn 2
Top of 2 – VIRD
James informs me that he’s in loss of lieutenant because I killed all of his Fusiliers, so he just spends his turn pushing camo tokens forward and throwing the ORC into suppression.
He tries to jam my Ryuken-9 again, but I pass BTS.
Bottom of 2 – JSA
Yojimbo is still covered by a Helot, so I cancel again. I briefly consider hunting down the ORC in suppression with the Oniwaban, but the Kamau is very likely to discover it so I decide no to. Instead, I take out the Helot covering Yojimbo with the same Ryuken-9 that took out the first Helot.
I discover-shoot the Croc Man on my left, shuffling the Kempetai back into view, but it passes ARM and drops prone. Sigh.
I decide to get Yojimbo moved up, and in the process get another Croc Man to reveal itself, but I smoke it out safely.
Turn 3
Top of 3 – VIRD
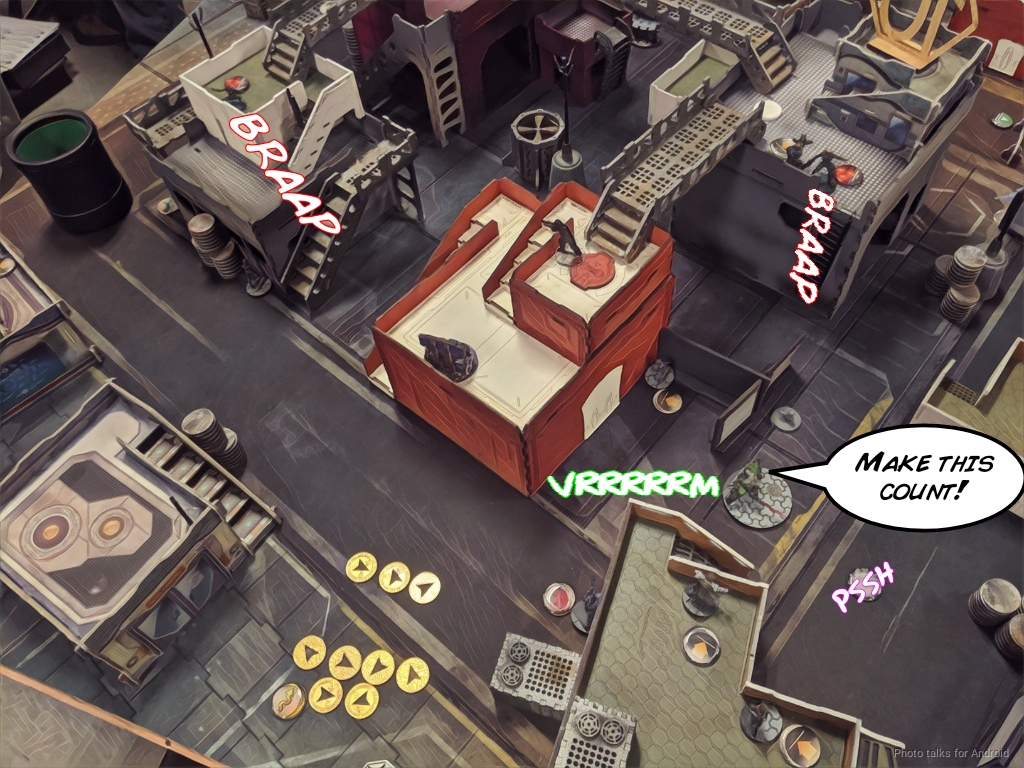
James tries to jam my Ryuken again, but I beat him on WIP. He used his Lt order on that Zulu Cobra though, so at least I know who his Lieutenant is. The rest of his forces push forward, particularly the ORC that was holding down his near scoring zone, and the two Croc Men go into suppression.
Bottom of 3 – JSA
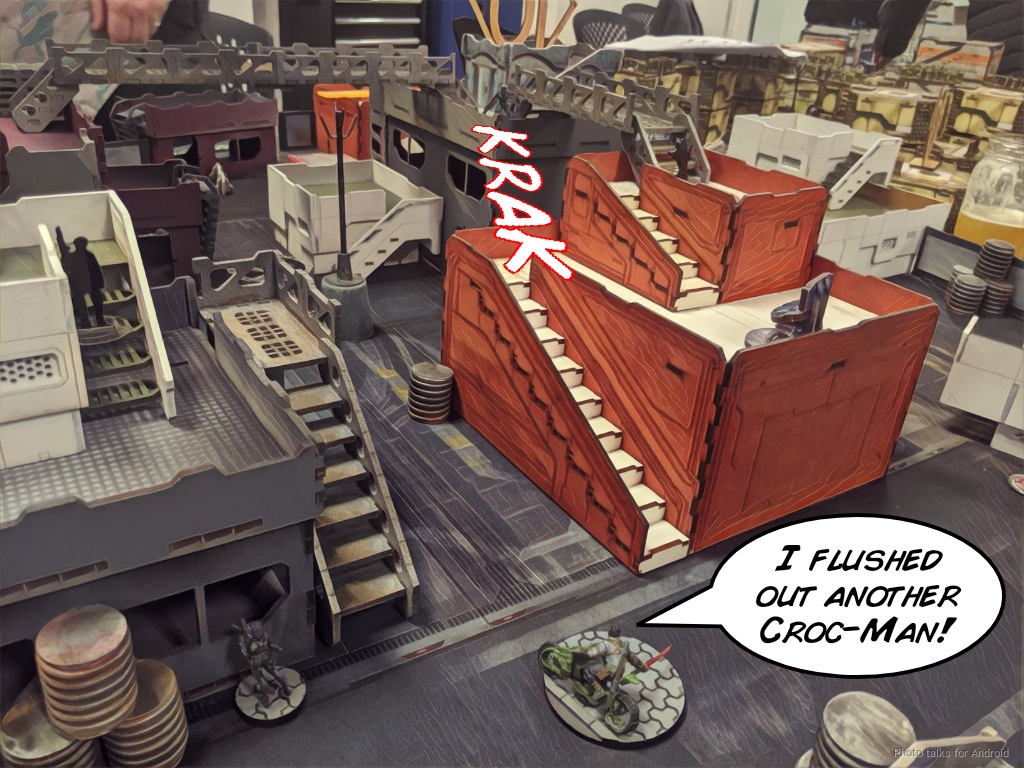
Yojimbo takes six shots worth of supression fire from the two Croc Men as he sets up smoke for my Kempetai to take out the Croc Man on my right. He doesn’t survive.
I move my trusty Kempetai into view and take the shot.
| 53.95 | 33.14 | 12.91 |
Of course, my Kempetai gets crit.
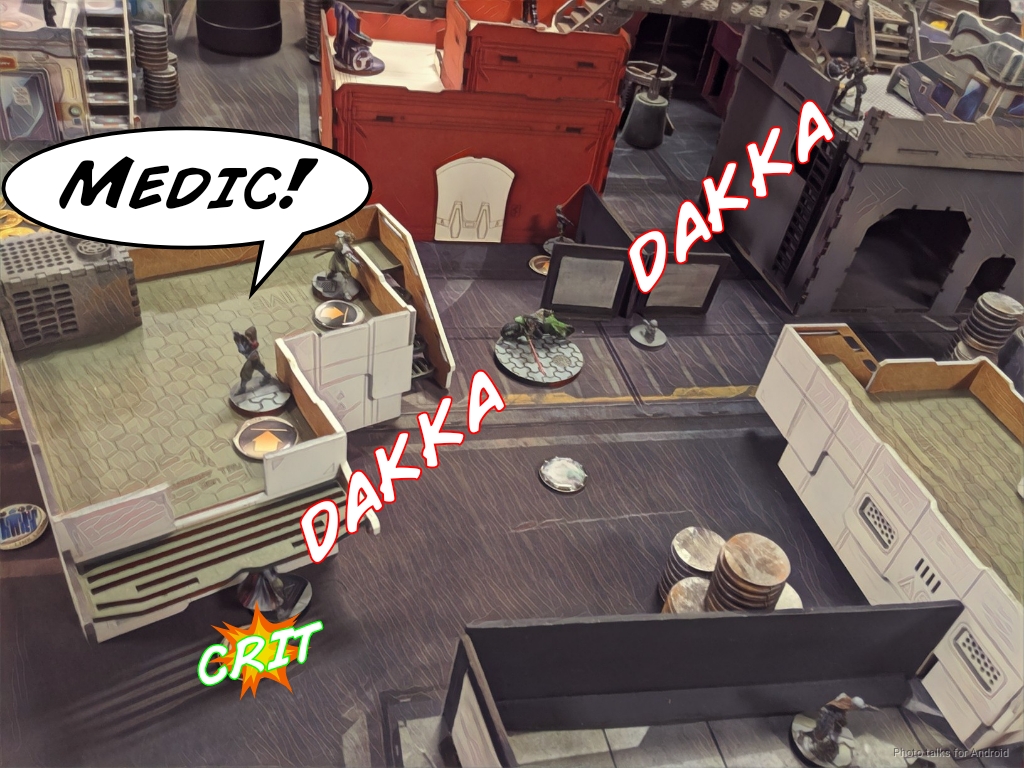
No matter. I push what I can forward, doing some silly ODD/TO slapfighting with a Shikami and a Croc Man, and reveal the Oniwaban’s TO camo marker to secure the far zone. Moving the Shikami up guarantees me my near zone, so James only has the middle, thanks to my Oniwaban barely out-pointing the Kamau. This makes it a
6-4 Japanese Secessionist Army Victory!
Post Game Analysis
I was a little surprised that I wasn’t forced to contend with a Bulleteer racing down my flank. I think that would’ve been a better use of the first few orders on his turn, and then James could’ve still challenged my Keisotsu ML if he wanted. That and the Zulu Cobras not sensoring either. I suppose he had a plan to jammer my Ryuken-9 and stuck with it. I wasn’t terribly concerned by this–I fully expected bad things to happen to the Ryuken-9, that’s why I was putting them in the second group!
I think putting the Croc Men on the roofs was good, although I disagree with his choice to deploy them revealed as TO camo markers, letting me respond to their location with mines and Koalas. Throwing them into suppression was a good idea as well. Losing the Fusiliers so early and having a disrupted second turn in loss of lieutenant really messed with James’ plan. I suspect he was going to make the Bulleteer run on turn two, after I pushed forward and had some things out of position.
In any case, I felt like I was in control of positioning this game, had an adequate answer to the problems James was posing, and correctly did not attempt to engage the ORC at the bottom of two with my Oniwaban, which would’ve been an absolute waste and would have cost me the game. It was SO TEMPTING though. I think this game is a good illustration of why 5-man links are difficult to pilot–if you’re not careful the weaker members of your link will be out of position and can be eaten, even by something compartively weak like a marksman rifle at extreme range. Three orders and all the link bonuses got deleted in 4-5 of my orders, which is absolulely a cost I’m willing to pay.
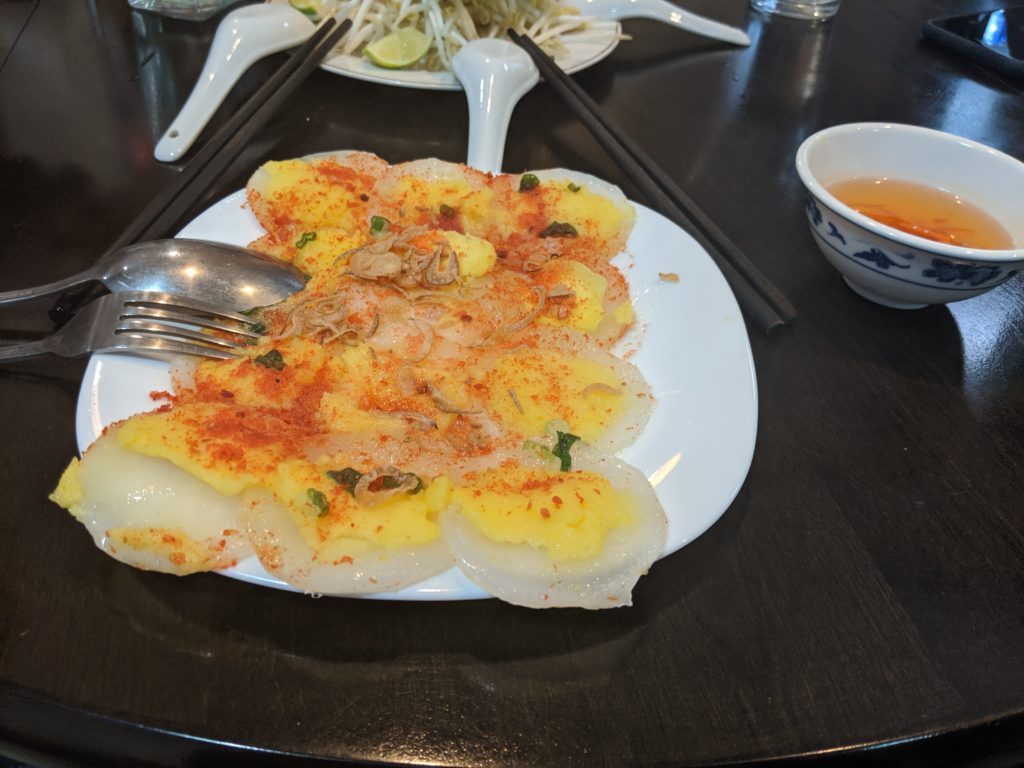
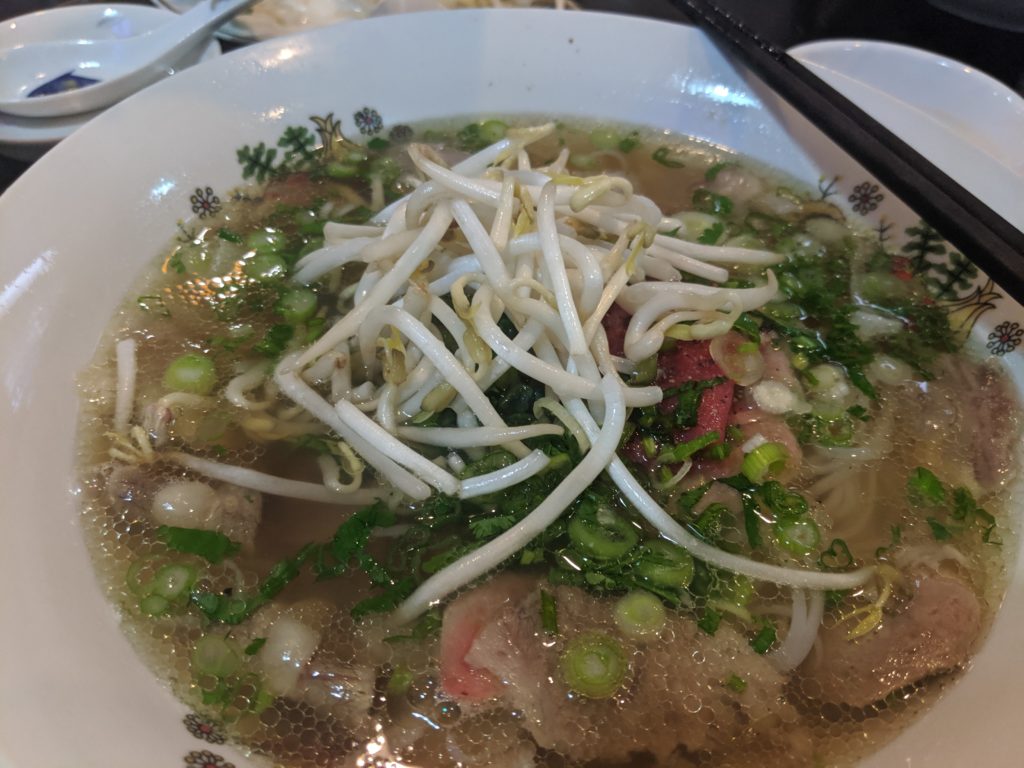
At this point, it was quite late, and restaurants were starting to close. We bundled ourselves into my car and made our way to the nearest Pho restaurant (PhoWin!) and scarfed down some lava-temperature food. I had some new-to-me rice cake dish, and of course a bowl of pho with all the fixin’s.
Upon returning to the AirBnB, we discovered one of those disco ball things that people put in their front yard during Christmas or whatever. The owner had drilled a hole into the floor and stuck the lawn-dart side of the disco ball thing into it… very wierd.

In any case, I was feeling pretty okay ending the day with a 2-1 record and a belly full of delicious beef broth, and retired to bed to get ready for Day 2 of Ragnarok! Thanks for reading!