March Démarche Tournament Report
Had a pretty good turnout this tournament, even had some folks that usually don’t get to make Saturdays! I haven’t seen Isaac and Jordan at a tournament in a few months so it was great to see them throwing dice with folks from other metas. All in all a good day of Infinity was had by all!
Game 1 – Cut to Shreds
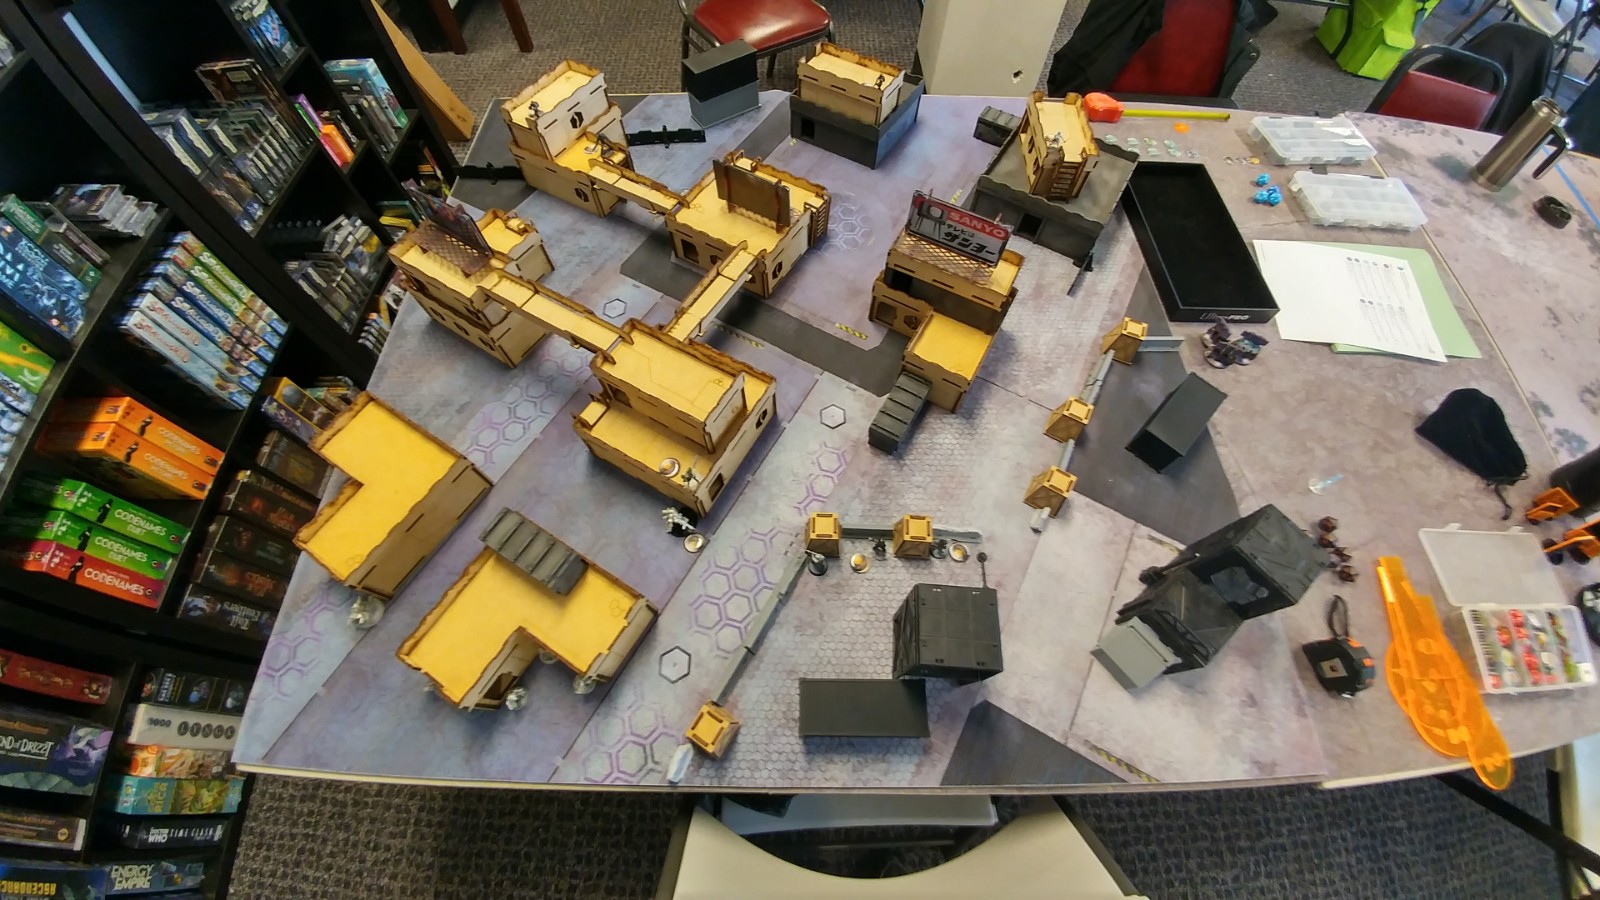
 My first game of the day was against Aaron, who’s a vanilla PanO player. He claims to be a bit on the newer side, but I suspect he’s just trolling us all because he gave me a pretty tough game!
Overview
- Mission: Annihilation
- Forces: Nomads versus PanOceania (300)
- Deploy First: PanOceania
- First Turn: PanOceania
[img]https://assets.infinitythegame.net/infinityarmy/img/_logosweb/logo_501.png[/img][b] Spektr DepRep[/b]
[img]https://assets.infinitythegame.net/infinityarmy/img/_logosweb/501/logo_56.png[/img] [b]KRIZA BORAC Lieutenant[/b] HMG / Heavy Pistol, CC Weapon. (2 | [b]54[/b])
[img]https://assets.infinitythegame.net/infinityarmy/img/_logosweb/501/logo_4.png[/img] [b]INTRUDER[/b] HMG, Grenades / Pistol, CCW. (1.5 | [b]42[/b])
[img]https://assets.infinitythegame.net/infinityarmy/img/_logosweb/501/logo_11.png[/img] [b]SPEKTR (Deployable Repeater)[/b] Combi Rifle, E/Mauler / Pistol, Knife. (0 | [b]32[/b])
[img]https://assets.infinitythegame.net/infinityarmy/img/_logosweb/501/logo_16.png[/img] [b]INTERVENTOR Hacker (Hacking Device Plus)[/b] Boarding Shotgun / Pistol, Knife. (0.5 | [b]24[/b])
[img]https://assets.infinitythegame.net/infinityarmy/img/_logosweb/501/logo_14.png[/img] [b]DAKTARI[/b] Combi Rifle / Pistol, Knife. (0 | [b]14[/b])
[img]https://assets.infinitythegame.net/infinityarmy/img/_logosweb/501/logo_34.png[/img] [b]ZONDBOT[/b] Electric Pulse. (0 | [b]3[/b])
[img]https://assets.infinitythegame.net/infinityarmy/img/_logosweb/501/logo_36.png[/img] [b]CARLOTA KOWALSKY[/b] Combi Rifle + Light Flamethrower, Adhesive Launcher, D-Charges + Moriarty / Pistol, Knife. (0 | [b]34[/b])
[img]https://assets.infinitythegame.net/infinityarmy/img/_logosweb/sep.gif[/img] [img]https://assets.infinitythegame.net/infinityarmy/img/_logosweb/501/logo_36.png[/img] [b]MORIARTY[/b] Electric Pulse. ([b]4[/b])[img]https://assets.infinitythegame.net/infinityarmy/img/_logosweb/501/logo_5.png[/img] [b]REVEREND MOIRA[/b] MULTI Rifle + E/M Light Grenade Launcher / Pistol, Shock CCW. (1 | [b]34[/b])
[img]https://assets.infinitythegame.net/infinityarmy/img/_logosweb/501/logo_18.png[/img] [b]REAKTION ZOND[/b] HMG / Electric Pulse. (1 | [b]26[/b])
[img]https://assets.infinitythegame.net/infinityarmy/img/_logosweb/501/logo_13.png[/img] [b]JAGUAR[/b] Light Shotgun, Smoke Grenades / Pistol, E/M CCW. (0 | [b]13[/b])
[img]https://assets.infinitythegame.net/infinityarmy/img/_logosweb/501/logo_31.png[/img] [b]BAKUNIN ÜBERFALLKOMMANDO[/b] . (0 | [b]23[/b])
[img]https://assets.infinitythegame.net/infinityarmy/img/_logosweb/sep.gif[/img] [img]https://assets.infinitythegame.net/infinityarmy/img/_logosweb/501/logo_31.png[/img] [b]CHIMERA[/b] Combi Rifle, Nanopulser, Eclipse Grenades / Viral CCW. (0 | [b]20[/b])
[img]https://assets.infinitythegame.net/infinityarmy/img/_logosweb/sep.gif[/img] [img]https://assets.infinitythegame.net/infinityarmy/img/_logosweb/501/logo_31_2.png[/img] [b]x3 PUPNIK[/b] DA CCW. (0 | [b]3[/b])
[img]https://assets.infinitythegame.net/infinityarmy/img/_logosweb/orden_regular.png[/img]9 [img]https://assets.infinitythegame.net/infinityarmy/img/_logosweb/orden_irregular.png[/img]1 [img]https://assets.infinitythegame.net/infinityarmy/img/_logosweb/orden_impetuosa.png[/img]1 [b]| 6 SWC | 299 Points |[/b] Open in Infinity Army
[img]https://assets.infinitythegame.net/infinityarmy/img/_logosweb/logo_101.png[/img][b] PanOceania[/b]
[img]https://assets.infinitythegame.net/infinityarmy/img/_logosweb/101/logo_5.png[/img] [b]ORC Lieutenant[/b] HMG / Pistol, Knife. (2 | [b]44[/b])
[img]https://assets.infinitythegame.net/infinityarmy/img/_logosweb/101/logo_12.png[/img] [b]CUTTER[/b] MULTI HMG / . (2.5 | [b]115[/b])
[img]https://assets.infinitythegame.net/infinityarmy/img/_logosweb/sep.gif[/img] [img]https://assets.infinitythegame.net/infinityarmy/img/_logosweb/101/logo_12.png[/img] [b]CRABBOT[/b] Flash Pulse / Knife. ([b][/b])
[img]https://assets.infinitythegame.net/infinityarmy/img/_logosweb/101/logo_2.png[/img] [b]AKAL COMMANDO[/b] Combi Rifle / Pistol, E/M CCW. (0 | [b]22[/b])
[img]https://assets.infinitythegame.net/infinityarmy/img/_logosweb/101/logo_1.png[/img] [b]FUSILIER[/b] Combi Rifle / Pistol, Knife. (0 | [b]10[/b])
[img]https://assets.infinitythegame.net/infinityarmy/img/_logosweb/101/logo_1.png[/img] [b]FUSILIER[/b] Combi Rifle / Pistol, Knife. (0 | [b]10[/b])
[img]https://assets.infinitythegame.net/infinityarmy/img/_logosweb/101/logo_15.png[/img] [b]MACHINIST[/b] Combi Rifle, D-Charges / Pistol, Knife. (0 | [b]15[/b])[img]https://assets.infinitythegame.net/infinityarmy/img/_logosweb/101/logo_54.png[/img] [b]LOCUST (Marksmanship L1)[/b] Marksman Rifle / Pistol, Shock CCW, Knife. (0 | [b]33[/b])
[img]https://assets.infinitythegame.net/infinityarmy/img/_logosweb/101/logo_35.png[/img] [b]BULLETEER[/b] Spitfire / Electric Pulse. (1 | [b]23[/b])
[img]https://assets.infinitythegame.net/infinityarmy/img/_logosweb/101/logo_22.png[/img] [b]AUXILIA[/b] Combi Rifle + AUXBOT_1 / Pistol, Knife. (0 | [b]14[/b])
[img]https://assets.infinitythegame.net/infinityarmy/img/_logosweb/sep.gif[/img] [img]https://assets.infinitythegame.net/infinityarmy/img/_logosweb/101/logo_22.png[/img] [b]AUXBOT_1[/b] Heavy Flamethrower / Electric Pulse. (- | [b]4[/b])
[img]https://assets.infinitythegame.net/infinityarmy/img/_logosweb/orden_regular.png[/img]10 [b]| 5.5 SWC | 300 Points |[/b] Open in Infinity Army
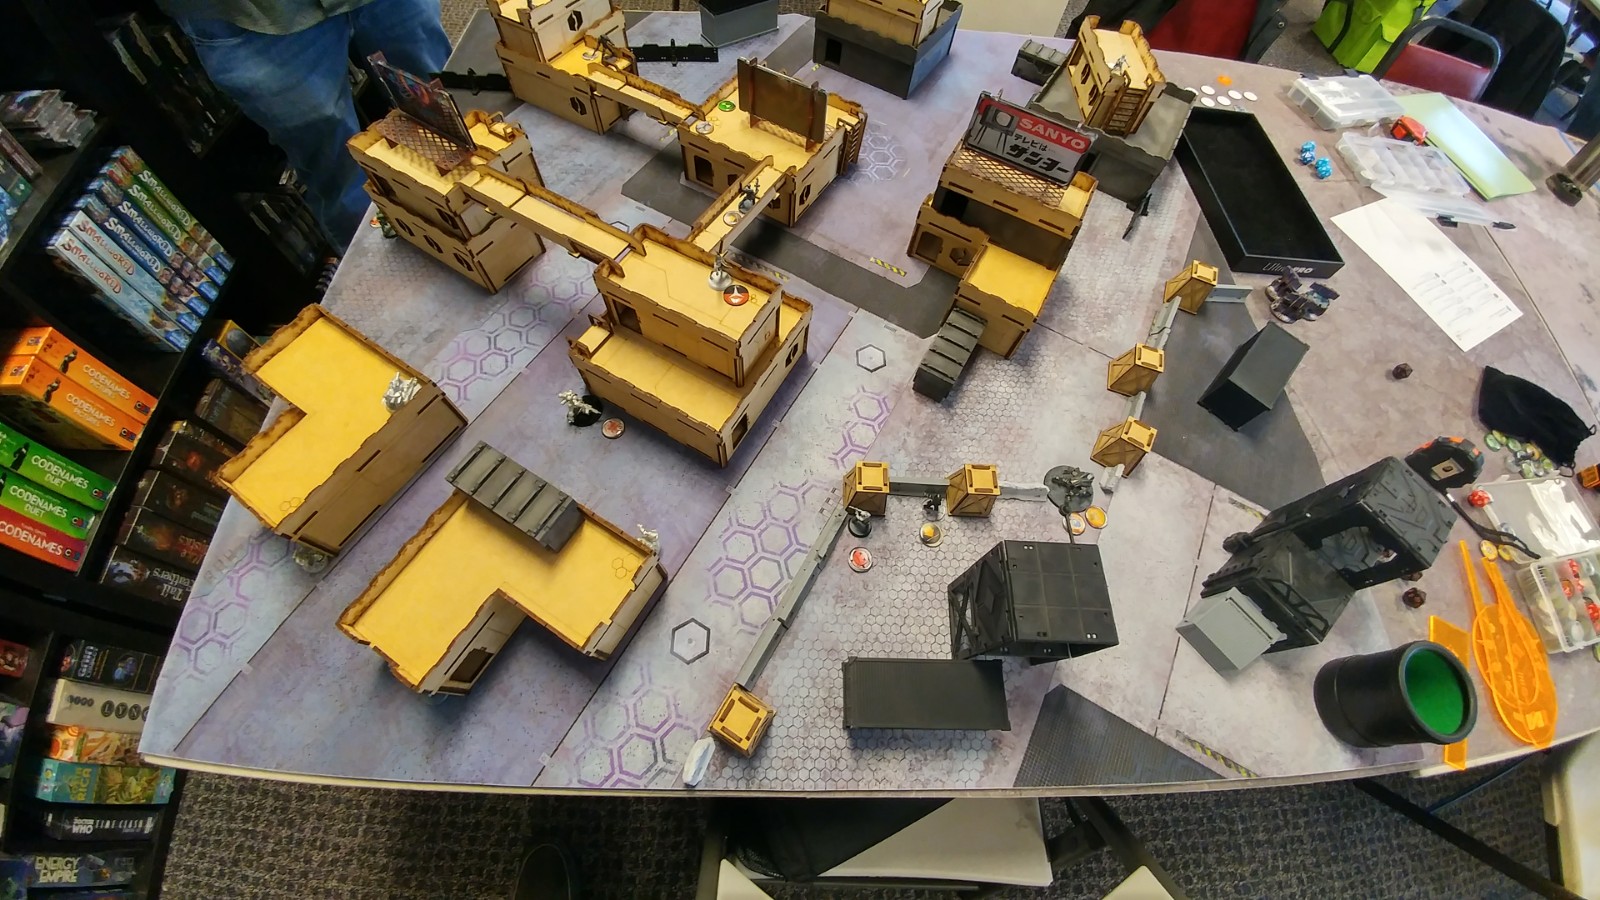
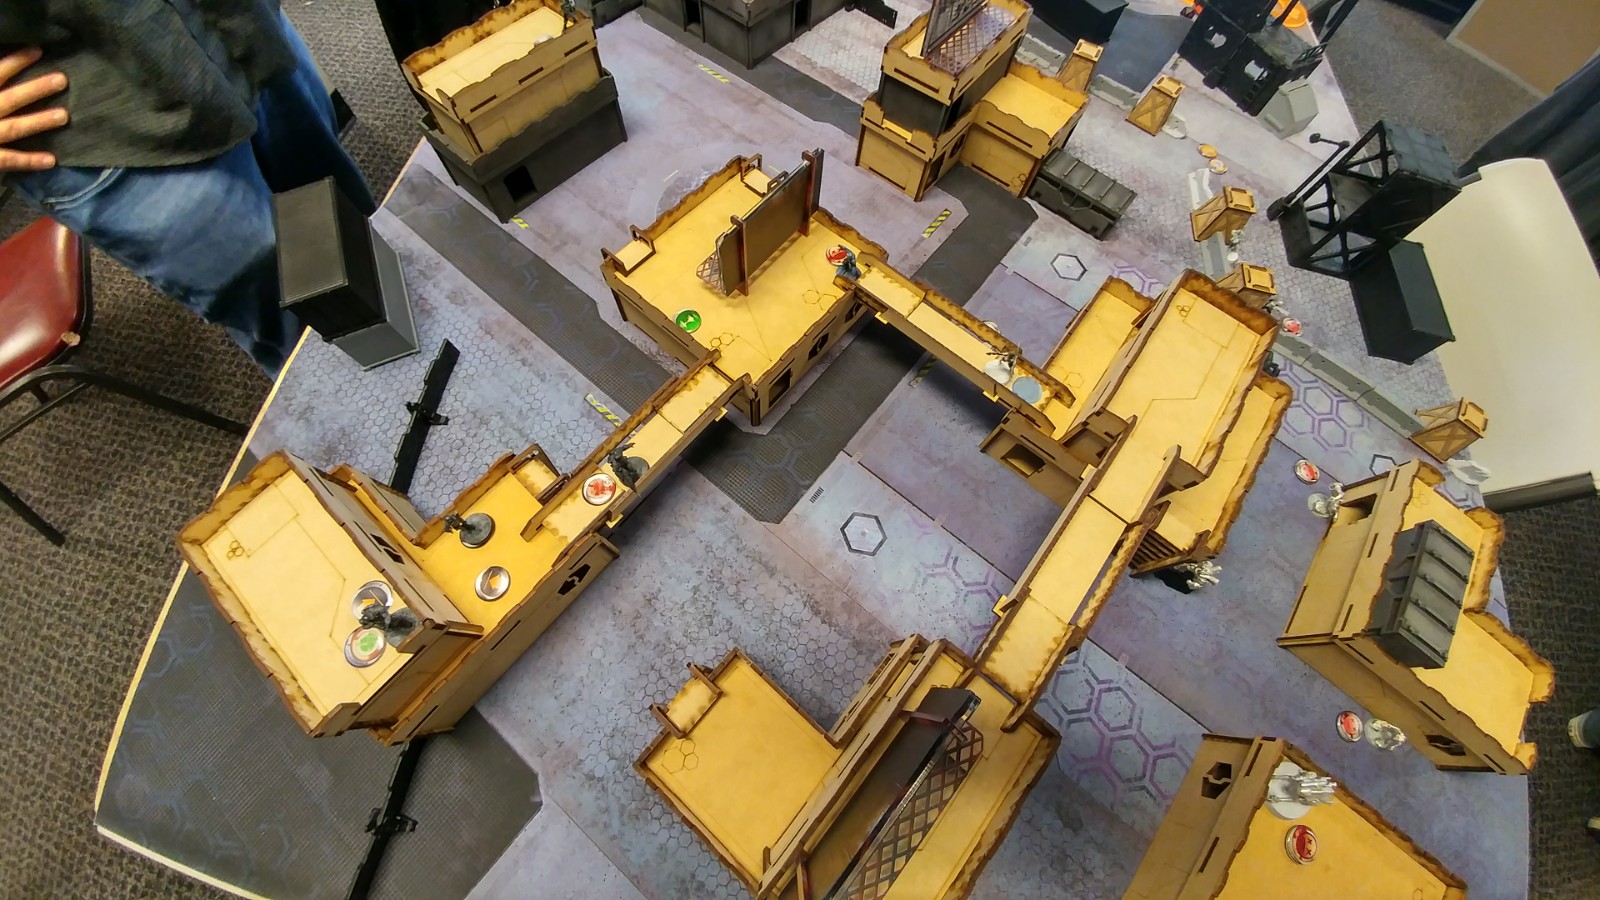
Deployment
I lost the rolloff, but Aaron chose turn order so I made him deploy first. He stuck two Fusiliers on rooftops in his backfield, which I’m guessing were Lieutenant decoys. His visible heavy hitters were an ORC HMG on my left, a Locust Marksman Rifle on my right, and a Bulleteer Spitfire in the middle of his backfield. He had a pair of Auxilia guarding his deployment zone as well, in case I were to try anything crazy like drop Bran or a Hellcat in there.
 I eyeballed his list and immediately suspected a Cutter, especially after he shooed me away from the table to take some secret pictures. I figured I’d do my best to protect my Intruder, and centrally locate my Spektr DepRep. The otherwise random Machinist was really the dead giveaway though. I stuck my Spektr in the center of the field, standing up, figuring that I would be able to ARO deploy a repeater if the Cutter walked by, and be within a few orders of dropping a repeater near the ORC. I also found a rooftop that was within 12″ of my board edge, so I put the Moira prone up there so she would have access to the rooftop for some spec-fire action.
 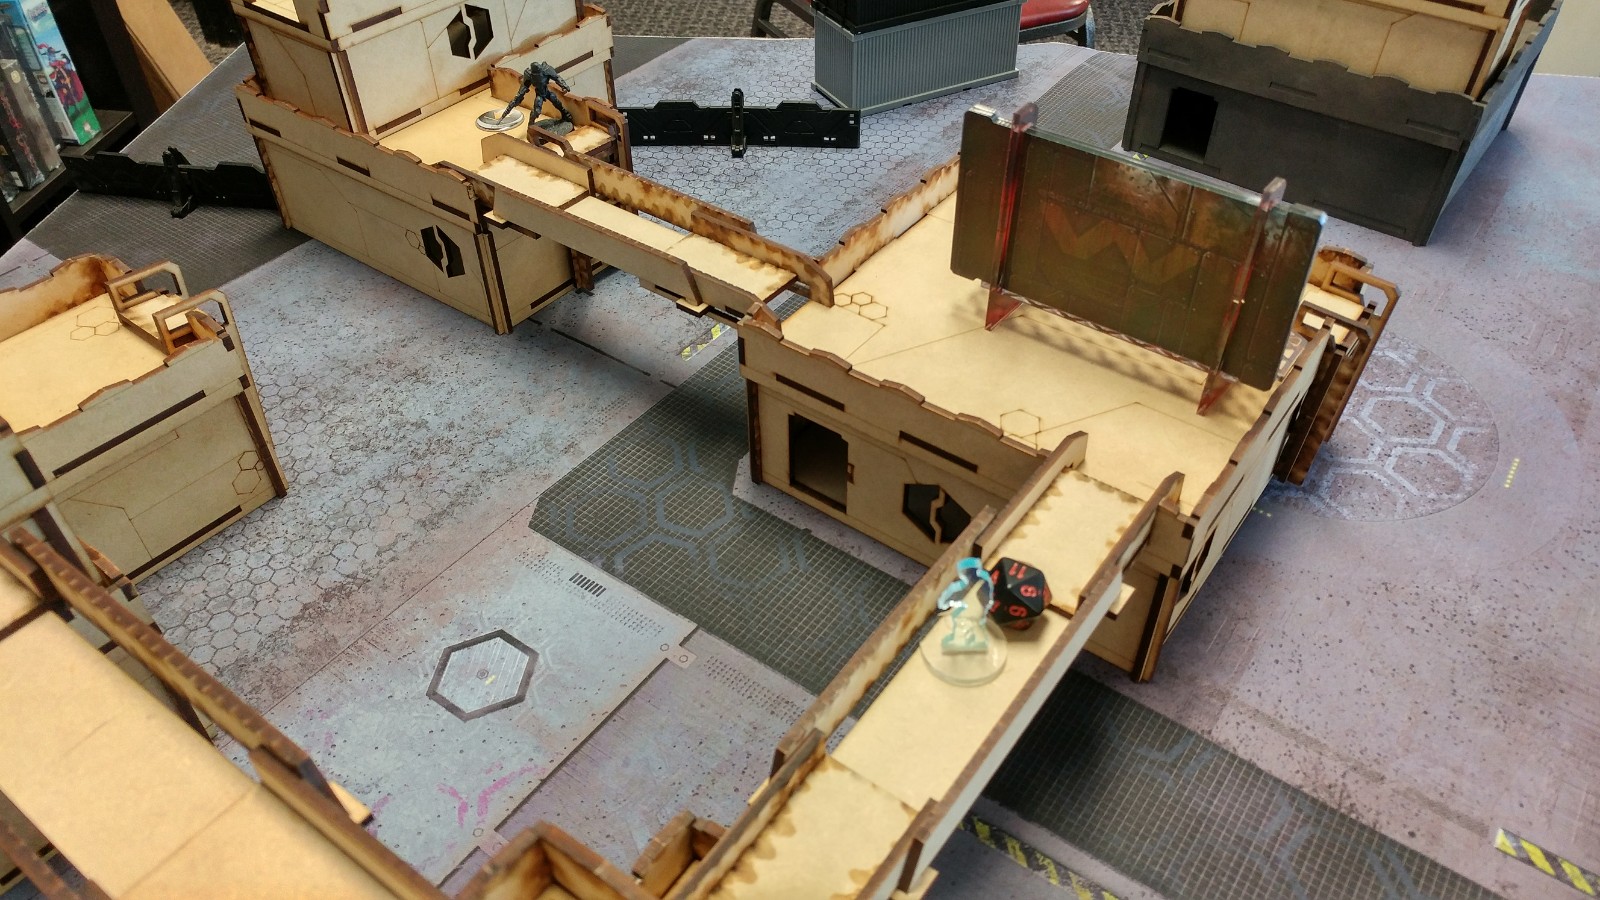 My main deployment was heavy on the left. The Uberfall clustered up in the back, protected by a TR bot. My Interventor hung out next to the TR bot, tucked into the corner of the L shaped building on the left. I put my Kriza advanced up a bit, covered by a Jaguar LSG, who was also covering my Intruder and Daktari, both of whom lay prone nearby. Although we forgot at the start, eventually both of us nominated our ODD troops as our DataTrackers.
Turn 1
Top of Turn 1 – PanO
Aaron starts the party off by dropping in an Akal Commando out of LoF of everything. I didn’t cover all the board edges with AROs, sadly, especially the left edge. That would’ve been easy with the TR bot. Ah well. The Akal comes around the corner and draws LoF to my Kriza. Thankfully we’re outside of 16″ and the -6 thanks to Full Auto flips the odds enough in my favor that the Akal breaks itself against my Kriza. So far, so good.
Aaron throws the Bulleteer into the fray, scooting it all the way around to my right flank, away from my Spektr. Darn. It manages to take out my Jaguar, a Pupnik, and Daktari, who heroically dodges a spray of bullets once before getting gunned down. It even manages to plink a wound off the Kriza, who retreats to safety. The Bulleteer ends the turn in suppressive fire, watching my deployment zone.
Bottom of Turn 1 – Nomads
Well, fortunately, I have the exact tool for this situation in the correct rangeband. After canceling the Uberfall’s impetuous order so as to not suicide them into the Bulleteer, I spec-fire an E/M grenade with the Moira and take out the Bulleteer. That nuisance taken care of, I push my Kriza, TR bot, and Moira into better positions with a coordinated order. The Moira is now lurking, safe, inside of the second story building. She’s on the roof because we’re lazy and don’t want to take the building apart. I’ll claim that it’s because I want to be kind and remind my opponent that there’s a model inside! Yeah, that’s it!
 I reveal my Spektr and drop a repeater next to the ORC as well as an E/Mauler covering the approach before retreating to the catwalk. Out of orders, I just shuffled my Uberfall around into a slightly better position with their irregular order and hoped to survive the coming storm.
Turn 2
Top of Turn 2 – PanO
Aaron used his Lieutenant Order on his ORC to try and shoot at my Spektr, but got Oblivioned and E/Maulered for his trouble. He did manage to tank the E/Mauler hit, but my Interventor successfully Isolated him. Well, as predicted, a Cutter materialized out of thin air and started marching across the board.  It took the same path as the Bulleteer, avoiding my Spektr, and started trading fire with my TR Bot. I thankfully got two crits over two orders, but I lost the Kriza and another exposed Pupnik in the process. The TR Zond finally went down, and the Cutter ended the turn in suppression watching the Uberfall’s approach and the base of the Moira’s building.
Bottom of Turn 2 – Nomads
My Chimera came around the corner towards the Cutter but just narrowly avoided breaking out into LoF. I tried to set up for a Uberfall CC attack but whiffed my Eclipse grenade. Thankfully, Aaron had ignored my Intruder, lying prone behind a barrier. So, even though I was in Loss of Lieutenant, I was able to get some stuff done. I walked the Intruder directly away from the Cutter and finished it off with a full burst of HMG fire in my 0 range band. Carlota came in at the base of the Locust’s building, preparing to take him out. I agonized long and hard on this, debating if it was better to bring Carlota in to fix the TR Zond, but I opted to go for the 2 points of killing Aaron’s DataTracker. I moved my Interventor up to try and shotgun the Akal, although I suppose Gotcha! against his ORC might’ve been better. I recamoed the Spektr and made him my Lt, and spent the Moira’s order on walking the Intruder back into cover, passing the turn.
Turn 3
Top of Turn 3 – PanO
Aaron’s in Loss of Lieutenant, thanks to my Oblivion from the top of 2. With the Cutter down, he tries to take out my Intruder with his Locust. I’m outside of 24″ and his ODD doesn’t work against me, so my Intruder drops the Locust without much trouble. Well, I guess Carlota could’ve gone somewhere else! I fully expected Aaron to just leave the Locust up there all game, but I guess I was mistaken. He then spends all of his command tokens to get his Machinist up the ladder to fix his ORC. The ORC then proceeds to gun down my Intruder and go into suppression. Well drat.
Bottom of Turn 3 – Nomads
I’ve gotta take out the Bulleteer, because it’s still scoring, even though it’s just sitting there. My Chimera takes it out with her combi rifle during her impetuous order. I then Gotcha! the ORC and start blasting away at the ORC with my Moira’s MULTI Rifle. Unfortunately, even though I plink off a wound, the ORC is still up. Unwilling to risk my DataTracker to a crit, I send in the Spektr, who promptly gets crit and goes down for the count.
 I try again with my last order on the Chimera, and that ends poorly as well. We’re in the same points killed and points surviving brackets, but my DataTracker is still alive whereas his isn’t. Very bloody game!
6-4 Nomad Victory! 92 to 107 points surviving
Notes
- I deployed okay, but didn’t use the Uberfall well. I suppose the Uberfall would’ve been a good counter to the Cutter, and I probably would’ve had to use them in that fashion if the Intruder had failed.
- I’m really happy with my careful play of bringing in Carlota next to the Locust at the bottom of 2. If he had spent effort trying to get rid of her, that would’ve been worthwhile, and had he not, I had an easy way of bagging his DataTracker during Turn 3.
- Spektrs are awesome! I’m a big fan of the DepRep one, because it lets me be aggressive and get into sneaky places and do sneaky Nomad things.
- I was a little disappointed with how I handled the Spektr after dropping all the kit. Perhaps staying prone and just recamoing was better. Would’ve given me an order for something else.
- We chatted with Nate and Isaac after the game, putting the Cutter all the way up the field next to my Uberfall was really gutsy. That and ignoring an obvious Intruder. Of course if you haven’t seen an Intruder before…
- I wasn’t the happiest with my anti-AD coverage–I don’t see it enough, but my TR Zond was definitely the MVP of the match, critting the Cutter twice.
- E/M LGL Moira continues to be one of my favorite profiles. Saved my bacon against the Bulleteer, and between her, the Intruder, and my Uberfall I had 3 great options of dealing with the Cutter once it got close.
- On that note, I was really happy with how I handled my Loss of Lieutenant turn. Lots of careful movement and efficient use of orders.
- One thing that was really annoying was that I should’ve just forfeited my orders on Turn 3 and done nothing. I wouldn’t have lost the Spektr or my Chimera, which would have put me in a different points bracket and widened the score gap.
- So, even though I played to the objective by bringing in Carlota in a good place, I should’ve done a better job of maximizing my points on Turn 3.
Game 2 – NCA Barrier
 Game 2 was against Isaac, who I haven’t seen at a tournament in ages. I knew his list, and I knew that I should be afraid. Three TO camo guys and 17 orders to power them all. I’d have to be super careful with my order expenditure and really play to the objectives.
Overview
- Mission: Unmasking
- Forces: Nomads versus Neoterra Capitaline Army (300)
- Deploy First: Neoterra Capitaline Army
- First Turn: Neoterra Capitaline Army
[img]https://assets.infinitythegame.net/infinityarmy/img/_logosweb/logo_501.png[/img][b] Gecko E/M[/b]
[img]https://assets.infinitythegame.net/infinityarmy/img/_logosweb/501/logo_16.png[/img] [b]INTERVENTOR Hacker Lieutenant (Hacking Device Plus)[/b] Combi Rifle, 1 FastPanda / Pistol, Knife. (0.5 | [b]27[/b])
[img]https://assets.infinitythegame.net/infinityarmy/img/_logosweb/501/logo_41.png[/img] [b]GECKO[/b] Mk12, Chain-colt, Blitzen / . (0.5 | [b]54[/b])
[img]https://assets.infinitythegame.net/infinityarmy/img/_logosweb/sep.gif[/img] [img]https://assets.infinitythegame.net/infinityarmy/img/_logosweb/501/logo_41.png[/img] [b]GECKO PILOT[/b] 2 Assault Pistols, Knife. ([b][/b])
[img]https://assets.infinitythegame.net/infinityarmy/img/_logosweb/501/logo_10.png[/img] [b]ZERO (Deployable Repeater)[/b] Combi Rifle, E/Mauler / Pistol, Knife. (0 | [b]19[/b])
[img]https://assets.infinitythegame.net/infinityarmy/img/_logosweb/501/logo_10.png[/img] [b]ZERO Hacker (Assault Hacking Device)[/b] Combi Rifle, Antipersonnel Mines / Pistol, Knife. (0.5 | [b]24[/b])
[img]https://assets.infinitythegame.net/infinityarmy/img/_logosweb/501/logo_37.png[/img] [b]BRAN DO CASTRO[/b] Boarding Shotgun / Pistol, DA CCW. (0 | [b]33[/b])
[img]https://assets.infinitythegame.net/infinityarmy/img/_logosweb/501/logo_26.png[/img] [b]PROWLER (Specialist Operative)[/b] Combi Rifle + Light Flamethrower, Adhesive Launcher / Pistol, CCW. (0.5 | [b]33[/b])
[img]https://assets.infinitythegame.net/infinityarmy/img/_logosweb/501/logo_5.png[/img] [b]REVEREND MOIRA[/b] MULTI Rifle + E/M Light Grenade Launcher / Pistol, Shock CCW. (1 | [b]34[/b])[img]https://assets.infinitythegame.net/infinityarmy/img/_logosweb/501/logo_40.png[/img] [b]RIOT GRRL[/b] Missile Launcher / Pistol, Knife. (2 | [b]33[/b])
[img]https://assets.infinitythegame.net/infinityarmy/img/_logosweb/501/logo_33.png[/img] [b]LUNOKHOD[/b] Heavy Shotgun, Heavy Flamethrower, D-Charges, CrazyKoalas (2) / Electric Pulse. (0 | [b]25[/b])
[img]https://assets.infinitythegame.net/infinityarmy/img/_logosweb/501/logo_57.png[/img] [b]JÄGER[/b] Submachine Gun + E/Mitter / Pistol, Monofilament CC Weapon. (0.5 | [b]18[/b])
[img]https://assets.infinitythegame.net/infinityarmy/img/_logosweb/orden_regular.png[/img]9 [img]https://assets.infinitythegame.net/infinityarmy/img/_logosweb/orden_irregular.png[/img]1 [b]| 5.5 SWC | 300 Points |[/b]
[img]https://assets.infinitythegame.net/infinityarmy/img/_logosweb/logo_104.png[/img][b] Neoterran Capitaline Army[/b]
[b]GROUP 1 | [/b][img]https://assets.infinitythegame.net/infinityarmy/img/_logosweb/orden_regular.png[/img]10
[img]https://assets.infinitythegame.net/infinityarmy/img/_logosweb/104/logo_6.png[/img] [b]SWISS GUARD[/b] HMG / Pistol, AP CCW. (2 | [b]68[/b])
[img]https://assets.infinitythegame.net/infinityarmy/img/_logosweb/104/logo_14.png[/img] [b]FUGAZI DRONBOT[/b] Flash Pulse, Sniffer / Electric Pulse. (0 | [b]8[/b])
[img]https://assets.infinitythegame.net/infinityarmy/img/_logosweb/104/logo_14.png[/img] [b]FUGAZI DRONBOT[/b] Flash Pulse, Sniffer / Electric Pulse. (0 | [b]8[/b])
[img]https://assets.infinitythegame.net/infinityarmy/img/_logosweb/104/logo_14.png[/img] [b]FUGAZI DRONBOT[/b] Flash Pulse, Sniffer / Electric Pulse. (0 | [b]8[/b])
[img]https://assets.infinitythegame.net/infinityarmy/img/_logosweb/104/logo_11.png[/img] [b]PATHFINDER DRONBOT[/b] Combi Rifle, Sniffer / Electric Pulse. (0 | [b]16[/b])
[img]https://assets.infinitythegame.net/infinityarmy/img/_logosweb/104/logo_19.png[/img] [b]TRAUMA-DOC[/b] Combi Rifle / Pistol, Knife. (0 | [b]14[/b])
[img]https://assets.infinitythegame.net/infinityarmy/img/_logosweb/104/logo_17.png[/img] [b]PALBOT[/b] Electric Pulse. (0 | [b]3[/b])
[img]https://assets.infinitythegame.net/infinityarmy/img/_logosweb/104/logo_22.png[/img] [b]CSU[/b] Boarding Shotgun, Nanopulser / Pistol, Knife. (0 | [b]11[/b])[img]https://assets.infinitythegame.net/infinityarmy/img/_logosweb/104/logo_22.png[/img] [b]CSU[/b] Boarding Shotgun, Nanopulser / Pistol, Knife. (0 | [b]11[/b])
[img]https://assets.infinitythegame.net/infinityarmy/img/_logosweb/104/logo_1.png[/img] [b]AUXILIA (Forward Observer)[/b] Combi Rifle + AUXBOT_1 / Pistol, Knife. (0 | [b]15[/b])
[img]https://assets.infinitythegame.net/infinityarmy/img/_logosweb/sep.gif[/img] [img]https://assets.infinitythegame.net/infinityarmy/img/_logosweb/104/logo_1.png[/img] [b]AUXBOT_1[/b] Heavy Flamethrower / Electric Pulse. (- | [b]4[/b])
[img]https://assets.infinitythegame.net/infinityarmy/img/_logosweb/104/logo_1.png[/img] [b]AUXILIA (Forward Observer)[/b] Combi Rifle + AUXBOT_1 / Pistol, Knife. (0 | [b]15[/b])
[img]https://assets.infinitythegame.net/infinityarmy/img/_logosweb/sep.gif[/img] [img]https://assets.infinitythegame.net/infinityarmy/img/_logosweb/104/logo_1.png[/img] [b]AUXBOT_1[/b] Heavy Flamethrower / Electric Pulse. (- | [b]4[/b])[b]GROUP 2 | [/b][img]https://assets.infinitythegame.net/infinityarmy/img/_logosweb/orden_regular.png[/img]7
[img]https://assets.infinitythegame.net/infinityarmy/img/_logosweb/104/logo_4.png[/img] [b]HEXA Hacker (Killer Hacking Device)[/b] Combi Rifle / Pistol, Electric Pulse. (0 | [b]27[/b])
[img]https://assets.infinitythegame.net/infinityarmy/img/_logosweb/104/logo_4.png[/img] [b]HEXA[/b] MULTI Sniper Rifle / Pistol, Electric Pulse. (1.5 | [b]32[/b])[img]https://assets.infinitythegame.net/infinityarmy/img/_logosweb/104/logo_2.png[/img] [b]FUSILIER[/b] Missile Launcher / Pistol, Knife. (1.5 | [b]15[/b])
[img]https://assets.infinitythegame.net/infinityarmy/img/_logosweb/104/logo_2.png[/img] [b]FUSILIER[/b] HMG / Pistol, Knife. (1 | [b]18[/b])
[img]https://assets.infinitythegame.net/infinityarmy/img/_logosweb/104/logo_2.png[/img] [b]FUSILIER[/b] Combi Rifle / Pistol, Knife. (0 | [b]10[/b])
[img]https://assets.infinitythegame.net/infinityarmy/img/_logosweb/104/logo_2.png[/img] [b]FUSILIER Lieutenant[/b] Combi Rifle / Pistol, Knife. (0 | [b]10[/b])
[img]https://assets.infinitythegame.net/infinityarmy/img/_logosweb/104/logo_2.png[/img] [b]FUSILIER[/b] Combi Rifle / Pistol, Knife. (0 | [b]10[/b])
[b] 6 SWC | 299 Points |[/b] Open in Infinity Army
Deployment
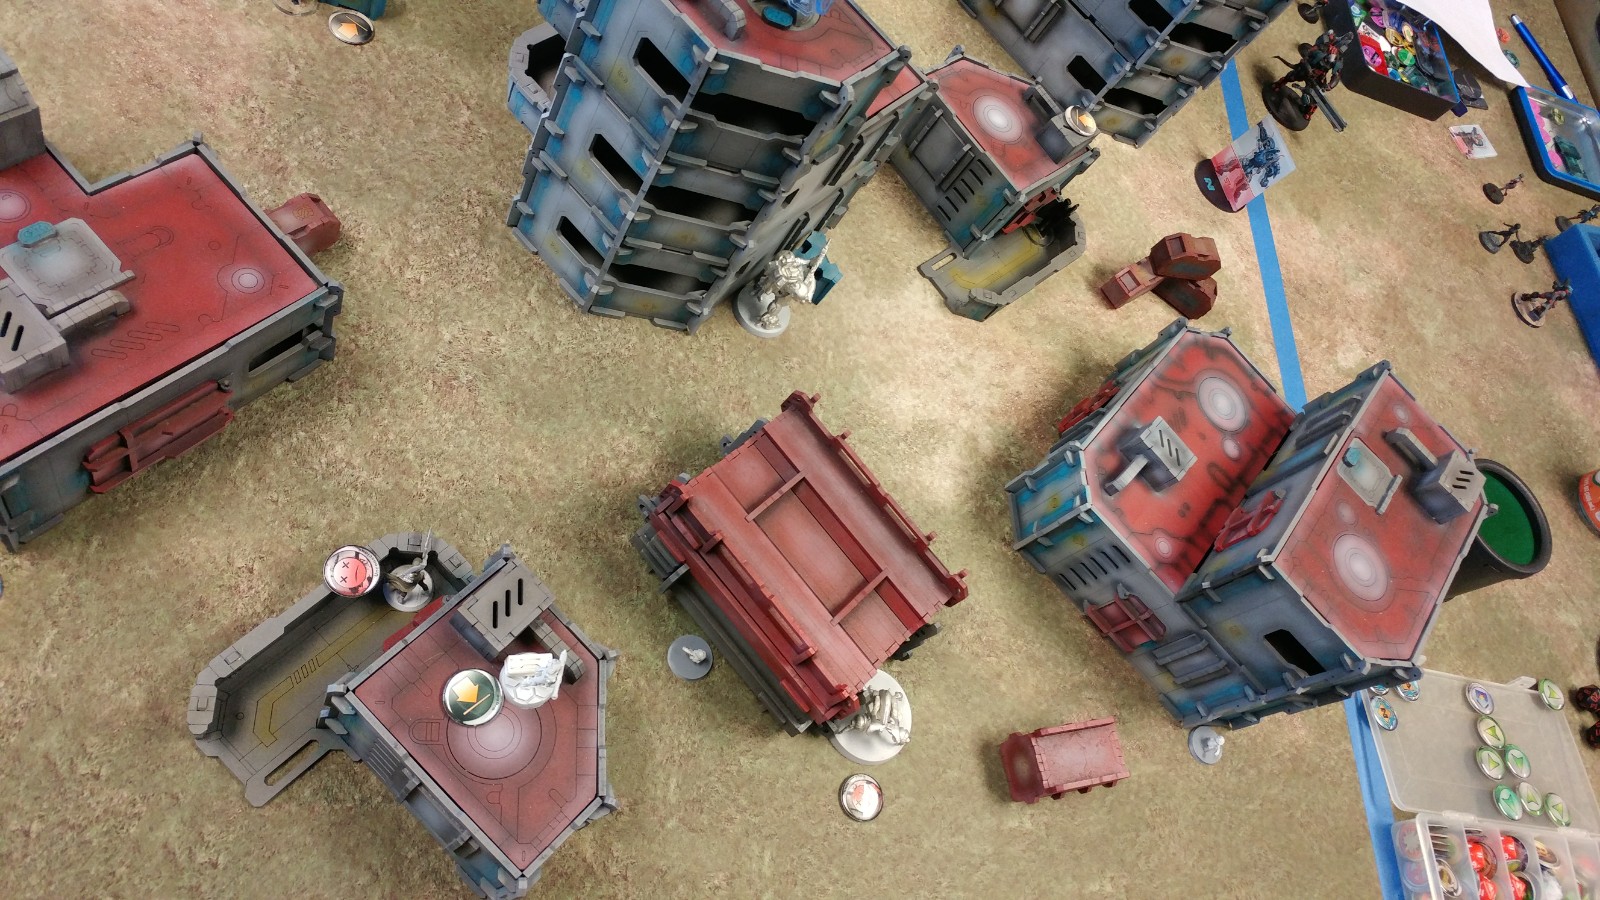
I forget who won the roll off, but Isaac definitely didn’t like one of the deployment zones, so he generously gave me that one and elected to go first. I put my AHD Zero on the right and my DepRep Zero on the left, with the Prowler in the center. I covered the giant chasm of a deployment zone on my left with my Lunokhod, who was also protecting my Interventor. My Gecko and Riot Grrl ML went on the right to be my mailed fist, and my Moira backstopped the Prowler with her MULTI Rifle and E/M LGL in the center.
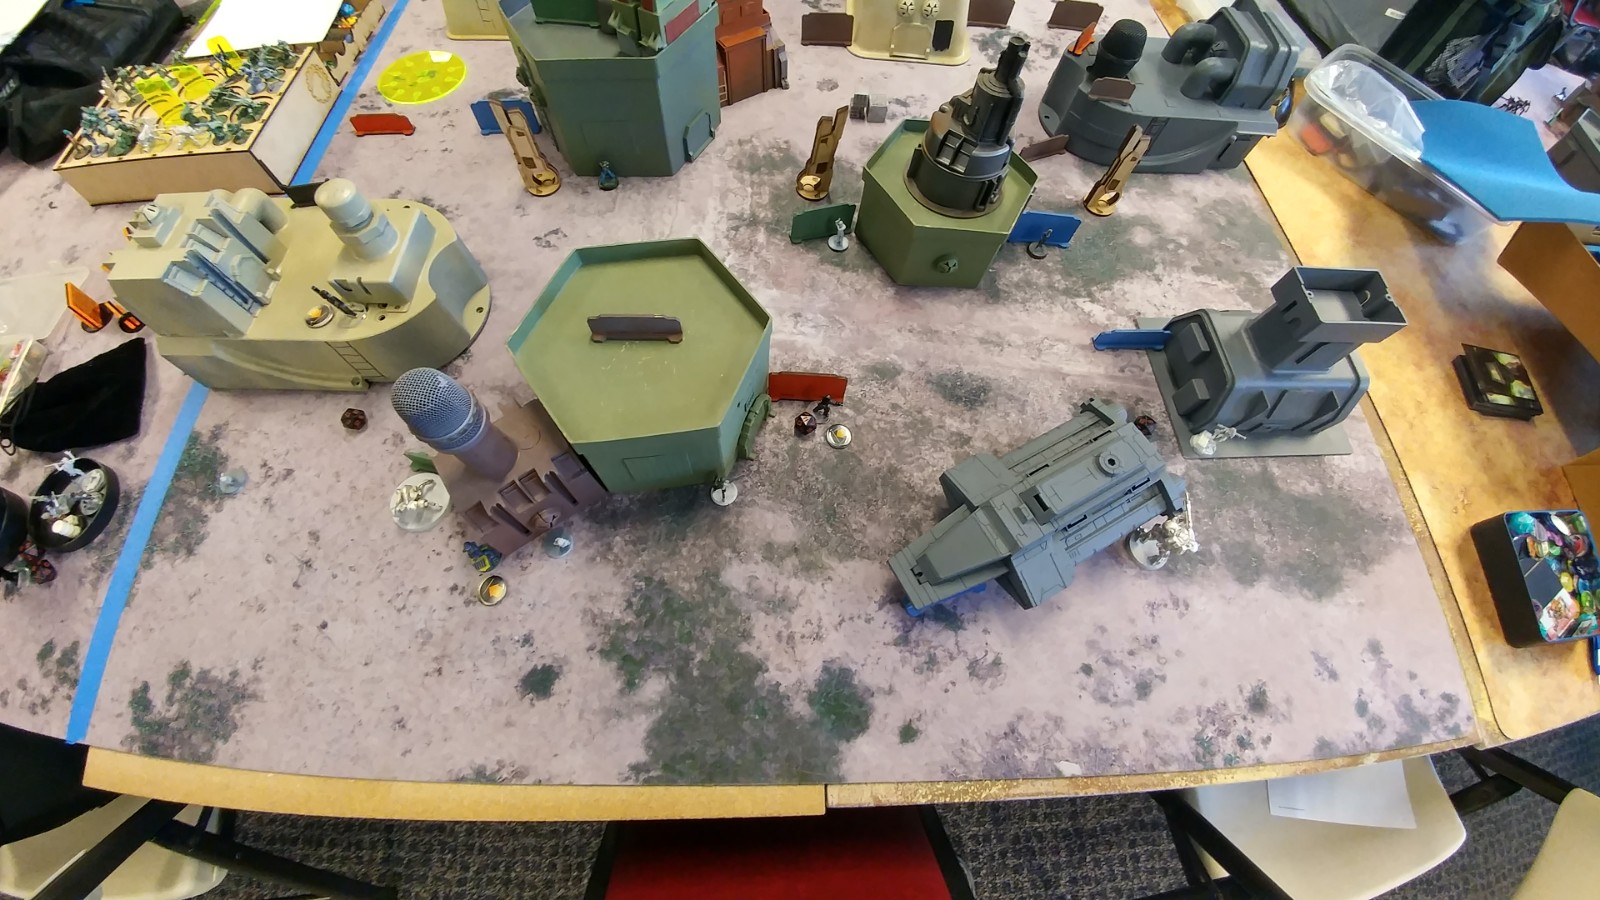 Both of us just sprinkled our HVTs across the centerline, more or less, without giving much thought to it–there simply weren’t enough places for things to go that were good. Isaac bottled up his link team in total cover, and protected everything with way too many Fugazi and a Pathfinder. His two Auxilia didn’t make my job any easier either. Ugh.
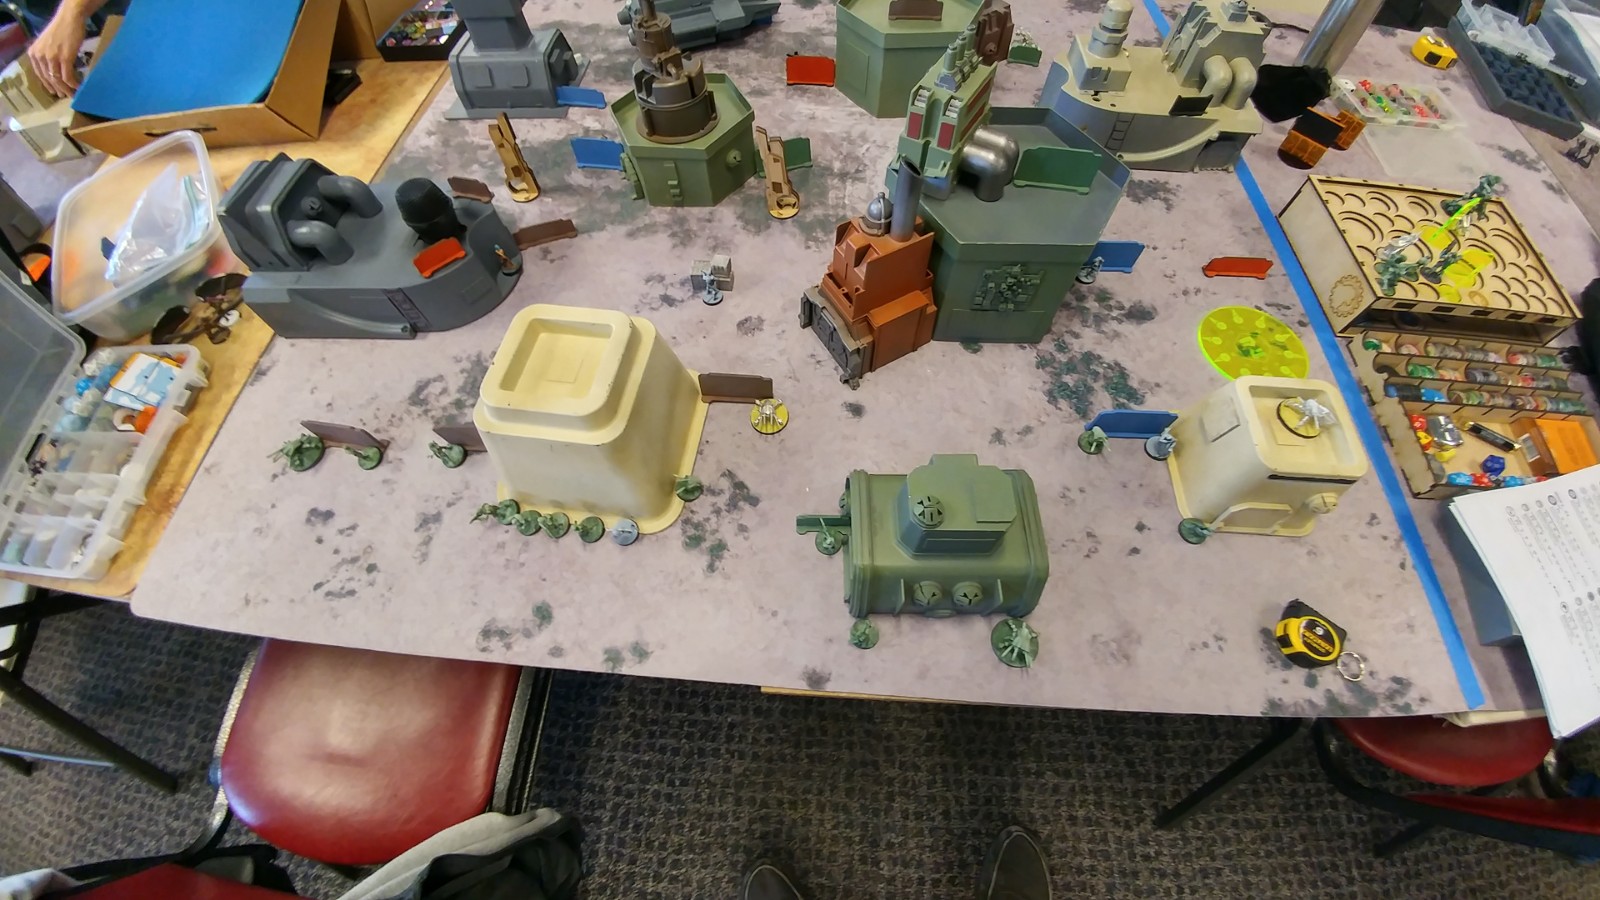 I thought long and hard about where best to put Bran. Isaac had left the Fusilier ML and HMG out to ARO me as I came up the board, and I wanted him as far away as possible from any Auxbot flamethrowers as possible, so I stuck Bran within a full-order move of his Fusilier heavy weapons.
  I didn’t know it, but after he shooed me away Isaac put his Hexa MSR out of reserve watching Bran. Smart. I nominated my Riot Grrl as my DataTracker and Isaac nominated one of his CSUs.
Turn 1
Top of Turn 1 – Nomads
Well, I moved Bran into place, shotgunned down the Fugazi and both the ML and HMG Fusiliers. The ML Fusilier got blown off the table, but the HMG Fusilier was only knocked out. When I tried to recamo Bran to continue his rampage, he got crit off the table by a Hexa MSR coming out of hidden deployment on a roof. Sigh. I suppose I should’ve been greedier and tried to shotgun that beautiful line of Fusiliers. Ah well. I remove the Hexa MSR with a coordinated order from the Riot Grrl, Gecko, and Moira, blasting the Hexa off the table. My main line of attack had stalled out, so I started to get the rest of my forces in place, by which I mean grossly overextend everything. I left my Riot Grrl where she was, but overextended my Lunokhod and Prowler as part of a coordinated order. I did, however, get the rightmost button pushed and rightmost decoy HVT unmasked, but this left my Zero AHD out in the open a little, and my Prowler’s butt hanging out in no man’s land. My Zero DepRep was at least in cover on the left. Not good though, overall. At least I remembered to Cybermask my lieutenant.
Bottom of Turn 1 – NCA
Isaac wastes no time exploiting my bad board position and brings out a Swiss Guard HMG, who promptly guns down my AHD Zero. Isaac trades my Lunokhod for an Auxbot (totally worth it for him), and downs my DepRep Zero with the Auxila. After plinking a wound off the Gecko with the Swiss Guard HMG, Isaac cautious moves his Trauma Doc up to the downed Fusilier HMG and picks him up, reforms the link team, and guns down my Prowler.
Quite a tidy turn! Isaac’s just sweeping up my forces with his HMG brooms. To finish things up, Isaac drops the Swiss Guard and the Auxilia into suppression fire along with a few things in his backfield and passes the turn. I’m definitely being reminded not to leave things overextended in a 10 order list. I really don’t have the luxury of letting you kill stuff.
Turn 2
Top of Turn 2 – Nomads
I coordinate an order and get the Moira, the Gecko, and the Riot Grrl into place to shoot down the Swiss Guard. Isaac breaks suppression to dodge, but I whiff all my shots thanks to TO and cover, so the Swiss Guard quickly scoots into safety.
 I spend two orders trying to spec-fire an E/M grenade on top of the Swiss Guard in good range, but I used up all my luck with the Bulleteer in the first game and whiff twice.
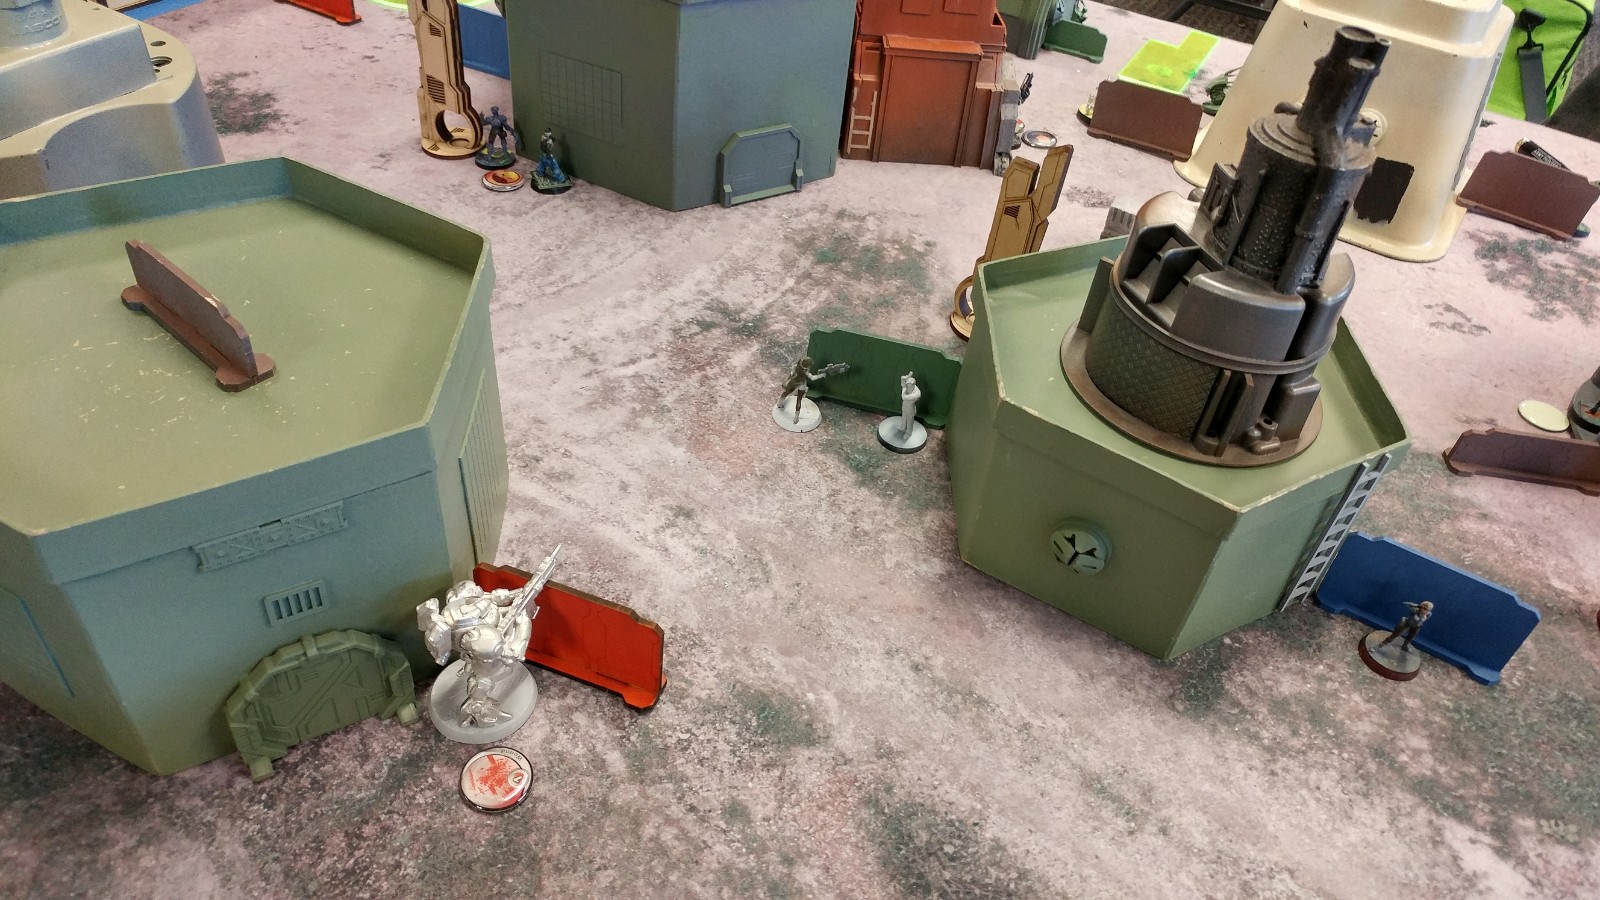 I manage to get my Interventor to the leftmost button in IMP-2 state, but don’t have the orders to push the button, sadly (and still wanted to leave him impersonated). My options are limited, and I’m out of orders. Cringing, I pass the turn after bringing in my Cube Jager, in hopes that I’ll have orders to spend on him.
Bottom of Turn 2 – NCA
Thankfully, my dice luck is back, and after Isaac runs the HMG Fusilier link up the field, he spends a ton of time blasting ineffectually at my Riot Grrl while I dodge her about. Rather than deal with that mess any further, he settles for throwing first the Auxilia and then his Hexa KHD at my Interventor. After I crit the Auxilia down, the Hexa KHD guns down my Interventor from out of hacking range. At this point, Isaac’s out of orders and passes the turn.
Turn 3
Top of Turn 3 – Nomads
Well, I’m in loss of lieutenant, and don’t have any way of getting specialists up the board because I’m out of command tokens. I reposition the Cube Jager to cover the central HVT and objective, throw the Moira into suppression, move the Gecko into a better spot, and then, the hail mary. I send the Riot Grrl in against the Fusilier HMG, knowing that the missile blast will catch the revealed decoy HVT since he’s now standing right next to the HVT! Luck is with me again and I drop both the Fusilier and the decoy. Okay, now to just keep Isaac off of the objectives!
Bottom of Turn 3 – NCA
Isaac sends in his Swiss Guard, who promptly is destroyed by the Moira, Gecko, and Riot Grrl, but the Cube Jager gets wrecked…
 The Hexa KHD manages to push the left most button but then gets gunned down by my Moira and Gecko before she can get anywhere. Same story for one of the CSUs, trying to clear a path. The remaining Auxilia tries to make it upfield but is stopped cold by the Moira as well. With that, we both have 1 button pushed but I have killed a decoy HVT, and Isaac hasn’t. Both of our DataTrackers are alive, so it’s a
4-3 Nomad Victory?
Definitely a skin-of-my-teeth affair. Isaac later lamented that he should’ve exposed the leftmost HVT and then suicided his Hexa in, but hindsight’s always 20-20.
Notes
- Don’t overextend! I’ve done this time and time again. I keep trying to use my Prowler in coordinated orders to get movement, but really I should just be focusing on the actual movement I want to get done and not wasting time blowing command tokens on movement.
- I really overextended the Lunokhod, when I really didn’t need to. A much better first turn would’ve been to just move the Lunokhod up and seed the area with Crazy Koalas. Much stronger, good order efficiency. 10 order lists are still tough to pilot, but I’m getting a better hang of them.
- Moiras in suppression continue to impress the hell out of me. I love my Moira E/M LGL. She does so much work for me!
- Geckos are great little pocket TAGs. I love the Blitzen.
- Riot Grrl ML is great! Dodging on 16s is no joke!
- I think this game came down to me recovering from doing dumb positioning things on turn 1, and then having hot dice.
- Exclusion zones really hurt AD:2 models.
- I’m finding more and more than I don’t like having irregular models in a 10 order list. Coordinated orders are so important.
Game 3 – Lizard Fight
 Hoo boy! Brain fried, feeling a little shaky after last game, and I’m up against No Mistakes Nate! But hey, at least I’d get to admire his beautifully painted Szalamandra as it guns down all my guys, right?
Overview
- Mission: Show of Force
- Forces: Nomads versus Nomads (OpFor) (300)
- Deploy First:Nomads (OpFor)
- First Turn:Nomads (OpFor)
[img]https://assets.infinitythegame.net/infinityarmy/img/_logosweb/logo_501.png[/img][b] Gecko E/M[/b]
[img]https://assets.infinitythegame.net/infinityarmy/img/_logosweb/501/logo_16.png[/img] [b]INTERVENTOR Hacker Lieutenant (Hacking Device Plus)[/b] Combi Rifle, 1 FastPanda / Pistol, Knife. (0.5 | [b]27[/b])
[img]https://assets.infinitythegame.net/infinityarmy/img/_logosweb/501/logo_41.png[/img] [b]GECKO[/b] Mk12, Chain-colt, Blitzen / . (0.5 | [b]54[/b])
[img]https://assets.infinitythegame.net/infinityarmy/img/_logosweb/sep.gif[/img] [img]https://assets.infinitythegame.net/infinityarmy/img/_logosweb/501/logo_41.png[/img] [b]GECKO PILOT[/b] 2 Assault Pistols, Knife. ([b][/b])
[img]https://assets.infinitythegame.net/infinityarmy/img/_logosweb/501/logo_10.png[/img] [b]ZERO (Deployable Repeater)[/b] Combi Rifle, E/Mauler / Pistol, Knife. (0 | [b]19[/b])
[img]https://assets.infinitythegame.net/infinityarmy/img/_logosweb/501/logo_10.png[/img] [b]ZERO Hacker (Assault Hacking Device)[/b] Combi Rifle, Antipersonnel Mines / Pistol, Knife. (0.5 | [b]24[/b])
[img]https://assets.infinitythegame.net/infinityarmy/img/_logosweb/501/logo_37.png[/img] [b]BRAN DO CASTRO[/b] Boarding Shotgun / Pistol, DA CCW. (0 | [b]33[/b])
[img]https://assets.infinitythegame.net/infinityarmy/img/_logosweb/501/logo_26.png[/img] [b]PROWLER (Specialist Operative)[/b] Combi Rifle + Light Flamethrower, Adhesive Launcher / Pistol, CCW. (0.5 | [b]33[/b])
[img]https://assets.infinitythegame.net/infinityarmy/img/_logosweb/501/logo_5.png[/img] [b]REVEREND MOIRA[/b] MULTI Rifle + E/M Light Grenade Launcher / Pistol, Shock CCW. (1 | [b]34[/b])
[img]https://assets.infinitythegame.net/infinityarmy/img/_logosweb/501/logo_40.png[/img] [b]RIOT GRRL[/b] Missile Launcher / Pistol, Knife. (2 | [b]33[/b])
[img]https://assets.infinitythegame.net/infinityarmy/img/_logosweb/501/logo_33.png[/img] [b]LUNOKHOD[/b] Heavy Shotgun, Heavy Flamethrower, D-Charges, CrazyKoalas (2) / Electric Pulse. (0 | [b]25[/b])
[img]https://assets.infinitythegame.net/infinityarmy/img/_logosweb/501/logo_57.png[/img] [b]JÄGER[/b] Submachine Gun + E/Mitter / Pistol, Monofilament CC Weapon. (0.5 | [b]18[/b])
[img]https://assets.infinitythegame.net/infinityarmy/img/_logosweb/orden_regular.png[/img]9 [img]https://assets.infinitythegame.net/infinityarmy/img/_logosweb/orden_irregular.png[/img]1 [b]| 5.5 SWC | 300 Points |[/b] Open in Infinity Army
[img]https://assets.infinitythegame.net/infinityarmy/img/_logosweb/logo_501.png[/img][b] Nomads[/b]
[b]GROUP 1 | [/b][img]https://assets.infinitythegame.net/infinityarmy/img/_logosweb/orden_regular.png[/img]10
[img]https://assets.infinitythegame.net/infinityarmy/img/_logosweb/501/logo_29.png[/img] [b]SZALAMANDRA[/b] Hyper-rapid Magnetic Cannon, Heavy Flamethrower / . (2 | [b]90[/b])
[img]https://assets.infinitythegame.net/infinityarmy/img/_logosweb/sep.gif[/img]
[img]https://assets.infinitythegame.net/infinityarmy/img/_logosweb/501/logo_29.png[/img] [b]SZALAMANDRA PILOT[/b] Contender / Pistol, Knife. ([b][/b])
[img]https://assets.infinitythegame.net/infinityarmy/img/_logosweb/501/logo_10.png[/img] [b]ZERO Hacker (Killer Hacking Device)[/b] Combi Rifle, Antipersonnel Mines / Pistol, Knife. (0 | [b]21[/b])
[img]https://assets.infinitythegame.net/infinityarmy/img/_logosweb/501/logo_30.png[/img] [b]MORAN (Forward Observer)[/b] Combi Rifle, CrazyKoalas (2) / Pistol, Knife. (0.5 | [b]22[/b])
[img]https://assets.infinitythegame.net/infinityarmy/img/_logosweb/501/logo_16.png[/img] [b]INTERVENTOR Hacker (Hacking Device Plus)[/b] Combi Rifle, 1 FastPanda / Pistol, Knife. (0.5 | [b]27[/b])
[img]https://assets.infinitythegame.net/infinityarmy/img/_logosweb/501/logo_13.png[/img] [b]JAGUAR[/b] Chain Rifle, Smoke Grenades / Pistol, DA CCW. (0 | [b]10[/b])
[img]https://assets.infinitythegame.net/infinityarmy/img/_logosweb/501/logo_13.png[/img] [b]JAGUAR[/b] Chain Rifle, Smoke Grenades / Pistol, DA CCW. (0 | [b]10[/b])
[img]https://assets.infinitythegame.net/infinityarmy/img/_logosweb/501/logo_21.png[/img] [b]TRANSDUCTOR ZOND[/b] Flash Pulse, Sniffer / Electric Pulse. (0 | [b]8[/b])
[img]https://assets.infinitythegame.net/infinityarmy/img/_logosweb/501/logo_21.png[/img] [b]TRANSDUCTOR ZOND[/b] Flash Pulse, Sniffer / Electric Pulse. (0 | [b]8[/b])
[img]https://assets.infinitythegame.net/infinityarmy/img/_logosweb/501/logo_35.png[/img] [b]SALYUT (Minesweeper, Repeater)[/b] Electric Pulse. (0 | [b]8[/b])
[img]https://assets.infinitythegame.net/infinityarmy/img/_logosweb/501/logo_24.png[/img] [b]TOMCAT Engineer[/b] Combi Rifle + Light Flamethrower, D-Charges / Pistol, Knife. (0 | [b]22[/b])[b]GROUP 2 | [/b][img]https://assets.infinitythegame.net/infinityarmy/img/_logosweb/orden_regular.png[/img]1 [img]https://assets.infinitythegame.net/infinityarmy/img/_logosweb/orden_irregular.png[/img]3 [img]https://assets.infinitythegame.net/infinityarmy/img/_logosweb/orden_impetuosa.png[/img]3
[img]https://assets.infinitythegame.net/infinityarmy/img/_logosweb/501/logo_49.png[/img] [b]TASKMASTER Lieutenant[/b] Red Fury, Pulzar, CrazyKoalas + TinBot A (Deflector L1) / Heavy Pistol, DA CCW. (1 | [b]53[/b])
[img]https://assets.infinitythegame.net/infinityarmy/img/_logosweb/501/logo_12.png[/img] [b]MORLOCK[/b] Chain Rifle, Smoke Grenades / Pistol, E/M CCW. (0 | [b]6[/b])
[img]https://assets.infinitythegame.net/infinityarmy/img/_logosweb/501/logo_12.png[/img] [b]MORLOCK[/b] Chain Rifle, Smoke Grenades / Pistol, E/M CCW. (0 | [b]6[/b])
[img]https://assets.infinitythegame.net/infinityarmy/img/_logosweb/501/logo_12.png[/img] [b]MORLOCK[/b] Chain Rifle, Smoke Grenades / Assault Pistol, AP CCW. (0 | [b]8[/b])
[b] 4 SWC | 299 Points |[/b] Open in Infinity Army
Deployment
Nate won the roll off and grumbled about how he wanted second turn, but knows that I like to alpha-strike. He decided to go first, and I stuck him with the slightly more open deployment zone. After securing his deployment zone against Hellcats with a pair of Jaguars on the right, a pair of Transductor Zonds on either side, and his Taskmaster Lt and attendant Koalas on the left, Nate tucked in his usual string of Morlocks across his backfield. A Moran defended the central objective with an Interventor crouched in Nate’s backfield, waiting to strike.
 I knew that a TAG was coming, so I tried to set up some nasty AROs. It’s quite difficult to stack AROs, especially against an experienced pie-slicer like Nate, so I settled for setting up some nasty ones. I put my Riot Grrl ML in the center of the board, watching both diagonal approaches to the center of my deployment zone. Covering her from below was my trusty Moira E/M LGL. Just in case Nate had stuck in a Hellcat for some strange reason, I tasked my Lunokhod to protect the right half of my deployment zone, in what I hoped was sufficient cover.
 My own Interventor settled in on the left. I didn’t know where Nate’s TAG was going to be, so I put my Prowler more or less in the center, paired with my Zero DepRep inside the two story building to the left of the central objective. My Zero AHD covered my right flank, daring Nate’s Szalamandra to come that way.
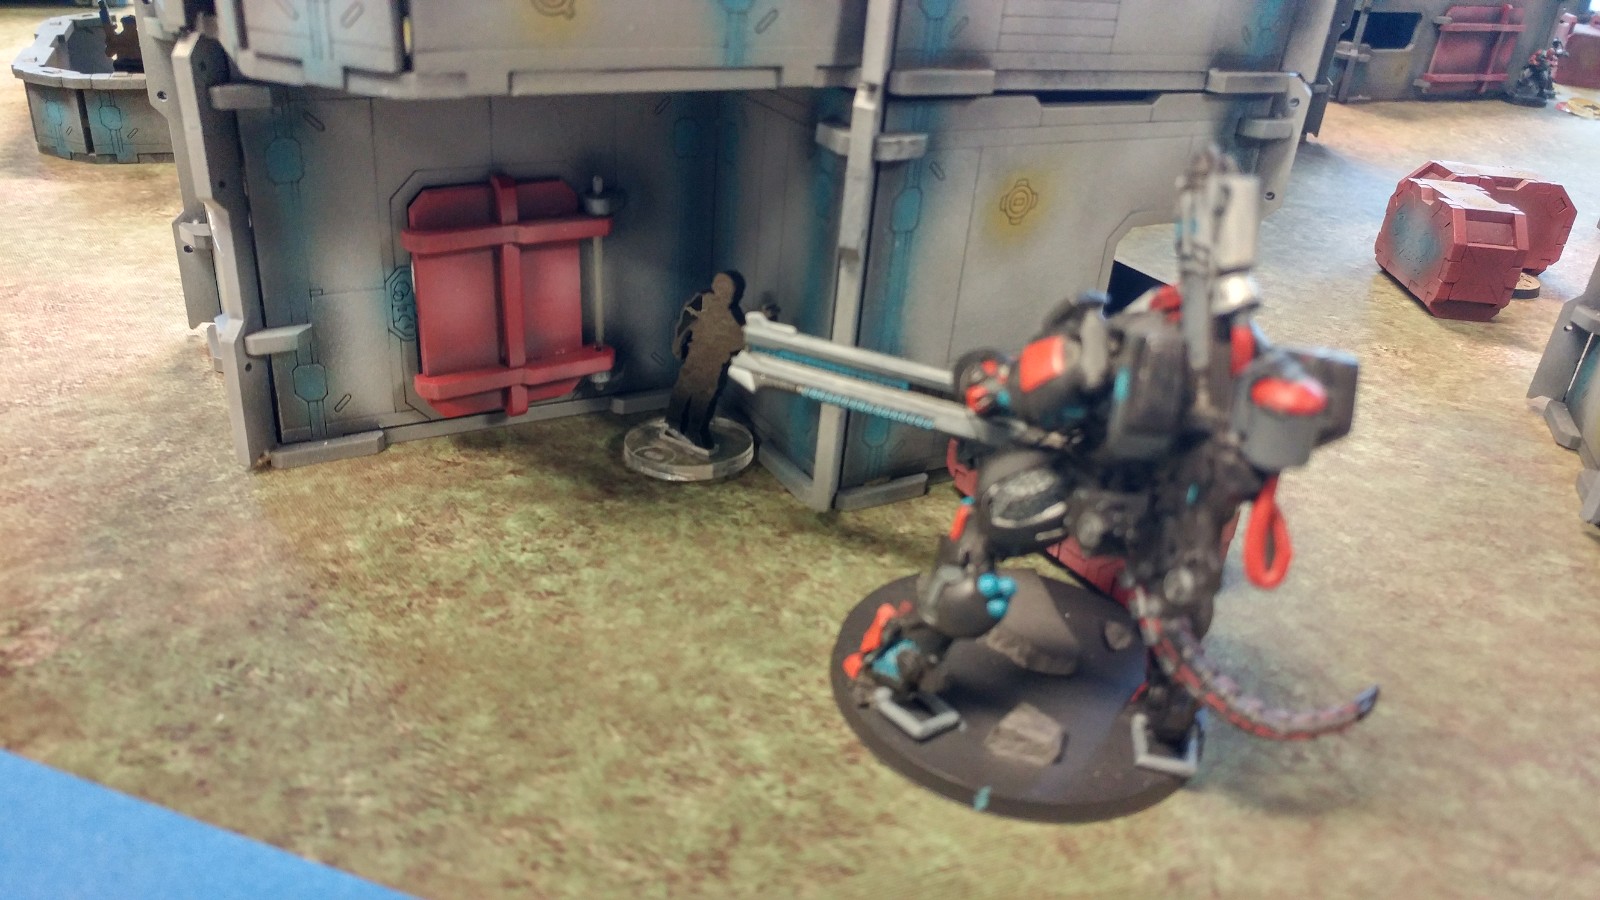 Nate plunked his Szalamandra on his left, near my AHD, and I cheekily put Bran right in front of him. On the ground. Like an idiot.
Turn 1
Top of Turn 1 – Nomads (OpFor)
After his Morlocks do their thing, Nate discover-shoots Bran with the Szalamandra. I assumed he would flamethrower, but he just shoots with the HRMC against my Engage. RUH ROH. Bran disappears off the table. Nate then proceeds to march the Szalamandra up my right flank, first taking out my Lunokhod.
Next up is my Riot Grrl, who, like the champion of champions she is, punches a missile through a hail of 5 dice worth of HRMC fire and lands a direct hit–which of course bounces off the TAG’s armor (I had forgotten about this but Nate reminded me later). Another round of shooting forces my Riot Grrl prone, and then Nate’s free to take out my Moira. Thankfully, Nate chooses AP against the Moira and not shock.
 Now that the way to the Gecko is clear, Nate takes on my TAG. Thankfully, this brings him into my Zero AHD’s 8″ ZoC. I manage to simultaneously land a Blitzen and Total Control attack, meaning the Szalamandra is now mine, immobilized, and isolated. Huh. Well. Hmph. Poop.
 Nate spends his remaining orders shuffling some Morlocks around and walking a camo token to within 8″ of my Zero AHD.
Bottom of Turn 1 – Nomads
We look it up, and determine that I can’t willingly relinquish the possession of Nate’s TAG, so I can’t bring in my Cube Jager and Monofilament it off the table. Drat. I settle for bringing the Cube Jager in next to the Moira and picking her up. I gun down a Morlock on my left with the Zero DepRep and my RiotGrrl and finally manage to take out the Zero KHD that Nate put in place to stall out my turn. It takes a few coordinated orders and a Prowler getting into position though, which is probably exactly what Nate wanted-suck up my orders.
 I throw both Zeros and the Gecko into suppression, but I don’t have anything covering the rightmost Morlock from my perspective. Sadly, this will be the end of me.
Turn 2
Top of Turn 2 – Nomads (OpFor)
Nate throws smoke to cover the Szalamandra, brings in a Tomcat, spends two orders fixing it up, and then retreats everyone to safety, shrugging off another possession attempt the TAG leaves. The Szalamandra actually stomps all the way to his deployment zone! He’s got an order or two left in his second pool, so he tries to take out my AHD Zero with his Morlock. Thankfully, my Zero is quick on the draw and guns down the Morlock, even in spite of using MA1 and Morlocks being stupidly good at stabbing things. I guess Nate’s Achilles heel is his occasional bad dice luck.
Bottom of Turn 2 – Nomads
I spend this turn trying to get a Prowler in place to glue the Szalamandra in Nate’s deployment zone. Yes, he’s got a Tomcat a few orders away, but that will at least make it a pain for Nate to get the TAG back into the center where it needs to be. I recamo and get in position after a laborious slog involving using a Zero to take out a Crazy Koala and then surprise shot ADHL. Sadly, I’m on 9’s to Nate’s 8’s, and it really does come down to the dice. Nate crits and I roll a 12. What happened to that bad dice luck!? I dash the Cube Jager up the field to pick up the downed Prowler so I can try again, but end up killing him instead due to a failed PH-3 roll.
 Well, I am now officially out of good things to do. I settle for moving my Interventor up a bit with his Lieutenant order,
Turn 3
Top of Turn 3 –Nomads (OpFor)
My Zero DepRep is quite out of position now, having overextended to remove the Crazy Koala to get the Prowler into position. He’s the first to die, going down to the Taskmaster’s Red Fury. The Szalamandra stomps its way up the field, gunning down my Cube Jager, Gecko, and Riot Grrl on the way. Nate ends his turn with the Moran and Taskmaster advanced and littering the area with Crazy Koalas and the Szalamandra in suppression in base to base with the central objective.
Bottom of Turn 3 – Nomads
I forget that I have Fast Pandas on my Interventor and try to cautious move to get him into position to possess the Szalamandra. Instead, I die horribly because I misjudge the required distance.
 I spend my last two orders trying to take out the Szalamandra with my Moira, but that fails, so that’s game.
 10-0 Nomad (OpFor) Victory!
Notes
- Should’ve taken out the Morlock on the right. Super important. Could’ve used the Cube Jager to do it. Dammit!
- Nate suggested putting Bran prone on one of the balconies near the Szalamandra. Smart, not like me! I was really gambling on the engage working.
- Don’t forget when you take Fast Pandas. Wouldn’t have won me the game, but would’ve kept my Interventor, who was my DataTracker, alive, and maybe let me possess the TAG, bringing it from a 10-0 to a 2-0. GRAAGH!
- I think I need to start thinking about taking more Doctors and Engineers in my lists. Maybe it’s time I shift away from 10 order Nomad lists and get a little more toolboxy again. Nate and I talked for awhile after the game about it, and he rightfully noted that a 14 order list with a bunch of Morlocks doesn’t mean I have to give up my big stompy toys.
- I really want to like the Prowler Specialist Operative. It has a lot of my favorite tools, but I’m not getting great use out of him. I think I need to spend a few games really pushing him to the limit in not a dumb way, like I’ve been doing–shoving him up the field as part of a coordinated order and so on. Can’t neglect him, gotta use him to his full benefit.
- I seem to just lose my Lunokhods all the time. Nate knows how scary they are, so maybe I’m just seeing the full fury of Nate unleashed on a troublesome model, but I do feel like they die a lot. I think I overextend and expose them too much. Need to think about that some more.
Final Thoughts
Adam informed me later that I came in 4th, which makes sense given my two minor victories and the curb stomping that Nate gave me. I had to leave early to make date night with the better half. One of the many great things about playing against Nate is that our games are always fast, so I made it to date night with time to spare! My big takeaways from this tournament are:
- I need to practice with Bran a lot more, find out what his limits actually are and when to take risks.
- Ditto for Lunokhods. They’re really powerful but I need to keep them safe for a turn and then put them in a difficult to remove place.
- I’m finding that I have trouble deploying S3 and up models. They tend to have to hug the side of a building, which makes them very very vulnerable to flanking. See my Gecko positioning from Game 3 and my Kriza positioning from Game 1.
- As always, stay calm and focused, and count objective points at the beginning of each turn.