

When a Plan Comes Together
So, after my last game I’ve been thinking a lot about how to make sure I have a good plan as well as a methodology to stick to it. Game night people shuffling resulted in a bright point in an otherwise dreary day–I was going to face off against Erik (Zelaponeepus), who I haven’t played in months, though I’ve seen him on and off during that time. He wanted to play Hunting Party, having never played it before, and I wanted to try out Ikari at 10 orders (which is what I had built my Hunting Party list at) so it all worked out.
Overview
- Mission: Hunting Party
- Forces: Ikari Company versus Shock Army of Acontecimento (300)
- Deploy First: Acontecimento
- First Turn: Acontecimento
[img]https://assets.infinitythegame.net/infinityarmy/img/_logosweb/logo_904.png[/img][b] List B[/b]
[img]https://assets.infinitythegame.net/infinityarmy/img/_logosweb/904/logo_2.png[/img] [b]BRAWLER Lieutenant[/b] Rifle + Light Shotgun / Pistol, Knife. (0 | [b]16[/b])
[img]https://assets.infinitythegame.net/infinityarmy/img/_logosweb/904/logo_2.png[/img] [b]BRAWLER Hacker (Assault Hacking Device)[/b] Submachine Gun / Pistol, Knife. (0.5 | [b]17[/b])[img]https://assets.infinitythegame.net/infinityarmy/img/_logosweb/904/logo_6.png[/img] [b]WÚ MÍNG[/b] Heavy Rocket Launcher, Light Shotgun / Pistol, Knife. (2 | [b]33[/b])
[img]https://assets.infinitythegame.net/infinityarmy/img/_logosweb/904/logo_6.png[/img] [b]WÚ MÍNG (Fireteam: Haris)[/b] Chain Rifle, Submachine Gun / Pistol, Knife. (0 | [b]25[/b])
[img]https://assets.infinitythegame.net/infinityarmy/img/_logosweb/904/logo_2.png[/img] [b]BRAWLER Engineer[/b] Rifle + Light Shotgun, D-Charges / Pistol, Knife. (0 | [b]20[/b])[img]https://assets.infinitythegame.net/infinityarmy/img/_logosweb/904/logo_4.png[/img] [b]DRUZE Hacker (Killer Hacking Device)[/b] Combi Rifle + Pitcher, D-Charges / Viral Pistol, Knife. (0 | [b]25[/b])
[img]https://assets.infinitythegame.net/infinityarmy/img/_logosweb/904/logo_8.png[/img] [b]FASID[/b] HMG + (Smoke and Normal) Light Grenade Launcher, Antipersonnel Mines / Heavy Pistol, Knife. (2 | [b]53[/b])
[img]https://assets.infinitythegame.net/infinityarmy/img/_logosweb/904/logo_9.png[/img] [b]DAIYŌKAI[/b] MULTI Marksman Rifle, Panzerfaust / Pistol, DA CC Weapon, AP CC Weapon. (0 | [b]52[/b])
[img]https://assets.infinitythegame.net/infinityarmy/img/_logosweb/904/logo_5.png[/img] [b]KARAKURI[/b] Mk12, Chain Rifle, D.E.P. / Pistol, Knife. (0 | [b]40[/b])
[img]https://assets.infinitythegame.net/infinityarmy/img/_logosweb/904/logo_15.png[/img] [b]JÄGER[/b] Submachine Gun + E/Mitter / Pistol, Monofilament CC Weapon. (0.5 | [b]18[/b])
[img]https://assets.infinitythegame.net/infinityarmy/img/logos/orden_regular.png[/img]9 [img]https://assets.infinitythegame.net/infinityarmy/img/logos/orden_irregular.png[/img]1 [b]| 5 SWC | 299 Points |[/b] Open in Infinity Army
[img]https://assets.infinitythegame.net/infinityarmy/img/_logosweb/logo_102.png[/img][b] Shock Army of Acontecimento[/b]
[b]GROUP 1 | [/b][img]https://assets.infinitythegame.net/infinityarmy/img/logos/orden_regular.png[/img]10
[img]https://assets.infinitythegame.net/infinityarmy/img/_logosweb/102/logo_1.png[/img] [b]REGULAR Lieutenant[/b] Combi Rifle / Pistol, Knife. (0 | [b]10[/b])
[img]https://assets.infinitythegame.net/infinityarmy/img/_logosweb/102/logo_1.png[/img] [b]REGULAR[/b] Spitfire / Pistol, Knife. (1 | [b]16[/b])
[img]https://assets.infinitythegame.net/infinityarmy/img/_logosweb/102/logo_1.png[/img] [b]REGULAR Hacker (Hacking Device, FastPanda)[/b] Combi Rifle + Light Grenade Launcher / Pistol, Knife. (1 | [b]23[/b])
[img]https://assets.infinitythegame.net/infinityarmy/img/_logosweb/102/logo_1.png[/img] [b]REGULAR (Minelayer, Sensor)[/b] Combi Rifle, Antipersonnel Mines / Pistol, Knife. (0.5 | [b]14[/b])
[img]https://assets.infinitythegame.net/infinityarmy/img/_logosweb/102/logo_3.png[/img] [b]BAGH-MARI Hacker (Assault Hacking Device)[/b] Combi Rifle + Light Shotgun / Pistol, Knife. (0.5 | [b]28[/b])
[img]https://assets.infinitythegame.net/infinityarmy/img/_logosweb/102/logo_23.png[/img] [b]ORC[/b] Boarding Shotgun + 1 TinBot A (Deflector L1) / Pistol, Knife. (0.5 | [b]36[/b])[img]https://assets.infinitythegame.net/infinityarmy/img/_logosweb/102/logo_4.png[/img] [b]GUARDA DE ASSALTO[/b] Spitfire + Heavy Flamethrower, D-Charges + AUXBOT_2 / Pistol, Knife. (2 | [b]51[/b])
[img]https://assets.infinitythegame.net/infinityarmy/img/logos/sep.gif[/img] [img]https://assets.infinitythegame.net/infinityarmy/img/_logosweb/102/logo_4.png[/img] [b]AUXBOT_2[/b] Light Shotgun + Eclipse Light Grenade Launcher / Electric Pulse. (- | [b]6[/b])
[img]https://assets.infinitythegame.net/infinityarmy/img/_logosweb/102/logo_26.png[/img] [b]SCYLLA Hacker (Killer Hacking Device UPGRADE: Maestro)[/b] Boarding Shotgun, Nanopulser + 1 Devabot Charybdis / Pistol, E/M CC Weapon. (0.5 | [b]27[/b])
[img]https://assets.infinitythegame.net/infinityarmy/img/logos/sep.gif[/img] [img]https://assets.infinitythegame.net/infinityarmy/img/_logosweb/102/logo_26.png[/img] [b]DEVABOT CHARYBDIS[/b] Heavy Flamethrower / Electric Pulse. ([b]7[/b])
[img]https://assets.infinitythegame.net/infinityarmy/img/_logosweb/102/logo_8.png[/img] [b]NAGA[/b] Combi Rifle, Monofilament Mines / Pistol, Knife. (0 | [b]30[/b])
[img]https://assets.infinitythegame.net/infinityarmy/img/_logosweb/102/logo_8.png[/img] [b]NAGA (Forward Observer)[/b] Combi Rifle, Antipersonnel Mines / Pistol, Knife. (0 | [b]28[/b])[b]GROUP 2 | [/b][img]https://assets.infinitythegame.net/infinityarmy/img/logos/orden_regular.png[/img]3
[img]https://assets.infinitythegame.net/infinityarmy/img/_logosweb/102/logo_14.png[/img][b]PEACEMAKER[/b] Heavy Shotgun + AUXBOT_3 / Electric Pulse. (0 | [b]21[/b])
[img]https://assets.infinitythegame.net/infinityarmy/img/logos/sep.gif[/img] [img]https://assets.infinitythegame.net/infinityarmy/img/_logosweb/102/logo_14.png[/img] [b]AUXBOT_3[/b] Heavy Flamethrower / Electric Pulse. (- | [b]4[/b])
[img]https://assets.infinitythegame.net/infinityarmy/img/_logosweb/102/logo_12.png[/img] [b]FUGAZI DRONBOT[/b] Flash Pulse, Sniffer / Electric Pulse. (0 | [b]8[/b])
[img]https://assets.infinitythegame.net/infinityarmy/img/_logosweb/102/logo_12.png[/img] [b]FUGAZI DRONBOT[/b] Flash Pulse, Sniffer / Electric Pulse. (0 | [b]8[/b])
[b] 6 SWC | 300 Points |[/b] Open in Infinity Army
Erik won the rolloff and wanted to go first, so I gave him the worse side with less places to deploy a link. So let’s talk about my plan. My mental checklist was as follows:
- Stall Erik Out – Erik’s a good player, and I know he’s going to want to do some damage to order pool in an alpha strike. He also knows that he doesn’t have to go push the button on the first turn, so I can’t rely on him spending orders on that. I need to put out enough of an ARO presence to drain enough orders to blunt his attack.
- Push Buttons – I’m going to need to get the two buttons on the centerline pushed, and do some classifieds. I’m going to rely on my Druze and Karakuri as specialists, and I’m prepared to give up one of the buttons if I have to.
- Glue/Stun Stuff – I took a few things with ADHLs, specifically the Daiyokai, Al Fasid, and Druze. The rest of my stuff doesn’t really have much in the way of ways of accomplishing this part of the mission, but I’m pretty sure that my two S5 beefcake face punchers can get this done. With only 10 orders I need to plan a turn or two ahead to move these guys up.
Hey look! Unlike last time, 2/3 checklist items are mission-related! I drew Data Scan and HVT: Espionage as my classifieds, so I knew I’d be relying on my Druze and my Brawler AHD for these. I’ll talk about Erik’s plan as we go through the battle report.
Deployment
Erik’s gotta deploy first, so I sit back and let him do his thing. We decided that the area under the Comanche stairs is solid, as is the area under the Comanche octagons, just to make things easier. His mixed link goes on the right, with his Regular Sensor covering the right side of the board with both a combi rifle and a mine. Erik knows I like AD troops so he’s just doing his due diligence. His Regular Hacker goes on top of some stairs, with the Spitfire nearby to help push his link up the board. The Orc and Bagh Mari hang out at the corner of the nearby building, safely away from any nasty AROs.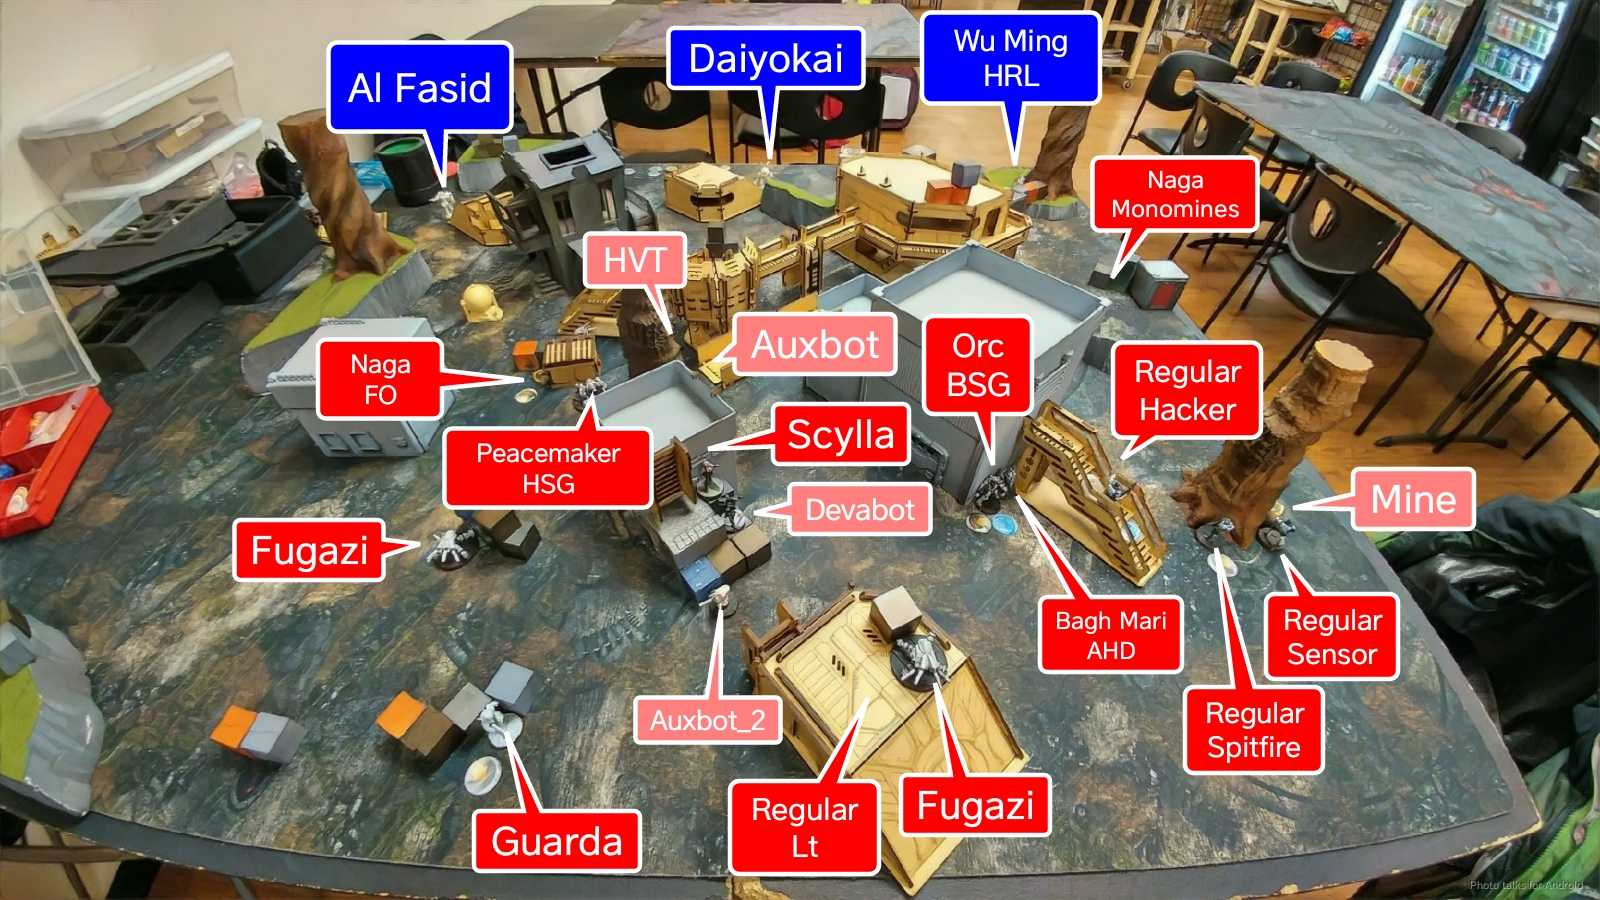 Erik also loves his Fugazi, so it’s no surprise that two make an appearance. One protects his Lieutenant, who is prone in a Comanche Pillbox at the back of the table, and the other protects his left flank and screens the approach to Erik’s Guarda de Assaulto, who is deployed in the back left. Scylla also makes an appearance in the middle of his deployment zone along with a single Devabot. The bot and Scylla are both on some blocks to get out of sight as best they can. Finally, Erik drops a pair of Naga, the FO on his left and one with Monomines on the right.
I feint a Ninja by telling Erik to turn around, and then set about deploying my stuff. I figure the Karakuri is the most useful to hold back and place as a corner guard, so I keep her in reserve. I’m pretty sure that the Regular Spitfire and Regular Sensor are under an HRL template, so I put a Wu Ming HRL covering them both. I can’t see either of them prone, but if either of them stand up I’ll have a shot. The rest of my Haris are screening my Brawler Lt, who is hiding in total cover in the back left of my deployment zone. I know I need to deal with Scylla and her ‘bot, and there’s a small LoF window where I can see the ‘bot from so I plunk my Daiyokai and his panzerfaust watching the ‘bot. The Brawler AHD hangs out nearby and screens the Daiyokai’s right flank and backstops the Druze KHD, who is atop a building to protect her from Erik’s alpha strike as she’s so key to getting my classifieds. 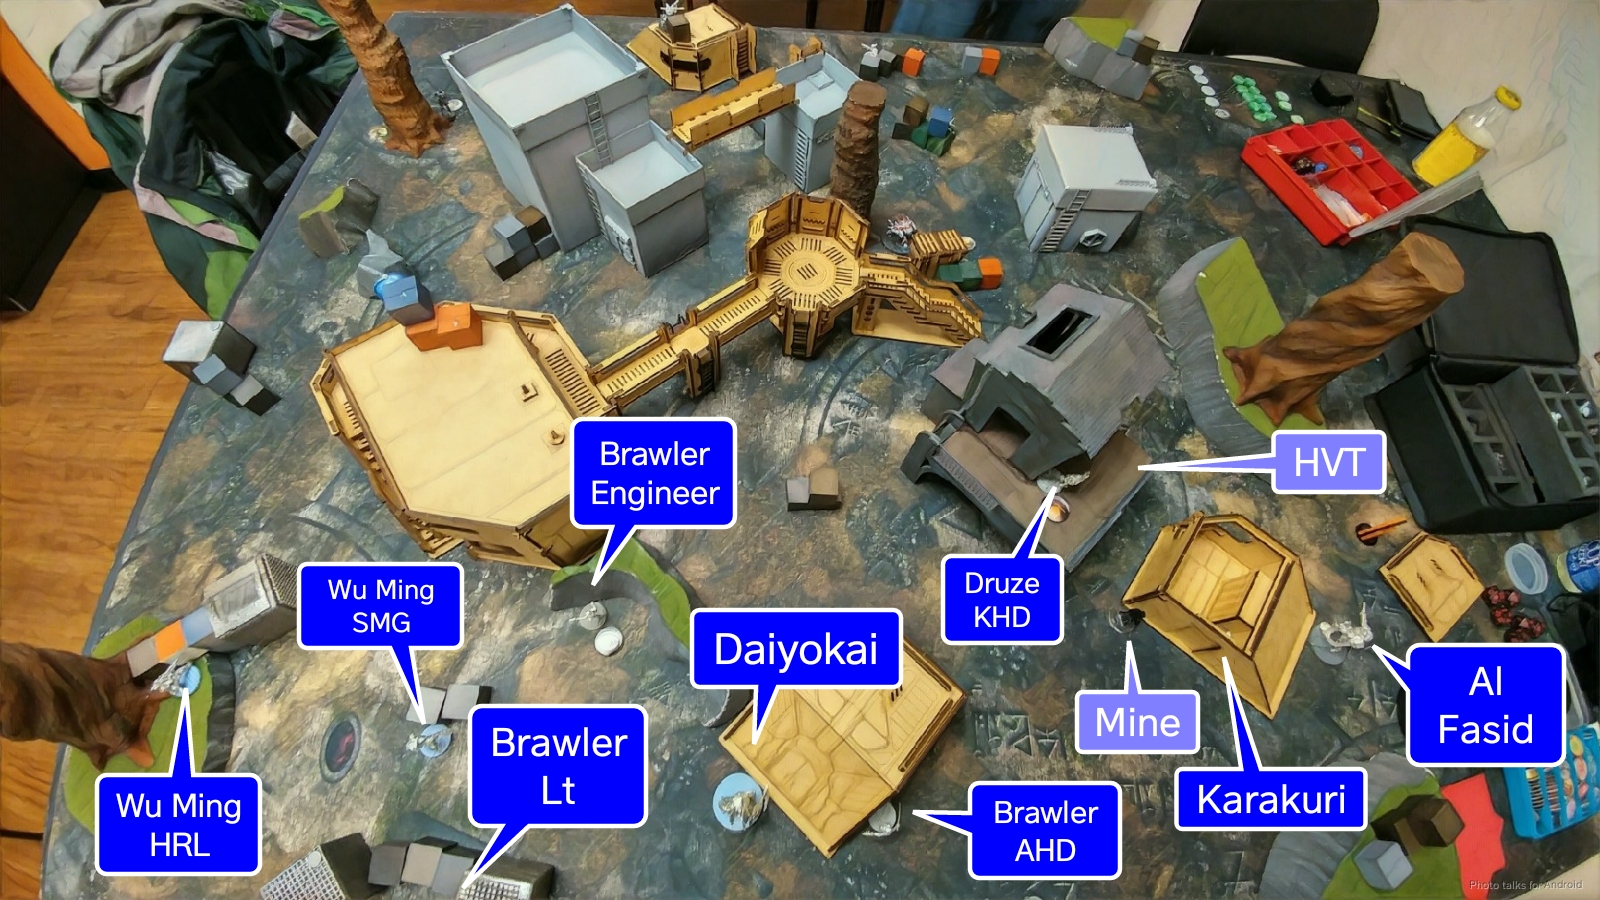 She’s also near Erik’s HVT, so that will make things easier. My Al Fasid covers my HVT and the right objective with his HMG and defends my AHD with a mine. Then it’s Erik’s turn to deploy his reserve. He struggled a bit trying to find the right place to put his Peacemaker and its bot and finally decided to put it in a place to threaten my Al Fasid and right flank. I responded by putting my Karakuri on that side to a) cover my Al Fasid and b) go after the midfield button.
So, let’s look at my checklist:
- Stall Erik Out – I’ve got an HRL covering his link team, a panzerfaust covering Scylla, and an Al Fasid pressuring his Peacemaker and his Guarda. All of my AROs have at least two wounds, good rangebands compared to all their targets, and the ability to fail guts into total cover. I’m feeling pretty good about my ARO situation this game.
- Push Buttons – The left button is going to be a bit tricksy to get to. I figure if I can do enough damage to the link I can get the Brawler engineer there, or maybe no one gets that one. I have a Cube Jager waiting in the wings if Erik gives me an opening too, but there’s some options on my right as well to go after stuff with E/M. On the right, I’ve got the Druze and Karakuri ready to go after it. I’m not worried.
- Glue/Stun Stuff – I’m assuming that both of the camo tokens are Naga specialists, so I figure I’ll hunt the one on the left with the Daiyokai and the one on the right with the Al Fasid. Worst case I’ll bomb the Al Fasid or Daiyokai into Erik’s DZ to go pick something off with an ADHL.
I feel like I have a coherent plan going into the game, and all I have to do is survive Erik’s alpha strike.
Turn 1
Top of 1 – Acontecimento
Erik informs me that he’s got 10 orders in group one and three in group two: the two Fugazi and the Peacemaker. I take two orders from group two–the Peacemaker and its bot can do some serious damage to my right flank even with just three orders–its mobility can quickly negate my Al Fasid’s rangebands, and I don’t want the bot climbing up to flamethrower my Druze.
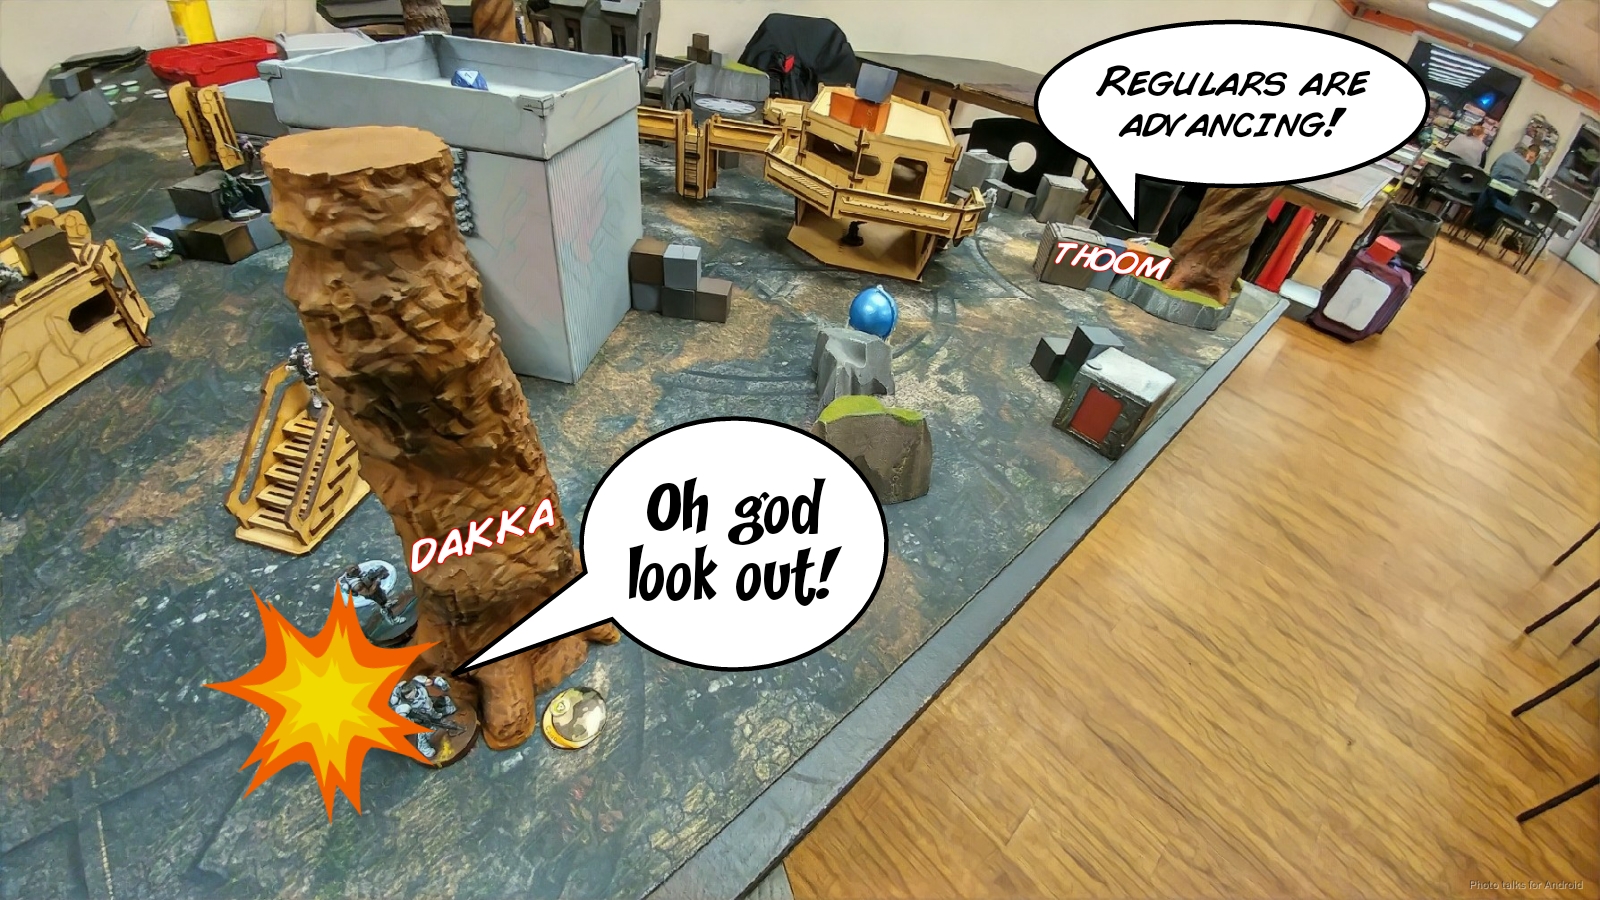
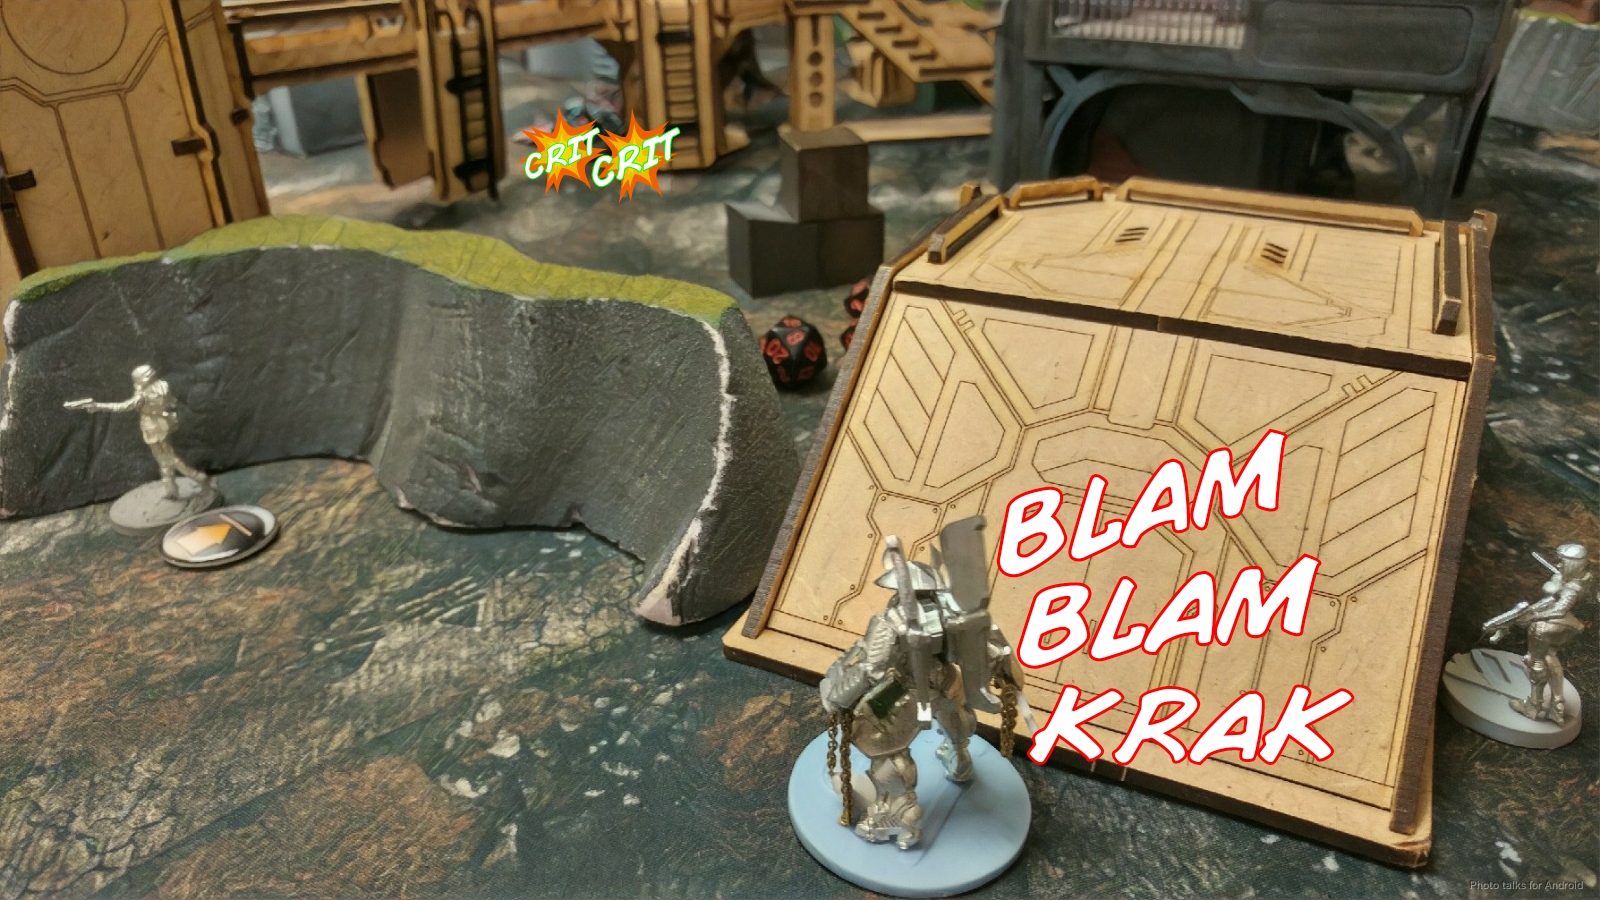
With only one order in group two, Erik spends most of his attention on group one. My Wu Ming Chain Rifle is the weak link, as it’s the only legal Haris leader given my deployment. I wasn’t really planning on moving the HRL anyway, and I figured I was going to lose it to the link over the course of a few orders. Erik surprised me by sending in the Naga Monomines to take out the Haris–I thought it was a non-expendable specialist. Instead, I’m taking fire from the Naga. First I try to bait a reveal by discovering with the HRL, but Erik doesn’t bite. On his next order, the Naga appears, relying on surprise shot, camo, and being out of 8″ from my Wu Ming’s SMG to take out my heavy infantry. I waffle a bit, deciding if I want to chain rifle back or not, and decide that I’m just outside of chain rifle range.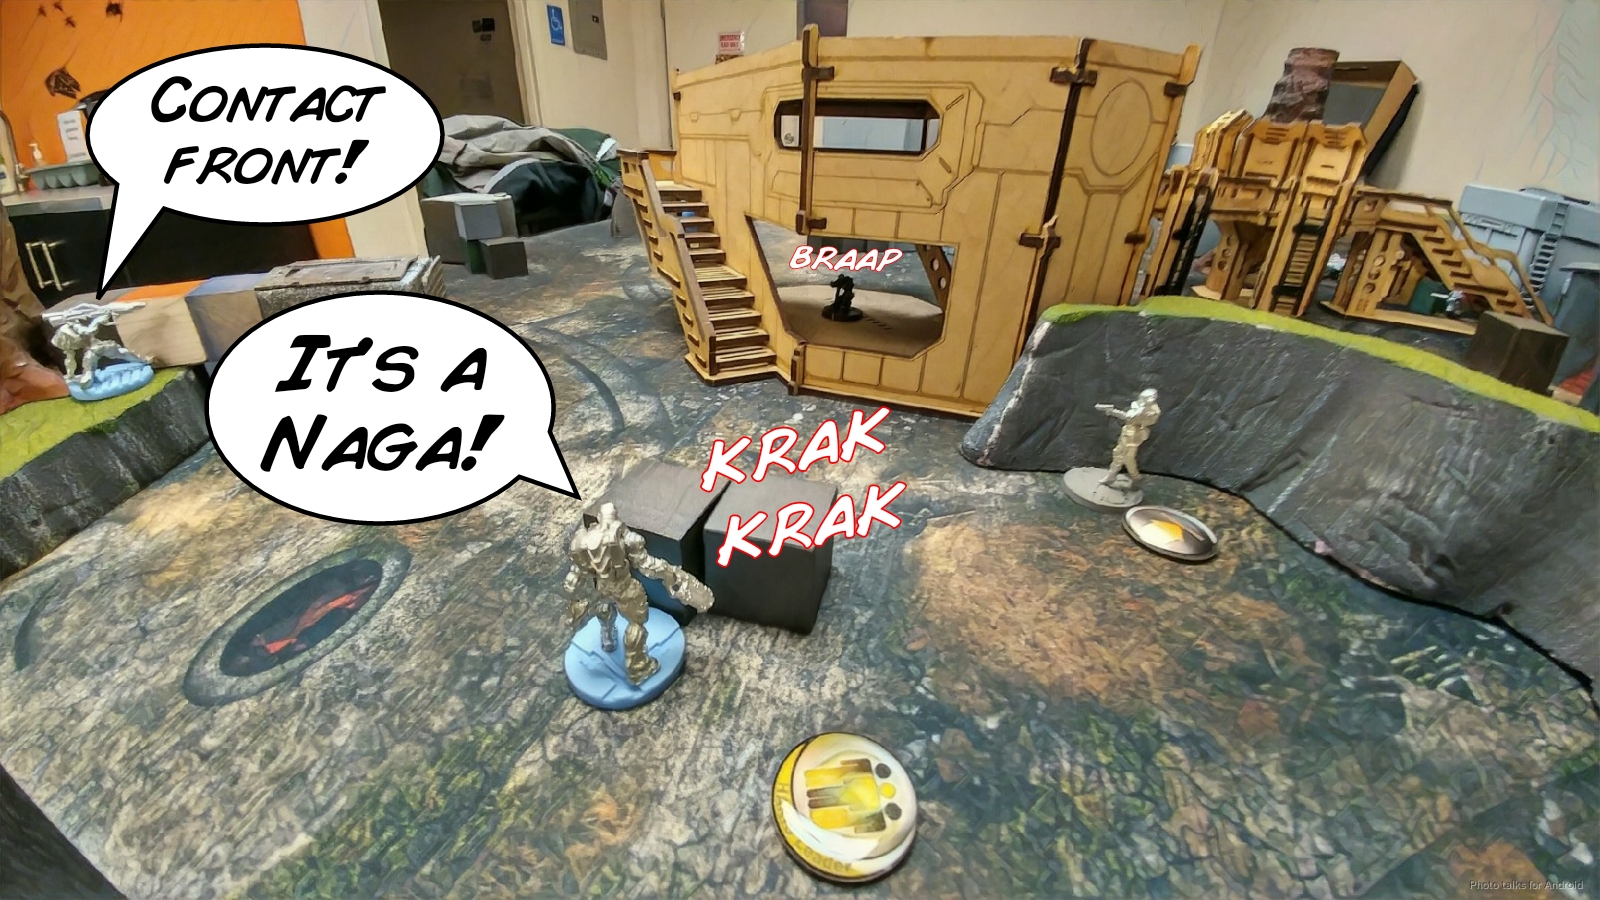 After measuring, it turns out that I’m just in chain rifle range, but I had already declared SMG shots on 7’s. Erik sneaks through two shots, but I pass ARM and guts and stay up, pinning the Naga with the Wu Ming’s chain rifle. Erik tries to attack another member of my Haris to drop the burst to get his Naga out of danger. He stands up the Regular Spitfire, and we’re outside of 24″ but inside 32″. Perfect. Even with all the link bonuses, I sneak a single rocket through. Turns out I was right about their spacing, and the Regular Spitfire is burned off the table with the Sensor getting knocked out.
 Erik turns to another familiar tool, Scylla. He tries to Cybermask her and succeeds, but the Devabot does this in view of my Daiyokai, who tank punches the ‘bot into unconsciousness.
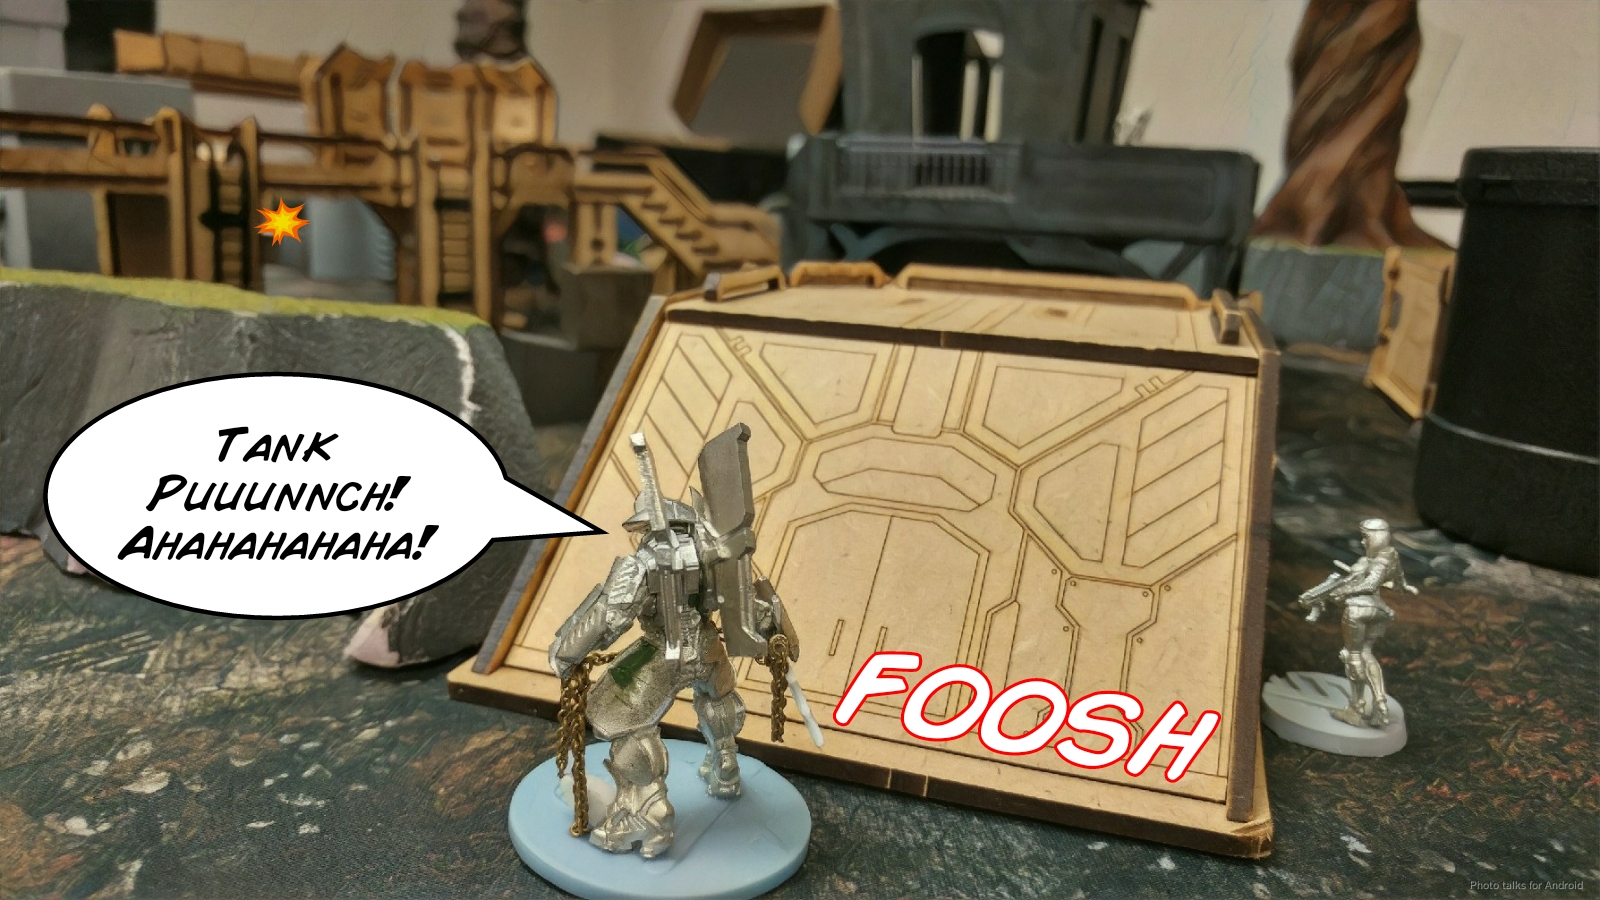 Erik tries to get his Naga out of trouble by retreating out of LoF, but I chain rifle it off the board, suffering only one wound from the Naga’s combi rifle in the process.
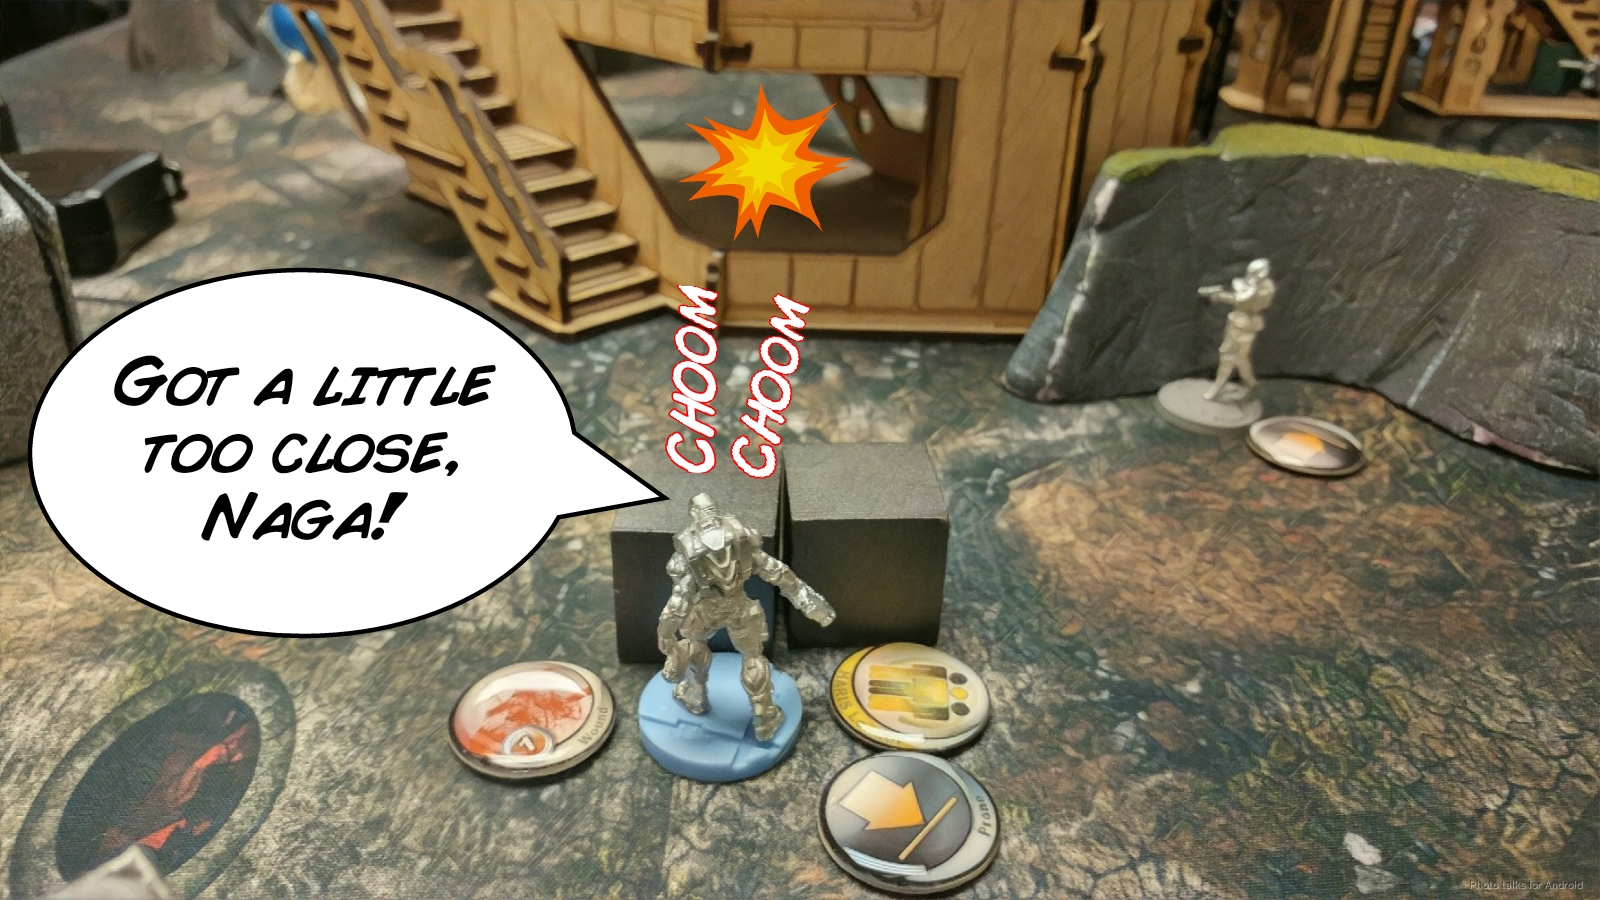 With his last few orders, Erik manages to get some eclipse smoke down on the Peacemaker, which advances up the board…
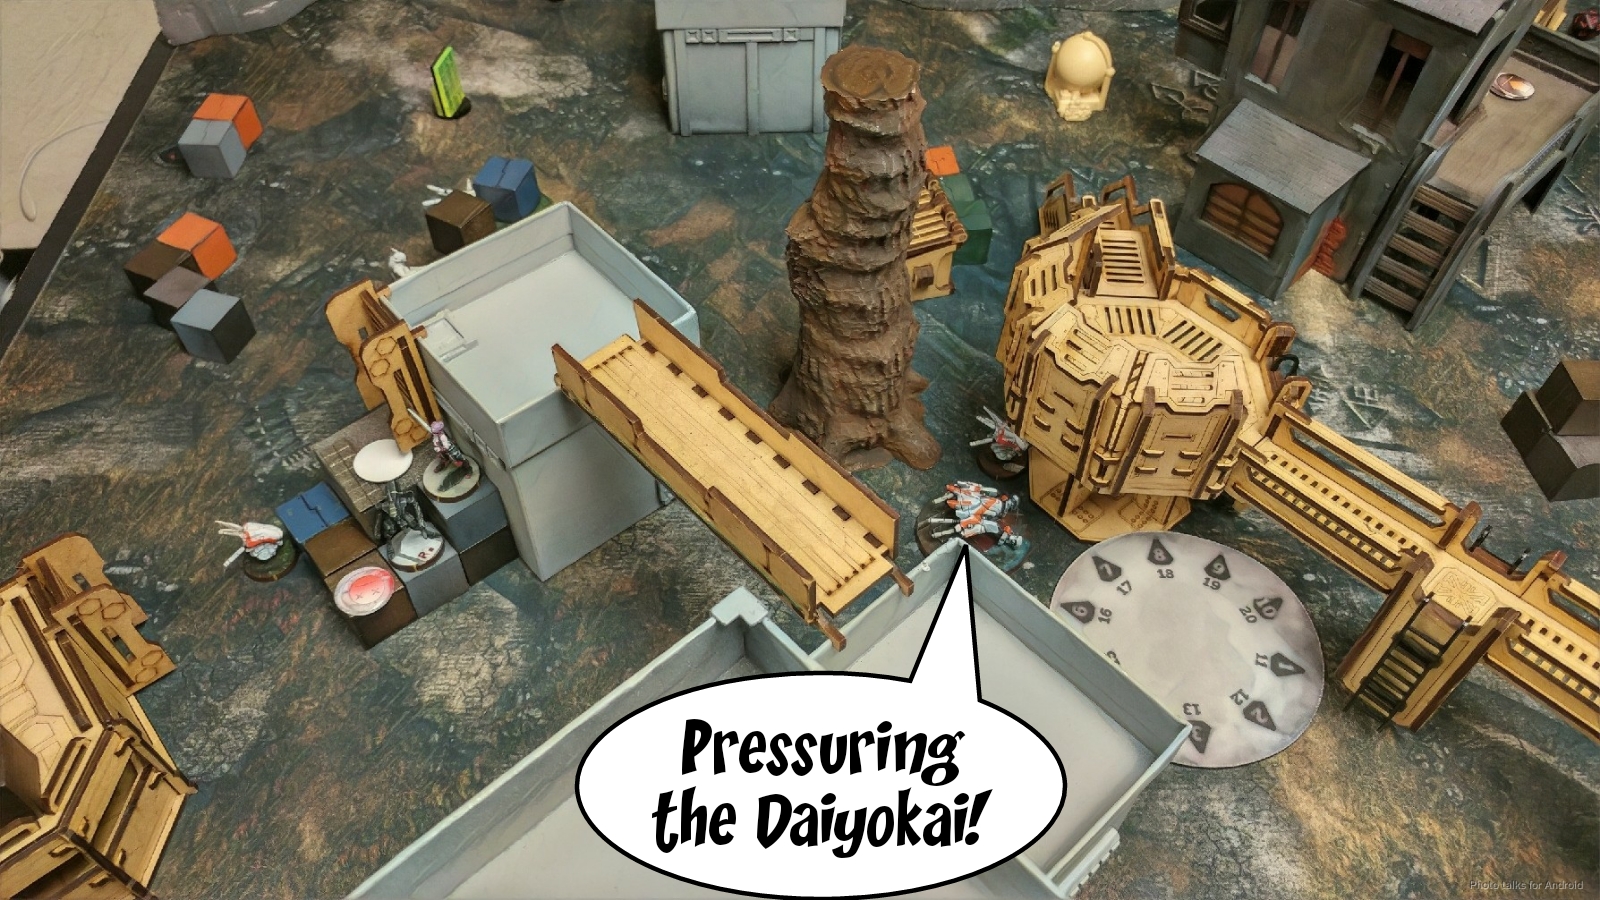 and parks itself in view of the Daiyokai to stall my advance. To make things worse for me, he throws up Enhanced Reaction to give the Peacemaker burst two in ARO, then passes the turn. I think he might’ve thrown the Guarda into suppression, and definitely put his Lieutenant into suppression,…
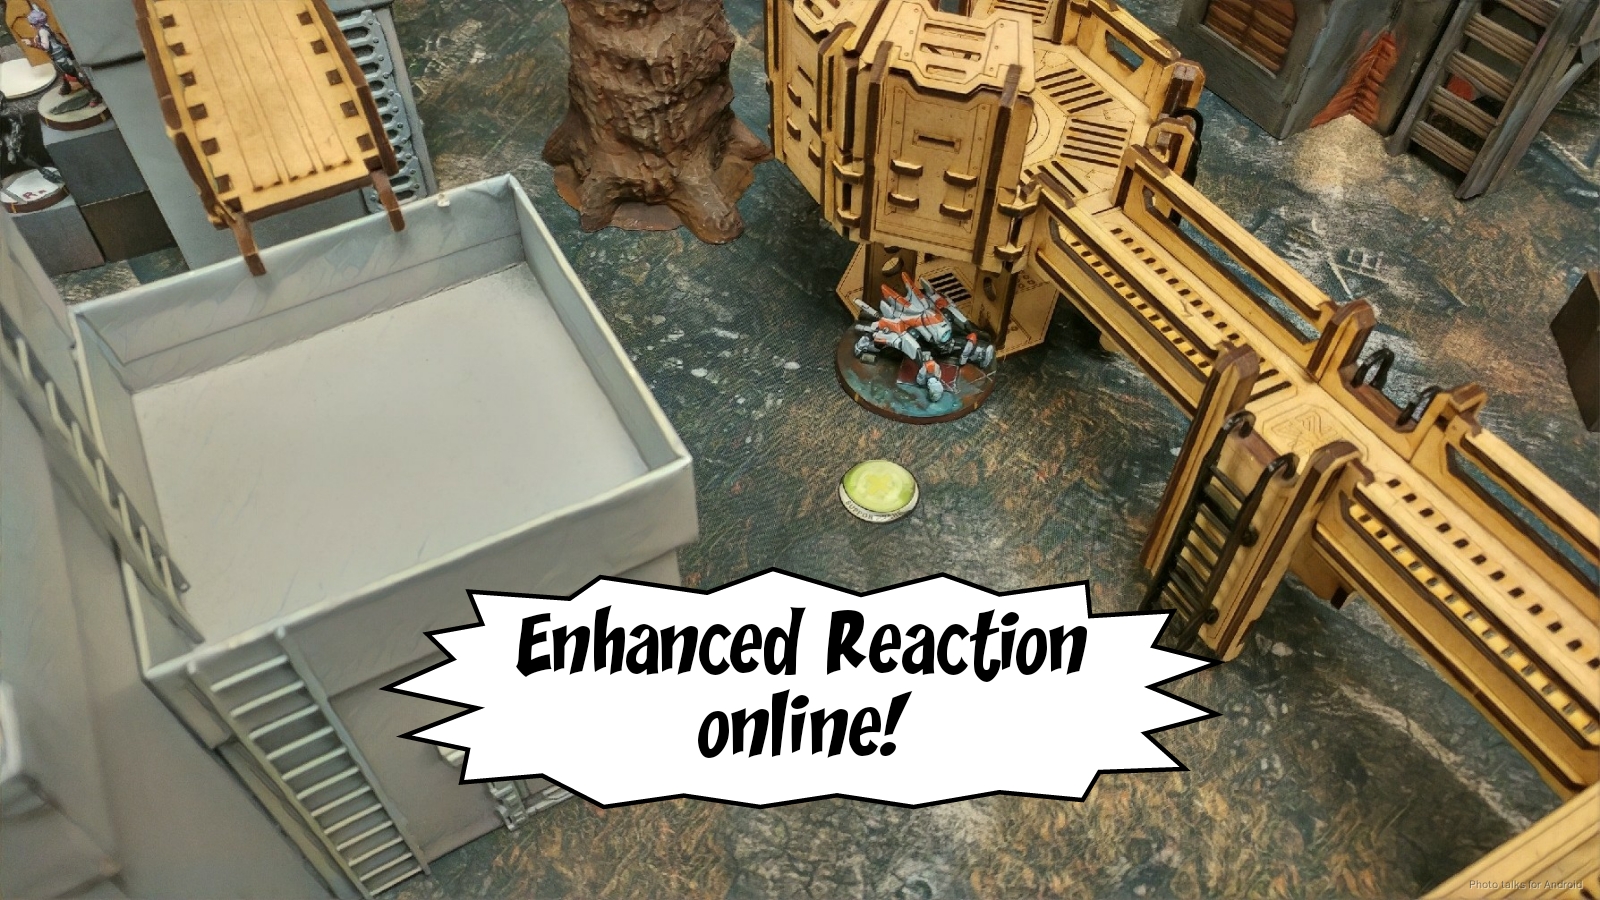 Erik’s plan was basically “do damage.” There were locally reasonable decisions to target isolated members of my Haris to unstick his link, but there was always something left on the table–the Naga was out of cover and in chain rifle range, the Spitfire was out of good range, and the Peacemaker, as we’ll find out shortly, is out of cover. I think I made the right choice in taking orders away from the Peacemaker as that had the best chance of making a hole for him somewhere.
Bottom of 2 – Ikari
Okay. Well, so far so good. I’ve accomplished my first checklist item, which was to keep Erik boxed in and at bay. I’ve drained 11 orders, killed two Regulars, a Naga, and a Devabot, and basically kept Erik in his deployment zone. I need to get rid of the Peacemaker, which is a still a serious threat to me, and it’s in direct view of my Daiyokai. With the smoke, neither of us had really bothered to check to see if the Peacemaker is in cover, but it turned out that it very much wasn’t.
Since it was an obvious silly mistake, I offered to let Erik back the Peacemaker back around the corner into cover, since the smoke would’ve blocked it anyway during his move. After checking out this other position, he decided that it might be out of 24″ and opted to stay in shotgun range of my Daiyokai. It ended up being an academic exercise, as I rolled two crits and a hit on my MULTI Marksman Rifle, and the Peacemaker was down for the count.
 With the Regular Sapper and Spitfire gone and the Peacemaker down, I had a window to bring in my Cube Jager. I thought about bringing him in on my right, to attack the Guarda in suppression, but I stuck to my checklist and brought him on to push the button the left. I was entirely convinced that Erik might still be able to push that button, but I was determined to drain his order pool if he did so. After successfully pushing the button after two tries, I throw the Jager into suppression watching the approach of the Regular link.
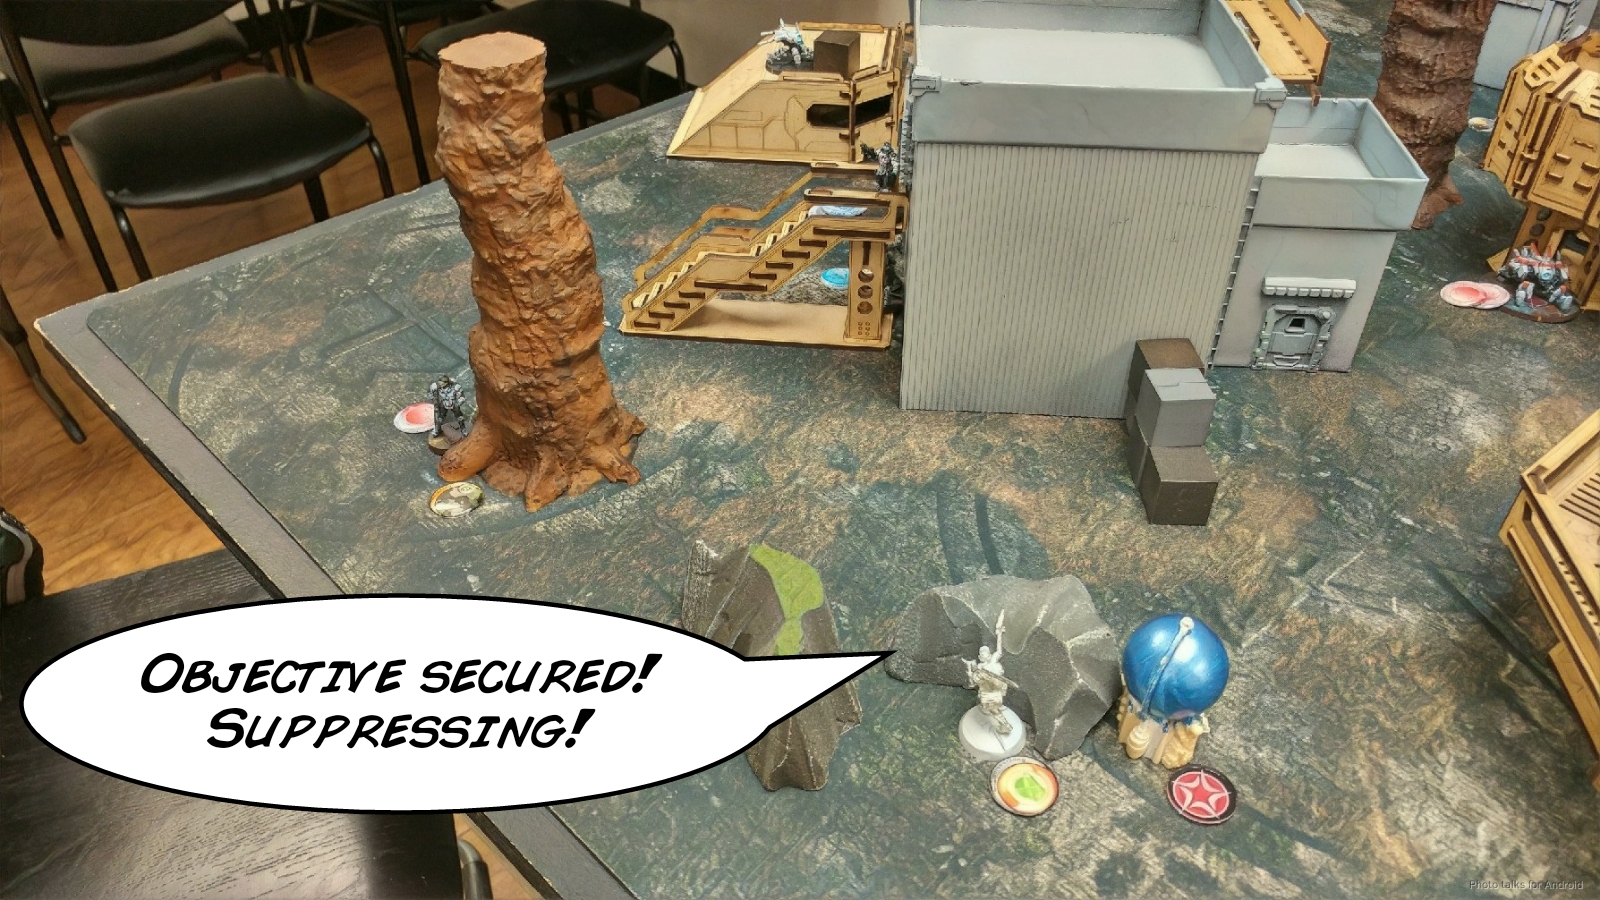 I had a few orders left–not enough to get my Druze off the roof safely and accomplish my classifieds, and I was concerned that the Naga on the right might be an AHD. I considered rushing my Karakuri up to push the button on the right, but then she would’ve been overextended and there wasn’t much in the way of specialists on that side for Erik. It would’ve basically been either the Naga or Scylla getting there, and I didn’t think he wanted to risk Scylla just yet. I also knew that I needed to get my Druze off the roof in turn 2, and there was a Fugazi in the way. So I sent in the Al Fasid, gunned down the Fugazi, dropped a mine covering the Naga’s approach, and threw the Al Fasid into suppression.
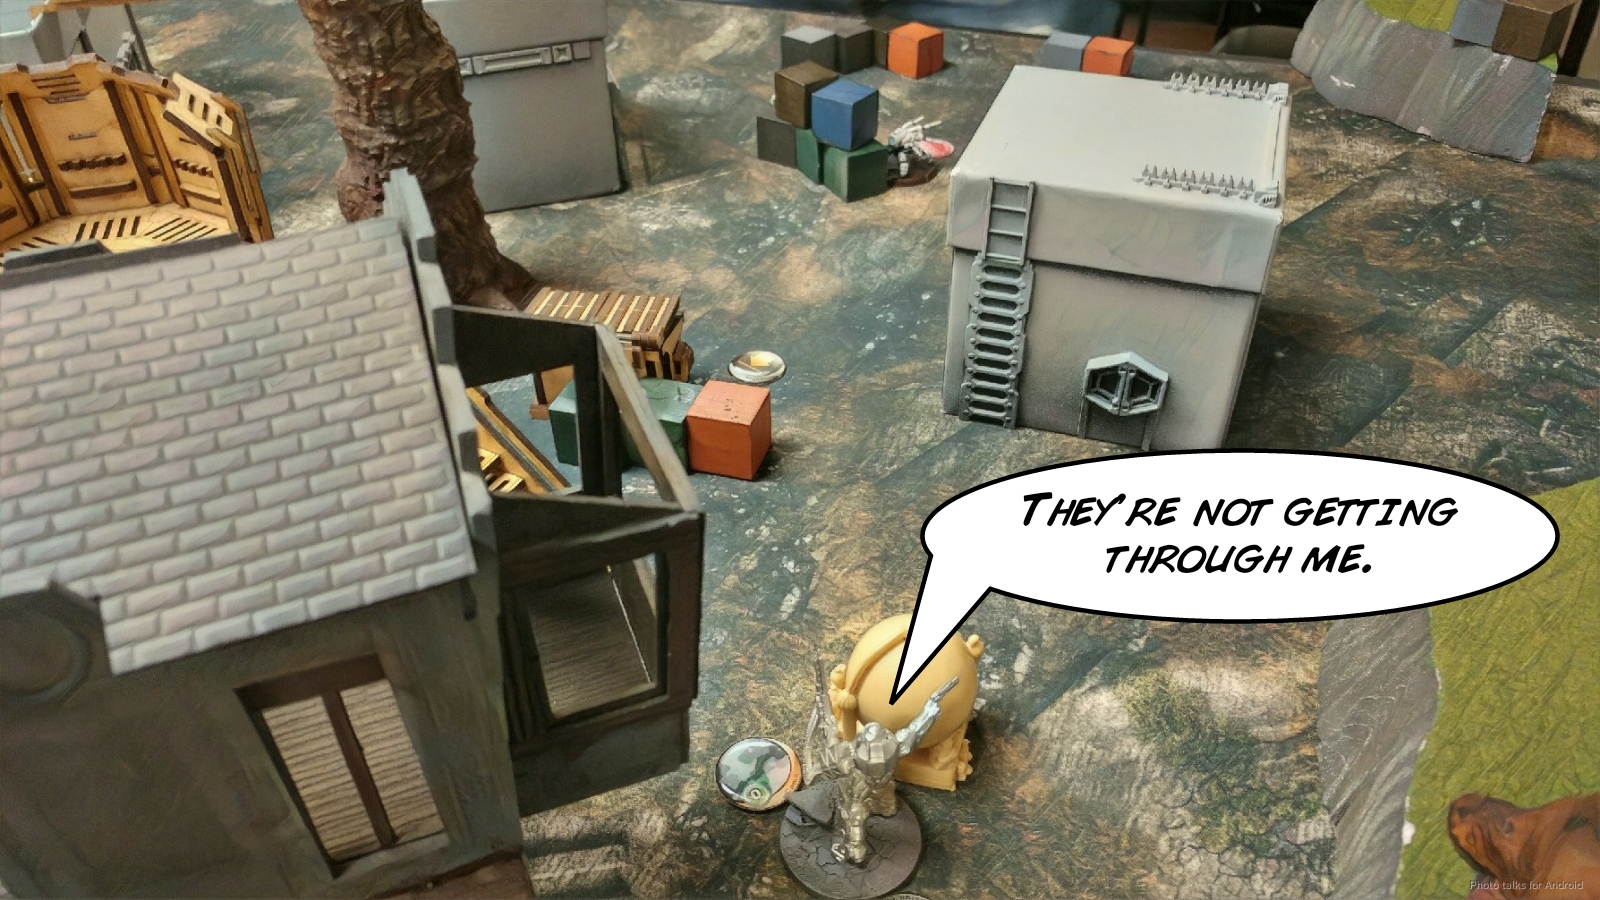 If the Naga attempts to make a run on the objective, I’ll make a judgement in the moment if it’s better to suppress it or to ADHL it, and I’m confident that my Fasid will prove tough to shift, especially with the Karakuri watching his back for any surprise Akali. Back to the checklist.
- Stall Erik Out – HRL is still covering my left flank, and now there’s a Cube Jager in suppression there too. The Fasid is now advanced and in suppression, and there’s a mine discouraging the Naga from doing anything.
- Push Buttons – I prioritized this with my Cube Jager, and it paid off. It also set me up to do item 1: Stall Erik Out. I’ve also prepped for a next turn Druze classified grab by taking out the Fugazi.
- Glue/Stun Stuff – The Fasid is advanced, so I can push that into Erik’s DZ if necessary, and there’s a potential glue on the Naga that’s nearby, assuming it survives the mine.
Now I’m just hoping that Erik gets stalled out again trying to take out something.
Turn 2
Top of 2 – Acontecimento
After putting the remaining Fugazi into group 1, Erik does exactly what I want, which is blow something like 4 orders trying to spec-fire my Cube Jager with his Regular Hacker’s LGL. Couldn’t have asked for a better outcome. The Cube Jager has bought me me an objective and half of Erik’s turn, so I’m feeling pretty pleased with its return on investment.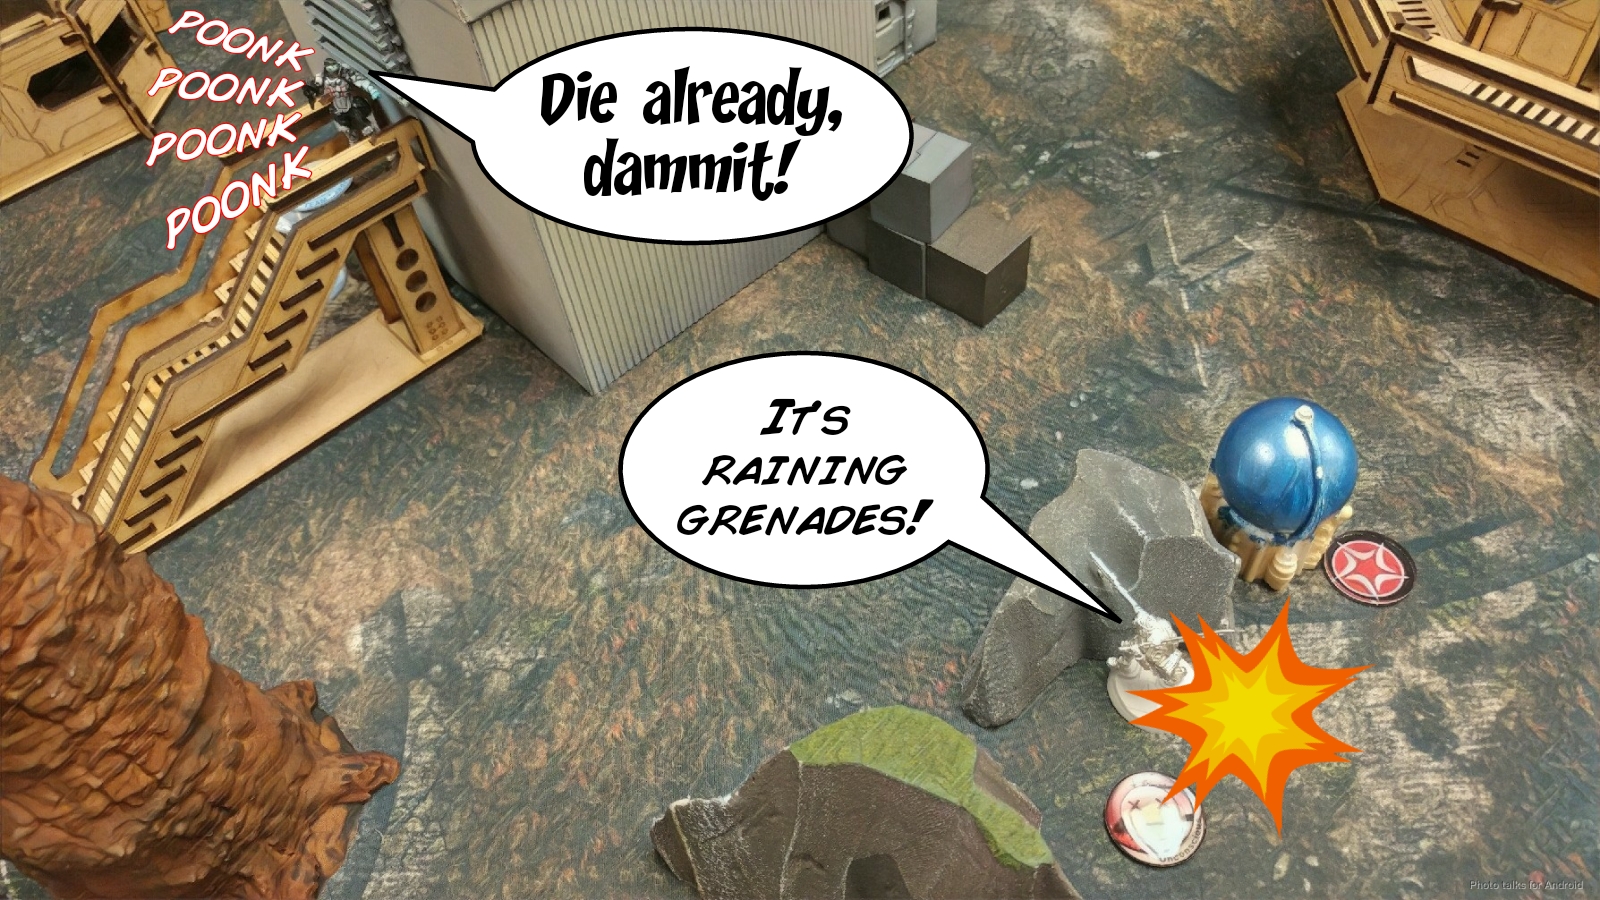 Erik and I talk about potential options for the rest of his turn. He really was concerned that I would push my Wu Ming or Daiyokai hard up his left flank, presumably because his Lieutenant was nearby. I didn’t think I had a strong option to do that, but with only a small handful orders there wasn’t much of an attack he could commit to that would be meaningful. Erik has historically been exceptionally good at saving orders to set up good defensive bunkers at the end of his turn–always throwing stuff into suppression, setting up defense in depth, and the like. He decided, ultimately, to crawl his Regular Hacker down the stairs and to throw out a Fast Panda to cover the right flank. Originally he had just thrown it out into the middle of no man’s land, but I suggested he put it behind cover so I’d have to work to shoot at it.
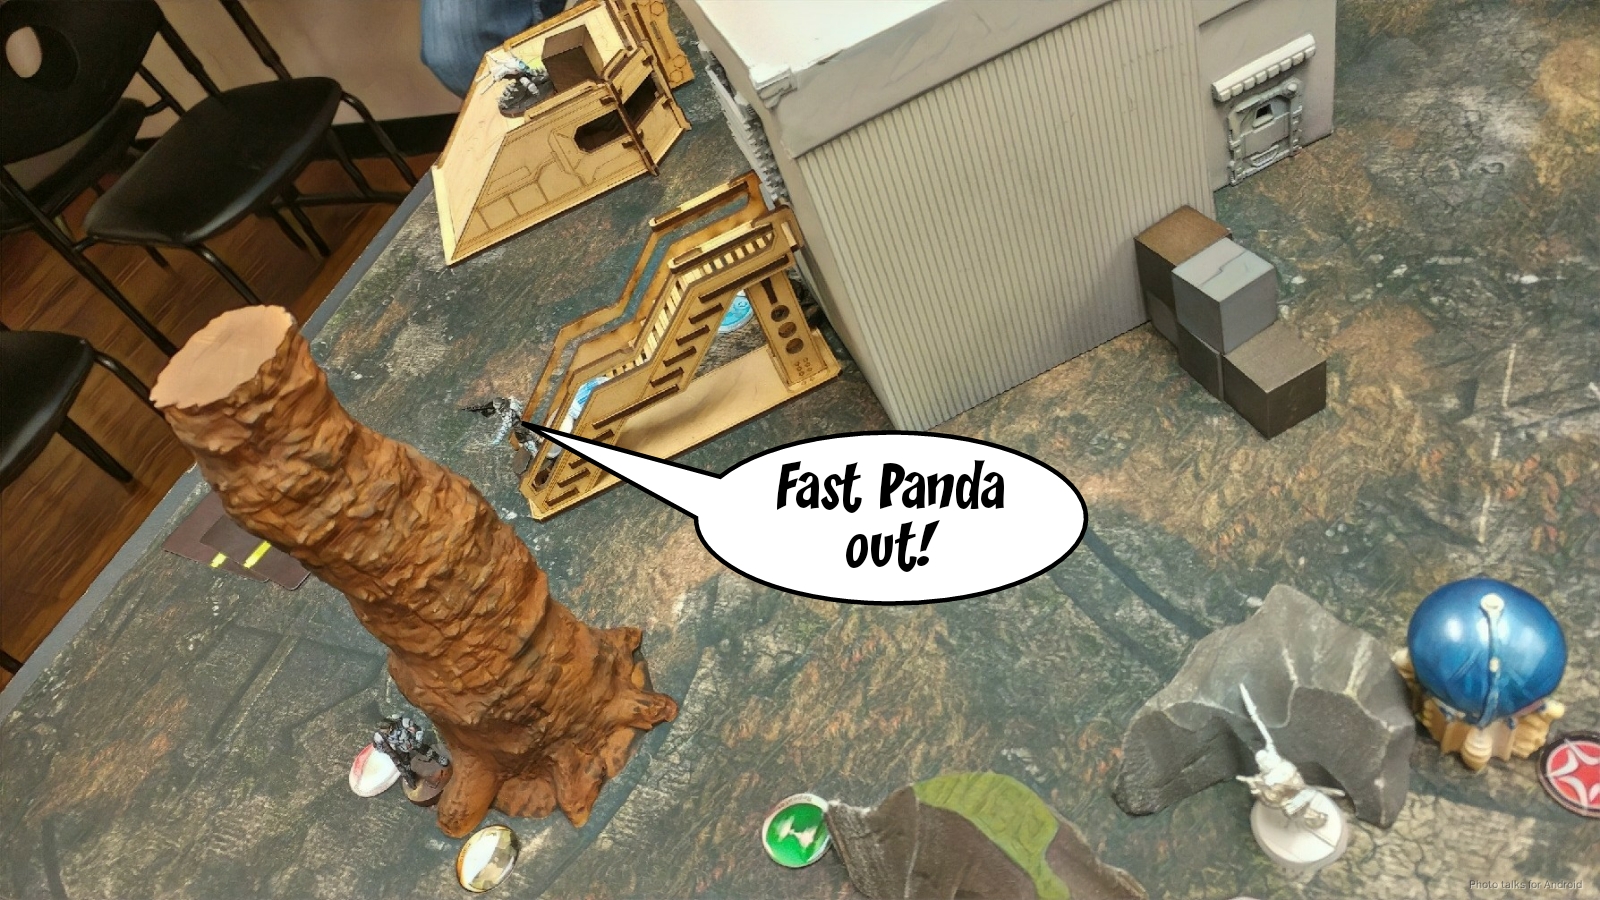 In any case, everything came up in my favor again. I don’t want to rag on Erik for making bad decisions–again, he’s a great player, I just think that he didn’t have a concrete plan for his second turn. I’m not entirely sure that he even needed to attack the Cube Jager, much less sink half his turn into it. Yes, it’s in place to attack his link, but his link is full of specialists that I want to glue, not kill, and burst 1 on my E/Mitter isn’t great odds against burst two PanO link. I also think the Fast Panda was a mistake, but perhaps was motivated by its extreme success in one of his recent games against James’s IA where it single-pawedly locked down the objective room for quite awhile. Getting smoke in place for Scylla to go hunt down my Druze, or to attack other pieces with his Guarda may have been a better option. I’ll confess that I don’t have a great plan for Erik myself.
Erik and I are really curious to hear people’s thoughts on this–I have some ideas, but I don’t want to influence people’s answers. Remember those old Inquest magazine MtG Puzzles? Well here’s one.
Your Assets:
After moving the Fugazi into group one, you’ve got 8 orders.
[img]https://assets.infinitythegame.net/infinityarmy/img/_logosweb/logo_102.png[/img][b] Shock Army of Acontecimento[/b]
[img]https://assets.infinitythegame.net/infinityarmy/img/_logosweb/102/logo_1.png[/img] [b]REGULAR Lieutenant[/b] Combi Rifle / Pistol, Knife. (0 | [b]10[/b])
[img]https://assets.infinitythegame.net/infinityarmy/img/_logosweb/102/logo_1.png[/img] [b]REGULAR[/b] Spitfire / Pistol, Knife. (1 | [b]16[/b])
[img]https://assets.infinitythegame.net/infinityarmy/img/_logosweb/102/logo_1.png[/img] [b]REGULAR Hacker (Hacking Device, FastPanda)[/b] Combi Rifle + Light Grenade Launcher / Pistol, Knife. (1 | [b]23[/b])
[img]https://assets.infinitythegame.net/infinityarmy/img/_logosweb/102/logo_1.png[/img] [b]REGULAR (Minelayer, Sensor)[/b] Combi Rifle, Antipersonnel Mines / Pistol, Knife. (0.5 | [b]14[/b])
[img]https://assets.infinitythegame.net/infinityarmy/img/_logosweb/102/logo_3.png[/img] [b]BAGH-MARI Hacker (Assault Hacking Device)[/b] Combi Rifle + Light Shotgun / Pistol, Knife. (0.5 | [b]28[/b])
[img]https://assets.infinitythegame.net/infinityarmy/img/_logosweb/102/logo_23.png[/img] [b]ORC[/b] Boarding Shotgun + 1 TinBot A (Deflector L1) / Pistol, Knife. (0.5 | [b]36[/b])[img]https://assets.infinitythegame.net/infinityarmy/img/_logosweb/102/logo_4.png[/img] [b]GUARDA DE ASSALTO[/b] Spitfire + Heavy Flamethrower, D-Charges + AUXBOT_2 / Pistol, Knife. (2 | [b]51[/b])
[img]https://assets.infinitythegame.net/infinityarmy/img/logos/sep.gif[/img] [img]https://assets.infinitythegame.net/infinityarmy/img/_logosweb/102/logo_4.png[/img] [b]AUXBOT_2[/b] Light Shotgun + Eclipse Light Grenade Launcher / Electric Pulse. (- | [b]6[/b])
[img]https://assets.infinitythegame.net/infinityarmy/img/_logosweb/102/logo_26.png[/img] [b]SCYLLA Hacker (Killer Hacking Device UPGRADE: Maestro)[/b] Boarding Shotgun, Nanopulser + 1 Devabot Charybdis / Pistol, E/M CC Weapon. (0.5 | [b]27[/b])
[img]https://assets.infinitythegame.net/infinityarmy/img/logos/sep.gif[/img] [img]https://assets.infinitythegame.net/infinityarmy/img/_logosweb/102/logo_26.png[/img] [b]DEVABOT CHARYBDIS[/b] Heavy Flamethrower / Electric Pulse. ([b]7[/b])
[img]https://assets.infinitythegame.net/infinityarmy/img/_logosweb/102/logo_8.png[/img] [b]NAGA[/b] Combi Rifle, Monofilament Mines / Pistol, Knife. (0 | [b]30[/b])
[img]https://assets.infinitythegame.net/infinityarmy/img/_logosweb/102/logo_8.png[/img] [b]NAGA (Forward Observer)[/b] Combi Rifle, Antipersonnel Mines / Pistol, Knife. (0 | [b]28[/b])
[img]https://assets.infinitythegame.net/infinityarmy/img/_logosweb/102/logo_12.png[/img] [b]FUGAZI DRONBOT[/b] Flash Pulse, Sniffer / Electric Pulse. (0 | [b]8[/b])
[img]https://assets.infinitythegame.net/infinityarmy/img/logos/orden_regular.png[/img]8
- Link – The remnants of your link are on the right, in total cover, but with an HRL and a Cube Jager in suppression pinning your Regular Hacker. You can get off your perch by crawling, but once you leave the stairway the Jager will see you.
- LT – Your Lt is reasonably safe, in suppression, and in a building prone underneath a Fugazi on the roof of his building. It’s a bit too far to rejoin the link, but you could do it within an order, probably.
- Scylla – She’s in the middle of your deployment zone, already Cybermasked, with a dead Devabot. Her approaches to the midfield are covered by a Daiyokai in LoF (middle), or a Fasid in suppression and mine backed up a Karakuri (left). You can probably get to the Druze and Maestro it
- Guarda – You have a Guarda still alive and well, in suppression on the left facing off against the Al Fasid, also in suppression (and in range). The Guarda’s bot is near Scylla, and can easily shoot smoke to cover either the left or middle lanes for her. If you move the Fasid will see you. You’re safe for now though.
- Naga FO – The Naga is right in the face of the Fasid and the un-pushed left button, but in total cover. There’s a mine right next to the Fasid too, which will go off if the Naga stands up. You could scoot away to safety by crawling, and then you’d be near the central approach, guarded by a Druze KHD around the corner.
Board State:
Ikari has pushed the button on your right. Their HVT (on the left) is guarded by a Karakuri, a Fasid, and two mines. The left button is covered by the Fasid, a mine, and probably a Karakuri. The enemy specialists on the board are a pair of Brawlers deep in Ikari’s backfield, a Karakuri screened by the Fasid and two mines, and a Druze KHD on a roof 4″ outside the middle of the Ikari DZ. The Ikari Lt is screened by a Wu Ming Haris and is in total cover basically at the far table edge. You’ve admittedly had a pretty bad first turn… but it’s the start of turn 2, and you’re looking to recover. You’ve got 2 command tokens, after having spent one to reform the link after losing the two Regulars and moving the Fugazi into group 1. The game’s not over yet! What do you do with your 8 orders?
Bottom of 2 – Ikari
In any case, Erik’s Guarda hasn’t moved, so it’s still covering my Druze. At least I had taken out that Fugazi earlier. I cybermask my Druze KHD (it took two orders), climb her off her roof, and then grab both classifieds after a few failed attempts. We ruled the gap between the stairs and the Comanche octagon base was solid, so my Druze is safe from getting shot in the back by anything. Thankfully there was a Peacemaker right there for Data Scan.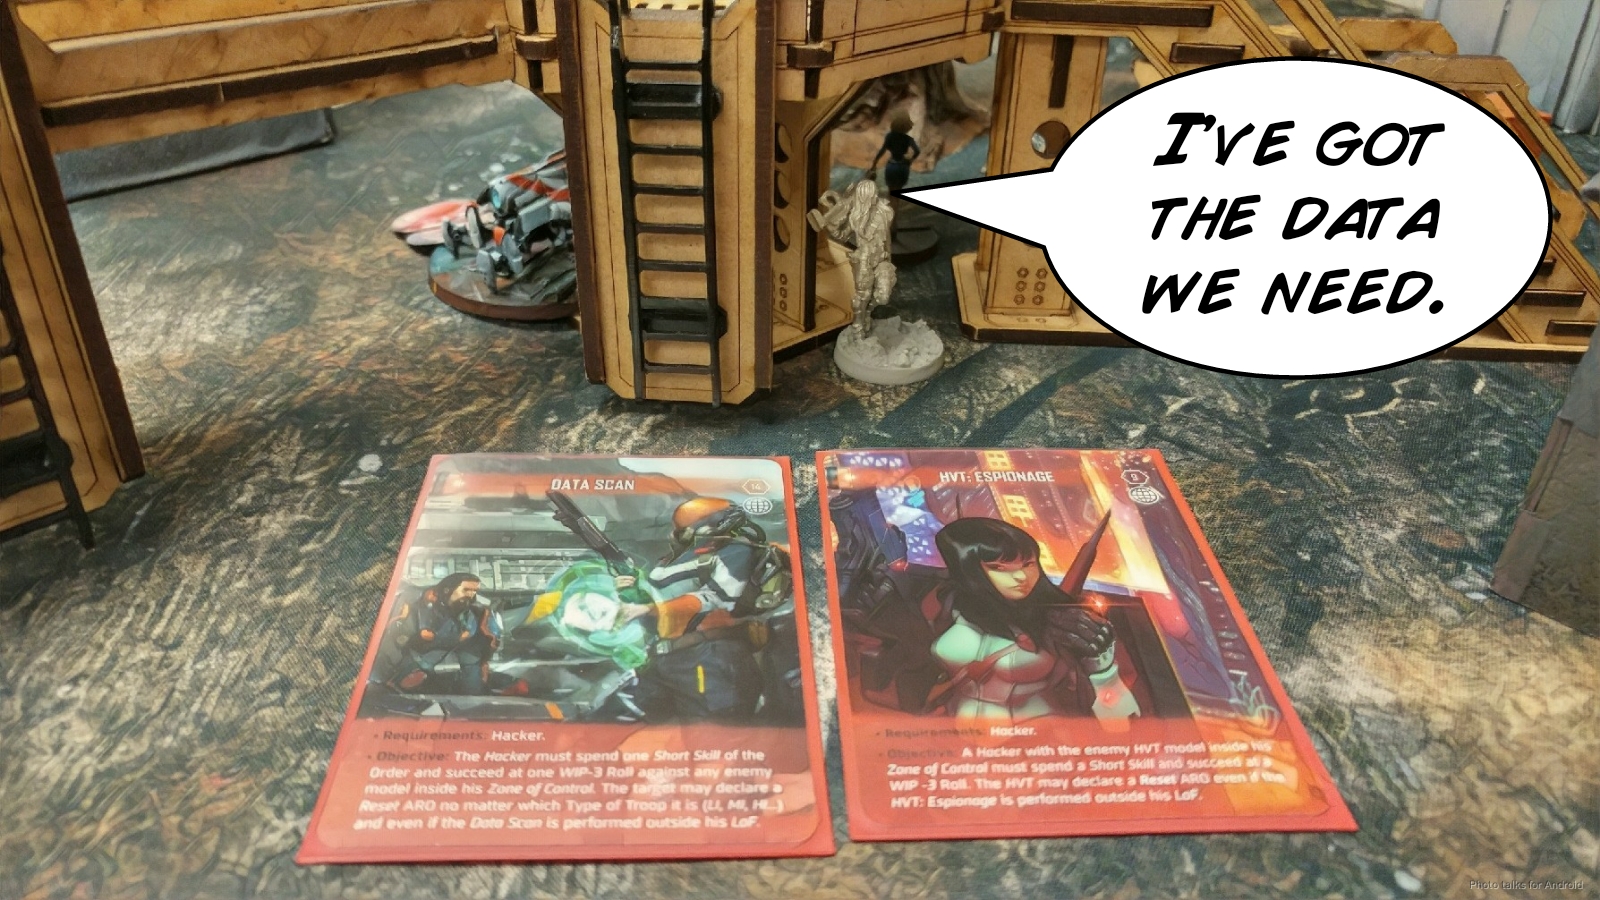 I don’t have a ton of orders left after that, so I just go after the button on the right with my Karakuri, figuring that this will also add to the stuff covering my right flank. I manage to get there but fail to push the button with my last order.
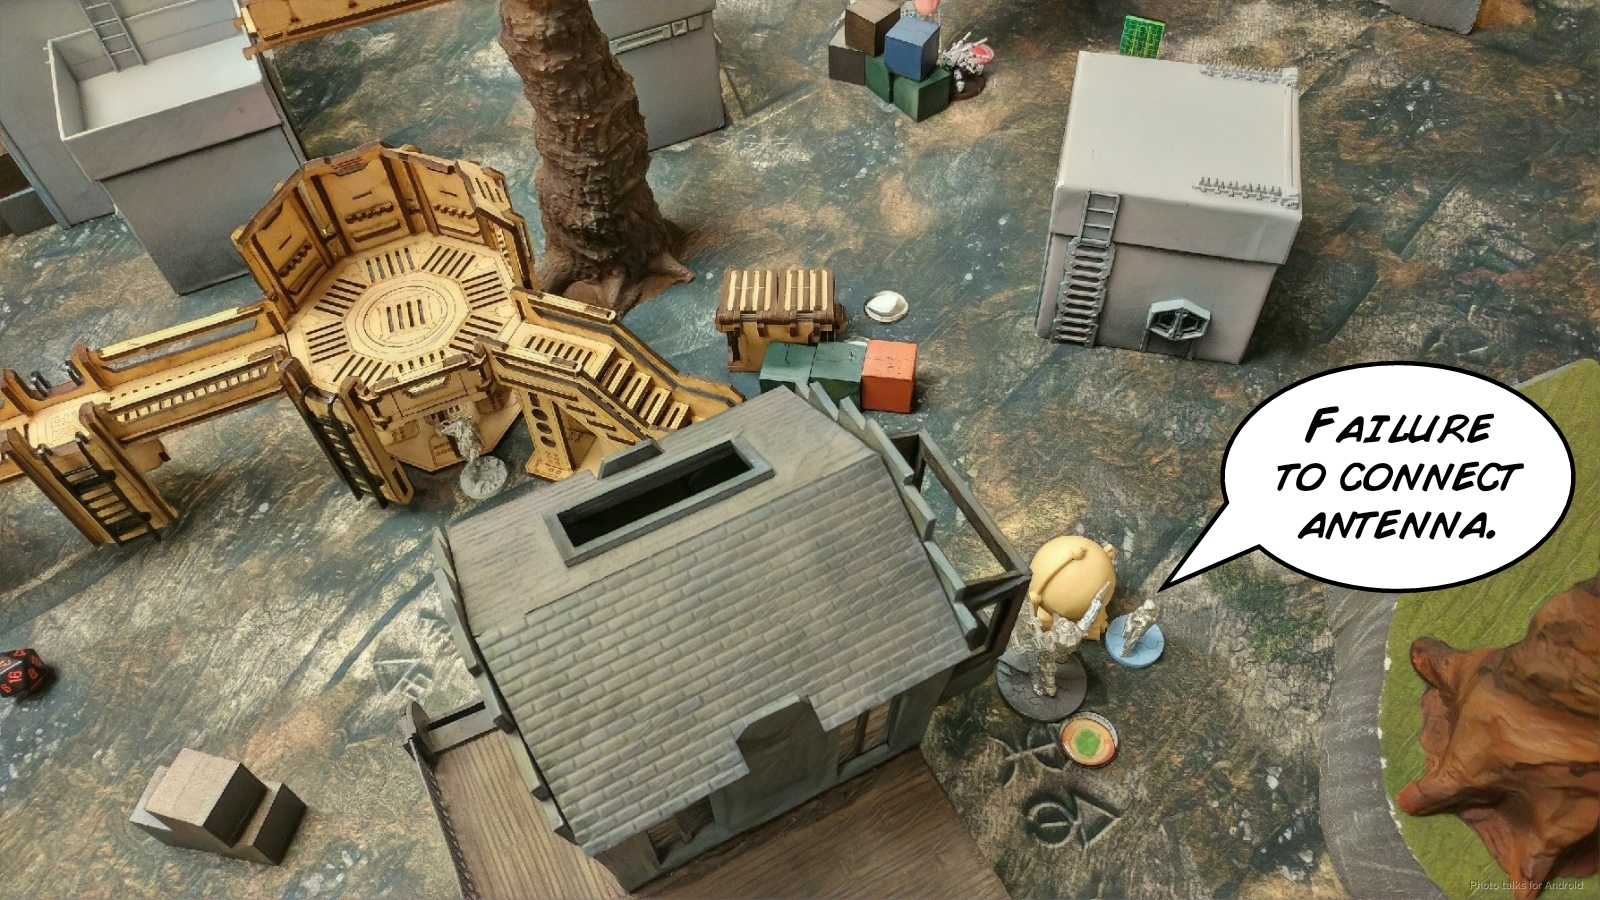
Turn 3
Top of 3 – Acontecimento
Erik sees an opportunity to put some points on the board and starts trying to ADHL my Karakuri by pie slicing to avoid the Fasid. I declare flash pulse in response, as it looks outside of 16″. It isn’t, the ADHL hits, and I pass my PH -6 save. I attempt to fail guts out of LoF but Erik can still see me.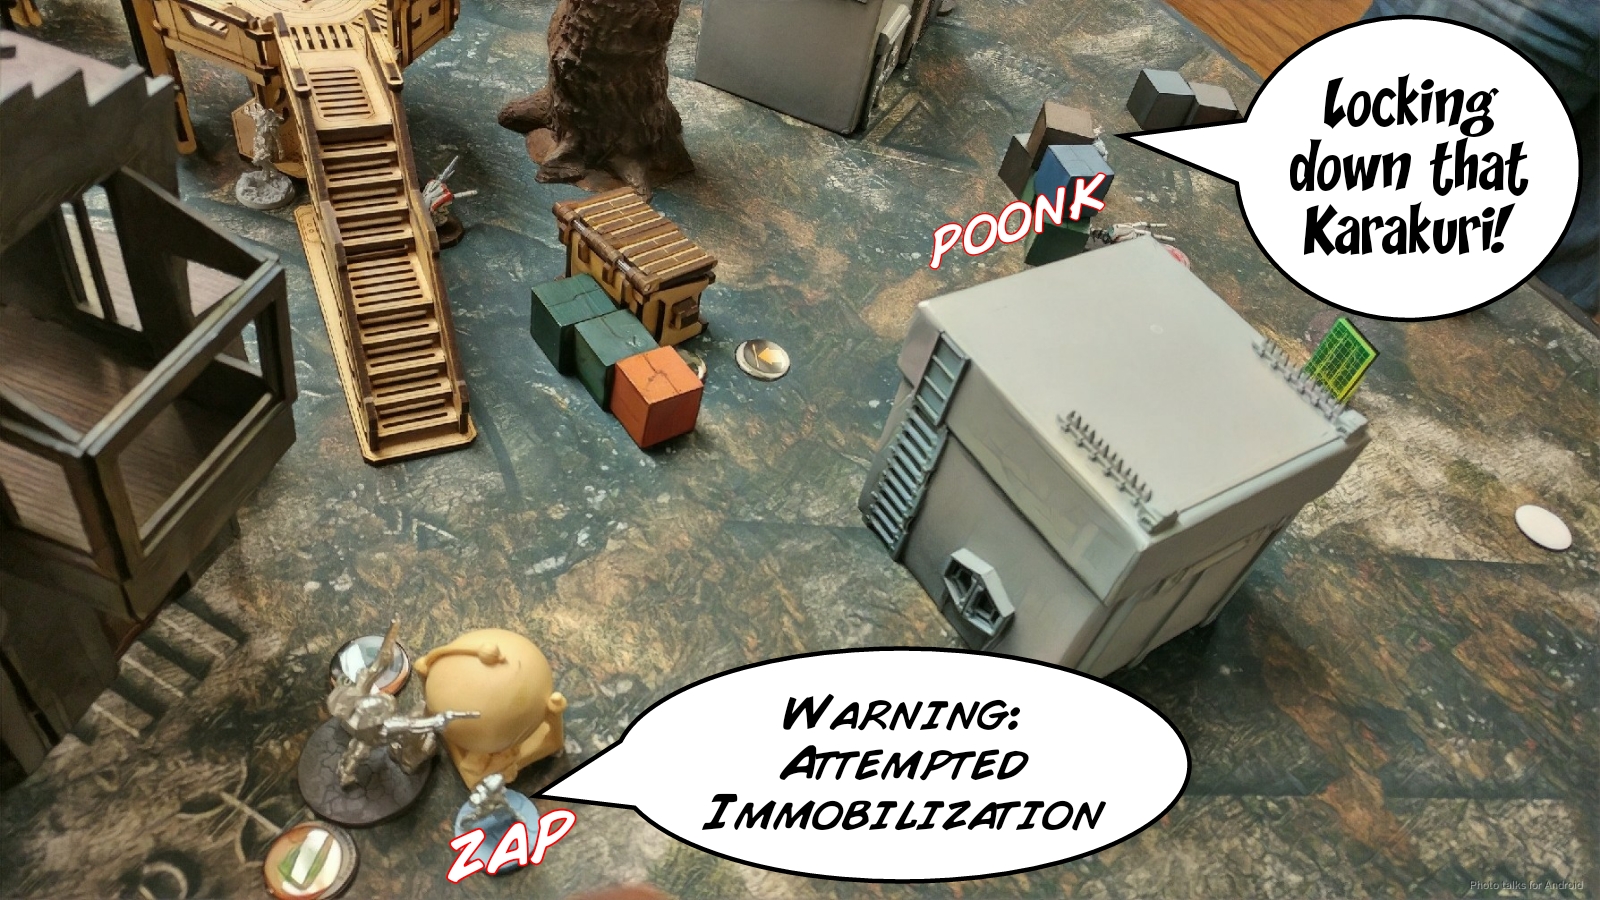 Erik gives it another go, and since I know that we’re in 16″ now I fire the DEP. Erik beats me again, and I fail the save, immobilizing the Karakuri.
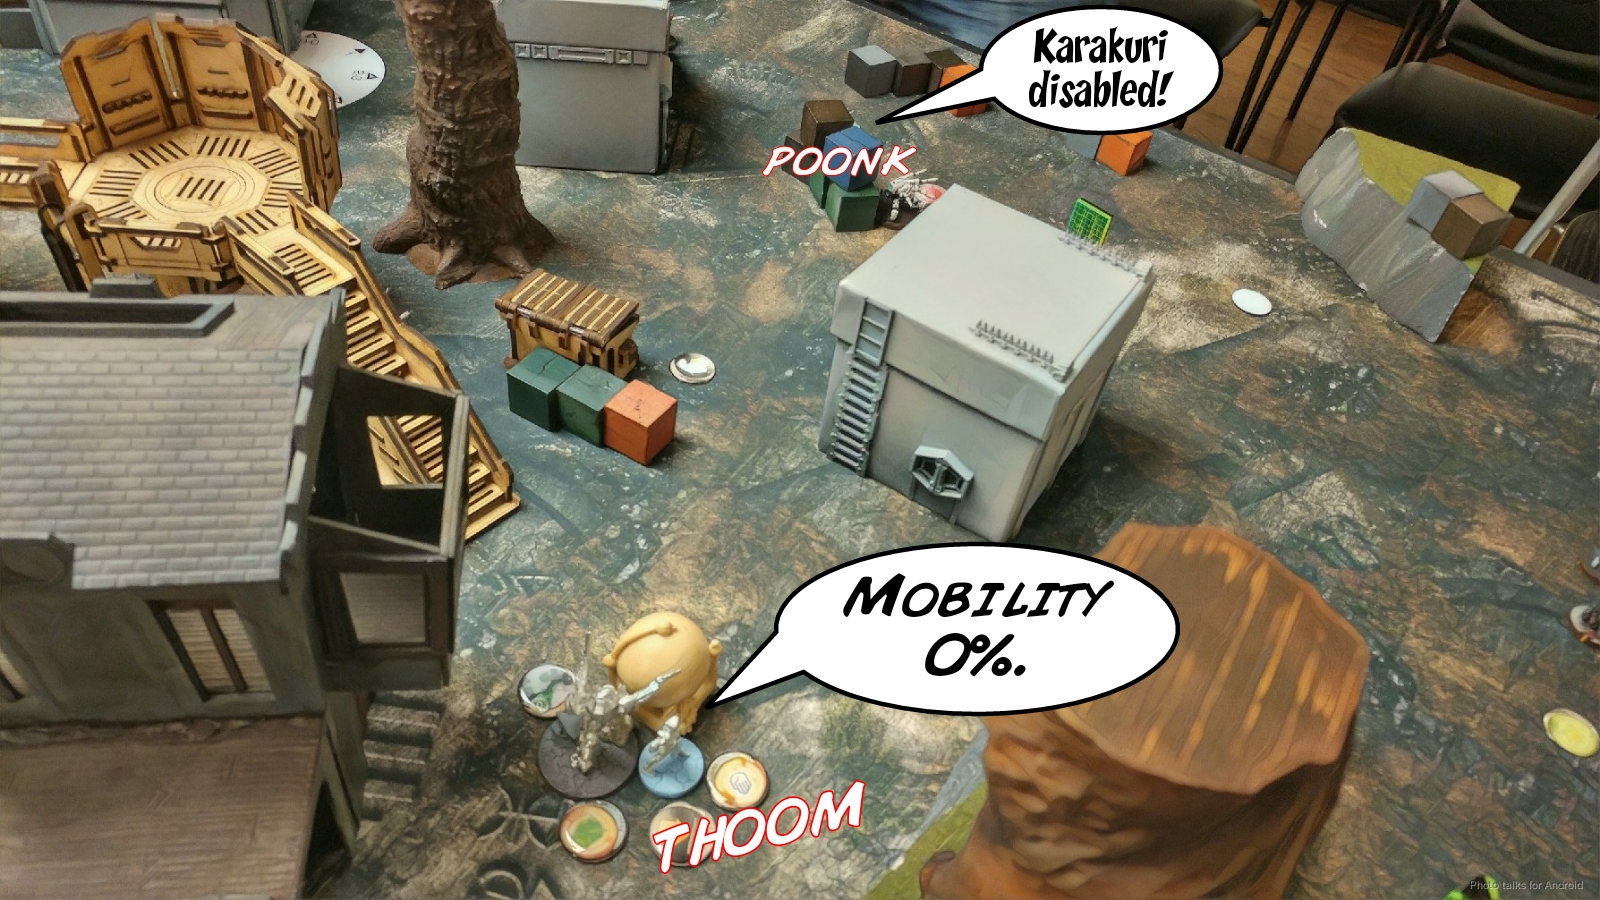 Erik then spends some orders on his Naga, dropping a mine from just outside of LoF to discourage my Fasid from advancing, then retreats the Naga and recamos her. I think he then threw the Guarda into suppression again and passed the turn.
Bottom of 3 – Ikari
I’ve got to get some buttons pushed, and glue some stuff! Right now it’s a 3-2 win for me, but we’re practicing for a tournament and I want to make it a major victory. I clear the mine with the Fasid’s face (sadly taking a wound) and drop some smoke blocking the Guarda’s LoF to negate its suppression.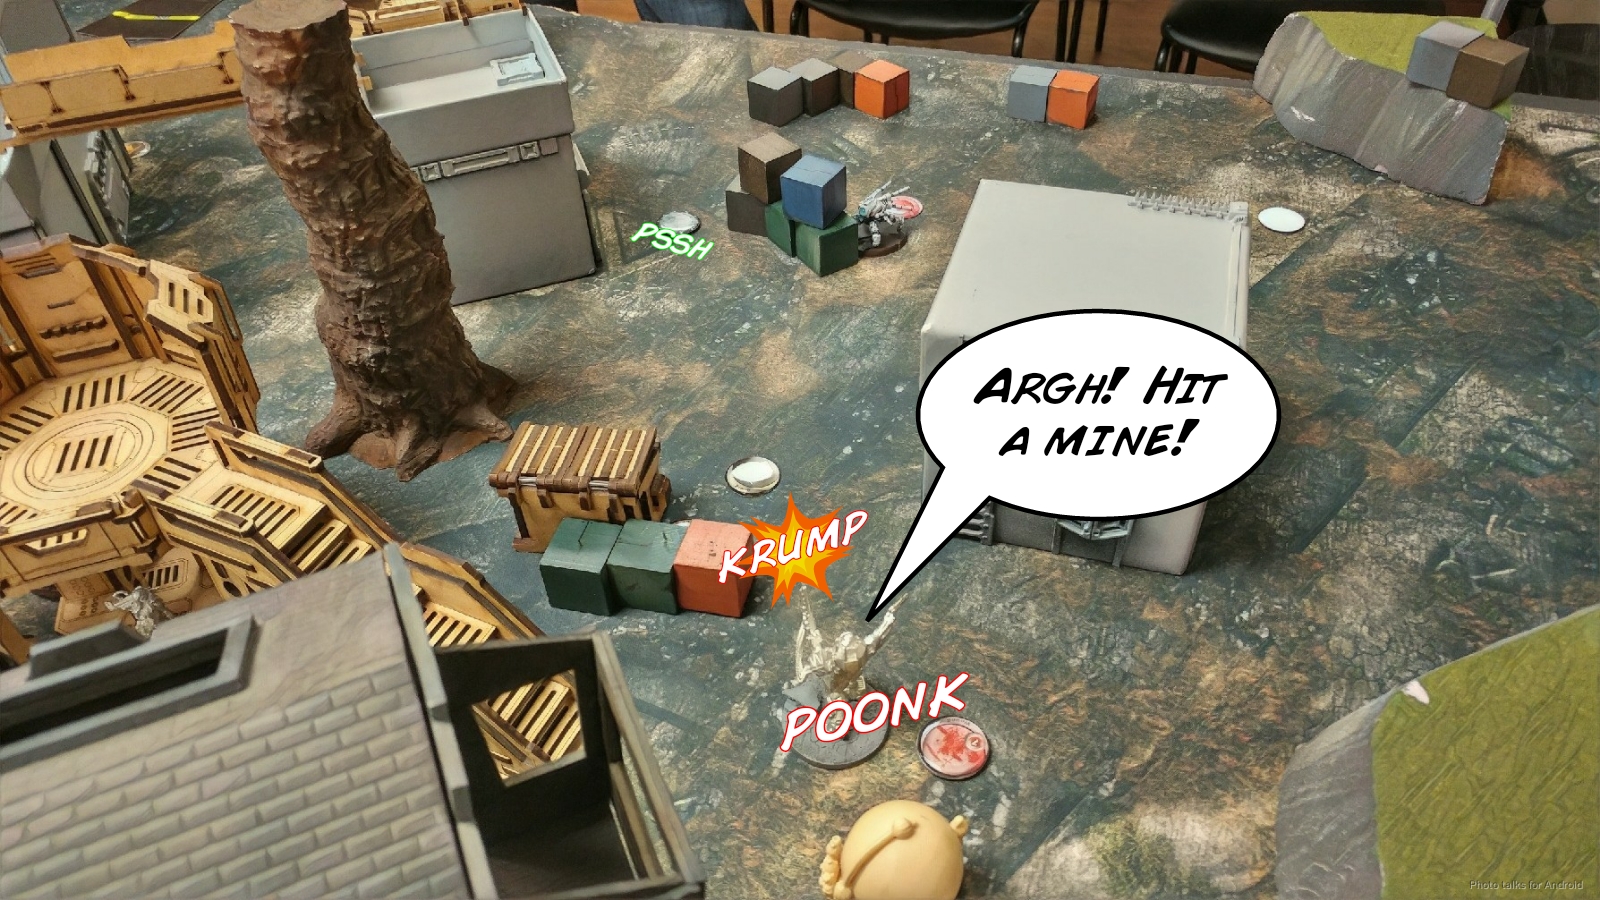 The Druze scurries over to push the button that the Karakuri failed to, and then it’s all about my Fasid. I push him into view of the Naga, who declares Engage, but I ADHL him in the face and keep moving. Now it’s 4-0. I need to get one more specialist or the Lt glued to bring it to a major.
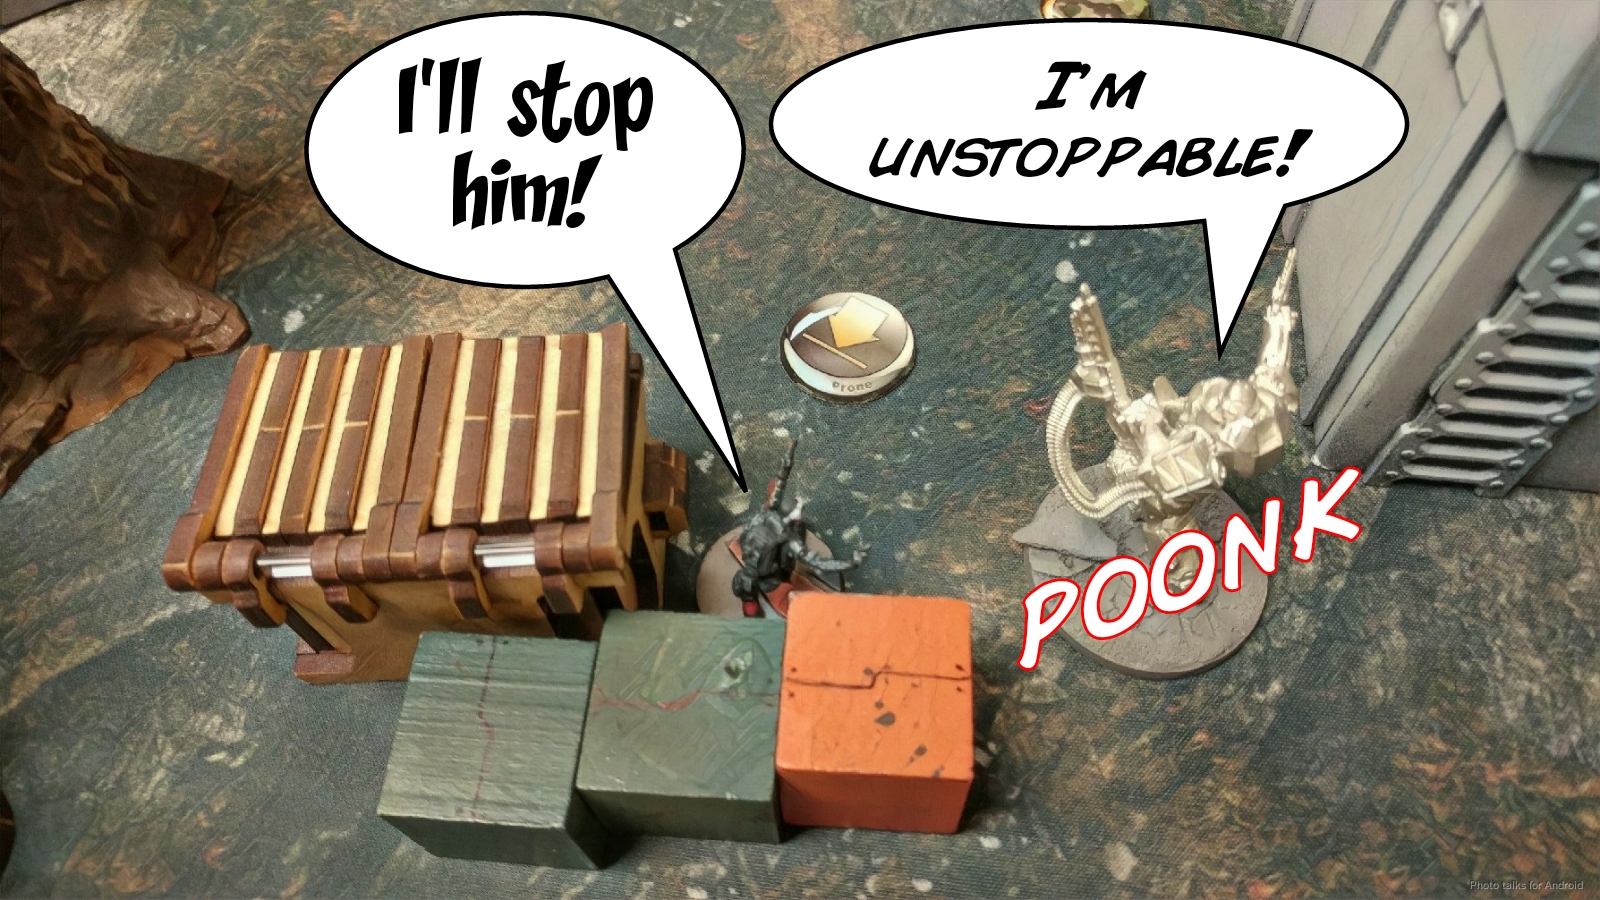 I stomp the Fasid into view of basically everything in Erik’s backfield. Scylla and the Guarda’s bot shotgun me, so I don’t like the odds of winning that face to face against Scylla. I’ve got a shot on the Bagh Mari in the back, so I choose to take that one instead, and sneak the ADHL through, gluing him. Between all the shotgun fire coming back, the Fasid gets knocked out.
 I’ve got one order left, and nothing to spend it on, so we call it there.
6-0 Ikari Company Victory!
It was really great seeing Erik across the table for the first time in a long while, and as he said as we left the store, hopefully it won’t be as long before that happens again!
Notes
Notes for Me
- I had a plan, stuck to it, and planned moves across multiple turns:
- Turn 1 – I pinned Erik with my deployment and my Fasid/Jager, and at the same time set up for my Druze on Turn 2 as well as a Fasid DZ run on Turn 3.
- Turn 2 – Got my classifieds, and attempted to get my last button pushed while simultaneously trying to stall out Erik some more.
- Turn 3 – Last of the “button” pushing, i.e. gluing stuff.
- Had Erik not done anything against the Fasid with his Naga, I would’ve attempted a discover-shoot from outside of 8″ as I moved away.
- The Fasid is pretty amazing–it has a tool for pretty much every job.
- The Daiyokai behaved like a really expensive Panzerfaust this game, but I’m sure it’ll get work done in other games of Hunting Party.
- Cube Jager continues to be amazing in Ikari. Honestly it might unseat Tomcats in Nomads for me in some scenarios. I have an unhealthy obsession with E/M, and to get that on a Tomcat I have to take a non-specialist profile. The Jager gives it to me all in one. I suppose I could just take two Tomcats. Nothing wrong with that either. :3
- The single Druze KHD is pretty fantastic. That Cybermask makes them great button pushers and assassins. I just wish it wasn’t a roll to re-engage Cybermask. It always feels bad sinking orders into cybermasking something in a 10 order list.
- The more I play Druze the more I fall in love with them!
- The Karakuri seems a bit much for the scenario. It doesn’t have a glue gun, can get glued pretty easily, and I think I want more Druze….
Notes for Erik
- We talked at length after the game…
- As I said, I’m not a fan of the link composition that you had for two reasons: 1) double hackers concentrates your hacking power in one location, where a single Regular Hacker and Naga AHD is more flexible. 2) The Bagh Mari HMG helps you get out of the DZ too, 32″ range limit nonwithstanding.
- As you said though, this is for both Hunting Party and Engineering Deck, so there are some concessions to me made for the other mission.
- Scylla needed some smoke coverage. I think cybermasking her and hunting my specialists would’ve been reasonable.
- I’m really curious to know what other folks have in mind for your Turn 2, because I don’t have a great answer myself…
- Let’s play again soon!

When the Cube Jager was receiving spec fire, did you dodge or leave it in suppression?
If memory serves, I left it in suppression. It’s been quite awhile though.