A Step Too Far
Made it to game night for the first time in awhile, this time lugging Adam’s plane table in tow. He’s sold it to me, since it’s intended to be part of the Ariadna mega-table I’m working on, although I suspect that it’s mostly because the table is a royal pain to store and transport… but Adam would never do that. Right? Anyway, after making something like 4 trips to the car to get everything unloaded gently and setting everything up, Jordan offered to throw down against me. No one seemed to have a strong opinion on what scenario they wanted to play, so I just rolled random ones for the four or so pairings of people using Comlog’s randomization feature. Nifty, that. It even lets you randomly choose a mission from one of your tournaments! Jordan and I rolled Frontline, which isn’t my favorite scenario, but it would be good practice.
Overview
- Mission: Frontline
- Forces: Japanese Secessionist Army versus Caledonian Highlanders Army (300)
- Deploy First: JSA
- First Turn: JSA
List A
O-YOROI Lieutenant AP HMG + Heavy Flamethrower, CrazyKoalas / EXP CCW. (3 | 86)
DOMARU Spitfire / Pistol, E/M CCW, Shock CC Weapon. (2 | 39)
KEMPEI (Chain of Command) Boarding Shotgun / Pistol, CCW, Electric Pulse. (0 | 21)
YURIKO ODA Combi Rifle + E/Mitter, D-Charges, Antipersonnel Mines / Pistol, CCW. (0 | 23)
KEISOTSU Paramedic (MediKit) Combi Rifle / Pistol, Knife. (0 | 11)
RYŪKEN (Forward Deployment L2, ODD) Submachine Gun, Antipersonnel Mines, D-Charges / 2 Breaker Pistols, Knife. (0.5 | 24)
ONIWABAN Submachine Gun, Nanopulser / Pistol, Monofilament CCW. (0 | 37)
ARAGOTO (Killer Hacking Device) Combi Rifle + Light Shotgun / Pistol, Knife. (0 | 25)
10
1 | 6 SWC | 300 Points | Open in Infinity Army
I wanted to run my TAG list from my recent game against Adam’s Druze, mostly to get more practice with the TAG. The list is still just… fine. I really wish there was a way to make a Domaru, Kempetai, Keisotsu 3-man core. Apparently that’s an illegal fireteam. Boo hiss. Anyway, I was a little concerned about weathering the storm of CHA chain rifles that I knew were coming, but I figured I’d give it a go.
Highlanders
GROUP 1 |
5
WALLACE Lieutenant Combi Rifle + Light Flamethrower, Smoke Grenades / Pistol, EXP CCW. (0 | 35)
HIGHLANDER Chain Rifle, Smoke Grenades / Pistol, AP CCW. (0 | 6)
McMURROUGH 2 Chain Rifles, Grenades, Smoke Grenades / Templar CCW (AP + DA). (0 | 31)
CATERAN T2 Sniper Rifle / Pistol, AP CCW. (1 | 24)
SCOT (2nd Battalion) CH: Camouflage Missile Launcher / Assault Pistol, Knife. (1.5 | 31)
S.A.S. Chain Rifle, Grenades / Assault Pistol, AP CCW, Knife. (0 | 22)
GROUP 2 |
VOLUNTEER Chain Rifle, Light Shotgun / Pistol, Knife. (0 | 6)
HIGHLANDER GREY AP HMG, Smoke Grenades / Pistol, CCW. (1.5 | 34)
WARCOR (Aerocam) Flash Pulse / Stun Pistol, Knife. (0 | 3)
6 SWC | 299 Points | Open in Infinity Army
I think CHA is a particularly bad matchup for JSA. They really don’t have any key pieces to remove with an Oniwaban, with the exception of Wallace, have plenty of chain rifles to negate your visual modifiers, and generally don’t care if they die because of their really deep order pools. Huh. As I write this, I think that’s the key. “Exception of Wallace.” More on this later.
Deployment
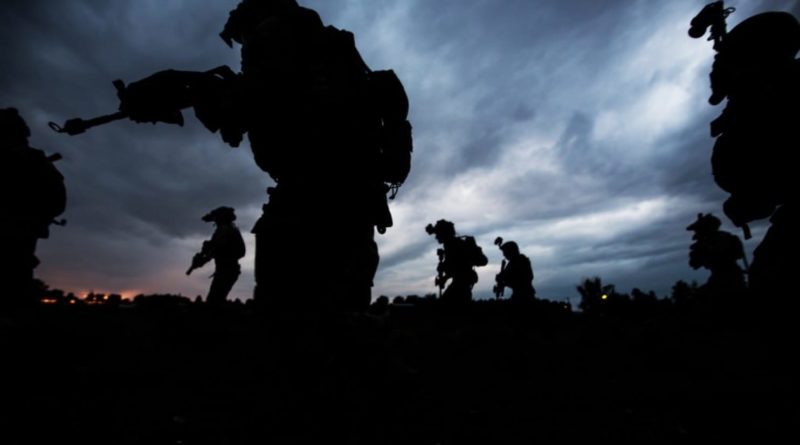
I went first, so I deployed first, and I figured I’d hold my Oniwaban in hidden deployment until the very end.  I anticipated just running it into Jordan’s near zone for maximum points. I stuck my two Ryuken-9 on either side of the table, and put their mines into the saturation/low-vis/”jungle” terrain zones to make dodging them a nightmare. I glued my Xenotech to the left Ryuken-9, just because, and stuck my HVT over there as well.
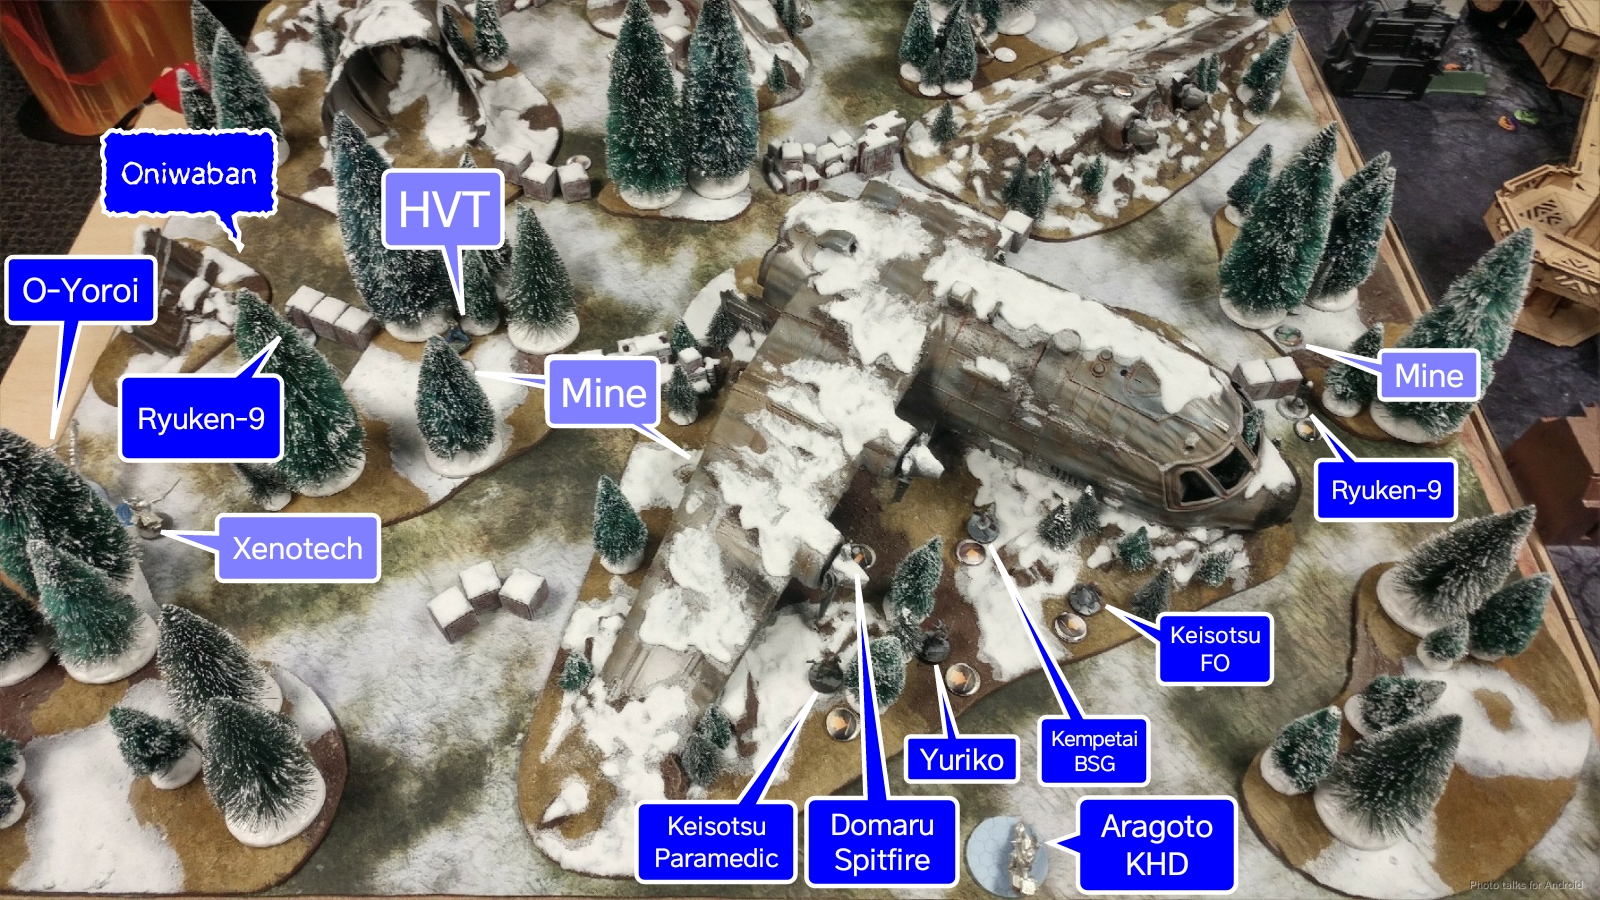 I’m still learning how to best deploy on the plane table. It was pretty clear that there was a “safe” place for my link team on the side that Jordan gave me, and it was behind the main body of the plane. I knew that there were going to be a pile of chain rifles on the other side of the table, so I did my best to spread them out a bit in case I didn’t have orders to fix their positioning later. I think my placement was a bit of a mistake, and I’ll talk about that a bit later.
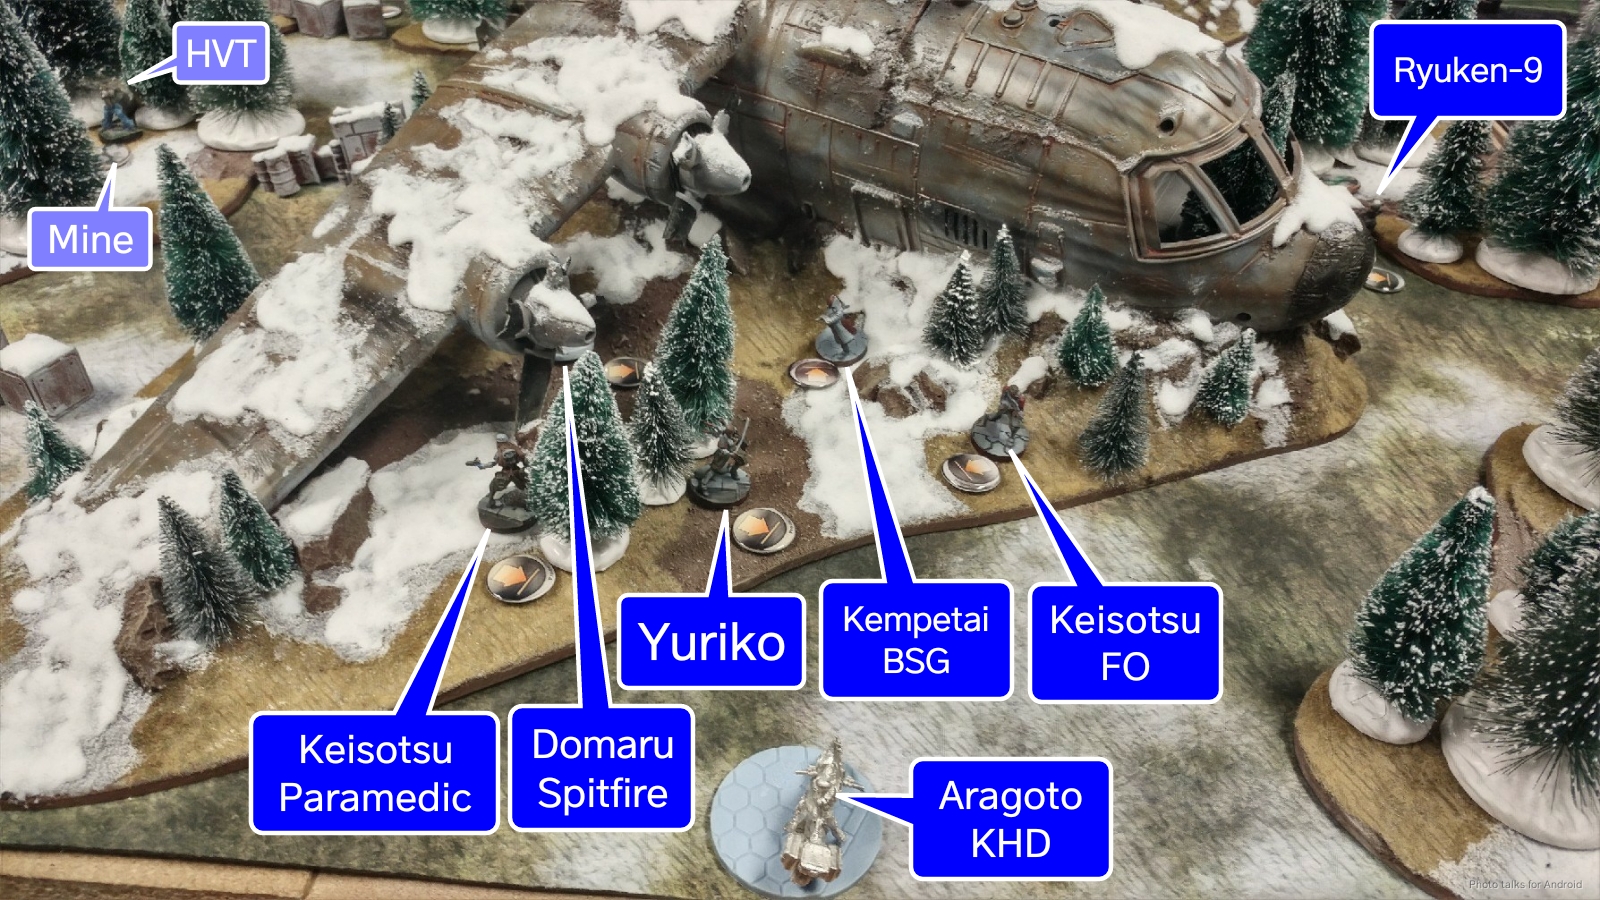 The Aragoto went in the giant LoF shadow of the plane to protect it during its impetuous move, and then it was time for Jordan to deploy. Adam’s playing CHA now, so Jordan’s had a taste of the business end of the SAS CRAP from one of their recent games. Jordan’s a quick study, which meant I was facing two of them, one on each side of the table. There was also a Cateran on top of part of the plane fuselage, a Scots ML on the broken wing, and a Scots Molotok on the right near the tail section of the plane. The Warcor hung out atop the tail section of the lane, proxied by the Unknown Ranger. Jordan bubble wrapped Wallace in the center with Galwegians, and then failed an inferior infiltration roll on a volunteer, putting it on his back table edge to shepherd his Xenotech.
 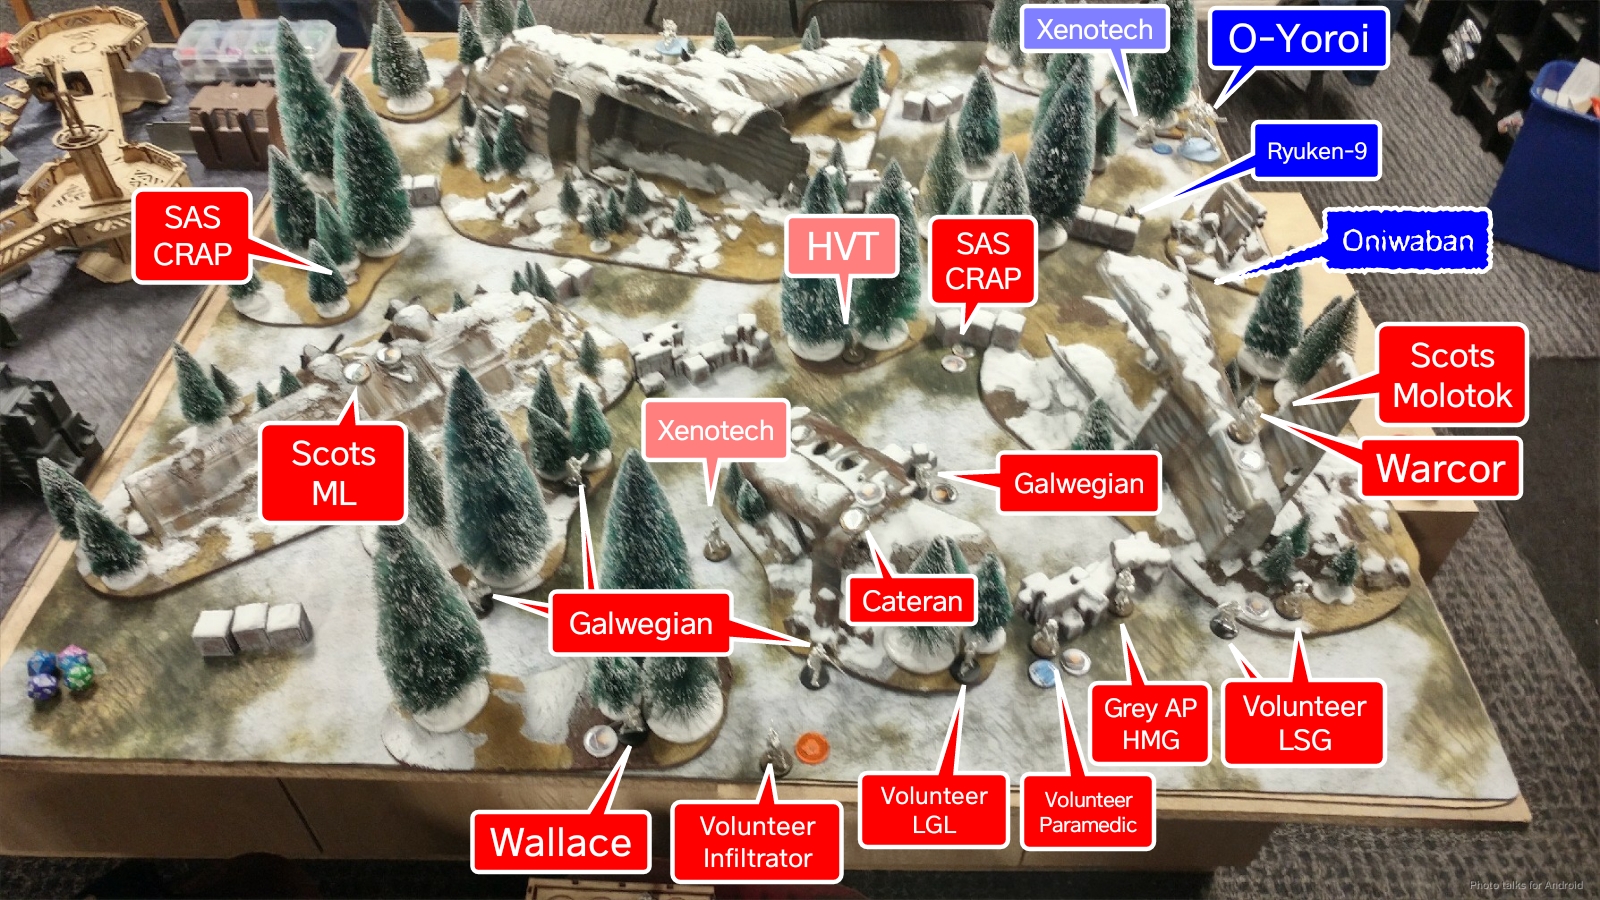 His volunteer link spread itself out along his right side, mostly hiding behind some scatter terrain. I decided that they were clustered up pretty well for heavy flamethrower purposes, and deployed my O-Yoroi from reserve on that side, intending to rush it up the board edge. Jordan responded by putting McMurrough (not pictured, sadly) in the trees between Wallace and the Scots ML.
Turn 1
Top of 1 – JSA
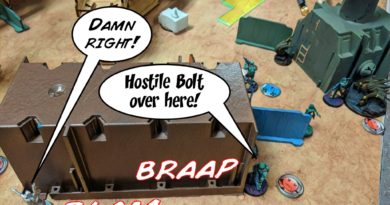
My goal for the game was to get some mileage out of the O-Yoroi. Really use it. People have been telling me to just smash it into stuff and see what happens, so I planned to do just that. First though, I had to move the Aragoto, so she rolled towards my right table edge towards McMurrough, in total safety behind the nose of the plane. I was pretty concerned with McMurrough, but I figured I’d do my best to wreck his order pool and limit the damage. I didn’t want my entire plan going to pieces by getting my O-Yoroi flash-pulsed by Jordan’s warcor, so I opted for the much more conservative option of shooting it with the nearby Ryuken’s SMG. This also had the side benefit of letting me move my Xenotech up. Been listening to White Noise, and the interview with the winner of Cancon really underscored the importance of putting points on the scoreboard, so this fit with that other priority as well.
In any case, the Warcor was shocked off the table, and then it was time to get the O Yoroi up the field. There was a Galwegian in view with a pistol shot at a -9, so I elected to ignore it to get the movement. Of course, Jordan rolls a 1 and crits. Bah.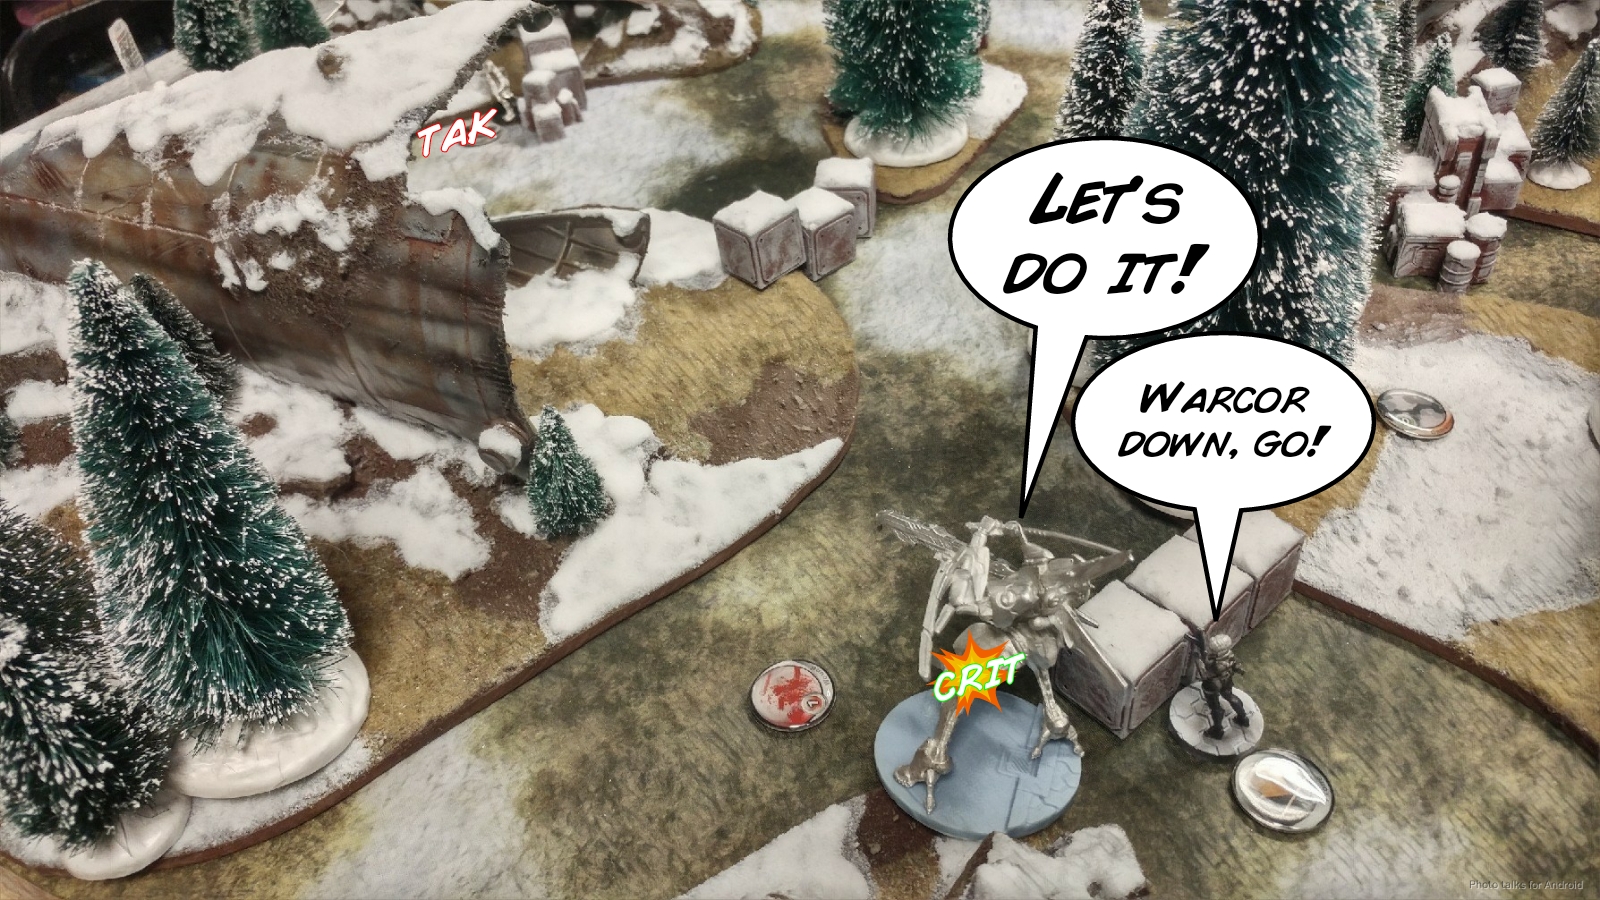 I push the O-Yoroi forward and split burst against the Galwegian that crit me and the inferior infiltrating volunteer. I throw one die at the Galwegian and three (effectively 2 thanks to saturation) at the volunteer, figuring that if I can take out the model synced to the Xenotech this will degrade Jordan’s ability to accomplish that objective. My gambit pays off and the volunteer goes down and I put a wound on the Galwegian, sending it dogged.
 I’m now behind the tail section, and more or less safe from AROs save this sketchy camo token in the trees. Jordan elects to not reveal it, so I discover with my second short skill.
 It’s a Scots Guard with Molotok, so I can’t just ignore it. I think for awhile about what the most efficient way is to remove the Scots Guard. I can’t let a Molotok shoot at my O-Yoroi unopposed, and I definitely don’t want to be in a position where I’m trying to shoot at HMG at it inside of 8, inside a low-vis/saturation zone. Flamethrowering is good due to the -3 PH to dodge thanks to low-vis, but I want an high-likelihood opposed roll. That means CC. I look at the O-Yoroi’s weapon and see that it’s an EXP CCW. Excellent… I roll into base to base, and Jordan elects to shoot me, so I just smash the Scots Guard into a pile of goo with an giant mecha explody sword. Seems good!
 This lets me roll the O-Yoroi around the corner to see Jordan’s backfield. The saturation and low-vis zone really help here, and I tank two chain rifles, a grenade, and a T2-sniper shot from the Cateran. Thankfully everyone else misses.
 The flamethrower takes out one of the Volunteer chain rifles and the Paramedic, but the Highlander Grey survives with a high ARM roll. I keep pushing the O-Yoroi forward, which lets me cover the Cateran (still a camo marker atop the fuselage just for model’s safety sake), the volunteer LGL, and the Highlander Grey again with a flamethrower template. Everyone that can shoots, and I manage to tank everything except for a chain rifle. Thankfully, the Cateran and the Volunteer LGL die, but the Grey continues to survive!
 I’ve got two orders left, and the TAG is a single move away from seeing Wallace. I throw three dice at him, but he dodges away to safety. THe remaining AROs manage to take the O-Yoroi off the table. I was hoping it would just be unconscious, because then I could’ve popped the pilot out later. Ah well.
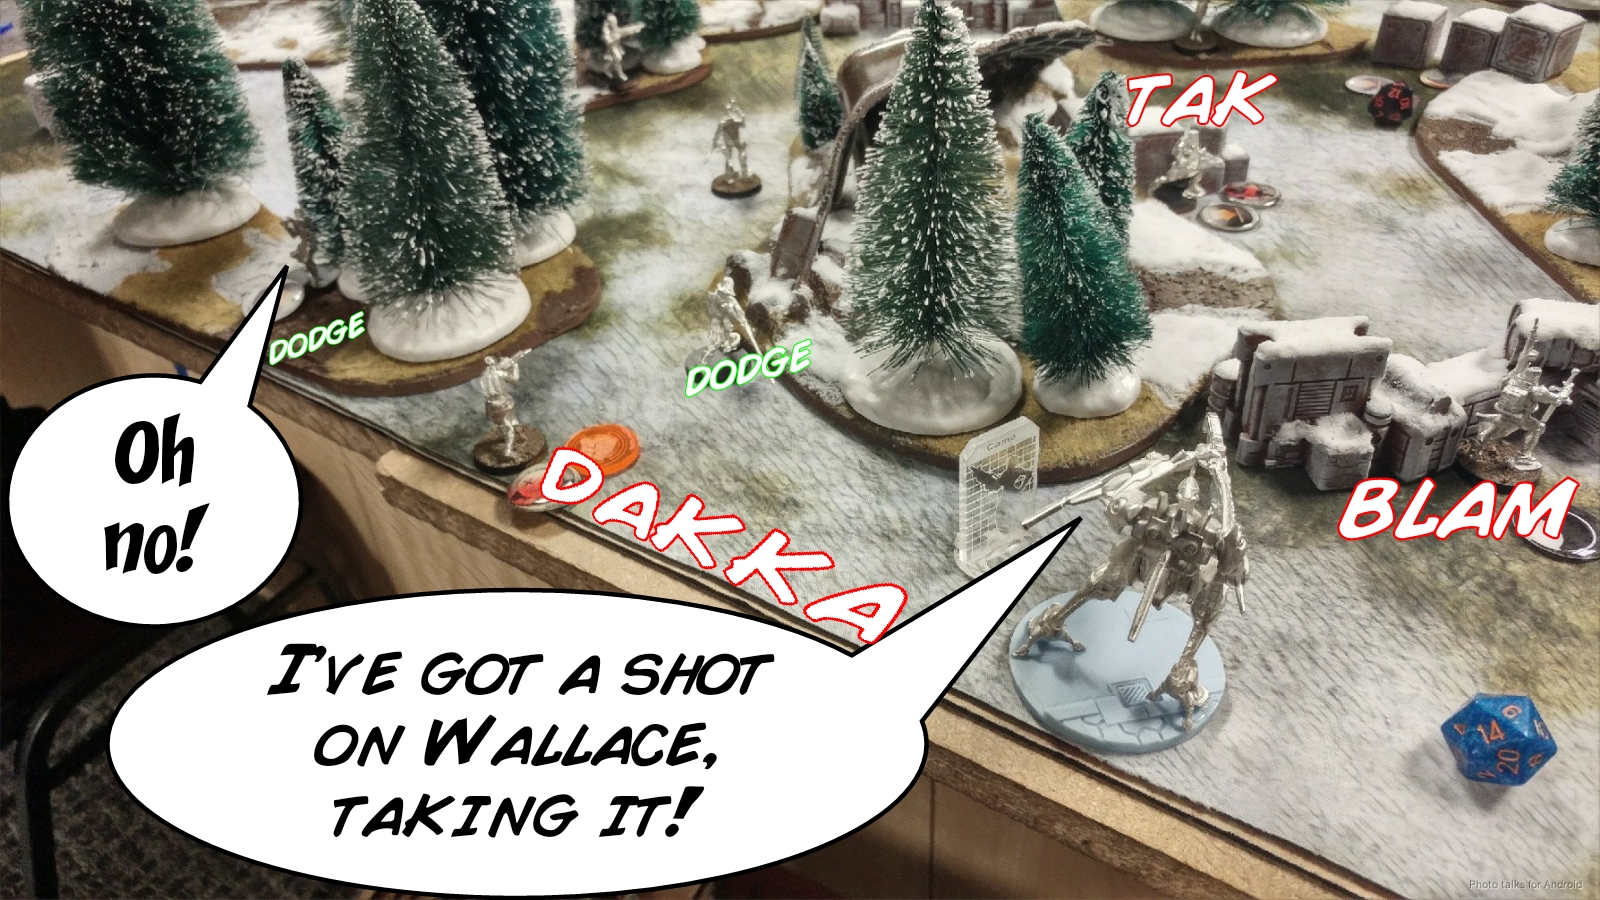 I spend my remaining order on link to retreat it towards my table edge, which will hopefully buy me more time agains McMurrough or some Galwegians.
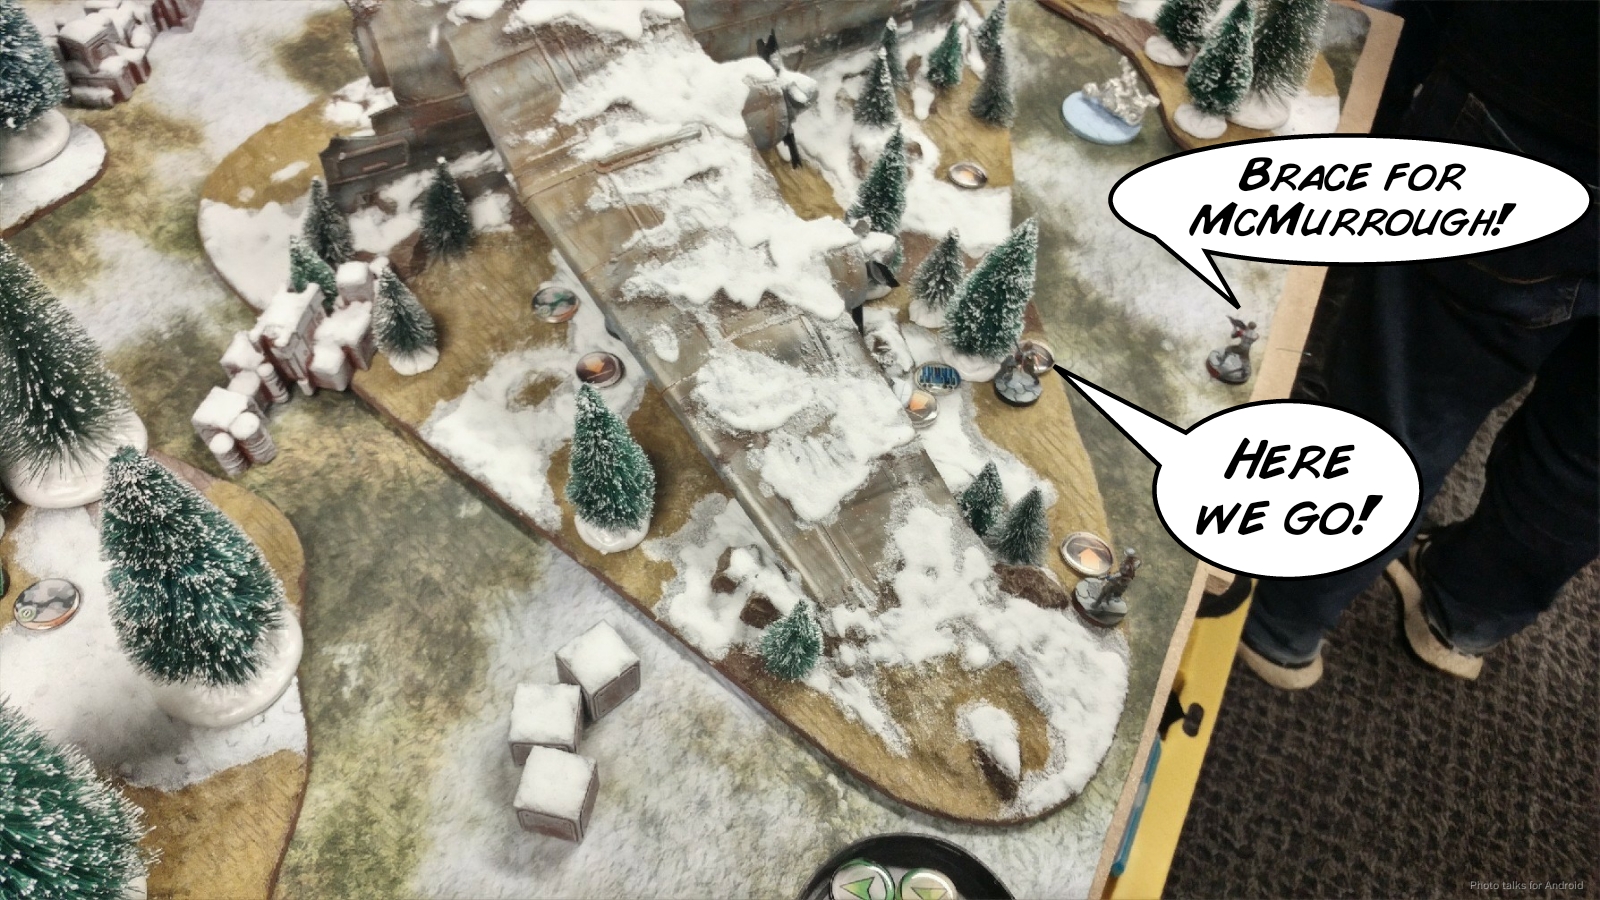 At this point, I’ve taken out four volunteers, a Galwegian (who is dogged so it counts), a Scots Guard, a Cateran, and a Warcor. 8 orders may seem like a lot, but it somehow didn’t feel like it. I think this is basically why CHA seems like such a bad matchup against JSA. I can blow up basically an entire combat group and it doesn’t feel like I’ve done anything. Take away a few orders from a JSA list and it starts to crumble. Perhaps this is a side effect of me gravitating towards lower-order JSA lists, but man, it feels bad to kill 8 orders in your first turn and still feel on the back foot.
I think part of the issue is that I simply didn’t have the orders or the positioning to go after Wallace and McMurrough effectively. And even if I had taken out McMurrough, there are still a ton of Galewegians on the board to basically replace him. Sure, they don’t have all the tools, but a dogged chain rifle is pretty close for the purposes of murdering my list. As I write this, a part of me wonders if I should have used the Oniwaban to just assassinate Wallace. Perhaps that’s the right call in the future, but that’s extremely difficult. Wallace is no slouch in close combat, and he had a screen of Galwegians that are likely to discover the Oniwaban as it walks by. I’m not sure I prioritized the targets for the O-Yoroi right either. I’ll try to unpack this more in my notes.
Bottom of 1 – CHA
Anyway, I passed turn. After forming a full 10 order combat group by putting the dregs of the second combat group into the first, the Galwegians started coming. I really should’ve saved some orders to throw Ryuken into suppression or at least put the O-Yoroi’s Koalas in standby. As it stands I just took them off the board as they were in a useless corner of the board and deactivated after the O-Yoroi died. McMurrough activated last and just pushed forward over the plane wing. Jordan cleverly exploited my bad mine positioning on my right Ryuken-9 and spec-fired a grenade with his SAS CRAP to cover the Ryuken and the mine. I successfully dodged the Ryuken into view of McMurrough, intending to SMG him as many times as possible as he came in, but the mine failed its ARM save.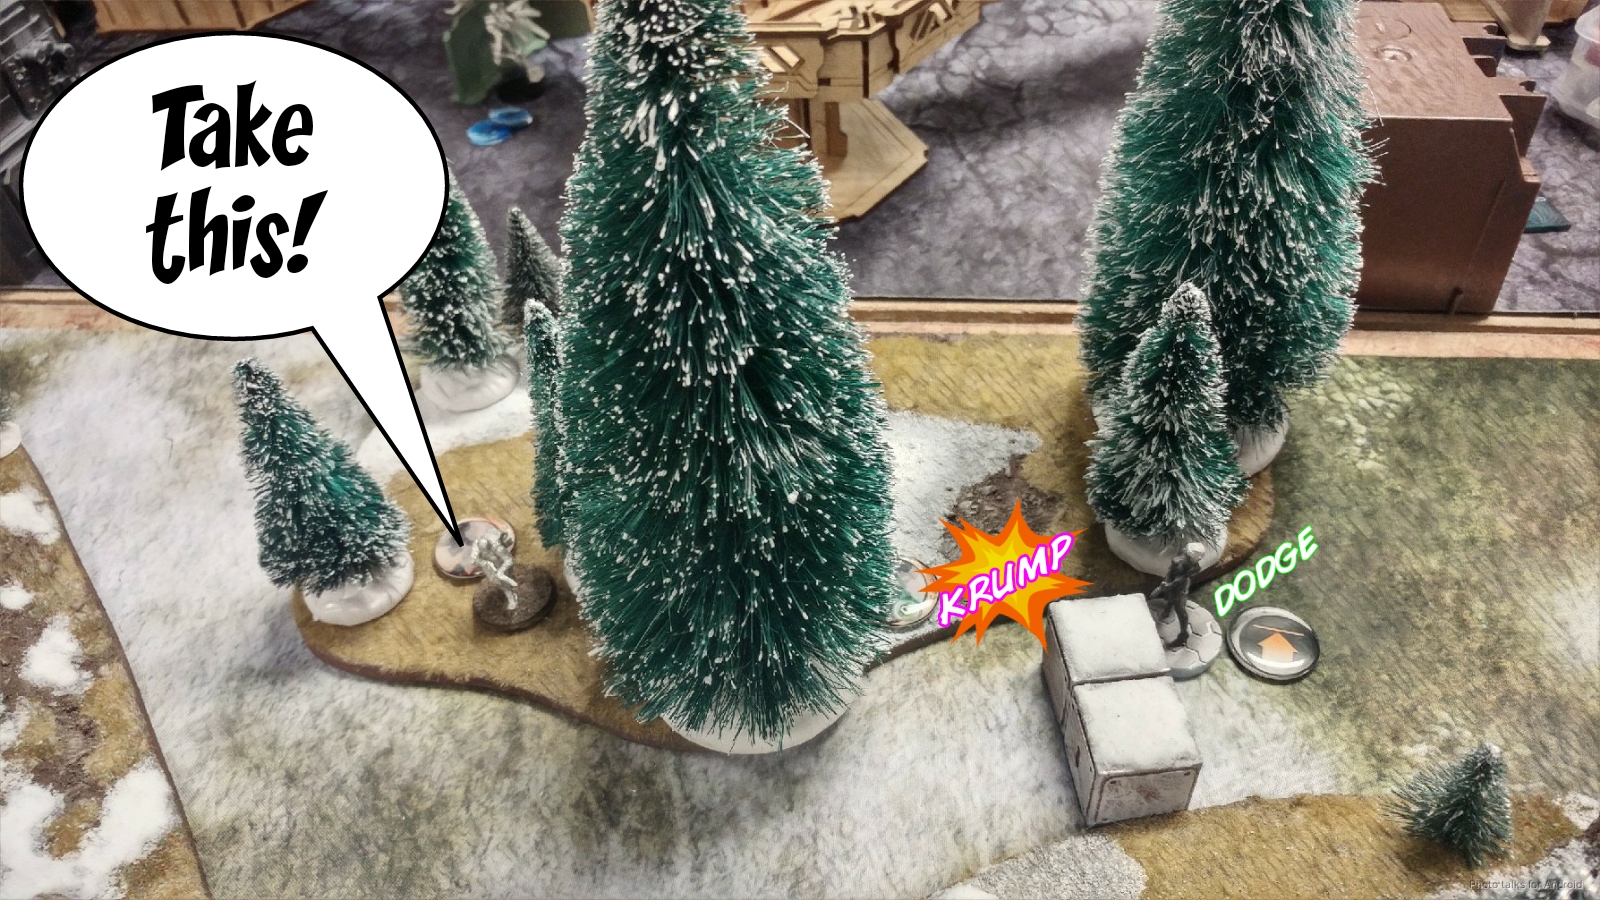 I had one SMG shot, basically, but it was worth it. I crit McMurrough as he came in, but the Ryuken failed one of the two chain rifle saves.
 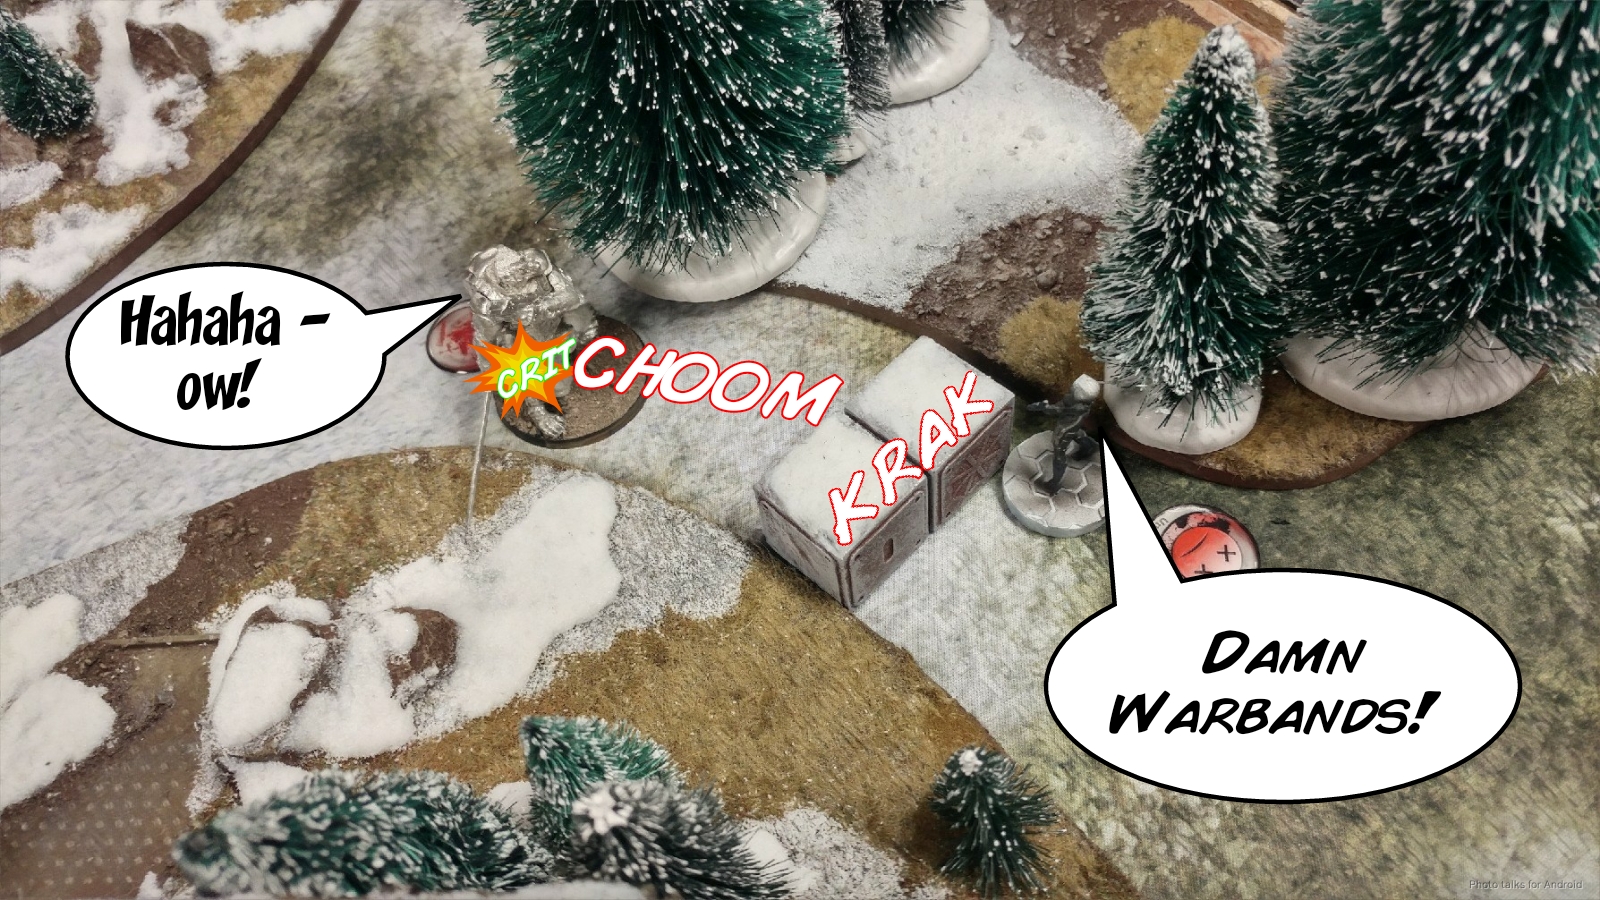 Jordan took this opportunity to shuffle his AP HMG Grey up towards his now unsynced Xenotech and managed to grab the Xenotech after two orders. This was pretty key. To me, there’s two takeaways here. The first is that Jordan has really improved as a player. A few months ago he might not have made the same call, and just tried to kill as much as possible. He was playing a much cagier game and setting up for Xenotech stuff in Turn 2. The second is that going after the model synced to the Xenotech was a really good call on my first turn, as it drained some of Jordan’s order pool, which I really needed.
In any case, Jordan had a few more orders to set himself up for a good Turn 2, and set about trying to take out my own Xenotech-synced model, the Ryuken-9 on my left. His SAS came around the corner, doing the no stealth trick to get into base to base for free, and then CC’ed me. I managed to fend him off for two orders, even winning the face to face and stabbing the SAS with the Ryuken-9’s knife. Sadly, the SAS’s flak jacket turned the blade and they were locked in combat. Jordan then used Wallace’s coordinated order to move McMurrough to relative safety in some trees, out of LoF of my Domaru Spitfire. Smart. He also shifted his Scots ML to have a better shot to the nose of the plane, should I choose to come around that side.
Turn 2
Top of 2 – JSA
Well, I really didn’t to deal with the Scots ML. I had no idea what it was, but I knew it was probably a Scots ML or a Cateran. Certainly nothing good, so I elected to not spend the Aragoto’s impetuous order and run her out in front of the ML. I would’ve been at -9 before range mods thanks to cover, camo, and low-vis zone… seems bad. Granted, the Scots Guard would be at -6 before range and down a burst, but orders are precious.
In any case, I revealed my Oniwaban and went to go back up my Ryuken-9 who was being harassed by the SAS. I managed to get behind the SAS without being discovered by some long range AROs, and then it was time to go to work. With the burst bonus thanks to the Ryuken-9, it actually was slightly better to choose MA3 instead of MA4, so I did that (84.85% versus 83.67%), and wrecked the SAS. Now that the Ryuken-9 was free to move, I spent the rest of my turn attempting to drop the stupid multiscanner. I spend so many orders that I’ve only got two left–one to recamo the Oniwaban, and one to break my link and coordinate move some of the link into better positions to hopefully stun or E/M McMurrough on his way in. I also used the coordinated order to rescue the Oniwaban from getting chain rifled by being next to the Ryuken.
 I then spend a command token to reform the link. UGH. Now, I know there’s a lot of negative stuff about the Xenotech rules online. I’m generally of the mindset that you roll with what you’re given, but man, it can really change a game. You really need to consider the cost of dropping the Multiscanner and plan ahead. I could’ve used those 3-5 orders to do something useful, like go after McMurrough or hunt down some Galwegians with the Ryuken-9.
Bottom of 2 – CHA
The Galwegians come in, throwing smoke every which way. McMurrough starts getting the CC two models classified by ganking my Ryuken-9 again, and then Jordan moves a Galwegian into the smoke.
 It’s at this point that he reminds himself to drop his own Multiscanner, after seeing my troubles with it my last turn. Much to my dismay, it only takes him an order, under the cover of smoke thrown by a Galwegian. BAH!
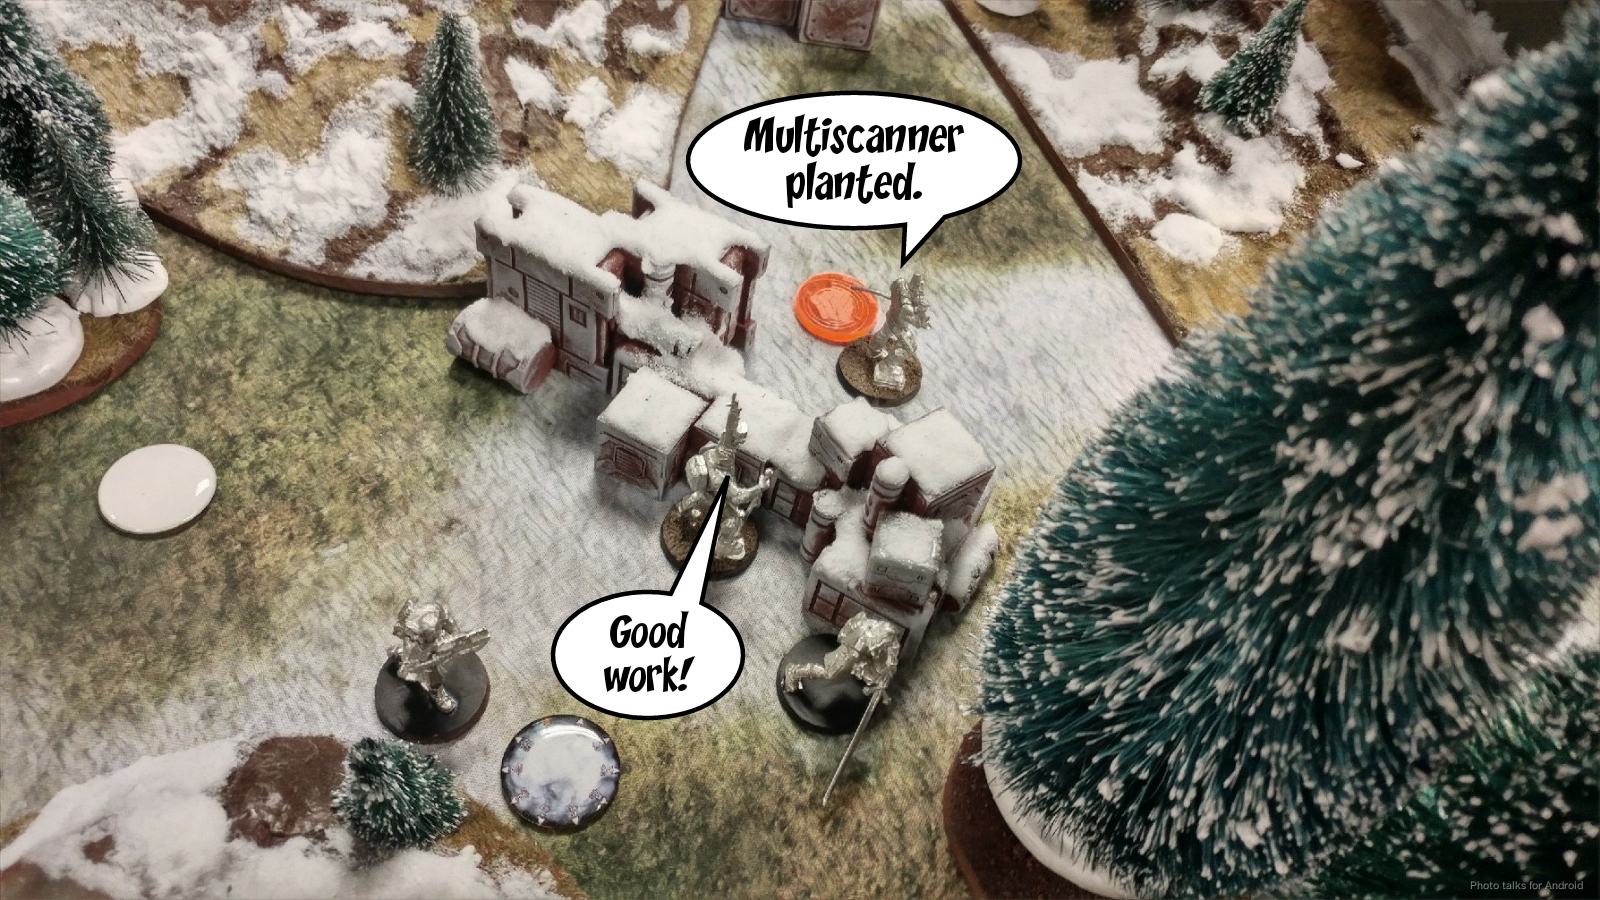 The Galwegian on my right finally comes screaming in, knocking out the Aragoto with a chain rifle. The Aragoto attempted to get an LSG shot off that would cover both the Galwegian and McMurrough, but I flub the roll. He keeps coming. Between the Domaru and the Keisotsu Paramedic I put the Galwegian down, but I lose the Paramedic. Thankfully, the Domaru tanks the chain rifle successfully.
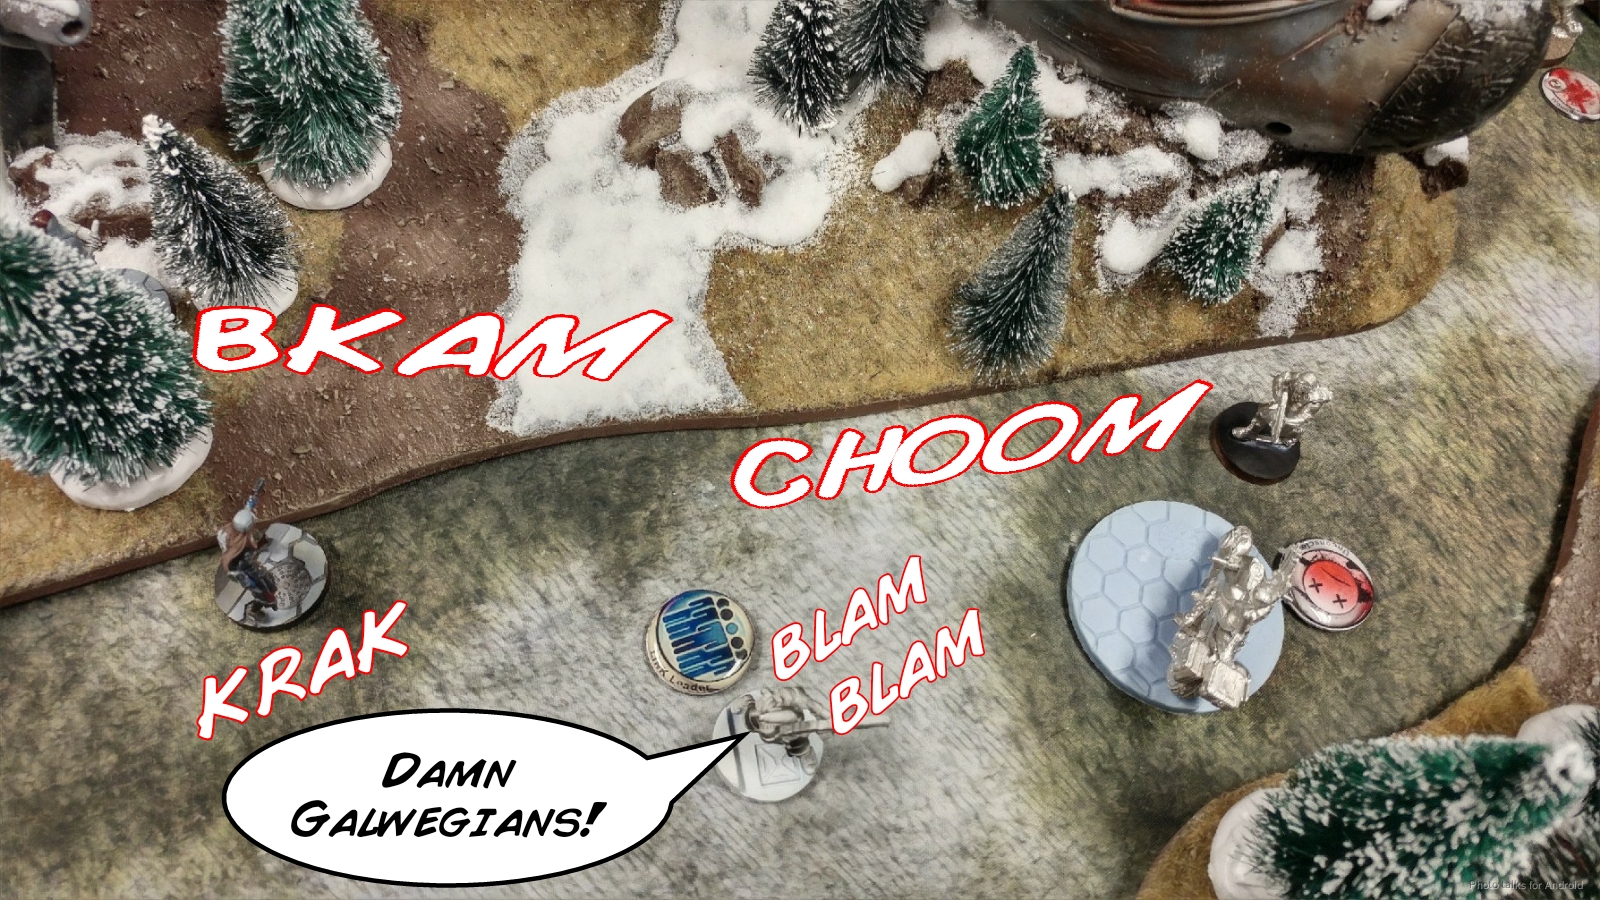 McMurrough comes in next and keeps chain rifling away. I keep shooting to try and take out McMurrough, but succeed only in taking a wound on the Domaru. Thankfully, the Keisotsu FO and Yuriko are in the trees. They can’t help, but Jordan can’t draw LoF either. Eventually Jordan runs out of orders and McMurrough is just sitting there in front of everything.
Turn 3
Top of 3 – JSA
The Domaru isn’t frenzied because it was still in the link when it wounded the Galwegian. To unstick my forces, I’m forced to spend an order running into base to base with McMurrough. I elect to not use dual-wield and choose the Shock CCW, MA3, and Berzerk to get an insane +9 CC bonus. McMurrough, no slouch himself, finishes off the Domaru but the Domaru easily crits McMurrough unconscious.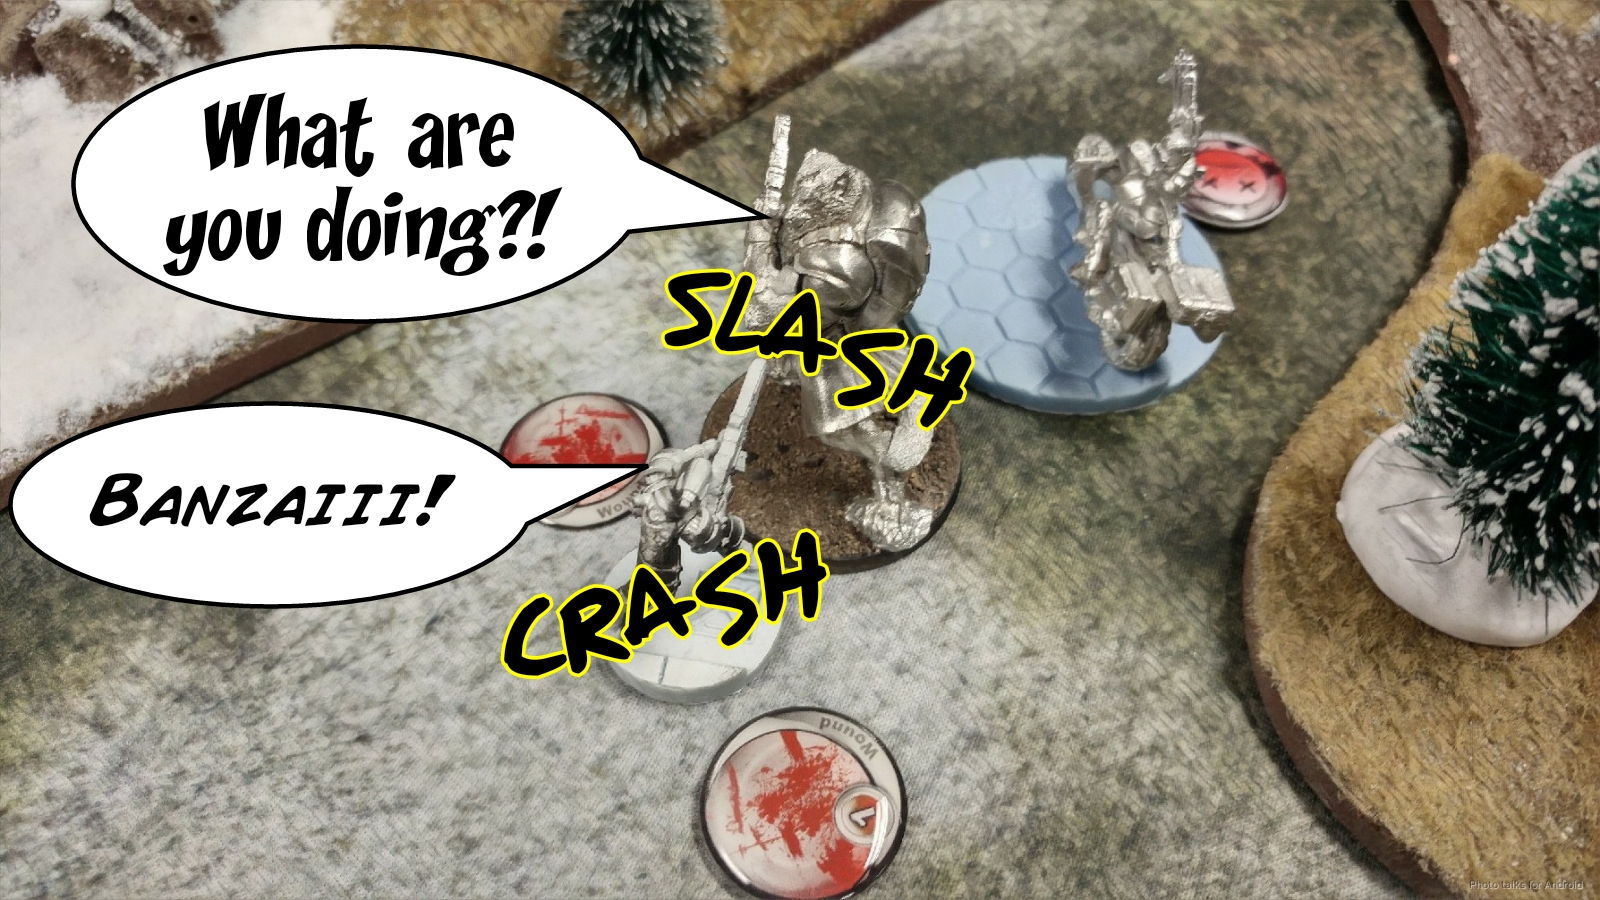 I use my Kempetai’s lieutenant order to get him close to Yuriko and the Keisotsu FO, reform the link, and then try to get my classified, In Extremis Recovery, off of McMurrough. I forget that I get a +3 WIP for this, and spend three orders walking each member of the link into base to base with McMurrough and fail each roll. Of course, I actually pass a roll with Yuriko as she walks by, and we figure this out at the end of the game when we’re doing scoring. I don’t have enough orders to really do much of anything else at this point, so I move the link up into my near zone, just to add a points buffer against Jordan, and the move the Oniwaban forward, into cover and what I hope is the middle, where I hope the Ryuken-9 is.
Bottom of 3 – CHA
Jordan throws his remaining Galwegians at my forces, and through a bunch of lucky dice rolls for me and some convenient mines, I survive all of them, with the Kempetai shooting the Galwegian and tanking the chain rifle and Yuriko dodging successfully.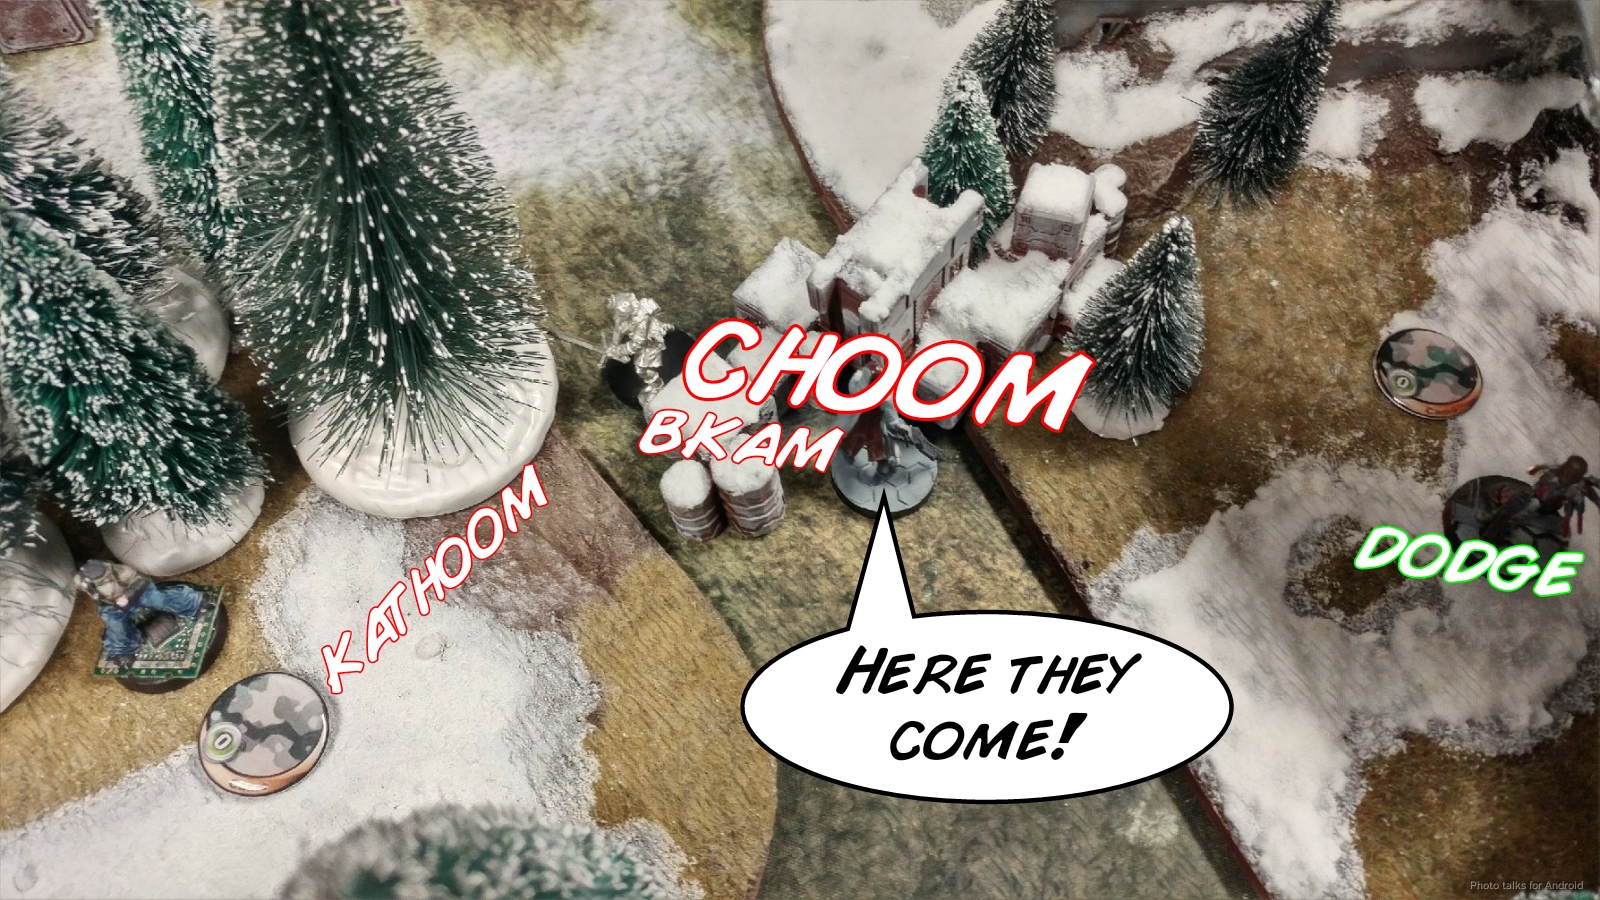 Jordan’s plan is to remove as many points in my near section, so he tries to get rid of my Kempetai with his Grey AP HMG, but fails. I fail guts out of LoF.
 He pushes another Galwegian up and throws smoke against my Ryuken’s shock SMG shot. We both roll 11s, so nothing happens.
 This does mean that Wallace’s path forward is now at risk, so Jordan gets him as close to breaking into the Ryuken-9’s LoF as possible before using Wallace’s coordinated order to move his remaining SAS forward.
 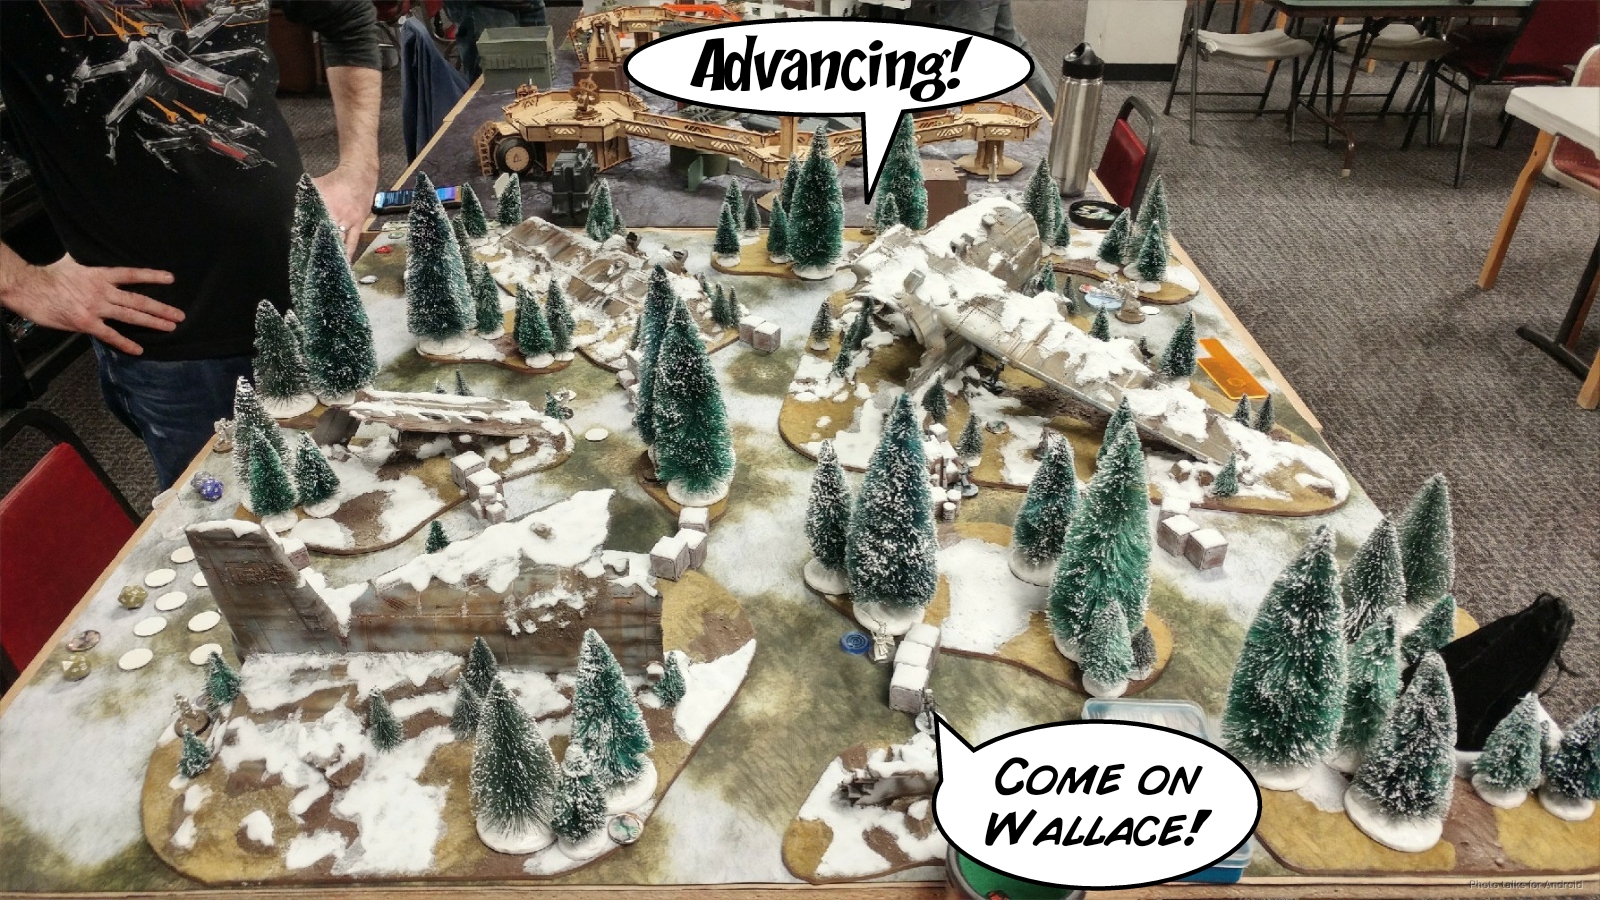 Funnily enough, this move cost him the game. We both measure the three zones. Moving his SAS forward put it solidly in my near zone, where Yuriko, the Kempetai, and the Keisotsu easily out-point it. Sadly, my Ryuken is also in this zone, and not the middle, where no one is save our two Xenotechs. My Oniwaban can’t out-point Wallace, a Scots ML, and a Grey AP HMG, so Jordan has his near zone. Since we’ve both dropped a Multiscanner, it looks like a 2-2 tie until we re-read our classified and find out that I have a +3 to WIP on the roll, making it a
3-2 Japanese Secessionist Army Victory!
Post Game Analysis
I’m changing up the format of the after game “Notes” section. I found it a little too constraining and wanted to write in free form prose instead of bullet points. I was finding myself starting to dislike starting to write the Notes section, often leaving it till the next day after a late night of writing up the actual battle report itself. In any case, I’d like to start this inaugural post game analysis section by offering a congratulatory note to Jordan, who has really improved his Infinity game in general. He’s focusing more on objectives and setting up plays for subsequent turns, whereas just a few months ago his play felt very reactive and sometimes a little too focused on shooting things or removing a red herring, high-aggro threat, so to speak. I was also really impressed with Jordan’s use of Wallace’s inspiring leadership order to effectively give everyone a crappy version of NCO.
I won the roll off and ultimately decided to go first. Again, my primary goal for this game was to be hyper aggressive with the O-Yoroi, just to see how far I could push it. To that end, I held the TAG in reserve as opposed to the Oniwaban. I suppose that knowing I was going to face CHA, holding the Oniwaban in reserve to go after Wallace was a reasonable option. Now that I’ve checked the math in the Infinity Dice Calculator, it turns out that I would have a whopping 78.23% chance to lightsaber Wallace in the face compared to Wallace’s paltry 7.42% chance of fighting me off (assuming Surprise Attack). HMMM. This is very interesting indeed. I thought Wallace has Natural Born Warrior, but he does not. Well, this really makes me respect the Oniwaban.
In any case, the TAG really did a fair amount of damage. It could’ve easily smoked the Warcor, I just wanted to completely avoid the risk of getting my fancy TAG flash-pulsed and instead used the Ryuken (also used it to get some movement for the Xenotech). So, the TAG alone accounted for 7 kills over the course my first turn. I think I probably should’ve gone after the Highlander Grey AP HMG to get it off the table instead of Wallace, and sent in the Ryuken-9 on turn to to go hunting Wallace, but that was going to be a lot of orders. I sort of had to leave the safety of the saturation/low-vis zone to ensure a template would hit the Cateran–there was no way I was going to leave that thing up and alive if I could help it. I got really lucky with all the TAG’s armor rolls, but I suppose that’s the point of a TAG…
I’m also not entirely sure I like the Ryuken-9 as Xenotech handler. It was a marriage of necessity in this case, but it restricts my ability to throw both Ryuken-9 into suppression with a coordinated order. I have plans for this list to rectify that. Adam brought up the excellent point that JSA are basically a “vanilla” faction. They have units that no other faction has, and I’m not obligated to use a link if I don’t want to. I’m going to continue trying to try and refine a link-light JSA playstyle.
Also, can we talk about the ridiculous resiliency of CHA? I wiped out this on my first turn:
Kill Count
That’s literally 1/3 of Jordan’s list and almost half his orders, and he won the game. Technically I won, but all he had to do was not walk his SAS forward on his last order and the victory was easily his. In my mental record keeping, I’m definitely counting this as a win for him. So what happened? Well, there were a few main threats in Jordan’s list:
- McMurrough
- 2x SAS CRAP
- AP HMG Grey
- 4x Galwegians
- Cateran
- 2x Scots Guard
Of those, the ones I can more or less control my exposure to are the AP HMG Grey, the Cateran, and the Scots Guards. I can’t really stop the SAS, the Galwegians, or McMurrough thanks to my limited board coverage (thanks to the giant plane and my link placement) and their smoke/marker states. If I just null deploy against the shooty stuff then I more or less don’t have to deal with it, or make Jordan work to get a shot, which while crappy is sorta in my favor. I think I prioritized the kill count and not going after the key pieces, which I think in this case are McMurrough and Wallace. As I write this, I’m saying to myself, “but what about the Scots Molotok?” And yes, that’s also a big threat. Fortunately several tons of Japanese mecha plastered it.
So how do I deal with these threats?
- Minelayers are a good start–I flubbed my placement on the mines, and I won’t be doing that again. I need to use the mines to screen the Ryuken, and not the mines to backstop the Ryuken. Mines are the first line of defense, in other words. So next time, I’ll have better board control. However, mines are single use, and CHA has deep order pools and a multitude of angry Galwegians to just throw at you. So I need more.
- I need to attack the order pool as well, to restrict the the amount of forward movement that can happen. It’s not terribly important to take out a Volunteer chain rifle in the back (yes I know it is Tony, I know you love suiciding them in, but I have to prioritize something!). The best way to do this in this scenario is to take out big threats. It’s not like facing an Avatar list where you can kill a bunch of goons and then the Avatar is mostly defanged. Everything in CHA is a killing machine. Removing McMurrough and the Scots Molotok would’ve been a great start. I managed to take out the Cateran, which was a much less important threat long term. It was high threat short term to my TAG, and it wasn’t too costly to go after it, so I don’t think that was a mistake, more a happy coincidence.
- I needed to improve my defense in depth. A few simple things would’ve helped here–deploying my link covering the approaches better would’ve been good, as well as putting the Ryuken into suppression. Simply pushing Yuriko’s mine towards the likely approach around the nose of the plane would also have helped, but I suspect that because I put the mine under the wing of the plane it forced Jordan to come around the nose.
That’s a lot to digest, and there’s still a lot to think about from this game. Sure, the silly be in the right scoring zone thing (for both of us) is something to consider, but that’s not really a learning exercise, more of a funny anecdote that hopefully won’t reoccur. If I had to condense my current thinking into a list of priorities for a future game against CHA, it would be as follows:
- Deploy with explicit thought towards implementing defense in depth.
- Kill Wallace.
- Plan ahead for objectives and improving or repairing your defense in depth.
- Destroy as many regular orders as possible, prioritizing high mobility threats like McMurrough, or threats that are already advanced, like SAS. The latter may be mitgated via mines, if necessary.
However, in the context of the game at hand, I think the biggest thing that would have reshaped the game would have been to spend more orders on the link in Turn 2. I could’ve used them aggressively to push forward and remove some of the important threats. The Scots ML really made that difficult, but not impossible. I think I could’ve overwhelmed it with dice from the Domaru, and then gone after McMurrough and the SAS on the right after the Oniwaban had dealt with the SAS on the left. I’m really liking Yuriko, and I think I’m underutilizing her capabilities currently. Pushing her up and laying more mines in the midfield would have been stronger. Also, going after the AP HMG Grey would’ve been a valid thing as well. This would have put me in striking range of Secure the HVT, leaving me Turn 3 to drop the multiscanner. I had some redundancy there, thanks to the Oniwaban. Thanks for following along with my rambling. Hopefully you found it useful. Thanks for reading!
Further Discussion
Some folks on the Internets have asked some pretty insightful questions, so I’ll reproduce our conversations here, in their entirety, edited only for formatting.
WiseKensai
The plane table is monstrous. It really disrupts your usual thinking and play style. I don’t do a huge amount of discussion in the battle report, but this is a warning to prepare yourselves!
Joseph Yull
What do you mean?
WiseKensai
Well, the most noticeable thing is that most of the table is a saturation/low-vis zone. This significantly disrupts your internal estimates of how face to face rolls should go, and degrades the ARO performance of link teams.
It also is surprisingly dense, in a weird way. Depending on setup, there can be some longish firelanes where traditional tools like HMGs and such would do well, but you can also do things like sneak a TAG all the way into the opponent’s deployment zone if you’re careful.
I don’t think that we’ll encourage that sort of outcome often, but we’re still learning how to set up the table properly to balance as many of Infinity’s complicated mechanics as we can. This game had the table dense enough to make DTWs king, but I can see a more careful table setup where there are dedicated long firelanes.
We’ve been toying with the idea of adding more dangerous terrain–the other tables that are part of this mega Ariadna board will include things like minefields, so perhaps we can use that to shape the table a little more.
I’m perhaps engaging in a bit of hyperbole/click-baity-ness on the internet. A more measured blurb would have been: This table has been a big departure from my infinity comfort zone, so it’s been quite a challenge. I’m enjoying it immensely, but expect a similar experience when you play on it for the first time. Hopefully this clarifies things.
Joseph Yull
We’ve been toying with the idea of adding more dangerous terrain–the other tables that are part of this mega Ariadna board will include things like minefields, so perhaps we can use that to shape the table a little more.
Careful with that, those rules were never really adapted for N3.
Hauke Ahm
What are your thoughts about the intention of lists with a small order pool? You listed it in your notes, that your defense was not as good, as it should have been and the issue of defense came up for me in my own games with just 10 orders, too.
So would you consider to redirect your gameplan a little bit to a more defensive plan, with all the draw backs, but wasting the opponents orders?
WiseKensai I don’t think it’s a problem with my list, if I’m understanding you correctly. There is one minor consideration, which is that the legal models to sync the Xenotech I believe are just the Ryuken and the TAG. I didn’t want to use the TAG, since I was planning on suiciding it into my opponent’s DZ, so I was stuck with the Ryuken. This meant that suppression costs 2 orders, not one since one is no longer a valid member of a coordinated order.
The list itself has three minelayers, so I don’t think I’m light on board control. It’s certainly not as heavy as say, a Nomad list with double Moran, double Zero Minelayer, double Lunokhod, and some Morlocks/Jaguars, but as you’re probably thinking, such a list is probably not a 10 order list.
I do think that one needs to plan for orderless defense in a 10 order list though. Things that you’d ordinarily find a non-issue, like buffing a remote before attacking, throwing smoke before attacking with MSV2, etc, are now quite costly in a 10 order list. The same goes for doing things like going into suppression, dropping mines, repositioning, and so on.
So, I think there’s two things at work here:
- Bring stuff that has orderless defense capability, like minelayers, Koalas, total reaction/neurocinetics (TR preferred since they’re more generally useful in a 10 order list), link teams, etc.
- Position those things that you brought smartly, to create a layered defense in depth.
I think I did a reasonable job on #1 above, but not a good job on #2. Concretely, what I should have done was:
- Put some members of the link into the trees at the back right of my DZ, to cover the approach around the plane’s nose.
- Deployed the Ryuken a little farther back, perhaps in a forest zone, with the mines in front and too far apart to have both be covered by a spec fire template, and deny chain rifle templates if possible.
- Put Yuriko’s mine right around the corner of the plane’s nose, forcing either a mine tank or a dodge when a Galwegian runs around the corner.
- Tweak the list to get a valid sync option that isn’t a Ryuken, so I could’ve thrown them both into suppression. I think this last one is relatively minor.
- And as I said in the report, prioritized developing the link’s position instead of dumping my turn 2 (relatively intact) order pool into the Xenotech. I was pretty concerned that the Chain Rifle Volunteer that survived the TAG rampage would come screaming up that side, so it got in my head a little.
Hopefully this helps. I’ve written up some more of my thoughts in the Bromad Academy Mission on Limited Insertion here:
- Mission 004: Limited Insertion, Maximum Entendre
- Mission 004 Update: Tip of the Spear
- Mission 004 Report: Extraction
Hauke Ahm
That are some important points, you mentioned, thank you very much!
Now I am wondering, if you feel comfortable with the TAG as suicidal rambo and then just situational attack-pieces left, because of a higher investment in the board-control section.
WiseKensai
You’re welcome!
Short answer no, I don’t feel comfortable with TAGs in general yet. I have a very short list of games where I’ve actually put a TAG on the table and it did something interesting.
Long answer: I think TAGs are really vulnerable and high variance, and I haven’t found a consistent way to slot them into my playstyle that’s comfortable for me. What do I mean by that? For example, if your opponent has E/M and knows how to use it, E/Ms your TAG and kills your engineer, it’s game over. If they don’t know how to handle a TAG, or make a deployment mistake, they can lose 8 orders on the first turn (like in this game). In other words, it’s really swingy. I tend to favor a more consistent playstyle, where I can get a more middle-of-the-road benefit out of my units.
I think eventually I’ll get to a point where I am comfortable with TAGs, which I currently think comes down to 1) knowing when to stop ramboing or when to continue. 2) Having the right support pieces in the list.
I think this list is pretty reasonable in terms of supporting the TAG. It can certainly be better, and I’m fussing around in Army trying to get there, but if you’re looking for a list that has board control to support a TAG suicide rambo, this one demonstrably works.
And, at least in JSA, I don’t think you need to sacrifice attack power for board control. The link I took can be changed around a bit to better support board control, but what I’m really getting after is the Ryuken-9, which is both an attack piece and board control. Other similar pieces out of Nomads, my most comfortable faction, would be all flavors of Moran, Taskmaster Red Fury, Zero Minelayer, Spektr DepRep, Lunokhod, etc. In Ariadna, one need look no further than the Chasseur Minelayer (she’s AWFUL to deal with)… you get the idea.
I don’t really consider Ryuken-9 situational attack pieces. I’d classify something like a Morlock or Galwegian as a situational attack piece. They don’t have the tools to reliably get up the board and into the opponent’s backfield unsupported. At the very least they need another smoke-throwing warband to cover their approach, and it can take a turn or two to get there.
In active turn, a Ryuken-9 falls apart against MSV2 and burst mods, but otherwise has an answer to just about anything else. High ARM? AP. NWI? Shock. Ariadna? Double breaker pistol. And the X-Visor makes it a terrible opponent. I really see it as the tool that has replaced the standard linked HMG that other factions rely on. Yes, the O-Yoroi and the Keisotsu HMG exist, but the Ryuken is cheap and reliable enough to show up in all your lists. Again, I’m looking for consistency. Keisotsu HMG is good, but needs a lot of support.
Here’s a game which illustrates what I mean about attacking with the Ryuken. I also did a much better job of prepping for the Cameronian here:

In reactive, ideally you’d have thrown one into suppression and placed your mines correctly. If your opponent doesn’t have visors, DTWs, camo CC specialists, or lots of smoke to deal with it, it’s a nightmare to dislodge. -12 to BS before range mods. It’s gross and is one of the current queens of board control… it just takes a fair amount of careful positioning and 1-2 orders to move there and go into suppression. So it’s pretty balanced from that perspective.
I think I’ve rambled enough. Hopefully this answers your question.
Hauke Ahm
Yeah of course, thats an answer to my questions! Now I have to think a little bit, how toconvert your thoughts and experiences to my playstyle and problems (which are a little bit different, because I am fielding MO, but the plan behind is similar).
WiseKensai
If you haven’t already, do consider taking a Peacemaker in your lists. They provide a lot of midfield control, and an Auxbot is kinda like a mine… two Peacemakers really complicate deployment due to the Mechanized Deployment restrictions, but I wouldn’t rule taking two out simply on that basis. I don’t have a ton of experience with MO, but I can say I am very jealous of your access to Peacemakers and the Crusader MULTI + LFT…
Owen Hermsen
Great writeup and analysis as always! Very few smaller forces can play well against CHA. I’ve been practicing against them a lot for a Satellite over here, but at 400 points, where the attrition effect is even more pronounced. Playing Nomads I found an MSV2 trooper vital, a TR bot helpful to draw out snipers (whom you then HMG to death) and one’s own chainrifle chaff vital. For you, might waiting until those cheap charger troops depart and then going on an Oniwaban rampage work best? Seems like the O-Yoroi did geeat work though, and that you played to the scenario well. It really is an uphill battle against CHA unless you can build specifically to them.
WiseKensai
Thanks! For that plane table an Intruder would really do some damage. I might even consider leaving the MSR out to ARO, which is something I rarely do. Morans and Zero Minelayers are also quite strong because of the low-vis dodge penalty. Makes me miss my Nomads.
I really like your idea of waiting a turn for the Galwegian bubble to “pop” as they run away, then running the Oniwaban in. That’s a great observation, and I didn’t really think about it. I was too busy focusing on a full-on first turn crippling alpha strike, but hidden deployment really lets you be patient.
I’m considering some lists with TR bots in JSA, along with the Kempetai MSV2, but it’s quite difficult to fit all the things in, especially with the additional SWC tax on the TR bot. I wish JSA had some chain rifle chaff, but that would ruin their character… Thanks for the feedback and the ideas!
Owen Hermsen
All good ideas, if they can fit. Glad you have the Ryukens at least. CHA’s almost as much of a bugger as TAK. MSV2 to ARO isn’t a bad idea but beware of getting ranged by the Cateran. Having a warcor sitting behind/above/by can help either prevent multiple rounds of shooting or at least split the bursts up.