Koala Space Program
Fresh after my drubbing from Obadiah in Mindwipe…
a freshly fully vaccinated Erik stopped by to do some RCR Lite 2021 preparation. We decided to both make two lists and just roll for which of the five missions we played, and we got Mindwipe! I’ve done some more work on my Blotz crashed space ship terrain since Adam last played on the table.
There’s much more smashed spaceship now!
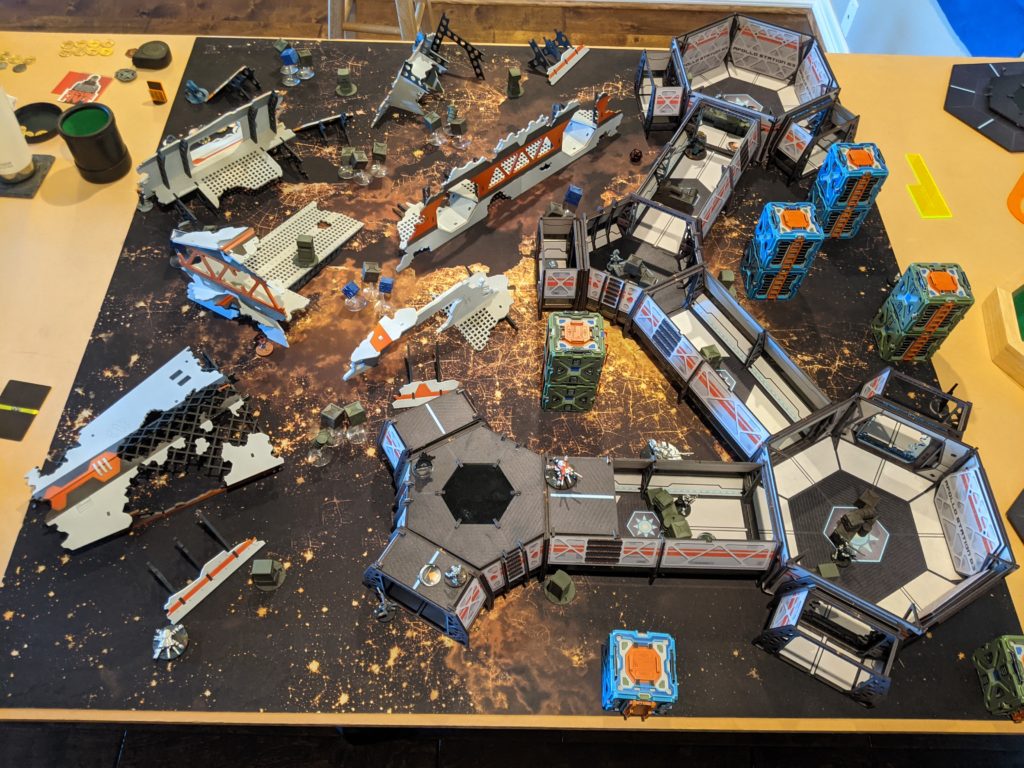
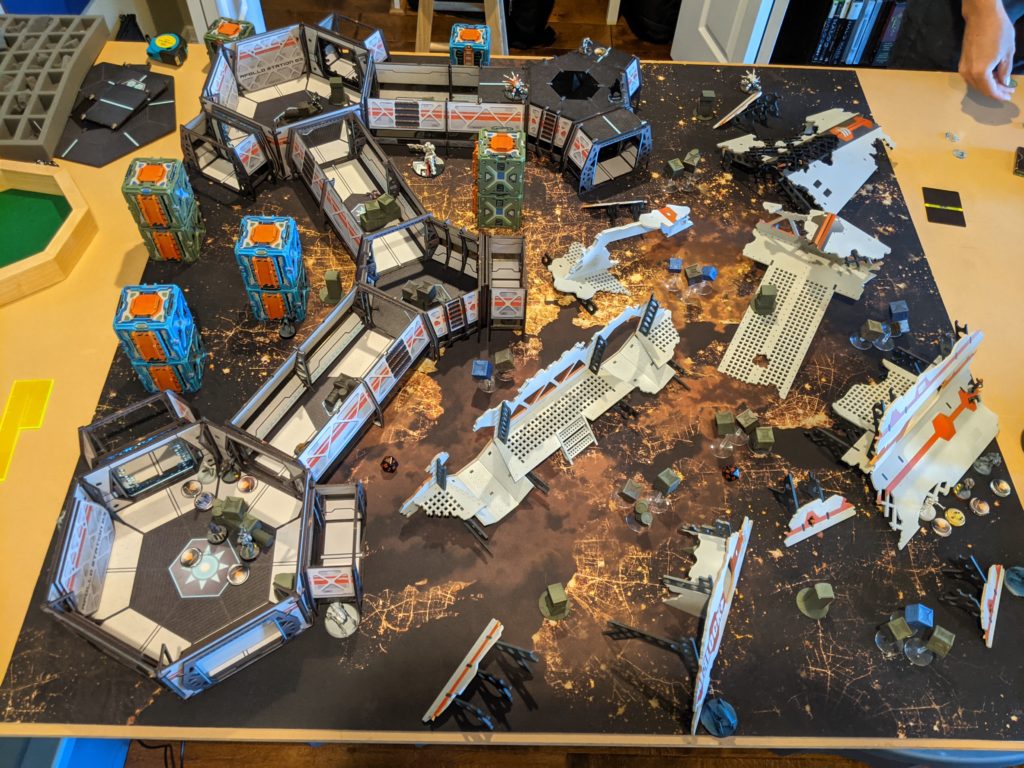
I kept the corridor system mostly the same, as I really do like the physical setup of it and the firelanes it generates.
Overview
- Mission: Mindwipe
- Forces: Jurisdictional Command of Corregidor versus PanOceania (300)
- Deploy First: Corregidor
- First Turn: Corregidor
As I said in the last battle report, the beatings will continue till morale improves, so I’m playing the same list. I organized the fireteams a little differently, and definitely made a mental note to protect my Brigada better.
Objectives
GROUP 1
9
MOBILE BRIGADA (Lieutenant) Boarding Shotgun / Pistol, CC Weapon. (0 | 32)
TSYKLON Feuerbach, Pitcher / PARA CC Weapon(-6). (1 | 36)
VALERYA GROMOZ (Hacker) Combi Rifle, Zapper, Pitcher / Pistol, CC Weapon. (0.5 | 21)
JAGUAR Adhesive Launcher, Panzerfaust / Pistol, DA CC Weapon. (0 | 11)
DAKTARI Combi Rifle ( | MediKit) / Pistol, CC Weapon. (0 | 14)
EVADER (Engineer) AP Spitfire, D-Charges ( | GizmoKit, TinBot: Firewall [-3]) / Pistol, CC Weapon. (1.5 | 34)
JAZZ FTO undefined / undefined. (0.5 | 19)
GROUP 2
CARLOTA KOWALSKY Breaker Combi Rifle, Light Flamethrower, Adhesive Launcher(+1B), D-Charges / Pistol, CC Weapon. (0 | 30)
1
1
MORAN (Repeater) Combi Rifle, Flash Pulse, D-Charges, Crazykoala ( ) / Pistol, CC Weapon. (0.5 | 17)
TRANSDUCTOR ZOND Flash Pulse / PARA CC Weapon(-3). (0 | 7)
VERTIGO ZOND Missile Launcher / PARA CC Weapon(-3). (1.5 | 17)
McMURROUGH Chain Rifle(+1B), Grenades, Smoke Grenades / AP + DA CC Weapon. (0 | 27)
6 SWC | 299 Points | Open in Infinity Army
Erik’s been on a vanilla PanO kick lately, which I’m a big fan of. RCR has a 12 XP SpecOps option, so Erik built a mega specialist on an Acontecimento Regular chassis. The list itself is designed to maximize the utility of Joan’s free coordinated order and push Joan forward to get her EXP CCW into range of the Mindwipe servers.
Mindwipe
GROUP 1GROUP 2
JOAN OF ARC (Lieutenant) Spitfire, Nanopulser / Pistol, EXP CC Weapon. (1 | 50)
BLACK FRIAR FTO (Sixth Sense) Heavy Rocket Launcher, Nanopulser / MULTI Pistol, CC Weapon. (1.5 | 25)
WARCOR (360º Visor) Flash Pulse ( ) / Stun Pistol, PARA CC Weapon(-3). (0 | 3)
HELOT MILITIAMAN (Camouflage [1 Use]) Submachine Gun, Light Rocket Launcher / Pistol, CC Weapon. (0.5 | 9)
ZULU-COBRA (Hacker, Killer Hacking Device) Breaker Combi Rifle ( ) / Pistol, CC Weapon. (0 | 28)
KRAKOT RENEGADE Chain Rifle(+1B), Grenades / DA CC Weapon, Heavy Pistol. (0 | 14)
KNIGHT OF MONTESA MULTI Rifle, Chain-colt / Pistol, DA CC Weapon. (0 | 31)
CROC MAN (Forward Observer) Combi Rifle, Flash Pulse, Shock Mines ( | Deployable Repeater) / Pistol, CC Weapon. (0 | 31)
FUGAZI DRONBOT Flash Pulse / PARA CC Weapon(-3). (0 | 7)
SIERRA DRONBOT Heavy Machine Gun / PARA CC Weapon(-3). (1 | 24)
SWISS GUARD Missile Launcher, Light Shotgun / Pistol, AP CC Weapon. (1.5 | 63)
REGULAR INDIGO (Infinity Spec-Ops) [i](CC:13, BS:12, PH:10, WIP:14, W:1, Hacking Device(Hacker), Doctor, Engineer)[/i] Combi Rifle / Pistol, CC Weapon. (0 | 11)
PALBOT PARA CC Weapon(-3). (0 | 3)
5.5 SWC | 299 Points | Open in Infinity Army
I have some reservations about the list, but I do think that it’s quite usable. There’s a lot of points in that Swiss Miss that can be spread out and used elsewhere.
Deployment
I lost the roll off and Erik chose side. After my string of losses, I consciously decided to stop before I did anything and think very carefully about my turn:
- Morans – The Morans are absolutely critical against PanO, especially when I found out that Erik was going for WIP 15 on his Lt roll (telegraphing Joan). I decided to spend a command token and hold them both in reserve to protect them. This is in stark contrast to my normal play, which usually starts with placing the Morans first!
- Links – With so many linkable troops, it’s really tempting to keep them all together for resiliency. I made a conscious decision to split them up so I could have a presence on both sides of the table.
- Brigada – The Brigada had to be protected, so I was going to make a ball of units and put him in the middle of it. Putting him in the corridor system makes sense for his loadout as well.
- McMurrough – I made a conscious decision to not run McMurrough across the table on the first turn. I decided to deploy as if I was going to, and stuck him in the corridor table.
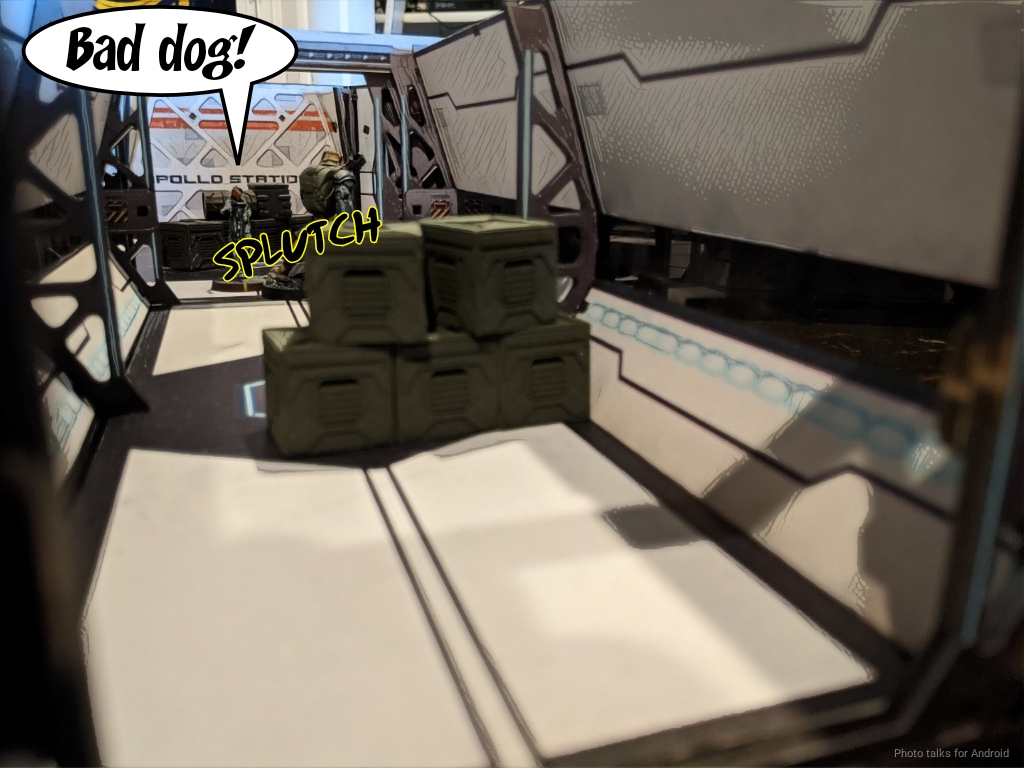
So, with all that decided, I split up the hacker ladies, with the Evader, Jazz, and a Jaguar chain rifle on the right. I figured between smoke and white noise, I’d be able to to carefully advance up the table to the objective that was in the open on the crashed spaceship ramp. The other objective was well protected by boxes and the knee of the corridor system, so I figured I’d just put a Moran nearby.
I was loathe to separate the Tsyklon and the Evader, but the Tsyklon was a natural fit to be outside the corridor system so it could use its Climbing+ and the boxes/corridor roofs to get some verticality and shots into the middle of the table if I needed to. I left the Jaguar Panzerfaust covering the approach to my link with its guns, and the Daktari and Brigada were tucked behind some crates. Not the best spot for them but way better than last game. I was a little uncomfortable with how exposed the flank of the Brigada was, and probably could’ve done something better about that. I wanted to keep him close for coherency, and I figured I’d have some warning before something came calling deep into my DZ.
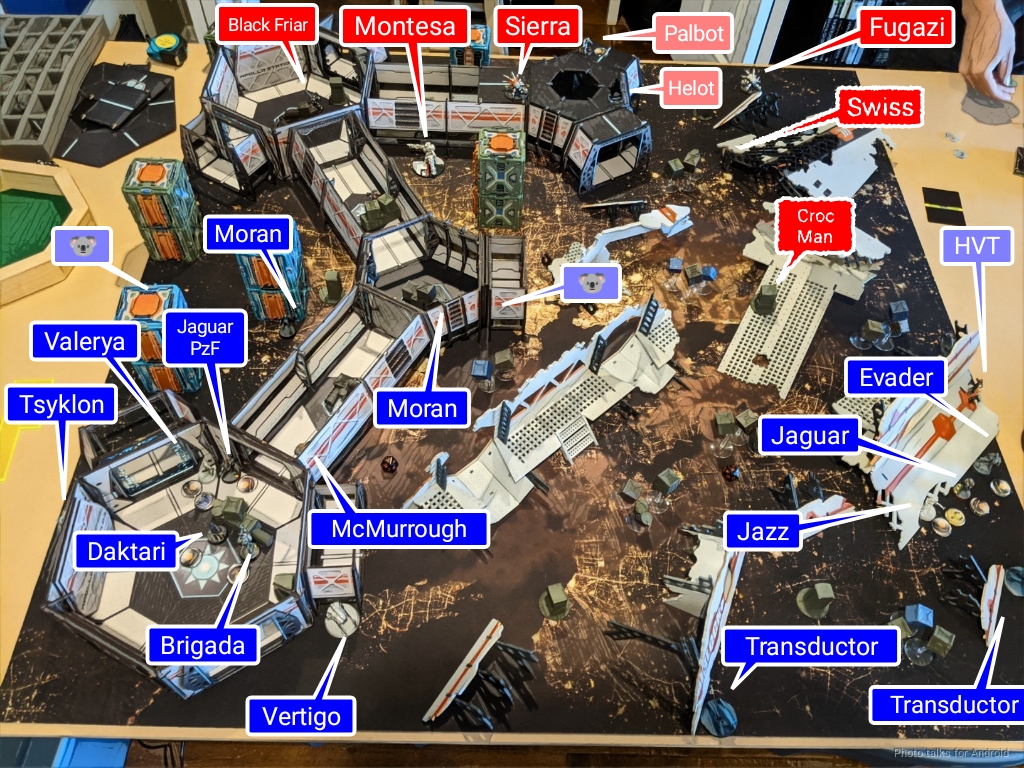
The two Transductors covered the remaining two servers (with my Brigada link on the other). I also put the Vertigo covering the very exposed console on the right, on the ramp. Erik deployed two specialists near the two consoles–the Croc Man right on top of the ramp and the Zulu Cobra near the other console, behind one of the Warsen.al Cosmica Cubes. Surprisingly, he didn’t leave much protecting the back table edge, though I did warn him about Carlota. I figured he thought the Warcor was sufficient.
He perhaps over-corrected a little in putting down the Black Friar and the Swiss to fire into the knee of the corridor system where McMurrough would have to advance. This left a pretty big hole for me to bring Carlota on. He of course had a Fugazi guarding one server, and then put a Helot and Sierra on top of the corridor rooftops to make my life difficult. Funnily enough, that Sierra went exactly where Adam’s Fugazi went! Erik’s mega-spec ops went down in the corridor, between Joan (under the Helot) and the Black Friar. I forgot to mark the Krakot’s position, but it’s in the hallway right above the Montesa, behind the crates.
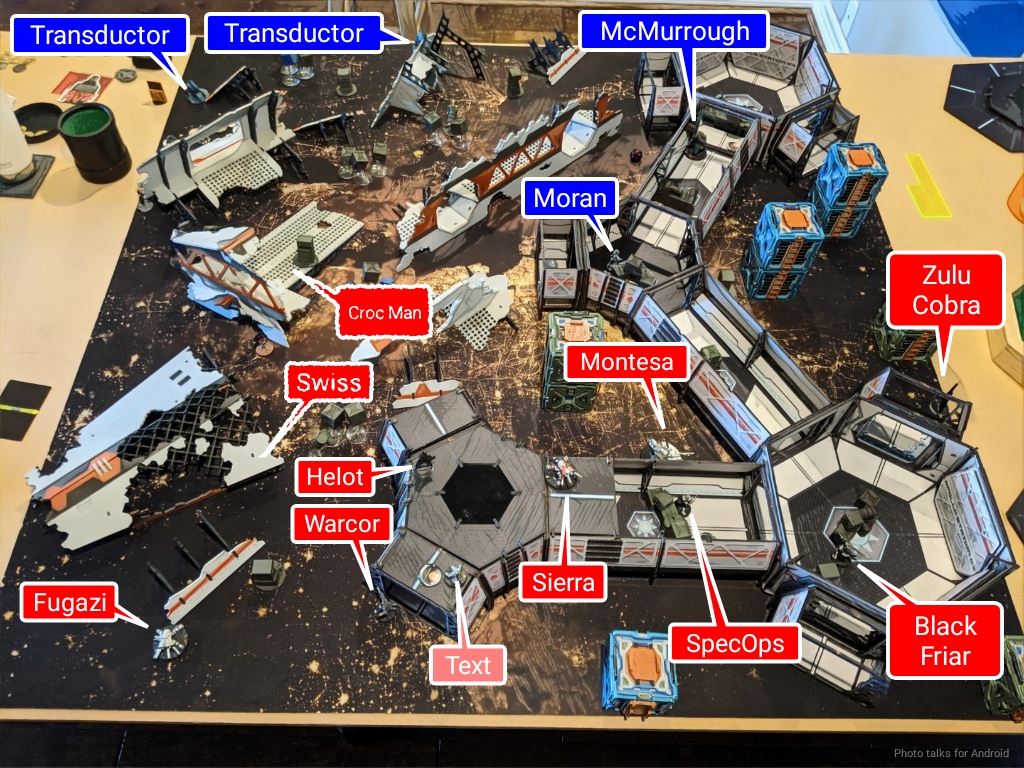
I put down both Morans out of reserve, one to contest the corridors and one to go after the console on my left. Erik’s reserve was Joan.
Turn 1
Top of 1 – Corregidor
I decided to ignore the objectives on Turn 1 and just do as much damage as possible. My goal was to clear out as many problems as I could. I had to get rid of:
- Krakot – I can’t let that guy near my link, so he needed to go. My plan was to spotlight/missile him.
- Sierra – Erik can’t have a TR bot on a roof. Cramps my style.
As a secondary goal, I figured I’d try to get repeaters as close to Erik’s stuff as possible just to annoy him. Turn 2 was going to be flip whichever console Erik doesn’t, and then set up for a run on the appropriate server on Turn 3, either by clearing a hole for Carlota or getting the Evader in there. I figured McMurrough would be dead, which was fine by me.
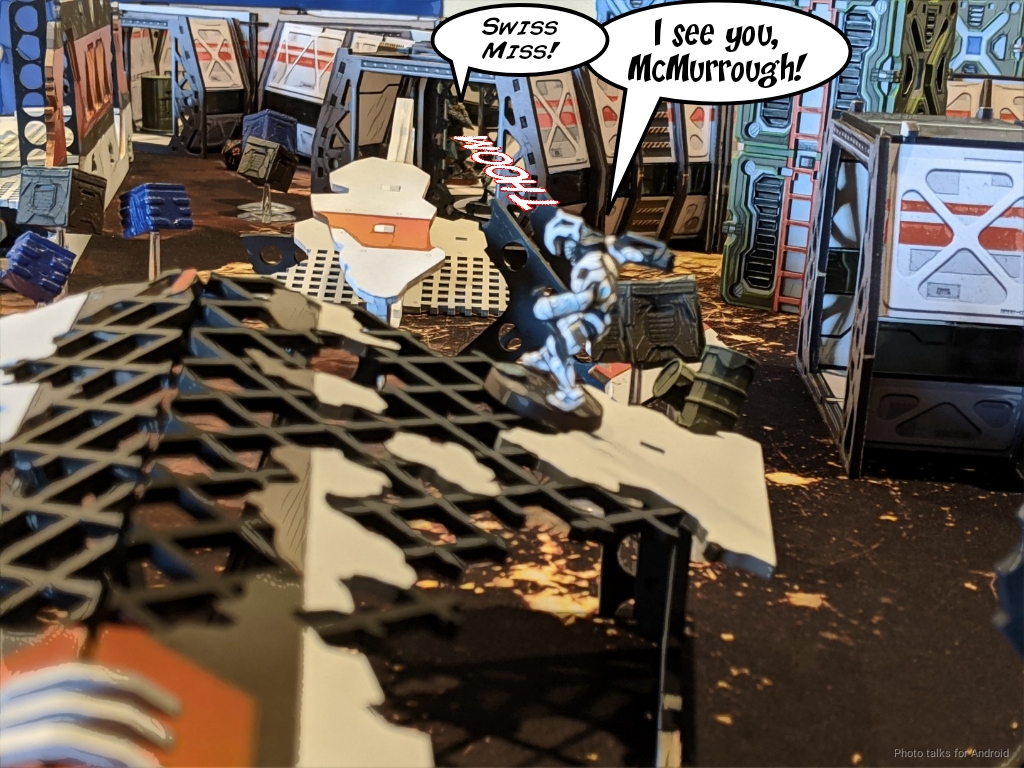
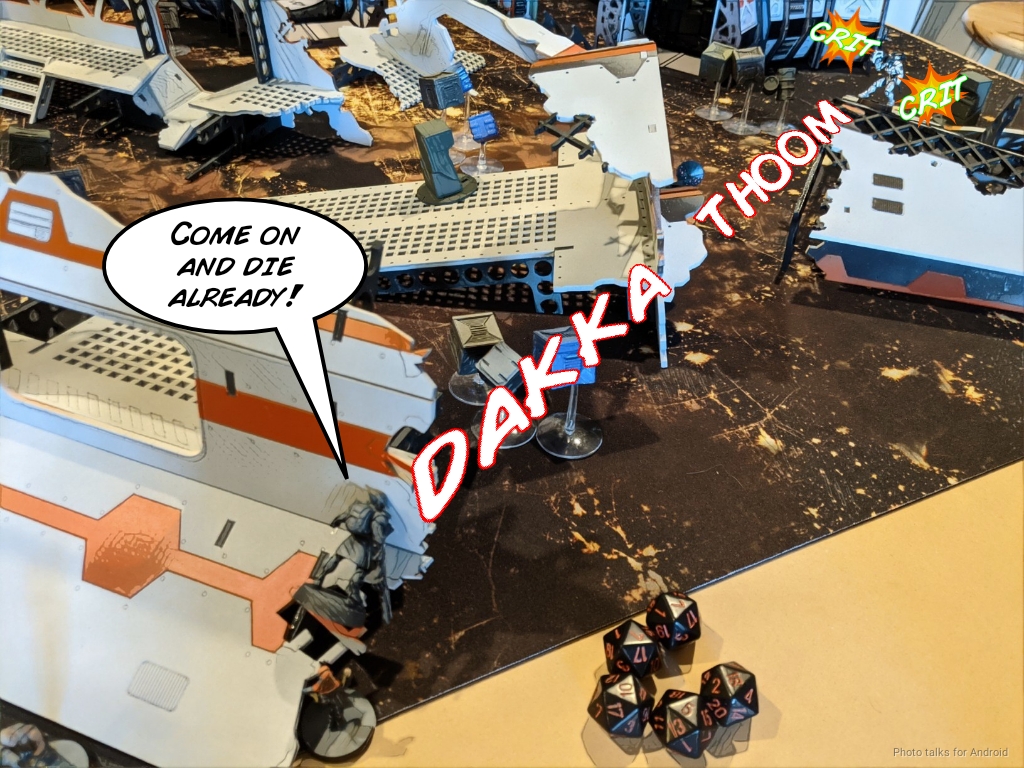
Still, I had to telegraph a run by McMurrough to keep Erik distracted, so I dutifully move-moved him… right into view of a Swiss Guard Missile Launcher! Thankfully, McMurrough tanked the hit and then threw smoke for the Moran while retreating. Okay, so far so good. McMurrough wasn’t prone behind the boxes in my corridor as I had planned, but he could always dodge prone against whatever nonsense came through if it was scary, or chain rifle something less scary. Having him up helps against the Krakot as well, just in case I didn’t kill the Krakot on my turn.
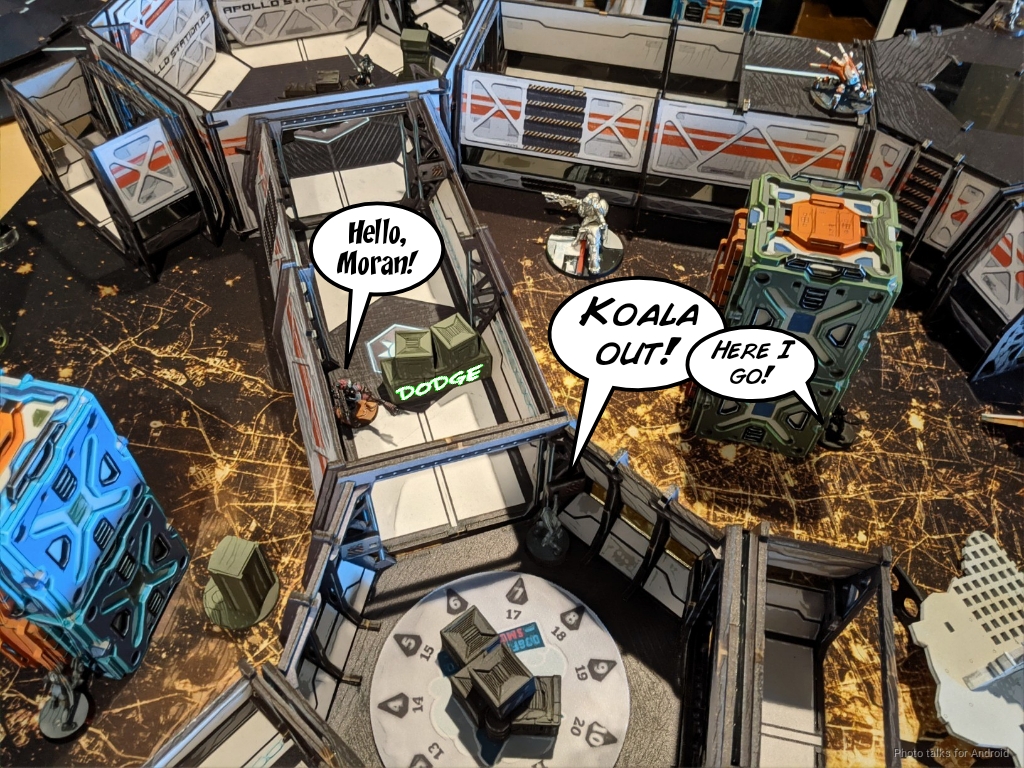
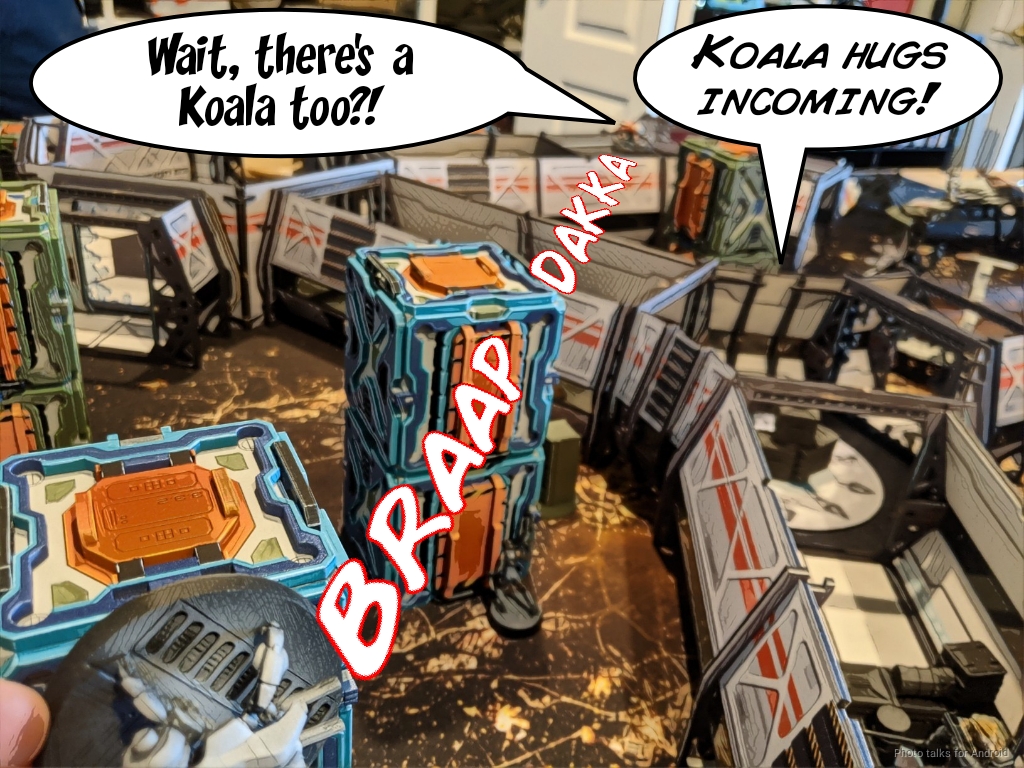
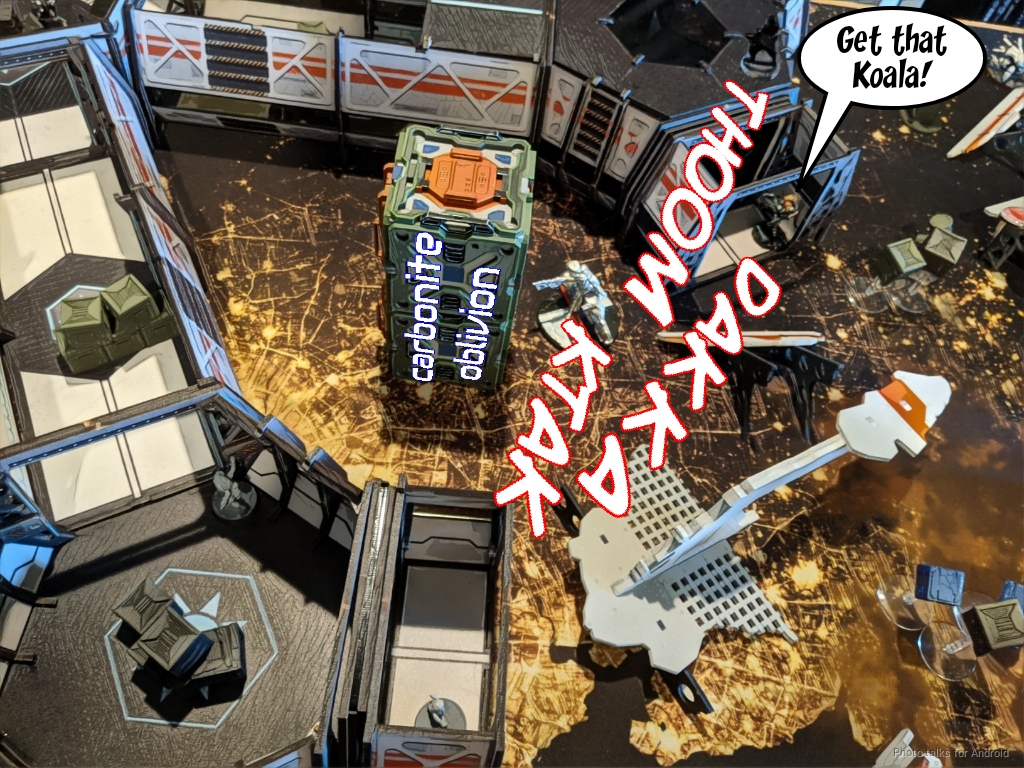
I pushed the Moran in the corridors forward, dropping a Koala right next to the Sierra as I went. This triggered a dodge from the Krakot, who was now in view and in chain rifle range. This is the problem with Morans… they’re great but they’re very squishy.
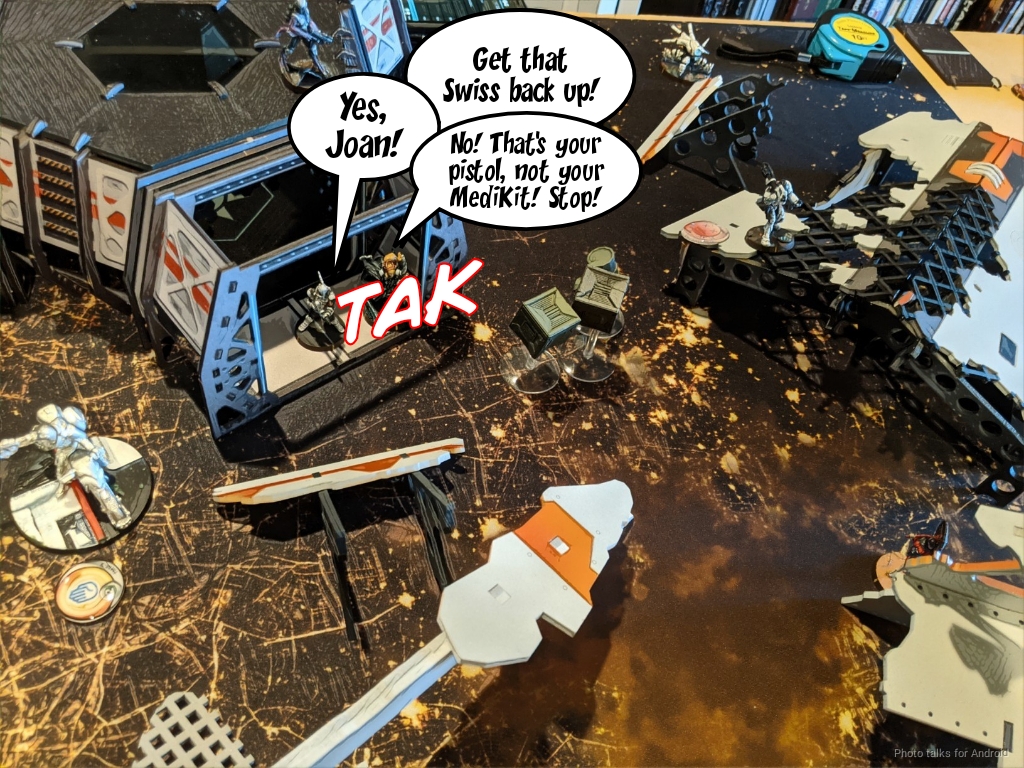
I set the Evader up for a shot on the Swiss inside 24″ while attempting a Spotlight with Jazz on the Krakot, who rolled an 11 against my 4. No good. I dumped 5 AP spitfire shots into the Swiss on 7’s… and Erik rolled an 8 while I was rattling my dice cup around. “Well, I guess I have have to crit now…” and promptly rolled two 7’s.
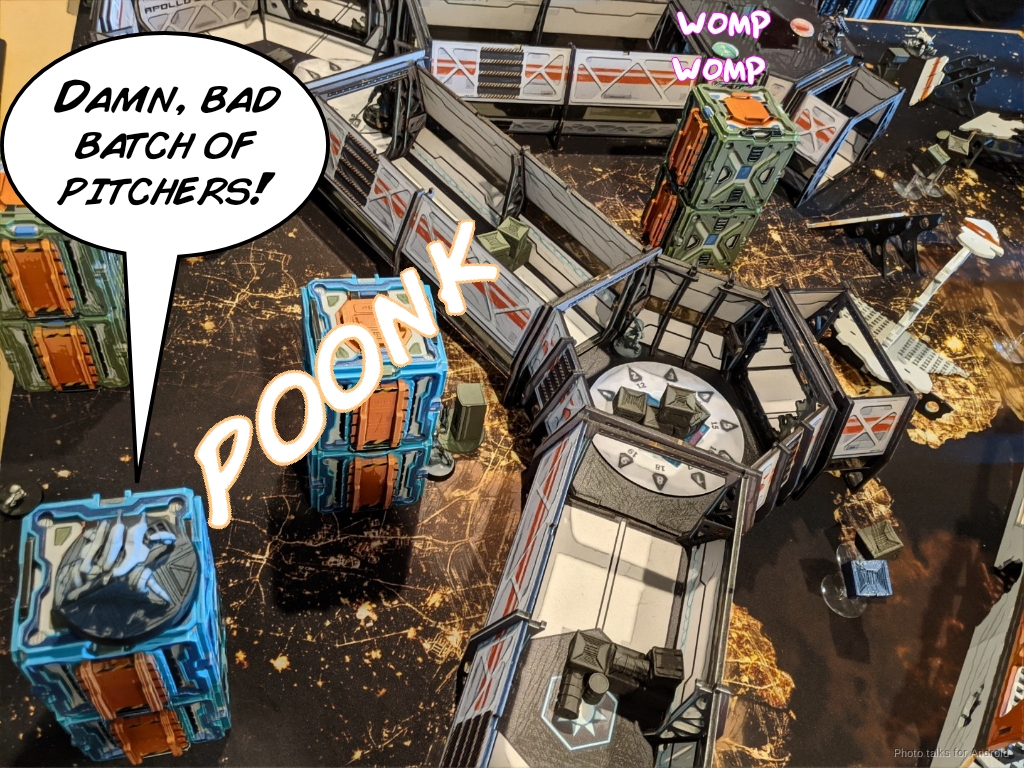
Of course, Erik passed all 4 saves with 16, 18, 18, 19. Two more orders and the Swiss was finally unconscious. I spent a few orders on the core link next, moving the Tsyklon up the boxes right outside the door while frantically trying to spotlight the Krakot with Valerya. The Tsyklon isn’t on top of the boxes, it’s on the side with the orange doors, we just put it up there as a reminder. I even threw out my last Koala with the second Moran to force an idle or dodge while spotlighting. Erik chose Idle, and then I finally succeeded on Valerya’s roll, allowing me to drop a missile on the Krakot, killing it.
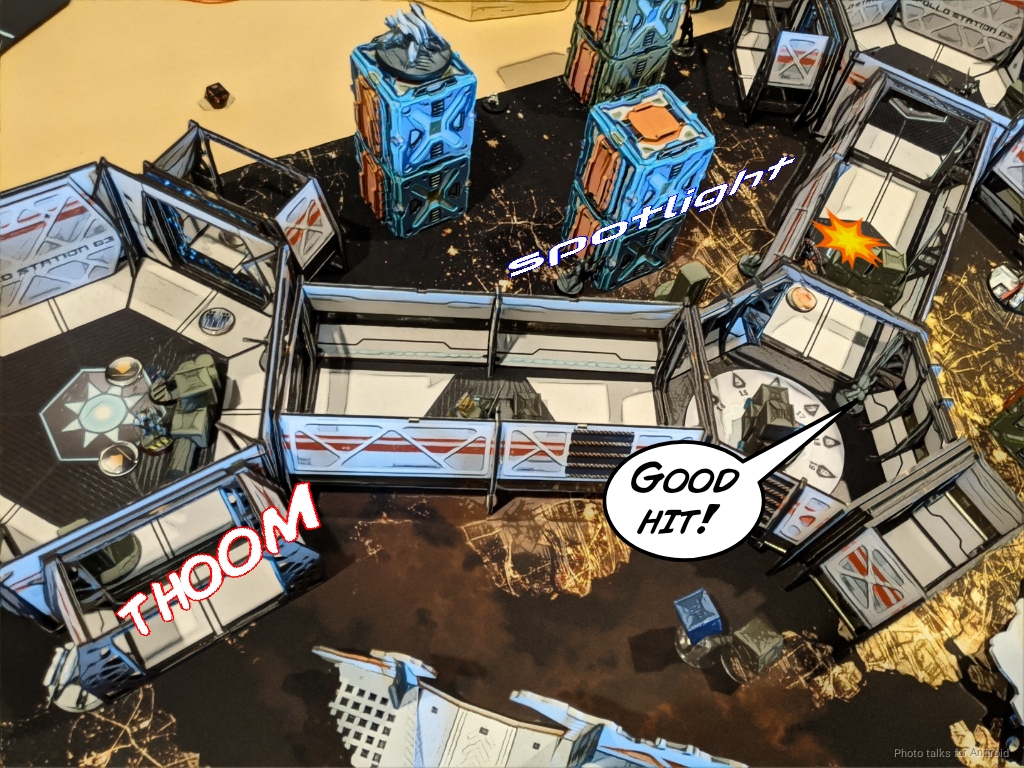
I’ve got one order left, and I had spent all my spotlight orders shuffling the link around to allow the Tsyklon to be the leader and still in coherency, so it scuttled its way up the rest of the height of the box to get a peek at the Sierra above the corridor. I managed to get two Feuerbach shots through, and the Koala did the last bit of damage to take the Sierra off the table!
I didn’t have the orders to throw pitchers out or reposition my Morans as I had wanted, but I got my two primary objectives done and killed a Swiss Guard that I wasn’t expecting. I’ll take it. The Moran in the corridors was close though to be relevant too, so I’ll call the bonus objective half complete.
Bottom of 1 – PanO
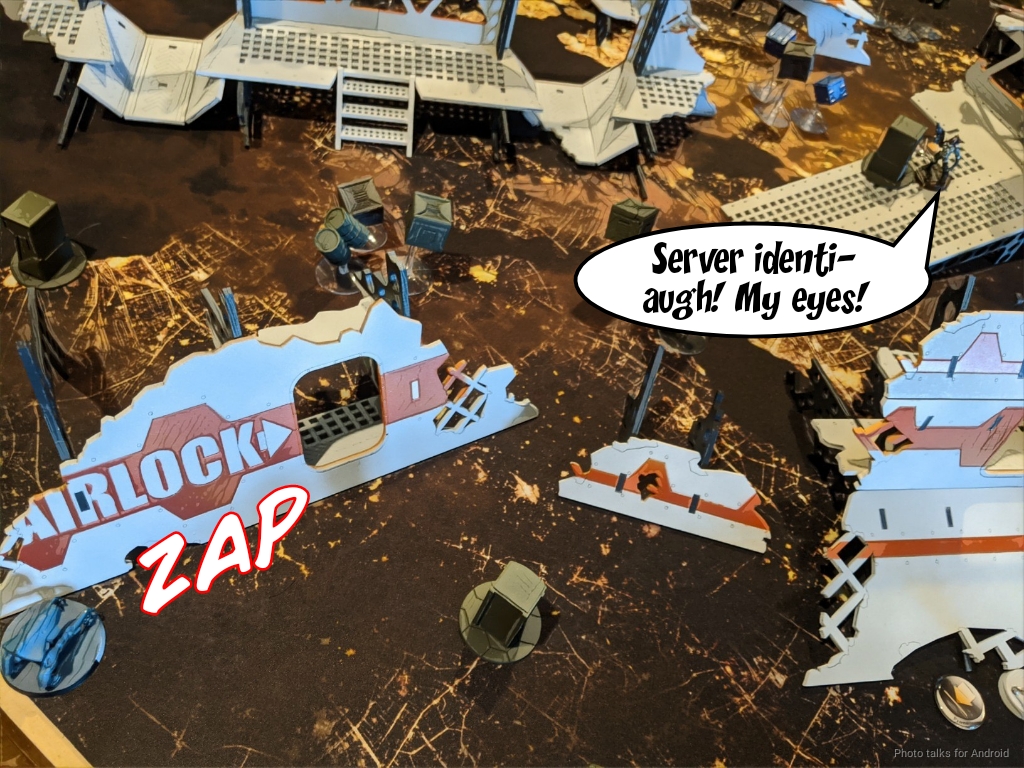
Erik didn’t want to contend with two Morans and a bunch of Koalas to get the box on my left, so he revealed his Croc Man to get the other box. I had positioned the Tranductor and Vertigo in such a way that he had to be exposed to one or the other, so he wisely chose the Transductor. I managed to flash pulse the Croc Man as it flipped the server, identifying the server right next to my core link as the one with the Rogue AI. I’ll take it!
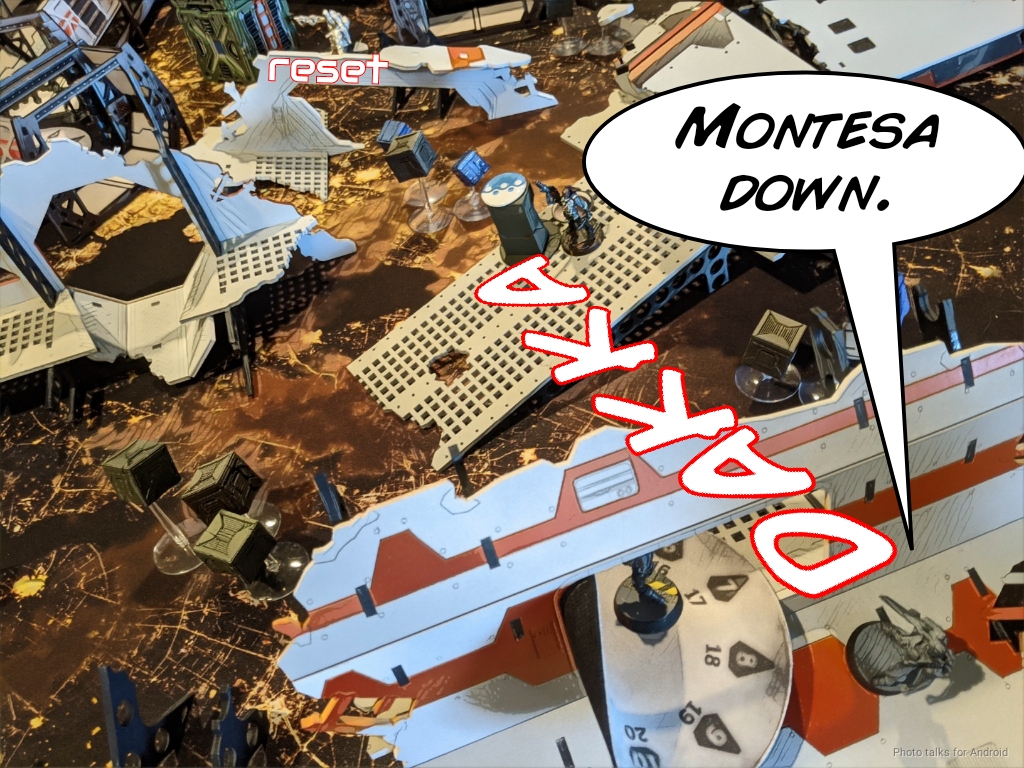
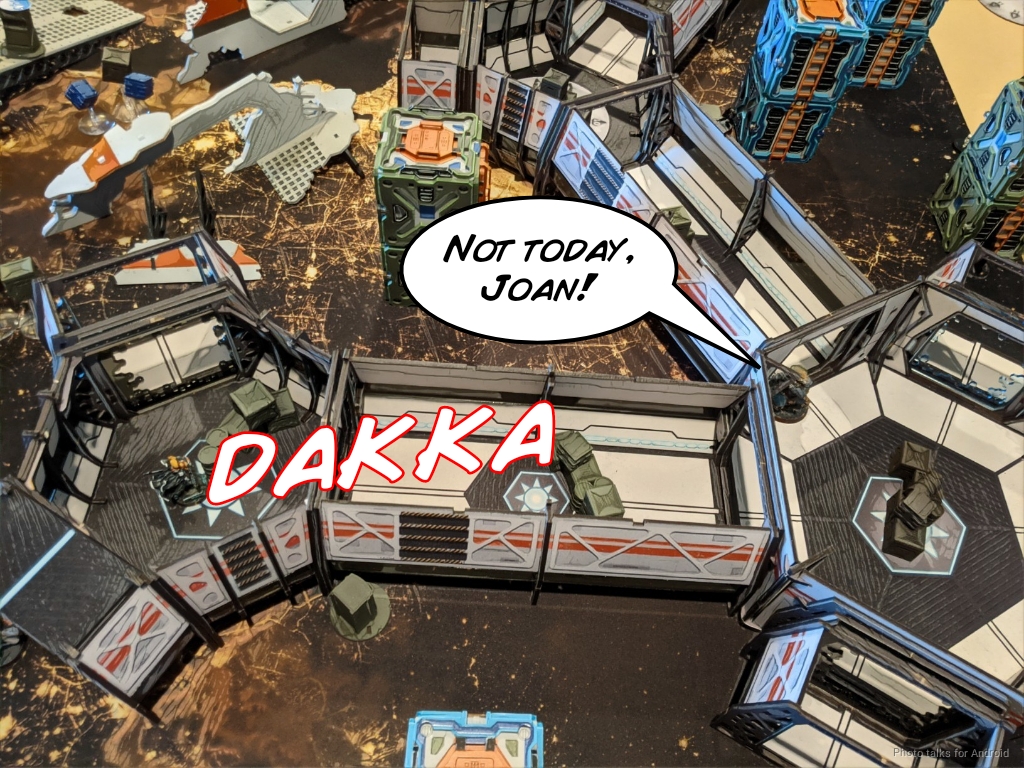
Erik had wisely forgone the Montesa’s order to avoid having to drive straight into my Moran’s repeater, but now he made a slight miscalculation and got too close as part of Joan’s coordinated order, which exposed Joan, the Montesa, and the Helot to take on my Koala protecting the side entrance to the corridors, behind the Moran. The Koala went down, but Carbonite succeeded on the Montesa where Oblivion did not.
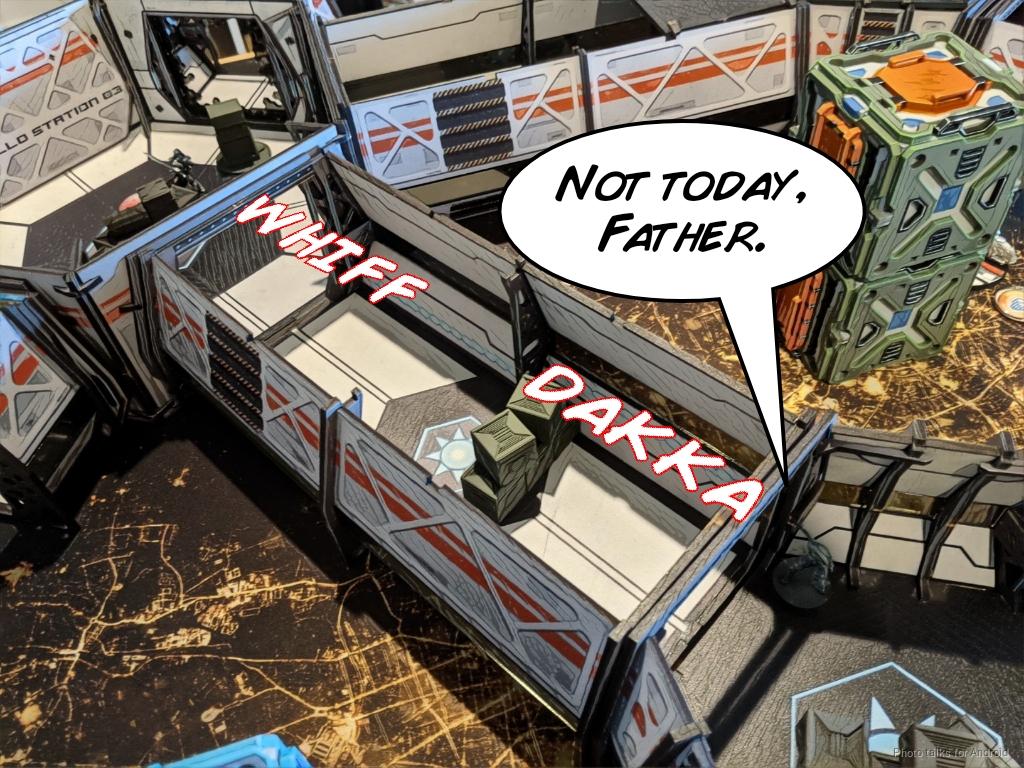
Erik’s SpecOps rocketed out of the space station to take a shot on the Swiss Guard with a MediKit, but as is the PanO way mistook a normal pistol for the MediKit…
The Black Friar went after my Moran in the corridors next, by hopping on some boxes. I think Erik should have led with this, to clear the repeater. Unfortunately for the Black Friar, we were just inside 16″ so I won the face to face roll and dropped the Friar.
The rest of Erik’s orders were spent retreating Joan and the SpecOps. The SpecOps did attempt to pick the Friar up, but ended up killing him instead.
Turn 2
Top of 2 – Corregidor
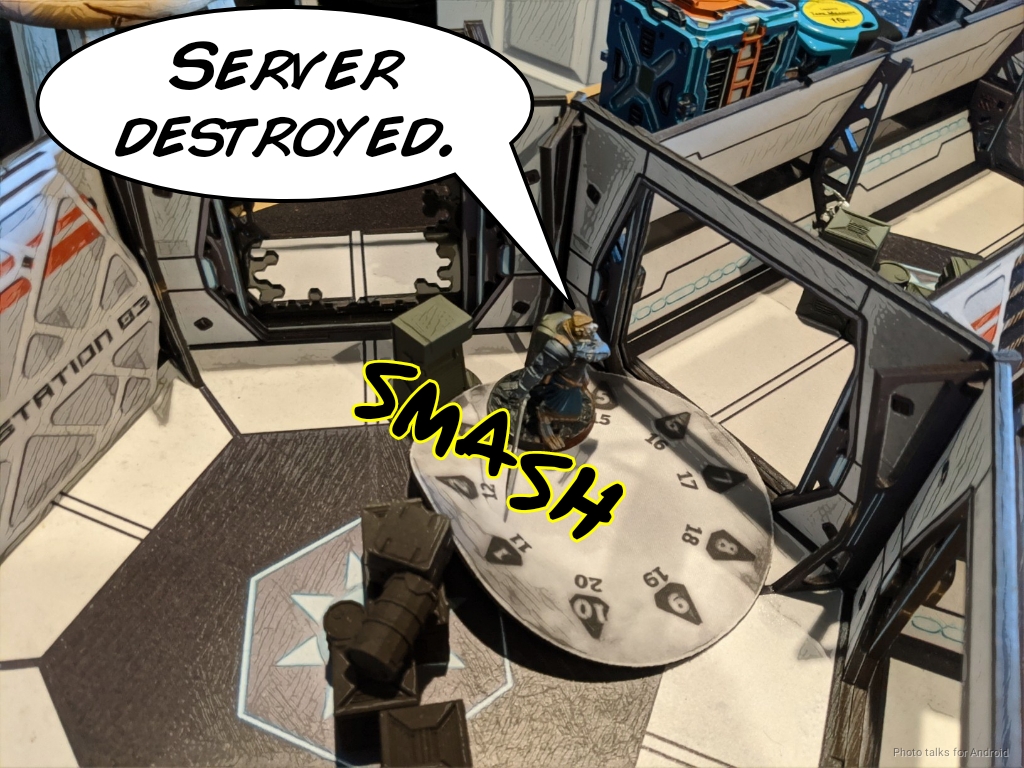
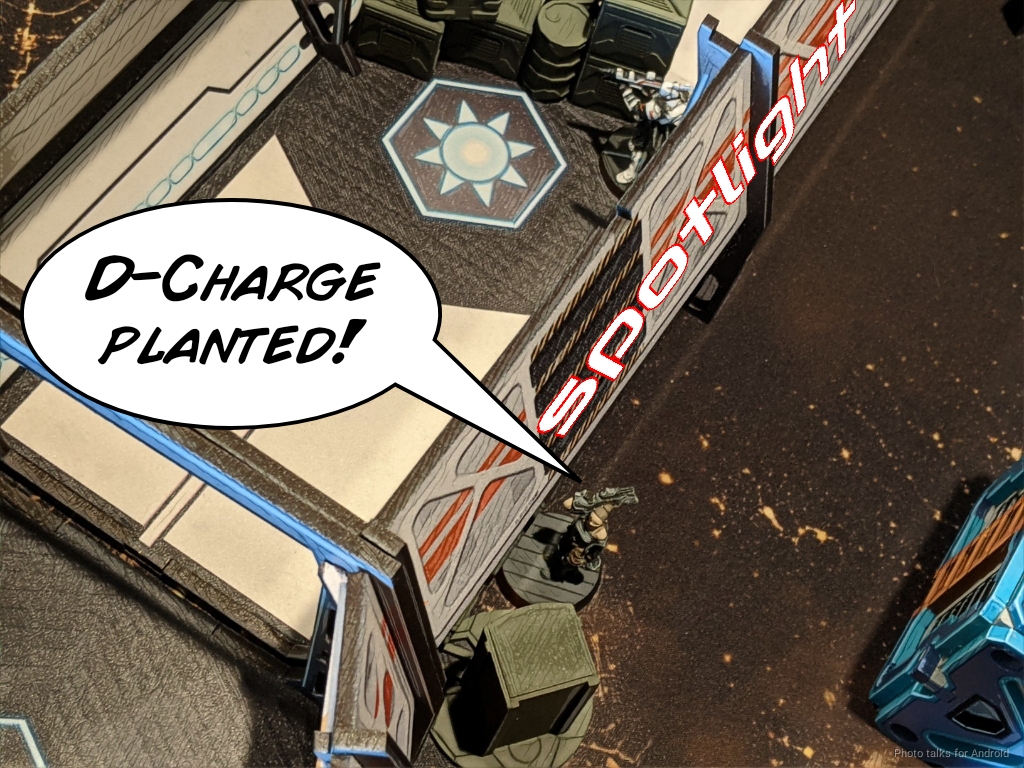
Well, it’s Turn 2 now, Erik left me the easy console to get to, as it’s within 1 short skill Move of a Moran, so I do that. I get it on the first try, and we roll the server in the corridors with easy access for McMurrough. I chuck smoke on the server and smash it to scrap, taking all the orders in my second pool. Worth it!
After the game, we briefly discussed this–there was a way for the Zulu Cobra to get one WIP roll on the console by the Morans. It would get Trinity’ed by Jazz, Oblivion’ed or something by Valeyra, and hit by one Koala, probably. But the Camo state would allow it to make one attempt. If it passed the attempt, that forces me to go after the much more obnoxious console on the ramp in the open. The Evader and Jazz could make that happen, but it would’ve take a fair amount of orders and I might have tried to help out with the Morans or something, draining orders from McMurrough.
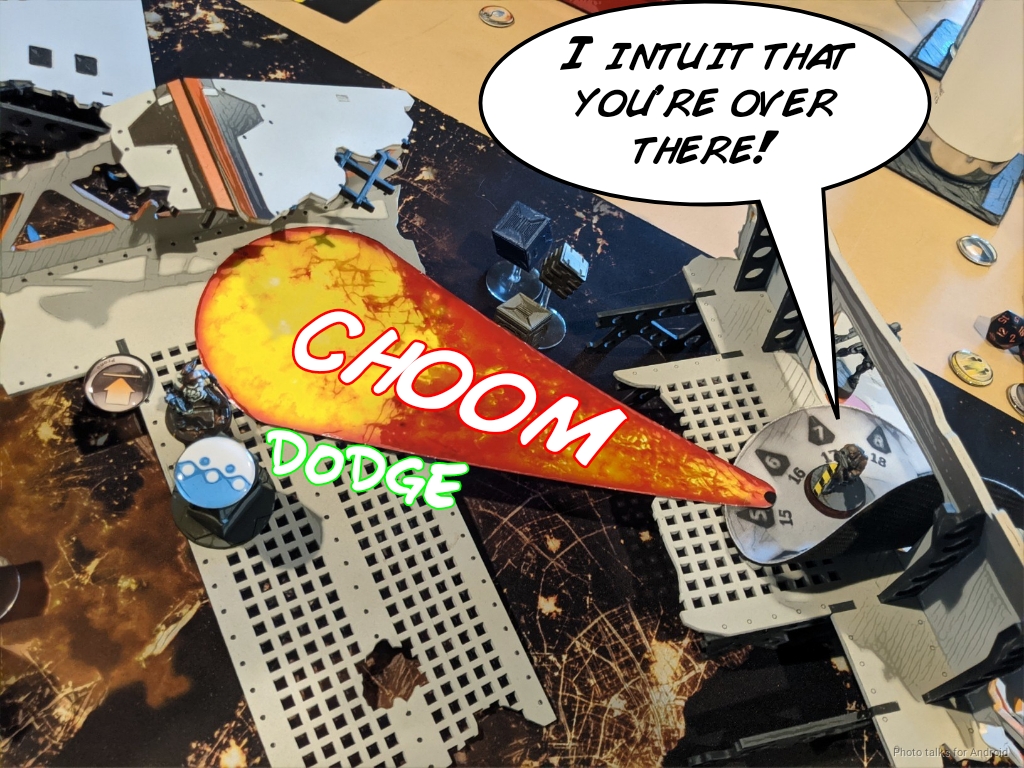
If the Zulu Cobra fails, then the play with the Croc Man is the same. It costs two orders to make the attempt, and might end up costing me 4-5 on my turn if successful. Not entirely sure it’s 100% worth it, but it was at least a line of play worth thinking about. As it stands, with my first order pool completely untouched, I was free to go after the Montesa with the Evader, getting normal rolls as the Montesa was immobilized. I threw smoke first to set up for an intuitive attack on the Croc Man. One order later the Montesa was off the table and the Jaguar was in the smoke.
I fail the intuitive attack twice…
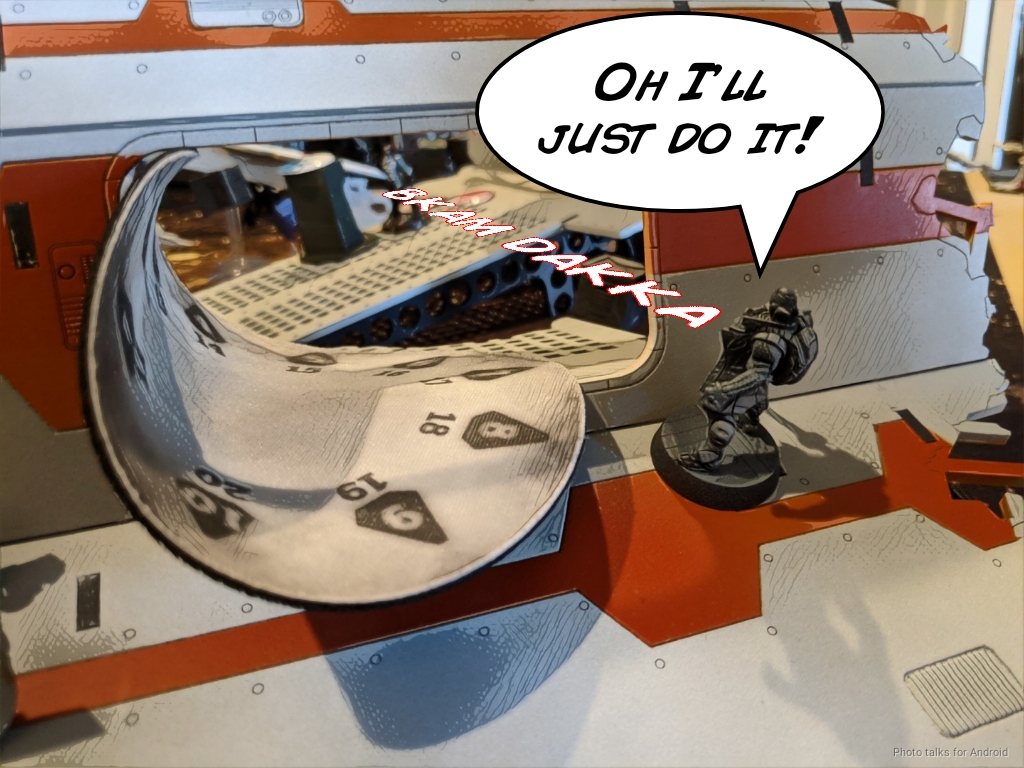
So I just blap the Croc Man with the AP Spitfire and kill it.
We notice after the dice are rolled that the Helot has a shot on the Evade as he does this, so I give Erik free shots, with the Evader taking a single wound from that exchange. Now that I know the Helot can see, I shoot it down with the Evader.
After settling the link into a better position, I pop the Tsyklon back up and try to drop a pair of pitchers near the Helot to cover Joan, but fail the BS roll on 15s twice. Womp womp.
Bottom of 2 – PanO
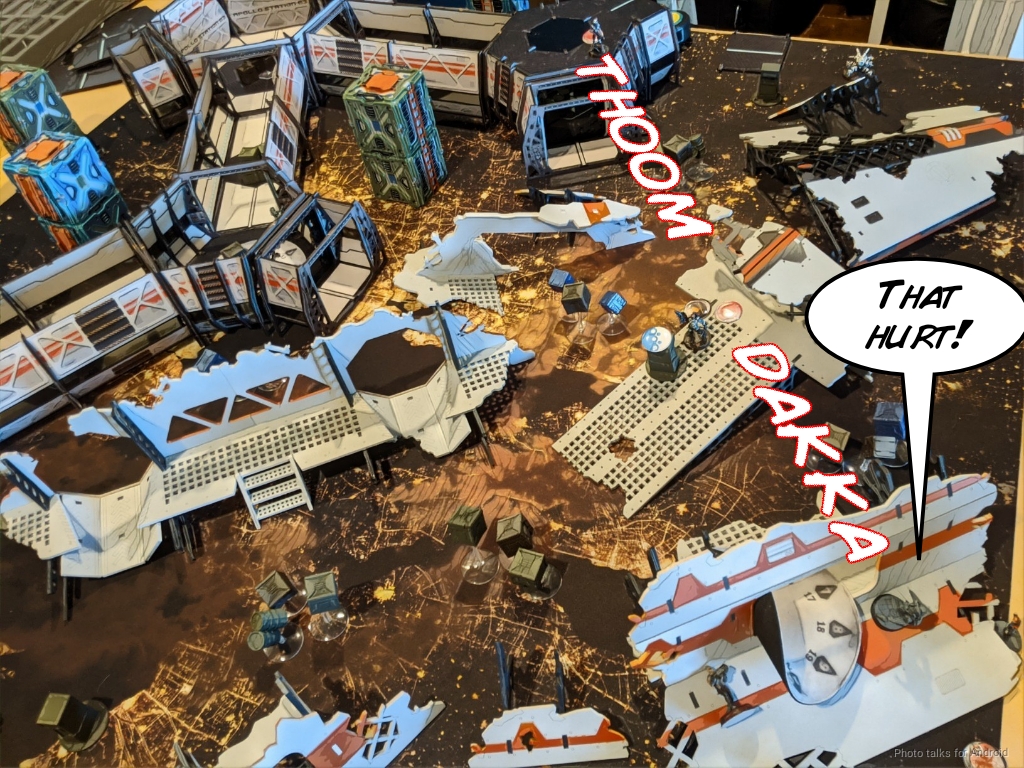
Joan starts her attack run, going after McMurrough, who had retreated away from the Console after smashing it. We both roll well and our dice bounce. Joan tries again and McMurrough makes his way out of line of fire after passing an ARM save.
Joan keeps pushing–Erik had it in his head that he really needed to kill McMurrough. He’s not wrong, but he’s also exposing Joan in a way that seems quite dangerous to me. I’m uncertain as to a better option though, I’ve killed a fair amount of his forces already and have a very strong hacking net for him to advance through with his Zulu Cobra KHD. In any case, Joan guns down a Transductor and the Moran in the corridor.
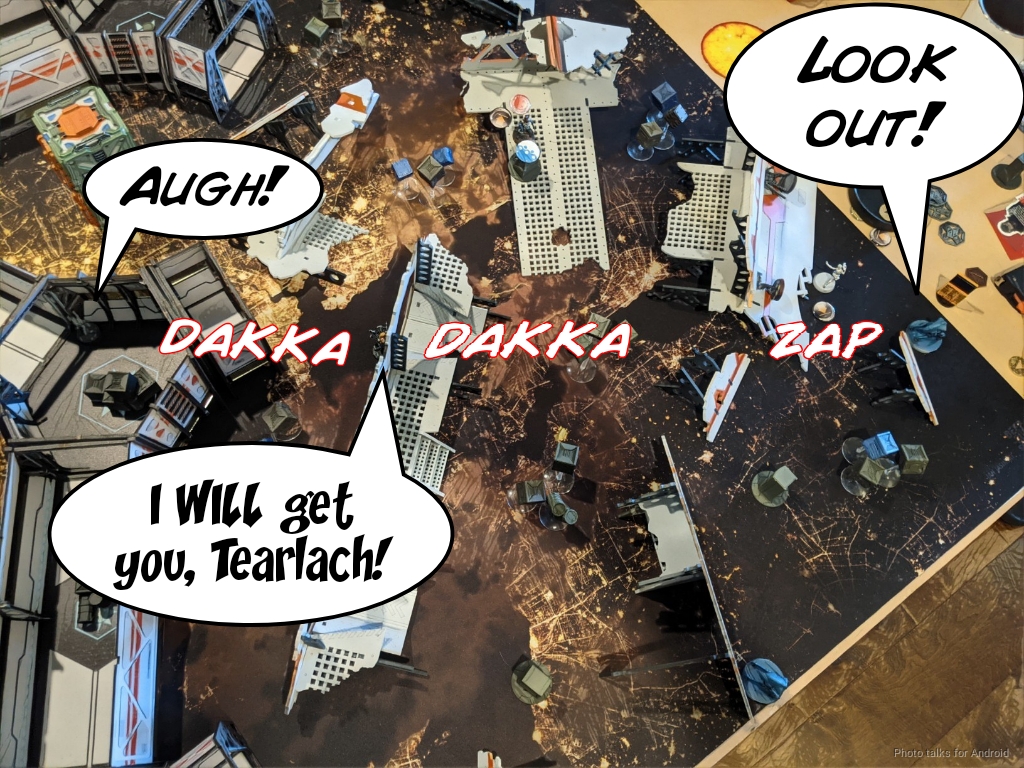
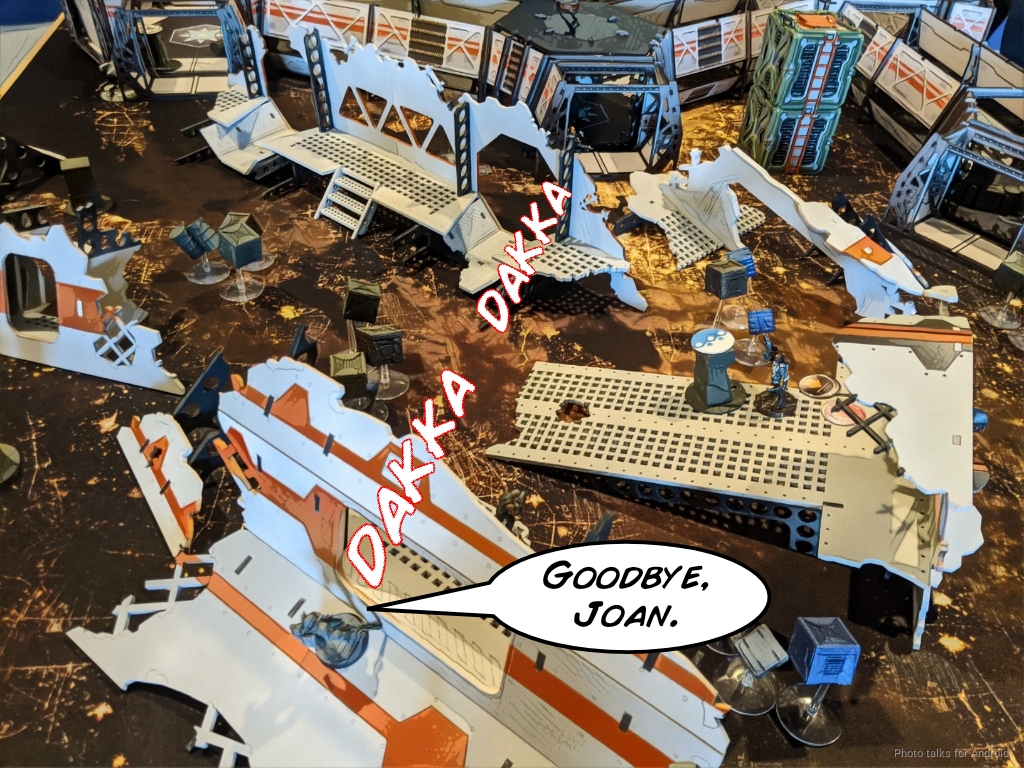
She circles behind McMurrough and guns him down in cold blood.
Erik had Extreme Prejudice as his classified, so he finished off McMurrough with his Zulu Cobra.
His last order was spent hiding Joan.
Turn 3
Top of 3 – Corregidor
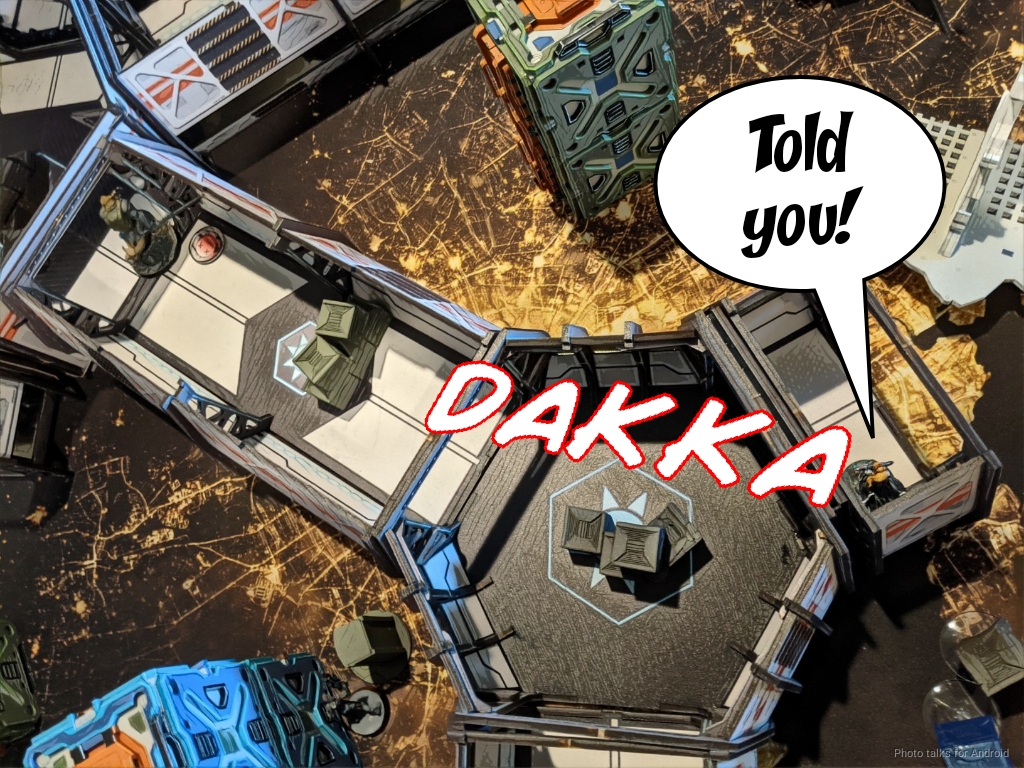
I eventually managed to Carbonite Joan as my Core link advanced on her. I was ready to throw the Brigada BSG around the corner if I had to, but the AP Spitfire Evader took her down.
I had two orders left so Carlota did one wound to another server, and that was that.
I pushed my Evader Haris to secure Erik’s HVT, and then we discovered that with the loss of Joan he was in retreat.
10-2 Jurisdictional Command of Corregidor Victory!
Post Game Analysis
Having a plan and sticking to it went waaaay better. This list is also supposed to cover Highly Classified and probably Frostbyte? Maybe? so I had stuff like the Daktari and such in there. Very very happy with putting both Morans in reserve. Let me respond with Koalas to where I was most worried about stuff. I forced myself to deploy both Moran’s Koalas and kinda wished I had a 3rd Koala on at least one of them, but I think that will be matchup, mission, and table dependent or something.
Being more careful with my Lieutenant let me not do something dumb with McMurrough, although I’m not sure that I would’ve done significantly better versus an impersonator like Jan Staar here. I knew I didn’t have to worry about it with PanO, but that remains a big problem. I think I just want to be careful and go first against in that matchup. If my opponent holds two things in reserve, then I can think about putting something in suppression to help defend. Not a huge amount of stuff to be done on that front, but definitely things to think about.
McMurrough performed excellently, first as a great distraction that shaped Erik’s deployment and then in destroying the appropriate server. Carlota could have covered for him, but having him alive and continuing to be a nuisance on Turn 2 was so powerful! He basically forced Erik to throw Joan under the bus to take him out–not that Erik had much of a choice at that point, given that Joan was his only way of attacking the consoles at that point.
I will say that the dice favored me this game, although I did on two occasions set up Carbonite to get normal rolls with a linked AP Spitfire. That was a big deal. I could have attempted to do that on the Swiss, which I think would have been good just in general to limit Erik’s mobility. I was particularly pleased with my attack on Erik’s TR bot–first setting up a Koala and then attacking it with a Tsyklon. I am a little concerned that the list itself doesn’t have much in the way of staying power at range, and I need to think about how to address that in future iterations of the list.
This list also lacks a good answer to things like Le Muet. Also, I was in real danger of losing that Evader to the Swiss with Erik rolling that 8. Very very dangerous:
| 24.80 | 37.17 | 38.03 |
I think I need to find a way to slot in something to help me with Mimetism -6 models, especially since Corregidor has one of the best tools for that. Lots to think about in the list as it evolves.
As far as the plan and execution goes, doing damage on turn 1 went off about as well as it could go. I was happy with my decision to delay flipping the console till Turn 2, as it doesn’t matter which console you get (although the positioning and local context is very important). As I mentioned, Erik had the opportunity to use the Zulu Cobra to make things difficult for me, possibly even forcing me to deal with a mine from the Croc Man while the Helot did horrible things. I had made it so unappealing to run that gauntlet to get a single WIP roll that it managed to dissuade him though. I think it would’ve been worth an attempt.
I think Erik needed a bit of a better marriage of list to plan, and plan to execution on the table. Once I had dealt with the Montesa and Krakot, things got very difficult for him. The fact that his two ARO troops were also down didn’t help either. There’s definitely more to learn from this list, so I may play it again if the opportunity presents itself, but I do think that there are some tweaks in there that might improve things for me.