
Shikami Scrum
New year, new approach to Infinity. Part of the reason I haven’t really enjoyed reinforcements was the constraints it placed on list building that weren’t fun. I talked about it some in a recent episode of Late Night Wargames:
One of the things that I’m having trouble with in the hobby side of my life is that I don’t have much energy or time to fully digest a new set of rules and push hard to master the a game tactically. What I’m looking for in gaming at this point in my life is the ability to express myself on the table, and things like reinforcements really hamper that because of the commlink tax at 250 points. I’ve been somewhat feeling that constraint in normal list building and deployment from links as well.
I’ve always been a vanilla player at heart, and links both bore and irritate me, which is not a great combo to encourage me to play them. I should clarify some–defensive links are boring. You take 1-2 big guns and then enough bodies to get the +1 burst and maybe sixth sense bonus. It’s a tool, it’s effective, it’s just… kinda boring to me. Unless you make a serious investment, you’re unlikely to do more than buy yourself a few orders of space in an alpha strike, and I don’t really like having to invest a lot in something that is generally single purpose–defense (I understand it’s more nuanced than that, but this is a first order approximation).
On the converse side, offensive links can be irritating. They’re hard to position effectively beyond 3 members (and I would argue that 3 is already pretty hard), and you end up exposing a lot of surface area to attack when you move into the midfield. There are a number of benefits to this of course, you can assemble and efficiently carry a bag of tools into the midfield, which is useful. You can also offset some of the detriments of the attack surface increase by having more bodies to cover one another’s backs, but more often than not you make a mistake and this doesn’t work as well as one might think.
I’ve yet to see someone have a perfect link placement in the midfield (or the deployment zone). There’s always a weakness to exploit. This generally means you get a strong active turn but then get into trouble and lose quite a few orders, which in effect you’ve delivered to your opponent in terms of bringing stuff to kill closer. So I decided to challenge myself this year and only play vanilla. This would cut out a fair number of armies that I enjoy, like all of NA2, so I softened the challenge to “duo links only,” allowing me to play my beloved JSA.
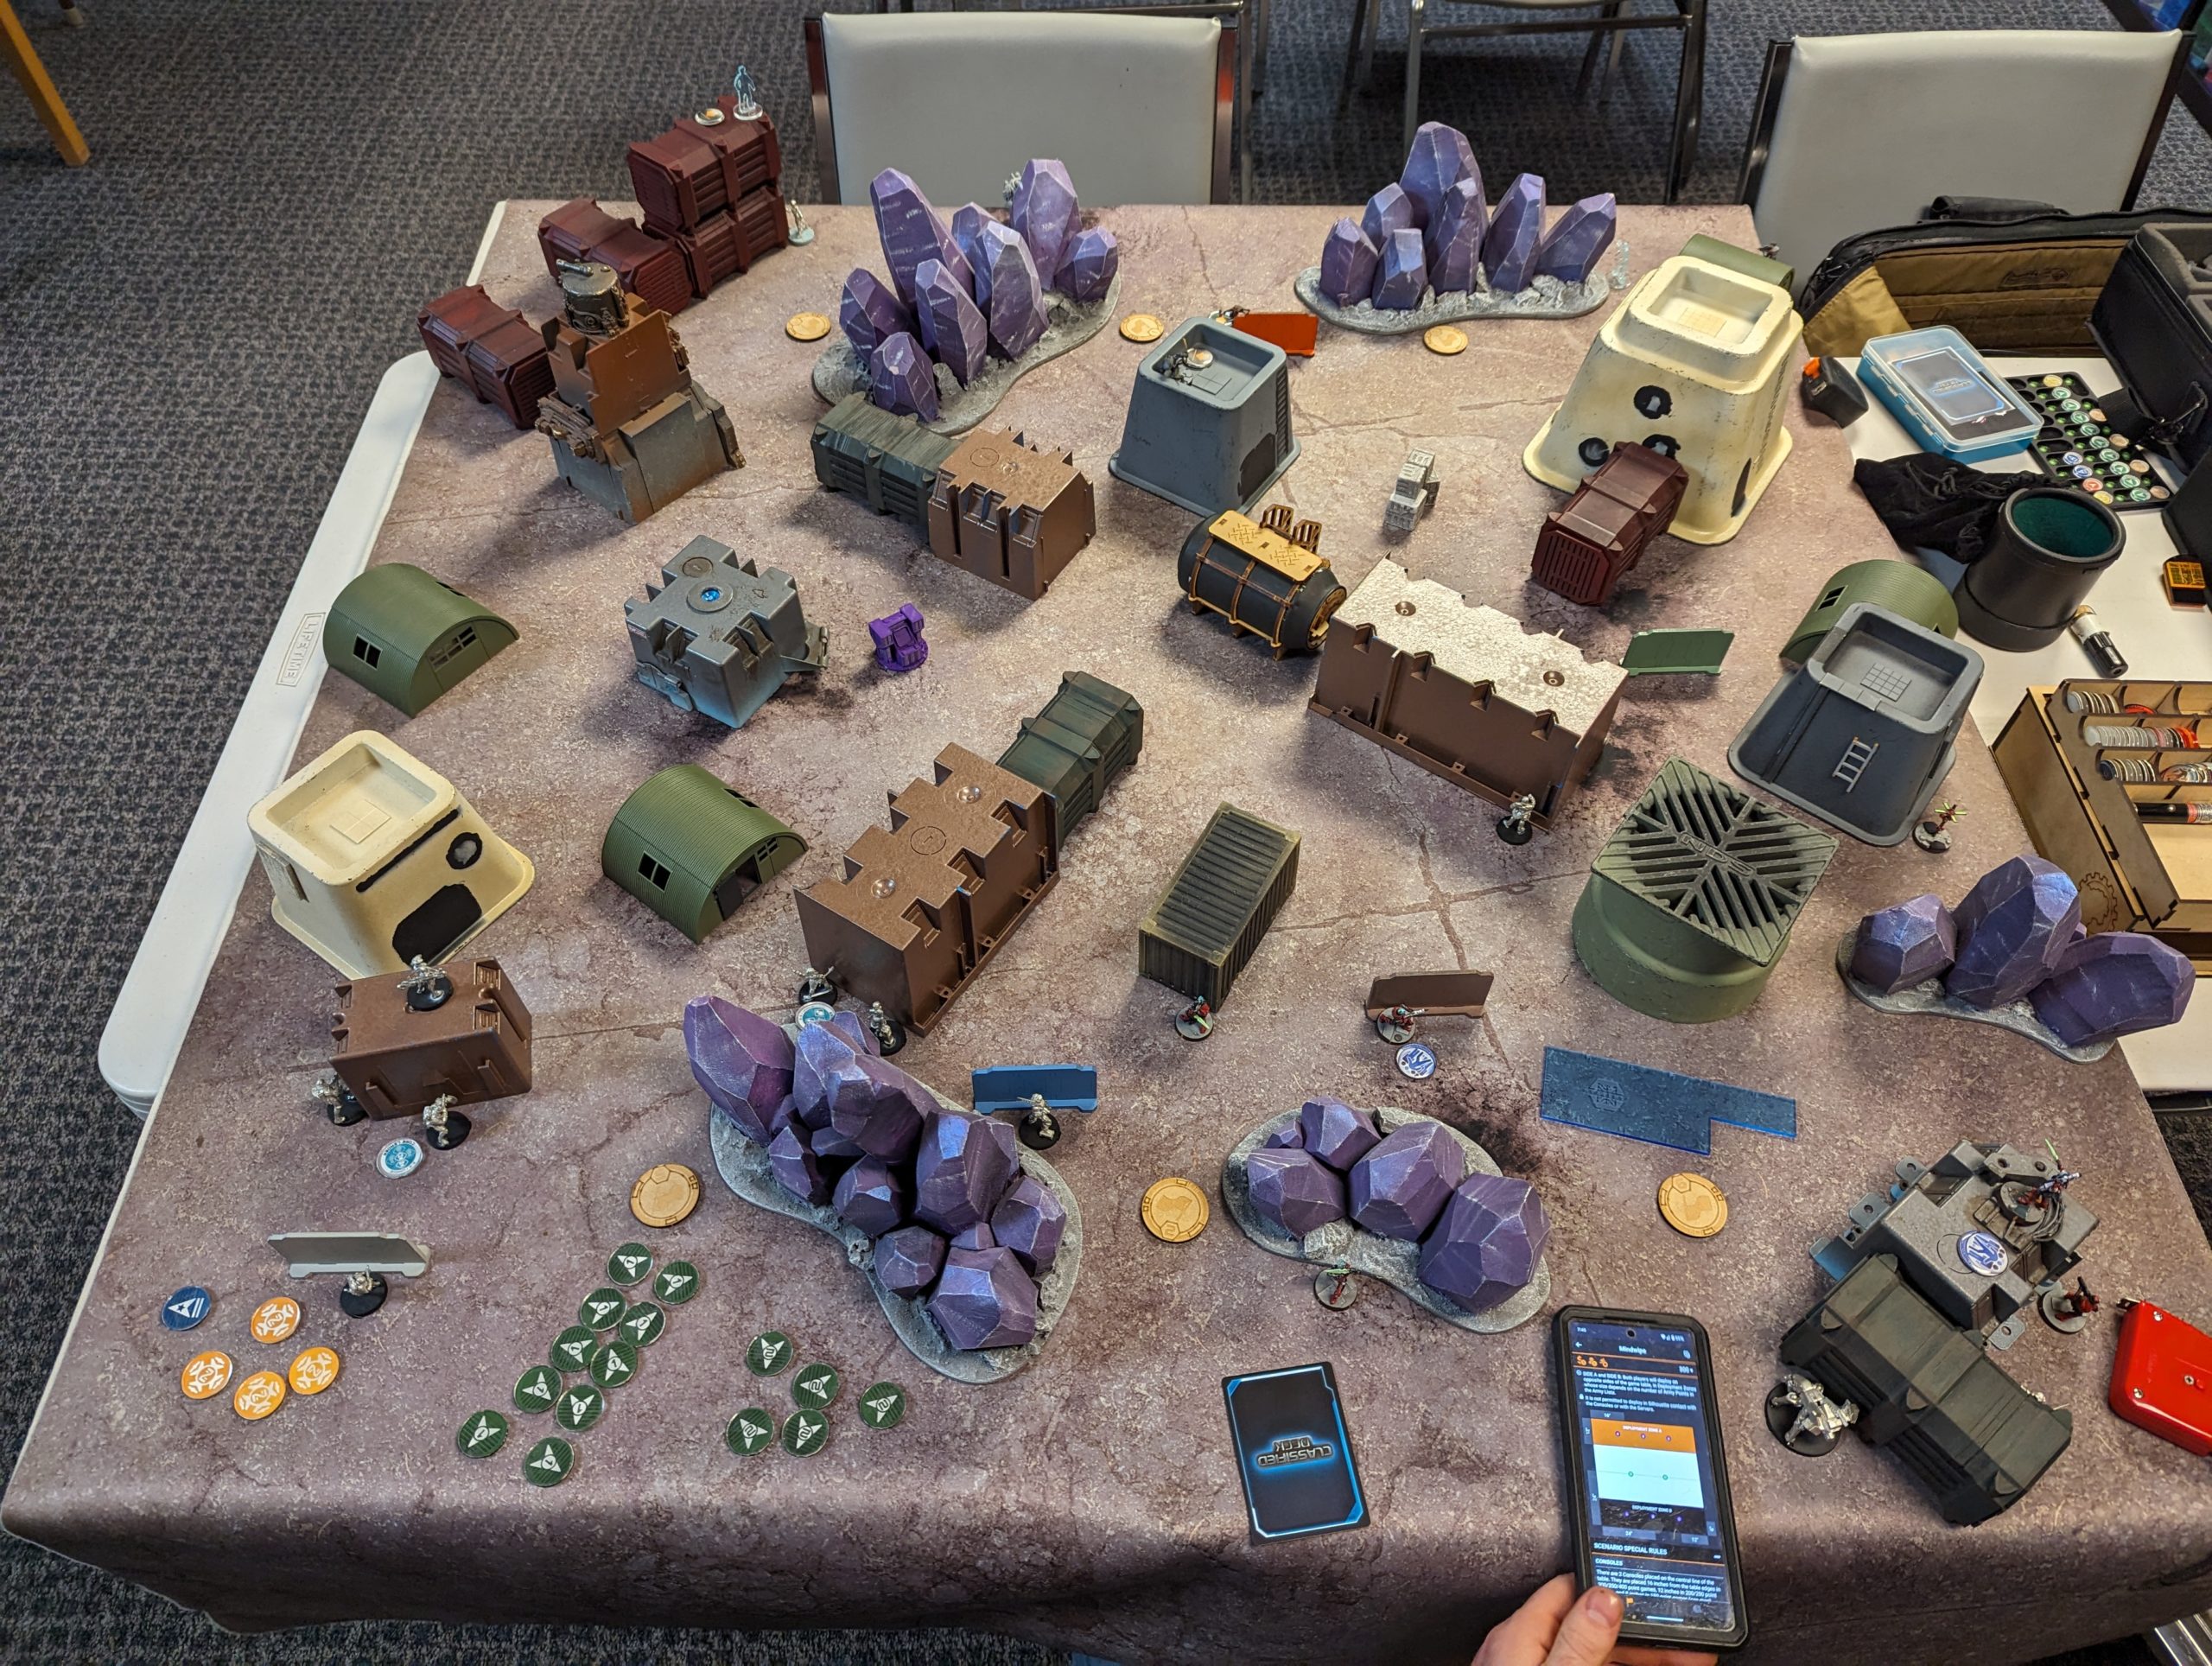
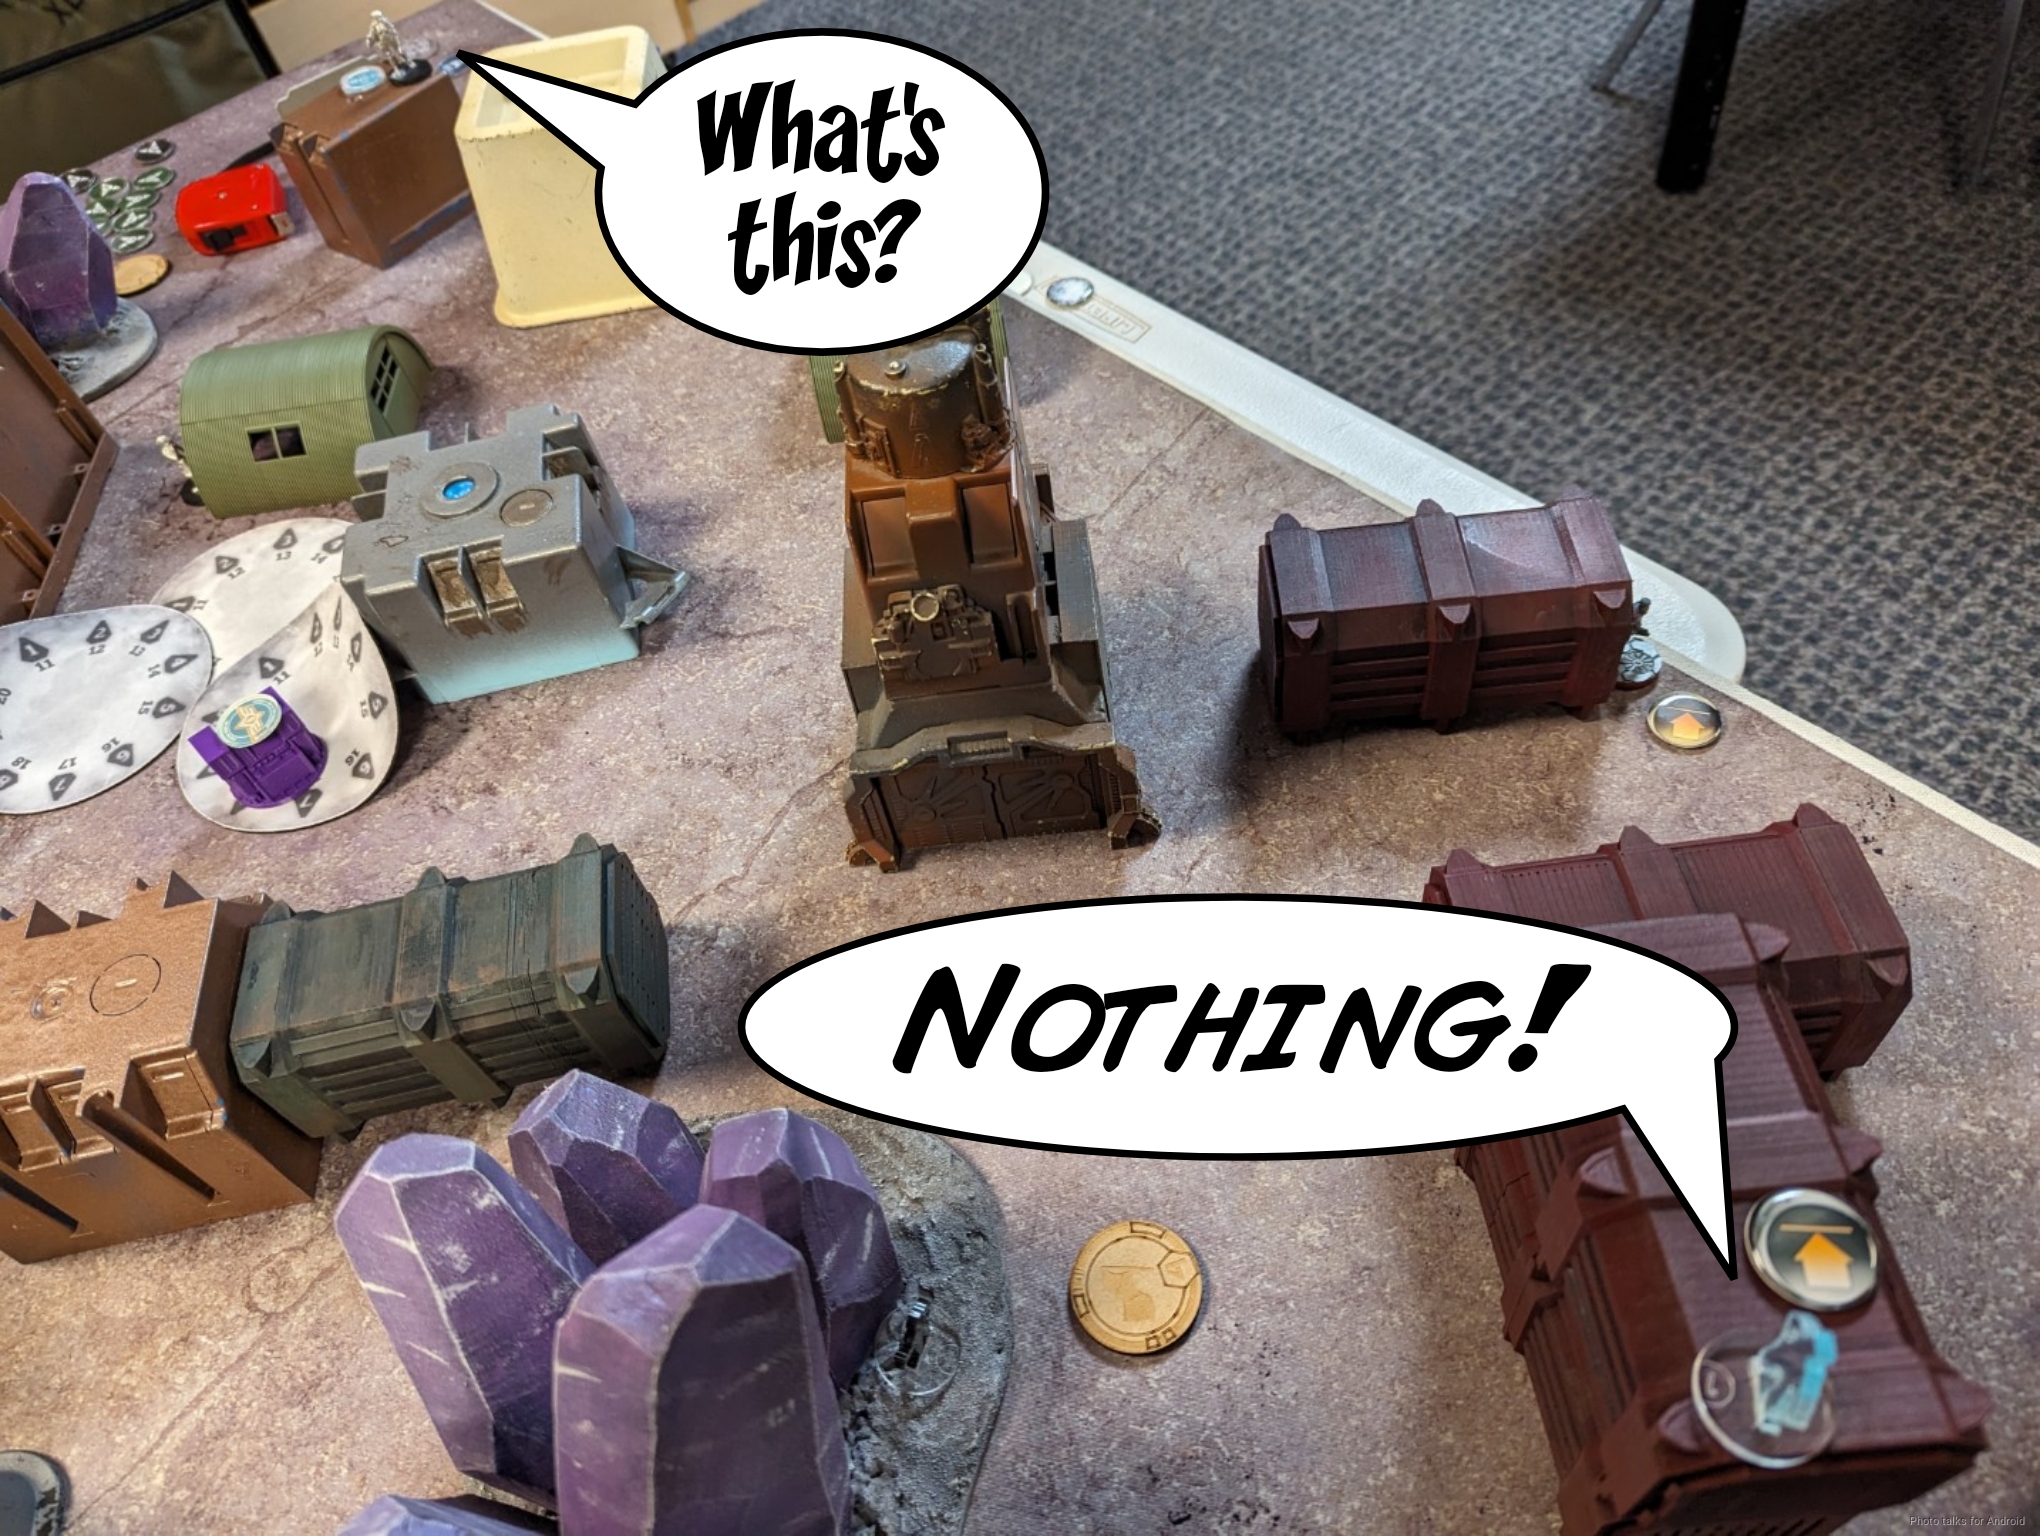
I’ve been away from the LGS for quite some time due to work and family obligations, so it was nice to see all the folks there and get a game in against Jordan (sprocketgx). He’s been really making things difficult for our local meta with his Steel, so I figured I’d see how my JSA fared on this table we hastily set up:
Overview
- Mission: ITS15 Mindwipe
- Forces: Japanese Secessionist Army versus Steel Phalanx (300)
- Deploy First: Steel Phalanx
- First Turn: Steel Phalanx
As I wrote earlier, only Duos allowed in my list building this year–I’m allowed to take a 2-model haris or 2-model core in a sectorial to make list building expressive. Here’s my list below. Everything here is intended to be run solo, even though there are some legal links in here:
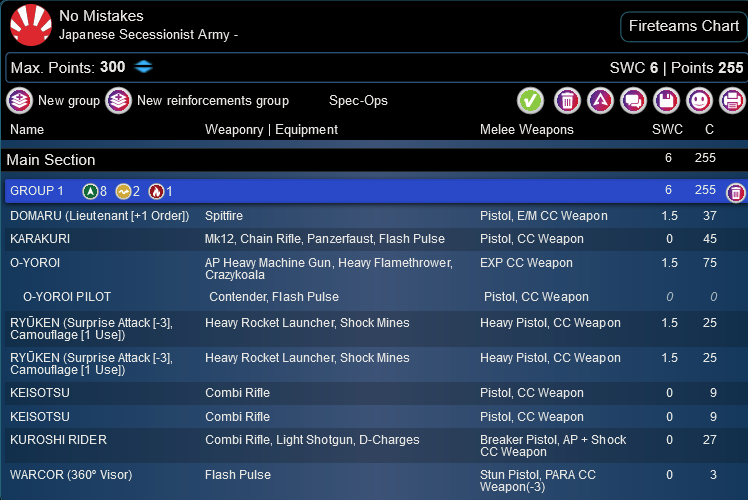
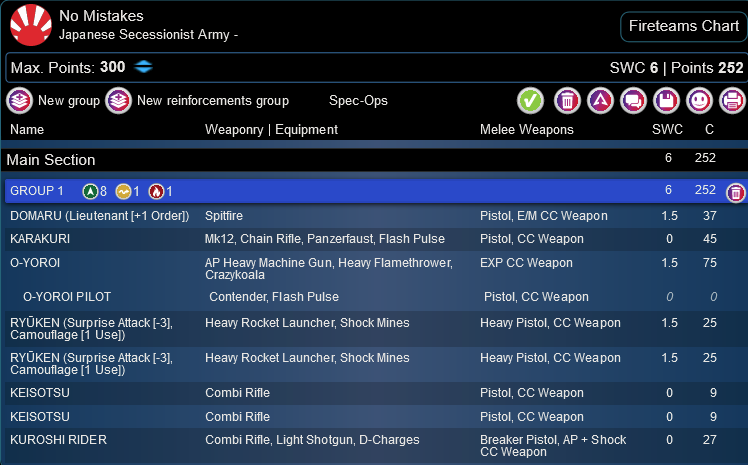
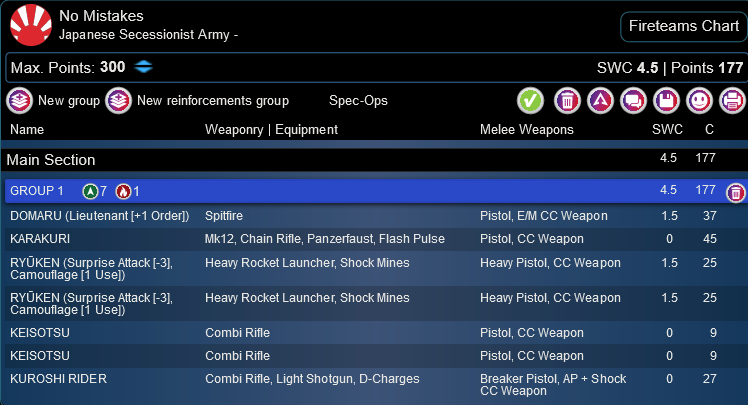
No Mistakes
DOMARU (Lieutenant [+1 Order]) Spitfire / Pistol, E/M CC Weapon. (1.5 | 37)
SHIKAMI Contender, Flash Pulse / Assault Pistol, AP + DA CC Weapon. (0 | 45)
KARAKURI Mk12, Chain Rifle, Panzerfaust, Flash Pulse / Pistol, CC Weapon. (0 | 45)
O-YOROI AP Heavy Machine Gun, Heavy Flamethrower, Crazykoala / EXP CC Weapon. (1.5 | 75)

O-YOROI PILOT Contender, Flash Pulse / Pistol, CC Weapon. (0 | 0)
RYŪKEN (Surprise Attack [-3], Camouflage [1 Use]) Heavy Rocket Launcher, Shock Mines / Heavy Pistol, CC Weapon. (1.5 | 25)
KEISOTSU Combi Rifle / Pistol, CC Weapon. (0 | 9)
KUROSHI RIDER Combi Rifle, Light Shotgun, D-Charges / Breaker Pistol, AP + Shock CC Weapon. (0 | 27)
WARCOR (360º Visor) Flash Pulse ( ) / Stun Pistol, PARA CC Weapon(-3). (0 | 3)
9
2
1 | 6 SWC | 300 Points | Open in Army | Copy Code
I’d been talking to Tim (Chainsaw), Obadiah (nehemiah), Frank (fwashburn) about how much fun Domaru are to run, and that inspired me to run the Domaru Spitfire Lieutenant as a turn 2-3 problem solver. I agree that not having the Daiyokai leaves some orders on the table on Turn 1, but I don’t think I necessarily need it. Perhaps to replace the O-Yoroi in future iterations of the list.
In any case, here’s the breakdown: Ryuken-9 to shape movement on the board. O-Yoroi to do early game heavy lifting, and then the Domaru, Karakuri, and Shikami to get some work done late game. Kuroshi is my pocket problem solver. I had built this list without a mission in mind, so was a little taken aback when Comlog rolled Mindwipe, but I’m all about making it work.
In contrast, Jordan had the opportunity to make his list post Comlog roll, and this is what he came up with:
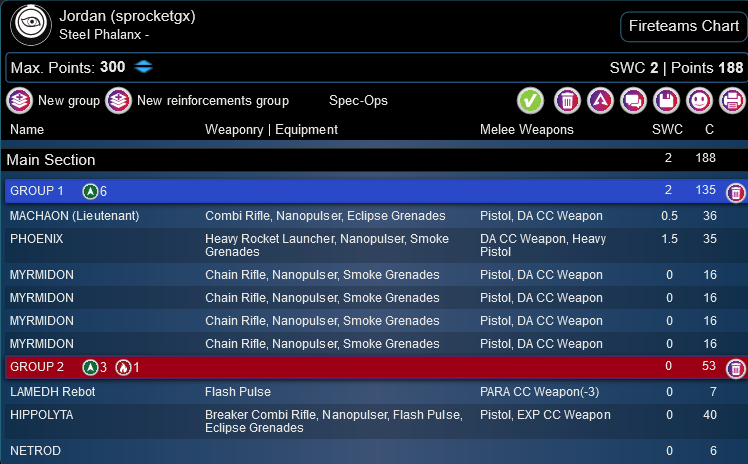
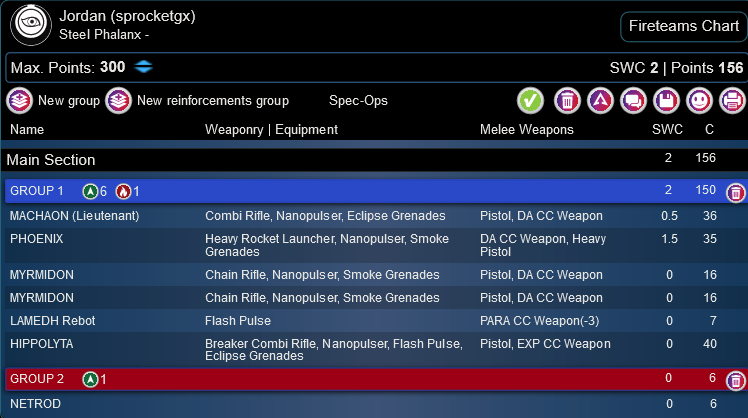
Jordan (sprocketgx)
GROUP 1
MACHAON (Lieutenant) Combi Rifle, Nanopulser, Eclipse Grenades / Pistol, DA CC Weapon. (0.5 | 36)
PHOENIX Heavy Rocket Launcher, Nanopulser, Smoke Grenades / DA CC Weapon, Heavy Pistol. (1.5 | 35)
MYRMIDON Chain Rifle, Nanopulser, Smoke Grenades / Pistol, DA CC Weapon. (0 | 16)
THORAKITES Submachine Gun, Pulzar / Pistol, CC Weapon. (0 | 12)
MAKHE Missile Launcher, Zapper / Breaker Pistol, CC Weapon. (1.5 | 32)
GROUP 2
LAMEDH Rebot Flash Pulse / PARA CC Weapon(-3). (0 | 7)
HIPPOLYTA Breaker Combi Rifle, Nanopulser, Flash Pulse, Eclipse Grenades / Pistol, EXP CC Weapon. (0 | 40)
PANDORA (Hacker) Pitcher, Pulzar, Flash Pulse(+1B) ( | MediKit [+1B]) / Viral Pistol(+1B), CC Weapon. (0.5 | 26)
NETROD . (0 | 6)
4 SWC | 300 Points | Open in Army | Copy Code
It’s got a whopping 4 links and three major problems for me to chew through: Phoenix, the Makhe, and Hippolyta. He’s got plenty that can handle the servers, and I was going to have some serious trouble keeping all of it off my side of the table without any MSV in my list.
Deployment
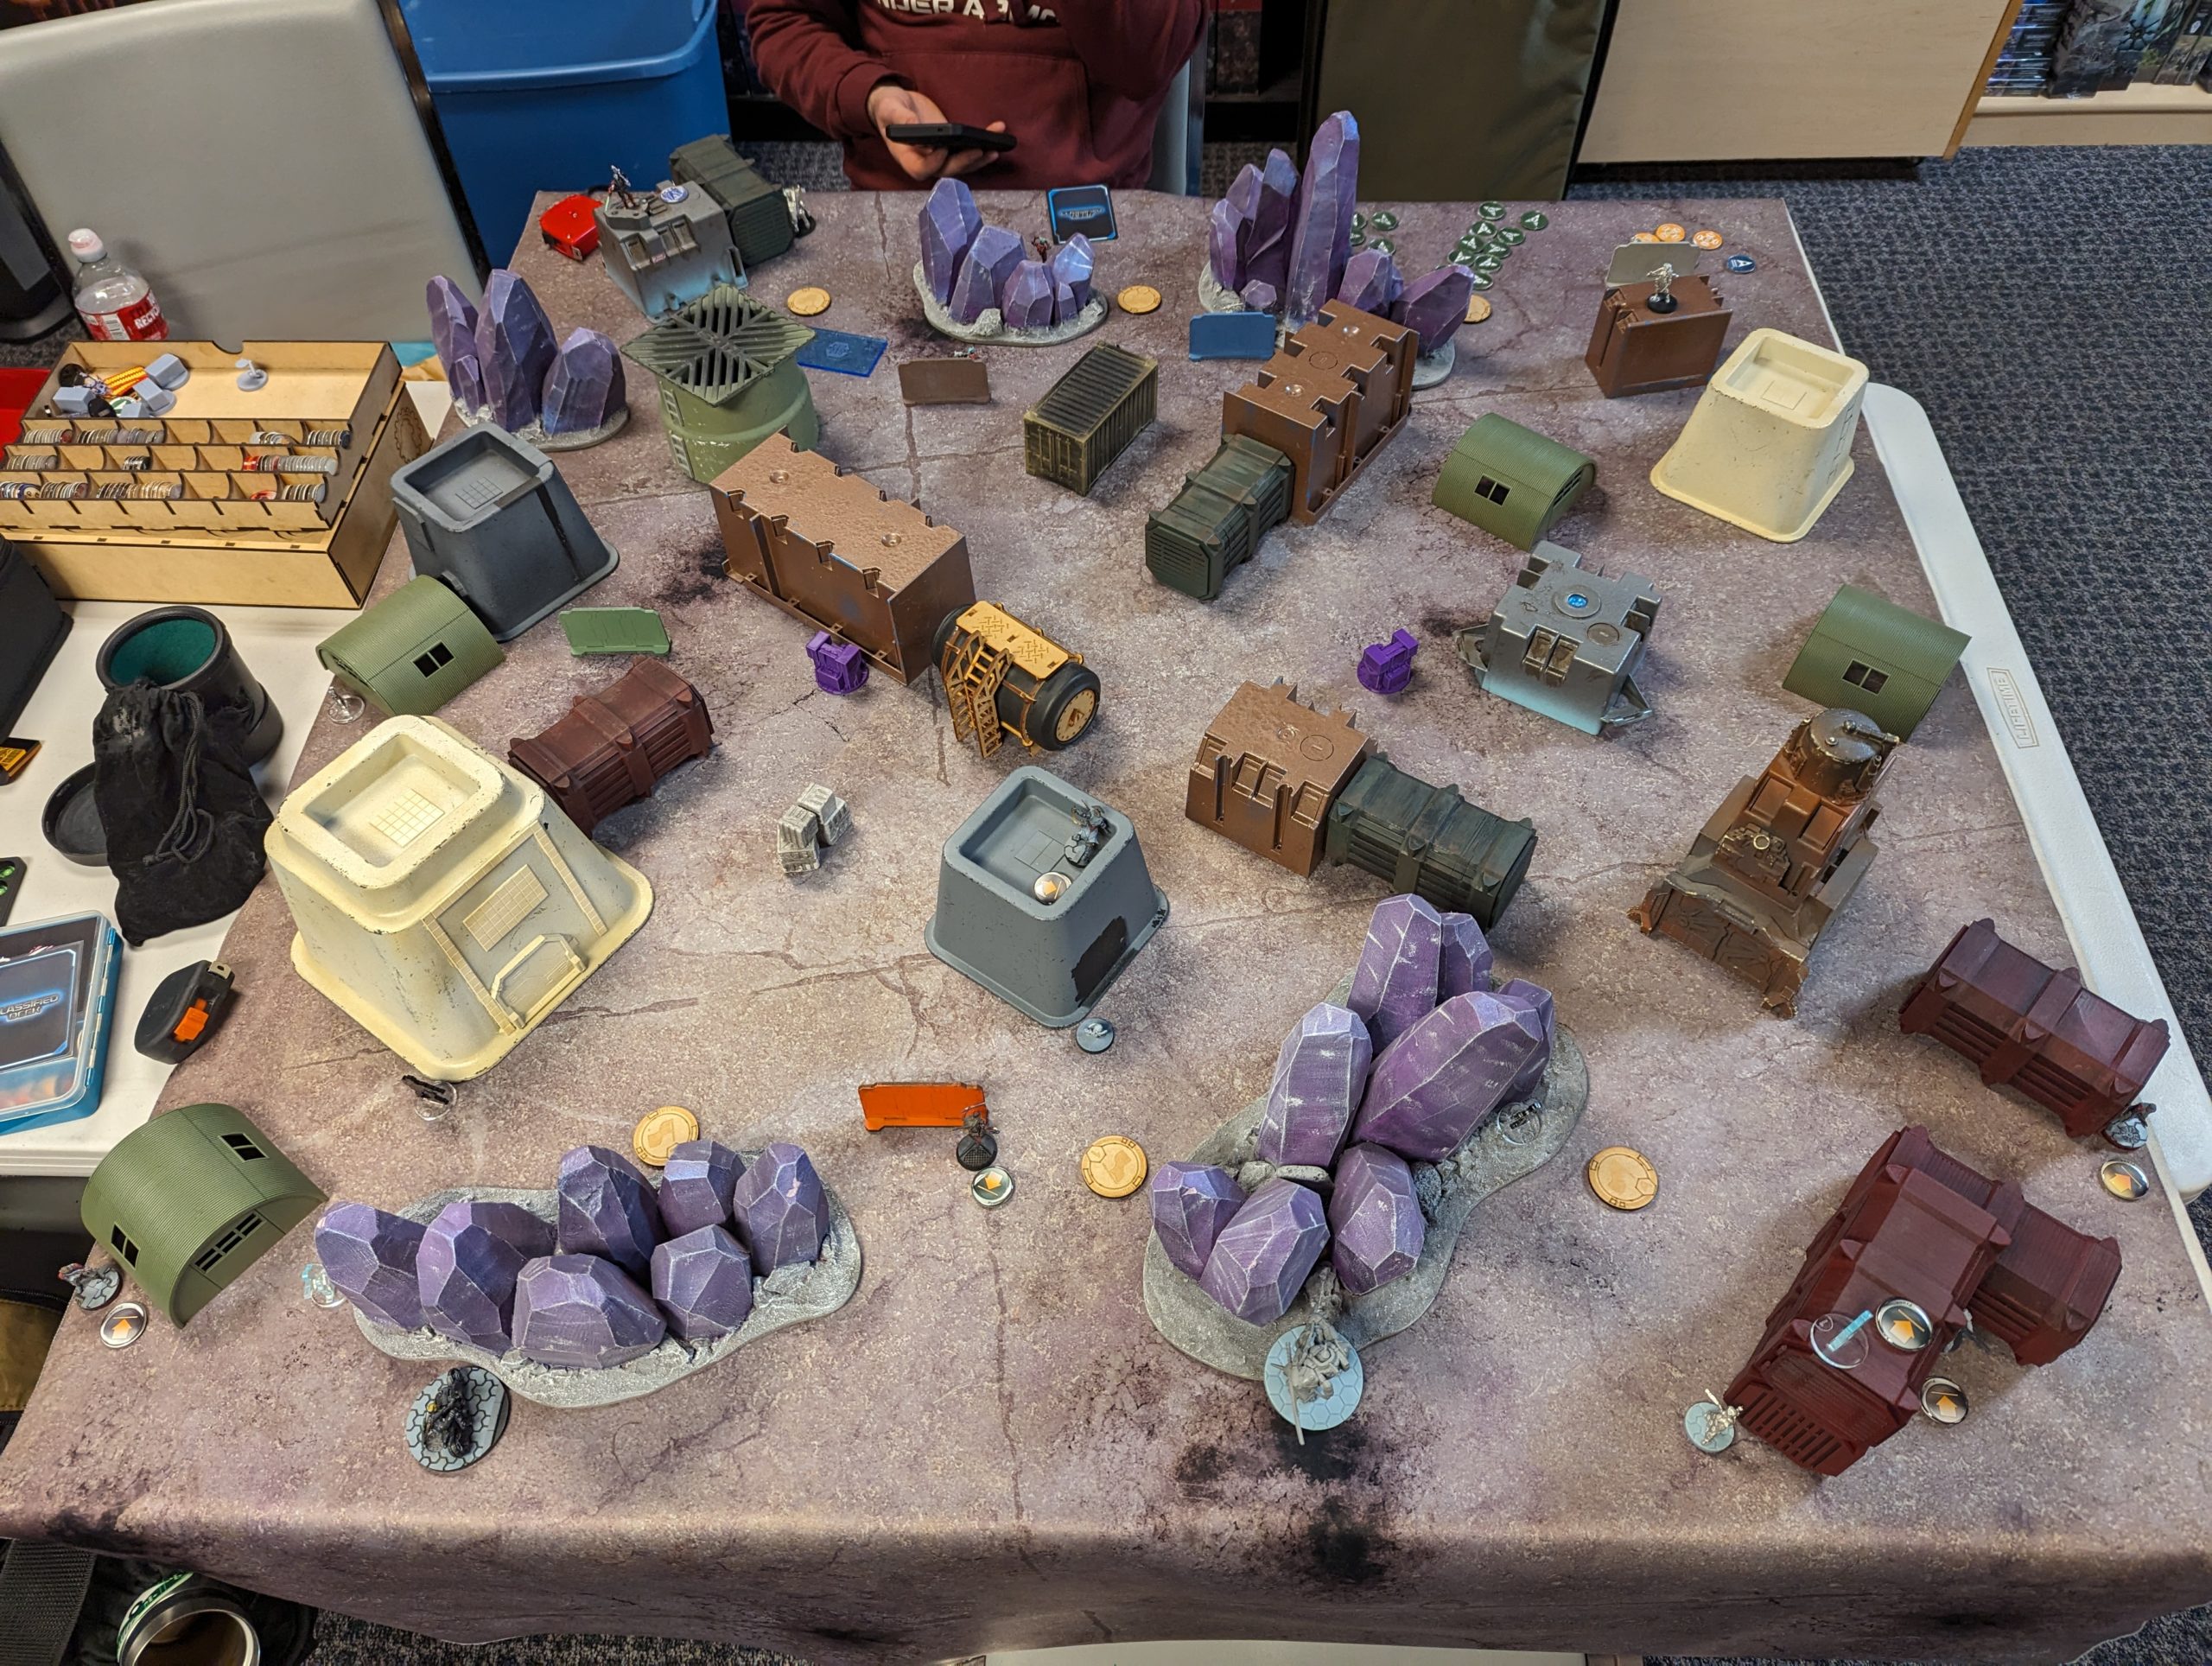
I won the rolloff and selected deployment, mostly to encourage Jordan to go first. There were a few buildings on my side that would help with my deployment, so that also worked out as well. Jordan set up a crossfire with the Makhe on the left and Phoenix on the right, with the Myrmidons in the middle and Hippolyta’s link just left of center.
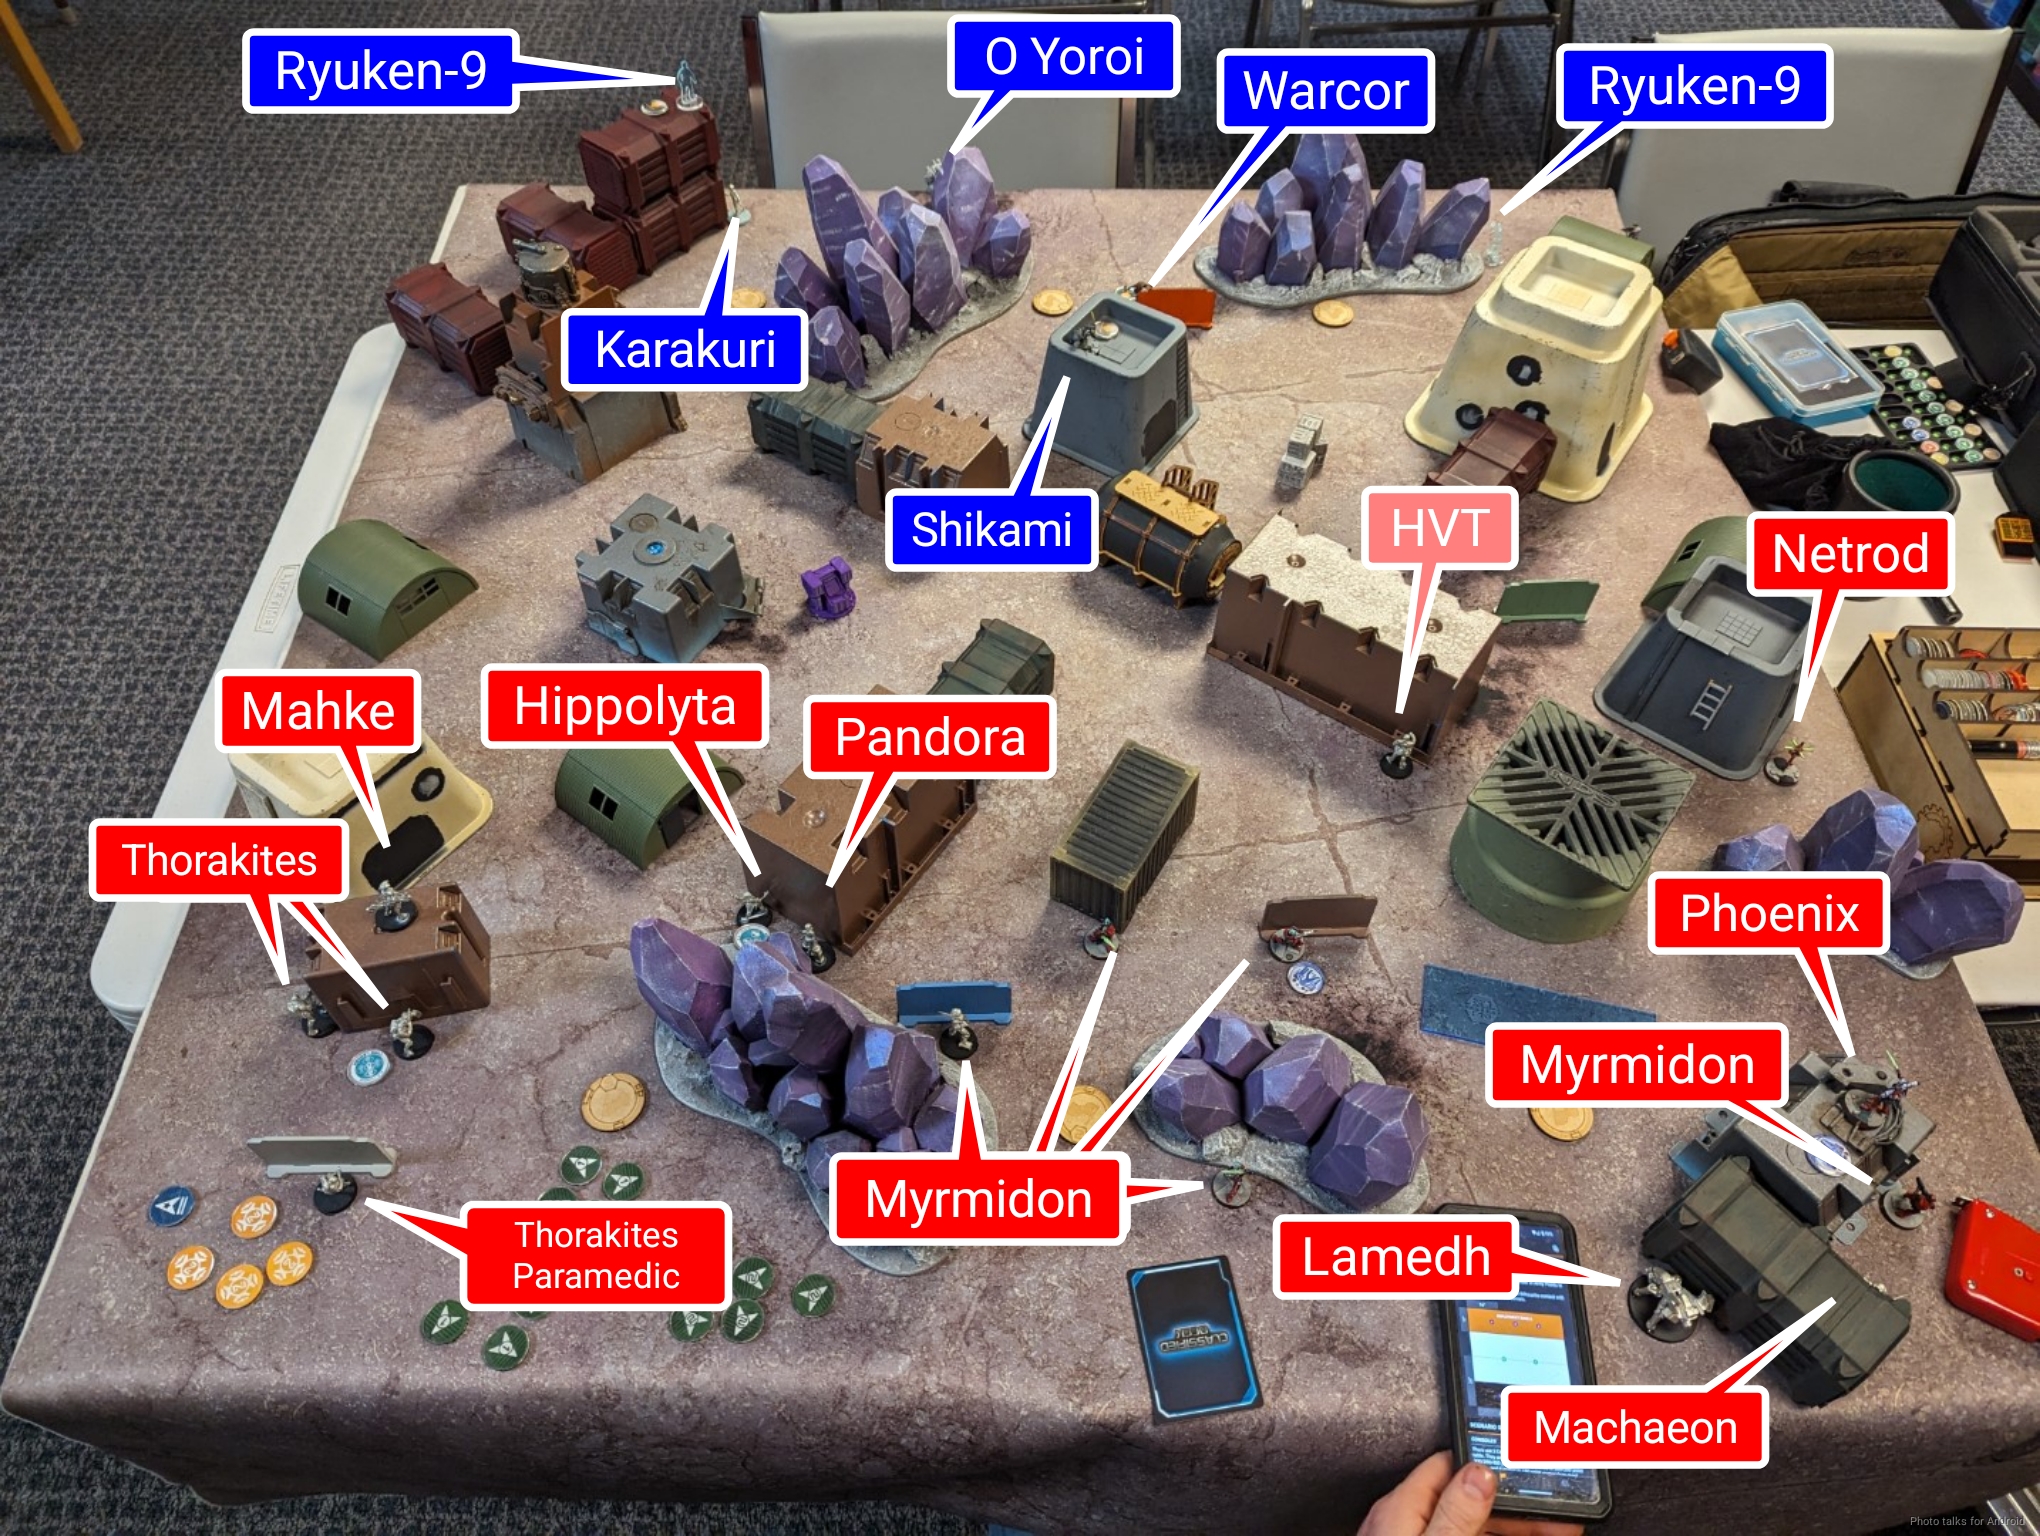
I set up the Karakuri to pressure the Makhe, put the Warcor right on top of the objective watching a “V” of approaches, and then set up the Ryuken 9 to watch both consoles, one each. They also watched the approaches to my deployment zone. Kuroshi went on my left, and the Domaru on my right, with the Keisotsu corner guarding for Ekdromoi.
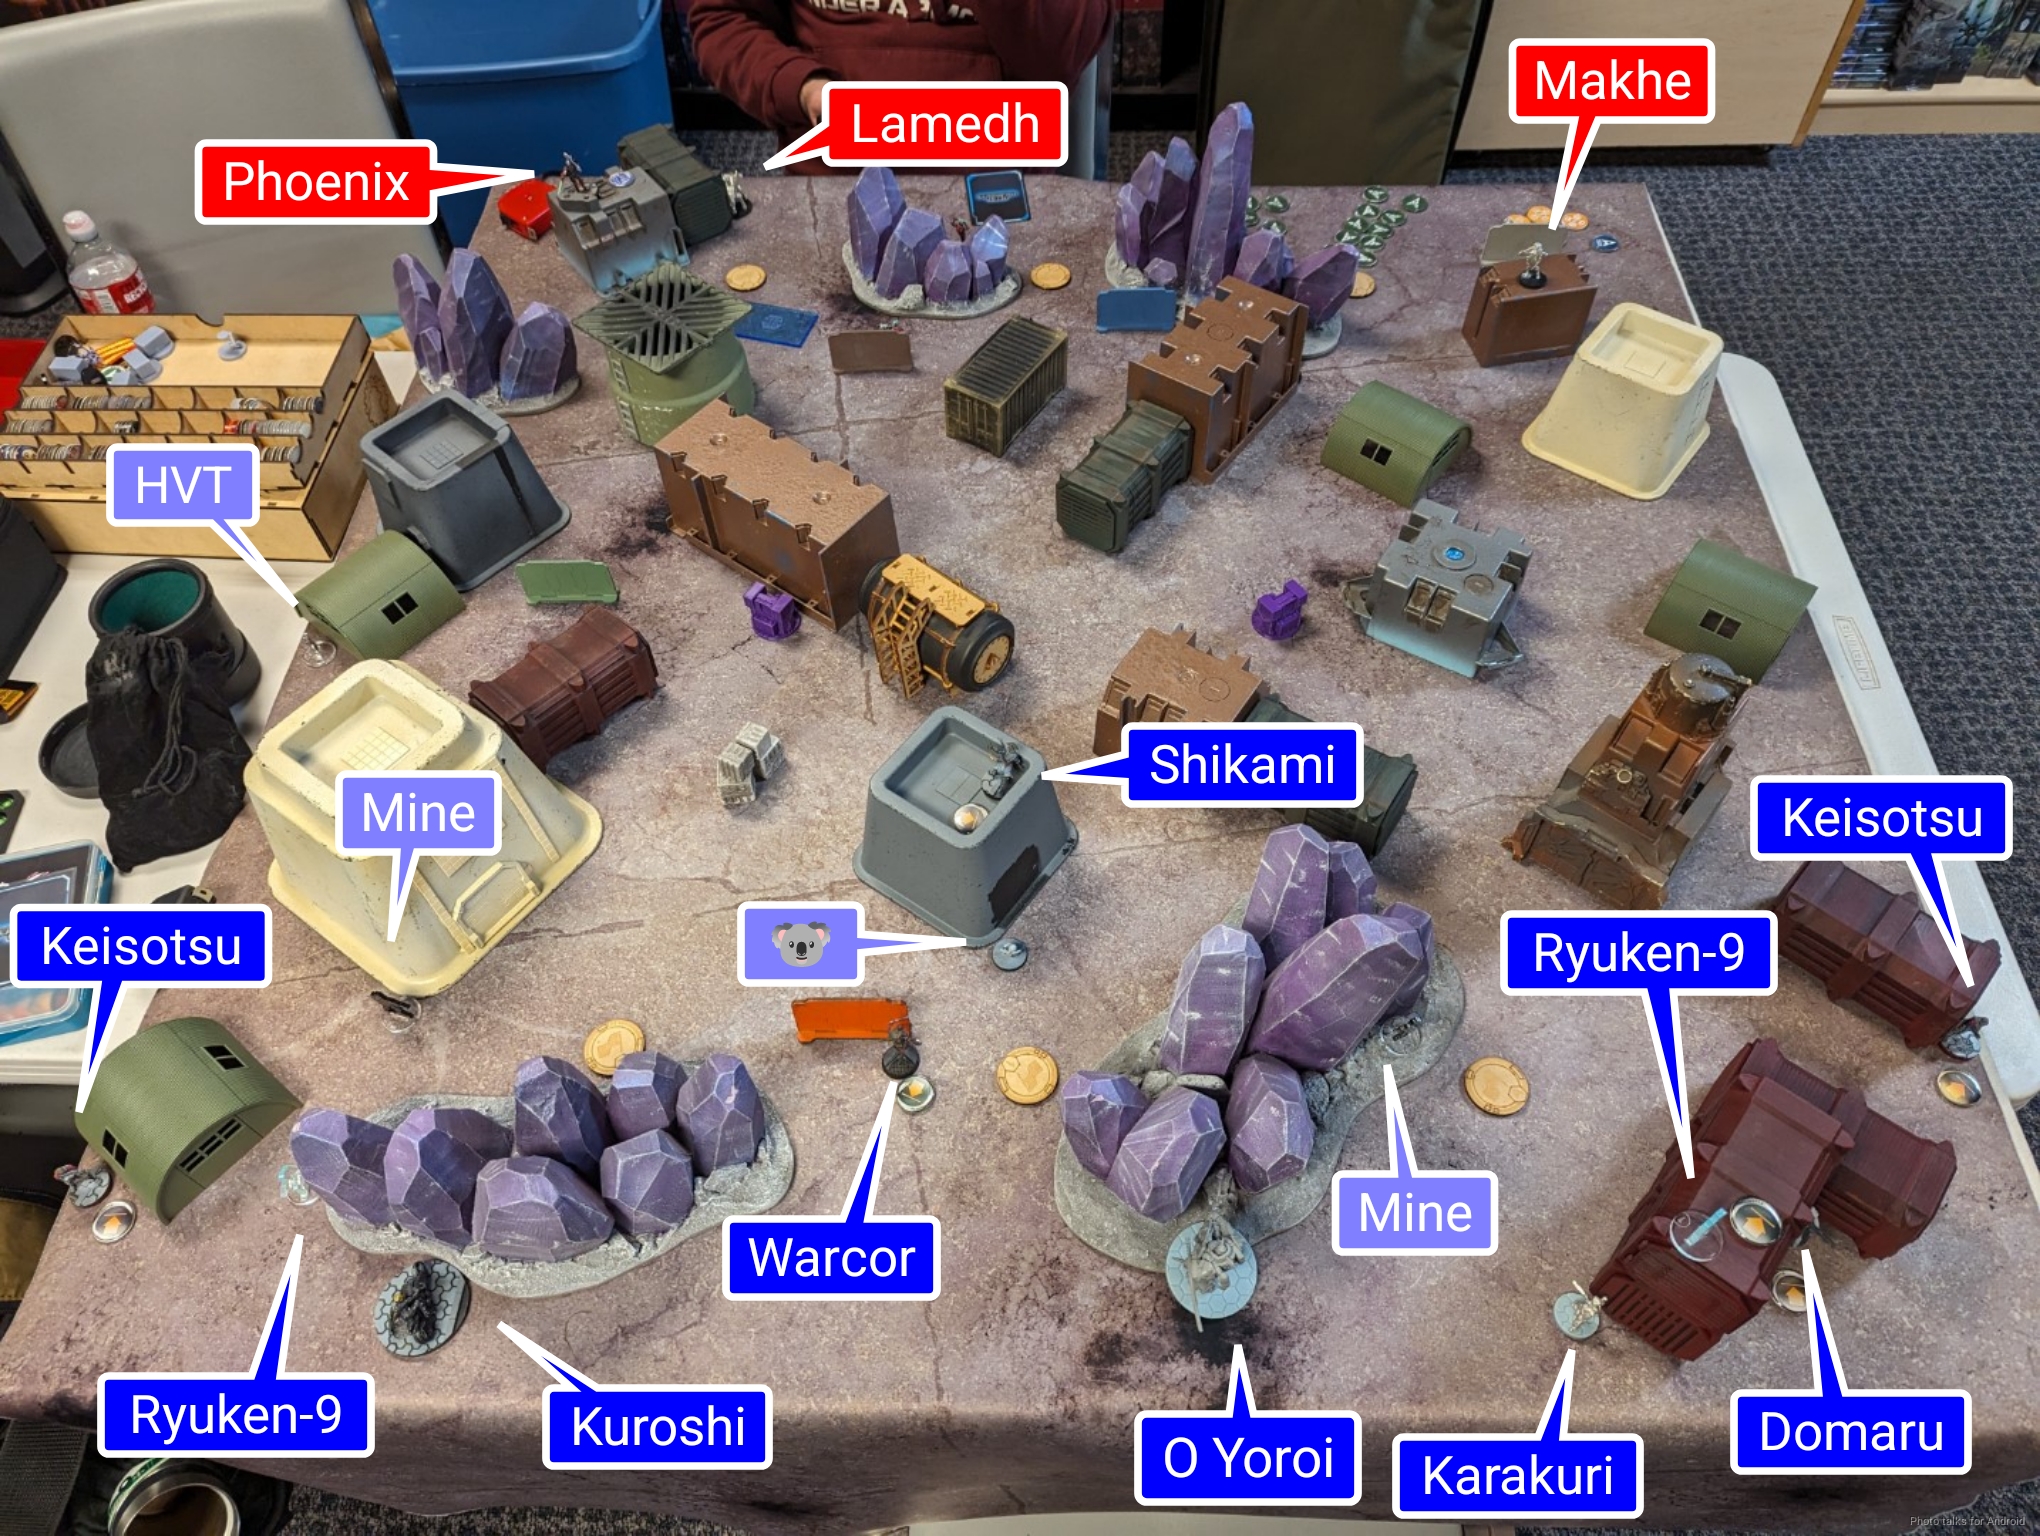
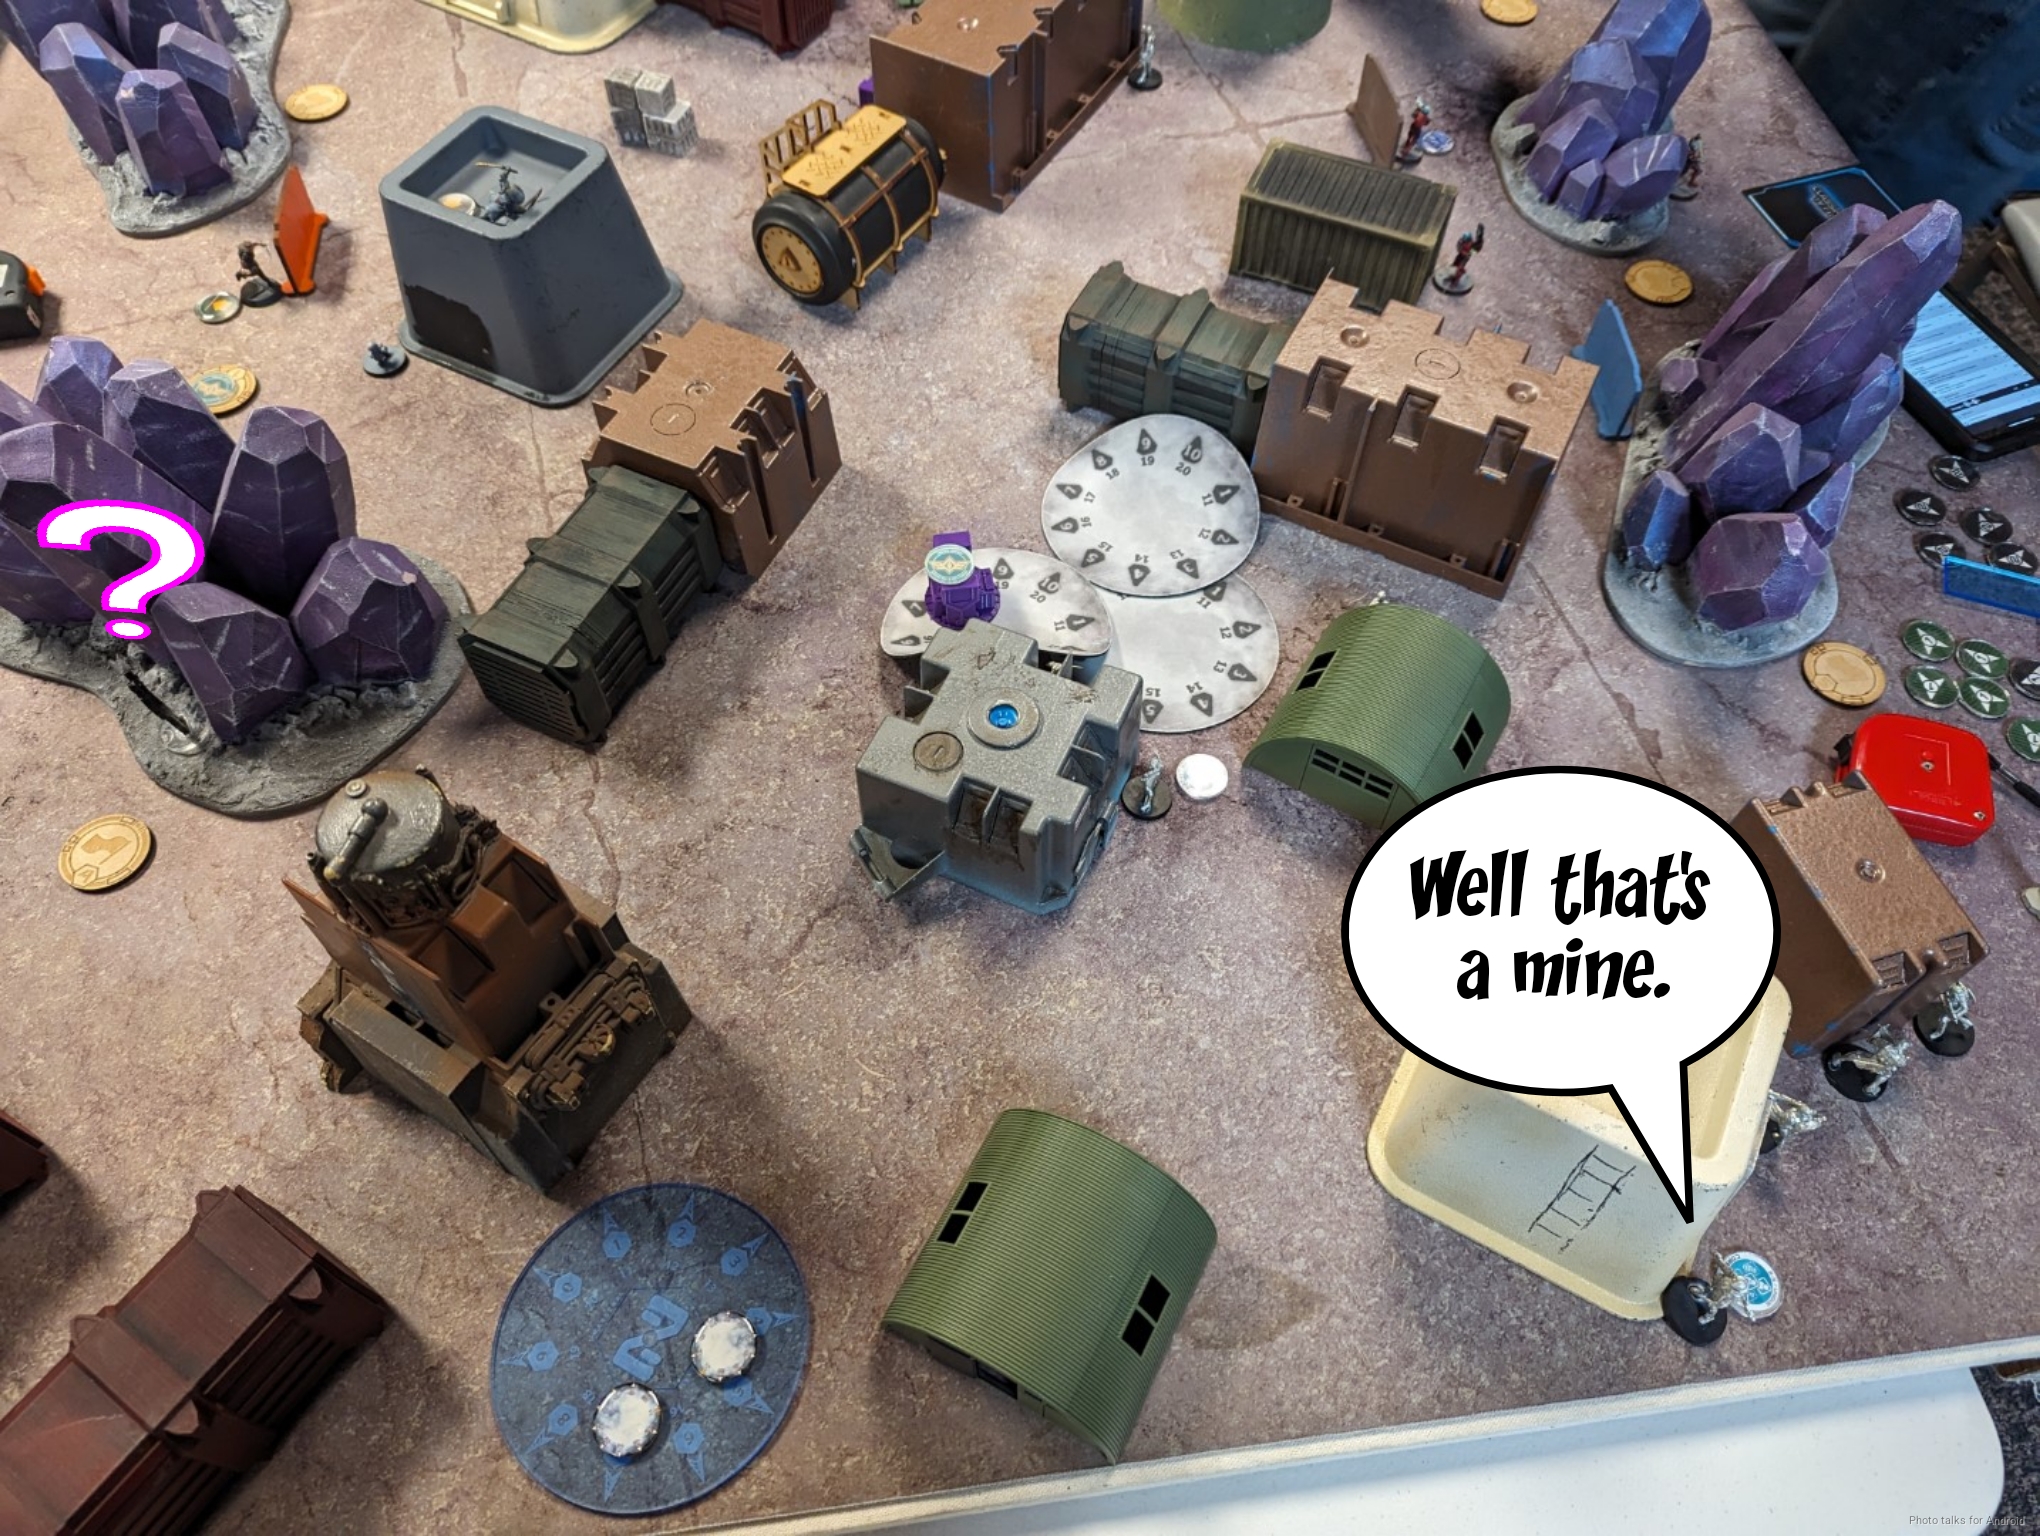
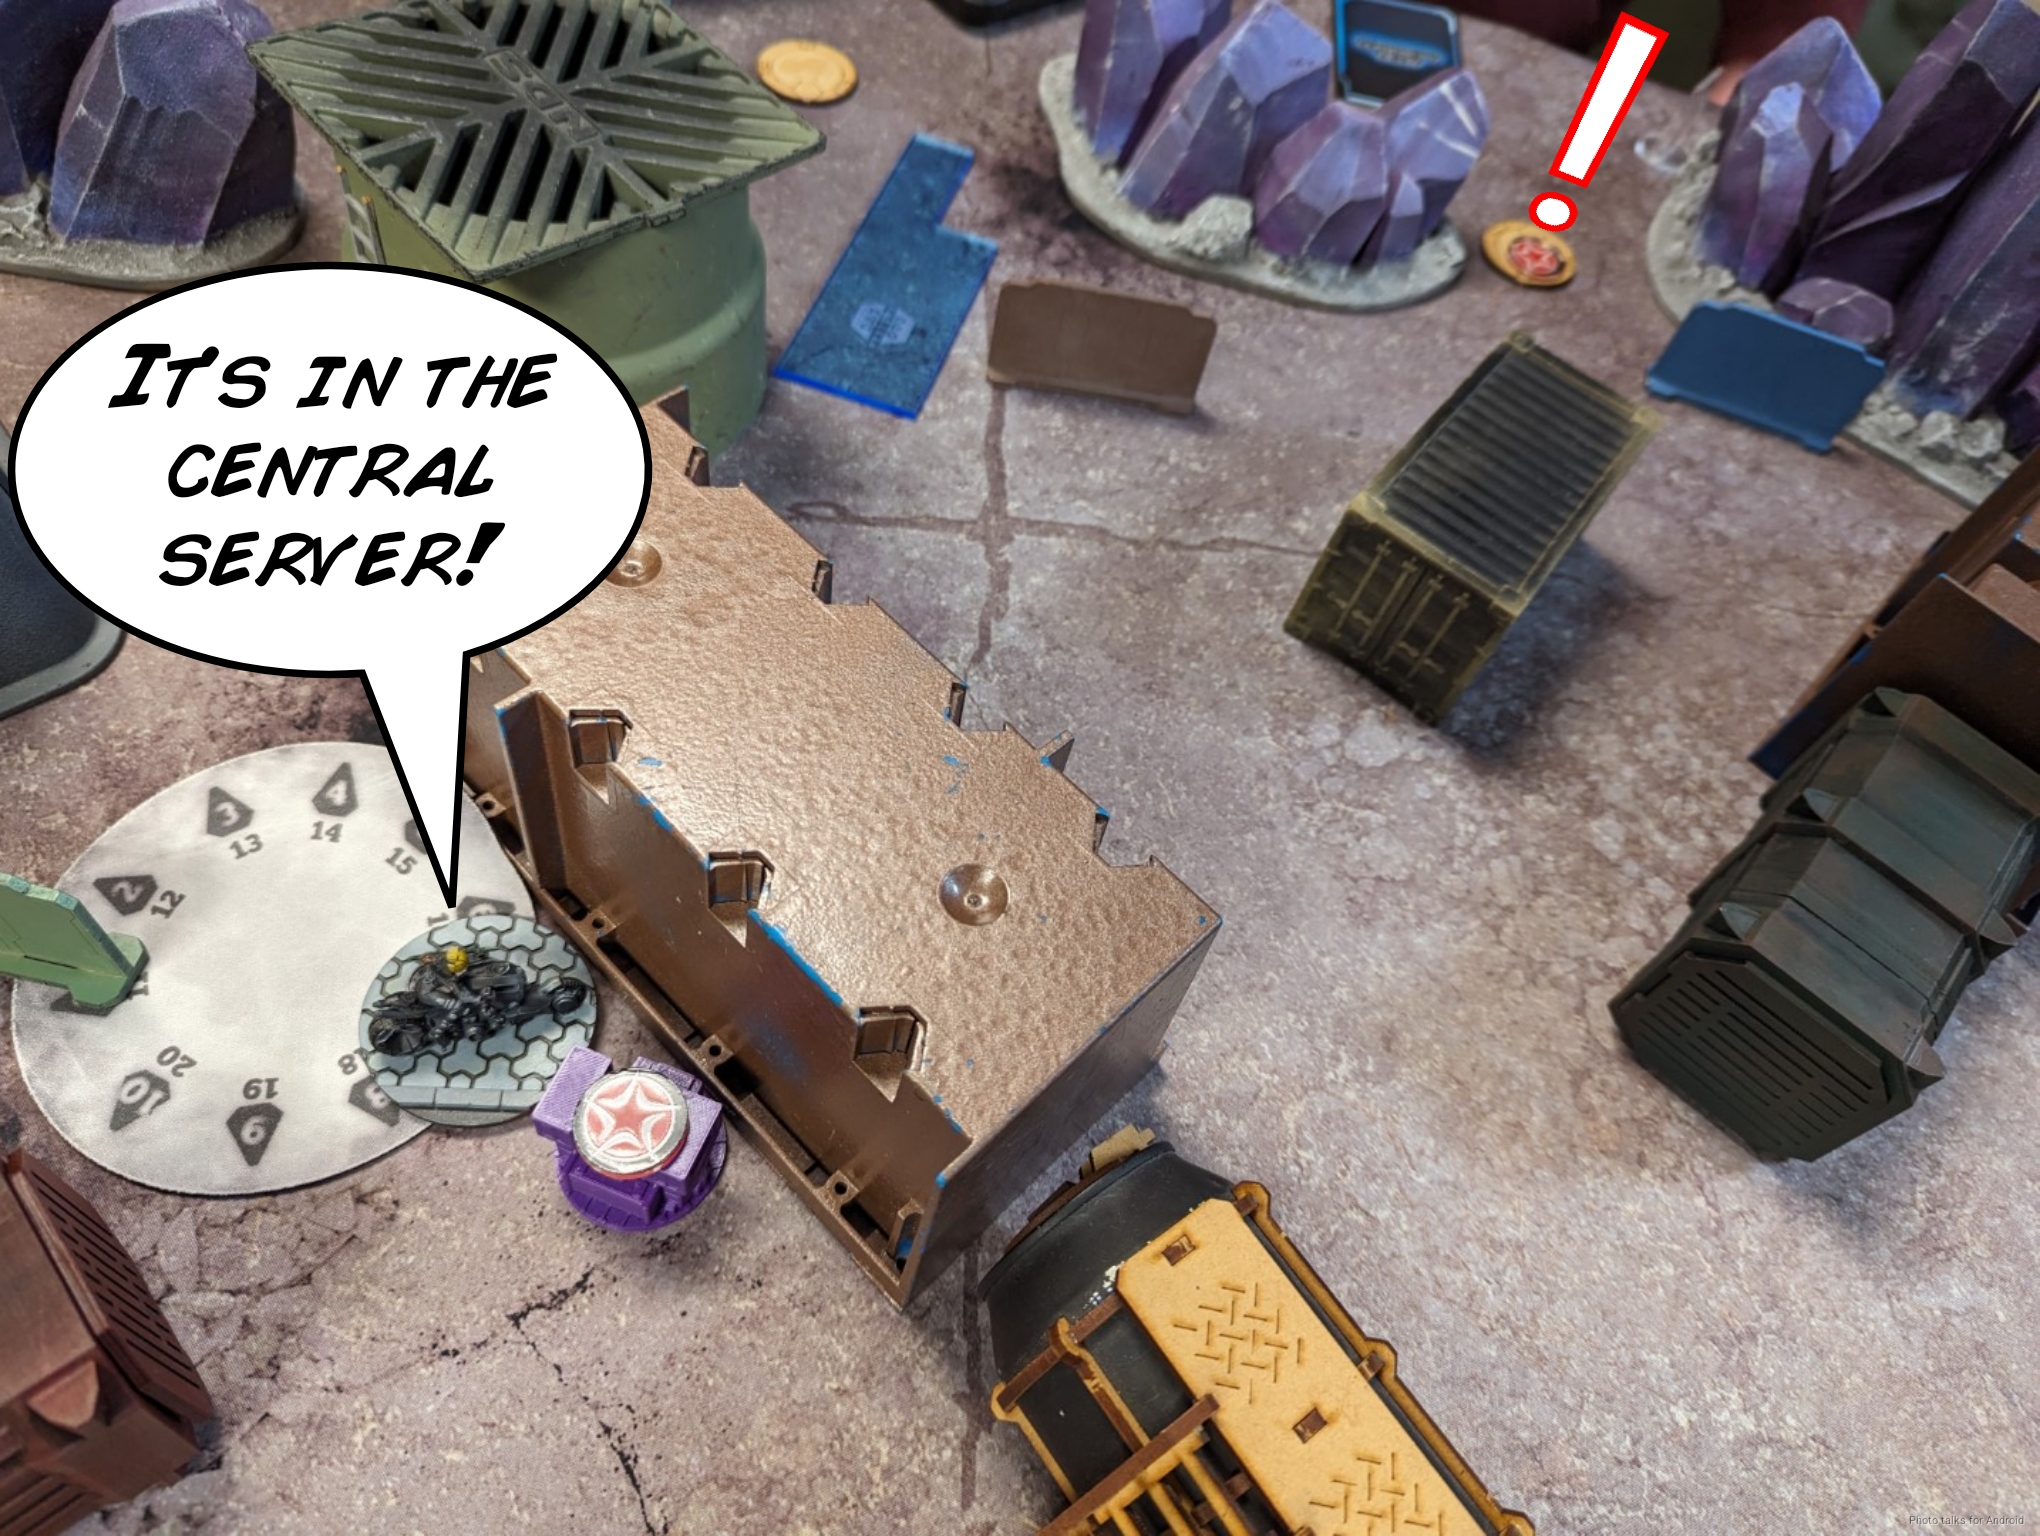
I forward deployed the Shikami, intending to cautious move off the roof if I needed to (or set up smoke), and it was in a good position to tackle either console and then attack into Jordan’s deployment zone. Kuroshi went on the left to cover that objective and to set up smoke in front of Phoenix should I need it. Jordan had forgotten to hold something in reserve but declined to change anything about his deployment, so I put the O-Yoroi down with its Koala covering the approach to the central server–the Ryuken-9s’ mines were covering the flanking servers.
Turn 1
Top of 1 – Steel Phalanx
I decided to take orders from Jordan’s second group, as I wanted to force Hippolyta to either overextend and not be able to reset, or pin her in place. Jordan obliged by immediately activating her and throwing smoke to cover the approach to the console on my right.
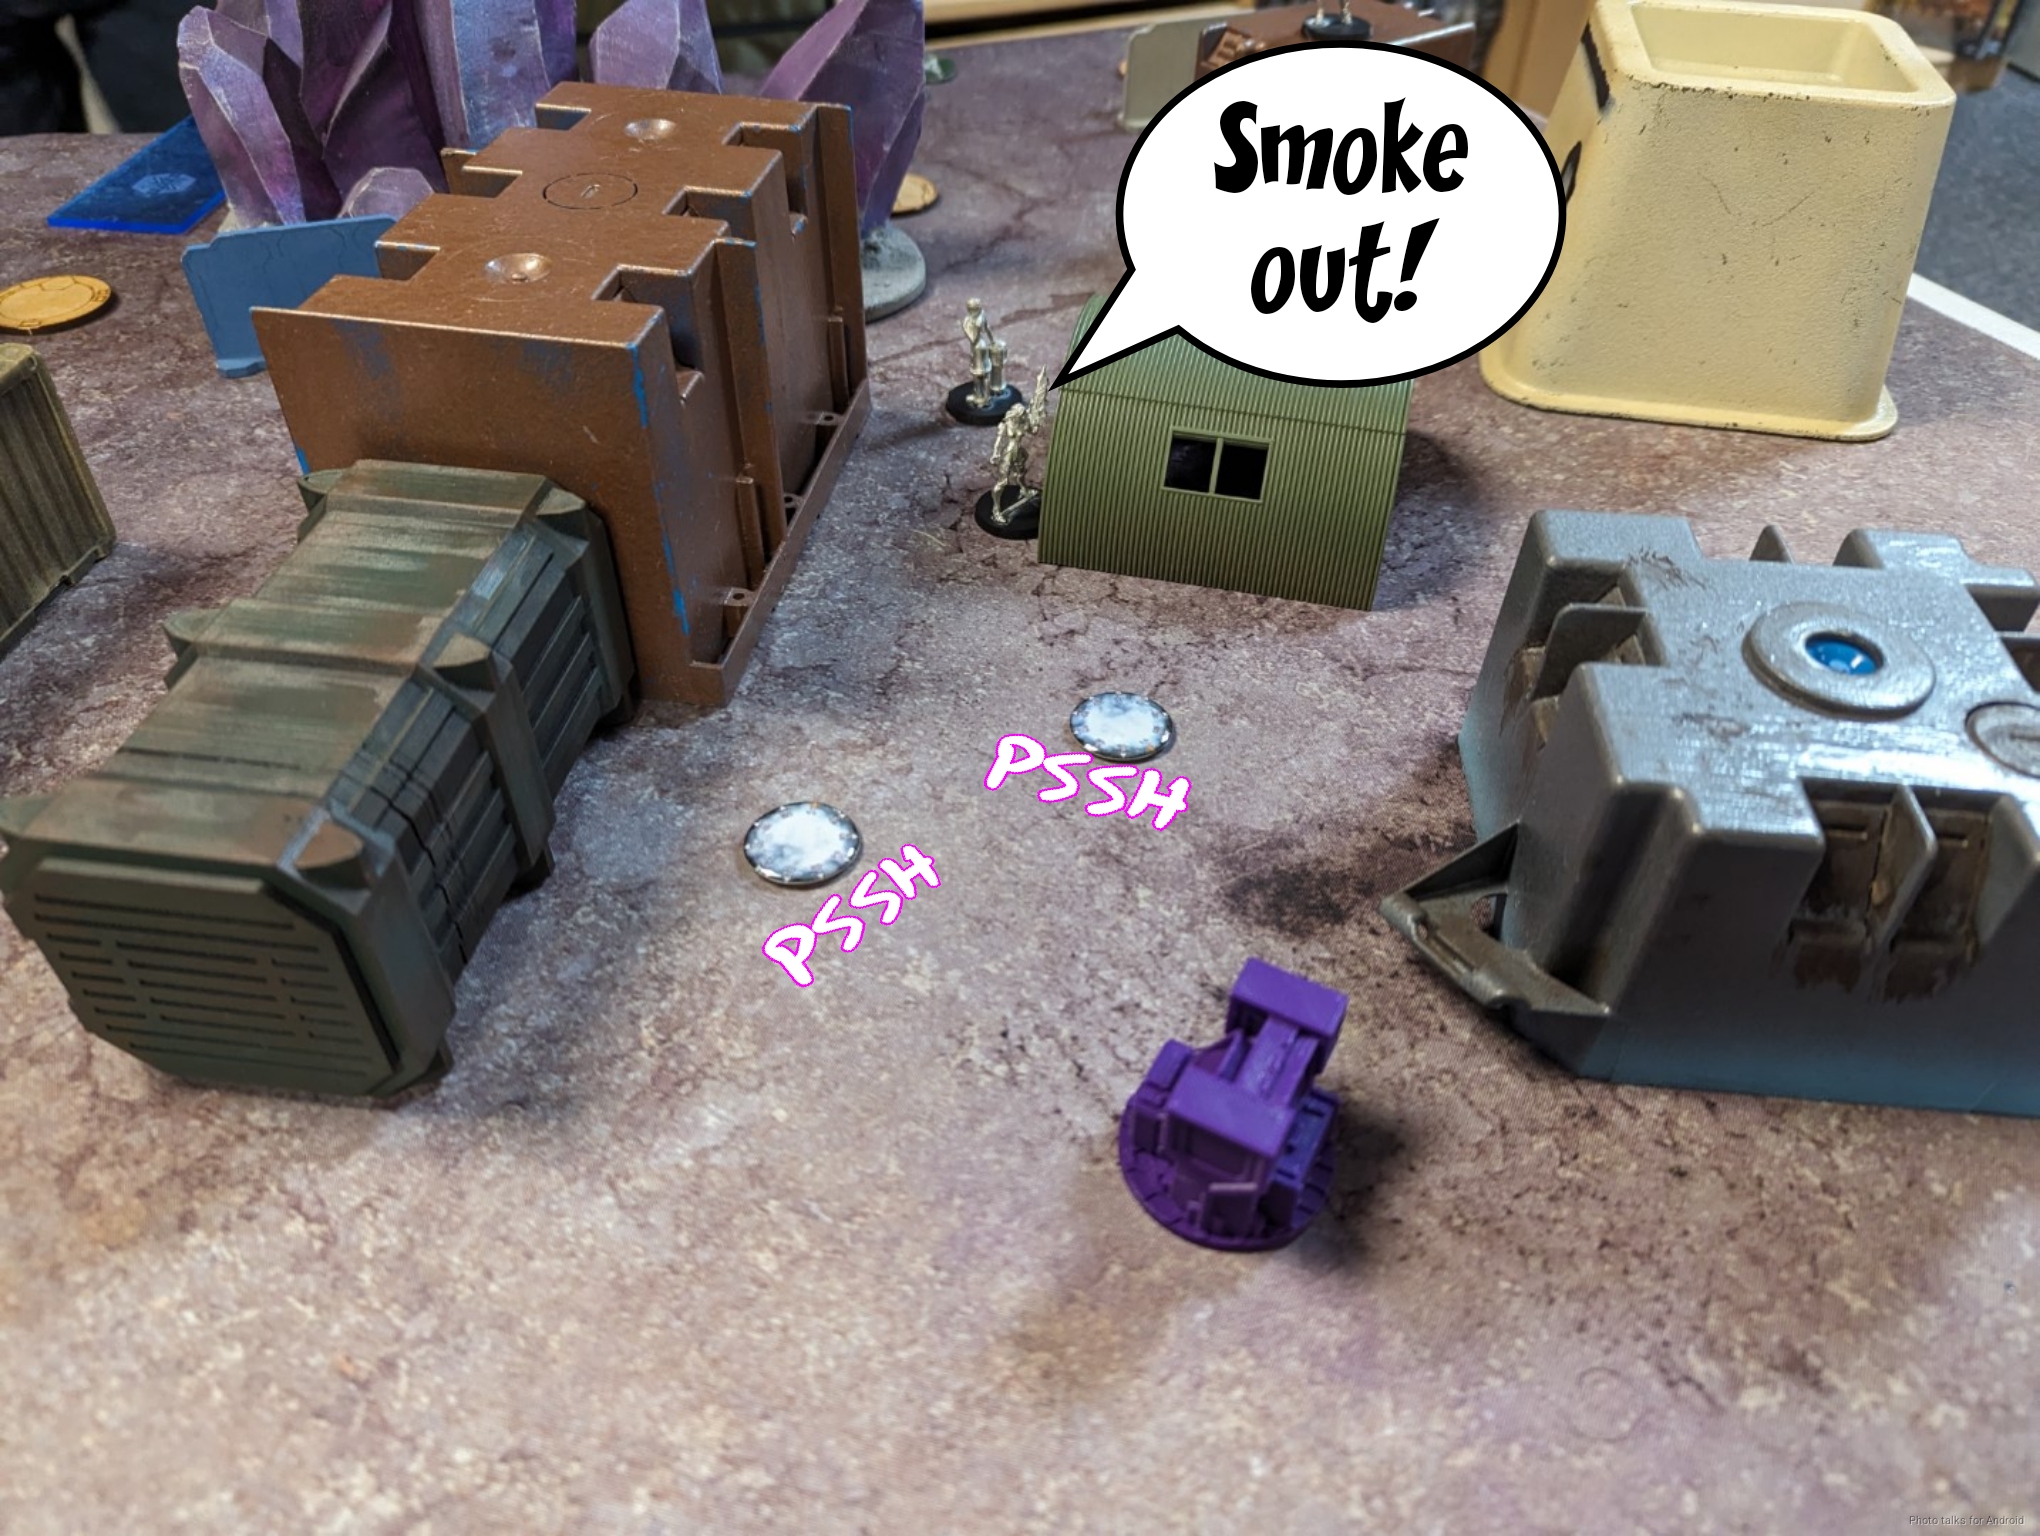
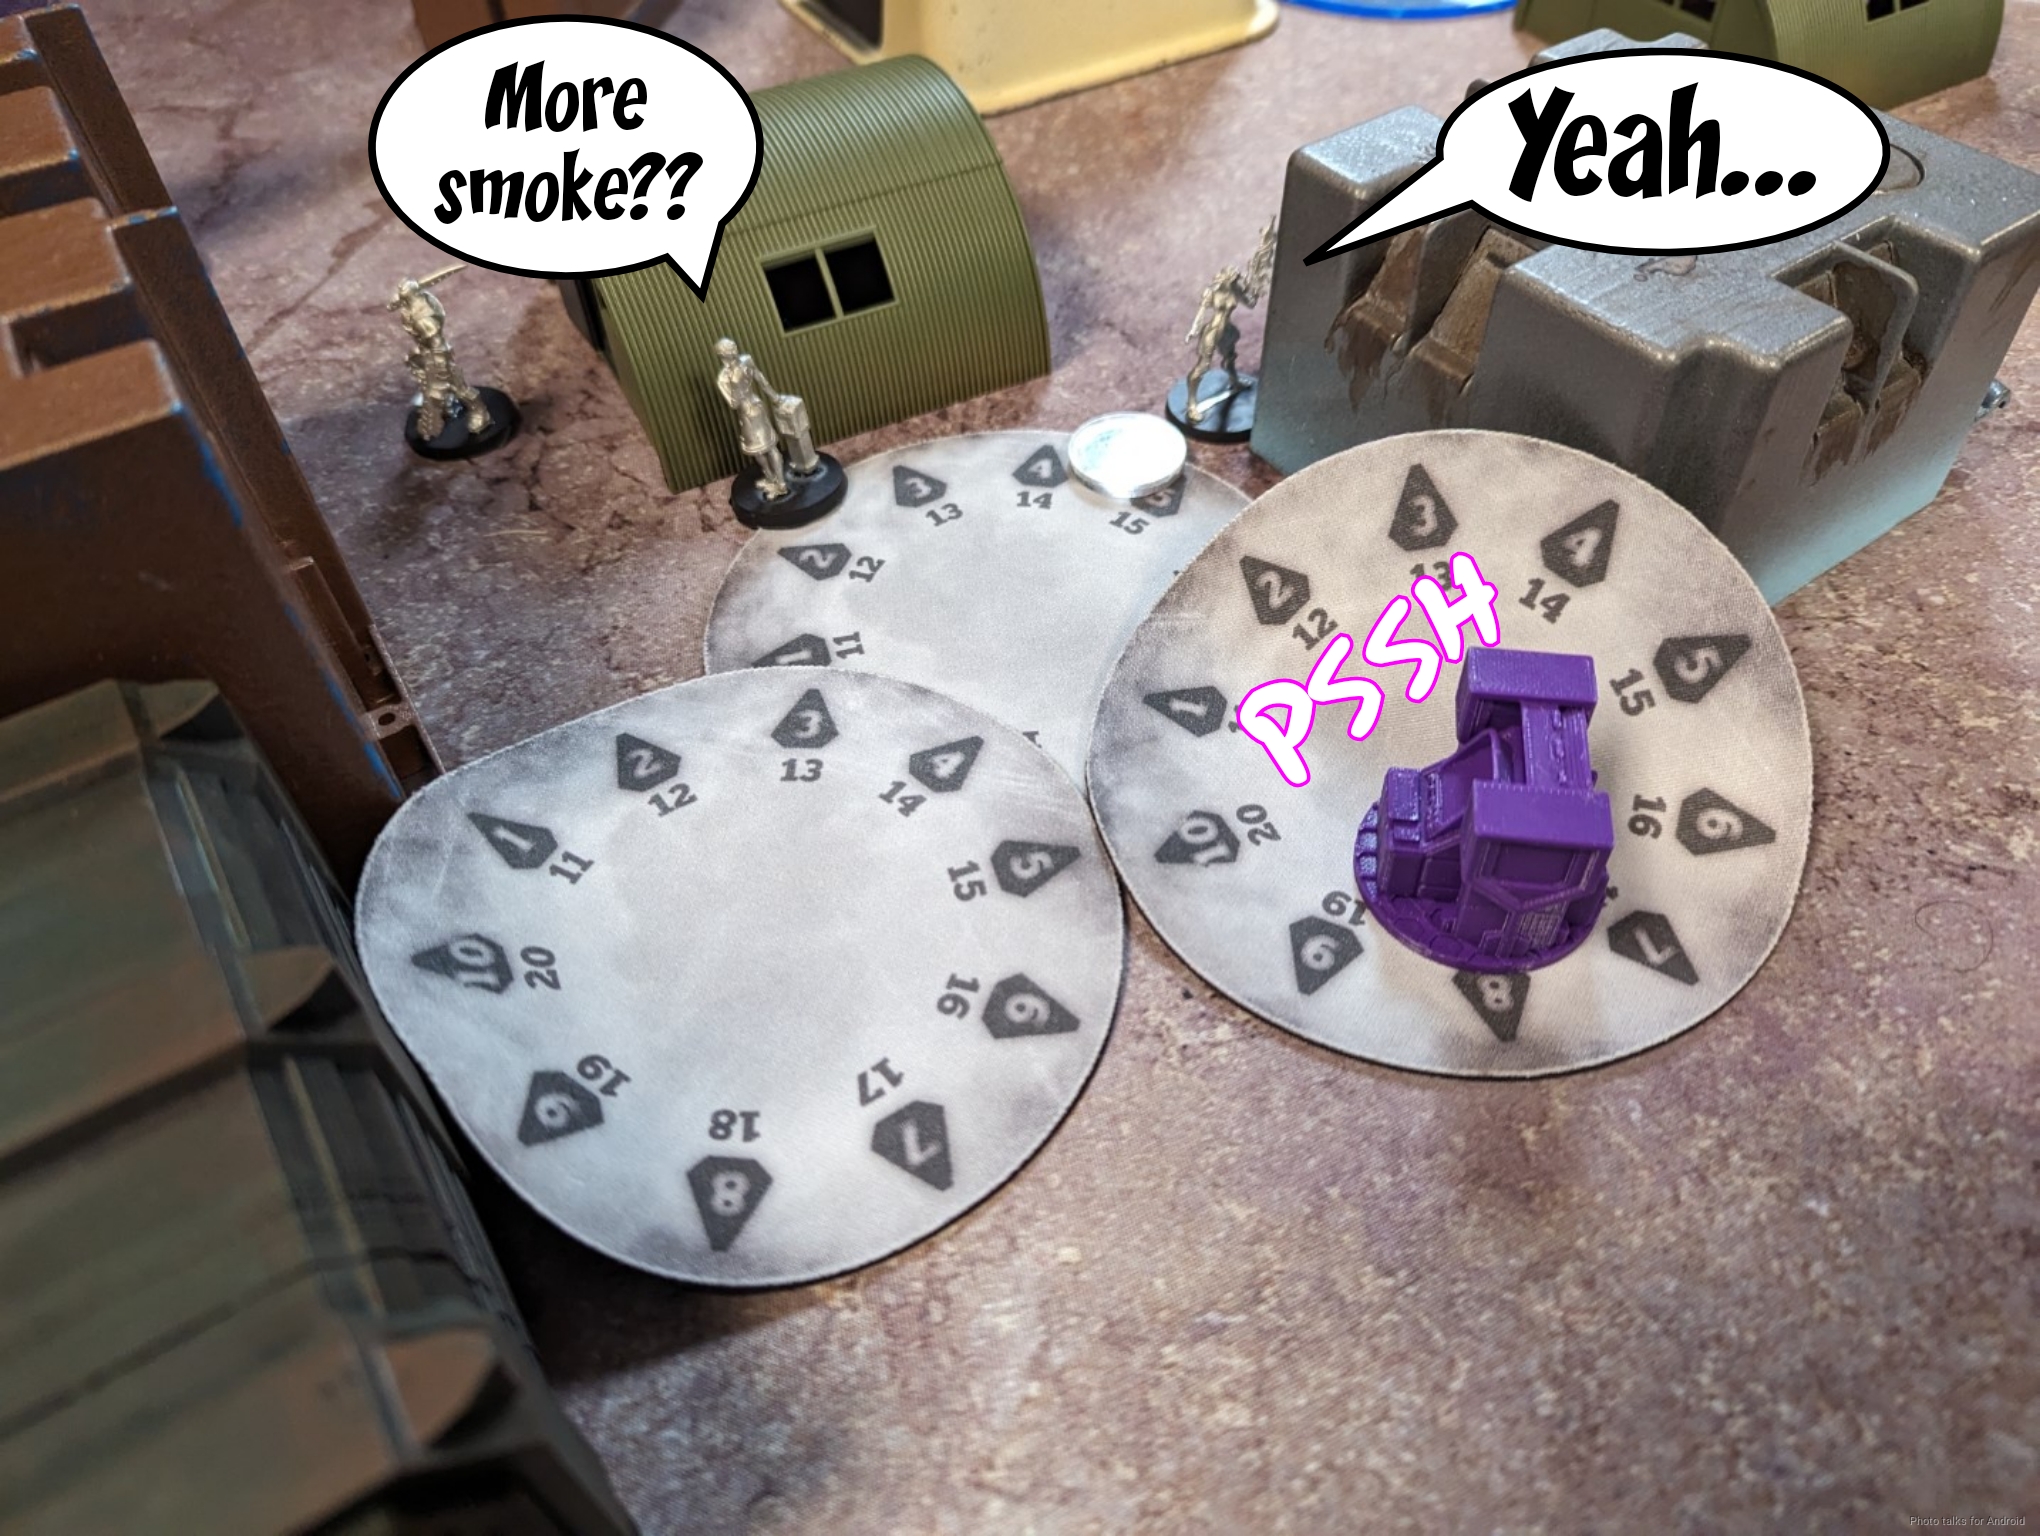
He realized that he hadn’t covered the entire approach, so had to throw some more smoke on top of the console to protect himself from the Ryuken-9 watching from on high.
With the smoke set up, he used Pandora’s uberhacker to flip the console, revealing my central server as the one with the Rogue AI.
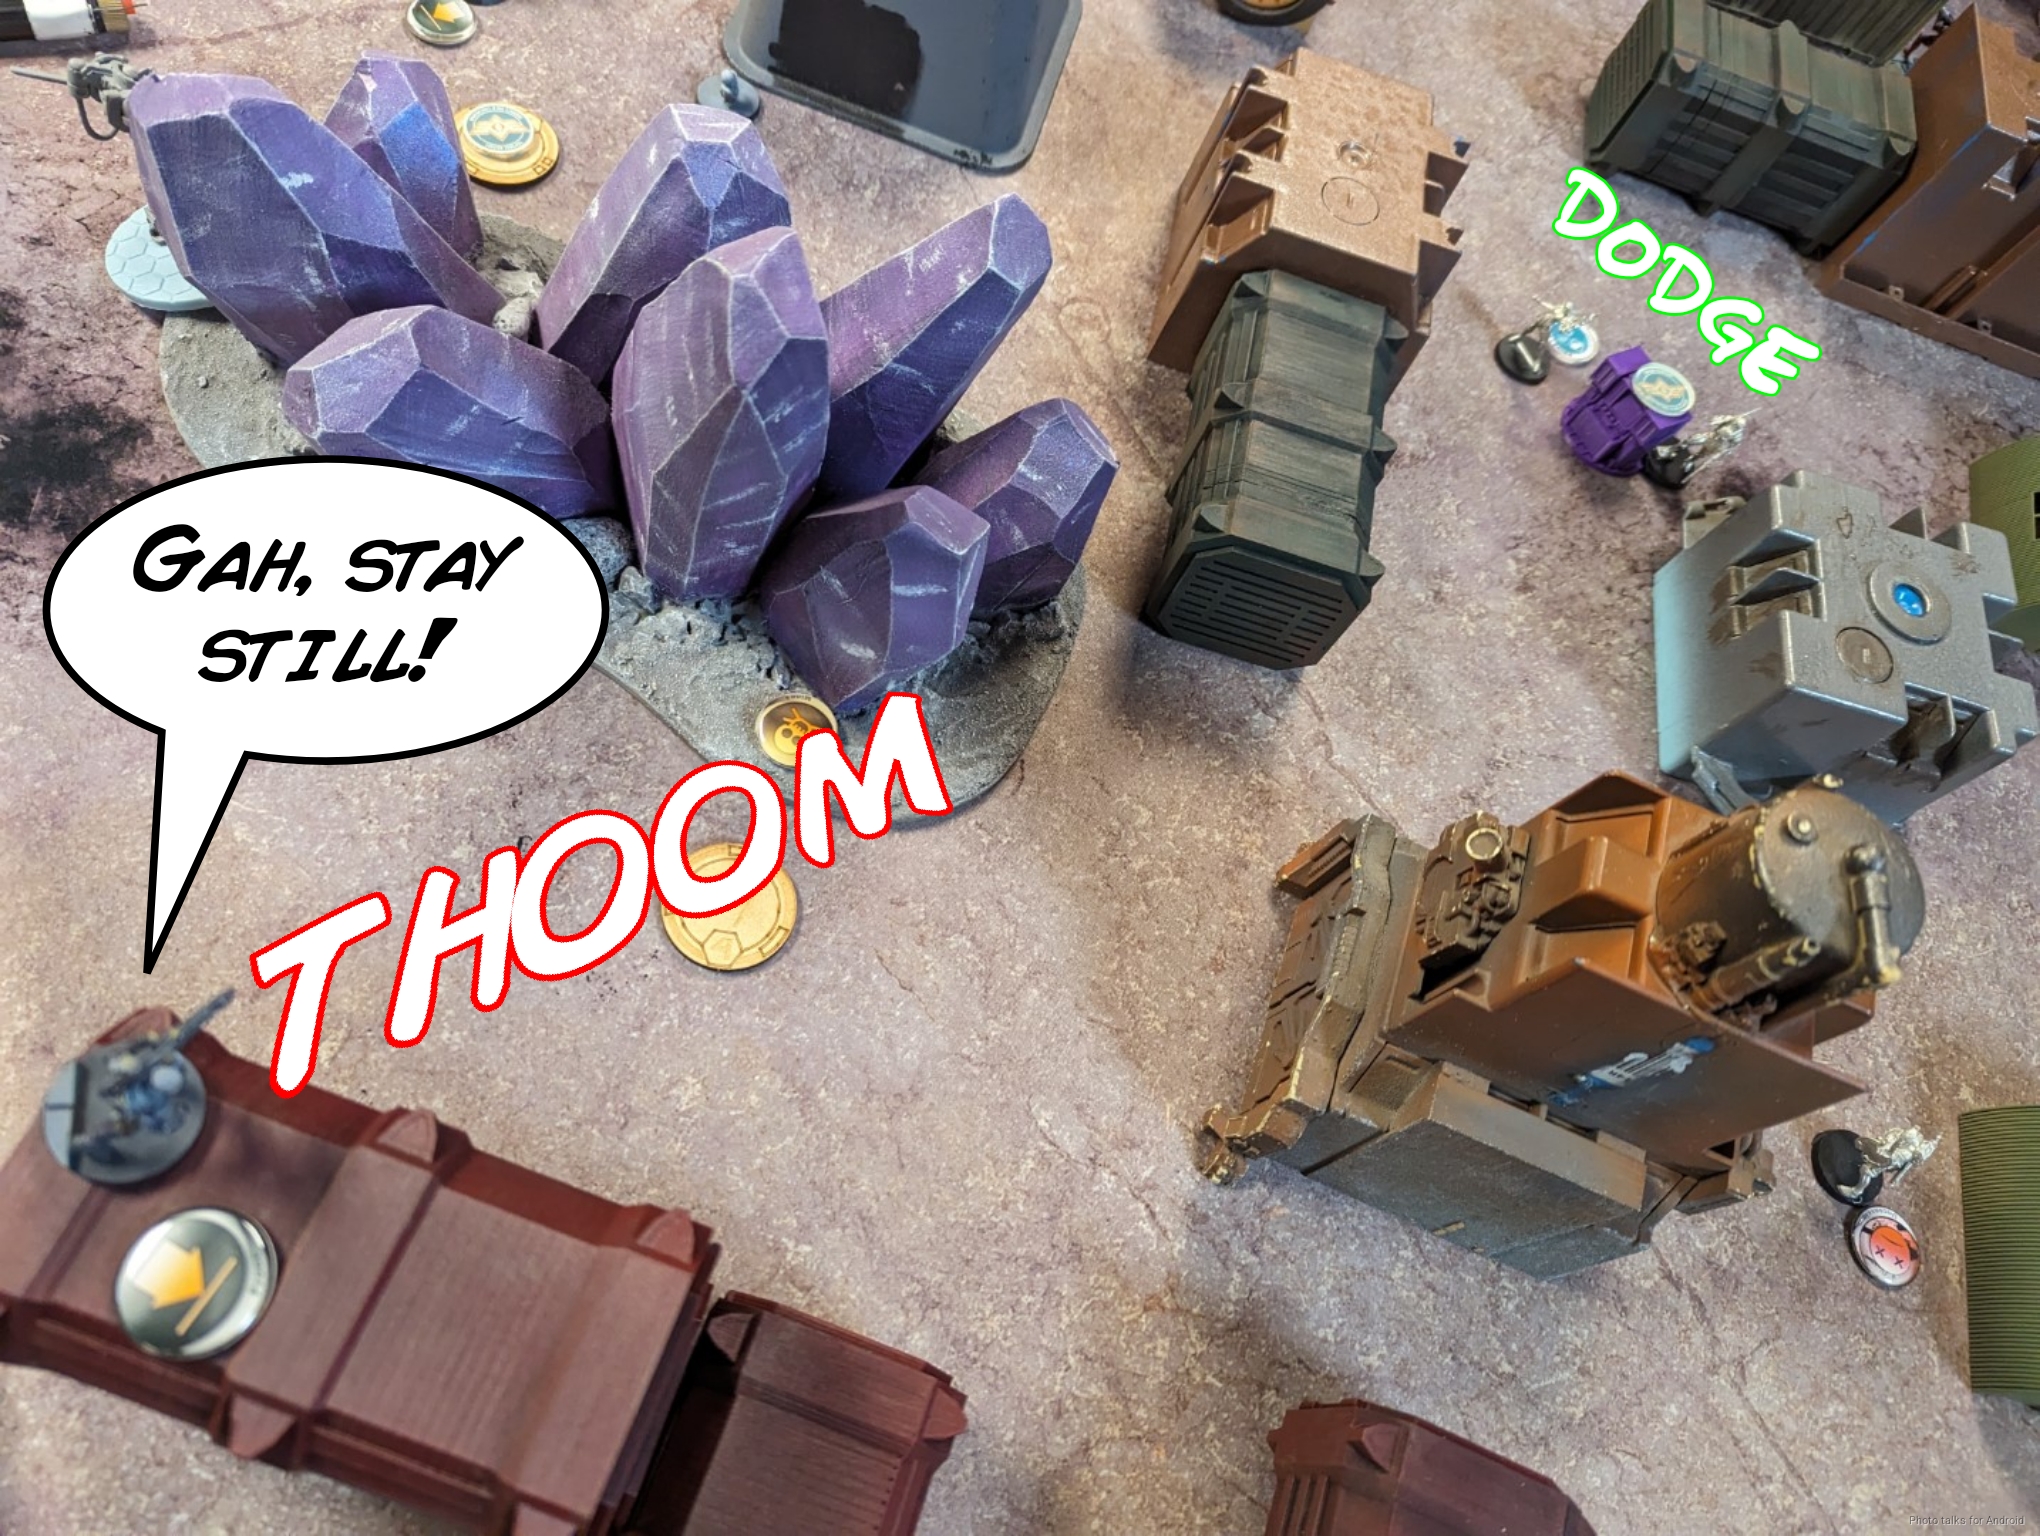
Jordan then spent 2 command tokens to reform the link and get an extra order to reset the link as best he could, ending the activation of his second group. Now it was time for him to attack my units. He started by launching two missiles at the Karakuri. I managed to beat one of them, but the second did a structure to the Karakuri. I wasn’t convinced that I could really do much more than that, so I failed guts to safety. I’m just trying to drain orders here, not do anything more serious.
Next the Makhe tried to discover the Ryuken-9 but failed due to the range.
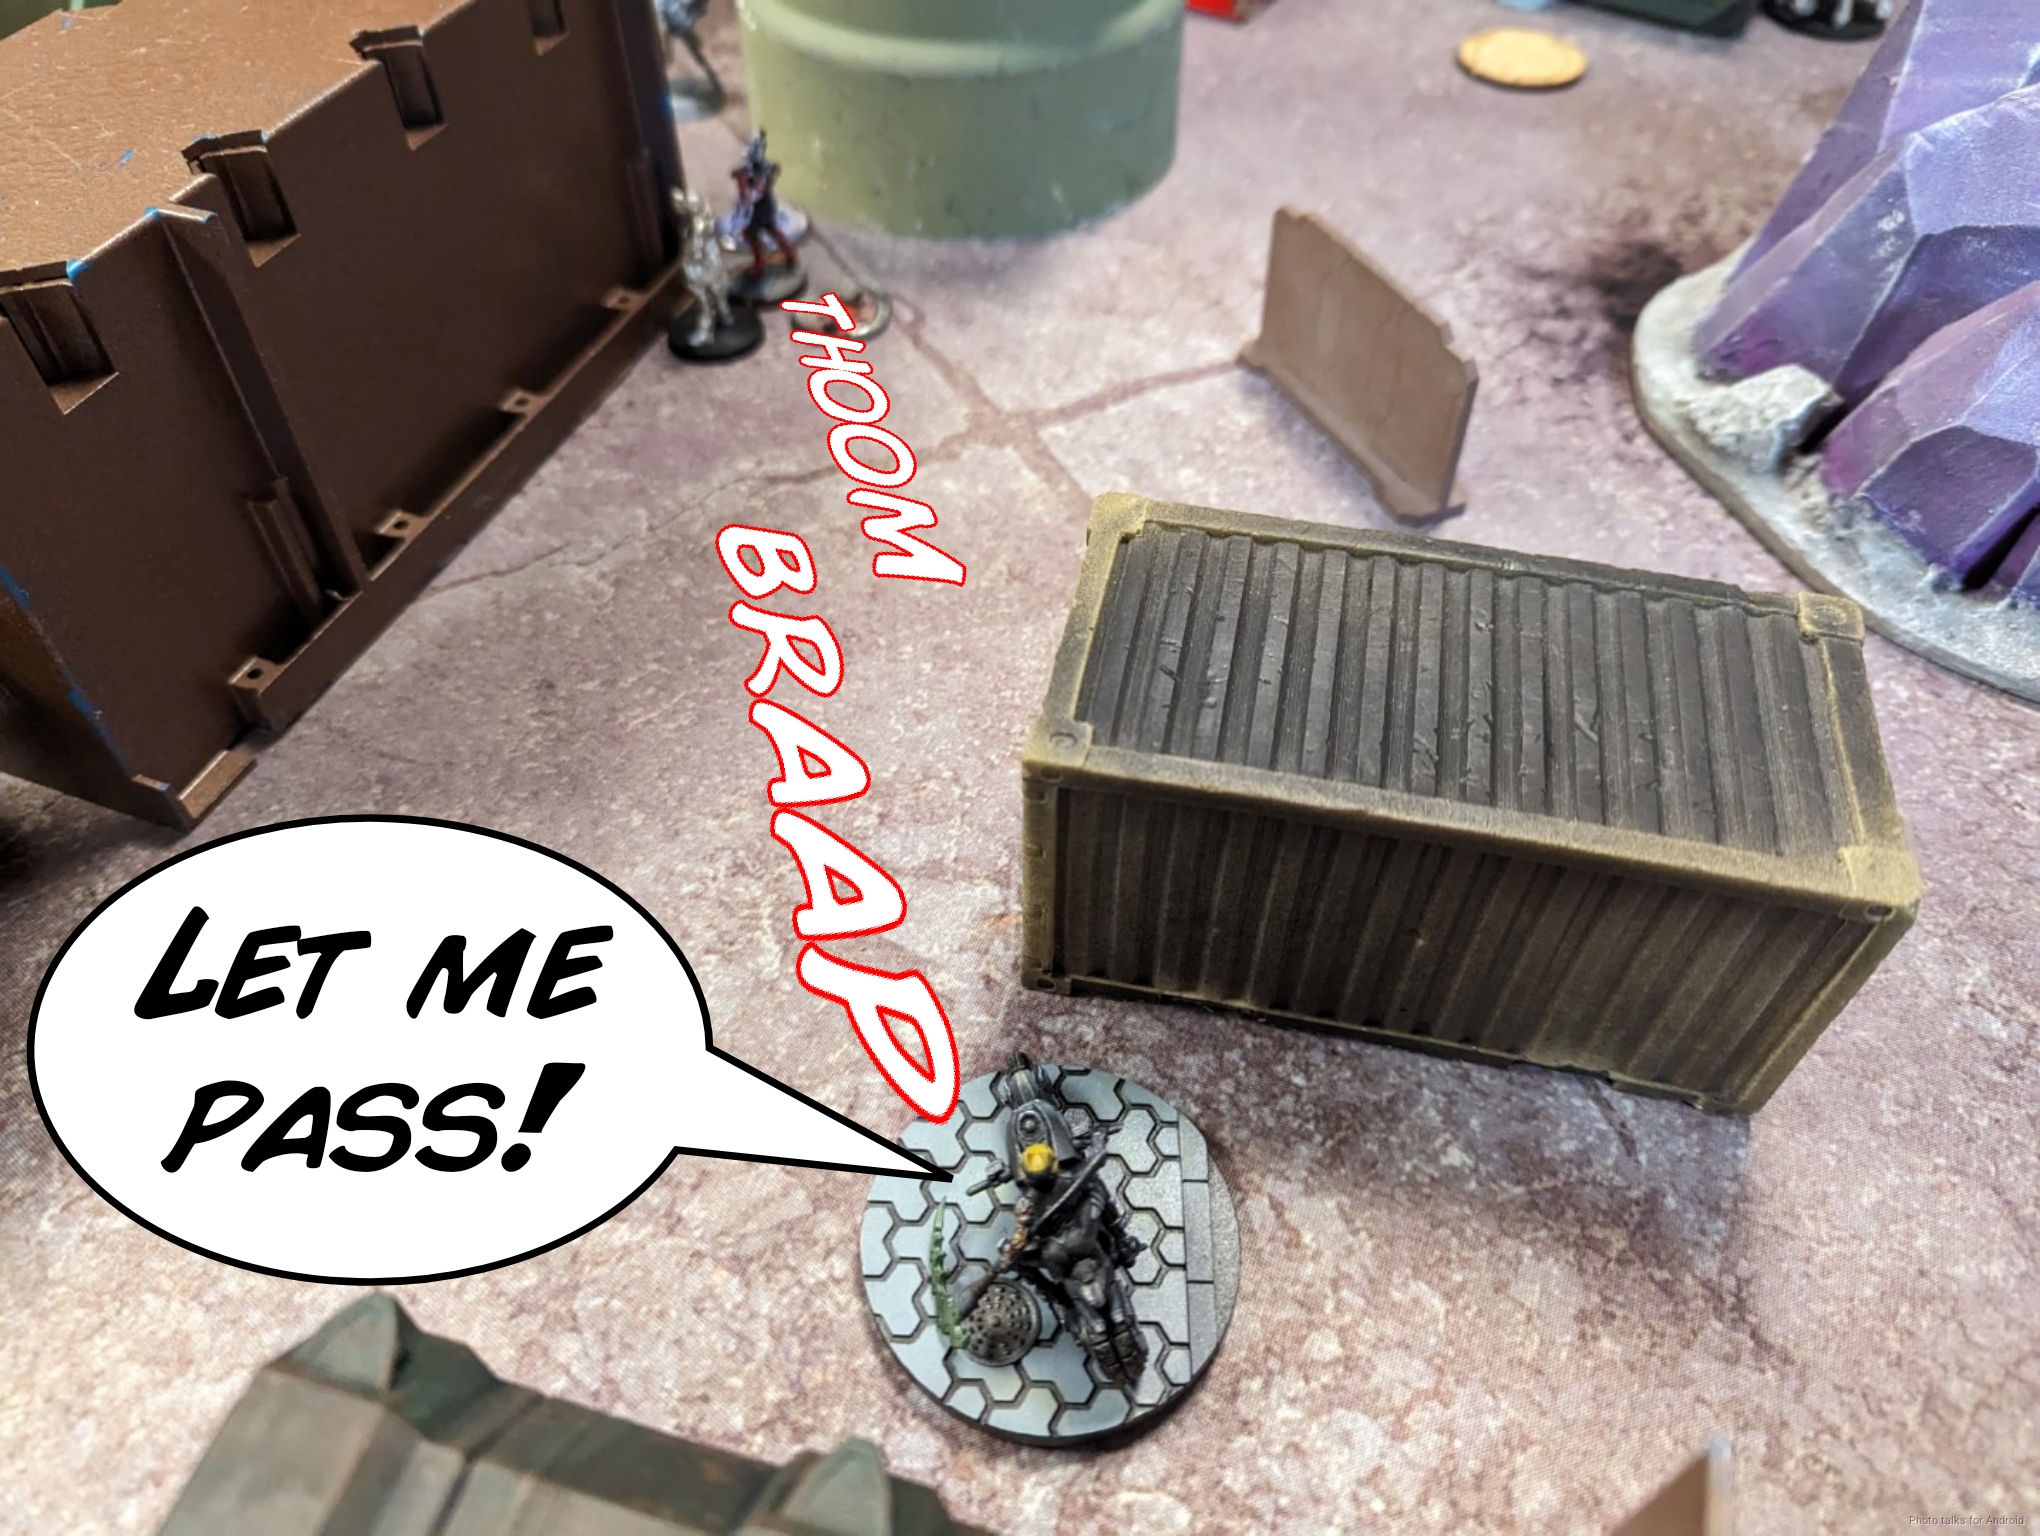
Jordan then decided to use the Makhe to try and take out my O-Yoroi on the first turn, which is a very high risk, high reward play. He discovered the Ryuken’s mine along the way to ease the approach to that server later if he needed it.
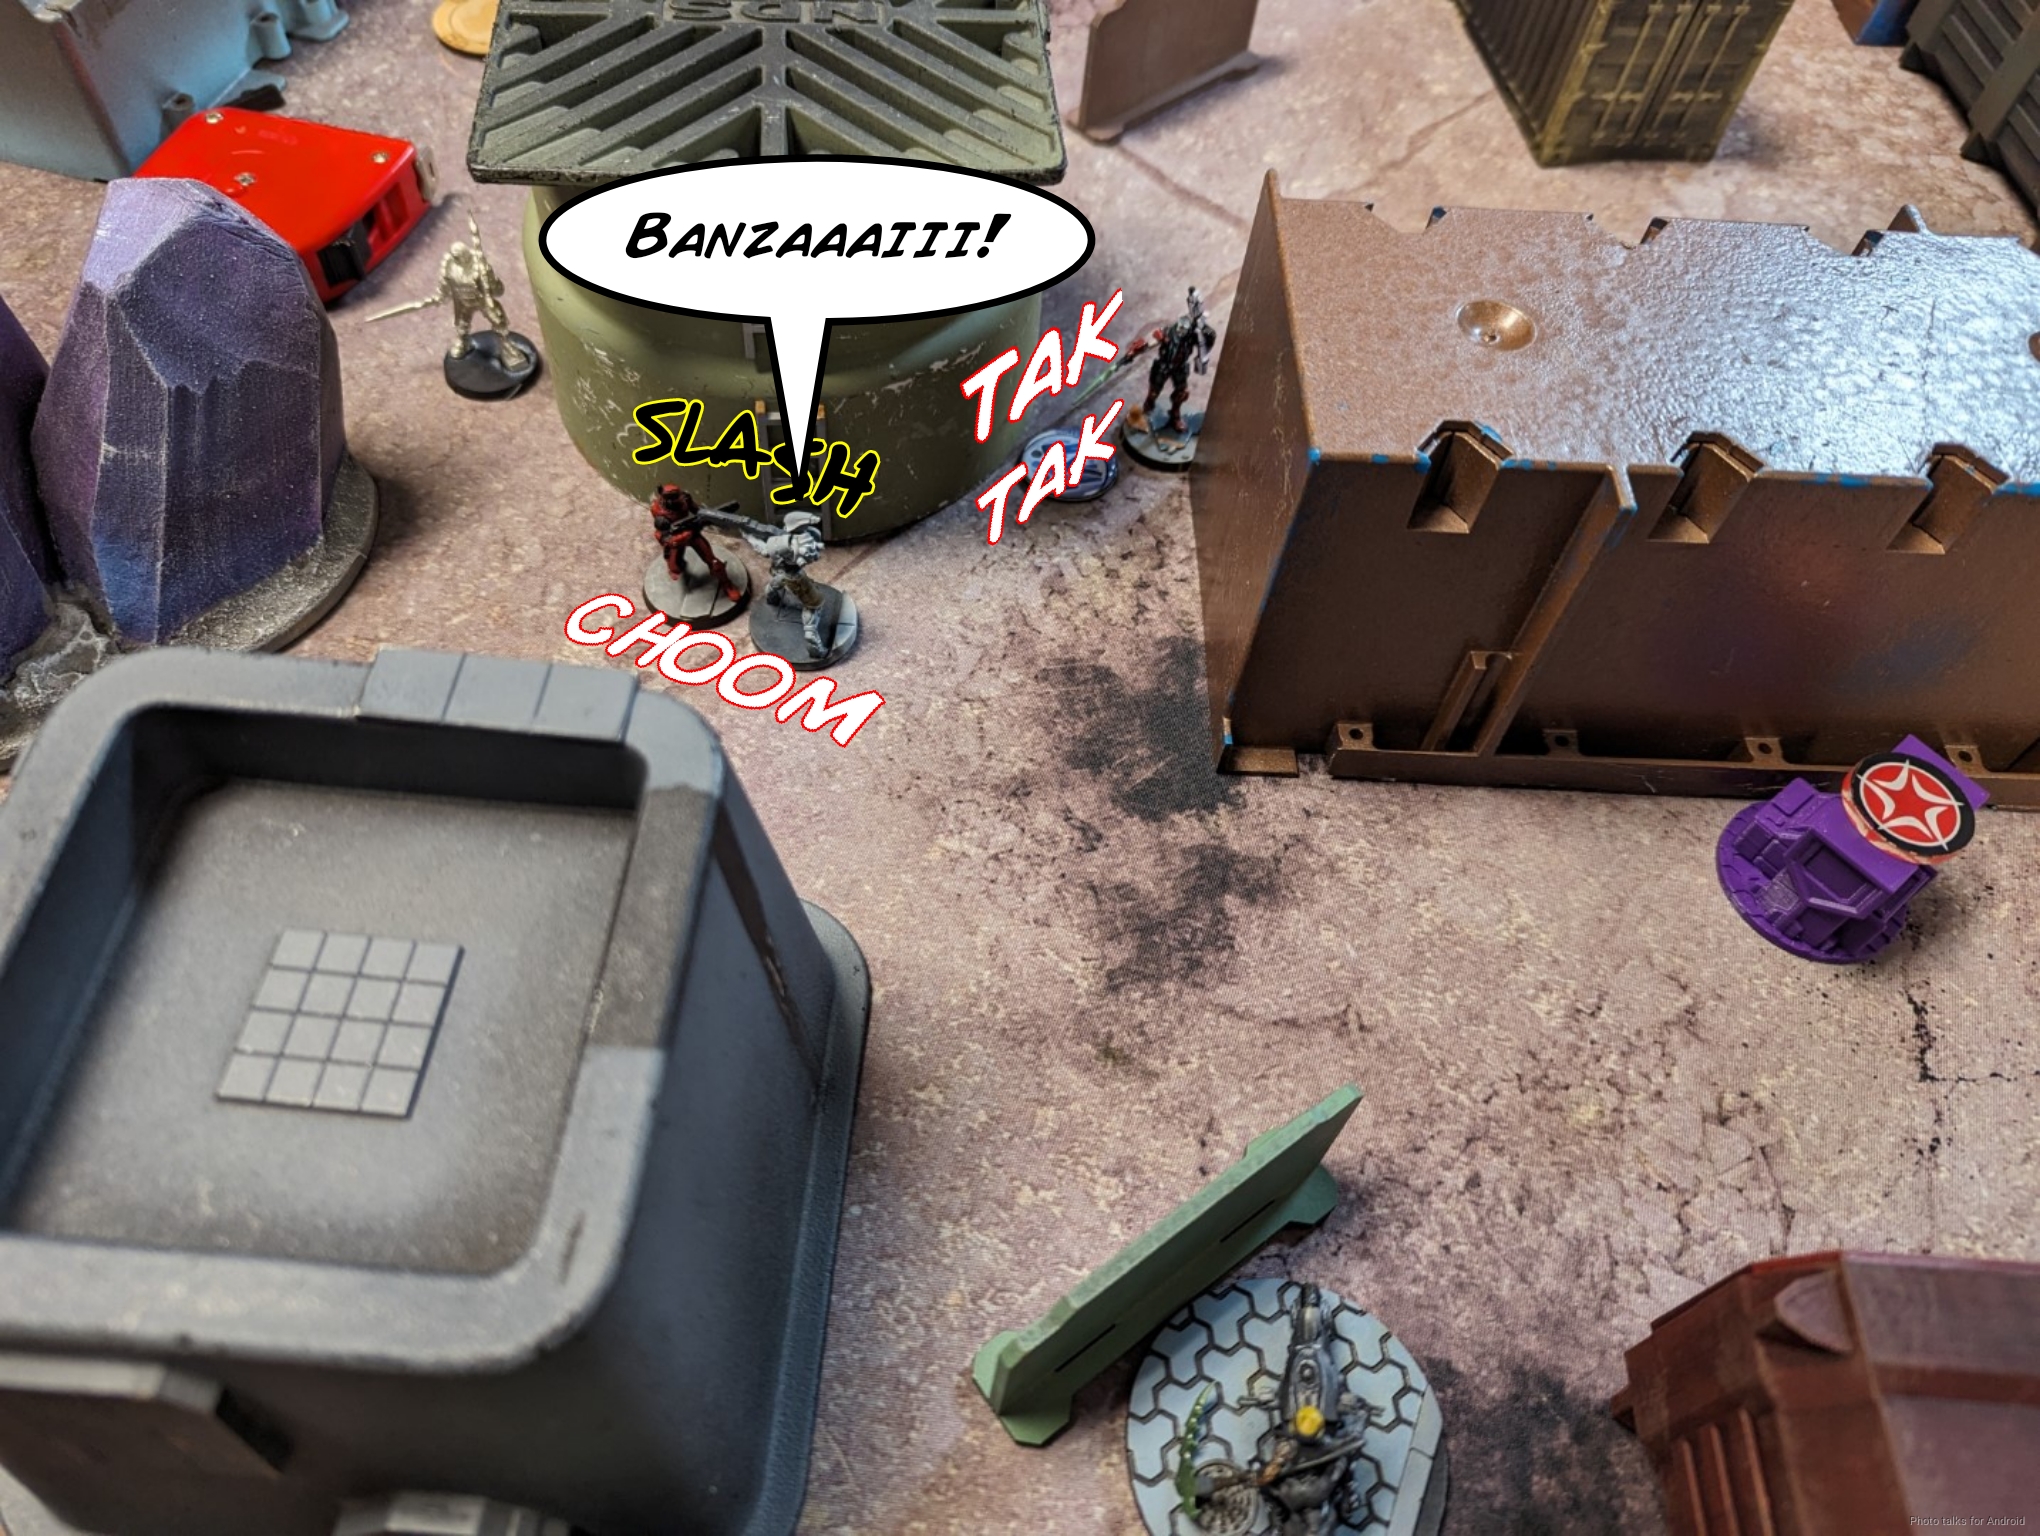
He then kept advancing the Makhe, using the shadow of a tall building to protect himself from the Ryuken, eventually dodging into view on the second half.
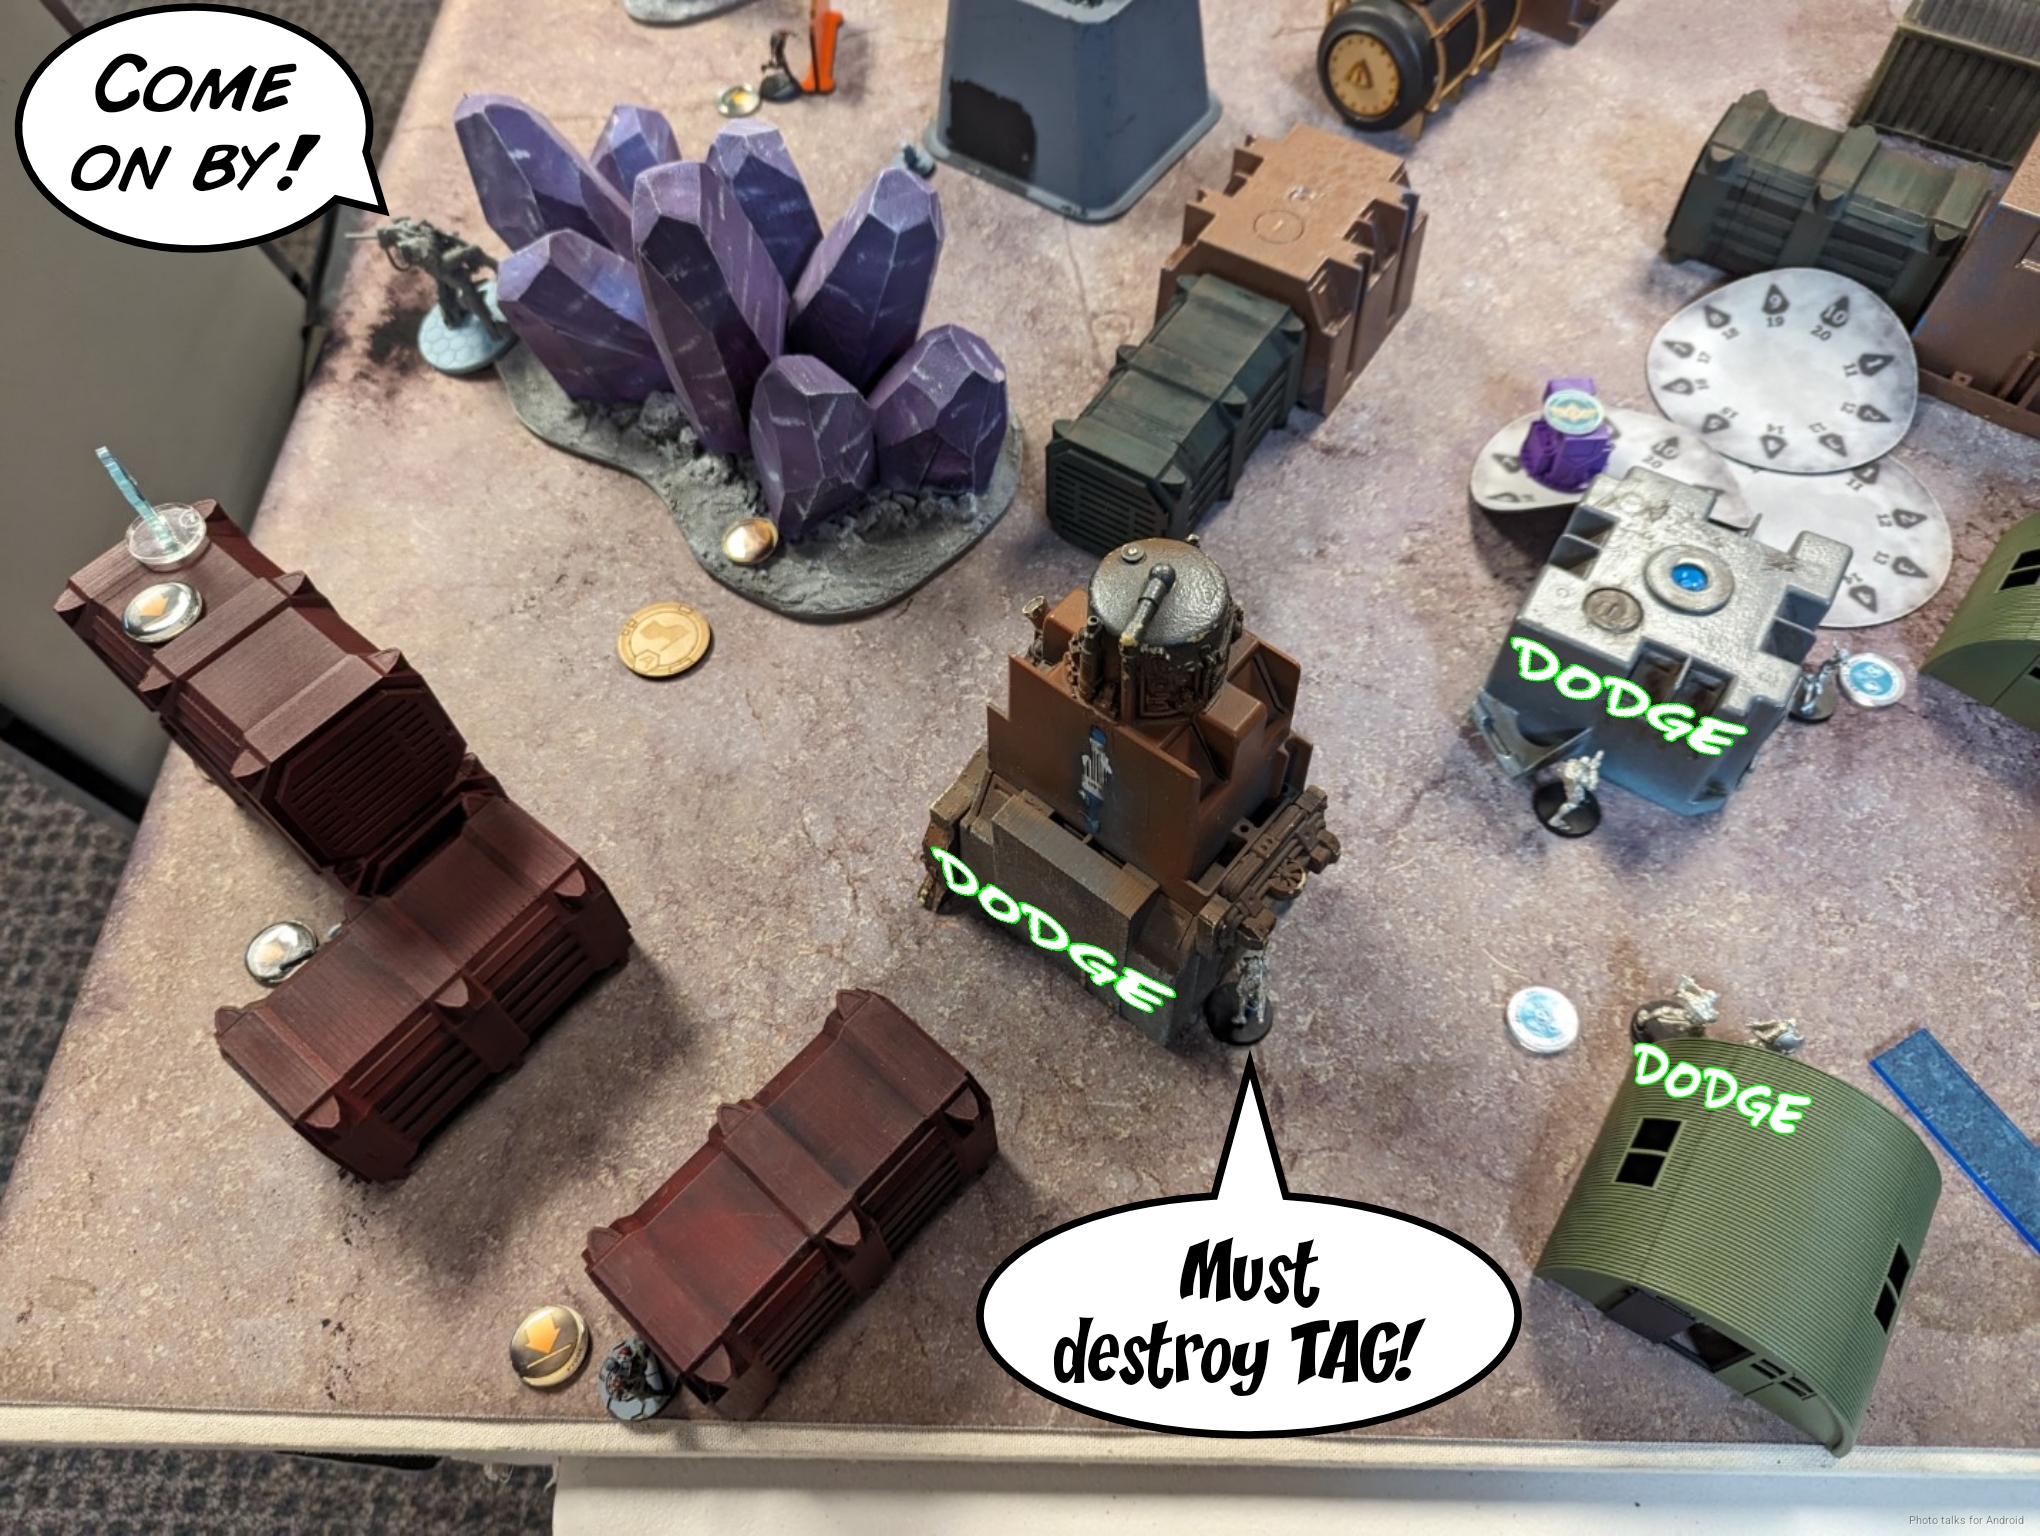
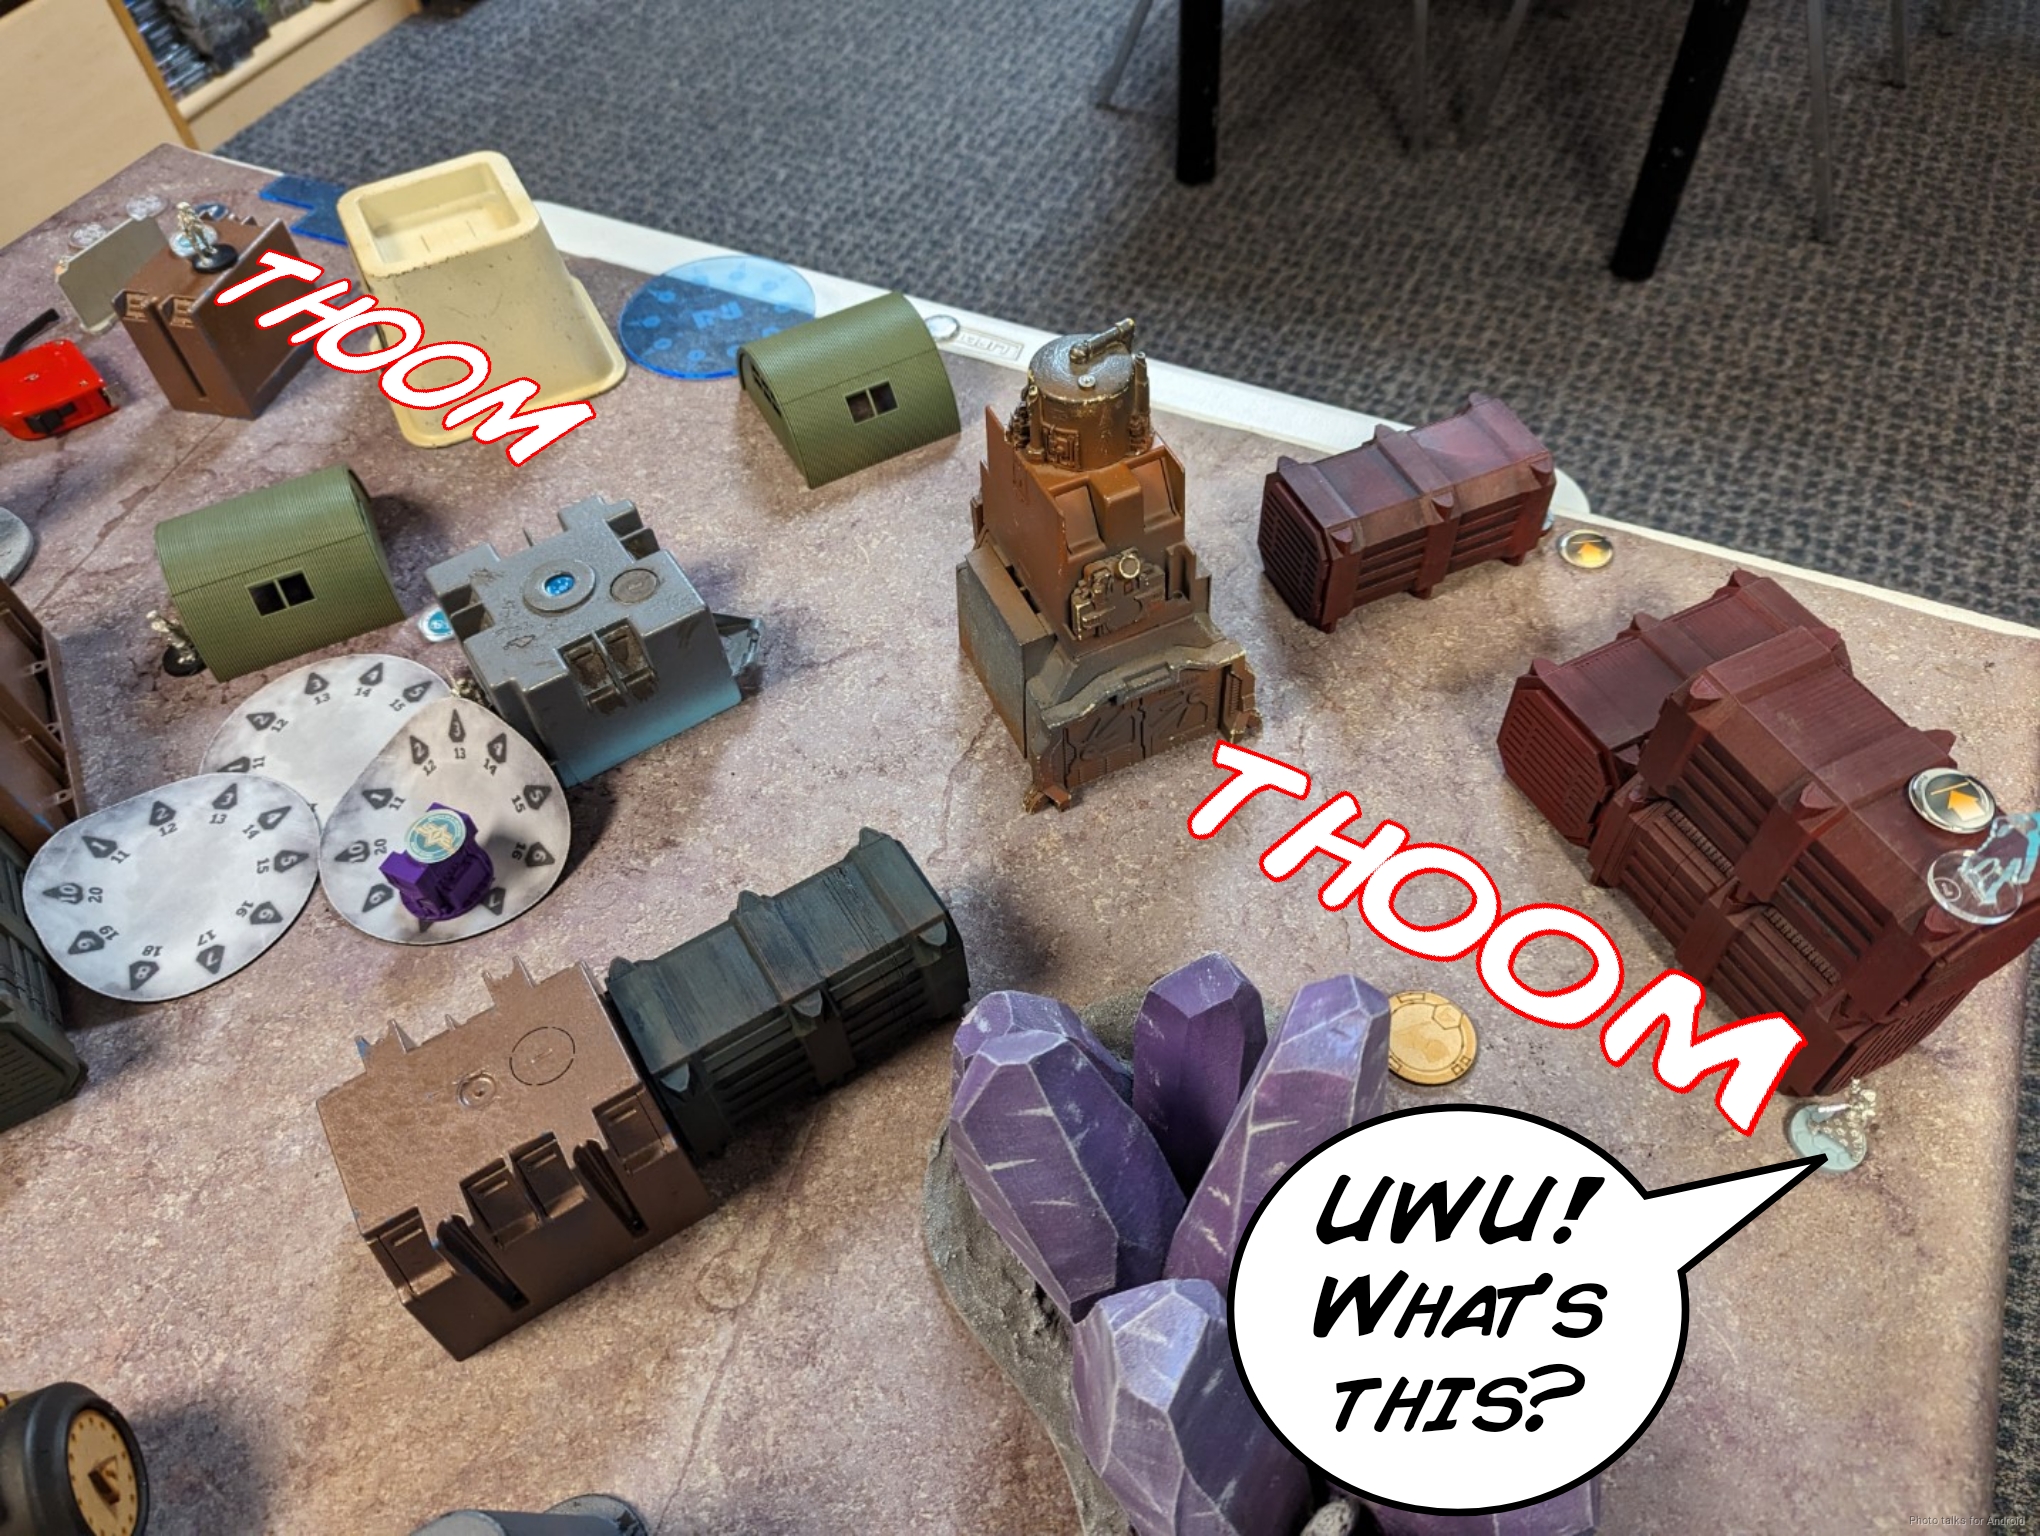
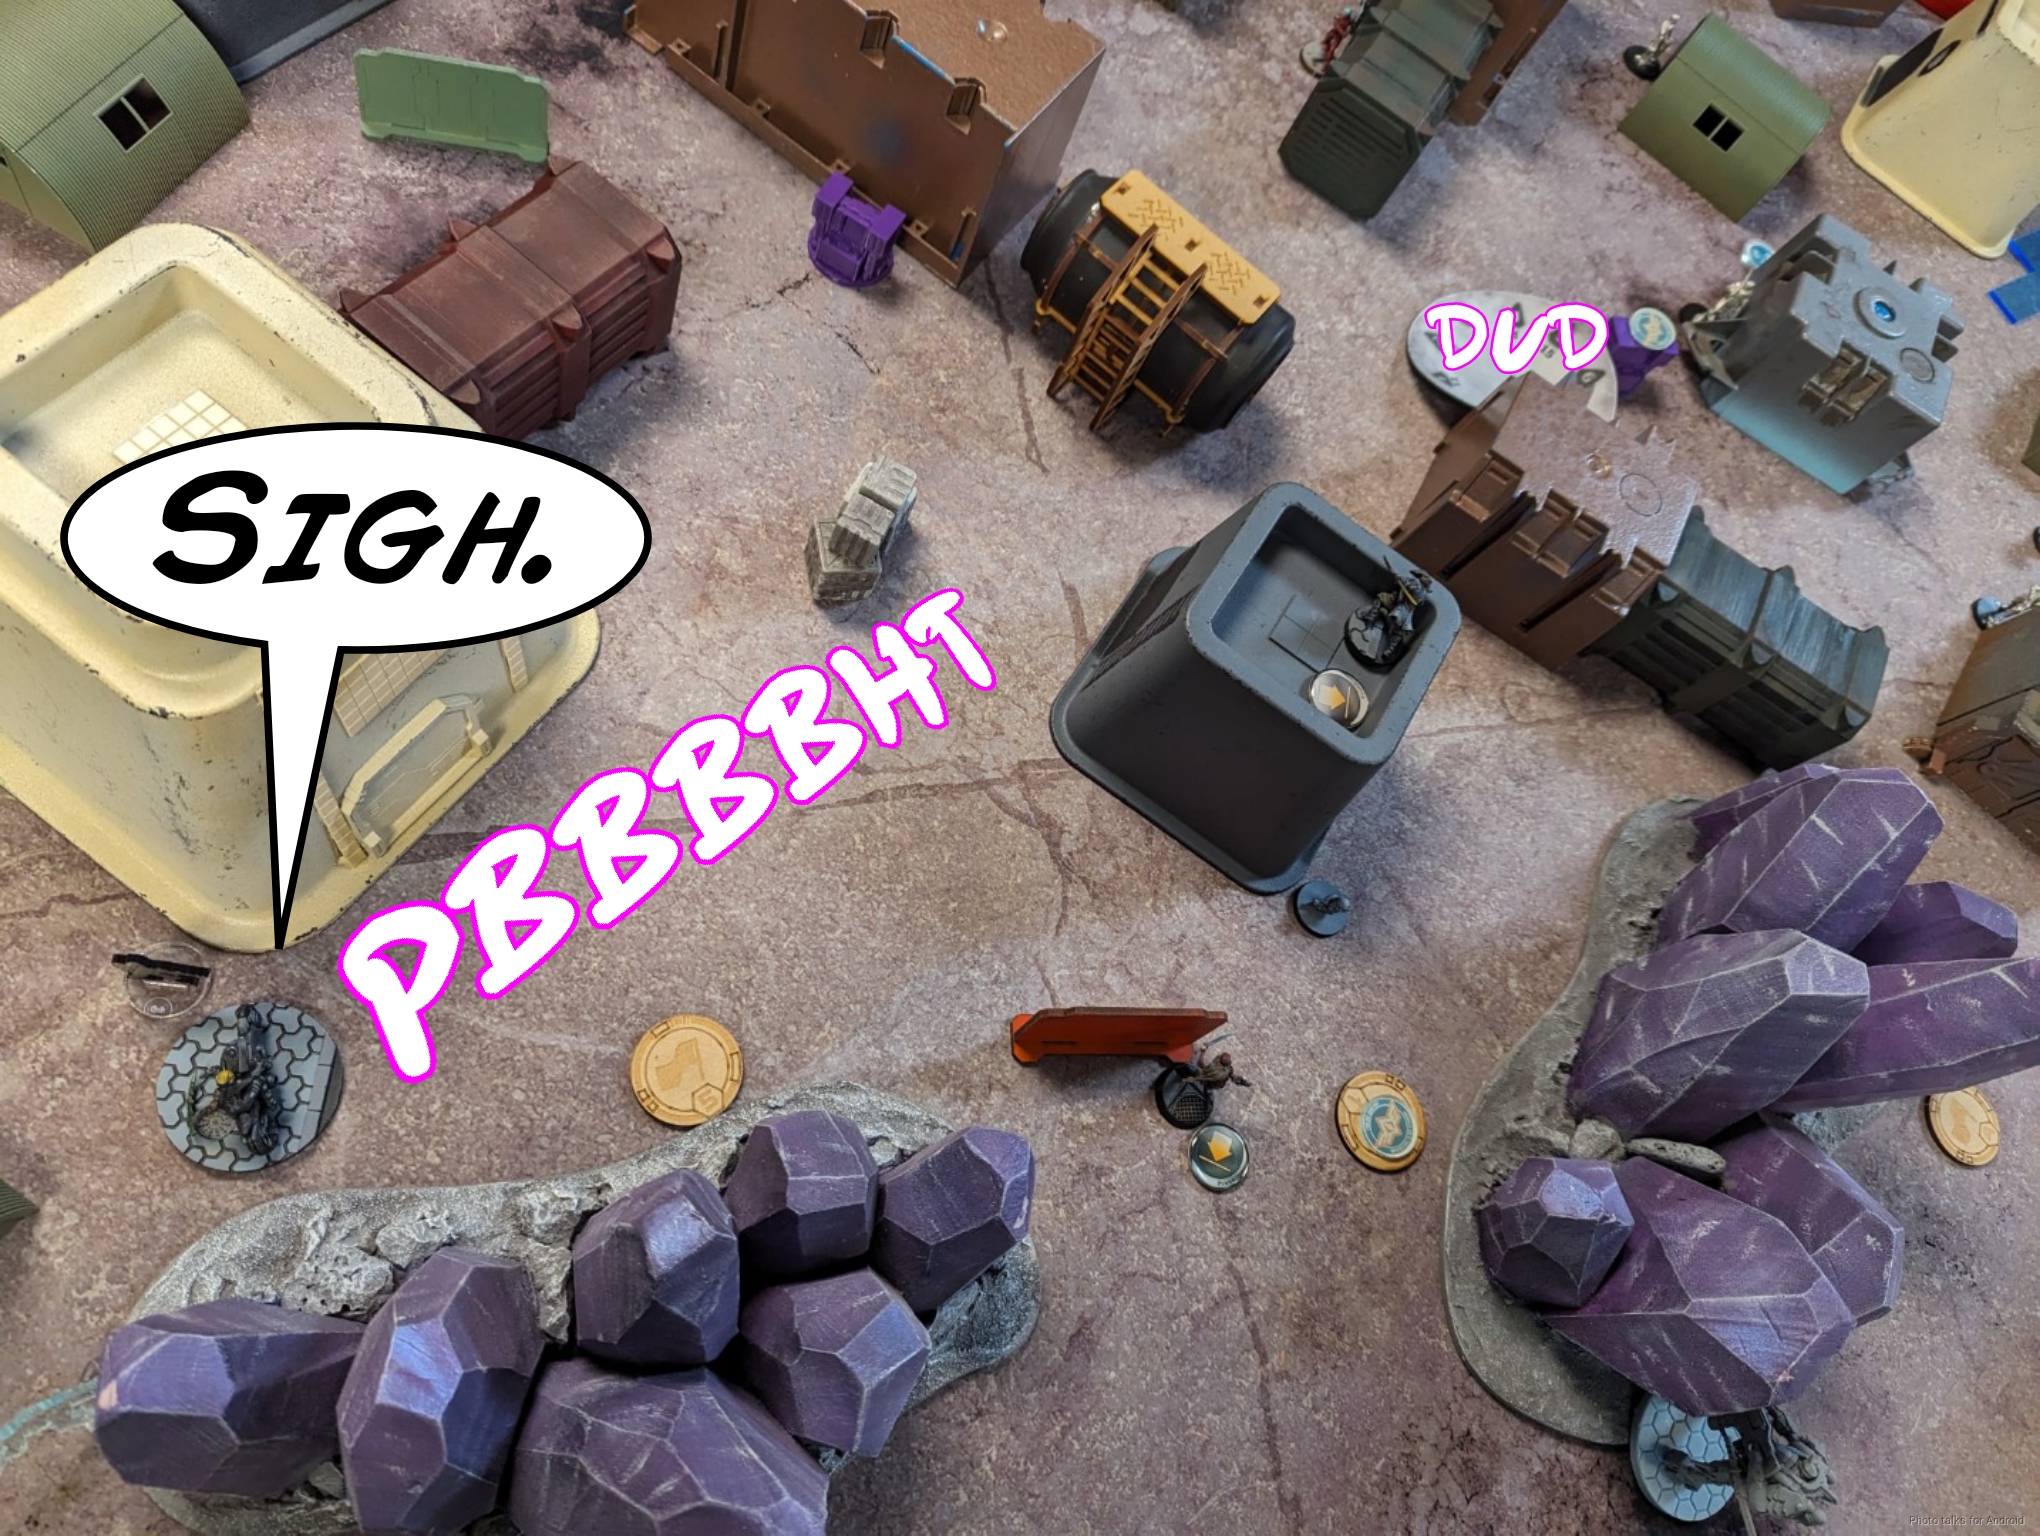
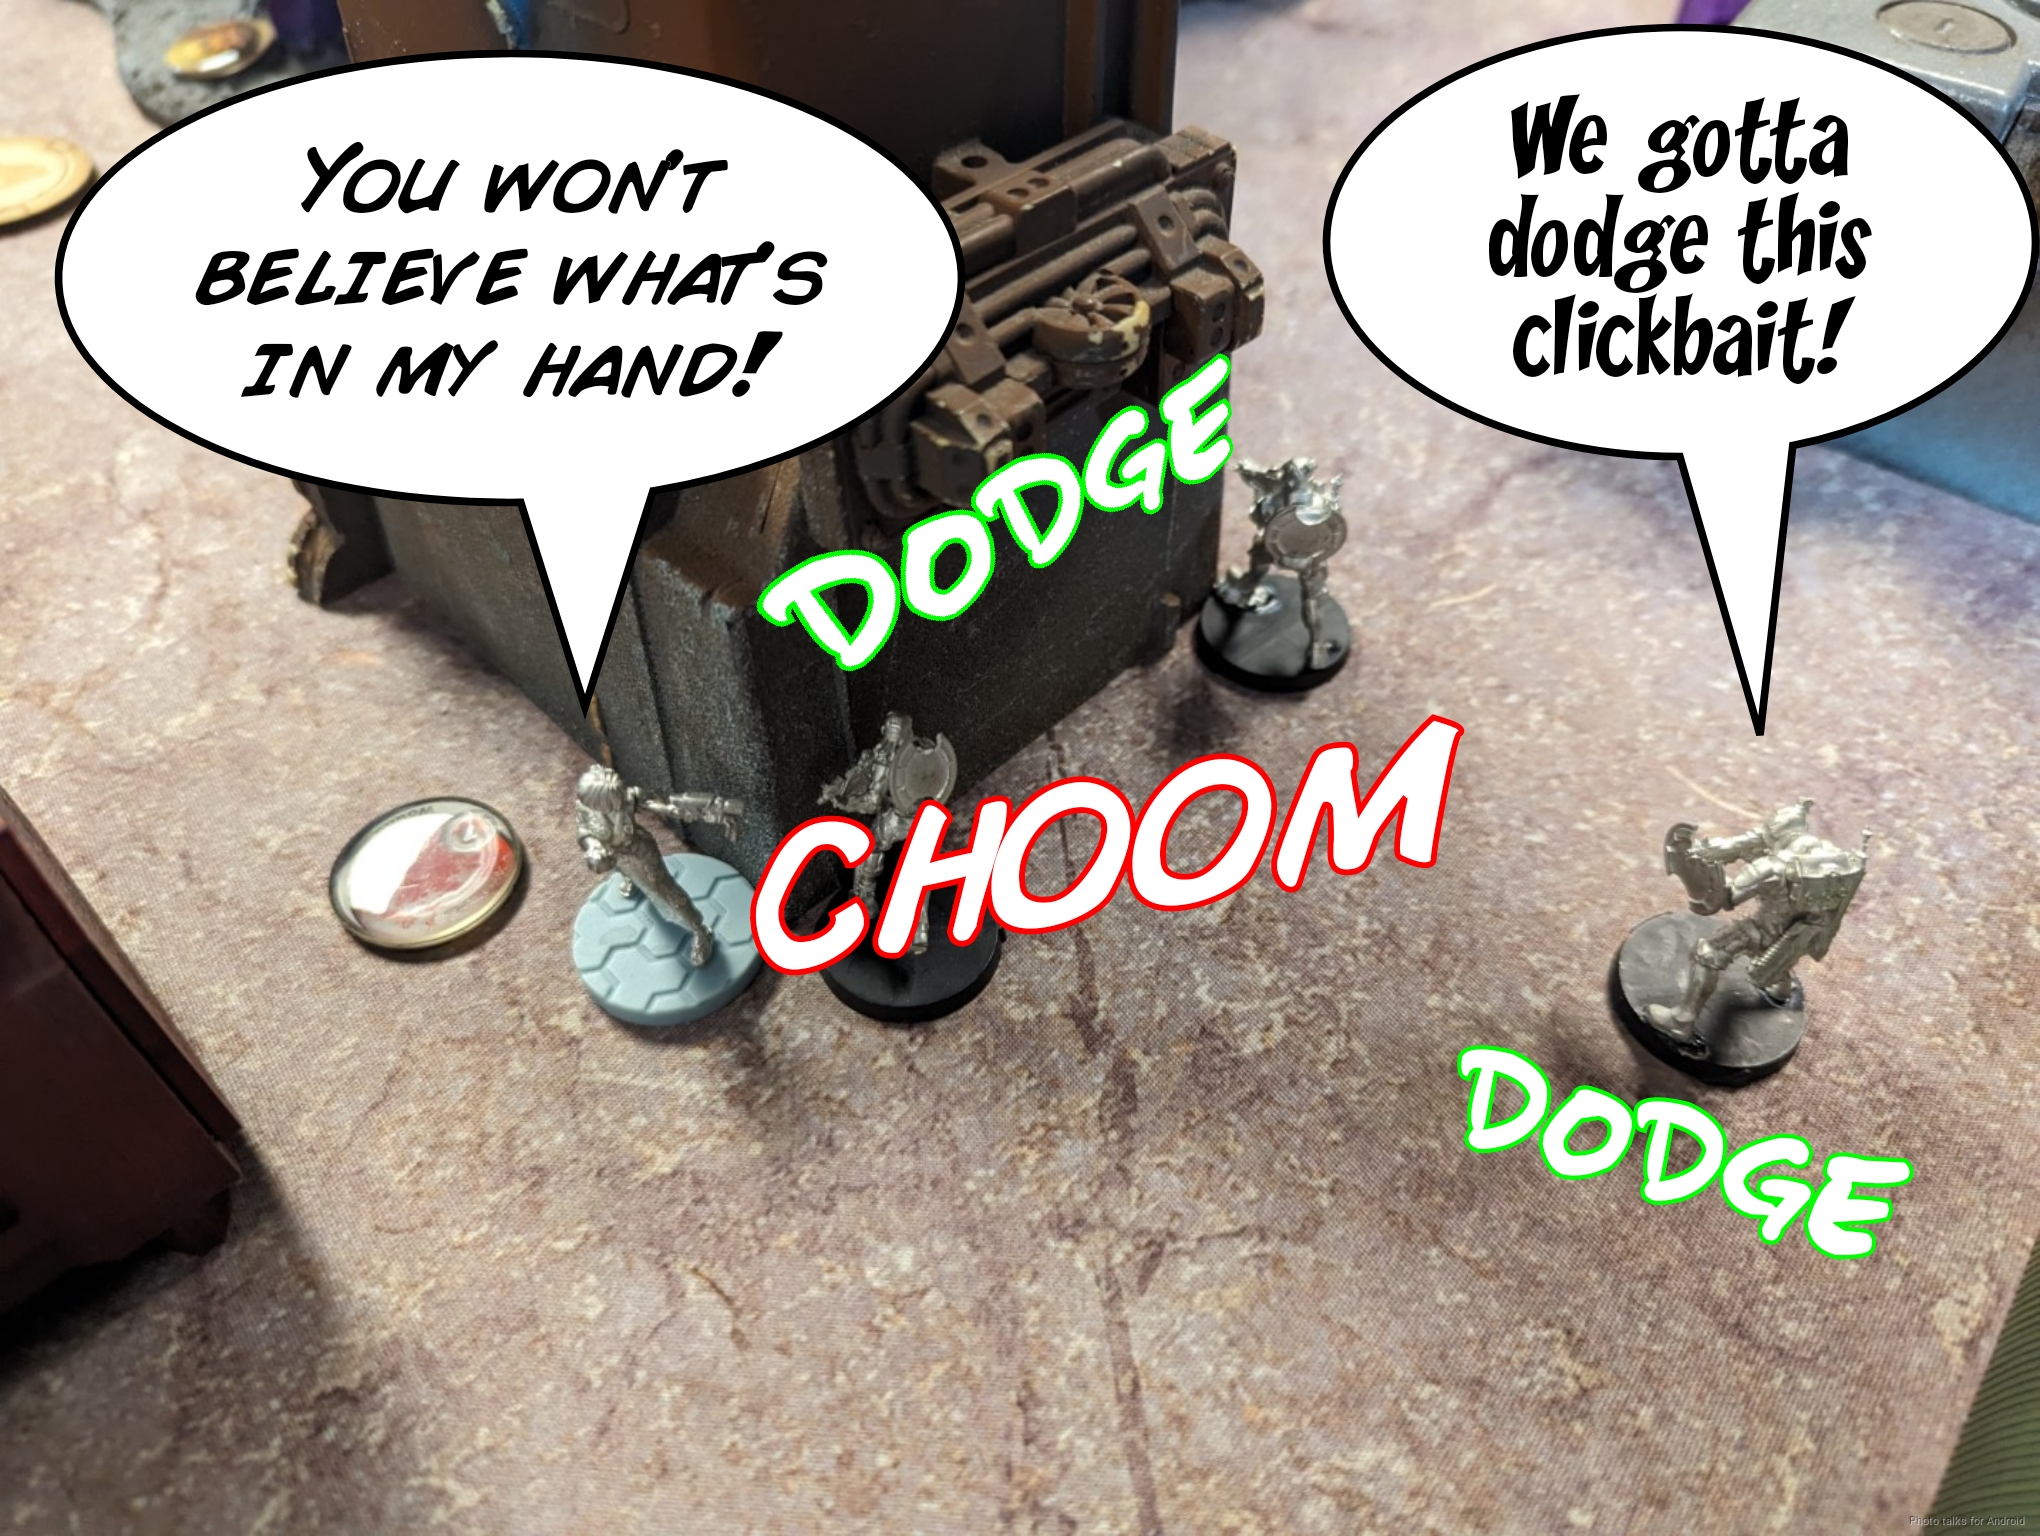
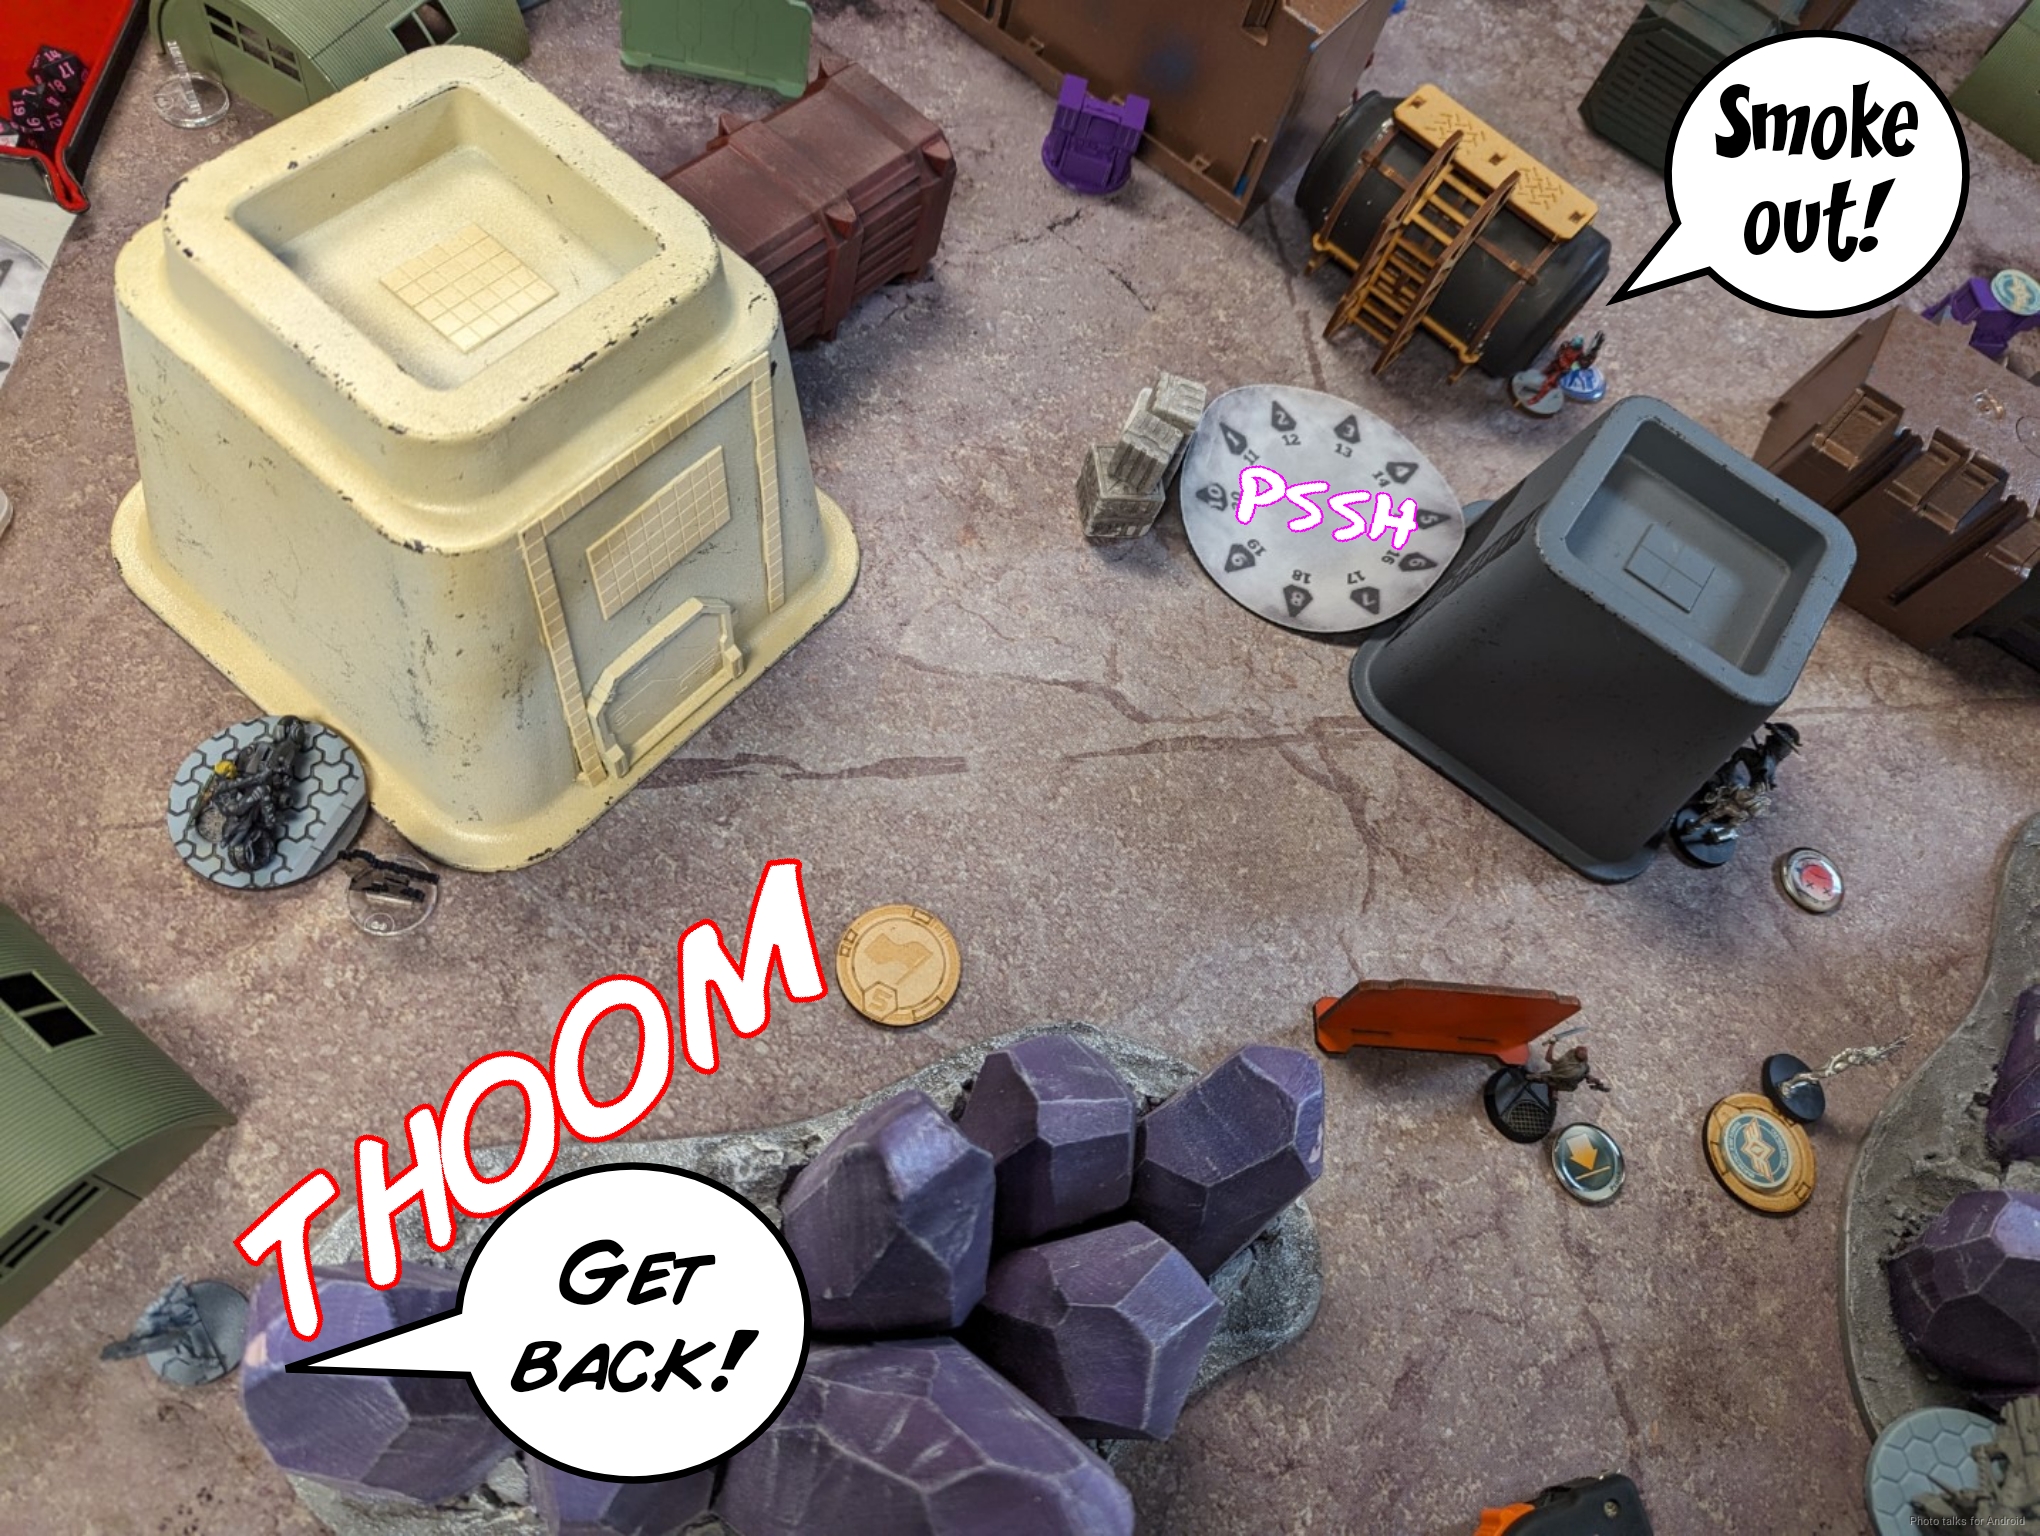
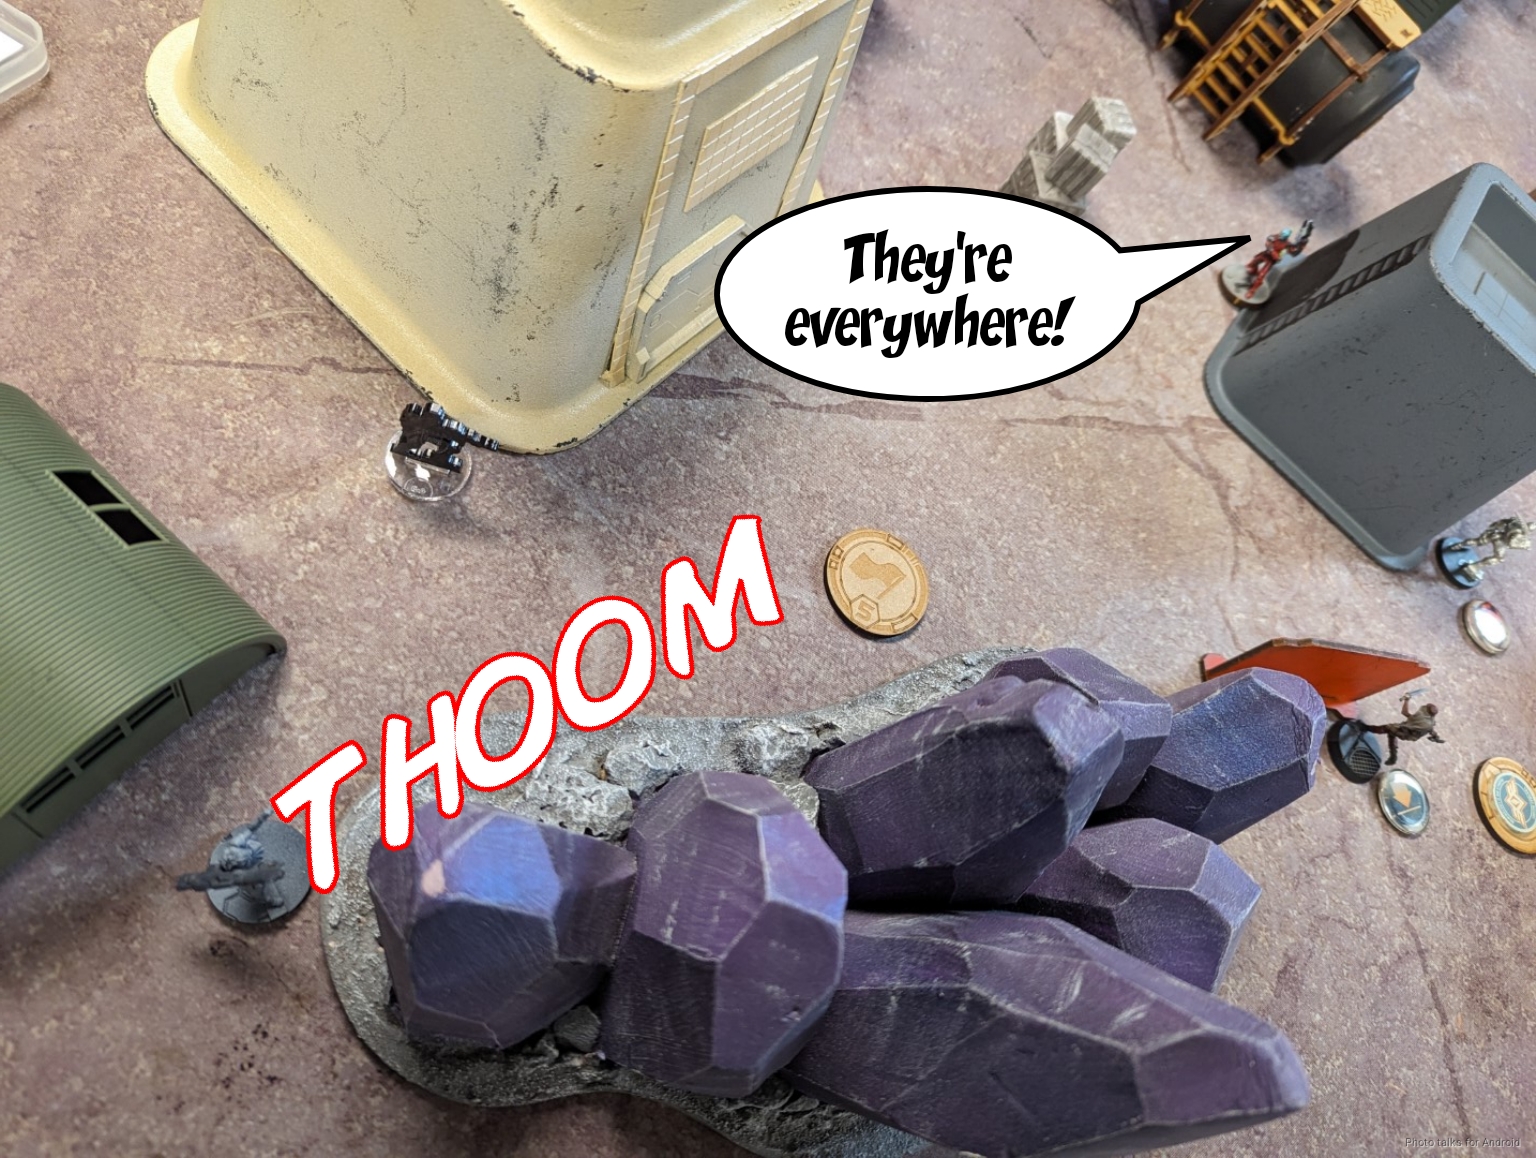
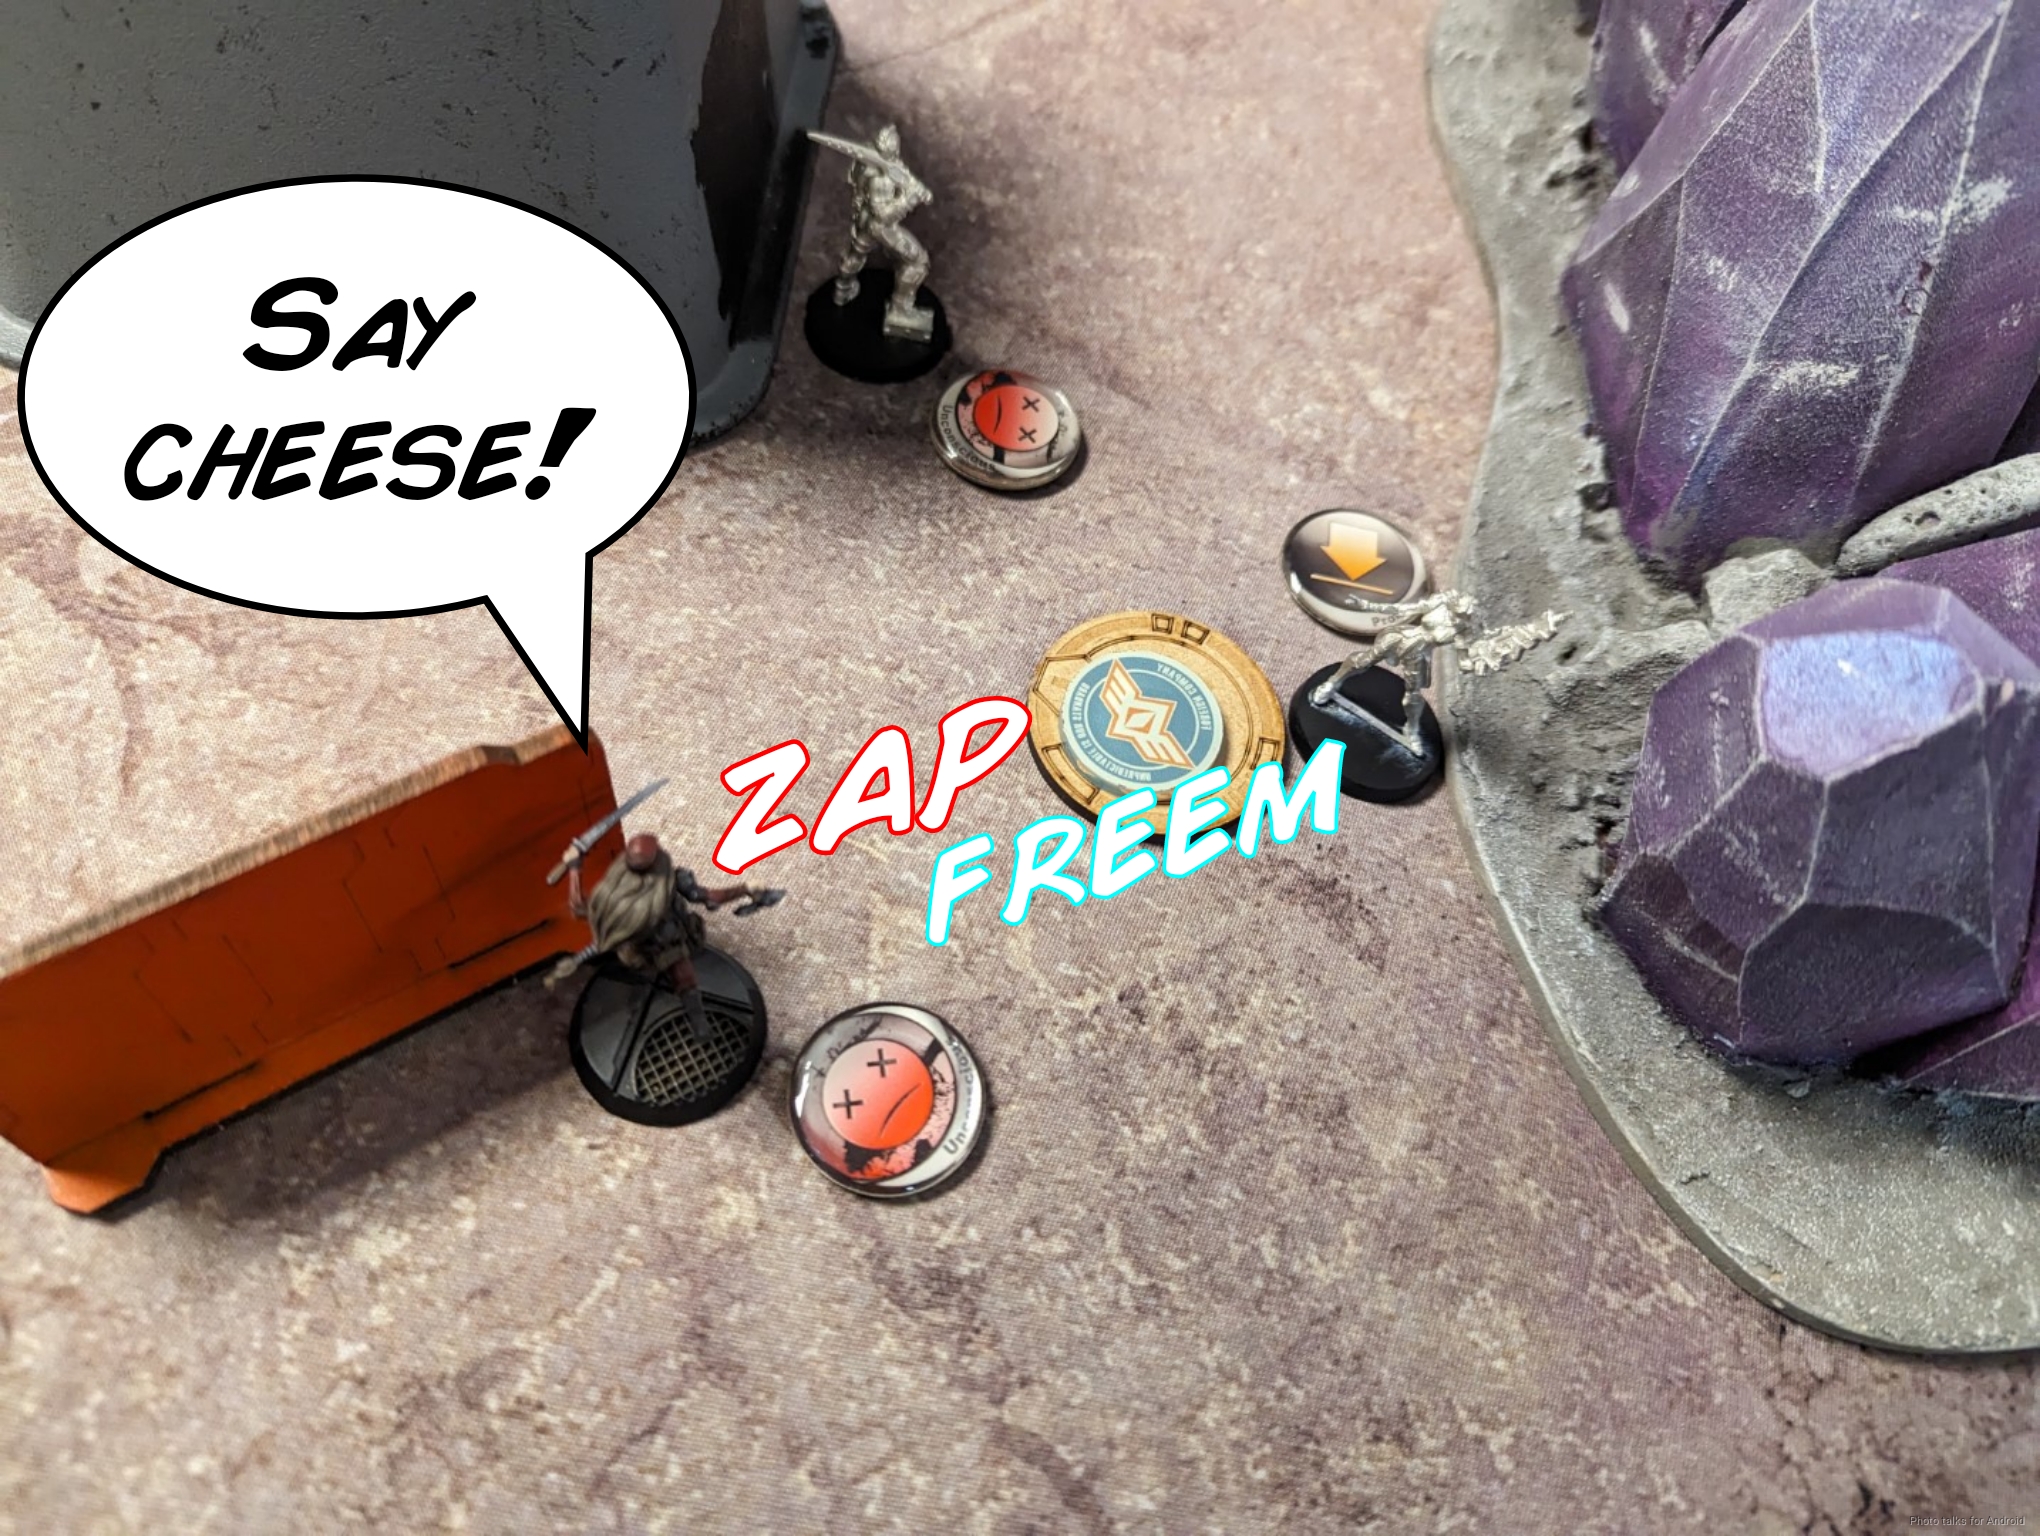
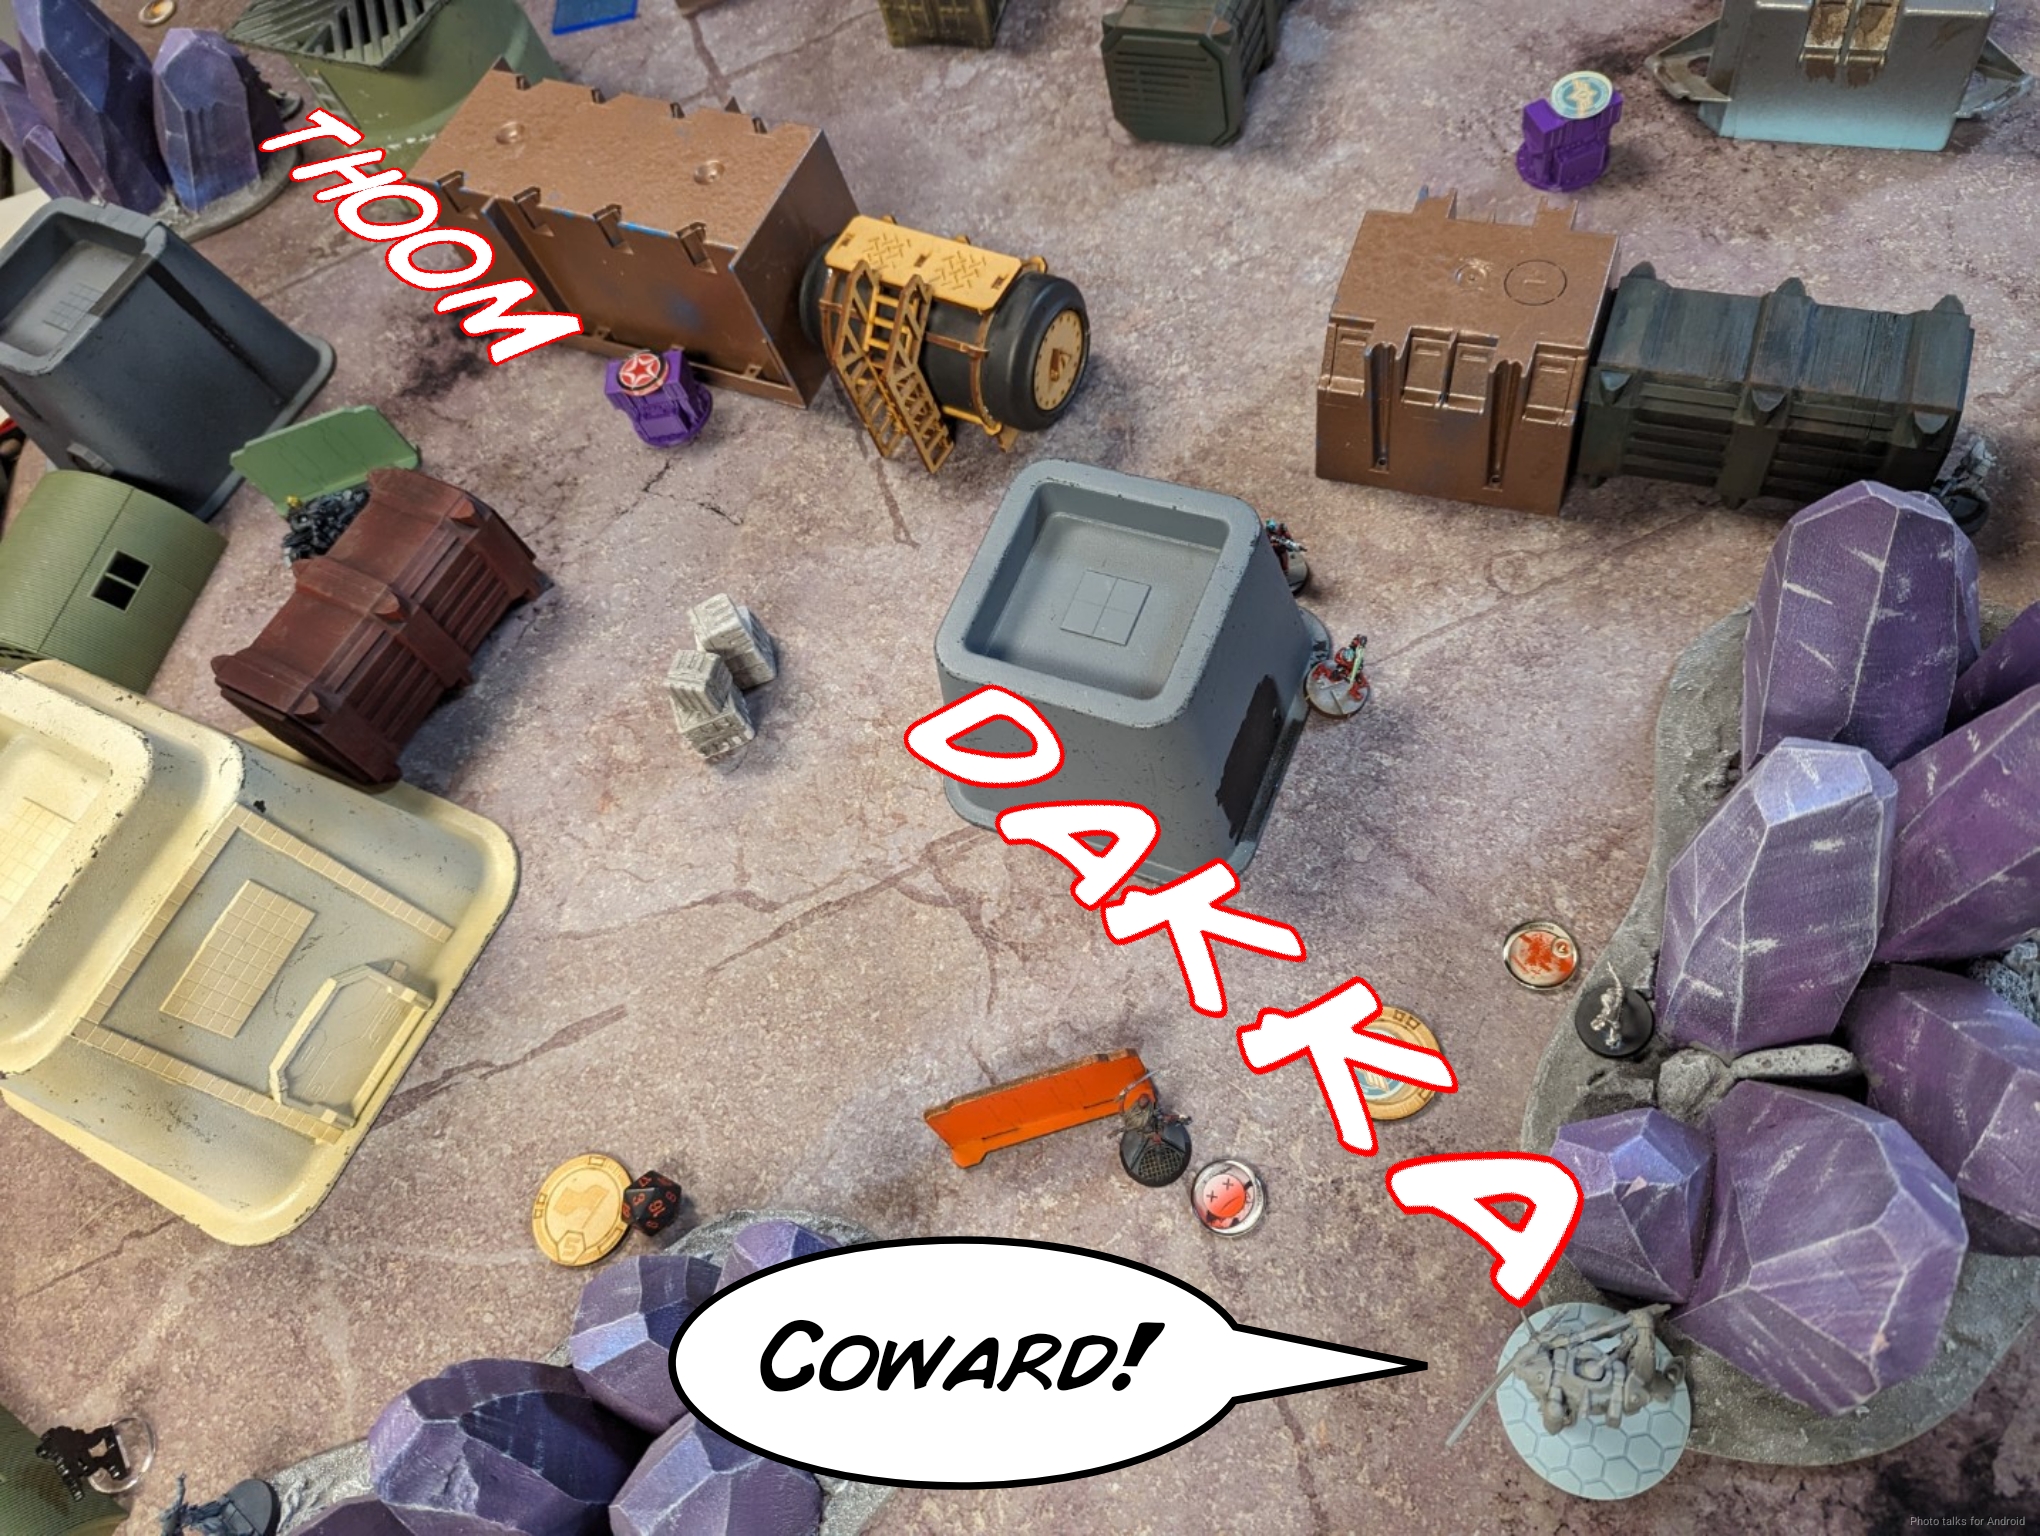
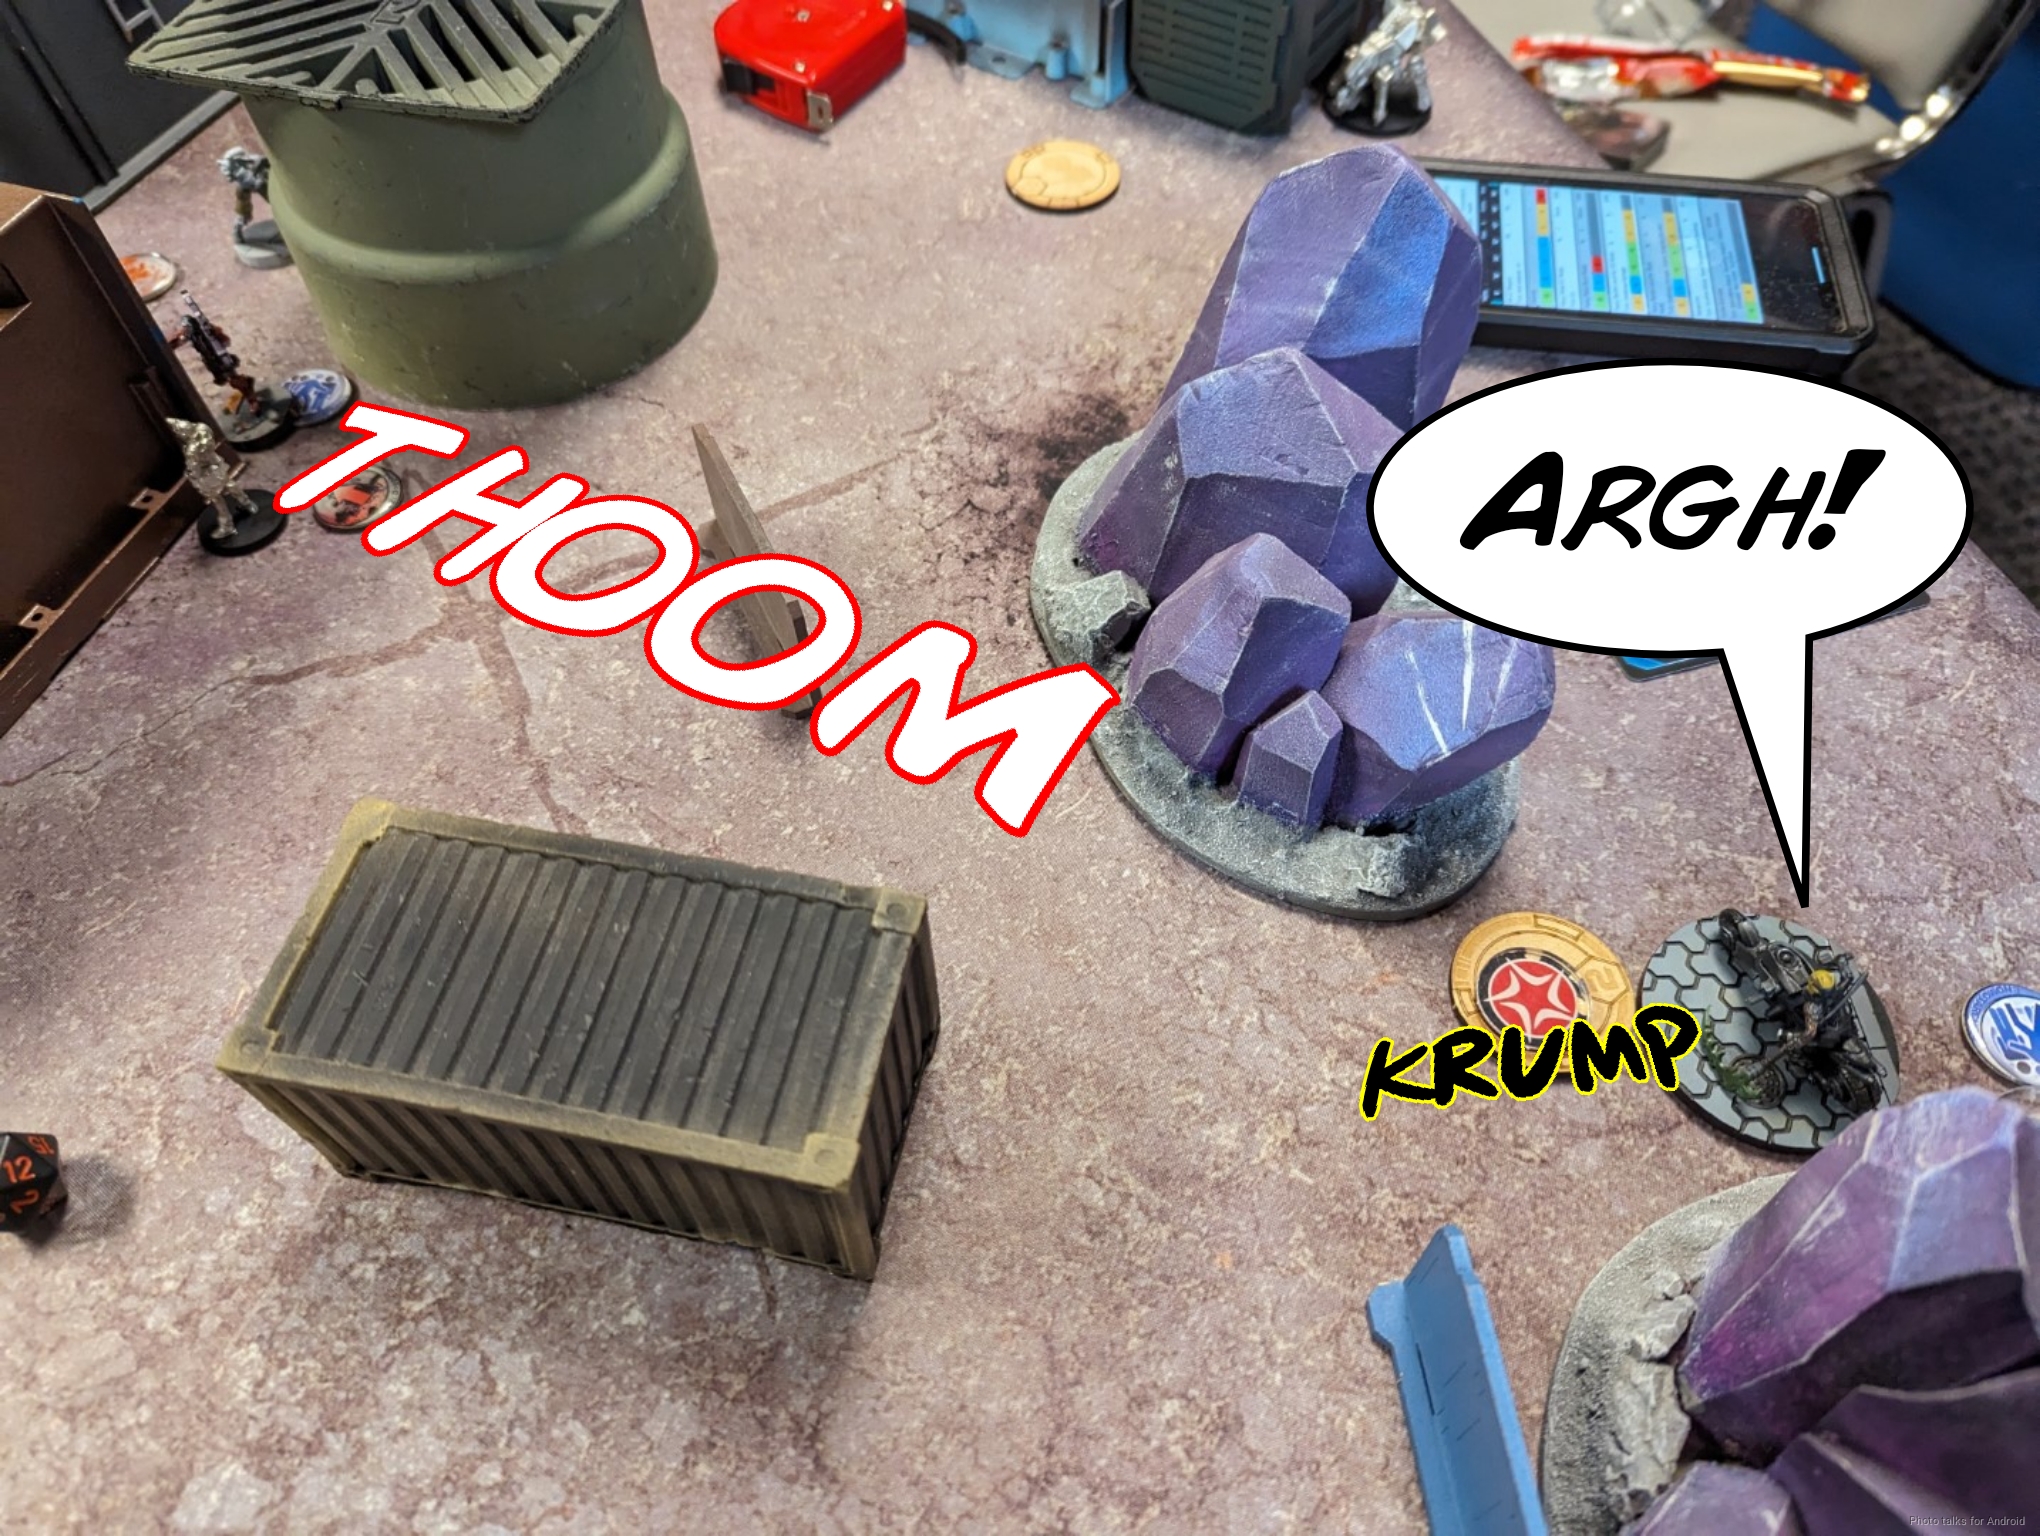
Unfortunately, he wasn’t careful enough with his link spacing, and when he challenged the O-Yoroi I was able to catch the Makhe and two Thorakites under a template, forcing the whole link to dodge (ignore the “thoom” in the picture below).
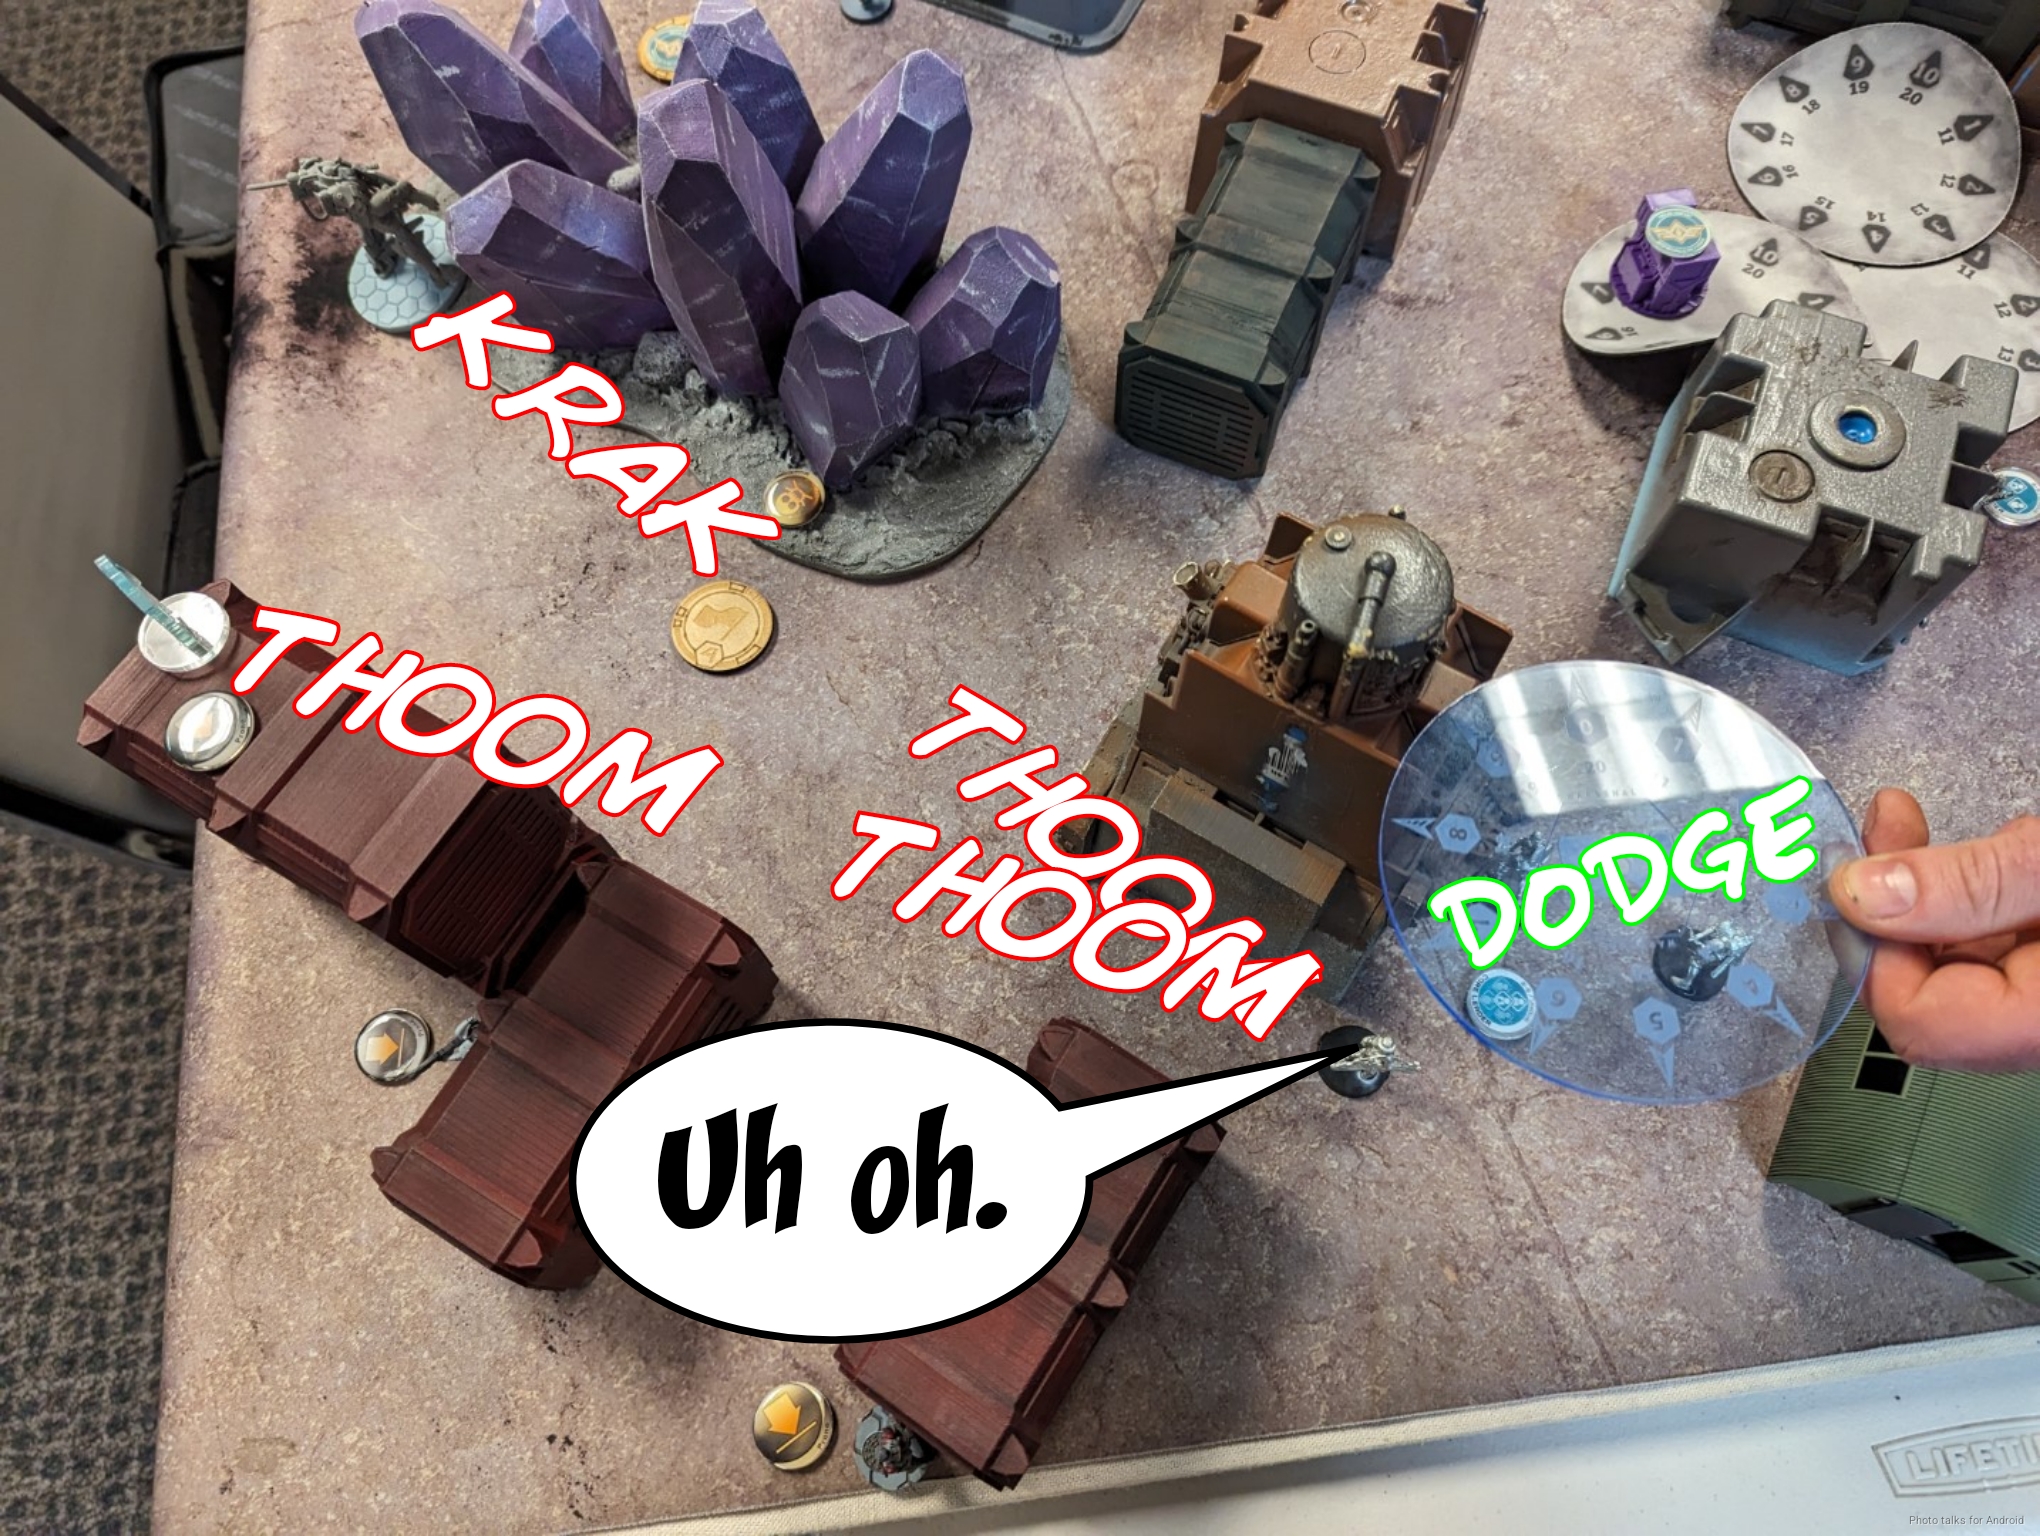
Luckily for Jordan, the two Thorakites survived the HRL blast, but the Mahke did not. He spent his last few orders advancing the pure Myrmidon link, and then passed turn.
Bottom of 1 – JSA
Somehow I’ve managed to get to my first turn with the only damage being a single wound on the Karakuri. I’ll take it. Kuroshi tries to set up smoke to make things easy for the Karakuri to push, but fails to do so on her impetuous order.
It just means I have to cautious move past Phoenix’s line of fire as it’s a small sliver, and then I’m threatening the Thorakites. I start with some Mk12 fire, but it just bounces off the Thorakites Paramedic’s shield.
I push further and then force dodges with a chain rifle. The two vanilla Thorakites tank or dodge the chain rifle, but the Paramedic is not so lucky and goes down.
I’d like to get the O-Yoroi into the fight so I set up smoke with Kuroshi to block Phoenix’s view to the O-Yoroi. I also get closer to the console, should I decide I want it this turn (I probably don’t, but it’s always nice to give myself options.
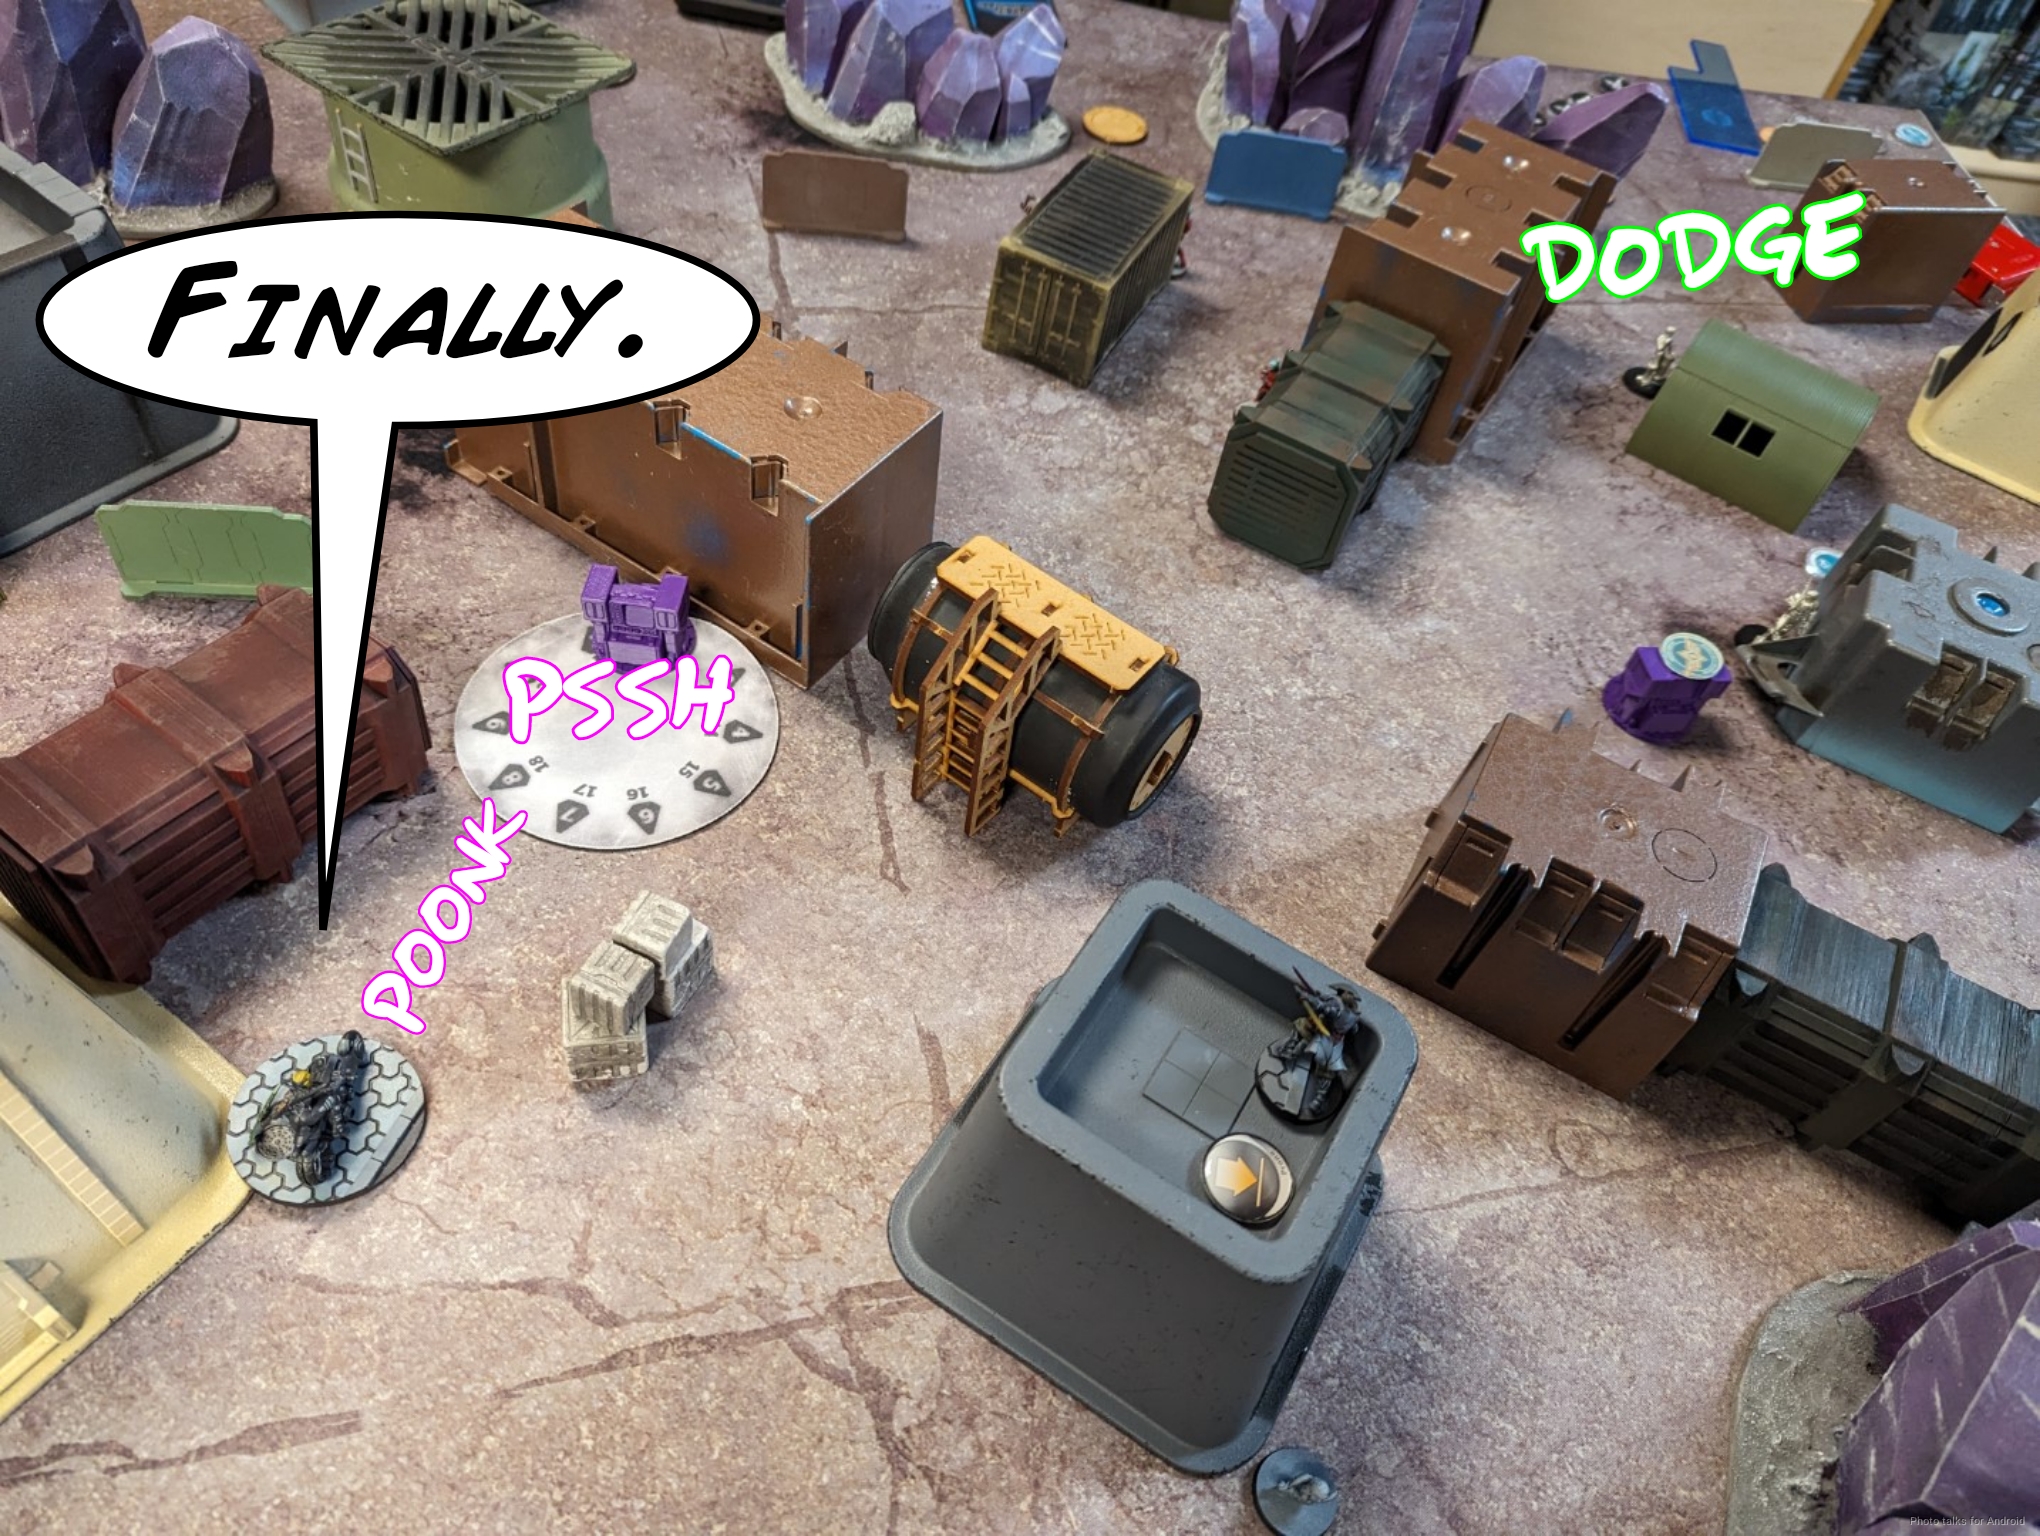
The Thorakites that dodged around the corner is pasted by the O-Yoroi with ease.
I then shift into where Phoenix could originally have seen, were it not for smoke, and do a wound to Pandora, forcing her around the corner of the green Quonset hut.
The Karakuri then does a combat roll past the remaining Thorakites and drops it.
I’ve got Hippolyta in good range with the Karakuri, but I can’t beat her eclipse smoke…
so I settle for finishing off Pandora instead.
I spend a command token to reset Kuroshi, the O-Yoroi, and the Karakuri with a command token, and then throw the Karakuri into suppression with the Warcor’s order. I generally don’t like doing that, but it does feel like a good way to really force Hippolyta’s hand. Either she spends a bunch of orders fighting me and chewing through effective BTS9, or she just ignores that part of the map, giving me a potential attack vector from that angle later. It felt acceptable.
Turn 2
Top of 2 – Steel Phalanx
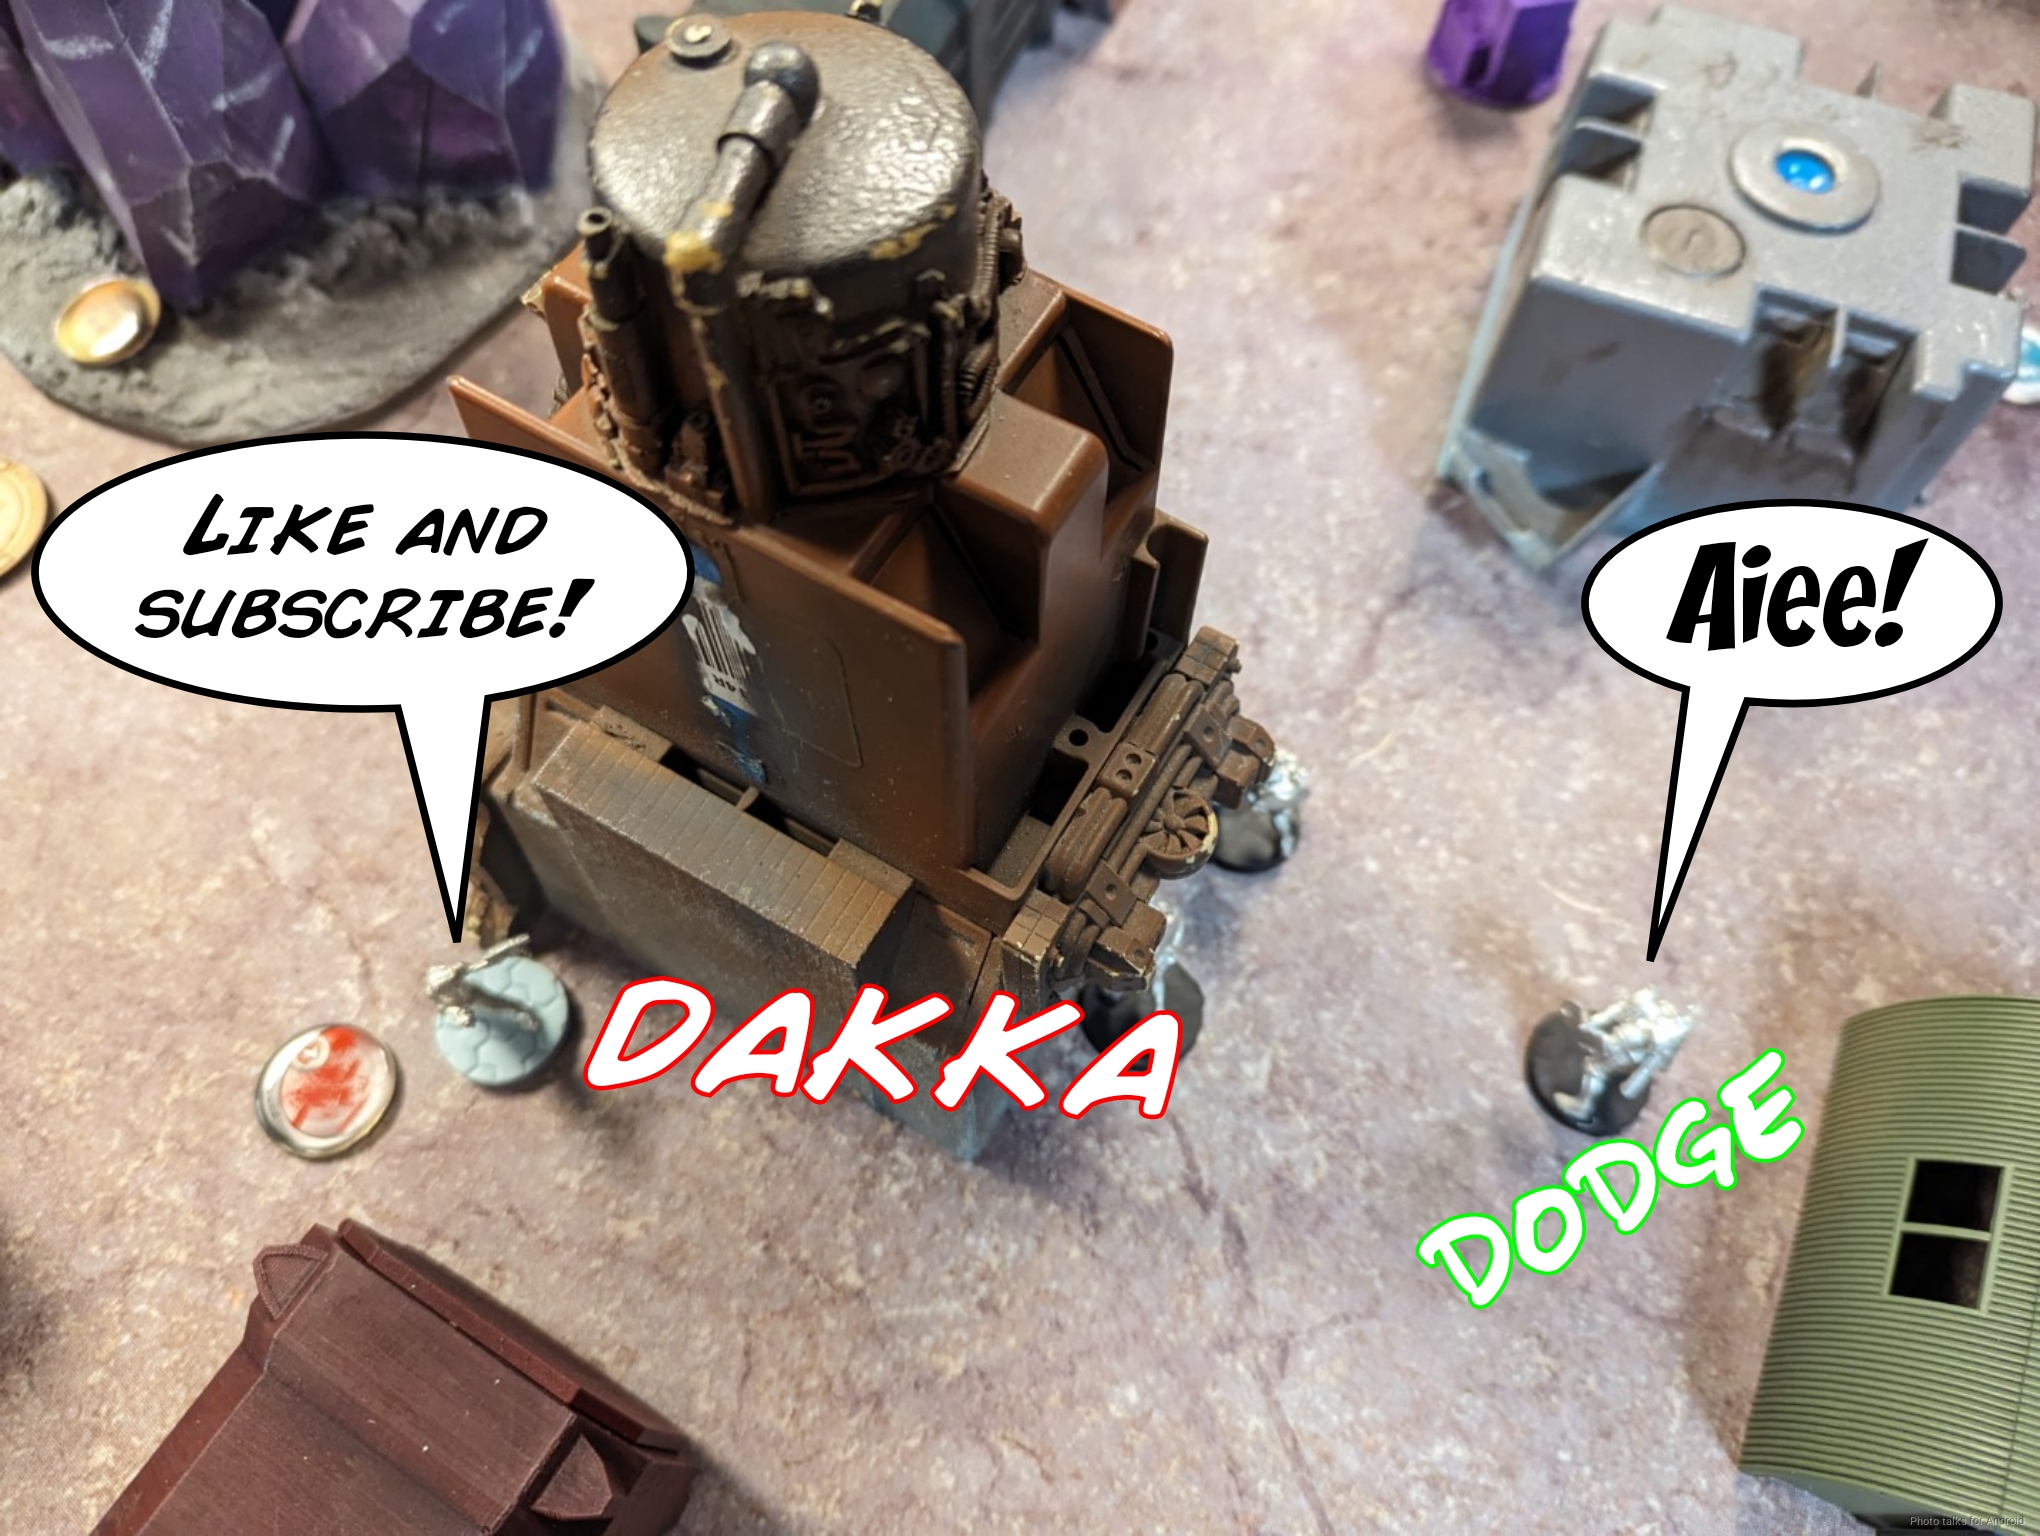
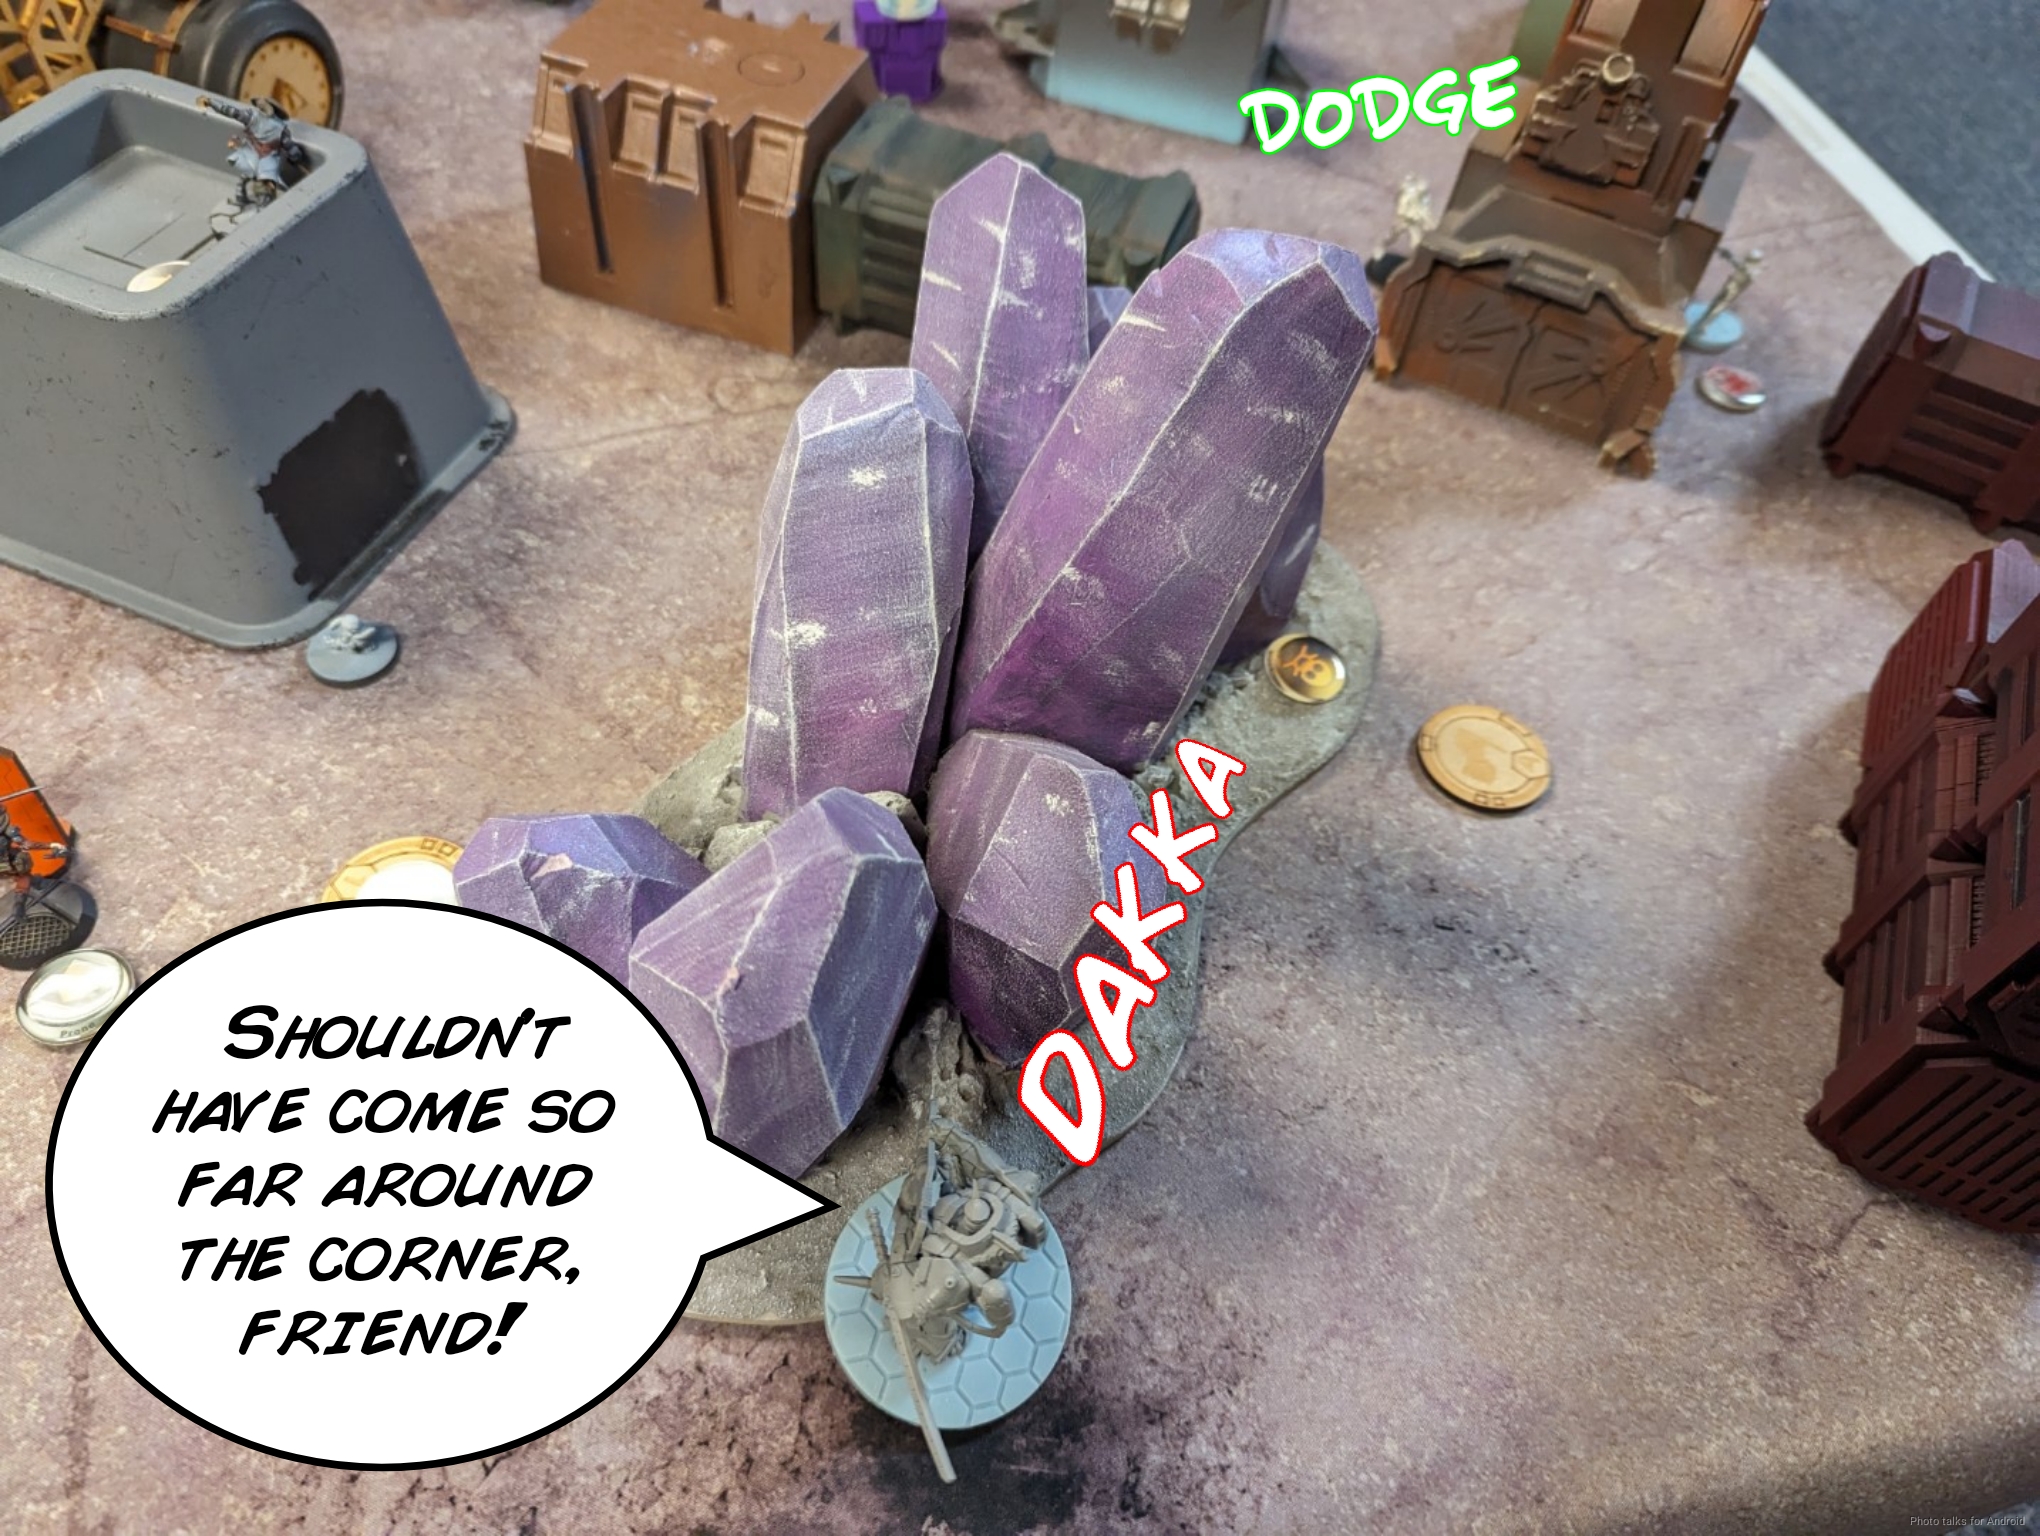
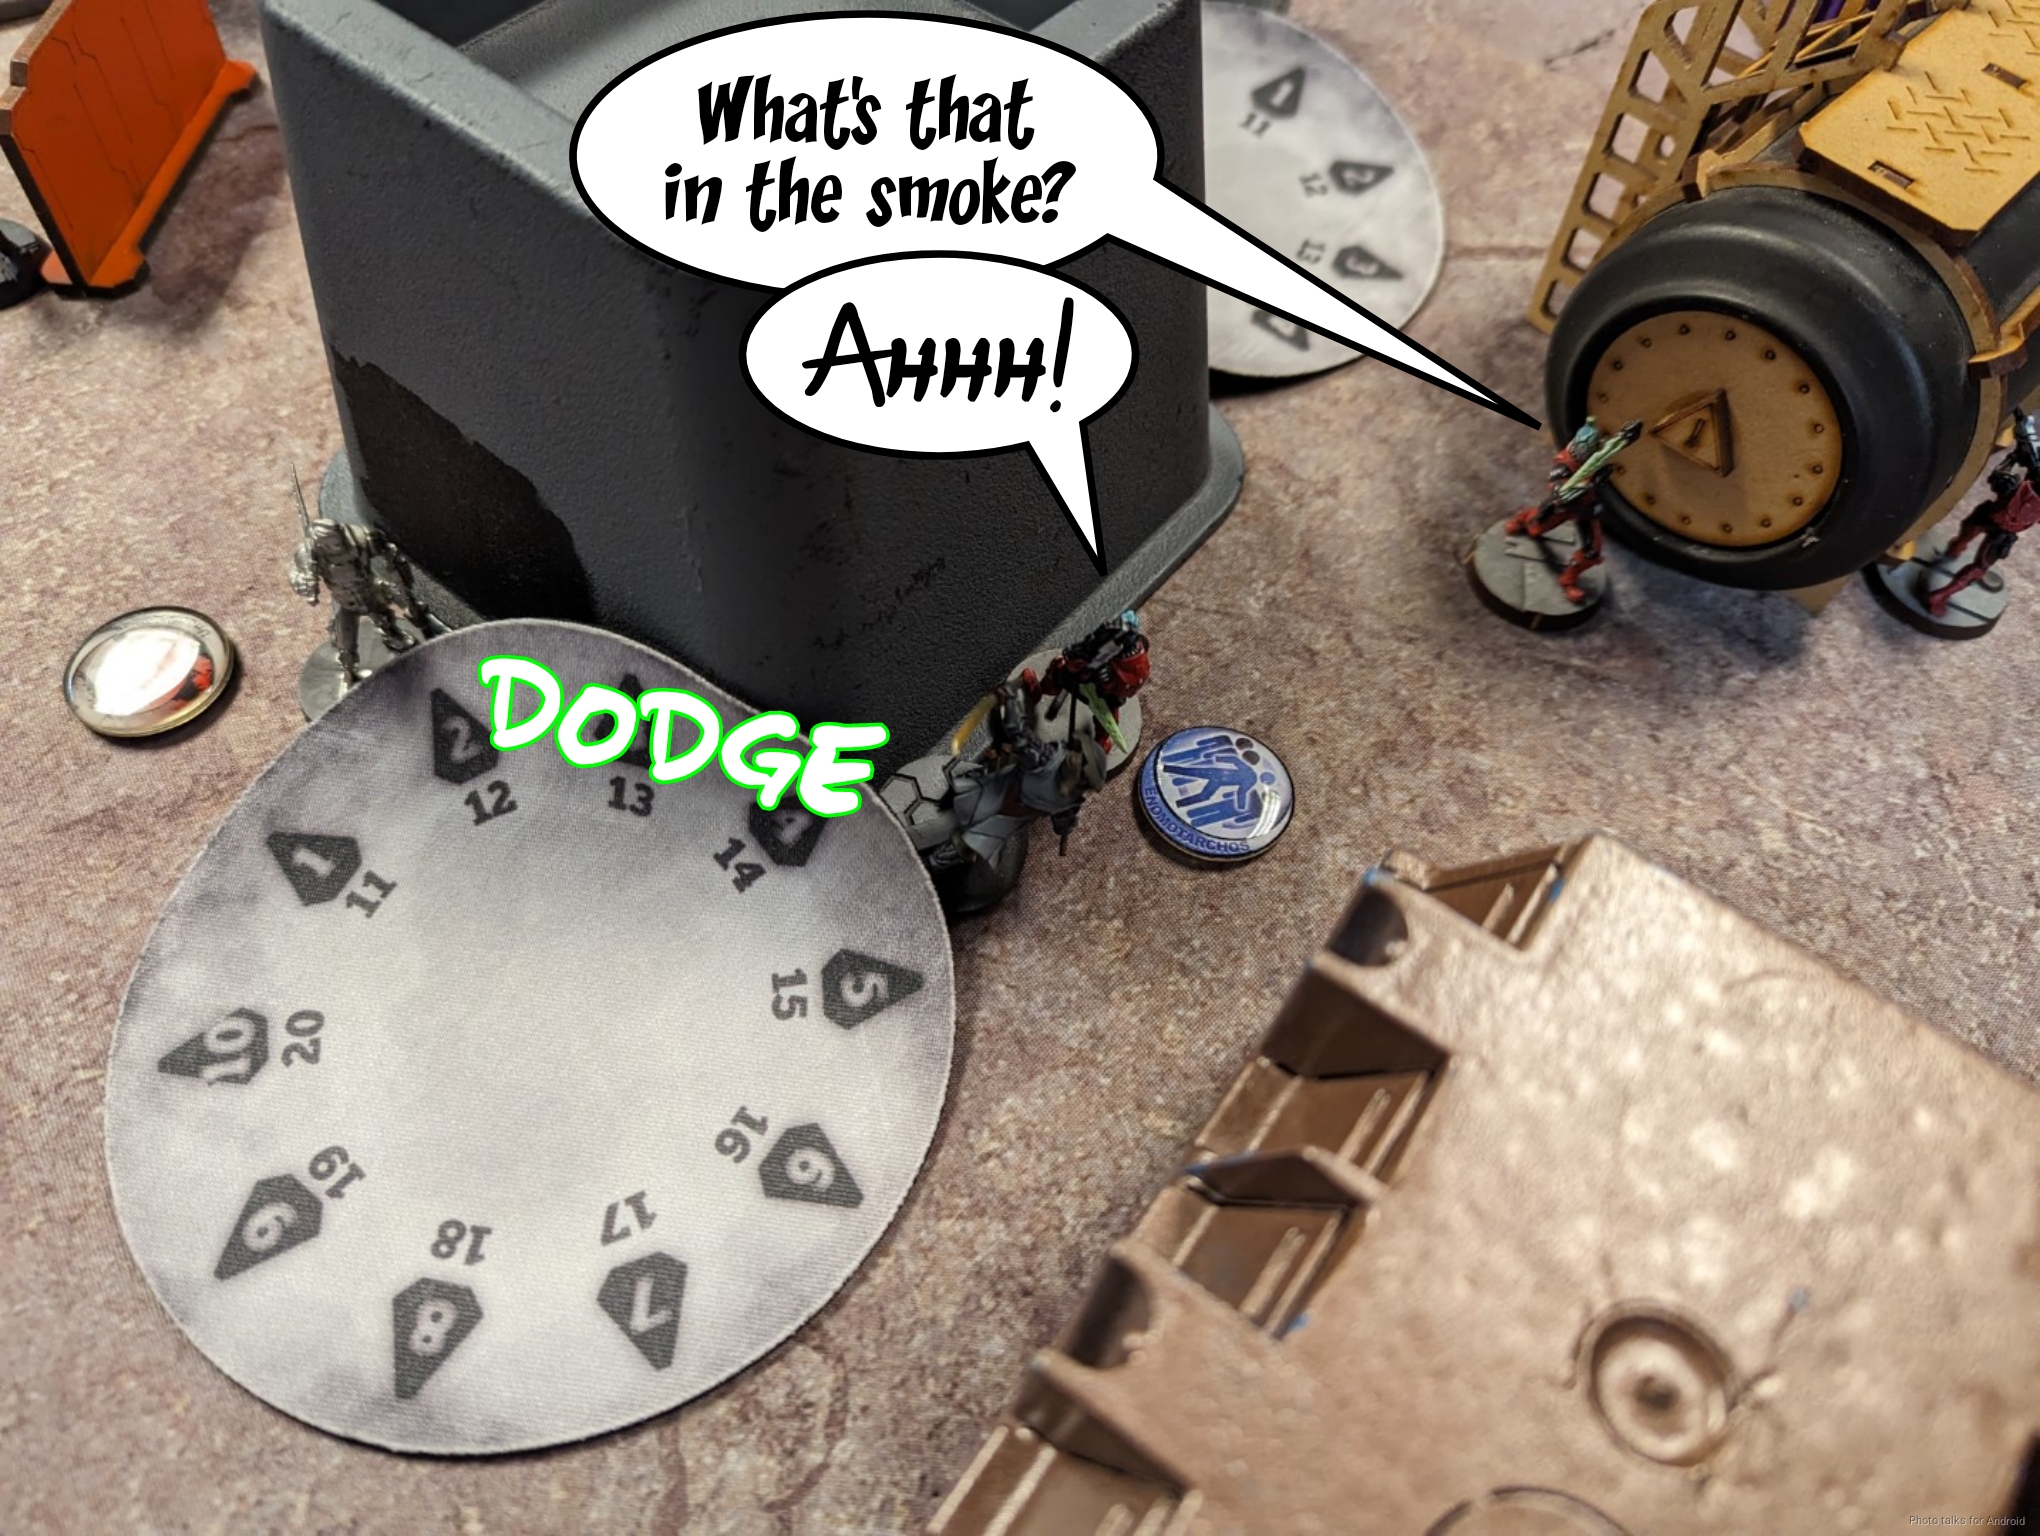
Hippolyta and her Myrmidon are pinned between the Ryuken-9 and the Karakuri, so Jordan decides to just dodge past the Ryuken-9. He does so effectively, breaking line of fire.
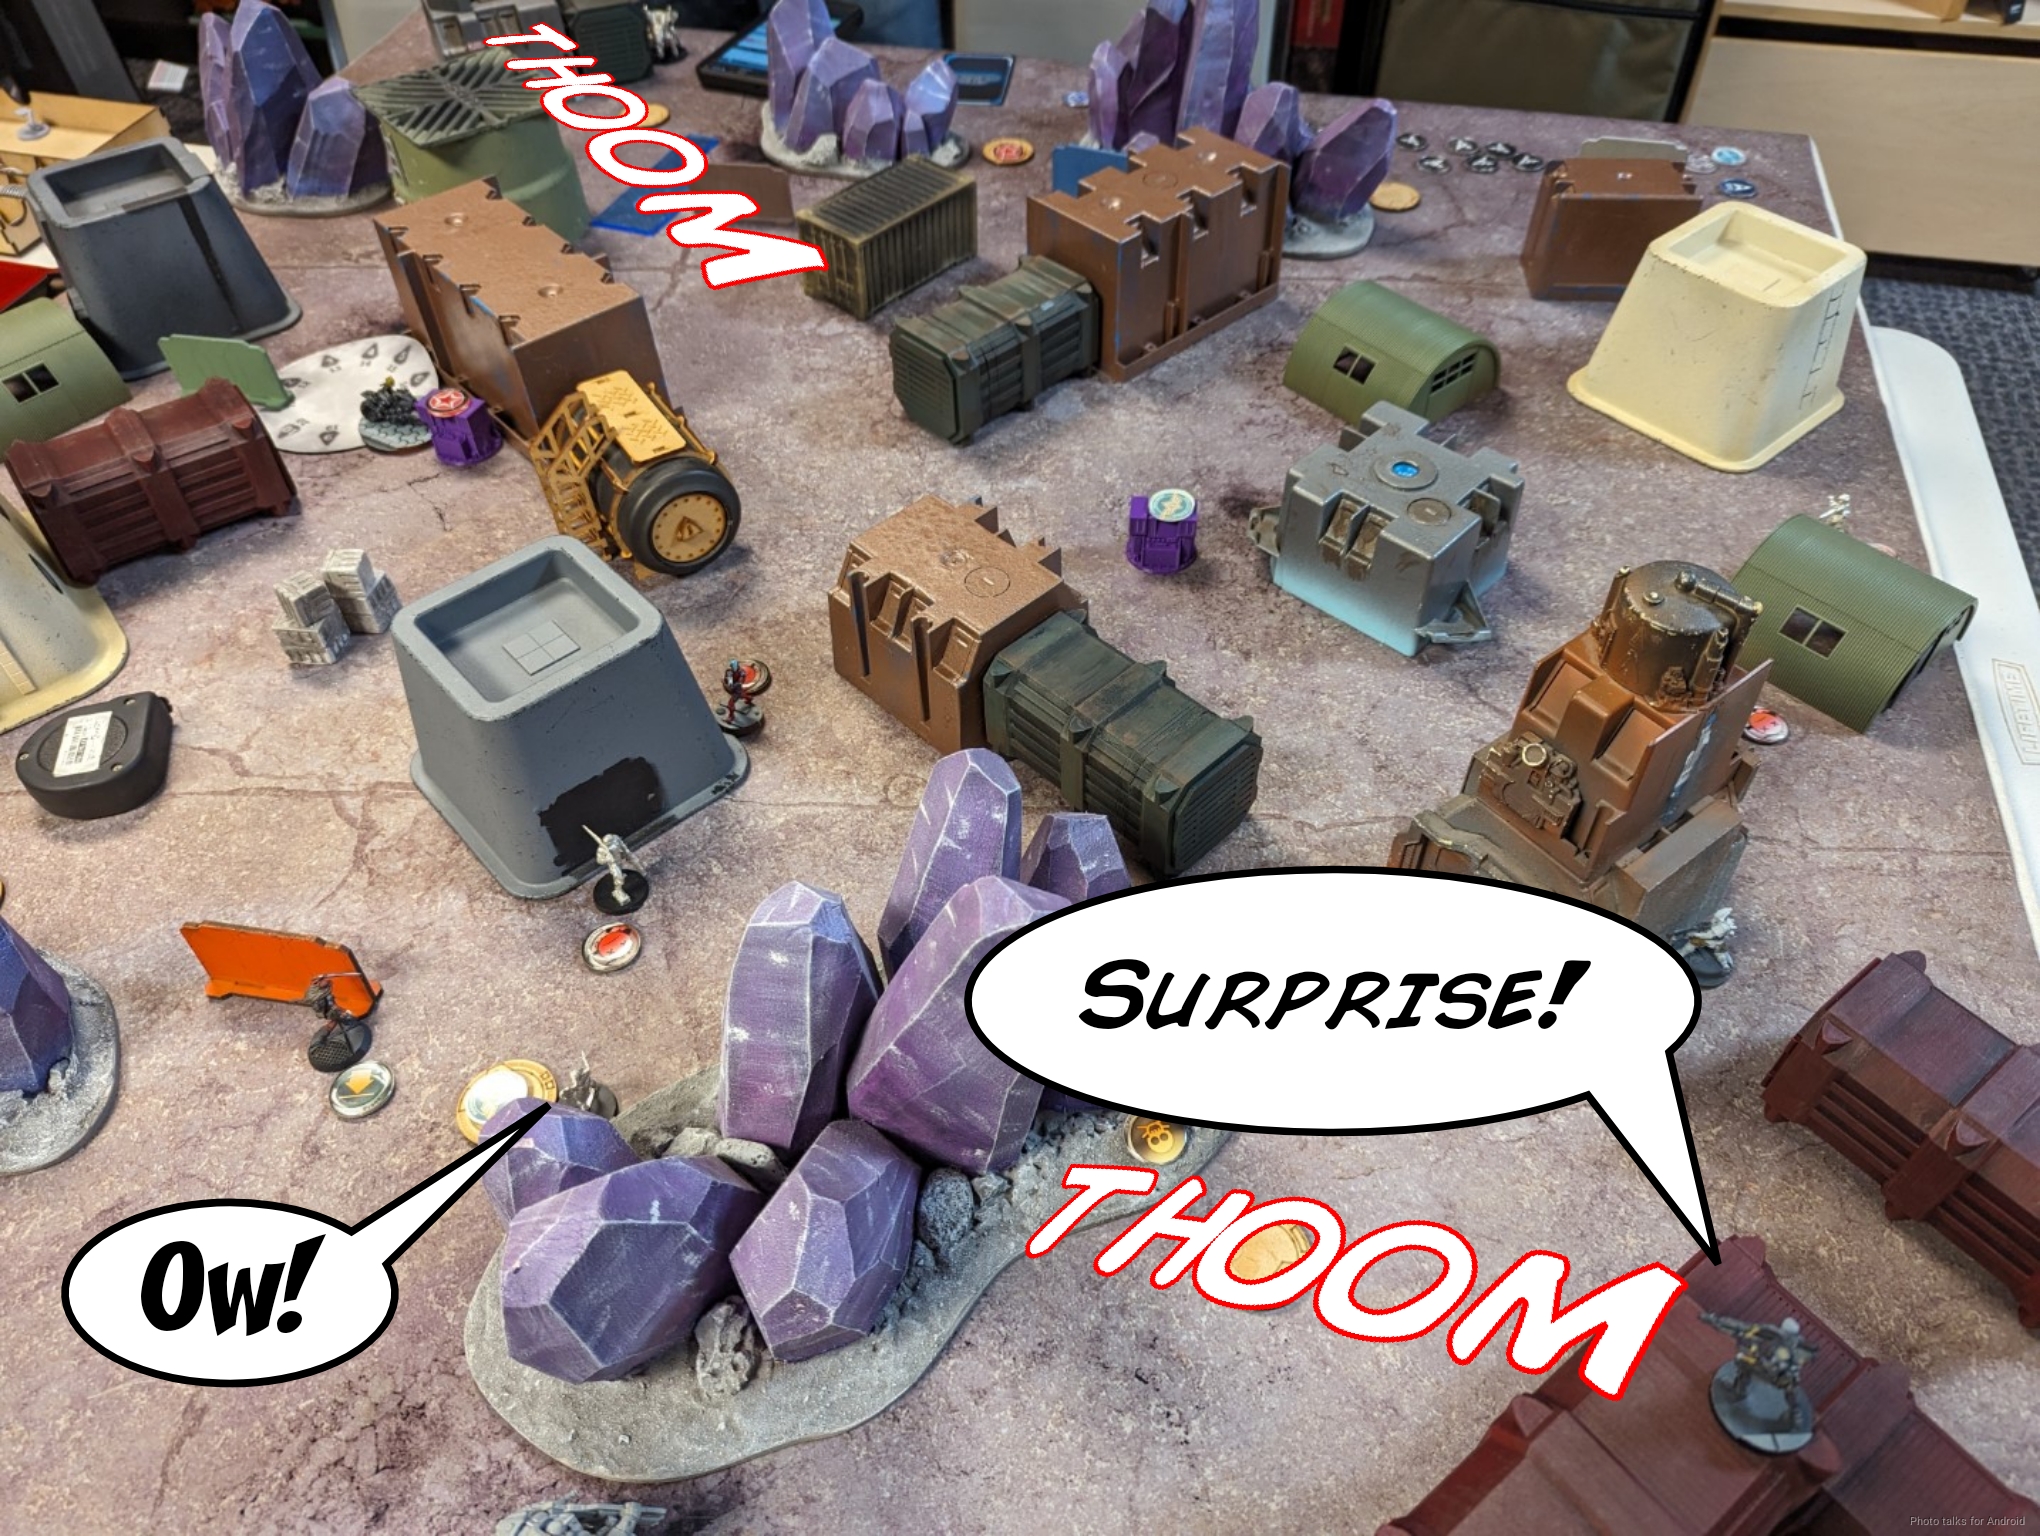
Hippolyta dodges the first Koala, but I just throw out a second one since I can see the first part of her move with the O-Yoroi.
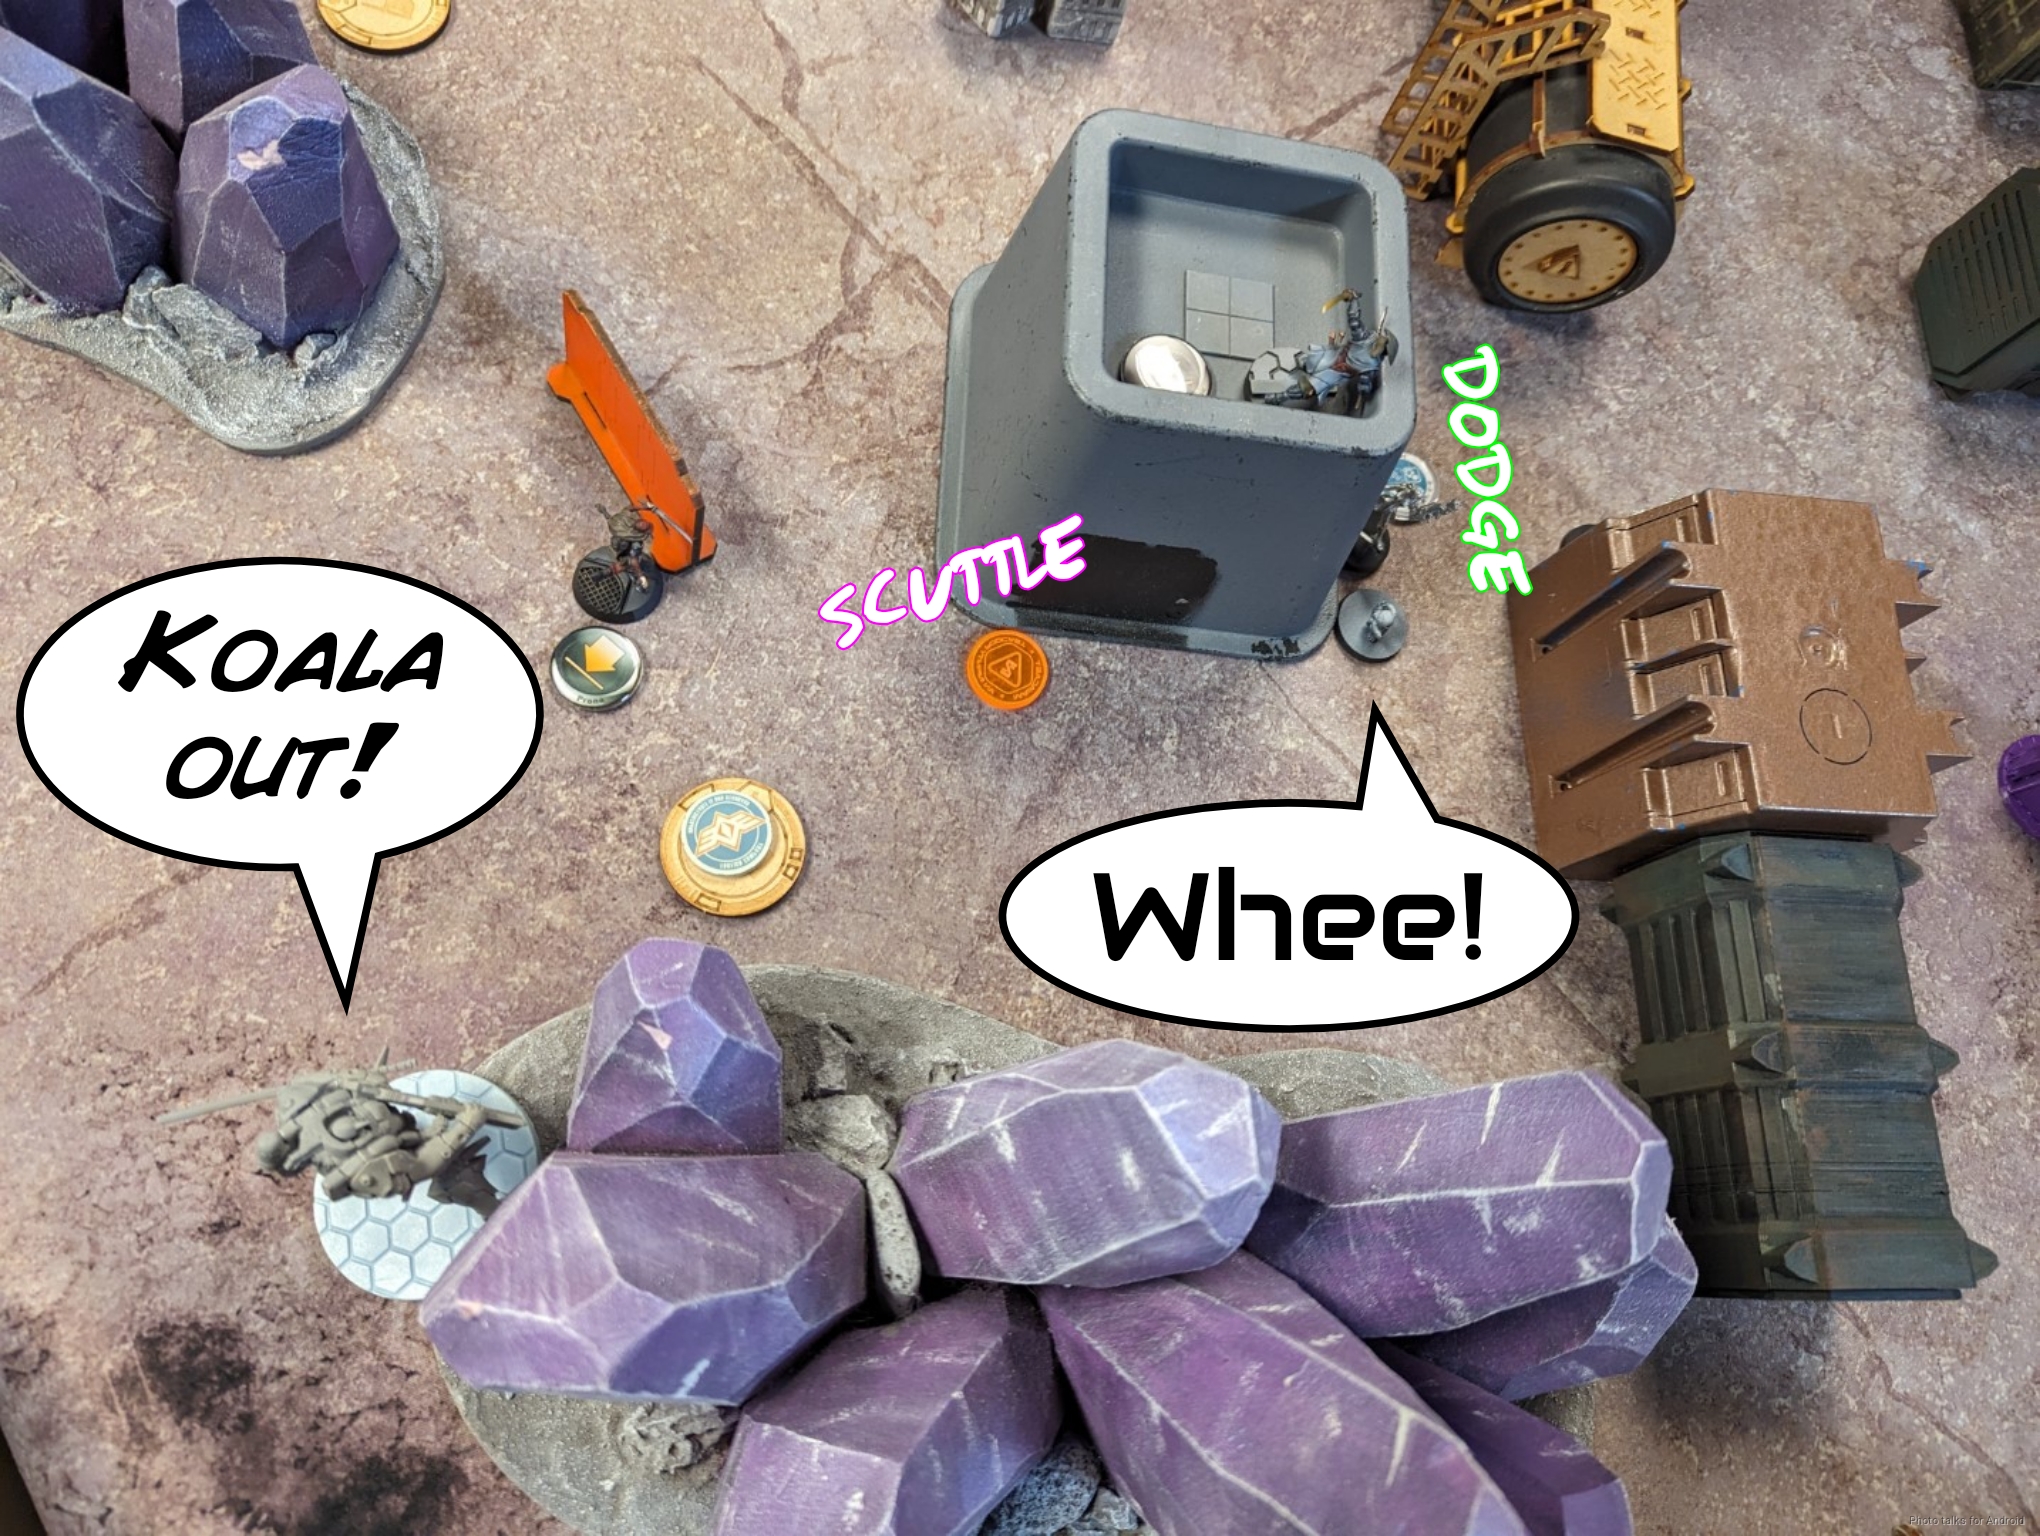
Hippolyta tries to get into base contact with the central server. Jordan has an opportunity to swing on it, but decides instead to dodge to clear the Koala. He dodges the Warcor’s flash pulse, the Koala, and the O-Yoroi’s flamethrower, but doesn’t dodge Kuroshi’s flash pulse. Excellent!
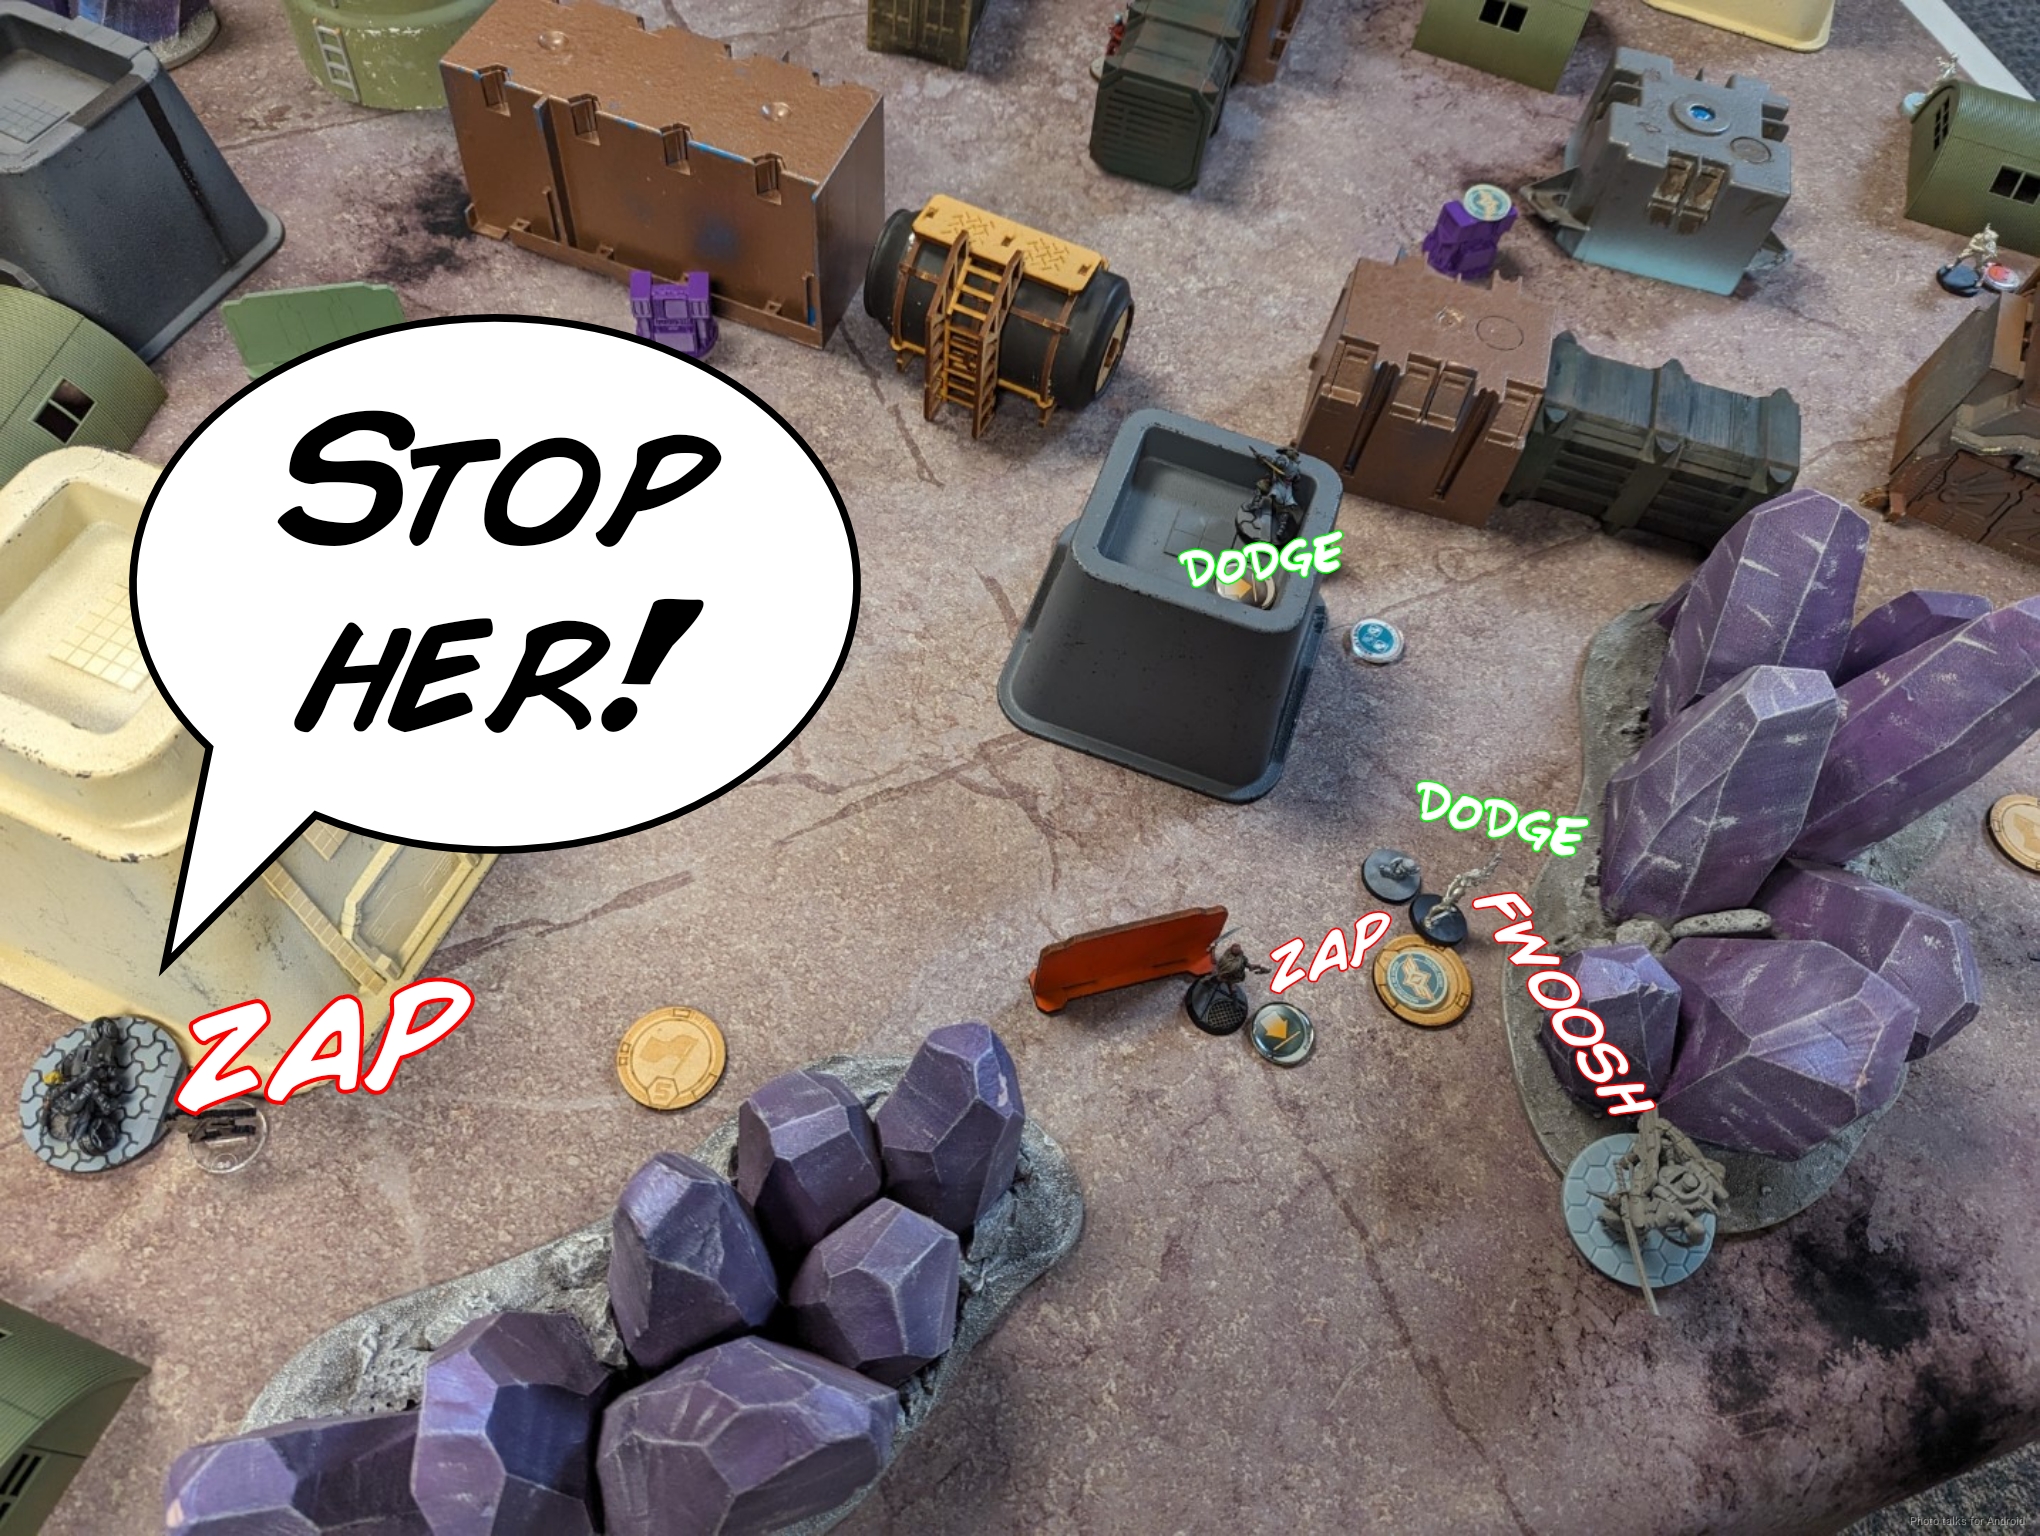
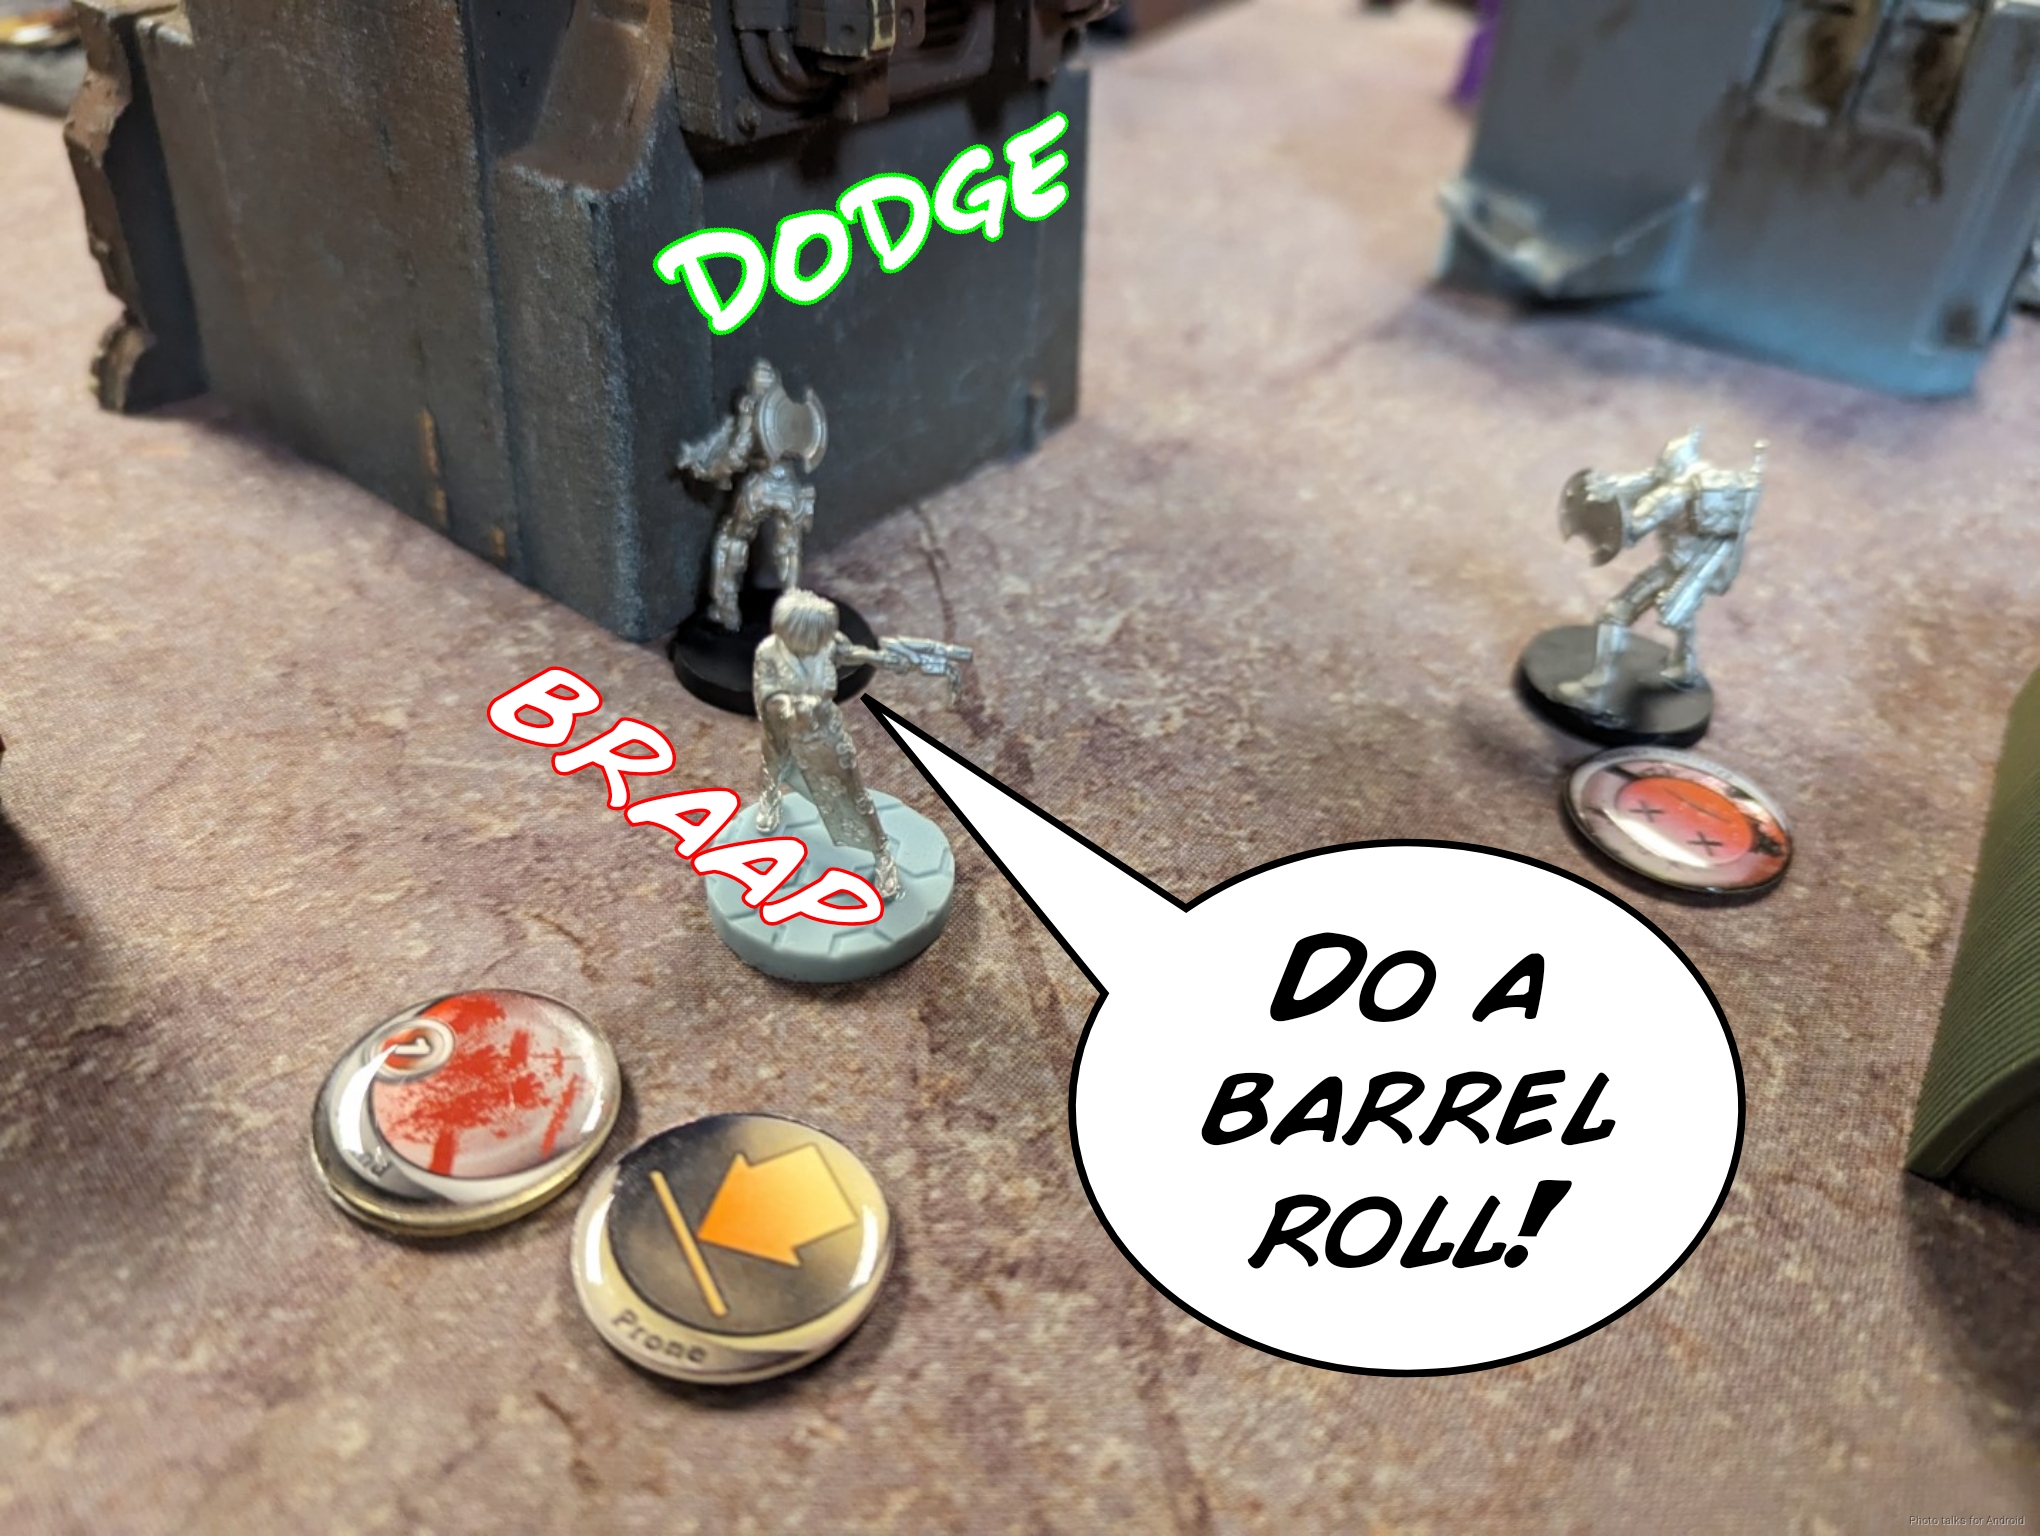
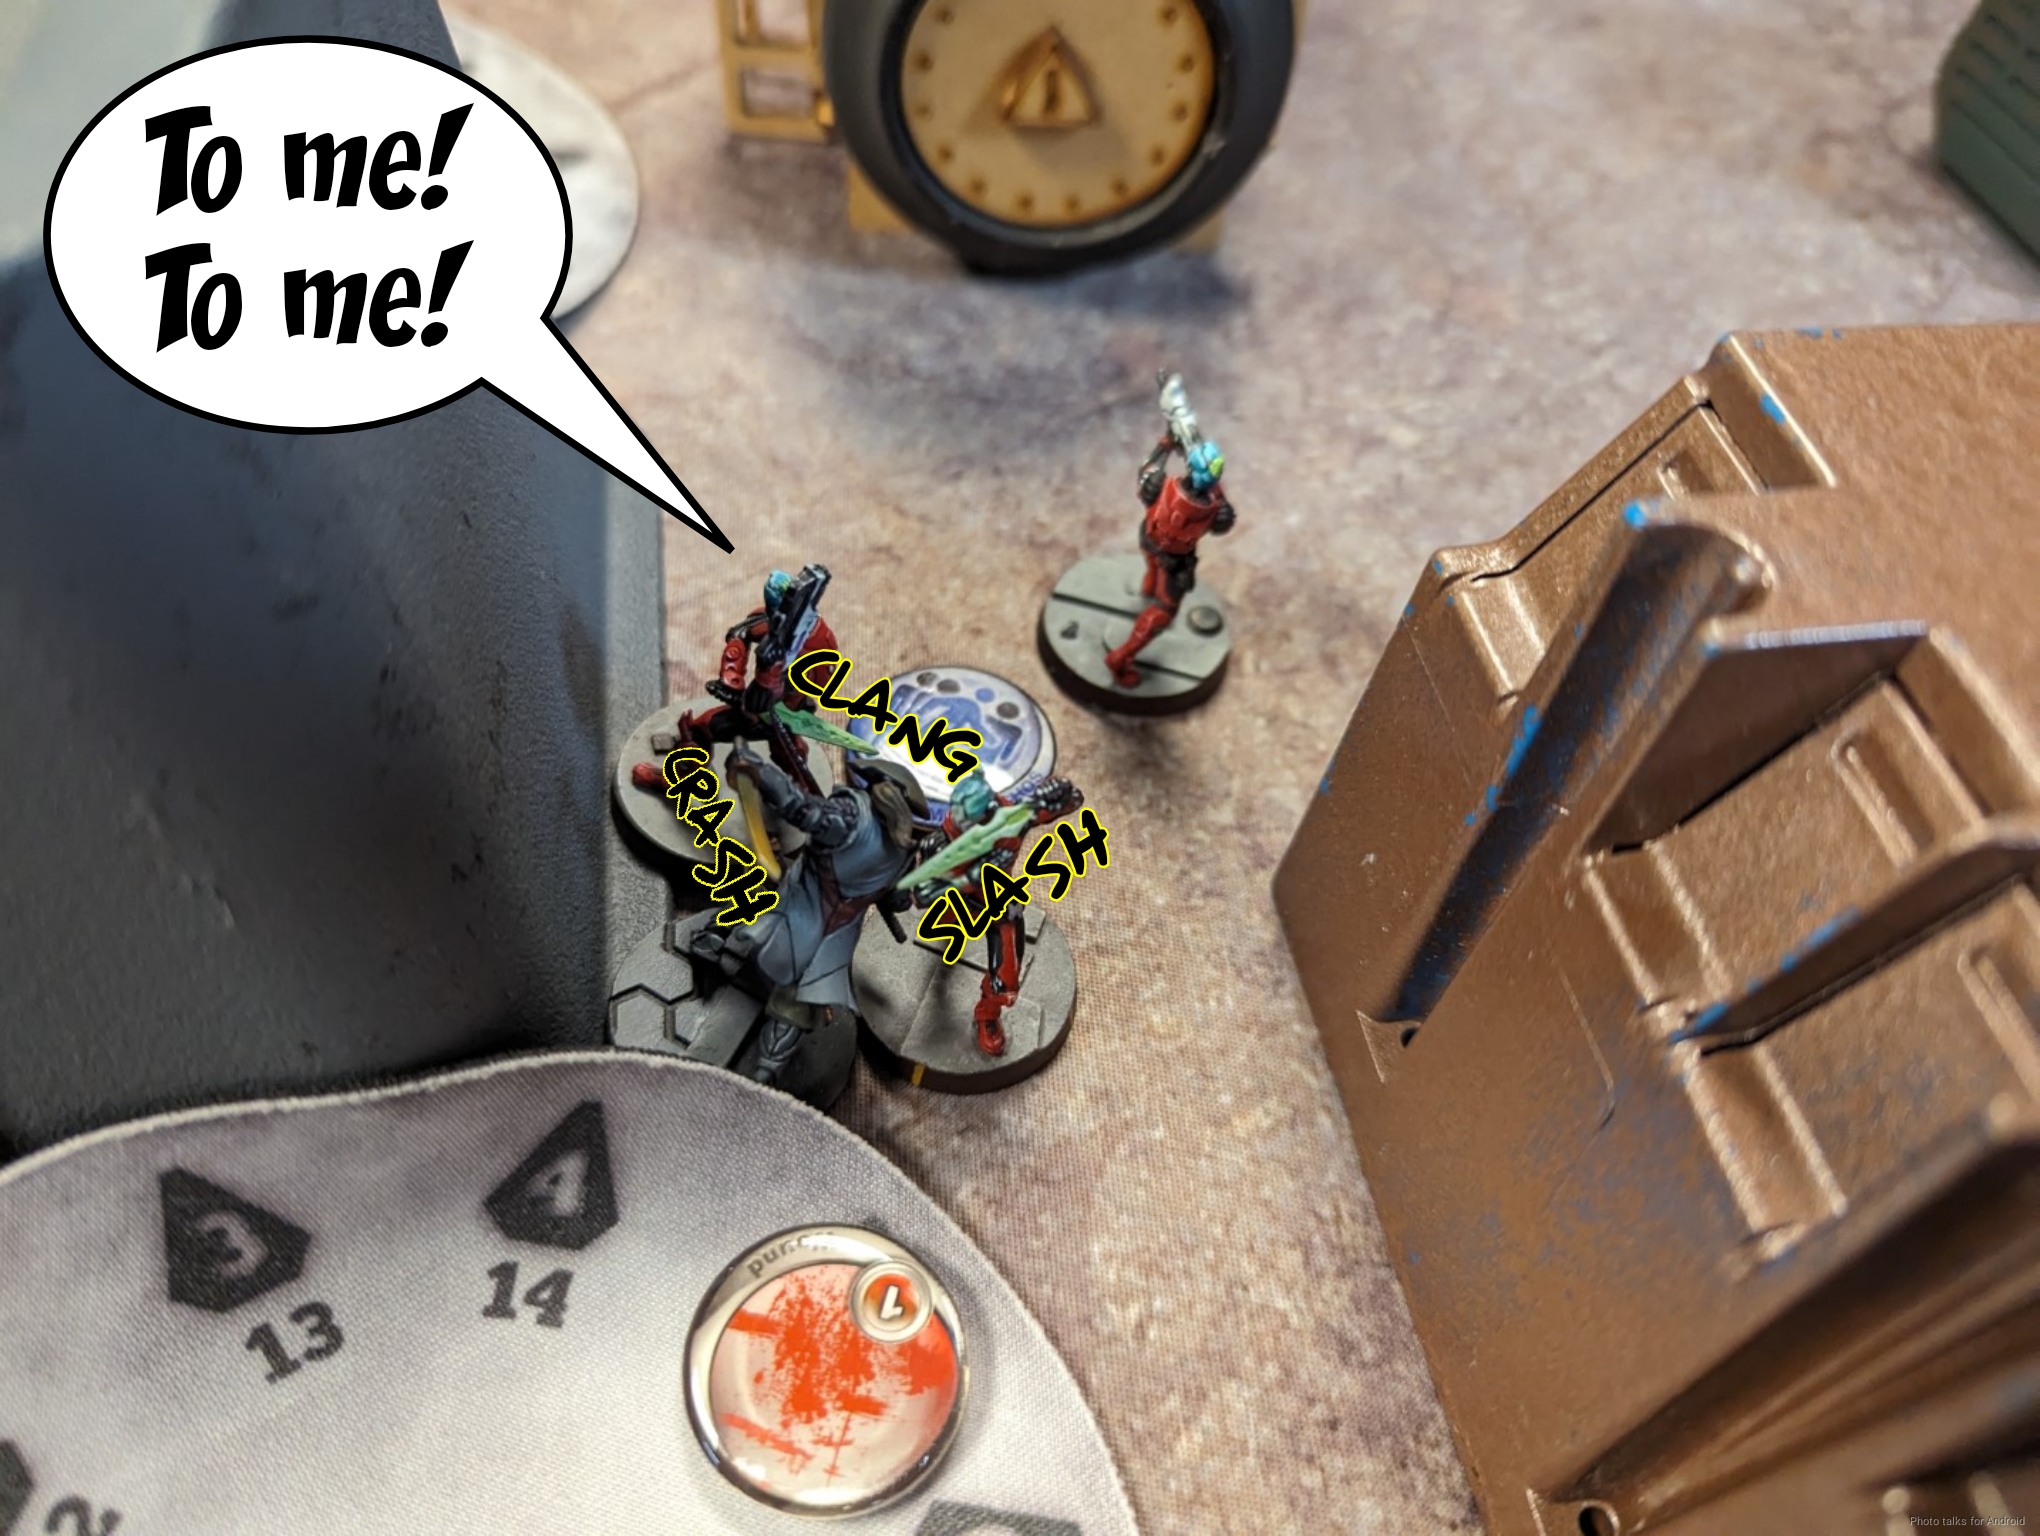
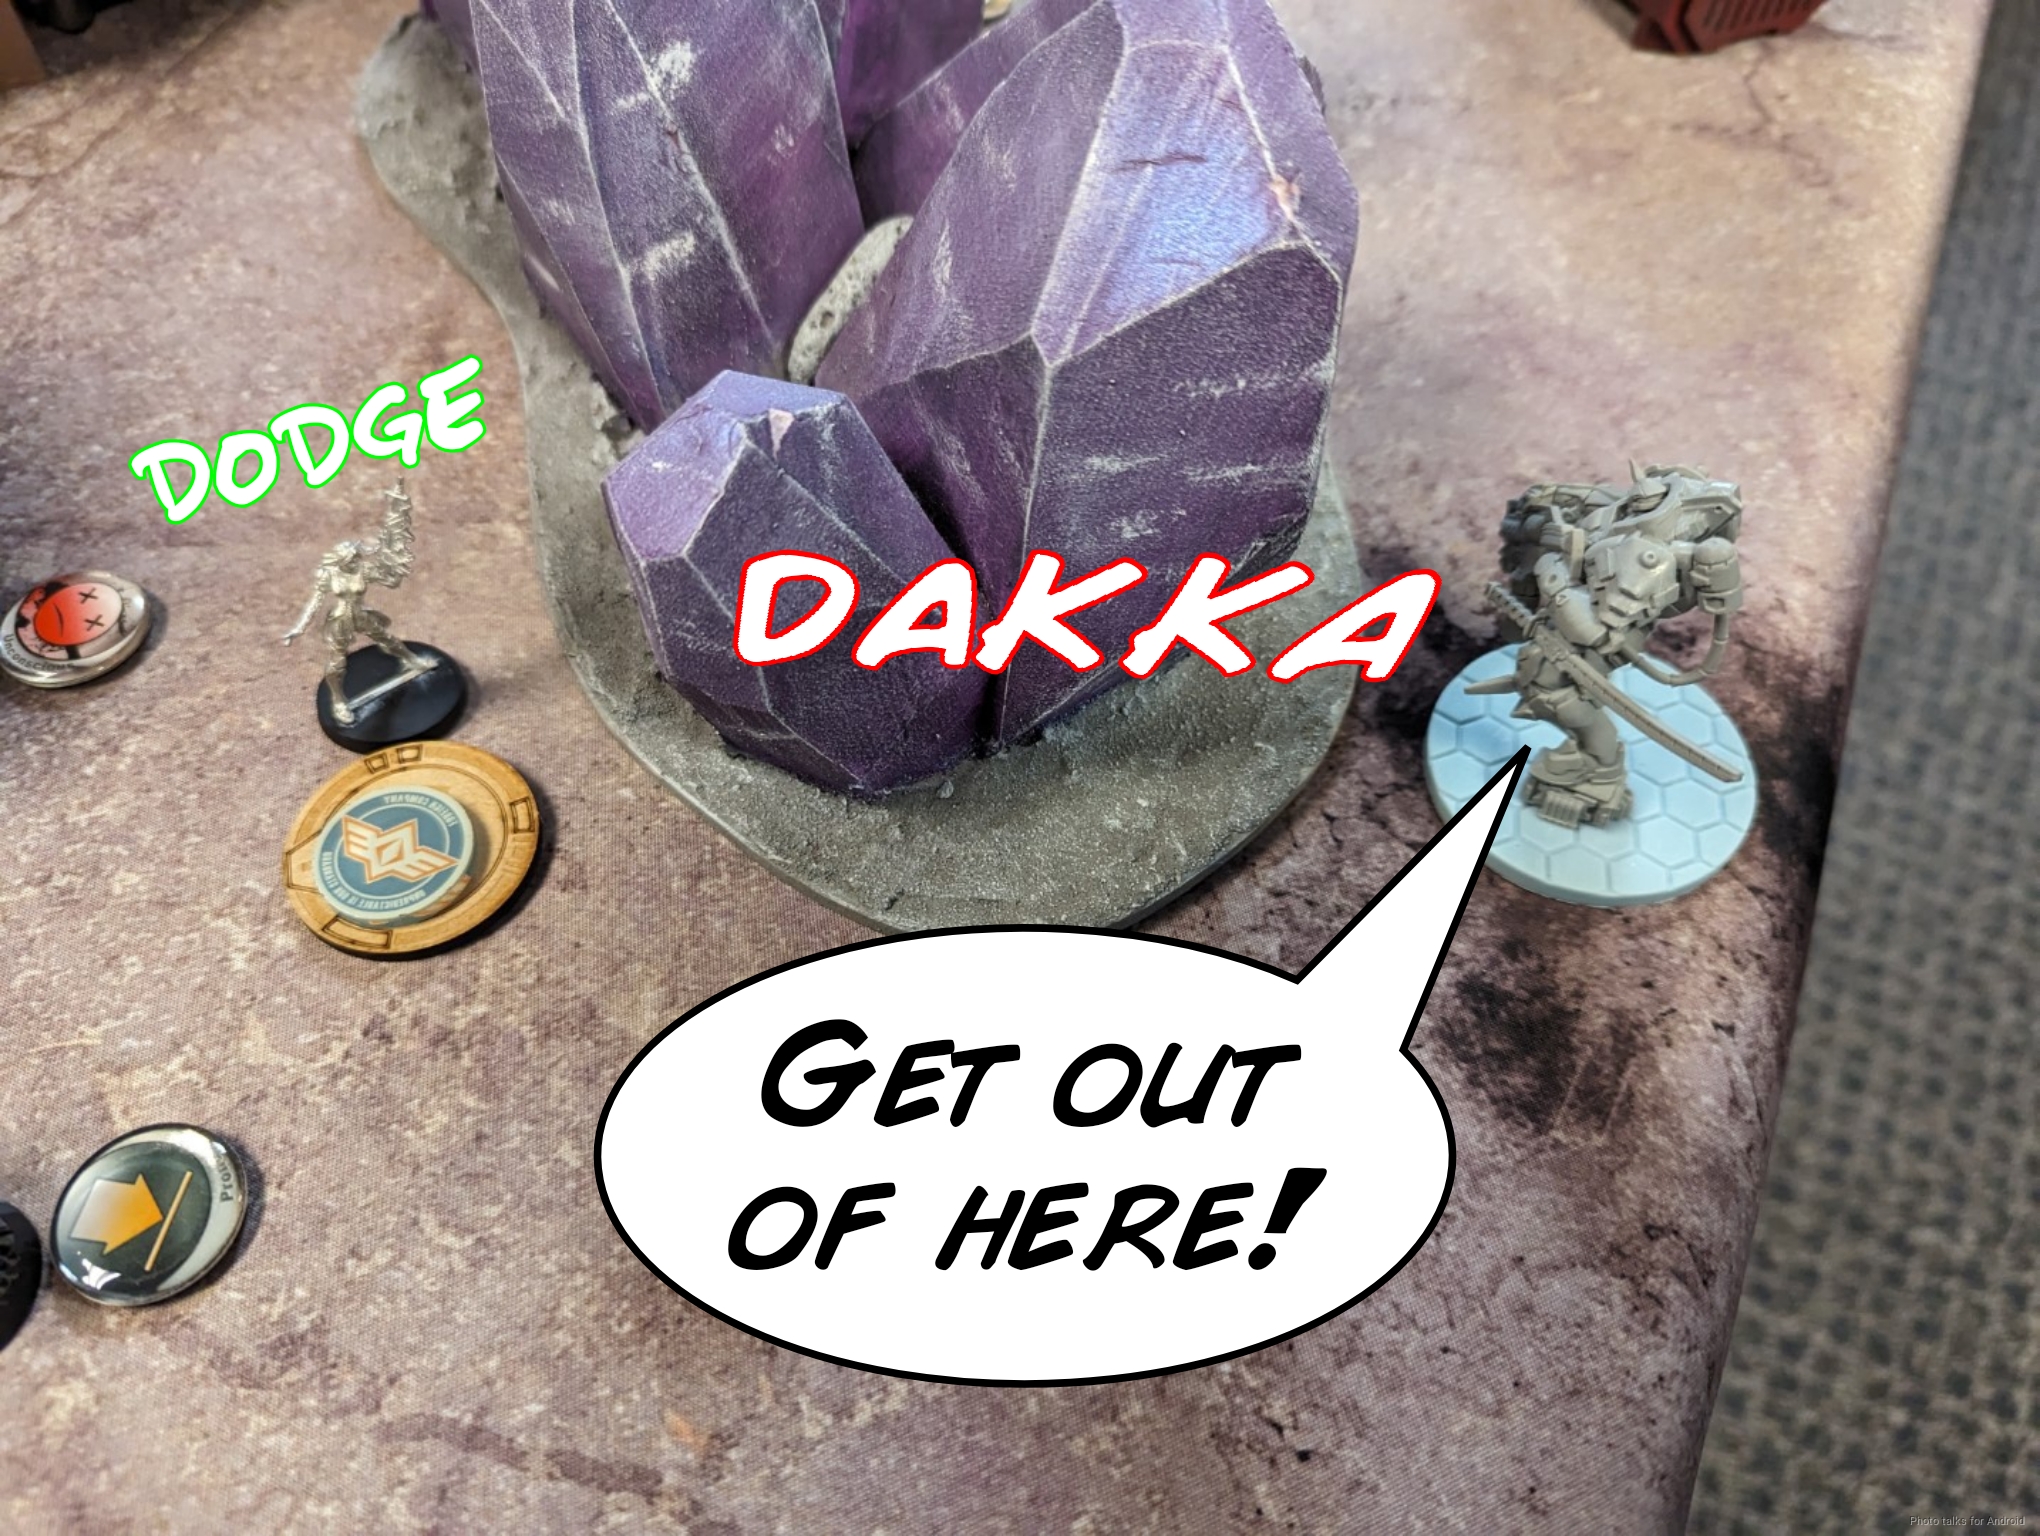
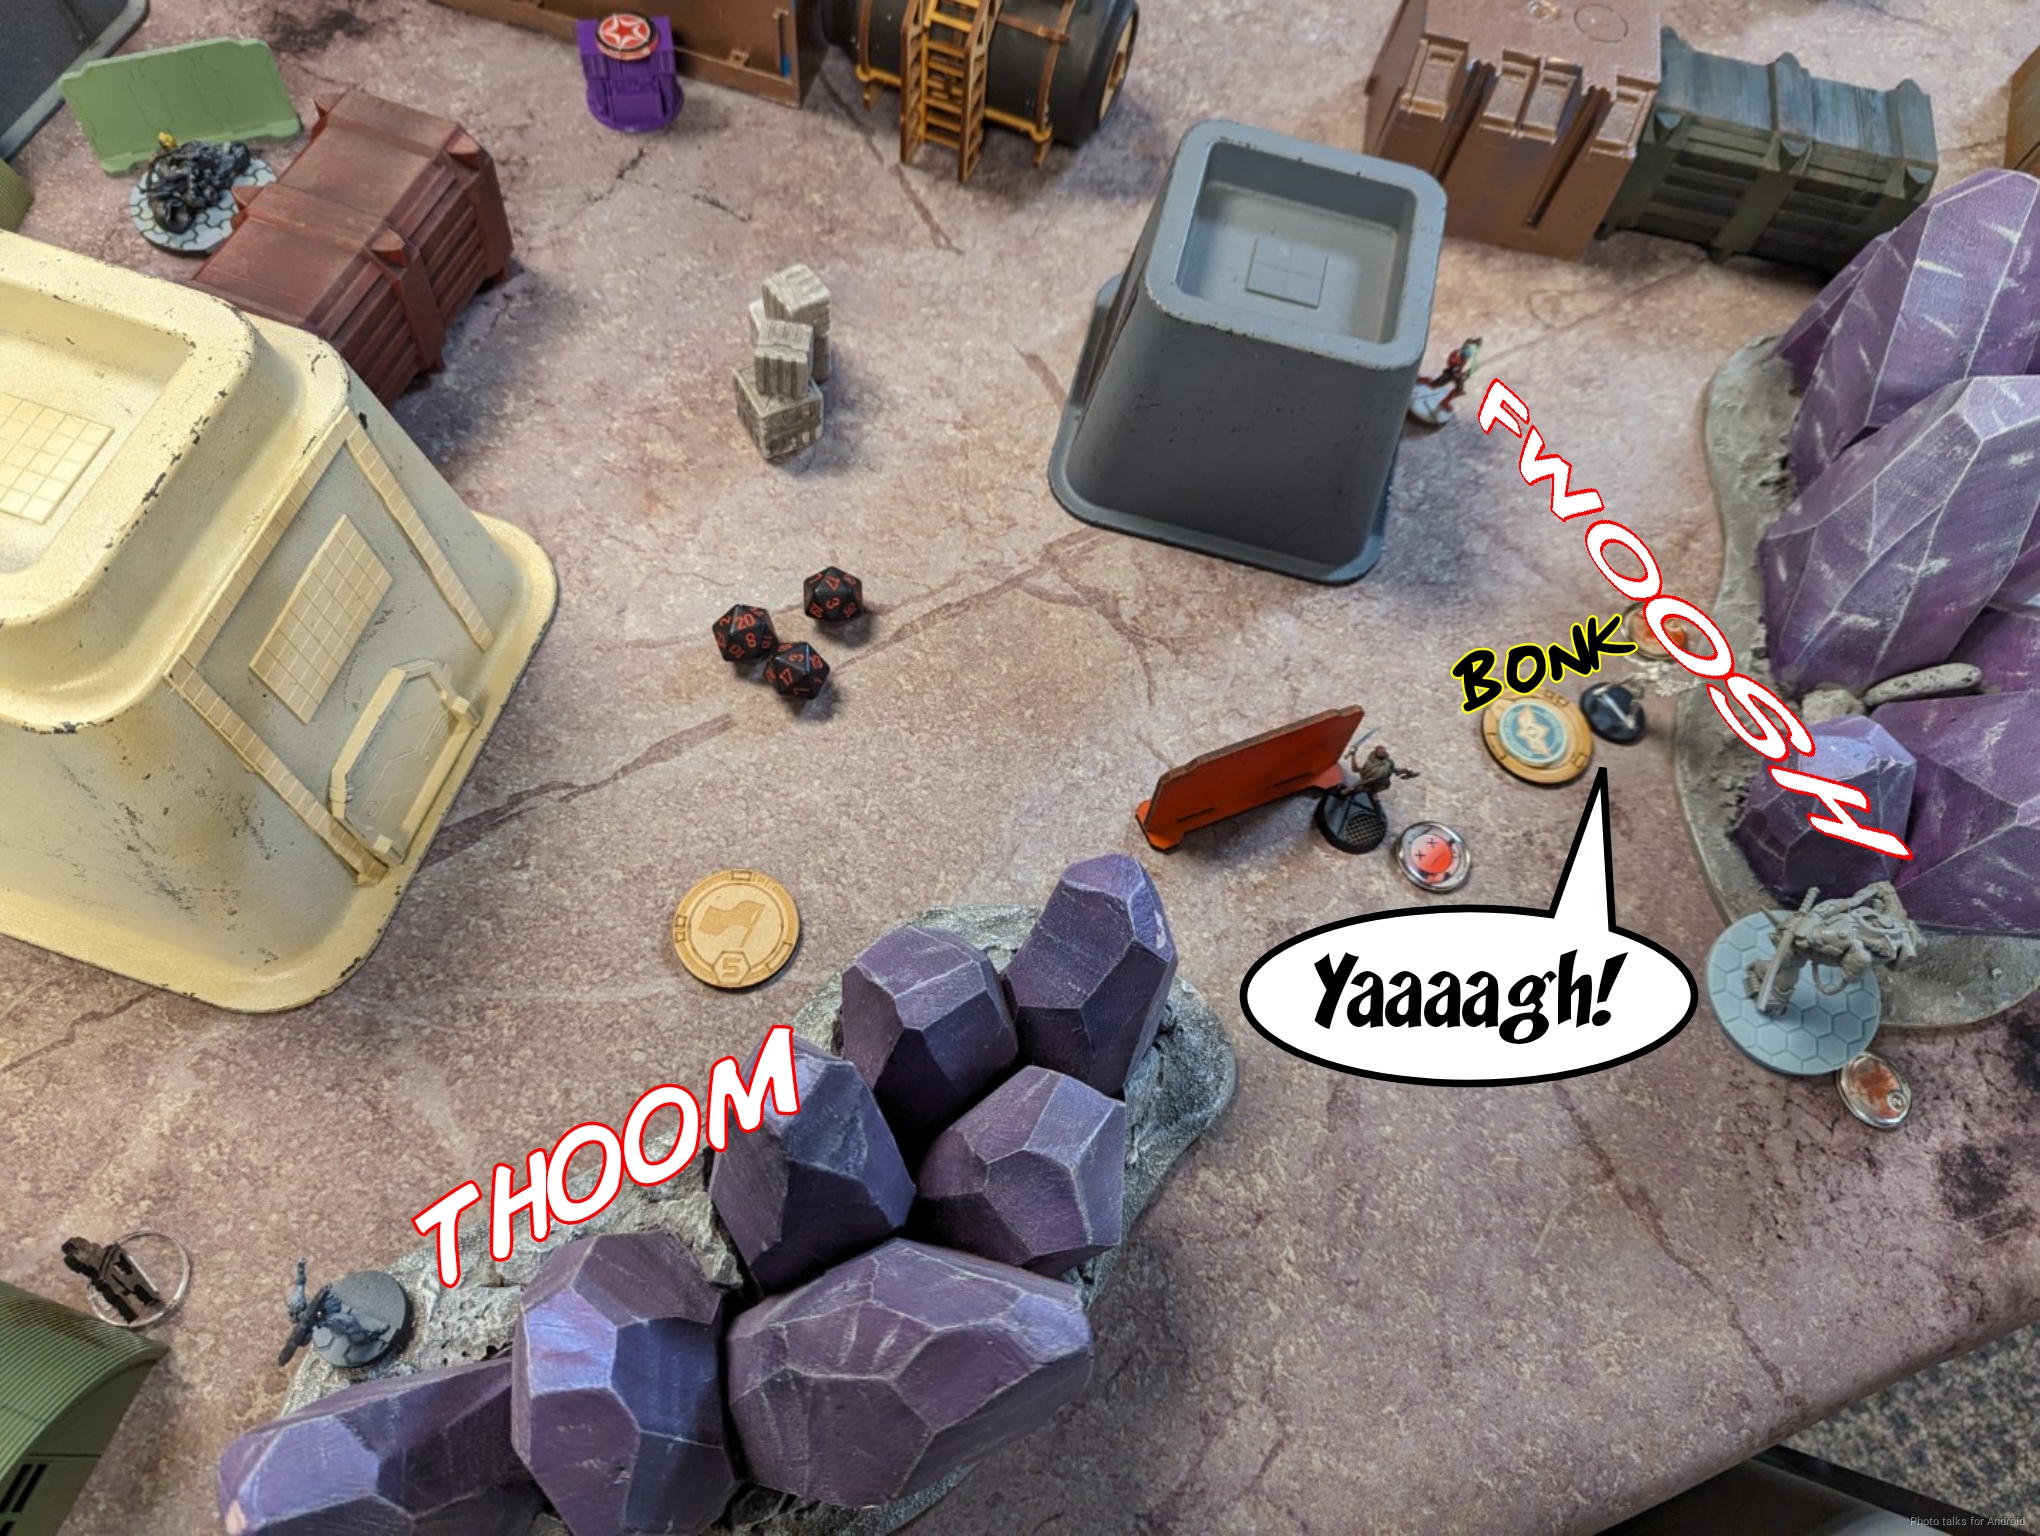
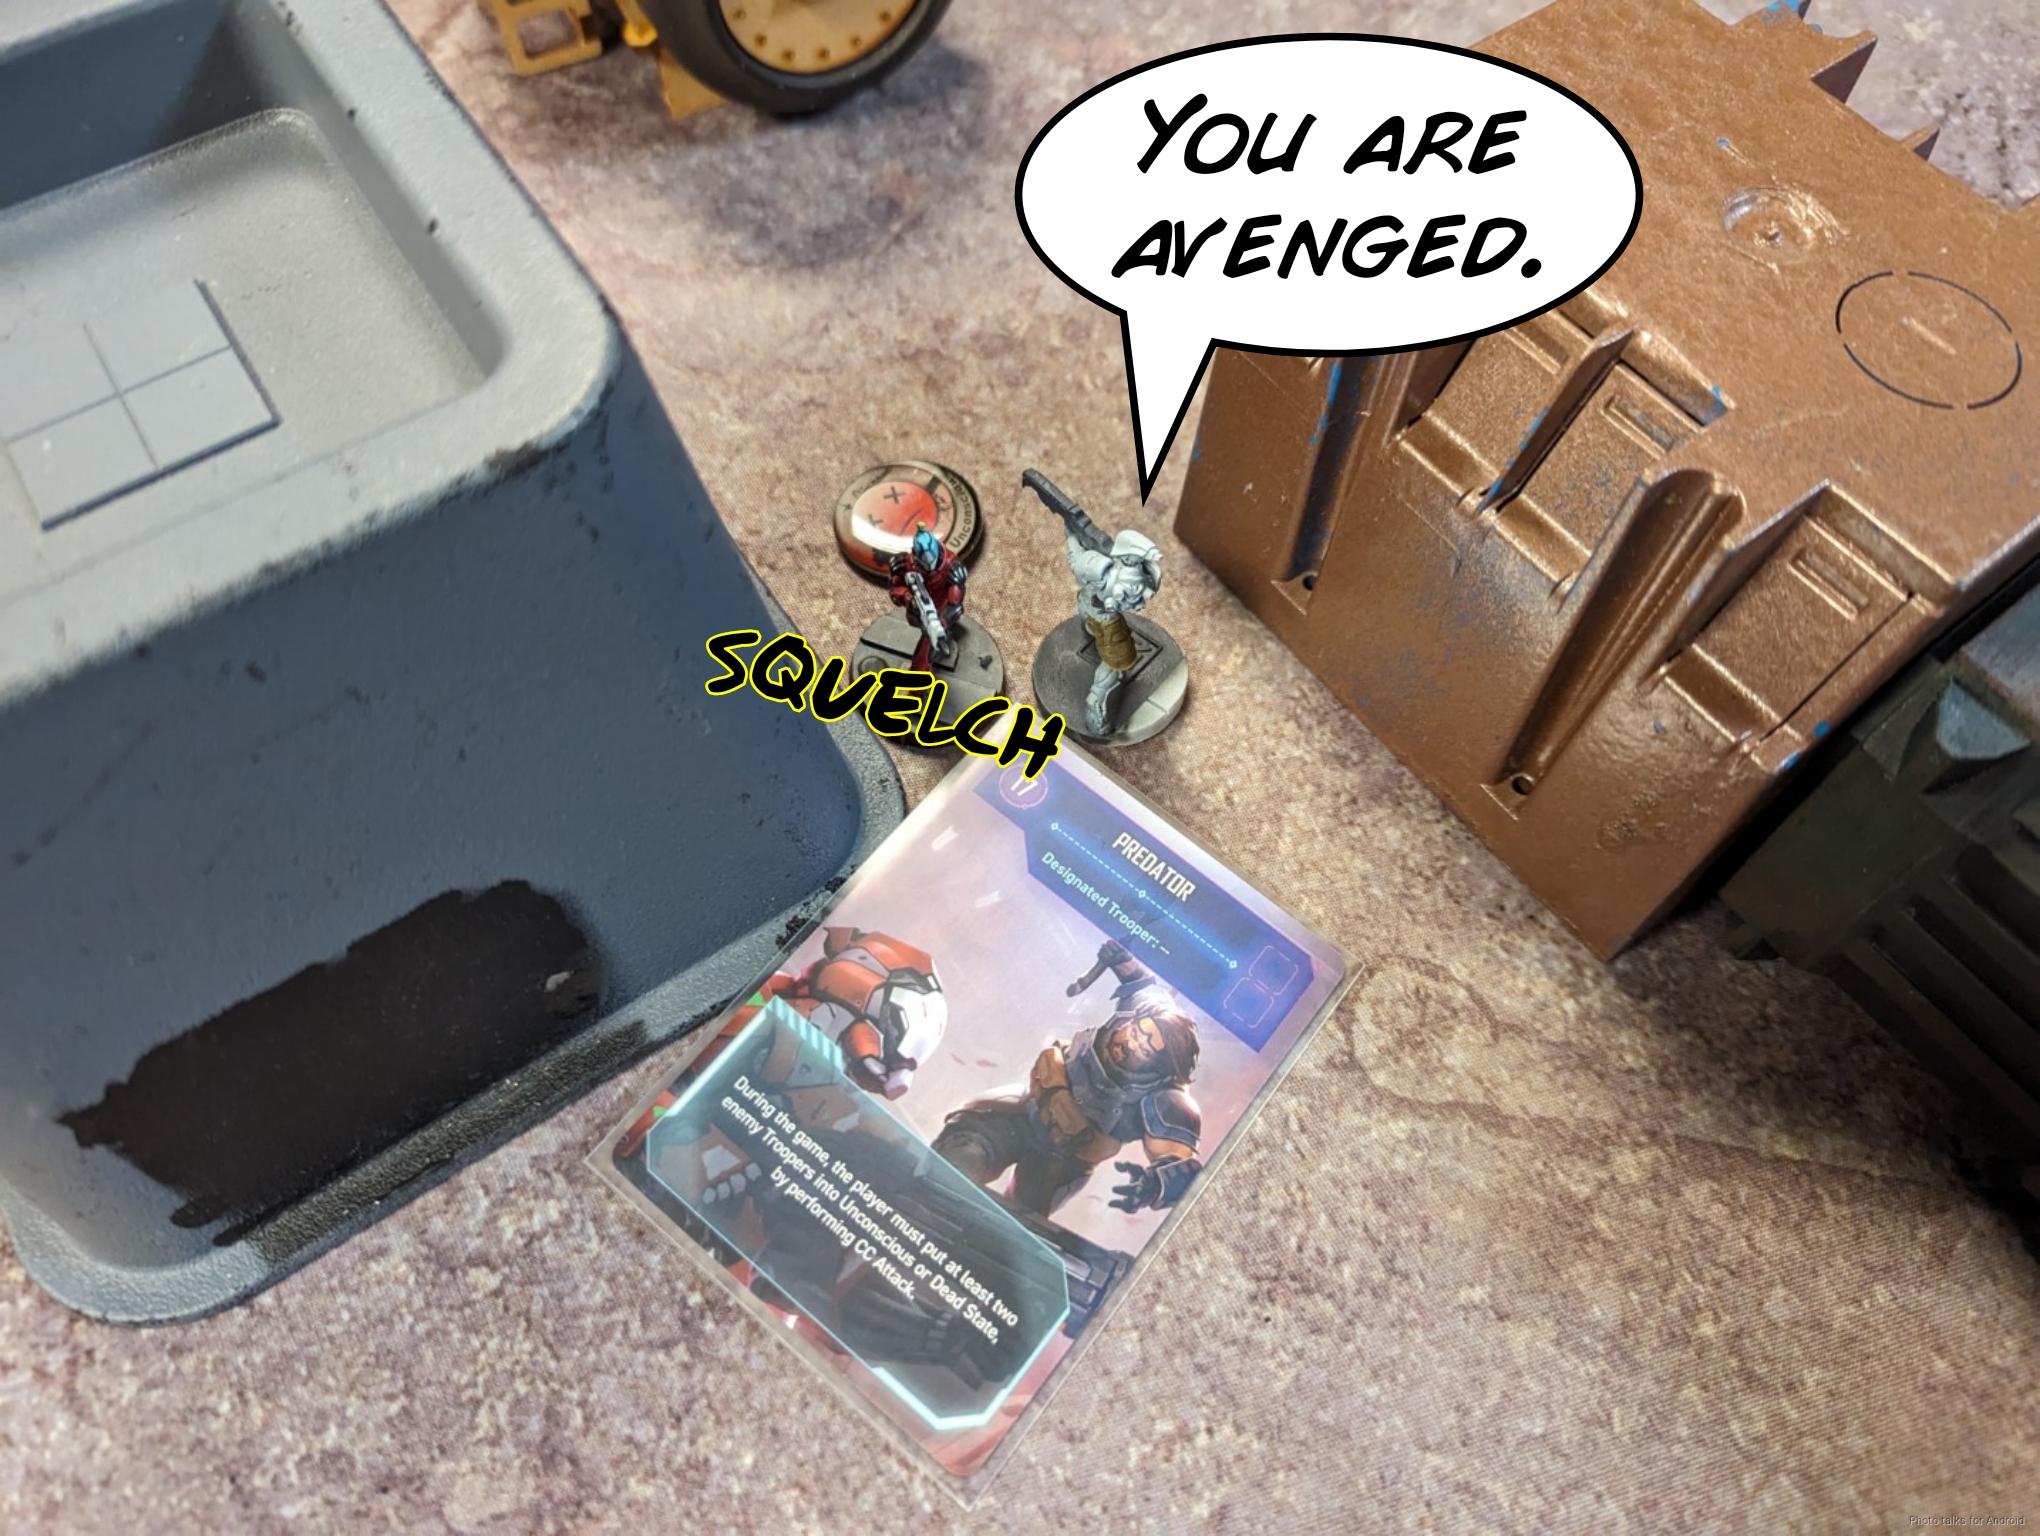
I choose this moment to dodge the Shikami off of his building into base contact with the Myrmidon trailing Hippolyta.
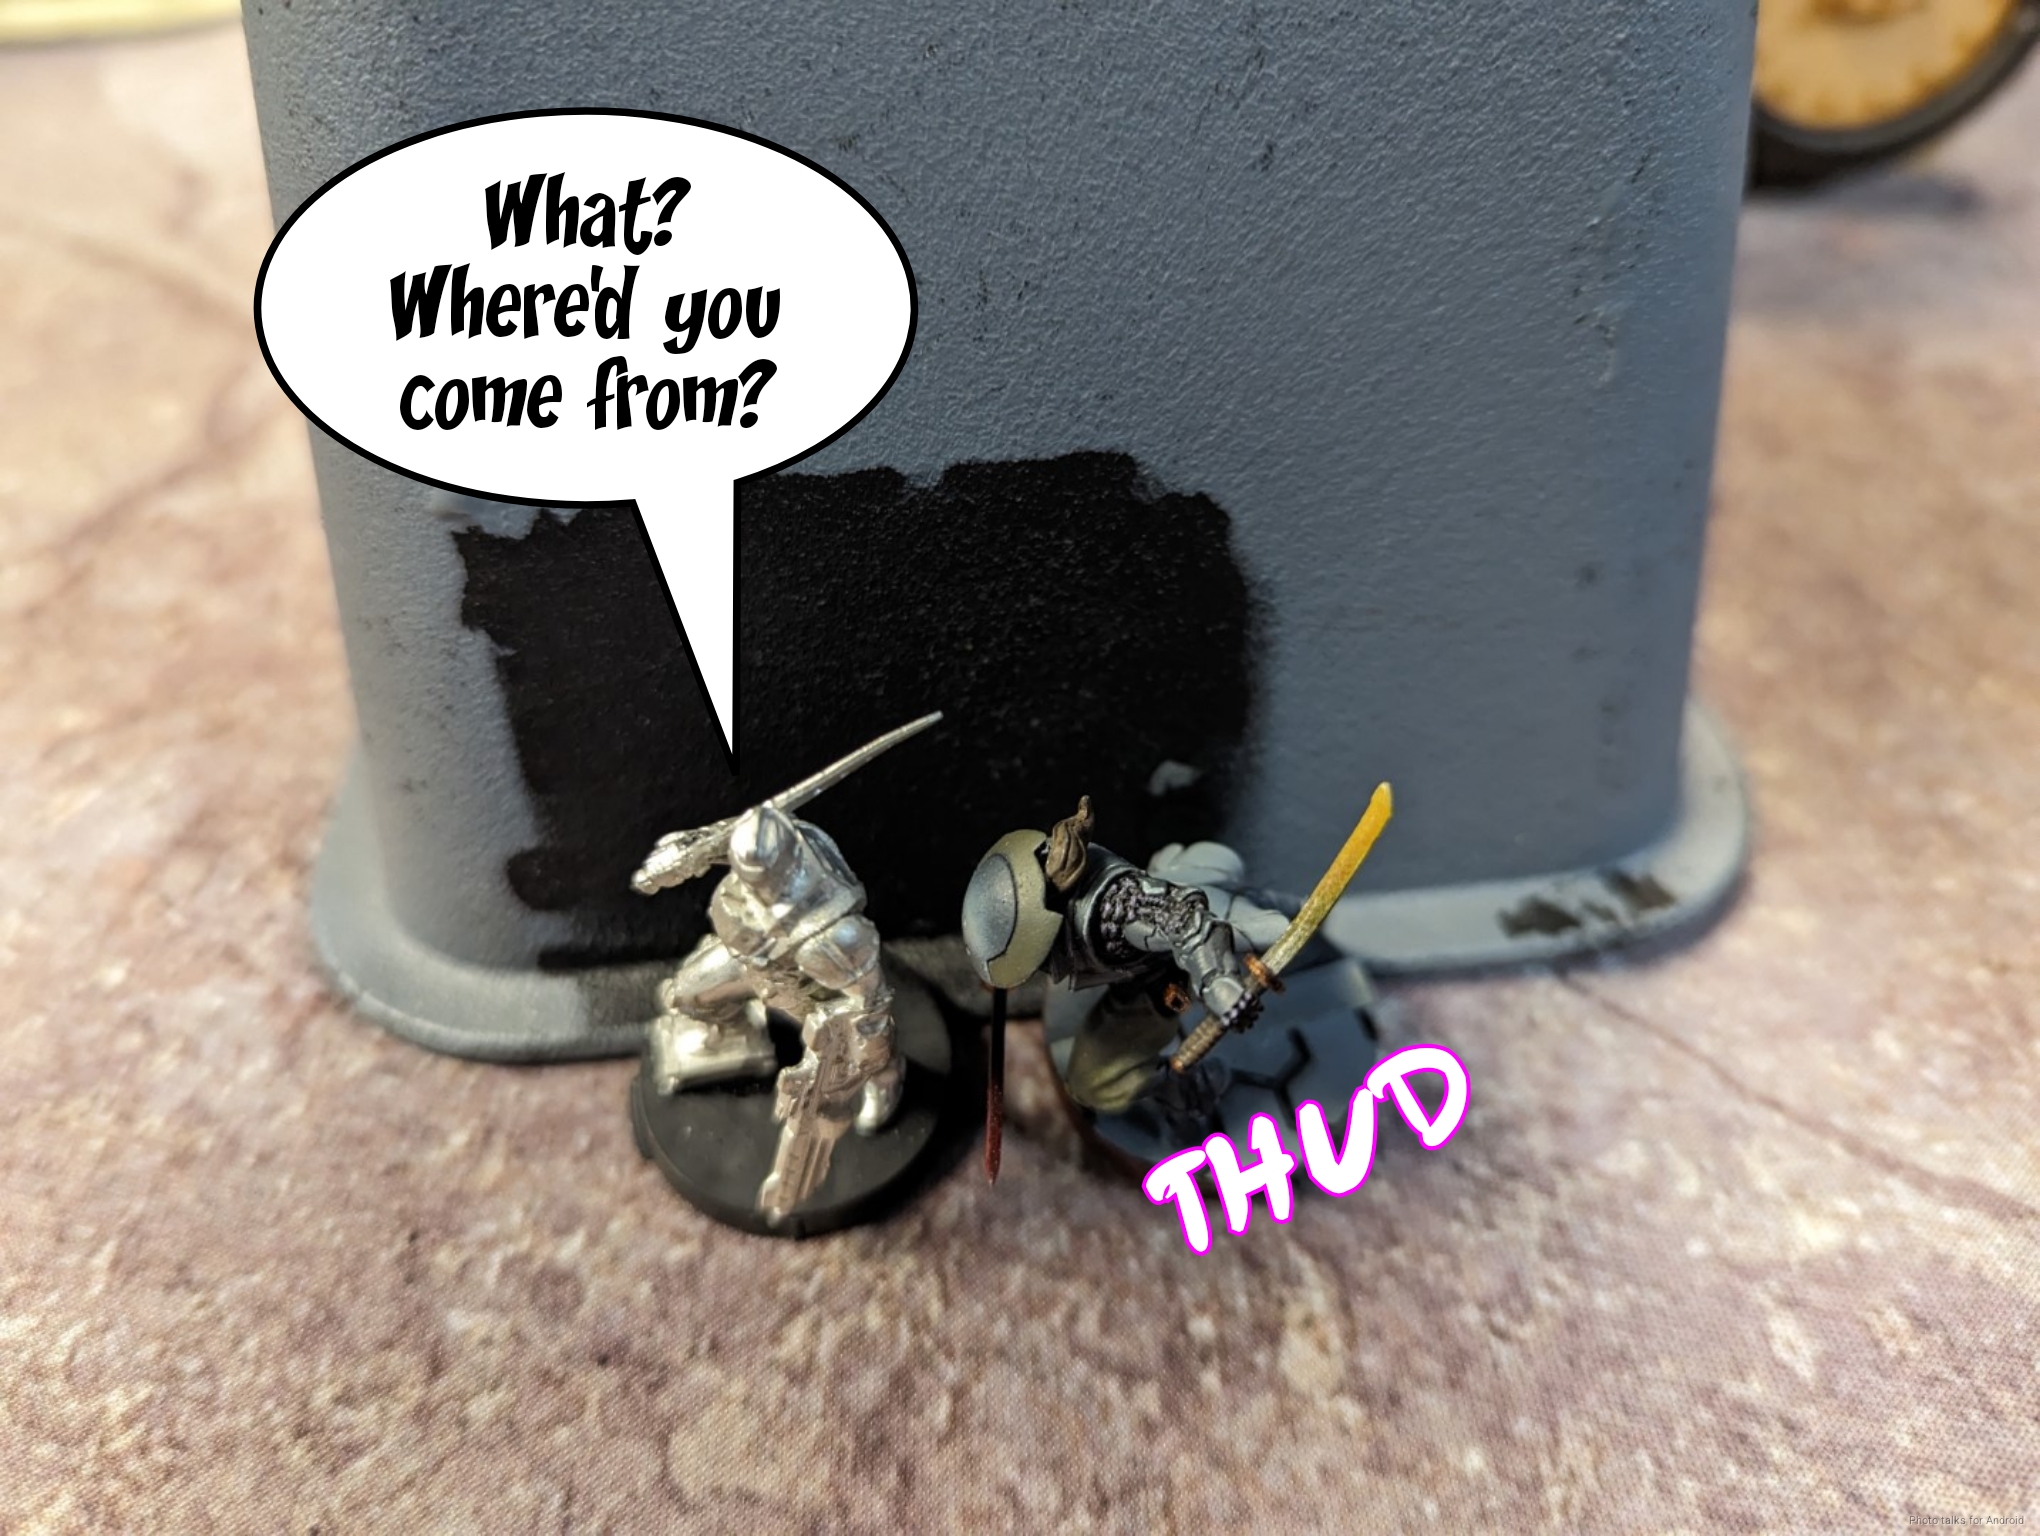
This is such a cool cinematic moment that Jordan throws his last order onto the Myrmidon and we have a sword fight, which I narrowly win thanks to being CC23 versus the Myrmidon’s CC21. This is perfect, because I’m now halfway to Predator.
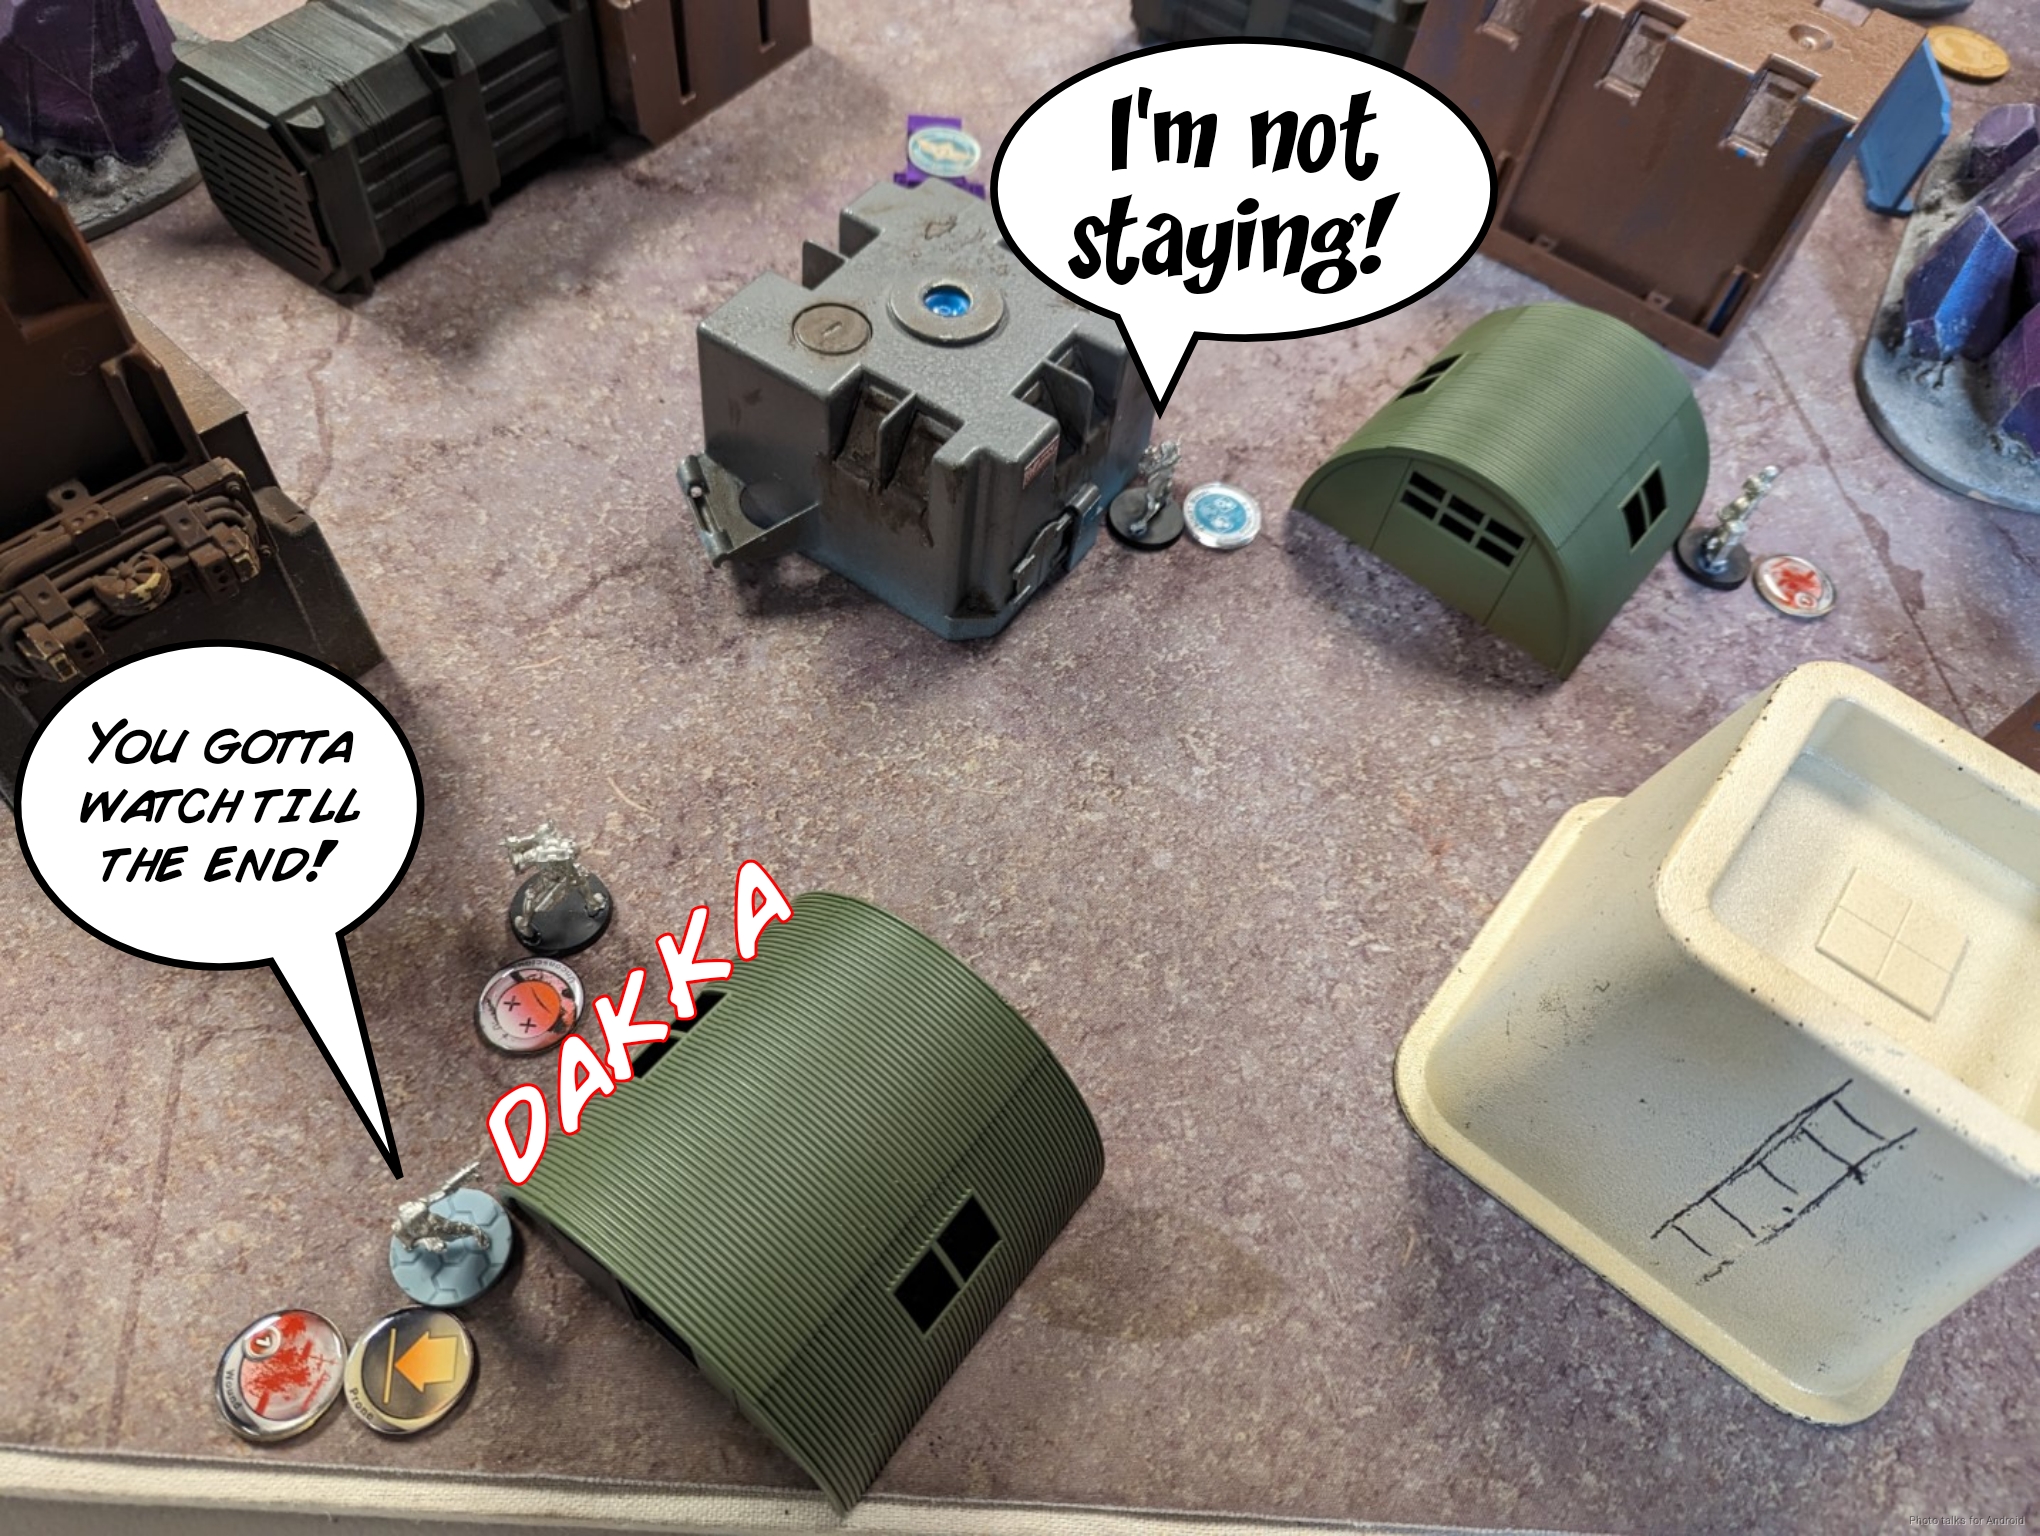
Jordan’s got plenty more Myrmidons though, so he sends in the squad of three, smoking out the Ryuken-9 that can see the approach.
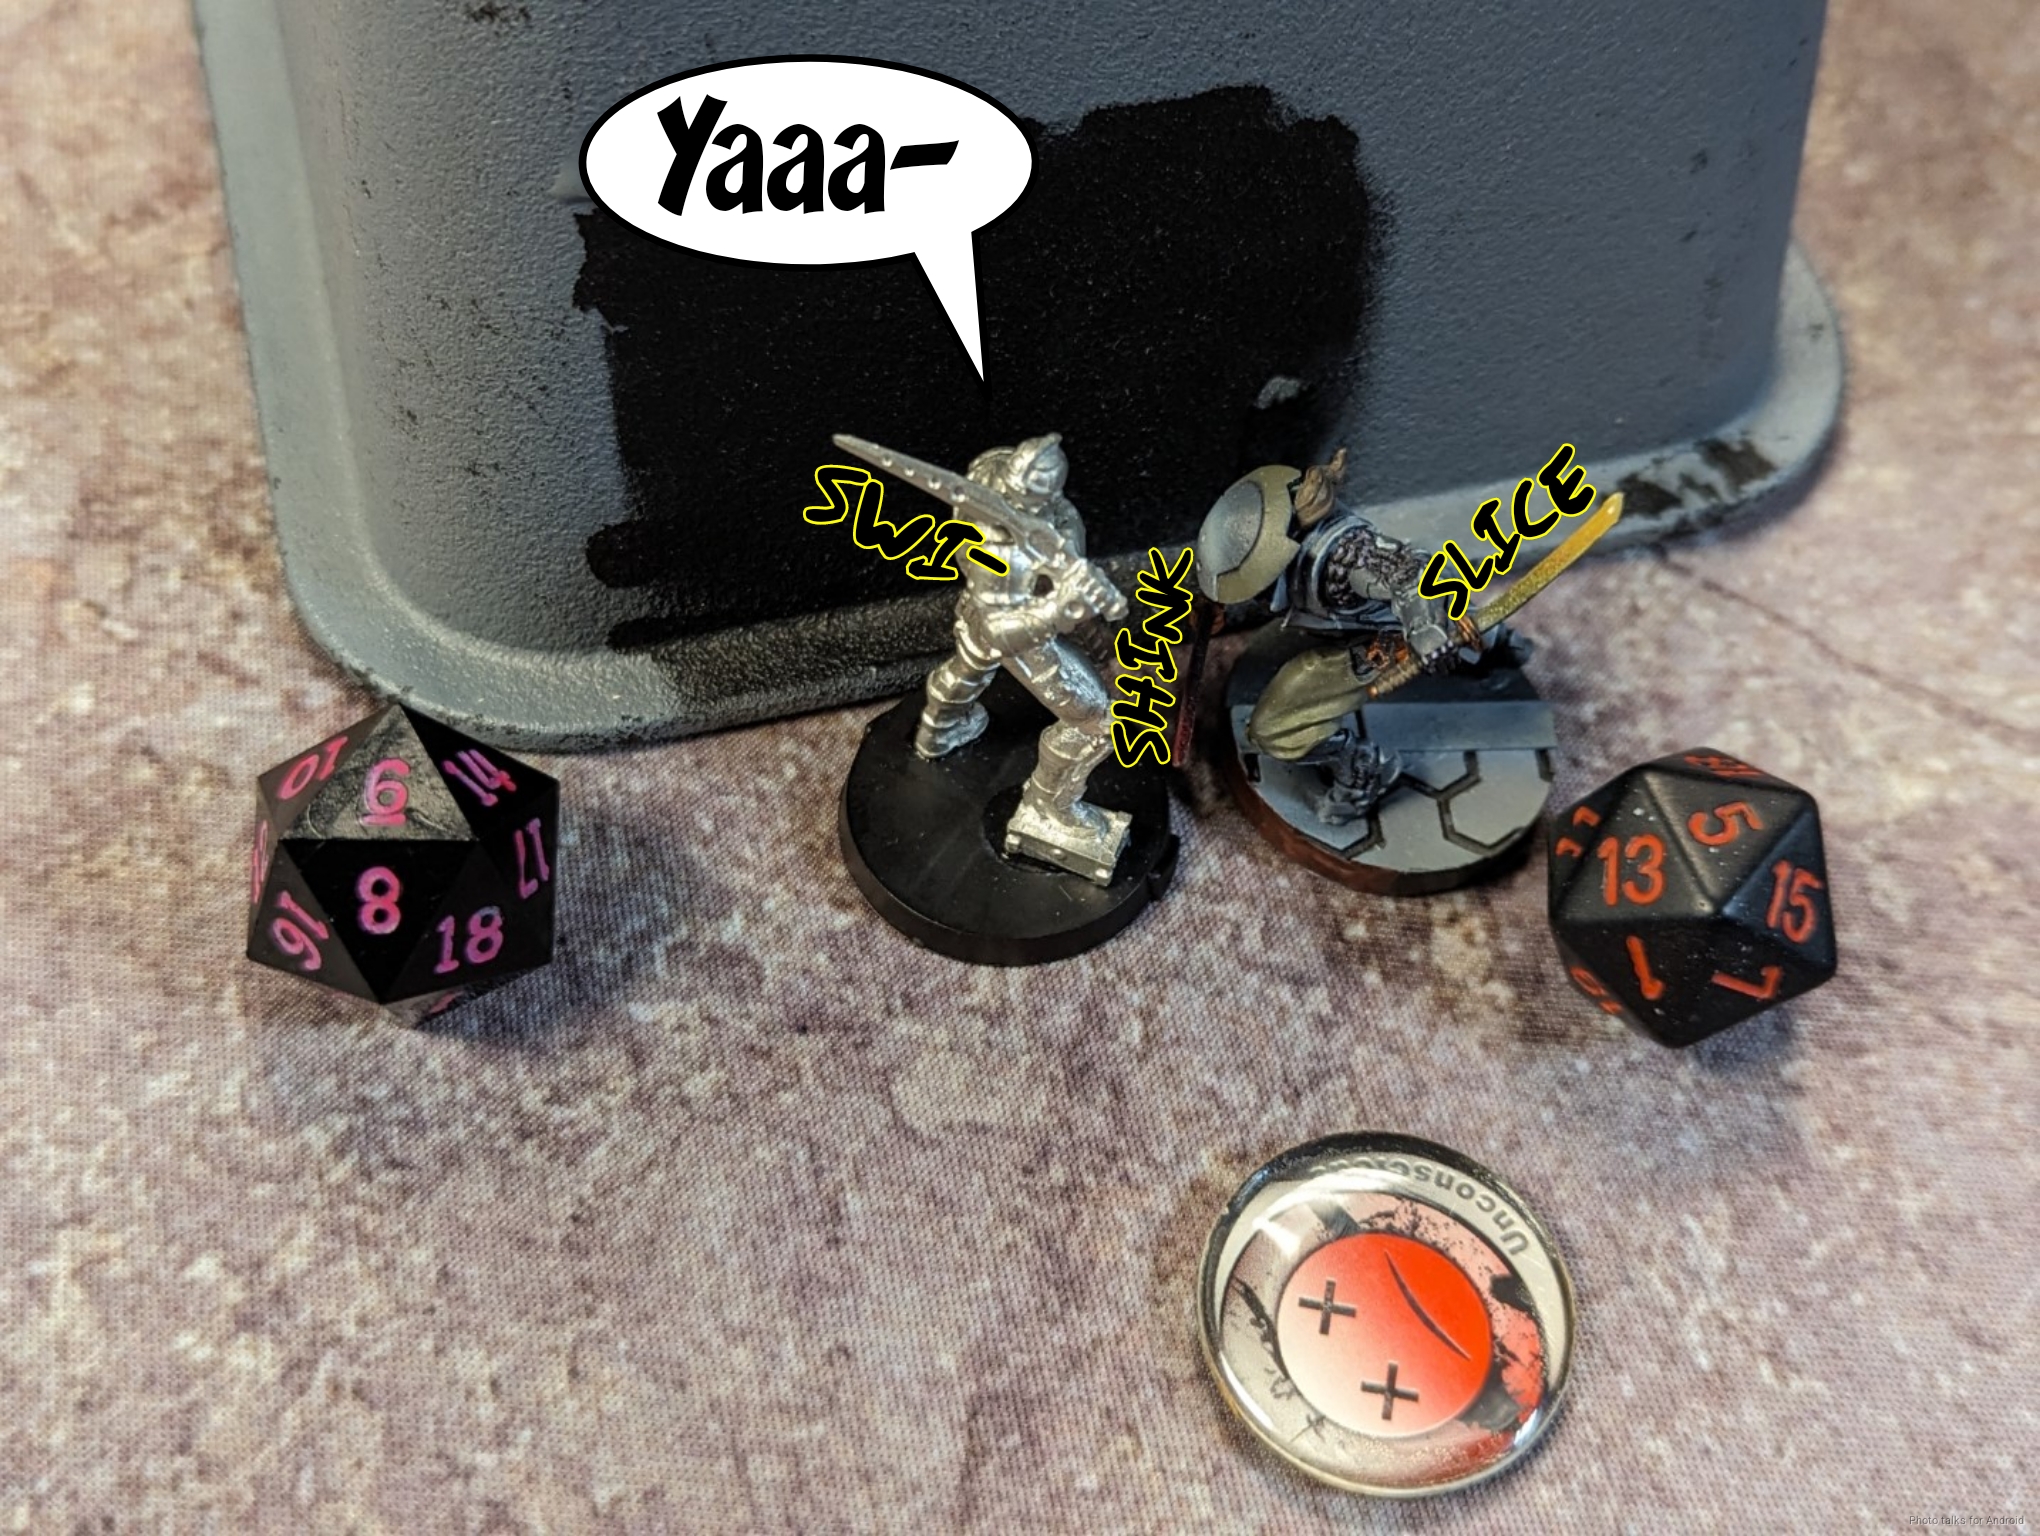
This does let me dodge the Shikami into base contact with one of the Myrmidons. Probably not the best plan–I could dodge away and cause more problems later, but this is too cinematic to not do.
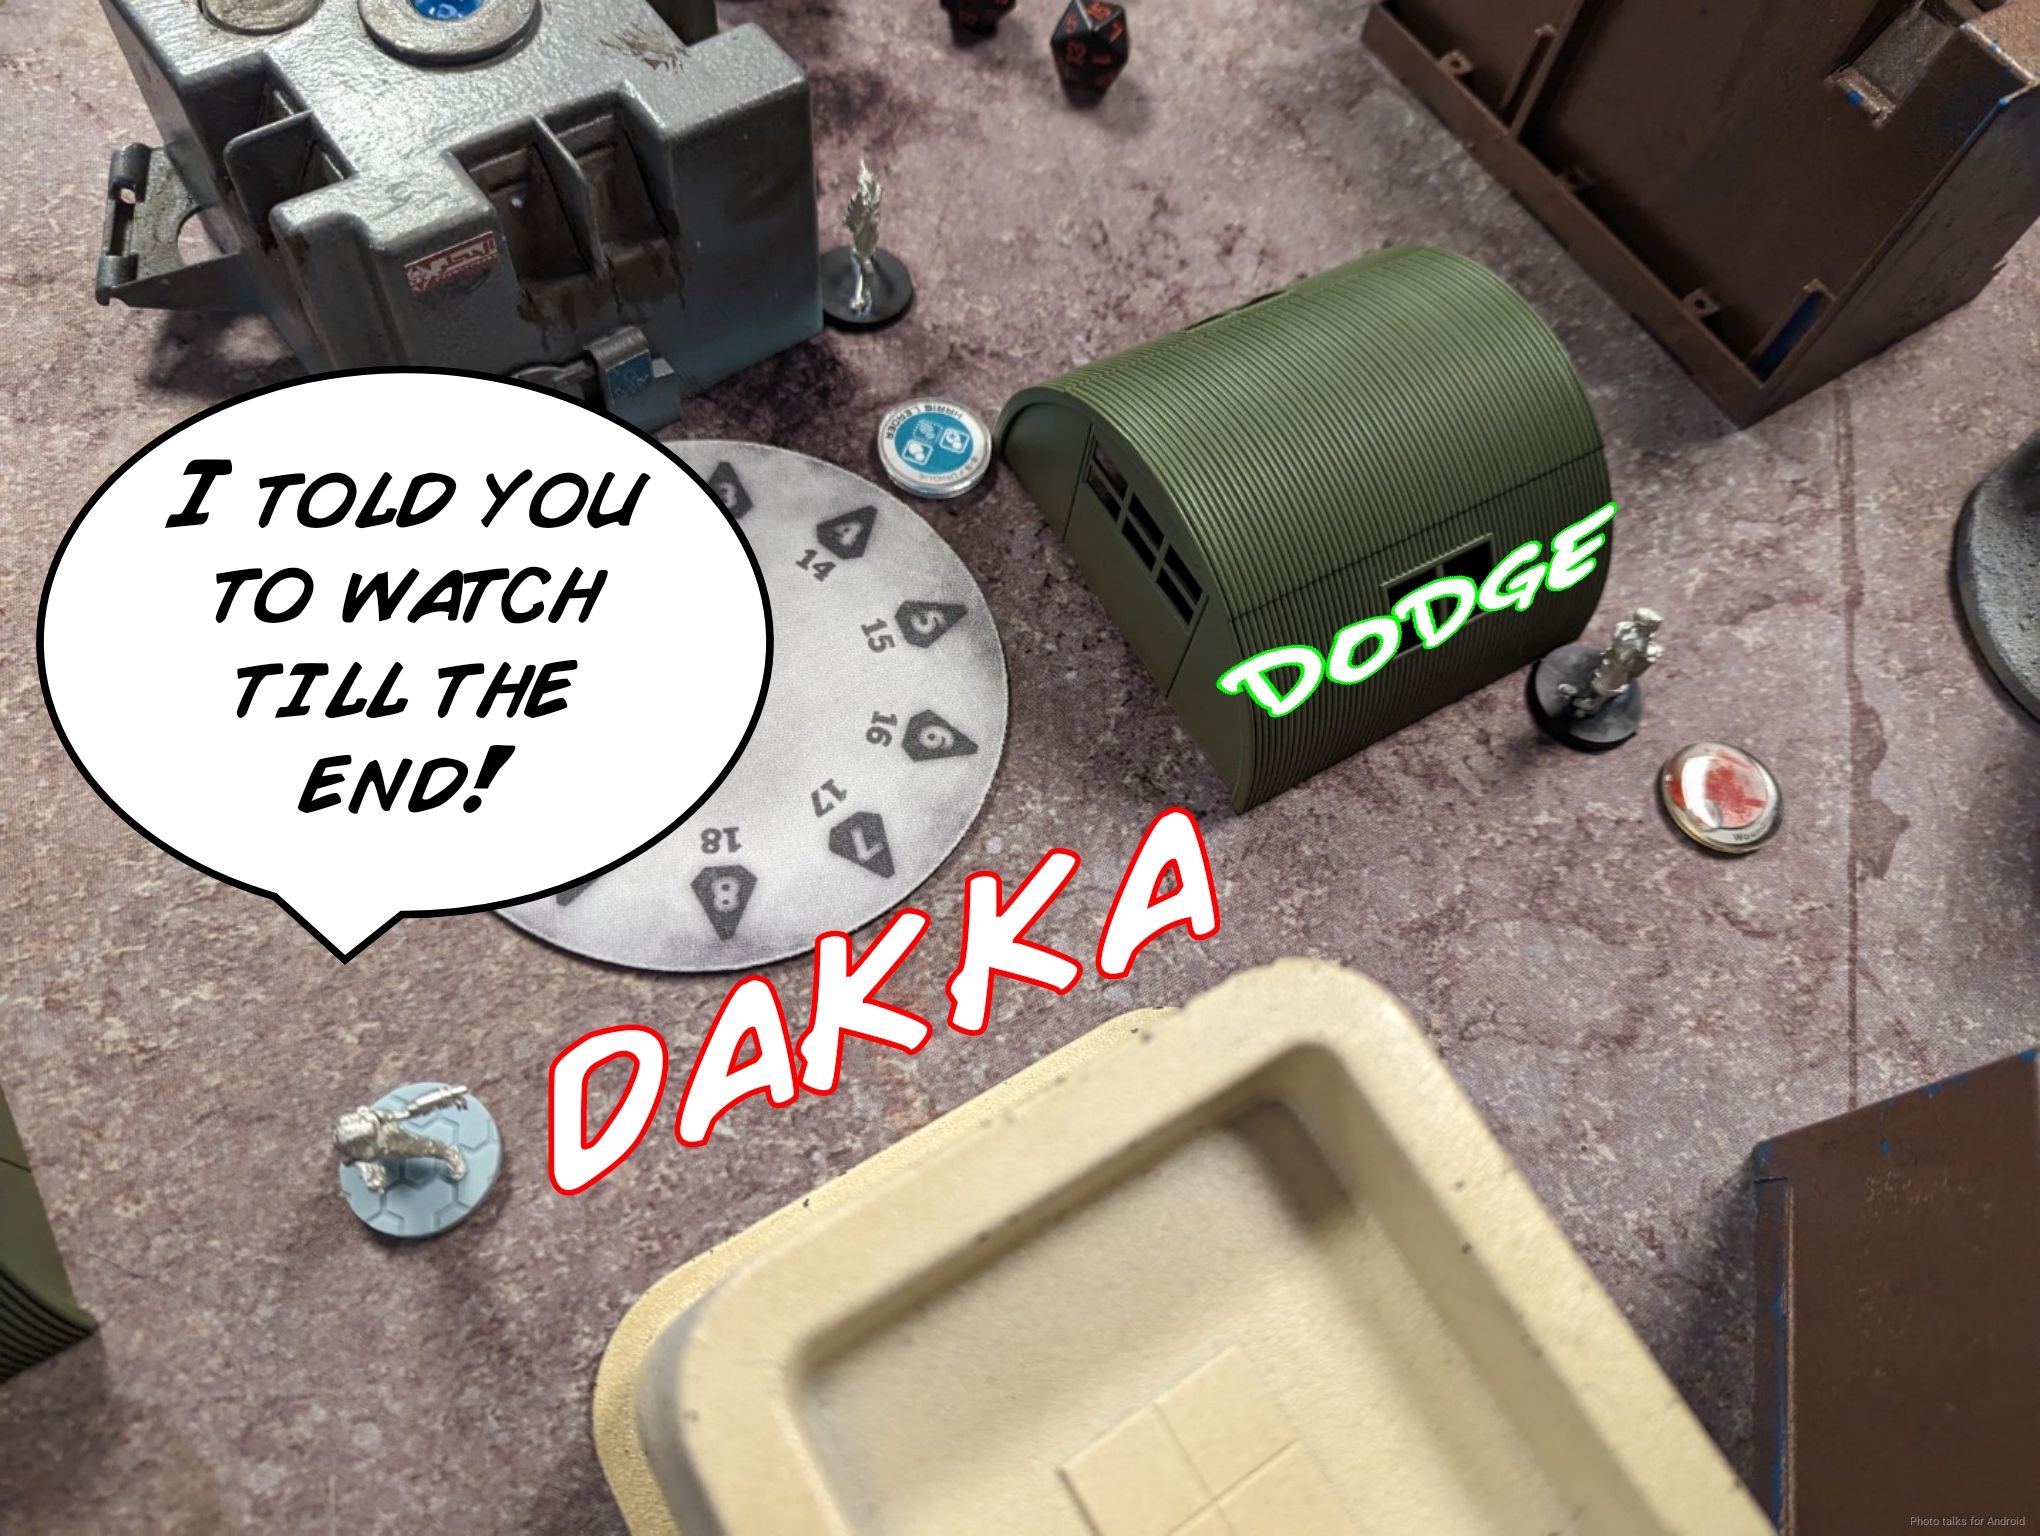
On the next order Jordan gets another Myrmidon into close combat, and I somehow manage to keep the damage to only 1 wound.
CC23 isn’t enough to defend against burst 3 CC21, and I lose the Shikami, finally.
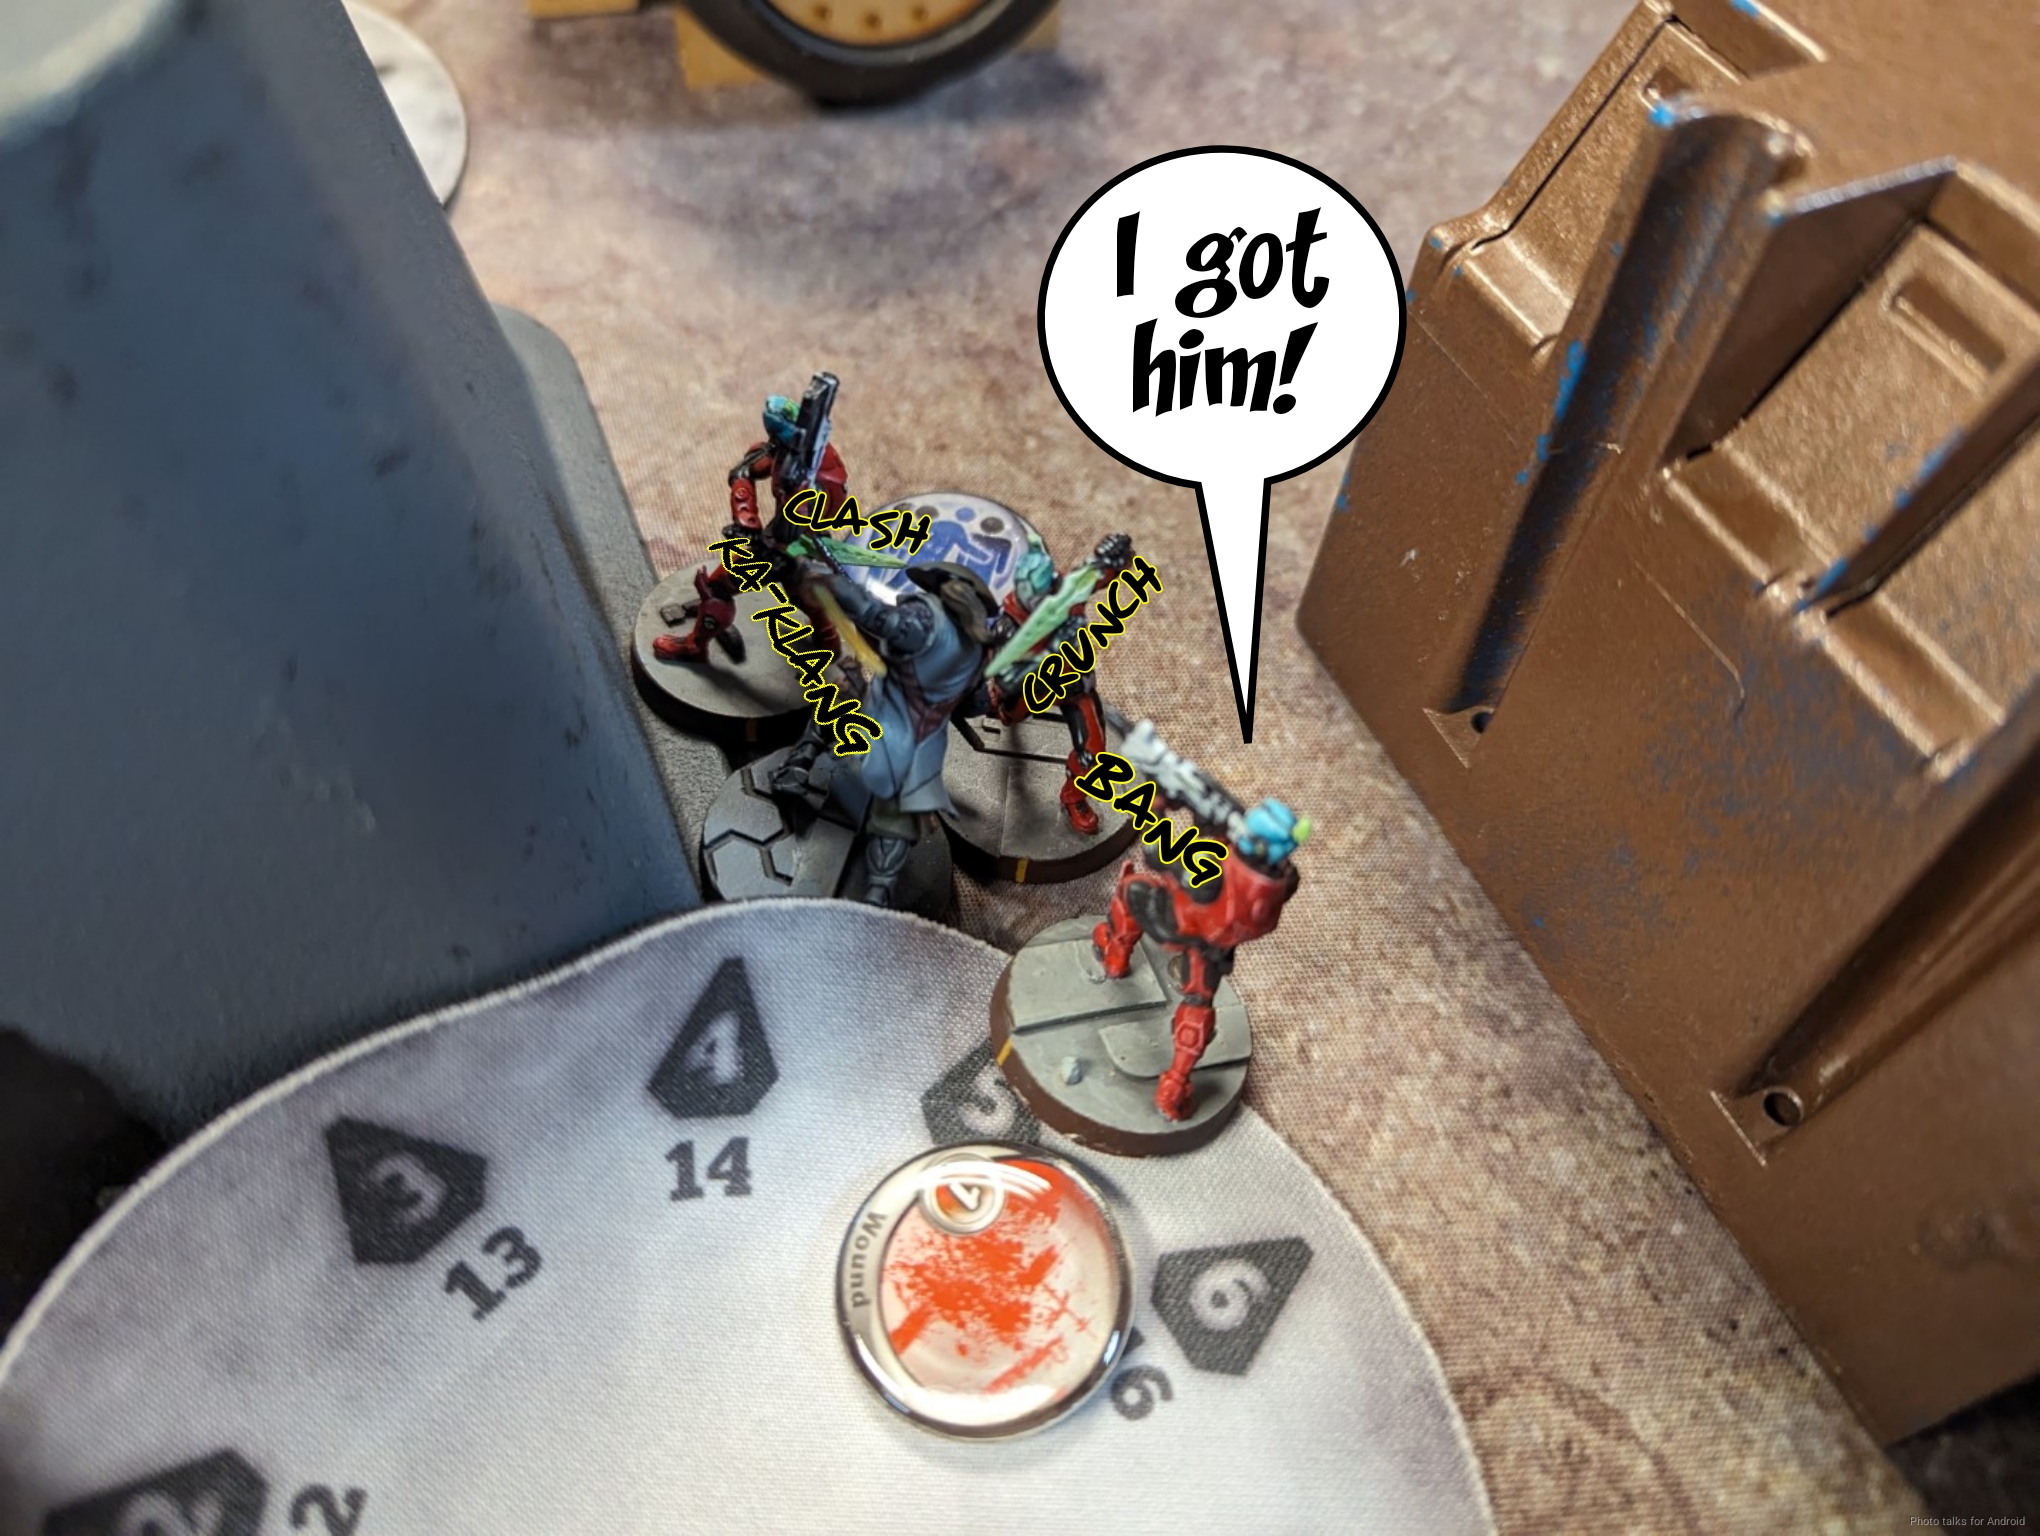
This is the last bit of Jordan’s orders though, so I’ve at least bought myself some time.
Bottom of 2 – JSA
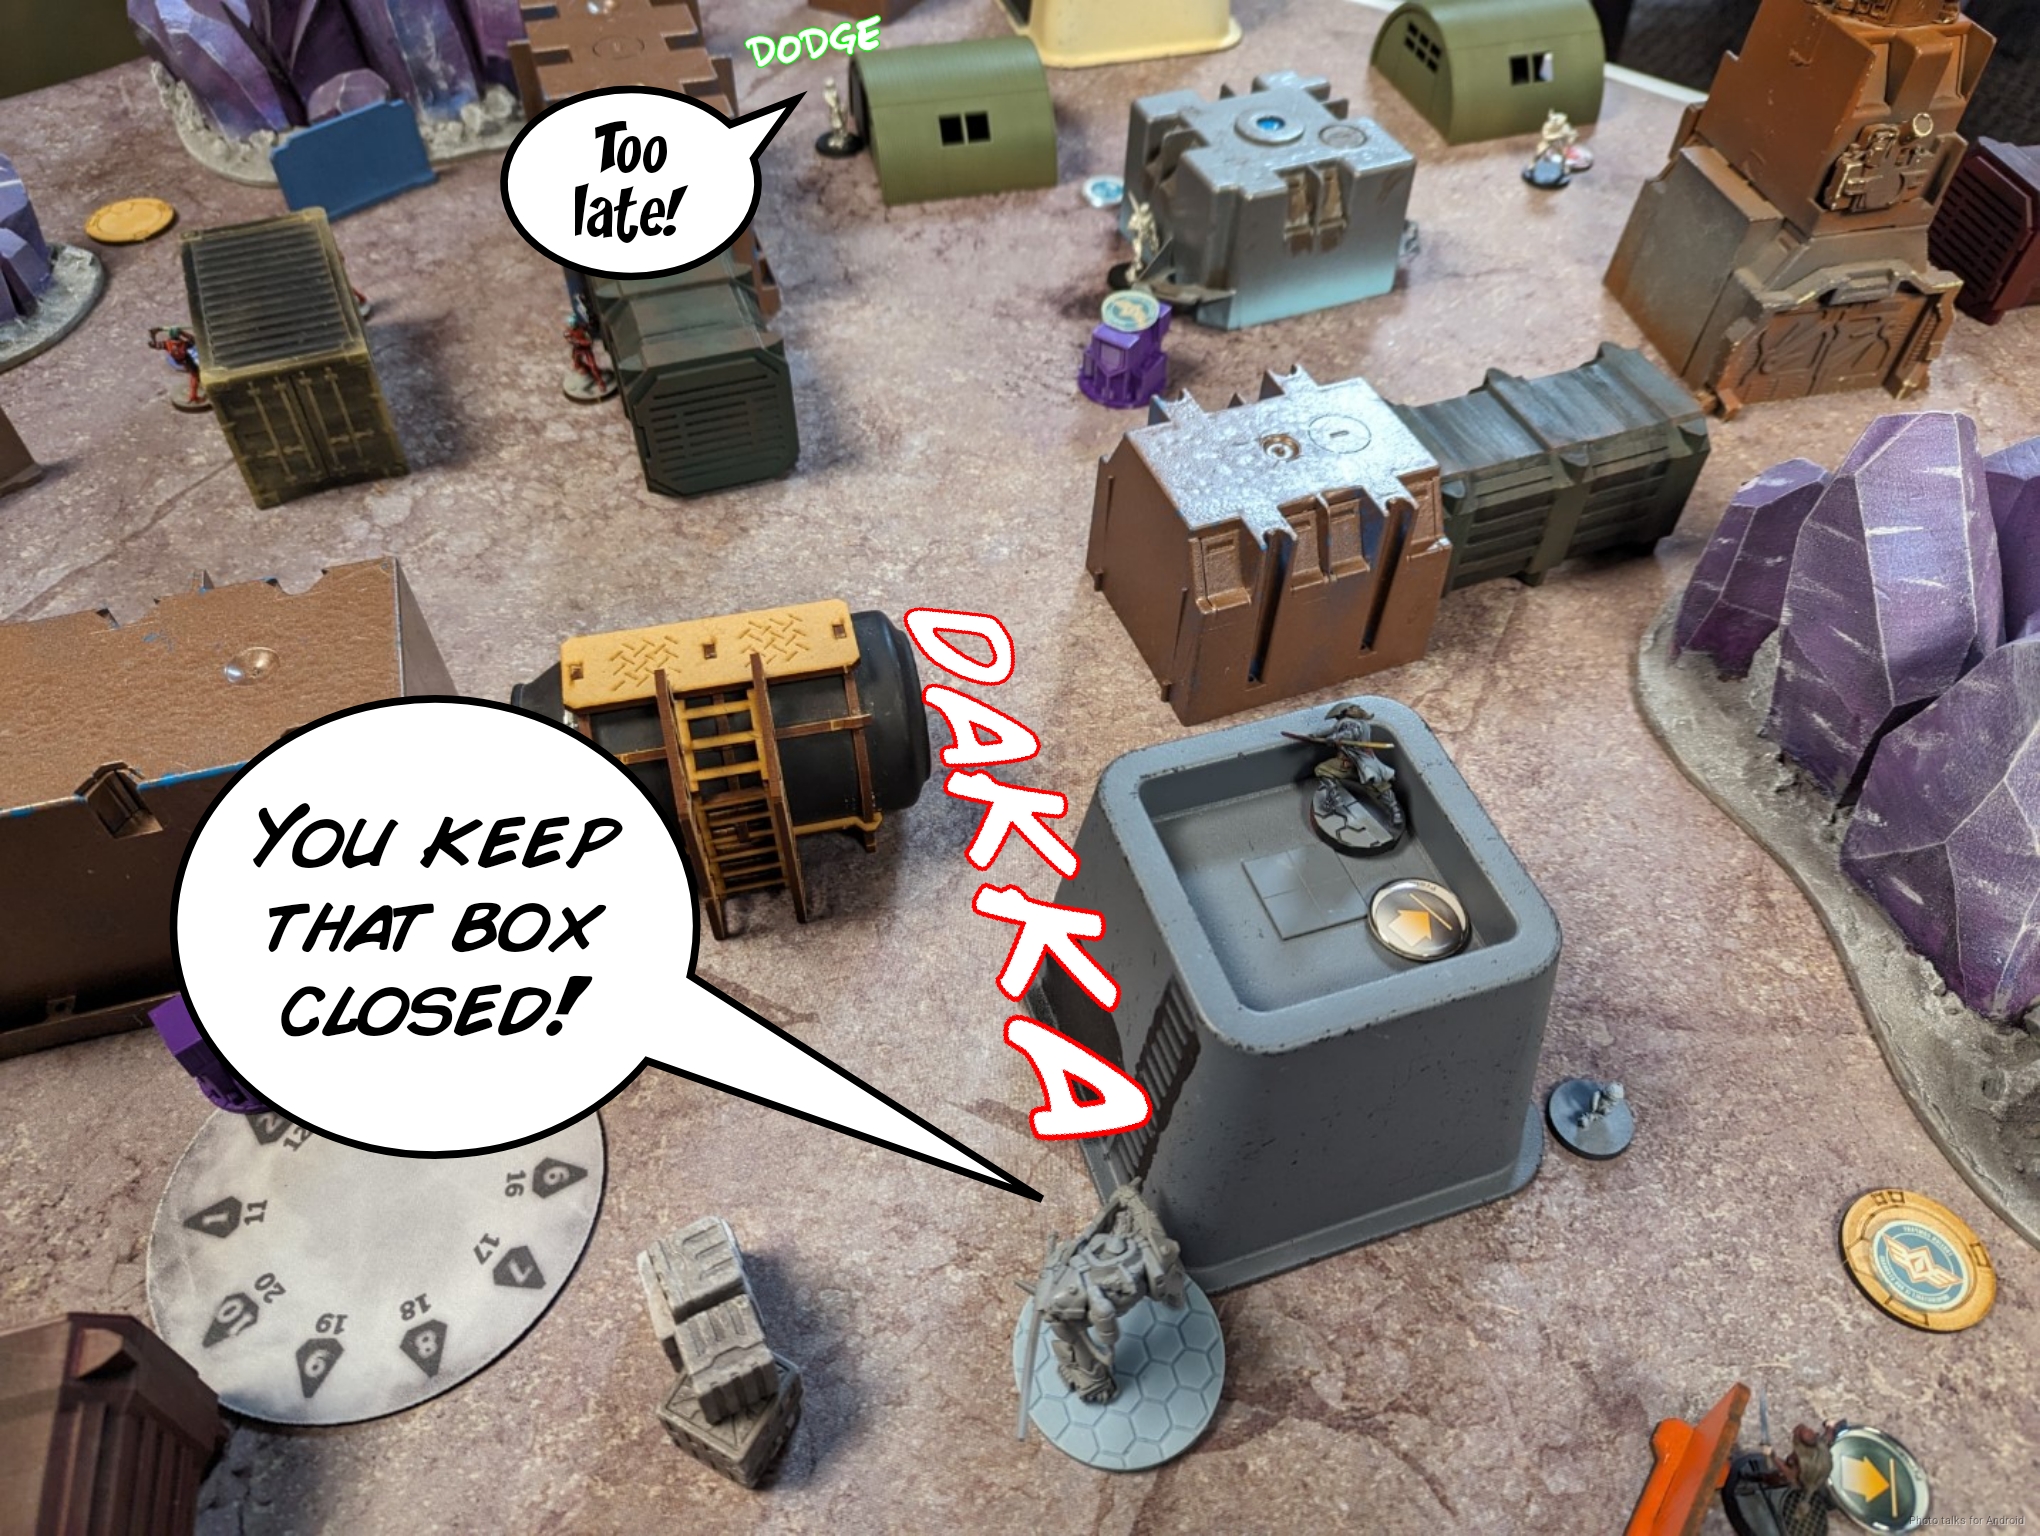
Well, I’ve taken my first loss now, and it’s a pretty big one. Now I’m down to just Kuroshi and the O-Yoroi that can handle the server, which sounds problematic. I reveal the central server as the one with Kuroshi, again setting up smoke against Phoenix.
I really need to get rid of Hippolyta and the Myrmidons. I start by shooting two Myrmidons in the back with the Domaru lieutenant, successfully dropping one but allowing the other to escape around the corner.
I try to take out Hippolyta from close range with the O-Yoroi, forcing a dodge against the O-Yoroi’s HMG, but fail. I could have tried to close combat, which is actually not a terrible plan…
In any case, nothing happens.
Kuroshi tries to take out the Myrmidon that gutsed around the corner from behind but can’t get past Mim -6 and armor. In retrospect I should’ve used the light shotgun, but I’ve still got her in my brain as having a Light Flamethrower from before the update.
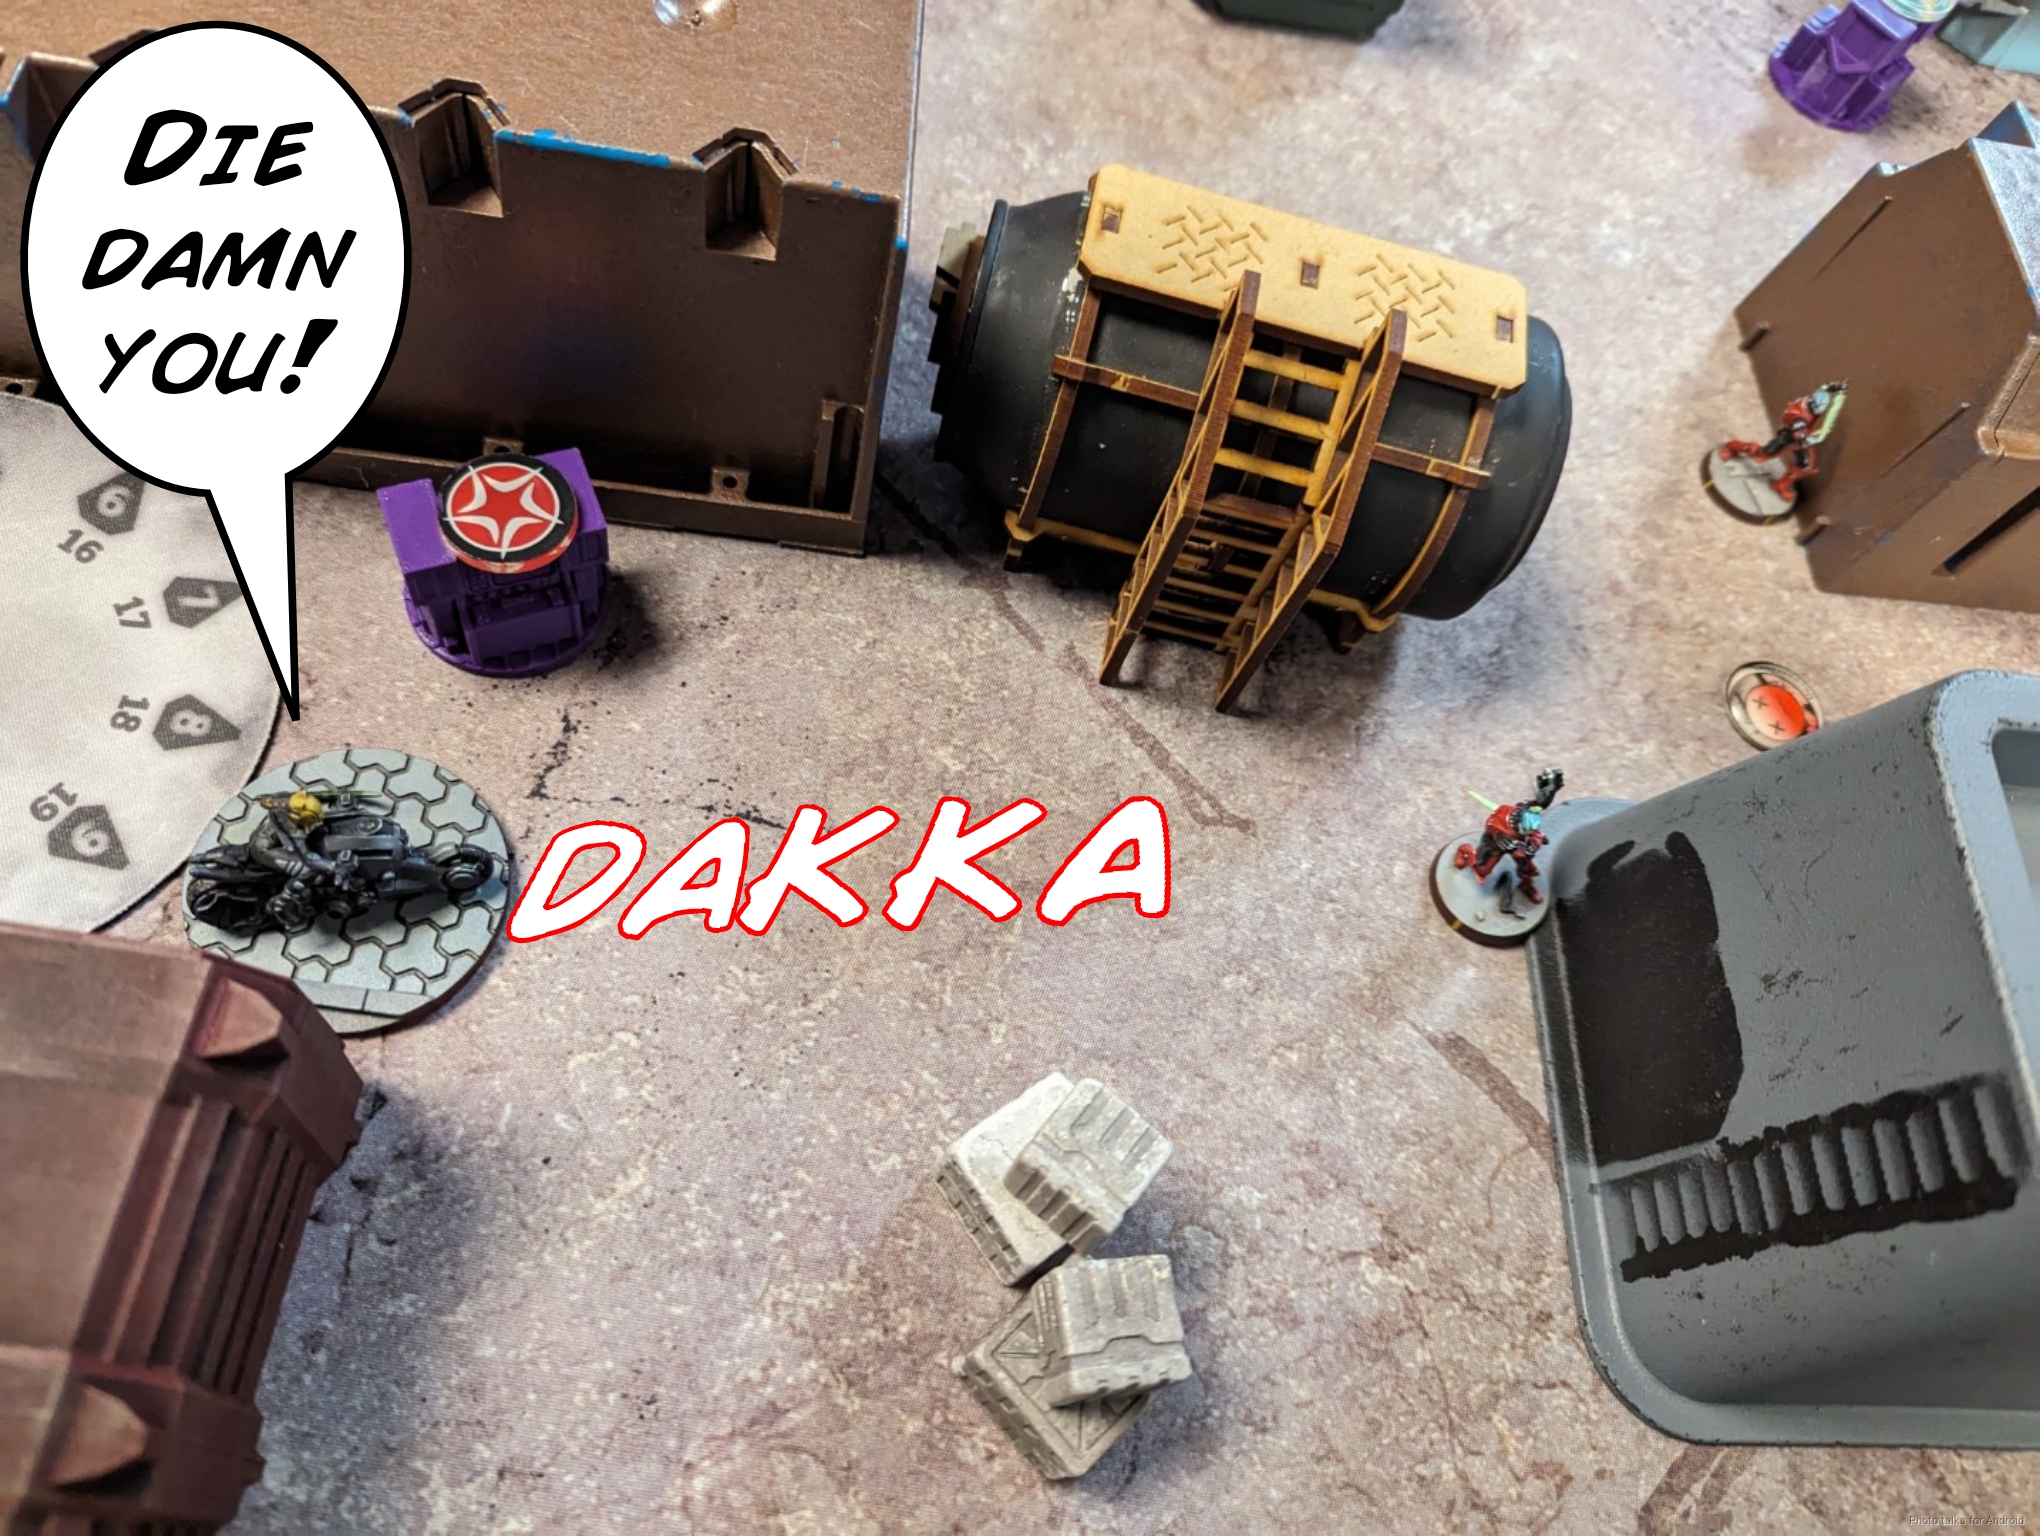
It falls to the Ryuken HRL to solve the problem, and he does so easily.
I then realize (with Jordan’s help) that the other Ryuken-9 can also see Hippolyta from behind if he moves, so I do so, trying to hit her in the back. Phoenix needs a 1 and doesn’t get it. I hit Hippolyta and she passes ARM then goes prone.
I try to flash pulse with the Warcor, mostly for the lulz, but that fails. Jordan’s so confident he just nanopulsars, taking out the Warcor.
I’ve got one more chance, which is to try and use the Domaru. A full burst doesn’t cut it.
I use a coordinated order to try and finish off Hippolyta and reposition the Domaru, O-Yoroi, Kuroshi, and the Ryuken-9 on my left. Thankfully this time the Ryuken-9 does manage to do 1 wound to Hippolyta but she stops burning.
Turn 3
Top of 3 – Steel Phalanx
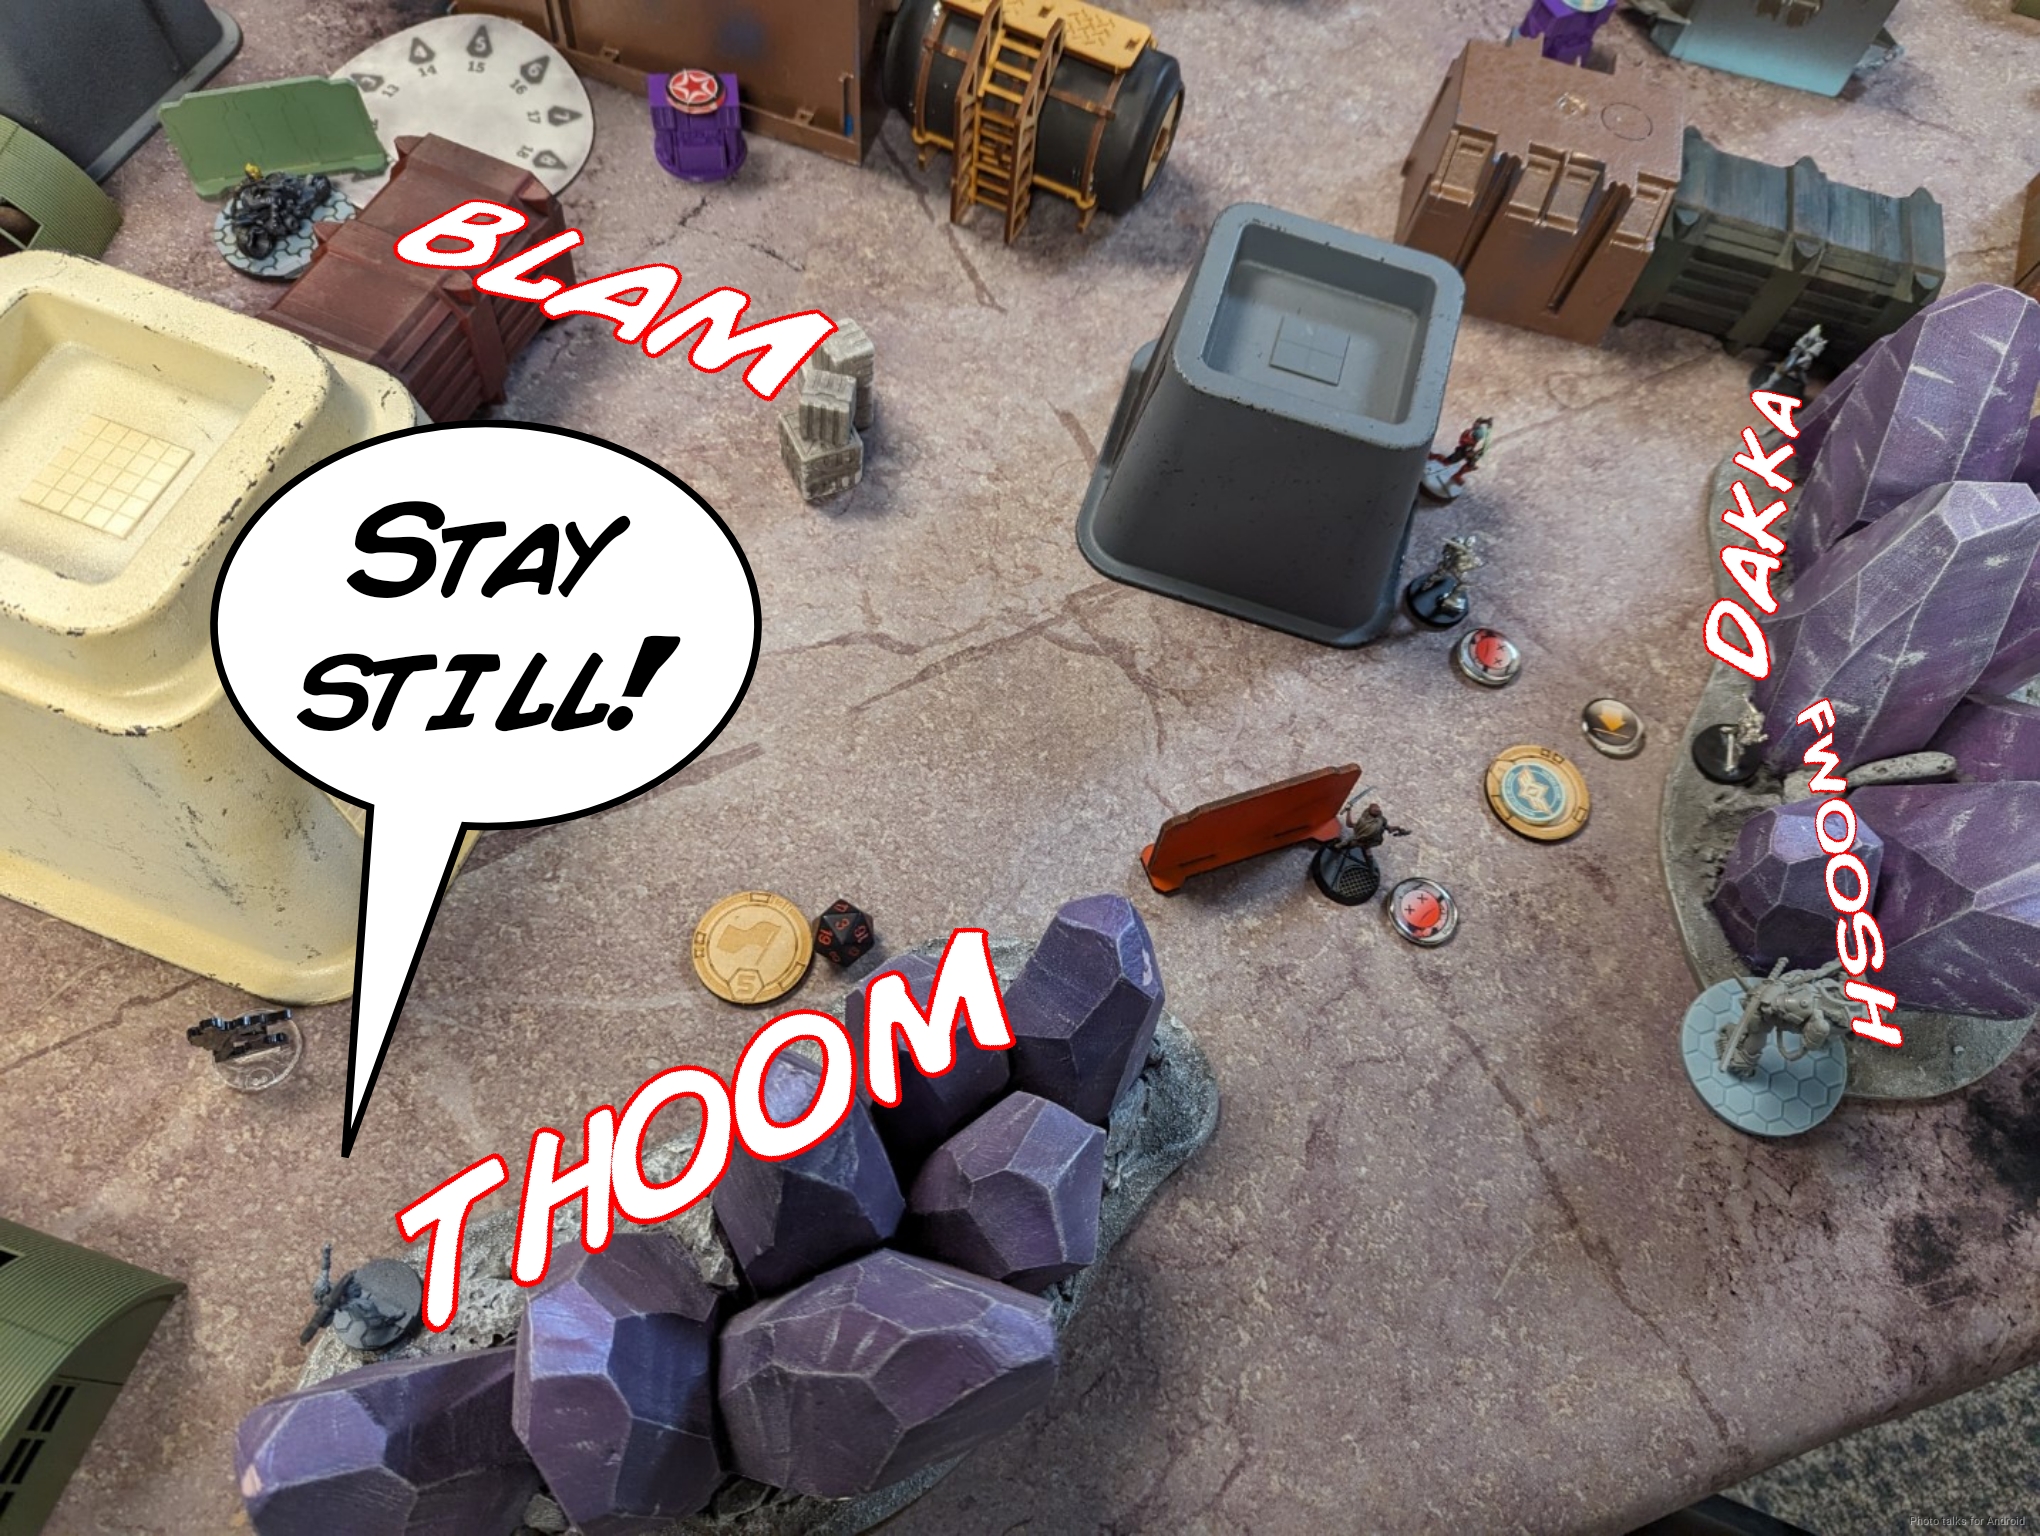
Jordan spends his last two command tokens moving Hippolyta and the Lamedh into group 1. I think he should have moved the Netrod instead of the Lamedh and used the order to reposition the Lamedh, but that’s not a huge deal. Now that the O-Yoroi is covering Hippolyta, Jordan decides to try and take it out with Phoenix. He starts at maximum range and does one structure…
then keeps pushing, failing to get a second structure on the O-Yoroi even one he hits 32″.

He then decides to make the run with Hippolyta, and I pass enough saves to keep the server online. Hippolyta and the last of the three Myrmidons in the center are obliterated by the O-Yoroi’s flamethrower, ending the threat.
Jordan throws one more round of HRL fire at the O-Yoroi, and this time I get burned off the table.

After resetting the link, Jordan passes turn.
Bottom of 3 – JSA
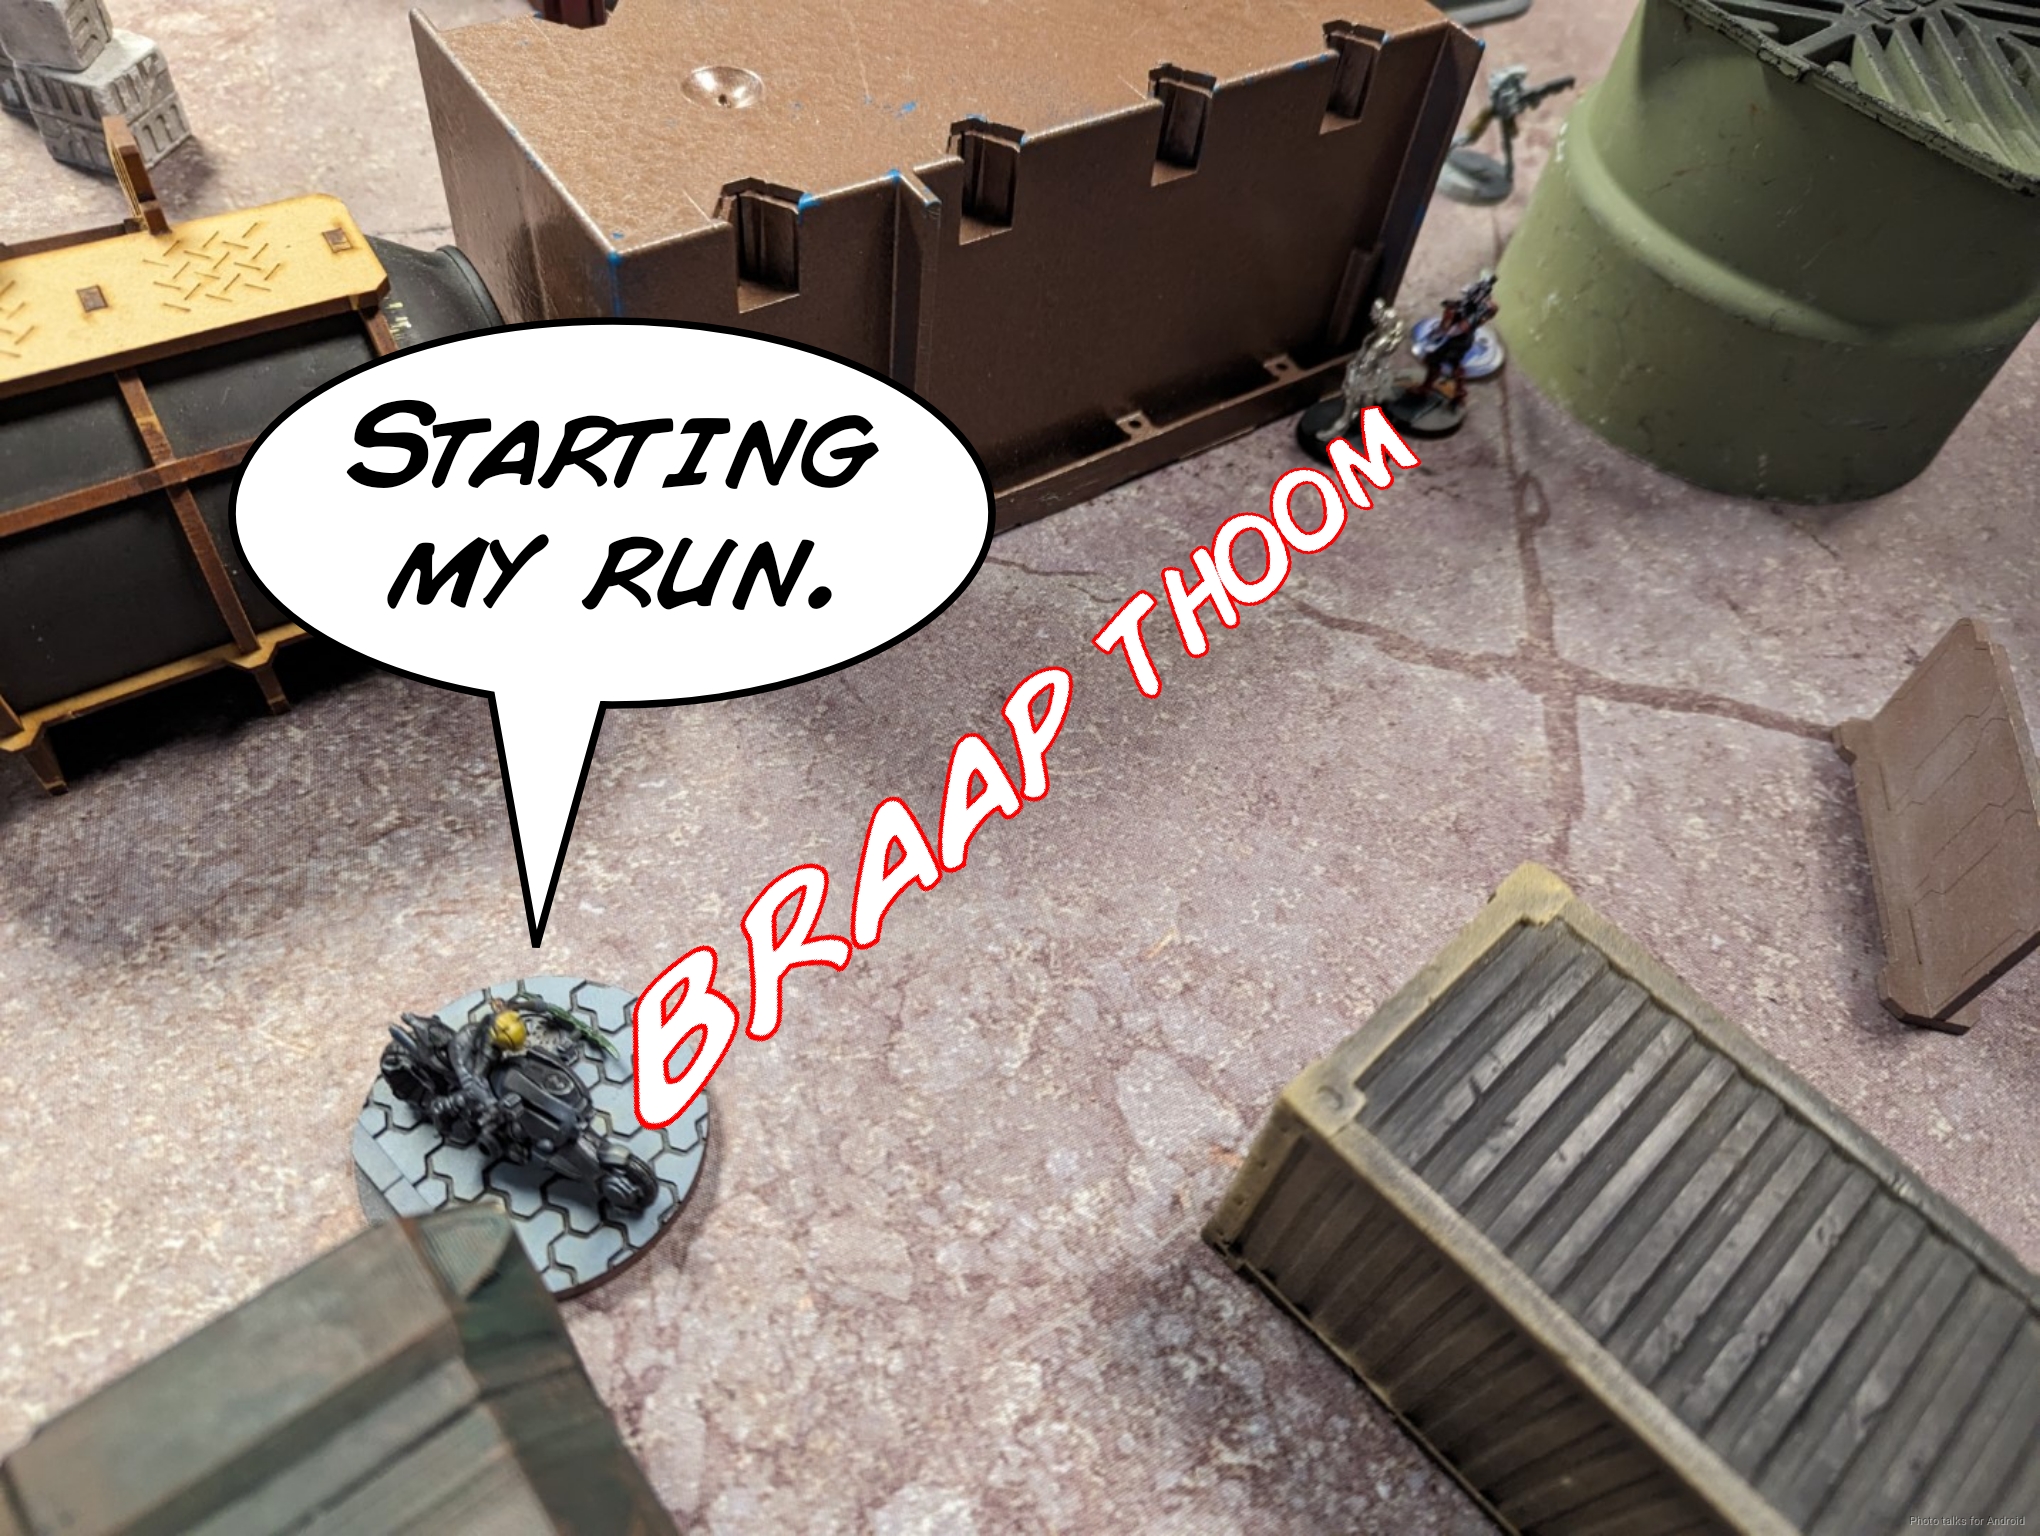
Sadly, I forget about the Domaru’s frenzy order, which I think would have been pretty relevant. In any case, I finish Predator by killing a nearby Myrmidon and then move to unstick Kuroshi.
At this point, because I’ve got a classified, I’ve won the game by 1 point, so I can be a little sloppy. I Berserk the Domaru into the Myrmidon for funs, tanking both heavy pistol shots from Phoenix and one of the chain rifles from the Myrmidon.
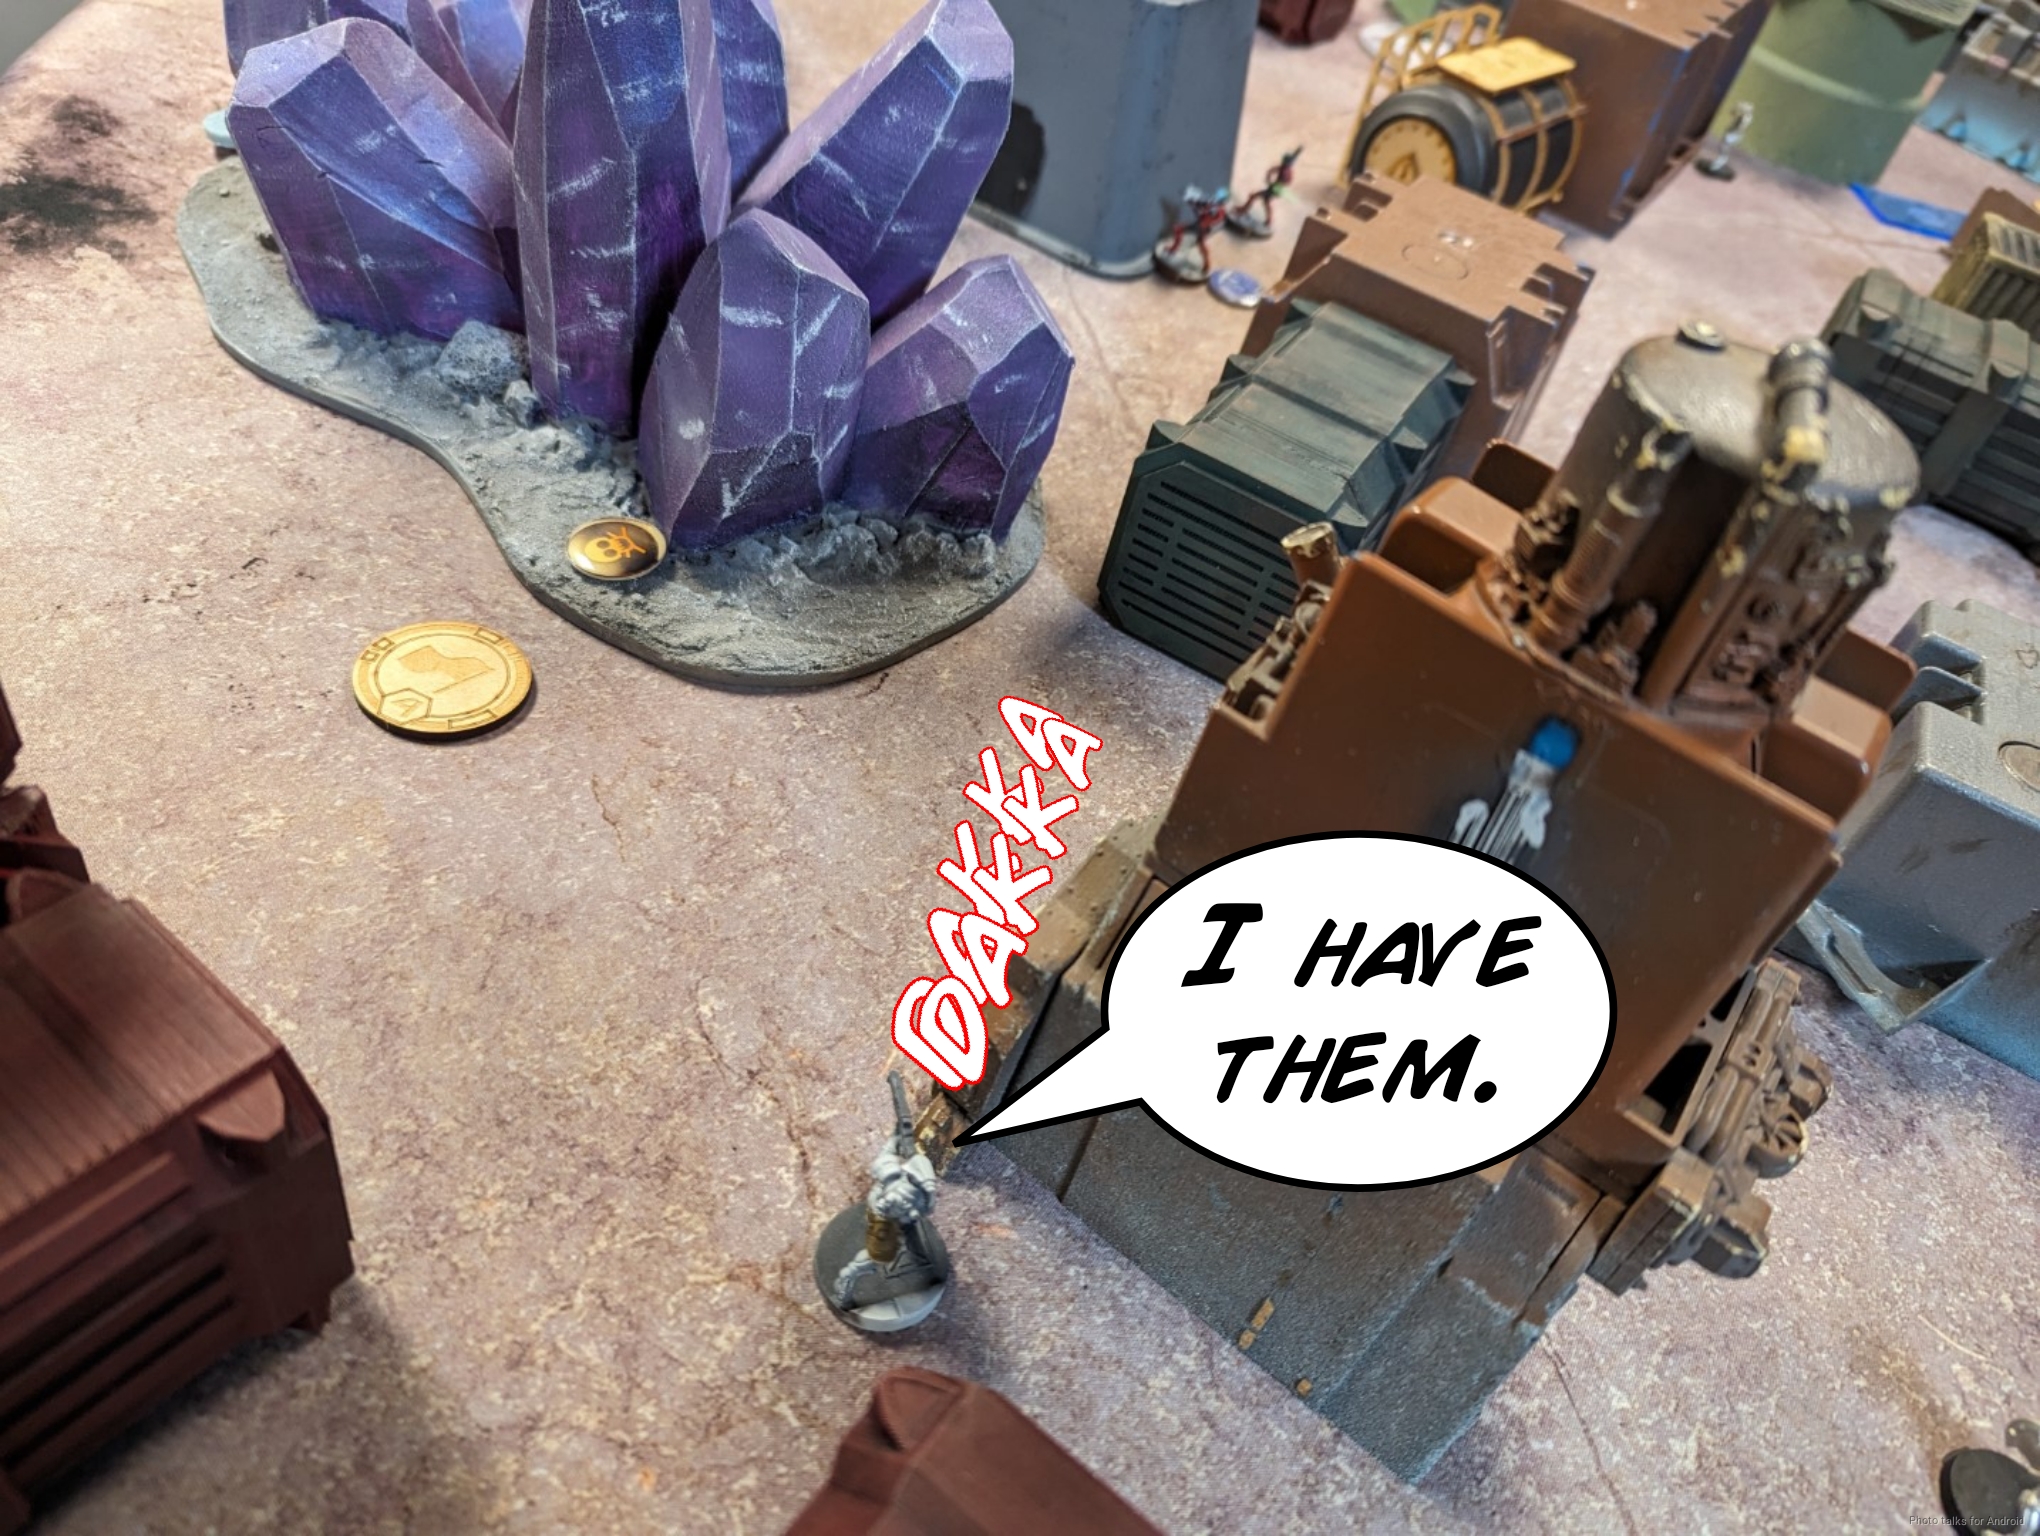
This does let me get around the building with Kuroshi and make a run on the central server to get more points. I use her combi to fend of Phoenix, even doing a wound.
I keep on going, failing to finish him off…
and get one D-charge in on the server, only doing one wound and losing Kuroshi to Phoenix’s HRL.
With that failure, it’s a
5-4, 150-84 Japanese Seccessionist Army Victory!
Post Game Analysis
What an incredibly fun game! I really enjoyed link-less JSA. It opened up a lot of options for me in list building, and the pacing felt right. Kuroshi continues to deliver, and the Domaru lieutenant did not disappoint. I do think that if I had remembered that frenzy order, I could’ve berserked into Phoenix after killing the Myrmidon. This would let Kuroshi take a more direct line to the central server, giving me more chances with the D-Charge. I’d have to fight past the Lamedh and Machaon, but Machaon can’t do more than one wound (unless crit) so that seems safer than dealing with Phoenix’s HRL. Kuroshi really has such a fantastic toolkit.
I’m quite happy with my read on Jordan’s first turn with Hippolyta, and my focusing on taking out Pandora was also good, because he had one of the hacking classifieds (I forget which one). Jordan’s overextension with the Makhe was a huge mistake, I think. Leaving it up on the roof was way stronger–he ended up just feeding me a bunch of order generators.
If he had left it on the roof, I had a pretty reasonable plan for dealing with it–I had a path to get the Karakuri into 24″, and then I just blast away till it dies. Not foolproof, but pretty solid. Phoenix was quite irritating all game, but thankfully Kuroshi only failed one of her smoke rolls and kept him out play for most of the game. I like the smoke grenade launchers, because they can get the smoke very close to the offending unit, thus creating a huge shadow zone on the table.
I think this was mostly a pacing issue for Jordan. He overextended pretty hard on both turn 1 and 2. This did give me fits though, because Hippolyta just refused to die and she was a very real problem. Having her and all those Myrmidons just made it really hard for me to defend the server. I think I might have swapped her link into the first group and put the 3-man Myrmidon in group 2 instead. This lets them just make steady progress up the board under the watchful eye of the Makhe and Phoenix and gives Hippolyta the orders she needs to smoke the objective and whack it to death.
Also, taking out my Domaru at the top of 3 might have been worthwhile as well. I’m not sure about the play at the top of three trying to deal with the O-Yoroi with Phoenix. The problem is that heavy flamethrower was already covering the Myrmidon in the back, so he couldn’t have thrown smoke to cover Hippolyta… anyway. Hard to say, he could’ve gotten lucky and crit and forced me to roll 4 saves. You still really need to swing at least twice, doing three wounds to an ARM4 target is hard.
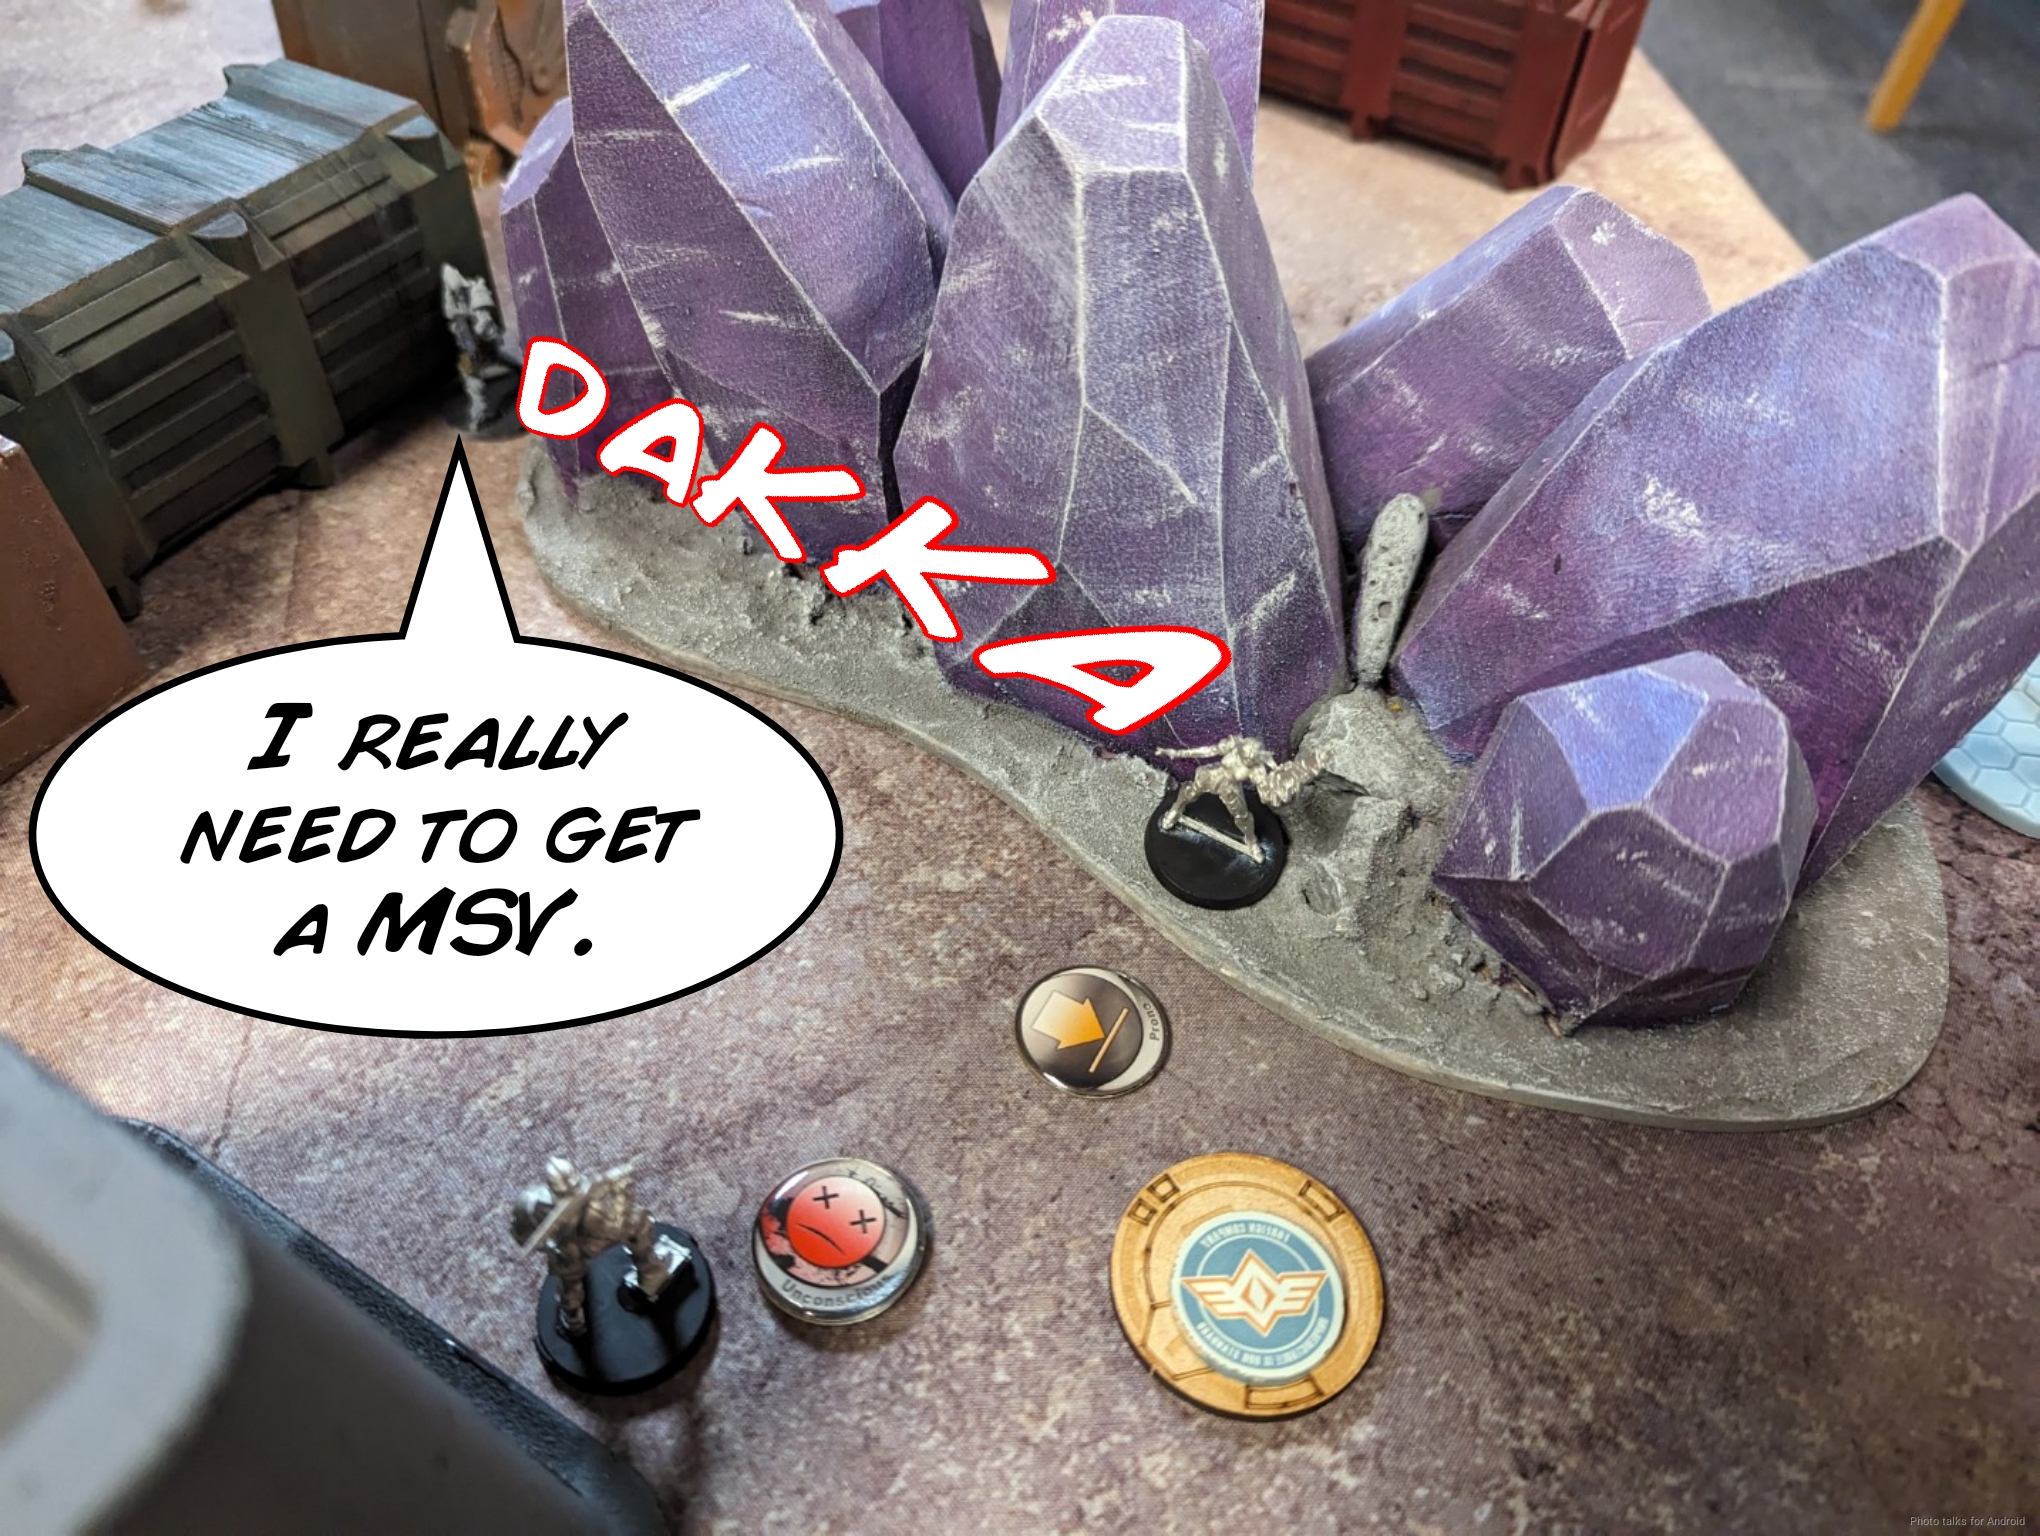
In any case, I really need to slot something with MSV. I was thinking something like this, perhaps, giving myself some duos:
YURIKO ODA FTO Combi Rifle, E/Mitter, D-Charges, Shock Mines / Pistol, CC Weapon. (0 | 24)
LÙ DUĀN Mk12, Heavy Flamethrower(+1B) ( | Deployable Repeater) / PARA CC Weapon(-3). (0 | 24)
CHAĪYÌ Yaókòng Flash Pulse / PARA CC Weapon(-3). (0 | 7)
Losing the Shikami sucks, but it does open up some options. I could also consider dropping the Karakuri instead, but it just feels too good to not take in this archetype. You’ll note that I’m not slotting chain of command. This is an intentional high-risk choice. I just need to be careful with the Domaru and use it when necessary and in low-risk situations or on turn 3.
Well, that’s it! Wishing you a happy and prosperous 2024! Thanks for reading.

Pingback: Ring Around the Bultrak – MERC Recon