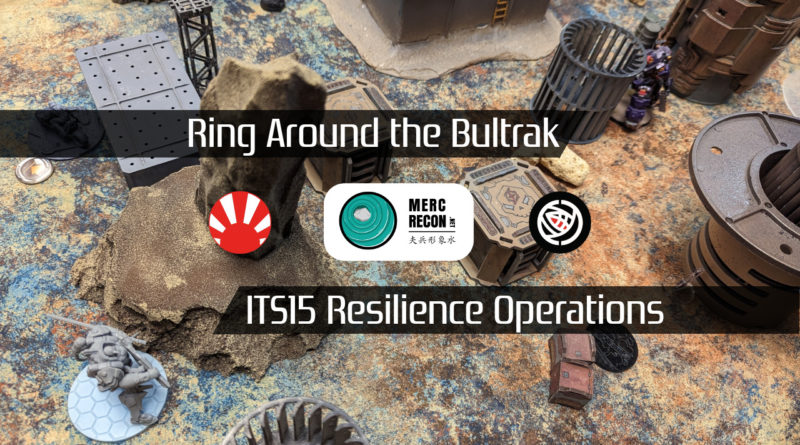
Ring Around the Bultrak
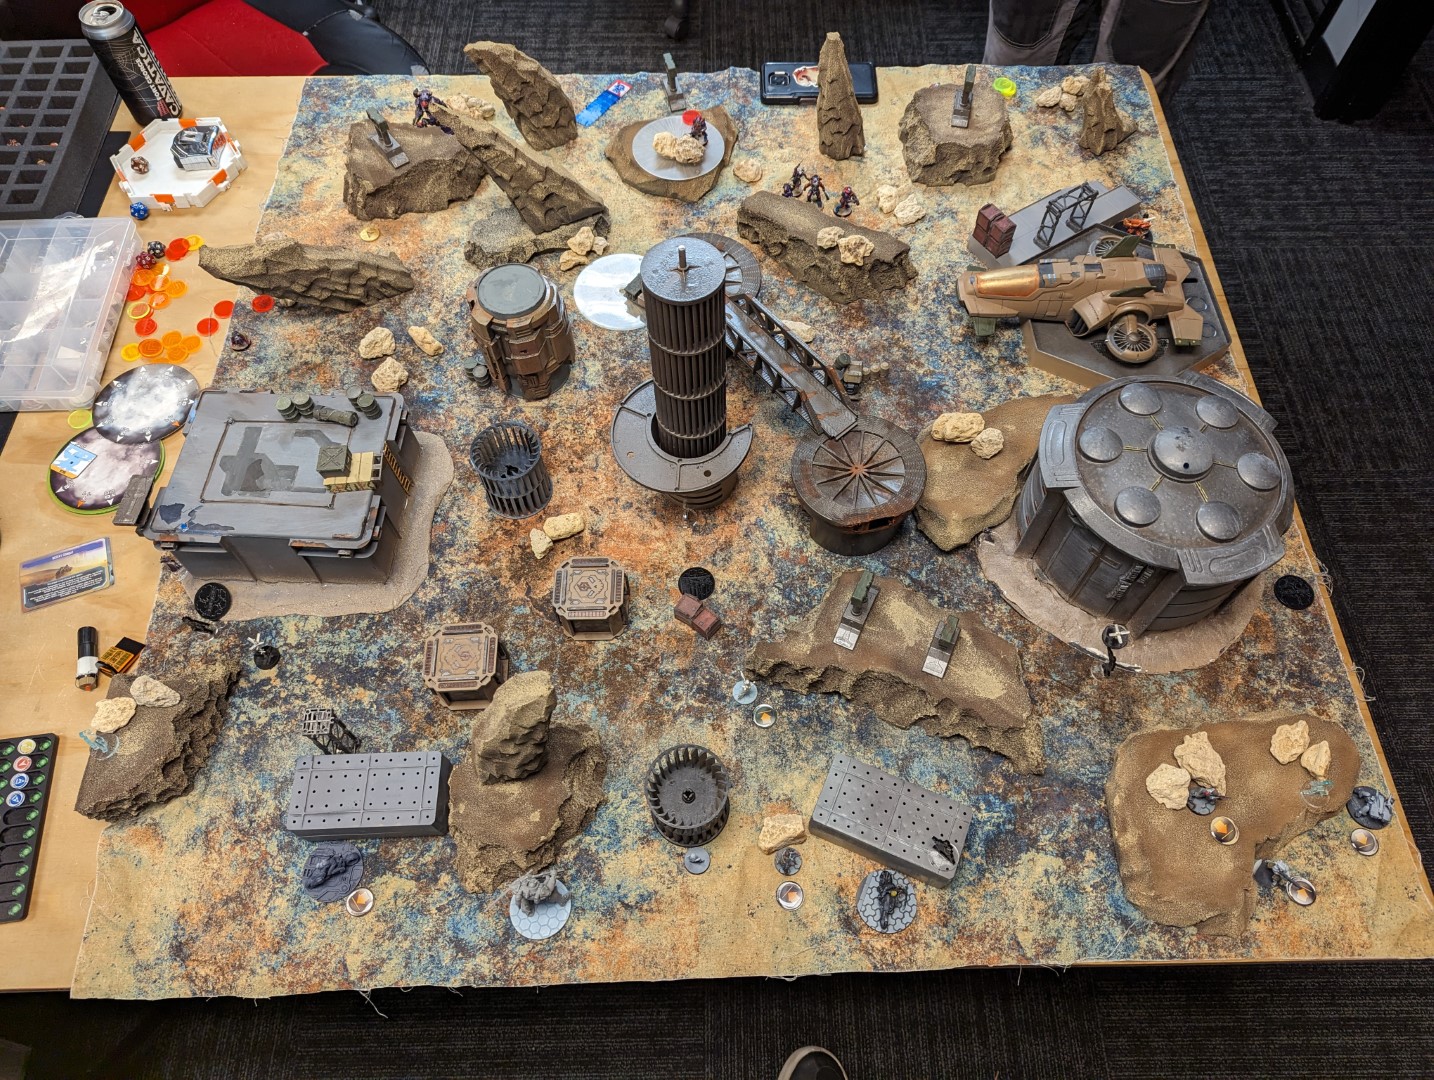
I met up with Than (zagdag) to play a game of Infinity and catch up post holiday season. He brought his lovely scale-agnostic desert table that works for both Infinity and 15mm games like Heavy Gear.
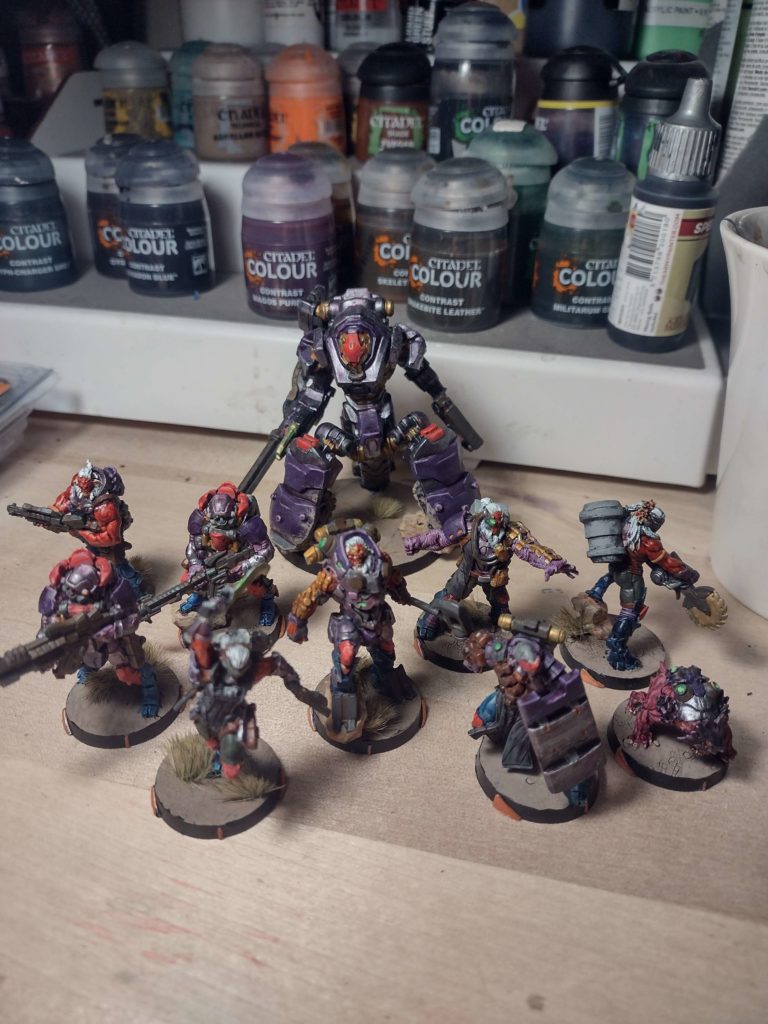
Than’s never played Resilience Operations, so he wanted to give it a go, and he even painted up 300 points of Morats!
Overview
- Mission: ITS15 Resilience Operations
- CQB
- Desert Terrain
- Forces: Japanese Secessionist Army versus Morat Aggression Force (300)
- JSA
- Decapitation
- N Domination
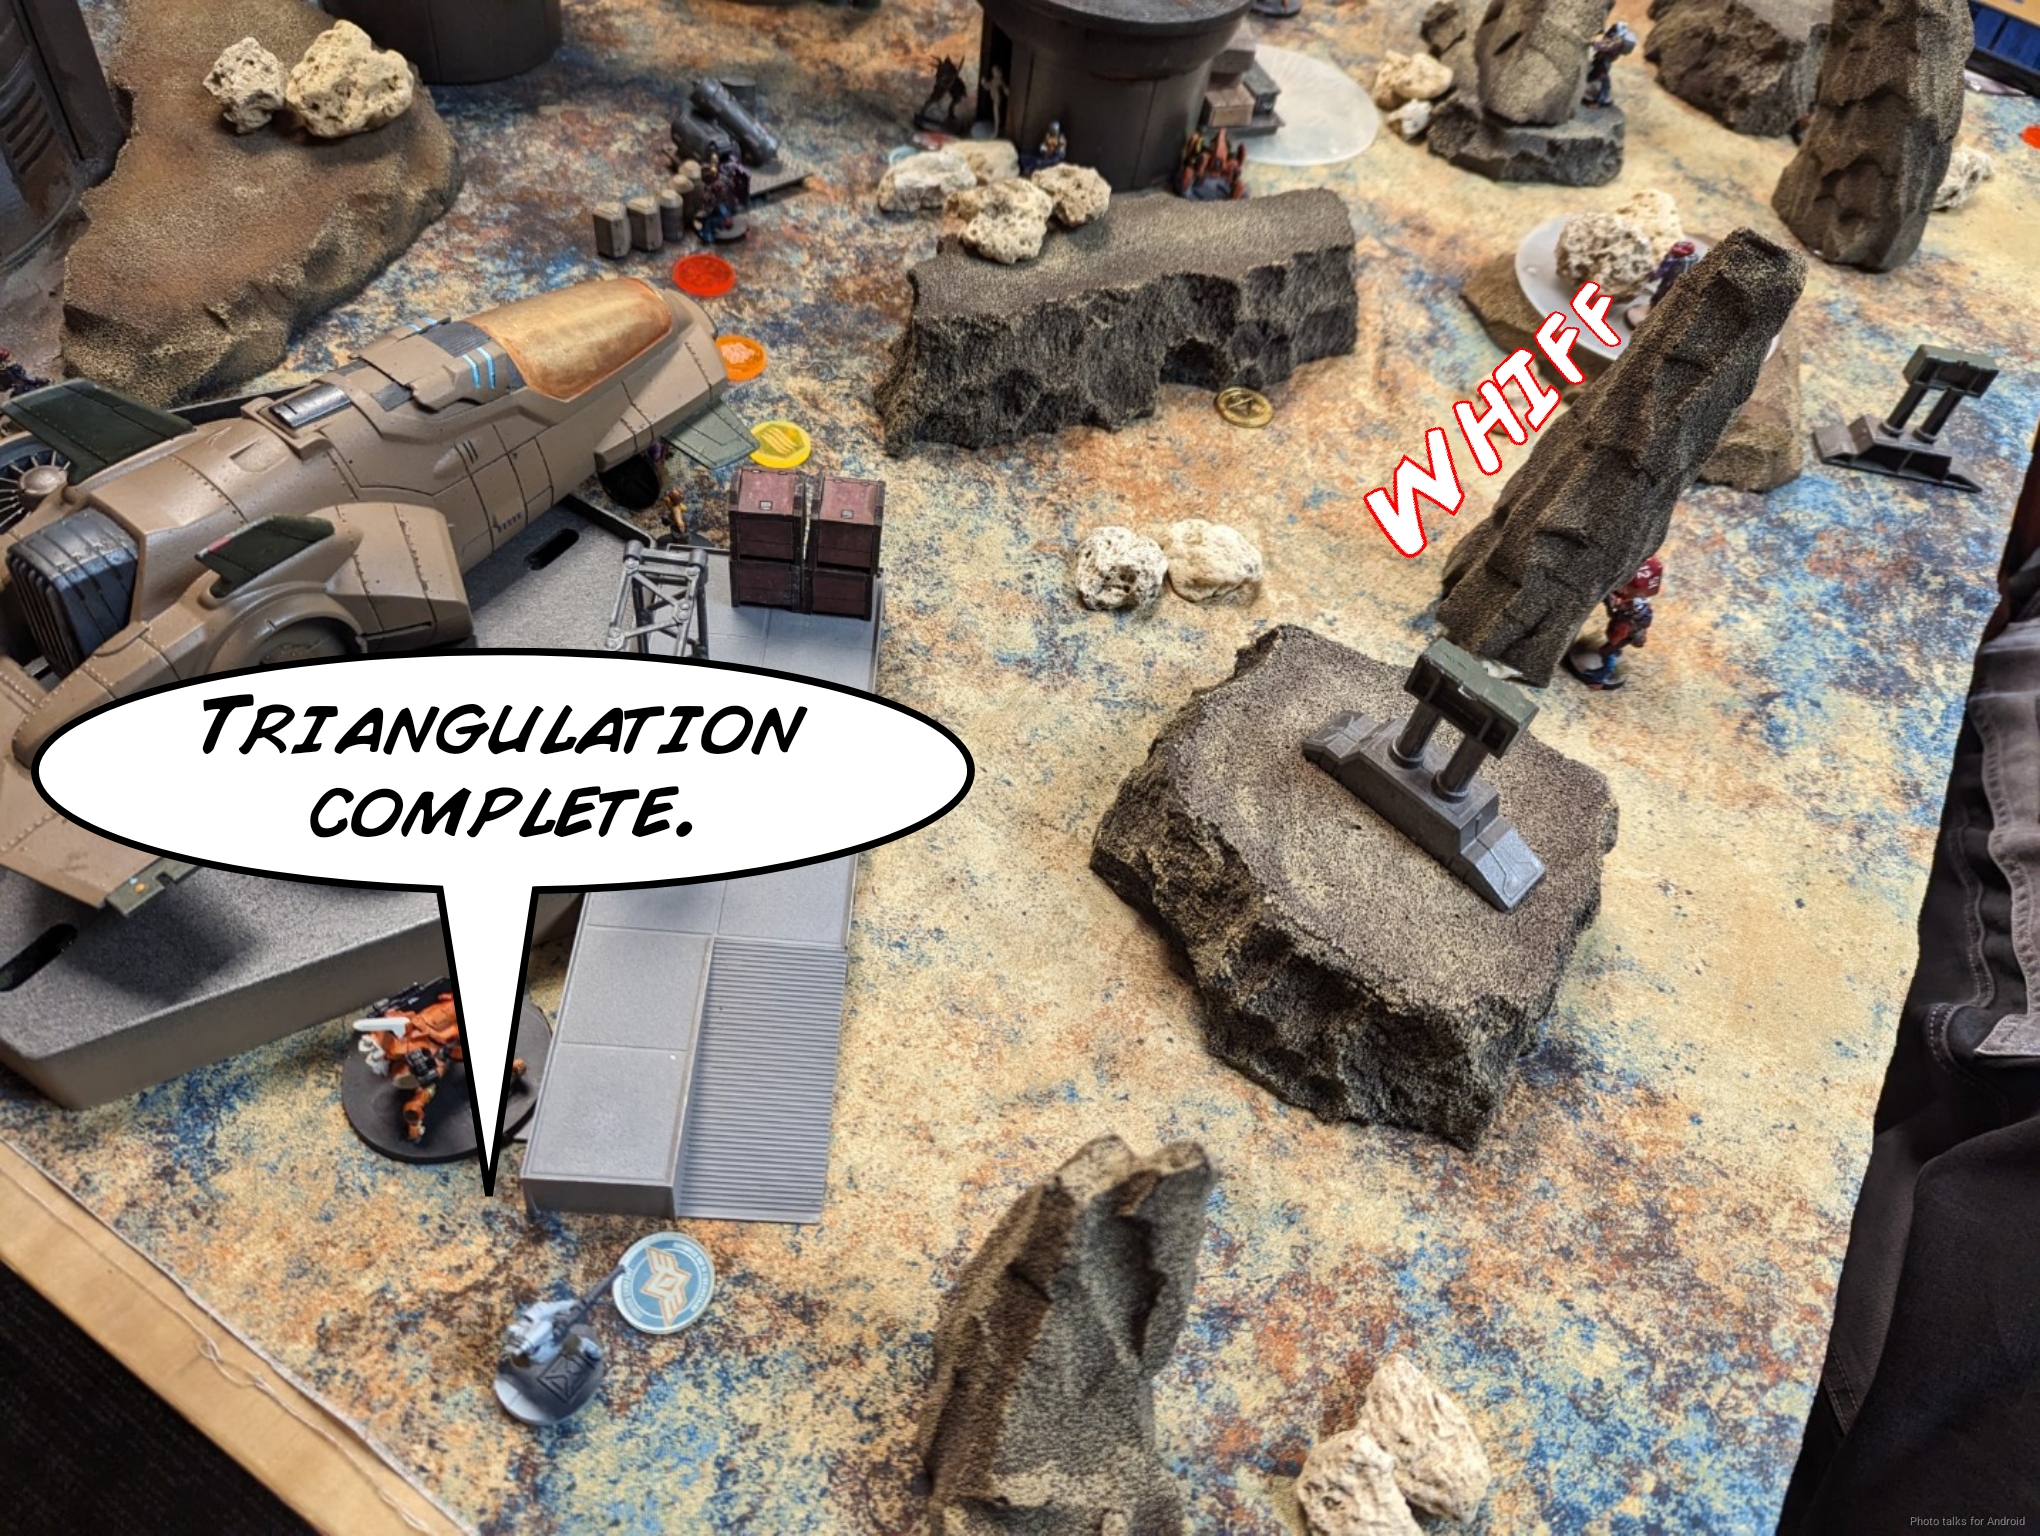
- Triangulate the Signal
- MAF
- King of the Hill
- Priority Target
- Z Domination
- JSA
- Deploy First: MAF
- First Turn: MAF
Than asked me to play my most painted army, which is JSA at the moment. Sadly I haven’t painted up all of it, but I was happy to try this out, especially since I talked about it last batrep:
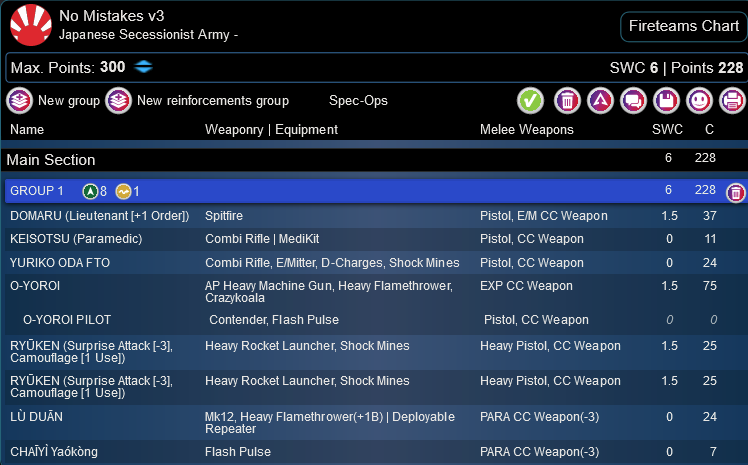
No Mistakes v3
DOMARU (Lieutenant [+1 Order]) Spitfire / Pistol, E/M CC Weapon. (1.5 | 37)
KEISOTSU (Paramedic) Combi Rifle ( | MediKit) / Pistol, CC Weapon. (0 | 11)
KARAKURI Mk12, Chain Rifle, Panzerfaust, Flash Pulse / Pistol, CC Weapon. (0 | 45)
YURIKO ODA FTO Combi Rifle, E/Mitter, D-Charges, Shock Mines / Pistol, CC Weapon. (0 | 24)
KUROSHI RIDER Combi Rifle, Light Shotgun, D-Charges / Breaker Pistol, AP + Shock CC Weapon. (0 | 27)
O-YOROI AP Heavy Machine Gun, Heavy Flamethrower, Crazykoala / EXP CC Weapon. (1.5 | 75)

O-YOROI PILOT Contender, Flash Pulse / Pistol, CC Weapon. (0 | 0)
RYŪKEN (Surprise Attack [-3], Camouflage [1 Use]) Heavy Rocket Launcher, Shock Mines / Heavy Pistol, CC Weapon. (1.5 | 25)
LÙ DUĀN Mk12, Heavy Flamethrower(+1B) ( | Deployable Repeater) / PARA CC Weapon(-3). (0 | 24)
CHAĪYÌ Yaókòng Flash Pulse / PARA CC Weapon(-3). (0 | 7)
10
1
1 | 6 SWC | 300 Points | Open in Army | Copy Code
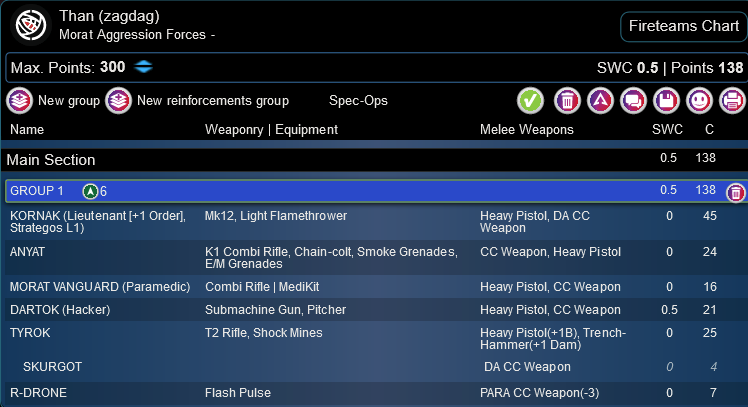
Than is going full linkable, with 7 possible link members and a Bultrak. He took the Tyrok because he loves the model, and an R-Drone to round things out.
Than (zagdag)
KORNAK (Lieutenant [+1 Order], Strategos L1) Mk12, Light Flamethrower / Heavy Pistol, DA CC Weapon. (0 | 45)
YAOGAT Spitfire / Heavy Pistol, CC Weapon. (1.5 | 32)
ANYAT K1 Combi Rifle, Chain-colt, Smoke Grenades, E/M Grenades / CC Weapon, Heavy Pistol. (0 | 24)
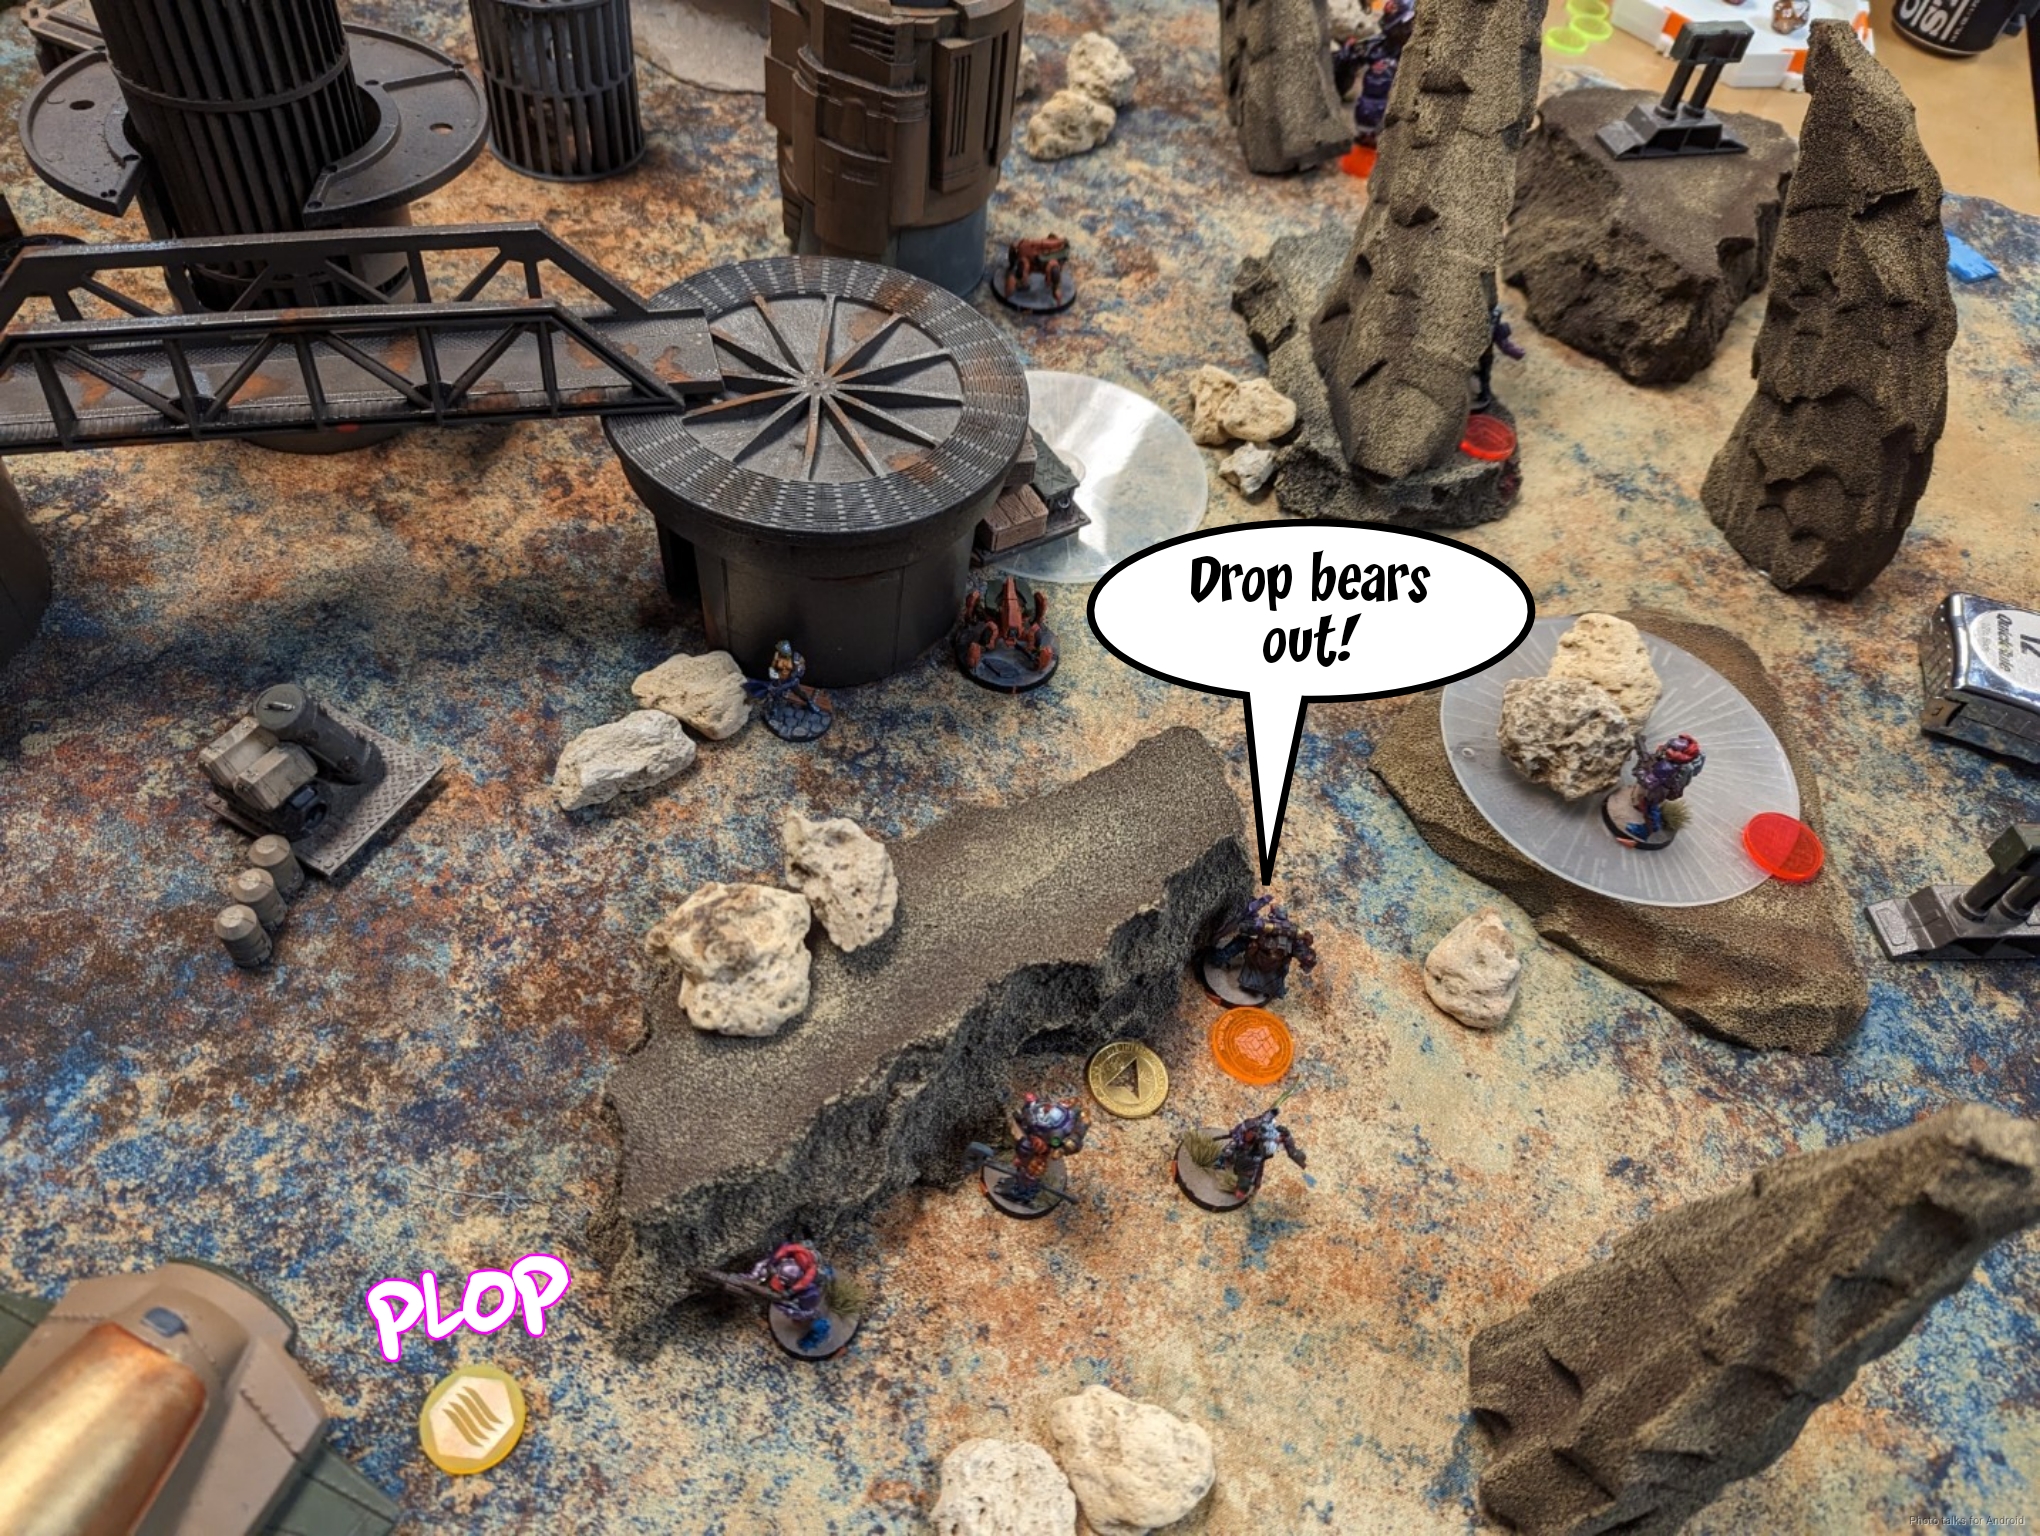
KURGAT Boarding Shotgun, D-Charges, Drop Bears / Heavy Pistol, CC Weapon. (0 | 23)
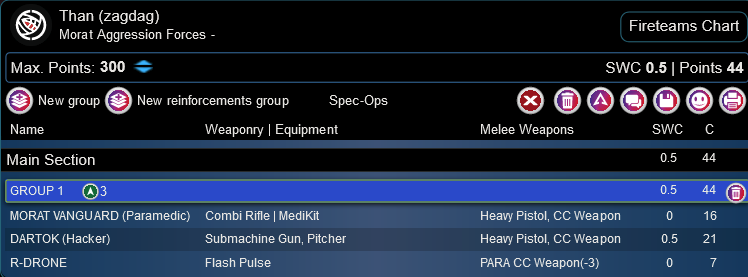
MORAT VANGUARD (Paramedic) Combi Rifle ( | MediKit) / Heavy Pistol, CC Weapon. (0 | 16)
DARTOK (Hacker) Submachine Gun, Pitcher / Heavy Pistol, CC Weapon. (0.5 | 21)
BULTRAK Hyper-Rapid Magnetic Cannon / Heavy Pistol, CC Weapon(+1B). (1.5 | 71)
BULTRAK PILOT Vulkan Shotgun, Grenades / Heavy Pistol, CC Weapon. (- | 0)
TYROK T2 Rifle, Shock Mines / Heavy Pistol(+1B), Trench-Hammer(+1 Dam). (0 | 25)
SKURGOT DA CC Weapon. (0 | 4)
R-DRONE Flash Pulse / PARA CC Weapon(-3). (0 | 7)
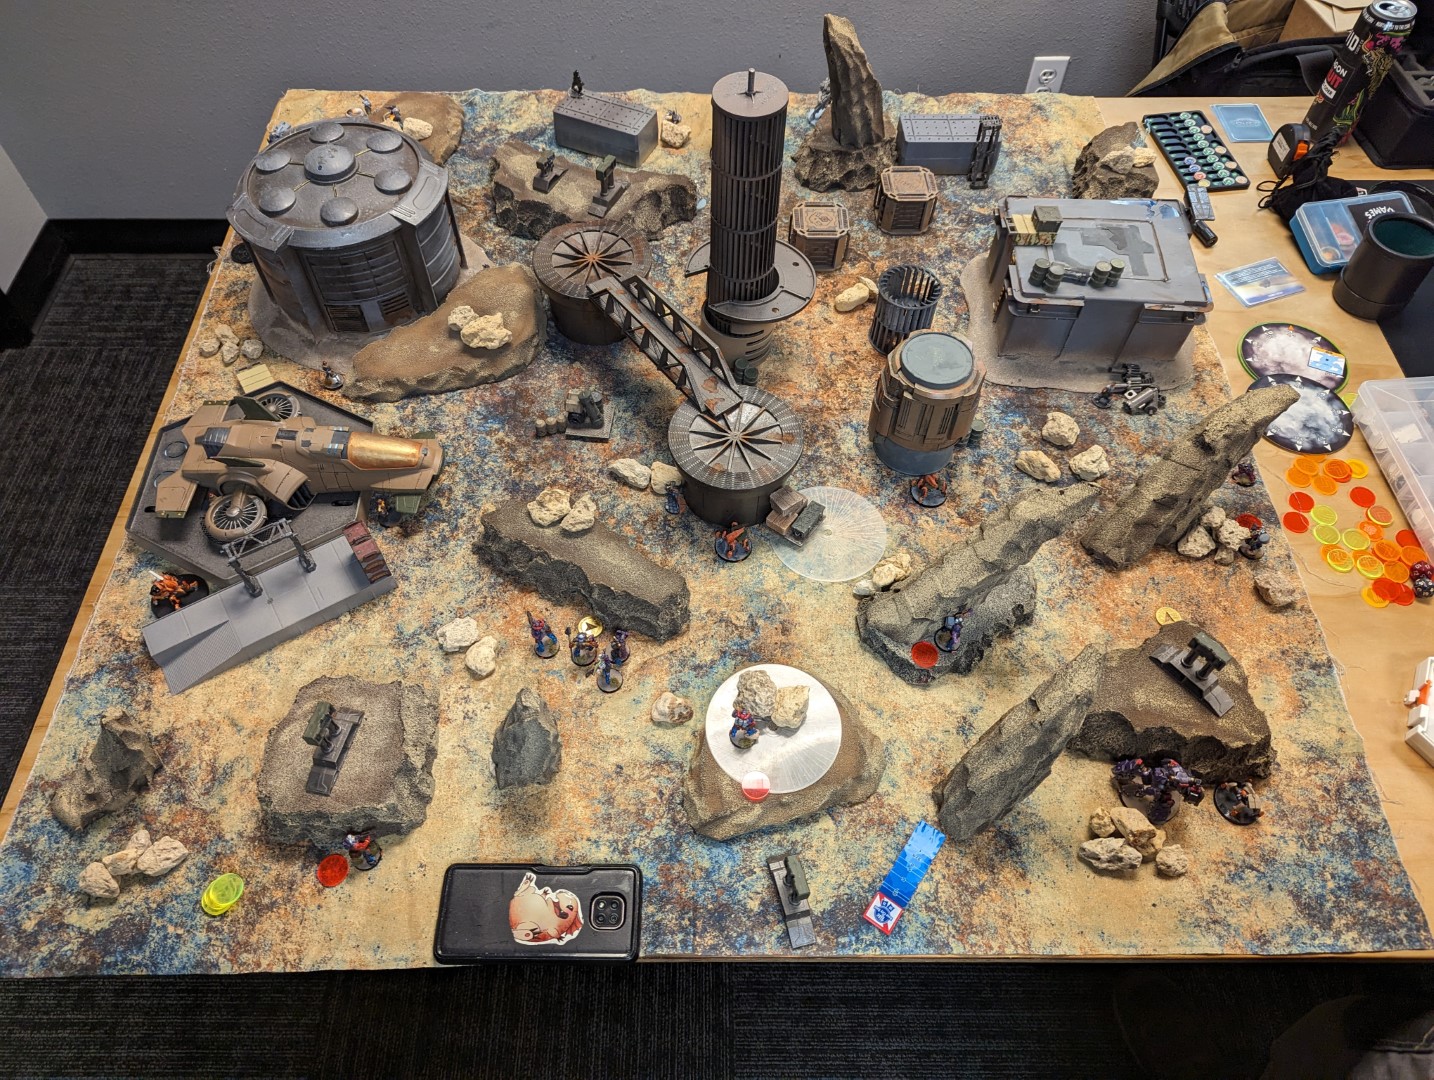
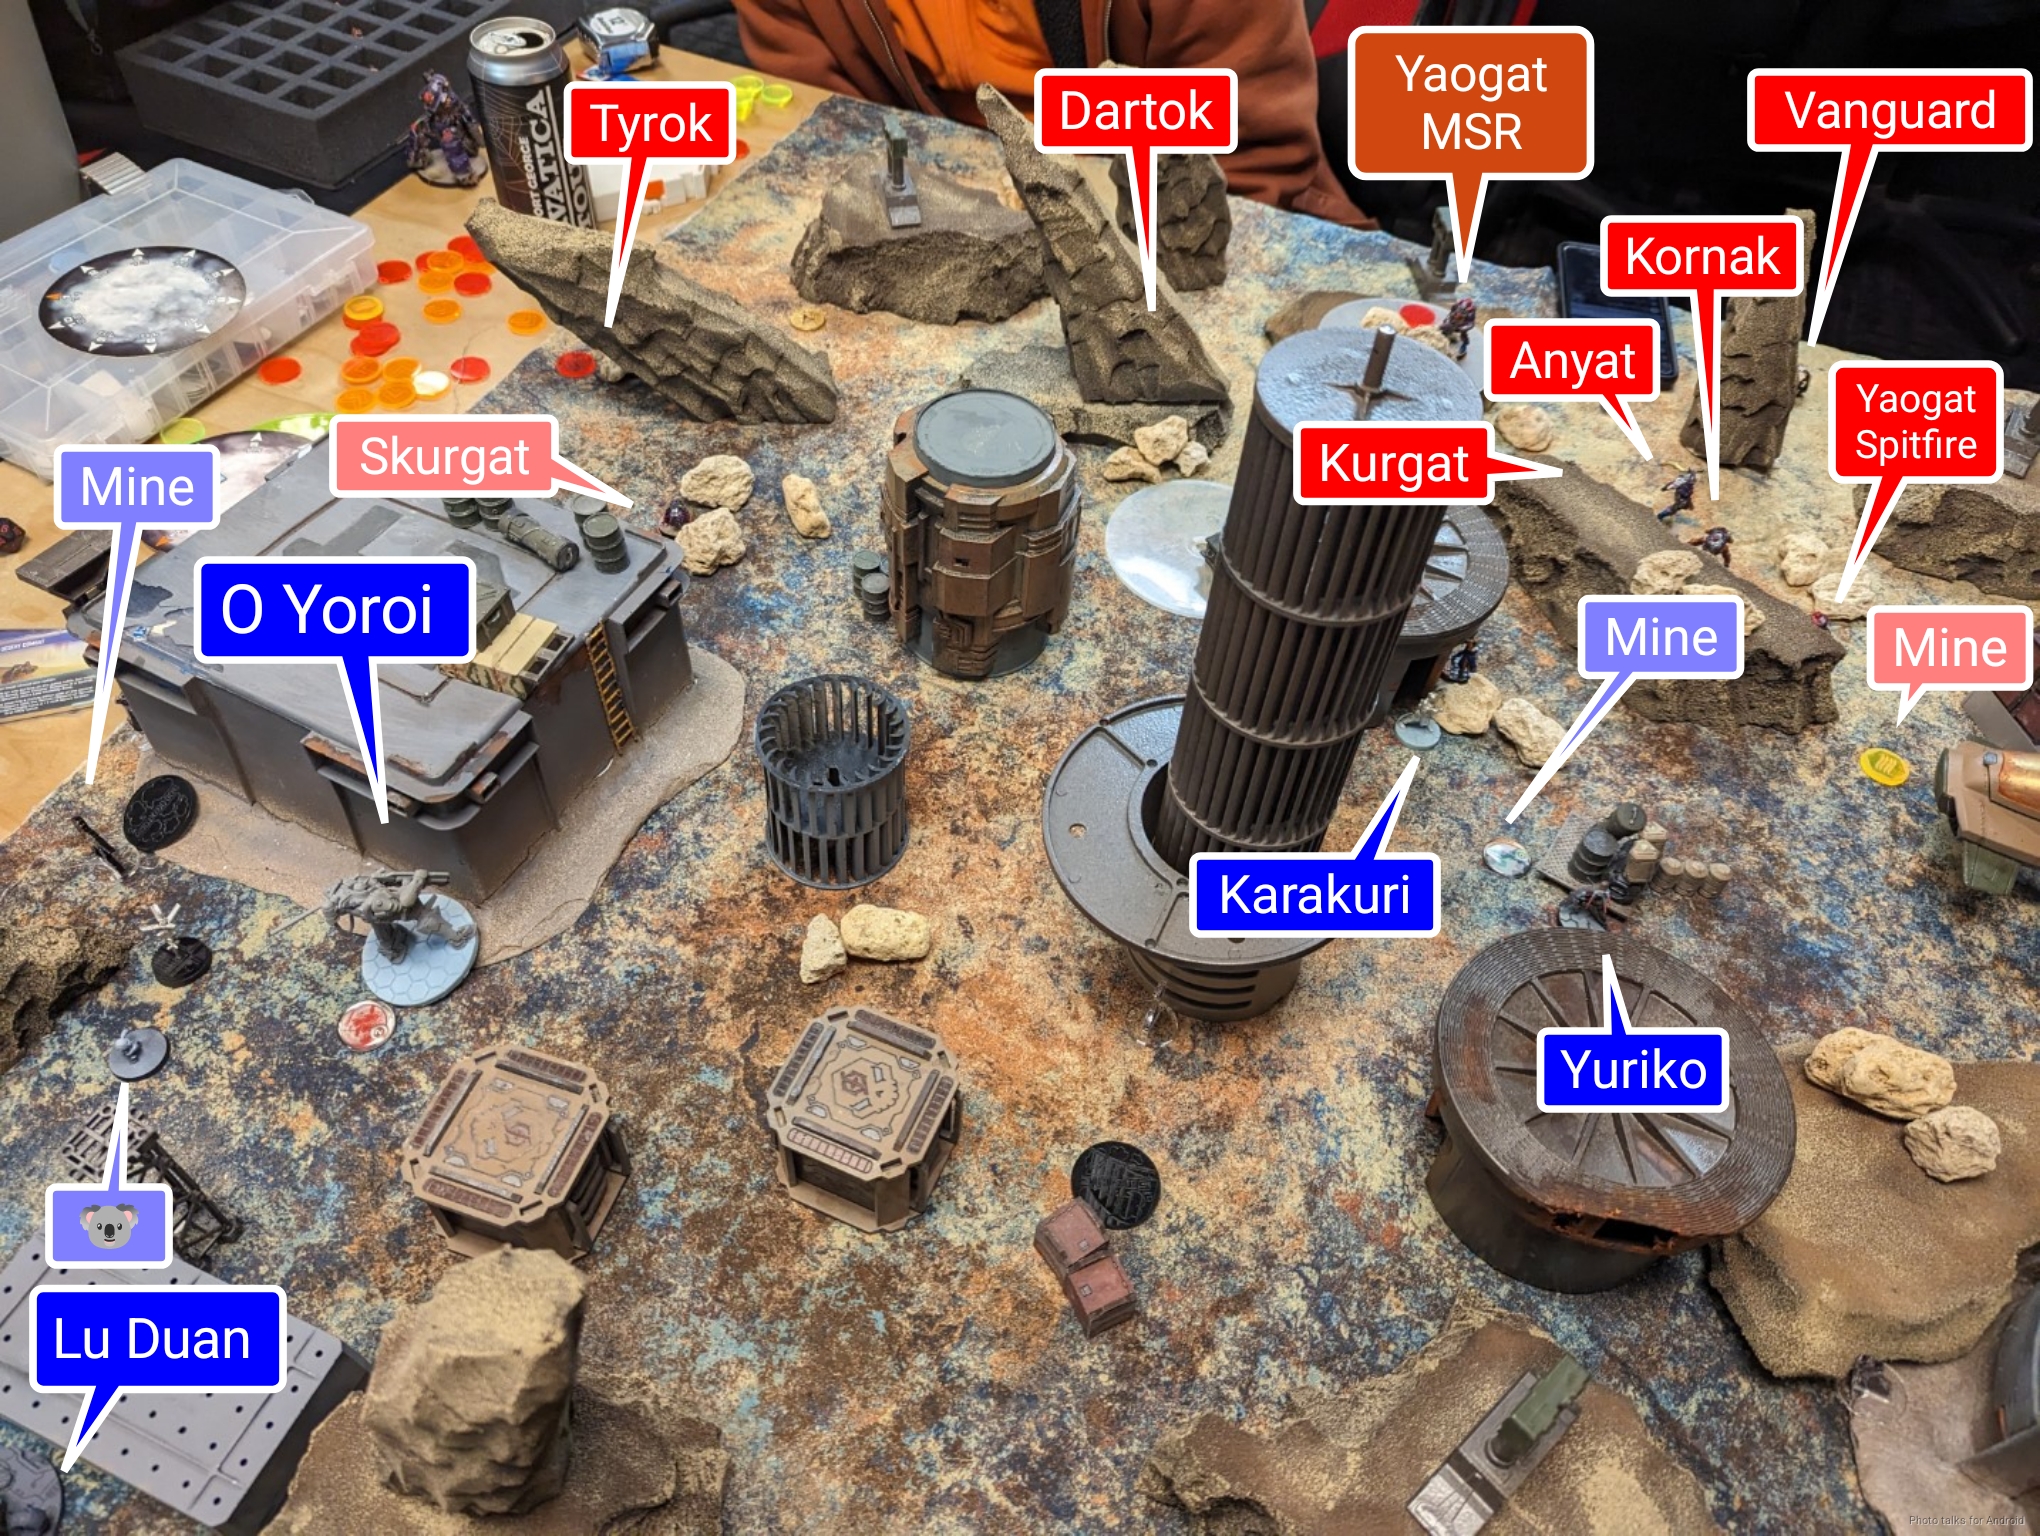
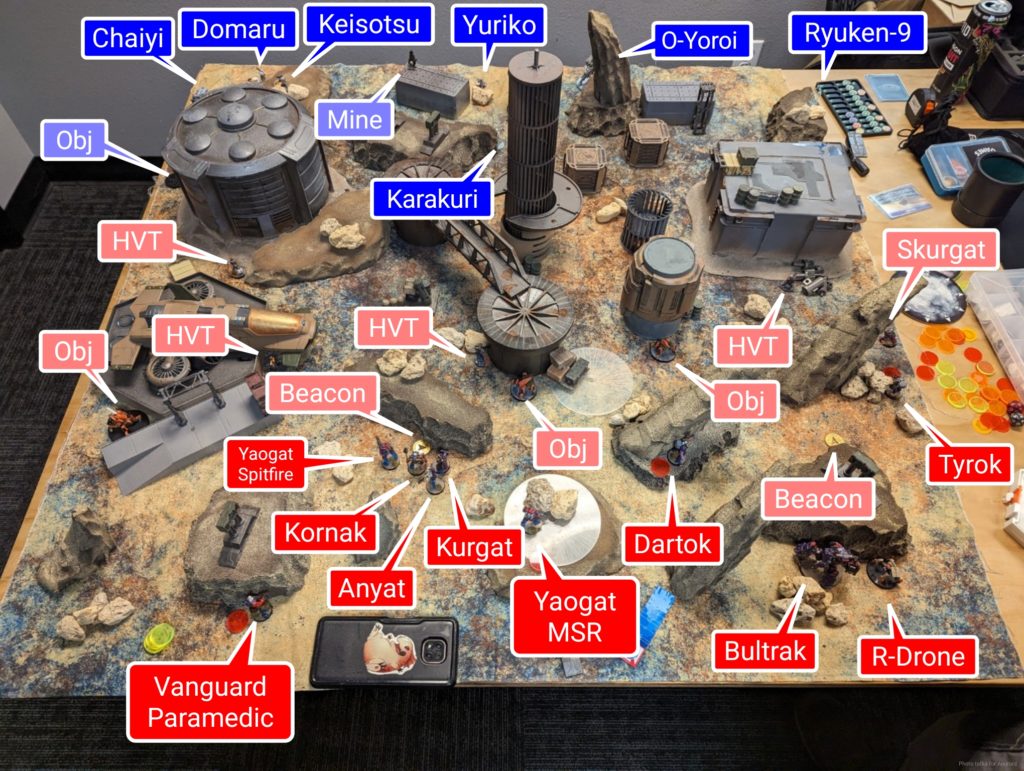
Deployment
Than won the rolloff and elected to go first, so I took the side that I was standing on. It also had what I thought were better spots to hide my O-Yoroi, so that helped me make the decision a little. I chose CQB and Than chose Desert Terrain as our battlefield conditions, so he set up his Yaogat MSR inside a desert terrain low-vis zone. The Yaogat is in a great place for normal play, but with CQB online it doesn’t punch all the way into my deployment zone. It’s still very annoying though.

In any case, the rest of his link bundled themselves up in a blob behind a nearby rock formation with the Vanguard Paramedic and Dartok a little farther away to refill the link if necessary. The Tyrok went all the way on the right to try to bait out an ARO piece that the reserve Bultrak could attack. Then deployment fell to me. I set up the Ryuken-9 first. One HRL was covering the Tyrok on my left. In a non-CQB game this is a big choice, as it kind of takes the Ryuken-9 out of the fight, but I think it works in a CQB game against two Yaogats. The Yaogats really negate a lot of JSA’s gear, so I have to make Than push hard to engage them and instead use the Ryuken-9 to cover something rampaging onto my table side.
I put the Karakuri out as a harder ARO, as it’s quite difficult to straight up her remove her quickly, with Yuriko behind. Kuroshi and the Lu Duan (hiding as a baggage bot) were pointed backwards waiting for a Rasyat, and the Domaru and her Keisotsu pal were on the right. All my mines from Yuriko and the Ryuken-9 covered as many of the Resilience Operations objectives as possible, with Yuriko’s plugging a Rasyat hole around the corner of the building from Kuroshi.
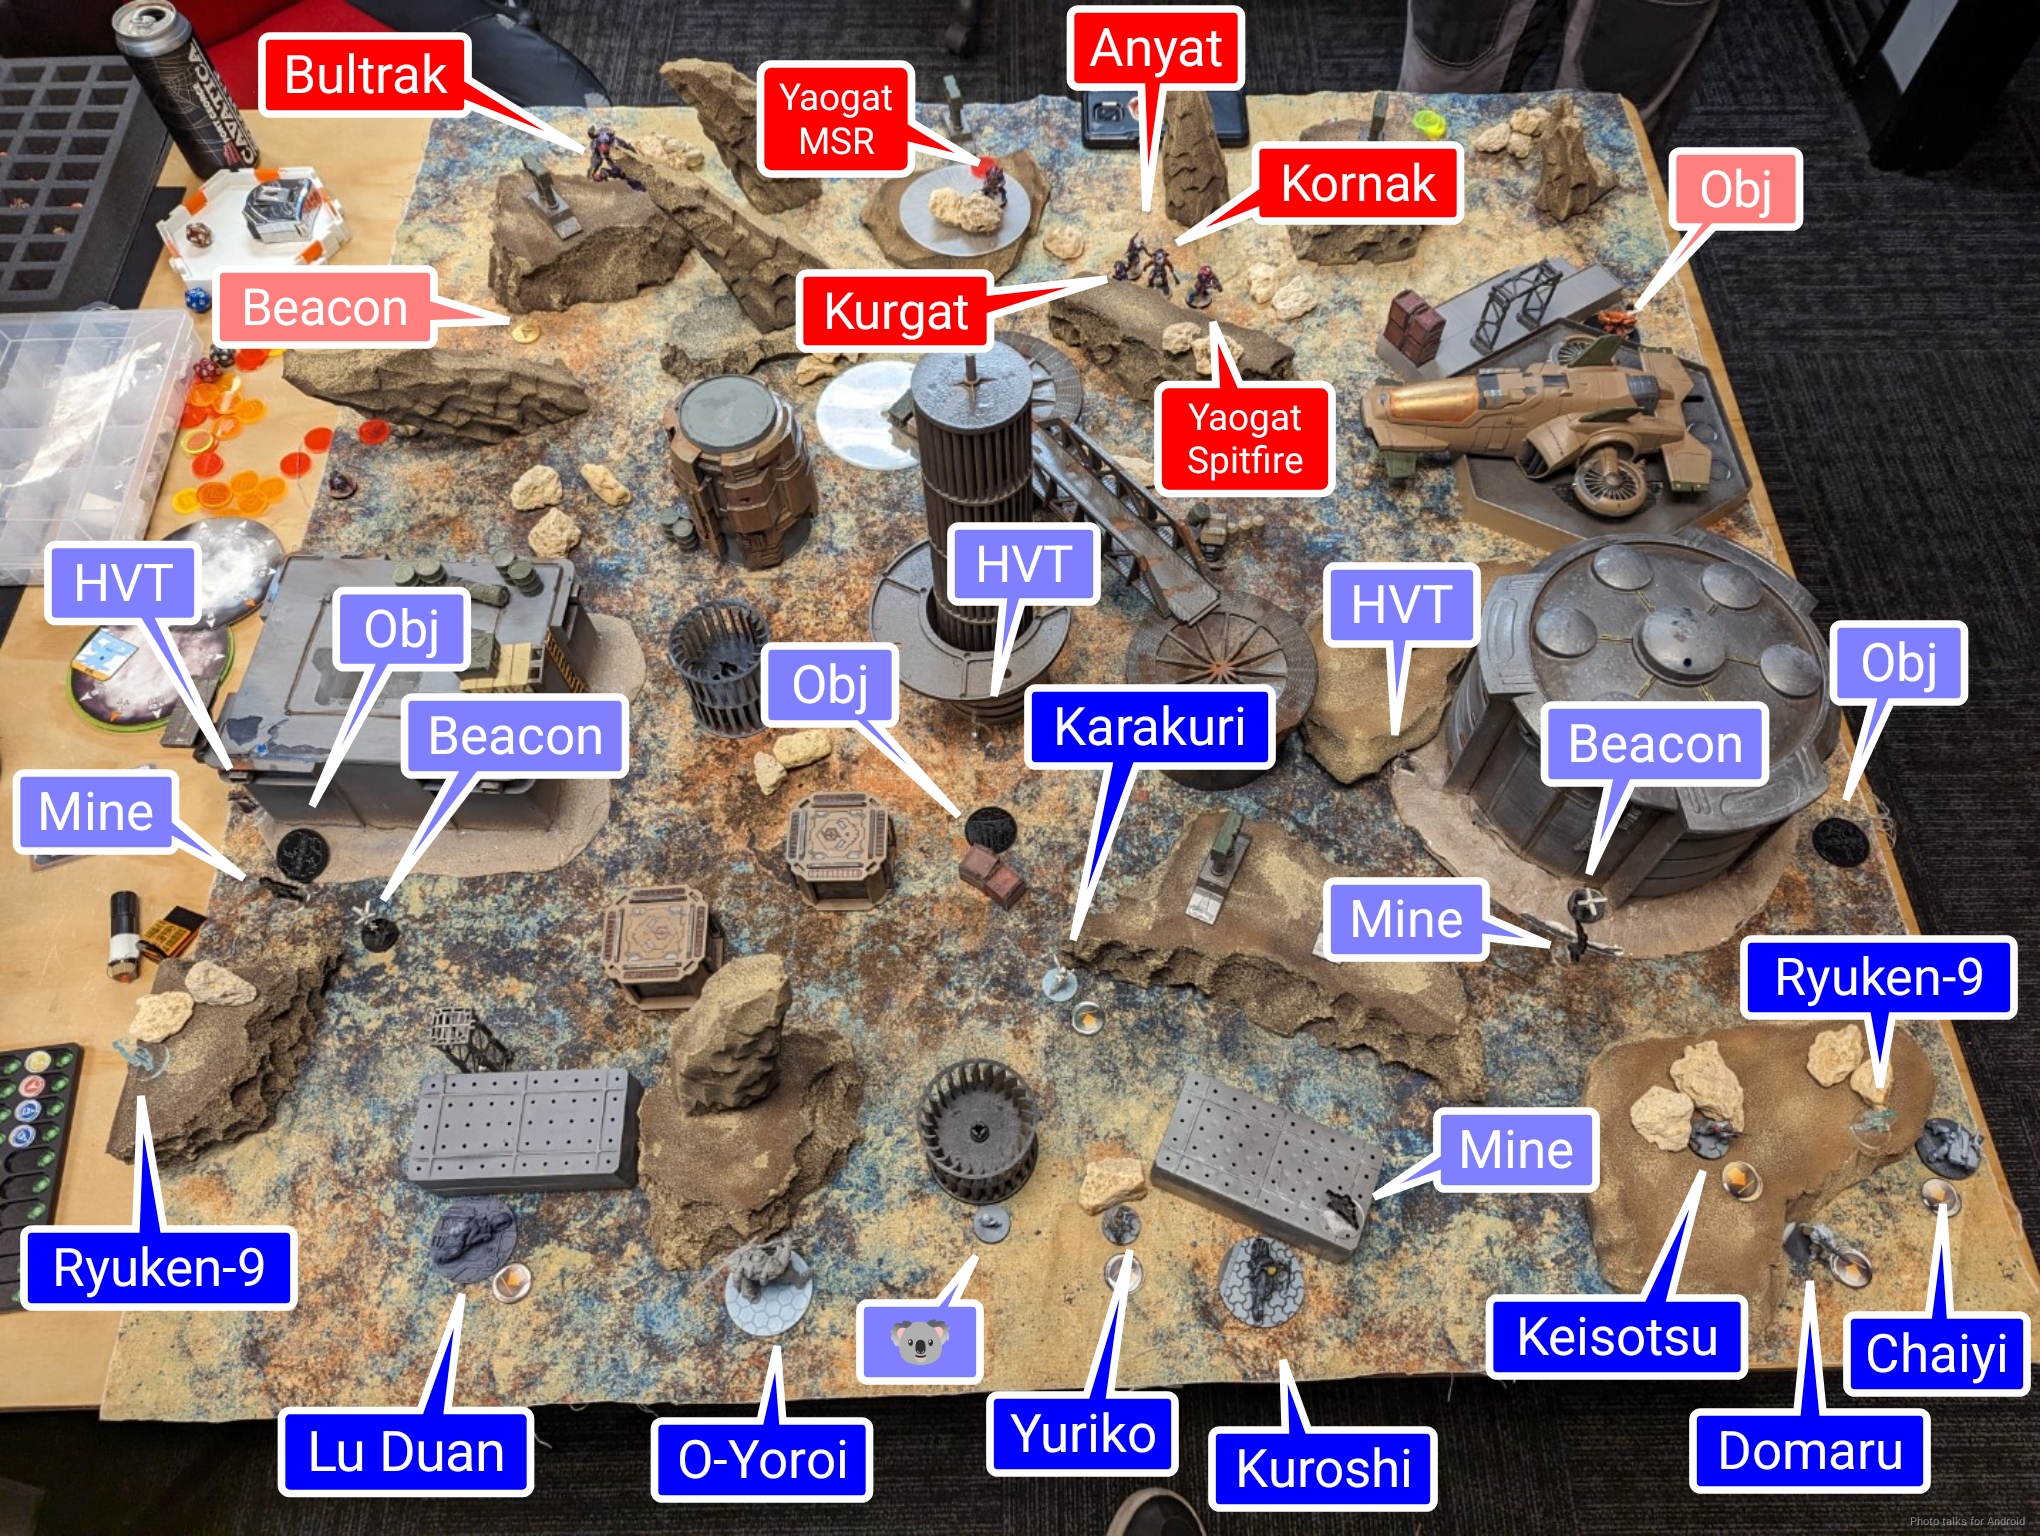
I had basically committed at this point to putting the O-Yoroi on my left, using its Koala to protect me from a Rasyat behind Yuriko, so I just went with it when Than put his Bultrak down. I figured I’d lose the O-Yoroi but it would take Than most of his turn to do it, so that felt okay to me. I felt confident in my ability to deal with the Tyrok if it tried to assassinate anything, and I figured if things really went poorly, Yuriko could pick the Karakuri back up.
Turn 1
Before we got rolling, Than informed me that he had chosen Priority Target as his objective, and that I had to choose three troopers for him to kill, each worth one point. I decided that I would choose the Keisotsu Paramedic and the Lu Duan, figuring that I’d just use them as orders this game and keep them safe in the backfield. Then I had to decide between the Domaru, Karakuri, or the O-Yoroi as the third.
The Domaru is intended as a suicide piece on Turn 2/3 if I need it, so that seemed bad. I chose the Karakuri, as it’s arguably more survivable than the TAG as it’s easier to pick back up (due to re-rolls). Also, I know Than will absolutely try to kill the O-Yoroi, and I didn’t want to make it a double reward–kill the TAG and get a point.
Top of 1 – MAF
I docked Than 2 orders to bring him from twelve to ten, and he got started by challenging the Karakuri with the HRMC Bultrak. I panzerfaust in response, keeping the exchange to only one structure damage on the Karakuri. I elect to fail guts to force Than to keep pushing foward, hopefully getting him into view of both Ryuken-9 and the Karakuri at the same time.
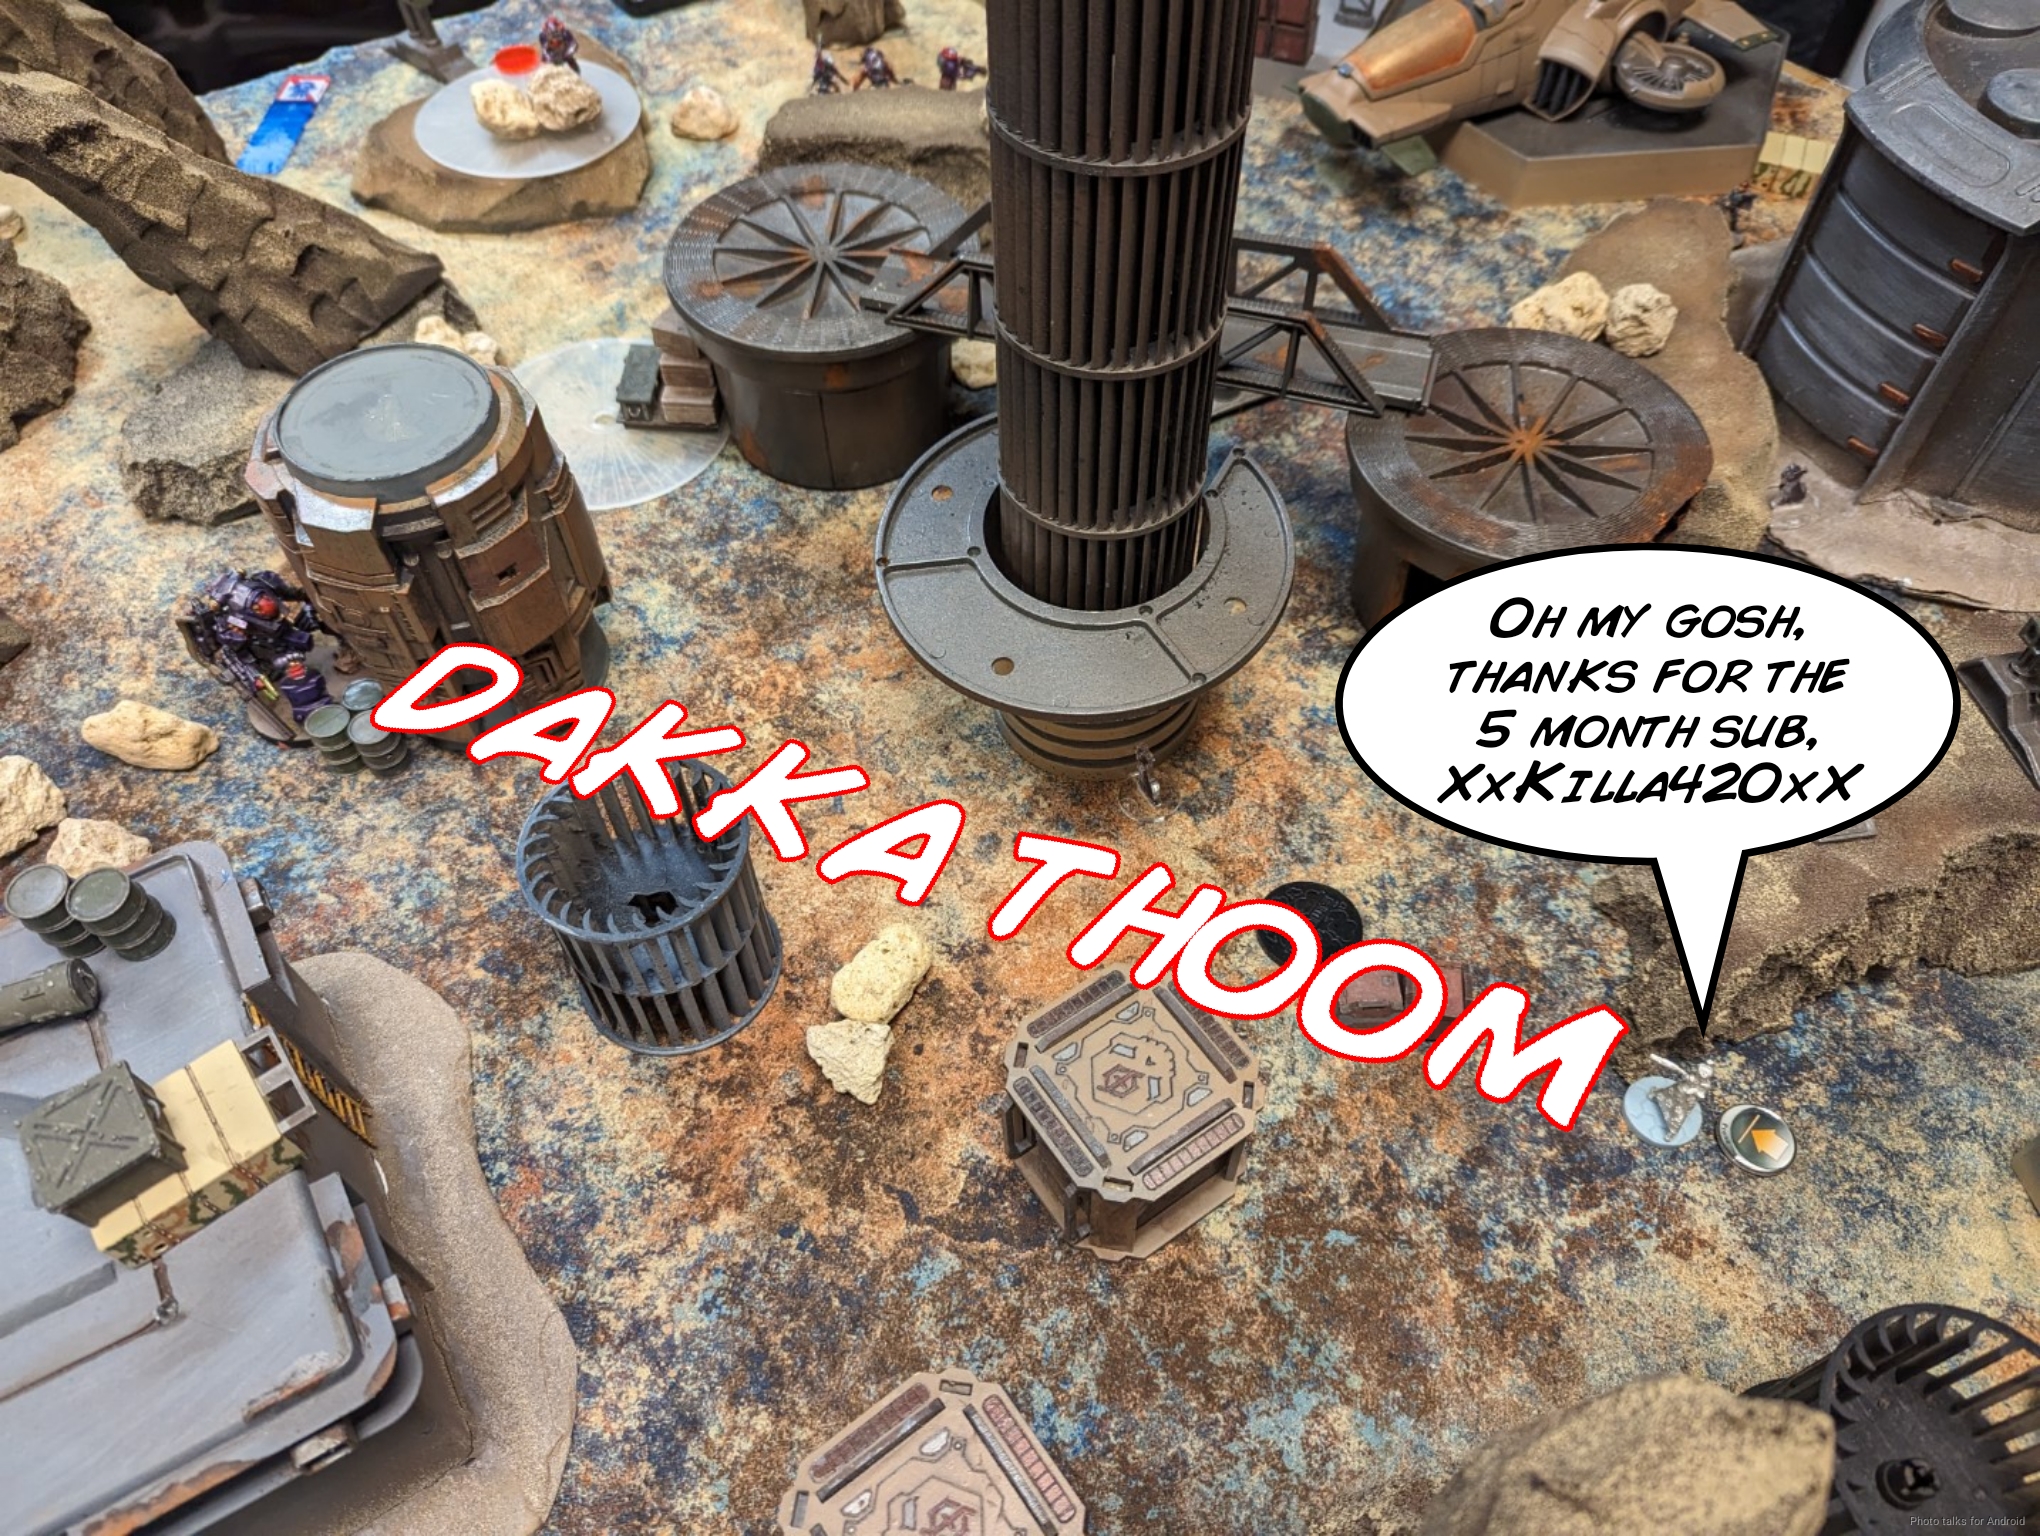
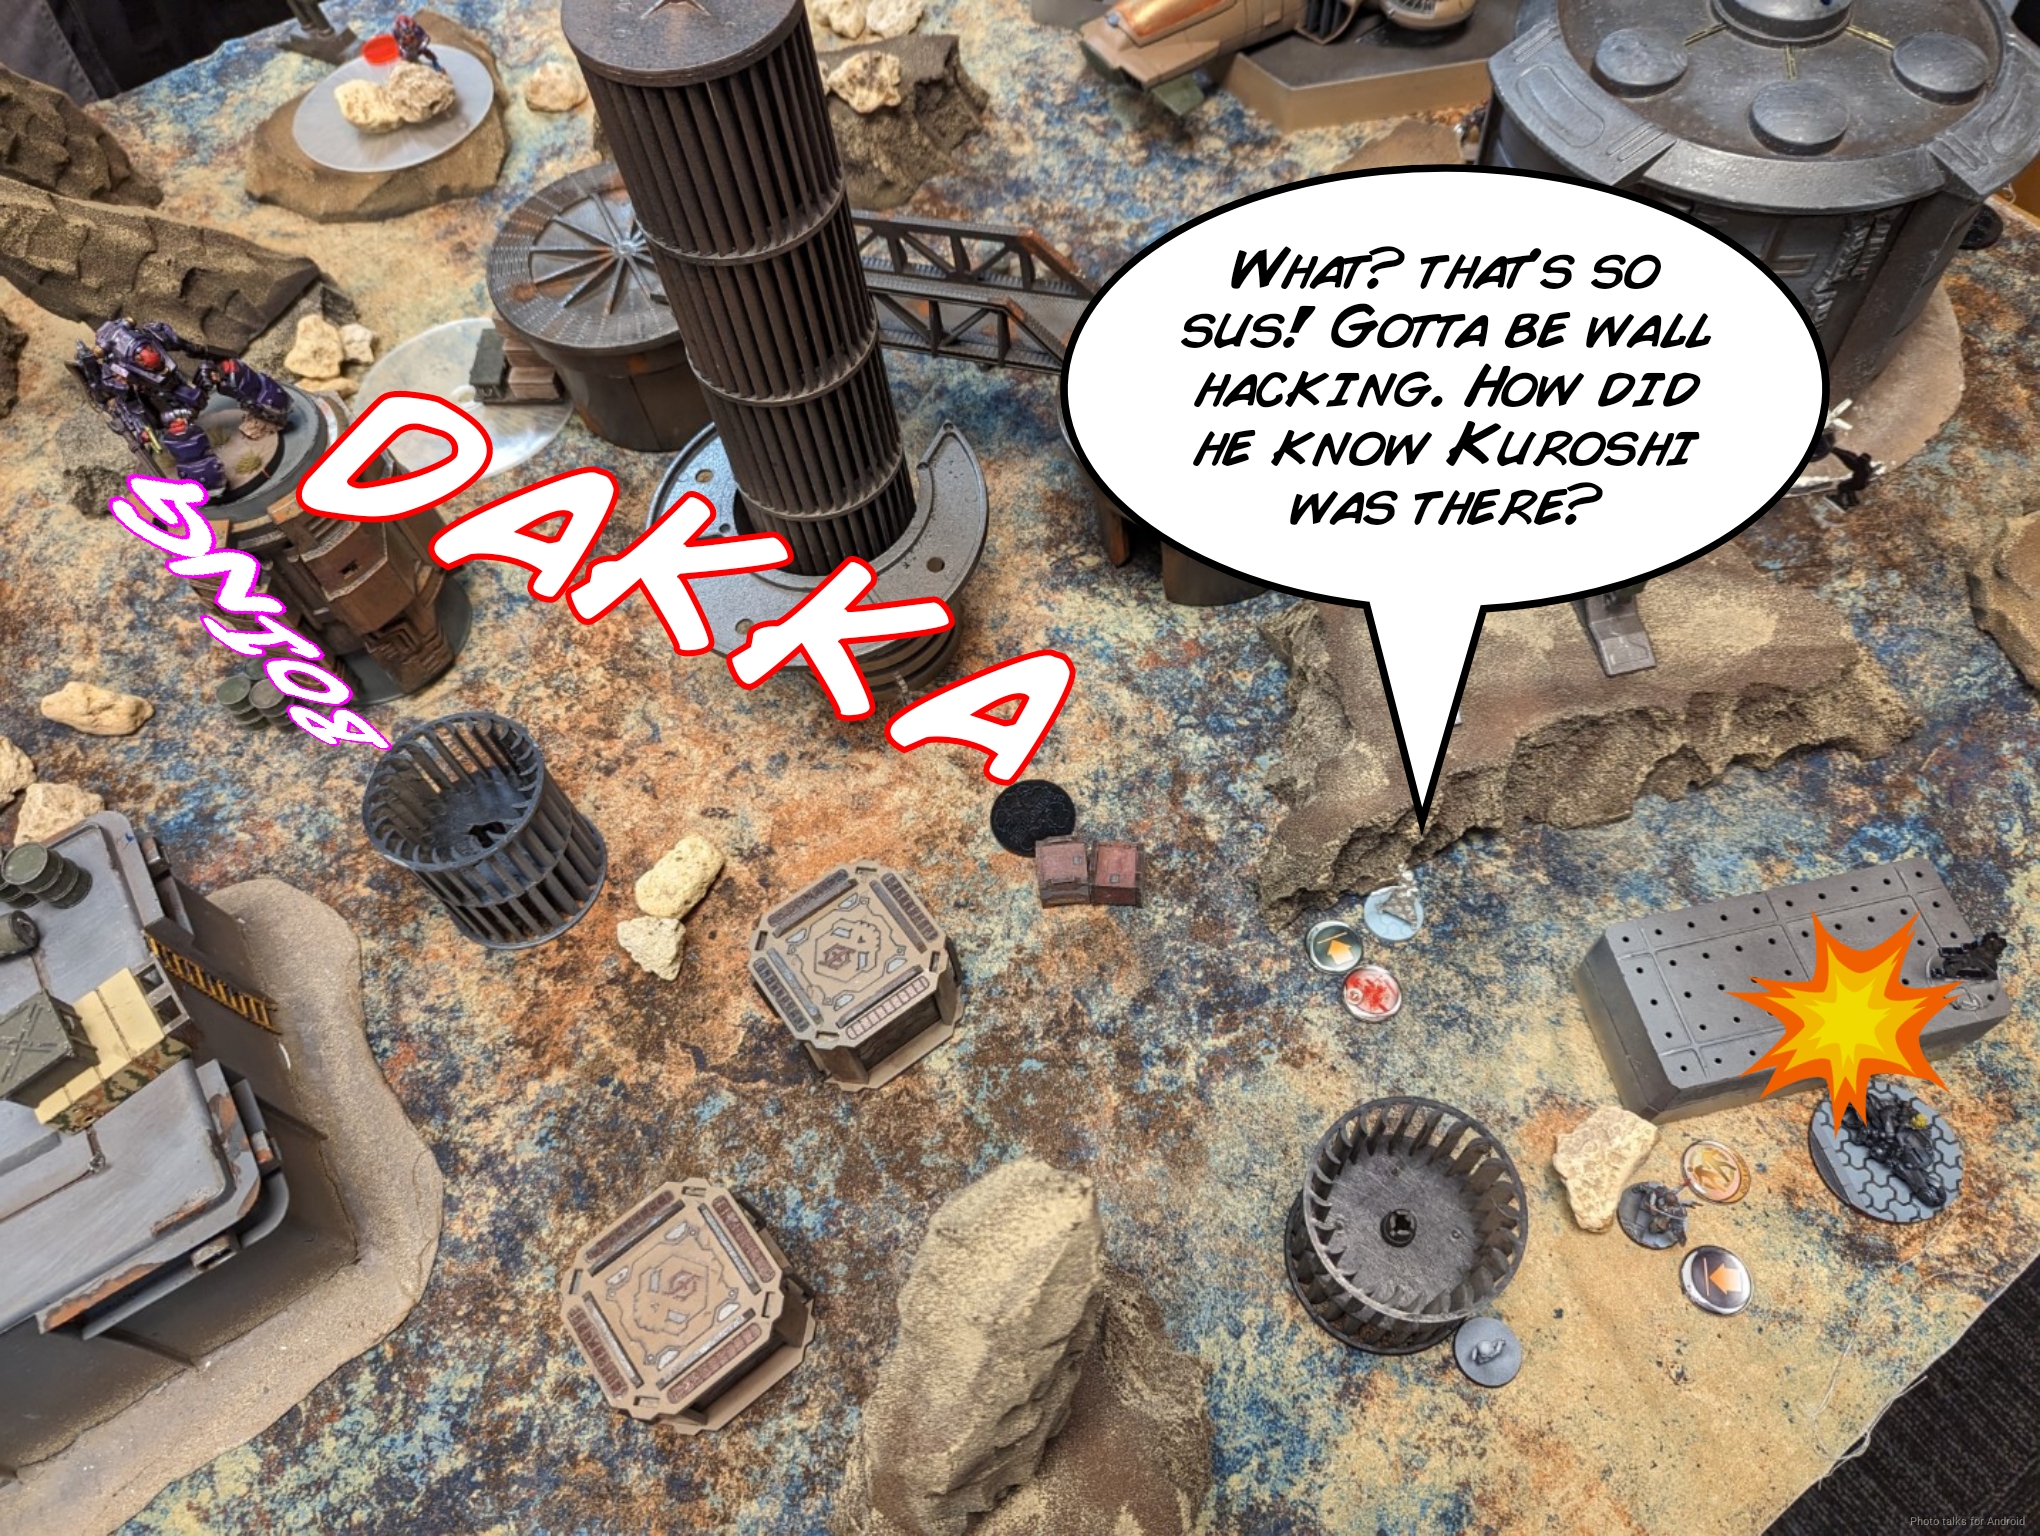
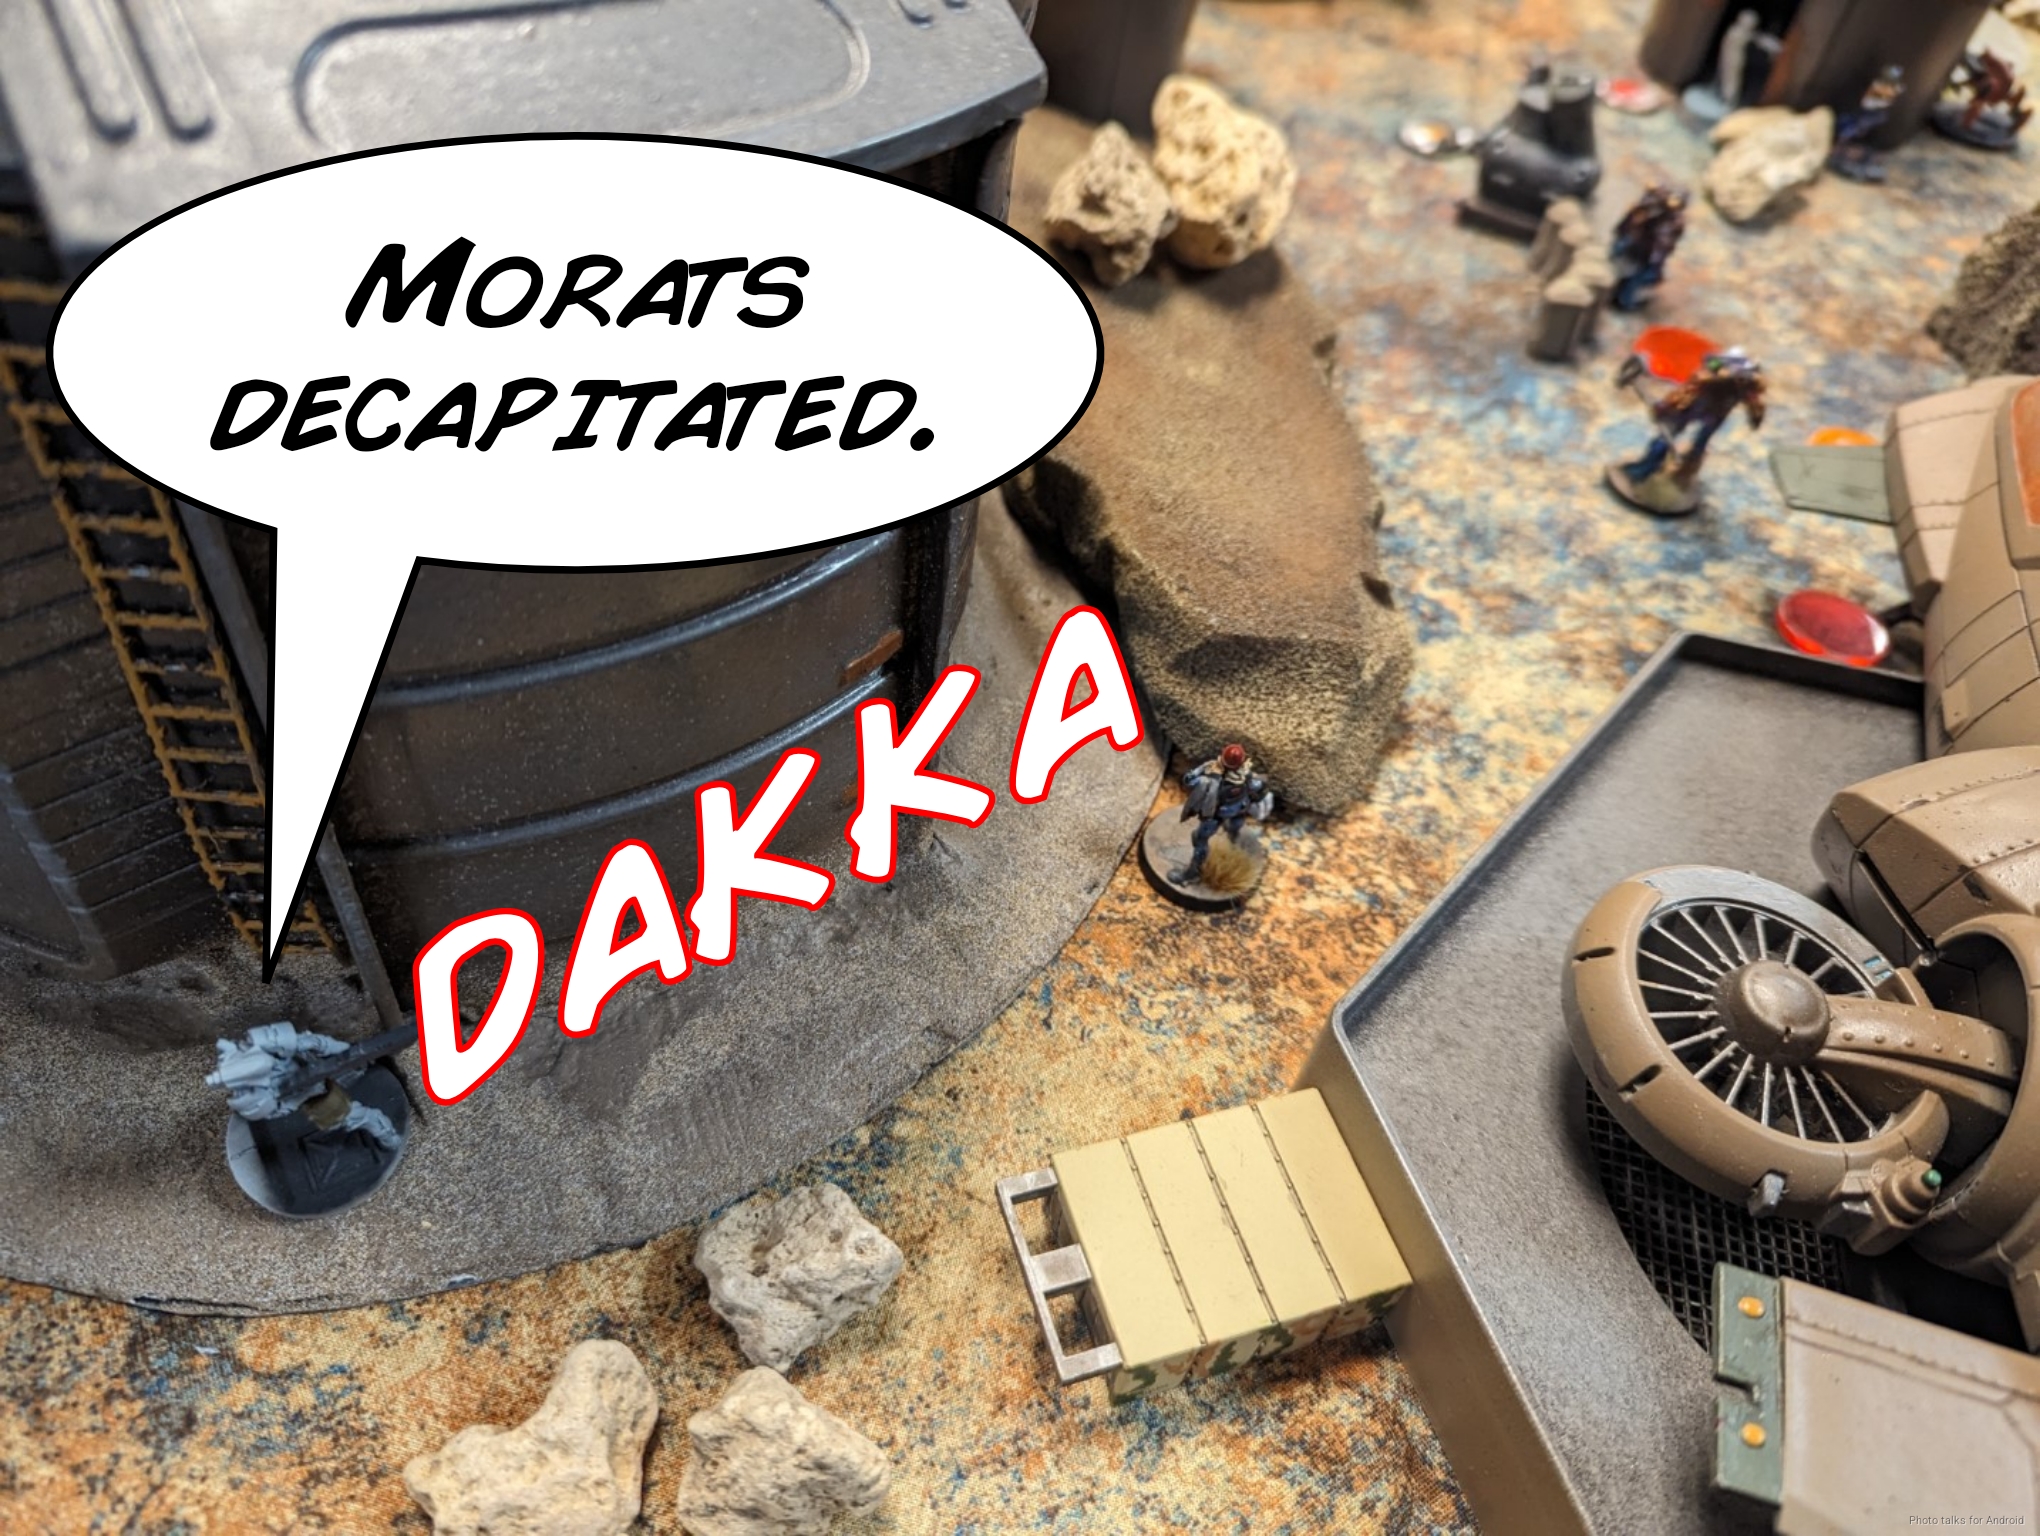
Than wisely decides to not over-extend, and instead finds an angle on Kuroshi Rider, who he can see from the top of a building. I hadn’t really thought through that, so I lose Kuroshi, unopposed. Drat.
Next up is the O-Yoroi. I expect this to take a few orders, and am pleasantly surprised to pass my first round of ARM saves.

I manage to crit the Bultrak in return as we dance around various pieces of cover, but it too passes its ARM saves.
Moving back and forth in this way allows me to catch the Bultrak out of cover as it moves to find LoF to the O-Yoroi and I sneak a wound onto it.

Finally the Bultrak stacks two more wounds over a few orders onto the O-Yoroi, leaving me with one structure left as we continue our dance around the various bits of cover.
Than wisely (and correctly) retreats the Bultrak to total cover near his Tyrok. I land a hit as he absconds. Even though the Bultrak is out of cover, it passes ARM and that’s the end of that interaction.
Than’s last order is on fixing his link positioning. He uses the Yaogat Spitfire to corner guard, and then sets up a drop bear covering the approach from that side, relying on the Yaogat MSR to cover the other approach.
Bottom of 1 – JSA


My objectives involve area control, killing Kornak, and getting some Beepers down. I feel pretty confident that Kornak will eventually come to me, especially if I kill the Bultrak, so I decide to start there and see how much damage I can do this turn. The Tyrok hasn’t moved, so I surprise attack it with the Ryuken-9. Luckily for me, the Bultrak is under the HRL template and takes a wound, bringing it down to one structure remaining. The Tyrok manages to make its ARM save though, and makes it around the corner to safety.
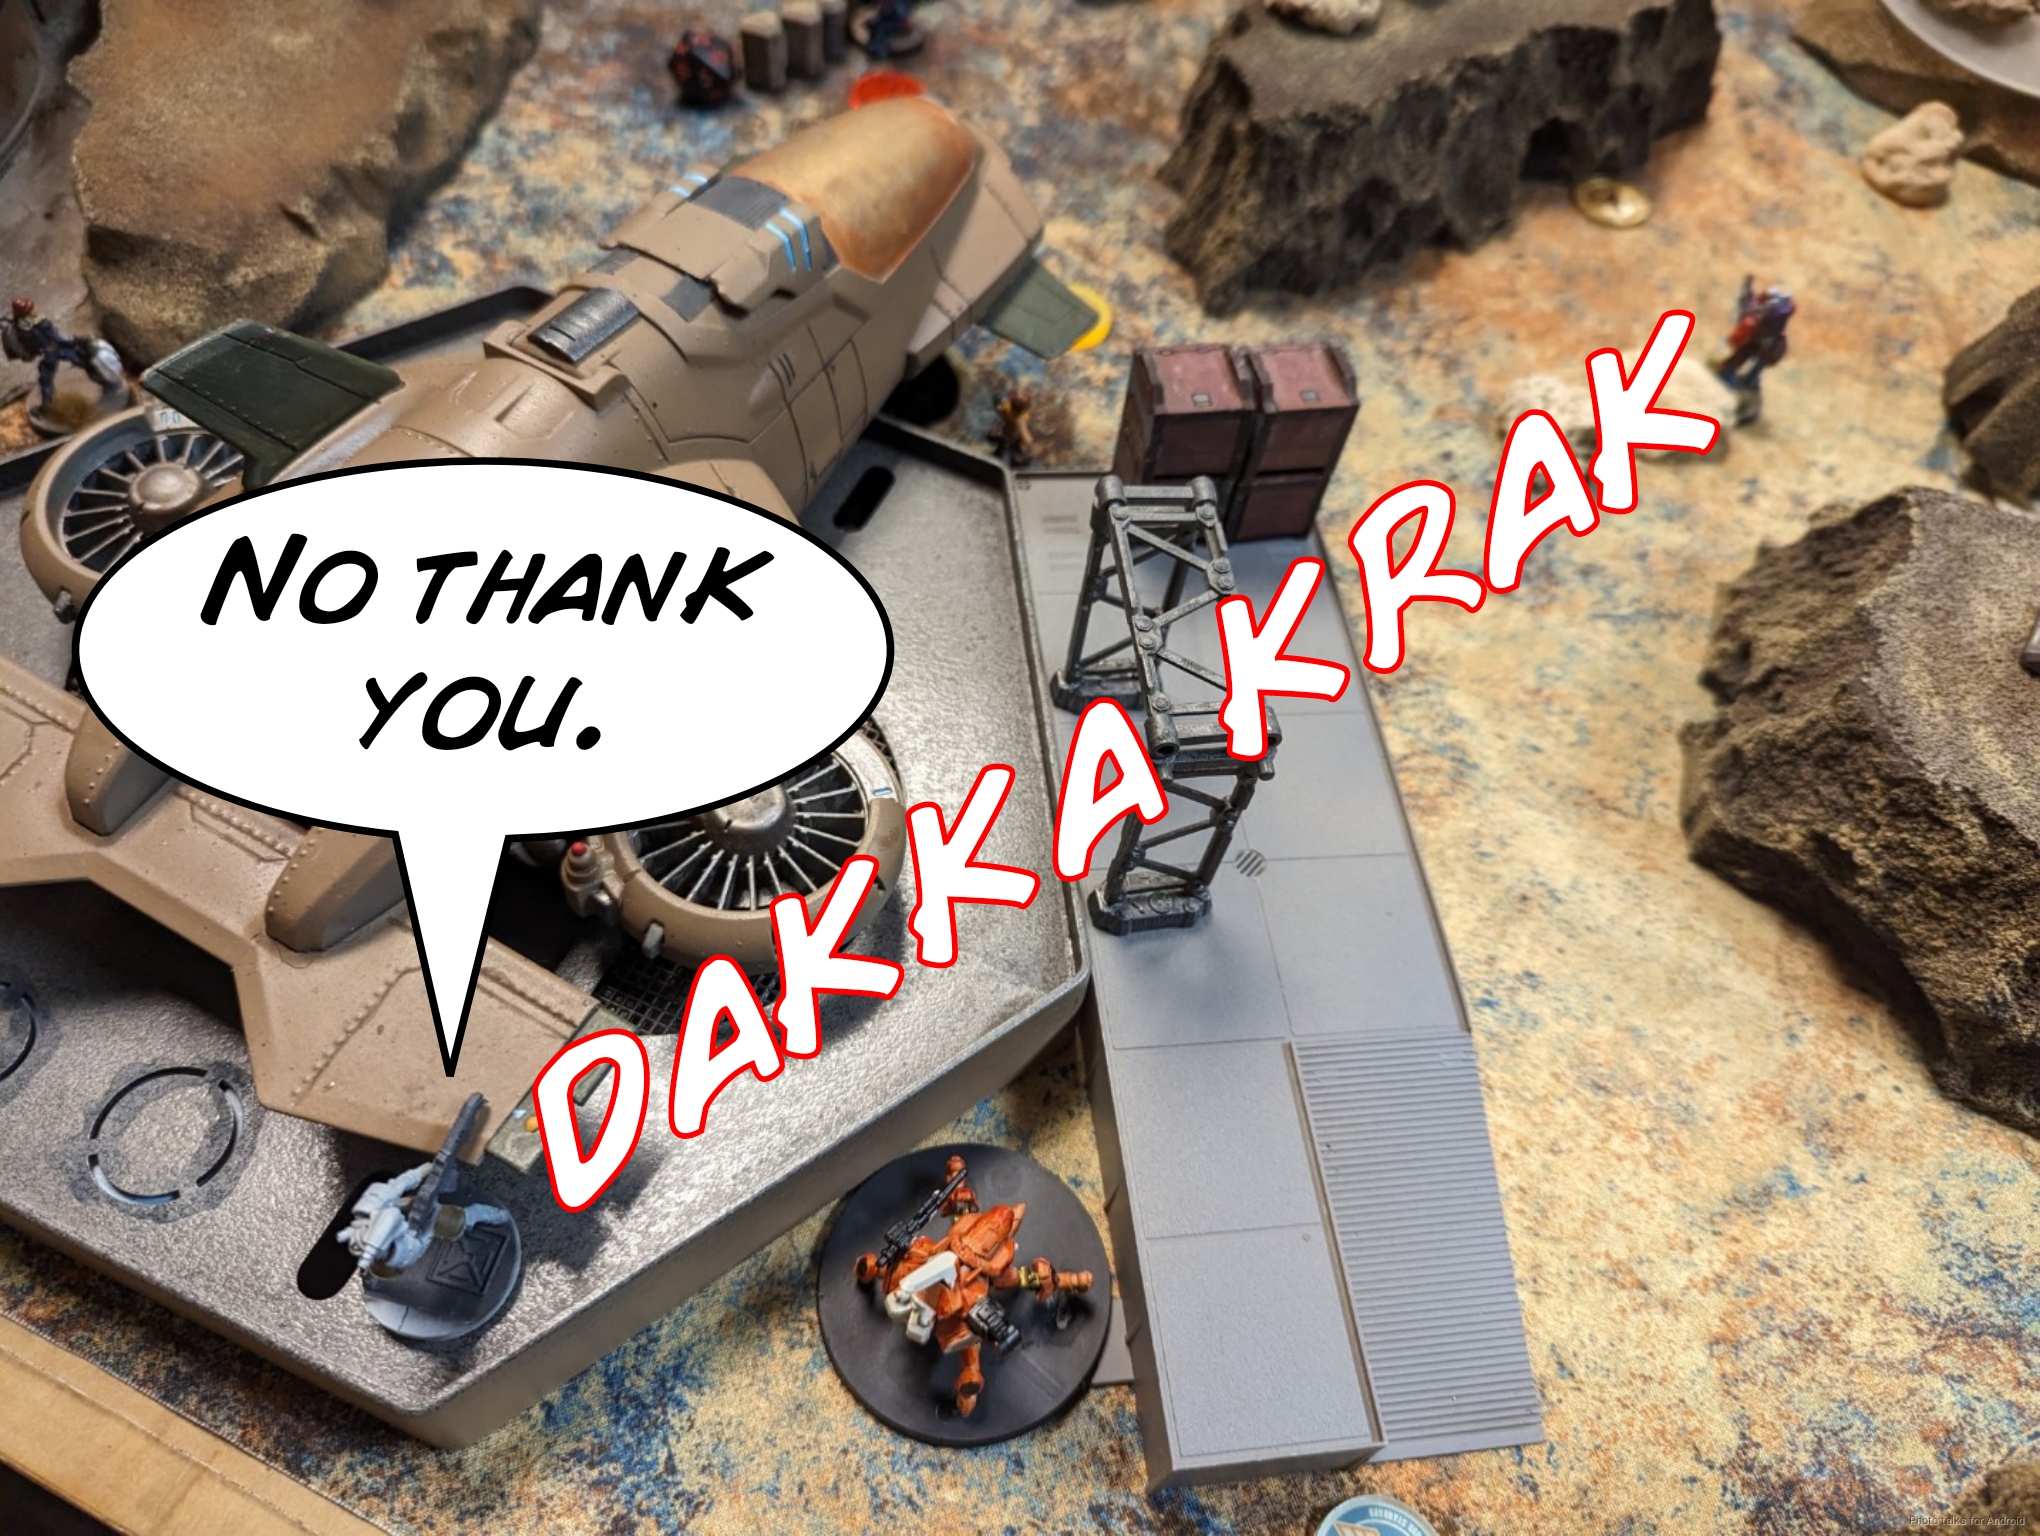
Since LoF is open information, Than helps me plan a safe route to his Bultrak for my O-Yoroi that the Yaogat MSR can’t see. The only question is if the initial move (which is in LoF of the Yaogat) is outside of 32″. We can’t pre-measure this, so I just commit and move the O-Yoroi. It turns out to be 34″, so CQB saves me here.
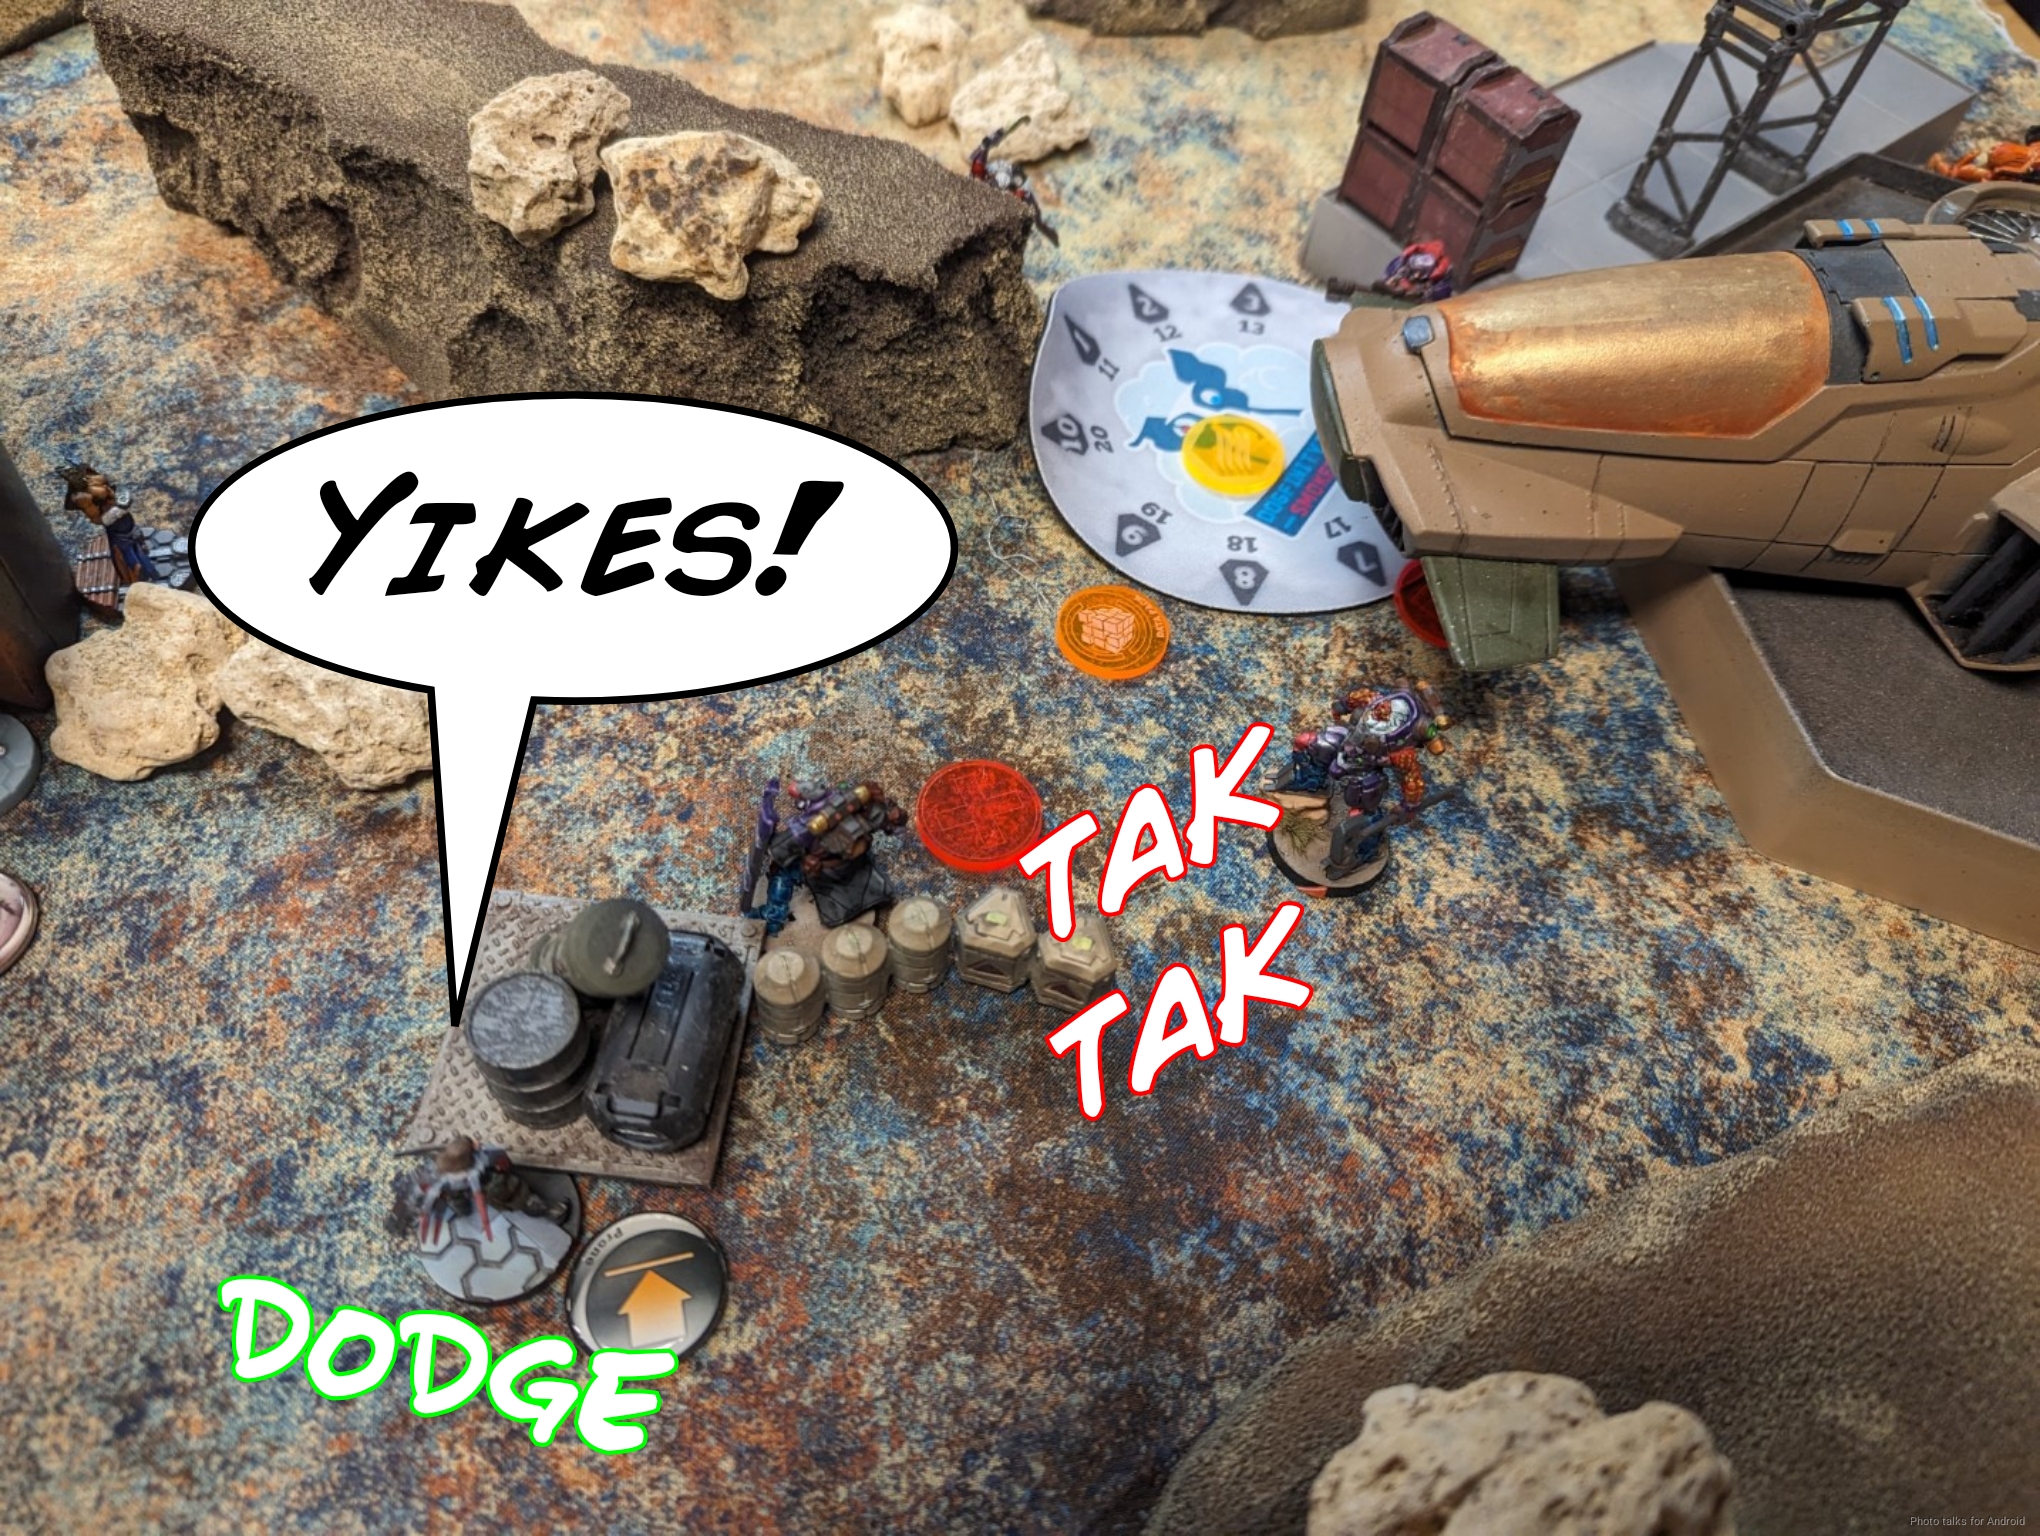
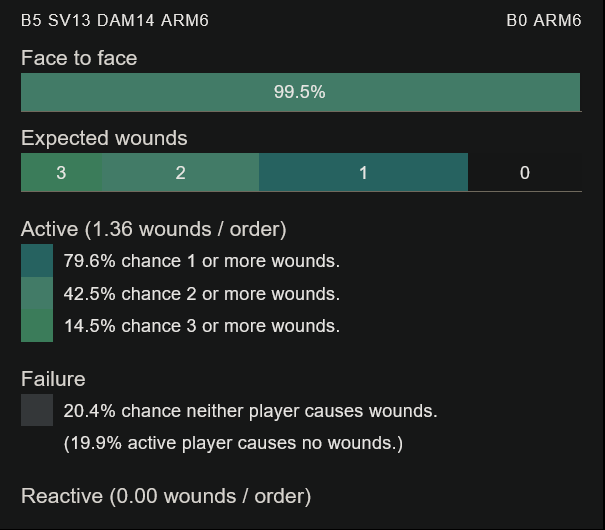
With the approach clear, I dump a full burst of AP HMG into the Bultrak from just outside 16″ and take it off the table.
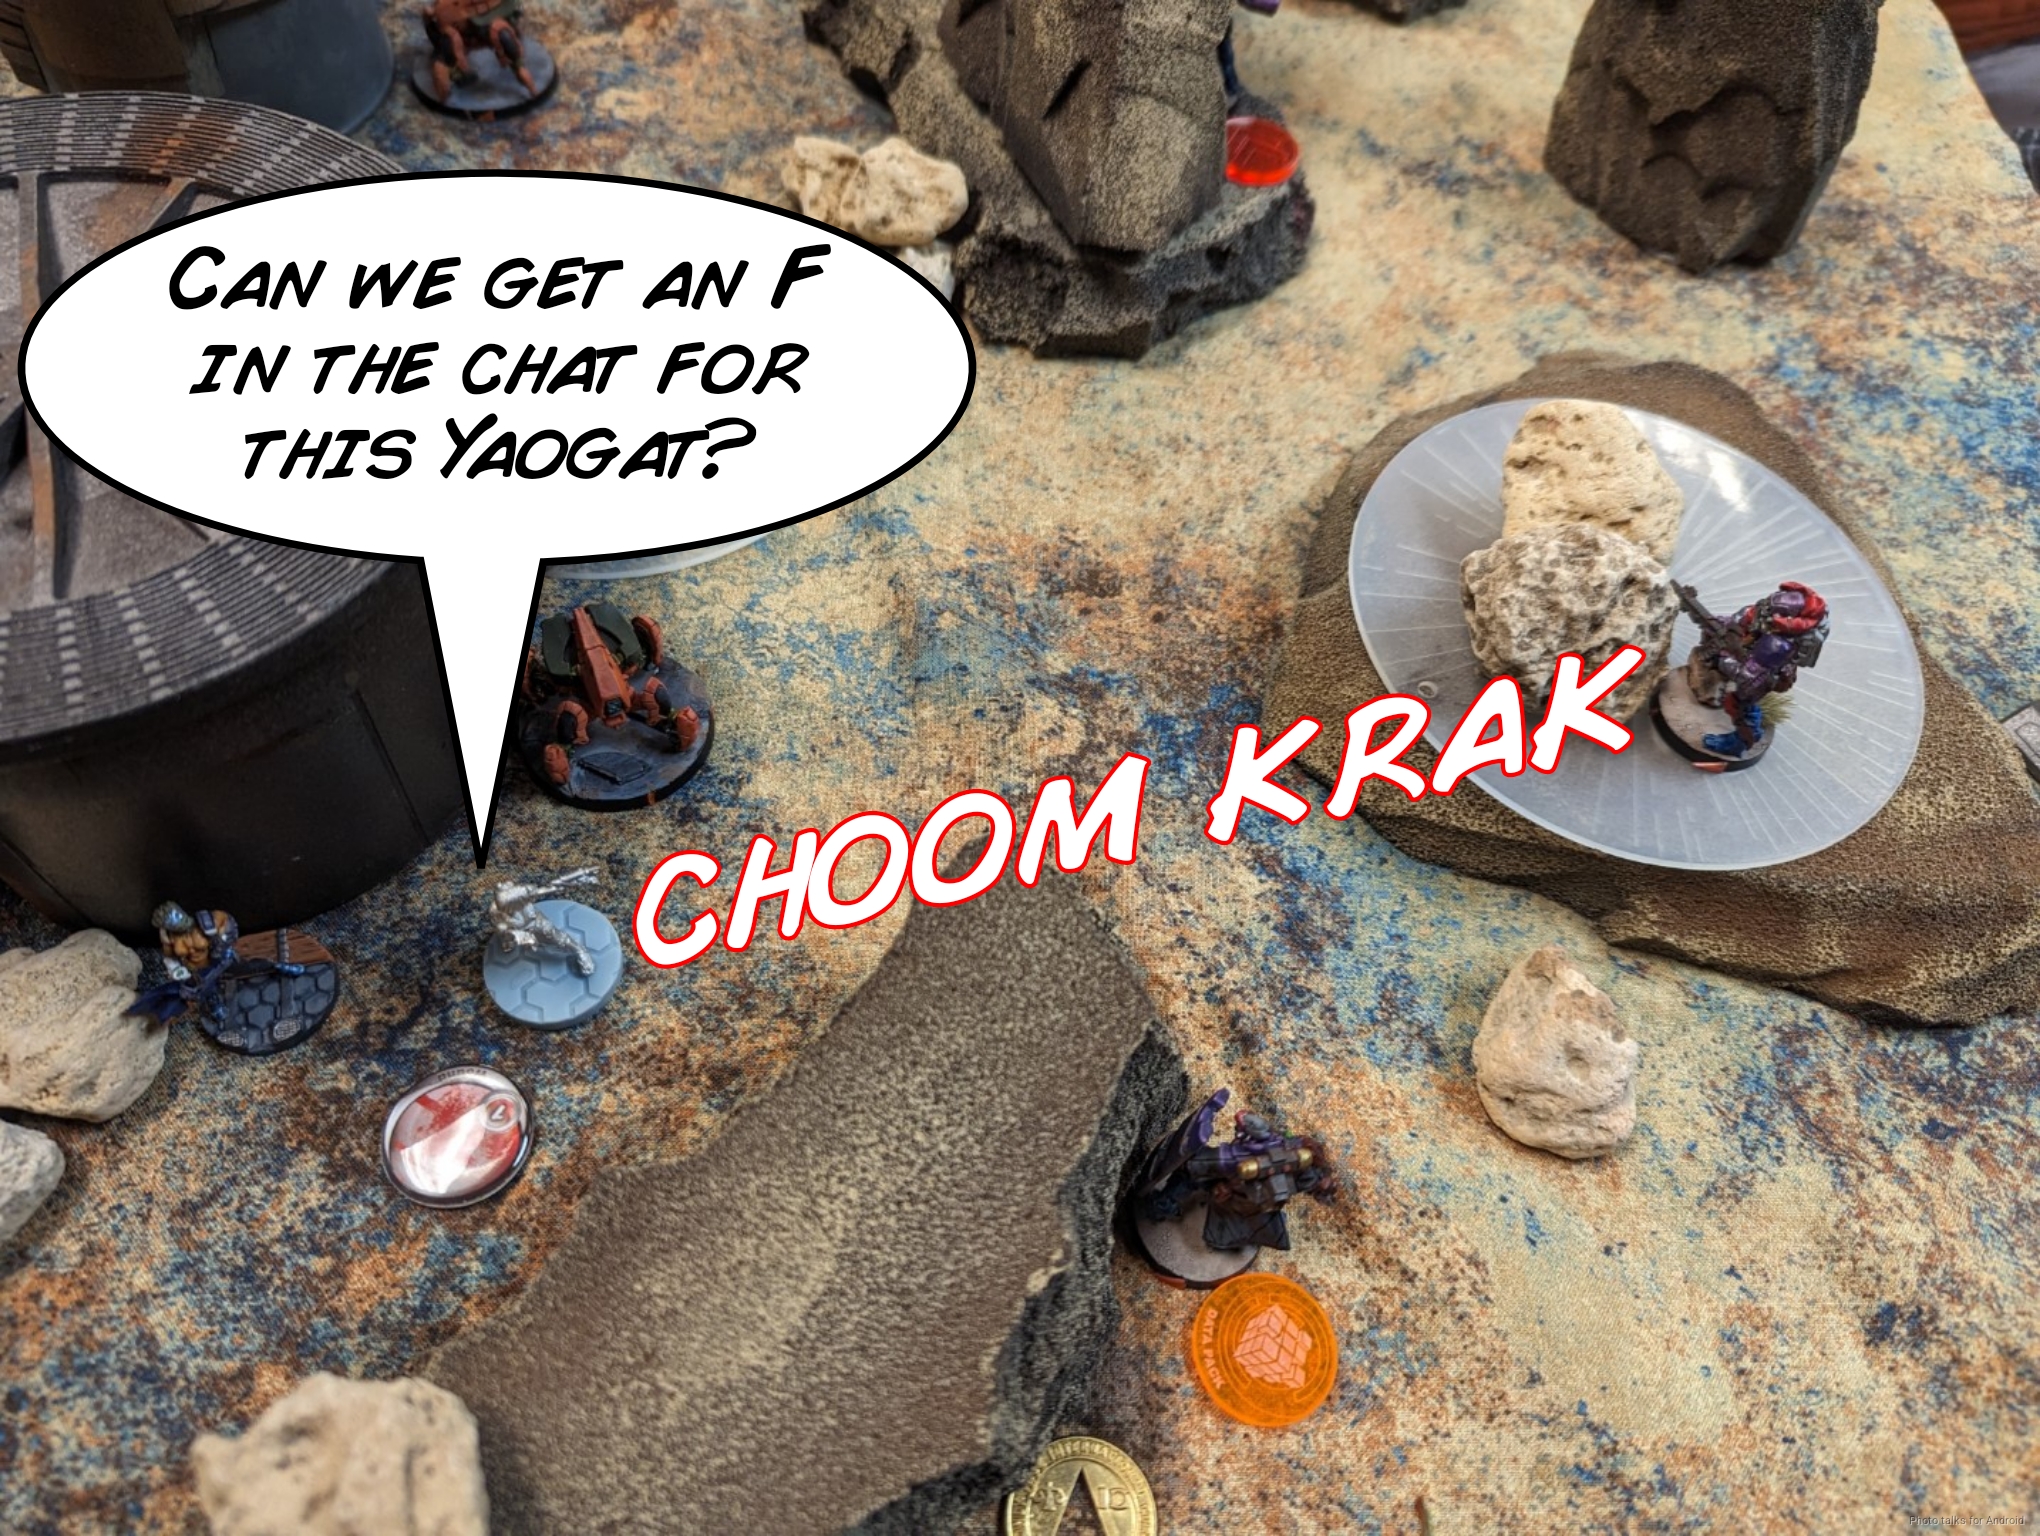
I don’t really want to risk the Karakuri yet, but I have 6-ish orders to spend on her and decide to remove the Yaogat MSR and tie up the link as best I can. The approach is in LoF shadow, so I pop out within 16″ and throw a full burst into the Yaogat, who passes ARM and asks for more.
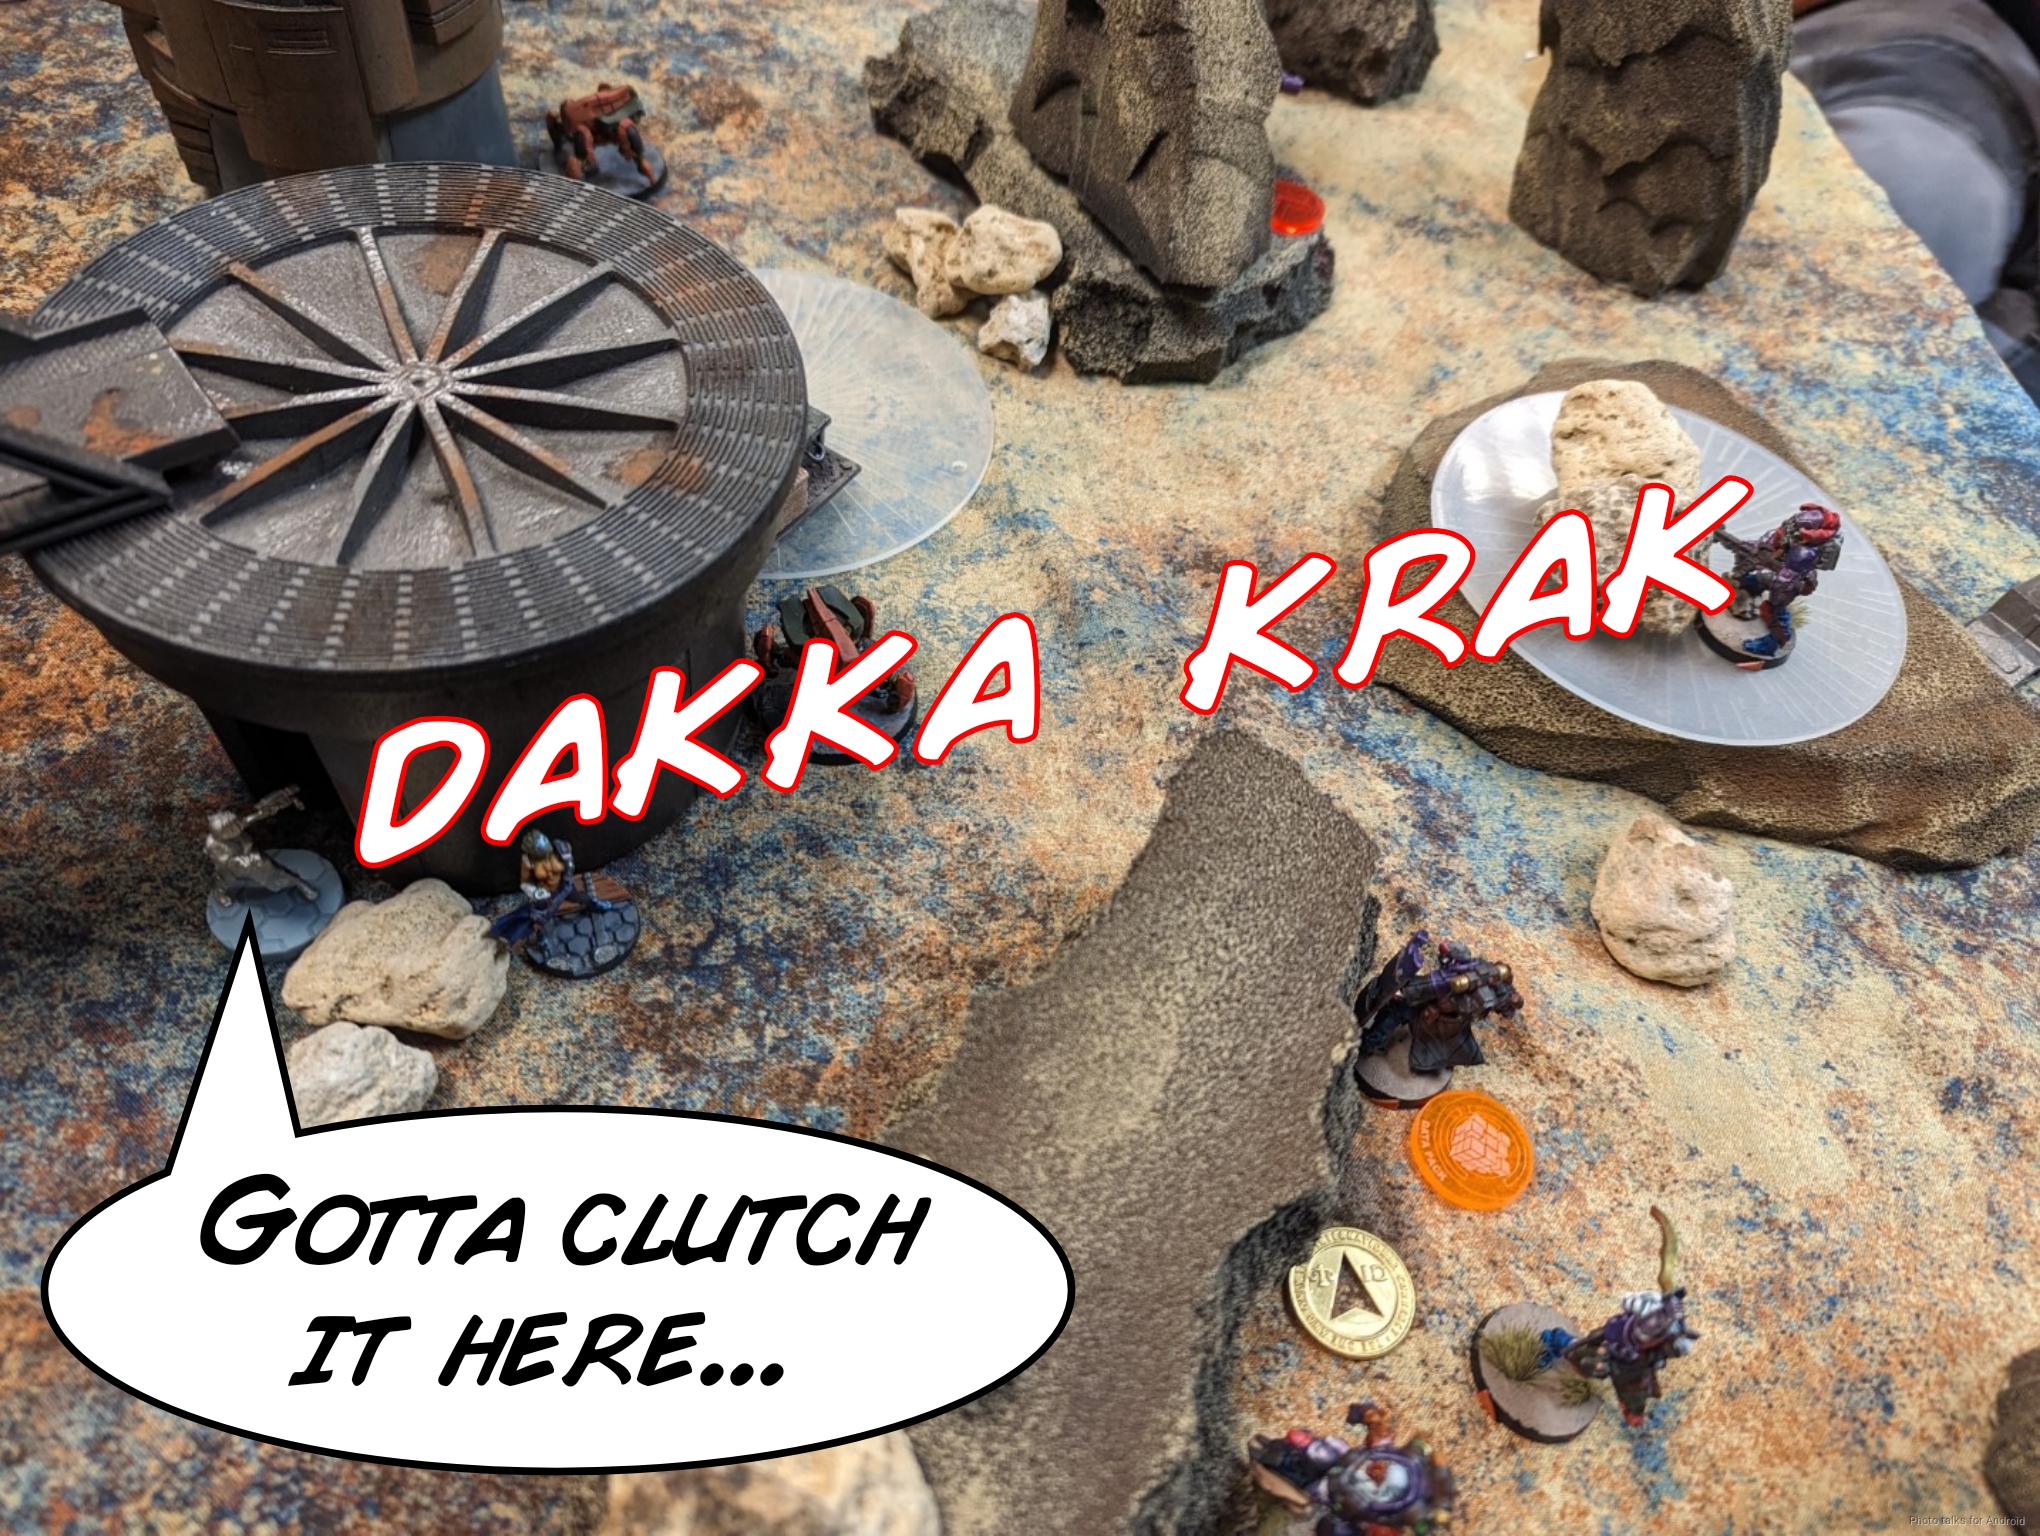
I decide to risk it and push into chain rifle range, daring the Yaogat to shoot me. It does, doing a second wound, but getting dropped by the Chain Rifle. “F.”
Yuriko is a huge jerk and repairs the Karakuri to full.
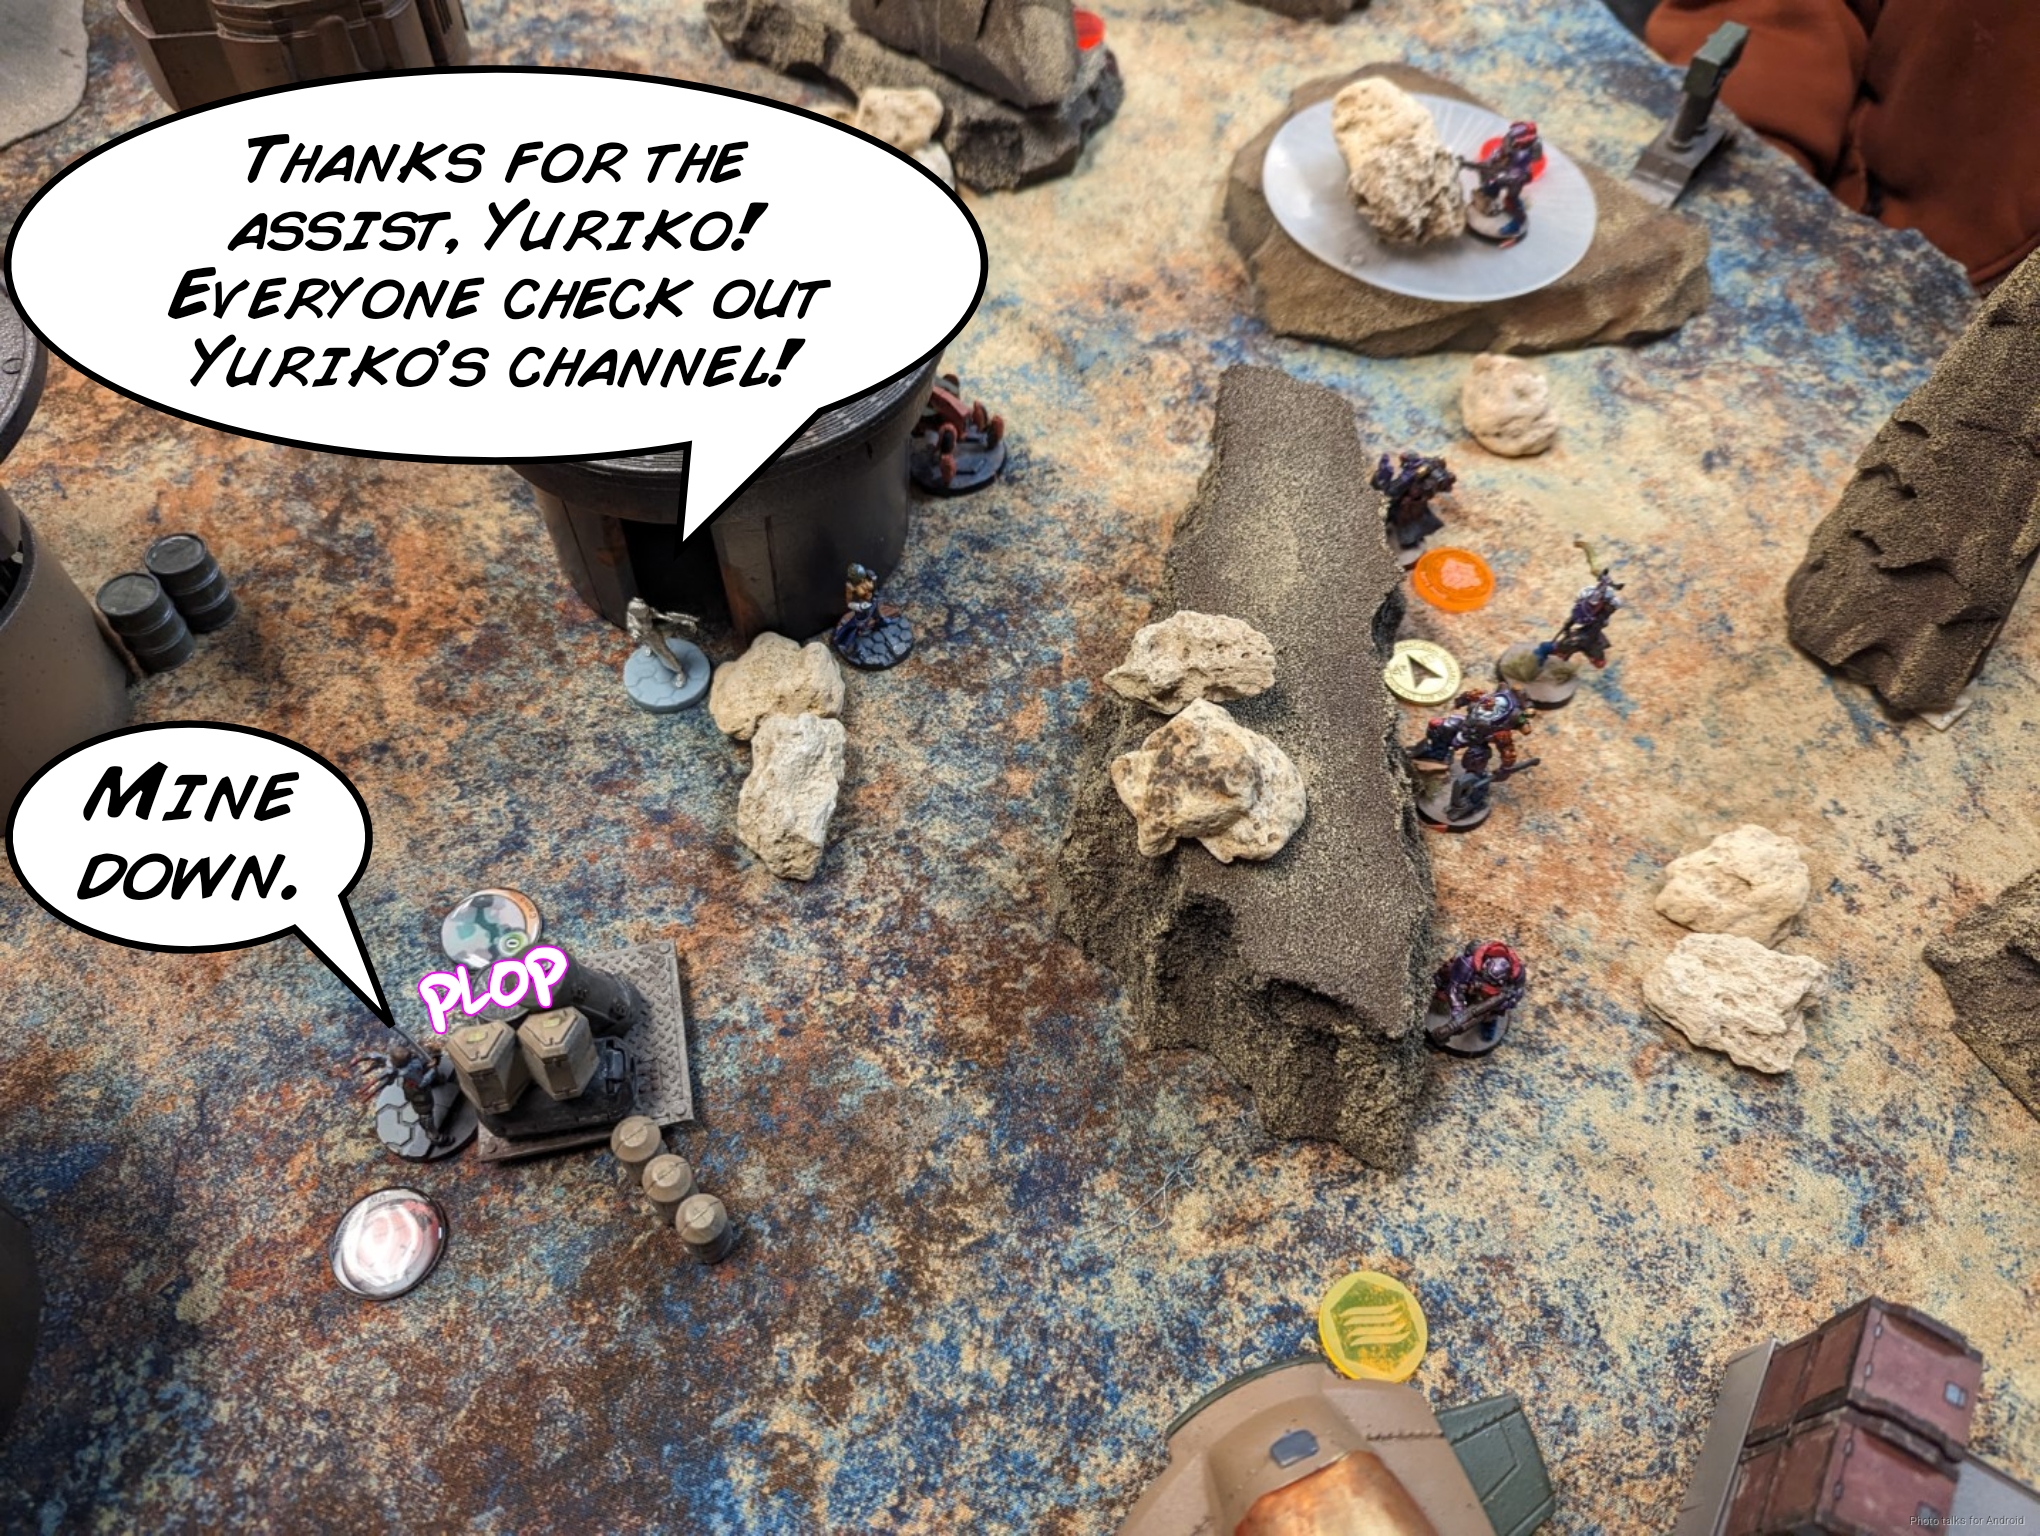
As part of a coordinated, I reset the O-Yoroi’s positioning, move the rightmost Ryuken-9 to see just behind the Karakuri and Yuriko, and have both Yuriko and the O-Yoroi drop deployables.
Turn 2
Top of 2 – MAF
Than’s objective this turn is to take out the Karakuri. He starts by setting up an insurance policy for himself and putting down a pitcher from the Dartok. He could carbonite here, but is dissuaded when he asks what the Karakuri’s WIP and BTS are.
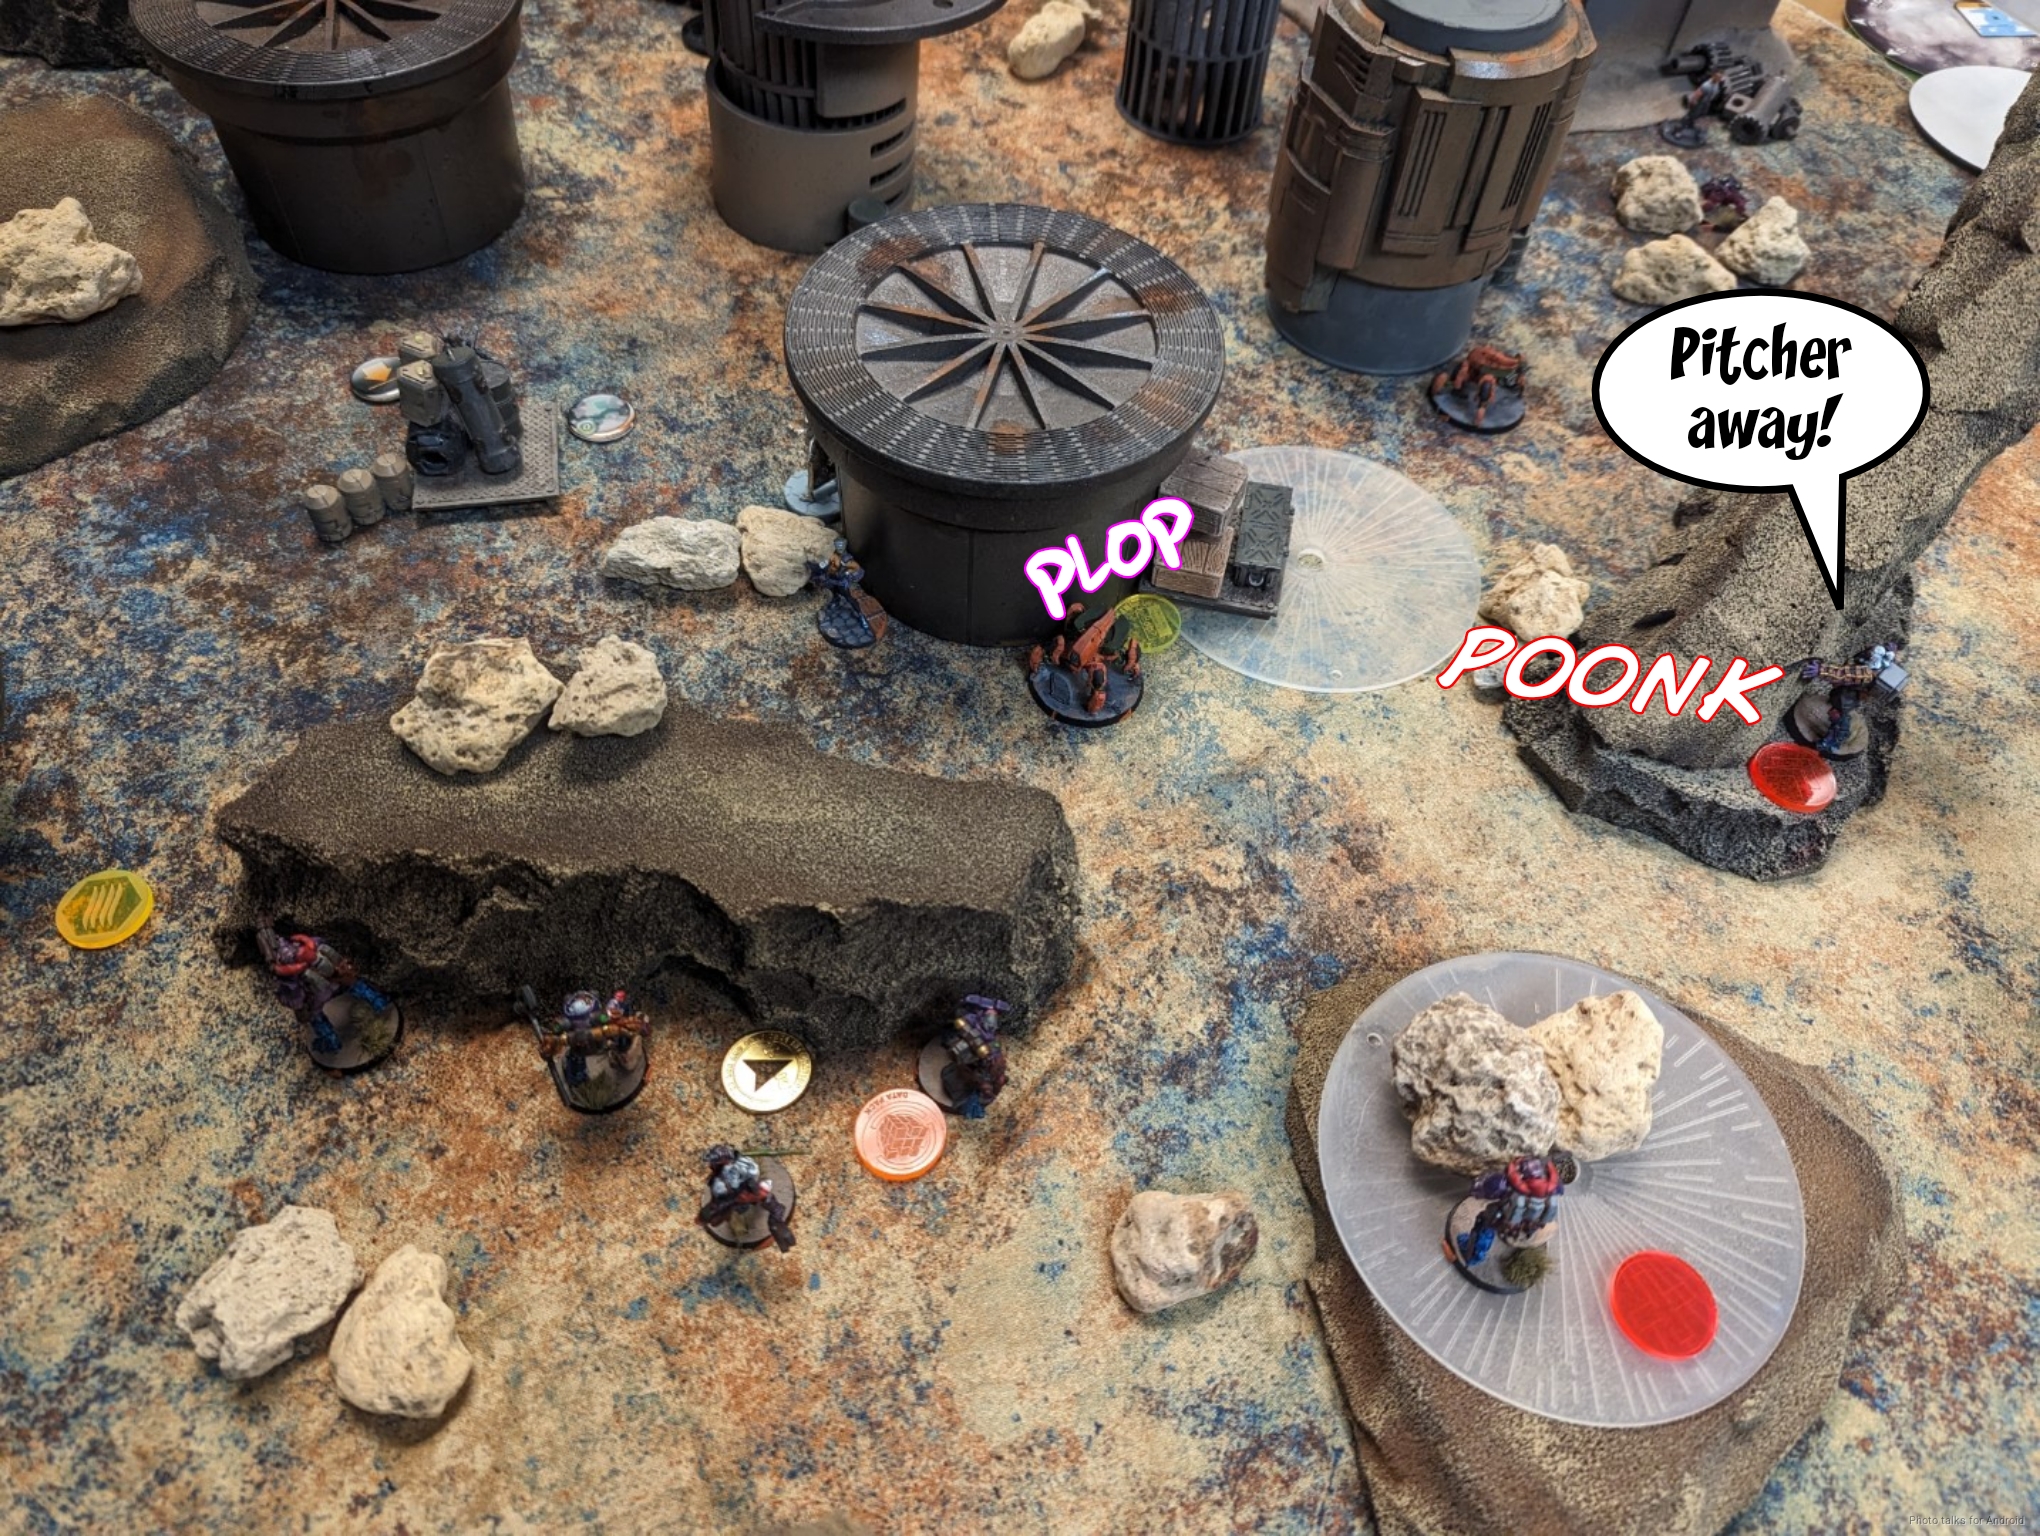
In general I think hacking in the active turn is a pretty nuanced decision, but Than also has access to Yaogats and smoke, so he has Anyat stick a smoke grenade down nearby.
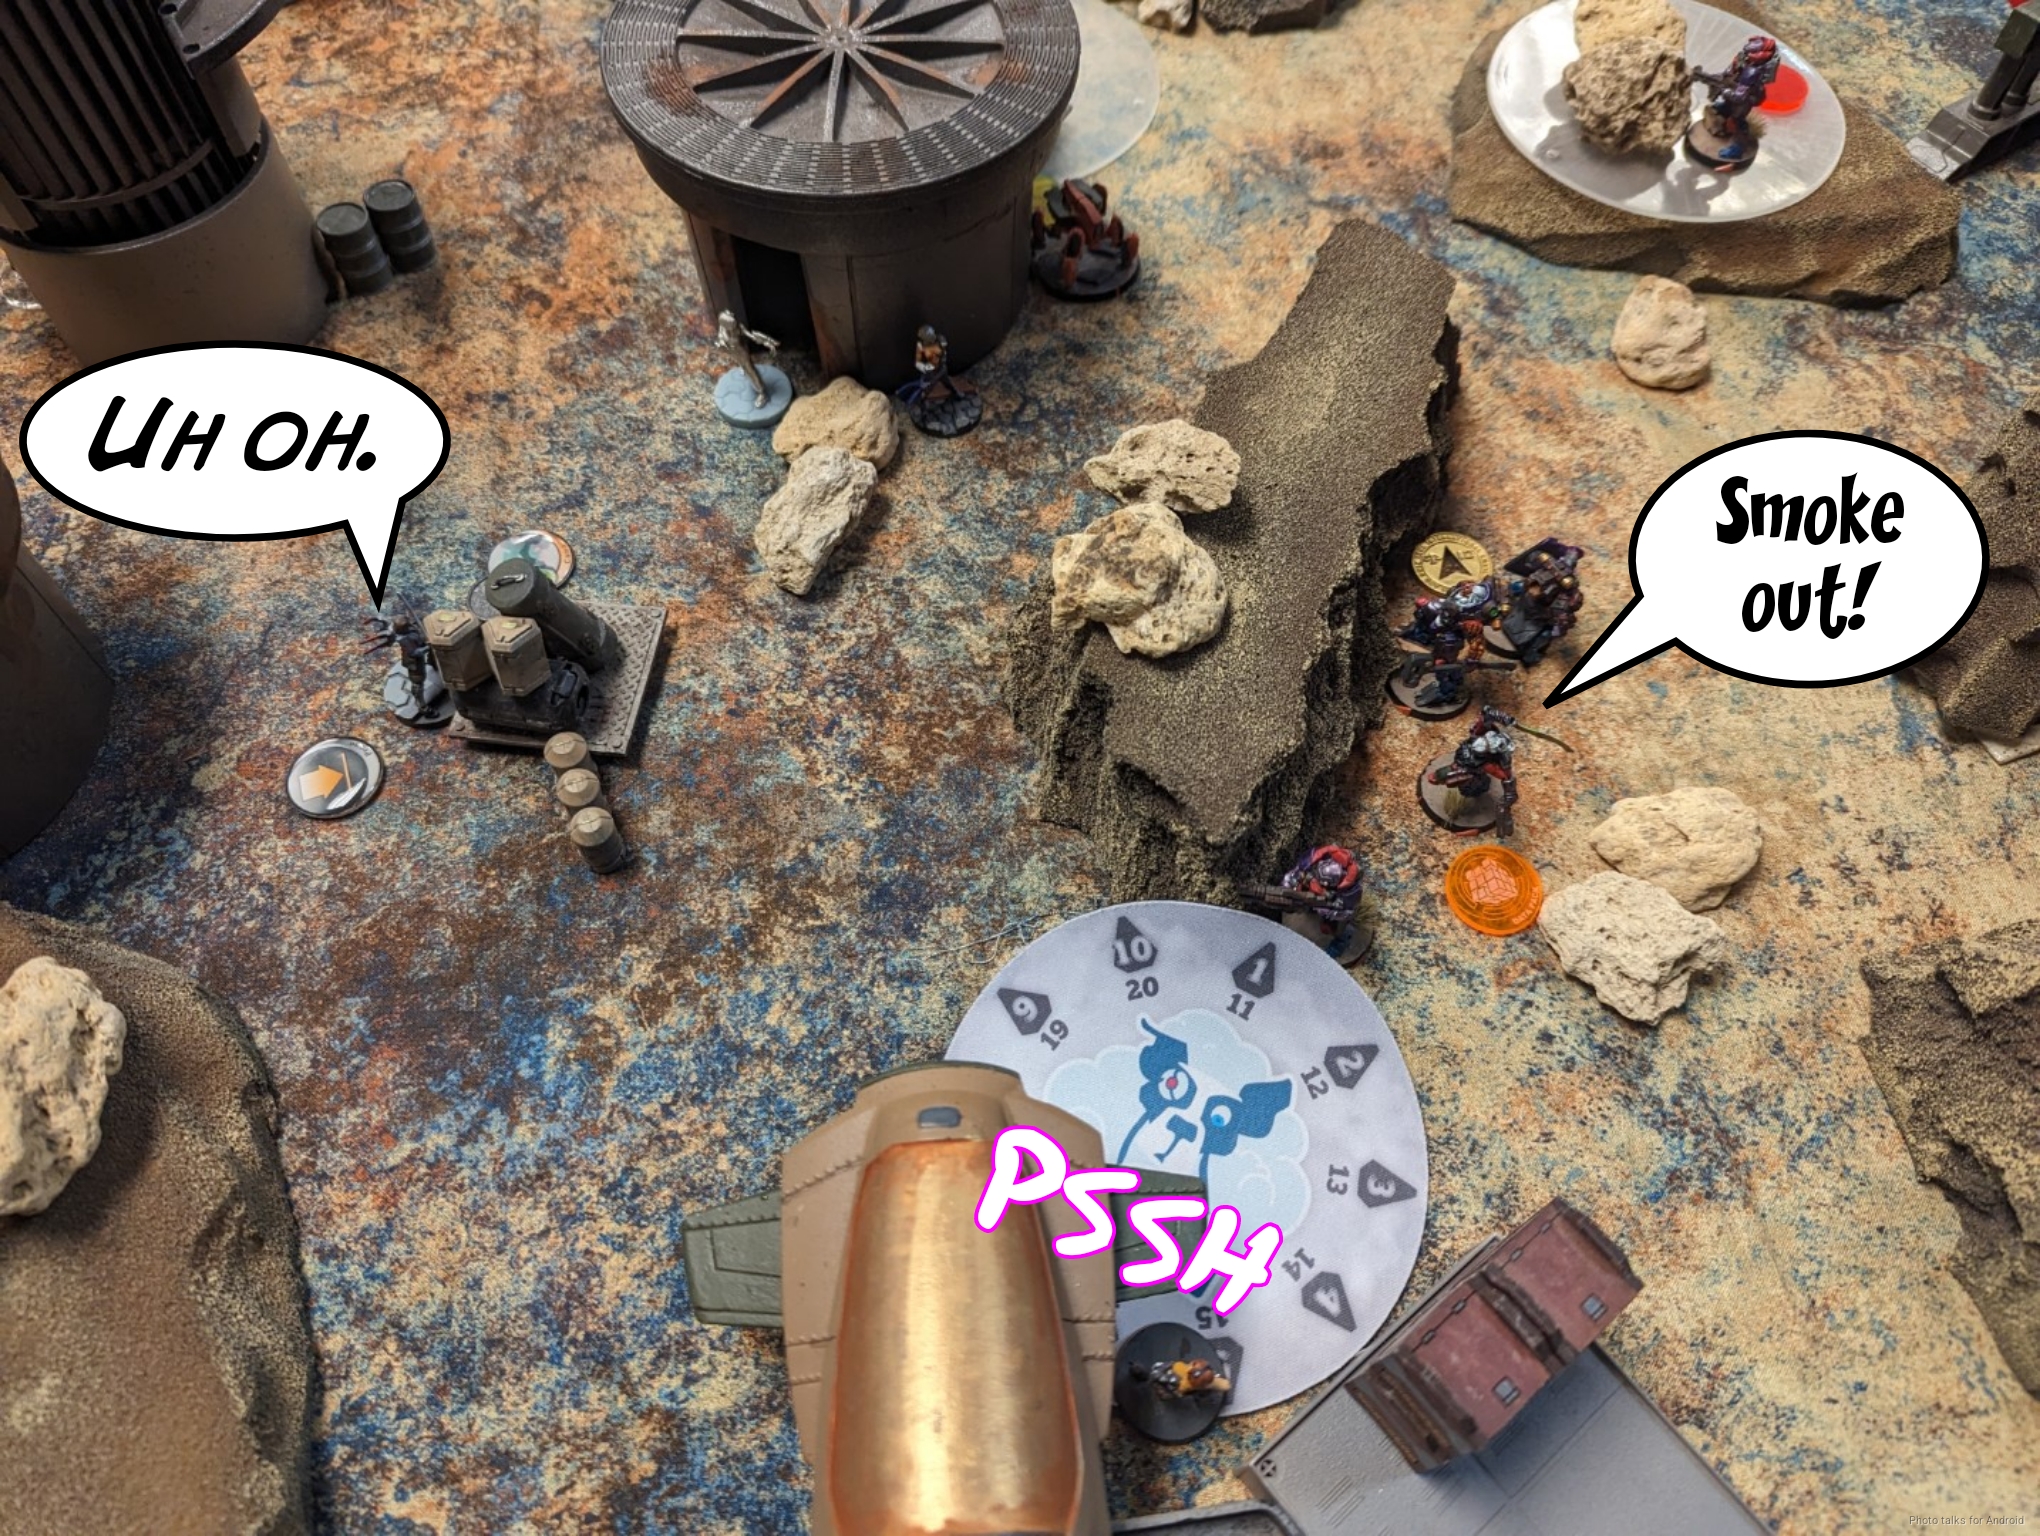
At the time i somewhat agreed with Than’s decision to not Carbonite before shooting. He’s got a pretty decent dice advantage here, 5 dice on 13s versus my one dice on 10s. Yuriko’s mine kept him out of cover, which is why I’m on 10s and not 7s. The first round of shooting puts a wound on the Karakuri…
but she shrugs off repeated attempts afterwards…
eventually beating a low roll with a single 8 and KOing the Yaogat Spitfire.
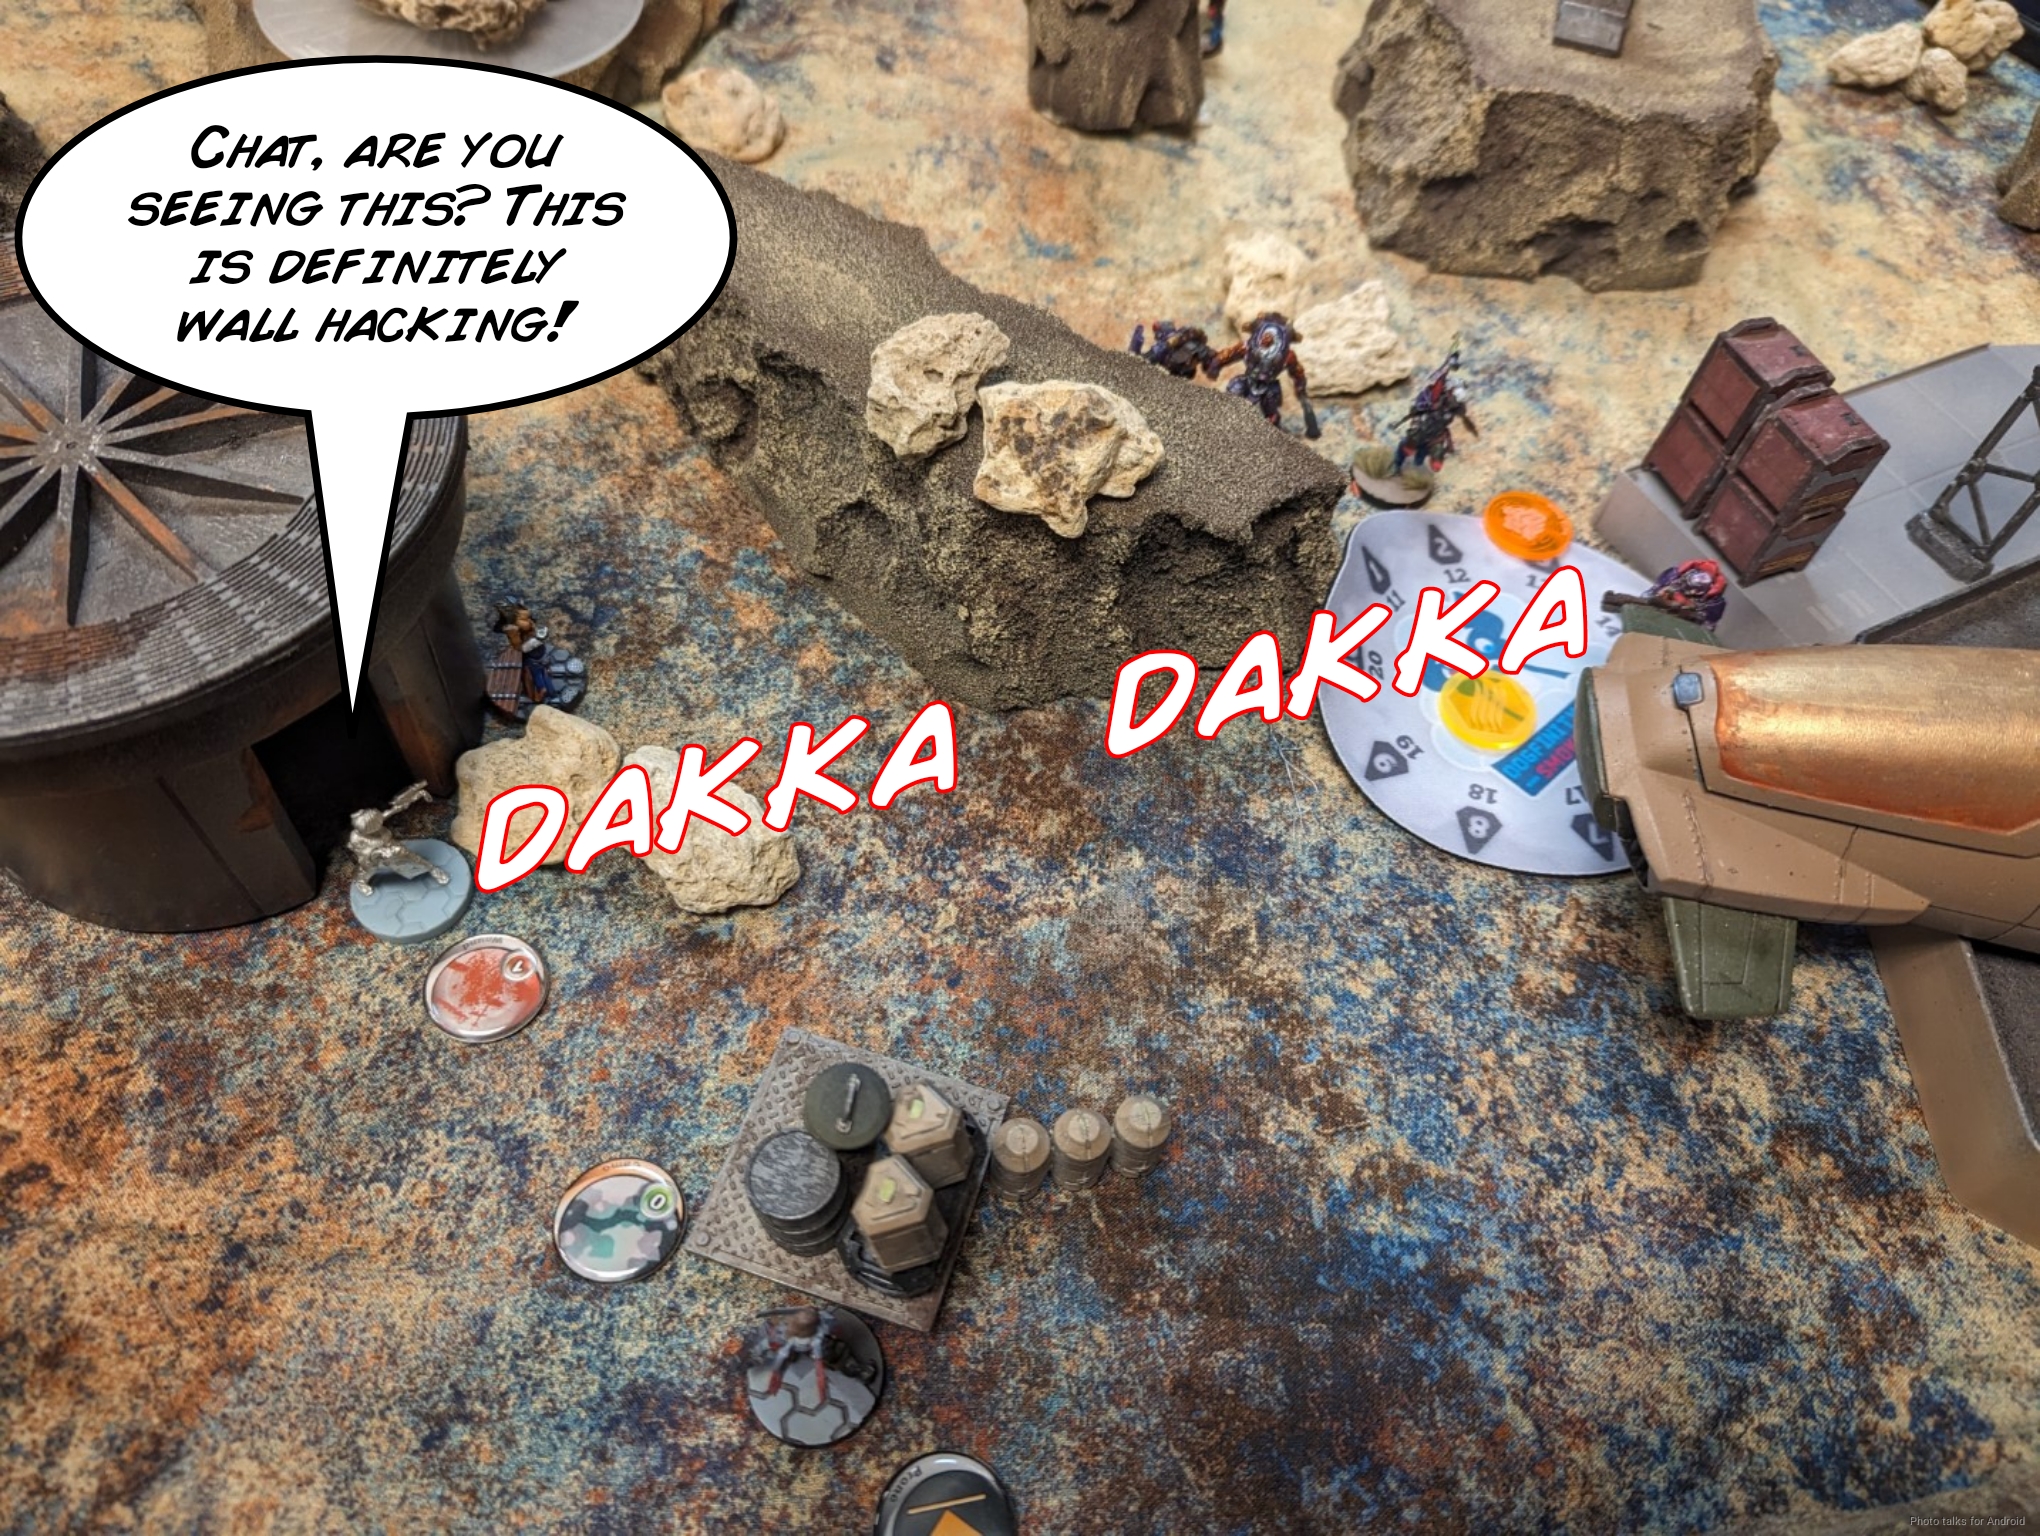
Than then dodge-clears Yuriko’s mine to make way for the Kurgat.
The Kurgat goes down to the O-Yoroi, but not before knocking out the Karakuri.
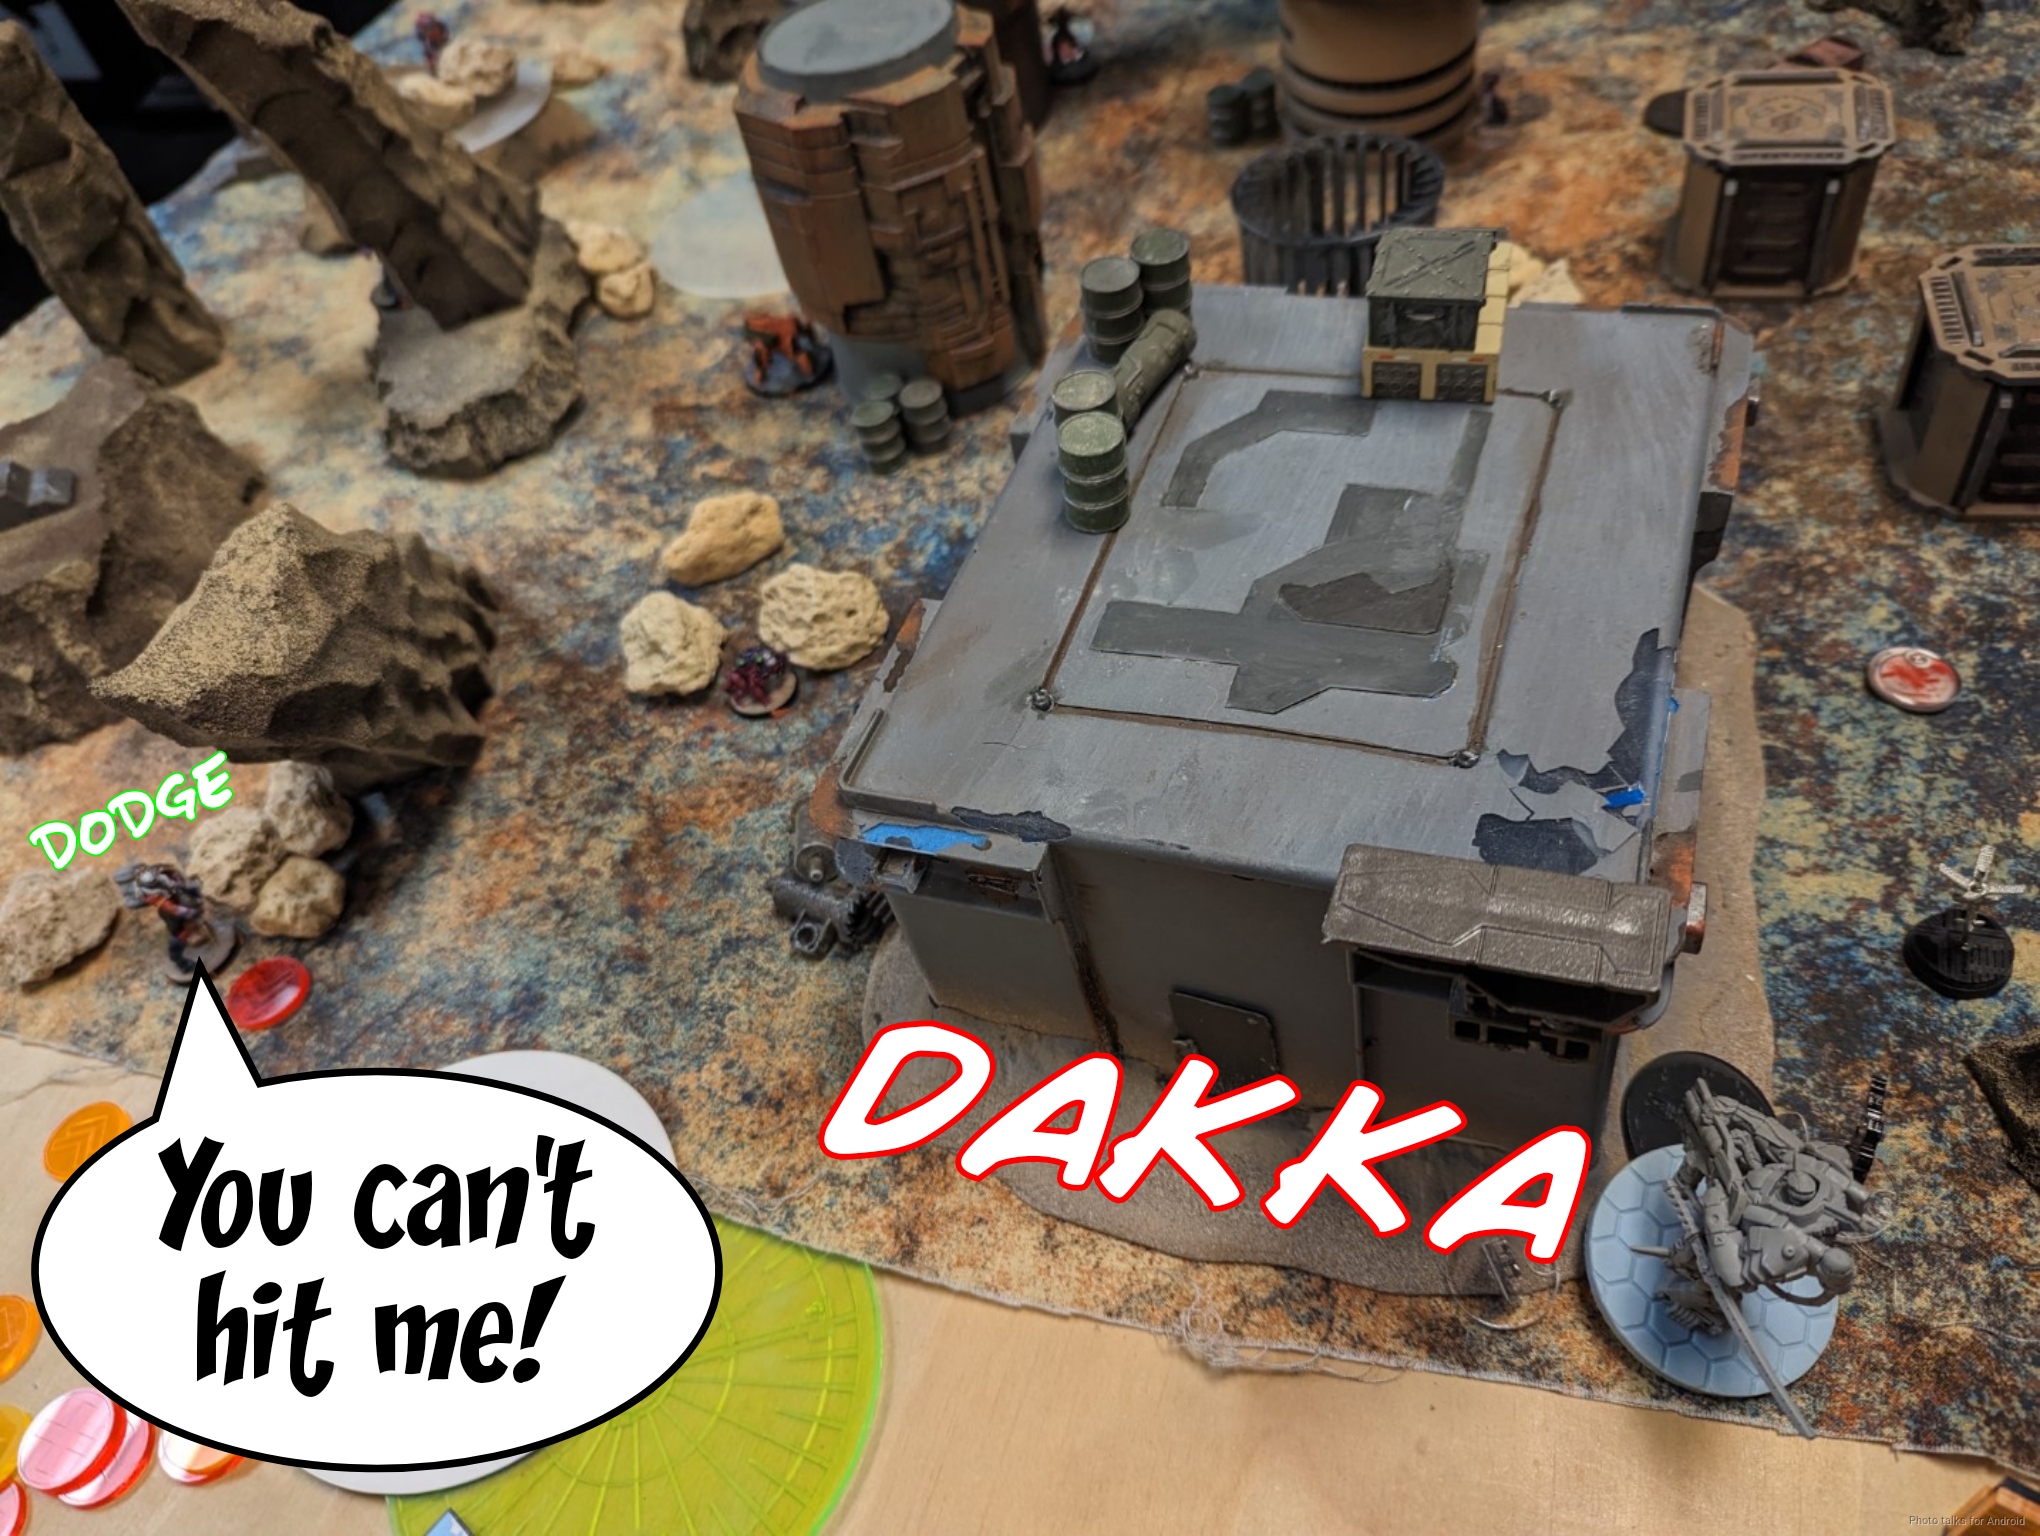
Than then throws Kornak forward to try and take out Yuriko to prevent me from picking the Karakuri back up, but she crit-dodges to safety.
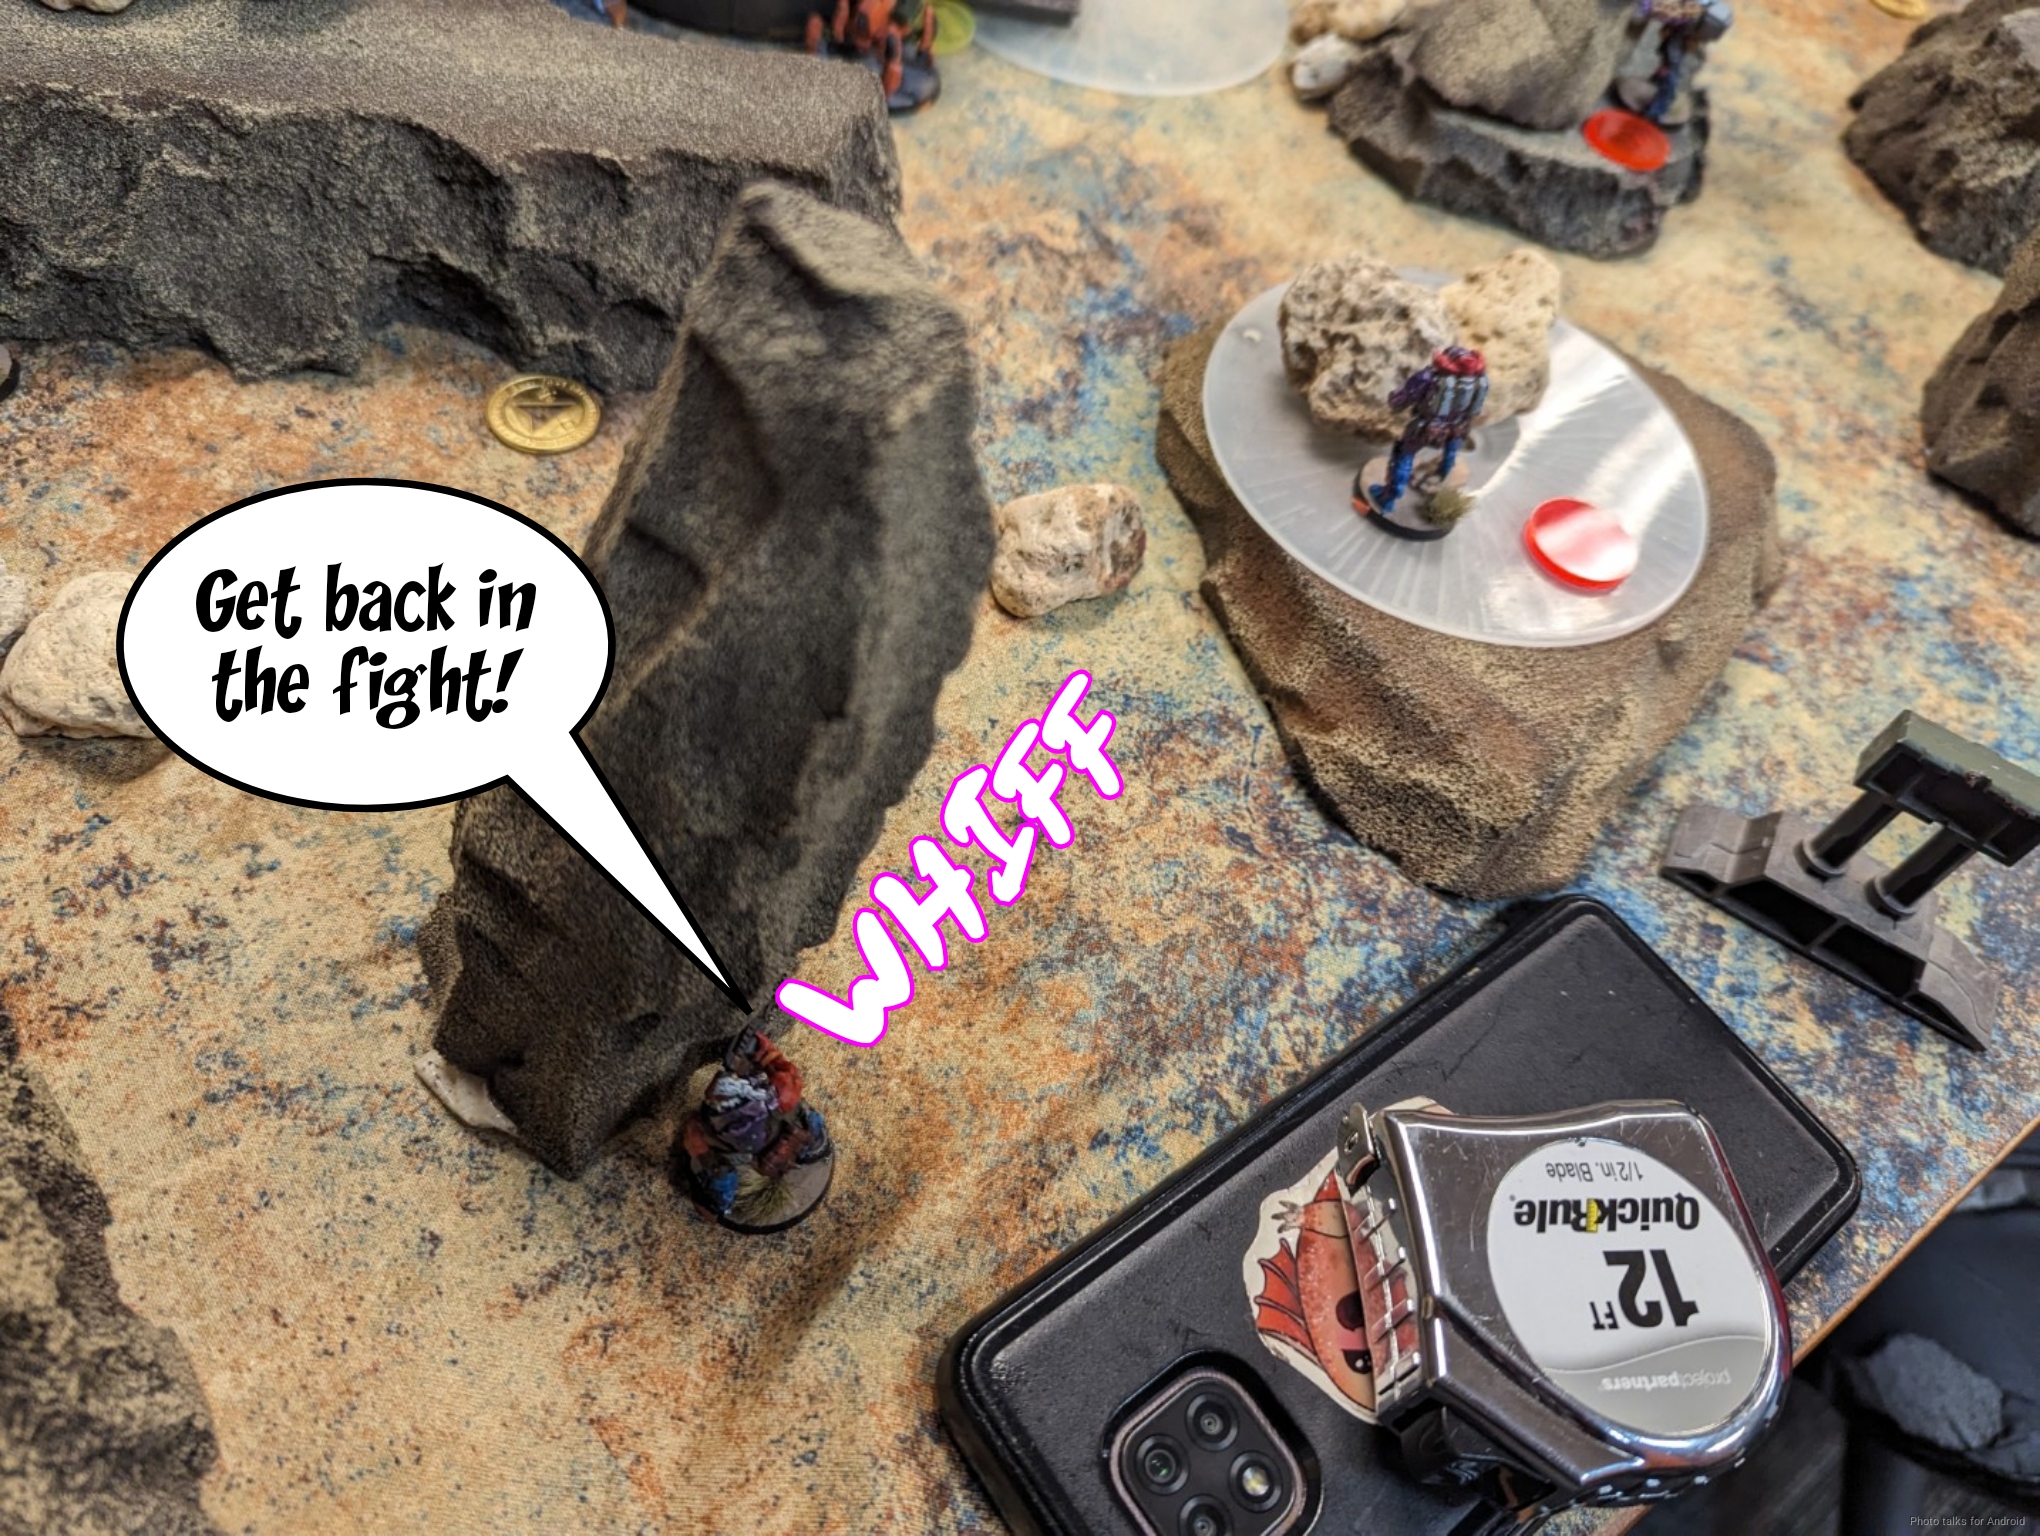
Rather than try again, Than tries to pick up the Yaogat MSR, whiffing the Medikit roll.
Bottom of 2 – JSA
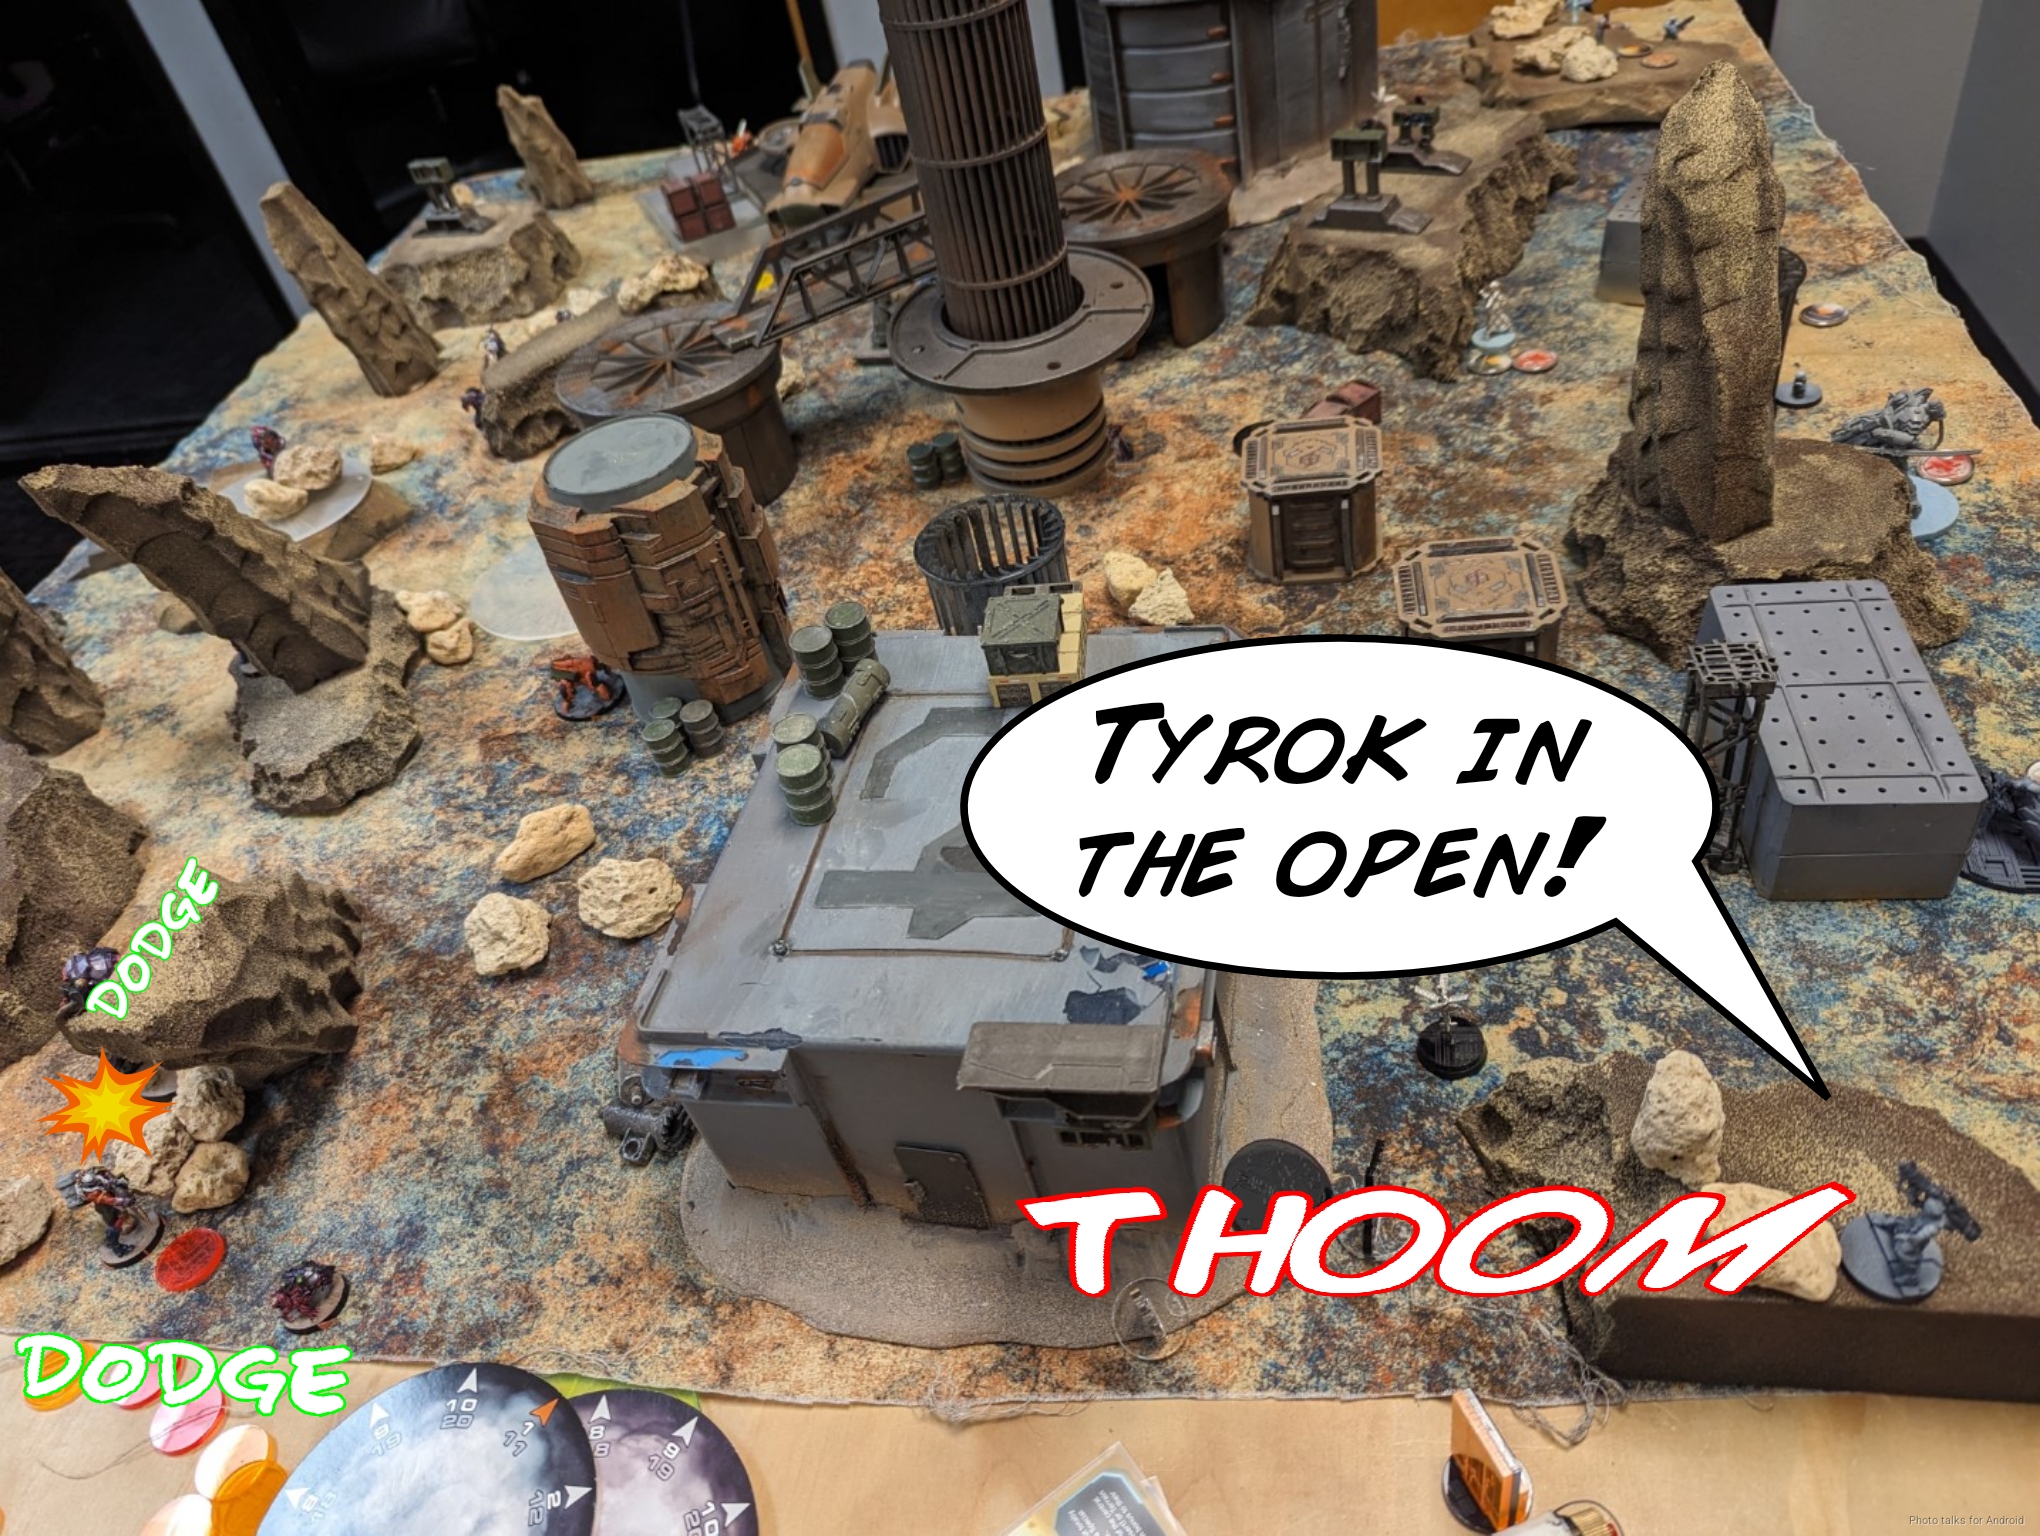
Kornak is in the open, with his back to the right table edge. Ripe for the taking with the Domaru.
Yuriko drops a Beeper and picks the Karakuri back up, getting Spotlit by the Dartok on the way.
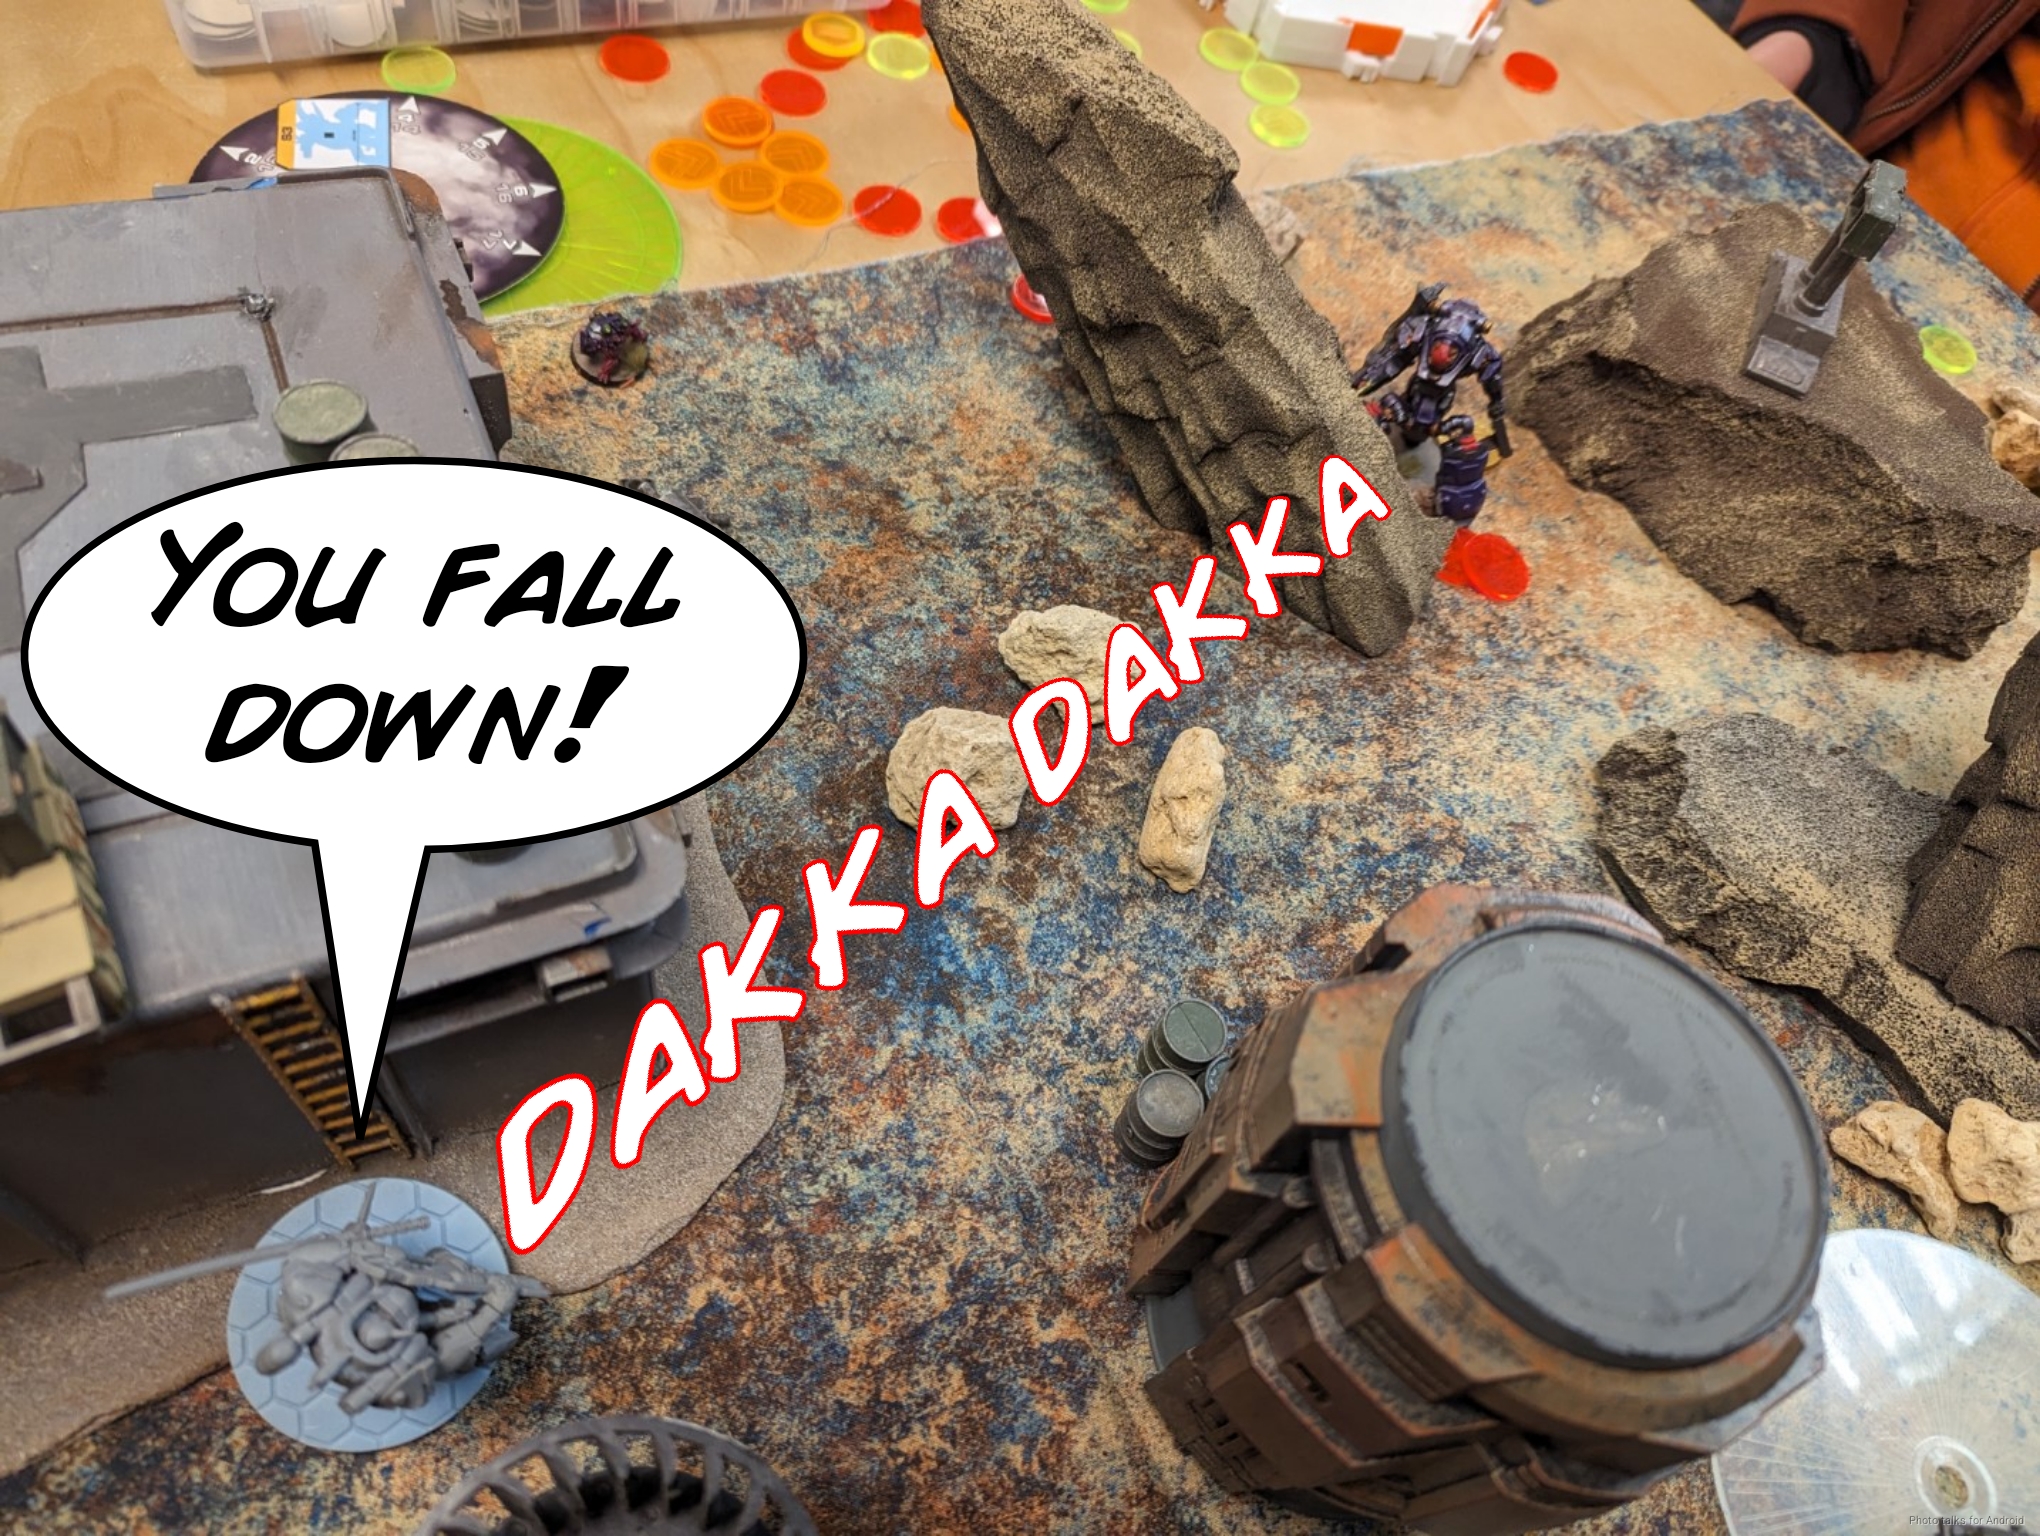
The Domaru keeps pushing and takes Anyat off the table…
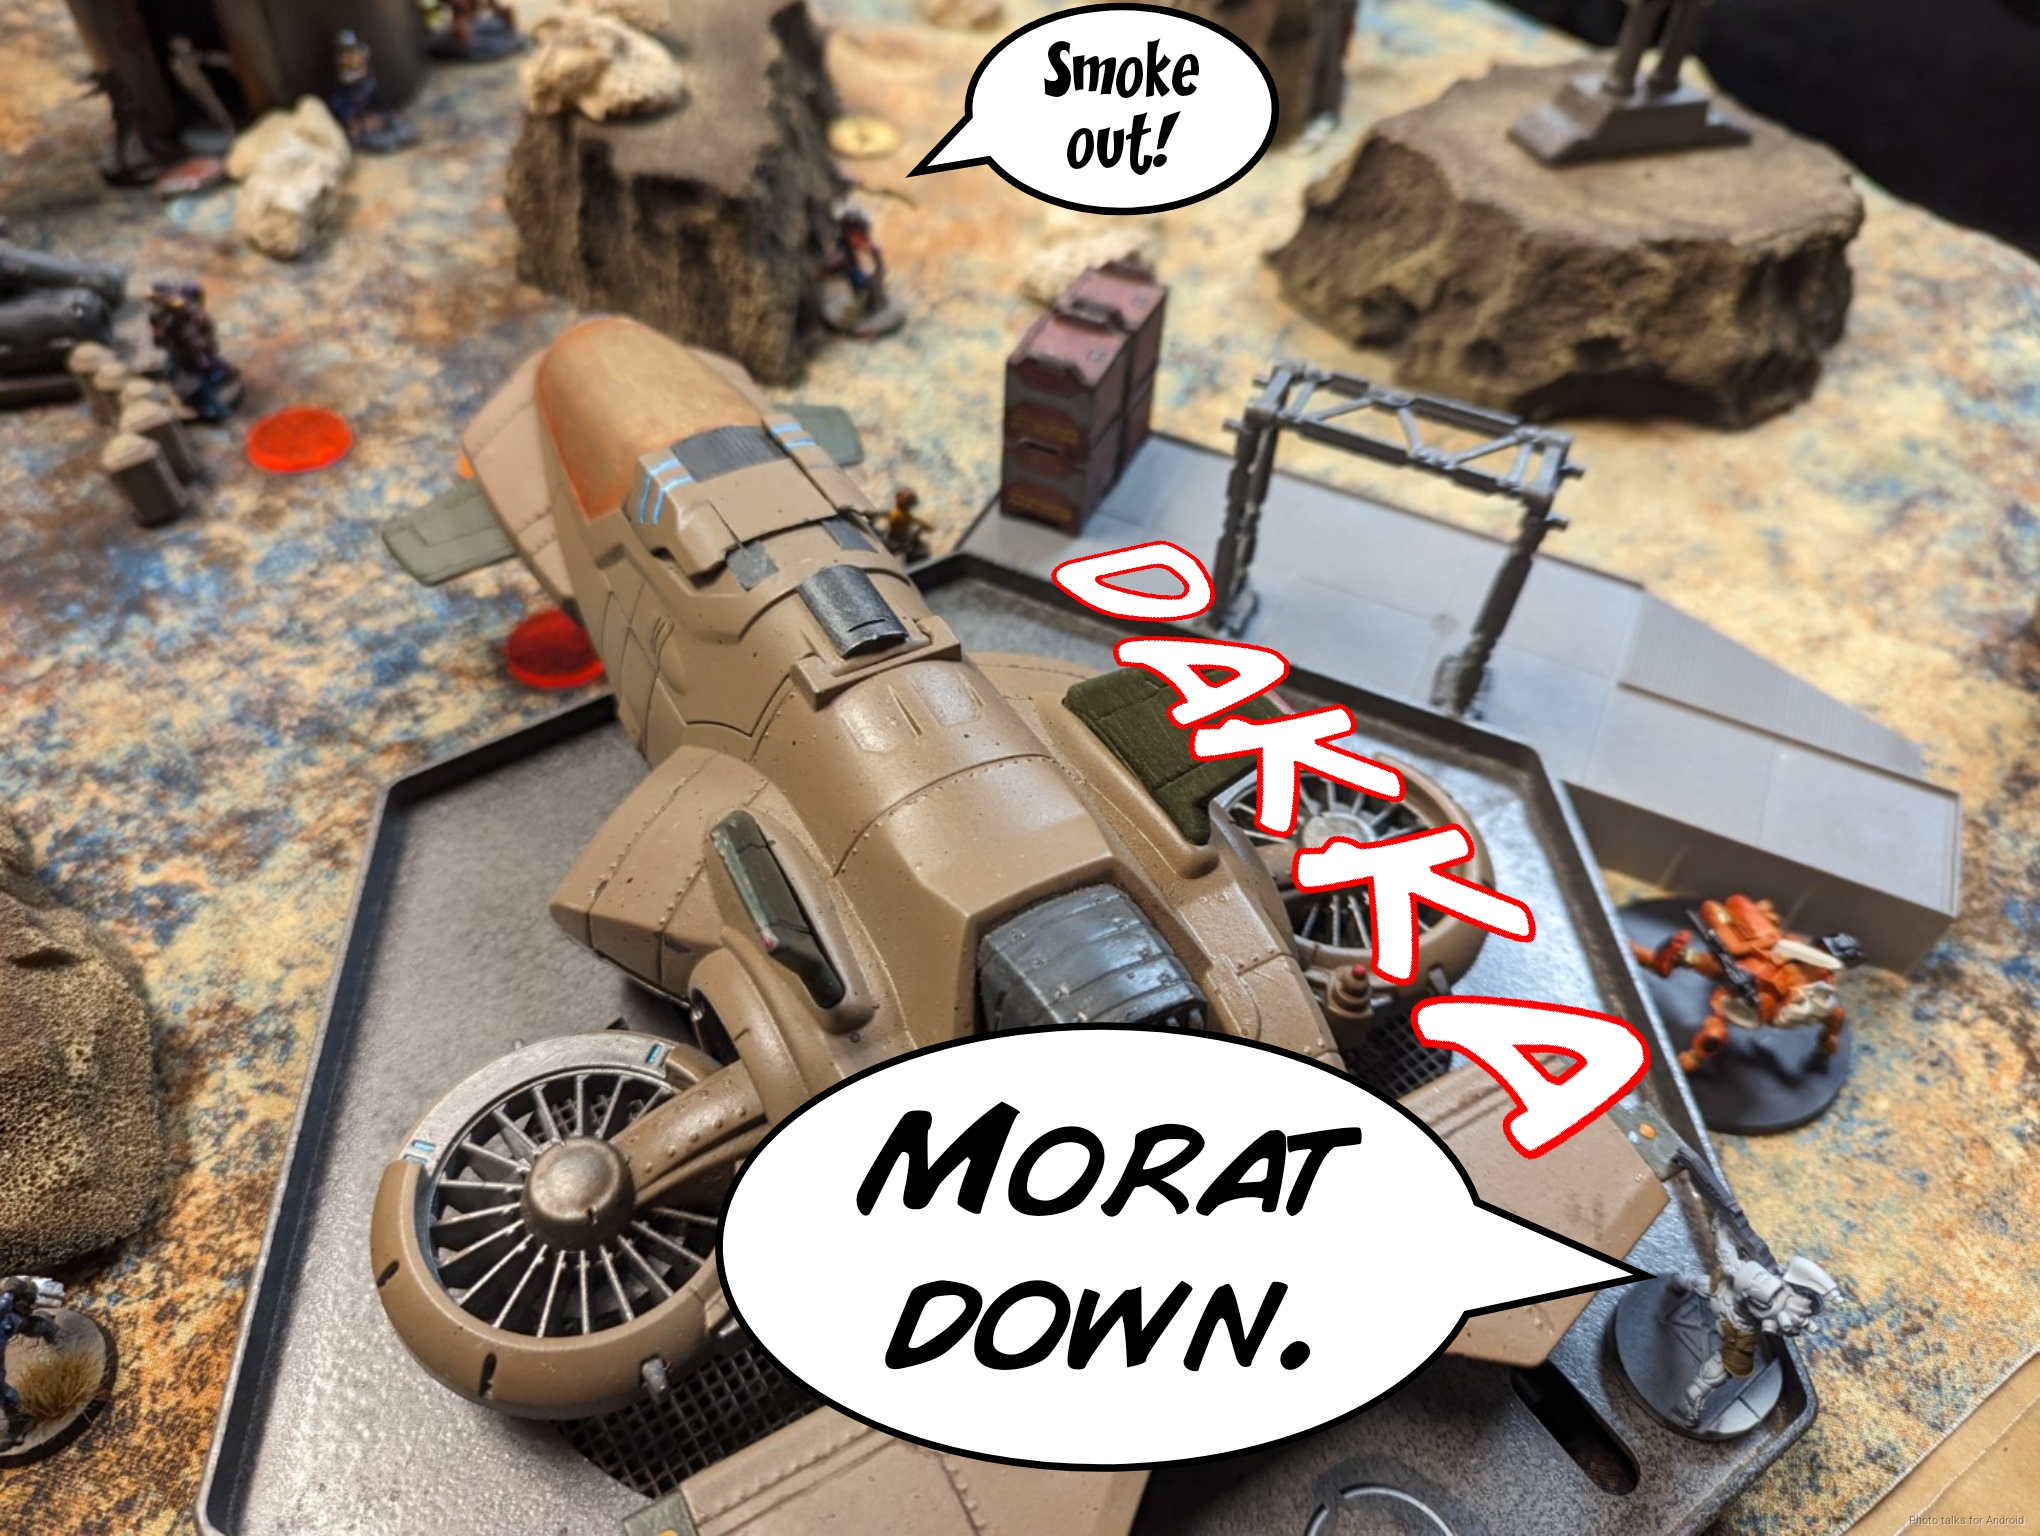
then I finish off the Tyrok hunter with the Ryuken-9.
The Domaru drops her Beeper in Than’s DZ while the Dartok tries to SMG her from a distance, and then I reset everyone’s positioning and pass turn.
Turn 3
Top of 3 – MAF
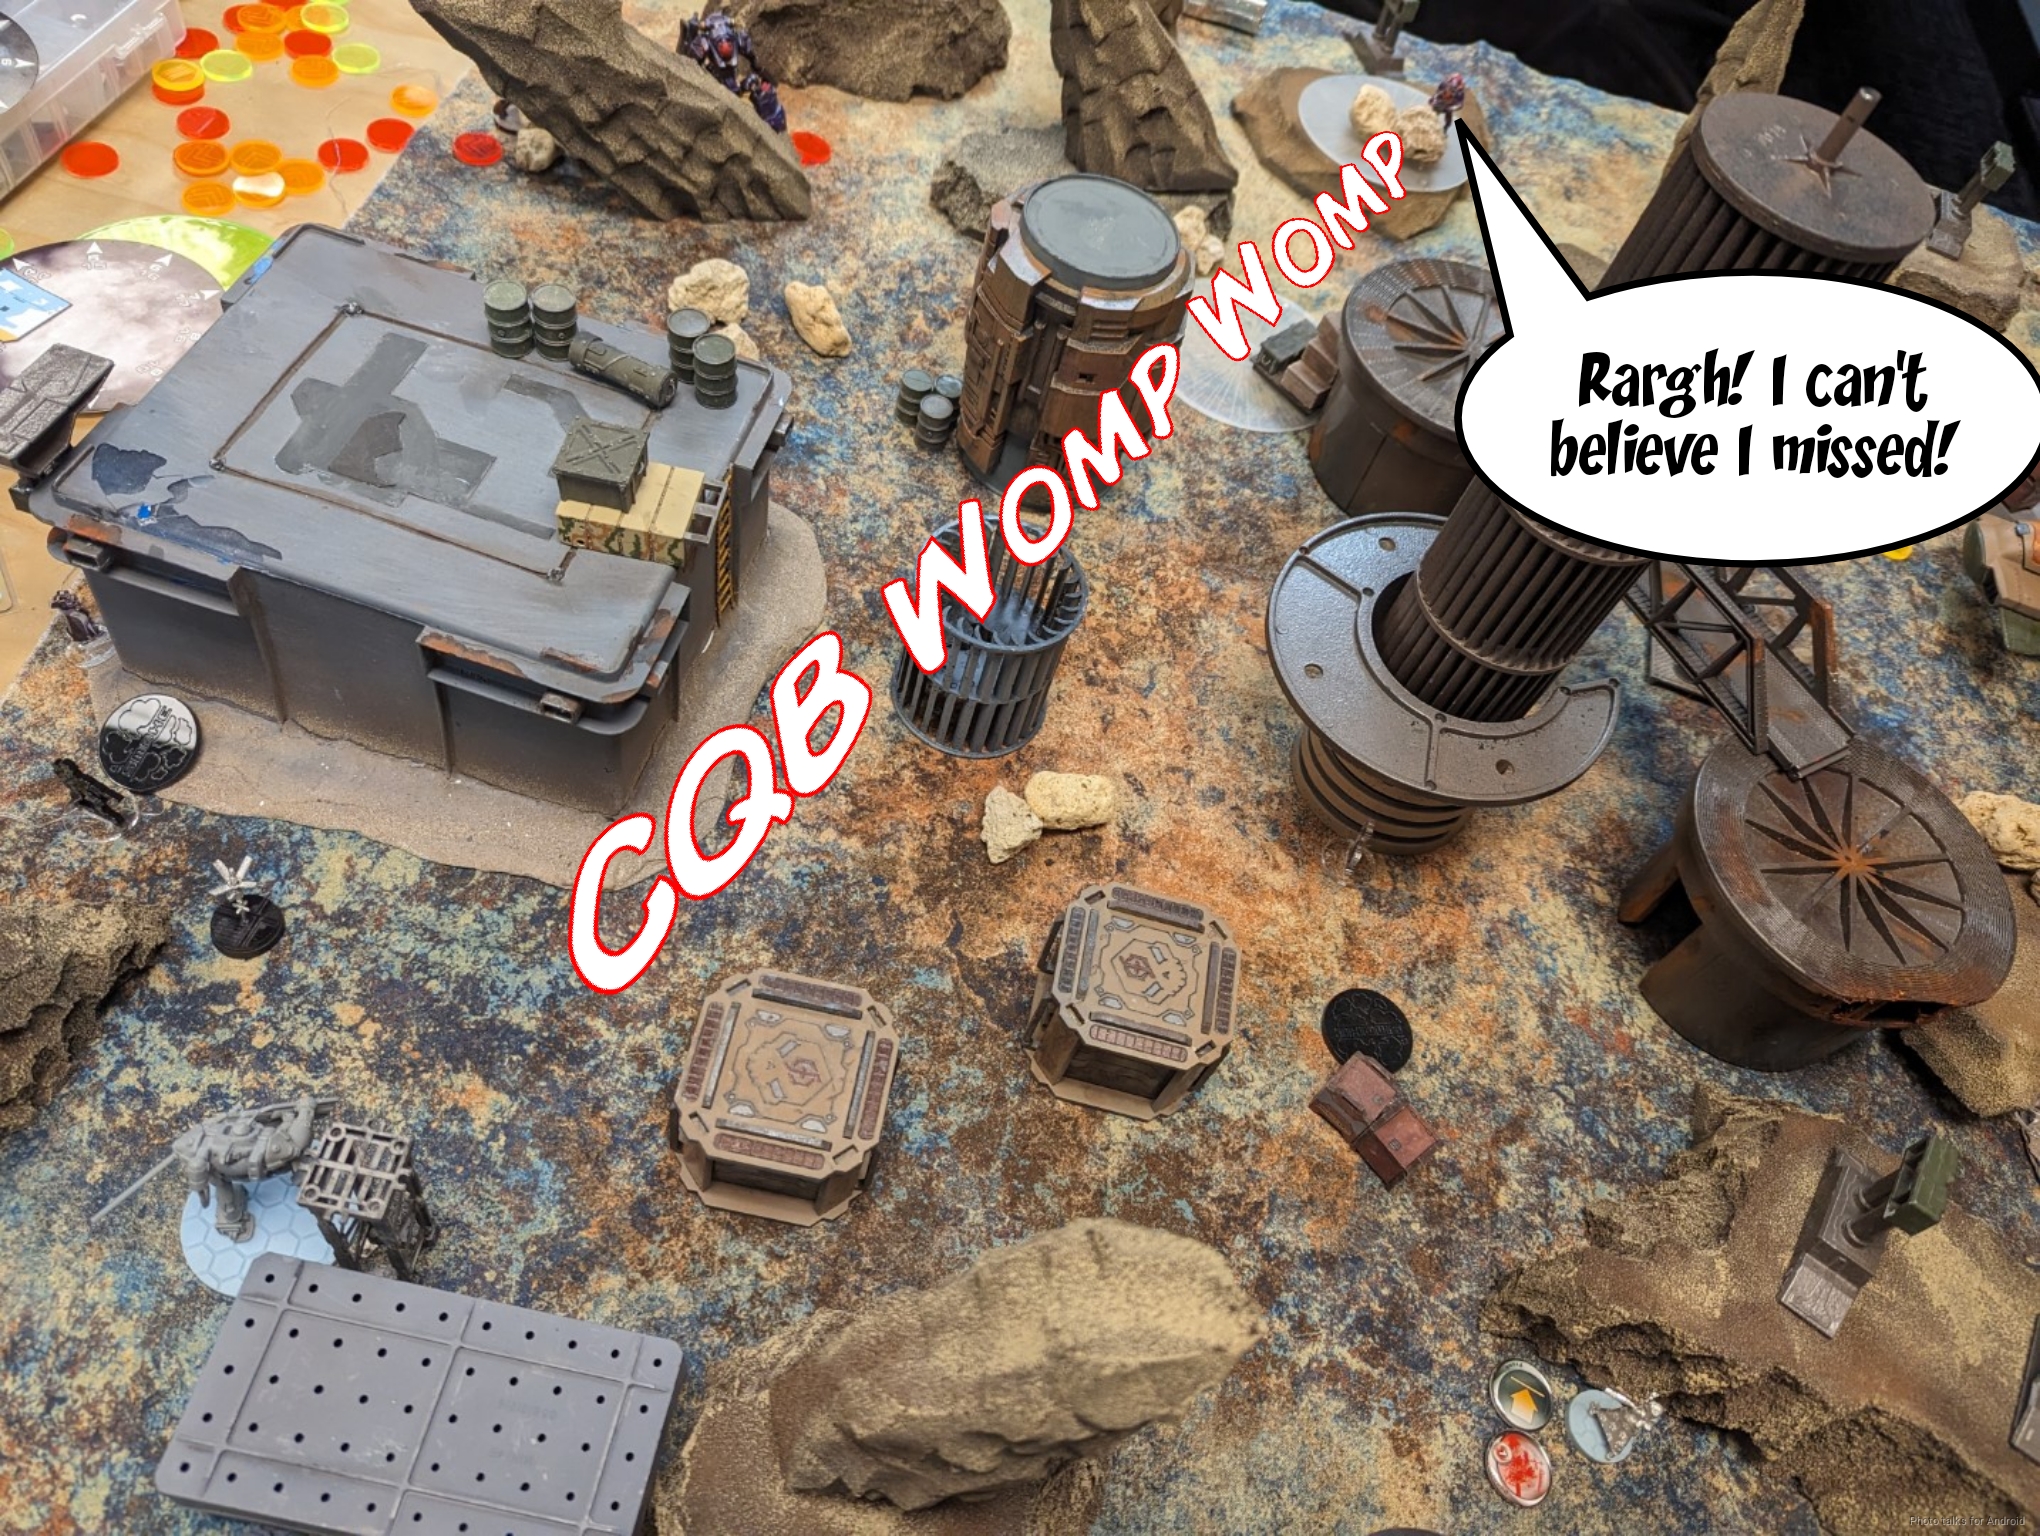
Than starts off by trying to pick up the Yaogat MSR but it fails PH.
The Vanguard then tries to make it past the Domaru while the Dartok walks towards the center during a coordinated, but I drop the Vanguard with the spitfire, and that’s game.
Let’s review the objectives:
- JSA
- Decapitation – 2 points, Kornak is dead.
- N Domination – 3 points, O-Yoroi/Domaru are holding the zones
- Triangulate the Signal – 3 points, two beepers down, one in Than’s DZ
- MAF
- King of the Hill – 0 points, Vanguard down, Dartok outpointed by Karakuri + Yuriko
- Priority Target – 0 points, Karakuri, Keisotsu, “Baggage Bot” all alive
- Z-Domination – 0 points, held by JSA
This makes it a
9-0, 273-28 Japanese Secessionist Army Victory!
Post Game Analysis
Than and I had a sizeable chat about what went wrong after the game. Here’s a summary of our conversation (recollected to the best of my ability) and some additional thoughts on the game now that I’ve had a few days in between to ruminate on it. Than’s first comment was that he should have been more aggressive on Turn 1. I countered with he had already been quite aggressive.
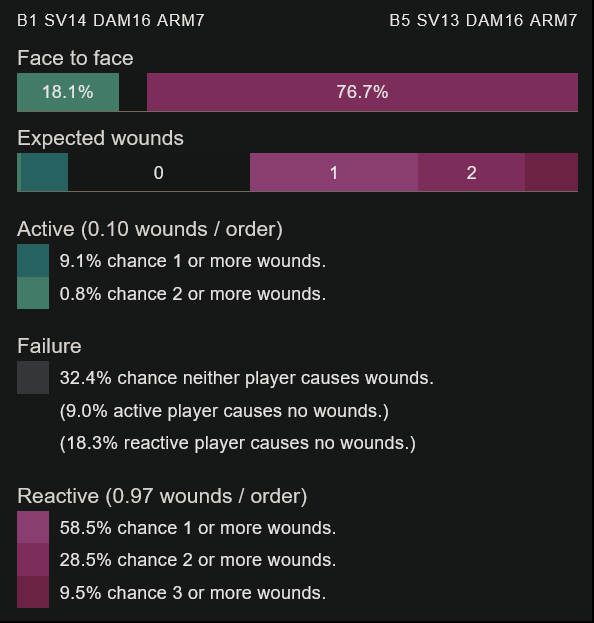
I think he made the right call in terms of what he did on the first turn. First he engaged the Karakuri and did a wound, which was reasonably likely:
I then made the right call and broke contact, failing guts around the corner. To see the Karakuri at that point, the Bultrak would have to go basically into my deployment zone and challenge both Ryuken, the O-Yoroi (assuming still alive), and the Karakuri simultaneously. It took 2 orders to get into position and do a wound, so that’s not that bad in terms of buying time for me. I could have attempted another face to face roll, but after the 2nd panzerfaust is gone it’s definitely time to break contact.
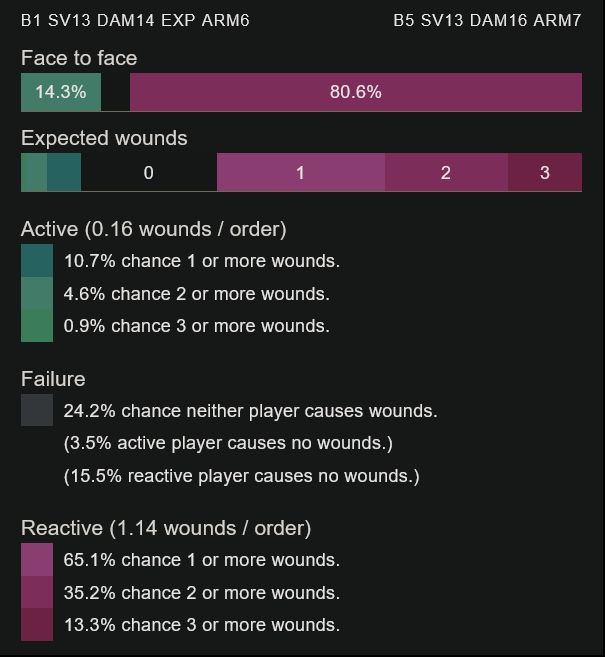
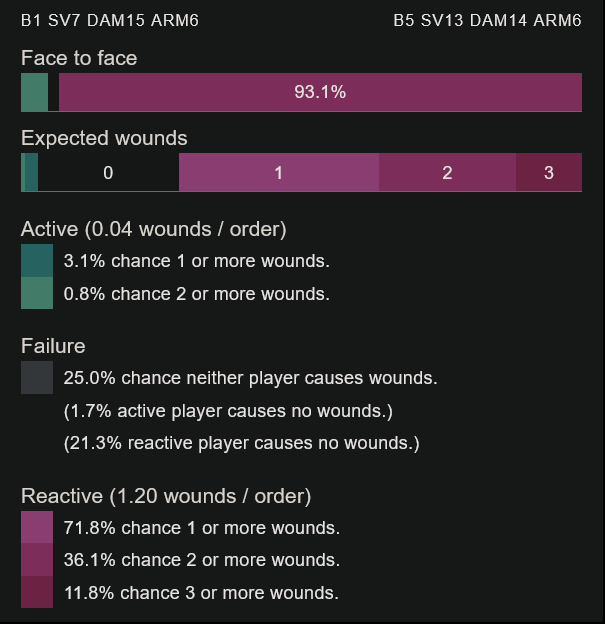
Taking out Kuroshi was really important, she is incredibly dangerous, so that was an excellent call and use of the Bultrak’s vertical movement. I was pretty bummed when that happened. Challenging the O-Yoroi was also a good call. You could say that the dice went my way, but I think it’s actually pretty consistent with the probabilities.
It’s within 9% of being a coin flip of what happens, in other words–41.5% chance something good happens for me (I do a wound or nothing happens) and 58.5% chance that Than does a wound with the Bultrak to the O-Yoroi. Overall, the O-Yoroi failed two saves and the Bultrak one over about 5-6 orders, so that seems pretty on target to me. N4’s changes to the crit mechanic (allowing an ARM save instead of insta-wounding) really made TAGs more relevant. This is a perfect example. Even with a 5:1 burst disparity, I still have a pretty reasonable chance of burning Than’s orders with minimal impact to me.
I think Than played the Burtrak pretty well in his first turn. He correctly prioritized targets:
- Karakuri – A big threat, a big value proposition (lots of points and structure), and actual objective points for him, and the first thing he could see.
- Kuroshi – A big threat, completely safe to attack, basically a freebie. Only reason to shoot her second was because the Karakuri was in the way first.
- O-Yoroi – My only real gun aside from the Karakuri, and the only credible threat to the Bultrak
Spending his last orders retreating the Bultrak was also very good. I might have spent one more order shooting at the O-Yoroi before retreating. This would have meant the Kurgat can’t set up drop bears, but that mine ended up being played around so it wasn’t as impactful as a potential chance to do the last wound (or better yet 2) to the O-Yoroi and remove a huge chunk of my capability. So perhaps that was the mistake in terms of the first turn and “not being aggressive” enough.
We also talked about him pushing the Yaogat Spitfire up my right flank, which I was kind of okay with. If he doesn’t successfully collapse the flank by killing the Chaiyi and Ryuken-9 there, I’m doing great. Even with MSV2 he still has to discover the Ryuken-9, and if he doesn’t, whatever the Yaogat drags along will have a really difficult time doing it. I think it’d be pretty hard to push up that flank and do irrevocable damage, it’d take too many orders and you either commit to overextension or you pull back too early.
In either case you’re probably out of position in a place where neither the Yaogat MSR and Bultrak can help you, and then the Domaru Spitfire does what I brought her to do. Just a really long winded way of saying that I think Than made the right call driving the Bultrak around. Ignoring the O-Yoroi after I broke contact was an option, but then you’d have to content with the Karakuri and the Ryuken-9, and that’s not a great proposition either. I think this game is a good example of the mental calculus that needs to happen during an alpha strike like this. At some point you’re going to get into a position where you have thrown a lot of dice at something and you can’t make the wounds stick. It’s a razor thin line between falling prey to the sunk cost fallacy or bailing too early. I think Than bailed an order too early.
Admittedly, staying for the extra order would have meant he couldn’t have fixed his link positioning and thrown drop bears, but that’s sort of the big problem with deploying a 5-man link if you’re going first. I think even if you intend to use them, you have to deploy as if you’re not going to be able to spend orders on them, just in case, or fix the positioning immediately with an order (assuming you need to move outside of your DZ to be in a decent position, i.e. terrain made it impossible to deploy nicely and you need to move). That way you can accurately budget your remaining orders to address whatever problems you have.
This brings me to my next point–links. If you’ve followed this blog for any reasonable length of time, you know I hate 5-man links. They’re boring, they’re expensive both in points and opportunity cost, and they create spatial concentrations of units which is bad for many reasons. With the (overall) nerf to links in N4, in my mind there’s not much reason to go past 3 members unless you’re looking for that sixth sense.
Than’s link is also full of overlap that doesn’t need to be carted around together, and also puts Kornak at risk. He’s a problem solver, for sure, but he’s also a lieutenant. Whenever I face him out of Morats he inevitably gets over-extended and dies on Turn 2 or something (I generally make a point of ensuring this if I can), and then Turn 3 is generally in shambles for my opponent because they don’t have his two lieutenant orders. If they are REM-heavy it’s even worse due to lack of Veteran. I think a superior link composition looks like this:
You then deploy the links on either side of the table. The Yaogat MSR goes right in front of the Butrak, with Kornak and the Dartok nearby (the Dartok doesn’t even need to move). Then the Kurgat, Anyat, and the Yaogat Spitfire go on the left behind the rock wall as they are now, with the Vanguard Paramedic behind the Yaogat MSR’s original position below.
This gives more CQB-favorable firelanes for the Yaogat MSR, while not really diluting the power on the left very much–a Yaogat Spitfire and smoke support are still very good. The Vanguard optionally can join either link during deployment for sixth sense, heal either link in case someone goes down, or serve as a “spare tire” as Frank (fwashburn) has been known to say.
This also lets you be much more agile and aggressive with the Yaogat spitfire as well, and you have a backup gun on the right once the Bultrak inevitably goes down. I also don’t like the Tyrok’s deployment, visible to my deployment zone. Than’s idea of putting it on the flank to “bait out” something for the Bultrak is a good one, but that doesn’t mean you have to expose the model immediately. I’m still likely to put something there to prevent the Tyrok from running up that table edge unopposed, so you can get the same benefit with no risk.
With regards to the interaction at the top of Turn 2 with the Karakuri fighting the Yaogat into submission, I think that was a reasonable plan that just needed some additional thought. A few options:
- Clear the Mine First – Than’s Yaogat was forced to stay in the open because any cover was in mine range. Clearing the mine first with Kornak then engaging is a slight improvement in odds.
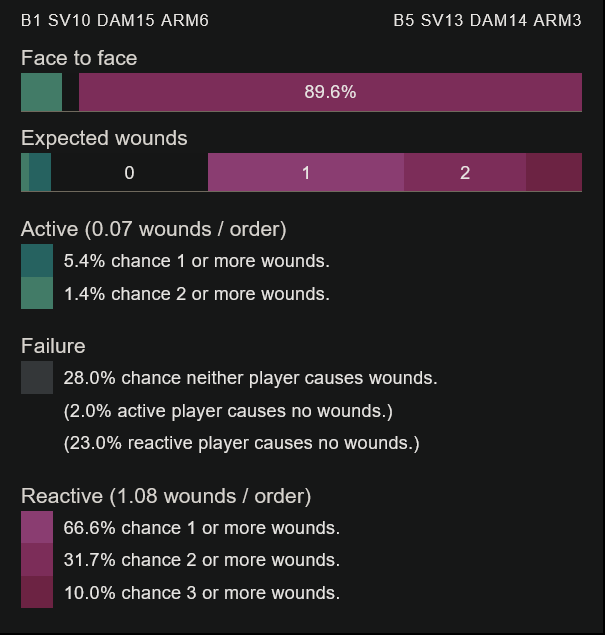
- Carbonite First – Forcing the reset instead to get normal BS rolls makes it pretty likely to drop the Karakuri in 2 bursts.
- Coordinating the Carbonite and Yaogat Spitfire – This is a maybe? But force me to choose between reset and the shot? Much less burst… not sure if worth it, but it’s a thought.
In any case, I think some more odds or sending in the Kurgat earlier would be an option. Berserking Kornak in is also okay, but you risk losing him to fire from the O-Yoroi and perhaps Yuriko, depending. Definitely much better chances at dealing with the Karakuri here than earlier with the Bultrak versus the O-Yoroi. In this case, the dice definitely went my way.
As far as the game flow went, once I removed the Bultrak and Yaogat MSR, it was all down to the Yaogat Spitfire and Kornak. They were in the same place and therefore could only attack one thing, the most survivable thing I have on the table thanks to Yuriko. Being able to undo all the damage very efficiently is just brutal, especially since that damage was so costly to apply. JSA is also surprisingly defensive with all their access to minelayers, so attacking into my DZ to get the Keisotsu and “Baggage Bot” aka Lu Duan was going to be pretty difficult.
Finally, a small edit to the list:
GROUP 1
GROUP 2
OZNAT FTO Vulkan Shotgun, Smoke Grenades / Heavy Pistol, DA CC Weapon. (0 | 18)
GAKI AP CC Weapon. (0 | 4)
5.5 SWC | 300 Points | Open in Army | Copy Code
It retains much of the same toolkit, selling the Kurgat to get the Bultrak 7 orders for itself. Once the Bultrak is down, just sacrifice the Gaki to delete midfield targets. This list I think also takes advantage of the order density you can get in a MAF list thanks to the double Haris, the Gaki core, and Kornak with Strategos and +1 order. I’d play it myself if I wasn’t restricting myself to only duos this year.
That was a longer than usual Post Game Analysis. I hope it was helpful! Thanks for reading.
PS> to Jonny, who commented on a very old JSA battle report from 2019 asking about Shikami duos and their viability… I honestly don’t think a Shikami duo is a good idea. I’m certain that it’s usable, i.e. if you forced me to do it I’d figure out some way to get some work out of them, but JSA needs those 40-something points you would spend on that second Shikami elsewhere. I’d take a Shikami + Karakuri duo over a 2x Shikami duo, and I think that’s also a mistake, because you don’t need that much power in one spot. I think if you’re going to take a duo of anything in any list, you want diversity of toolkit, not the same toolkit. As for the comment about a CC-focused list–this is a common pitfall for new JSA players. CC is a tool, and the Domaru are the best-in-class to utilize it, but they need support. I hope this helps.