Raucous August Tournament Report
First Saturday of the month means a three round Infinity tournament, run by our very own Adam (TheDiceAbide). This time we were playing with the Soldiers of Fortune rules active, but most of us didn’t take advantage. We had a big turnout with Nomads, Haqq, Combined, PanO, NA2, and ALEPH represented. Some of the faces were new, some were old but have been unseen for awhile, and for some this was their first or second tournament! If you’re ever in the Portland, Oregon area, swing on by to roll some dice with us!
Game 1 – Perky Perseus
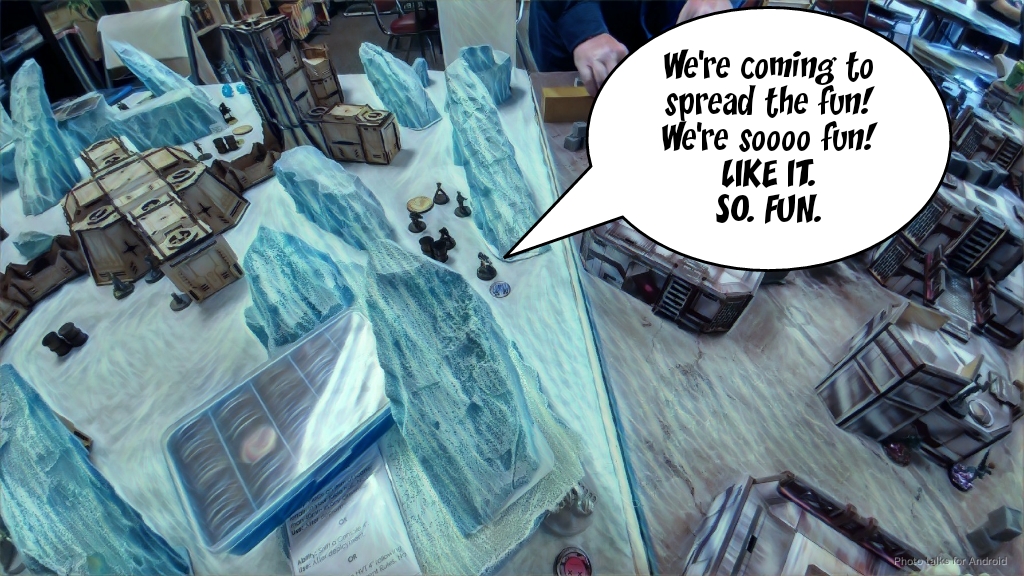
 Adam threw up the pairings and announced that Nate and I would be playing each other. As I’ve said many times, Nate is a very challenging opponent for me, so I knew this was going to be a tough game. I just had to hope the dice went my way. Unfortunately, the game started with Nate dropping a model and it coming apart, which is always heartbreaking. Thankfully we found all the pieces and the damage wasn’t too bad. I’m sure the Alguacil HMG Nate uses as a Securitate HMG will be back in one piece soon. We played on Nico’s beautiful table. The MDF is Nico’s, but the ice-planet pieces of ice are all from Than–Nico won Than’s table at the Rose City Raid 2018.
Overview
- Mission: Highly Classified
- Data Scan
- HVT: Kidnapping
- HVT: Espionage
- Test Run
- Forces: Nomads versus Nomads (OpFor) (300)
- Deploy First: Nomads (OpFor)
- First Turn: Nomads (OpFor)
[img]https://assets.infinitythegame.net/infinityarmy/img/_logosweb/logo_501.png[/img][b] List A[/b]
[img]https://assets.infinitythegame.net/infinityarmy/img/_logosweb/501/logo_16.png[/img] [b]INTERVENTOR Hacker Lieutenant (Hacking Device Plus)[/b] Combi Rifle, 1 FastPanda / Pistol, Knife. (0.5 | [b]27[/b])
[img]https://assets.infinitythegame.net/infinityarmy/img/_logosweb/501/logo_62.png[/img] [b]MARY PROBLEMS Hacker (Forward Deployment L1)[/b] Submachine Gun + Zapper, Pitcher / Pistol, Knife. (0.5 | [b]30[/b])
[img]https://assets.infinitythegame.net/infinityarmy/img/_logosweb/501/logo_14.png[/img] [b]DAKTARI[/b] Combi Rifle / Pistol, Knife. (0 | [b]14[/b])
[img]https://assets.infinitythegame.net/infinityarmy/img/_logosweb/501/logo_34.png[/img] [b]ZONDBOT[/b] Electric Pulse. (0 | [b]3[/b])
[img]https://assets.infinitythegame.net/infinityarmy/img/_logosweb/501/logo_34.png[/img] [b]ZONDBOT[/b] Electric Pulse. (0 | [b]3[/b])
[img]https://assets.infinitythegame.net/infinityarmy/img/_logosweb/501/logo_59.png[/img] [b]HOLLOW MEN Hacker (Assault Hacking Device)[/b] Combi Rifle, Chain-colt + 1 TinBot A (Deflector L1) / Breaker Pistol, Knife. (0.5 | [b]37[/b])
[img]https://assets.infinitythegame.net/infinityarmy/img/_logosweb/501/logo_30.png[/img] [b]MORAN (Forward Observer)[/b] Combi Rifle, CrazyKoalas (2) / Pistol, Knife. (0.5 | [b]22[/b])
[img]https://assets.infinitythegame.net/infinityarmy/img/_logosweb/501/logo_24.png[/img] [b]TOMCAT Engineer[/b] Combi Rifle + Light Flamethrower, D-Charges / Pistol, Knife. (0 | [b]22[/b])
[img]https://assets.infinitythegame.net/infinityarmy/img/_logosweb/501/logo_9.png[/img] [b]BANDIT Hacker (Killer Hacking Device)[/b] Light Shotgun, Adhesive Launcher / Pistol, DA CCW. (0 | [b]25[/b])
[img]https://assets.infinitythegame.net/infinityarmy/img/_logosweb/501/logo_56.png[/img] [b]KRIZA BORAC[/b] HMG / Heavy Pistol, CC Weapon. (2 | [b]54[/b])
[img]https://assets.infinitythegame.net/infinityarmy/img/_logosweb/501/logo_32.png[/img] [b]TSYKLON[/b] Spitfire, Pitcher / Electric Pulse. (1 | [b]31[/b])
[img]https://assets.infinitythegame.net/infinityarmy/img/_logosweb/501/logo_58.png[/img] [b]ZONDNAUT[/b] Spitfire / Pistol, Knife. (1 | [b]32[/b])
[img]https://assets.infinitythegame.net/infinityarmy/img/_logosweb/sep.gif[/img] [img]https://assets.infinitythegame.net/infinityarmy/img/_logosweb/501/logo_58.png[/img] [b]ZONDMATE[/b] Chain Rifle, Smoke Light Grenade Launcher / Electric Pulse. ([b]5[/b])
[img]https://assets.infinitythegame.net/infinityarmy/img/_logosweb/orden_regular.png[/img]9 [img]https://assets.infinitythegame.net/infinityarmy/img/_logosweb/orden_irregular.png[/img]1 [img]https://assets.infinitythegame.net/infinityarmy/img/_logosweb/orden_impetuosa.png[/img]1 [b]| 6 SWC | 300 Points |[/b] Open in Infinity Army
[img]https://assets.infinitythegame.net/infinityarmy/img/_logosweb/logo_504.png[/img][b] Jurisdictional Command of Tunguska[/b]
[b]GROUP 1 | [/b][img]https://assets.infinitythegame.net/infinityarmy/img/_logosweb/orden_regular.png[/img]10
[img]https://assets.infinitythegame.net/infinityarmy/img/_logosweb/504/logo_13.png[/img] [b]PERSEUS FTO (Fireteam: Haris)[/b] Breaker Combi Rifle, Nanopulser, Smoke Grenades / 2 Pistols, DA CC Weapon. (0 | [b]33[/b])
[img]https://assets.infinitythegame.net/infinityarmy/img/_logosweb/504/logo_1.png[/img] [b]SECURITATE[/b] HMG / Pistol, Knife. (1 | [b]21[/b])
[img]https://assets.infinitythegame.net/infinityarmy/img/_logosweb/504/logo_1.png[/img] [b]SECURITATE Paramedic (MediKit)[/b] Combi Rifle / Pistol, Knife. (0 | [b]15[/b])
[img]https://assets.infinitythegame.net/infinityarmy/img/_logosweb/504/logo_1.png[/img] [b]SECURITATE (Repeater)[/b] Boarding Shotgun / Pistol, Knife. (0 | [b]15[/b])
[img]https://assets.infinitythegame.net/infinityarmy/img/_logosweb/504/logo_1.png[/img] [b]SECURITATE (Repeater)[/b] Boarding Shotgun / Pistol, Knife. (0 | [b]15[/b])[img]https://assets.infinitythegame.net/infinityarmy/img/_logosweb/504/logo_11.png[/img] [b]MARY PROBLEMS Hacker (Forward Deployment L1)[/b] Submachine Gun + Zapper, Pitcher / Pistol, Knife. (0.5 | [b]30[/b])
[img]https://assets.infinitythegame.net/infinityarmy/img/_logosweb/504/logo_5.png[/img] [b]KRIZA BORAC[/b] HMG / Heavy Pistol, CC Weapon. (2 | [b]54[/b])
[img]https://assets.infinitythegame.net/infinityarmy/img/_logosweb/504/logo_17.png[/img] [b]LUNOKHOD[/b] Heavy Shotgun, Heavy Flamethrower, D-Charges, CrazyKoalas (2) / Electric Pulse. (0 | [b]25[/b])
[img]https://assets.infinitythegame.net/infinityarmy/img/_logosweb/504/logo_4.png[/img] [b]HOLLOW MEN[/b] Spitfire, Chain-colt / Breaker Pistol, Knife. (2 | [b]36[/b])
[img]https://assets.infinitythegame.net/infinityarmy/img/_logosweb/504/logo_22.png[/img] [b]TRANSDUCTOR ZOND[/b] Flash Pulse, Sniffer / Electric Pulse. (0 | [b]8[/b])[b]GROUP 2 | [/b][img]https://assets.infinitythegame.net/infinityarmy/img/_logosweb/orden_regular.png[/img]2
[img]https://assets.infinitythegame.net/infinityarmy/img/_logosweb/504/logo_9.png[/img] [b]INTERVENTOR Hacker Lieutenant (Hacking Device Plus)[/b] Combi Rifle / Pistol, Knife. (0.5 | [b]25[/b])
[img]https://assets.infinitythegame.net/infinityarmy/img/_logosweb/504/logo_7.png[/img] [b]HECKLER[/b] Combi Rifle, Jammer, 1 FastPanda / Pistol, Knife. (0 | [b]23[/b])
[b] 6 SWC | 300 Points |[/b] Open in Infinity Army
Deployment
Nate won the rolloff and decided to go first. The Securitate link with Perseus went on the left, screened by Mary. The Heckler and the Hollow Man covered Nate’s HVT, and then his right was defended by his Interventor and a Lunokhod. The Kriza came later out of reserve, but I assumed it would be on my left (Nate’s right).
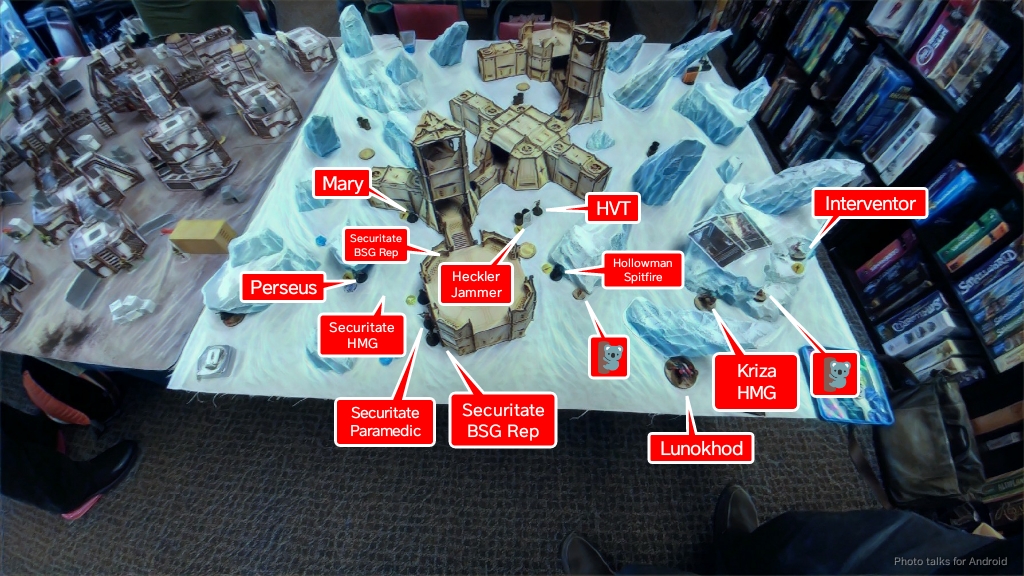 I didn’t really have anything that would be very good at stopping either a Kriza or Perseus rampage, so I tried to put some pieces in place to stall Nate out a bit. I put my Moran in the center to discourage any of Nate’s attack pieces from crossing diagonally, deployed the Kriza to hopefully stall where I expected Nate’s Kriza to go (on my left) and then deployed the Tsyklon on the right watching the link’s approach. The other benefit to having the Moran in the center is that it would help me protect my own HVT from Nate trying to get his classifieds. The Tsyklon was super close to the right board edge so I could easily pick it back up with my Tomcat for my classified. The Zondnaut and Zondmate got deployed separately, with the Zondmate covering one of the approaches to Zero Cool, my Interventor Lt. I put the Hollow Man in the center to protect it, as it was my best hope for achieving most of the classifieds.
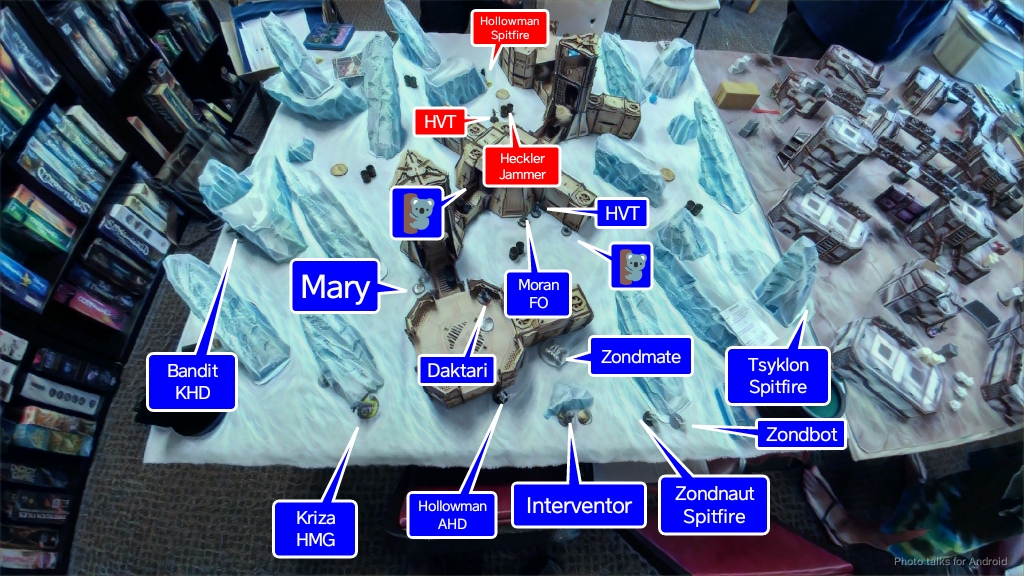 The Daktari went on a roof, as I figured that she wouldn’t rate as a threat. After Nate dropped his Kriza, I put my Bandit there to help bubble wrap my left flank against the Kriza and also apply some pressure with Mary on Nate’s Interventor, who was on my left as well. Mary was a little exposed–I didn’t deploy her very well. That’s probably the best way to sum up this game.
Turn 1
Top of Turn 1 – Nomads (OpFor)
Perky Perseus and the Fun Police started their way down the board. Nate showed the Securitate HMG first, but without her head she couldn’t see where she was shooting so my Tsyklon dropped her with a lucky Spitfire shot. This didn’t matter, because Perseus is in the link, so after re-forming it, Nate used him to gun down my Tsyklon with a crit and a hit.
 With my ARO presence on that flank removed, Perseus and crew were free to revive the downed Securitate HMG, reform the link again, and then trundle their way down the board towards me, giving the Moran and his Koalas a wide berth.
 Nate pauses briefly by the Tsyklon to snag his secret classified by spotlighting it through one of the Securitates’ repeaters. After executing the Tsyklon, mostly to get it out of the way of the Fun Police (and of course to prevent me from getting an easy Test Run), Nate sliced the pie and dropped my Zondnaut Spitfire, which was really not the best at all.
 I missed an Alert! with the Zondbot to get a free spin on my Moran, but I don’t think it would’ve helped at all. At least I wasn’t in loss of lieutenant, but the Fun Police were dangerously close.
Bottom of Turn 1 – Nomads
I needed to put an end to Perseus’s rampage, so I brought in a Tomcat just out of LoF, and then did some fancy footwork to get him in range of Perseus, the Securitate HMG, and the Securitate Paramedic. The two Securitate fired back and Perseus dodged, breaking the link. Sadly, I lose the Tomcat and Perseus dodges. Both Securitate go down, leaving just two BSG/Repeater Securitate and Perseus, so really absolutely nothing was accomplished there aside from the loss of two orders and a specialist. Not good enough. I did some coordinated orders to protect the Hollow Man and then moved Zero Cool to the other side of the board, trading places with my Kriza. I got one round of shooting on Perseus before he threw smoke, and then my turn was over.
 Turn one was absolutely disastrous. I had no worthwhile progress on the mission, and hadn’t removed any threats whatsoever. Unless the dice were exceedingly kind to me, it was going to be a tough fight clawing my way back to the surface.
Turn 2
Top of Turn 2 – Nomads (OpFor)
I lose the Kriza immediately to Perseus’s breaker rifle, and then Nate finishes off my Zondbot just to make sure I can’t do anything else.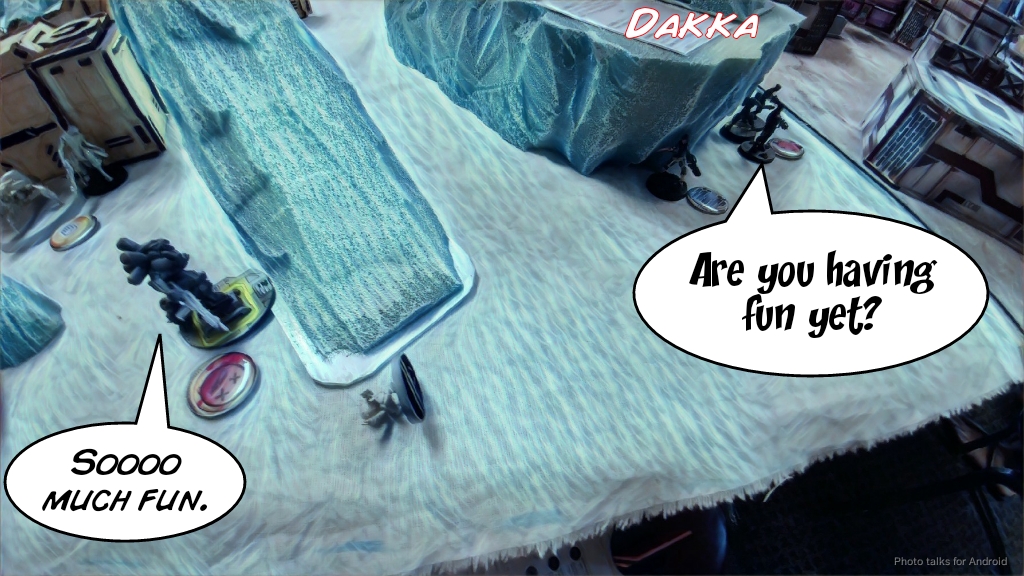 I again miss the Alert!, and my Moran takes a shot in the back, rendering his Koalas useless.
 It’s now Nate’s turn to his his Kriza, and my Mary disappears from the table.
 Perseus is still an active threat in my backfield, and I’m down to a Bandit, Daktari, Interventor, and Hollow Man AHD.
Bottom of Turn 2 – Nomads
I attempt to deal with the Kriza with the Bandit’s ADHL, but we both fail to do any damage. I grab Data Scan with my Bandit though, tanking a Heavy Pistol shot to the face in the process. With my last few orders I super jump the Hollow Man away from Perseus and hide him, prone, in one of the “trenches” near Zero Cool.
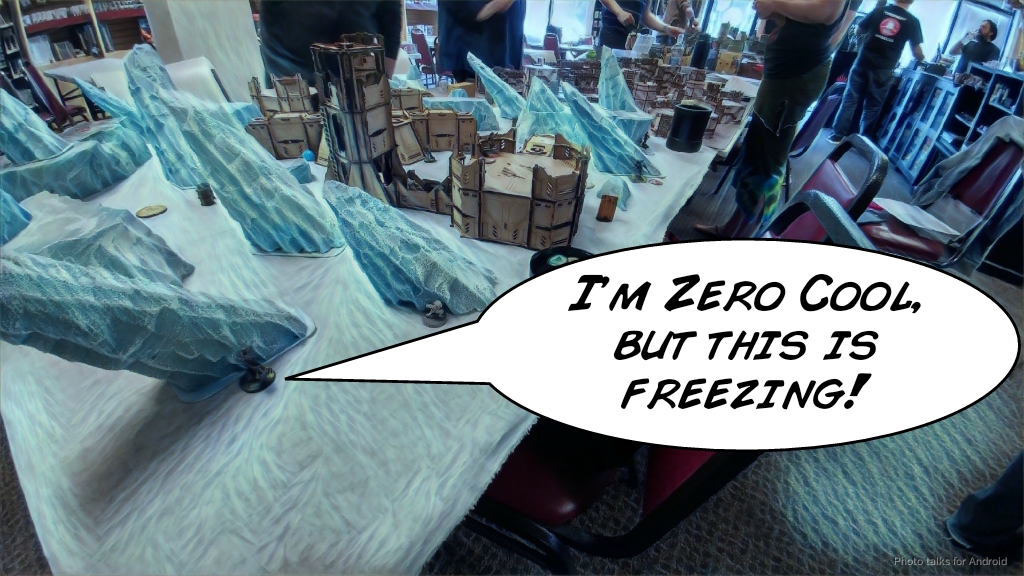 Zero Cool manages to Cybermask himself, and then I pass the turn.
Turn 3
Top of Turn 3 – Nomads (OpFor)
Nate brings up Mary Problems, fires a pitcher at my Hollow Man AHD, and then chews through two wounds by repeatedly Sucker Punching with his Interventor, finally dropping the Hollow Man on the third order. Nate’s own Hollow Man takes out my Bandit. Nate sinks the rest of his order pool into trying to hack my HVT with Mary Problems, finally succeeding on the last order. The dice were kind to me after all!
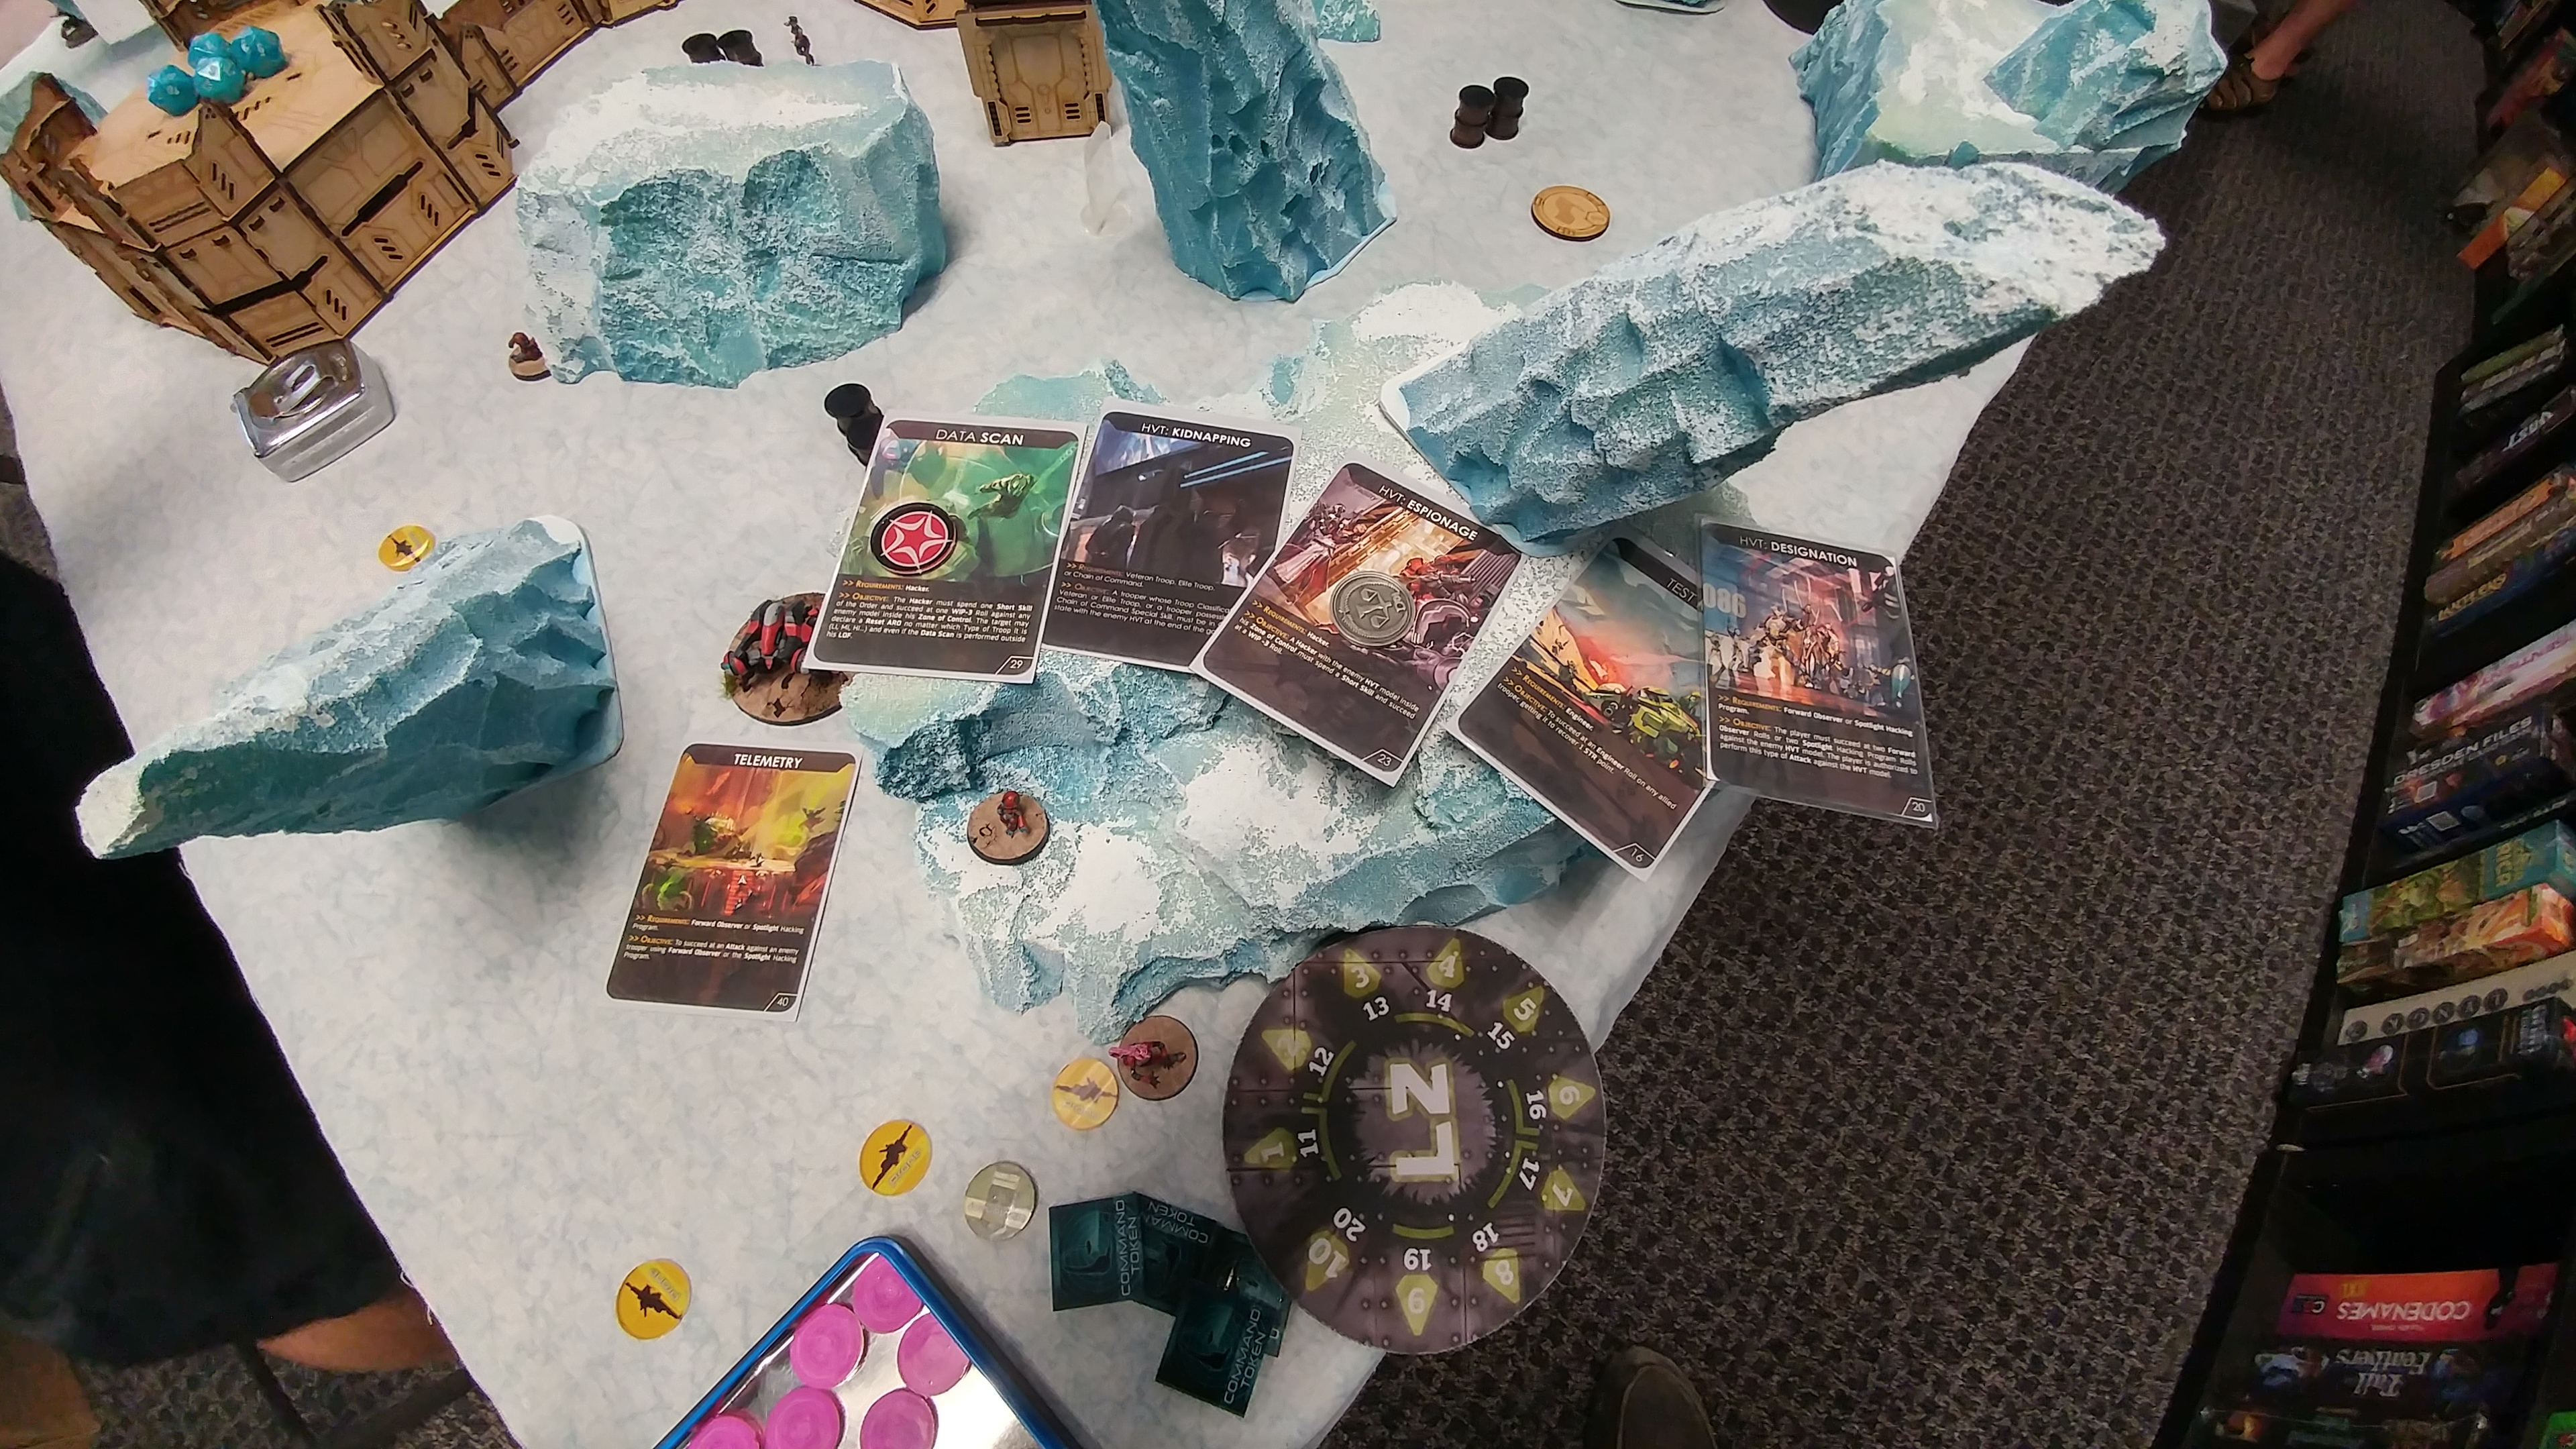 With us tied on public objectives and Nate having his private objective, it’s a
5-3 Nomad (OpFor) Victory!
I don’t consider this a minor victory for Nate. This should’ve been a blowout. Victory points was 264 versus 64, so it was a pretty one-sided game, and Nate, as usual played a very tight game. Had Nate’s dice been better to him when trying to make his WIP rolls we could easily have been looking at a 8-1 or even 9-1 game.
Notes
Notes for Me
- Where do I begin. Basically deployment. Should’ve kept the Moran far back to protect my right flank, or maybe put the Bandit there. The Bandit wasn’t doing much to pressure Nate’s Interventor on the left.
- The other concern is that if I move the Moran, there’s nothing stopping Nate from just walking Mary Problems and the Hollow Man up and grabbing all the objectives turn one.
- Nate thought that putting the Bandit up on my right flank near the Tsyklon would’ve drained some orders from him, as he would’ve had to respect the Intruder and gone after it with his link.
- So that, and the Moran needing to be in the center basically sealed the deal. I really wanted to take my other list, but it only had one hacker so it wasn’t going to be reliable enough for these particular objectives.
- Maybe I should also have lined up the Kriza behind the Tsyklon, to stall out the link. Had I done that, Nate just rambos the Kriza and I’m still screwed.
- Mary was left out to die. Whoops.
- I definitely should’ve climbed the Tomcat down to use Perseus to body block the Tomcat from the Securitate shooting back. That would probably have netted me at least another order.
- I think I lost this game in deployment. I had a little bit of early dice luck to slow Nate down, but it didn’t work out long term.
- Maybe I should’ve sent in the Hollow Man, playing chicken with the repeaters to get Test Run. I could’ve also just let Perseus stay up and gone for the objective, somehow chewing through the Heckler Jammer.
- Definitely had an uphill climb to get back into the game. I think I should’ve focused more on that turn one instead of trying to kill Perseus. Not a great situation to be in.
Notes for Nate
- Well, everything worked out quite well for you, in spite of your early string of bad luck.
- Roll WIP checks better? =P
Game 2 – Courageous Charontid
 We blew through a quick lunch at a nearby Mexican restaurant and then were back to Glimpses of Wonder and Warfare for round two. To my delight, my next opponent was Andrew (SimpleKnight), who I rarely see outside of tournaments these days. Thankfully the wonders of the modern world allow us to stay in touch. Andrew brought 10 orders of vanilla combined to throw down with. We were also on Adam’s new table, hot off the hobby cutting mat, so that was exciting too!
Overview
- Mission: Power Pack
- Forces: Nomads versus Combined Army (300)
- Deploy First: Combined Army
- First Turn: Combined Army
[img]https://assets.infinitythegame.net/infinityarmy/img/_logosweb/logo_501.png[/img][b] List C[/b]
[b]GROUP 1 | [/b][img]https://assets.infinitythegame.net/infinityarmy/img/_logosweb/orden_regular.png[/img]10 [img]https://assets.infinitythegame.net/infinityarmy/img/_logosweb/orden_impetuosa.png[/img]2
[img]https://assets.infinitythegame.net/infinityarmy/img/_logosweb/501/logo_16.png[/img] [b]INTERVENTOR Hacker Lieutenant (Hacking Device Plus)[/b] Combi Rifle, 1 FastPanda / Pistol, Knife. (0.5 | [b]27[/b])
[img]https://assets.infinitythegame.net/infinityarmy/img/_logosweb/501/logo_30.png[/img] [b]MORAN (Forward Observer)[/b] Combi Rifle, CrazyKoalas (2) / Pistol, Knife. (0.5 | [b]22[/b])
[img]https://assets.infinitythegame.net/infinityarmy/img/_logosweb/501/logo_30.png[/img] [b]MORAN (Forward Observer)[/b] Combi Rifle, CrazyKoalas (2) / Pistol, Knife. (0.5 | [b]22[/b])
[img]https://assets.infinitythegame.net/infinityarmy/img/_logosweb/501/logo_14.png[/img] [b]DAKTARI[/b] Combi Rifle / Pistol, Knife. (0 | [b]14[/b])
[img]https://assets.infinitythegame.net/infinityarmy/img/_logosweb/501/logo_34.png[/img] [b]ZONDBOT[/b] Electric Pulse. (0 | [b]3[/b])
[img]https://assets.infinitythegame.net/infinityarmy/img/_logosweb/501/logo_24.png[/img] [b]TOMCAT Engineer[/b] Combi Rifle + Light Flamethrower, D-Charges / Pistol, Knife. (0 | [b]22[/b])
[img]https://assets.infinitythegame.net/infinityarmy/img/_logosweb/501/logo_59.png[/img] [b]HOLLOW MEN[/b] MULTI Rifle + Pitcher, Chain-colt / Breaker Pistol, Knife. (0 | [b]35[/b])
[img]https://assets.infinitythegame.net/infinityarmy/img/_logosweb/501/logo_56.png[/img] [b]KRIZA BORAC[/b] HMG / Heavy Pistol, CC Weapon. (2 | [b]54[/b])
[img]https://assets.infinitythegame.net/infinityarmy/img/_logosweb/501/logo_58.png[/img] [b]ZONDNAUT[/b] Spitfire / Pistol, Knife. (1 | [b]32[/b])
[img]https://assets.infinitythegame.net/infinityarmy/img/_logosweb/sep.gif[/img] [img]https://assets.infinitythegame.net/infinityarmy/img/_logosweb/501/logo_58.png[/img] [b]ZONDMATE[/b] Chain Rifle, Smoke Light Grenade Launcher / Electric Pulse. ([b]5[/b])
[img]https://assets.infinitythegame.net/infinityarmy/img/_logosweb/501/logo_60.png[/img] [b]HECKLER[/b] Combi Rifle, Jammer, 1 FastPanda / Pistol, Knife. (0 | [b]23[/b])
[img]https://assets.infinitythegame.net/infinityarmy/img/_logosweb/501/logo_48.png[/img] [b]KRAKOT RENEGADE[/b] 2 Chain Rifles, Grenades / Pistol, DA CC Weapon. (0 | [b]14[/b])[b]GROUP 2 | [/b][img]https://assets.infinitythegame.net/infinityarmy/img/_logosweb/orden_regular.png[/img]1 [img]https://assets.infinitythegame.net/infinityarmy/img/_logosweb/orden_irregular.png[/img]3 [img]https://assets.infinitythegame.net/infinityarmy/img/_logosweb/orden_impetuosa.png[/img]3
[img]https://assets.infinitythegame.net/infinityarmy/img/_logosweb/501/logo_61.png[/img] [b]PUPPET MASTERS (Minelayer)[/b] Submachine Gun, Antipersonnel Mines / PistolKnife. (0.5 | [b]14[/b])
[img]https://assets.infinitythegame.net/infinityarmy/img/_logosweb/501/logo_12.png[/img] [b]MORLOCK[/b] Chain Rifle, Smoke Grenades / Pistol, E/M CCW. (0 | [b]6[/b])
[img]https://assets.infinitythegame.net/infinityarmy/img/_logosweb/501/logo_12.png[/img] [b]MORLOCK[/b] Chain Rifle, Smoke Grenades / Pistol, E/M CCW. (0 | [b]6[/b])
[img]https://assets.infinitythegame.net/infinityarmy/img/_logosweb/501/logo_12.png[/img] [b]MORLOCK[/b] Chain Rifle, Smoke Grenades / Pistol, E/M CCW. (0 | [b]6[/b])
[b] 5 SWC | 300 Points |[/b] Open in Infinity Army
[img]https://assets.infinitythegame.net/infinityarmy/img/_logosweb/logo_601.png[/img][b] Combined Army[/b]
[img]https://assets.infinitythegame.net/infinityarmy/img/_logosweb/601/logo_7.png[/img] [b]CHARONTID Lieutenant (Multispectral Visor L3)[/b] HMG, Nanopulser / Heavy Pistol, Knife. (2 | [b]79[/b])
[img]https://assets.infinitythegame.net/infinityarmy/img/_logosweb/601/logo_56.png[/img] [b]KERR-NAU (UPGRADE: White Noise)[/b] Plasma Rifle + Pitcher, D-Charges / Breaker Pistol, Knife. (0 | [b]27[/b])
[img]https://assets.infinitythegame.net/infinityarmy/img/_logosweb/601/logo_18.png[/img] [b]Q-DRONE[/b] HMG / Electric Pulse. (1 | [b]26[/b])
[img]https://assets.infinitythegame.net/infinityarmy/img/_logosweb/601/logo_48.png[/img] [b]E-DRONE[/b] Combi Rifle / Electric Pulse. (0.5 | [b]28[/b])
[img]https://assets.infinitythegame.net/infinityarmy/img/_logosweb/601/logo_17.png[/img] [b]M-DRONE[/b] Combi Rifle, Sniffer / Electric Pulse. (0 | [b]17[/b])
[img]https://assets.infinitythegame.net/infinityarmy/img/_logosweb/601/logo_16.png[/img] [b]MED-TECH OBSIDON MEDCHANOID[/b] Combi Rifle, D-Charges / Pistol, Knife. (0 | [b]23[/b])
[img]https://assets.infinitythegame.net/infinityarmy/img/_logosweb/601/logo_35.png[/img] [b]SLAVE DRONE[/b] Electric Pulse. (0 | [b]3[/b])
[img]https://assets.infinitythegame.net/infinityarmy/img/_logosweb/601/logo_13.png[/img] [b]DĀTURAZI[/b] Chain Rifle, Grenades, Smoke Grenades / Pistol, AP CCW. (0 | [b]14[/b])
[img]https://assets.infinitythegame.net/infinityarmy/img/_logosweb/601/logo_13.png[/img] [b]DĀTURAZI[/b] Chain Rifle, Grenades, Smoke Grenades / Pistol, AP CCW. (0 | [b]14[/b])
[img]https://assets.infinitythegame.net/infinityarmy/img/_logosweb/601/logo_12.png[/img] [b]SPECULO KILLER[/b] Boarding Shotgun, Smoke Grenades / Pistol, Monofilament CCW, Knife. (1 | [b]34[/b])
[img]https://assets.infinitythegame.net/infinityarmy/img/_logosweb/601/logo_3.png[/img] [b]FRAACTA[/b] Spitfire, Nanopulser / Pistol, Knife. (1.5 | [b]35[/b])
[img]https://assets.infinitythegame.net/infinityarmy/img/_logosweb/orden_regular.png[/img]10 [img]https://assets.infinitythegame.net/infinityarmy/img/_logosweb/orden_impetuosa.png[/img]2 [b]| 6 SWC | 300 Points |[/b] Open in Infinity Army
Deployment
Andrew won the rolloff and elected to go first. A 10 order list is pretty easy to deploy, at least in terms of board space. His right flank consisted of a Daturazi, Kerr Nau, his Charontid Lt, and two drones of the M- and Slave variety.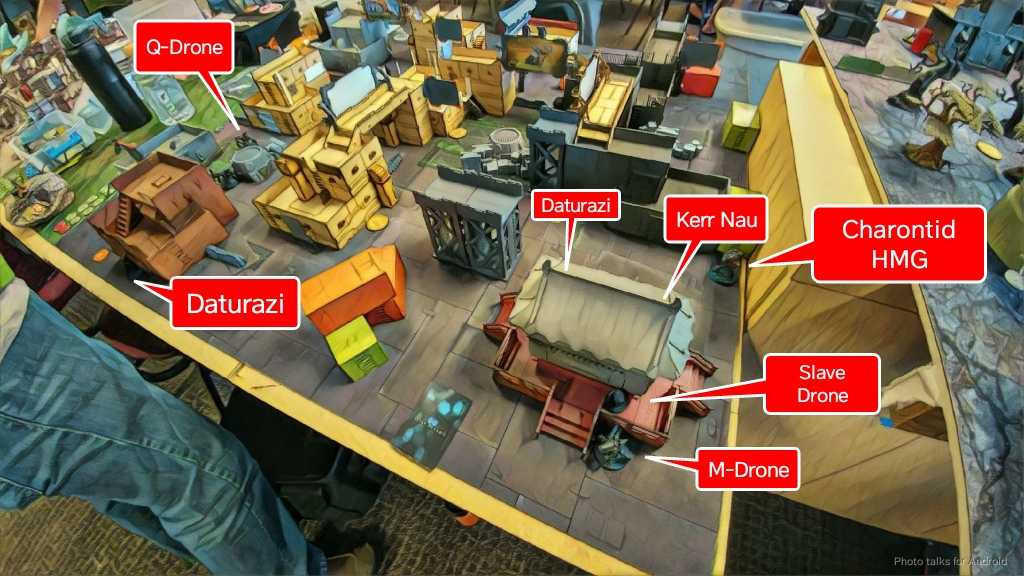 The left-flank was also populated by two drones: the Q- and E-Drones (slightly behind the Q-Drone). Dr. Worm and a Daturazi also hung out. Andrew played some mind games and shooed me away from the table to feint a Noctifer, and then it was my turn to deploy.
 Since this was Power Pack, I knew I’d need board control. That meant a Moran on both sides. Two Morlocks went on the left, with the third keeping the Krakot company on the right. I deployed the Heckler a little forward to try and get a FastPanda off on the Charontid if I could, or at least jam it, then set about finding a spot for the Kriza.
 It seemed like I’d probably need the Kriza to help out with the Q-Drone the right, so that’s where he went. Zero Cool went on a roof with the Hollow Man below, and the approach to both was protected by the Puppeteer and his mine.
 Andrew put down a Speculo next to my Interventor, so I responded by putting the Zondnaut on the next level down with the Zondmate and mine watching the Speculo’s silhouette. It’s worth noting that one distinguishing feature of Adam’s table are the round, grilled structures on the table that are Nimbus zone generators. While not earth shattering, they definitely did change the character of our game, especially with the Saturation Zone in effect thanks to Power Pack.
Turn 1
Top of Turn 1 – Combined Army
I had barely left anything out, so Andrew’s two Daturazi make their impetuous moves without any trouble. Andrew’s next move was to drop in a Fraacta Spitfire, just walking it in the dead zone between my two deployent zones. Thankfully, I had a watchful Morlock and Zondbot, who took an (ineffective) pistol shot and alerted the rest of the forces to their predicament. He pushed the Fraacta forward, attempting to delete my Kriza. Full Auto managed to fend off all four shots, but my Kriza also missed. Thankfully, my Zondnautica and Morlock finish off the Fraacta with a hit each. Phew!
 Andrew clears my Koala that’s covering the Q-Drone’s approach with a Daturazi. The Koala is persistent enough to get the hug that it’s always wanted, and shocks the Daturazi off the table due to failed dodge and ARM rolls.
 The Q-Drone is free to move though, so it comes around the corner to take on my Krakot. I’ve got an angle on the corner and drop a chain rifle on it. Since we’re so close I weather the worst of the HMG fire and only go unconscious, but the Q-Drone passes its ARM save and scuttles back into cover.
 Andrew clears another Koala, this time on the the left and with his Charontid’s lieutenant order and a successful dodge.
 Andrew finally returns his attention to the Speculo lurking near Zero Cool. It goes prone and scoots closer, with me passing a discover from the Morlock that helped to take out the Fraacta. One level isn’t good enough, and with the Speculo now prone, I can’t stop what happens next. Zero Cool eats a monofilament crit, fumbling with his combi rifle as the alien hunter comes bearing down on him.
 Andrew rightfully requested a non-cartoon-form pictures of his model be posted, because it’s so pretty! He’s got a very subdued grey and blue scheme going, which I really enjoy. While it doesn’t have as much “pop” as some of the brighter Combined schemes I’ve seen, it does make them very sinister and implacable feeling.
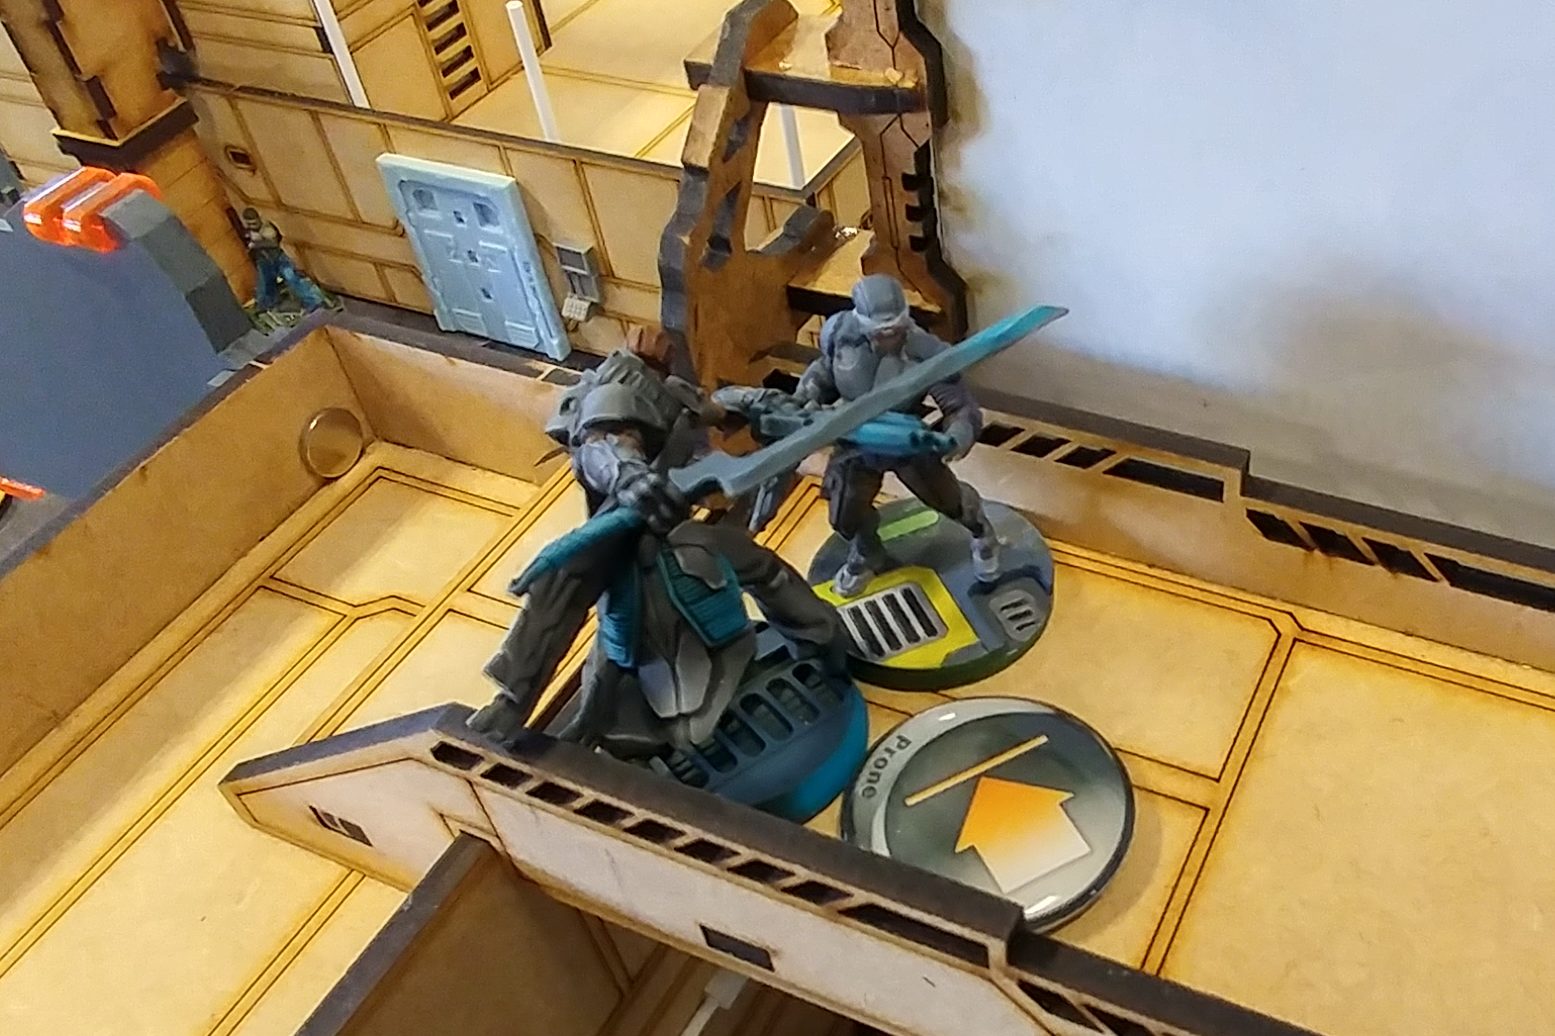 In any case, I’m down a Krakot, an Interventor, and two Koalas.
 After throwing the Charontid, the E- and Q-Drones, and Dr. Worm into suppression, Andrew passes the turn.
Edit: Andrew noticed this after reading the battle report. Dr. Worm has a Slave Drone and therefore cannot take part in the coordinated order Suppression. We then also missed some other suppression-related stuff later, but it ended up not mattering and only costing me an order or two on Turn 3, which was not a big deal at that point.
Bottom of Turn 2 – Nomads
The Zondnaut climbs to just under the top of the ladder near the Speculo and the Zondmate moves forward to provide smoke for the NWI Morlock on my right, who is ready to make an made dash forward. The other Morlocks move forward without any fuss. I use the Zondnautica’s order to climb the Zondnaut up and empty her Spitfire into the Speculo. Sadly, Andrew’s dodge change face wins the FtF since I roll all misses.
 I finish the job by super jumping the Hollow Man to chain colt the Speculo and drop it, taking the return boarding shotgun fire.
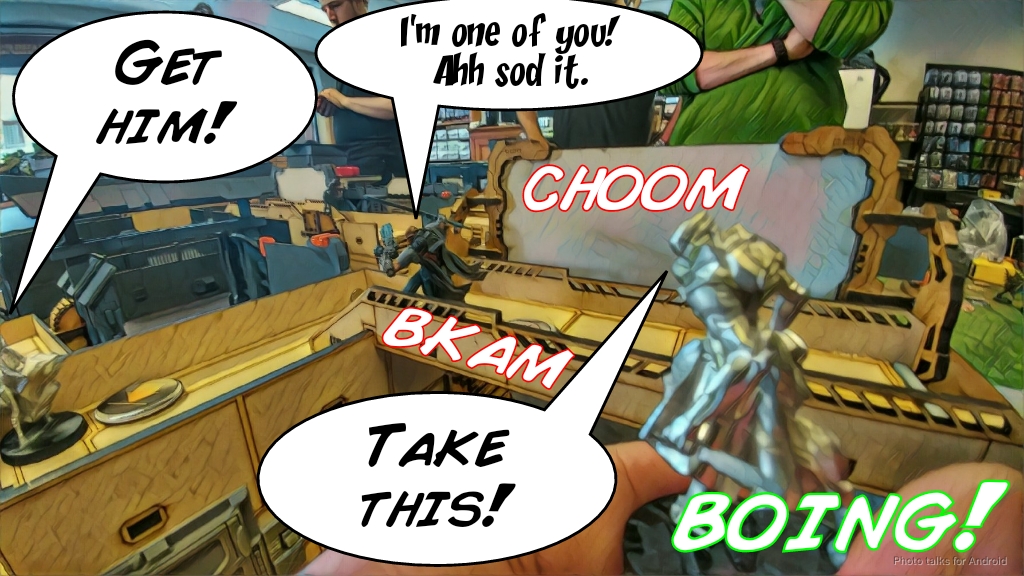 The threat to my deployment zone gone, I return my attention to the Q- and E-Drone situation on the right. I push my NWI Morlock straight at the Q-Drone, leveraging the saturation zone to reduce the burst of the Charontid and Q-Drone. It works, and I only take a single wound from the Q-Drone, with the Q-Drone finally going unconscious to my Morlock’s chain rifle. Dr. Worm is right there, and I’m unwilling to let Dr. Worm pick the Q-Drone back up, so I move the Morlock around to get into base to base with the Q-Drone, feinting a chain rifle. Andrew bites and suppresses me through the Nimbus zone with the E-Drone, missing all his shots, and the Charontid is now out of 24″ and can’t hit me anyway.
 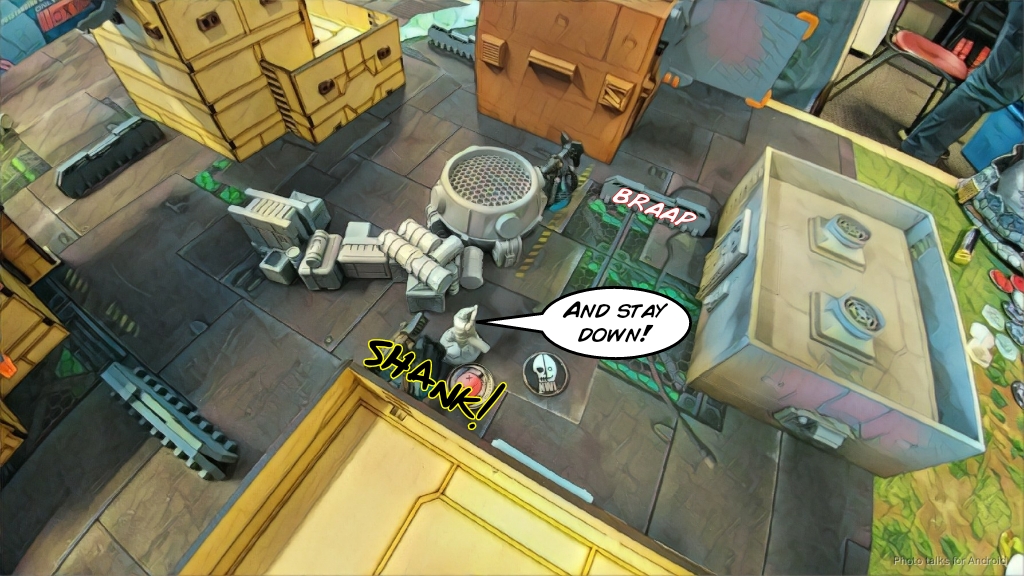 I coup de grace the Q-Drone instead of chain rifling, and then spend another command token to push up the field. This time, the Morlock goes down, but not before knocking out the E-Drone too.
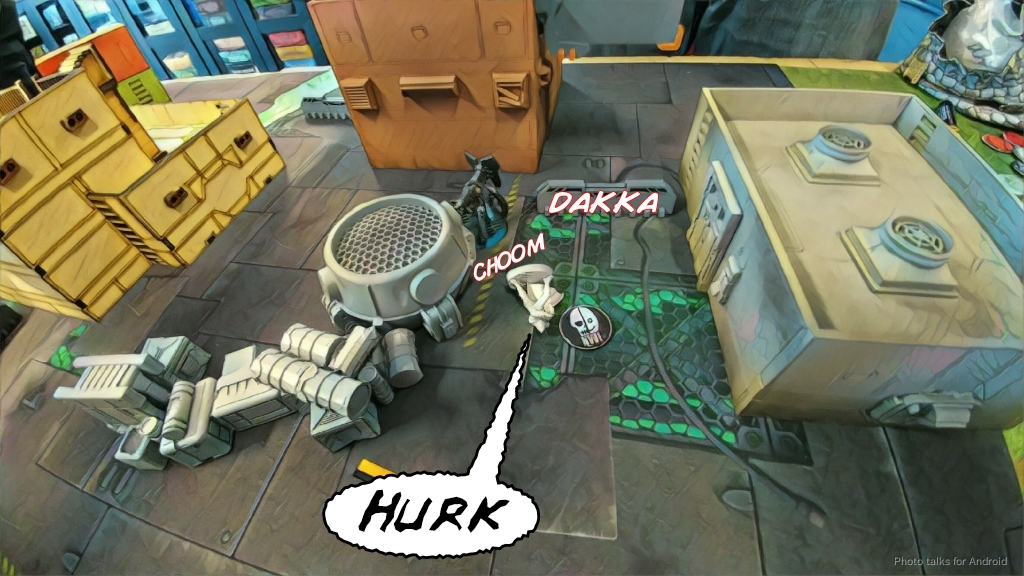 A big threat to my right flank is now gone, giving me more or less free reign over there, so I return to the left flank. The Charontid is now pretty close to my Heckler, so I run him forward and attempt to jammer Andrew’s lieutenant. Fortunately for him, he passes BTS. Unwilling to sink more orders and command tokens into this, I spend everyone else’s irregular order to reposition themselves. In particular, I push a Morlock closer to the Charontid, fail a WIP check on the left objective with the Moran there (using a command token and someone’s order to retreat to cover), and shift the Kriza left to cover the console at the edge of my DZ. All in all not a bad loss of lieutenant turn. Dropped a Speculo, a Q-Drone, and an E-Drone for the low cost of a handful of command tokens. I usually only have three Morlocks in the second pool, but I used to run 2-3 Morlocks, 2 Jaguars, and a Krakot in there. I’m glad I put the puppeteer in there. I should shift back to deeper pools for my warbands. Food for thought.
Turn 2
Top of Turn 2 – Combined Army
Andrew uses a coordinated order to push Kerr Nau, the remaining Daturazi, and the M-Drone forward. The Daturazi takes a Koala to the face and dies, but Kerr Nau can see my Heckler as he vaults the railing of the red/tan building he was hiding in. We trade fire and I lose the face to face. I knew that I would lose the Heckler, but I hoped it would at least get another jammer attempt. At least the Daturazi is gone!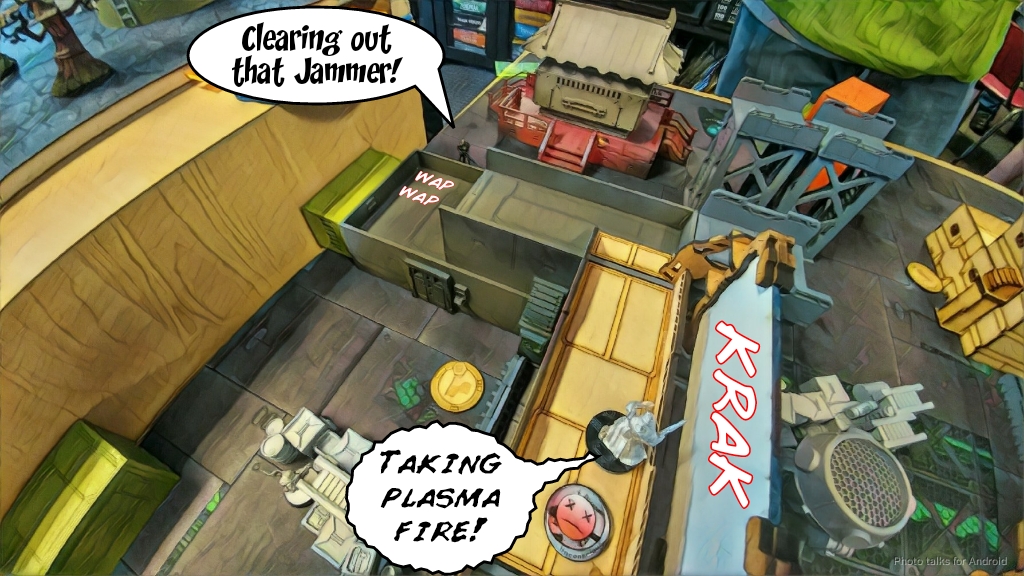 All of this frees the Charontid to pop around the corner and empty its HMG at short range into my Morlock, who dodges successfully once but not twice, failing her engage roll.
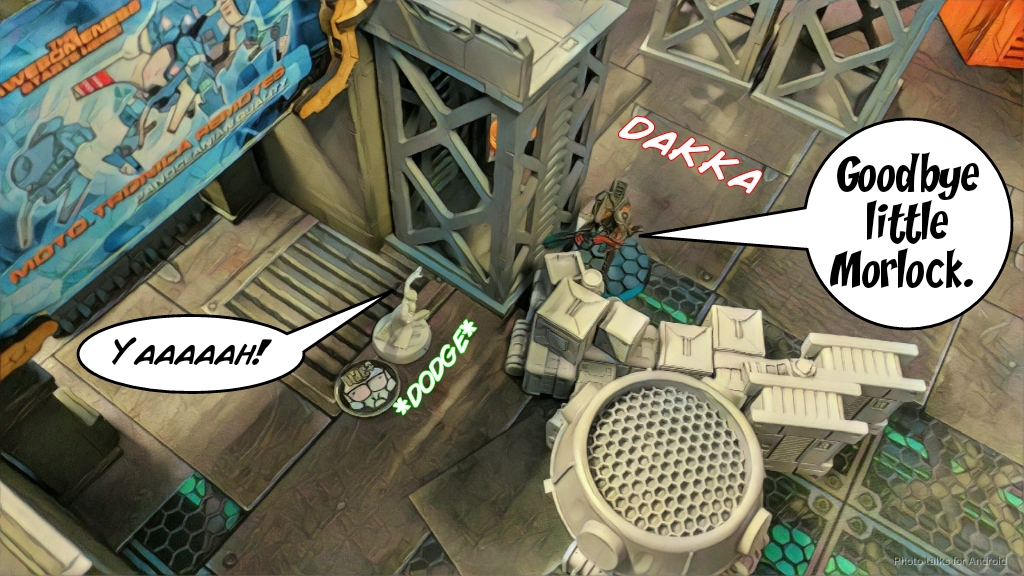 The Morlock gone, Andrew makes a play for the objective by climbing Kerr Nau over the shipping container, but mimetism and the saturation zone win me the the FtF and I knock out Kerr Nau with my Moran’s combi-rifle.
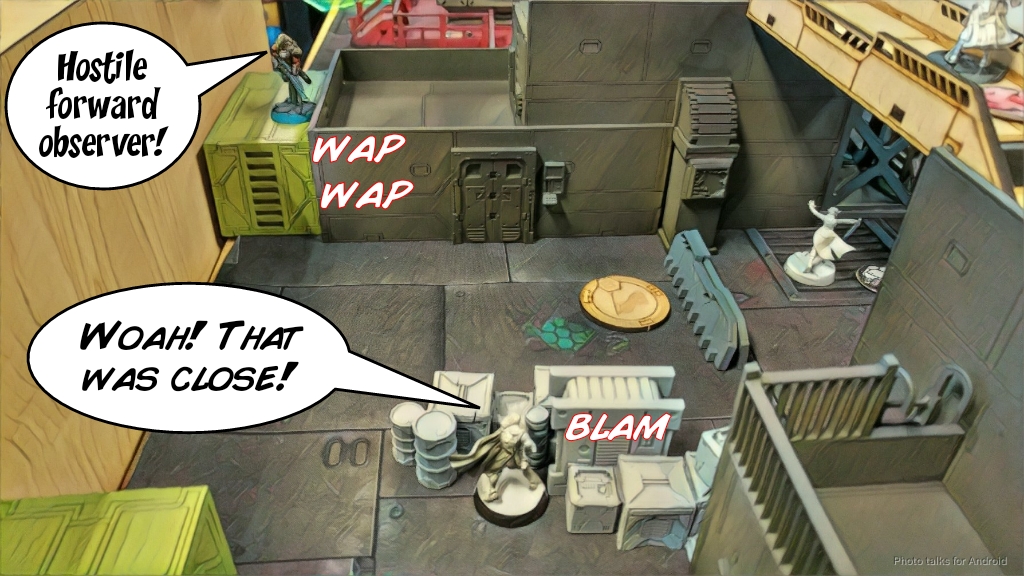 Andrew tries to take out the Moran with the Charontid as it advances up the field towards the center, but I land a successful flash pulse against both the Charontid and the M-Drone, who has now advanced into the Charontid’s original position.
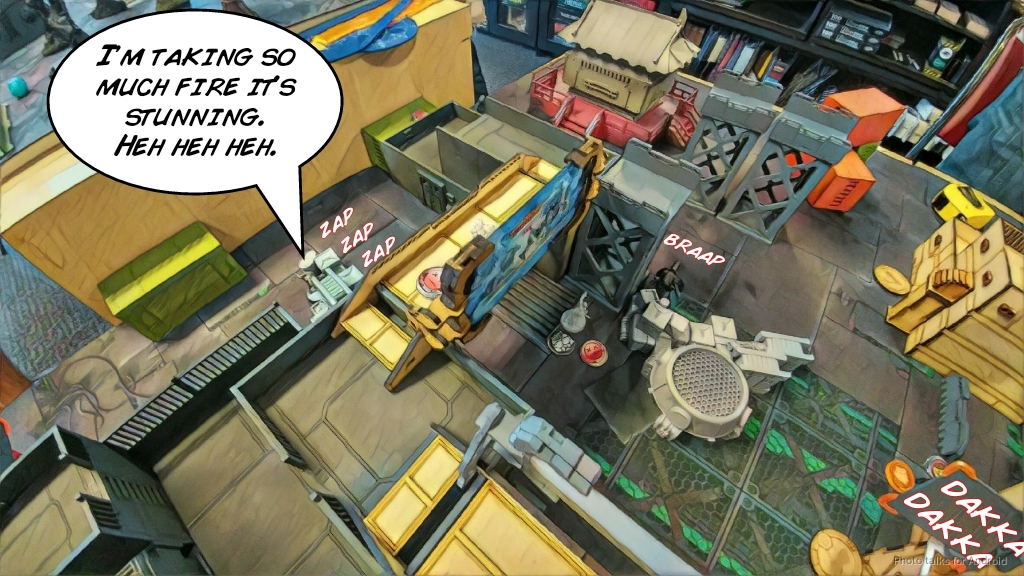 With his main attack pieces now stunned and out of orders, Andrew passed things back to me after moving Dr. Worm’s slave drone closer to Kerr Nau. This breaks suppression, of course, but we missed this.
Bottom of Turn 2 – Nomads
This turn is all about objectives. I spend my last command token to move the Puppeteer into group one. After losing my remaining Morlock to the Charontid, I execute Kerr Nau with the Moran’s combi on the way to grabbing the left objective, then retreat him back into cover.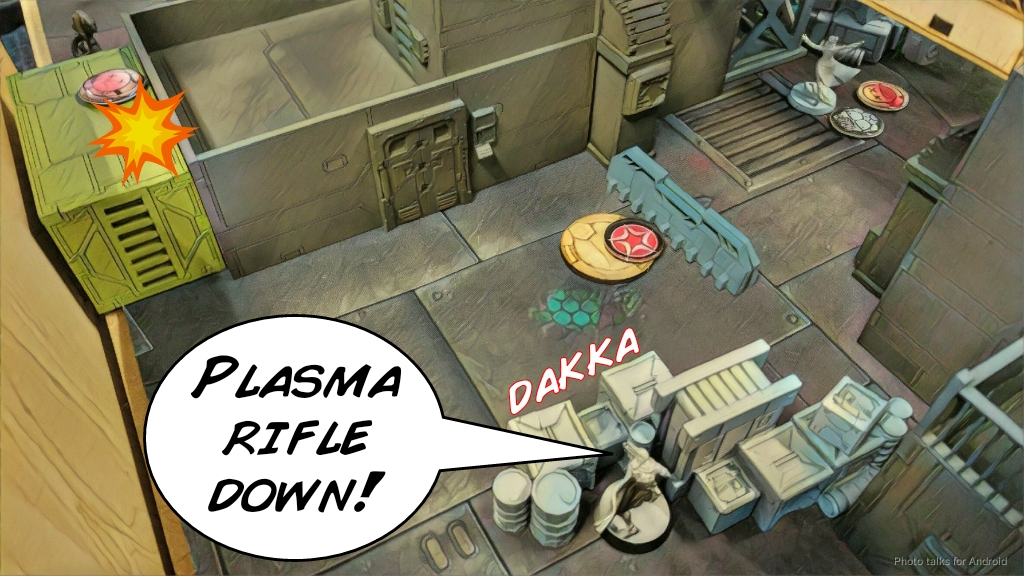 With the left objective handled, it’s time for the right one.
 I climb the Moran off the roof and grab it, but I’ve got a few more orders left. I drop his remaining Koala, then push the Moran up a bit.
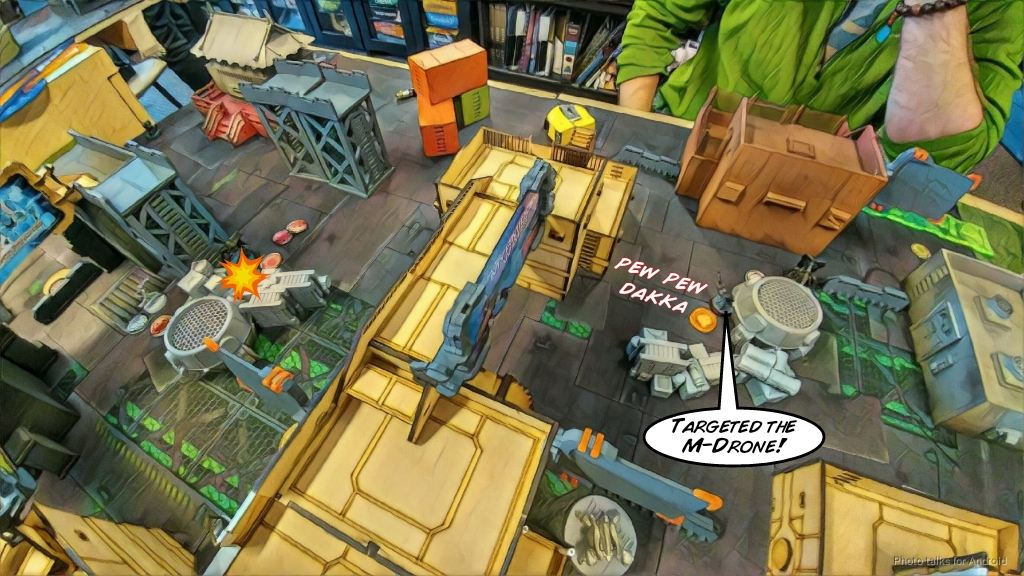 I spend the rest of my orders Forward Observing the M-Drone for a classified and then take it out, pushing the Moran back into cover before passing the turn.
Turn 3
Top of Turn 3 – Combined Army
Andrew spends his entire turn courageously rushing the Charontid forward through some flash pulses from my Morans to make a play for my console. He succeeds, getting into base to base and tanking all the return fire from the Kriza and my Daktari, who is now my lieutenant! A bit of sweating went on there, I assure you.
Bottom of Turn 3 – Nomads
My Zondnaut is obligated to come for the Charontid, and we were playing the objectives as flat pieces of terrain, so it was in the open. One full burst of hits later, the Charontid is off the table. Talk about efficiency! I thought I would have to involve the Kriza. I do “lose” the Zondmate as its runs away from the Zondnaut, but oh well. This lets me spend the rest of my order pool carefully navigating the Moran around Dr. Worm’s suppression to beep boop Andrew’s console.
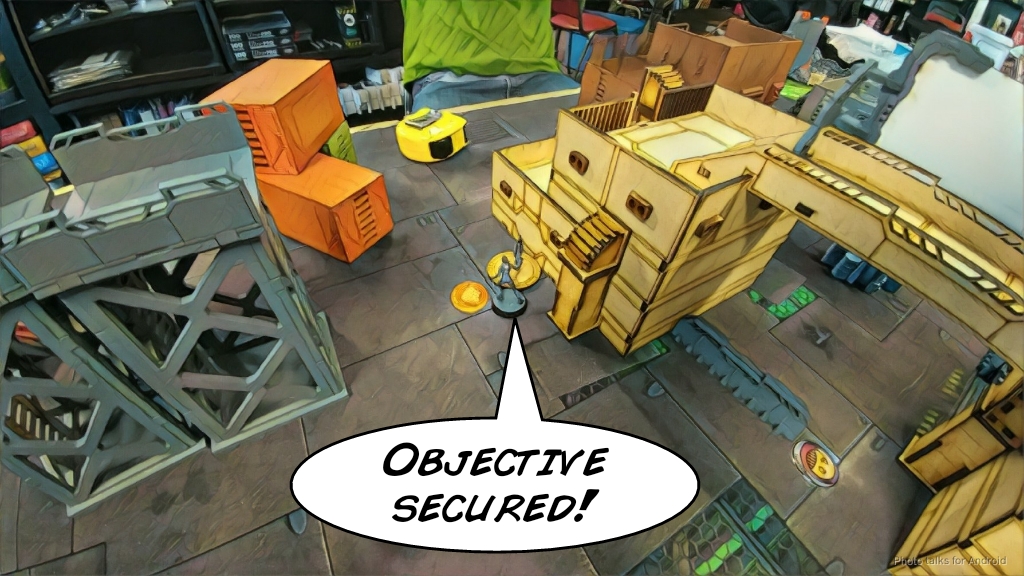 With two central objectives, controlling/beep-booping Andrew’s console with my DataTracker, and my classified, it’s a
10-0 Nomad Victory!
This one was pretty bloody for Andrew, 241 to 26 VP remaining. I walked my Tomcat on at the end to make sure I wouldn’t lose the VP. Still, sadly, I can’t help but color this game as a loss in my mind. Dr. Worm still lives! GARRAGGHH!!
Notes
Notes for Me
- Wow. The Zondnautica really came through for me this game, taking out the Charontid in a single order. I really like the verticality that you can get by dismounting them. I did have to run the Zondmate out of ZoC of the Zondnaut though, which sucked.
- The Kriza did nothing but bait a Fraacta. I’ll take it.
- My Morans and Morlocks won me this game. Koalas and Flash Pulse slowed Andrew down enough to let me recover and reposition, and then my Morlock missile on the first turn in LoL really put the hurt on Andrew as well.
- I think this game is a pretty decent example of how to carefully recover from LoL and to not worry about leveraging your power pieces. Aside from a shift and a Speculo kill, I didn’t use either the Kriza or the Hollow Man this game–everything was done with combis. There’s definitely a bias against combi rifles on the internet, I think, as well as a crippling fear of Loss of Lieutenant. It’s all good. Just keep calm and carefully spend your orders.
- Also, this game compared against the previous game should really underscore the difference in the two lists–here I have a ton of chain rifles to literally corner guard, and in the previous list I was sorely lacking, letting the link just roll over me.
- I didn’t do a good job counter-deploying a Speculo. I also got faked out successfully by the Noctifier and missed the potential for a Fraacta. Things could’ve gone much worse, but fortunately I deployed very conservatively and had a helper bot in the right place to declare Alert!.
- Andrew had overloaded my thought process with a TON of threats, so I had totally forgotten about my Tomcat. I should’ve brought him in to take out Dr. Worm.
- This list is quite good. I think I’ll need to play with it more and tune it.
Notes for Andrew
- Losing the Fraacta for no gain really sucked. That wasn’t supposed to happen, dice wise. You caught me with my pants down after telegraphing a Noctifer, but my little helper bot bailed me out. I don’t think that you made a bad call here, even though we talked about you coming in on a side. That’s much harder since I had better frontal and flank assault defense.
- Good job taking out Zero Cool. I think after he went down working the angles with the Speculo and doing more damage would’ve been better. I guess you were prioritizing taking out the Krakot and the Koalas, which is a good idea, but depleting my order pool is stronger overall, I think.
- That said, taking out the Krakot was probably important enough to have done early. I can easily spec-fire grenade the Q-Drone and then work my way through your flank if you don’t do anything about it.
- I don’t think you needed to telegraph the Kerr-Nau slave drone thing. You broke suppression for my turn (which we missed, no big deal), and then you re-prioritized killing Kerr Nau for me. I might’ve missed Kerr Nau there, and forgotten about your slave drone. That said, I would’ve had more orders to kill Dr Worm so there’s that too.
- Losing the Daturazi was really unnecessary. I think clearing the Koalas with the Charontid and the Q-Drone would’ve been better. They can’t go off the table from it, and you have Dr. Worm and his bot right nearby. Definitely worth thinking about for next time.
- I didn’t have to spend any orders killing the Daturazi at all, and if they had been up, I think you could’ve cleared out my Morans easily with spec-fire grenades. Daturazi are “cheap” so in some sense it feels “okay” to use them as mine/koala clearers, but in a 10 order list you cannot afford to do this. The order is way more important, and in this game, access to chain rifles and smoke/regular grenades even more so. That Daturazi on your left would’ve easily protected your Q-Drone and E-Drone from my Morlock.
- Great game! I don’t get to play Combined very much so it’s always a treat to see Andrew and his awesome aliens and face off against different profiles (I don’t think I’ve faced a Charontid before).
Game 3 – Almighty Asura
 Game three was against Gunnar, from Eugene. He was bringing Vanilla ALEPH, which meant I’d have to chew through a TON of wounds and models to even take orders off the table. Fortunately, any frustration stemming from that is more than canceled by Gunnar’s cheerfulness and warm smile. Come up to Portland more often to play, Gunnar!
Overview
- Mission: Capture and Protect
- Forces: Nomads versus ALEPH (300)
- Deploy First: Nomads
- First Turn: Nomads
[img]https://assets.infinitythegame.net/infinityarmy/img/_logosweb/logo_501.png[/img][b] List C[/b]
[b]GROUP 1 | [/b][img]https://assets.infinitythegame.net/infinityarmy/img/_logosweb/orden_regular.png[/img]10 [img]https://assets.infinitythegame.net/infinityarmy/img/_logosweb/orden_impetuosa.png[/img]2
[img]https://assets.infinitythegame.net/infinityarmy/img/_logosweb/501/logo_16.png[/img] [b]INTERVENTOR Hacker Lieutenant (Hacking Device Plus)[/b] Combi Rifle, 1 FastPanda / Pistol, Knife. (0.5 | [b]27[/b])
[img]https://assets.infinitythegame.net/infinityarmy/img/_logosweb/501/logo_30.png[/img] [b]MORAN (Forward Observer)[/b] Combi Rifle, CrazyKoalas (2) / Pistol, Knife. (0.5 | [b]22[/b])
[img]https://assets.infinitythegame.net/infinityarmy/img/_logosweb/501/logo_30.png[/img] [b]MORAN (Forward Observer)[/b] Combi Rifle, CrazyKoalas (2) / Pistol, Knife. (0.5 | [b]22[/b])
[img]https://assets.infinitythegame.net/infinityarmy/img/_logosweb/501/logo_14.png[/img] [b]DAKTARI[/b] Combi Rifle / Pistol, Knife. (0 | [b]14[/b])
[img]https://assets.infinitythegame.net/infinityarmy/img/_logosweb/501/logo_34.png[/img] [b]ZONDBOT[/b] Electric Pulse. (0 | [b]3[/b])
[img]https://assets.infinitythegame.net/infinityarmy/img/_logosweb/501/logo_24.png[/img] [b]TOMCAT Engineer[/b] Combi Rifle + Light Flamethrower, D-Charges / Pistol, Knife. (0 | [b]22[/b])
[img]https://assets.infinitythegame.net/infinityarmy/img/_logosweb/501/logo_59.png[/img] [b]HOLLOW MEN[/b] MULTI Rifle + Pitcher, Chain-colt / Breaker Pistol, Knife. (0 | [b]35[/b])
[img]https://assets.infinitythegame.net/infinityarmy/img/_logosweb/501/logo_56.png[/img] [b]KRIZA BORAC[/b] HMG / Heavy Pistol, CC Weapon. (2 | [b]54[/b])
[img]https://assets.infinitythegame.net/infinityarmy/img/_logosweb/501/logo_58.png[/img] [b]ZONDNAUT[/b] Spitfire / Pistol, Knife. (1 | [b]32[/b])
[img]https://assets.infinitythegame.net/infinityarmy/img/_logosweb/sep.gif[/img] [img]https://assets.infinitythegame.net/infinityarmy/img/_logosweb/501/logo_58.png[/img] [b]ZONDMATE[/b] Chain Rifle, Smoke Light Grenade Launcher / Electric Pulse. ([b]5[/b])
[img]https://assets.infinitythegame.net/infinityarmy/img/_logosweb/501/logo_60.png[/img] [b]HECKLER[/b] Combi Rifle, Jammer, 1 FastPanda / Pistol, Knife. (0 | [b]23[/b])
[img]https://assets.infinitythegame.net/infinityarmy/img/_logosweb/501/logo_48.png[/img] [b]KRAKOT RENEGADE[/b] 2 Chain Rifles, Grenades / Pistol, DA CC Weapon. (0 | [b]14[/b])[b]GROUP 2 | [/b][img]https://assets.infinitythegame.net/infinityarmy/img/_logosweb/orden_regular.png[/img]1 [img]https://assets.infinitythegame.net/infinityarmy/img/_logosweb/orden_irregular.png[/img]3 [img]https://assets.infinitythegame.net/infinityarmy/img/_logosweb/orden_impetuosa.png[/img]3
[img]https://assets.infinitythegame.net/infinityarmy/img/_logosweb/501/logo_61.png[/img] [b]PUPPET MASTERS (Minelayer)[/b] Submachine Gun, Antipersonnel Mines / PistolKnife. (0.5 | [b]14[/b])
[img]https://assets.infinitythegame.net/infinityarmy/img/_logosweb/501/logo_12.png[/img] [b]MORLOCK[/b] Chain Rifle, Smoke Grenades / Pistol, E/M CCW. (0 | [b]6[/b])
[img]https://assets.infinitythegame.net/infinityarmy/img/_logosweb/501/logo_12.png[/img] [b]MORLOCK[/b] Chain Rifle, Smoke Grenades / Pistol, E/M CCW. (0 | [b]6[/b])
[img]https://assets.infinitythegame.net/infinityarmy/img/_logosweb/501/logo_12.png[/img] [b]MORLOCK[/b] Chain Rifle, Smoke Grenades / Pistol, E/M CCW. (0 | [b]6[/b])
[b] 5 SWC | 300 Points |[/b] Open in Infinity Army
[img]https://assets.infinitythegame.net/infinityarmy/img/_logosweb/logo_701.png[/img][b] ALEPH[/b]
[img]https://assets.infinitythegame.net/infinityarmy/img/_logosweb/701/logo_27.png[/img] [b]MACHAON Lieutenant[/b] Combi Rifle, Nanopulser, Eclipse Grenades / Pistol, DA CCW. (0.5 | [b]38[/b])
[img]https://assets.infinitythegame.net/infinityarmy/img/_logosweb/701/logo_4.png[/img] [b]ASURA Hacker (Hacking Device Plus UPGRADE: Redrum)[/b] Combi Rifle, Nanopulser / Pistol, AP CCW. (0.5 | [b]72[/b])
[img]https://assets.infinitythegame.net/infinityarmy/img/_logosweb/701/logo_1.png[/img] [b]DAKINI Tacbot[/b] HMG / Electric Pulse. (1 | [b]21[/b])
[img]https://assets.infinitythegame.net/infinityarmy/img/_logosweb/701/logo_18.png[/img] [b]PROXY Mk.2 Hacker (Assault Hacking Device)[/b] Boarding Shotgun, Nanopulser / Pistol, Knife. (0.5 | [b]21[/b])
[img]https://assets.infinitythegame.net/infinityarmy/img/_logosweb/701/logo_48.png[/img] [b]PROXY Mk.4[/b] Heavy Rocket Launcher, Submachine Gun, Nanopulser / Pistol, Knife. (2 | [b]20[/b])
[img]https://assets.infinitythegame.net/infinityarmy/img/_logosweb/701/logo_49.png[/img] [b]PROXY Mk.5 (Forward Observer)[/b] 2 Submachine Guns, Nanopulser, E/M Grenades / Pistol, Knife. (0 | [b]10[/b])
[img]https://assets.infinitythegame.net/infinityarmy/img/_logosweb/701/logo_7.png[/img] [b]DASYU Hacker (Killer Hacking Device)[/b] Combi Rifle, Nanopulser / Pistol, Knife. (0 | [b]37[/b])
[img]https://assets.infinitythegame.net/infinityarmy/img/_logosweb/701/logo_6.png[/img] [b]NAGA Hacker (Killer Hacking Device)[/b] Combi Rifle, Antipersonnel Mines / Pistol, Knife. (0 | [b]30[/b])
[img]https://assets.infinitythegame.net/infinityarmy/img/_logosweb/701/logo_6.png[/img] [b]NAGA (Minelayer)[/b] Boarding Shotgun, Antipersonnel Mines / Pistol, Knife. (0.5 | [b]27[/b])
[img]https://assets.infinitythegame.net/infinityarmy/img/_logosweb/701/logo_8.png[/img] [b]MYRMIDON[/b] Chain Rifle, Nanopulser, Smoke Grenades / Pistol, AP CCW. (0 | [b]16[/b])
[img]https://assets.infinitythegame.net/infinityarmy/img/_logosweb/701/logo_15.png[/img] [b]NETROD[/b] . (0 | [b]4[/b])
[img]https://assets.infinitythegame.net/infinityarmy/img/_logosweb/701/logo_15.png[/img] [b]NETROD[/b] . (0 | [b]4[/b])
[img]https://assets.infinitythegame.net/infinityarmy/img/_logosweb/orden_regular.png[/img]10 [b]| 5 SWC | 300 Points |[/b] Open in Infinity Army
Deployment
I won the roll off and elected to go first. I definitely needed to get some board coverage down, but the board was pretty bare. There was not a lot of cover on the right side of my deployment zone, and not much cover in the midfield on the left. This meant I ended up deploying on sort of a diagonal, starting on the left in my deployment zone and ending on the right in the midfield. I covered my objective with a Heckler Jammer and a mine from the Puppeteer, then clustered my two Morans in the center, one on the ground, one on the roof. My Interventor went on a roof, and I strung some Morlocks across m deployment zone edge.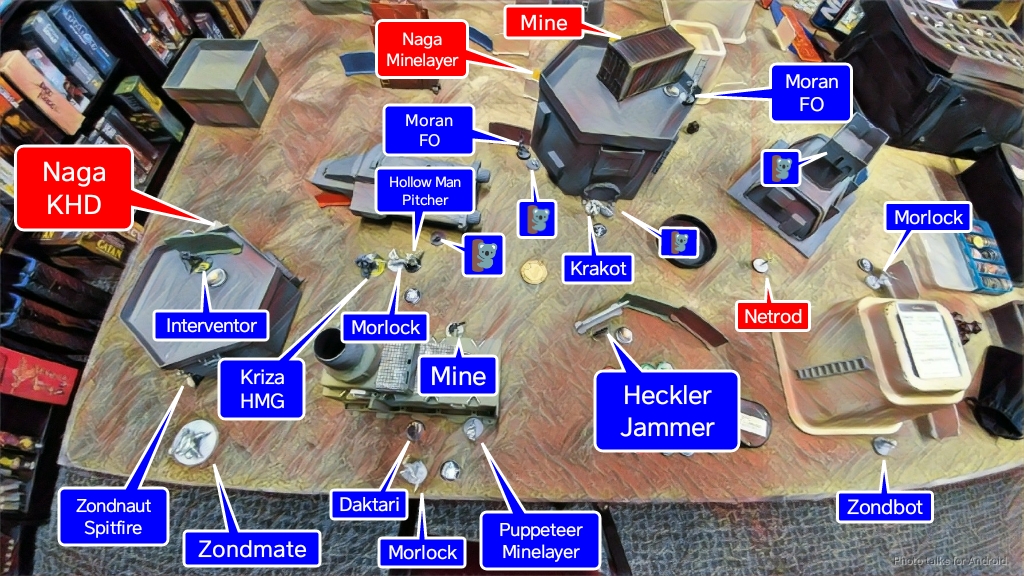 I didn’t know where I wanted my Kriza to go yet, as it was my reserve, so I put my Daktari and Zondbot out to cover as much area as possible. I left my Hollow Man in a dead LoF zone where nothing could see it, but it was out of cover. I’d probably get in trouble if there were any infiltrators, but I figured I’d move it in my active turn to a better position. I deployed my Zondnautica dismounted on the left, and my Krakot to the right of center, figuring I could use the big central building as a way to get around safely during my impetuous order.
Gunnar deployed his Netrods, with the first scattering near my deployment zone and the other landing behind a building in the middle. He put his Proxy Mk5 on the left and Proxy Mk4 on the right–the former for objective grabbing the latter for ARO duty. Macheon, a chain rifle Myrmidon, and the Asura were deep in his deployment zone near the center, with a Dakini HMG near the Asura for ease of buffing later. He over-infiltrated a Naga KHD next to my Interventor just in case, and then plopped a Proxy Mk2 covering my Krakot’s approach on Gunnar’s left and then put a Dasyu KHD next to my Moran (and the Naga’s mine) on the roof. I saw an opportunity to push on the Proxy Mk4 side and do some damage so I deployed the Kriza on that side.
Turn 1
Top of Turn 1 – Nomads
My rightmost Morlock gets a free chain rifle shot on the out-of-place Netrod as part of her impetuous order, taking it off the table. After throwing smoke to cover the Zondnautica from the HRL on the left and moving the last Morlock up safely, I activated my Zondnautica pair, rushing at the HRL. This brought me directly in line with the Naga KHD. Gunnar deliberated for some time before electing to reveal it and try to gun down my Zondnaut. The spitfire and chain rifle made short work of the camo trooper, lulling me into a false sense of security now that there were “no more KHDs on the table.”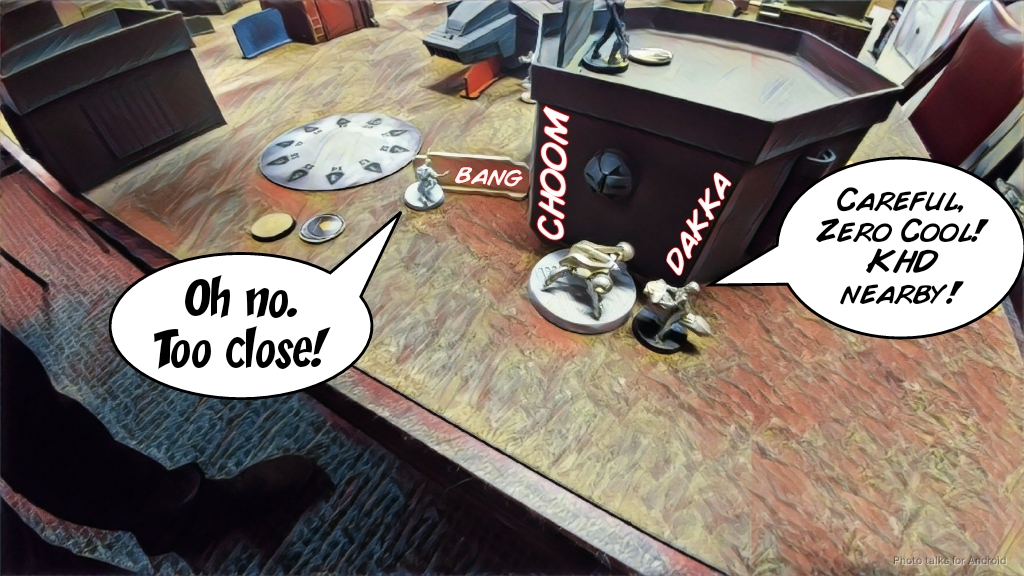 I pushed my Krakot around the corner of the building to find the Proxy Mk2’s BSG barrel shoved in his face. I failed ARM, and so did the Proxy on one of the two chain rifle hits, sending it into NWI.
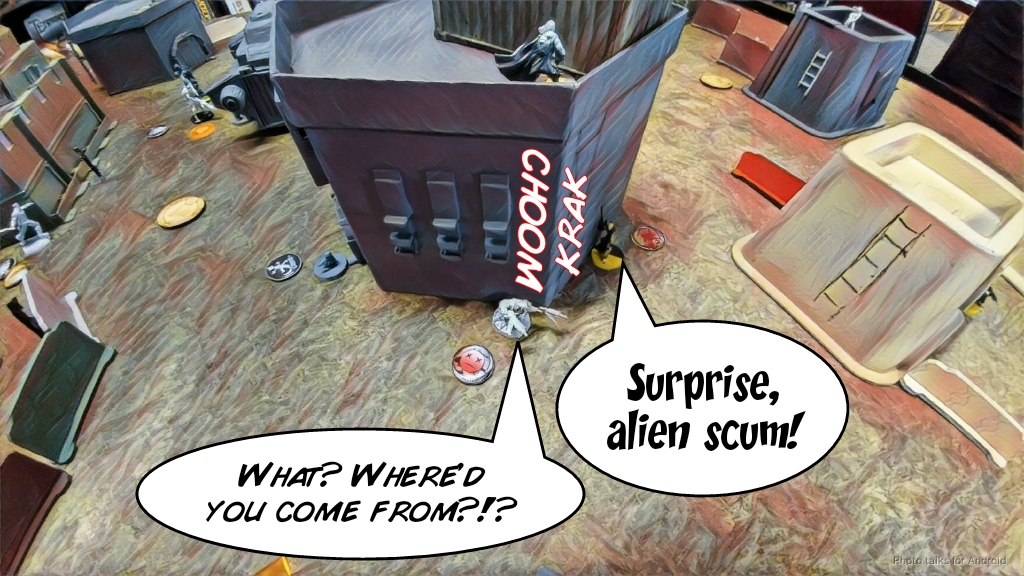 I was pretty excited to use the Kriza at this point–I had a plan and an execution strategy, so I just went for it. The Kriza peeked out to see the Proxy Mk4 and landed 2 crits and two hits, blasting it off the table.
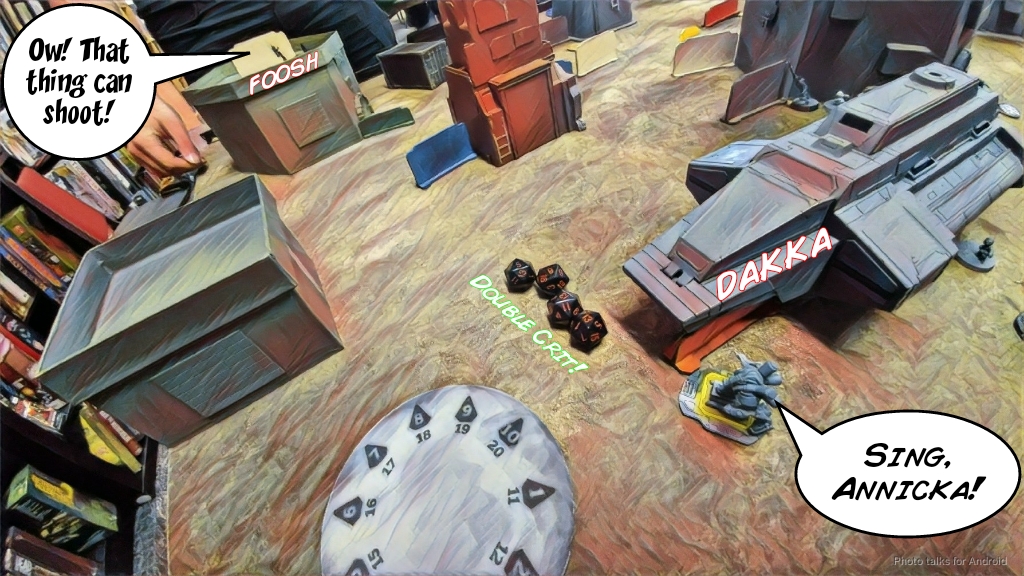 Unfortunately, in my excitement I forgot to move a Morlock out of the way, and the HRL blast fried it. Whoops!
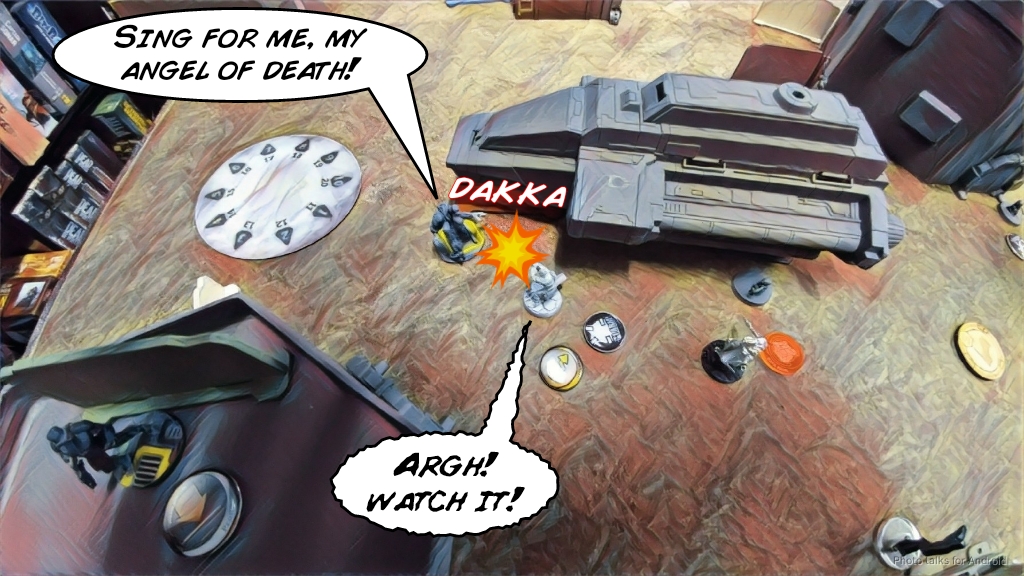 I spend the BBQed Morlocks order on my rightmost Morlock (who rolled NWI) and get it right in the Proxy Mk2’s face, baiting a dodge out of Gunnar, who pulls it behind the building.
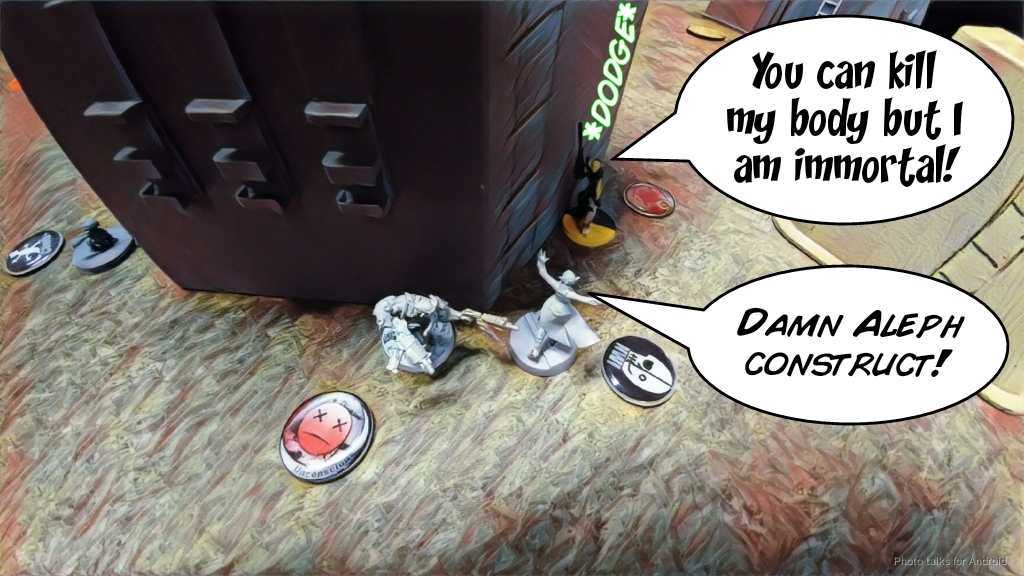 Instead of chain rifling, I let him dodge away and spend the second short skill pushing the Morlock around the corner, moving into base to base with the Proxy and dumping a chain rifle into both the Proxy and the Netrod on a new order. The Proxy dies, but the Netrod passes ARM! Boo!
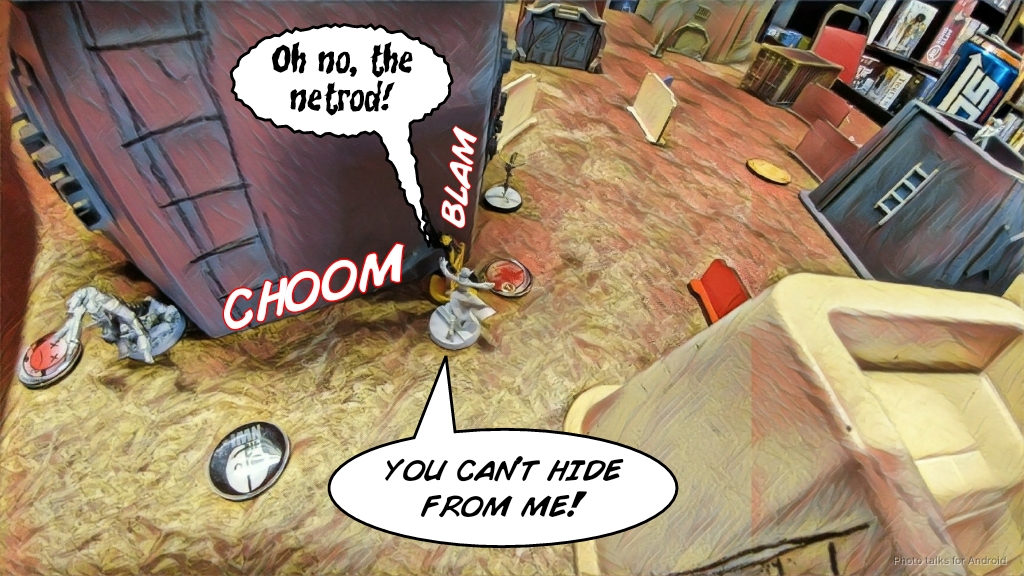 I continue pushing the Kriza forward, baiting the Naga Minelayer out of hiding and gunning it down. Taking out the Dakini HMG took too many orders (that Mimetism!), but I make up for it by shooting the Proxy Mk5 in the back and off the table in one order before scuttling back to cover.
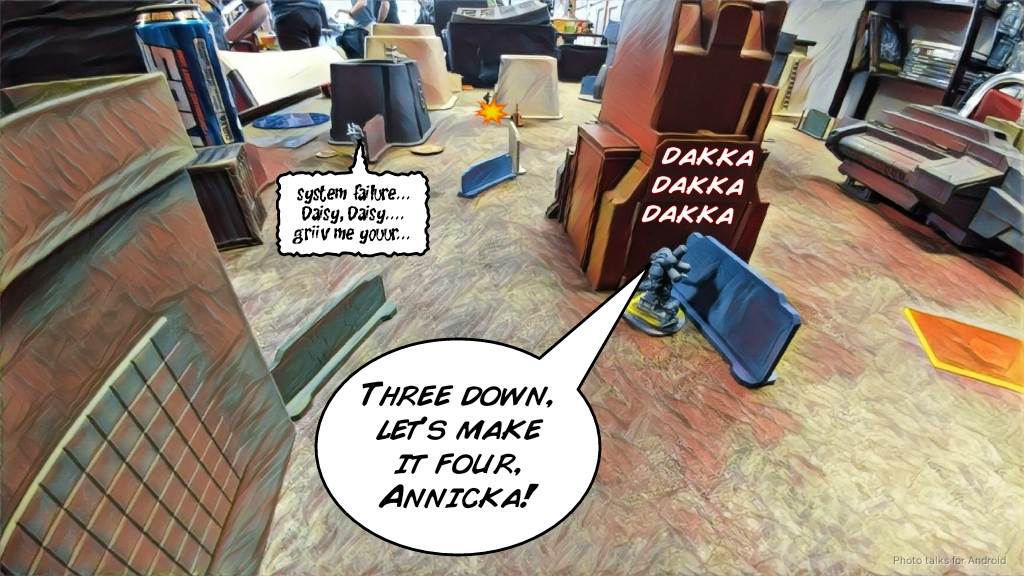 I figure at this point I’ll cybermask my Interventor before passing the turn, and eat a Redrum to the face from the hidden deployment Dasyu KHD. NOOOO!!!!
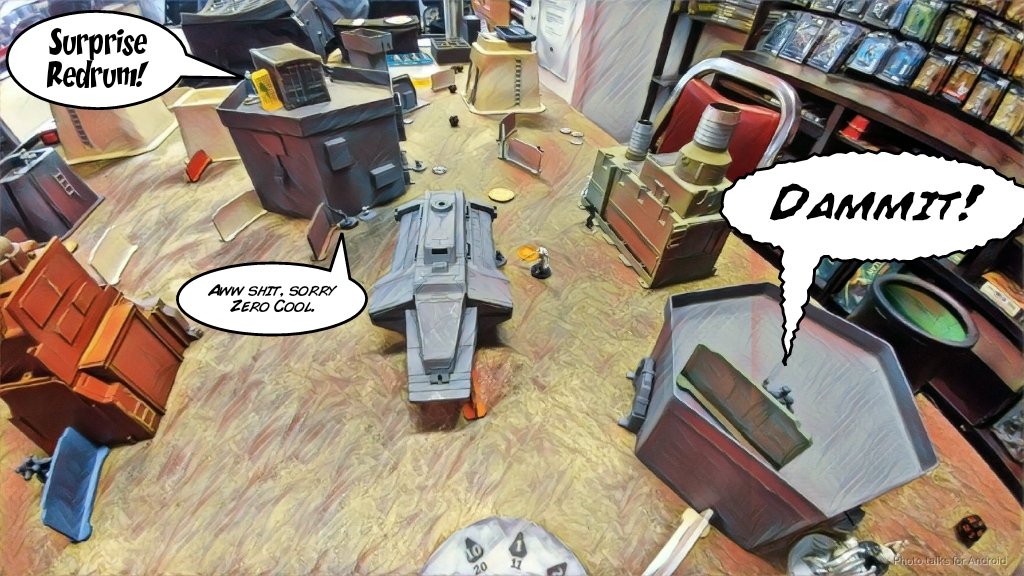 I end my first turn in loss of lieutenant, but at least I’ve killed all three proxies, a Netrod, two Nagas, and a Dakini. So far so good.
Bottom of Turn 1 – ALEPH
Macheon spends quite a bit of time trying to take out my Kriza, but I pass 4 ARM saves and eventually get around the corner by failing guts. The Myrmidon pokes out to pistol my Morlock, and while it fails to pistol my Morlock, I fail my dodge into cover. With the Kriza out of LoF, the Asura is now free to stand up and take out the Morlock. With that accomplished, Gunnar passes the turn.
Turn 2
Top of Turn 2 – Nomads
I’m in loss of lieutenant, but I still have some fight left in me! The Zondmate gets taken out by the Asura but blocks Macheon’s LoF to the Zondnaut’s advance. I bring in a Tomcat and gun down the last Netrod, taking out two orders for the cost of a command token. I don’t have much else to do so after dropping an additional mine with the Puppeteer, throwing some pieces into suppression, and repositioning some models, I activate the Zondnaut. She attempts to take out the Asura with her spitfire, but just ends up getting shot in the face instead.
 I try again with the Kriza twice, but this doesn’t work either. I pass the turn, in a tough spot, after nominating the Hollow Man as my lieutenant and shifting it out to see Macheon’s approach.
Bottom of Turn 2 – ALEPH
Macheon breaks cover, but his ODD protects him from the Hollow Man’s shock round. Gunnar spends the rest of his order pool sneaking Macheon into base to base with my Kriza.
  While I lose the Kriza, Gunnar loses Macheon thanks to my Moran in suppression nearby.
 Gunnar started the turn with only 4 orders, so he’s forced to pass it back to me.
Turn 3
Top of Turn 3 – Nomads
With m Kriza down, I don’t have a great way to get the Asura off the objective, and I’d really like to get the Hollow Man up there. I basically spend my entire order pool firing AP rounds from the MULTI Rifle at her until she drops.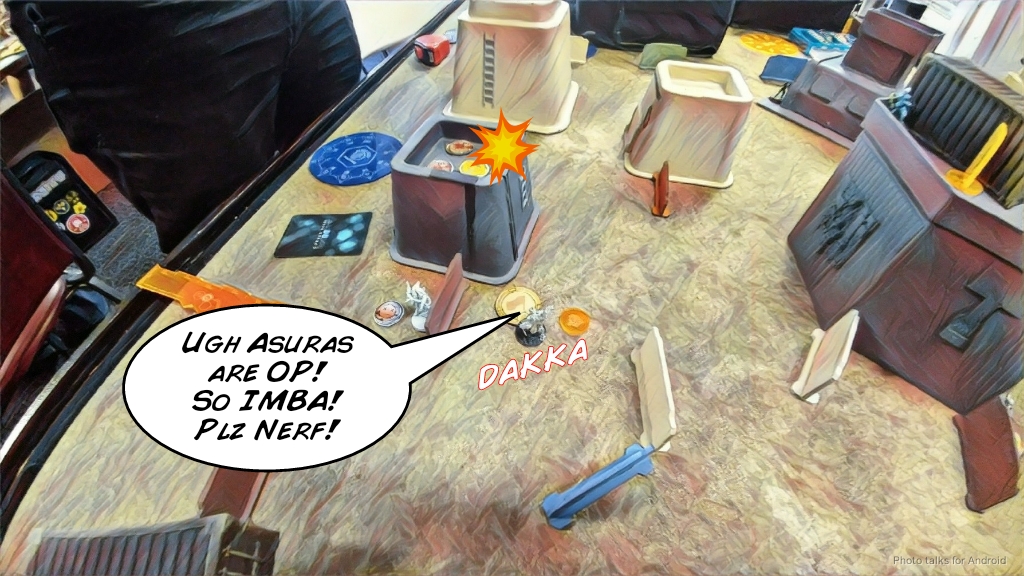 With only two orders left, I grab the objective with the Hollow Man, and attempt to bring back some random unit that was unconscious with a MediKit with m Daktari (don’t remember what). I whiff the MediKit shot though, so I fail my classified.
 With all the objective-related bullet points ticked, it’s an
8-0 Nomad Victory!
The Kriza did some serious work, but so did Gunnar, with us ending the game at 155 to 53 points remaining on the table. I’ve got two majors and a loss to Nate. Nate and Erik (who Nate proudly (and rightly) referred to his as Padawan) both had two Majors and a Minor, putting them at 1st and 2nd place, and I made third out of ten players. I’ll take it!
Notes
Notes for Me
- Well, losing my Interventor unnecessarily was dumb. Sigh. Gotta pay more attention to the infiltrating TO KHD thing when I’ve got Morans on the table. Thankfully I’m pretty used to playing in Loss of Lieutenant these days so I made do.
- Nate-ing with my Kriza worked great! Just stomped him up the field and killed 4 things. I am really starting to love the Zondnautica too.
- I keep losing Krakots to silly things, but I guess people know they have to go.
- I really need to think about my Daktari deployment some more. It was quite hard to deploy her and her bot properly to get things to within an order or two of getting picked back up.
- Definitely should start taking a sensor bot more, not as a knee jerk reaction to what happened in this game, but I’d been thinking about it and I think it would add ot my game. The Dasyu just brought it back to my attention–it’s worth underscoring that responding to games with big swings in your list construction is not a great plan.
Notes for Gunnar
- Definitely wouldn’t have revealed the Nagas on my turn. Make me work for it. Deploying the Naga KHD so damn close was probably not the best, although it was juicy. It also mind gamed me pretty decently.
- Great work with the Dasyu KHD.
- You had mentioned that you missed the Proxy Mk2 MSR, and that you crutch on it a little. Well, it’s a huge PITA for me, so it’s a good unit, but it’s also good to stop relying on your crutches every once in awhile. I think you did just fine without it.
- Definitely needed to protect your Dakini HMG more, as we discussed post game. Letting me get a flank shot on it was a mistake.
- I like Garudas. Have you tried Garudas?
- As you said yourself, smoking your way into base to base with the Kriza on your first turn would probably have been more efficient.
- Not sure why you put the Proxy Mk2 so close to my Krakot, especially if you know it’s got 2 chain rifles. I guess there wasn’t a significantly better place to put it? It ended up being fine, but ah well. Tough, open board.
- The Asura really shaped this game. I couldn’t get anything forward to get the objective because of the damn MSV3 seeing through any of my smoke tricks, and with the Interventor down I didn’t have white noise to help either.
- Great game, as always. Looking forward to playing you again, hopefully sooner than the next tournament!