The Unexpendables
March 2019 has been and continues to be a really busy Infinity month for me. After two days of the Best of the Pacific Northwest, I ran a Showdown Tournament of Deadly Dance split across two stores to make up for the lack of our usual tournament, and then I am flying out to Adepticon 2019 at the end of the month. That and I’m painting JSA and Ikari frantically in preparation for Adepticon. Much thanks to my better half for putting up with my all-encompassing hobby.
I ran the tournament with Soldiers of Fortune so factions without TAGs weren’t going to lose out on objective points. Of course, some of my players decided that this was license to take all the warcors with Joan or Wallace. You know who you are :: glares daggers ::.
I was actually looking forward to not playing in the Deadly Dance tournament, especially after playing 7 games in less than 7 days about a week earlier, but we had an unexpected drop, so them’s the breaks. To make matters more interesting, the store was closing on time (instead of staying super late after close) the night of the tournament on account of the owners having some personal responsibilities.
Thankfully, I was playing Jordan, who has improved dramatically with his CHA in recent months. He’s definitely not our fastest player, so I took it as an opportunity to encourage him to play quickly. I’m a big proponent of not over-analyzing every decision and just dealing with the consequences. You’ll make more mistakes which means there are more opportunities for learning. Perhaps a tournament isn’t the right place to do this, but given we had time pressure from the store anyway, might as well make the best of the situation.
A huge thanks to everyone for showing up a half hour early on a work night, to Adam for helping me set up, and to Amy at Glimpses of Wonder and Warfare for putting her plans on hold as we finished the last few orders of the top table game.
Overview
- Mission: Deadly Dance (Soldiers of Fortune)
- Forces: Ariadna versus Caledonian Highlander Army (300)
- Deploy First: CHA
- First Turn: CHA
On the car ride up to the Best of the Pacific Northwest 2019, Adam and were messing around with stupid list ideas, including an experiment to see if we could make vanilla lists for each faction with nothing but named characters. Our strategy was to add a reasonable profile for each named character, and then add all the named characters before slowly removing the ones that didn’t fit in the list very well. One amusing outcome was that the ALEPH list ended up well above 800 points by the time we were done adding characters.
As it turns out, the most sane lists were out of Ariadna and Nomads (huzzah, two factions I play), and I had most of the Ariadna stuff built already! Funnily enough, if you swap out Margot and Duroc, it makes a Scarface and Cordelia sized hole in your list. So that’s what I did. I elected to take Aida over Isobel… because… Aida.
One of the problems with taking an all named character list is that they’re generally all attack pieces with a bajillion attack tools but very few defensive tools, and they’re all universally expensive and capable enough to not want to lose them. So, while it’s basically an ensemble cast of Ariadnan badasses like the cast of the Expendables, none of them are really expendable. Hence, Adam coined the name “The Unexpendables.”
The Unexpendables
COLONEL VORONIN Lieutenant Rifle / Assault Pistol, AP CC Weapon. (0 | 21)
VASSILY (Chain of Command) T2 Sniper, D-Charges / Heavy Pistol, Knife. (1 | 39)
BRIGADIER BRUANT Molotok, D-Charges / Pistol, Knife. (1 | 28)
UXÍA McNEILL (Covert Action) (CH: Limited Camouflage, Superior Infiltration, Specialist Operative) Boarding Shotgun, D-Charges, Smoke Grenades / 2 Assault Pistols, AP CCW, Knife. (0 | 27)
AÏDA SWANSON 2 Submachine Gun, Viral Mines / Viral Pistol, Shock CC Weapon, Knife. (0 | 24)
ROSIE Light Rocket Launcher, Light Shotgun, D-Charges / Pistol, Knife. (0 | 22)
PAVEL McMANNUS Ojotnik, Chain-colt, Antipersonnel Mines / Pistol, T2 CCW, Knife. (0 | 31)
SCARFACE & CORDELIA TURNER . (1.5 | 68)

SCARFACE Light Shotgun / Pistol, CCW. ()
CORDELIA TURNER Combi Rifle, Chain-colt, D-Charges / Pistol, Knife. (0 | 17)
VAN ZANT AP Rifle / Heavy Pistol, AP CCW. (0 | 38)
10 | 4.5 SWC | 298 Points | Open in Infinity Army
As for dissecting the list, it’s not bad! A full half of the list is specialists for swapping quadrants, and there’s a good deal of AP/T2 in there for dealing with TAGs and the like. Lots of camo, and a few mines. I definitely didn’t pick things based on toolset, with the exception of Aida versus Isobel (SMGs + Viral anything wins out, sorry Isobel). Lots of mimetism too, on the things that aren’t in camo. It definitely SUUUUCKS at passive board control though. I basically have to leave stuff out to ARO unless I want warbands rampaging through my DZ on turn 1, and there is basically no one in here that I’m willing to trade for a warband.
Here’s Jordan’s list. It has the usual CHA stuff in it. Cheap link with a big gun, Cateran to kill my TAG if I move it, Scarface/Cordelia for farting around in the assigned zone to score points, Wallace and a pile of cheap ass orders (including 3 warcors), and some TAG hunting Cameronians. Thankfully, it wasn’t a giant pile of Galwegians, which made me happy.
TAG
GROUP 1 |6
3
GROUP 2 |
CAMERONIAN 2 Chain Rifles, Grenades, Smoke Grenades / AP CCW. (0 | 23)
WALLACE Lieutenant Combi Rifle + Light Flamethrower, Smoke Grenades / Pistol, EXP CCW. (0 | 35)
WARCOR (Aerocam) Flash Pulse / Stun Pistol, Knife. (0 | 3)
WARCOR (Aerocam) Flash Pulse / Stun Pistol, Knife. (0 | 3)
HIGHLANDER Chain Rifle, Smoke Grenades / Pistol, AP CCW. (0 | 6)
CATERAN T2 Sniper Rifle / Pistol, AP CCW. (1 | 24)
S.A.S. Chain Rifle, Grenades / Assault Pistol, AP CCW, Knife. (0 | 22)
UXÍA McNEILL (Covert Action) (CH: Limited Camouflage, Superior Infiltration, Specialist Operative) Boarding Shotgun, D-Charges, Smoke Grenades / 2 Assault Pistols, AP CCW, Knife. (0 | 27)
VOLUNTEER Paramedic (Medikit) Rifle / Pistol, Knife. (0 | 10)
HIGHLANDER GREY AP HMG, Smoke Grenades / Pistol, CCW. (1.5 | 34)
5 SWC | 299 Points | Open in Infinity Army
Actually, as I write this, I’m not entirely sure that the Cameronians are the right TAG-hunting tool. In close combat, it’s a 40% chance to wound Scarface, a 25% chance to take a wound, and 35% chance for nothing to happen. Even with super jump and quick movement, it’ll take you 3 orders to put the TAG down. McMurrough, on the other hand, is better. Roughly 80% chance of wounding the TAG once, 43% chance of wounding twice, and the TAG has less than a 10% chance of wounding, thanks to MA3. Probably take McMurrough and not a second Cameronian, which gives you 16 points to play with i.e. net you an additional order. Hmm. Food for thought.
Deployment
We were under time pressure, so we got straight into it. Jordan won the rolloff and decided to go first. There was a big sniper tower on some rocks, so his Cateran went there, and then he plunked his Grey/Volunteer link down on the left. The only reasonable spot to hide Wallace was on the left, so Jordan did exactly that
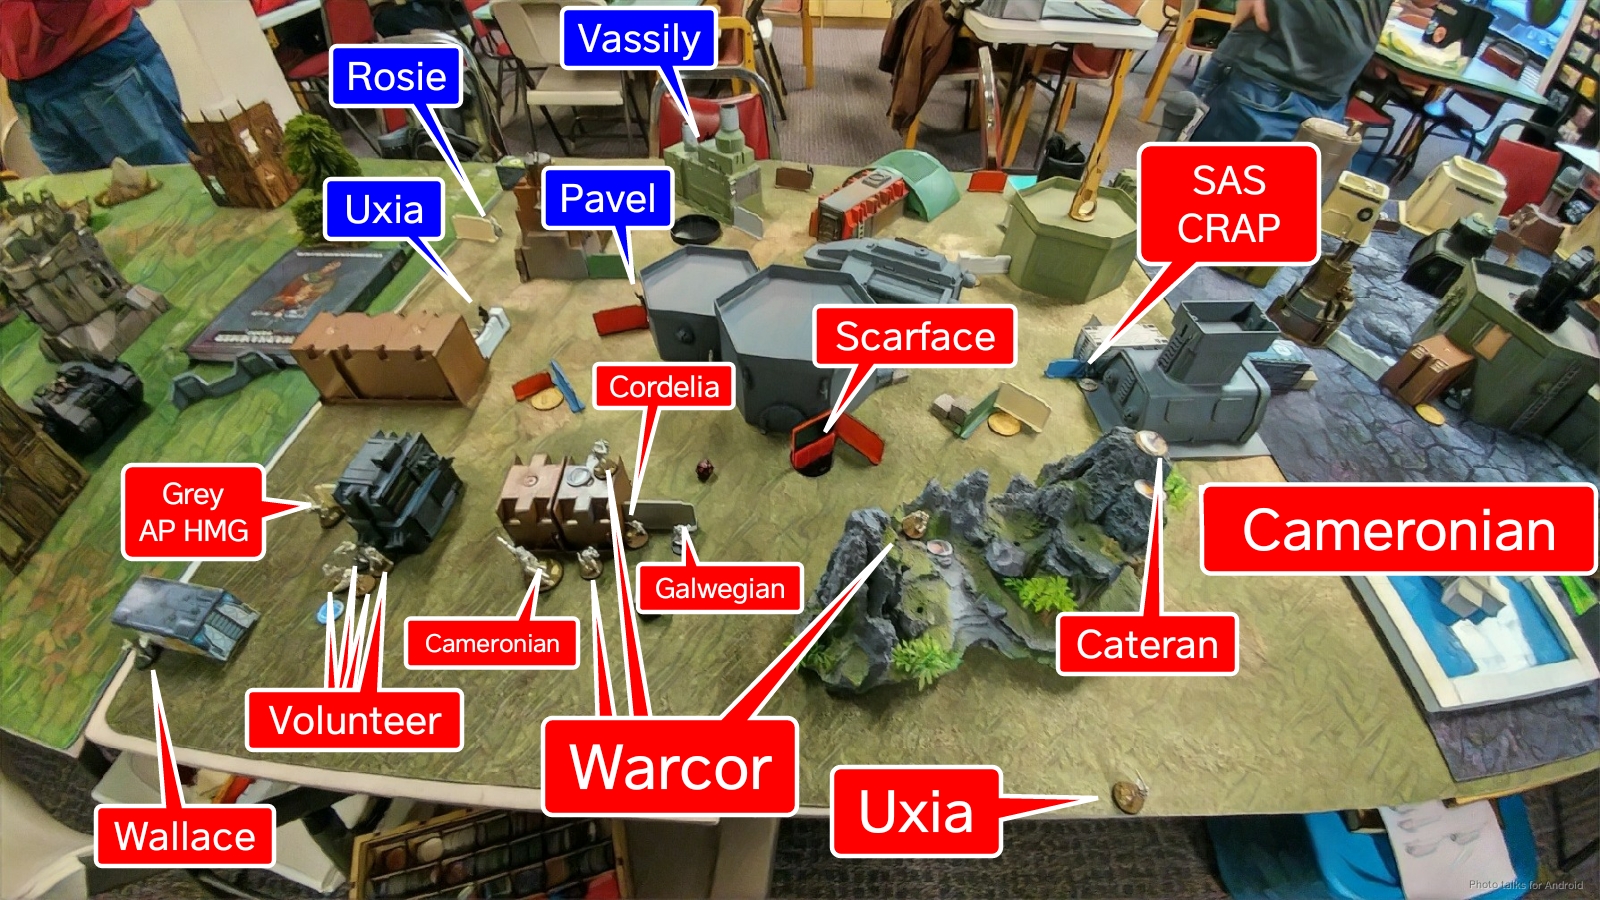
Then, Jordan put down three Warcors, proxied by USARF models. UGH. He finished his deployment with Scarface forward deployed behind a big building and Cordelia on the left, protected by a Galwegian and a Cameronian. The remaining Cameronian went on the right, with an SAS CRAP screening access to that side.
Ugh. I hated absolutely everything about this situation. Wallace and multiple Warcors definitely skews Caledonia’s power level way up and double Cameronian definitely makes it a tough uphill battle. Going second was going to be pretty back breaking. I’d like to use this game to talk about pressure. There’s a few of different types of pressure you can exert in a game of Infinity:
- Positional Pressure – Basically areas of generated threat and area denial. Warbands, impersonators, snipers/MLs out to ARO, mines, Koalas/MadTraps, repeaters, etc. generate positional pressure. They shape your movement by forcing you to avoid an area, or to shift power pieces to remove whatever’s causing the pressure. Positional pressure is your opponent’s way of saying: “Don’t go here.”
- Order Pressure – Order pressure is pressure on your order pool. It’s very closely related to and often is a result of positional pressure. For example, a Jaguar Panzerfaust watching a lane that you need to move through will force you to expend orders to kill him (and he’s Dogged so it’ll probably take a few), cautious move through, smoke through, etc. Warbands are another great example of order and positional pressure. You can deal with them, but it’s going to cost you a lot of orders to go around the corner in a safe range and shoot them. When your opponent exerts order pressure, they are saying: “You can do whatever you like, but it’s not going to be order efficient.”
- Psychological Pressure – This is the tough one, because it mostly comes from you, and not your opponent. To briefly get into the psychology of it, we’re wired to respond to threats and external pressures as if they were life and death, because there was a time in our biological development where that was true. Of course, I’m not suggesting that we respond to the trials and tribulations of our little metal mans as it were a matter of life and death, I’m just saying that we have an asymmetric emotional response to it. At the end of the day, there’s basically nothing of actual long-term value at stake on the table, but we still get upset at losing models, afraid of an opponent’s scary trooper, or angry when our toy soldiers “fail” us. This is part of the fun, honestly–it’s because we care that we play this game. Too much of an emotional response, especially if we go “on tilt,” can negatively affect your performance in the game. The fear and psychological pressure we feel when a Speculo shows up out of reserve or when a horde of Ghazi Muttawiah start advancing across the table can lead to significant over-corrections in our play or just plain mistakes.
So basically I found myself under all three types of pressure at the start of the game, during deployment. Jordan had set up some some great positional pressure with a Cateran on overwatch covering most of the board. If that wasn’t enough, three Warcors covered the other firelanes that the Cateran couldn’t see. I knew he’d have order pressure as well by forcing me to deal with Galwegians and Cameronians in the midfield, if not in my deployment zone, and I’d have to extricate myself from that morass under the baleful gaze of that F$*KING Cateran.
To make matters worse, I was under psychological pressure as well. I had rushed from work to the game store to set up tables in time for an early start so we could get out of the store on time, was eating a sandwich for dinner with one hand while deploying with the other… you get the idea. I wasn’t in the best headspace to have a calm, thoughtful response to Jordan’s deployment. I let my instincts take over and ended up with a denied flank deployment, hiding from the Cateran and basically hoping to cautious move through the areas he could see if absolutely necessary. Aside from Vassily, I had no long range guns so I was in trouble if I needed to get somewhere quickly–that Cateran was going to be pretty awful in terms of order and positional pressure.
I basically hid Scarface behind the only thing that was tall enough to protect him from the Cateran, and that dictated the rest of my deployment. Cordelia hung out nearby just in case, and Voronin hid in the far corner. I really considered putting Uxia to cover the link team’s activation with a shotgun, but then looked at my options for cover and decided it was terrible. Instead, I put her in a position to attack the link team once they advanced, on the right, and protected access to her with Pavel, who also guarded my HVT.
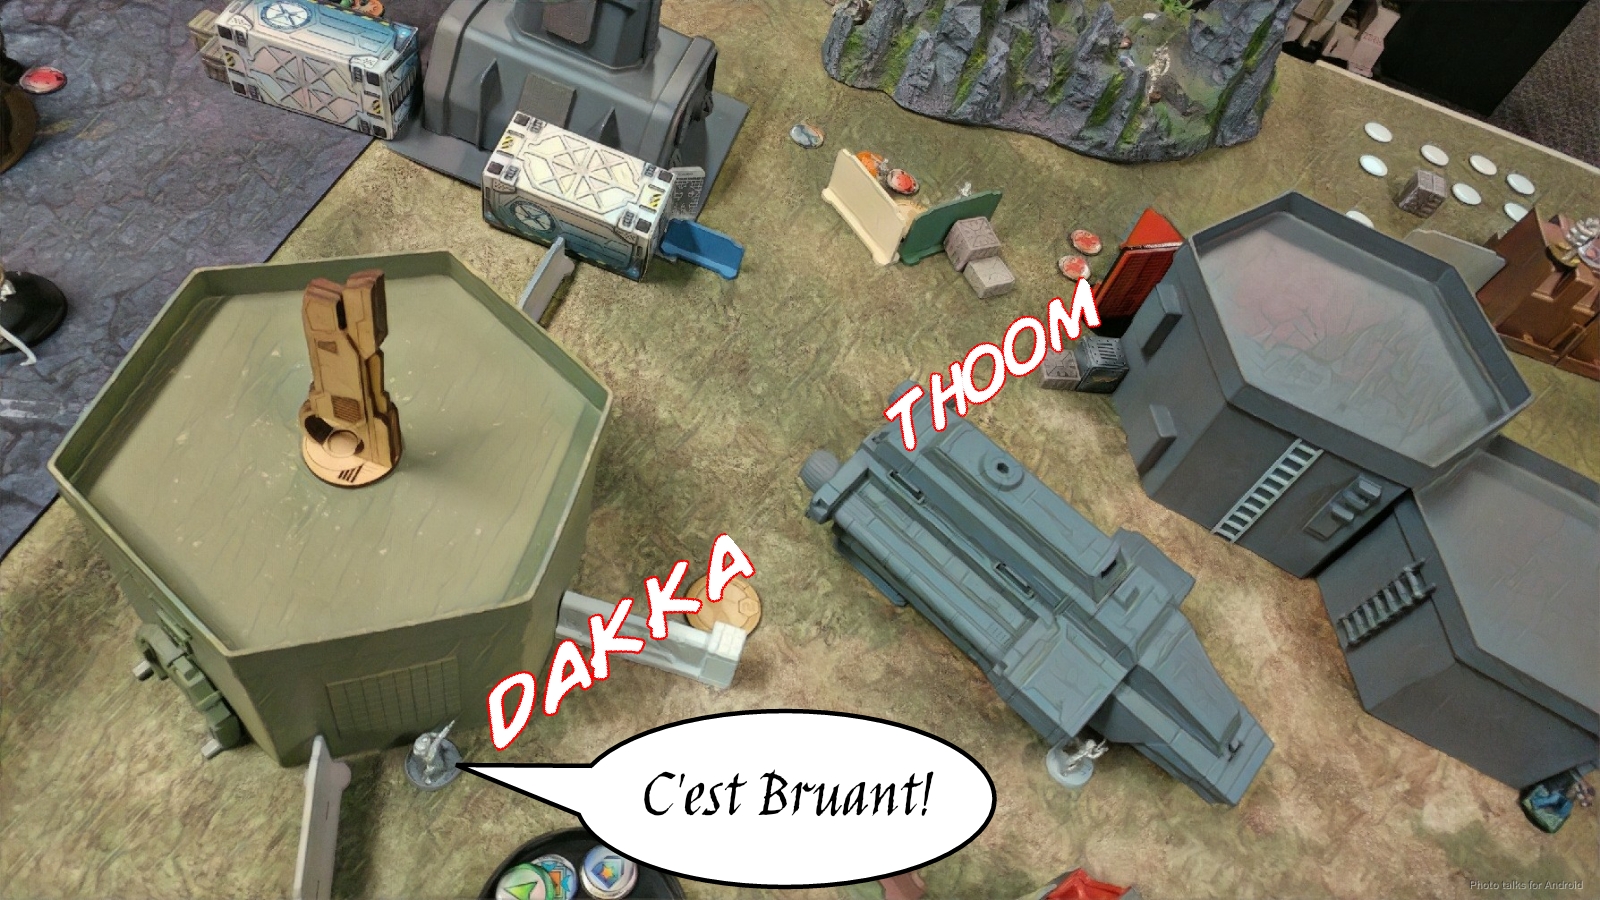
Vassily pretended to watch two firelanes, and I left his ambush camo token in view of the Cateran, but not blatantly so. I was hoping that I could get Jordan to reveal the Cateran to attempt a discover on it, thinking that I had made a mistake and left something out for the Cateran to eat. I screened my left flank with Aida, figuring I could at least get a viral mine out or a viral pistol shot on the left Cameronian as it came snarling in, and then left Bruant on the left behind her to go hunt Scarface with his Molotok.
I was super displeased with the deployment–it felt very unsafe and like I would have to trade pieces to stop bad things from happening, and that would just shatter my list. Unexpendables, remember? I was very overwhelmed and just made a decision to deploy denied flank and committed.
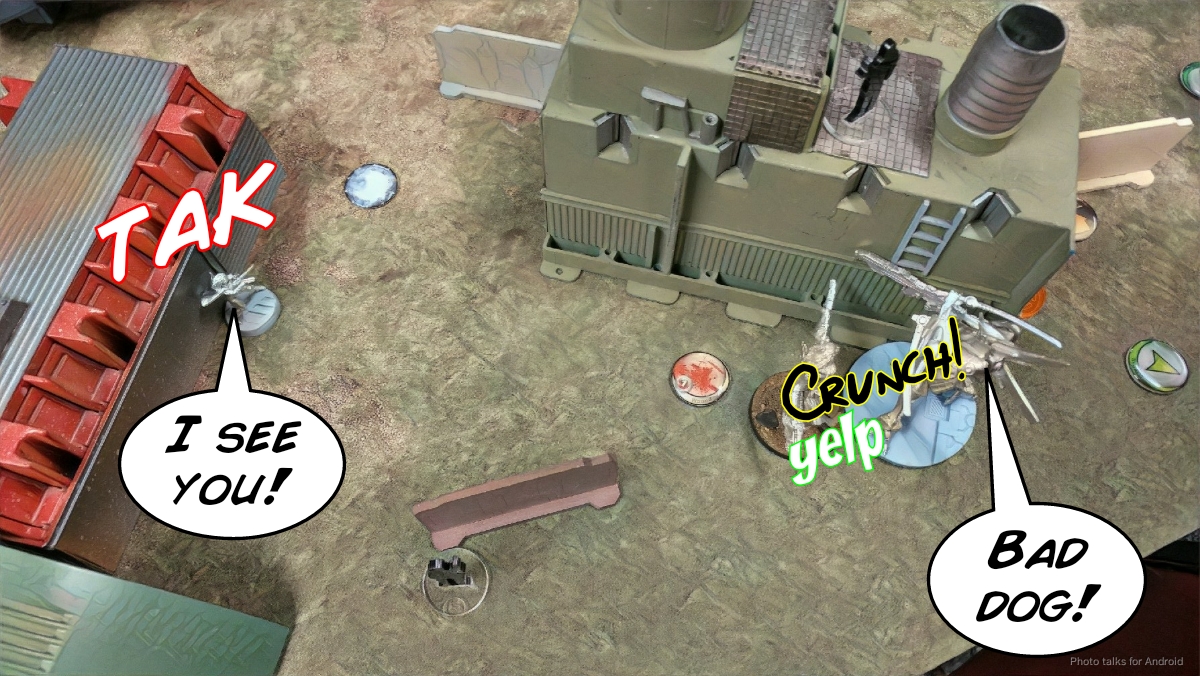
I was figuring out how best to salvage that mess when Jordan did what I was dreading for his reserve and attempted to over-infiltrate Uxia. Thankfully, she failed her roll and ended up on his deployment edge. That would probably have lost me the game right there.
I plunked Rosie down out of reserve. I eyeballed (correctly) that when the Cameronian and the Galwegian on my right advanced, I’d be able to tag a Warcor and Cordelia in the rocket launcher blast as they moved up, so I put her in the exact right spot to do that. One delightful outcome of this list is that I was able to use the Voronin that Than (zagdag) generously gave to me when liquidiating his TAK after he converted and painted it. What a guy!!
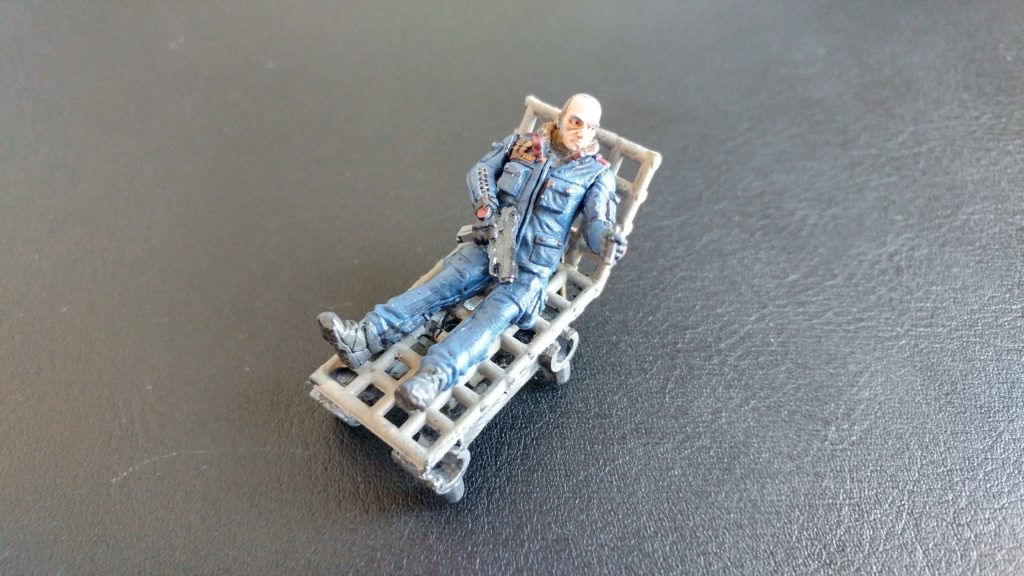
Than had converted up Voronin to be enjoying a cigar while lying prone on a lawn chair, which was perfect for this list. I had no intention of actually using Voronin for anything except his order and his lieutenant order this game, so I was content for him to enjoy his synthetic Cuban cigar in the depths of my deployment zone.
We rolled for quadrants, and Jordan got his near right (my far left), which meant that I had the diagonally opposite. I changed the rules for the tournament to diagonally mirror the quadrants for fairness in the Showdown single-round format. I chose Cordelia as my DataTracker, figuring I might need the extra order to go and heal up Scarface, and Jordan chose Uxia as his DataTracker to be able to get her upfield from his back table edge more efficiently. Smart. With that, we were off.
Turn 1
Top of 1 – CHA
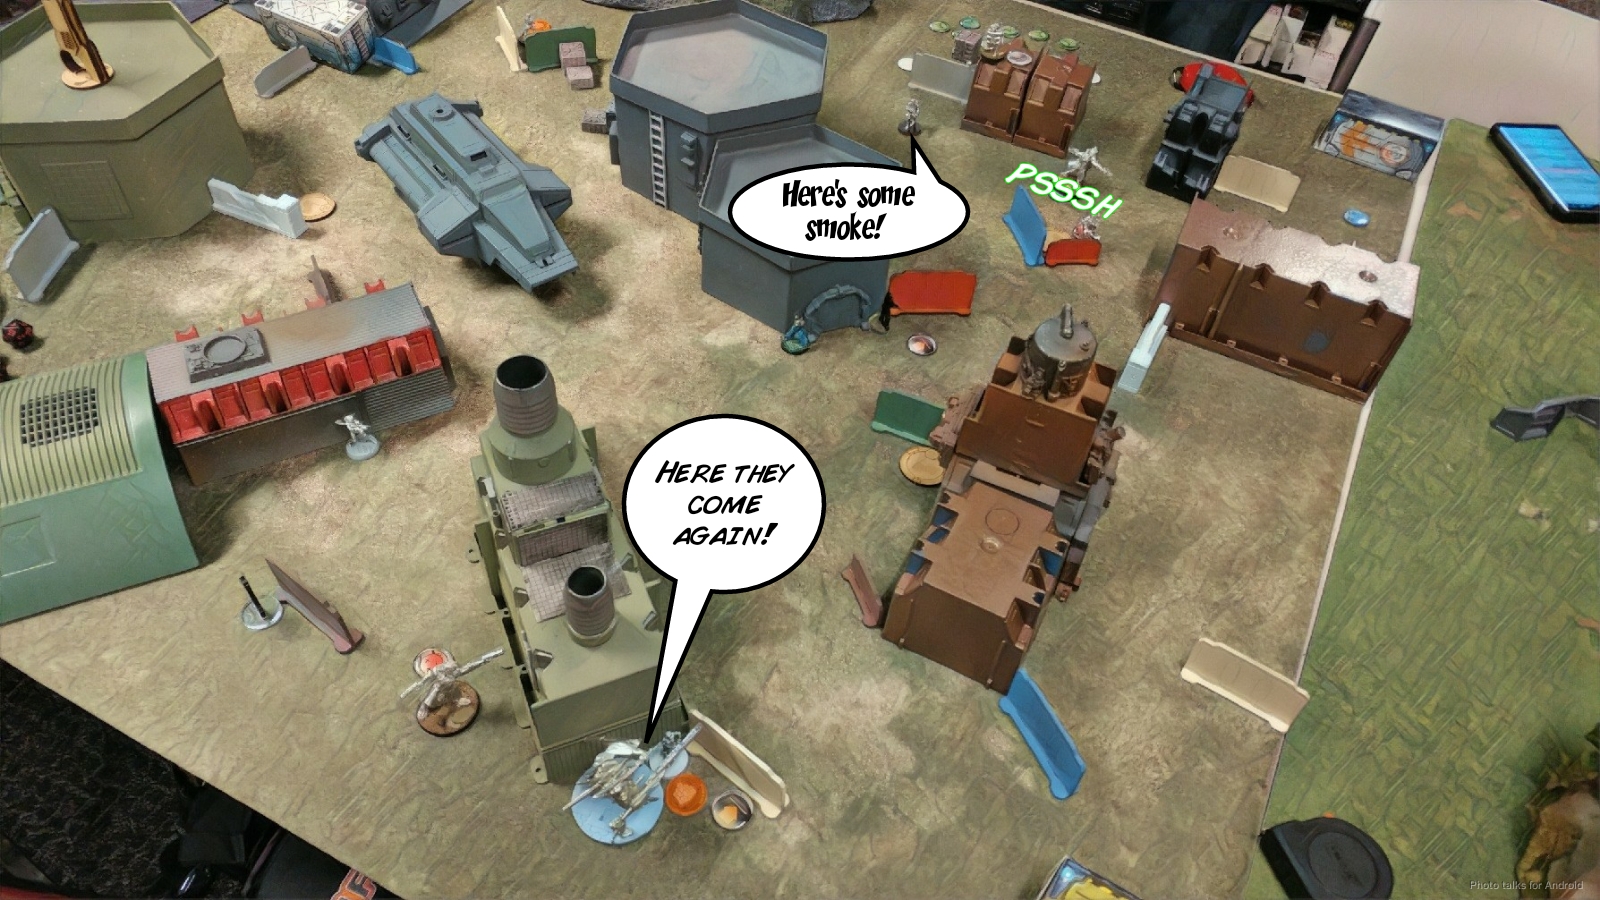
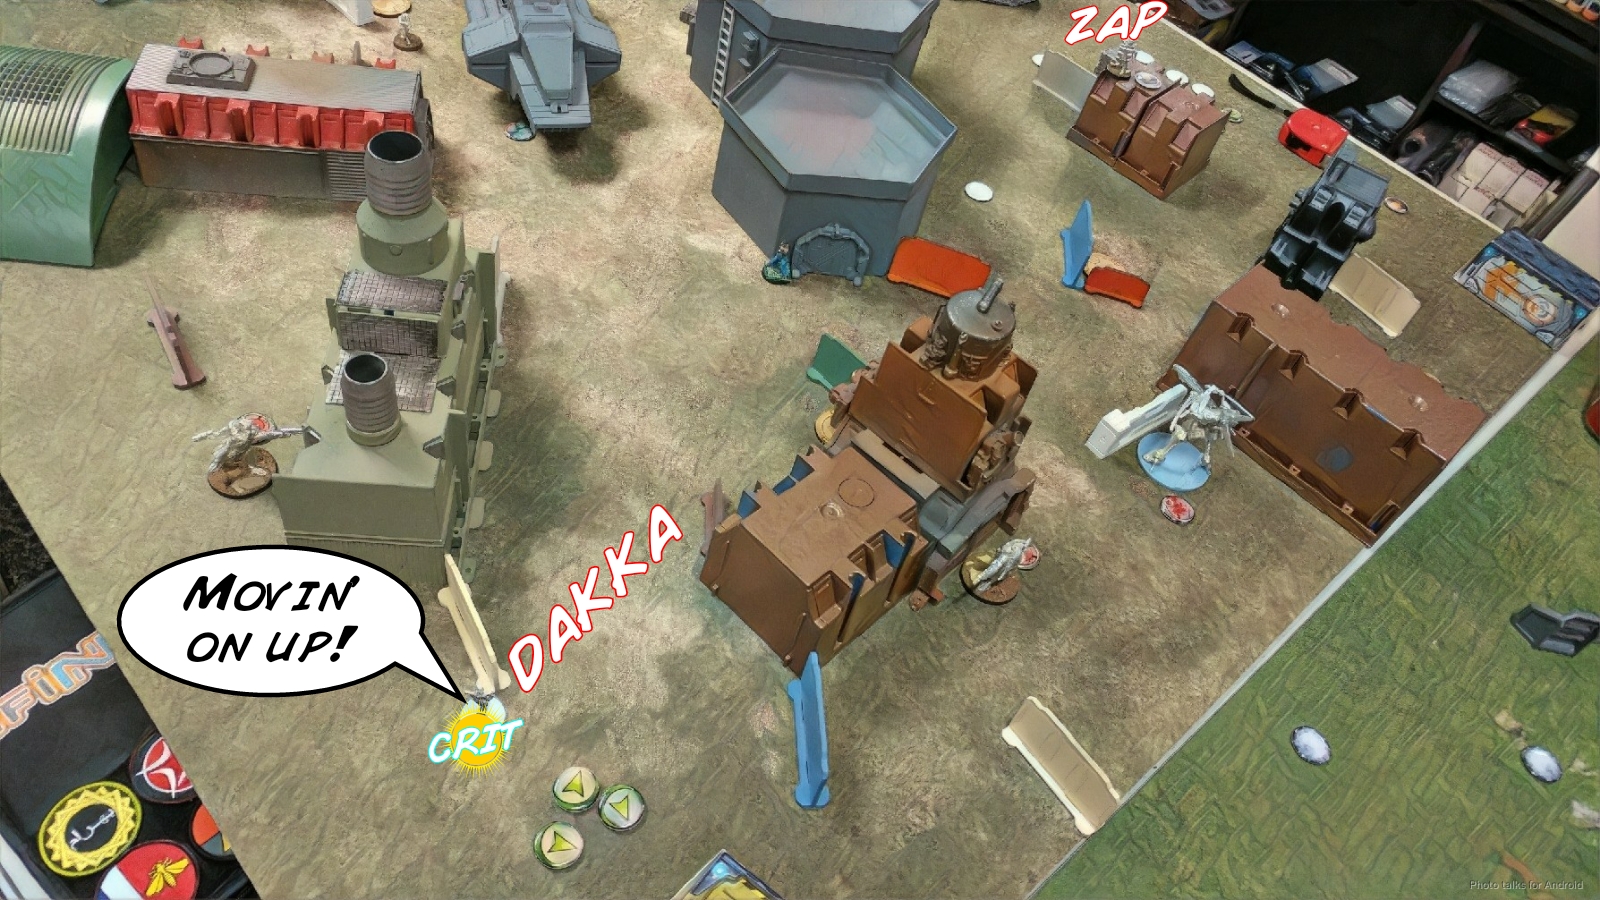
I was right, and as his Cameronian came rolling in, I tagged one of Jordan’s many warcors with a template from Rosie. The Cameronian beat her out with smoke, and the warcor rolled a 20 on ARM. Bah! The Galwegian got smoke off too against Rosie’s flubbed rocket roll, sadly, meaning Cordelia was also safe. This was me exerting a little order and positional pressure of my own!
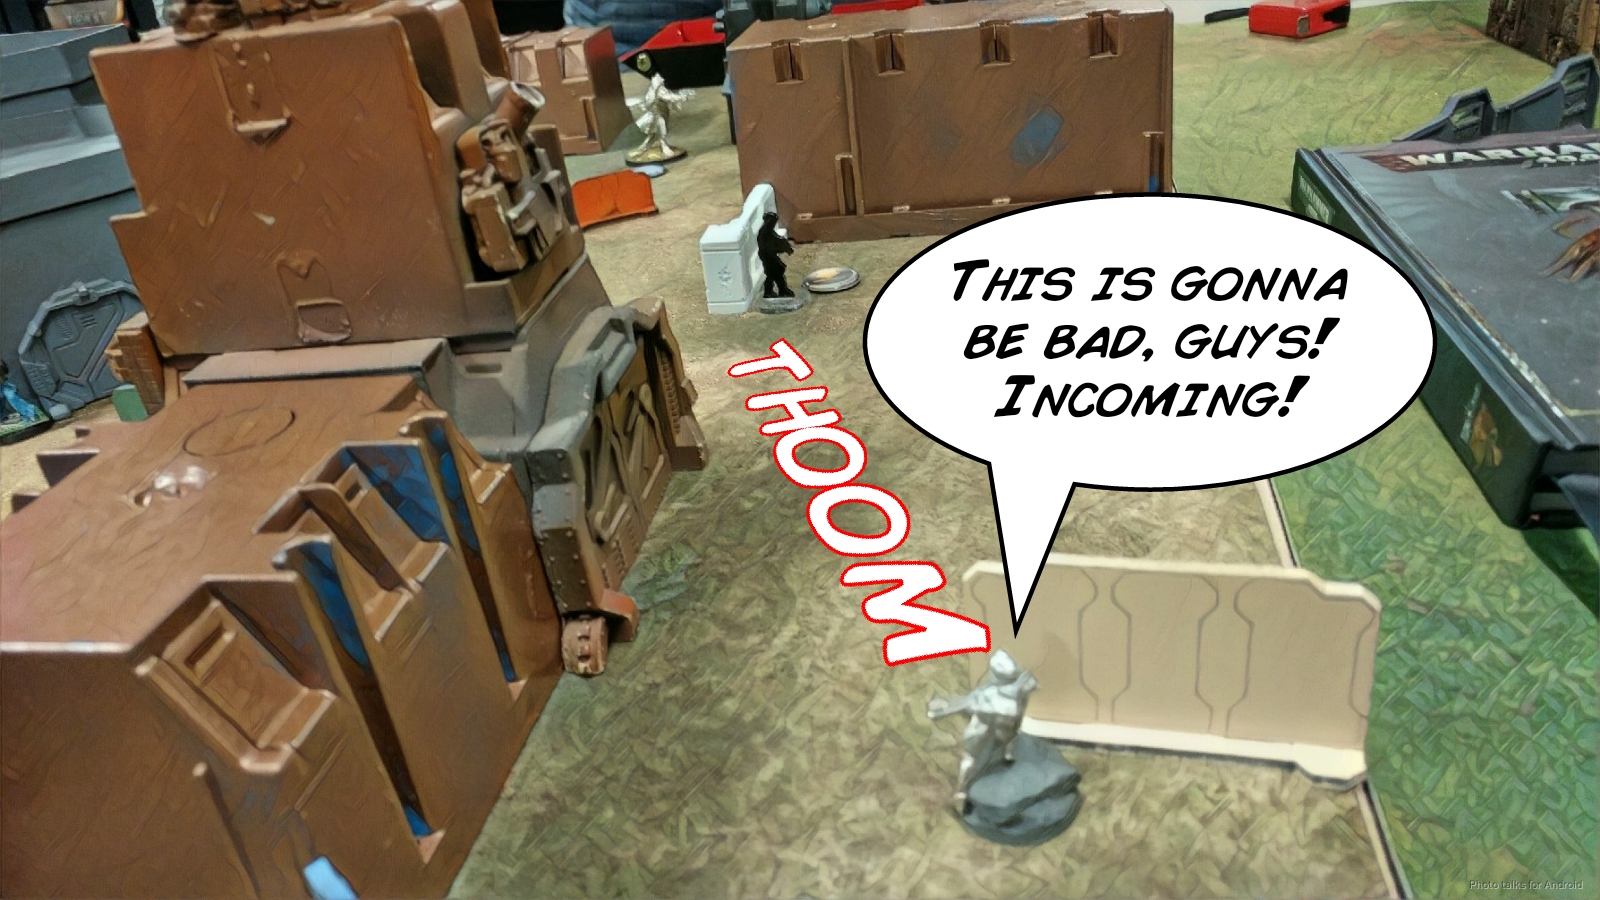
Jordan then committed to the plan of getting the Cameronian on my left (not the one that Rosie was shooting at) into CC with Scarface. After throwing all kinds of smoke to block the ambush camo marker’s LoF, the Cameronian was in my deployment zone. This, I think, was a mistake that Jordan fell prey to due to his own psychological pressure. It’s definitely safer to throw smoke to completely deny me the option of breaking camo to shoot at the Cameronian, but there’s basically nothing that can straight up kill one that’s camo and in Ariadna in a single order, so he was much better off running across the board and throwing smoke only when necessary.
In any case, after some more smoke, he was ready for his attack run. Credit where’s credit due, Jordan stuck to his plan solidly. I was way more concerned with him chain rifling everything in my deployment zone, but he opted to go for the TAG kill to deny the maximum number of objective points.
Only problem was he only had two orders left in the pool, including Wallace’s coordinated order, so there was no possible way he can do three wounds to Scarface in CC even if everything went magically his way. He was probably better off chain rifling Scarface and Aida, and then double chain-rifling Scarface while hoping Aida’s viral pistol didn’t kill him. And as we discussed earlier, non-McMurrough Cameronians aren’t the the best at killing TAGs.
On his first order, Scarface wins the roll and punches the Cameronian in the face while Aida has a negligent discharge and shoots the ground ineffectually. Jordan laudably commits to his plan and swings again with Wallace’s coordinated order. Scarface wins again, but Jordan makes the ARM roll. Aida’s got her shit together this time though, and successfully shoots into close combat and nets one failed BTS save, KOing the Cameronian. Phew! One major threat gone with basically no damage. Jordan also cleverly used the coordinated order to retreat the Galwegian and the Cameronian out of LoF from my big guns to set up for my turn.
After advancing Uxia into base contact with his near right console using her DataTracker order and another order, it’s time to start moving the link around. I let him do it, in spite of Vassily’s itchy trigger finger. Finally, he pushes the AP HMG Grey into view of both Vassily and Rosie, and he has to cross an open patch of ground to do it, so he’s out of cover. I fall prey to psychological pressure here myself, and reveal Vassily to take the shot, forcing Jordan to split burst against Rosie and Vassily. Of course he wins the face to face in both cases, with Rosie passing ARM and Vassily going dogged.
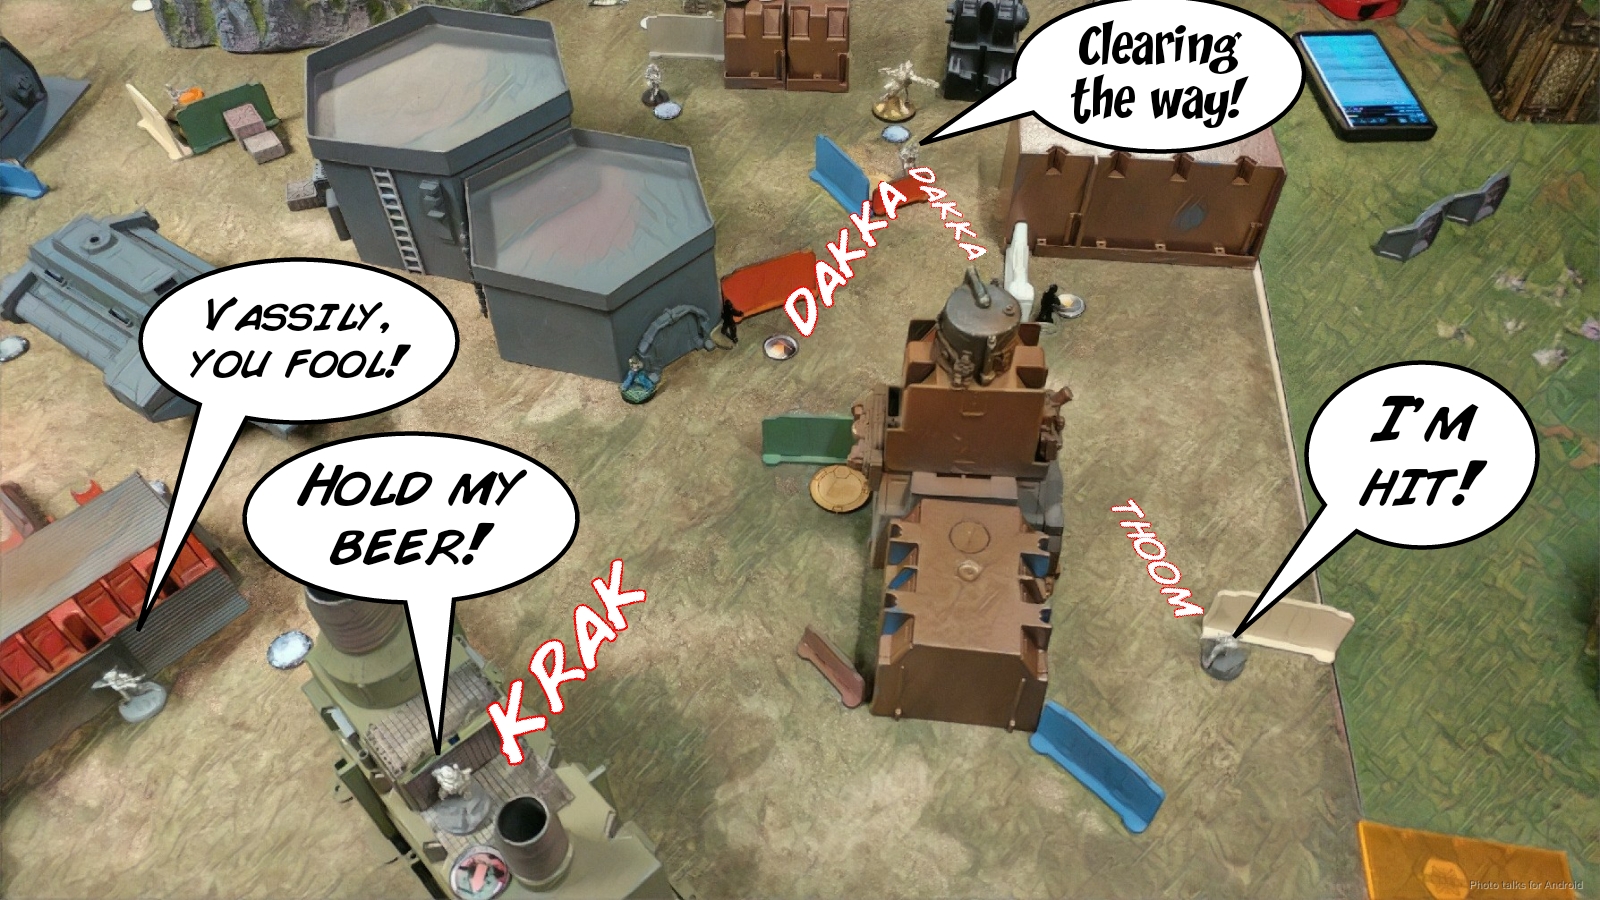
He doesn’t want to leave Rosie up, so he splits burst again and takes them both out. He’s got one more order, which he spends on the link to tuck them all into total cover and move link leader to someone other than the AP HMG Grey, who he leaves out to ARO.
Bottom of 1 – Unexpendables
Okay, team, it’s time to earn your hazard pay! You’re supposed to be the baddest MFers that Ariadna can assemble, so act like it! I forget about Scarface’s frenzy and move him around the corner to take a shot at the AP HMG Grey. I don’t think the no-cover mattered in the F2F, I had a solid set of rolls versus some pretty meh stuff from Jordan’s dice, but I don’t remember the details. In any case, I sneak a shot though and that’s enough to KO the Grey.

This lets Uxia get into position to illustrate the vulnerabilities of link teams, laying a shotgun template across all four remaining link team members.
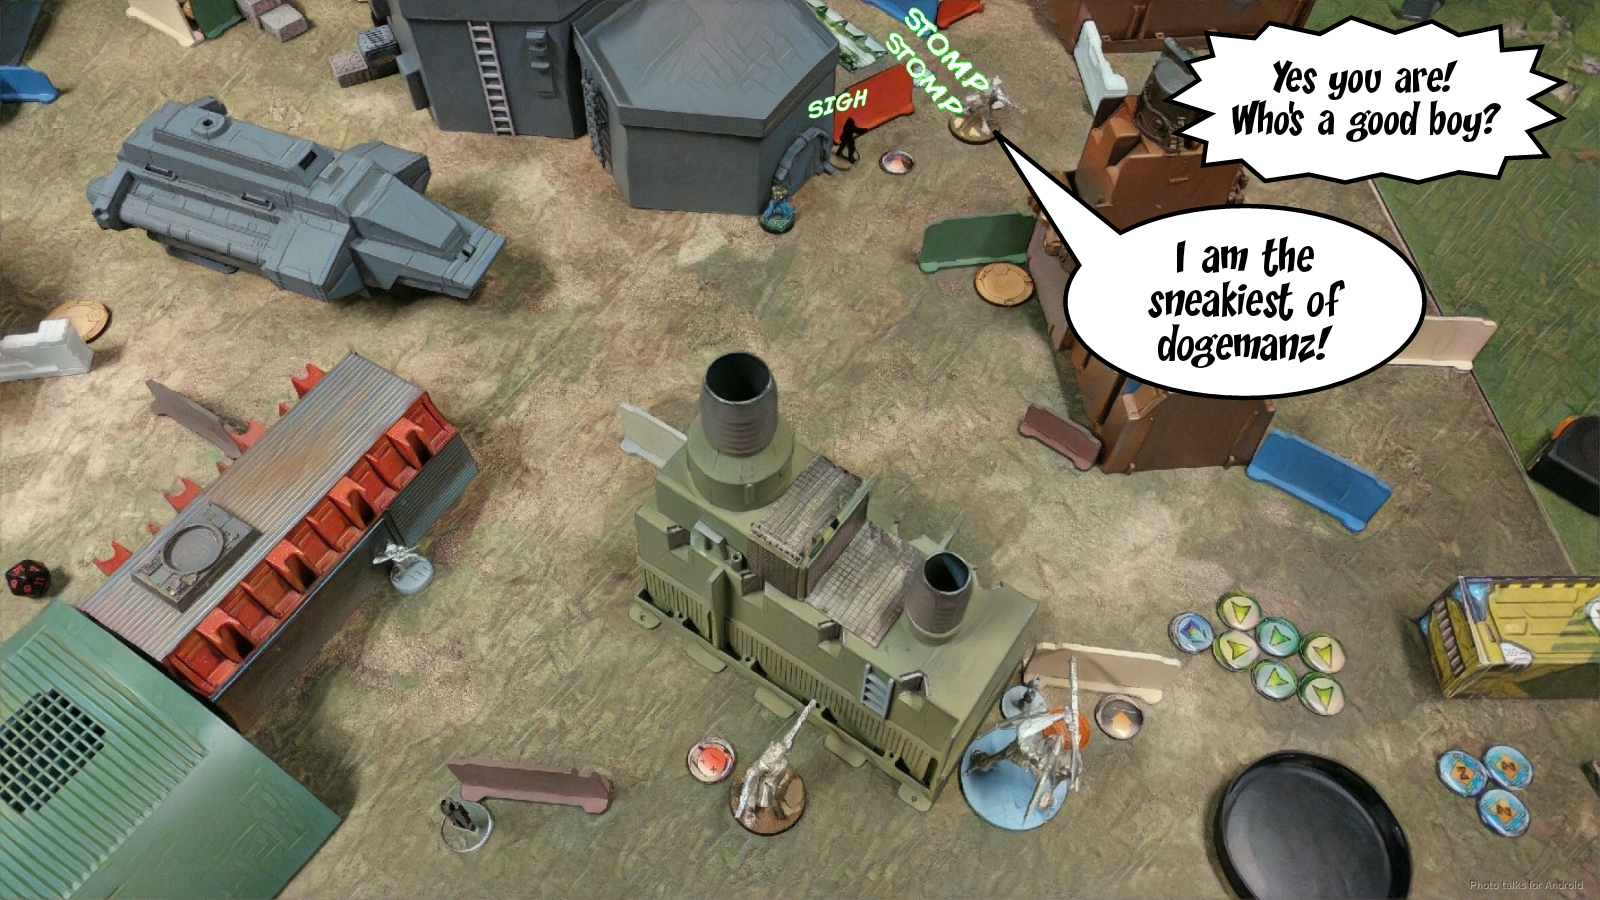
Jordan breaks the lead Volunteer out of the link to chain rifle Uxia and dodges with the rest of the link. Uxia pastes everyone except the Paramedic, leaving a line of unconscious bodies and one soon to be very busy Paramedic. I fail the chain rifle safe, but most importantly, Jordan reveals the Cateran to ensure Uxia’s death. The pressures of a potentially active Uxia in his deployment zone so close to Wallace were weighing on his mind, I’m sure. The Cateran does his job and takes my Uxia off the table.
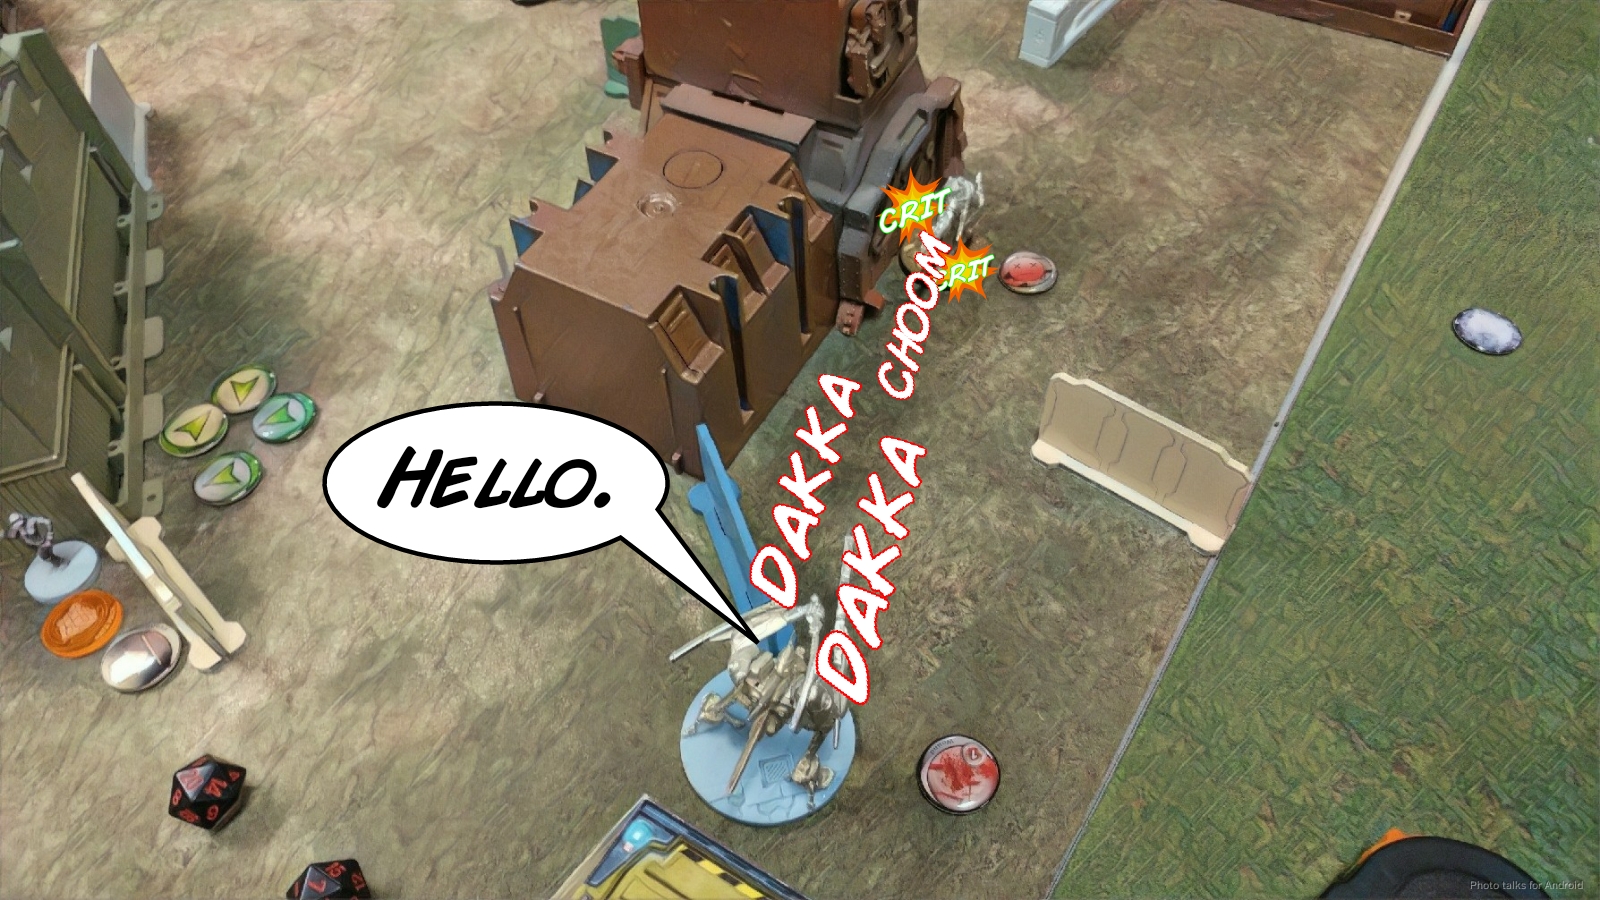
This does, however, open a hole for Van Zant behind his Cateran, which I immediately exploit. Van Zant fails to take out the Cateran on his first order, which lets his Uxia turn around. I’m now forced to split burst between the two of them, finally dropping both on the third order after Uxia sends Van Zant dogged. UGH.
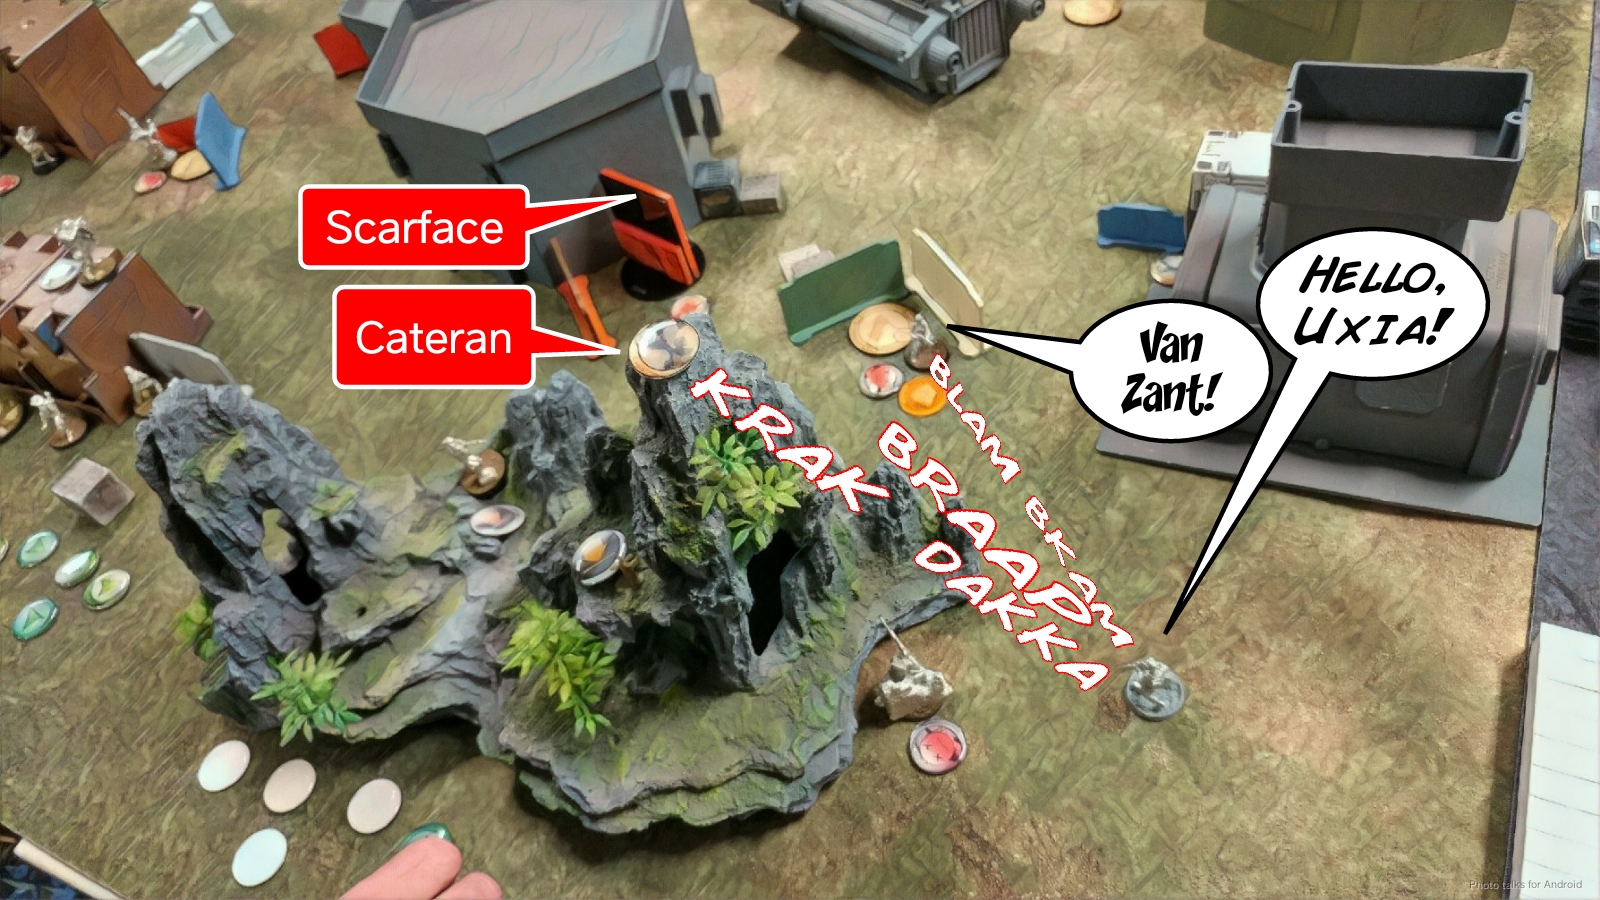
I’ve got one more order. I think about moving the TAG up, but this is too good of an opportunity, so I elect instead to shove Van Zant around the corner to take some AP rifle shots against Scarface, who is now also facing Van Zant due to Uxia’s death. I land three hits with the AP Rifle and almost resume my nail biting habit that I kicked over a decade ago while Jordan picks up his dice to make ARM rolls. He passes one, which means Scarface is one wound away from knockout. So close! I’m not sure if this was the right call, it was perhaps too greedy and not focused on points, but I was in go-fast mode and didn’t second guess myself.
Turn 2
Jordan’s DataTracker is dead, and we’re both dominating our assigned zones. He’s got a TAG in his though, so it’s only a 3-2 lead for me at the moment
Top of 2 – CHA
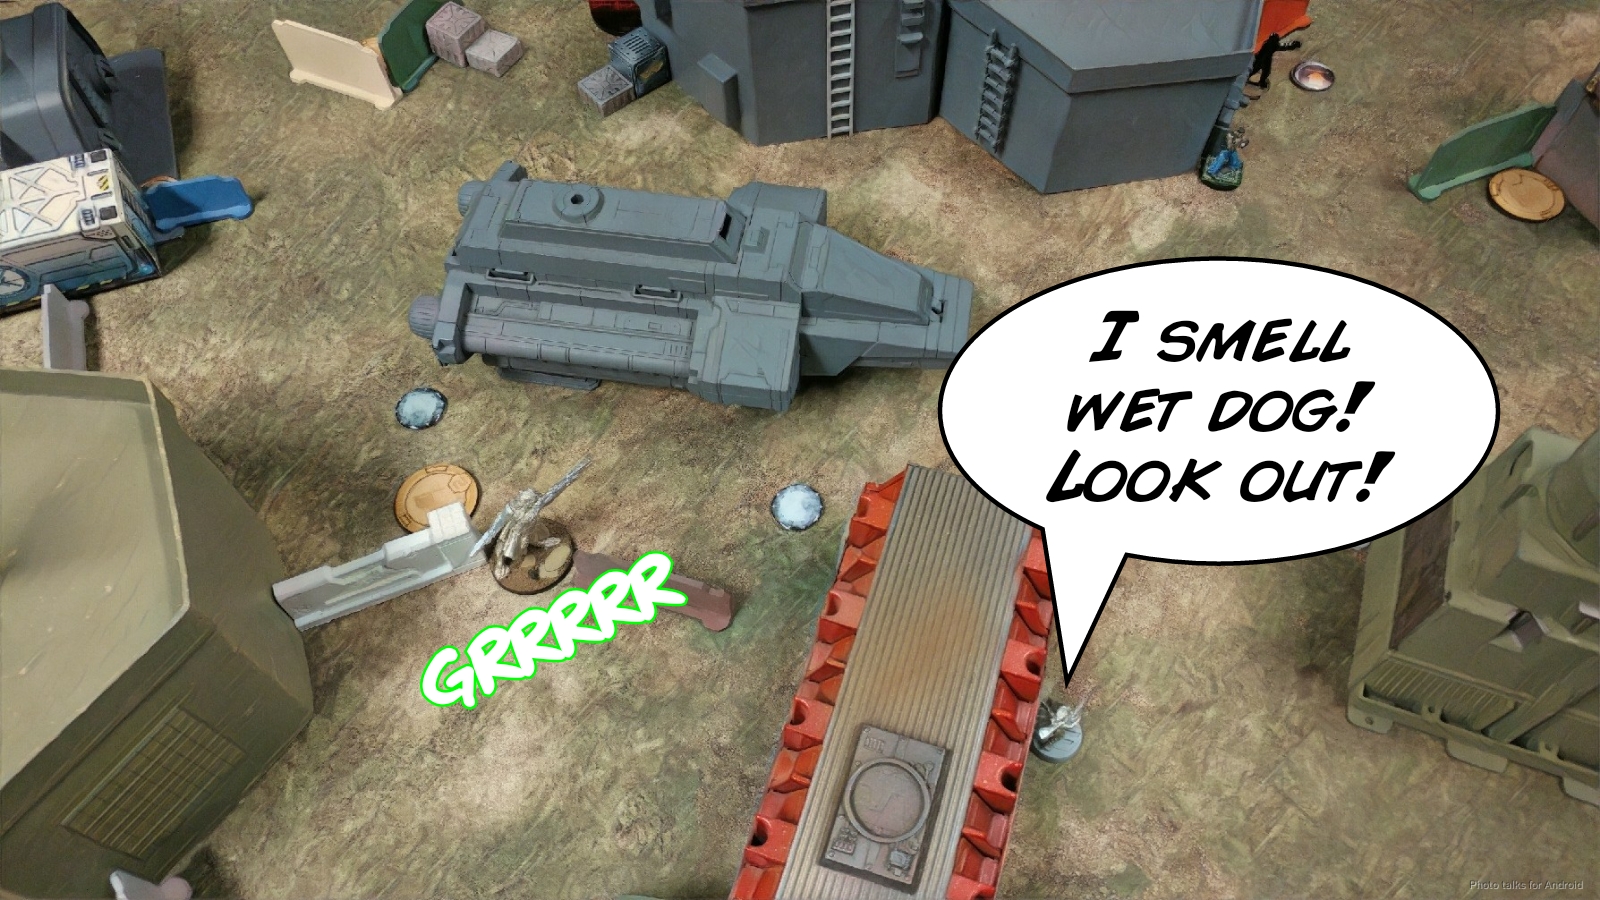
Well, I had a pretty good turn, but there was still a lot of Caledonian death on the table. I had unintentionally left Scarface out to ARO, but there wasn’t anything that could hurt him at range so it was fine. Jordan covered the Cameronian’s approach with smoke from his Galwegian, and then repeated his plan to go after Scarface with his remaining Cameronian.
He even went as far as to spec-fire smoke from within smoke to avoid getting shot at by Scarface. This is a good example of a combination of psychological and order pressure. Jordan really doesn’t want to get shot, so he spends a lot of orders to make sure that doesn’t happen. I’m of course fine with this.
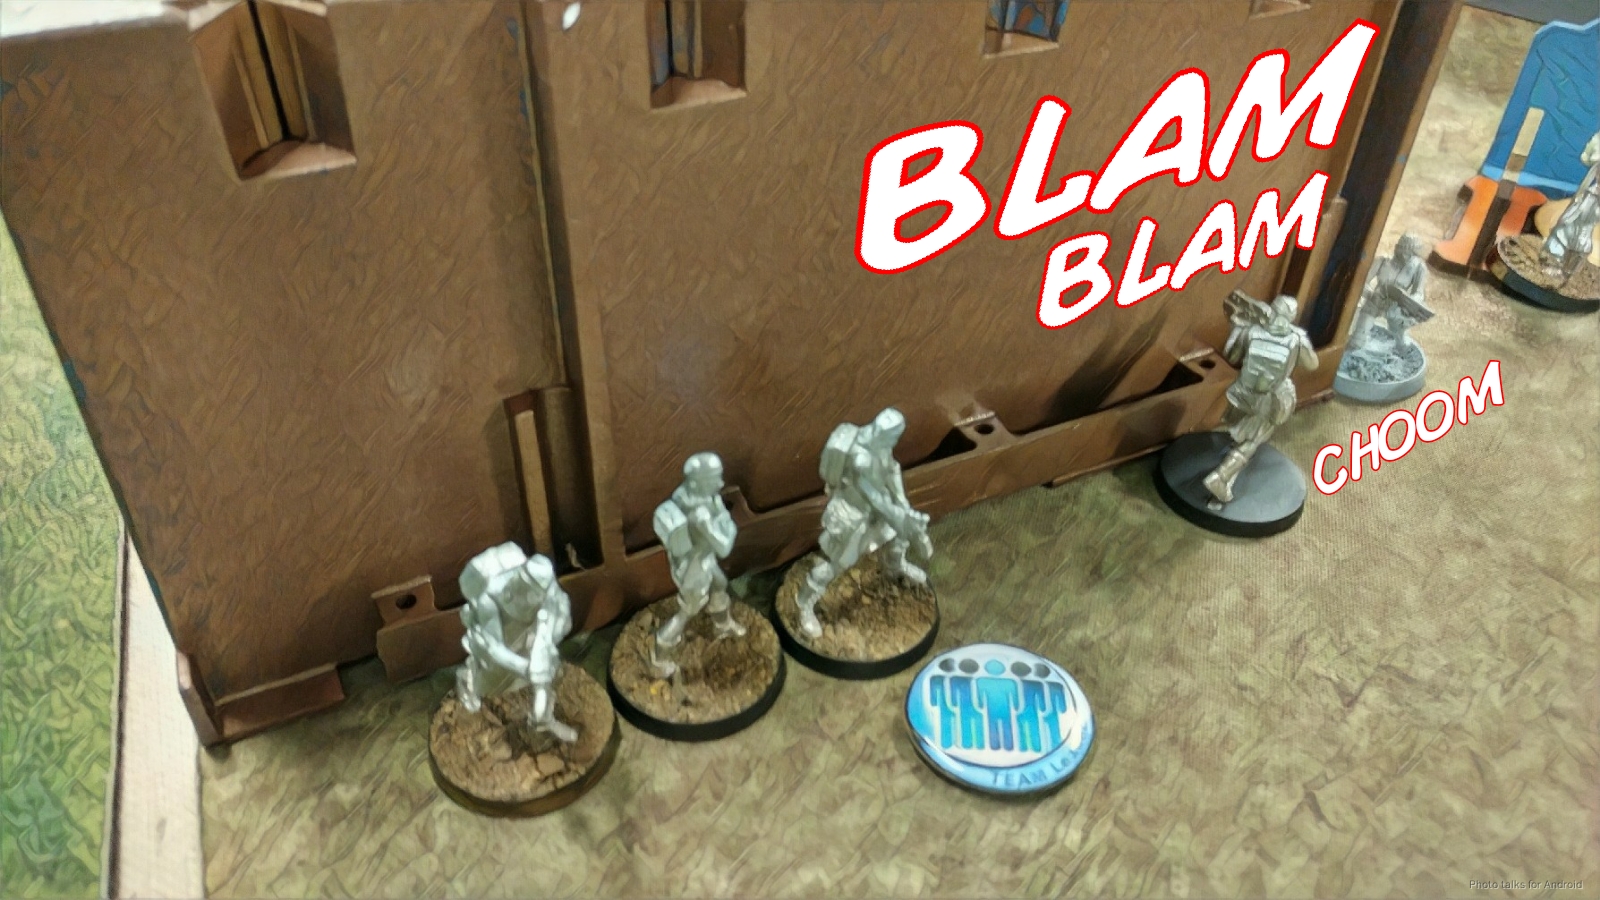
He then, somewhat confusingly to me, spends his second order pool trying to Paramedic up his shattered link team. He generally has good “luck” with PH rolls due to playing Ariadna, so I think this is just a habit for him, especially since it’s won him games. I suppose with only the Warcor and the Paramedic in the second pool it’s worthwhile. In any case, he picks up a Volunteer and kills the Grey with whatever Caeldonians put in their MediKits. I’m pretty sure it’s just Lagavulin.
He doesn’t have the orders to safely get his Cameronian into base to base with my Scarface, so he settles for tucking it behind a building on my right near my Uxia’s starting position with Wallace’s coordinated order, while Cordelia gets into base to base with the antenna the his Uxia died on. My (unintentional) strategy of leaving Scarface out to ARO created enough positional and psychological pressure to stall out his second turn, which more than okay for me, especially since it was all the pressure he was exerting on me that left me without orders to fix Scarface’s position.
Bottom of 2 – Unexpendables
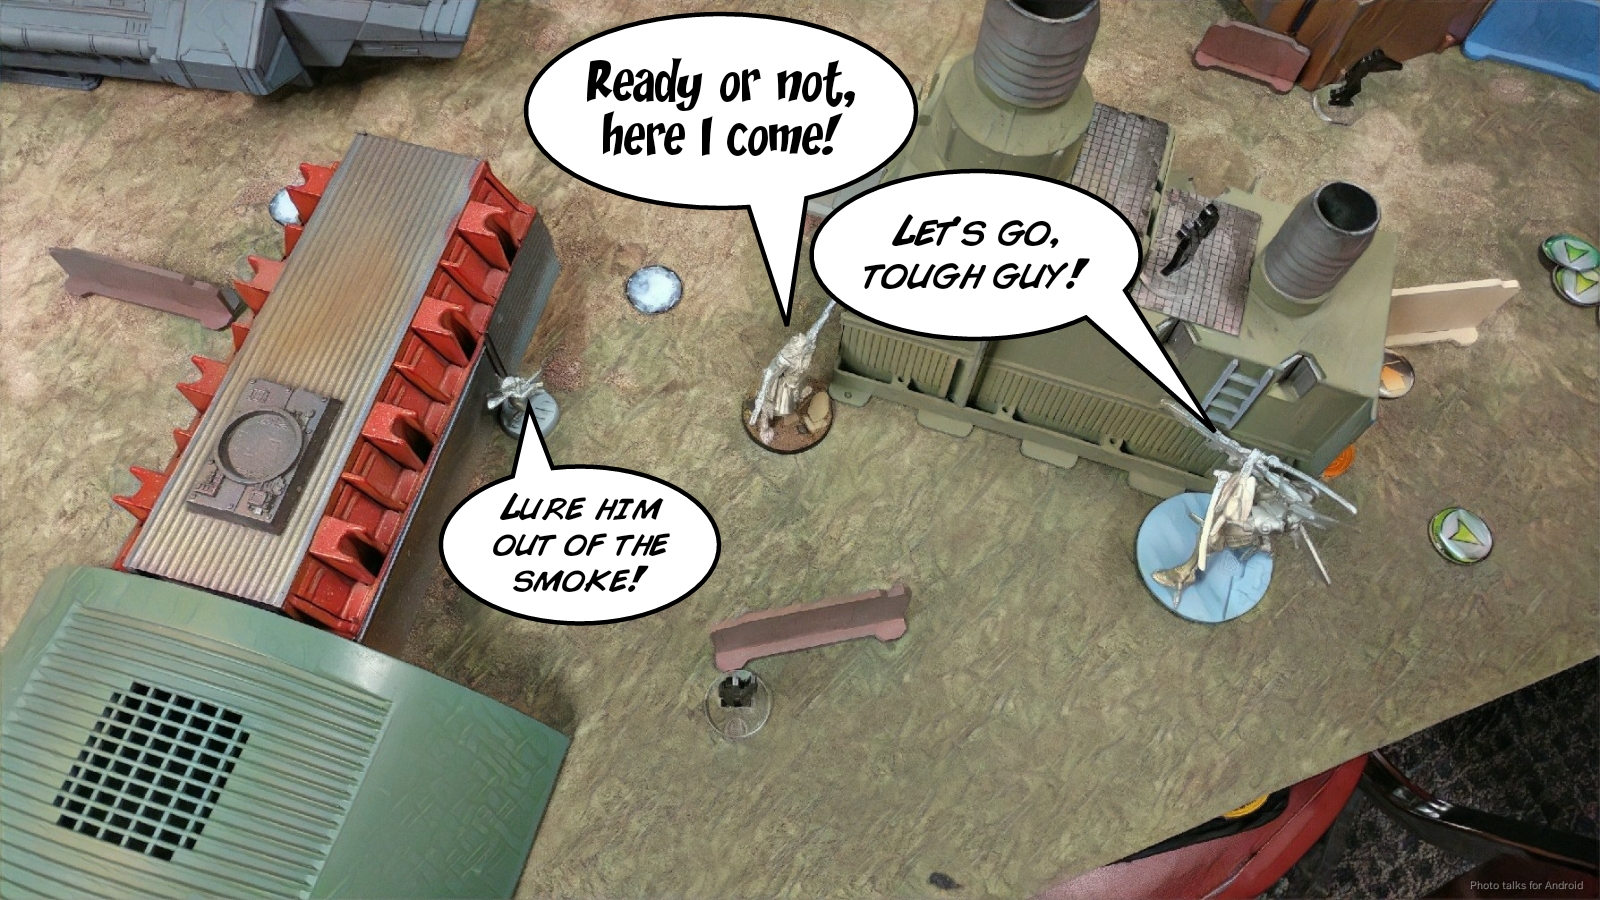
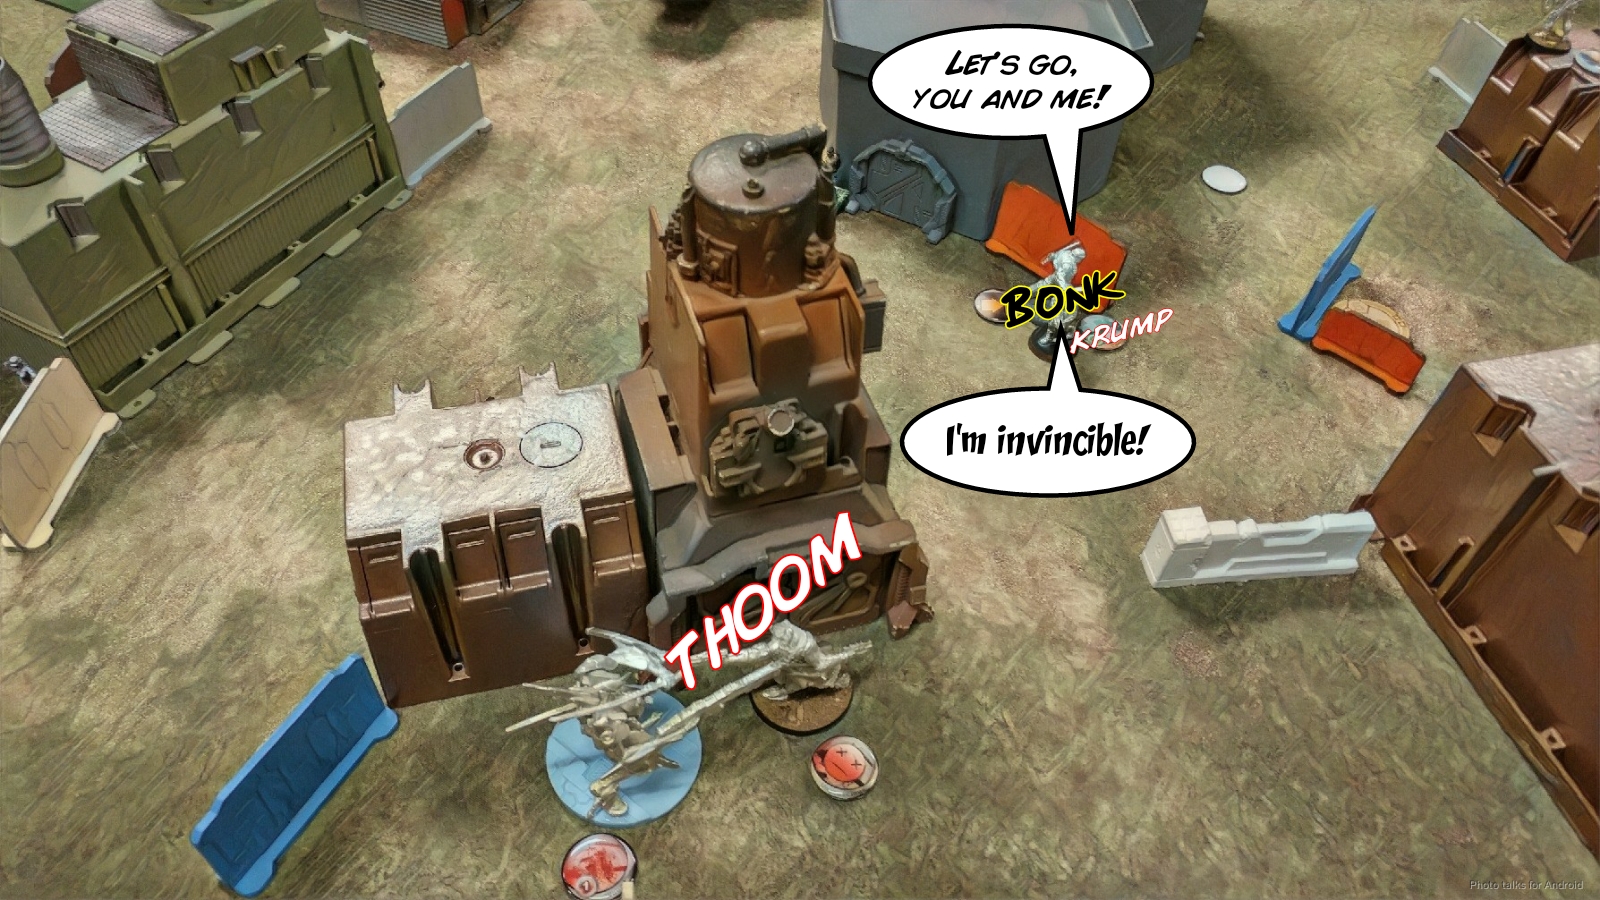
Now that the Cateran is gone, there’s way less positional pressure on me. I get a little cocky and run Scarface forward, tanking a Warcor flash pulse while the Galwegian fires his pistol ineffectually at a giant space robot. This lets me get into view of the Cameronian, and I just let Scarface do his thing. The angry man holds down the trigger over the course of two orders until his Mk12s’ magazines run dry. It’s worth it, because over the course of those two orders I get two crits, putting down the Cameronian for the low cost of one of Scarface’s wounds, lost to a chain rifle.
I start burning coordinated orders to move Pavel, Aida, and Bruant in position. Pavel’s moving to get the Galwegian in LoF on his next impetuous order, Aida’s moving to my left to screen against the SAS (by dying after laying a viral mine, most likely), and Bruant is going after Jordan’s Scarface.
I manage to get one hit on Scarface on Bruant’s surprise shot order, but of course Jordan passes ARM.
I try again, and this time Jordan beats out four dice of Molotok with his remaining Panzerfaust, and I bid adieu to my scrappy Frenchman. My hopes of taking Scarface out die with Bruant–there’s almost no way I’m not losing Aida. I’m looking at her position and frowning, because I don’t think I should’ve moved her, especially without placing a mine. Ah well.
Turn 3
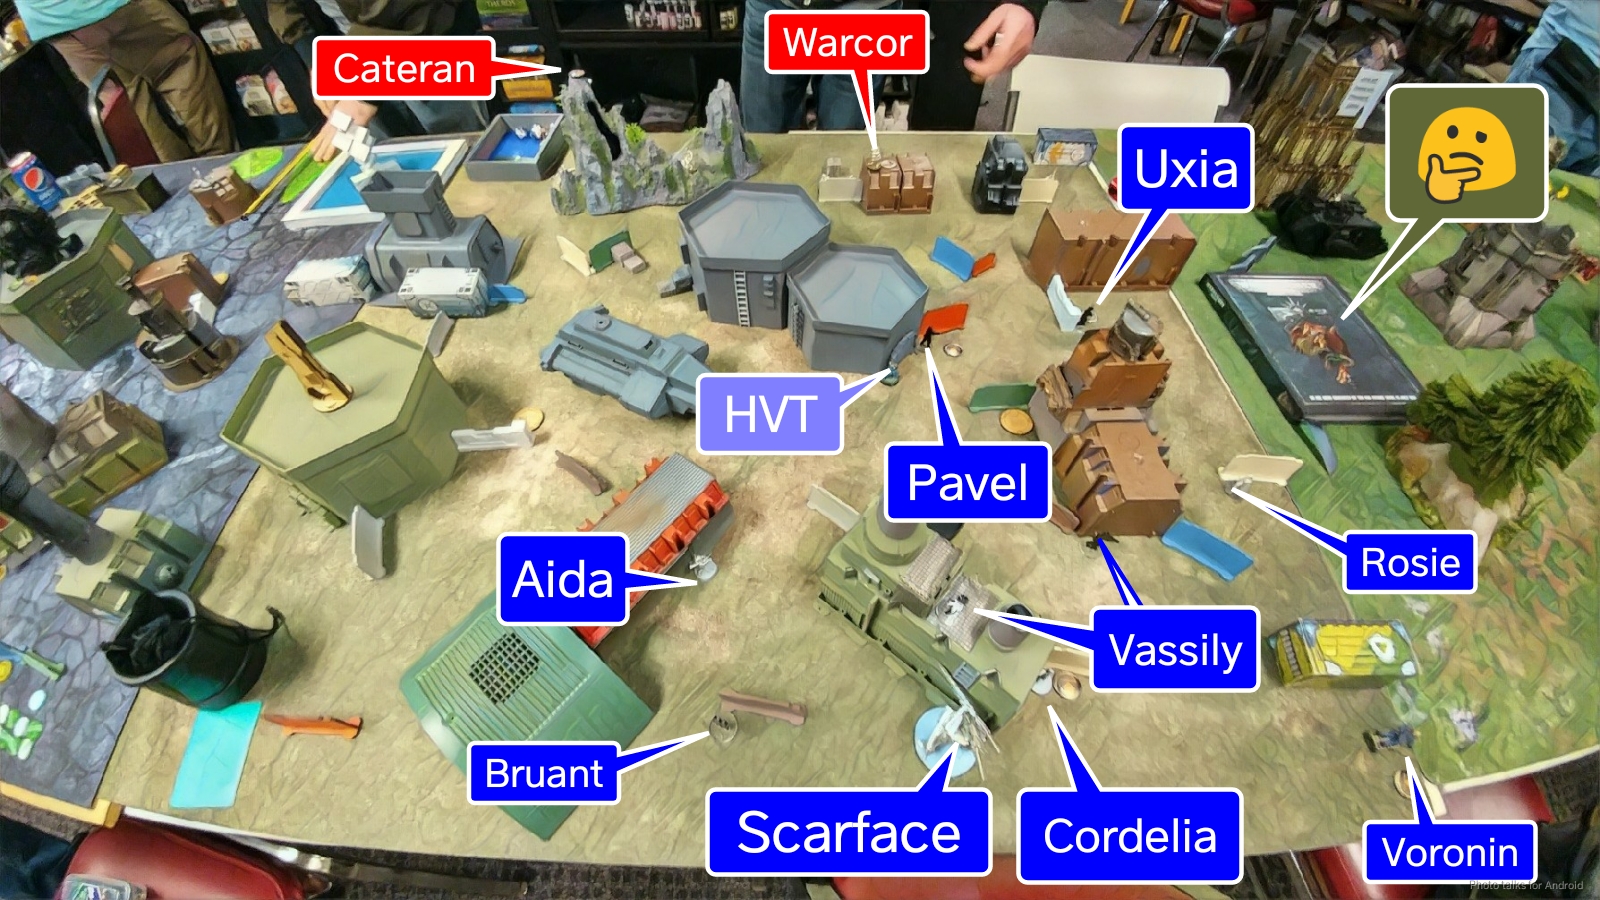
We’ve both got our TAGs in the right place this time, bringing the score to 5-4, and his Cordelia moves my Quadrant to my far right. Easy peasy, just move Scarface forward, call it good.
Top of 3 – CHA
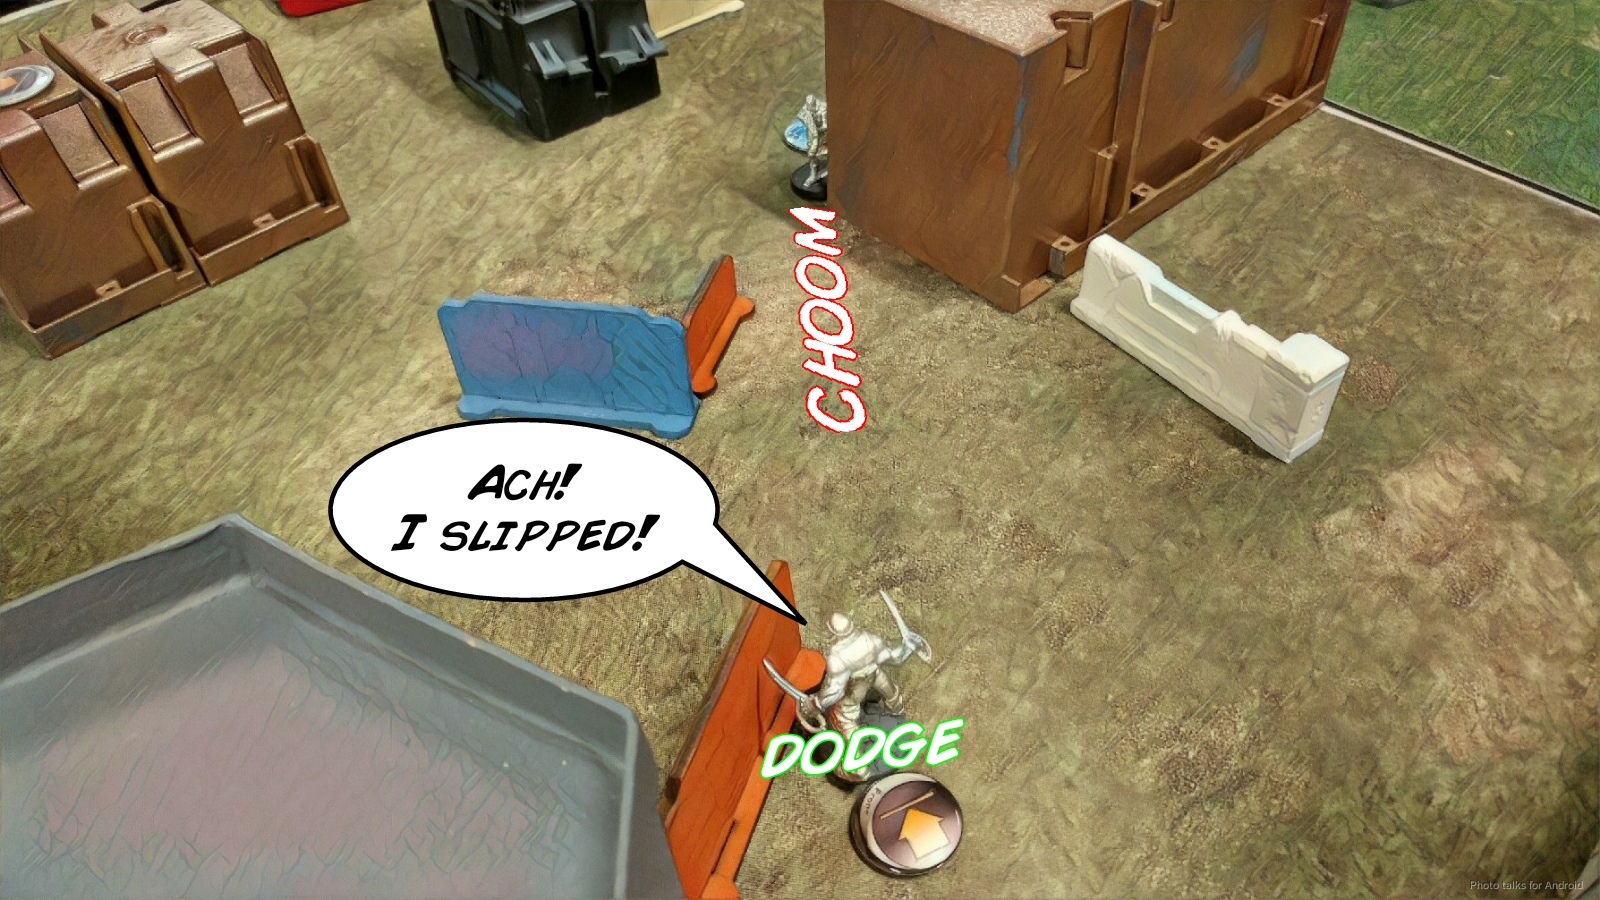
Sure enough, the Galwegian runs into view of Pavel. I drop a mine and thankfully tank a chain rifle. The Galewegian runs into base to base with Pavel, which breaks into Scarface’s LoF.
I’m quite lucky here, at least it seems so, and Pavel tanks the berserk Caledonian’s sword without trouble. Between Pavel’s own beastly CC, a successful Panzerfaust, and the mine going off, the Galewegian is turned into a pile of goo. My euphoria is short lived, because Jordan picks up a third Volunteer with his Paramedic, reforms the link, and double-chain rifles Pavel off the table after I fail a simple dodge roll. What was interesting here is that the Volunteer couldn’t use his shotgun because the template would’ve covered my HVT, canceling his shots.
The SAS starts his attack run and takes out Aida after much fancy shuffling around. I do the thing I planned though, and drop a viral mine. Jordan wisely elects to stop spending orders on the SAS.
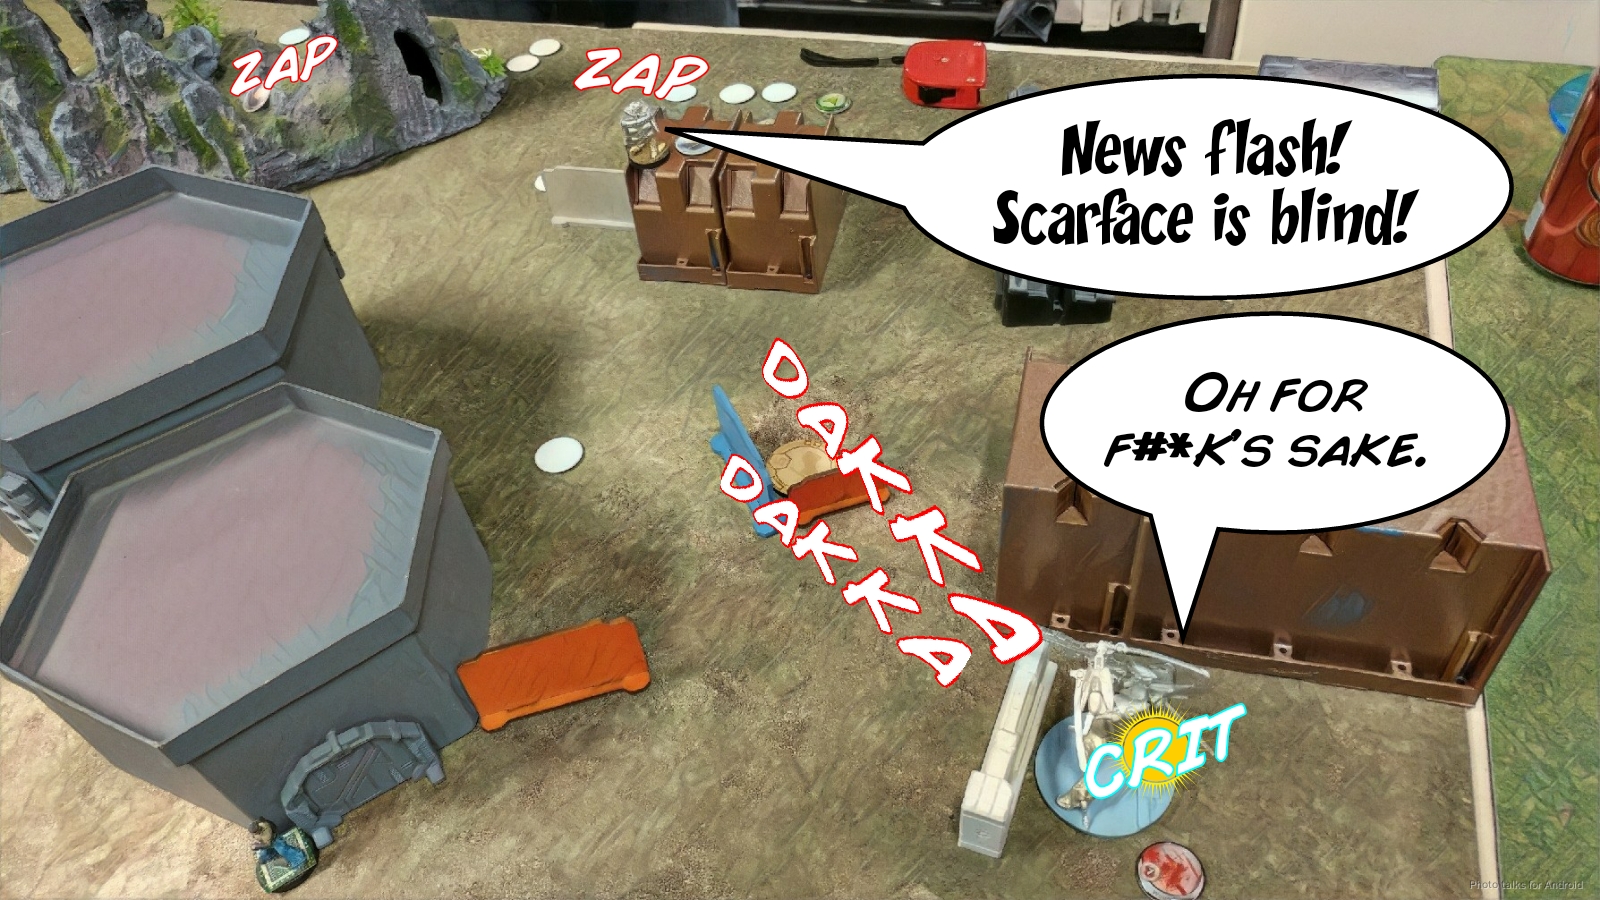
Jordan then goes after Scarface. He smartly uses one of his Warcors to try to stun Scarface, but I gave him some hard-hitting news to report on in the form of a Panzerfaust to the face. His last order in his second pool is spent trying to take out Scarface with a Volunteer’s rifle. I beat the roll with a Mk12, but he rolls high and retreats to safety.
Bottom of 3 – Unexpendables
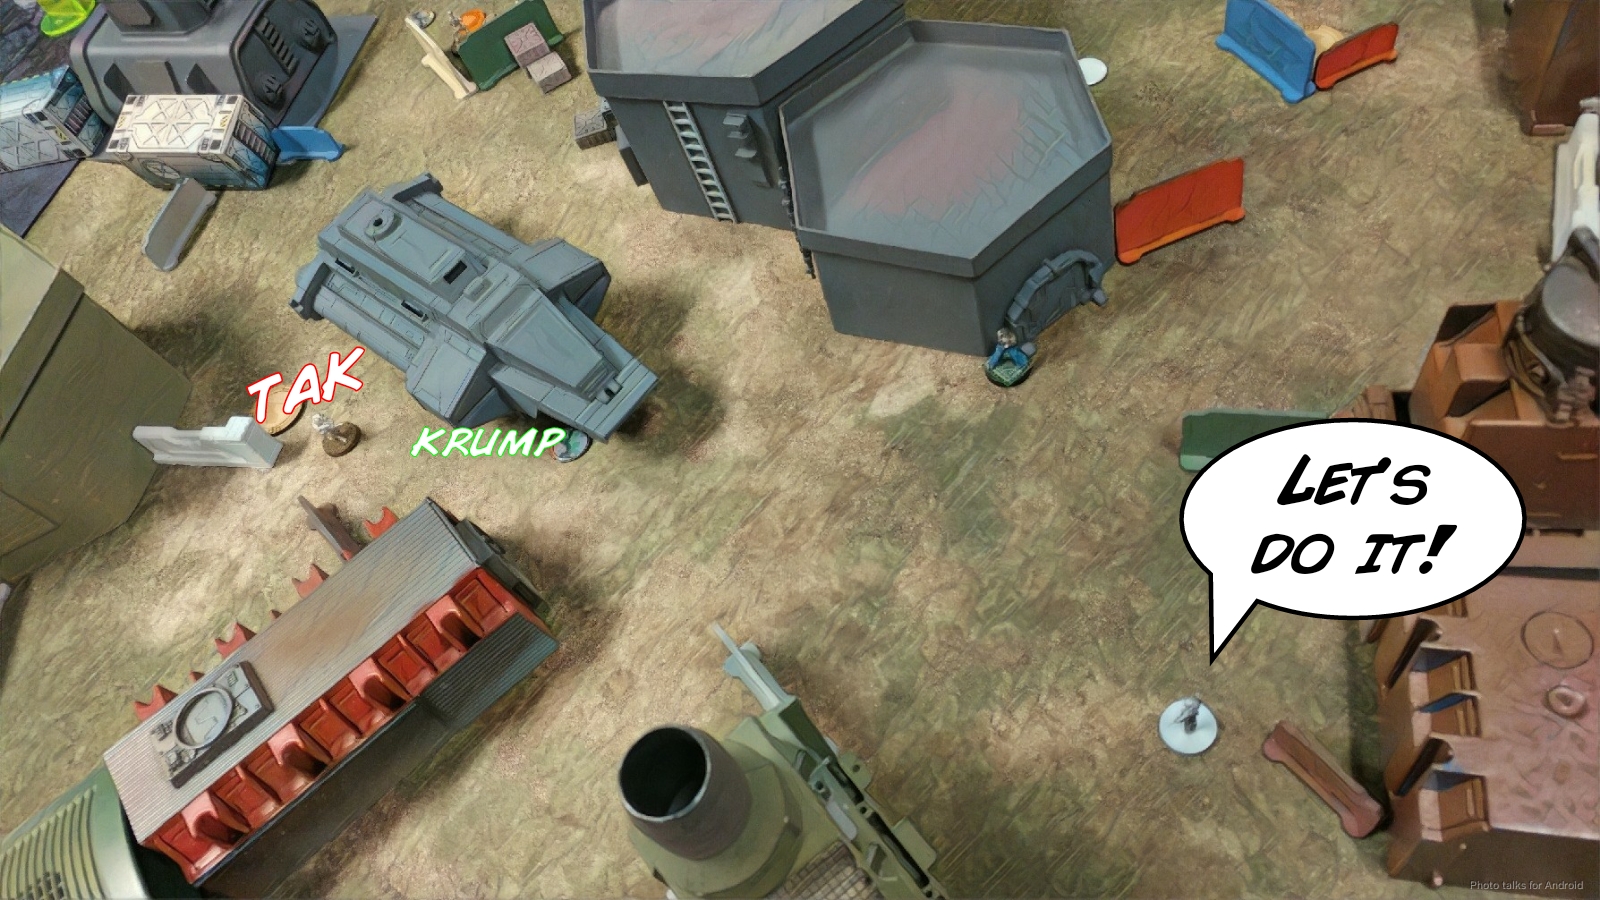
I can sit still and win this 7-6, but this is a showdown tournament. I’m thinking I can push it to a 9-4 major victory if I can kill his Scarface with my Scarface, get back to my quadrant, and secure his HVT. All of those goals are achievable if everything goes well, I make a ton of ARM and BTS saves, and nothing goes wrong.
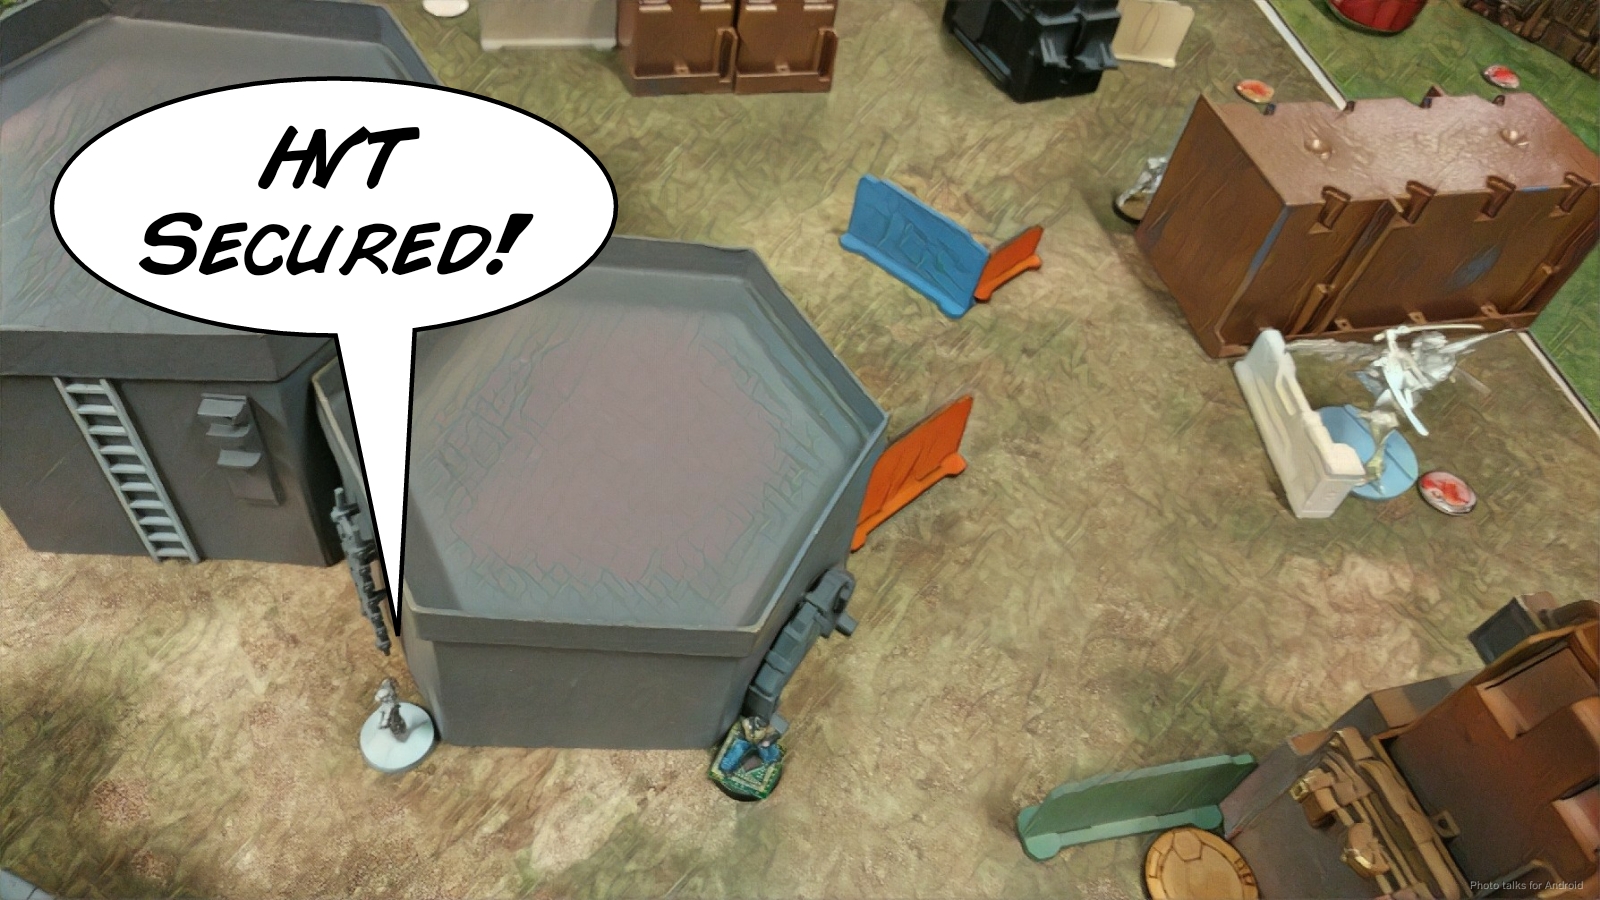
I remember about Frenzy this time, and split burst against two Warcors. I hit one and the other hits me, but everyone makes their saves. No way I’m getting it done. I needed them both dead so I could make it around the back of the building, splitting burst on the Volunteers as I went. Ah well. I settle for taking them both out and then Securing the HVT for a 8-6 victory, and set about that plan by moving Scarface solidly into the quadrant. One warcor dies, but I get crit flash pulsed. Sigh.
I figure I can get Cordelia to within ZoC of Jordan’s HVT without dealing with anything worse than a flash pulse, so I start doing that… and immediately get crit again. Seriously!!?
We laser it, and determine the SAS has LoF to Cordelia as she moves up. He’s got a shot with his assault pistol on a 2, so I let him have it and keep moving. He rolls a 3, and my heart goes through my stomach before we remember that they’re BS 11, not 12. The mine turns the SAS into a quickly melting puddle of biomass and Cordelia keeps moving
I misjudge things again, and it turns out I can’t cautious move past the Volunteer watching the gap between Jordan’s HVT and Cordelia. Even though this could lose me the game, I just say screw it and throw her across the gap. She tanks the shot and makes it to safety.
That comedy of bad decisions was saved by dice. As for the reason I didn’t use Scarface, I was pretty concerned that, with my luck, I would fail to tank both chain rifle shots and then lose my TAG and the game. Honestly, taking the 7-6 win was by far the least risky scenario, and I should’ve done that. Showdowns make you do dumb things, but it worked out, so I walked away with a
8-6 Unexpendables Victory!
I ended up coming in third at the tournament. Erik (Zelaponeepus) took first with a major victory, and Nate (natetehaggresar) took second with more VP, 8 OP, and a minor victory. Thanks again to everyone who came out and to the Portland Game Store and Glimpses of Wonder and Warfare for hosting! And a special thank you to Amy of Glimpses for letting Erik finish up his game a few minutes after closing time. I’m sure he appreciated it too!
Post Game Analysis
Well, I should’ve lost that game. I was so concerned with dealing with my effects of my own psychological pressure that I didn’t consider what pressures I was exerting on Jordan. This is the first time I’ve actually really thought about pressure like this in a formal way, and I expect that I’ll start adding it consciously to my decision making process in future games. If I can, anyway!
First off, the Unexpendables list is… fine. I think it’s better with Margot and Duroc instead of Scarface and Cordelia, but I needed the TAG for the mission. They are pretty rubbish at defense but amazing at offense.
Mirage-5 definitely does a better job of breaking my opponent’s positional pressure and creates a ton of problems for them too, more than the TAG does anyway. This was also my first time taking Scarface, hence my Frenzy mistake early on. I like the Mk12s. I’m sure I’ll want an HMG at some point, but their rangebands match up well with his Frenzy.
I definitely shouldn’t have revealed Vassily. Having him around simply to have orders on the table would’ve been totally worth it. I could’ve also used him to back up Pavel versus the Volunteers and gone SAS hunting or even gone after Scarface with him. I’m a little miffed that I didn’t put him on the ground, but I thought Bruant could’ve handled things. Of course, in a 10 order list you can’t really have redundancy in troopers, positioning, or orders. Everything has to work.
I’m glad that I’ve played a ton of 10 order lists, because that means I know what I can do and what I should just straight up give up on. For example, I didn’t bother dealing with the consoles. It’s not worth it. The TAG is a killing tool anyway, I can kill while I walk to where I need to be. Let my opponent waste orders and overextend things to get to a console.
Van Zant and Uxia, winning games since forever. Uxia forcing the Cateran out of camo and Van Zant coming on from behind saved the game for me. That was the inflection point. Had that not happened I would’ve been stuck in my deployment zone with no way out, especially after losing Vassily.
So yeah. I started on the back foot, in the wrong headspace, with a pretty awkward (but FUN) list, and somehow managed to pull out a win. I think I forced some small mistakes which snowballed into major ones by exerting the right kinds of pressure and then recognized the opening and exploited the living daylights out of it. In any case, a great game from Jordan. He’s not used to playing quickly (family obligations keep him from joining us on Saturdays during our usual tournament times), and he kept up very well this tournament. I was pressuring him a lot to stay on schedule too, and I felt pretty bad about it, but he handled it with grace. I’m really impressed with how he’s improved over the past year. I think starting CHA after stagnating a little with his USARF really opened up his play. I am excited to see where Steel Phalanx takes him once he gets them on the table!