
Riot Against the ISS Machine
It’s time for my fortnightly game with James (RomanLegion). Based on our last game, he decided to break out a different table setup and also to play ISS. The primary issue from last game was that the table was just too open, letting my TAGs dominate the table.
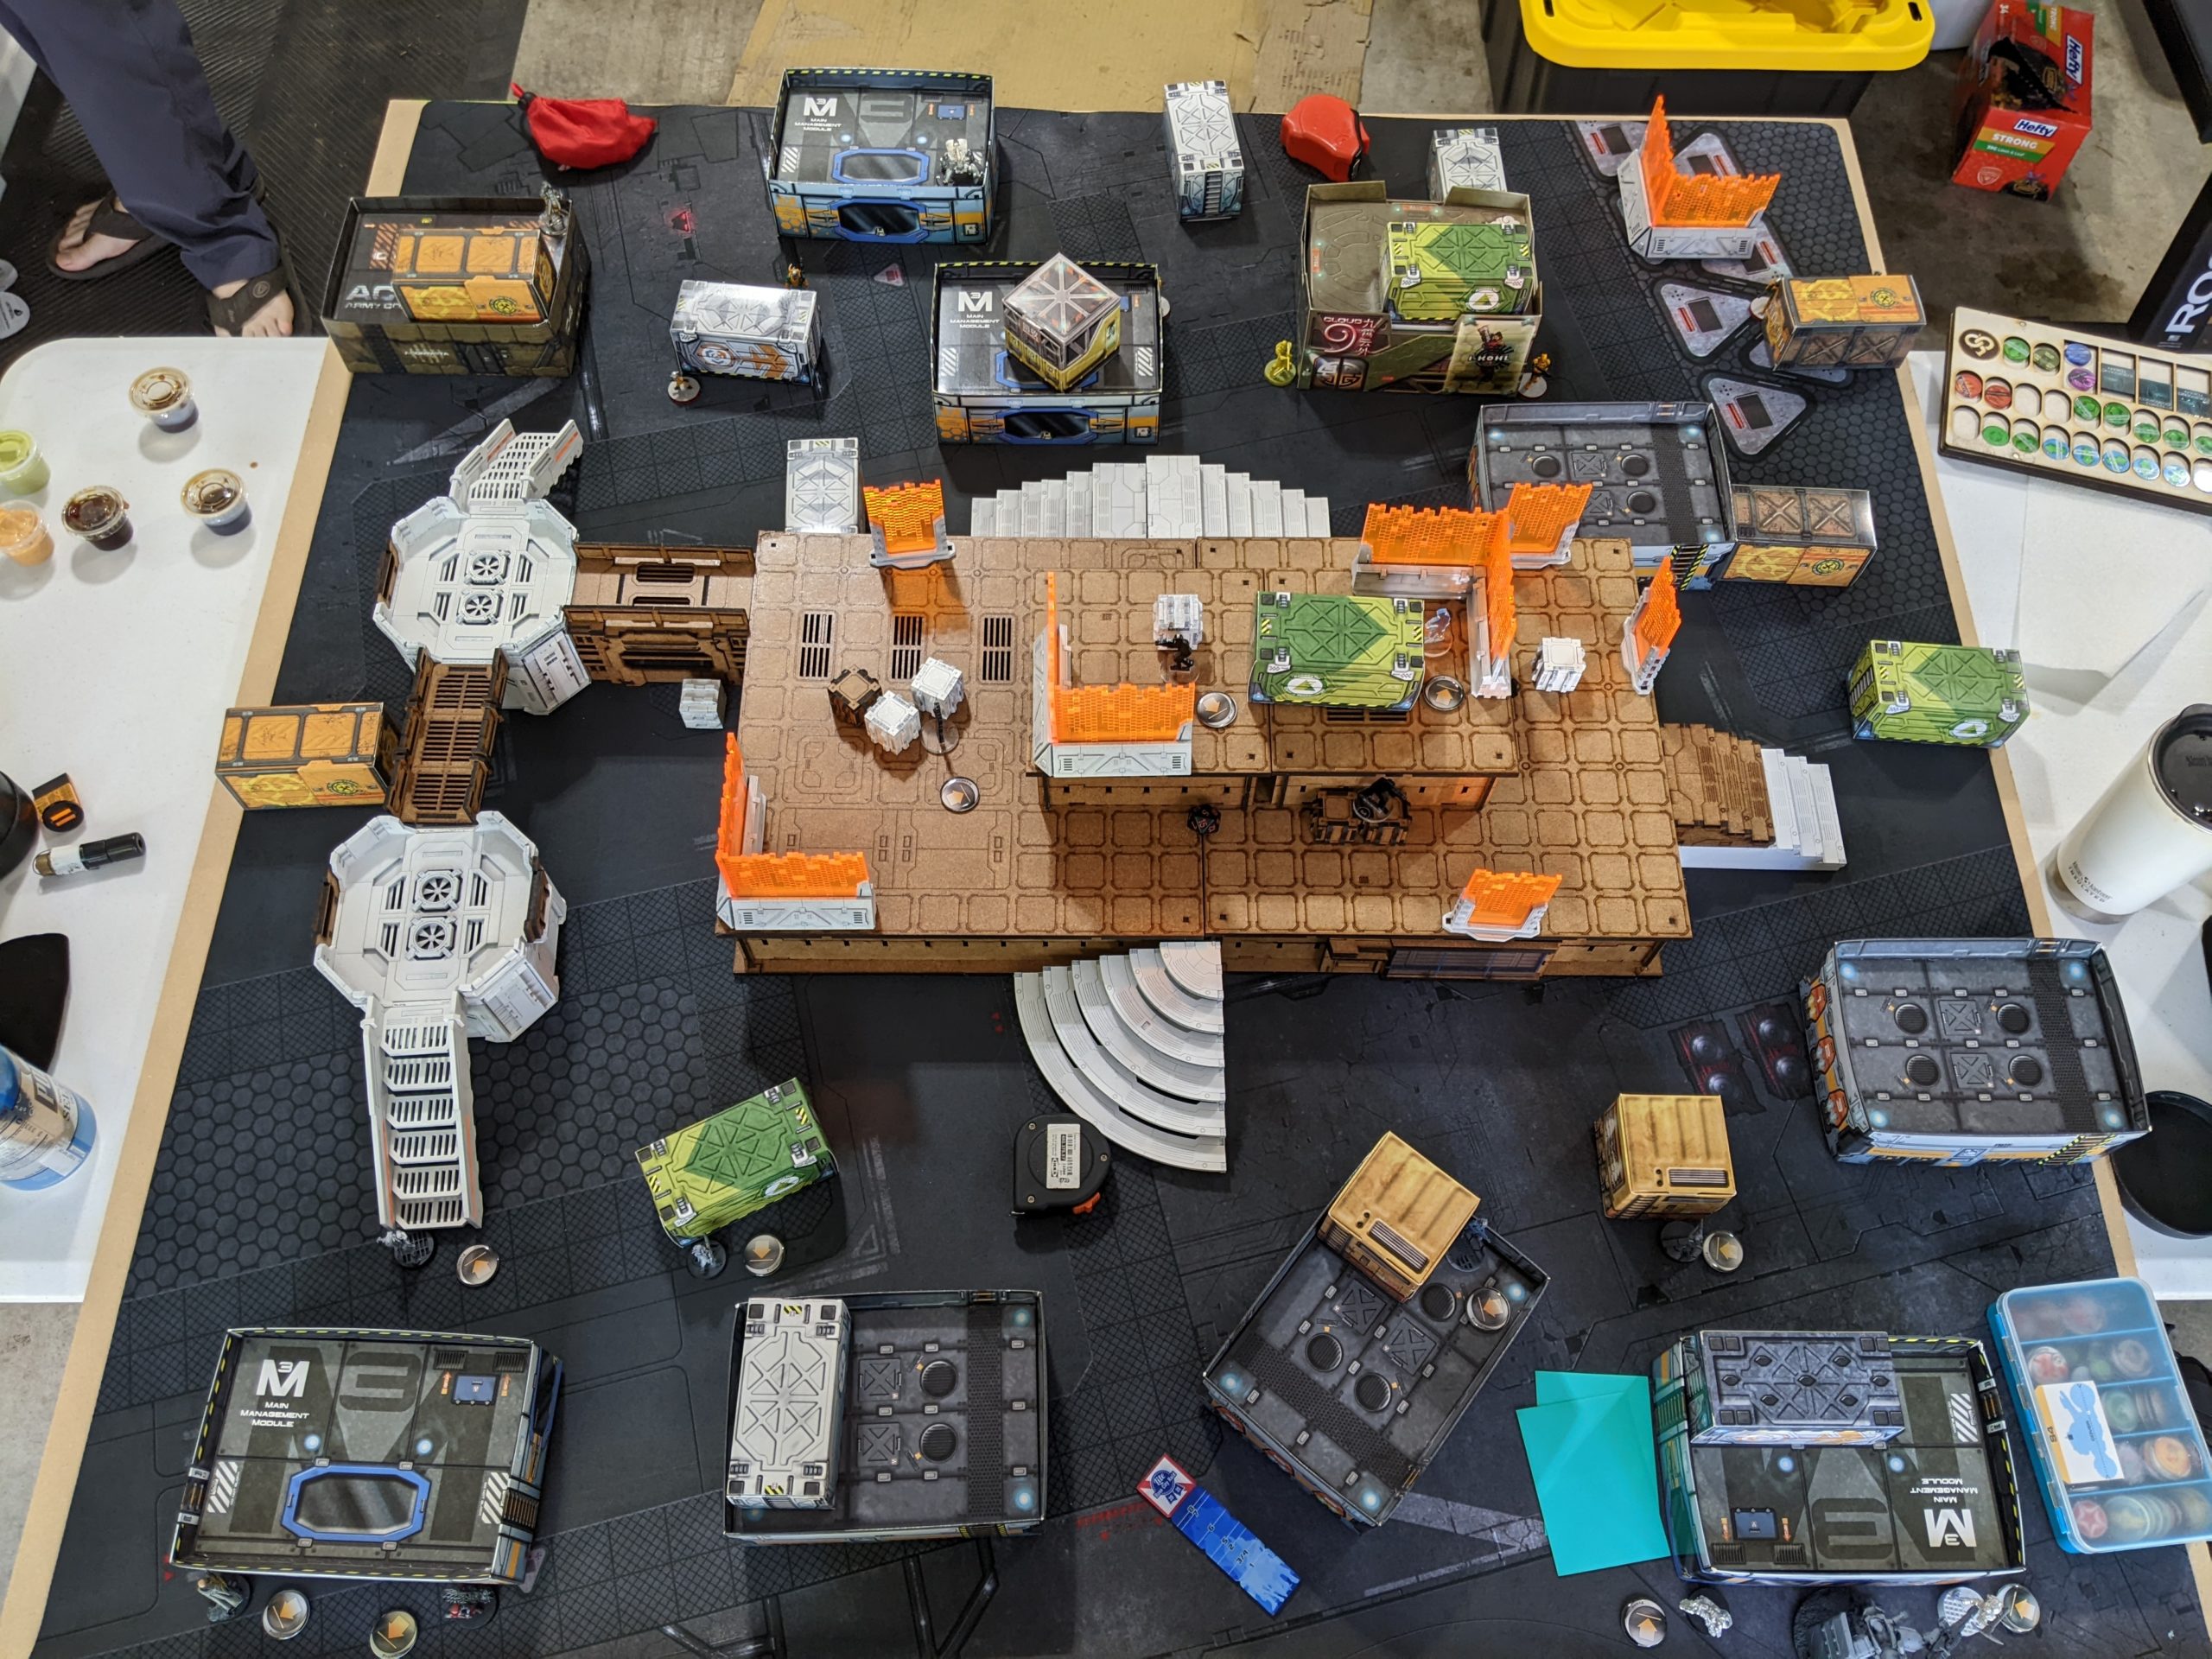
This time, James decided to set up a big central building to help break up the table. I think this new configuration is quite good, although it does benefit me a little more in the ISS versus StarCo matchup.
Overview
- Mission: ITS13 Supplies
- Forces: StarCo, Free Company of the Star versus Imperial Service (300)
- Deploy First: ISS
- First Turn: ISS
The feedback I got on my last game against Nathan (Jhokalups) was that StarCo is quite good and doesn’t deserve it’s last place popularity ranking.
I’ve just had a miserable time making lists for it, but Greg Strom set me on the right path by suggesting the Anaconda/Irmandinho/Digger Haris.
Hmph
GROUP 1
6
2
2
KNAUF MULTI Sniper Rifle / AP Heavy Pistol, CC Weapon. (1.5 | 32)
UHAHU (Hacker) Pitcher, D-Charges / Assault Pistol, CC Weapon. (0.5 | 18)
RIOT GRRL Spitfire / Pistol, CC Weapon. (1.5 | 33)
GROUP 2
ANACONDA Heavy Machine Gun, Chain-colt, Panzerfaust / AP CC Weapon. (1.5 | 55)
OPERATOR Spitfire / Pistol, CC Weapon. (0 | 0)
DIGGER Chain Rifle(+1B), Grenades / Pistol, AP CC Weapon(+1B). (0 | 14)
IRMANDINHO Chain Rifle, D-Charges, Smoke Grenades / Pistol, AP CC Weapon. (0 | 8)
BRAWLER (Lieutenant) Rifle, Light Shotgun / Pistol, CC Weapon. (0 | 15)
CSU Boarding Shotgun / Pistol, PARA CC Weapon(-6). (0 | 12)
HAWWA’ (Minelayer) Sniper Rifle, Shock Mines / Pistol, CC Weapon. (0.5 | 23)
HELLCAT Combi Rifle ( | Deployable Repeater) / Pistol, CC Weapon. (0.5 | 24)
HARDCASE FRONTIERSMAN Tactical Bow, Light Shotgun / Pistol, CC Weapon. (0 | 12)
BANDIT (Hacker, Killer Hacking Device) Light Shotgun, Adhesive Launcher ( ) / Pistol, DA CC Weapon. (0 | 25)
6 SWC | 300 Points Open in Infinity Army
The primary draw for StarCo is linkable Knauf, at least in my mind, so he had to make an appearance. I think he’s a very good fit in a Riot Grrl link along with Uhahu, as they both add a lot to the capability of that link. I took the Riot BSG with Tinbot to support Uhahu, and then the Spitfire as a backup gunfighter to Knauf. That’s a lot of hitting power in that link. If I needed to cut something, dropping the Riot Spitfire would be reasonable, but that would be a high variance choice.
In any case, the two links made up Group 1, and then Group 2 was just a collection of good StarCo stuff. I’ve got a huge crush on midfield snipers, and the fact that the Al’Hawwa is also a minelayer made me very happy. I wanted more camo tokens, so I put the Hardcase and Bandit in there as well, and then filled the rest of the list out with required stuff like a Lieutenant. The CSU was just a fun choice to sit in my backfield in case of emergency. The last bit of flavor was a Hellcat Deployable Repeater, which is very key to giving Uhahu so much needed reach.
James was saying that he was feeling pretty uninspired by Invincible Army these days, as every list he made wanted to be a White Banner list… which wasn’t something he was interested in at the moment. ISS is what he started the game with, so he went back to a place of comfort. He chose the excellent Hsien MULTI Marksman as his lieutenant to give that all important +1 SWC and rounded out his first Haris iwth a Zhanying hacker and Xi Zhuang. That Haris was powered by a full Kuang Shi link.

GROUP 1
HSIEN (Lieutenant) MULTI Marksman Rifle, Nanopulser ( | TinBot: Firewall [-6]) / Pistol, AP CC Weapon. (+1 | 53)
ZHÀNYING (Hacker, Hacking Device) Breaker Combi Rifle, Chain-colt, D-Charges ( ) / Pistol, PARA CC Weapon(-6). (0.5 | 25)
XI ZHUANG Combi Rifle, Light Flamethrower(+1B), Flash Pulse, Madtraps / Pistol, CC Weapon, PARA CC Weapon(-6). (0 | 21)
GROUP 2
CELESTIAL GUARD Monitor Combi Rifle, Smoke Grenade Launcher / Pistol, CC Weapon. (0.5 | 13)
KUANG SHI Chain Rifle / Pistol, CC Weapon. (0 | 5)
PHEASANT IMPERIAL AGENT (Hacker, Killer Hacking Device) Combi Rifle, E/Mitter ( ) / Breaker Pistol, PARA CC Weapon(-6). (0 | 28)
SFORZA FTO Viral Rifle, Adhesive Launcher(+1B), Nanopulser / Heavy Pistol, PARA CC Weapon(-6). (0 | 26)
BÀO TROOP MULTI Sniper Rifle / Pistol, CC Weapon. (1.5 | 29)
SON-BAE Yaókòng Missile Launcher / PARA CC Weapon(-3). (1.5 | 16)
BOUNTY HUNTER Boarding Shotgun / Pistol, PARA CC Weapon(-6). (0 | 15)
MAJOR LUNAH VIRAL Sniper Rifle / Pistol, CC Weapon. (1.5 | 29)
GARUDA Spitfire / PARA CC Weapon(-3). (1.5 | 25)
7 SWC | 300 Points Open in Infinity Army
His group two was another Haris, this time a Bao MSR, Pheasant Killer Hacker, and Sforza disguised as a second KHD. I think he intended to have the missile bot plan online, so the Son Bae made an apperance. It’s not a complete ISS list without Lunah and a Garuda, so they showed up as well, taking full advantage of that +1 SWC from the Hsien.
Deployment
I won the rolloff and chose side after noticing that one of the boxes was significantly easier to get to for me (the one on my left). James elected to go first, deploying his Kuang Shi order battery in a shipping container maze on his left. The Bao Haris went in the middle of the table, and the Hsien Haris on the right. Lunah, his reserve, covered much of his deployment zone and parts of the central building, and the Son Bae covered a few more angles, in particular the central and left (from James’s perspective) supply boxes.
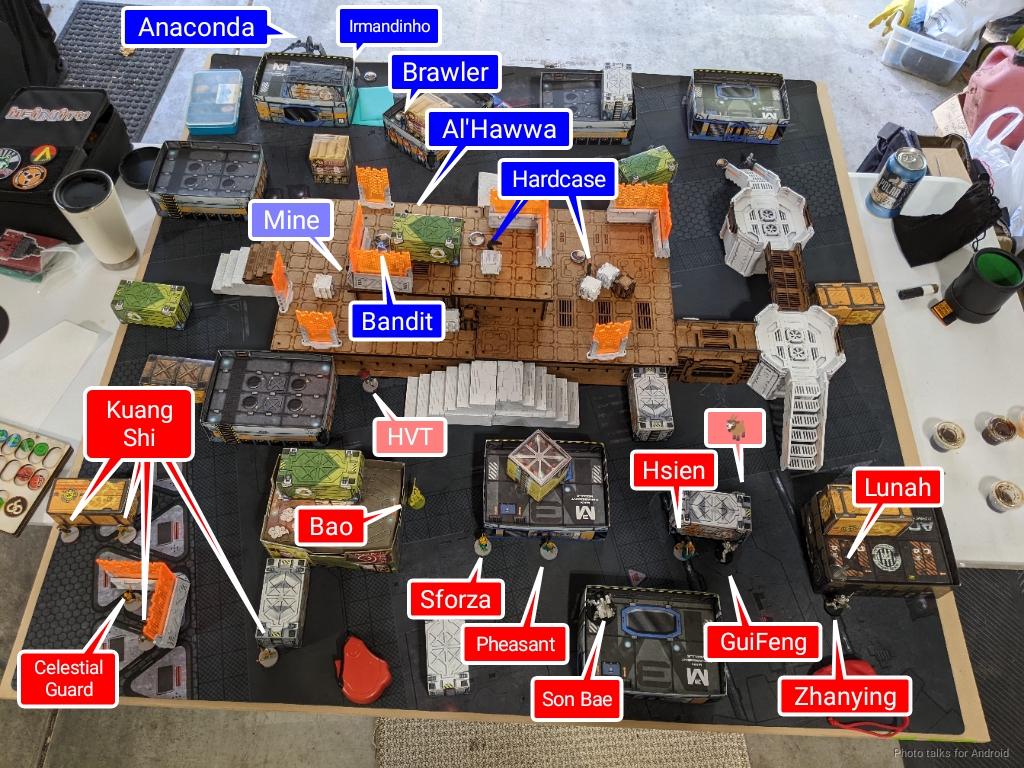
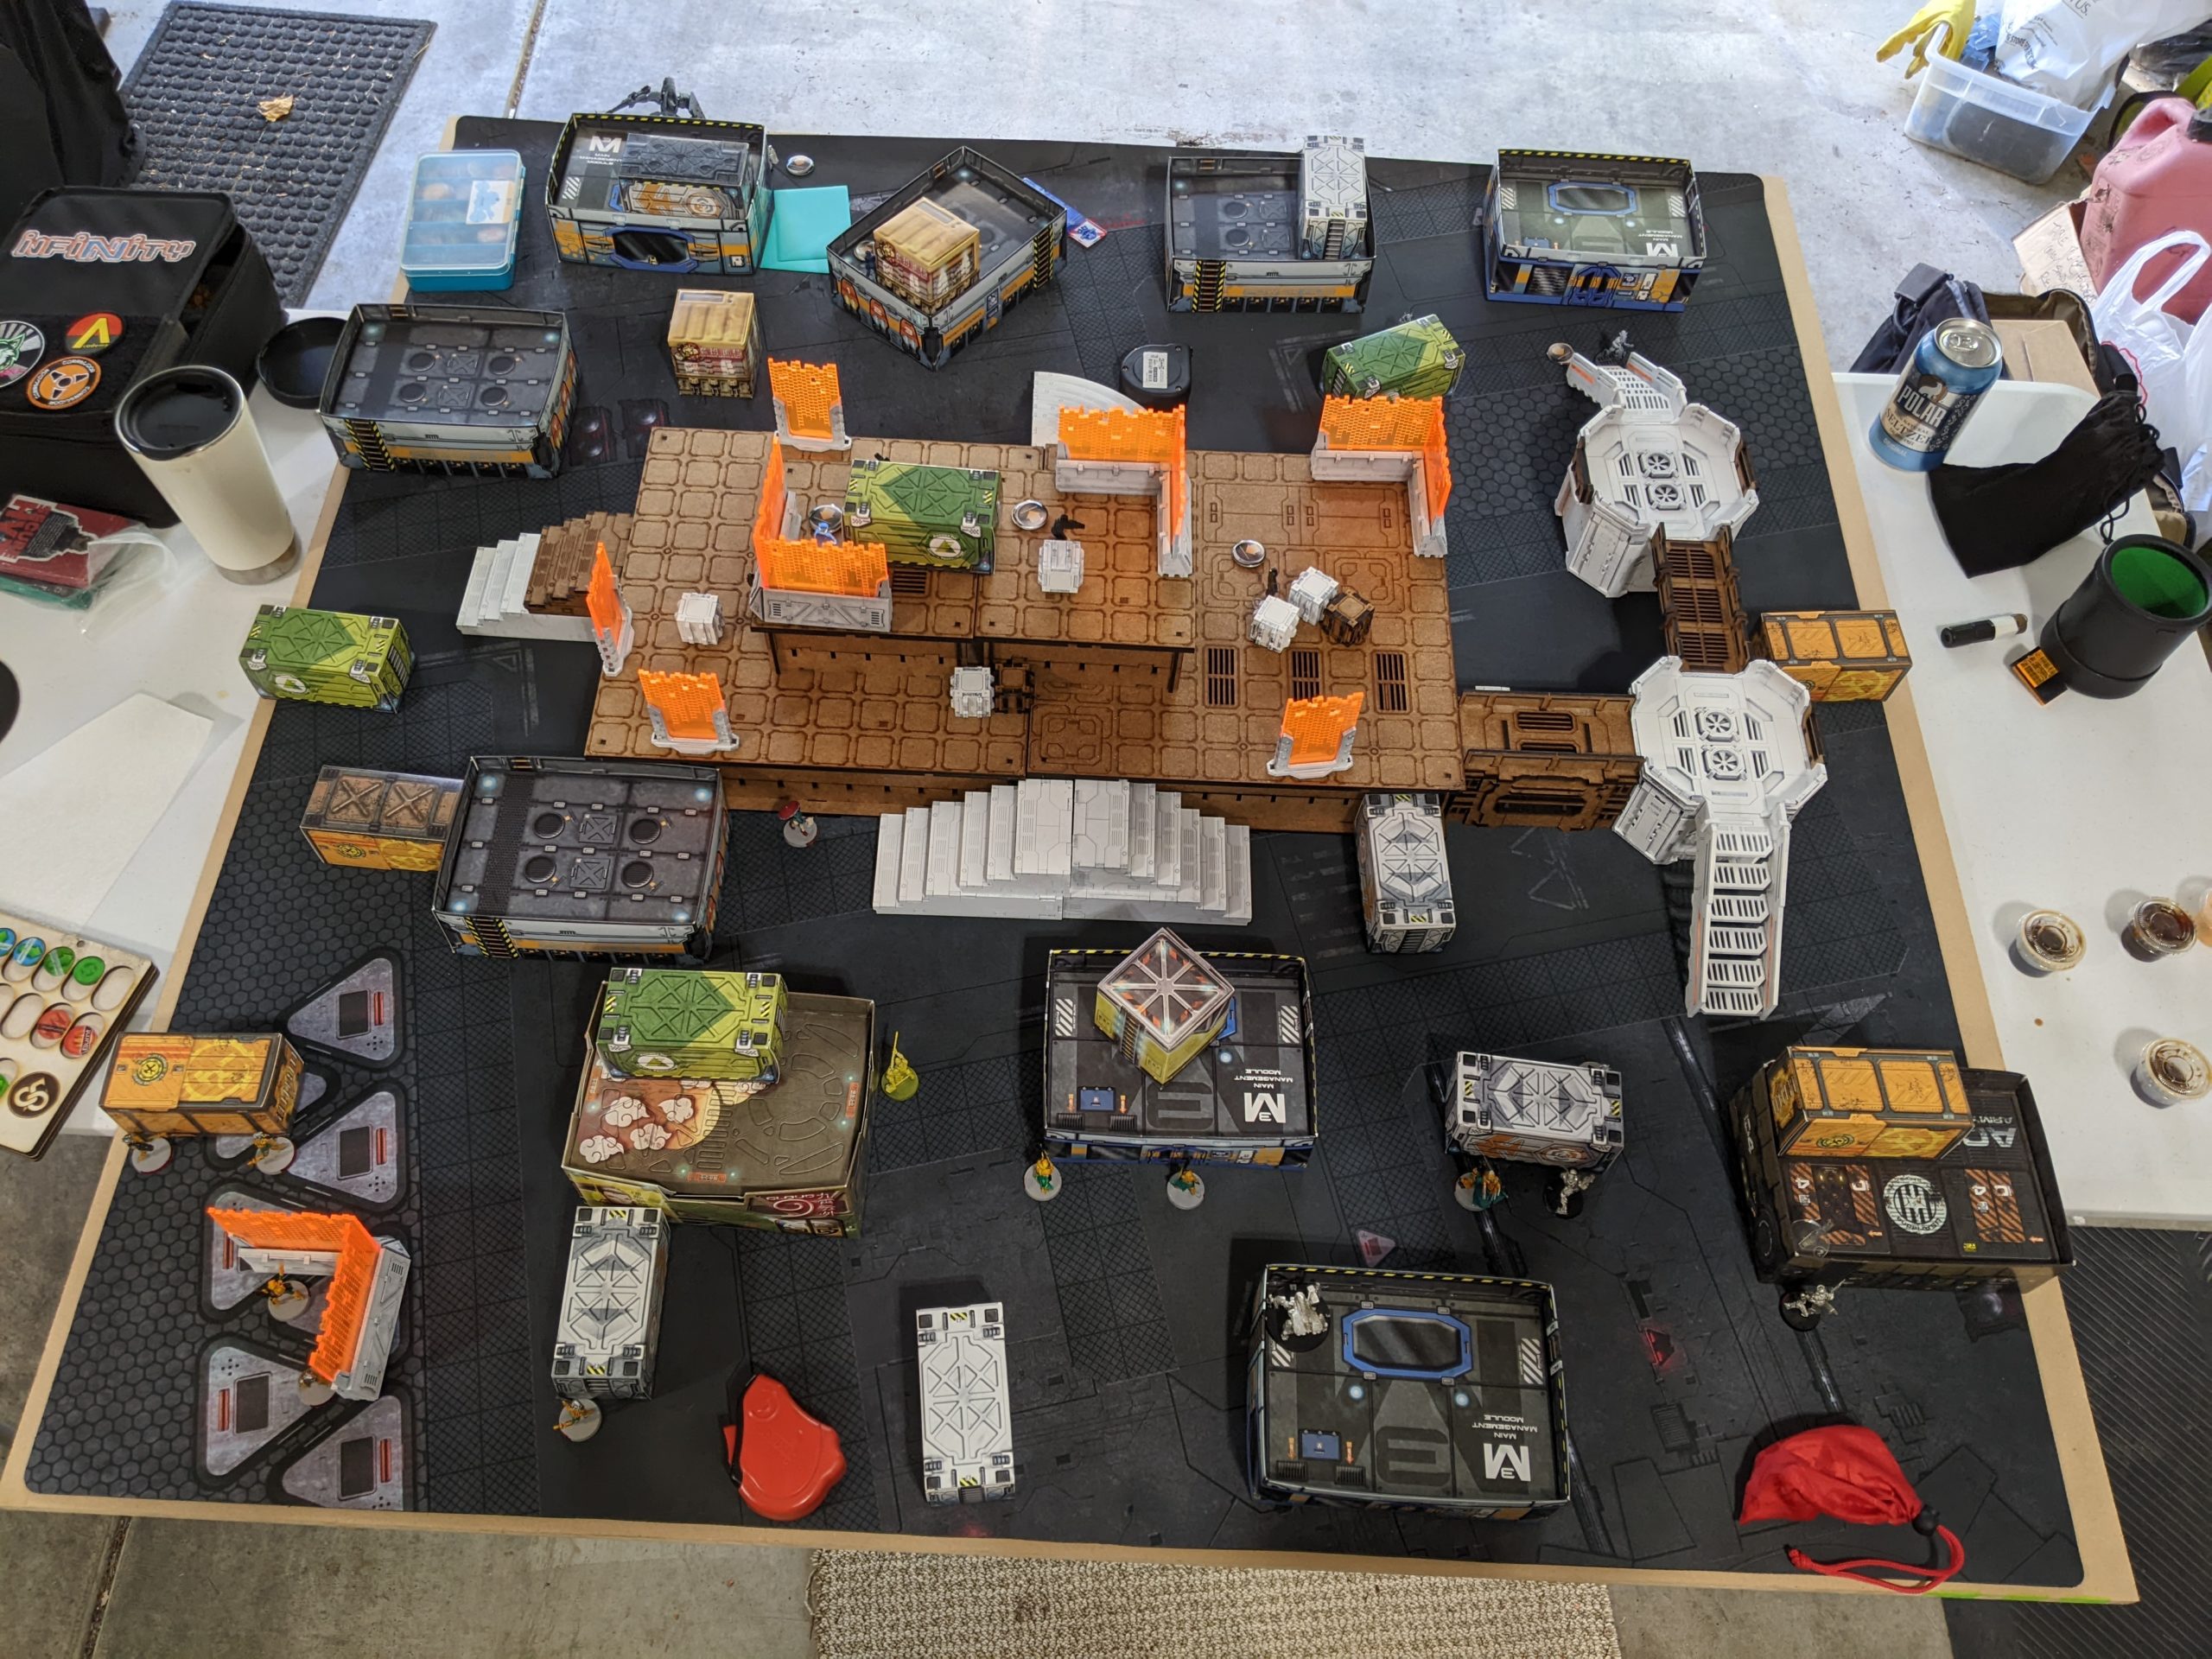
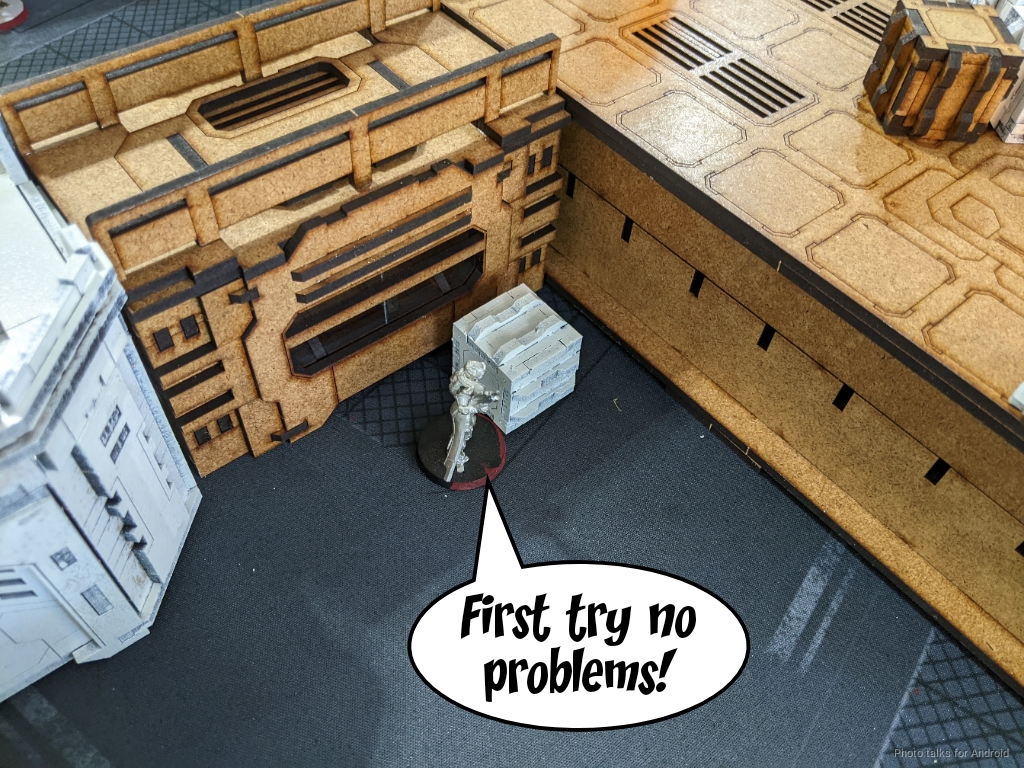
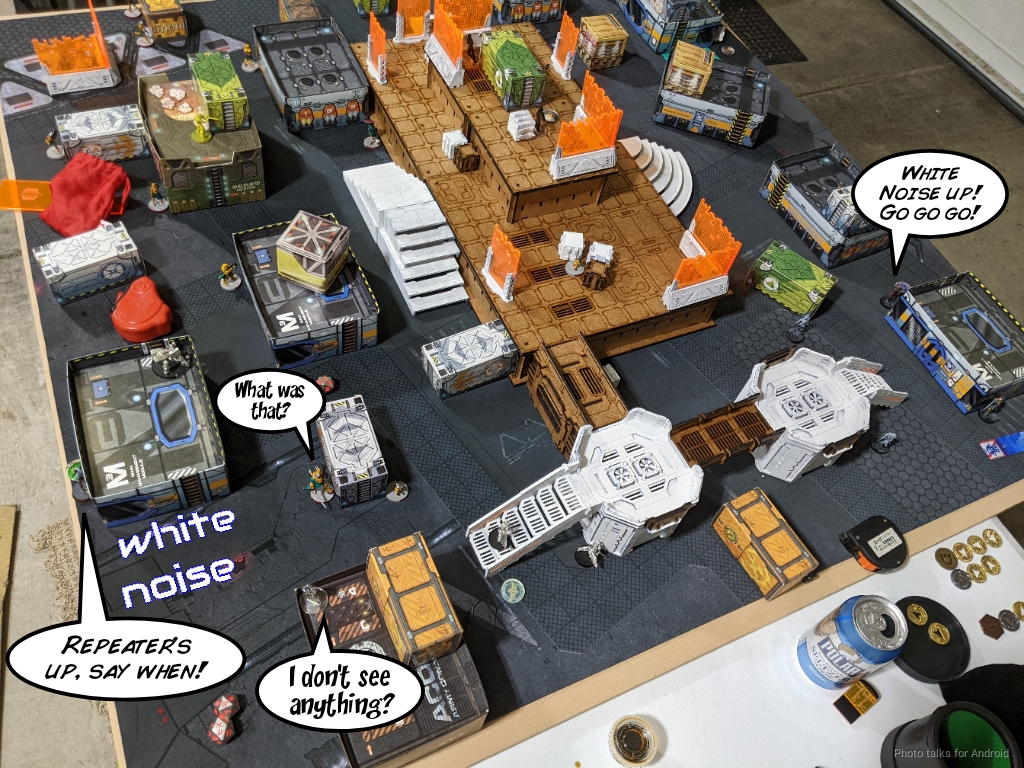
Not a particularly complex deployment, but very effective and pretty safe. I think the Bao is a little out of position, but he’s going first so there’s an opportunity to either push or correct the placement. My deployment, on the other hand, was a bit complicated. I decided to put the Bandit (who rolled a Panzerfaust) on the top of the central building, erroneously marked as a Brawler. My Bandit is poked out just enough to cover the central box with a shotgun.
The Hardcase’s decoy went up there as well, feigning a camo specialist, and the real Hardcase went on the next level down, ready to push down the catwalk system and shotgun some stuff. The Al’Hawwa stood on a box watching my deployment zone for Garuda, with its mine covering the box on the right. I decided to not contest the left box, not really anticipating James might seriously consider going after it as it’s quite a bit of movement to do so.
There was only one building that I felt was safe enough for the Anaconda with an additional shipping container on top to really block line of fire, so I set up the Irmandinho and Digger there, with the Digger watching the right table edge. The Brawler and the CSU hung out on the right as well, doing light anti-Garuda work but really just being an order battery.
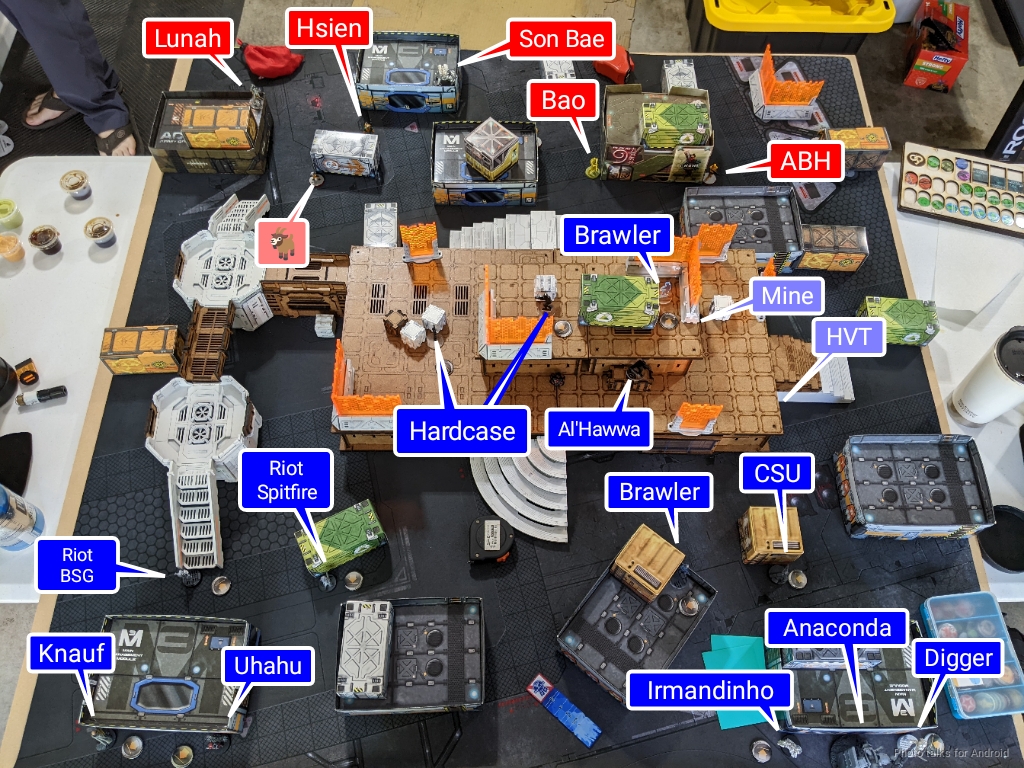
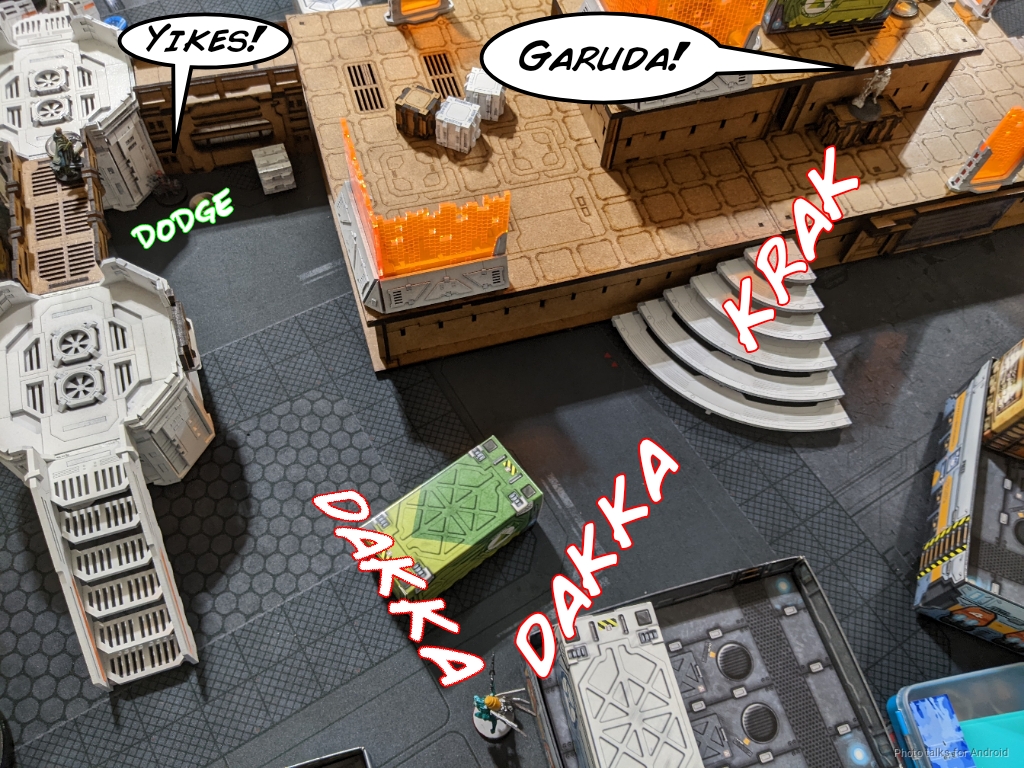
The Riot link went on the left, with Knauf watching the left table edge and the Riots pushed up a bit further. This was the weakest point of my deployment, but I was hoping that there wasn’t really going to be an opportunity for James to punish very hard.
Turn 1
Top of 1 – ISS
James showed me 8 orders for the Hsien in group 1 and 6 orders for the Bao in group 2. I elected to dock orders from the Bao, as it had the wierdest positioning and I wanted to put additional pressure on that situation. Also, it satisfied my usual rule of docking the smaller group for the higher percentage hit. Much to my surprise, James blew all 8 orders on the Hsien taking the long way around the catwalk system to grab the undefended box, even covering the Hardcase with a MadTrap.
He managed to retreat most of the way to his original starting position, leaving Xi Zhuang as a speedbump for his Zhanying who was carrying the box.
The Bao climbed up onto the roof of a nearby building and discovered both the Hardcase and the Al’Hawwa’s mine. It managed to kill the Hardcase, who dodged to clear the MadTrap but shockingly missed the mine (it split burst, one against the mine).
Bottom of 1 – StarCo
With that, it was my turn. I felt pretty confident in my ability to collect the boxes on later turns. James hadn’t really done any significant damage on his turn, and had weakened the Hsien haris’s shape as a result of having to walk around the catwalk system with all 8 orders. I didn’t want to let him keep the Hsien, as it’s a pretty powerful active turn piece and there wasn’t much else on the table that really concerned me.
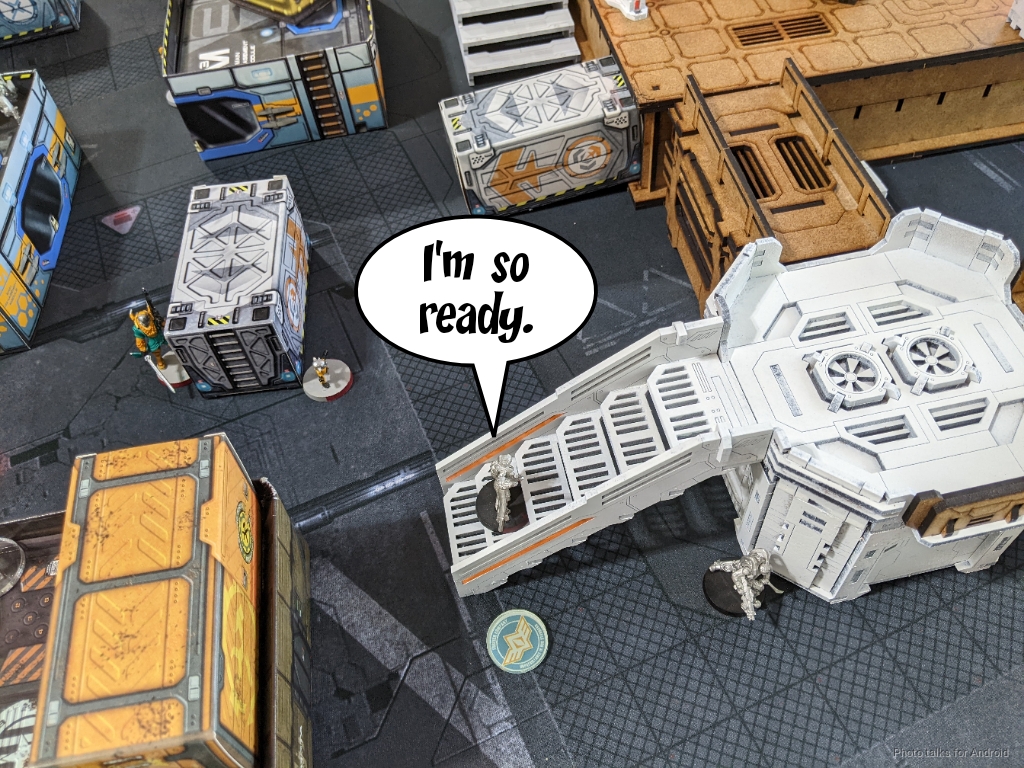
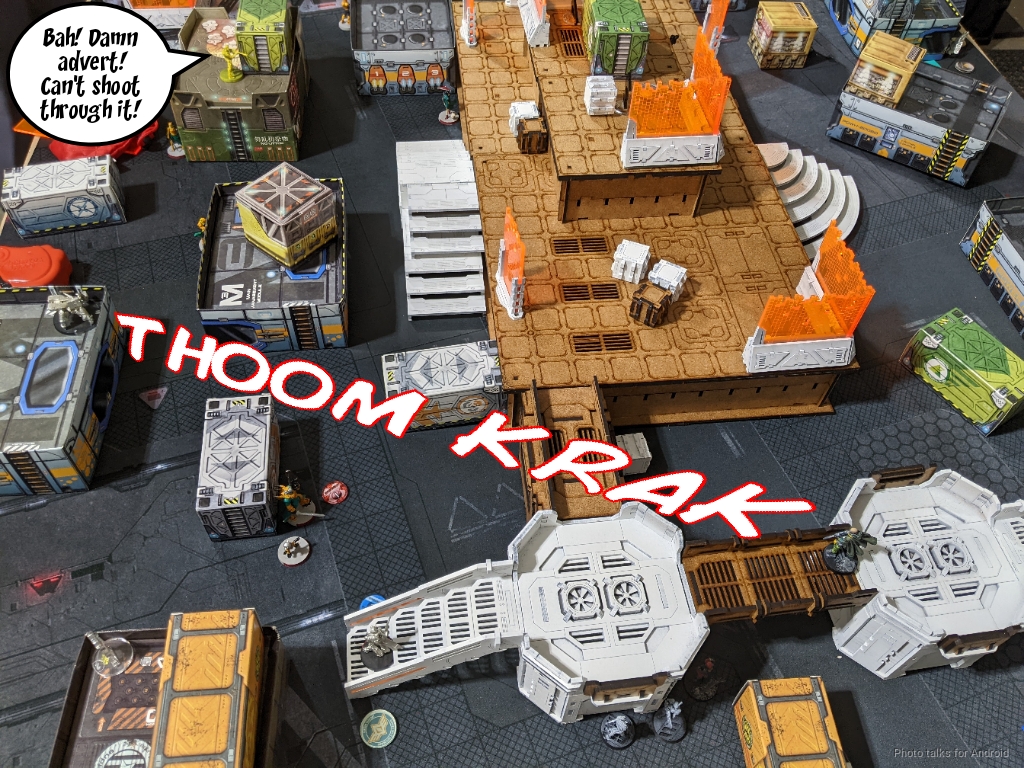
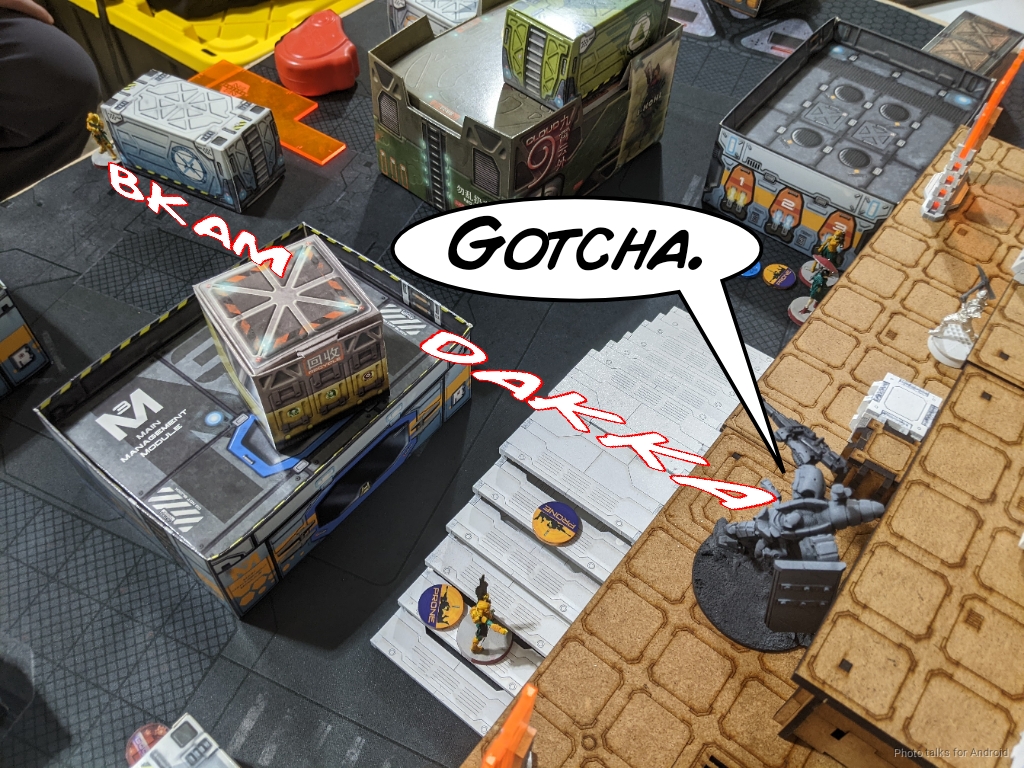
Given all this, I decided that now was the time to punish the Hsien Haris’s positioning, and dropped in the Hellcat all the way on James’ back table edge, dropping a repeater and throwing up White Noise with Uhahu while advancing the Riot Link. This had the amazing effect of nullifying Lunah and the Hsien.
The Hellcat doesn’t have many orders, so I just shoot the Hsien in the back, doing no wounds but forcing it around the corner into cover. The next order drops the Zhanying, who turned around as a result of the Hsien getting hit (not that this matters due to Sixth Sense).
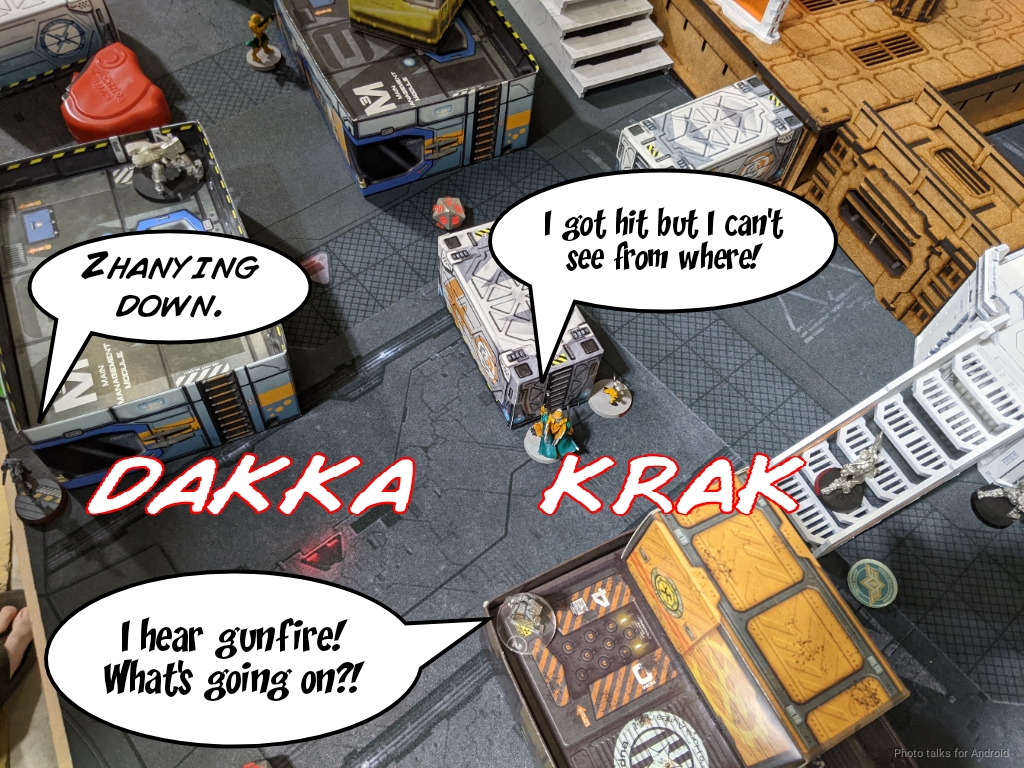
I spent one more order on the Hellcat, judging myself to be out of Nanopulsar range and popping out and back to get the Hsien out of cover. I hit a few times, but ARM 4 is good and I only do one wound.
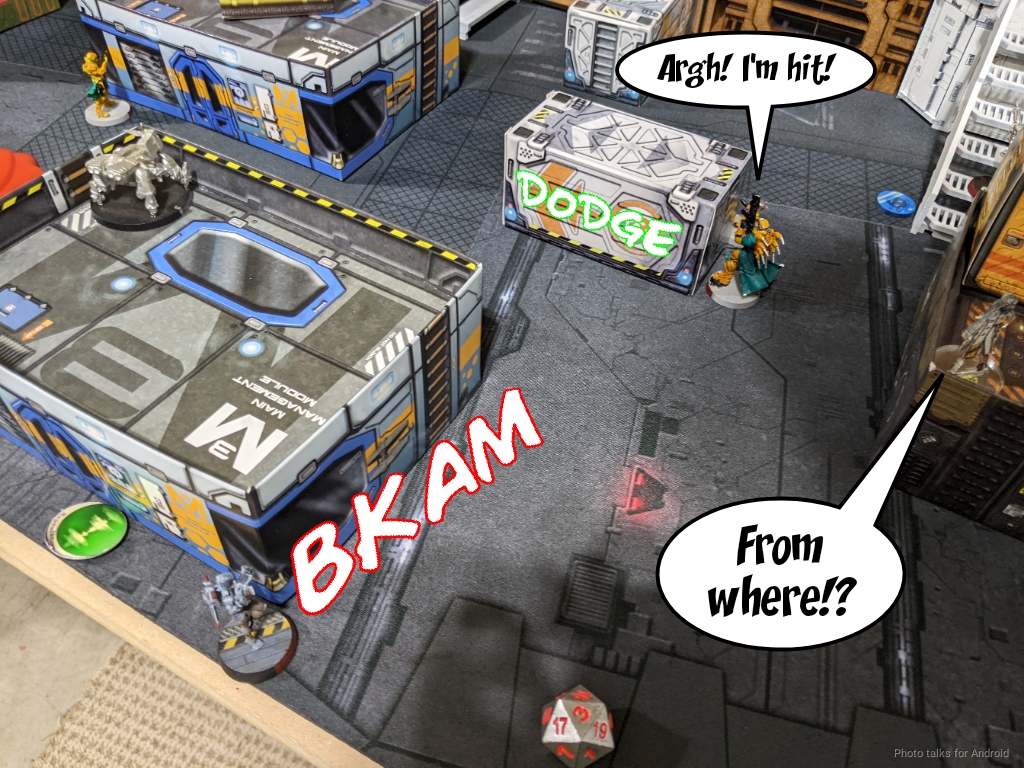
I have all the orders in my first pool still, so I start by removing Xi Zhuang with the Riot Grrl BSG. He hits me with a flamethrower, so I just triple template him and get an 18 on my ARM roll. I’ll take that!
This lets me get Knauf in position to see the Son Bae, which I drop with a crit and two hits. I forget to roll an extra die and only roll 3 here. I use one of the white/orange walls to hide from the Bao as I stand up, which is pretty fun.
Same story against the Bao as I move out from behind the wall thing. I get the Bao out of cover here, so even with my forgetting about Knauf’s extra burst I down it without much trouble.
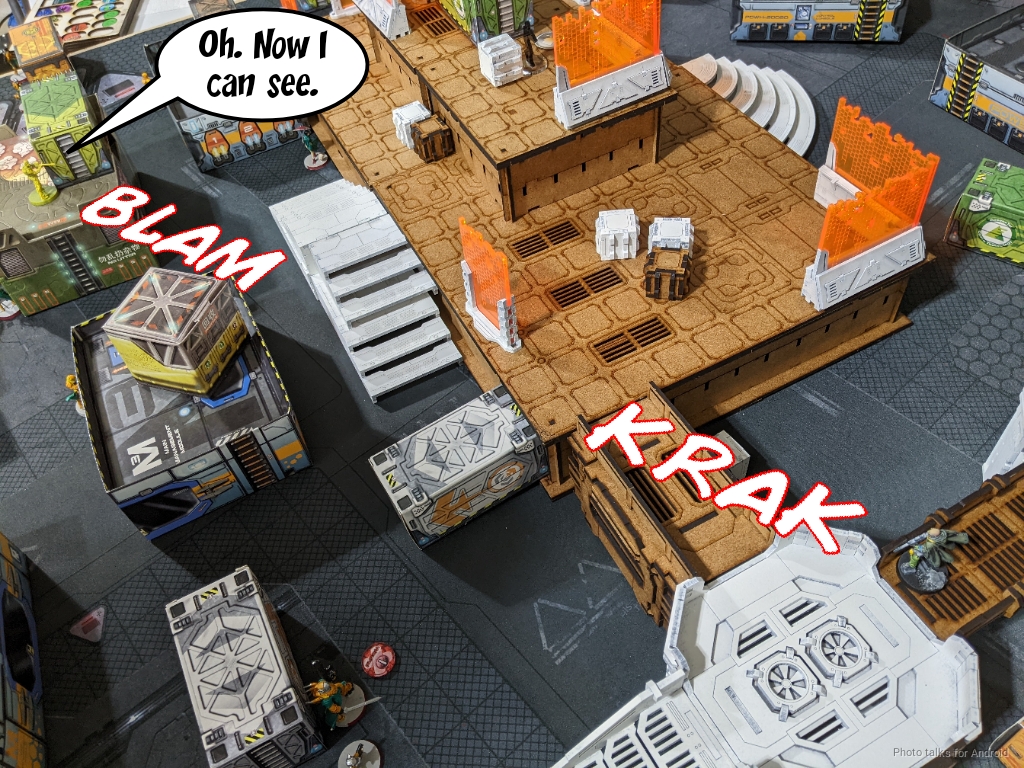
This lets me get the Riot BSG into position to see the Hsien outside of 8″ to avoid the MadTrap. I sneak one hit through, and DAM 15 AP is enough to take it down to unconscious.
I’ve got the Anaconda’s tac aware order left, and I don’t want a Kuang Shi link pushing into my right flank, so I set it up in overwatch now that all the big scary guns are gone.
Turn 2
Top of 2 – ISS
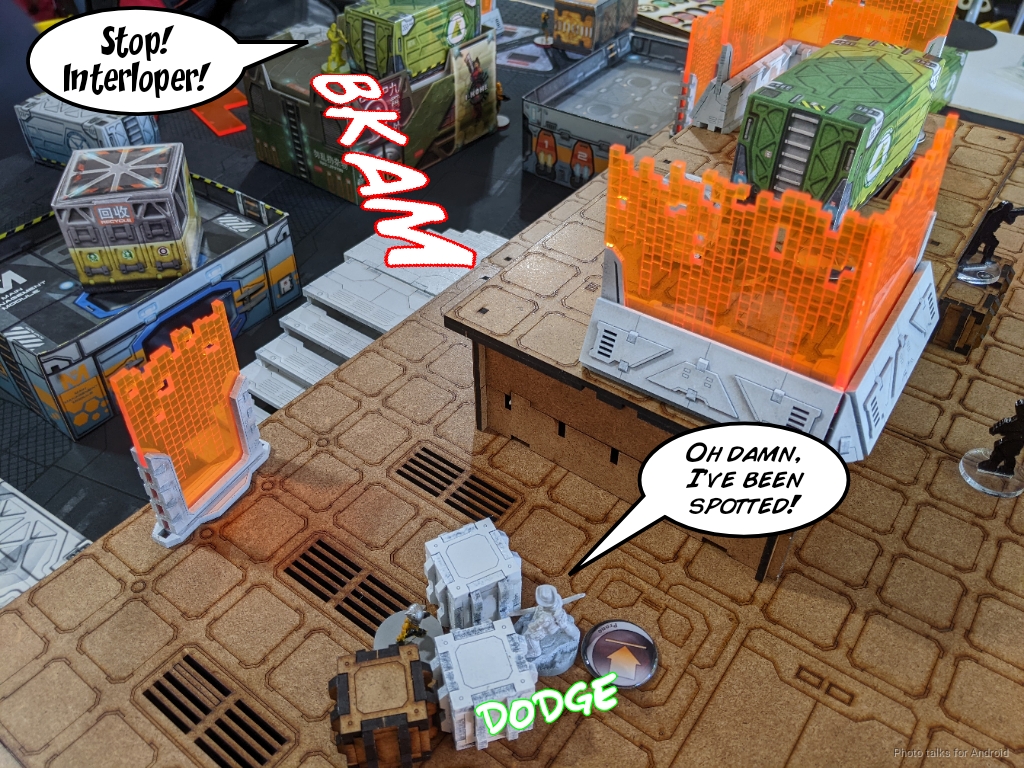
James isn’t in loss of lieutenant thanks to the Pheasant, so he drops in a Garuda to try and take out Uhahu. He has to take an ARO from the Al’Hawwa to get an angle, so he puts three into the Al’Hawwa and one into Uhahu. Uhahu fails her dodge and the Garuda whiffs its shot on her, but I land a sniper hit on the Garuda against burst 3 and stop the nonsense immediately. Phew! I’m quite glad that I had the sniper instead of any of the shotgun profiles, the extra range was key for this.
Next he reveals that one of the Pheasants was actually Sforza all along! He lands a crit and hit on the Hellcat, who passes all but 1 BTS save and dies. Absolutely not upset by this at all–got all of the value I needed out of her.
Lunah tries to take out my Riot Grrl BSG but loses the face to face. Thankfully for James, she tanks the hit and retreats into total cover.
James is basically out of specialists at this point, so he shifts the entire Kuang Shi link across the table to try and recover the Zhanying’s supplies. He doesn’t have the orders to do it, but he sets up a net of chain rifles to make things difficult for me.
At this point, his turn is over. He’s an amazing host and before I start my turn, he asks me if I’d like an espresso drink, to which I enthusiastically accept. He’s still working on his latte art, but this cappuccino he made for me was delicious!

Bottom of 2 – StarCo
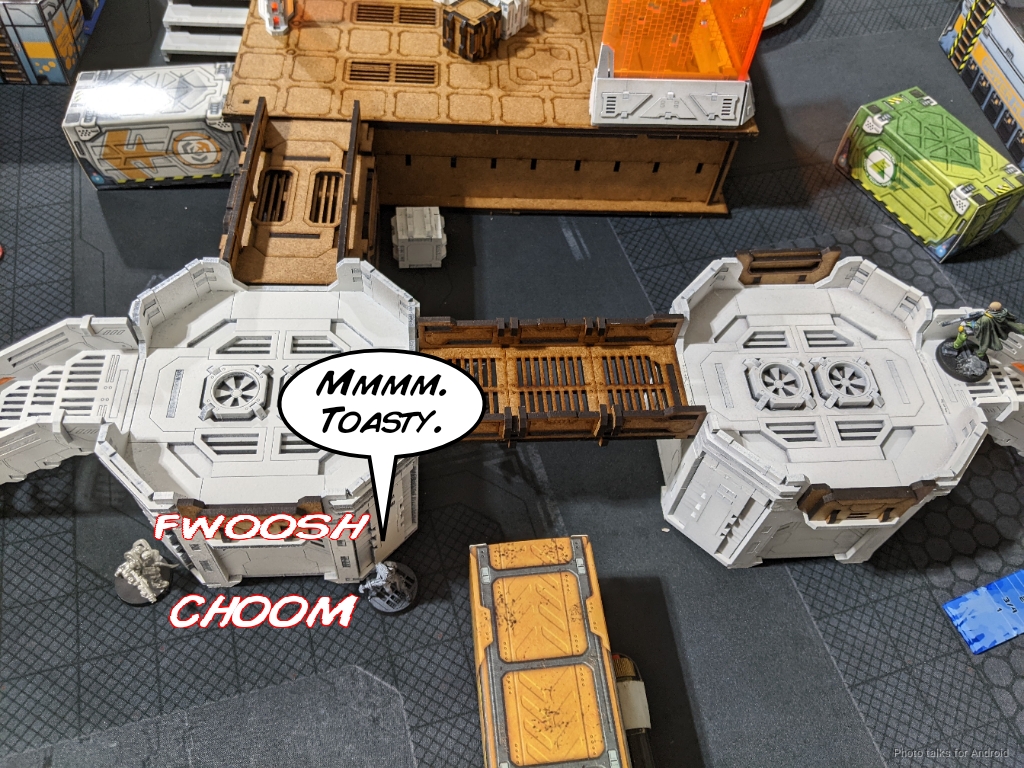
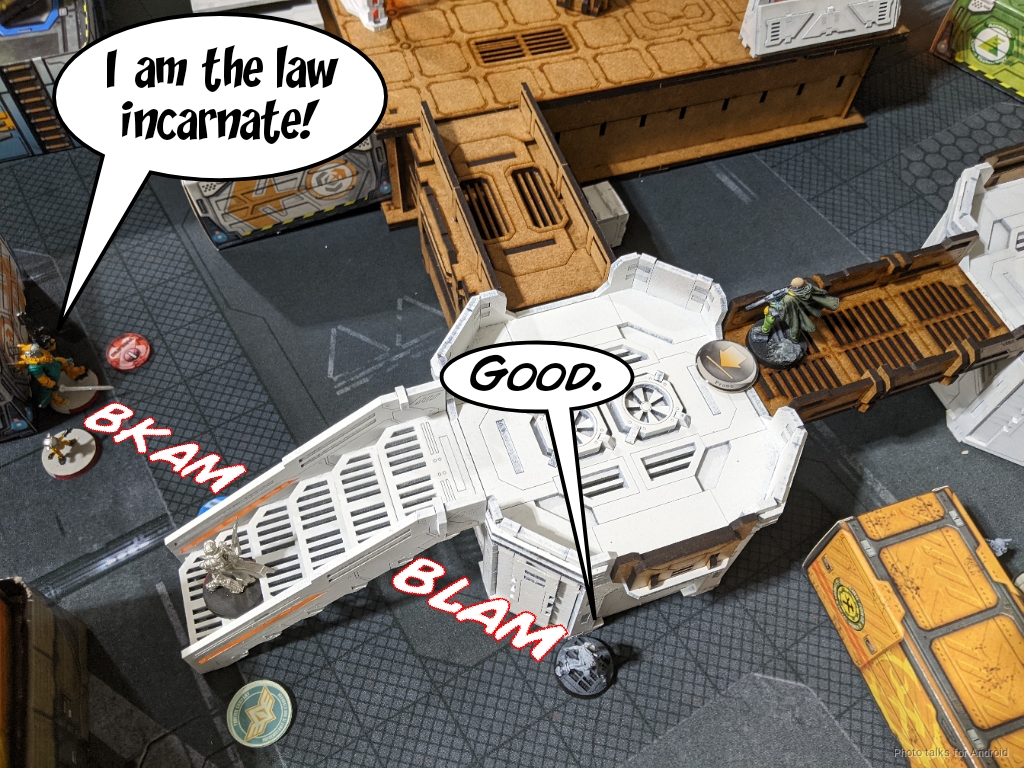
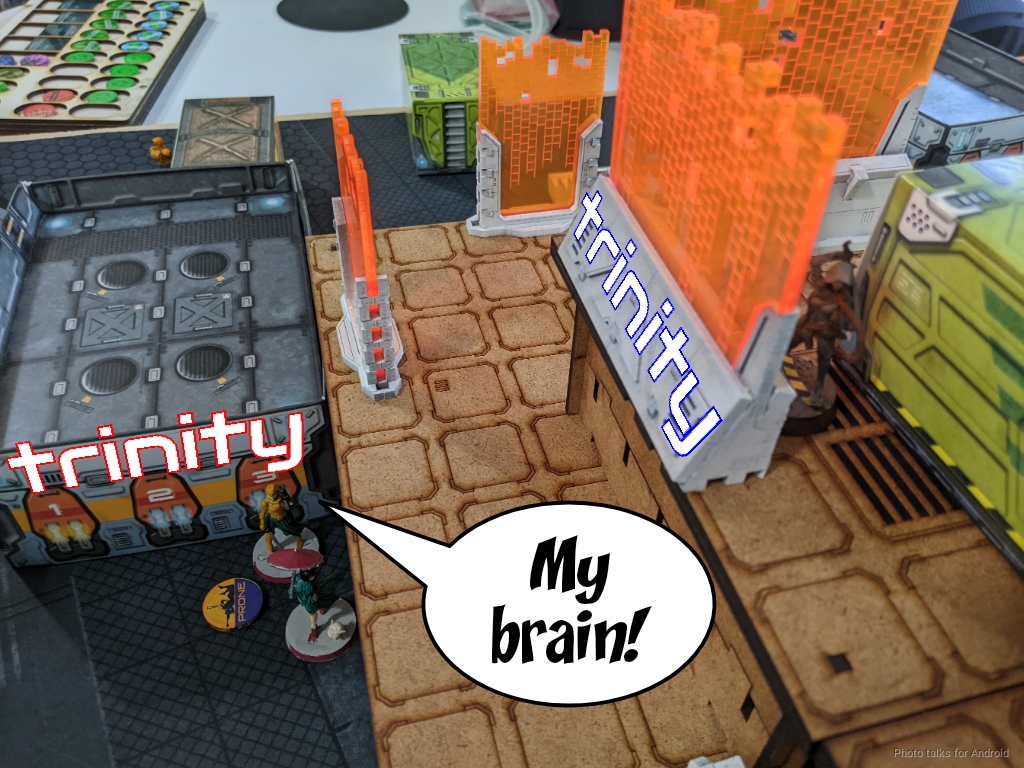
Fully caffeinated now, I can only make good decisions, right? I decide the play is to get the two remaining boxes. The Bandit will grab the box all the way up top and I’ll push the TAG onto the central platform and grab the rightmost box with the Irmandinho. I’m a little concerned about hackers, so I ask where his hackers are and he shows me his KHD right in range of the Bandit. Success! A quick Trinity later and he’s going to be in loss of lieutenant on Turn 3.
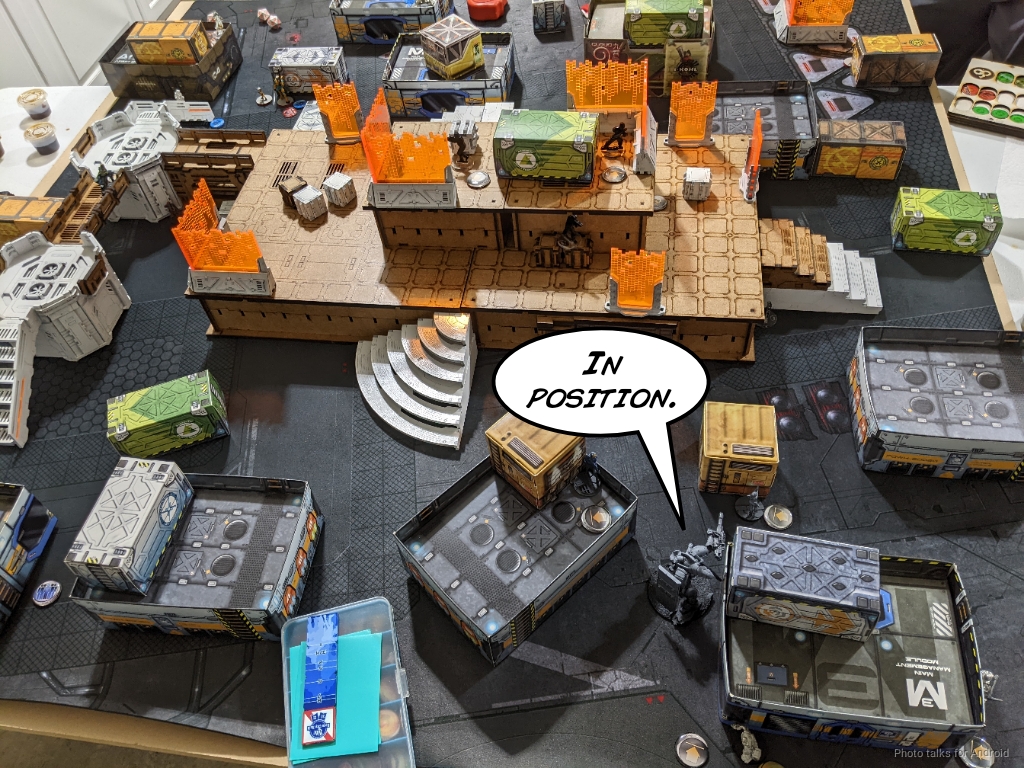
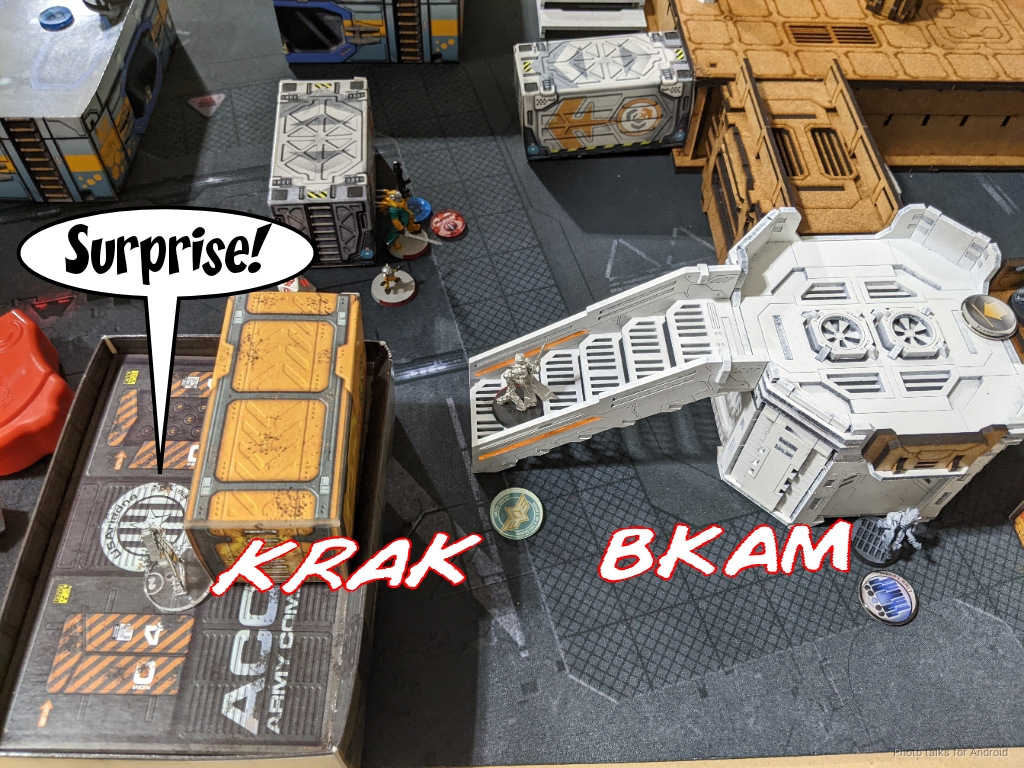
The TAG marches up onto the central building and starts blasting away at the Kuang Shi, putting some dogged as the Irmandinho drops out of the link to spend entirely too many orders trying to grab the box.
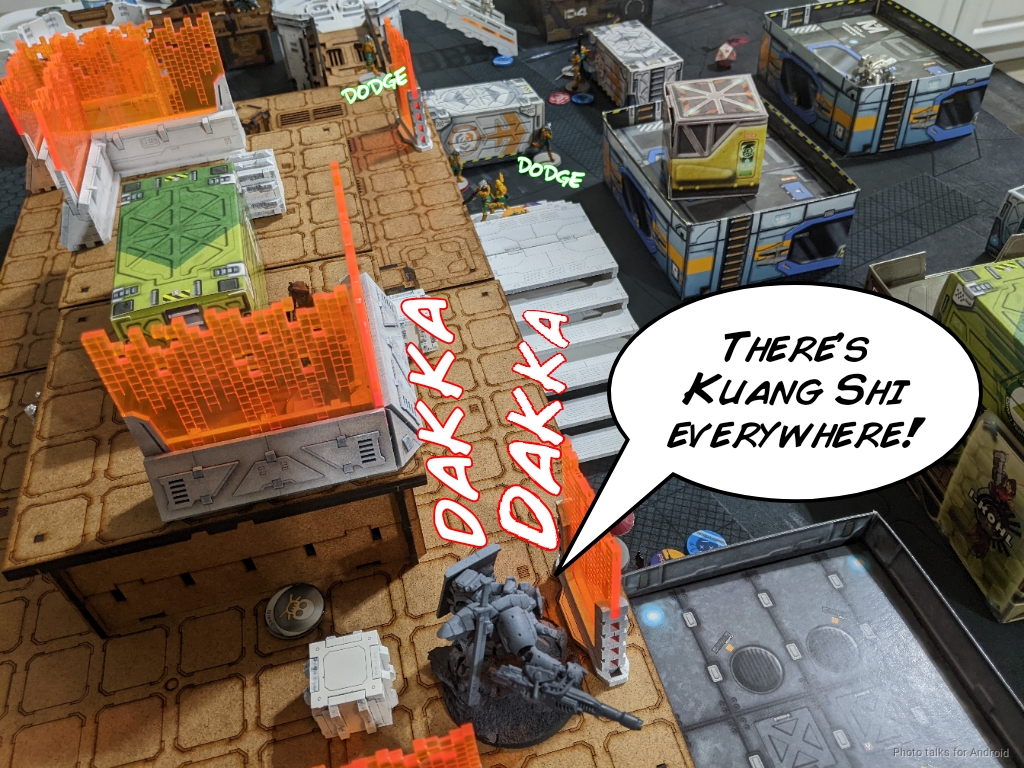
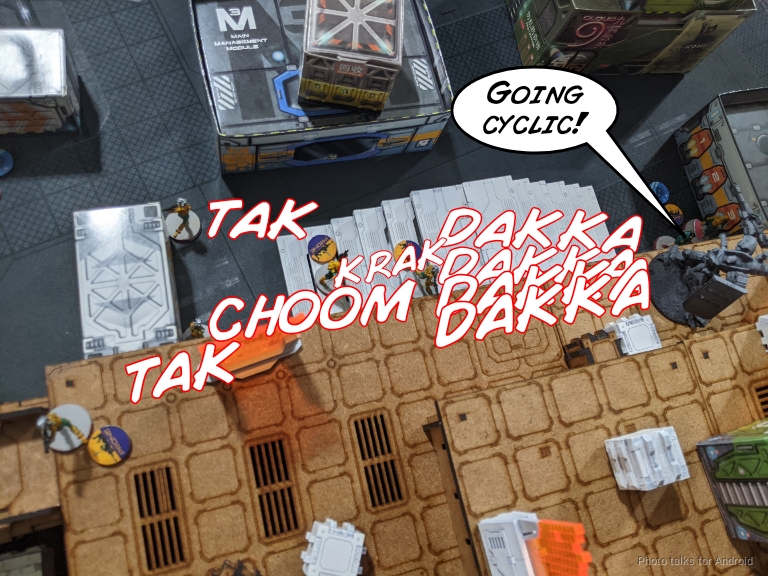
I finally get it, so I reform the link to get the Irmandinho to safety while splitting burst on the Anaconda against all but one member of the Kuang Shi link, taking a wound in the process.
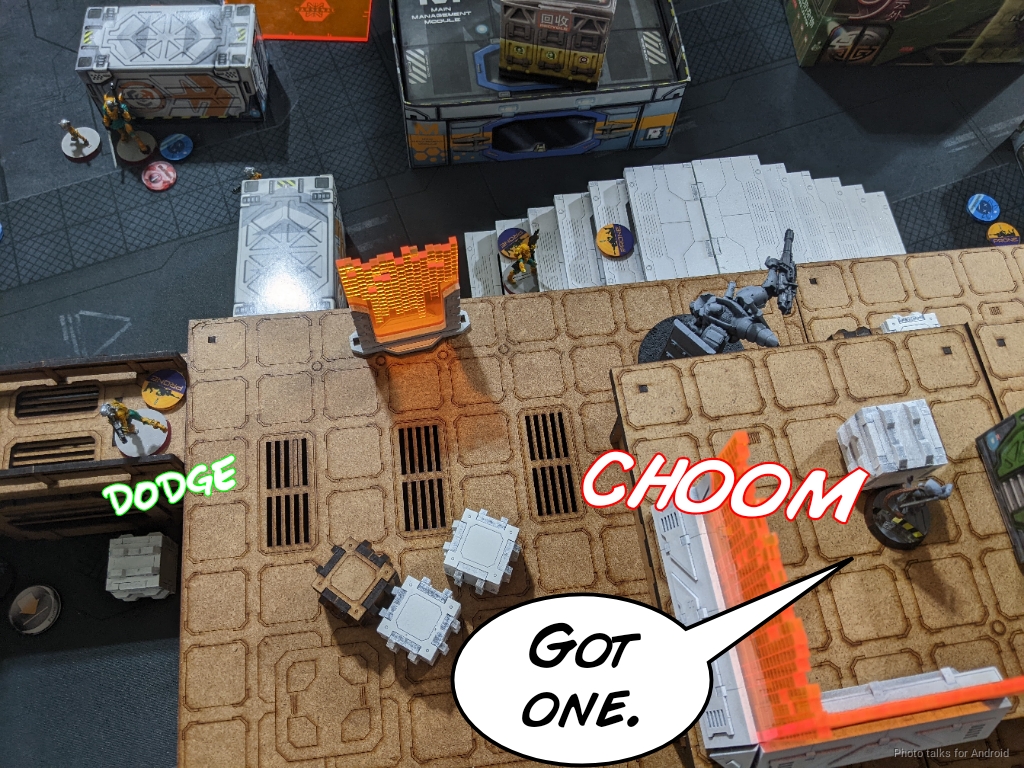
When I finally run out of orders in the pool, there’s only one Kuang Shi not dead/dogged and the controller left. I grab the box up top with the Bandit and shotgun the last Kuang Shi dogged before retreating to total cover.
Turn 3
Top of 3 – ISS
As predicted, James is in loss of lieutenant. He goes for the TAG kill with Lunah. This has reasonable odds, given that I’ve only got one wound left… but not if James rolls double 17’s and I stick a Panzerfaust ARO.

Lunah disappears after being hit by a shaped charge, and then it’s Sforza’s turn. I’m out of Panzerfausts, but the TAG has plenty of bullets and I use them to kill Sforza.
There’s not much else James can do at this point, so he passes turn.
Bottom of 3 – StarCo
I’m already securing his HVT, so all I need to do is clear the Madtrap and snag the Zhanying’s box, then grab Data Scan with Uhahu. I’ve got a whole order pool to do this with, so I just make a few rolls and that’s that.
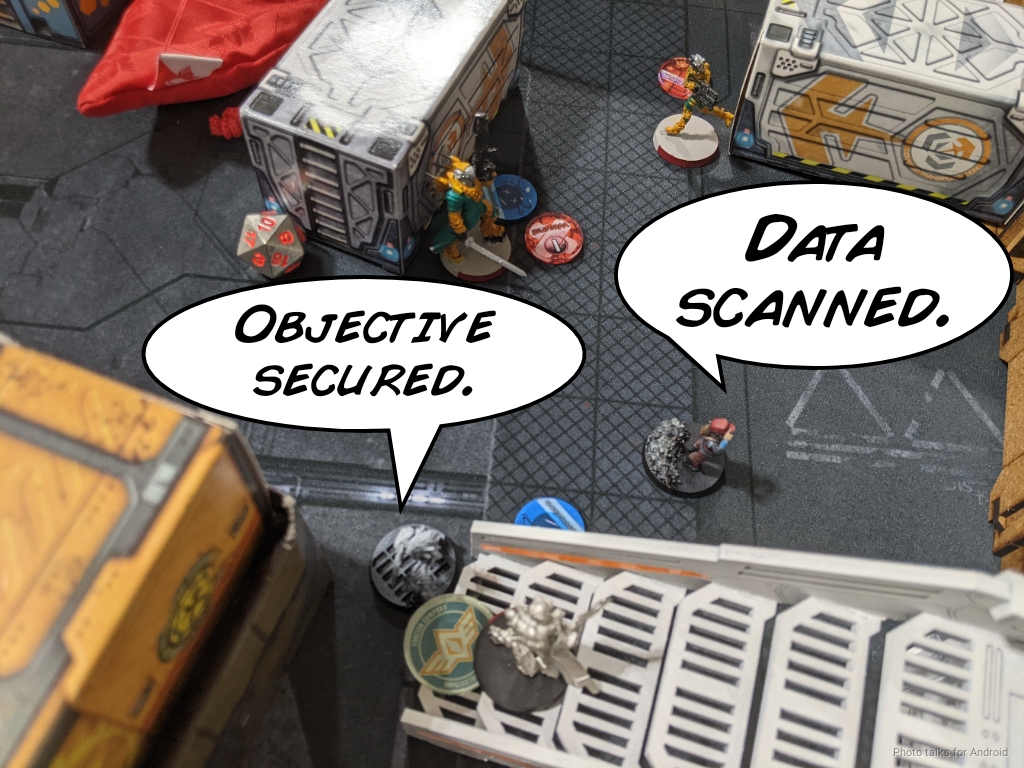
With all three boxes and two classifieds, that’s a
10-0, 264-28, StarCo, Free Company of the Star Victory!
Post Game Analysis
So, I’m not entirely sure what happened here. On the surface, I had the right tools in the right places at the right times, and rolled well. That’s presumably how you win games, right? I think James also had the right tools, perhaps not in the right places at the right times, and he rolled poorly.
But that’s such a boring explanation. I’ve been thinking a lot about N4 lately, in the context of my recent games. Looking at this game and the last 10 games (ignoring the two less than 300 point games for Durgama), what I’ve noticed is that the games have mostly been high scoring as well as fairly one-sided on the lethality (I may have made some mistakes in calculating army points, but it’s close).
| Game | Objective Points | Army Points |
| Leave Nun Alive | 9-0 | 233-0 |
| That‘s Morlock It | 3-2 | 110-95 |
| Szally Forth | 6-3 | 263-91 |
| Unidron Batrep | 8-1 | 270-117 |
| Warcors and Wildcats | 6-2 | 151-151 |
| Perfidious Parachutists | 9-1 | 198-106 |
| Asked and Answered | 8-3 | 290-43 |
| Gluttonous Caliban | 9-1 | 290-18 |
| See You Later ‘Gator | 7-1 | 160-150 |
| Riot Gearr | 9-1 | 275-70 |
| Riot Against the ISS Machine (This Game) | 10-0 | 264-28 |
One common theme in I think basically all of these games is that my opponent overextended something. This either cost them in resources, e.g. orders, on that turn, meaning they didn’t have enough orders for other things in their list, or it gave me opportunities to severely punish the over-extension. As a concrete example of running out of resources, in Leave Nun Alive my opponent dumped a bunch of orders and command tokens into a Taigha trying to kill some Reverends and then couldn’t get stuff out of the biotechvore zone. In Unidron Batrep and Gluttonous Caliban, my opponents advanced very expensive and powerful 3-model links into weak positions, allowing me to flank with power pieces like a linked Grenzer MSR and a plasma Overdron to just delete the links.
What’s interesting is that I’m also advancing links into the midfield. Leave Nun Alive is a bit of a straw man here, since it’s Biotechvore, so Szally Forth is perhaps a better example where my core link is basically over the centerline! I don’t think there’s a significant power differential or toolkit disparity between the links I’m pushing forward, so it’s not like my links can survive better in the midfield. So why the difference?
Let’s look at this game in particular. I’ll summarize the turns quickly to jog your short term memory:
- Top of Turn 1 – ISS
- Hsien haris grabs a supply box and resets to slightly weaker than starting position with Zhanying in weak position and with Xi Zhuang intentionally left in a place to die as speedbump.
- Bao moves into overwatch position and takes down a Hardcase and reveals a mine.
- Bottom of Turn 1 – StarCo
- Hellcat takes out Zhanying, forcing supply box drop, and wounds Hsien.
- Knauf takes out Son Bae and Bao
- Riot BSG takes out Xi Zhuang and Hsien
- Riot link is now in midfield with very little threatening it on that side save Lunah.
- Top of Turn 2 – ISS
- Garuda dies to ARO trying to attack Riot link.
- Kuang Shi displace to try and recover Zhanying’s box
- Sforza takes out Hellcat
- Bottom of Turn 2 – StarCo
- Grab the other 2/3 boxes
- Kill the new Lt, the Pheasant CoC
- Push TAG into the midfield, take out the entire Kuang Shi link, basically.
- Top of Turn 3 – ISS
- In loss of Lt, Lunah and Sforza die to TAG
- Bottom of Turn 3 – StarCo
- Get Zhanying’s box and classifieds
James didn’t overextend a link here, in fact he pulled all the way back to basically his deployment positioning with some important differences. I think the issue here was that James spent 8 orders and didn’t really affect board state. At the start of my first turn, the board essentially hasn’t changed since deployment. James has a box, true, but has made no real positional improvements.
I’d argue that standing the Bao up in overwatch is very very dangerous and probably a mistake with linked Knauf on the table, even with me forgetting the fact that he’s burst 4 in a link the entire game. There were places to put the Bao to cover the top of the table to contest the TAG later that wouldn’t have been exposed to Knauf, although that’s not a great plan either. That said, Lunah was in an excellent position to fight stuff, I just had the exact tool to deal with her in the form of White Noise.
So, after spending 12 orders on his first turn, James has a box and has killed a Hardcase (which is disruptive but not terribly). Unfortunately, he hasn’t really put any real positional pressure on me. In fact, he exposed the Bao to be shot at. This sort of segues into a discussion we’ve been having on The Dice Abide Discord, which resolves around the perception that N4 is more of a lethal game than N3 was. I’ll sort of talk through and summarize the discussion:
On its face, the increased lethality seems a strange statement, because the removal of auto-wounds from critical hits certainly has made ARM a more relevant stat, with lots of stuff being more survivable as a result. We’ve also seen the addition of a lot more AP and increased damage bonuses to various profiles, and a bunch of highly optimized profiles.
Things are also much faster because of a move to 6-2 HI profiles, the additional of dodge movement in the active turn, and what seems like an overly liberal sprinkling of +3 Dodge across a wide range of profiles. The improvements to dodge both improve the odds of success in the +3 case, but also reduce the effectiveness of deployables. Forcing the dodge often only costs 2″ now, instead of 4″ as it was before, so the order tax of deployables is lessened, especially if the thing dodging has +3 or more.
Regarding shooting, the active turn burst bonus has always been very powerful. The fact that ARM is so good now and combi rifle crits are very likely to do nothing against highly armored targets means that the active turn is really really strong. Furthermore, the limit of 15 orders in most cases results in the devaluation and subsequent absence of very cheap “ablative armor” pieces like Mutts and similar warbands that used to dominate the reactive turn and the rise of active turn warbands with berserk like Taigha. At the same time, there’s also been a cost decrease on big stompy things like TAGs to incentivize their use.
The odds on shooting don’t look ridiculously different. Accounting for the crit changes and using the ghostlords dice calculator to do some spot checking, we’re looking at anywhere from a 5-10% decrease in lethality for a linked HMG fighting stuff from ARM 3 all the way to ARM 8, but it’s important to remember that 5-10% is actually quite a big difference when dealing in matters of life or death, even if it’s just our little metal toys.
In short, the big scary things are harder to kill in reactive, move faster, and there’s less things in your list that you’re comfortable throwing under the bus to drain orders. Deployables are also less effective at blunting an attack, as we discussed earlier. A competent killing stroke is thus harder to stop, and AROs are really only there to drain orders, not to stop it. Investing heavily in AROs to bring them to parity with active turn pieces, e.g. a full order bonus linked sniper, ML, or equivalent, weakens the board coverage of the list and depending on the table has some very strong counter-plays.
What we haven’t seen is a dramatic shift in tables to account for the new movement efficiency and general increase in lethality. We also (at least in our meta) haven’t really seen a increase in things like hackers to have passive and generally relatively safe counter plays to stuff like TAGs. Although I would point out that in my games versus James he possessed my Overdron and even took extra hackers this game. I just happened to do the exact thing to be able to counter him.
The point I’ve been building to is that N4 has provided tools to improve killing efficiency, and the traditional tools to counter that efficiency are less effective. This has necessitated a shift in list and table configurations as well as deployment and actual play on the table. Using this game as an example, just doing the objective and removing 1-2 models on the first turn is not sufficient. This isn’t to say that alpha strikes are required, but rather is to say that creating some sort of positional, resource, or even psychological advantage is paramount.
James’s first turn didn’t really do enough damage, either to my order pool or to my position on the table. I think setting up a MadTrap on the center platform to annoy the Bandit would have been good, as well as setting the Hsien up on the central platform, perhaps. There’s something to be said for just rolling up onto the center platform and killing the Bandit, the Al’Hawwa, and the Hardcase. I think with 8 orders the Hsien can do it, but perhaps at the cost of the Zhanying if he discovers and I Trinity the Zhanying or something. Then he has the high ground and I have to get him out of there, and he has access to a box.
Not being able to do this efficiently is a weakness of ISS, because they have limited infiltrating/forward deploy specialists. Perhaps my choice of table edge and my laziness in protecting the left box was more effective than I thought. I honestly had just chosen it because the box looked easy for Uhahu to grab on the left and also because my lunch was already on that side of the table. I thought the long way around the catwalk system was just too annoying for James to even attempt, but me making it completely safe to do so enticed him into the easy choice. Gamer inertia is a real thing!
James’s real line of play out of the problem was to drop in the Garuda. I did set up to counter a Garuda pretty hard, so perhaps that wasn’t a strongly viable option on Turn 1, but dumping 8 orders into just getting one box felt ineffective. Perhaps this game is a bit of an outlier, because the Garuda did absolutely nothing, but I think I did my best to ensure that with my choice of the Al’Hawwa sniper and its positioning. I don’t think James needed to challenge the sniper and Uhahu at the same time. Taking shots on Uhahu from outside 24″ would have been fine, I can basically do nothing but dodge in response.
There’s a part of me wondering if I should have fired pitchers with Uhahu instead of dodging with her, but I think the dodge encouraged a good 3-1 split burst. Unclear. Honestly the Garuda on Turn 2 was a great move by James, the dice just didn’t let him have it. I don’t think it would have been as devastating as my Hellcat drop, but I think it would have been very disruptive. I probably lose one of the Riot Grrls, Uhahu, and the Al’Hawwa if the dice went his way. Then I have to remove the Garuda somehow, which I can do but significantly changes my turn 2.
So perhaps James was in a difficult position at the start of 2 and me rolling an 8 on that sniper rifle was the beginning of the end for him. I think me null deploying and denying the Hsien and Bao any real targets was very helpful. James didn’t take a Su Jian, so there was really no way in his list aside from the Garuda to punish my null deployment. Not taking a Su Jian as the reason he lost feels extremely unsatisfying though.
In any case, I think the best play, positionally, was to take the high ground. This also removes a lot of tools for me and puts me on the back foot in terms of tempo. I probably have to use the CSU’s super jump and boarding shotgun to get work done, and that’s just so expensive. Also, that would have severely damaged my second order pool and made my Hellcat probably lurk in her dropship for another turn.
This also probably allows the Garuda a better attack option in Turn 2. That was a lot of discussion! To summarize, I think basically James spent orders on the wrong thing in Turn 1. Getting objectives on Turn 1 I think is a mistake in most cases now. There’s too much tempo ceded if you do that, and you generally develop a positional weakness if you do that. I’m not a very good Go player, but framing it in terms of stone positions during the opening feels correct.
It feels like James played this:
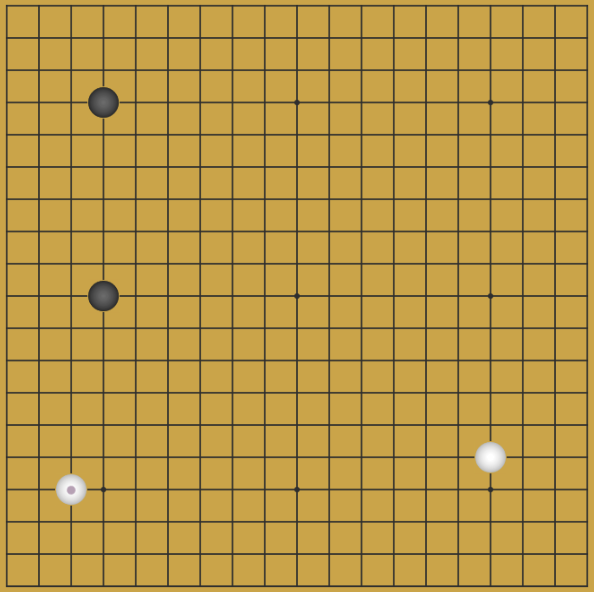
Instead of this:
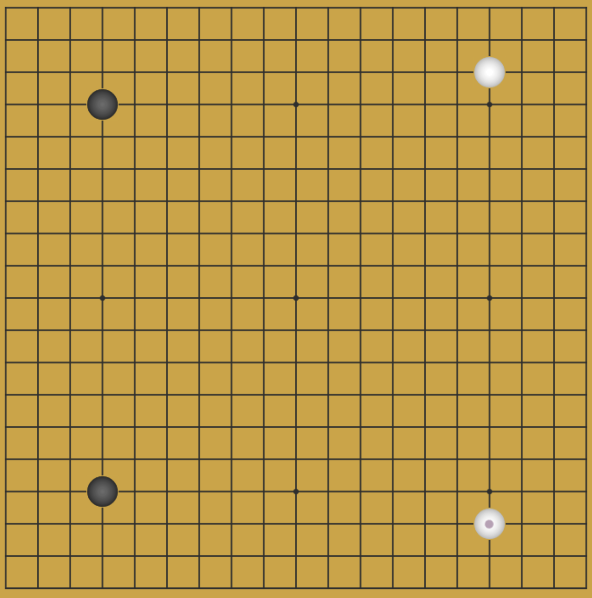
Both Go and Infinity are games about positioning, and the first board position is stronger in the upper left for black but just cedes the rest of the board to the white player. The second game state feels much more equitable. I think there’s a lot to be learned from other games that you can take back to your Infinity game to improve it. Playing a lot of Heavy Gear recently has taught me a lot about tempo and resource investment in a way that Infinity can’t, unless you’re in loss of lieutenant every turn (don’t do that, it’s bad).
I should probably talk about StarCo a bit. StarCo fixes my complaints about Riot Grrl links and lets me have a midfield sniper for an affordable SWC cost that comes with minelayer. I see the appeal now. The Anaconda Haris is pretty rad. My one complaint about the faction is that it’s incredibly reliant on its irregular profiles, so you’d better budget those command tokens carefully! Alright, I think this bit of somewhat unfocused rambling has gone on for long enough. If you stuck through the whole thing, thanks for reading and I hope it was helpful.

Pingback: Mission 048: Highly Irregular – Bromad Academy
Pingback: Dodgy Dartok – MERC Recon