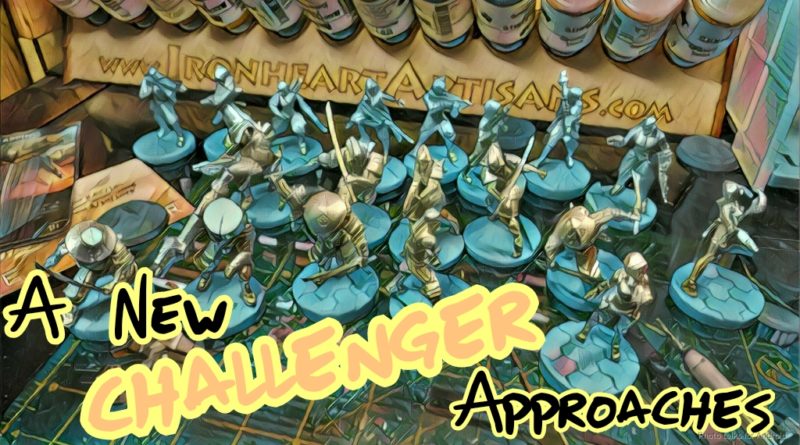
A New Challenger
A few weeks ago, I had asked around as to what army I should assemble next (I have too many) and the general consensus was JSA. Space Ninjas it is! My better half and I had a quiet weekend at home, so I more or less had 48 uninterrupted hours (thanks honey!) to cut, scrape, file, and glue my JSA together while we binge re-watched The Office. We’re running a painting league in September, so I figured it would be a good time to dovetail the two efforts together. Adam’s back on a Combined Army kick, with the explicit purpose of reminding our meta what a pain in the ass Combined Army in his hands can be. So thanks for that, Adam!
I’m brand new to JSA and Adam’s coming off a long stint of NA2, so we decided to get in two quick games of Recon+ to give ourselves a shakedown cruise, so to speak. This also had the added benefit of letting us see what the rest of the folks in our meta would experience as they got into Recon+ and what pitfalls we might want to avoid as we encourage the locals to play some of this new format.
Game 1 – Shikami versus Raktorak
 I’m really excited about the Shikami, so I threw together a quick list that had the greatest hits of JSA in it: a Shikami, Ryuken-9 SMG, Ninja KHD, and a Kempetai MSV2 MR. 150 points is definitely a pretty brutal format. You can bring some cool toys but man it’s hard to cram everything you want in there with the orders to power it. I took one look at Adam’s list and felt the bile rise at the back of my throat. UGH. Q-Drone Plasma in a 2′ x 3′ table! So gross! At least there wasn’t a hacker to buff it. That would just be the trolliest of moves (which is Adam’s favorite). He definitely had a strong list so it was going to be a tough fight. We chose “Break Through” as our mission, which is basically mini-Frontline.
Overview
- Mission: Break Through
- Forces: Japanese Secessionist Army versus Combined Army (Recon+)
- Deploy First: Combined Army
- First Turn: Combined Army
[img]https://assets.infinitythegame.net/infinityarmy/img/_logosweb/logo_903.png[/img][b] Recon C[/b]
[img]https://assets.infinitythegame.net/infinityarmy/img/_logosweb/903/logo_1.png[/img] [b]KEISOTSU Lieutenant[/b] Combi Rifle / Pistol, Knife. (1 | [b]9[/b])
[img]https://assets.infinitythegame.net/infinityarmy/img/_logosweb/903/logo_2.png[/img] [b]KEMPEI (Multispectral Visor L2)[/b] Shock Marksman Rifle / Pistol, CCW, Electric Pulse. (1 | [b]25[/b])
[img]https://assets.infinitythegame.net/infinityarmy/img/_logosweb/903/logo_1.png[/img] [b]KEISOTSU (Forward Observer)[/b] Combi Rifle / Pistol, Knife. (0 | [b]10[/b])[img]https://assets.infinitythegame.net/infinityarmy/img/_logosweb/903/logo_3.png[/img] [b]RYŪKEN (Forward Deployment L2, ODD)[/b] Submachine Gun, Antipersonnel Mines, D-Charges / 2 Breaker Pistols, Knife. (0.5 | [b]24[/b])
[img]https://assets.infinitythegame.net/infinityarmy/img/_logosweb/903/logo_11.png[/img] [b]NINJA Hacker (Killer Hacking Device)[/b] Tactical Bow / Pistol, DA CCW, Knife. (0 | [b]29[/b])
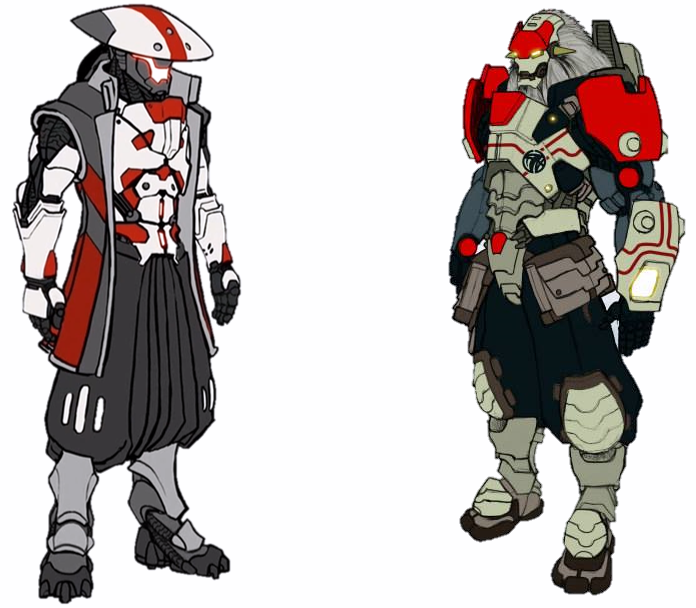
[img]https://assets.infinitythegame.net/infinityarmy/img/_logosweb/903/logo_8.png[/img] [b]SHIKAMI[/b] Contender, Nimbus Grenades / Assault Pistol, DA CCW, AP CCW, Knife. (0 | [b]45[/b])
[img]https://assets.infinitythegame.net/infinityarmy/img/_logosweb/903/logo_21.png[/img] [b]CHAĪYÌ Yaókòng[/b] Flash Pulse, Sniffer / Electric Pulse. (0 | [b]8[/b])
[img]https://assets.infinitythegame.net/infinityarmy/img/_logosweb/orden_regular.png[/img]7 [b]| 2.5 SWC | 150 Points |[/b] Open in Infinity Army
[img]https://assets.infinitythegame.net/infinityarmy/img/_logosweb/logo_601.png[/img][b] List 1[/b]
[img]https://assets.infinitythegame.net/infinityarmy/img/_logosweb/601/logo_25.png[/img] [b]NOCTIFER Lieutenant[/b] Combi Rifle / Pistol, Knife. (1 | [b]24[/b])
[img]https://assets.infinitythegame.net/infinityarmy/img/_logosweb/601/logo_56.png[/img] [b]KERR-NAU (UPGRADE: White Noise)[/b] Plasma Rifle + Pitcher, D-Charges / Breaker Pistol, Knife. (0 | [b]27[/b])
[img]https://assets.infinitythegame.net/infinityarmy/img/_logosweb/601/logo_49.png[/img] [b]KRAKOT RENEGADE[/b] 2 Chain Rifles, Grenades / Pistol, DA CC Weapon. (0 | [b]14[/b])
[img]https://assets.infinitythegame.net/infinityarmy/img/_logosweb/601/logo_49.png[/img] [b]KRAKOT RENEGADE[/b] 2 Chain Rifles, Grenades / Pistol, DA CC Weapon. (0 | [b]14[/b])
[img]https://assets.infinitythegame.net/infinityarmy/img/_logosweb/601/logo_38.png[/img] [b]RAKTORAK[/b] Red Fury / Pistol, Knife. (1 | [b]26[/b])
[img]https://assets.infinitythegame.net/infinityarmy/img/_logosweb/601/logo_18.png[/img] [b]Q-DRONE[/b] Plasma Rifle / Electric Pulse. (1 | [b]25[/b])
[img]https://assets.infinitythegame.net/infinityarmy/img/_logosweb/601/logo_41.png[/img] [b]IKADRON (Baggage, Repeater)[/b] 2 Light Flamethrowers, Flash Pulse / Pistol, Electric Pulse. (0 | [b]9[/b])
[img]https://assets.infinitythegame.net/infinityarmy/img/_logosweb/601/logo_41.png[/img] [b]IKADRON (Baggage, Repeater)[/b] 2 Light Flamethrowers, Flash Pulse / Pistol, Electric Pulse. (0 | [b]9[/b])
[img]https://assets.infinitythegame.net/infinityarmy/img/_logosweb/orden_regular.png[/img]8 [img]https://assets.infinitythegame.net/infinityarmy/img/_logosweb/orden_impetuosa.png[/img]2 [b]| 3 SWC | 148 Points |[/b] Open in Infinity Army
Deployment
I won the rolloff and selected deployment, as I thought one side was a little better. I also wanted to get some more experience going second. Adam dropped his Lieutenant prone on a roof , put an Ikadron on each flank, then clustered up his attack pieces in the center to give himself the option of going in either direction. He held the Raktorak in reserve.
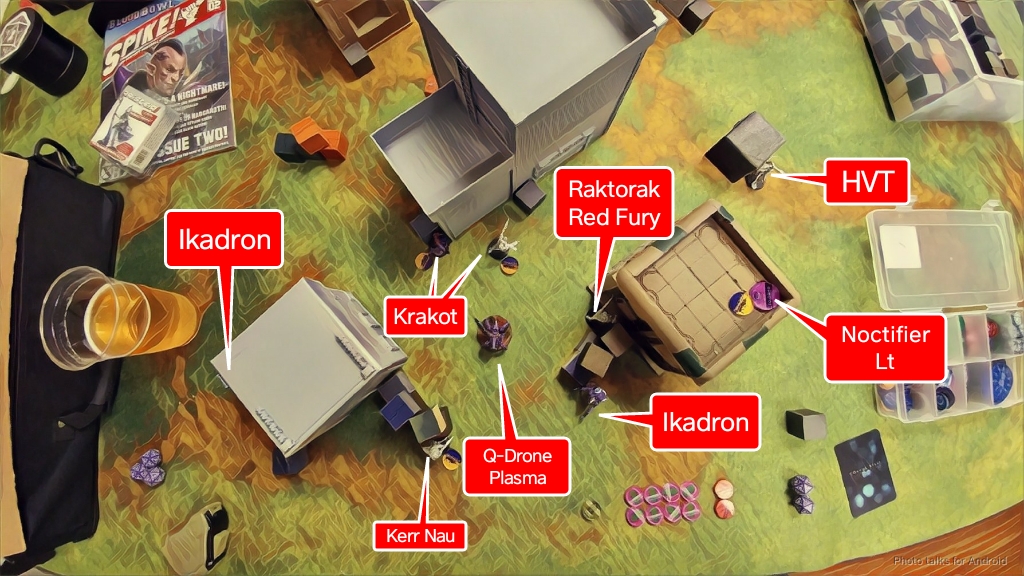 I was pretty terrified of getting wrecked by the Krakots, so I deployed with a bunch of stuff left out to ARO. The mine was pretty key to this effort and centrally located. I didn’t want to give the Krakots free reign, but at the same time there was a Red Fury and two Plasma Rifles on the table, forcing me to think very carefully about shot angles and so on. I did my best to deny Adam any plasma templates, and then dropped my Shikami out of reserve.
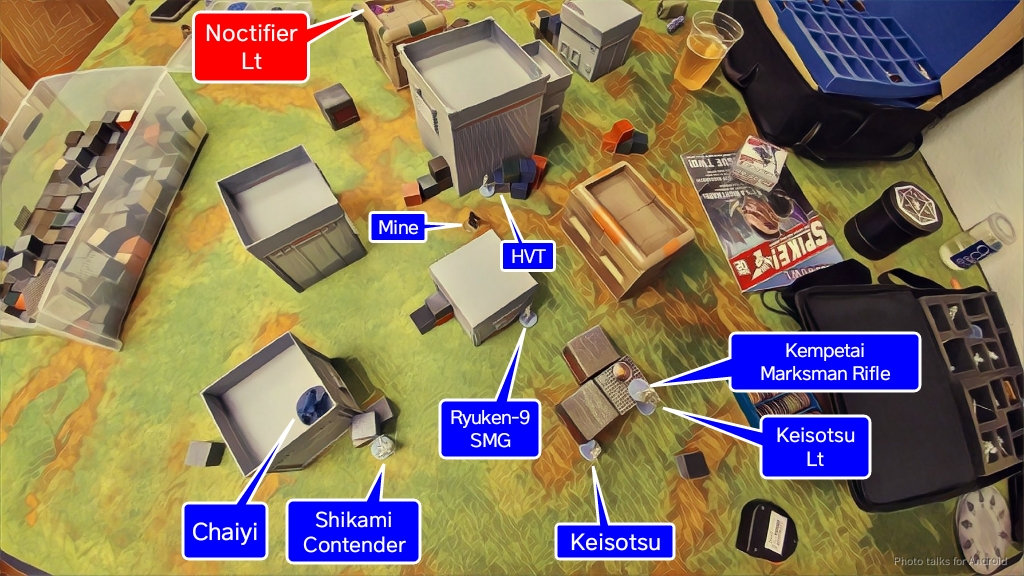 This was going to hurt, no matter what. Hopefully the dice would go in my favor.
Turn 1
Top of Turn 1 – Combined Army
One of Adam’s Krakots had rolled super jump, and he didn’t want it or the other one running out in front of my AROs, so he canceled both impetuous orders. The Raktorak drops my poor little flash pulse bot with a crit and a hit, then trades some ineffective fire with my Shikami, who is not very happy about shooting stuff at outside of 16″. I think the trick here is dodging and not shooting back with a contender on 6’s. Unwilling to risk some lucky rolls on my part, Adam shifts his attention to my Ryuken 9, taking her out with Kerr Nau.
 Thankfully, at 150 points the order pools aren’t terribly deep, so after Adam shifts the Raktorak and Q-Drone into better positions to protect his right flank he passes the turn.
Bottom of Turn 1 – JSA
Kerr Nau is visible at outside of 16″ to my Kempetai, who shocks him off the table after moving into LoF. It sadly takes entirely too many orders and my Keisotsu are now out of position. I wasn’t sure what I wast trying to accomplish by moving them up, I think I’m too used to a full 4′ x 4′ table and wanted to set up for later turns, which is pretty unnecessary in this format. I can see the Q-Drone with the Kempetai by standing her up, so I do that, but it tanks the shot and fails guts back into cover. I pass the turn after dropping my Kempetai prone again.
Turn 2
Top of Turn 2 – Combined Army
Adam clears the mine with his Krakot’s face, rolling a 20 to dodge and a 1 for ARM. I guess some prankster spit out their chewing gum in the Krakot’s path, messing up his dodge. I’ll take it!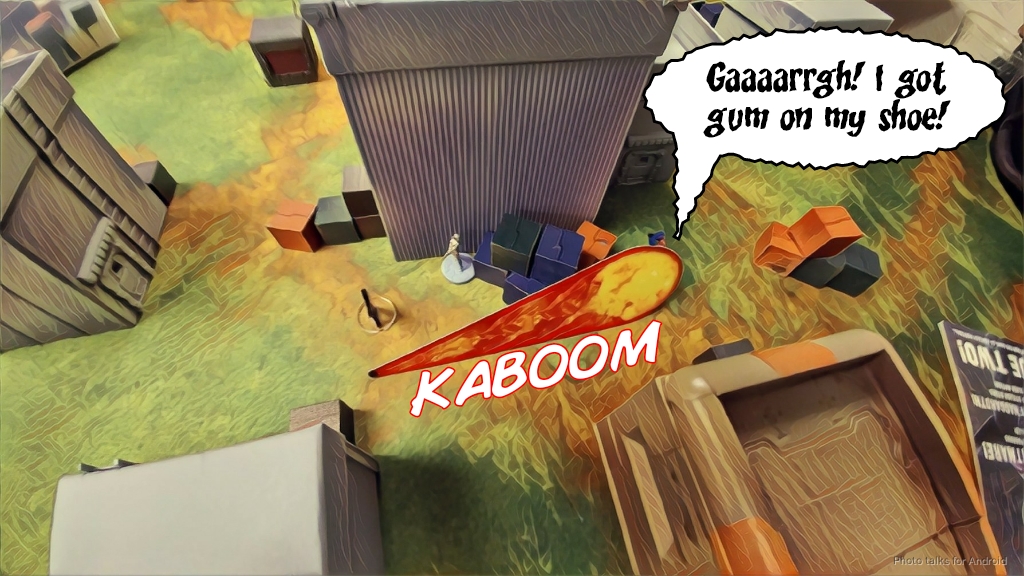 I am celebrating a bit too early, because Adam has two Krakots. He runs it into chain rifle range of my Kempetai and a Keisotsu. I think a bit before deciding to shoot him with both of them. I figure I’ll probably lose both anyway by failing dodge rolls, and I can’t let the Krakot get into my back lines. Four dice should do it, I tell myself.
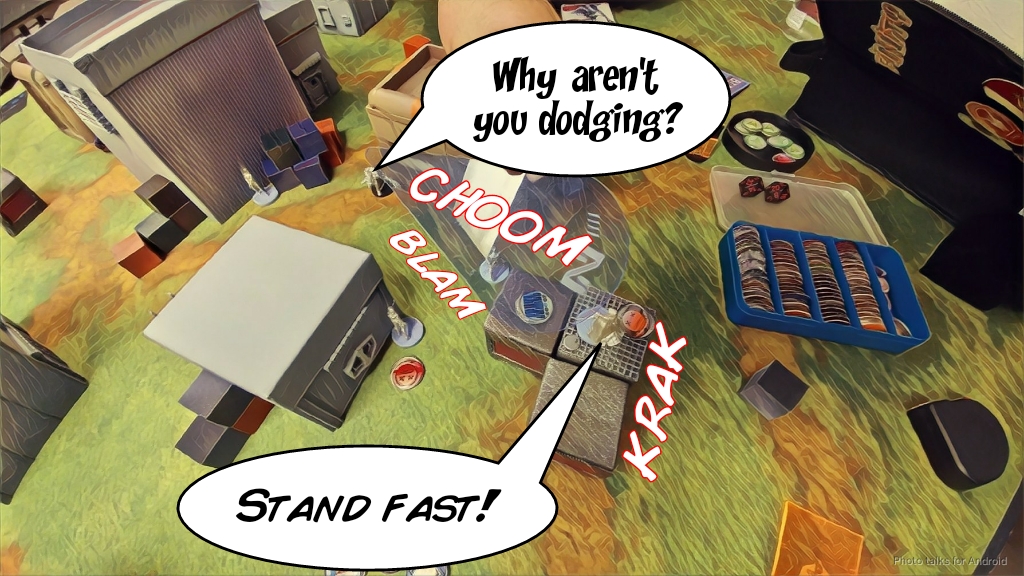 Thankfully, 4 dice is indeed enough. I lose the Kempetai and the Keisotsu, but there aren’t any more Krakots on the table. Not sure if this was the right call, but I don’t think there were any good ones, honestly, other than not sucking the previous turn and setting up properly. With my order pool savaged, Adam just sets up to box me in, advancing the Q-Drone and Raktorak again along with his two Ikadrons. The Q-Drone forces my Shikami back into cover, and Adam passes the turn.
Bottom of Turn 2 – JSA
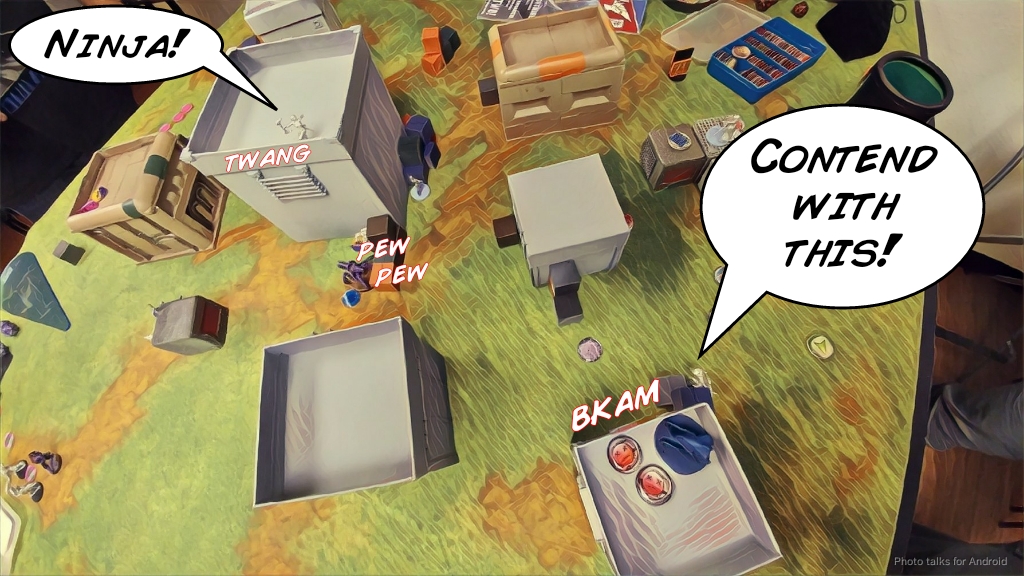
I decide to do the previously unthinkable, and reveal my Ninja to tactical bow an Ikadron at outside of 8″ in cover that Adam moved into the middle scoring zone, possibly my near zone for Break Through. I’ve long been a critic of tactical bows, as I feel they’re pretty meh in most respects in comparison to my usual preferred weapons–i.e. anything else. I was horribly low on orders and nothing else was in position. Thankfully, mod stacking forced a dodge out of the Ikadron, which I beat, knocking it out with DA ammo. Phew!
 I then dropped a Nimbus grenade with the Shikami, following that up with a coordinated order between it and the Ninja. Adam chose to go after my Ninja, rolling a single crit, but my Shikami, in spite of the awful odds, managed to knock the Q-Drone out with his contender. I’m out of orders at this point, so I just pass the turn.
Turn 3
Top of Turn 3 – Combined Army
Adam pushes his remaining pieces forward, even attempting a shot with his Noctifer at outside of 16″. Funnily enough, this means we zero each other out. Knowing this, I dodged, but Adam’s Noctifier just impotently pew pews into the air. I leave my Shikami out to delay the Raktorak, and he does an admirable job, draining a few orders from the Red Fury before going down. 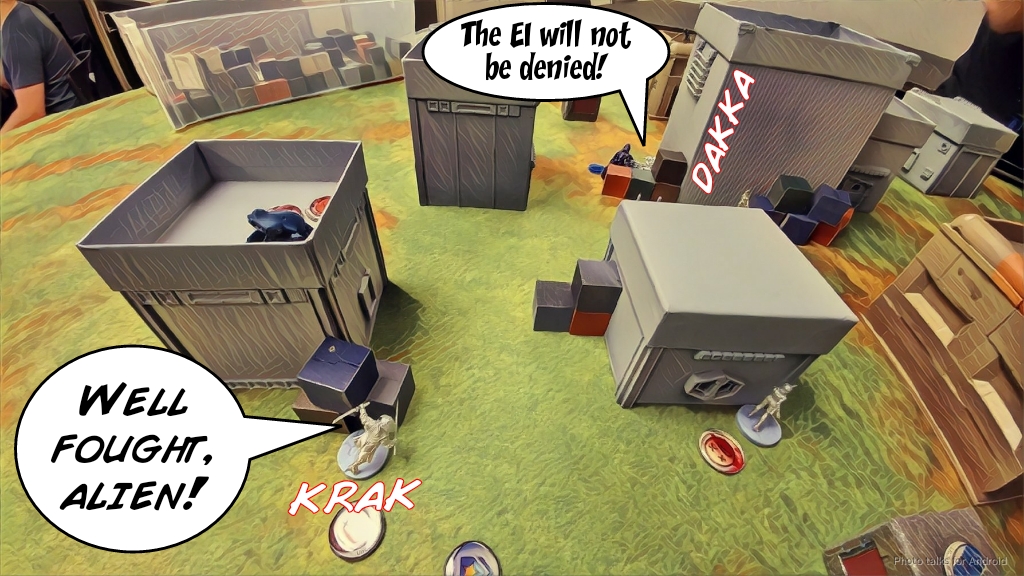 Adam ends his turn with the Raktorak pushed up into my near zone with the Ikadron watching its back.
Bottom of Turn 3
I have two orders left, and one of them is my Lieutenant order. I spent that to gun down the Raktorak, but catch a flash pulse from the Ikadron.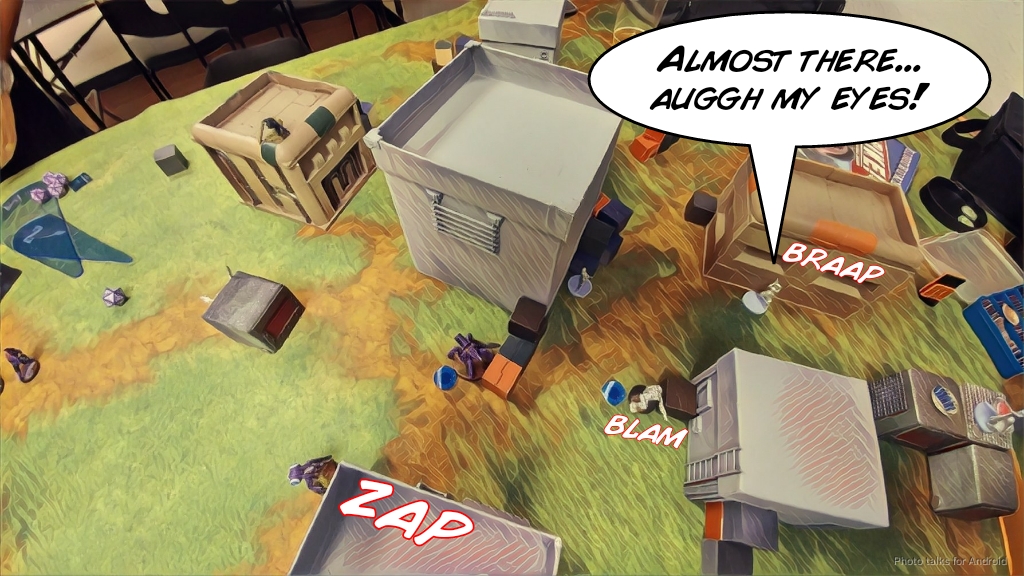 I’m sadly unable to remove the Ikadron, so I’m forced to just move into my near zone so I don’t get 0 points. Neither of us got our classified, so it’s a
3-1 Combined Army Victory!
Notes
Notes for Me
- Hide your kids, hide your wife, hide your Shikami! I was pretty worried about a rush by the Krakots, so I left basically everything out to ARO. The Shikami is kinda bad at ARO, as it’s easy to skirt the range of his combi rifle/contender. I suppose just standing around and dodging on 14’s isn’t terrible. If only one could start off by throwing Nimbus…
- The real problem with leaving the Shikami out to ARO is that it then makes it quite hard for you to get him out of there to go do some damage. I think putting him prone on a roof is probably a good idea, but I’m literally one game in and don’t have any more data. I did feel like he was basically trapped by the Q-Drone so I think I might be over-correcting. Have to try it out next game though, to see.
- I really really like the Kempetai shock marksman rifle. She is pretty freaking amazing and makes an active Keisotsu link pretty scary, especially in Recon+.
- I made a pretty big mistake moving the Keisotsu link up.
- I missed Morlock smoke. A lot. I think I’m going to have to get used to playing without pervasive access to smoke, or just put Yojimbo in every list and play very carefully with him.
- I’ve poo-poohed Ninja tacbows for awhile, but as a tool of necessity they’re… fine.
- I still like the Recon+ format, but you really need some serious redundancy and defense in depth to your list.
- I’m finding that JSA don’t play the ARO game super great, but maybe I’m doing something dumb? More experience required!
Notes for Adam
- Solid work. The list is pretty disgusting.
- I think you just had the right tools to leverage at the right time to exploit the holes I left you.
Game 2 – Yuriko Oda versus Corax Hasht
 Well, after that abysmal showing, it was time to re-rack and try again! That’s the nice thing about games of Recon+, they run so fast you can get two or maybe even 3 games in each game night. We elected to try the Supplies mission, which is called Smash and Grab. It basically is Supplies with an exclusion zone and only two instead of three Tech Coffins. The scoring is also slightly different, rewarding you for holding boxes at the end of turns instead of at game end.
Overview
- Mission: Smash and Grab
- Forces: Japanese Secessionist Army versus Combined Army (Recon+)
- Deploy First: Combined Army
- First Turn: Combined Army
[img]https://assets.infinitythegame.net/infinityarmy/img/_logosweb/logo_903.png[/img][b] Recon B[/b]
[img]https://assets.infinitythegame.net/infinityarmy/img/_logosweb/903/logo_1.png[/img] [b]KEISOTSU Lieutenant[/b] Combi Rifle / Pistol, Knife. (1 | [b]9[/b])
[img]https://assets.infinitythegame.net/infinityarmy/img/_logosweb/903/logo_1.png[/img] [b]KEISOTSU[/b] Combi Rifle / Pistol, Knife. (0 | [b]9[/b])
[img]https://assets.infinitythegame.net/infinityarmy/img/_logosweb/903/logo_17.png[/img] [b]YURIKO ODA[/b] Combi Rifle + E/Mitter, D-Charges, Antipersonnel Mines / Pistol, CCW. (0 | [b]24[/b])
[img]https://assets.infinitythegame.net/infinityarmy/img/_logosweb/903/logo_2.png[/img] [b]KEMPEI (Multispectral Visor L2)[/b] Shock Marksman Rifle / Pistol, CCW, Electric Pulse. (1 | [b]25[/b])[img]https://assets.infinitythegame.net/infinityarmy/img/_logosweb/903/logo_1.png[/img] [b]KEISOTSU (Forward Observer)[/b] Combi Rifle / Pistol, Knife. (0 | [b]10[/b])
[img]https://assets.infinitythegame.net/infinityarmy/img/_logosweb/903/logo_1.png[/img] [b]KEISOTSU (Forward Observer)[/b] Combi Rifle / Pistol, Knife. (0 | [b]10[/b])
[img]https://assets.infinitythegame.net/infinityarmy/img/_logosweb/903/logo_9.png[/img] [b]DAIYŌKAI[/b] Red Fury, Panzerfaust / Pistol, DA CC Weapon, AP CC Weapon. (1 | [b]49[/b])
[img]https://assets.infinitythegame.net/infinityarmy/img/_logosweb/903/logo_13.png[/img] [b]TOKUSETSU EISEI Doctor (MediKit)[/b] Combi Rifle / Pistol, Knife. (0 | [b]14[/b])
[img]https://assets.infinitythegame.net/infinityarmy/img/_logosweb/orden_regular.png[/img]8 [b]| 3 SWC | 150 Points |[/b] Open in Infinity Army
[img]https://assets.infinitythegame.net/infinityarmy/img/_logosweb/logo_601.png[/img][b] List 2[/b]
[img]https://assets.infinitythegame.net/infinityarmy/img/_logosweb/601/logo_25.png[/img] [b]NOCTIFER Lieutenant[/b] Combi Rifle / Pistol, Knife. (1 | [b]24[/b])
[img]https://assets.infinitythegame.net/infinityarmy/img/_logosweb/601/logo_1.png[/img] [b]MORAT (Forward Observer)[/b] Combi Rifle / Pistol, Knife. (0 | [b]15[/b])
[img]https://assets.infinitythegame.net/infinityarmy/img/_logosweb/601/logo_46.png[/img] [b]CORAX HASHT[/b] Spitfire / Breaker Pistol, Knife. (1.5 | [b]34[/b])
[img]https://assets.infinitythegame.net/infinityarmy/img/_logosweb/601/logo_6.png[/img] [b]RODOK[/b] Combi Rifle, 2 Light Shotguns / Pistol, Knife. (0 | [b]26[/b])
[img]https://assets.infinitythegame.net/infinityarmy/img/_logosweb/601/logo_38.png[/img] [b]RAKTORAK[/b] Combi Rifle + Heavy Flamethrower / Pistol, Knife. (0 | [b]23[/b])
[img]https://assets.infinitythegame.net/infinityarmy/img/_logosweb/601/logo_49.png[/img] [b]KRAKOT RENEGADE[/b] 2 Chain Rifles, Grenades / Pistol, DA CC Weapon. (0 | [b]14[/b])
[img]https://assets.infinitythegame.net/infinityarmy/img/_logosweb/601/logo_49.png[/img] [b]KRAKOT RENEGADE[/b] 2 Chain Rifles, Grenades / Pistol, DA CC Weapon. (0 | [b]14[/b])
[img]https://assets.infinitythegame.net/infinityarmy/img/_logosweb/orden_regular.png[/img]7 [img]https://assets.infinitythegame.net/infinityarmy/img/_logosweb/orden_impetuosa.png[/img]2 [b]| 2.5 SWC | 150 Points |[/b] Open in Infinity Army
Deployment
Adam won the rolloff this time and elected to go first. He basically copied his last deployment from the previous game, albeit with more specialists.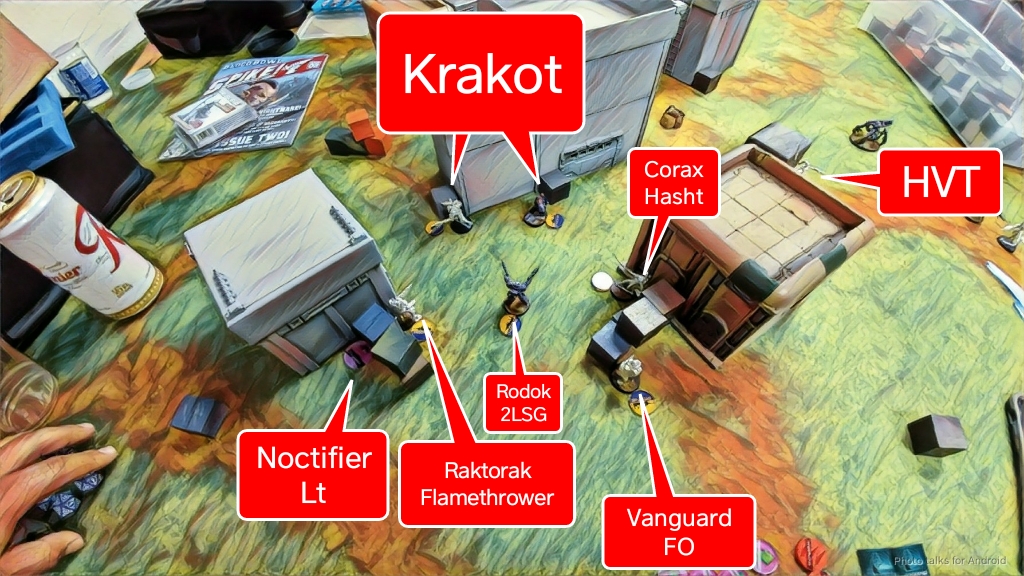 I took a different list with significantly more Keisotsu. I left pretty much everything out again to ARO. I fully expected to lose Yuriko and maybe one of my FOs, but I was going to make it tough for Adam.
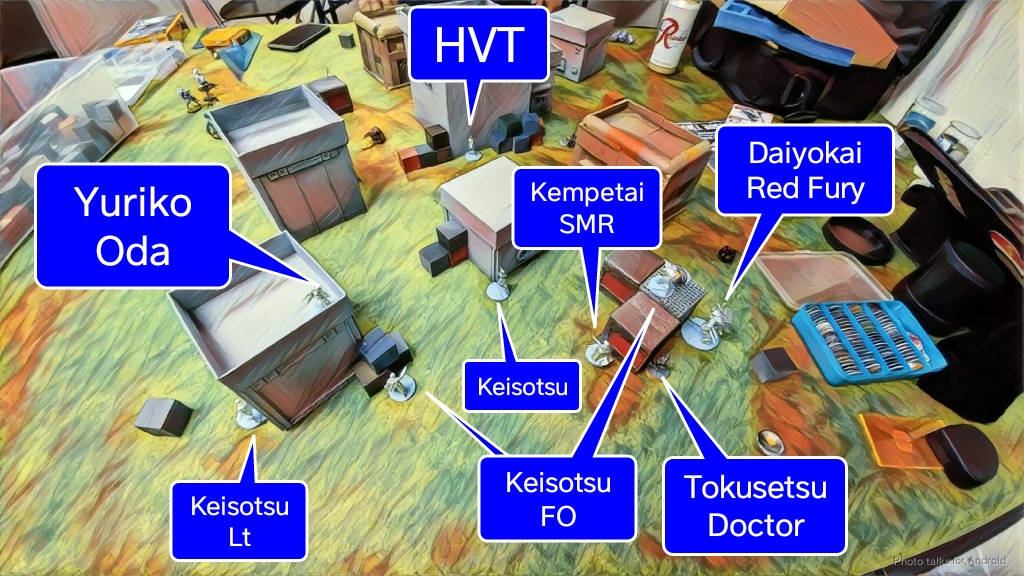 I put Yuriko, the Kempetai, and a random Keisotsu in the link to give them burst two.
Turn 1
Top of Turn 1 – Combined Army
My ARO network is again enough to keep Adam’s Krakots boxed in, so he cancels both orders. He then sends in Corax to break my left flank. This is the game where Adam rolls nothing but 16’s and up, so while he whiffs all his spitfire shots, he tanks all but one Panzerfaust save, sending Corax into NWI. A second order sees me land a combi hit, which is enough to take out Corax.
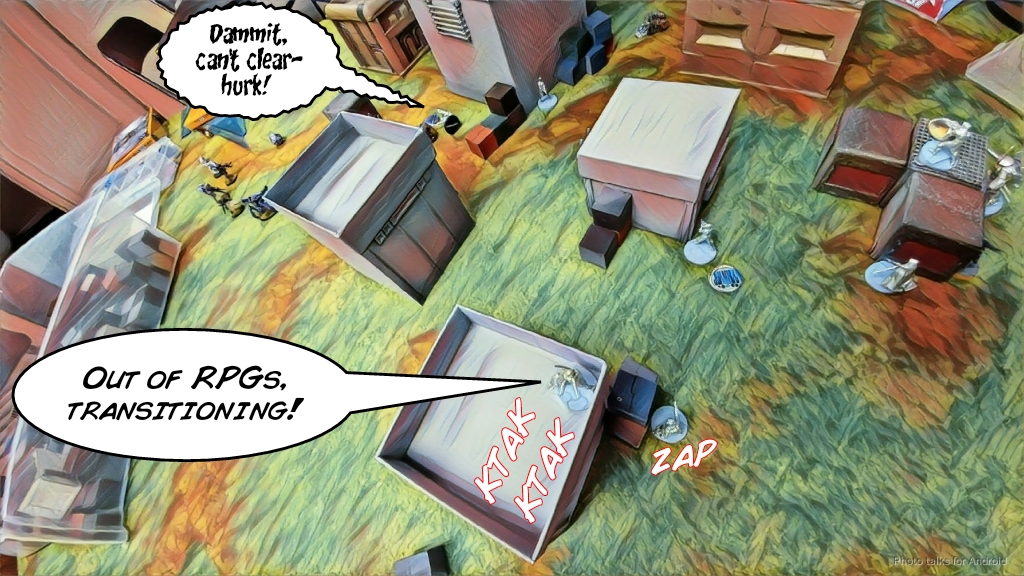 Adam groans in frustration and sends in his Rodok to finish off Yuriko, now that she’s out of Panzerfausts. Of course, I roll a crit.
  Adam mimes poking his head around a corner: “Hey, are there bullets here!?” and starts chuckling. I join in–this is a complete reverse from the last game where none of the dice really went my way. Now that he’s spent most of his orders killing his own guys with Yuriko Oda, Adam tries to cover the objectives with a Krakot and his Raktorak before passing the turn.
Bottom of Turn 2 – JSA
Adam hasn’t left anything out for me to shoot at, so I reform the Keisotsu link with the central stock Keisotsu and the two FOs, then set about grabbing objectives. The objective on the right has a blind spot in the Krakot’s field of view, so I grab the box without any difficulty. Ispend an order pushing the successful specialist backwards towards my deployment zone while advancing the other two Keisotsu, effectively breaking the box-carrying FO out of the link.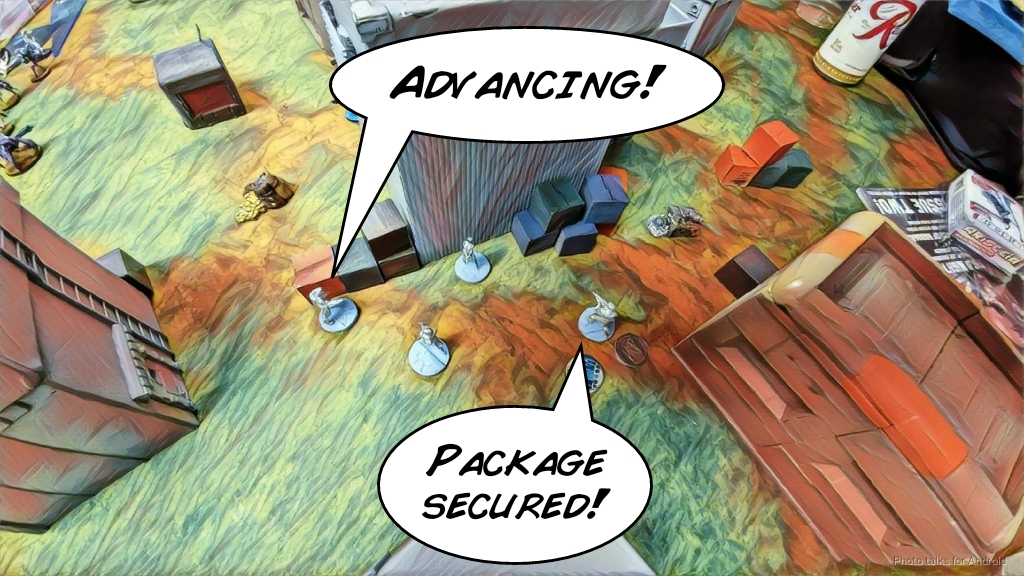 I spend my lieutenant order to move him into range of the link and reform it for the burst bonus, keeping him hidden behind a building. The vanilla Keisotsu tries to gun down Adam’s other Krakot, who is peering at the objective from outside of chain rifle range, but I fail to hit it.
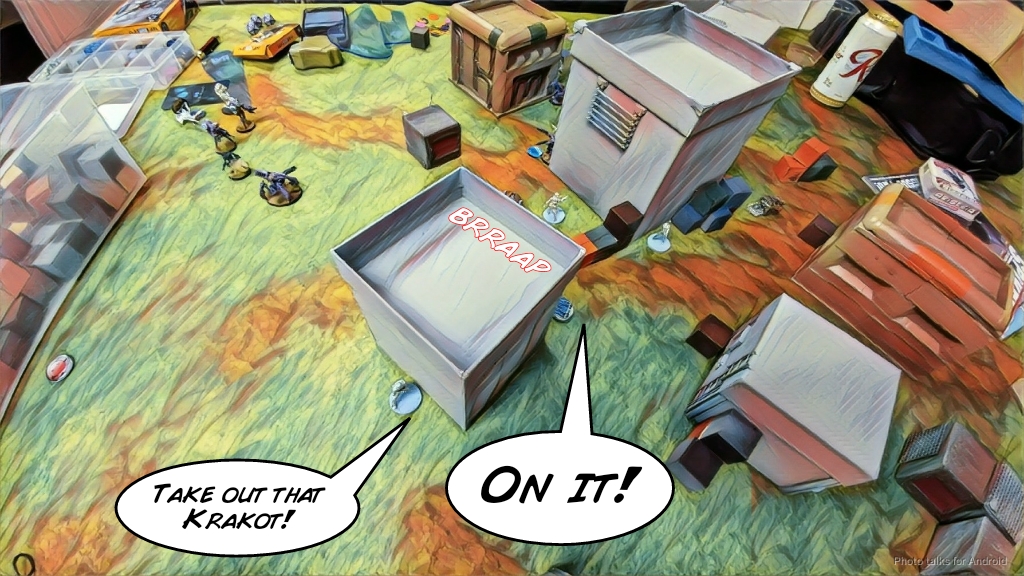 The Krakot can’t really cover all the objective, but the Raktorak can, so it has to go. I sacrifice the Keisotsu, pushing it around the corner while getting the FO closer to the objective. Adam doesn’t want to grant me normal rolls by flamethrowering, so he contests my combi rifle with some gunfire of his own.
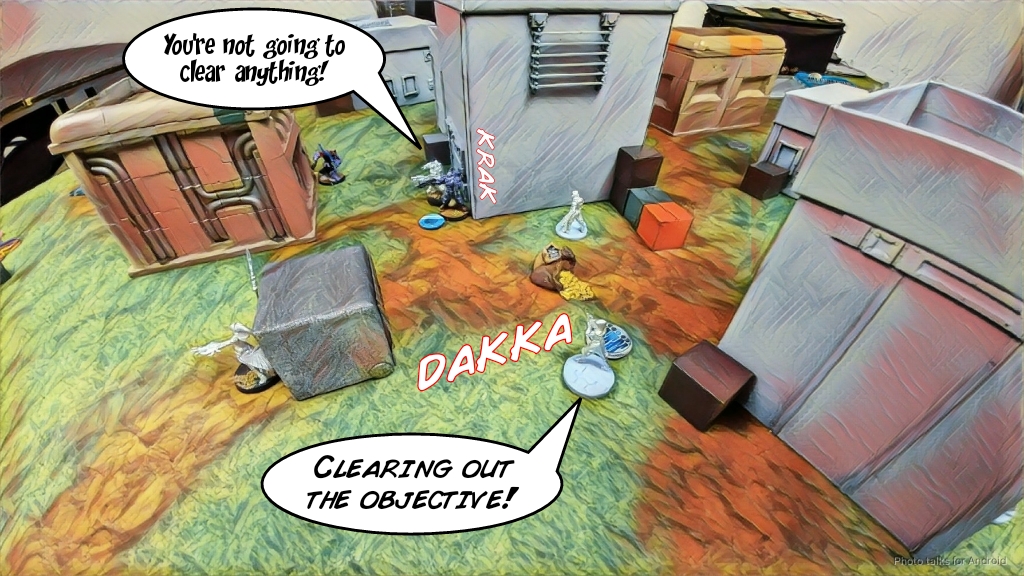 I can’t grab the box this turn safely, so I spend my last order retreating both Keisotsu to safety, gunning down the Krakot in the process while the Raktorak dodges.
Turn 2
Top of Turn 2 – Combined Army
Adam tries to break the link with the Raktorak, but my dice luck holds and I knock it unconscious with the Keisotsu’s combi rifle.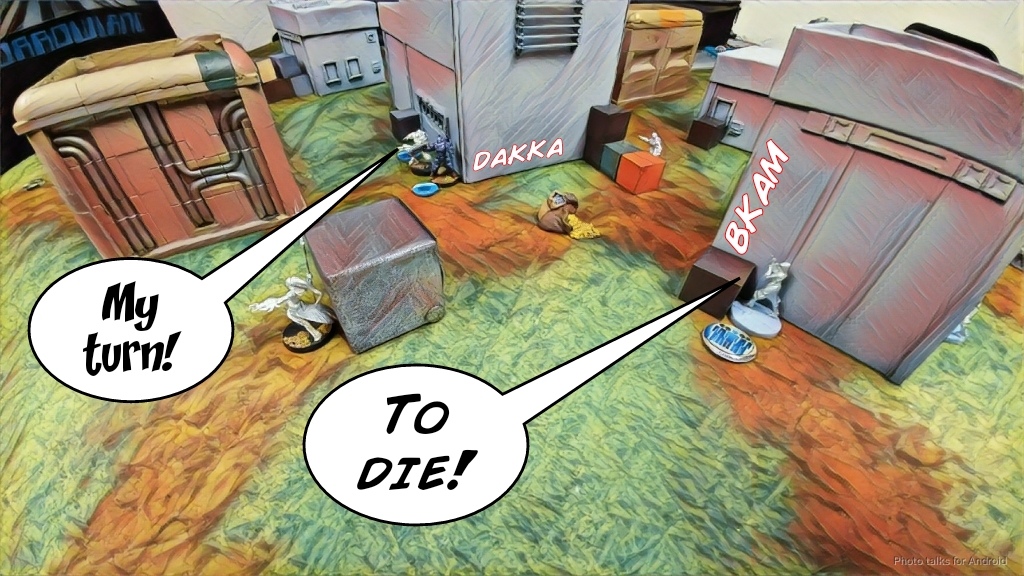 Adam is pretty out of orders at this point, but he needs to get a box to win. After finally killing my troublesome Keisotsu with his Vanguard FO, Adam sighs loudly before chuckling and passes the turn.
Bottom of Turn 2 – JSA
I reform the link with after moving the Kempetai close enough, putting my lieutenant, the Kempetai, and the Keisotsu FO in the link. I can’t get the Kempetai into place, but my lieutenant manages to take out the vanguard. I push everyone forward, grabbing the second objective and then scooting around the corner with my FO designate Adam’s HVT for my classified. I’m out of orders at this point… and the box is pretty close to Adam’s deployment zone… I’m out of orders, but I reform the link to include Yuriko, the Kempetai, and my Lieuteant to hopefully protect him.
Turn 3
Top of Turn 3 – Combined Army
Adam’s remaining Krakot blasts my Keisotsu unconscious, but gets shot in the face for his trouble. Adam runs his Noctifier across the board to grab the package off my downed FO, but my shock marksman takes him out. Huzzah!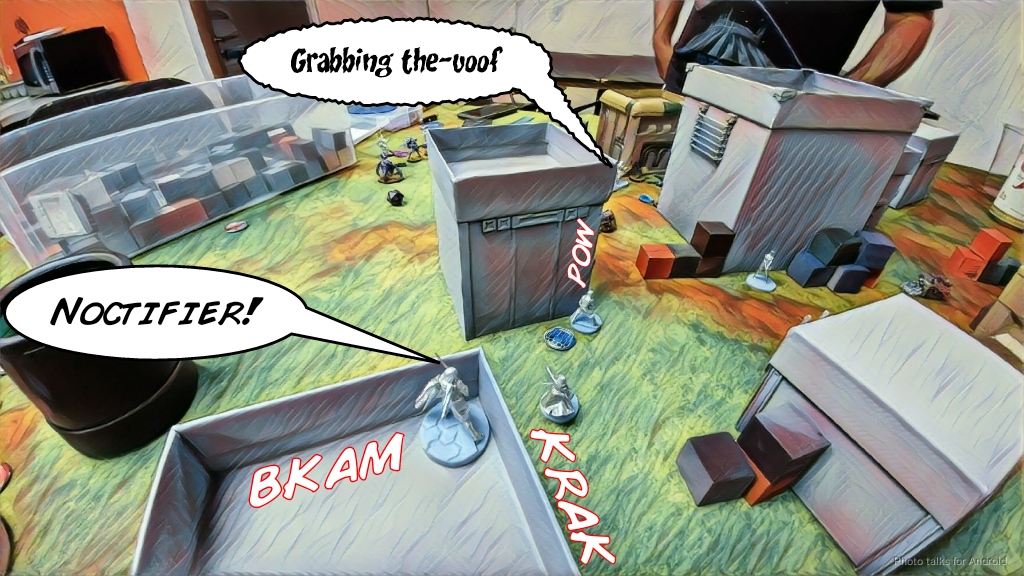 We call it at this point, so we can have an early start home. After puzzling out the funny scoring for this Recon+ scenario, it’s a
8-0 JSA Victory!
Notes
Notes for Me
- That went much better. The deeper order pool (I was effectively at 6 thanks to the Ninja in HD in the first game) made a big difference.
- I am also really liking the extra Keisotsu to form links. It makes for a pretty flexible link, and you can keep your link at full strength as you lose guys to positioning or wounds.
- The Daiyokai basically did nothing but be imposing. Hooray? He was a bit of a pain to put together. I’m glad that’s over.
- I basically got stupidly lucky at the beginning of the game and then carried the momentum through.
- I made a huge mistake by going for the second objective and just leaving my FO out there to die and get the objective stolen. Should’ve just set up AROs and then waited for turn 3.
Notes for Adam
- Roll better?
- Good work trying to sneak out a box grab on turn 3.
- What a silly game.